
I was at my sweet cousin Stacey’s house a few weeks ago helping her prepare for her son’s Graduation party. She had told me about some of her summer decor before I arrived, but, her words didn’t do her creations justice; I was in awe of how she had redecorated, her home looked amazing. She has used mermaids, sea horses, shells, and all sorts of warm summery accent pieces all around her home, and they inspired me to try and make her a wreath that would blend in nicely with her creations. Let me start by saying that I had made her a burlap summer wreath a couple of years ago and well, it didn’t quite fit in with her new theme (also, my wreath making skills have improved since I made that other one and honestly, I wasn’t happy with it…haha).
Here I am with Stacey (in the middle) and our other wonderful cousin Donita (left) when we were at the Grad party. 🙂

Okie dokie…So first, let me show you the supplies that I collected to make this wreath:
- 24″ Wreath Form
- 2 1/2 Skeins of Burlap Runner
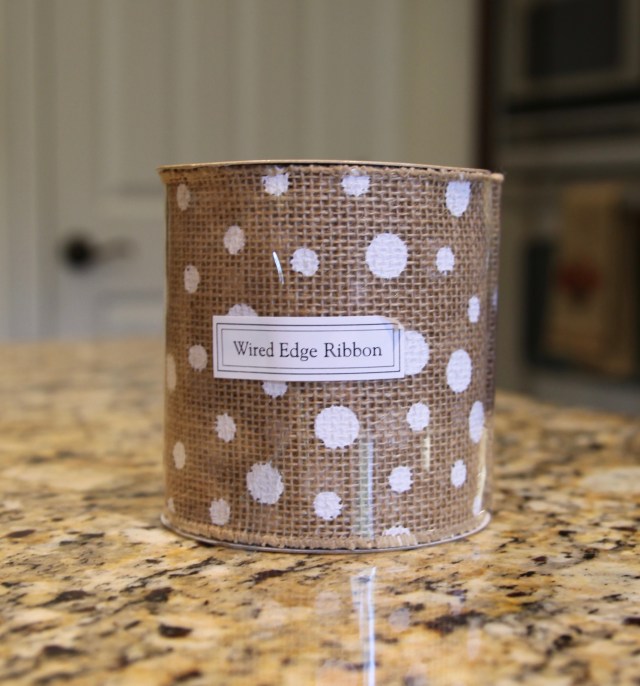
- 1 Roll of Burlap and Polka Dot Ribbon
- 2 Pip Berry Garlands
- Scroll’y’ Accent Piece
- 2 Metal Starfish
- A Large Resin Mermaid
- Sea Shells
- 3 Large Cream Burlap Sunflowers
- A Few Small Silk Flower Accents
- Hot Glue Gun, Pipe Cleaners, & Floral Wire
Now to explain how I pulled all of those pieces together to make one pretty huge wreath…Here goes:
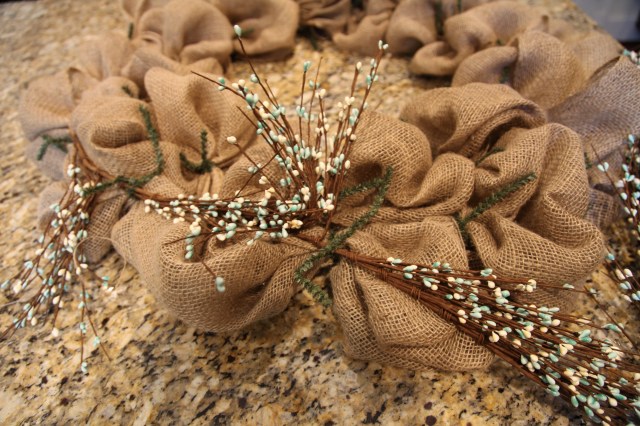
I attached the burlap to the wreath form by catching big tufts of the burlap into each chenille twist tie…I started on the outside ring and worked my way around, I transitioned to the inner ring and proceeded to work my way in the same way around the entire wreath form. I went through 2 entire skeins and finished up with 1/2 of another skein.

This is how far one skein of burlap runner got me, I wanted this wreath to look like it was large and in charge, so my loops were quite big. 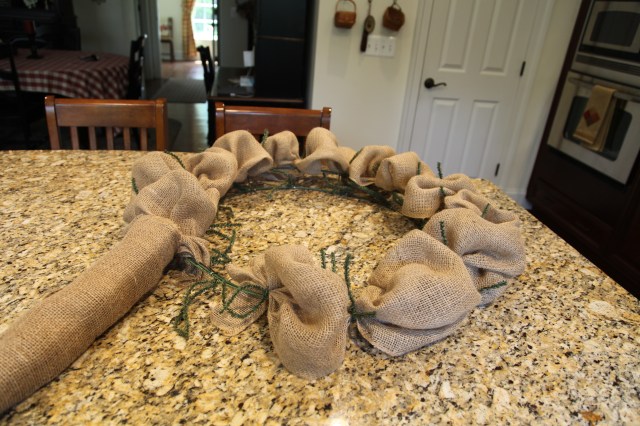
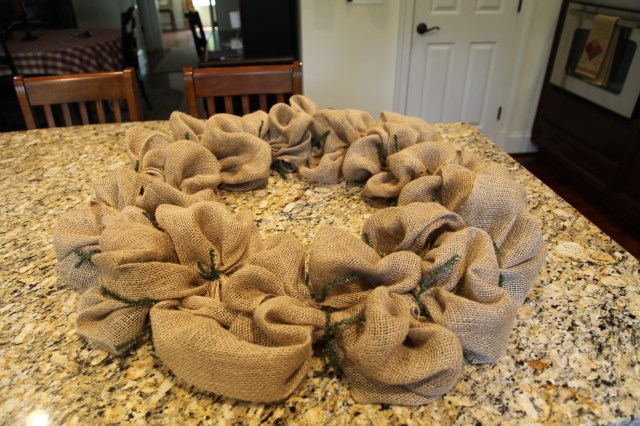
When I finished with one skein and started with a new roll, I simply started literally where I left off; I added the burlap right on top of where I had just finished and continued tufting on around. I completed the entire outer ring finishing by again adding the last tuft right into the the same chenille tie as where I started, then the next tuft was in the inner ring. I continued to add until I had completely finished both rings.
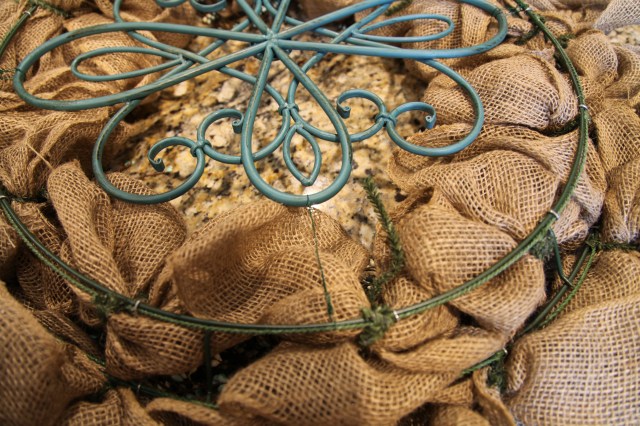
The next thing that I did…Well, honestly, my hubby helped me with this part…I flipped the wreath over and centered the scroll’y’ accent piece (got it for half price at Hobby Lobby)…

And my hubby attached it to the wreath form using floral wire…By the time he was finished, that scroll’y’ piece was rock steady.

Now, I paused for a second and took some time to hot glue some pipe cleaners onto the back of the mermaid:


The metal Starfish:

And onto several Coral Starfish Shells:


Then I took a moment to create one pretty huge bow out of the burlap and polka dotted ribbon (BTW, I have created a video of me doing a bow tutorial, if you’d like to try to make a bow for yourself, click here) I used the entire roll to make this bow:
My daughter mentioned that the tails of the bow actually matched the mermaid’s tail…I told her that that was by design <~~~ I fibbed…LOL…I always cut my bow tails that way, it just so happens that my bow tails look like a mermaid tail–who knew? 😉 😉
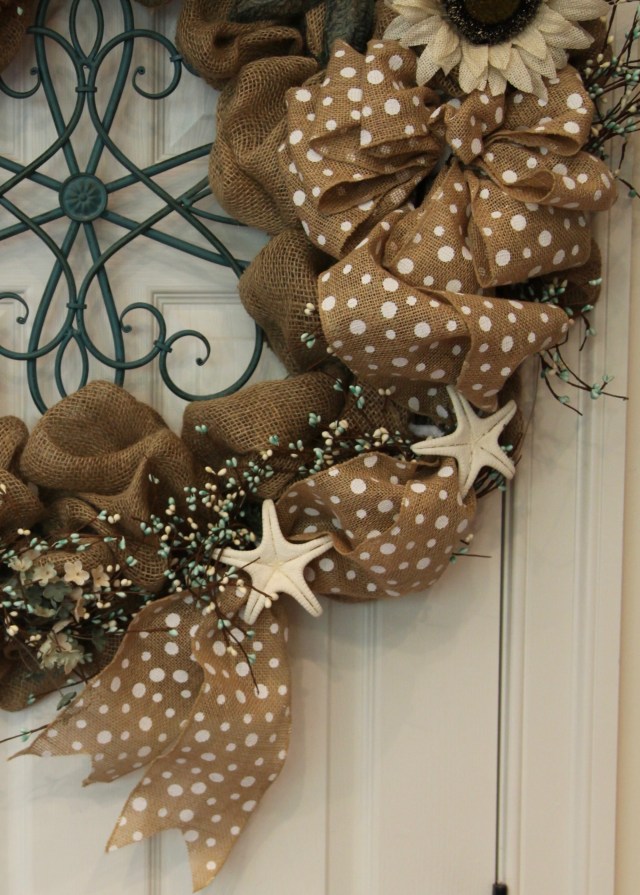
Next, I started to add the pip berry garland to the outer ring (only) catching it in each chenille twist tie. I worked my way around the entire wreath form–I used 2 garlands and I only had about 3 inches of length left. Here is where I purchased this Light Teal and Vanilla Cream Berry Garland.
Now, I was ready to start placing and adding all of my accent pieces. Of course I used the glued on pipe cleaners to attach the mermaid, metal starfish, and coral starfish. I also used hot glue to anchor them in place. I can’t really explain I how pull a wreath together, it is just a trial and error sort of approach. I’ll place an item, stand back and look and decide if I like it there or if I want to move it. I do this with each accent piece and eventually it all comes together and when I’m satisfied with how it looks, I anchor everything down with hot glue (well honestly, I don’t *always* use hot glue–I’d rather not really, but, with wreaths this size, I often need to add the hot glue to give it more stability). Sometimes this entire process happens quickly & and sometimes I will tweak for hours…haha…I really wanted this wreath to be special for Stacey, so I will admit that I did a bit of tweaking for a good amount of time. 🙂
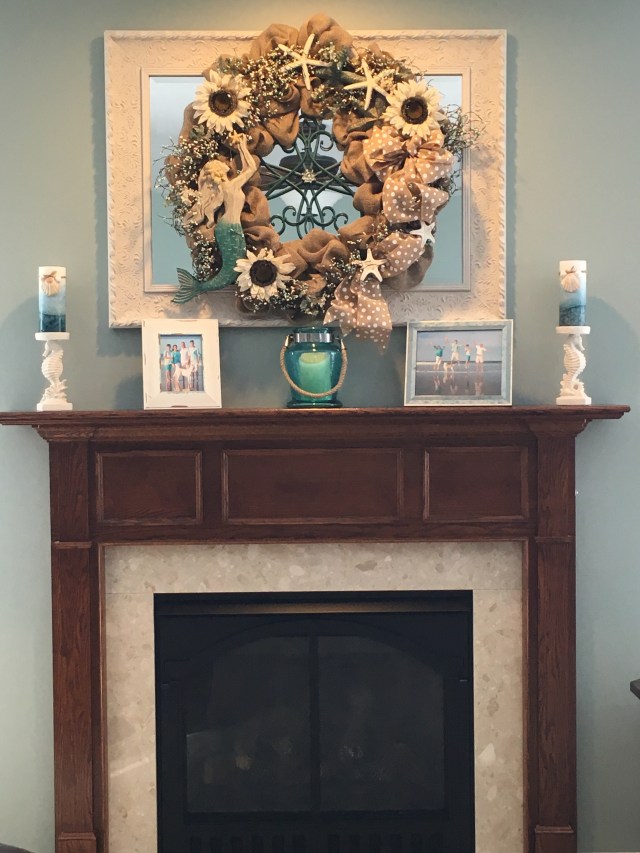
By being able to see Stacey’s home decor in person, it made this wreath easy to create. I ‘felt’ her house while I was there, it was warm, cozy, and whimsical in places–I *think* I managed to create the same ‘feel’ with this wreath…Here is the finished product–It measures every bit of 32+” around:

Stacey squealed when she saw it…hahaha…Bless her heart, I just love that girl to pieces!! And this is where she hung it when she got it back to her gorgeous home–I LOVE it here, and I am reallllly happy to see that those sunflowers, creamy pip berry beads, and the coral starfish match that frame around that beautiful mirror…gosh, how pretty does that combination look?!! YAY!! 🙂 GREAT place to display that wreath Stacey!! You go girl!!
I cannot tell you how special my entire family is to me–I would do ANYTHING for them, and this particular wreath was made with tons of love and with Stacey on my mind while creating it. ❤
Until next time, y’all take good care! ❤
**In crafting there are no mistakes just unique creations**
~Arlynn ❤

Pingback: Cream on Cream Burlap Wreath: Stacey’s Christmas Gift (Video Tutorial for Wreath and Craft Bow Included) – Country Craft Corner
So cute, Arlynn- I’ve been loving mermaids lately, and the colors are sooo nice! That’s so awesome that you and Stacey have still stayed close!
LikeLiked by 1 person
Hi Tracey, thank you so very much sweet lady. I’m so glad that you like that wreath, Stacey decorates with mermaids in the summertime, her decor looks fantastic!!! 🙂 We are very close, more like sisters than cousins…well, I think, neither of us have sisters, hahaha. 😉 🙂 ❤
LikeLike