
It has become obvious that I have a real affinity for adding owls to my wreaths…after all they are cute little creatures. 🙂 Here are the wreaths that I’ve made in the last year that I’ve adorned with an owl…or two… 😉

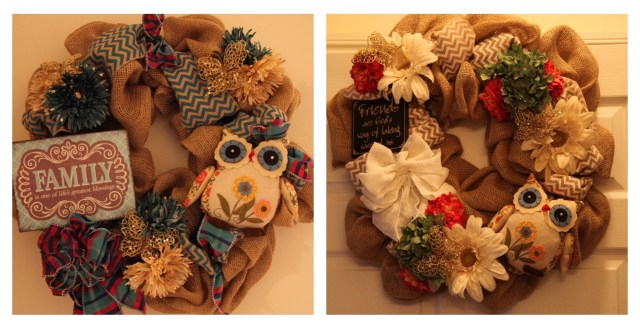
Of course, I don’t have all of these hanging up at one time, and the one on the bottom right was given as a gift to a dear friend. BUT, as you can see, owls are often my choice with which to build an entire wreath. 🙂
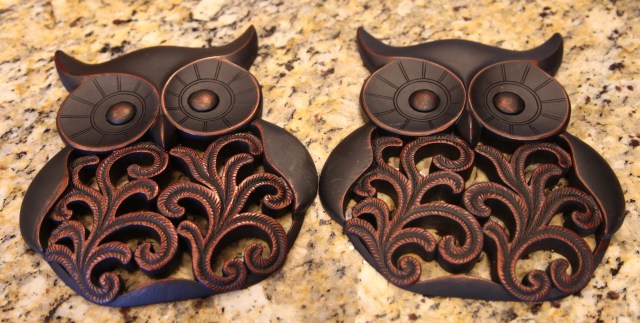
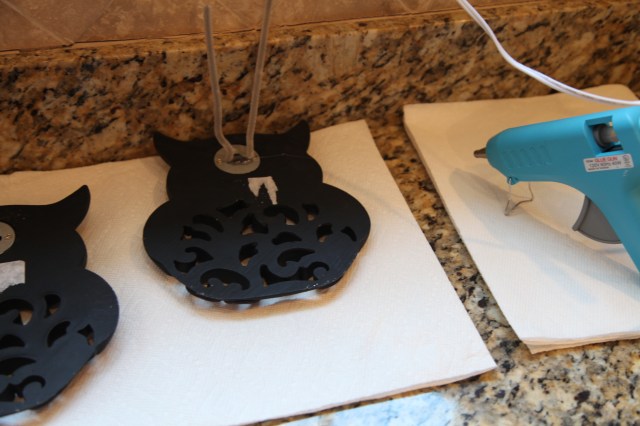
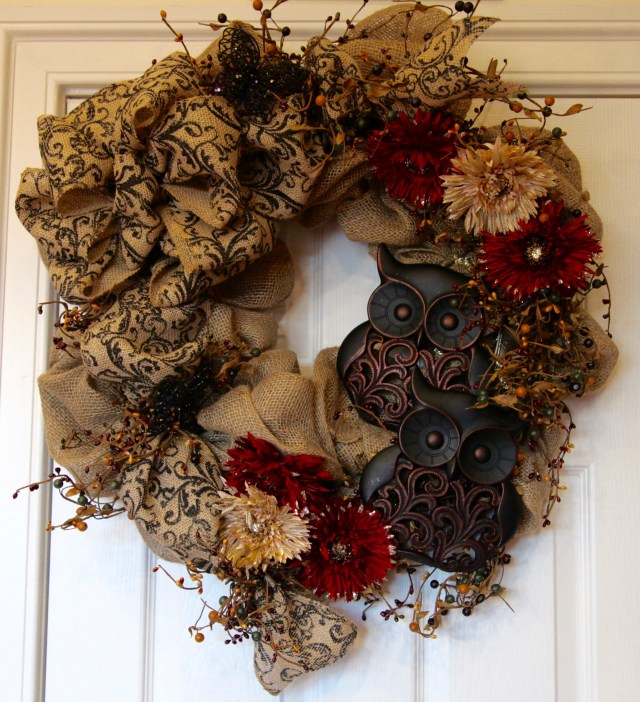
That said, I did not surprise myself when I picked up these two wrought-iron *looking* owls (they are really resin, still pretty heavy though) and started formulating a plan for a wreath that I wanted to make for my powder room.
Here are the other supplies that I collected so that I could bring the wreath that was in my mind’s eye to fruition:
- Work Wreath (90% off at Hobby Lobby)
- Burlap ‘Runner’ (1 – 1/2 Skein)
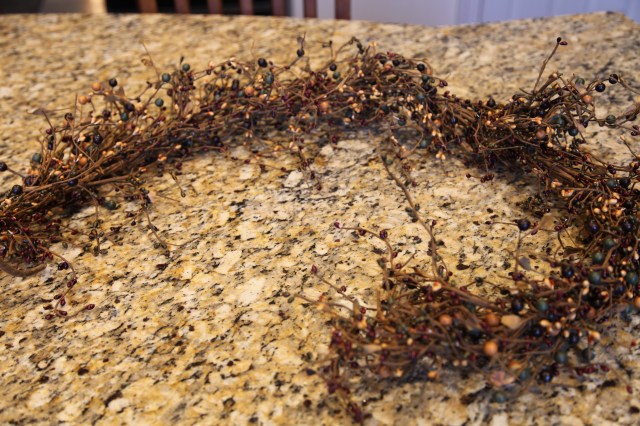
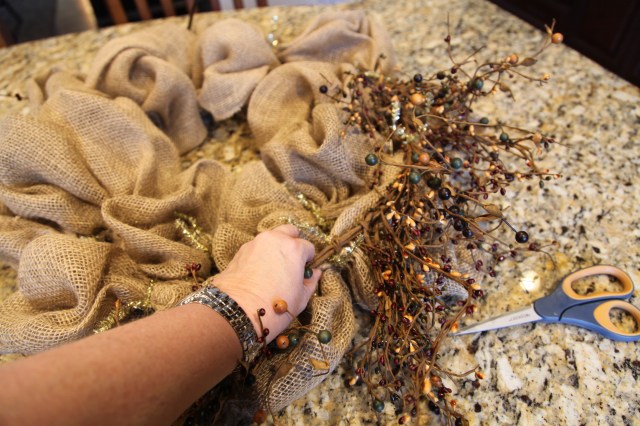
- Pip Berry Runner
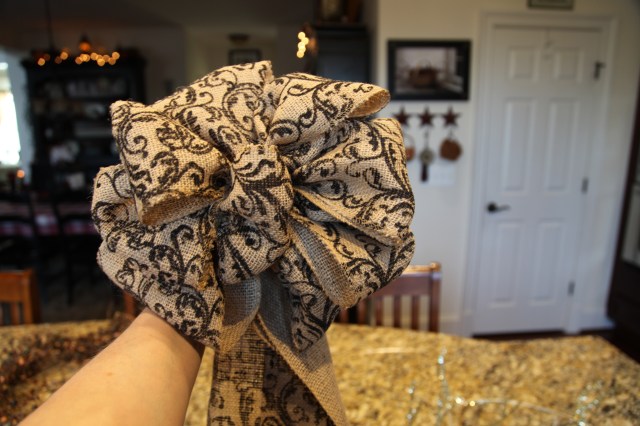
- 5″ Burlap Ribbon (for a bow)
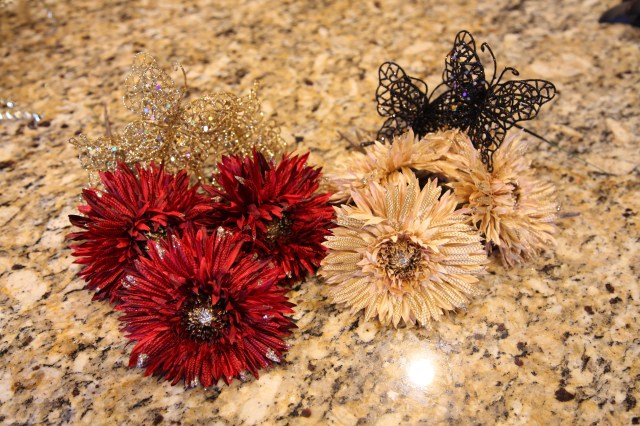
- Burgundy and Khaki colored daisies
- Sparkly Butterflies


The first thing that I did was to hot glue pipe cleaners onto the back of those owls…they were pretty heavy and pretty big so I knew that glueing them onto the wreath was not going to be an option, the pipe cleaners provide a nice sturdy way with which to attach the owls to the wreath…

The next thing that I did was to make a bow out of the burlap ribbon…This was not wired ribbon, but it sure did make up into a pretty bow. I just taught myself how to make this kind of bow at Christmas time, check out this link to see how I learned: Big Beautiful (Christmas) Bows…
I then started to build my wreath; so as not to bore you with the “how-to” details here, if you’d like to know how I put my burlap wreaths together here is a link to my Front Door Burlap Wreaths post, in there I describe my process…


As you see in the pictures of the wreaths that I’ve made, I usually will attach a contrasting colored burlap or ribbon to the wreath to add interest. But, I did a little something different with this wreath in that instead of a contrasting burlap or ribbon, I used a pip berry garland. I attached the garland to each of chenille pipe cleaners on the outer ring of the wreath (I just added it right on top of the burlap that I had already attached)…
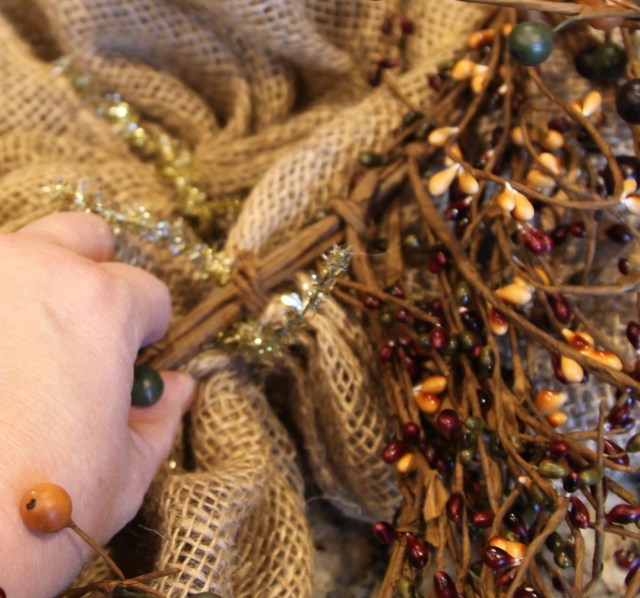
After that, I tied the bow onto one side of the wreath and the owls onto the other side and I placed the flowers and butterflies where I thought they looked nice and hot glued them in place. I took a moment to fluff out the pip berries and the burlap. I pulled one of the bow tails up and around the top and caught it in a couple of pip berry twigs and I did the same thing under the bow and around the bottom of the wreath; I cut the tails of the ribbon into an inverted ‘v’.
In the end, this is what I came up with:
And here it is hung up in its spot in the Powder Room:


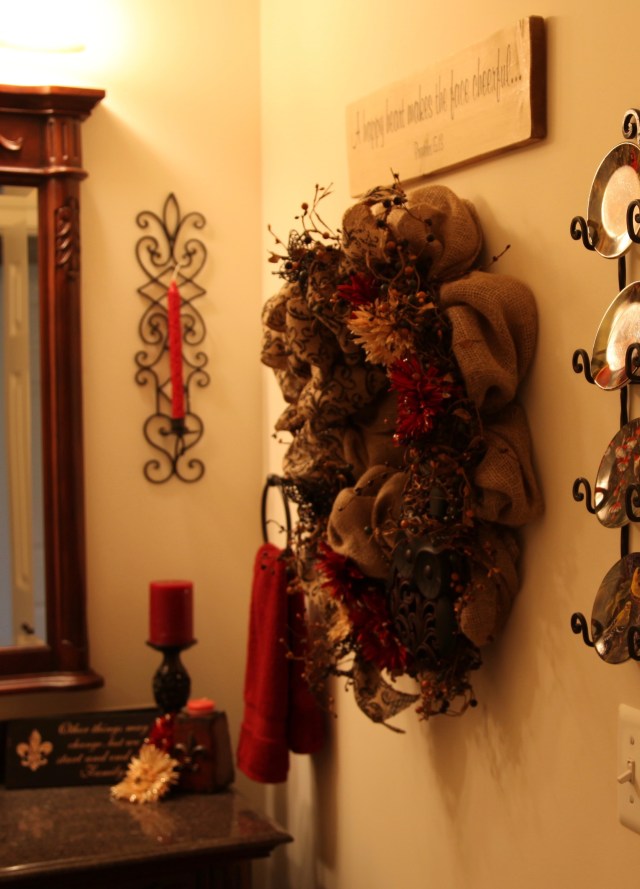
I truly do love the creative process and am very happy with how this wreath turned out. It fills up that wall nicely and it will be a lovely every-day wreath. It will most likely hang there until next Fall.
Until next time, y’all take good care! ❤
**In crafting there are no mistakes, only unique creations**
~Arlynn ❤

Pingback: Pick A Theme & Carry It From Room To Room – Country Craft Corner