
My sweet cousin Stacey has been kind enough to share another one of her amazing creations with all of us!!! Wait till ya’ll see *this*!! ❤
This is me (in the black blouse) with Stacey:
Okie dokie…Take it away Stacey!!
*****Hello Everyone!! It’s your favorite random relative of Arlynn’s, Stacey!! I’m here to show you how to do a Fall decor item that requires ZERO crafting or artistic ability! Woo! (It’s also great for getting out some aggression as you get to beat the snot out of a plank of wood!) So, lets begin the easiest craft project I’ve ever created!
I had a VERY large wall space that I wanted to cover. I needed a piece of art (or something) to cover a space approx 4’ long by 1’ tall. I scoured Home Goods, Hobby Lobby, Kirklands and everywhere in between looking for such a large piece with no luck. So that meant I was going to have to create something. I wanted something to compliment the decor I already had on the opposing wall. Pretty rustic and quite specific. (No, sadly, I did not create this
beauty) But, no worries, I was on a mission and once that happens, crafting magic is about to go down!

I started by creating my “ingredients” list. Plank of wood 1’x4’. (You can make yours any size you like!), chalk paint and wax, brushes, cloth, roller brush, sander/sand paper, tools to distress wood (chains, screwdrivers, hammer, etc) letters to attach, hooks for hanging and a glue gun to attach your letters.
First place I headed to was my other favorite craft store…HOME DEPOT!! Oh my goodness y’all! I love me some Home Depot! Those guys see me and turn the other way because they know I’m going to make them cut, sand, search or reach something for me! LOL! Suck it up buttercup, I’ve got decor to create! But, they got lucky this time because I found a super cheap plank of pine for $9!! It was exactly the size I wanted too! (1’ x 4’). So, I grabbed my plank and headed on over to Michaels to snatch up some chalk paint and search for the metal letters to attach.
Once at Michaels my search began. The chalk paint was no problem! I chose a yellowish tone called “Tuscan Gold” and a brown antique wax to go over top. Easy peasy, light and breezy! Onward towards the metallic letters! Oh man, I am gonna spell the heck out of some Fall words!! Pffft!! Not so much! My husband (God Bless him) and I spent a BAGILLION hours pulling out all the letters they had on the shelves and a good amount of time on the scrabble word creator app trying to spell Fall themed words! Goodness Gracious!! It looked like my “easy” craft idea was going to be a bust. But, I’m no craft quitter! So, I got to thinking, lets mix up our media. I took both the metallic letters and some painted wood letters and finally had enough to spell a word!! YESSS!! I had chosen the word HARVEST. I figured that was better than some of the other words we had the letters for like Hokey, Chokey, Jokey, Sock, Whore 😳, Oyster and Shylock. But, I don’t know your life. Maybe you would like to create a nice “Shylock” sign. In that case, you’re in luck! But for me, I had my heart set on Harvest. Thankfully, on the other side of the store, they had some red/gold painted wood letter and I screeched “I CAN SPELL HARVEST NOW!” I’m sure the lady that was beside me thought, “Lady you need to spell MEDS”. Oh well, not the first time someone thought that! SO HA! Once I had purchased all my ingredients we headed home and the fun began!


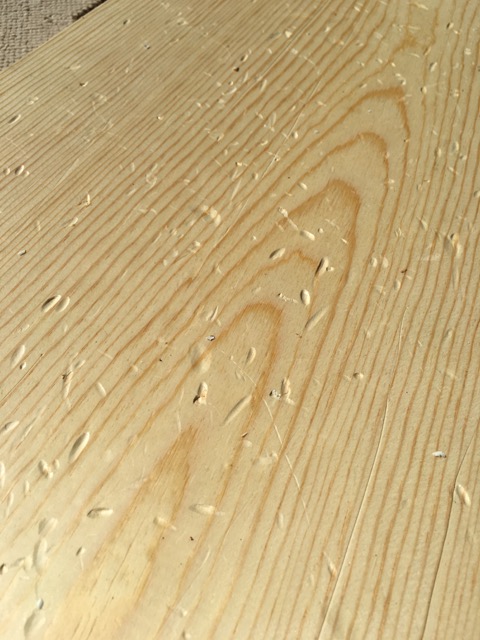
I took my plank outside with some chains, a hammer and some assorted screwdrivers. Basically, you want to use whatever tools you have to “distress” your plank of wood. Good time to get out those frustrations! I wanted a pretty distressed look so I just whacked the heck out of that plank of wood! Don’t forget to do your edges! This comes into play later when you put on your wax top coat. See all those divits and scratches? Thats what you want. Looking back, I wish I would have added more! Also, I used a little hand held sander to round the edges and remove the splintered pieces on the corners. You don’t want any sharp angles. We want to make this thing look old.

Next step, Paint that Plank!! I loved the Fall-ish yellow of the Tuscan Gold. It also complimented the red in my wooden letters. Now, be patient and let it dry. Who am I kidding, I only let it dry for about 30 min.


Once your beautiful plank is painted. DON’T FORGET YOUR EDGES!! It’s time to move on to the wax top coat. I chose a warm chocolatey brown. I figured this would look like years of dirt and wear. Guess what?! I was correct! Mmmmm, look at that! All aged planky goodness!
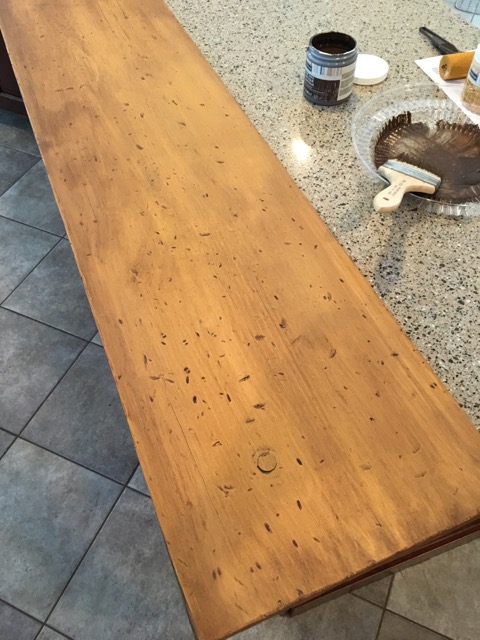
I brushed on a good amount of the brown wax and took extra care to get into all the nooks and crannies! Even on the edges! Then, I wiped off a little bit with a dampened cloth. Be careful you don’t remove too much or you won’t get the super aged look we were going for.


Finished product! A nice aged looking plank with just a little bit of effort.
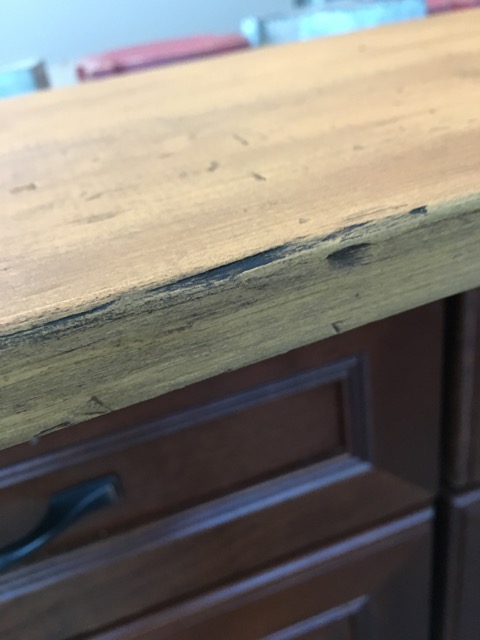
Also, see why distressing the edges was important? Now all the sides are gorgeous too!
So this is pretty much the hardest part of this project! Your kidding me?!? NO, I am not! Only thing left is to attach your letters and the hanging hooks. Can you believe this project?! So easy and so professional looking! I love that (if you can find the letters) you can make one for anywhere! Maybe Sock wouldn’t be such a bad word to spell after all!! Would be great in a laundry room! Hahaha! Here is my final project! It’s glorious! It has the metal in it that I was looking for and it’s just the right size! Oh, I forgot to mention that I just attached my letters with hot glue.

And hung in the perfect spot:
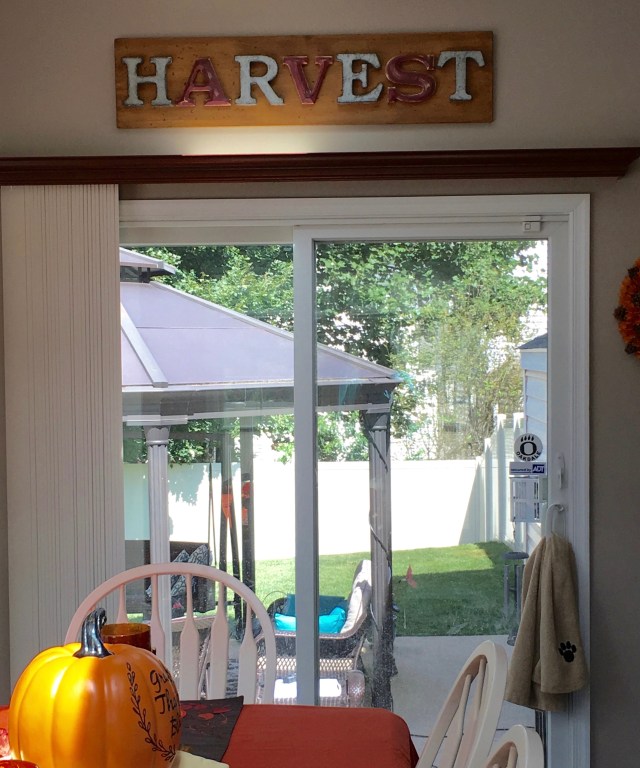
Seriously, how easy is this?! Now get out your word finder app, head to Home Depot and Michaels and spell some words!Enjoy making your house a home by crafting your own glorious creations!! Until next time, smooches from Stacey 😘 *****
Arlynn here again—THANK you SO much Stacey!!!! You are awesome and you have inspired me to try to do one of these beauties, and I’m guessing that you’ve also inspired many more!! LOVE you bushels and pecks and (((hugs))) around the neck!! MWAH!! ❤
I hope y’all have enjoyed this wonderful blog post from Stacey—She is a very talented lady!! 🙂
**In crafting there are no mistakes just unique creations**
Until next time, y’all take good care! ❤
~Arlynn ❤
