
Hi Everyone!
I just returned home from my cousin Stacey’s house, she lives 1-1/2 hours away from me and during our visit we had a wonderful time laughing, crying through laughter, hugging, chatting, and crafting with another one of our cousins Donita. Here is a picture of the three of us, left to right: Donita, me (Arlynn), and Stacey (I adore these two ladies!!):
:
We’ve dubbed our fun time together as “Cousins Craft Weekend” and I will be posting three separate Blog entries to showcase what we created during our time together. Stacey will be contributing to two of the entries, this one (Part One) where she will describe a ruffle deco mesh Halloween wreath, and another one showcasing a matching deco mesh garland. Both things turned out fabulously well, and have now adorned her front porch with a splash of Halloween fun! Stacey is an amazing mother/wife/daughter/cousin/friend AND crafter! I love her dearly and I know that you will enjoy her sense of humor as you read through her entry as she describes the process that she used to create her finished product. 🙂
Here goes:
“Hello!! My name is Stacey and my fabulous crafty cousin has graciously allowed me to hijack her blog for an entry! (I hope she doesn’t regret that!) I, like Arlynn, love my family more than my own life and enjoy making my house a home using crafts. I love to paint, build, design, create and repurpose just about anything to accomplish that task! Maybe, in the future, I’ll share some of my other creations here as well.
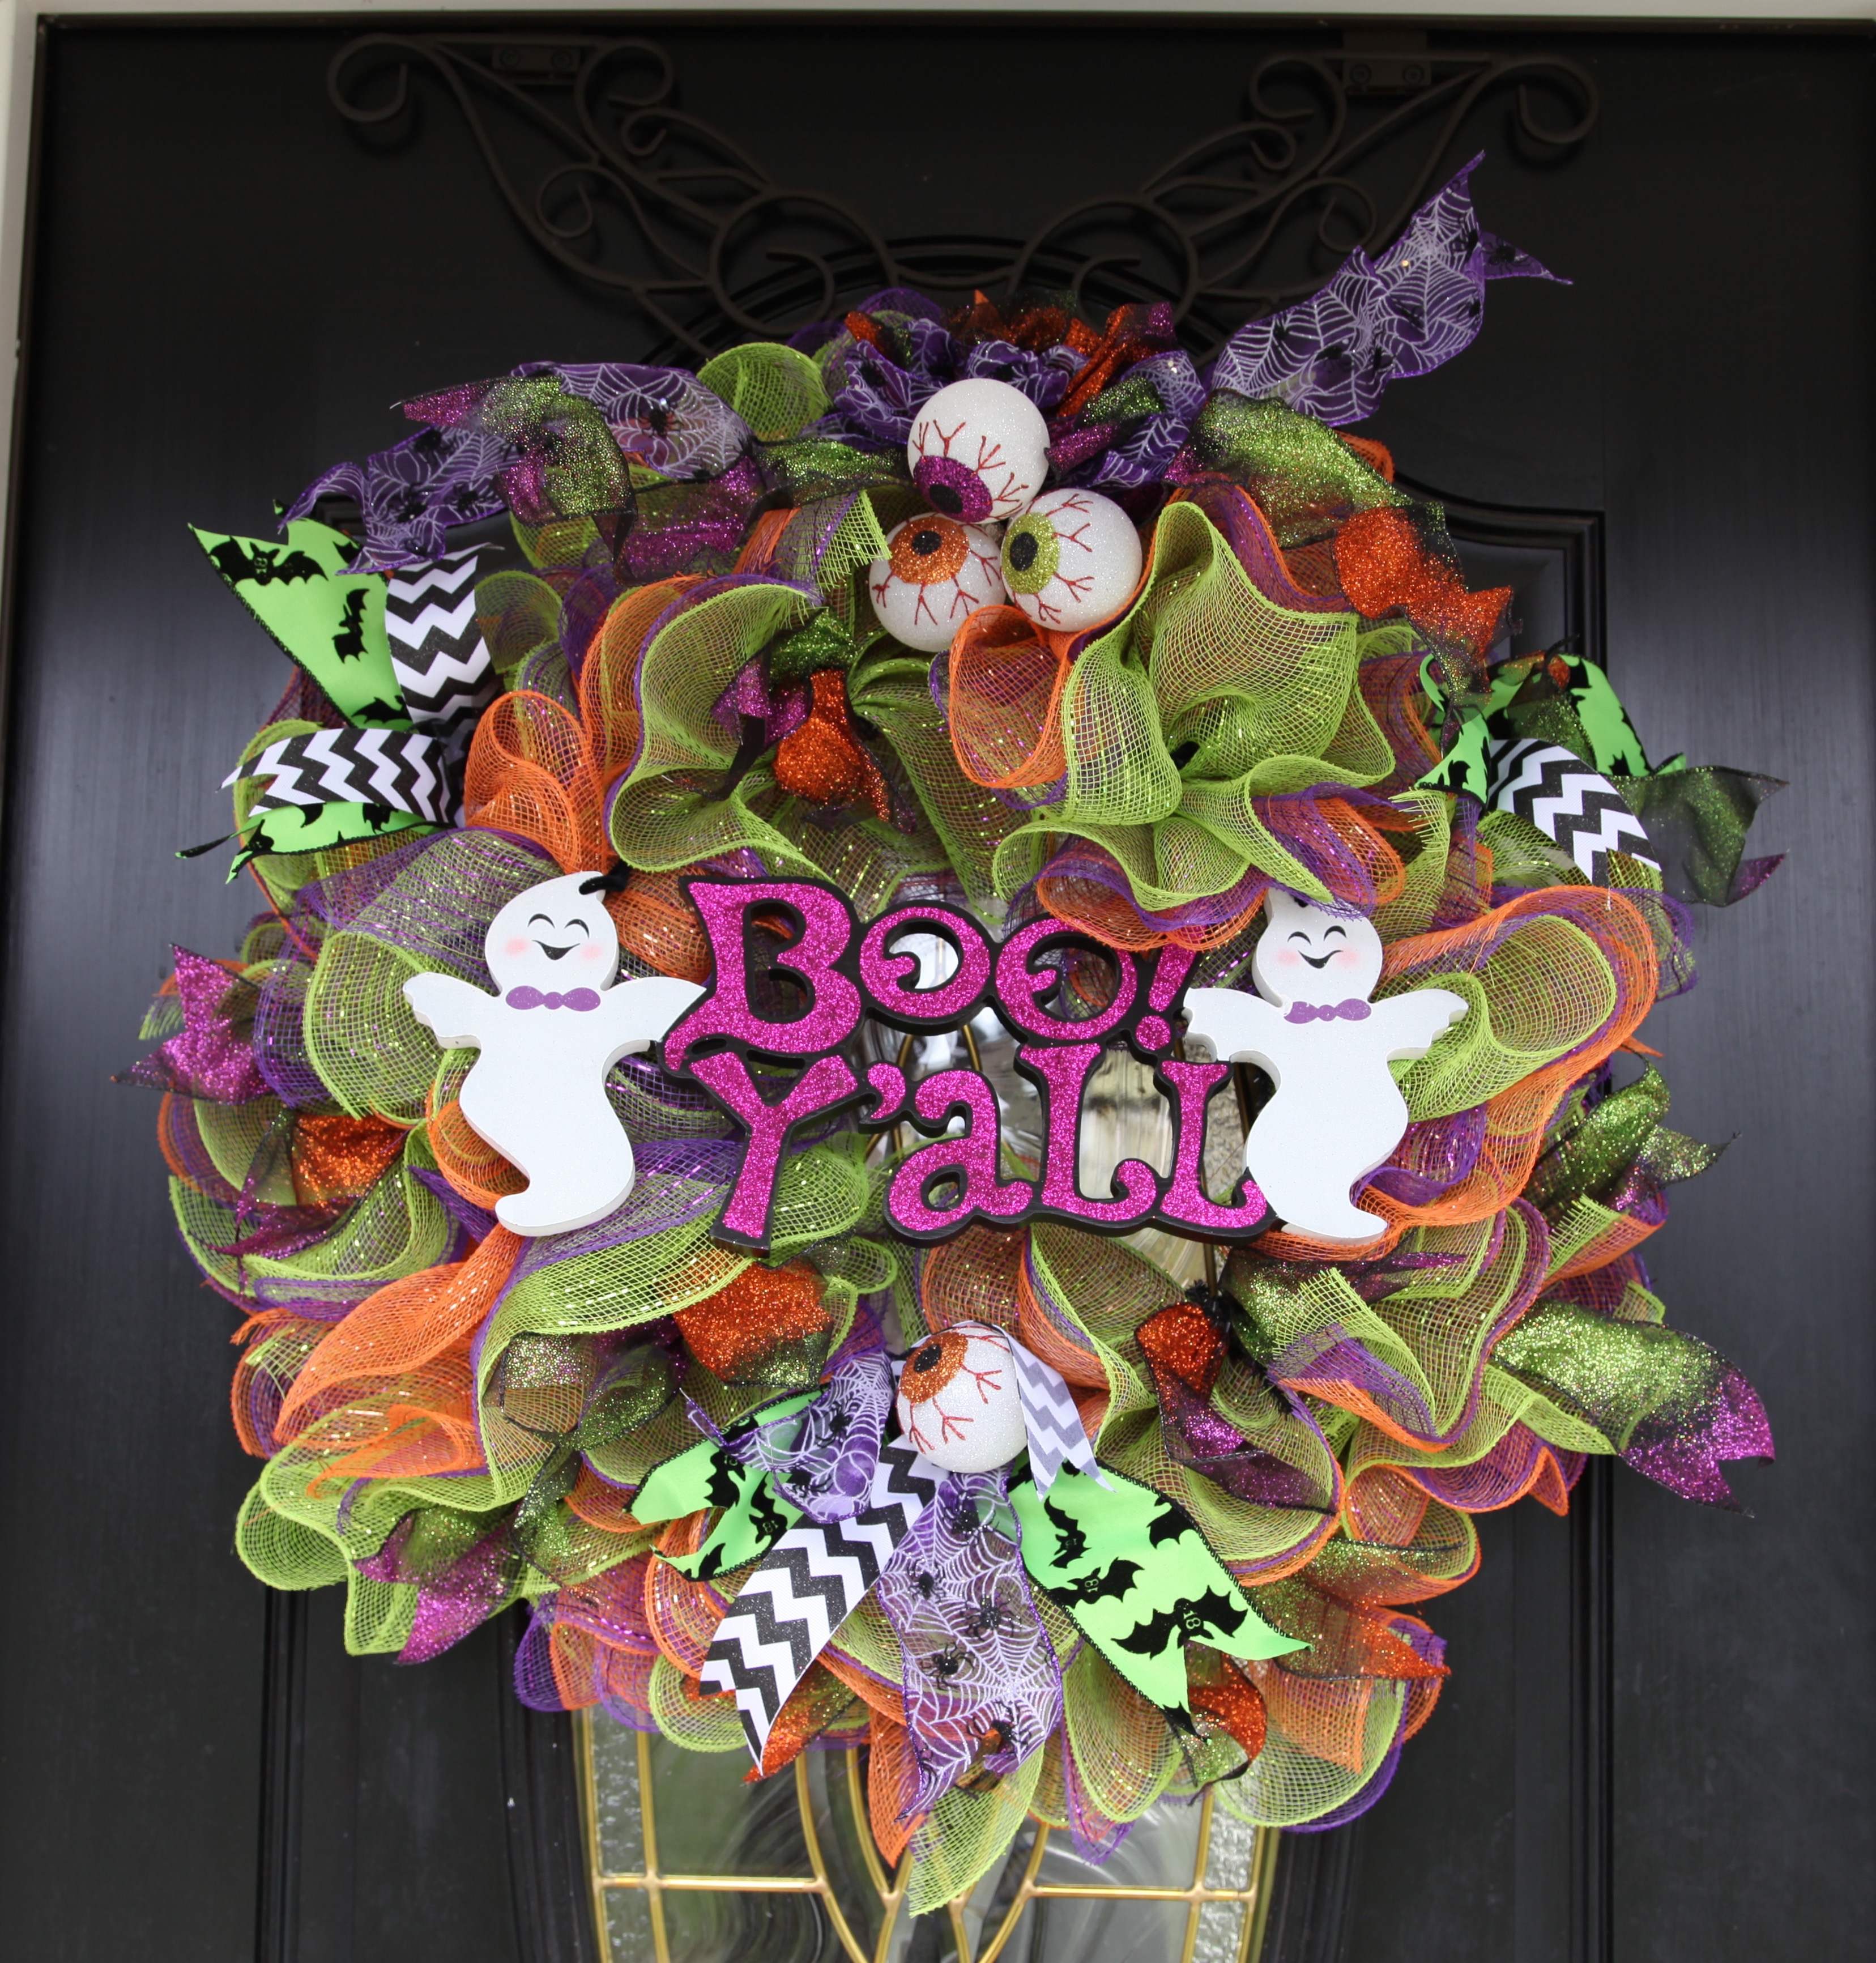
Since Halloween is almost upon us, I’ve decided to show y’all how to make a ruffle deco mesh wreath and garland to spookify your front porch! The hardest part of this entire craft is deciding on a theme. This is really important. Stick with your theme. If you try to add too many different ideas into one craft, you will end up with a disjointed and confused product. We want FABULOUS not WTF? (What the Flip)
I decided to go with Monster Eye Balls! I don’t really do ghouls, witches and anything especially dark and/or scary. You may choose whatever makes your little holiday heart go pitter patter!
Once I decided on my theme, I took myself to our local craft stores and purchased all the goodies I needed! And even some I didn’t! LOL!!
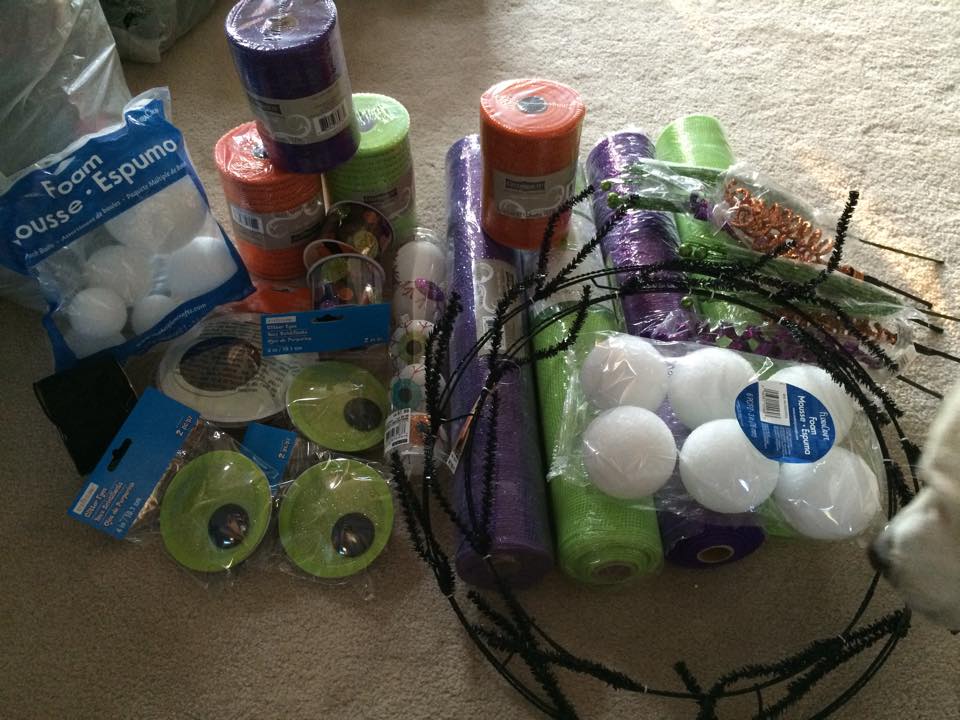
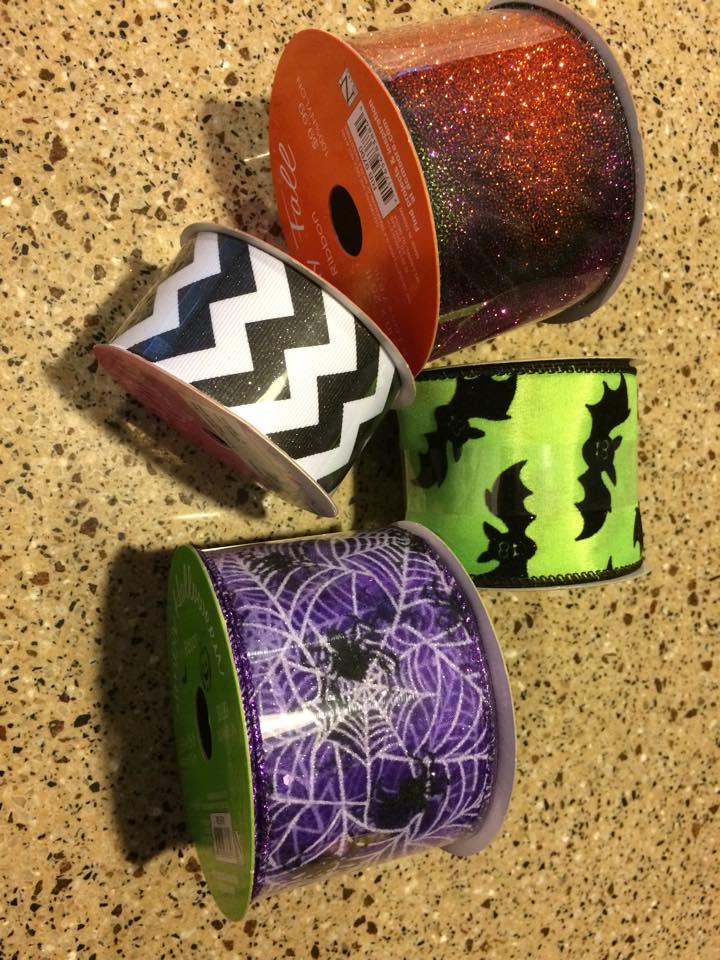
For the wreath I bought a 16” pre made wreath form, three 10” rolls of Deco Mesh, Halloween ribbon, eyeball ornaments, assorted picks and black pipe cleaners. The 10” deco mesh can sometimes be tricky to find. I found mine at JoAnn’s Fabric but there are lots of great online stores that sell all colors and even patterns of this particular size.
To make the garland, I recycled some old pre lit Christmas garland I had languishing in the basement. I bought two rolls of 12” deco mesh and one roll of 5.5” deco mesh. I purchased some foam balls and painted them to look like eyeballs. (More on that in the garland post.)
I began my project with the wreath. I decided instead of the traditional deco mesh wreath, I would make a ruffle mesh wreath! Let me tell you, it was WAY easier and super fast!

I also loved using the pre-made wreath form! What a time saver! These forms already have the pipe cleaners attached and spaced.
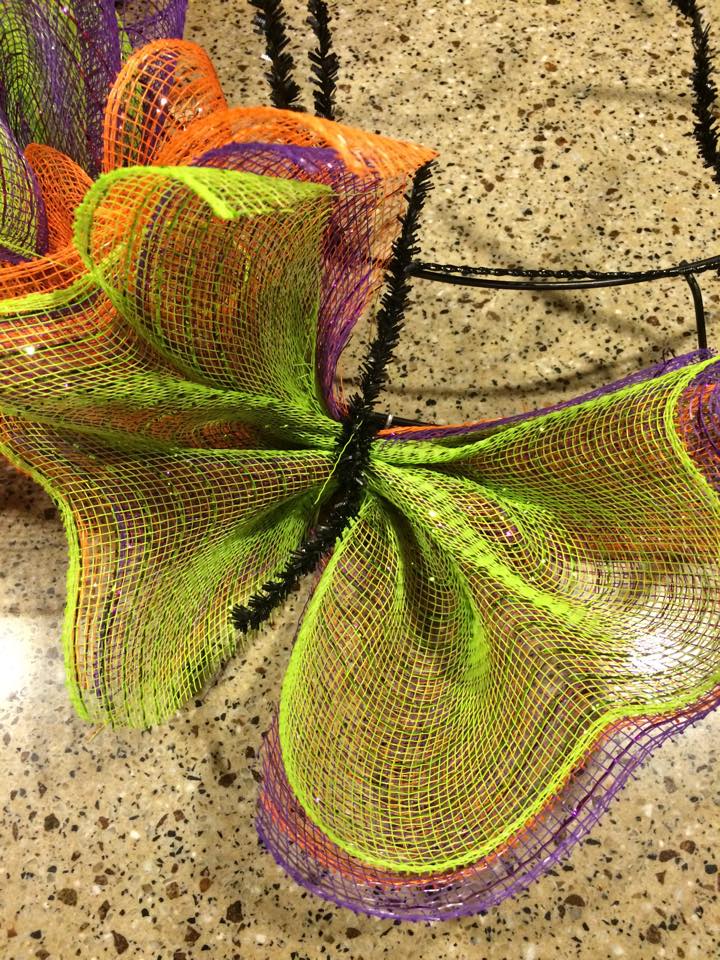
I started by laying out a tape measure and taping it to my workspace. I then rolled out my deco mesh and cut 20” lengths of mesh. One thing you must know about me before I go on. I am incredibly lazy and impatient!! So, with that in mind, you will see that I stacked all three rolls of mesh on top of each other, cut them all at the same time and made 17 rolls. (the number of pipe cleaner attachment spots).


Once I had all my rolls cut, I scrunched them up and attached the bunch at each pipe cleaner. *Remember my laziness? Well, I didn’t even separate the colors! I just left them all stacked and bunched them all at the same time!! YEA Laziness!!
After all the spots had been filled in, I started work on my ribbon accents. I began the same way as before. Rolling the ribbon along the tape measure and cutting 12” lengths of ribbon. *Note to self. If you decide to use glitter ribbon, be prepared to look like Tinker Bell exploded all over your skin, counter, floor, dog etc!! That stuff is harder to get rid of than grey hair!!
I had all my ribbon lengths cut. To finish the ends I just cut pretty little tails on them. To do that, fold your ribbon lengthwise and cut at an angle. 

OK!! At this point, you have all your deco mesh attached, and all your ribbons cut!! TIME TO FLUFF AND DECORATE!! Fluff and separate your mesh to add the fullness and ruffle effect. Then, use your creativity to add ribbons, eyeballs or whatever makes your Halloween Wreath strike fear into all Trick or Treaters!!
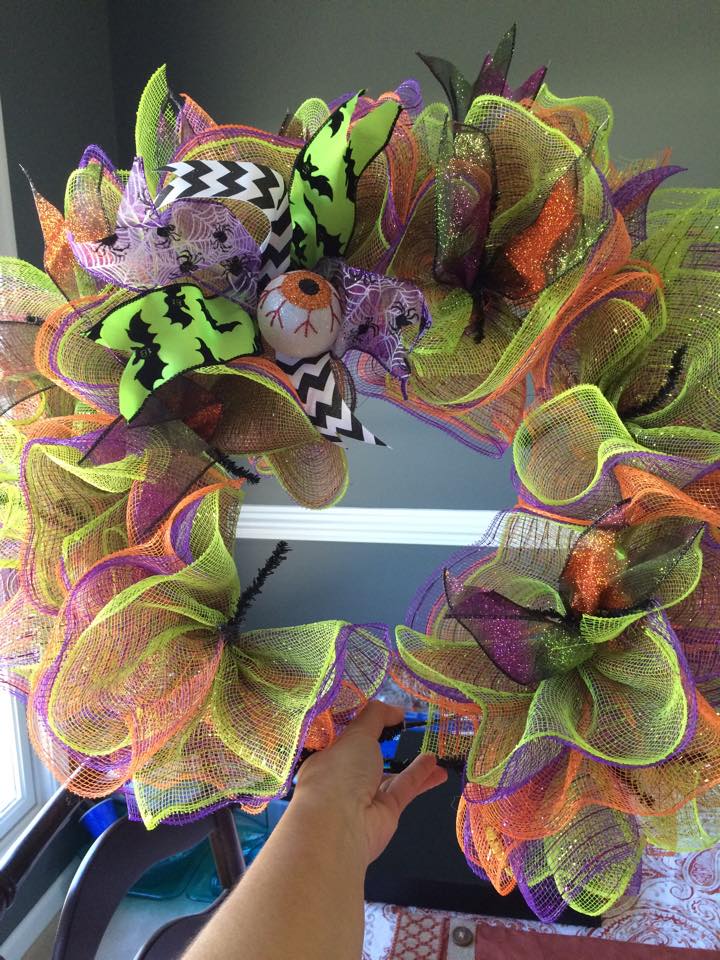
The last thing I added was a “Boo Y’all” sign! How cute does that look?!!
Oh now look at that!! What a beauty!! Guess what?!?! Yours will be AWESOME too!”
***Arlynn here again…Wasn’t that wonderful? Stacey is as sweet and funny in person as she sounds in this entry. 🙂 Stay tuned for Part 2! I can’t wait to share with you the wreath that I made for Donita and Stacey will be sharing the deco mesh garland that she made to match this awesome wreath!***
Until next time, y’all take good care! ❤
**In crafting there are no mistakes just unique creations**

Pingback: Cousins Craft Weekend – Part 2 – Grapevine Fall Wreath | Country Craft Corner
Pingback: Cousins Craft Weekend – Part 3 – Deco Mesh Garland with Guest Blogger (my) Cousin Stacey | Country Craft Corner
Pingback: Christmas Wreath: Ornament & Burlap Mesh (Burgundy & Gold) | Country Craft Corner
Pingback: Pasta Fagioli – Country Craft Corner