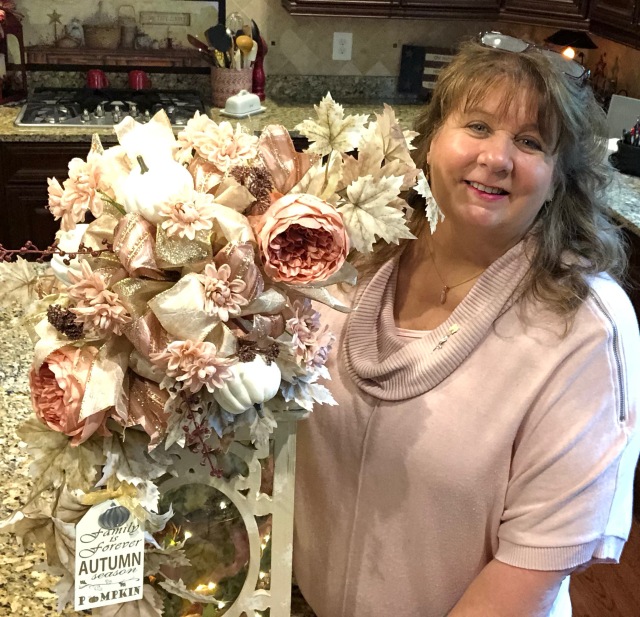
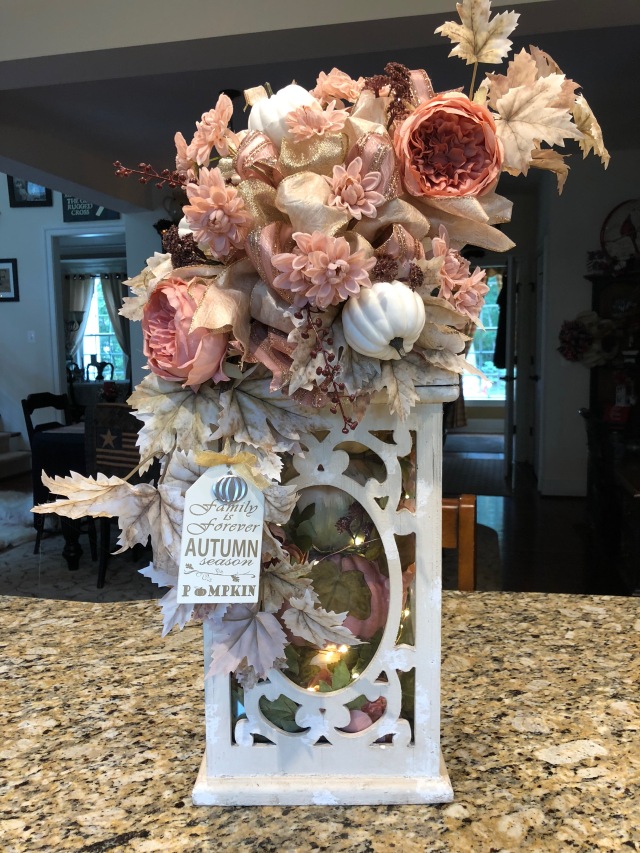
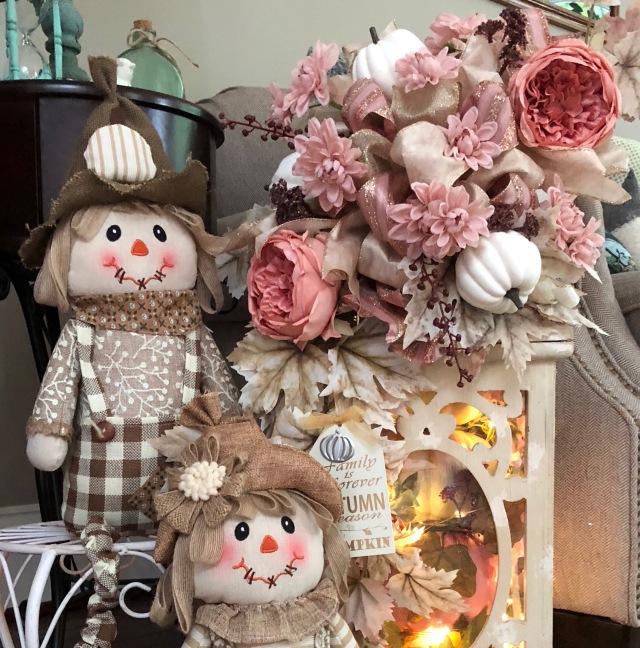
Hi Everyone! I have been busily about in the last month and have now finished decorating our home for Fall. In this post, I will show you many pictures of each space that I have decorated. At the end of the post, I will give you a link to my YouTube “2018 It’s Fall Y’all” Playlist in which I share many tutorials of me literally creating many of the crafts, cozy corners, not to mention nooks and crannies abounding that you will see in the following pictures. The very last video in the Playlist is my 2018 Fall Home Tour in which I walk you through our home and explain every little thing and then set it all to music as I travel around the house in the evening hours while all of the soft lights glimmer and glow. 🙂 Here we go!
All of those pictures covered the rooms that span the back of our home…Now let me show you how I lightened up the pallet and give a little nod (with a pop of color) to the Farmhouse. 🙂
Hi Everyone!! It has been such a busy time around our home as of late! As most of you know, Chris and I just returned from our back to back Voyage of the Glaciers cruises in Alaska with Princess. I’ve been diligently working on my blog series for that trip, sharing with you a time that I have already tucked safely away in my heart and mind, I’ll be able to conjure up those memories any time I need to be transported to one of the most gorgeous places on the planet. If you haven’t happened to see my blog posts about our trip up to this point, here is a link that holds all of the links to the blogs that I’ve written so far (check back often, I have a long way to go to finish that series):
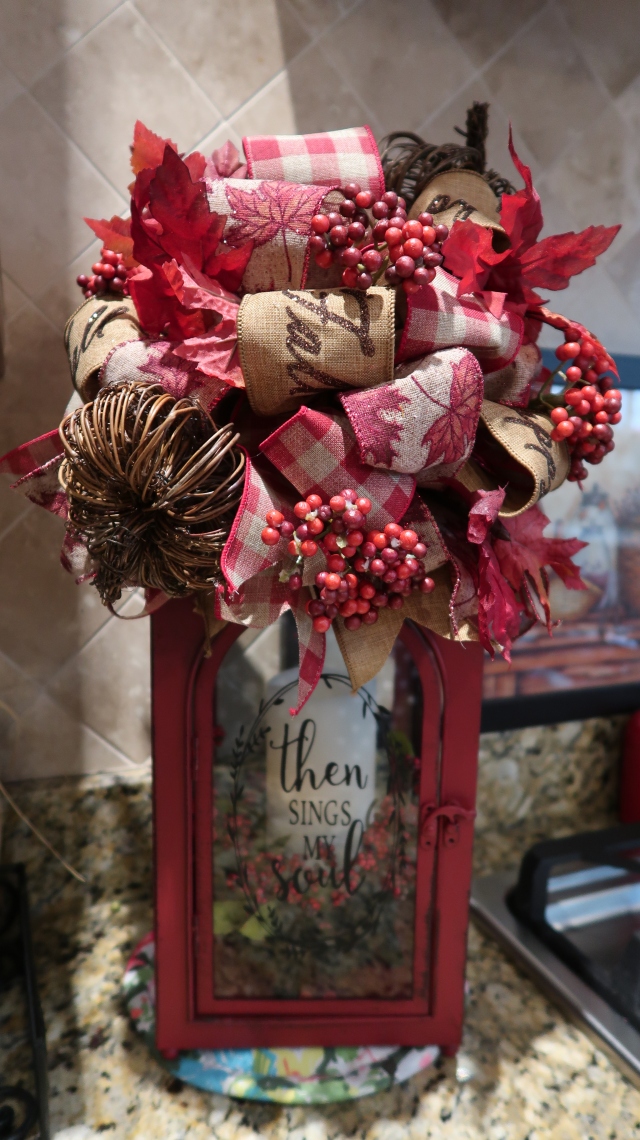
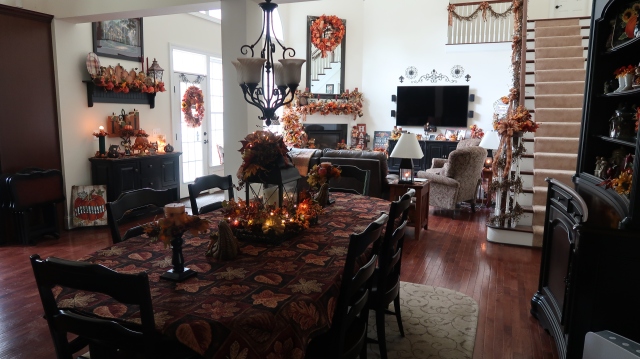
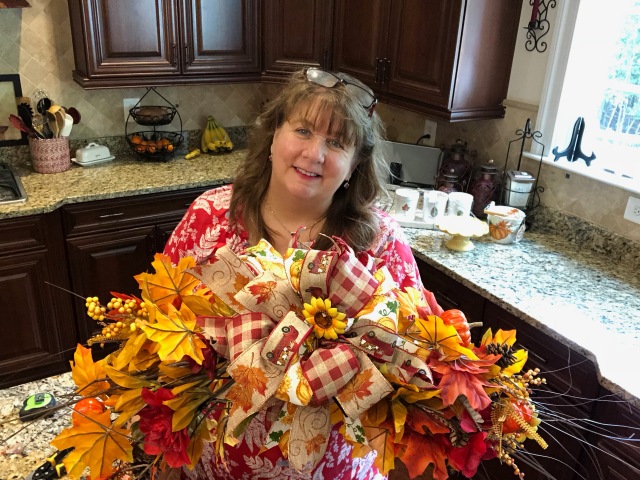
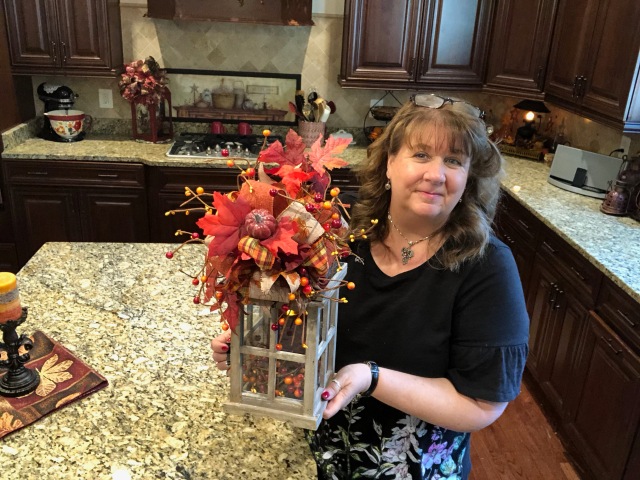
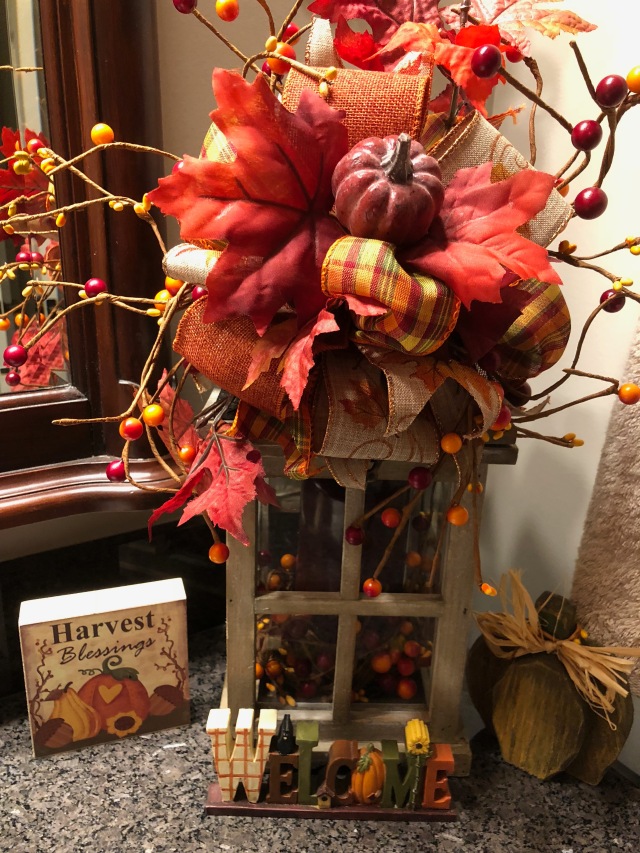
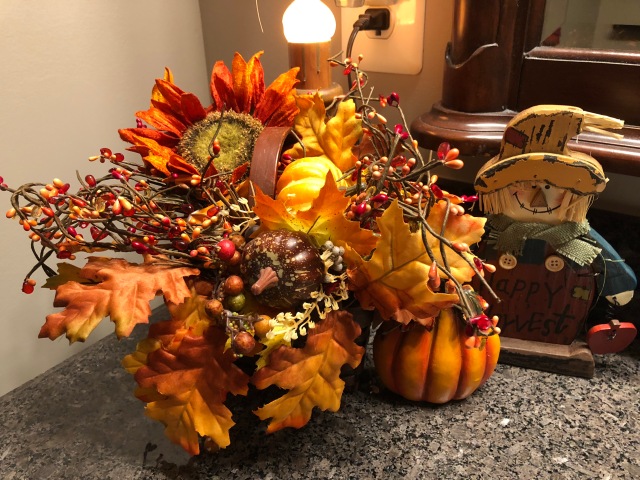
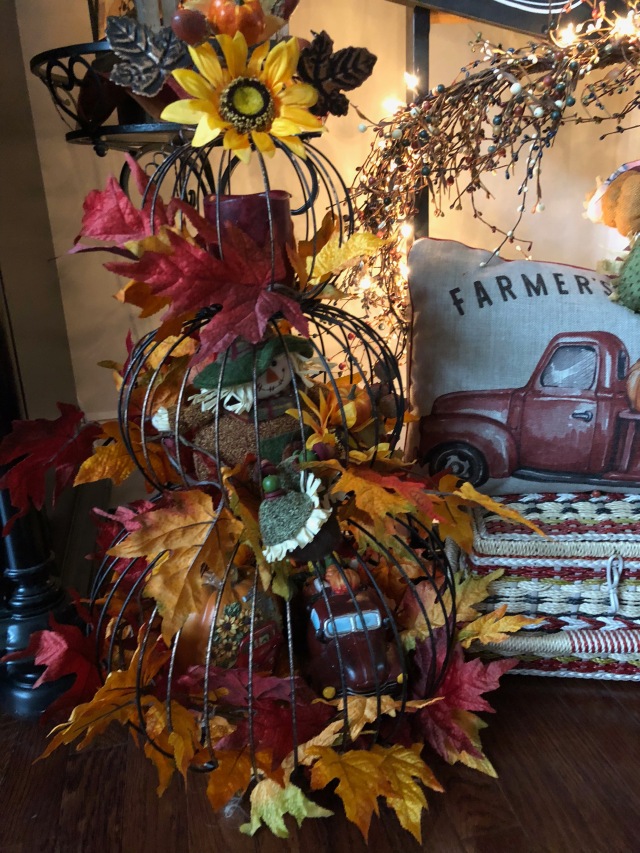
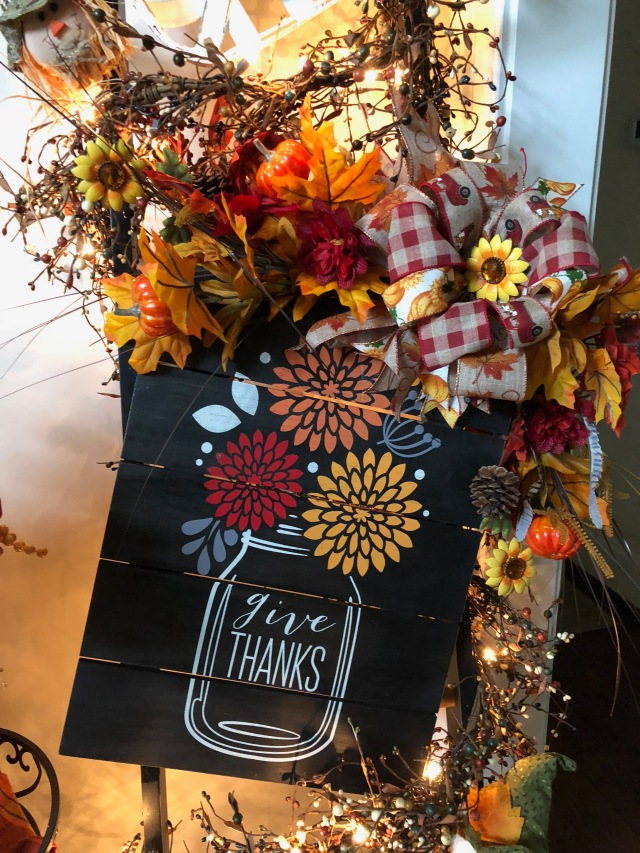
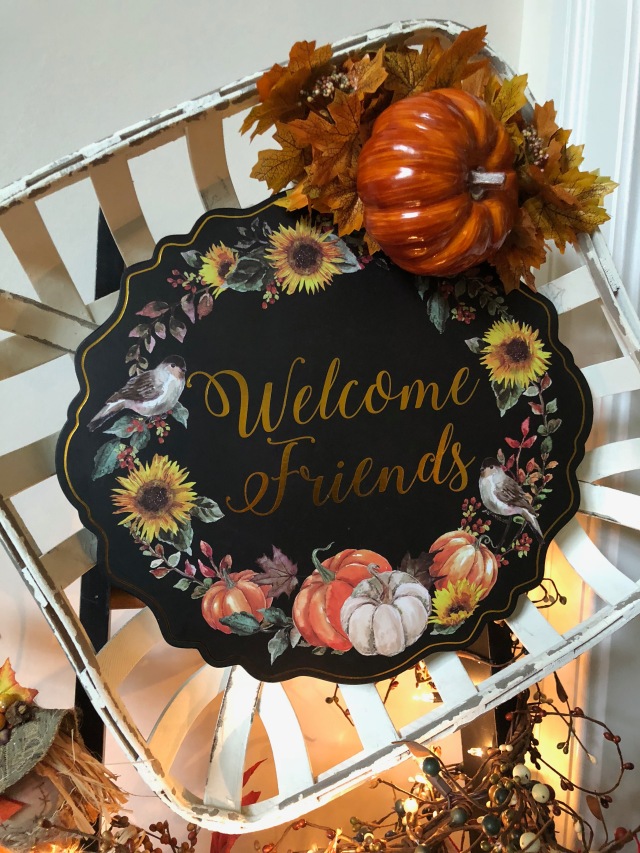
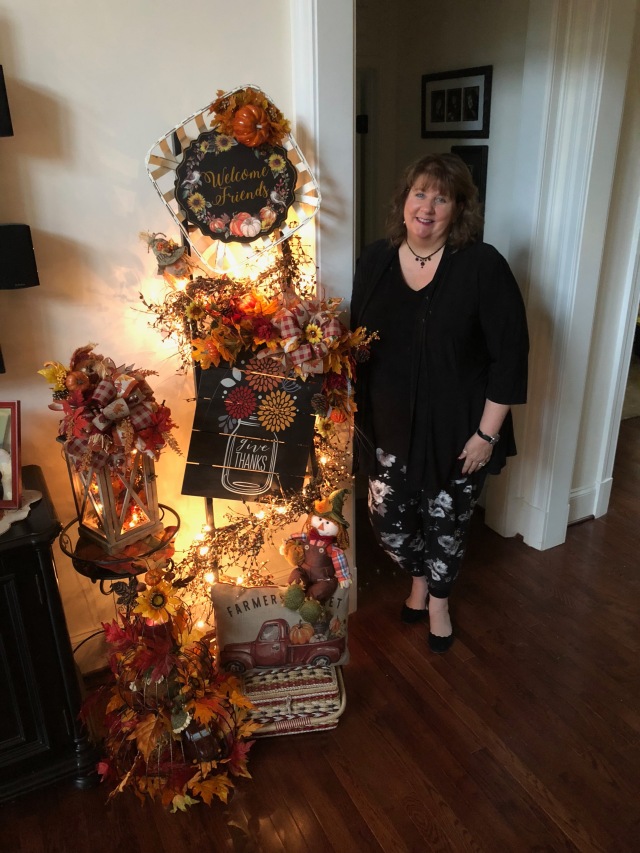
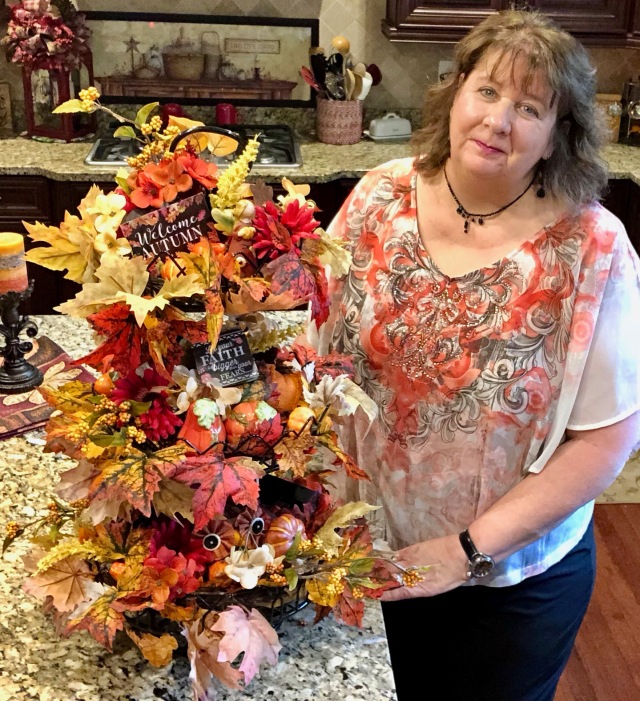
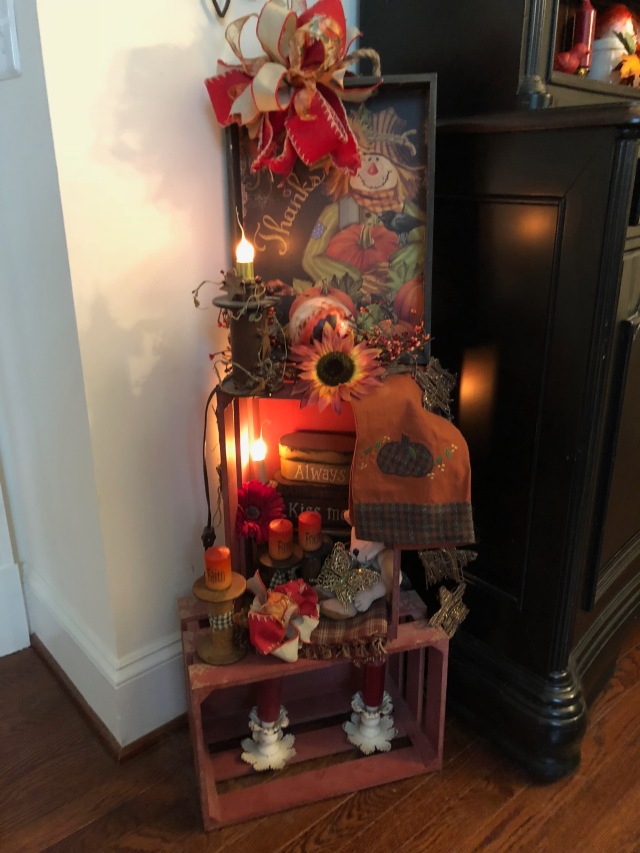
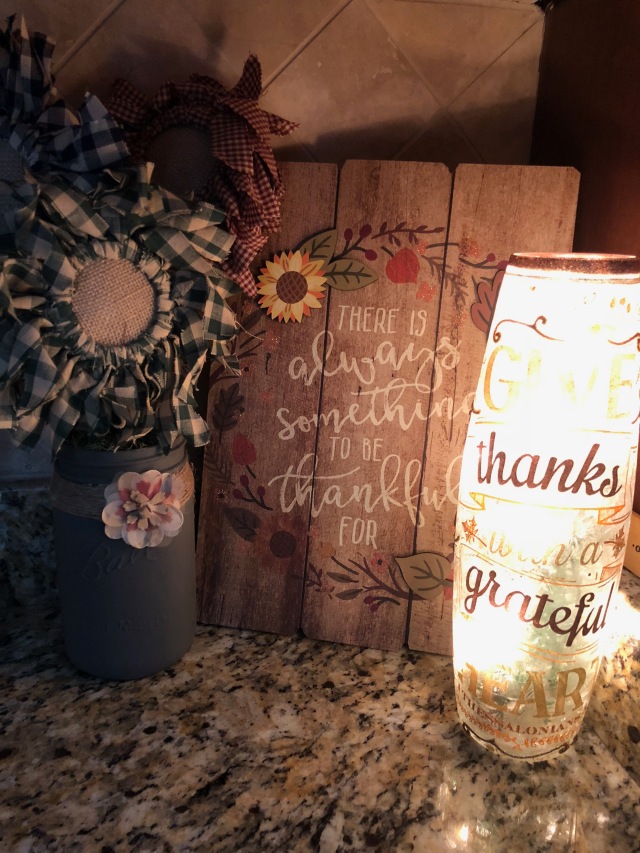
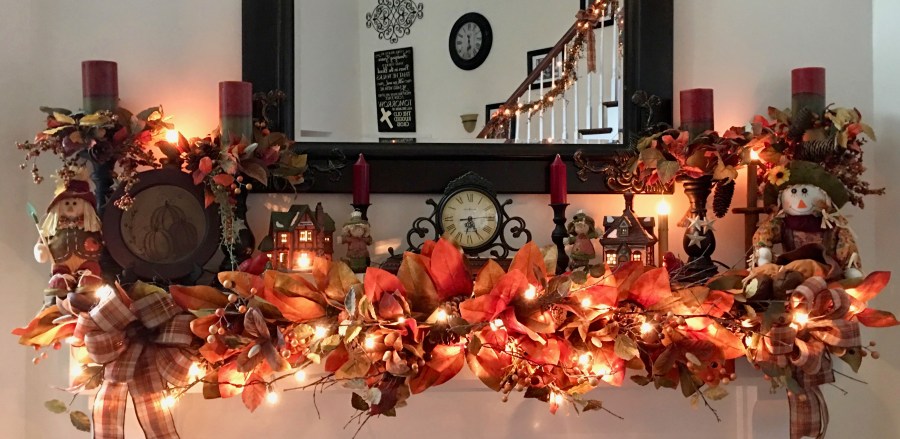
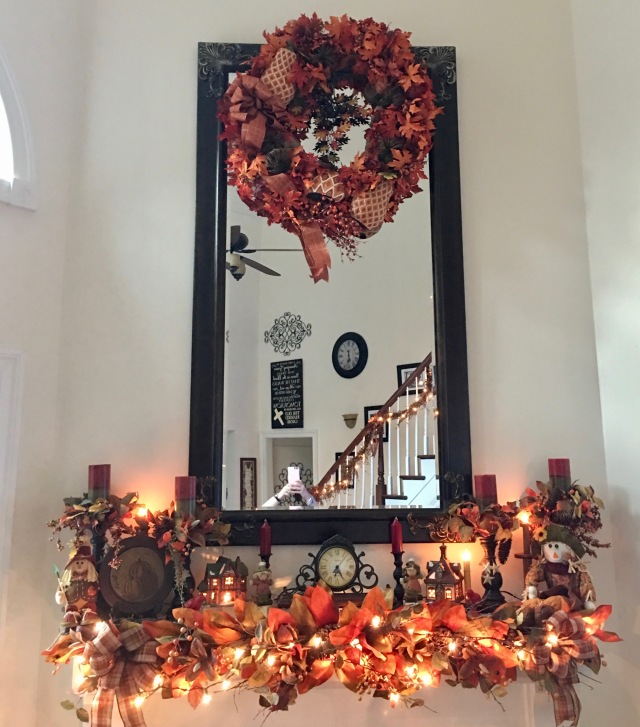
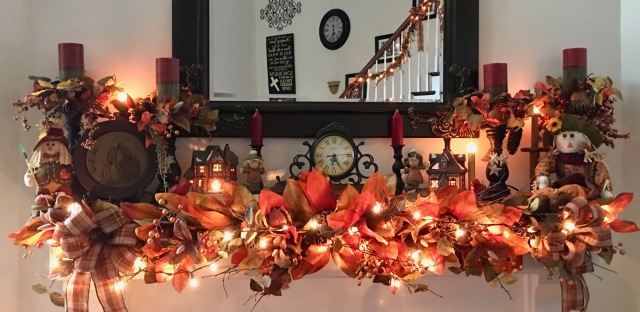
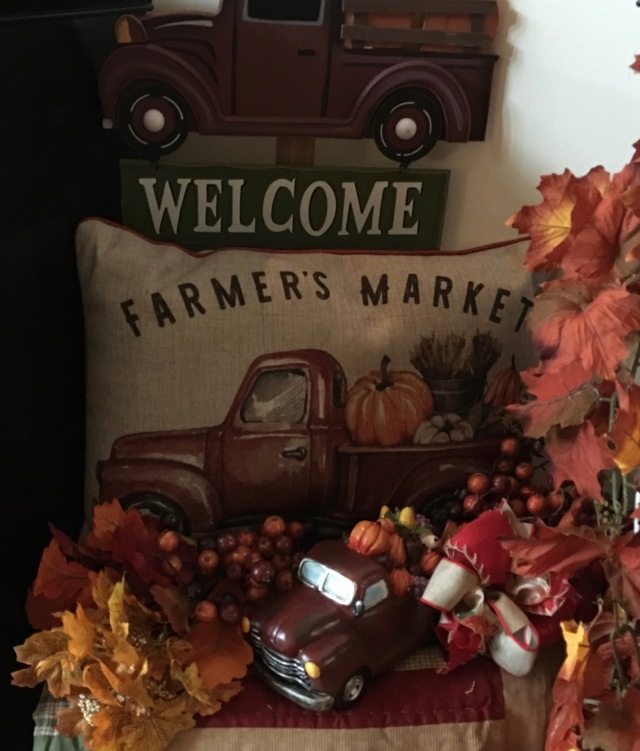
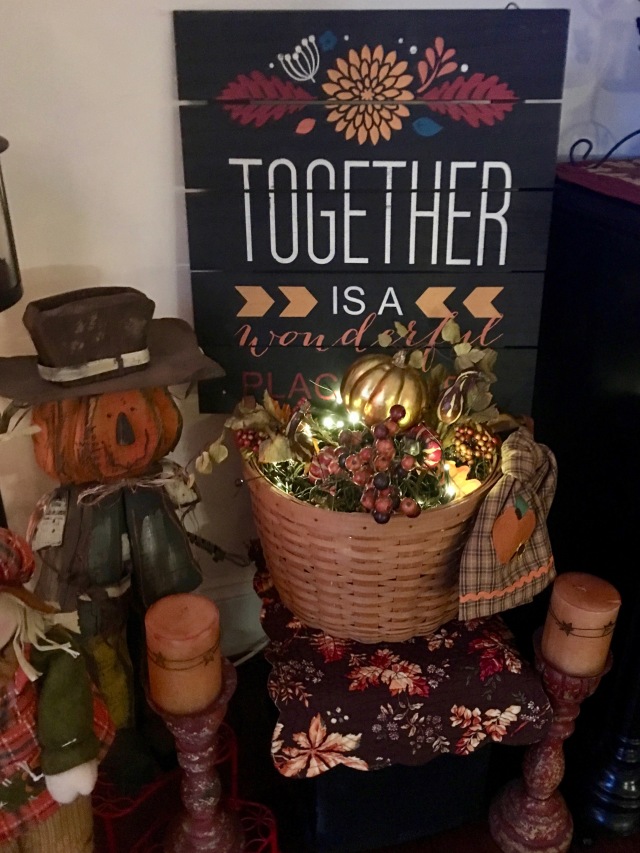
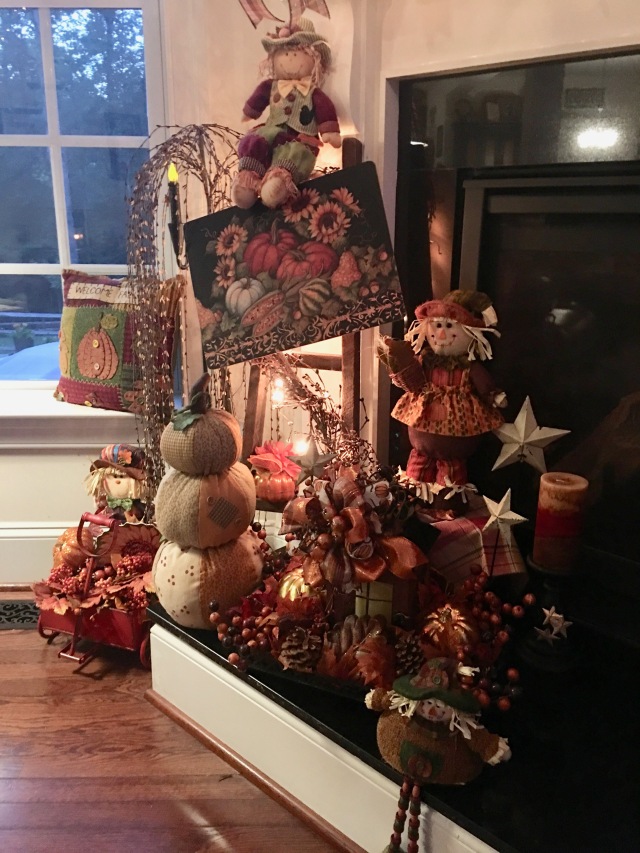
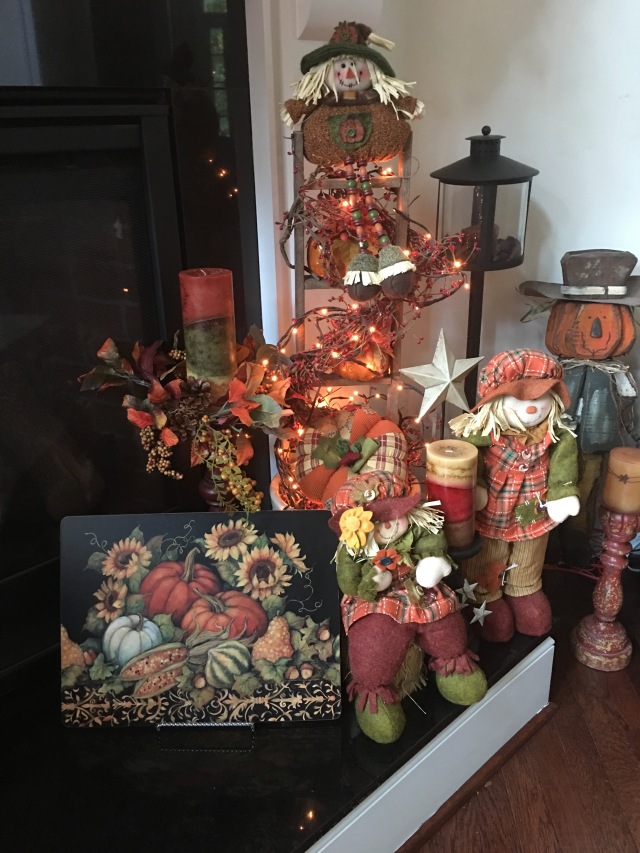
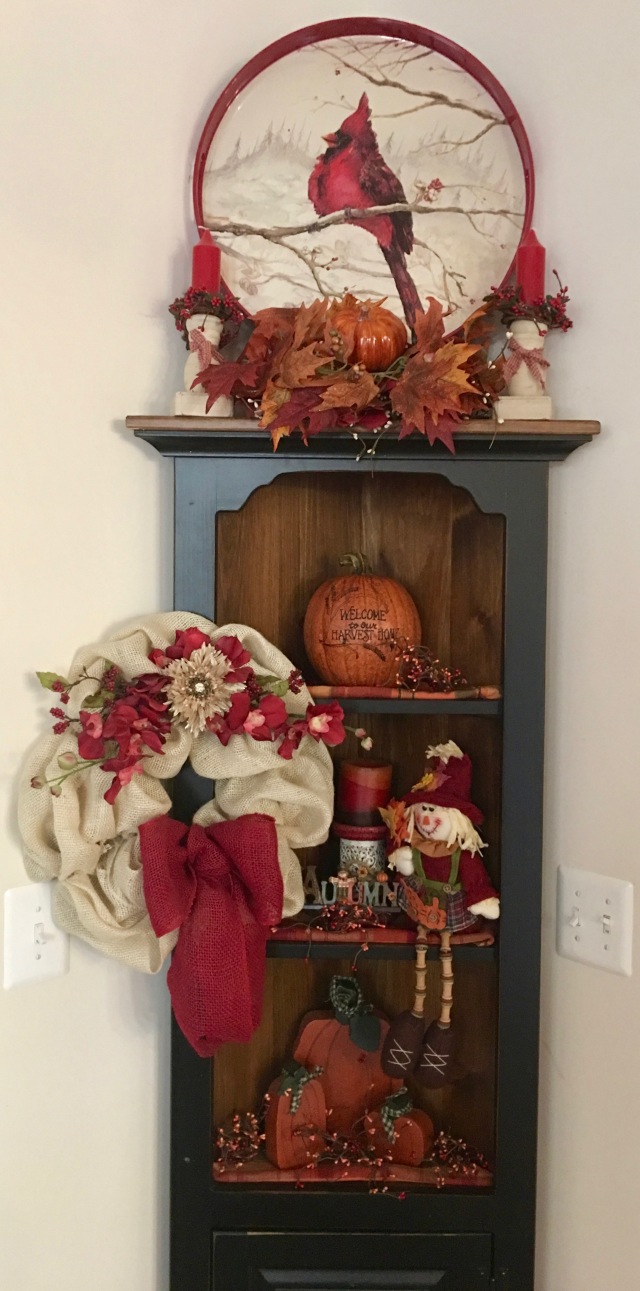
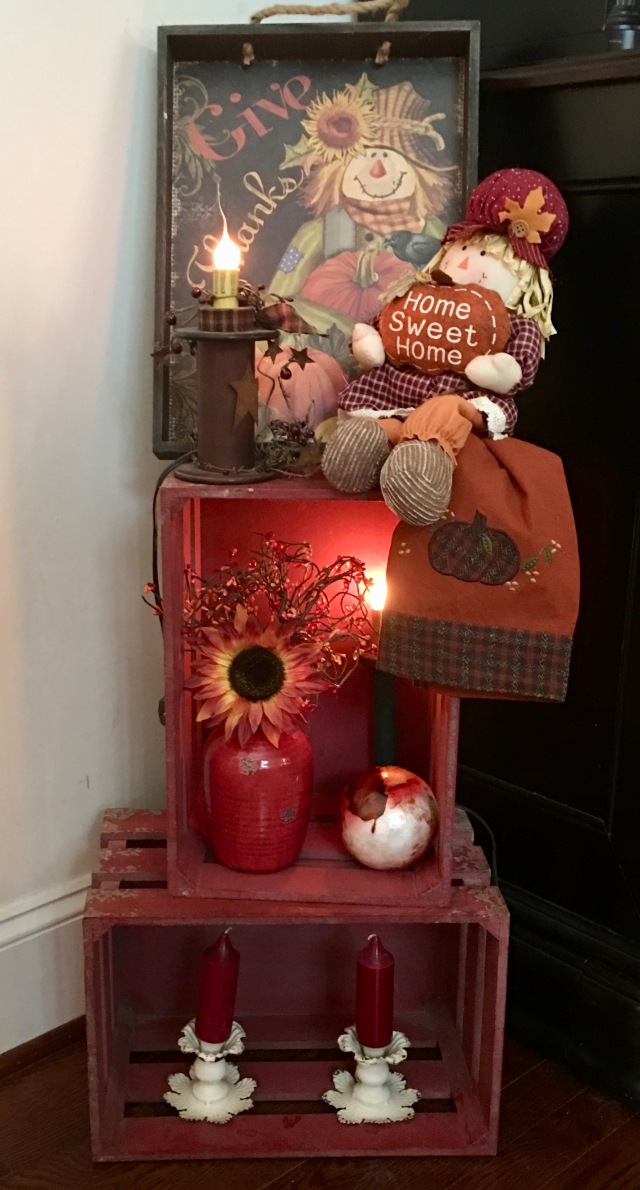
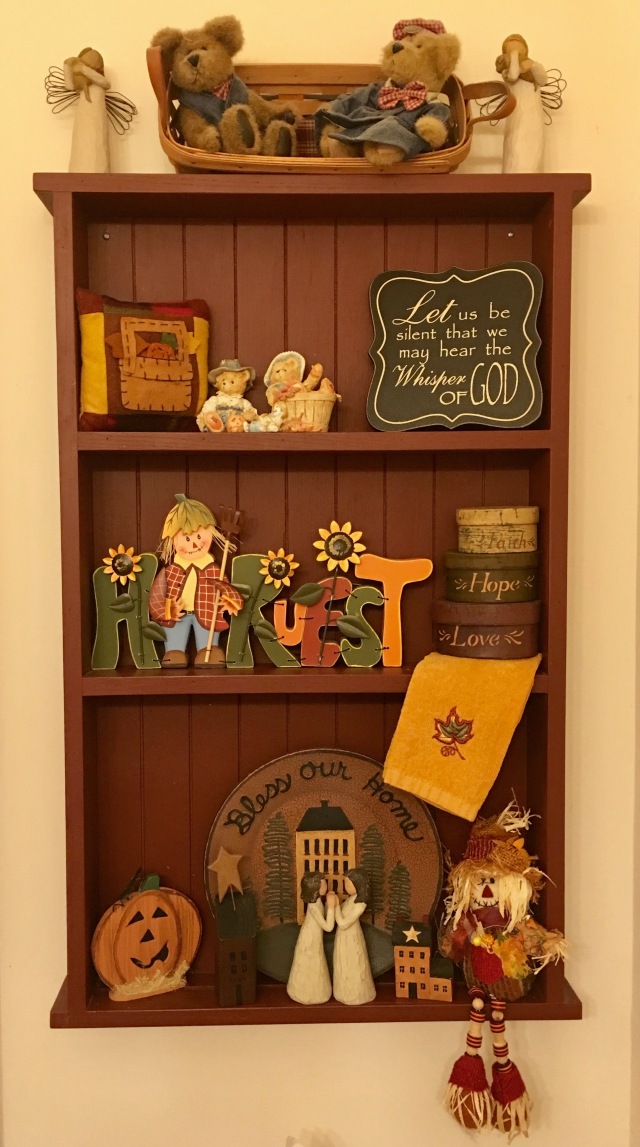
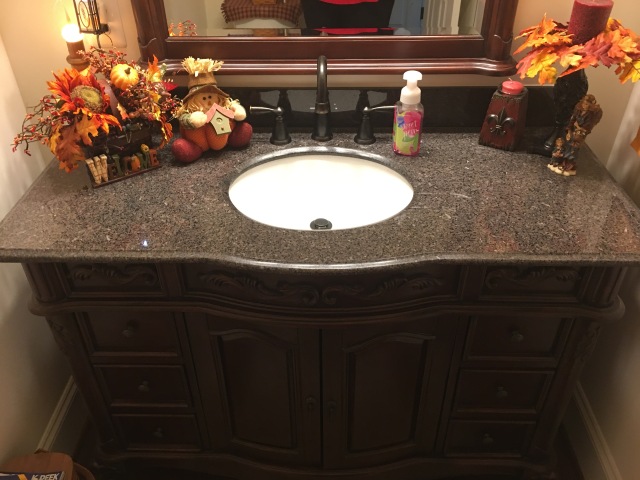
Before we departed for our trip, I was diligently working on getting my Fall Decor up and in place; I worked very hard for the couple of weeks before we left. And I was successful…whew…I managed to get all of the indoor spaces completely finished! That said, I not only got my decor into place, I also created YouTube Videos of every craft and space that I created. First, let me share some pictures with you of our home decorated up for Fall, then, I will give you a link to my YouTube Channel’s “Arlynn’s Country Craft Corner” 2017 Fall Home Tour Playlist that holds 20, yes, count them *20* videos of me bringing my creations to life such as Cozy Corners, wreaths, lantern centerpieces, lantern swags, etc…To say I worked hard, well, that is an understatement…haha. 😉 BUT, of course I thrive on my crafting and decorating, so it was definitely a labor of love!! 🙂 So here we go with some pictures:
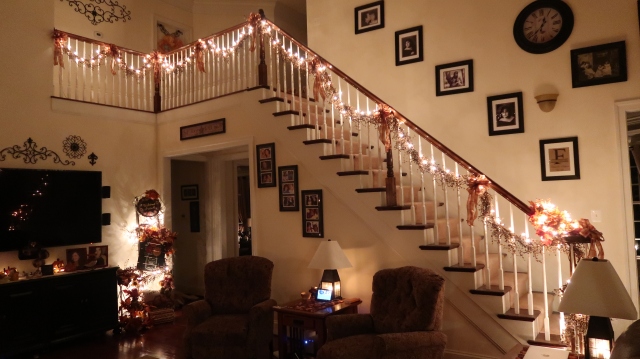
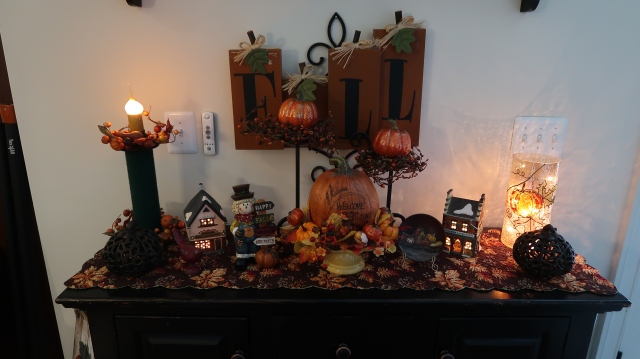
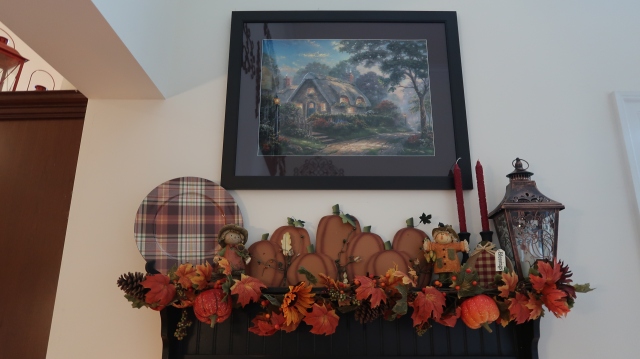
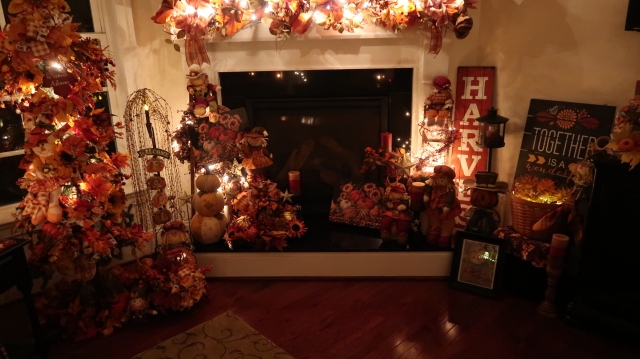
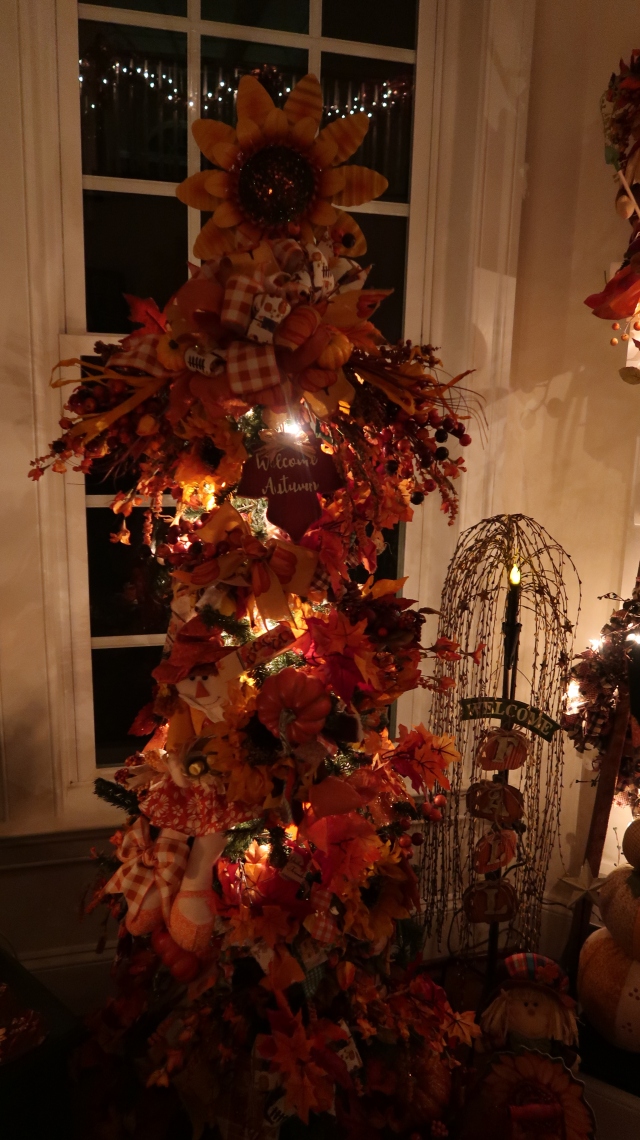
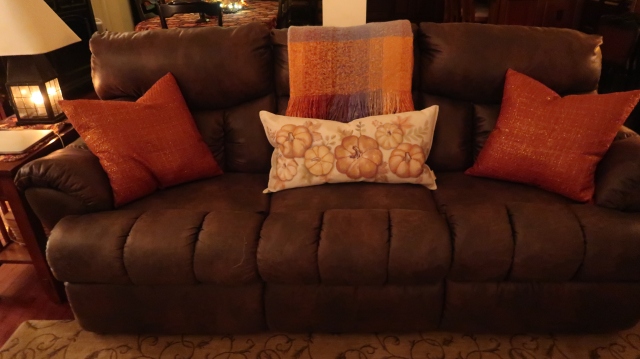
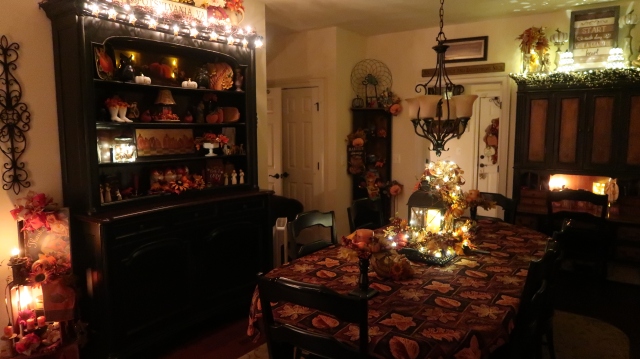
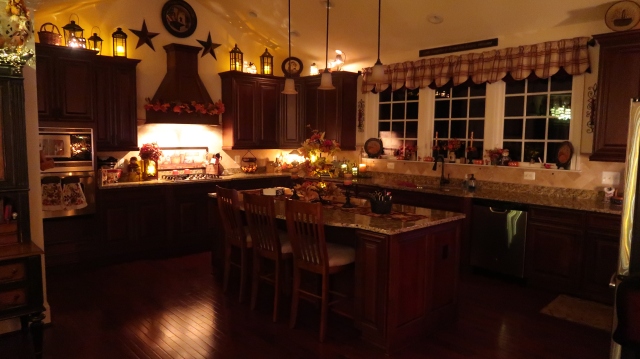
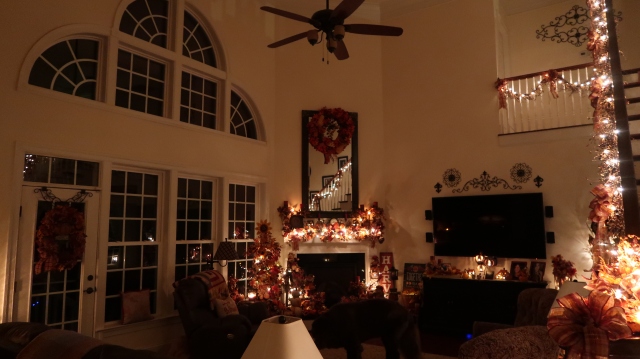
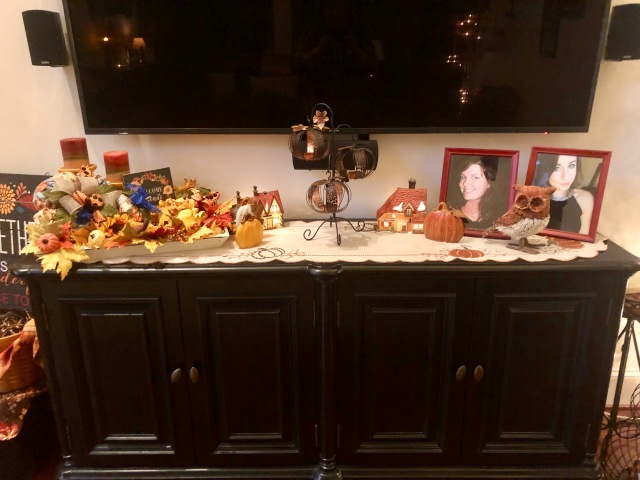
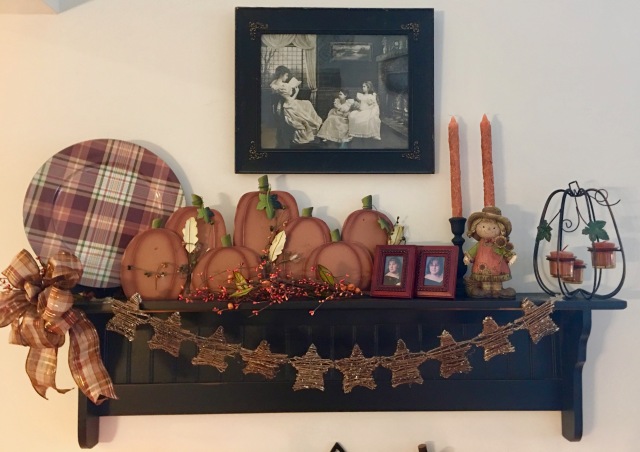
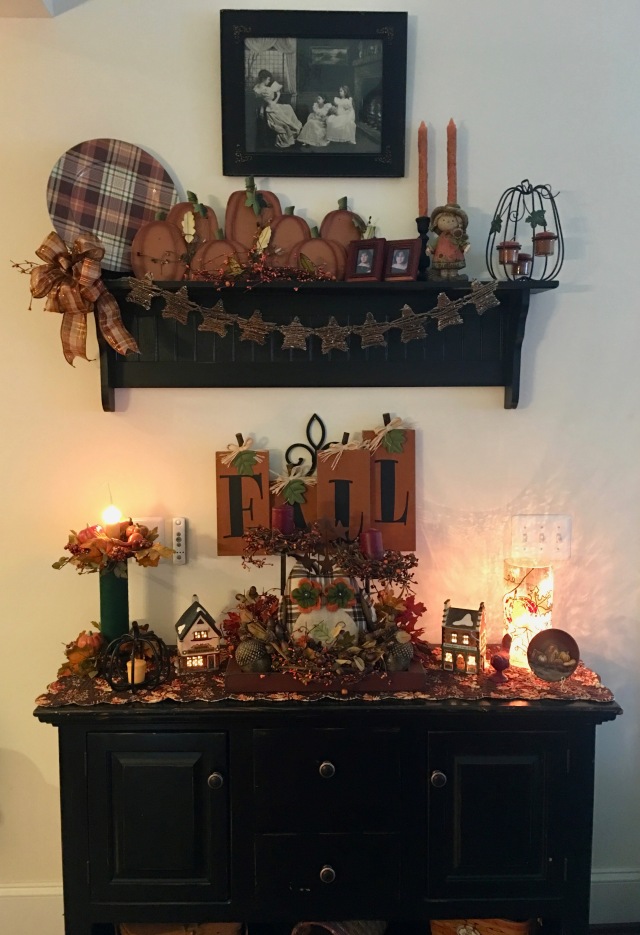
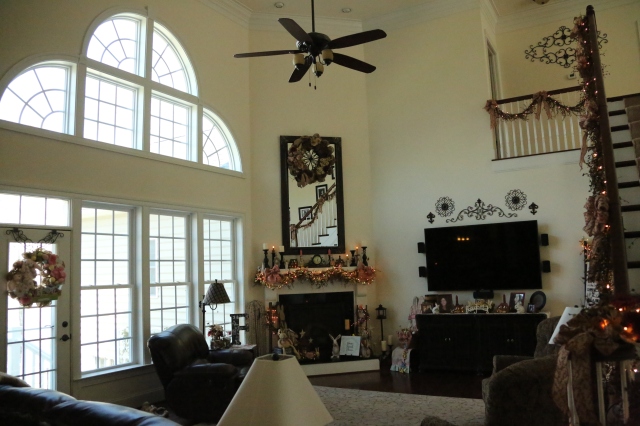
Okie dokie, here are some pictures of the Family Room…
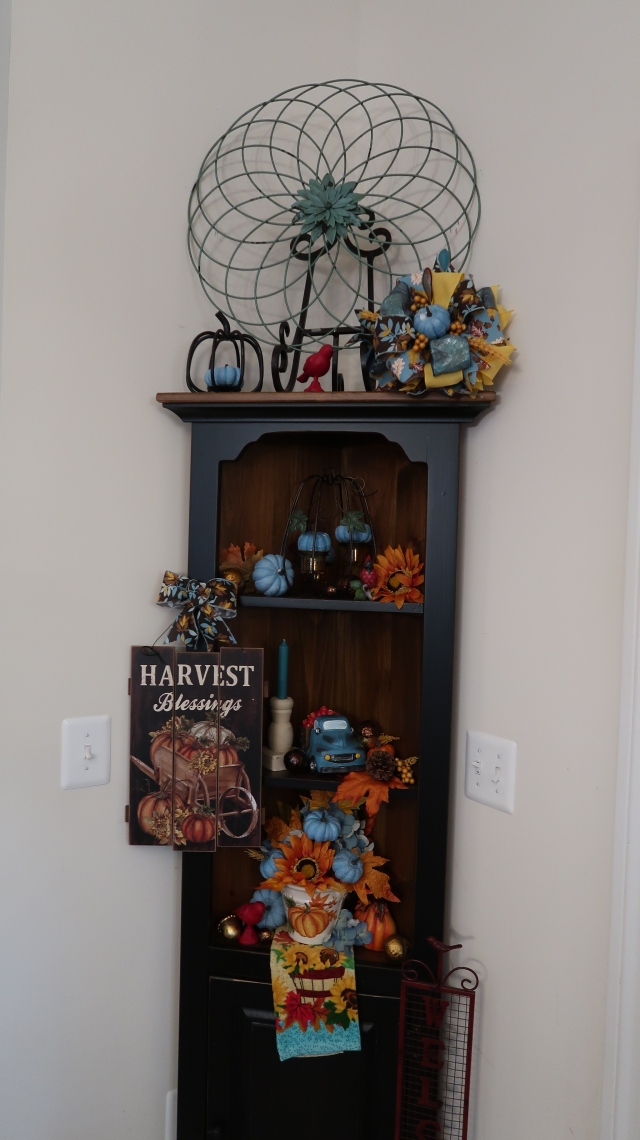
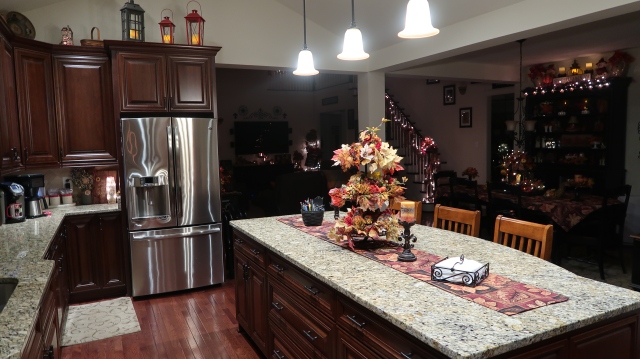
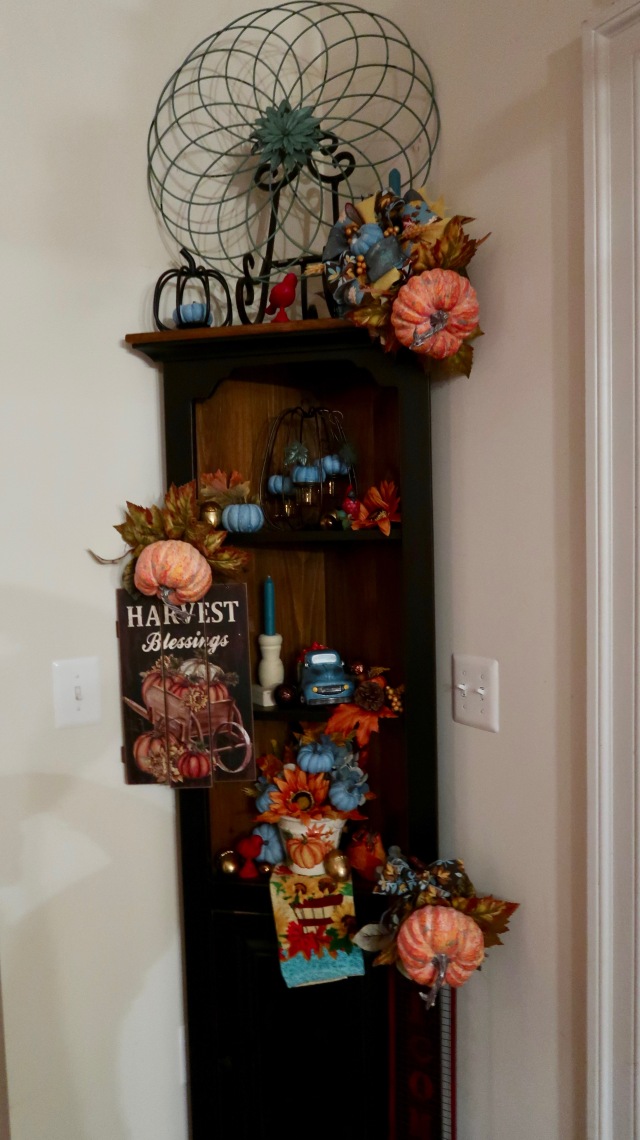
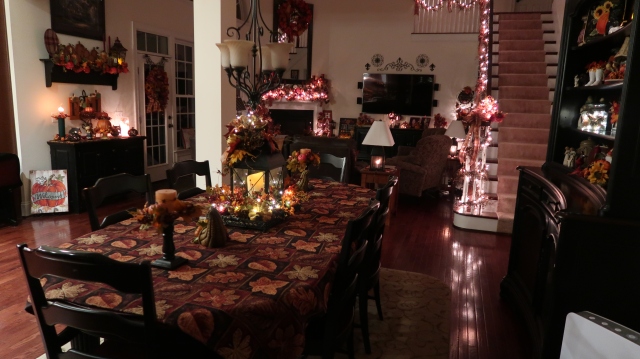
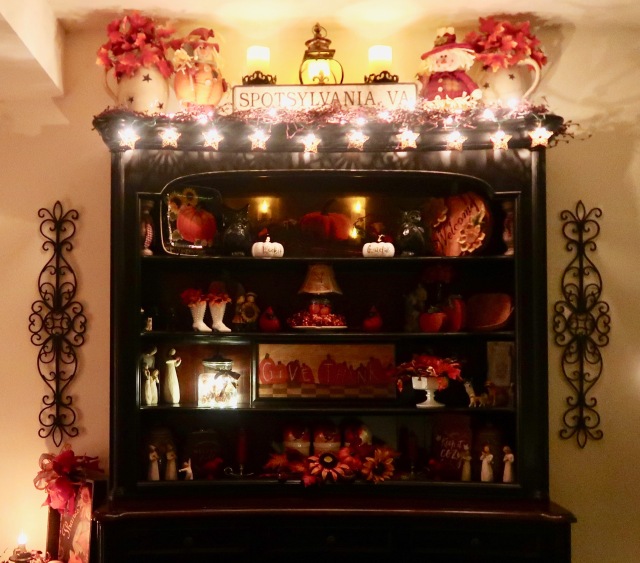
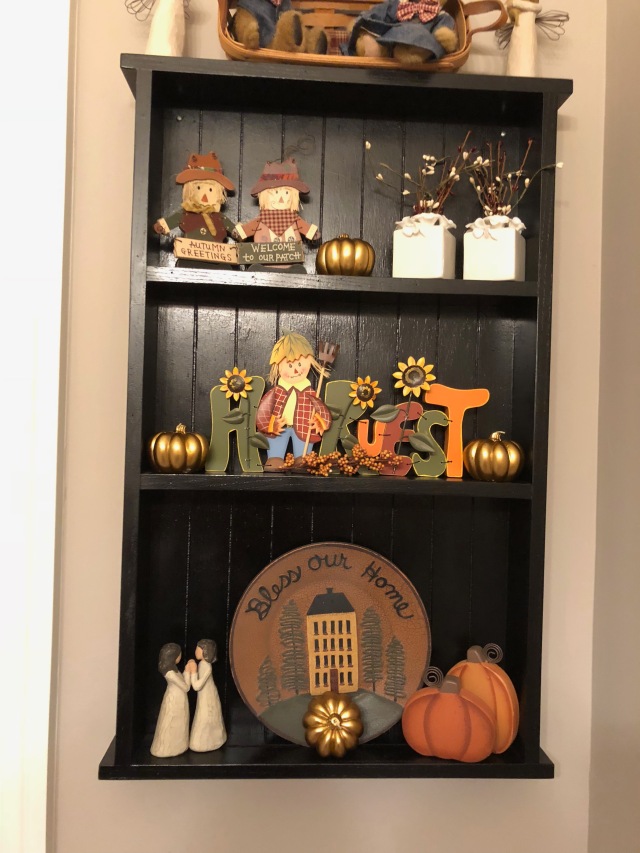
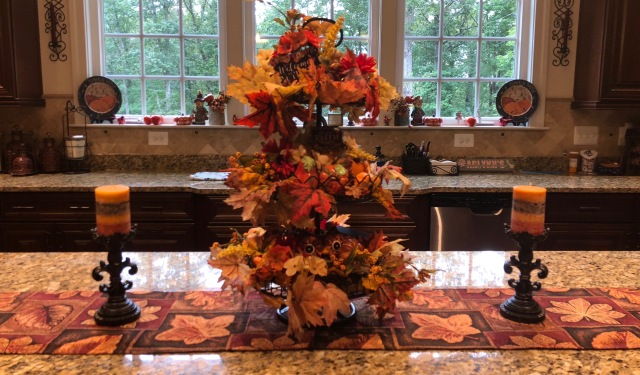
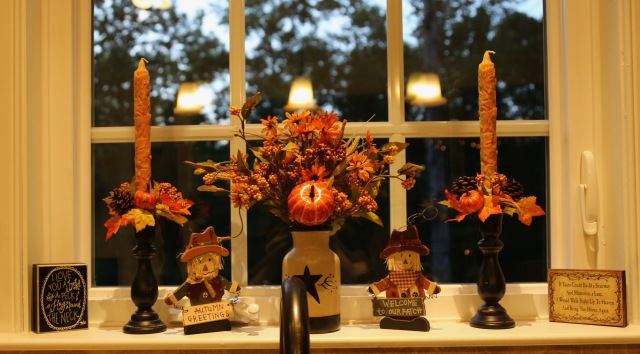
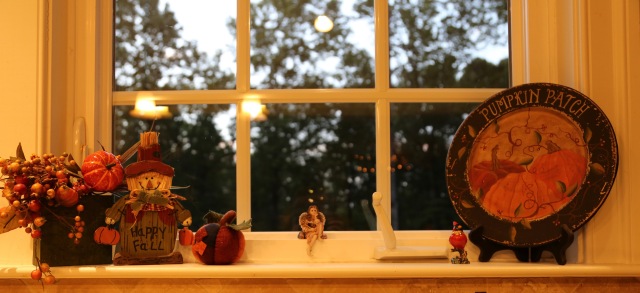
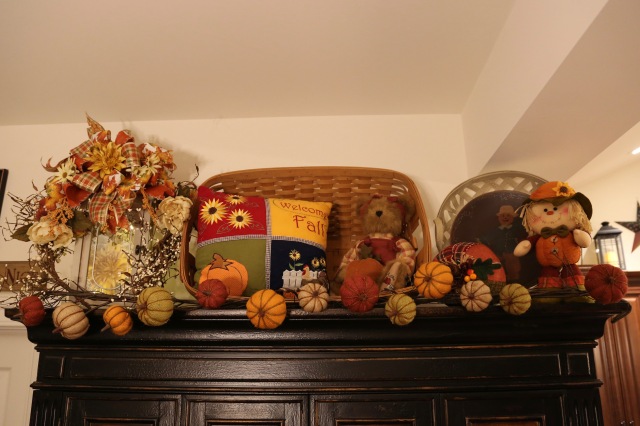
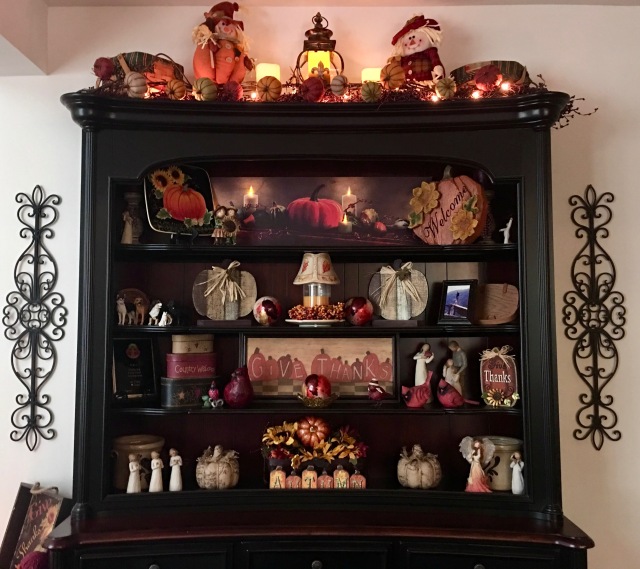
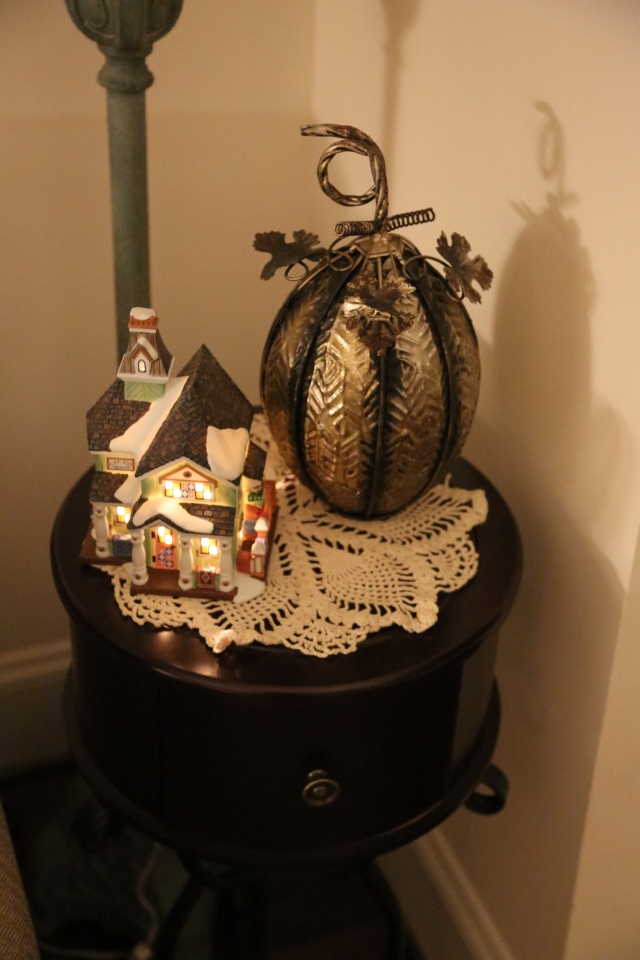
And here are some more shots of how I decorated up the rest of the back side of the house, moving through the family room, into the kitchen, over to the kitchen eating area, the kitchen hutch and desk, and the powder room.
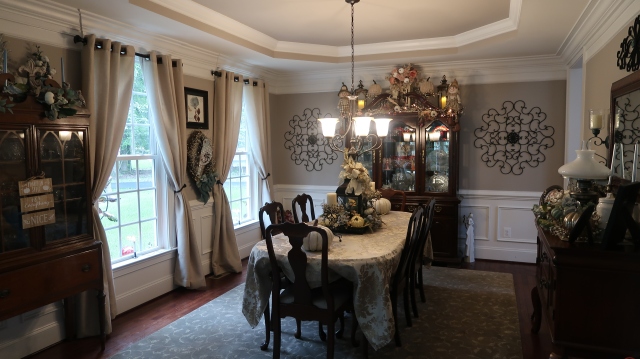
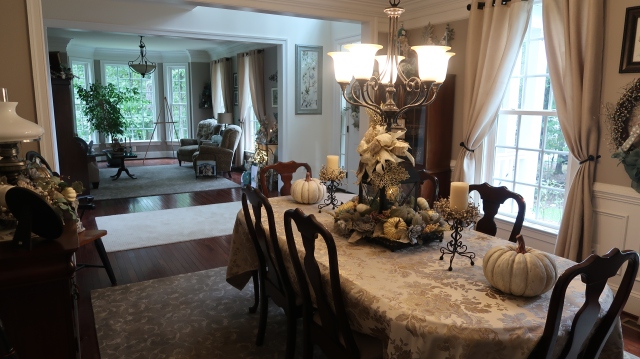
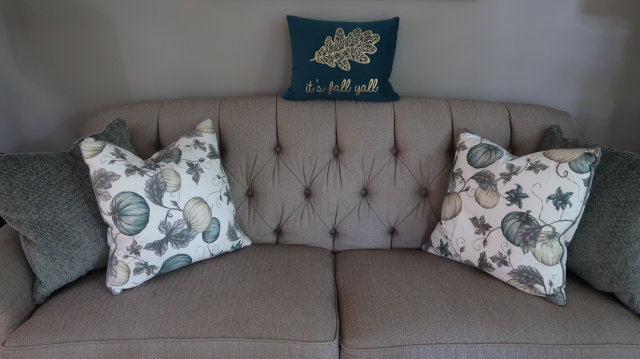
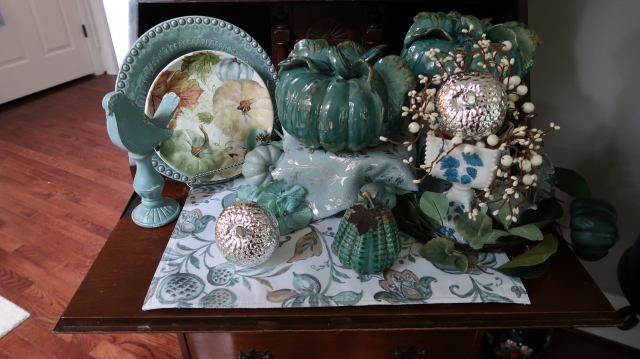
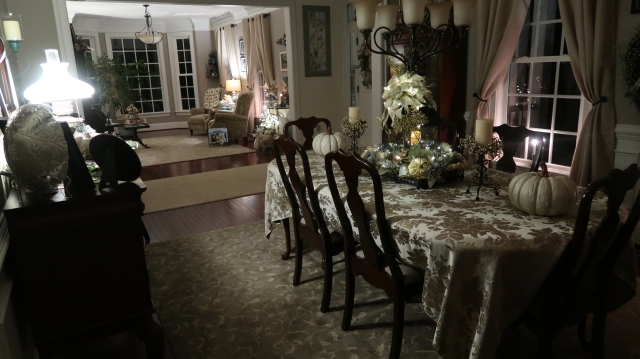
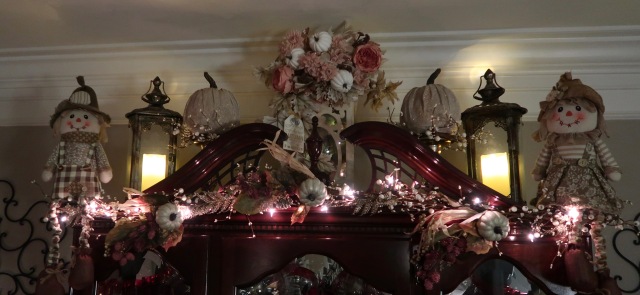
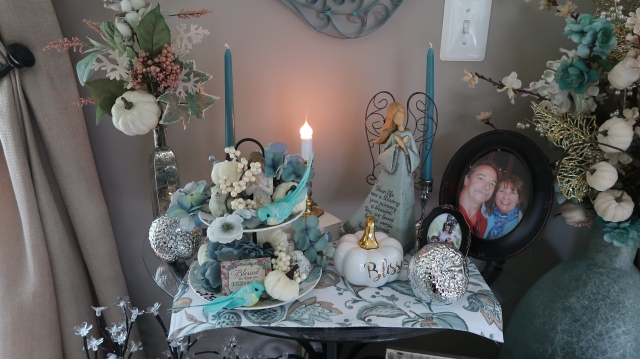
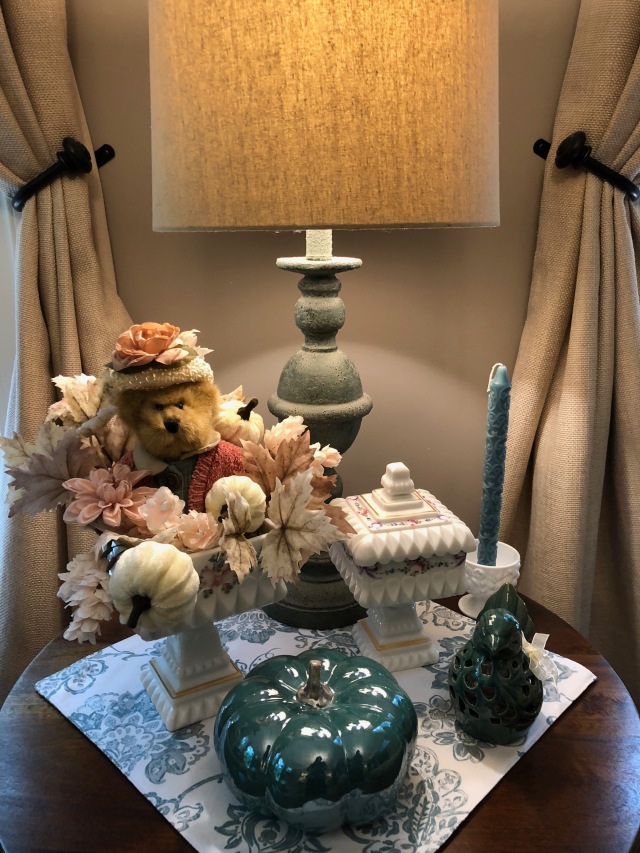
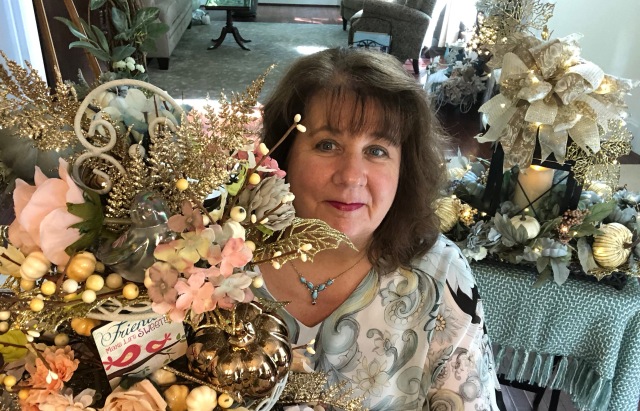
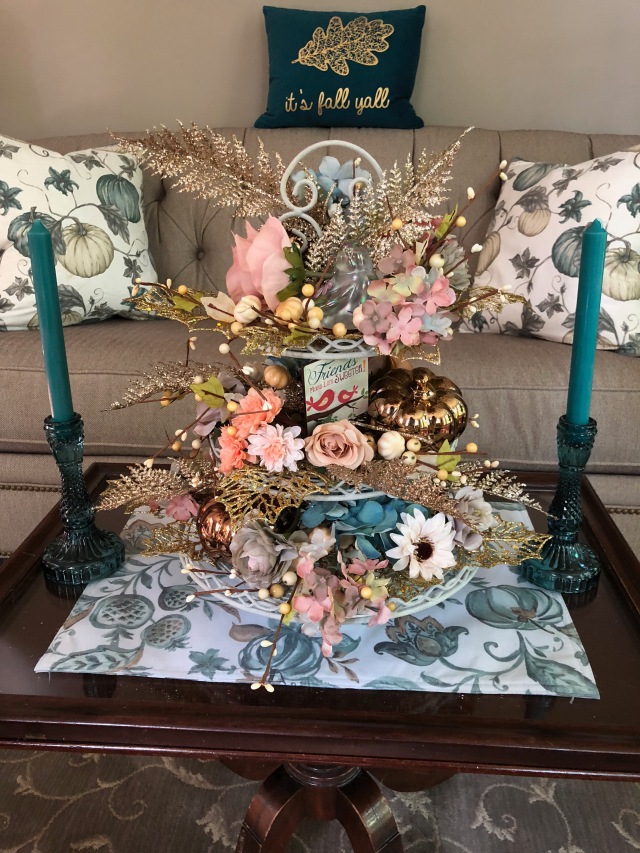
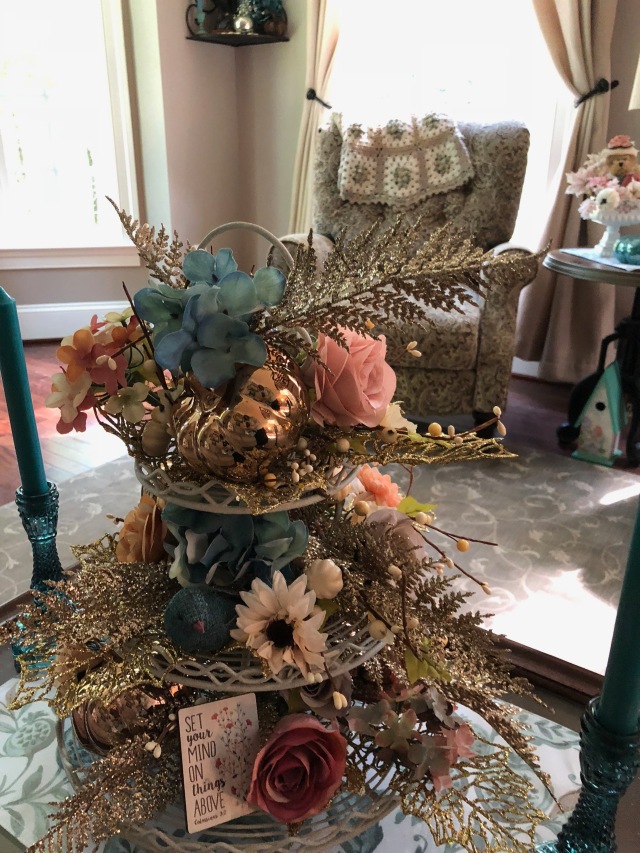
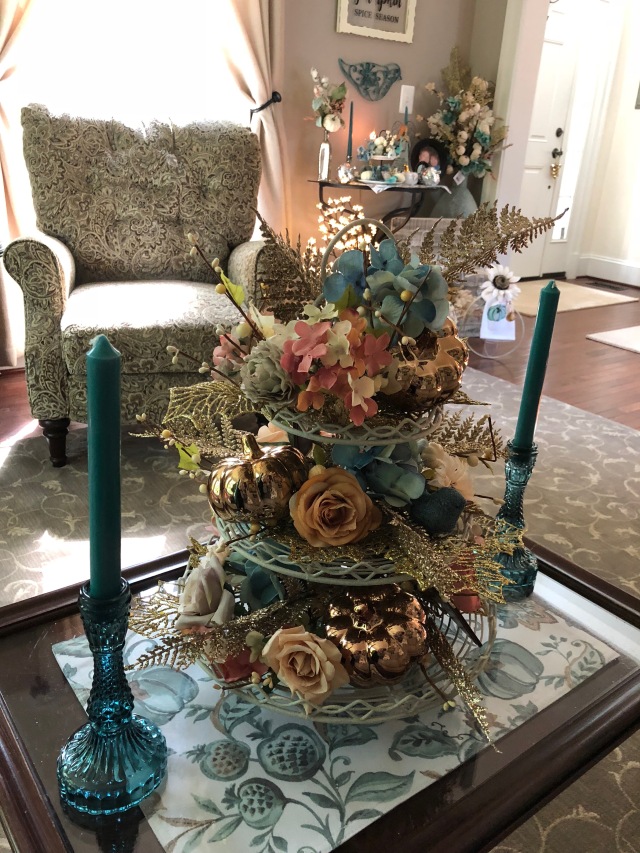
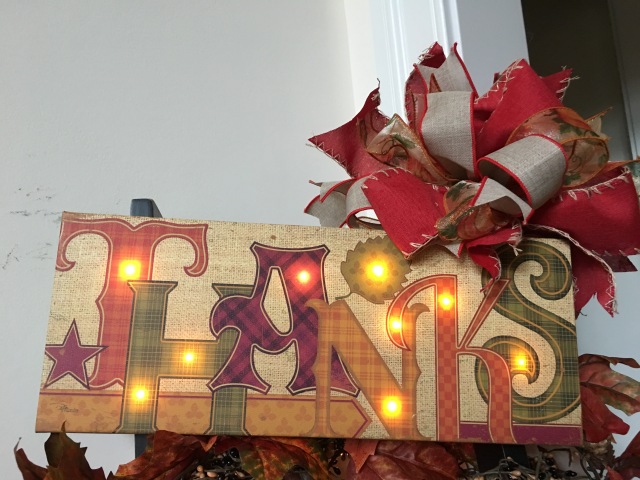
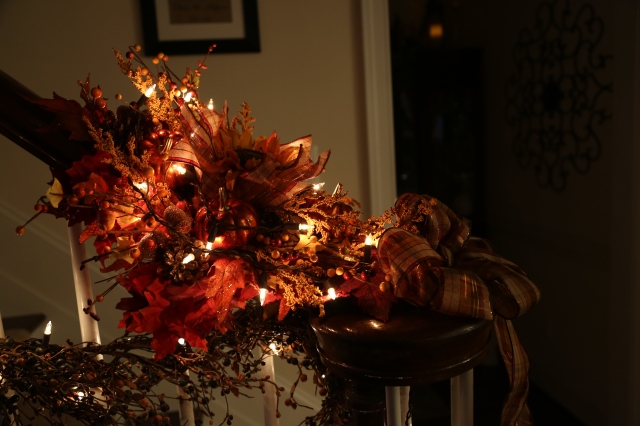
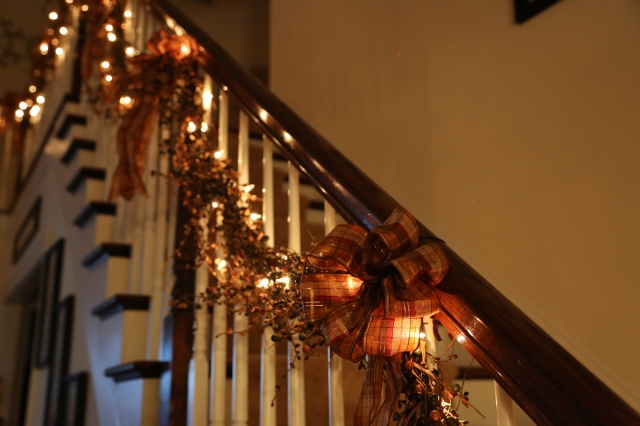
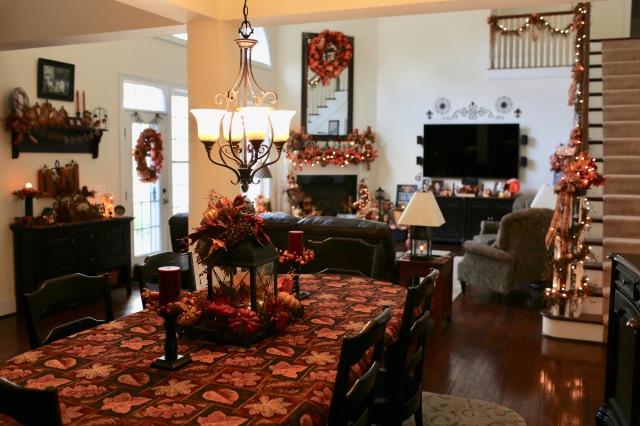
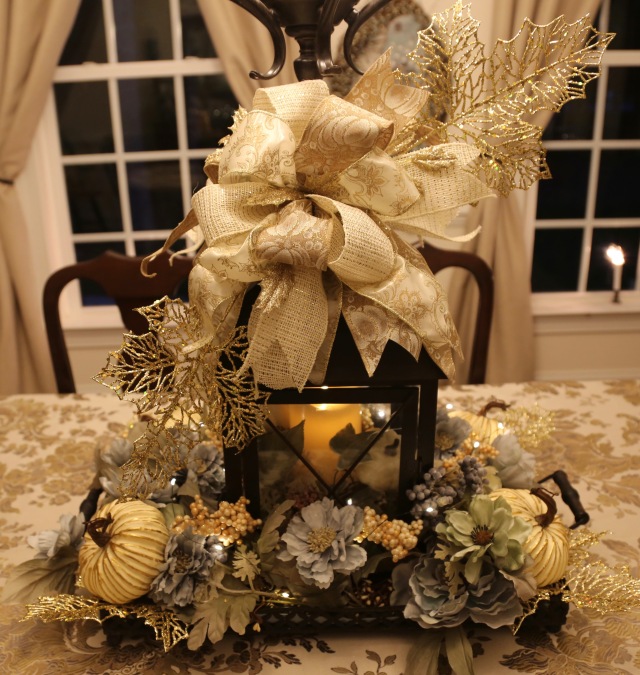
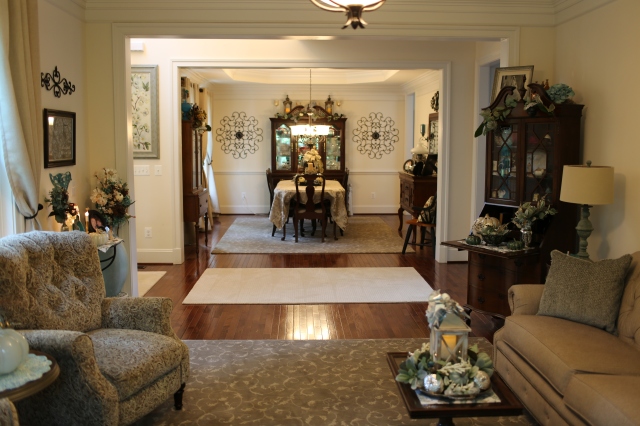
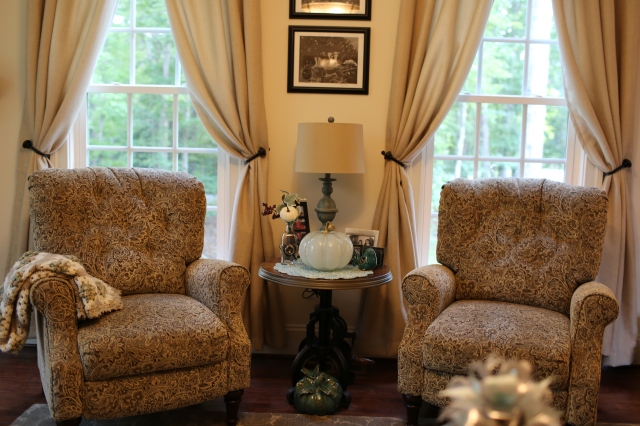
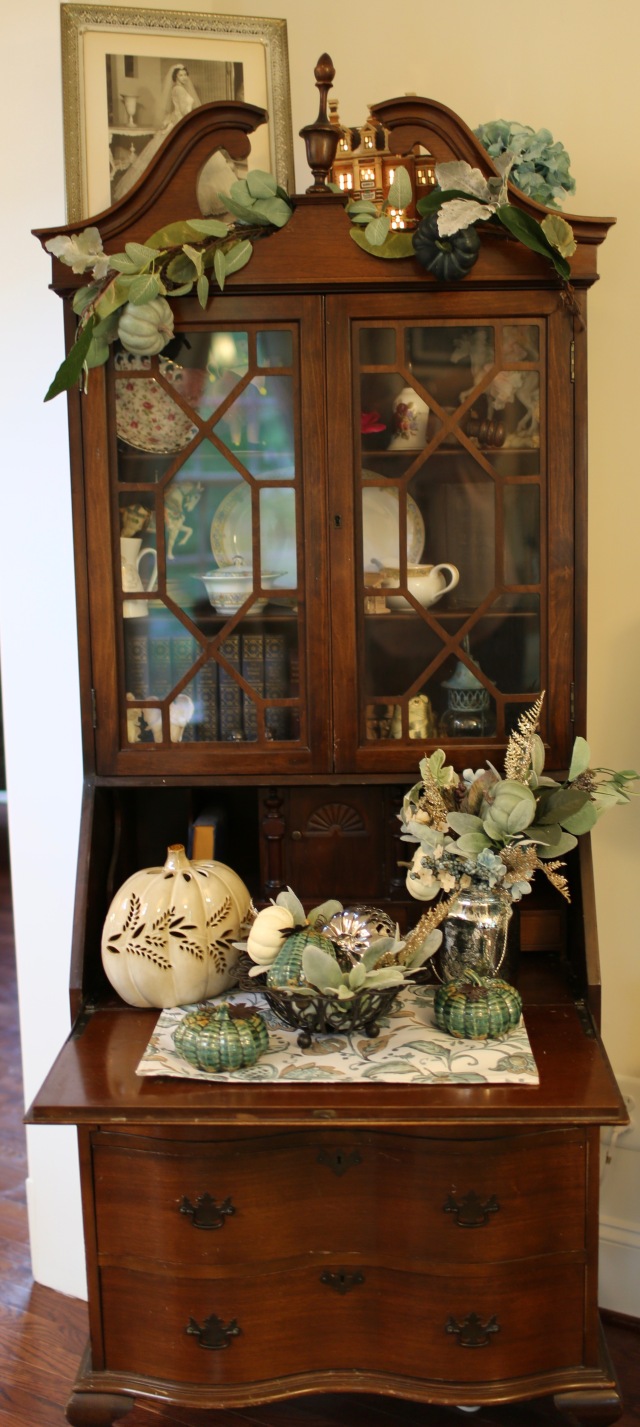
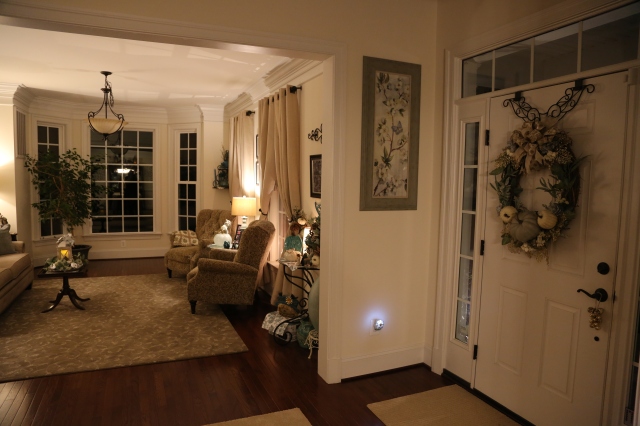
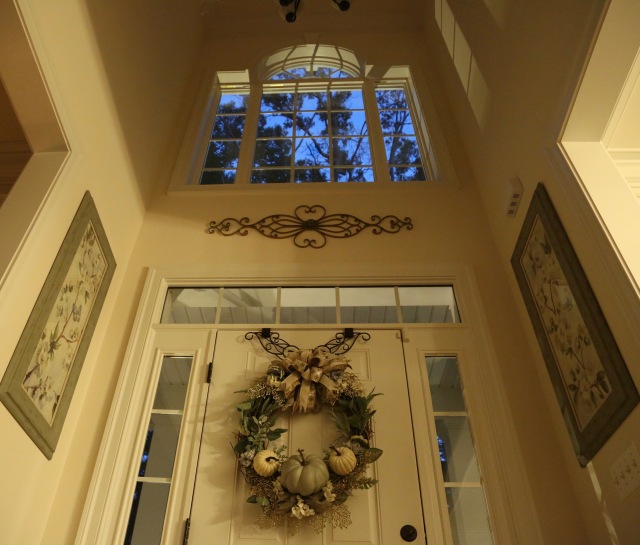
Okie dokie…That did it for the back of the house. I was very happy with how everything turned out!! I utilized a lot of my old decor and mixed it in with some of the new things that I had purchased and crafted. I had a huge feeling of accomplishment, but, I wasn’t done yet! It was time to soldier on and move into the rooms that sit on the front of our home and in which I prefer a lighter, softer, and calmer color palette. Instead of utilizing the the more traditional, bolder, oranges, reds, greens, and yellows like what we’ve just seen, I’d be utilizing soft silvers, creams, grays, blues, & khakis in the living and dining room as well as in the foyer that sits between the two rooms. Let me show you some pictures:
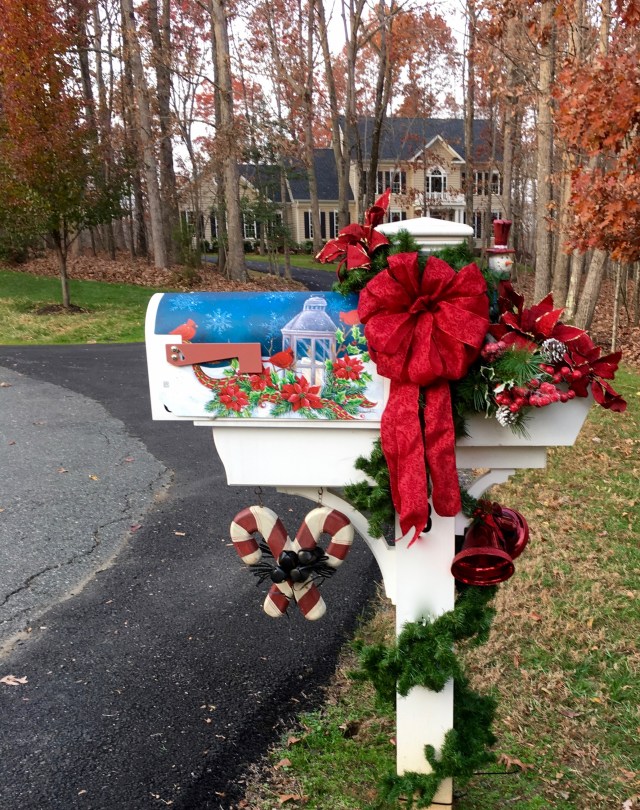
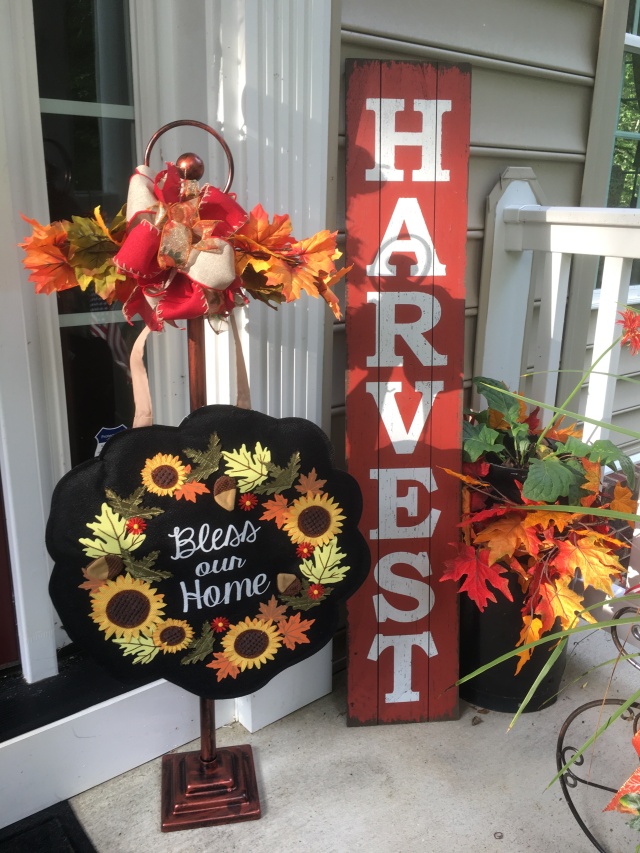
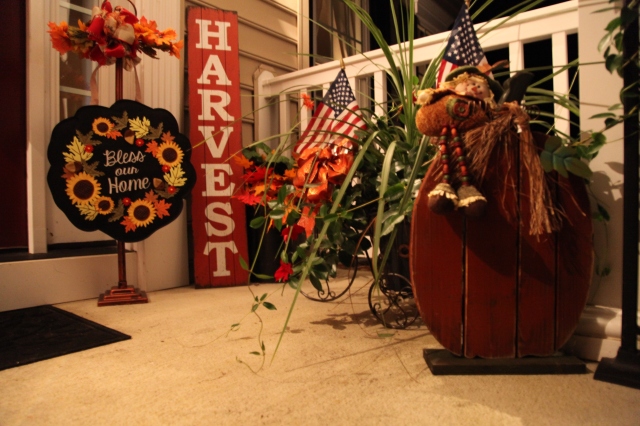
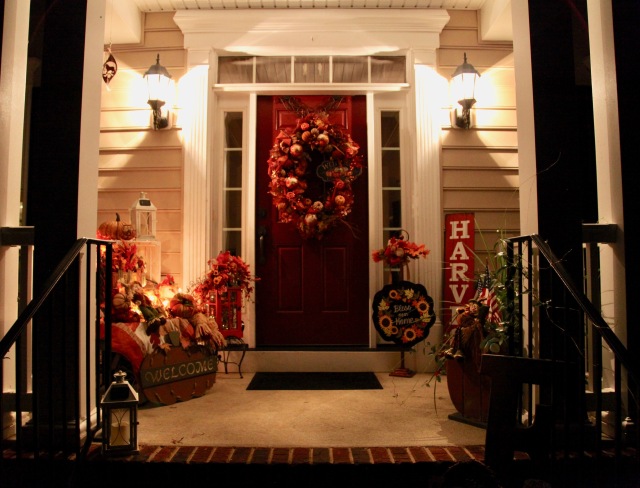
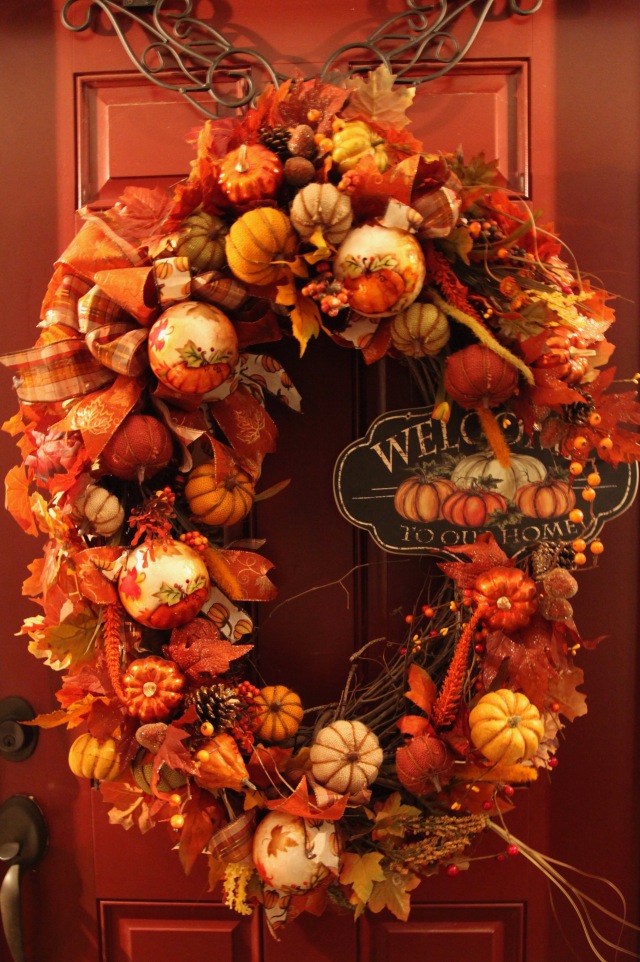
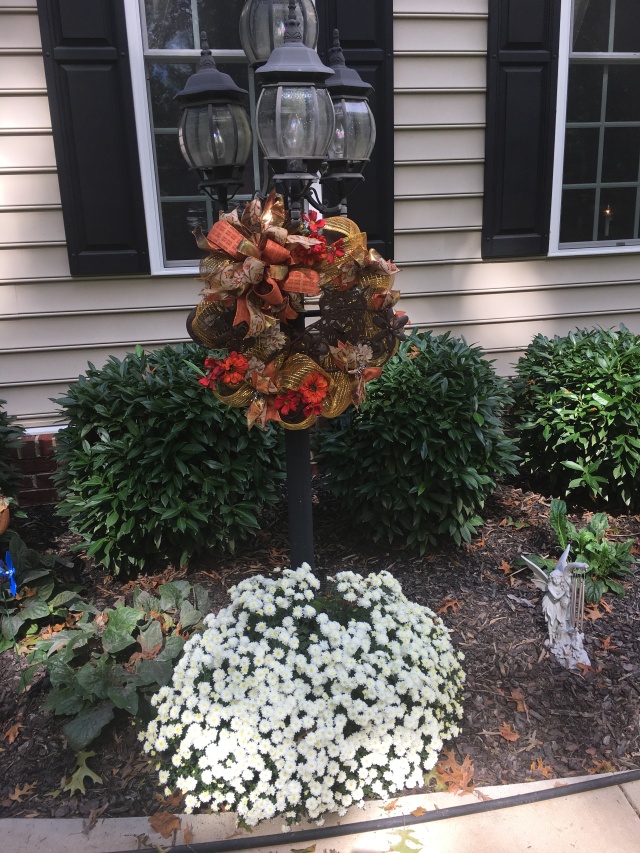
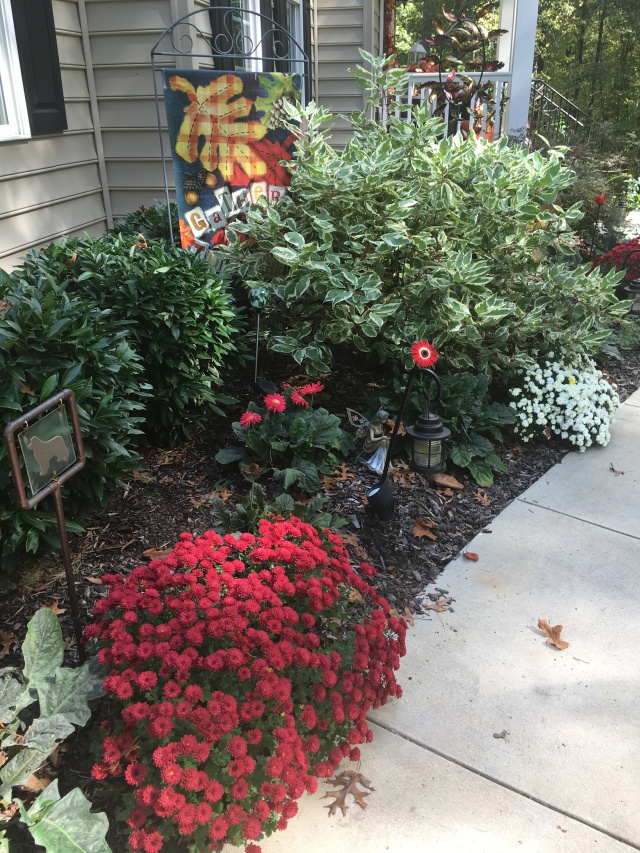
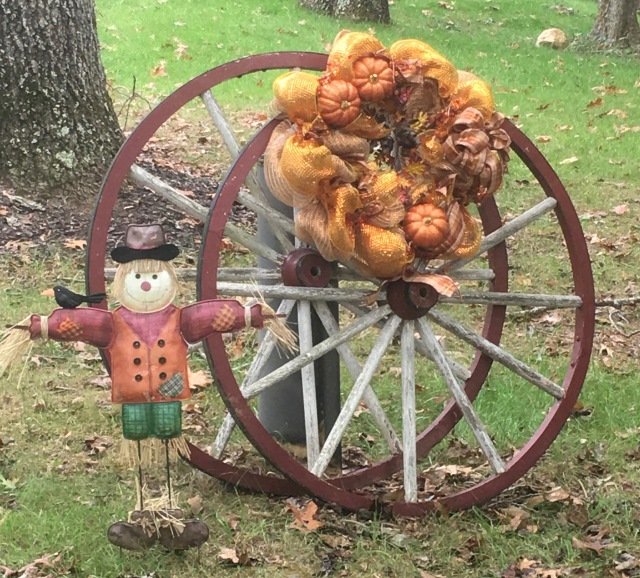
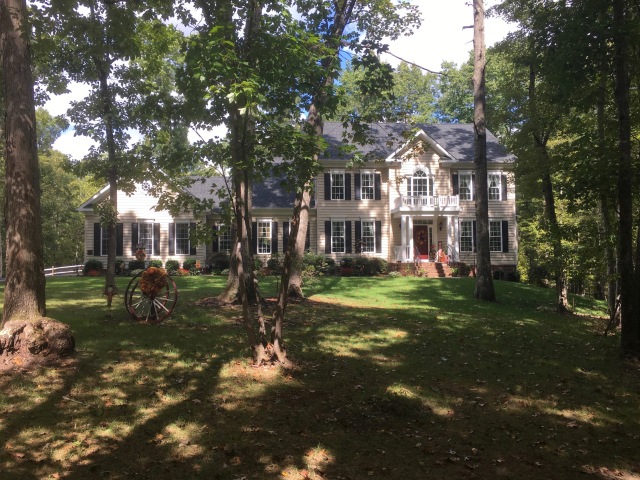
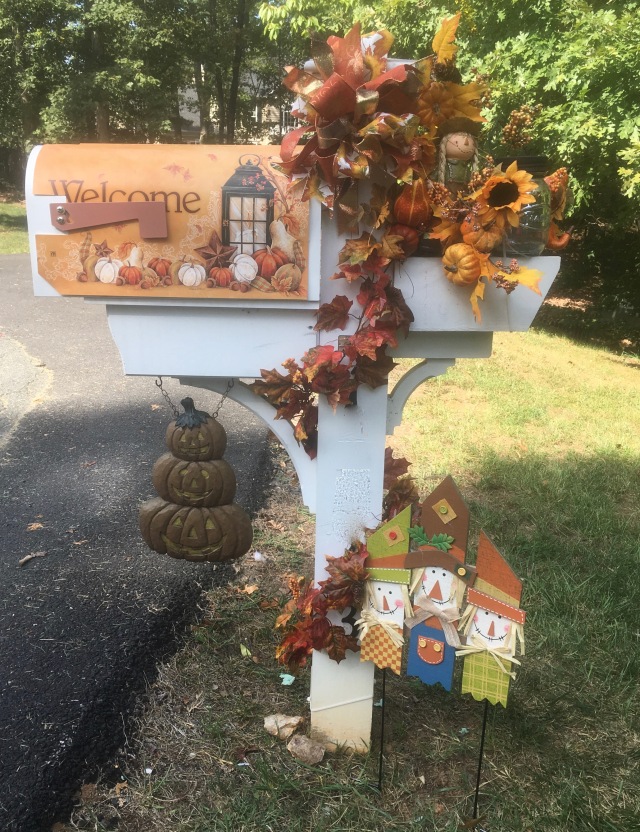
As I mentioned above, I did all of the decorating that you see in these pictures prior to leaving for our cruise, and when we returned home, I went ahead and finished the outdoor spaces. Here is was I completed just last week:
And that finished up my Fall decorating for 2017! I am so happy that I took that 2 weeks before we left on our cruise to get the entire inside of the house finished. I had forgotten just how much work it is to switch everything out and recreate the wheel for the next Season. BUT, that said, I’m super happy with how everything looks now and I’m even happier that I was able to create an entire Playlist of me showing y’all *in person* how I brought it all to fruition. Actually, do y’all know what? It was Chris’ idea for me to start at the very beginning of my process, my first video begins with me in our basement showing where and how I store all of the Seasonal decor. I literally take you through my entire process in that Playlist of videos…so, without further adieu, here is a link that will take you through my process, as I said, it is 20 videos strong:
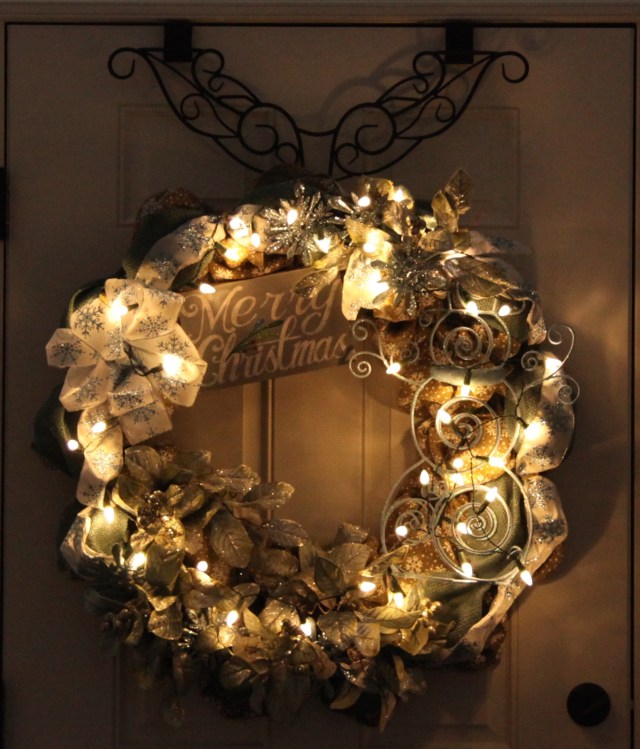
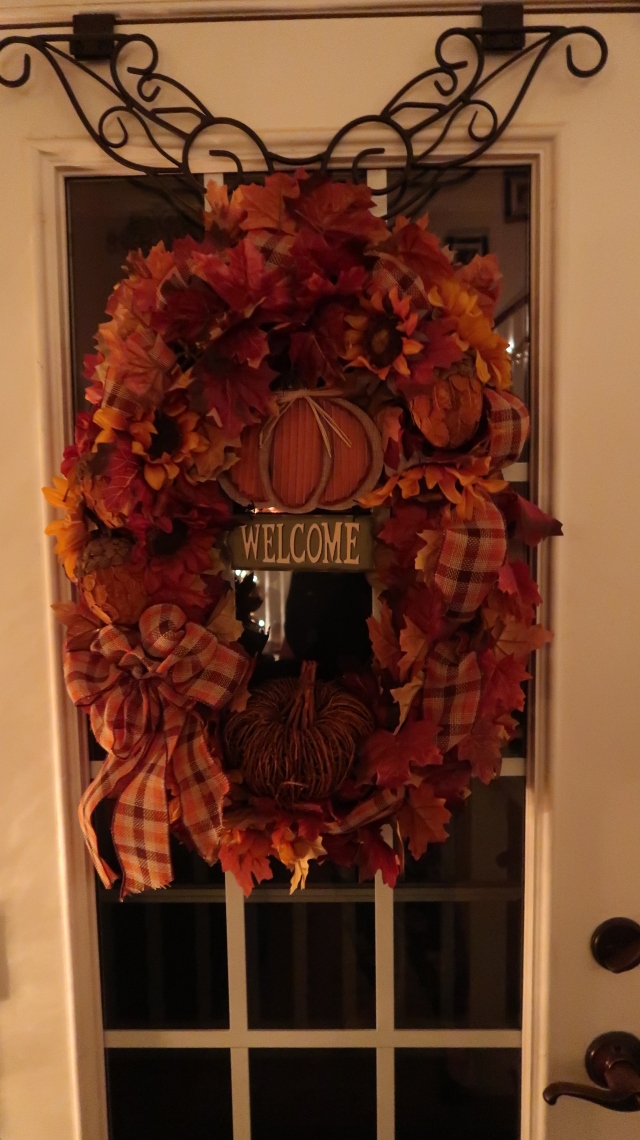
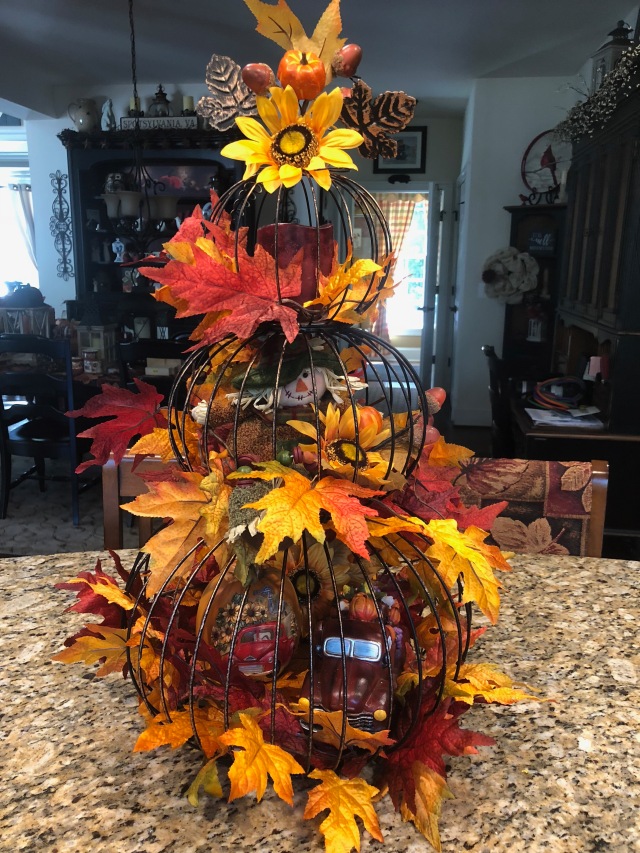
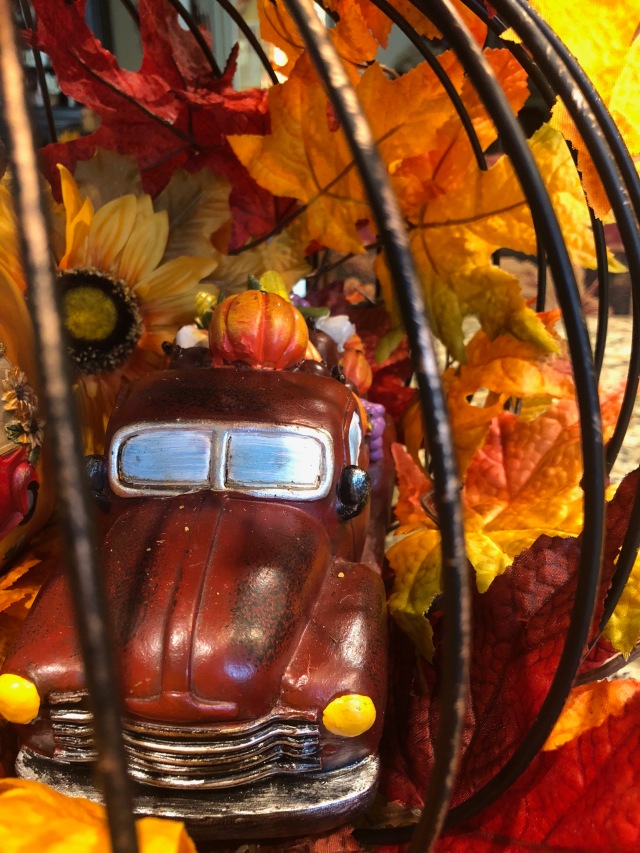
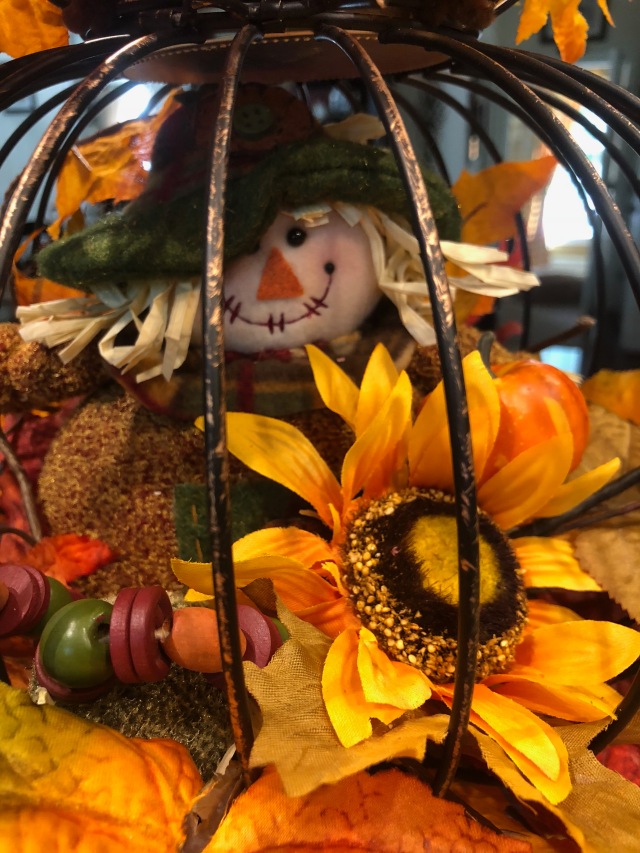
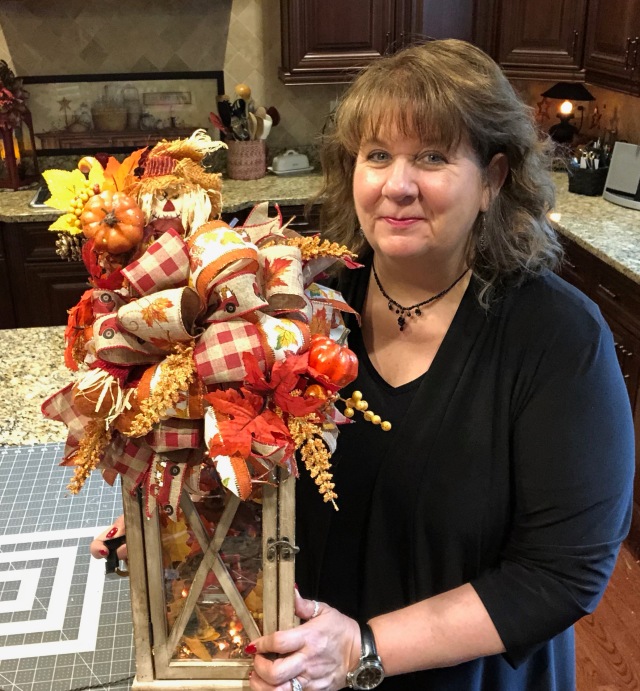
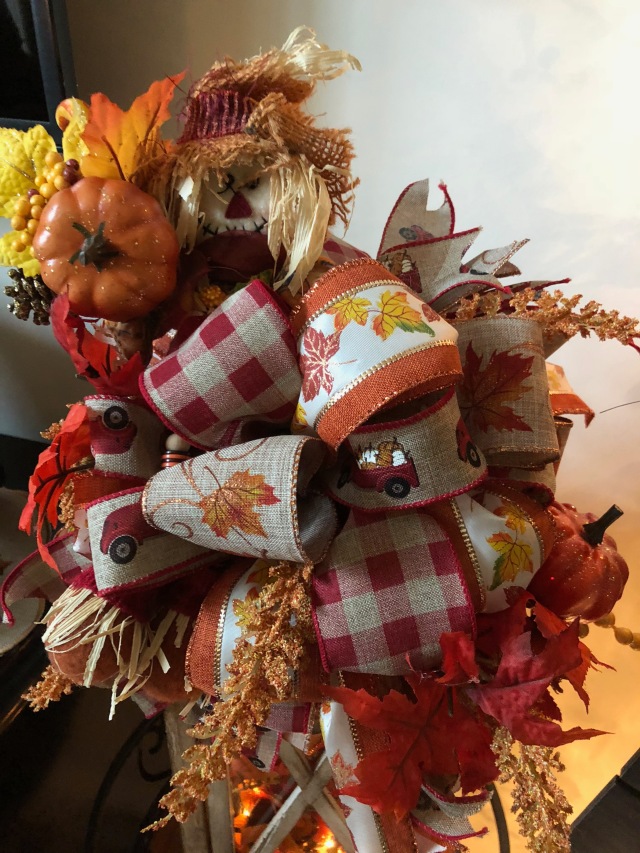
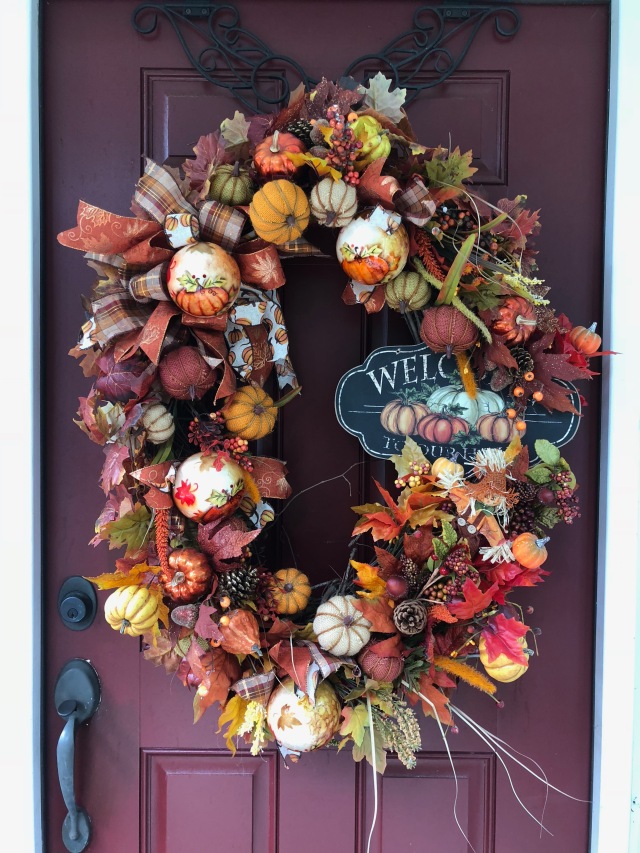
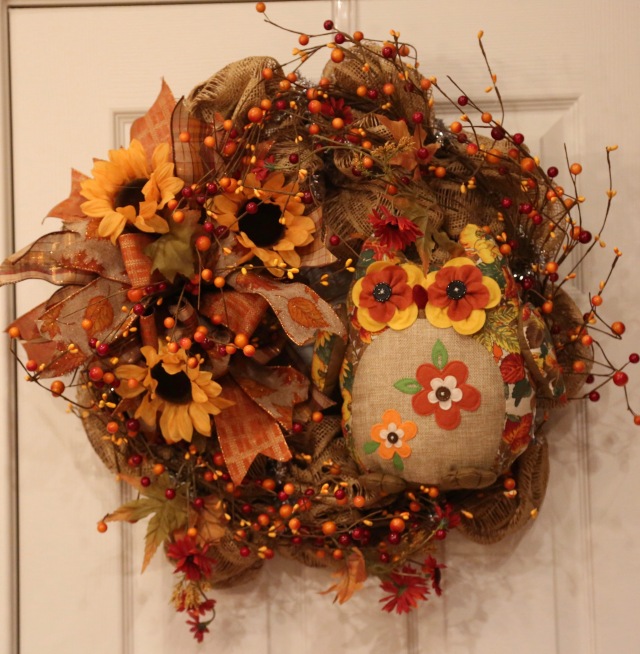
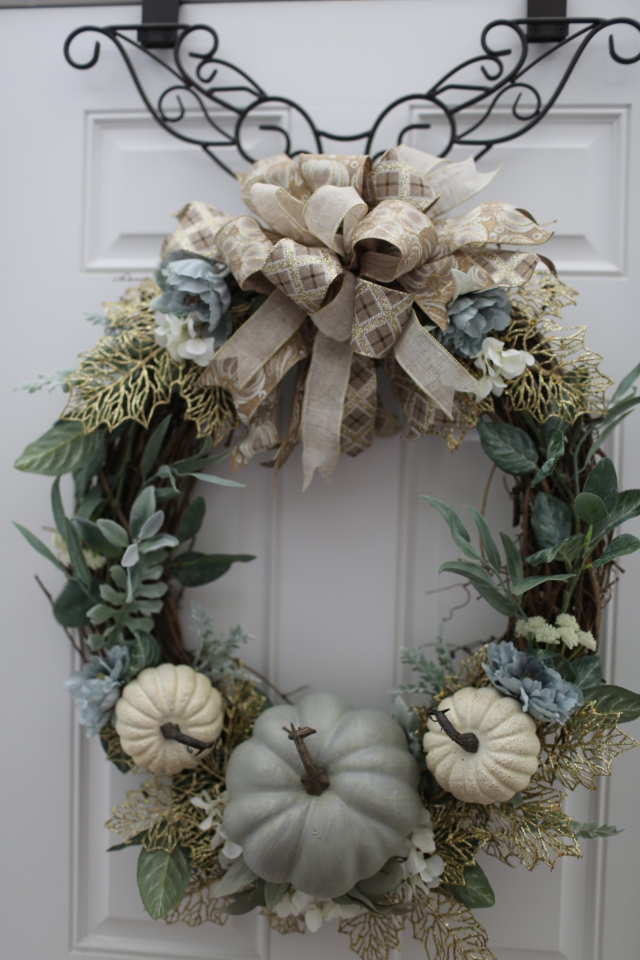
OHHHHHH wait!!! There is ONE more wreath that I created that is not included in that Fall Playlist, this one (as I said, I’ve been b-u-s-y over here…lol):
And that my friends is, as they say, *that*. 🙂 U-n-t-i-l I start decorating for Christmas in a few weeks….ahhhhhhhh….HELP! LOL 😉 JUST Kidding, y’all know I will love doing it once I get started!! So for now, because I worked so hard before we left for Alaska, I will be able to sit back and write my Alaska Cruise Blog Series until it is time to switch everything out for the most wonderful time of the year *Christmas*!!
**In crafting there are no mistakes, only unique creations**
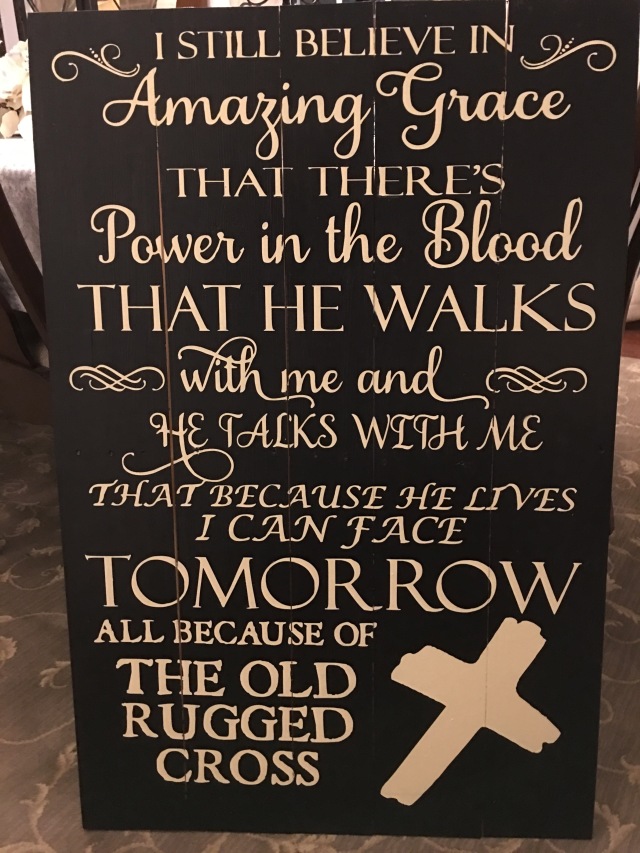
Life throws us curves at times doesn’t it? Please accept my sincere apologies for not getting this blog post written a little sooner, although if truth be told, I just finished my indoor Easter/Spring decorations the other day. But, I needed to push the pause button with my decorating and my blogging/vlogging–My sweet Aunt Midge passed away last week, and I needed a little bit of time to mourn, reflect, and to go and spend a little bit of time with my family. Crazy things like what I’m about to tell you happen to me all of the time, and I don’t know if it is a good or a bad thing, but, it is a *thing*. Chris and I had scheduled a visit up to “God’s Country” as we call it because I had commissioned a lady to make me a sign like this:
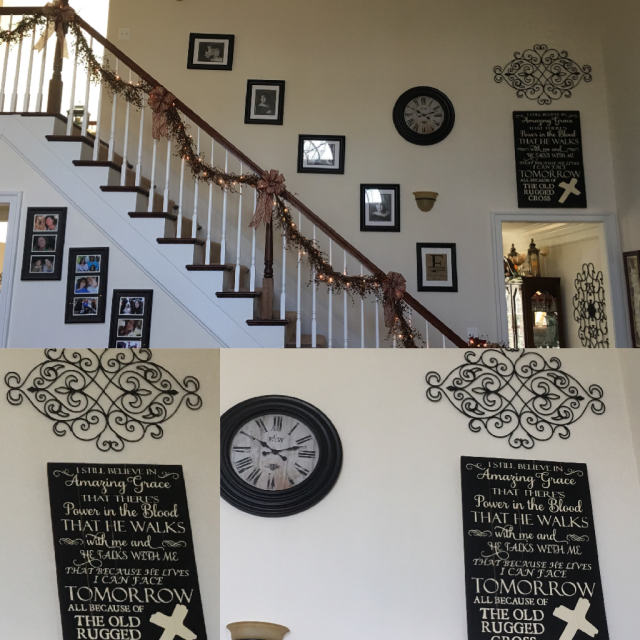
I saw that one of my cousin’s had gotten one, then another one got one, so I wanted one too, and I got one for my cousin Stacey (who y’all have met here on my site), and then my cousin Donita and I split the cost of one and we gave it to our Aunt Barb (Stacey’s Mom). SO that means that most of us here in my family have one of these precious signs now. It contains all of the old hymns that we sang as a family when I was growing up, and to this day, every time we’re together, we sing these hymns. I cannot tell you how special this is to me. ANYway, that’s the backstory of the sign, but, what I wanted to tell y’all was that my Aunt Midge who was in a nursing home up there in God’s Country happened to take a turn for the worse on the day that we were traveling to collect our signs. Bless her heart, it was so special for us to be able to go up and visit with her for that day—she passed away the next evening and her funeral (really a celebration of her amazing life, she touched so many with her sweet ways, knowledge of the Bible, her piano playing, and much, much more) was last week. When my Mom was dying, I happened to be shopping across town and got a feeling of dread and I literally hopped in my car and drove the 100+ miles to my Mom’s nursing home–I walked in and my Dad asked…”How did you know? I was just getting ready to call you”…Whew…cold chills when up my spine and I was very grateful that I had listened to that little inner voice that told me to GO. SO, anyway, I ramble…But, I wanted y’all know where I’ve been and why it has taken me a bit of time to stop, sit, and write a blog about the rest of my Easter/Spring decor. 🙂 Here is where that sign went to live in our home–We added that scroll’y’ piece over it and the clock to the left of it to try to pull all of the decor together.
NOTE: If you would like to get one of these signs, here is the contact information:
Craft Allie on Facebook Orders can be taken through Facebook or email at Ali.Candelas@yahoo.com or phone at 301-268-0816.
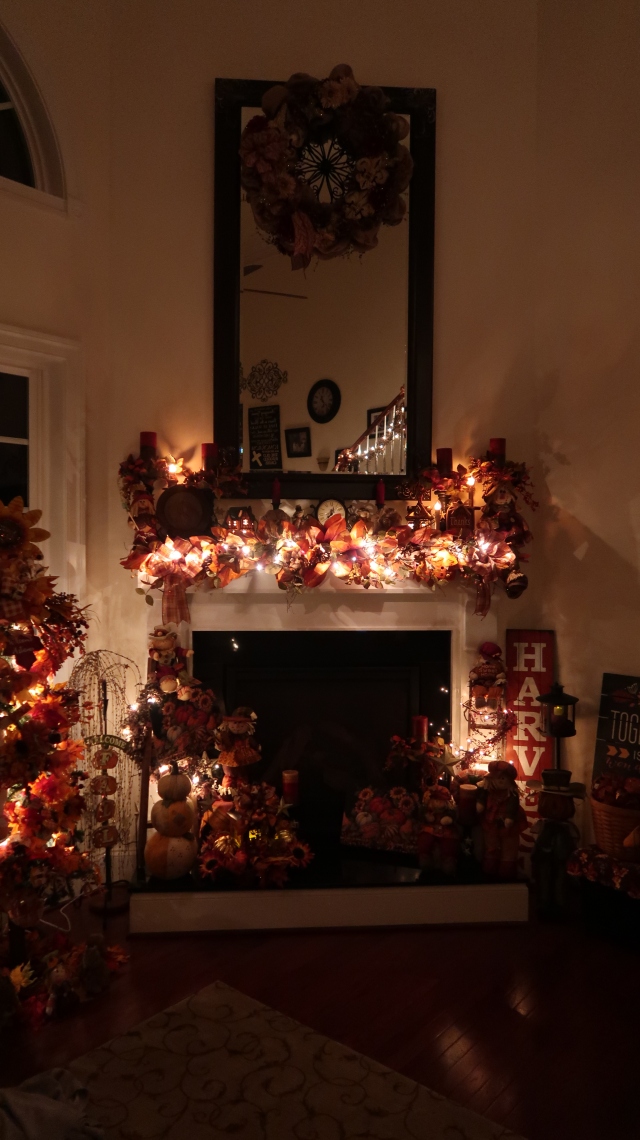
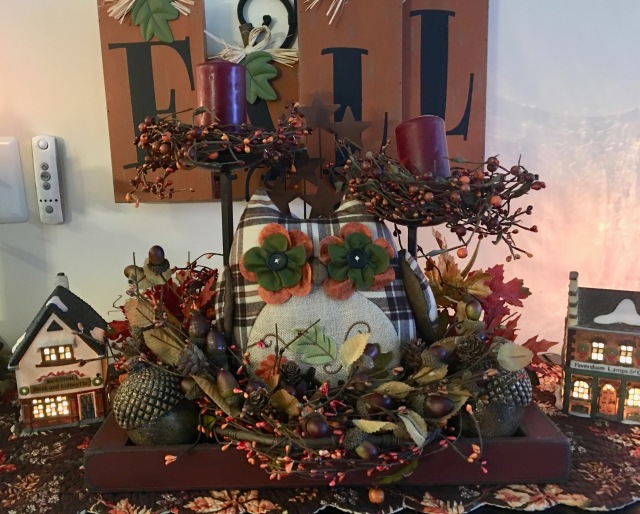
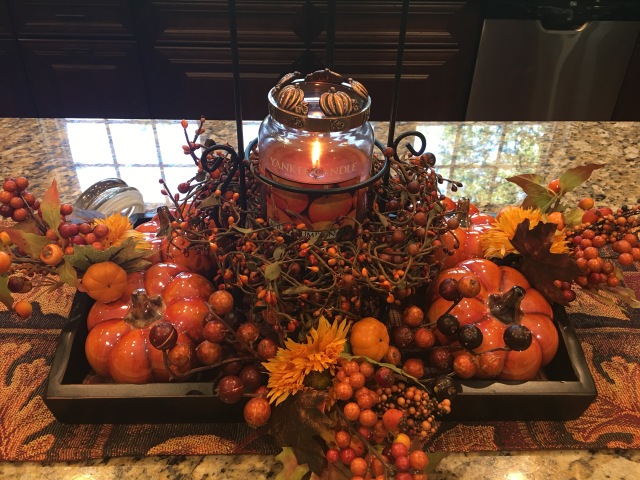
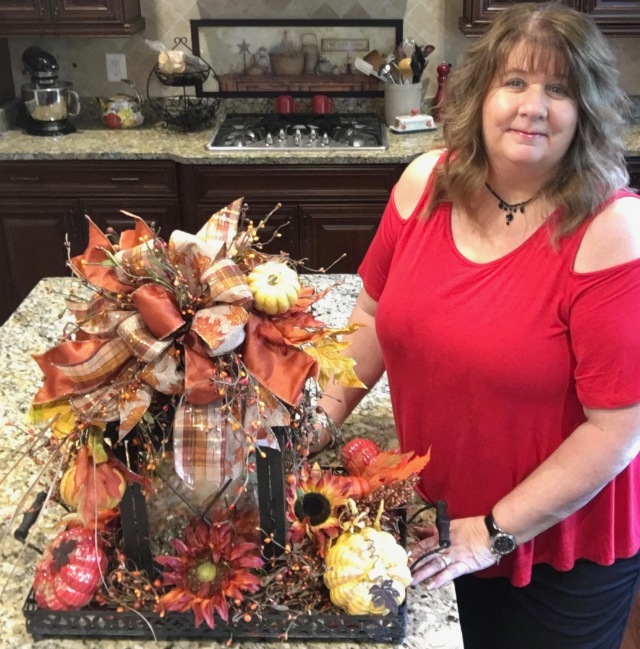
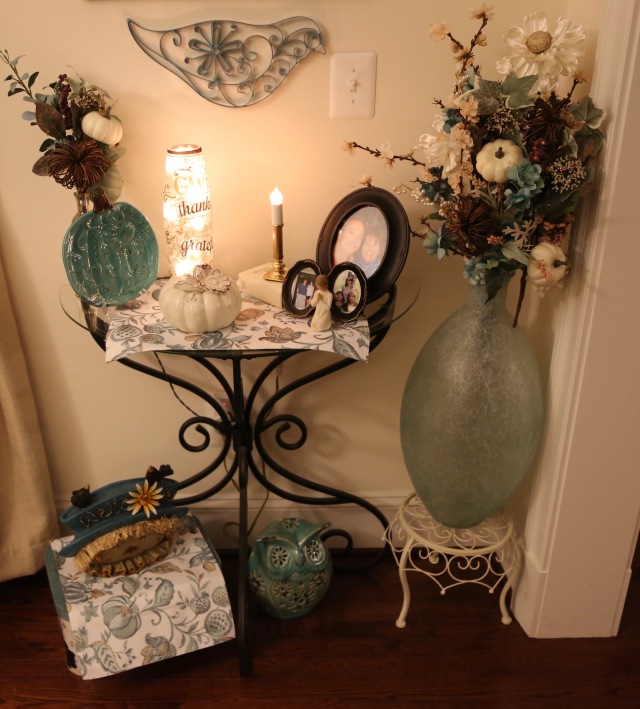
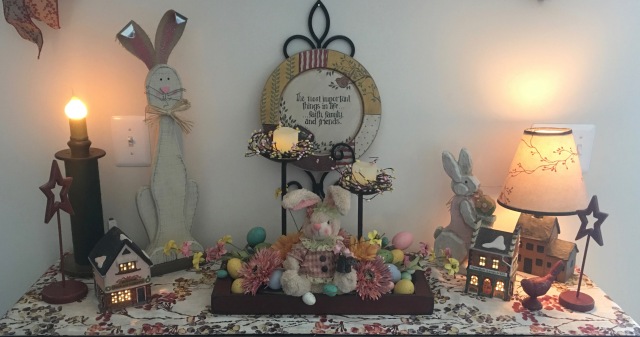
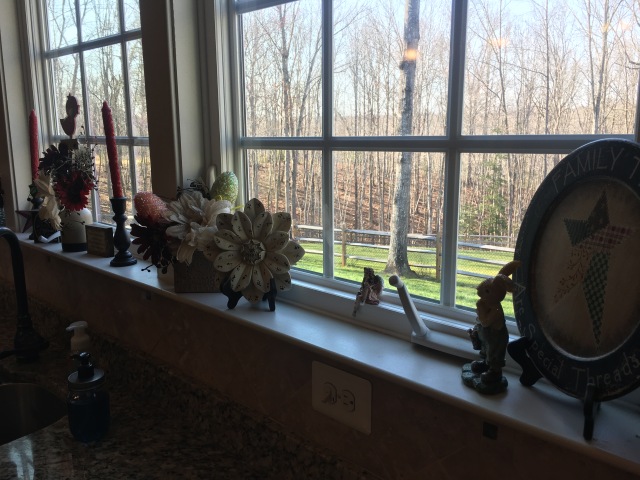
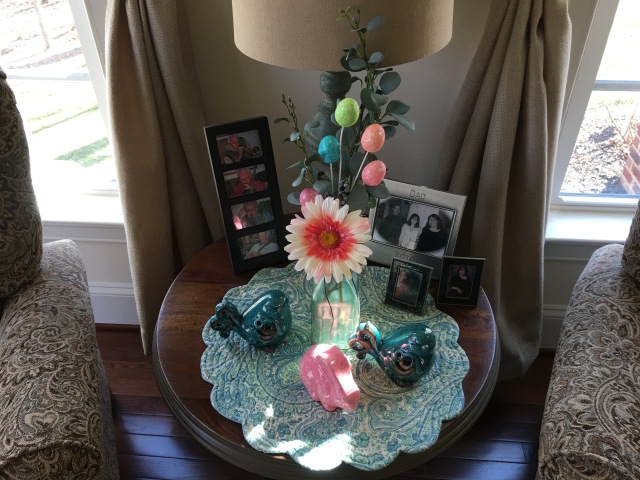
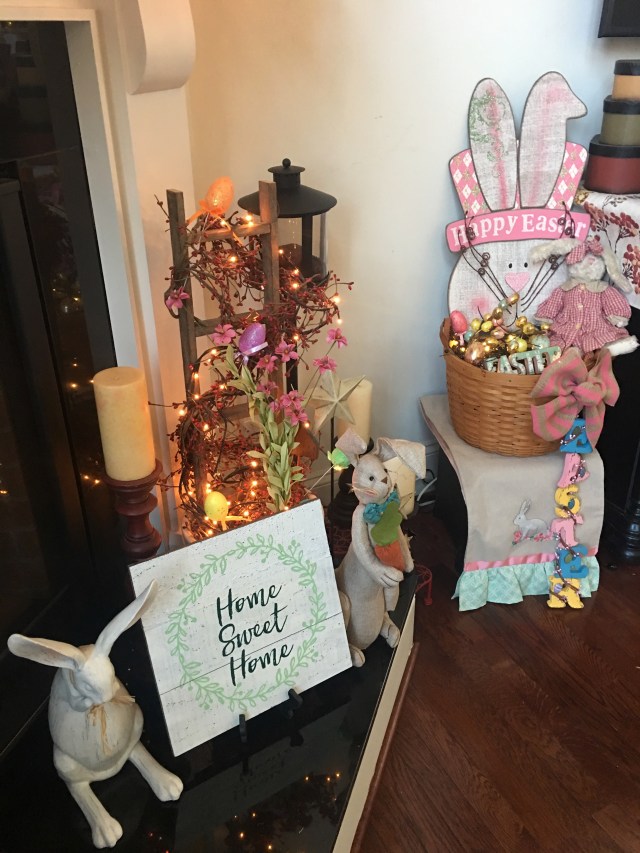
So onward we soldier folks…Okie dokie, when last I wrote, I do believe I left off at the fireplace. This sweet little arrangement is what I created next. It sits on a table that is between our family room and kitchen. I found that sweet little bunny at a country store we have in our town…I’ll post a video where I give a little tour of that store and where I show you how I created that centerpiece. 🙂
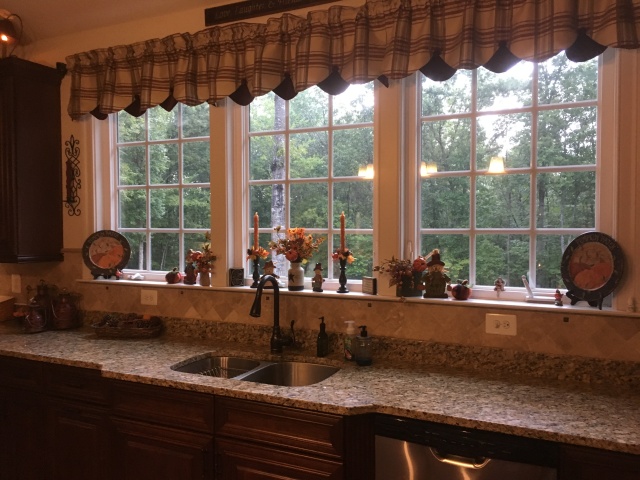
I did add a few things to the kitchen windows:
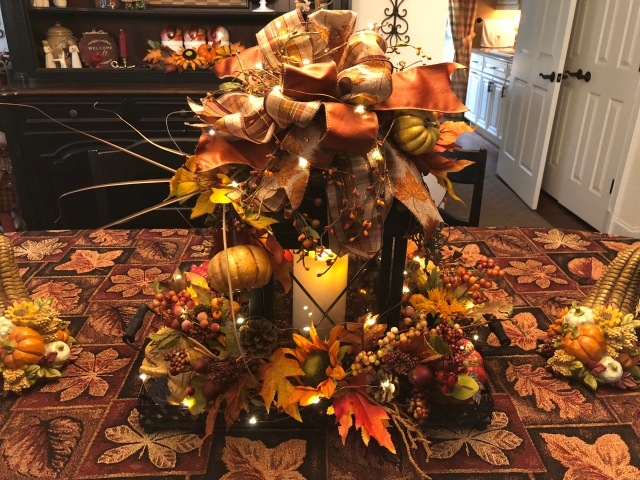
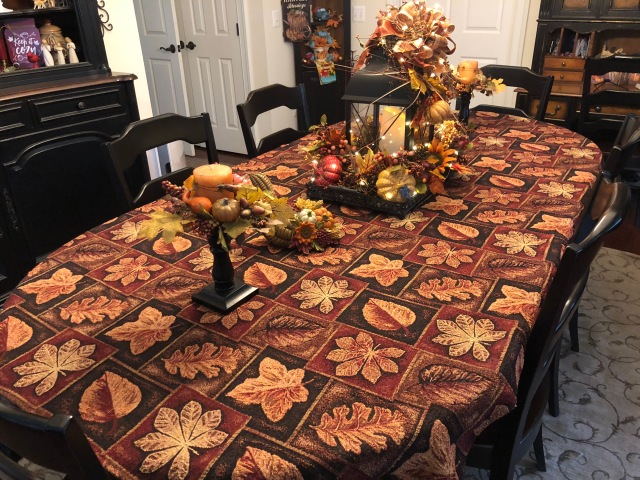
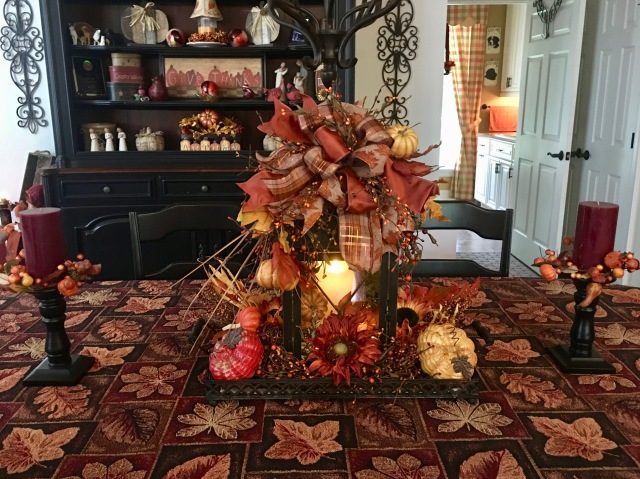
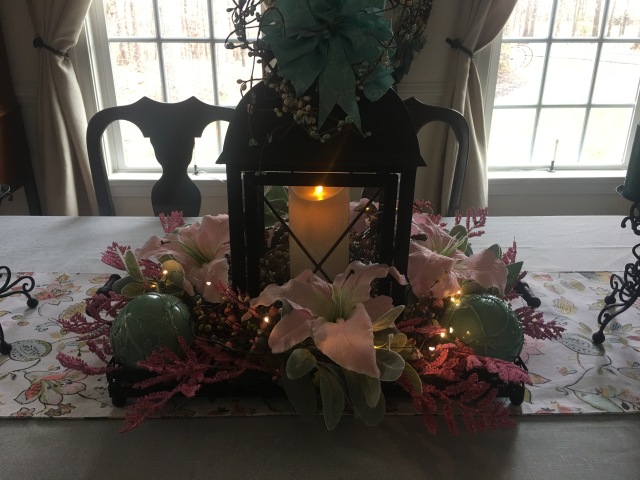
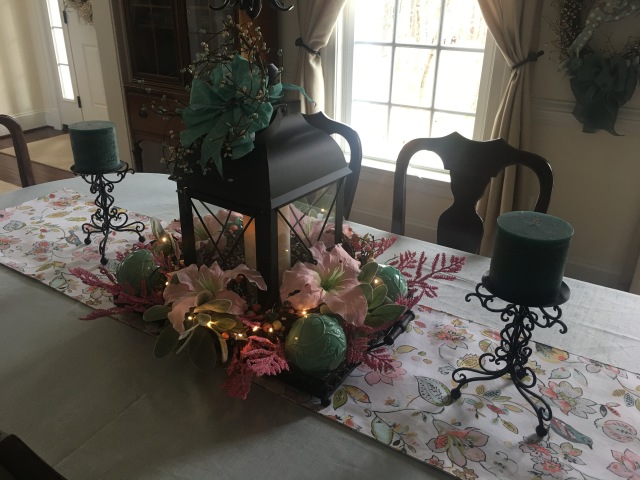
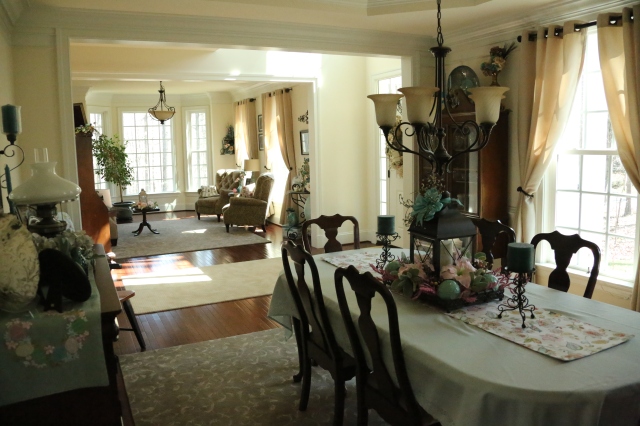
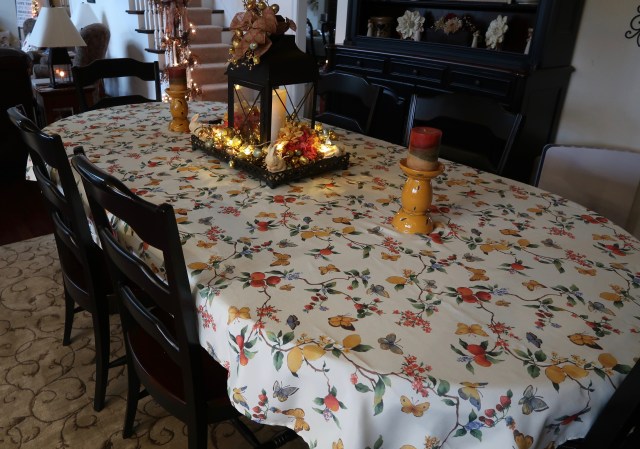
Next I moved into the dining room where I created this lantern centerpiece, switched out my tablecloth, and added a pretty Springy table runner:
Here is my YouTube video where I show you how I put together this dining room table:
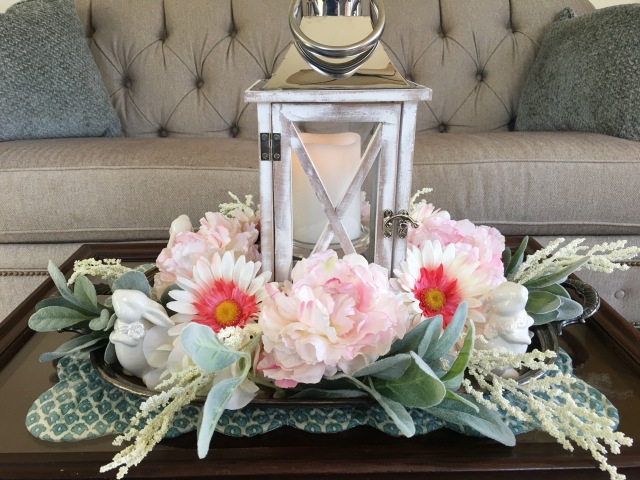
And just the other day to finish my indoor decorations, I added a few little things to the living room to bring Spring and Easter into that space. 🙂 Of course I did make a video of that too and I will post a link below the pictures.
Here are a couple of shots of the family room and then the living and dining rooms:
And here is my YouTube video where I show you how I finished up the living room, and then after that I’ll share a “Car Chit-Chat” video that has a home tour of everything that I did for Easter/Spring after the Chat. 🙂
Next, I’ll be moving outside and decorating out there for Easter. 🙂
**In crafting there are no mistakes, only unique creations**
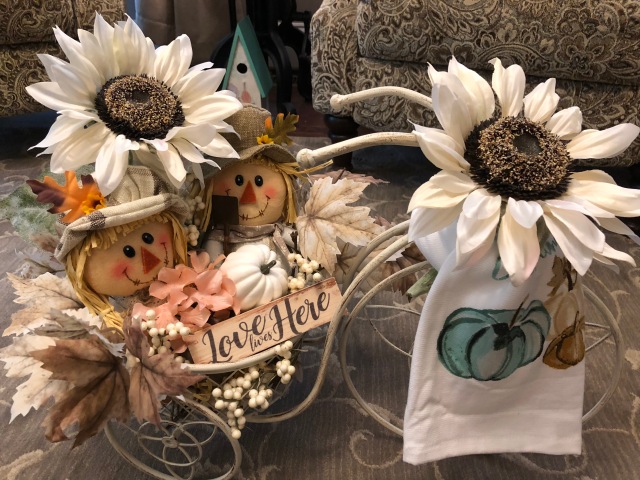
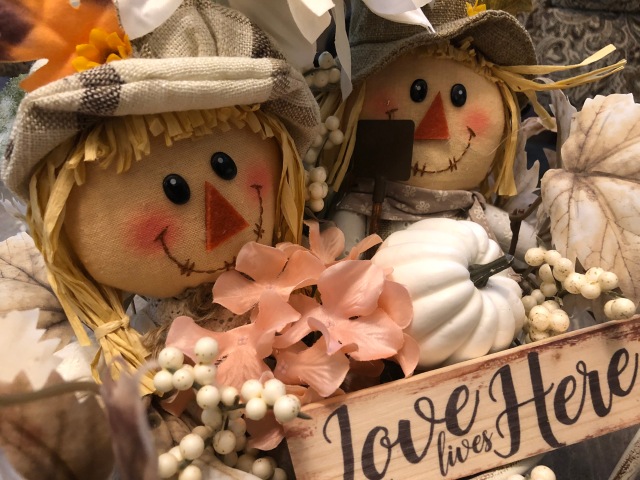
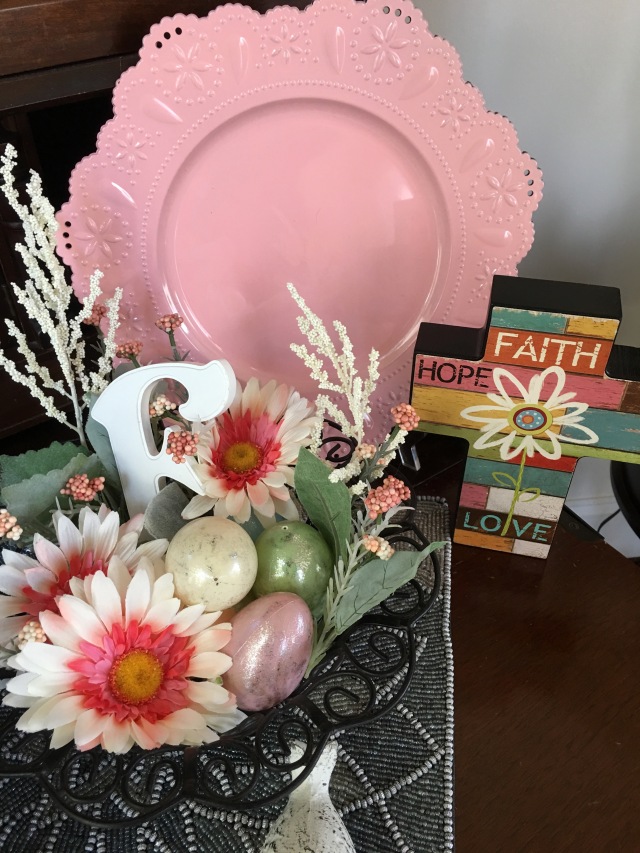
Do y’all know what I realized this year? I had only decorated this our new house once for Easter. What?! That hardly seemed possible, after all, I live to decorate for every little thing. 😉 But, nope, I had only decorated once, so I’ve gone on a mission this year, I’m trying to add a little bit of the Easter/Spring feel into our home. This has proven to be a bit of a challenge for me in our family room area because my usual decor lends itself to the more traditional country colors of burgundies, reds, dark greens, tans, khakis, and so on. In that one year that I had decorated, I had purchased a few things, and had only done the fireplace hearth, but, this year, I’ve been on a mission to find more decor accents that I can incorporate into our home to bring in the light and airy feeling of Easter and Spring. Well, little did I know when I found an egg garland in Hobby Lobby one day that I would base my entire design around that–at first I thought that garland was a little over the top with its gold tipped eggs of all pastel colors of the rainbow, but, I’ve really embraced it for my family room, and as you’ll see, I’ve incorporated it into every little venue and centerpiece.
This year, my plan is to only decorate “here and there” for Easter/Spring…WISH me luck please!! I’m trying really hard not to re-create the entire wheel (so to speak) like I do for Fall and then for Christmas–As much as I love the creating and decorating process, I do not love the pulling out of Seasonal bins and then un-decorating and storing all of my decor. I’m trying to keep some of my existing decor in place and augment with my Easter accents so I don’t go through the *pulling out of hair and gnashing of teeth* part of the redecorating journey. I’ve been somewhat successful, but, admittedly, I have done a bit of recreating of that wheel…haha. Although, I do think I’ll only be left with one bin of things that I’ve removed to make room for the Easter/Spring accents and therefore will only have 1 or 2 Easter/Spring bins versus the 8,9, & 10 (not exaggerating) bins I have for Fall and then Christmas.
All that said, I will show you what I’ve completed so far in the family room, and I will not be expanding my efforts too much further, meaning, I will not be removing any more decor in this area of the house. I have switched out my kitchen table’s tablecloth and redone that lantern centerpiece though, I’ll show you pictures of that below. From now on, in this portion of the house, I’ll just be adding an accent piece here or there to continue the theme throughout the kitchen and possibly powder room. 🙂 (I’ll put links to the YouTube Videos that I’ve created during this process below).
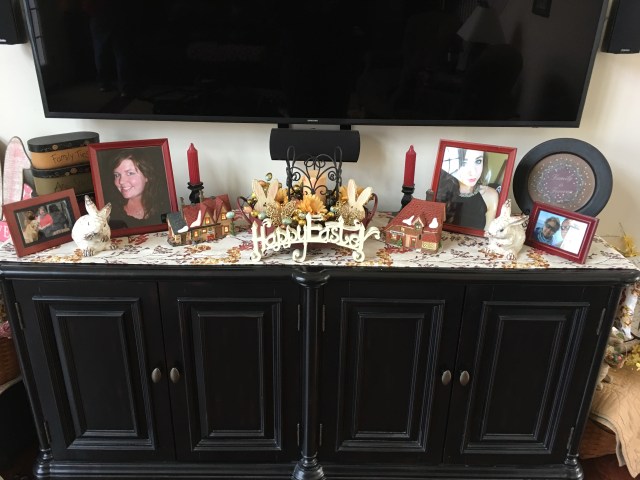
Here is the “Cozy Corner” that sits beside the tv credenza, admittedly, I did remove all of the decor and created this new design; there’s that new bling’y’ egg garland, and I wrapped it in pastel colored lights–OH gracious, did that ever make it pretty!
I switched out the table runner, added a couple of bunnies, and made a new centerpiece for the top of the credenza:
There’s a bit more of the egg garland peeking out of the centerpiece:
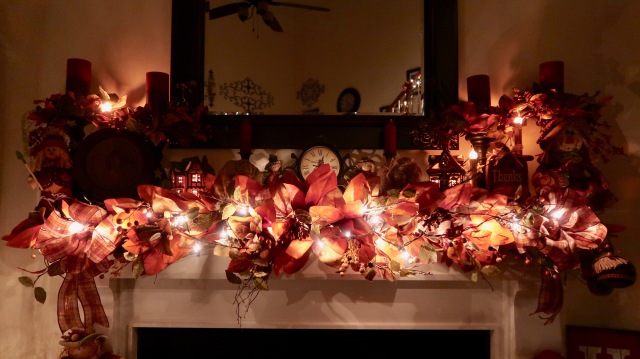
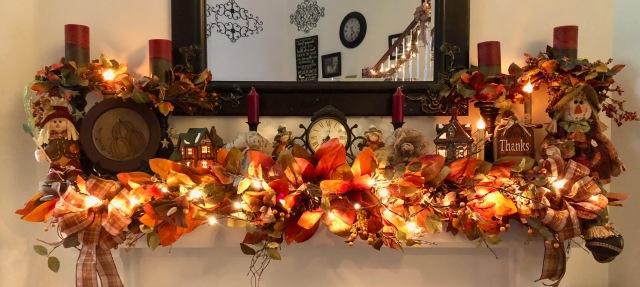
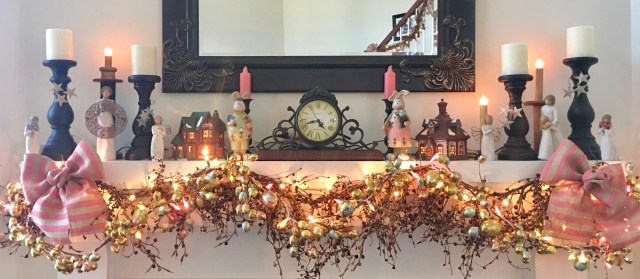
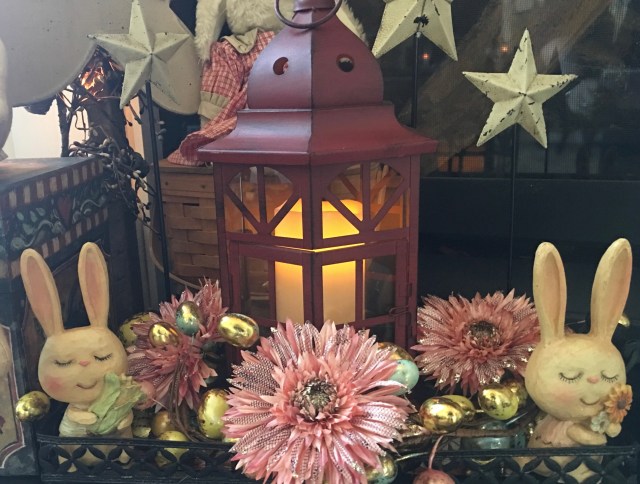
Here is the mantel, and instead of removing the pip berry lit (with white lights) garland, I simply wrapped another egg garland in those pastel lights and added it right on top of the pip berry garland…wow, I didn’t know if that would work out, but, I LOVE it…Other than the garland, I simply replaced the candles, made a couple of bows and added them to either side of the garland, and added a couple of ceramic bunnies on either side of the clock. I can’t tell you how happy I am with this mantel…so light, so airy, so, so pretty–if I do say so myself…lol…nothing like patting one’s self on the back a bit huh? haha
And here is the hearth–I made a new lantern centerpiece, and admittedly removed a good bit of the more traditional decor…this is the focal point in the room, I needed to really work with it and lighten it up in feel and design in order to bring everything together. I also redid the “cozy corner” basket design I have sitting right next to the credenza.
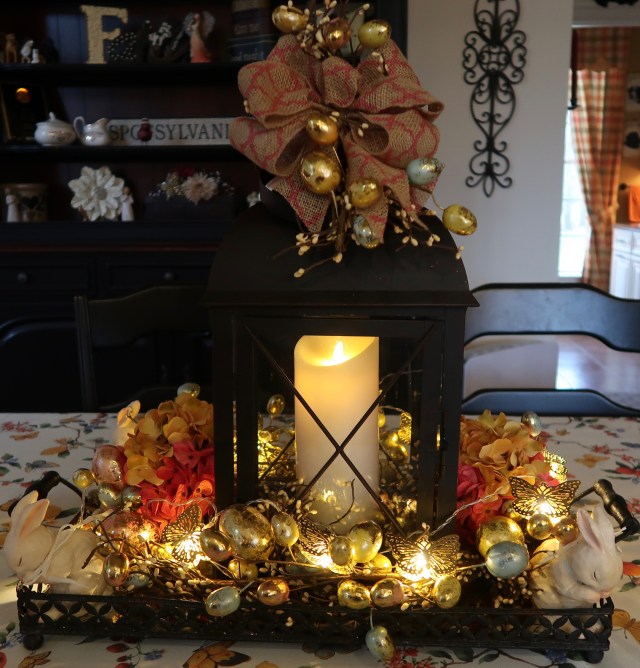
Here is the kitchen table–I had purchased the tablecloth last year, and I had some of the lantern centerpiece’s accent pieces, but, I did add a few more things to it this year…like…some of that egg garland, I’m nothing if not consistent. 😉 I also found a lovely golden butterfly light strand here at Victoria Trading Company.
I fell in love with those sweet little “praying” bunnies that I used to anchor the corners of this centerpiece. 🙂 ❤
Okie dokie…That about does it for what I’ve completed so far…I do have a table runner to add to the Island, and I might redo the centerpiece that I have sitting up there, and I plan to do a little something with that table that sits between the family room and kitchen…and then maybe add one or two things to the Powder room…maybe..haha. 🙂 I will then move into the living and dining rooms, I do have supplies to redo the dining room table’s lantern centerpiece, but that is about it for in there…we’ll see if I’m satisfied with that. 🙂
I’m pretty proud of myself that I’ve been able to step outside of my box and expand my decorating into the pastel arena—I’m quite happy with the results so far. 🙂
Here are a couple of links to my YouTube channel. I’ve been making tutorial videos (along with a car Chit-Chat too), as I’ve been working my way through this process. 🙂
Remember what I always like to say:
**In crafting there are no mistakes, *only* unique creations**
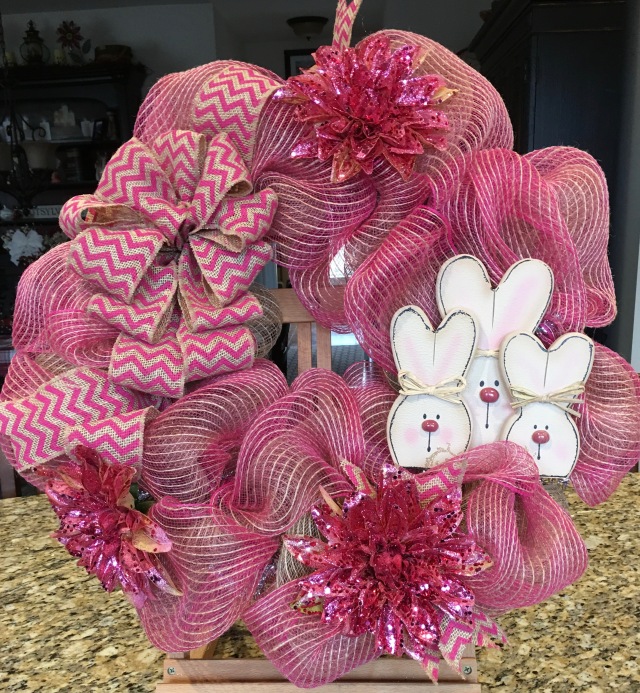
I am gearing up to do a little bit of Easter/Spring decorating in the coming days–Not too much, but just enough to bring a touch of one of my favorite times of year into our home. 🙂 I’ve only decorated this new house once for Easter, so I didn’t have many decorations to work with, I’ve been out and about doing a bit of hunting and gathering as of late. 😉 My YouTube channel is really growing nicely, so I am going to be linking some of my shopping trip/haul videos here for y’all to take a peek at…I’ve been a busy girl, like the energizer bunny–There *are* days that I wish I could find my “off” switch though..haha. ANYway, before I give you all of those links, I will post the supply list and the video that goes along with my new Easter Deco Mesh wreath (it will hang out on our front light post). 🙂
Here is that supply list:
1- 16″ Metal Wreath Frame (with the chenille ties already attached)
1 Roll of 21″ Deco Mesh in a burlap color
1 Roll of 10″ Deco Mesh in pink
1 Roll of Burlap and Pink Chevron Ribbon (for a bow)
1 Bunnies accent piece
3 Sparkly Pink Flowers
Scissors, Pipe Cleaners, & a Hot Glue Gun
Okie dokie…Here is my YouTube video tutorial–I do a craft bow tutorial in the video too:
Here is a link of one my shopping trips and Easter haul videos:
And here is where I explain how I’m going to decorate with the new items and I also show you what I’ve used in the past. 🙂
And here are a couple of “Car Chit-Chat” Videos that I’ve made up in the last couple of days where I’m collecting a few more supplies with which to get my Easter/Spring decorating completed. 🙂
A-n-d, my decorating will commence today!! YaY!! Finally! 🙂
Until next time, y’all take good care!
**In crafting there are no mistakes, only unique creations**
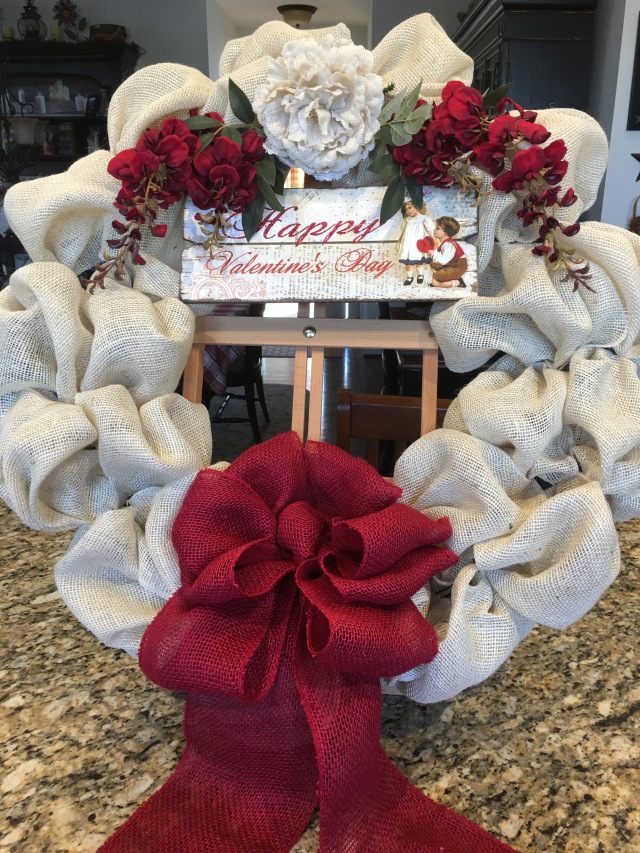
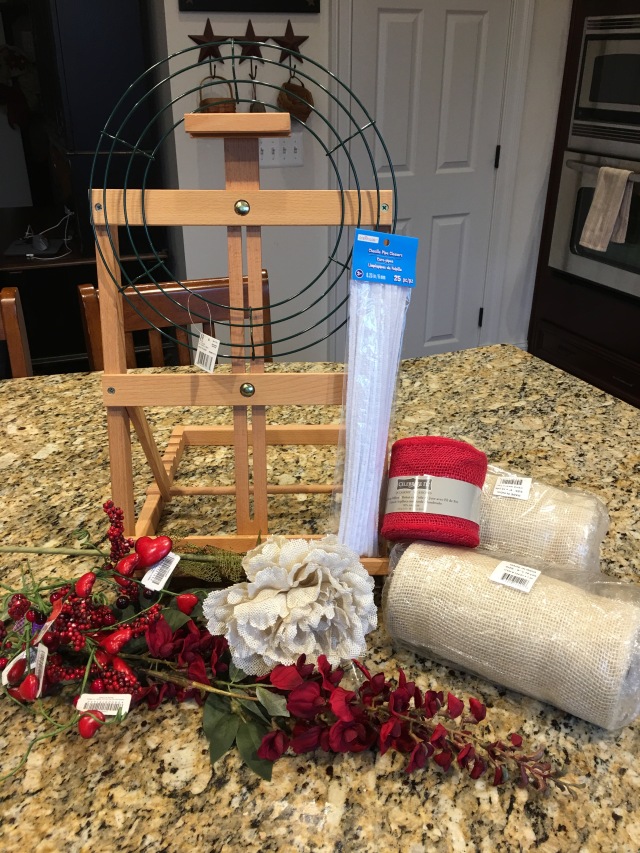
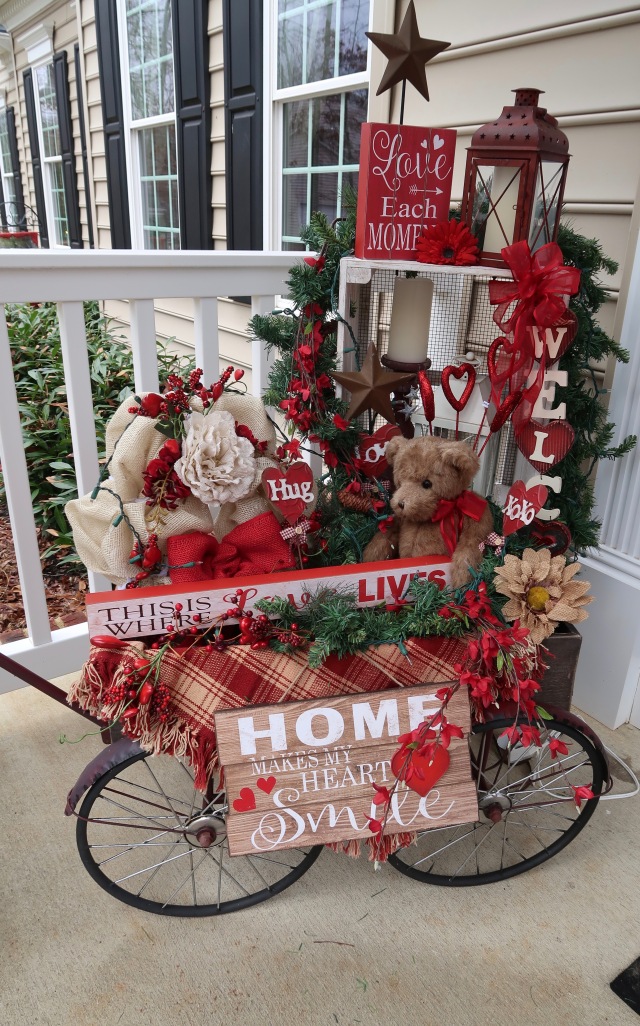
Okay, go ahead, call me anal retentive, you’d be smack dab on the money if you did…lol. 😉 All right, so some of you may have seen my blog post about this my Large Cream and Red Burlap Valentine’s Wreath:
I made that wreath to hang on my front door for February…Here is my YouTube Tutorial if you are at all interested btw….
ANYway, I knew that I’d be changing out my Little Red Wagon decor for Valentine’s Day as well, so I decided that I would make a matching baby wreath to go along with that big one to use as an accent piece in the wagon. I’ve made a YouTube video tutorial of me making that little wreath as well, I’ll post a link below, but first, here are the supplies that you’d need if you’d like to try one for yourself–it really is very quick and extremely easy, I promise:
5- Valentine Heart and Berry Picks (I got mine from AC Moore)
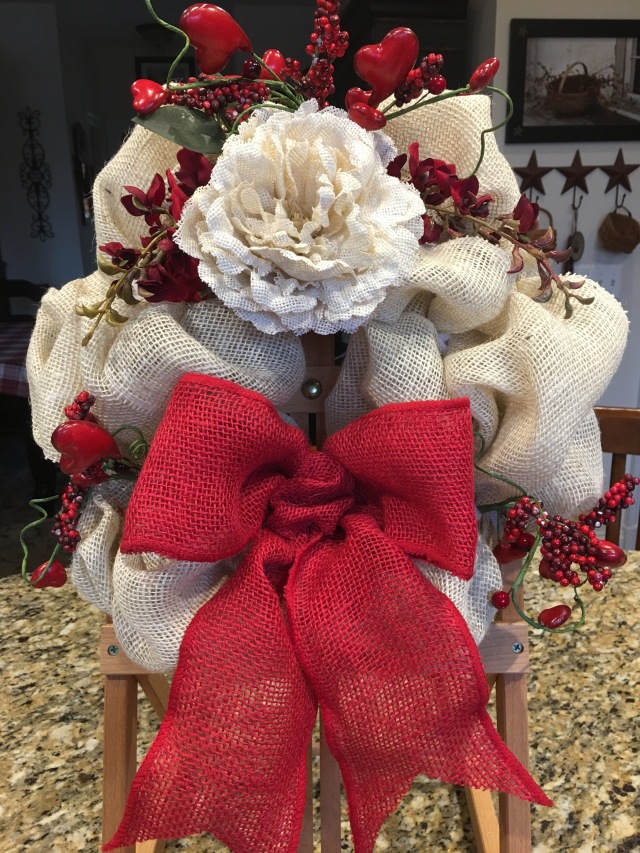
Here is the finished wreath:
And here is me holding both wreaths together:
And here is how that little wreath looked when I put it into my little red wagon:
And a picture of the front porch done up for Valentine’s Day. **BTW**, I’ve made a brand new Home Tour Series for my YouTube channel–I’ll be writing a separate post and I’ll give you all of those links in there, but, I will stick a link for the one where I show you more of how I decorated the outdoor spaces for Valentine’s Day.
Okie dokie…Now for those links:
Here is the link for this sweet little red and cream burlap wreath:
And here is a link to one of my Home Tour Series videos that show you my other outdoor Valentine’s Day decorations and also tells you about the other outdoor choices that we made when building this home:
Stay tuned for the rest of my Home Tour Series videos as I’ll be writing that little blog soon (you can always find them in my “Country Home Tour Series” playlist on my YouTube channel if you’d like to go and take a peek. 🙂
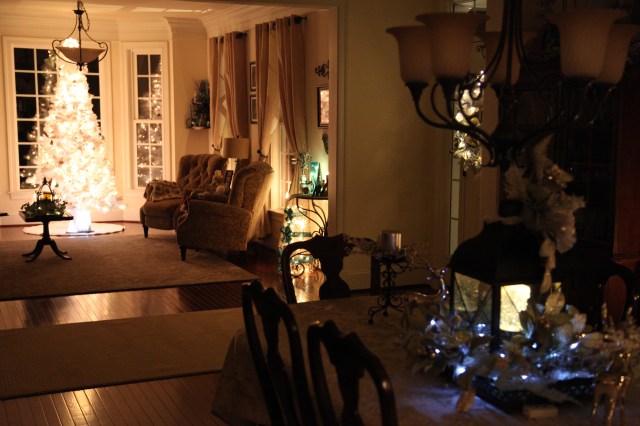
I am now officially finished decorating for Christmas–Woohoo! And, I am going to enjoy a couple of days of rest before attacking my Christmas shopping with a fervor. And if truth be told, I am one tuckered out lady at the moment. I feel like I have been working on this for weeks…OH wait, I *have* been working on this for weeks…haha. 😉 BUT, it is a labor of love to be sure–I absolutely love to create and decorate, as I told someone the other day, it is my “wheelhouse” and I’m never more happy when I can see what is in my mind’s-eye come to fruition. 🙂
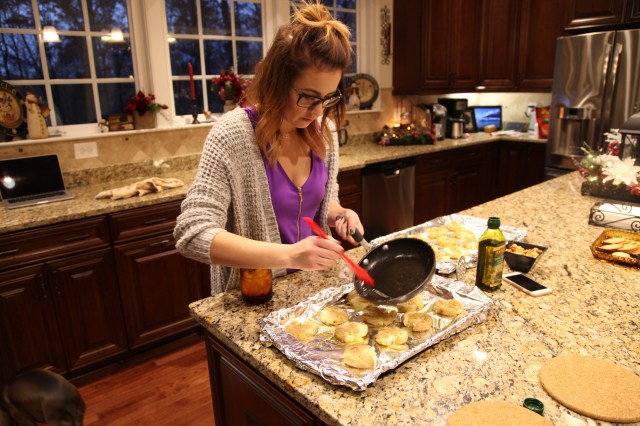
Before I start with my last home tour in this Series, let me tell you a little bit about our Thanksgiving. We had a lovely time of it here, both of our girls were here and my Dad was also here. In addition, we had our daughter’s beau and their pup here as well. Candace (our youngest) cooked us a wonderful dinner one evening, we played trivia games, we trimmed a Christmas tree, we laughed, hugged, and did all of those things that close families do–We are blessed. 🙂 Here are a few pictures of our time together:
Candace and Dustin’s pup Valentino!
Candace cooking up some dinner one night…YUM!!
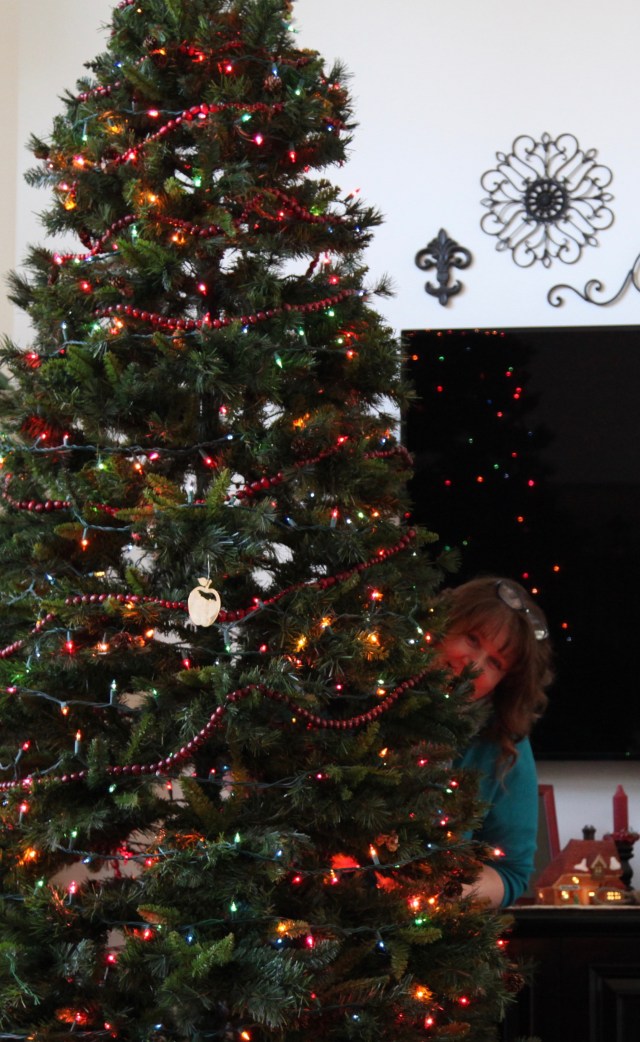
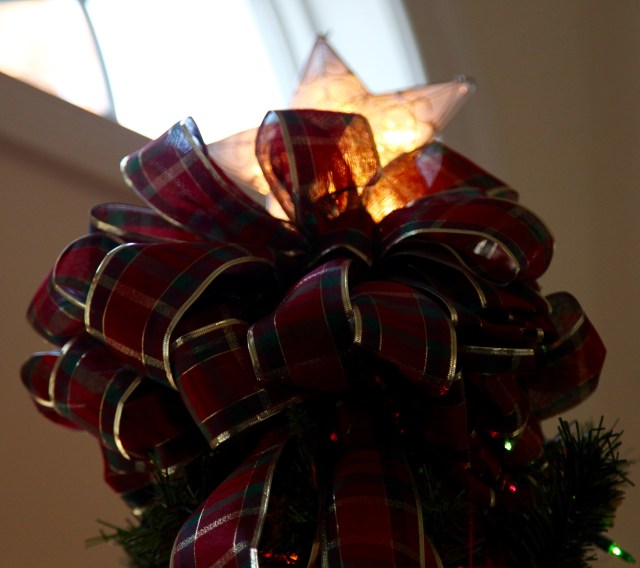
We all trimmed the big family room Christmas tree together:
And here is the finished tree that evening:
And the pups posed prettily for me…Left to right– Gracie, Samson, & Sophie:
And then Thanksgiving morning dawned–Here are a smattering of pictures of our time on that most special of days–I definitely have so much to be thankful for:
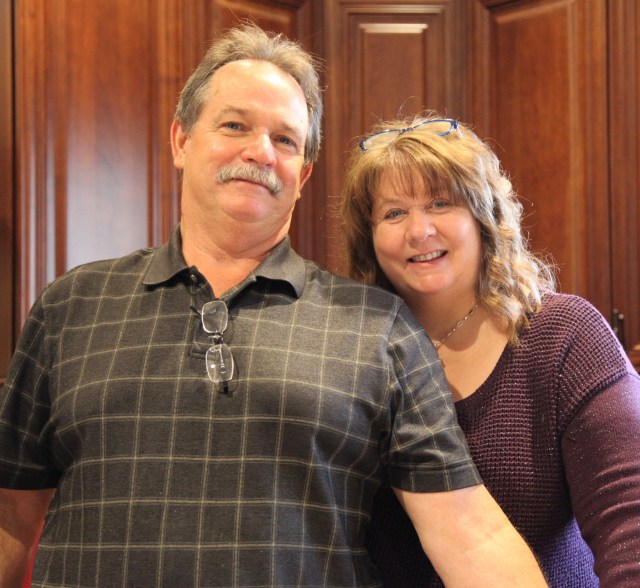
Here I am with my handsome hubby Chris:
And these two beauties are our daughters Christin & Candace:
Here are the girls with my sweet Dad Dave…
Here is Candace with her beau Dustin…
It was a ***wonderful*** day!! ❤ Everyone headed home on Thanksgiving evening…So sad to see them go; there is nothing more important than family!
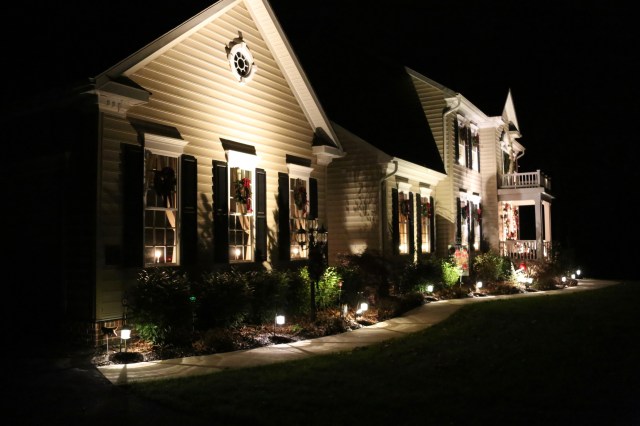
So the day after Thanksgiving dawned, and honestly, I didn’t have a whole lot of energy…lol…BUT, Chris and I were bound and determined to get our outdoor decorating completed. So we went into attack mode and by the end of the day, we had everything created, hung, blinged out, and in place. 🙂 I will post my YouTube video below that will give you a quick ornament and pine garland tutorial. I found more of that ornament garland at Walmart and I attached it to the garland that goes around the front door and I put some on the lit wreath that hangs on the front door…
And then I give you a tour of the outdoor decorations…
And here is a link to my YouTube video:
I am completely content and pretty happy with the end result of my decorating efforts this Christmas. It took me several years to gather all of the parts and pieces together and this year, I feel as if I have one cohesive design happening throughout the house. 🙂
I hope everyone had a fantastic Thanksgiving filled with family, friends, as well as good food, tons of hugs and unconditional love–I know that we sure did. 🙂 And I am completely and totally glad that my decorating is totally finished on this day, just two days after Thanksgiving. 🙂
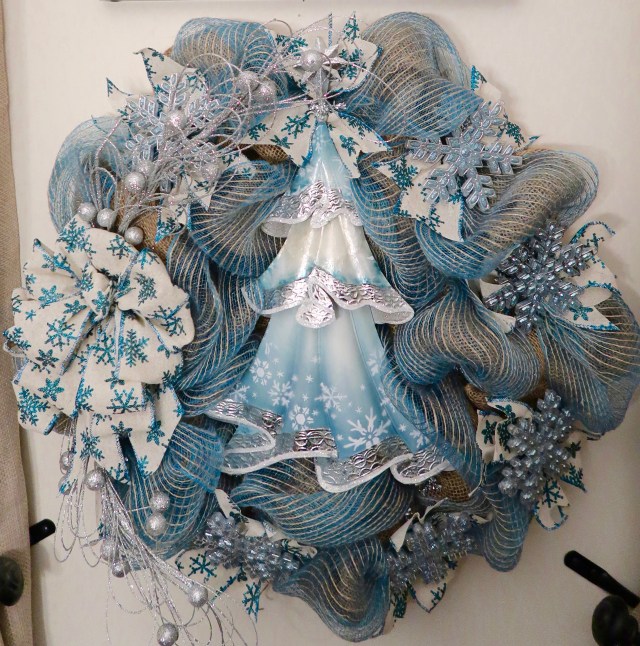
Okay, okay, okay…I’ve got to stop with the crafting huh? lol Yeah right, that’s like telling the sun not to rise tomorrow morning! 😉 What might help me is to stop heading into Hobby Lobby *just* to look. Such is the scenario that was taking place when I found this Christmas tree:
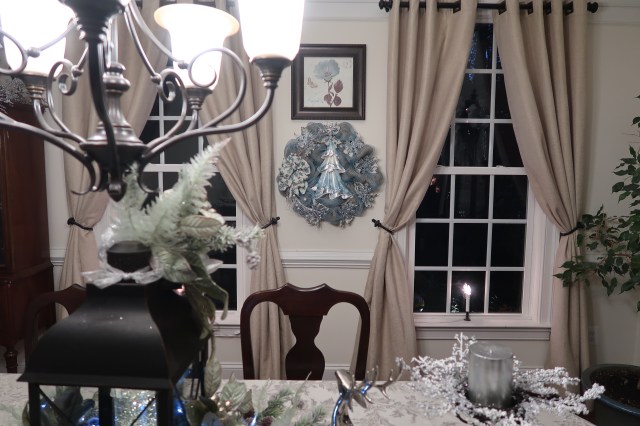
As y’all know, my Christmas decorations in the living and dining rooms are done up in light blues and greens, silvers, and whites. But, see that wreath hanging between the windows in the picture below, the one with the bird on it? Well, in my mind, where the wheels are always turning and new ideas are always spewing forth, I thought that I would love to have a Christmas wreath hanging there :
So when I saw that Christmas tree, the imaginary lightbulb above my head went off–btw, that Christmas tree was sitting way up on the very top shelf display, good thing I’m tall because I was able to reach it with knocking only one or two things over–yes, yes, I fixed it right back up, trust me, they never knew that my frenzied self had been anywhere near that spot. 😉
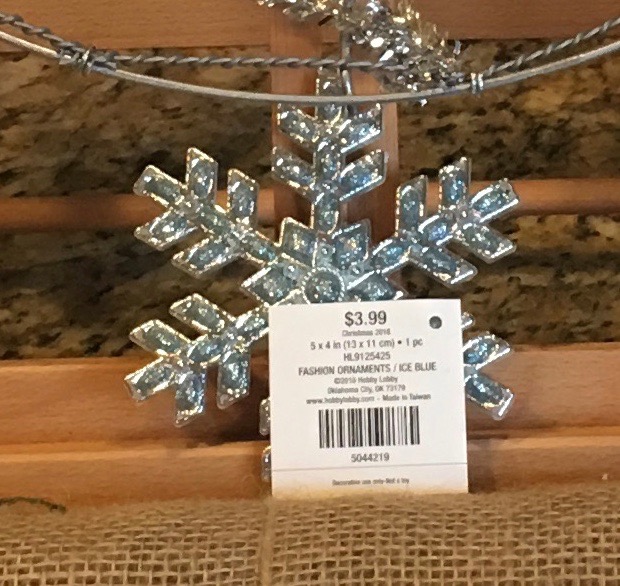
I then zipped around up and down the aisles of Hobby Lobby searching for all of the parts and pieces that I would gather to bring the wreath that was in my mind’s eye to fruition. The next thing that I found were these snowflakes which were perfect because there were snowflakes on that tree…
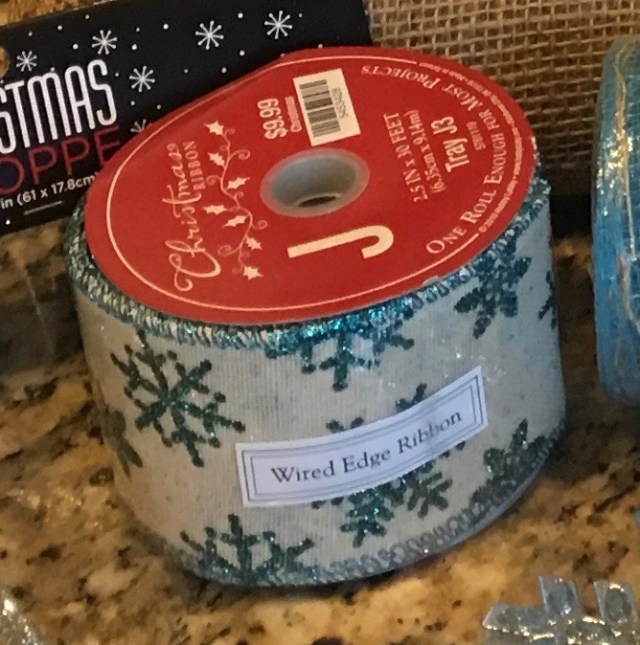
And then I found the wired ribbon that would be for my craft bow pretty snowflakes abounded there as well:
I decided that I wanted to do a burlap wreath, but, since I couldn’t find a coordinating burlap in the exact color that I wanted, I chose to use deco mesh instead–boy am I ever glad that I made that choice because adding that to the burlap just made everything come together. Here are the supplies that I collected, every single thing that I purchased was 50% off in their Christmas department–except for the burlap runner and deco mesh, but they were on sale this week for 40% off (admittedly, it still cost me about $55 to make):
Supply List:
16″ Work Wreath
1 Skein + a little more of Burlap Runner– 18″ x 15′
1 Skein of Deco Mesh (with jute)–10″ x 30′
1 Roll of Wired Craft Ribbon
Metal Christmas Tree
Snowflake Ornaments
Other accent pieces of your choosing
Pipe Cleaner (to close bow), Hot Glue Gun
Can I tell y’all how much I adore the finished wreath? It went together beautifully as you’ll see in my YouTube video tutorial that I’ll post below. First, here are a few pictures of what turned out to be one of my favorites wreaths that I’ve ever created.
Here is a link to my YouTube tutorial:
Until next time, y’all take good care! ❤
**In crafting there are no mistakes, just unique creations**
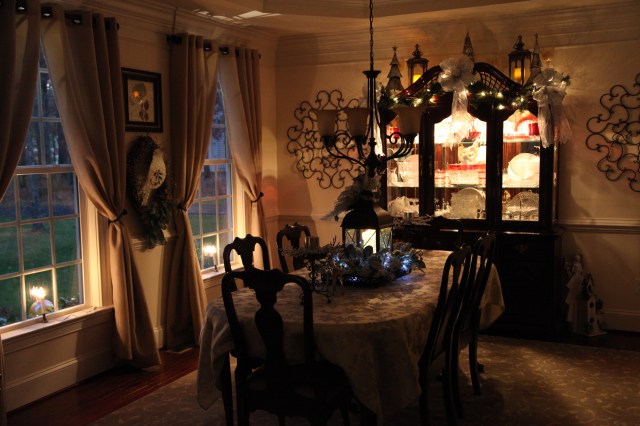
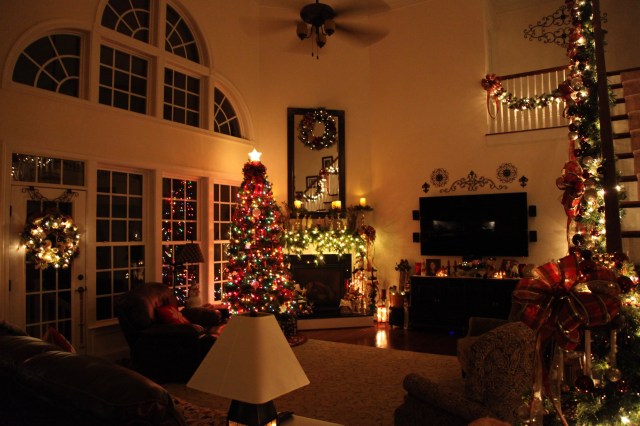
Can you see me doing the “Happy Dance” over here…*wait* on second thought, that might not be too, too entertaining. 😉 lol Regardless, I’m a happy girl, I am completely finished decorating the inside of our home for Christmas (except for our big 12 foot tree that we will put up in the family room on Thanksgiving evening—a-n-d, we’ll also put up some outside decorations).
I have used light and airy colors in our living and dining rooms again this year. I figured out last year that bringing these colors to life in my centerpieces and accents definitely warms up the space–I had feared that it might cool it down because whites and silvers tend to be cooler looking colors in my humble opinion…but, when those colors are paired with the soft greens and blues—pfft, the rooms are just as warm and cozy as can be. 🙂
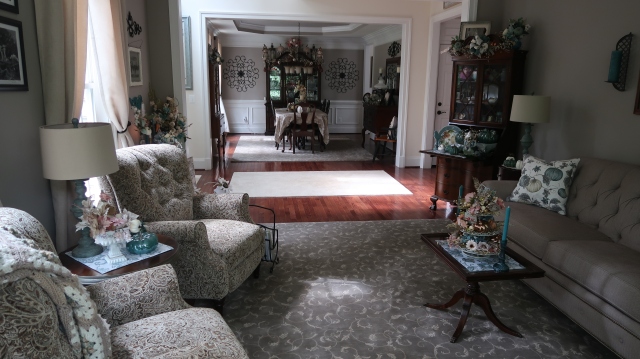
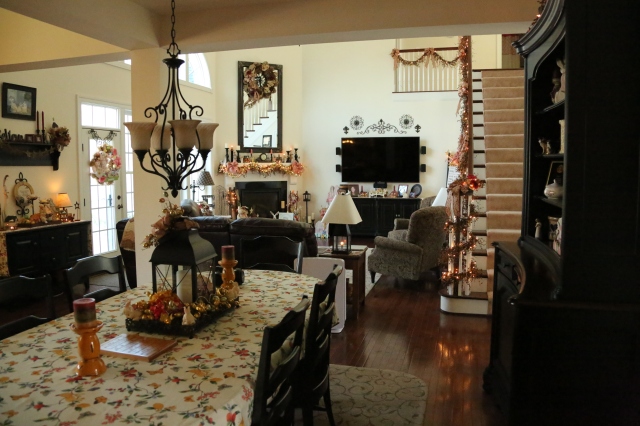
Here are some pictures of the living and dining rooms, these rooms sit on the front of our home and are separated from the back by our staircase. It provides a nice buffer between the more traditionally decorated family room, kitchen, etc… and these light and softly decorated living and dining rooms.
And our 3 scruffy muffins who will be bathed, brushed, and spiffed up before Thanksgiving. ❤
I feel like I have been one productive lady in the last week or so, and now, I’m really glad that I worked so hard to get all of the indoor decorating completed before Thanksgiving. Now, I can really enjoy celebrating with my family while they enjoy seeing the house all decked out in its Christmas finery. 🙂
I have created and narrated a YouTube video showing this portion of the house, here is a link:
I hope that all of you have a very, very Happy Thanksgiving, may your day be filled with wonderful family, good times, awesome food, and happy memories!! ❤
Much, much love from my home to yours as we officially enter the Holiday Season. ❤
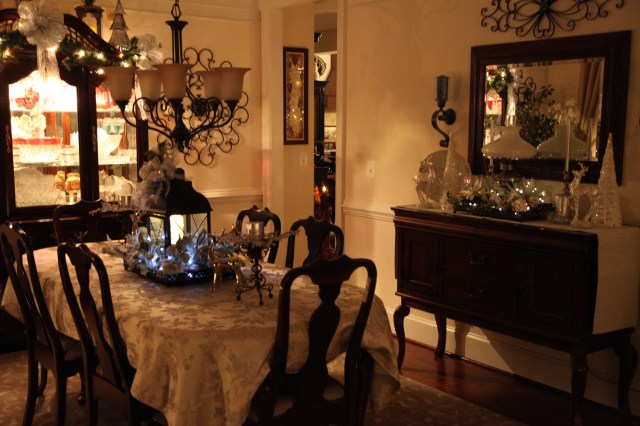
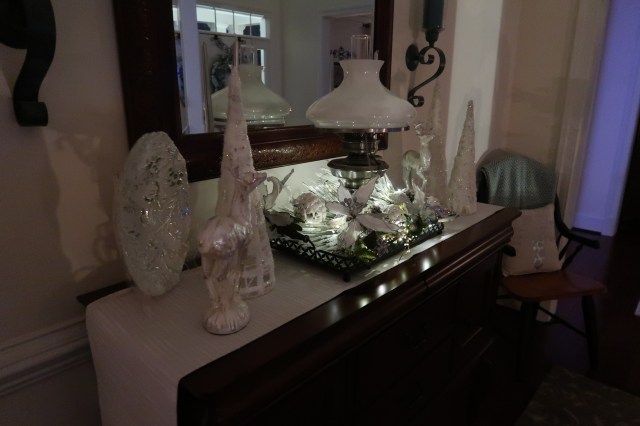
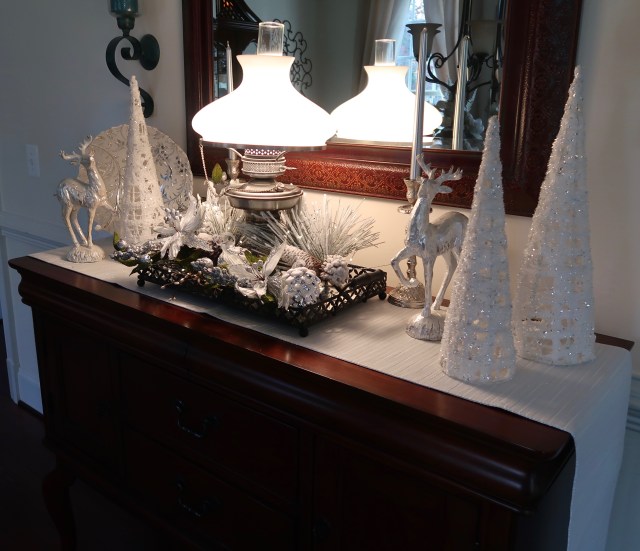
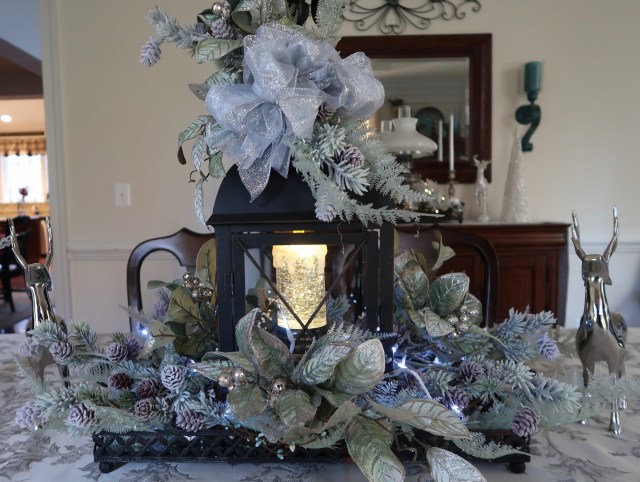
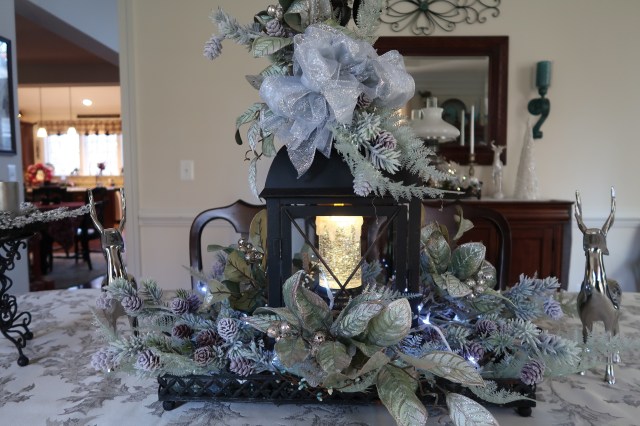
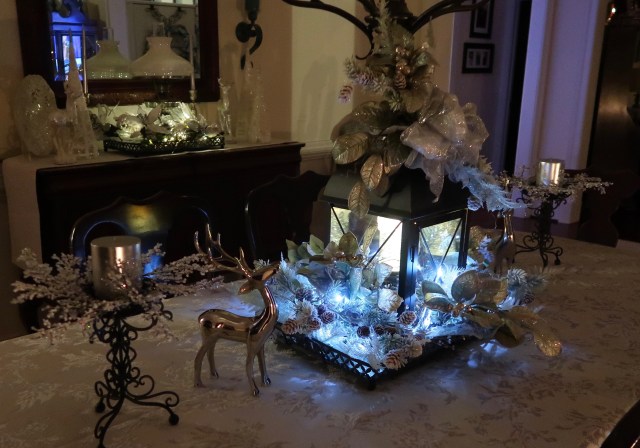
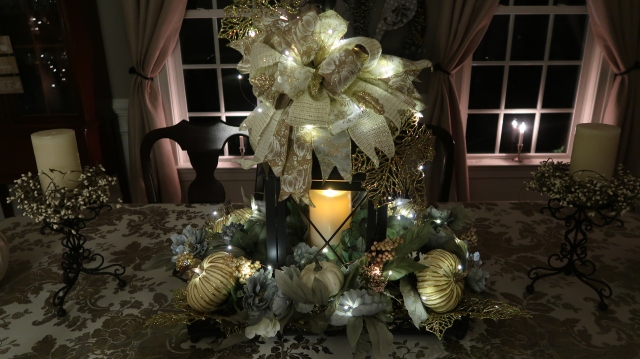
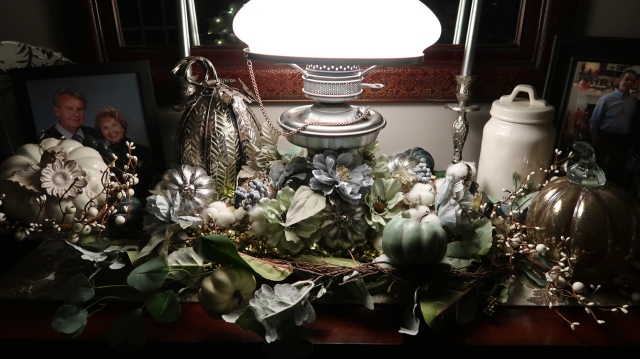
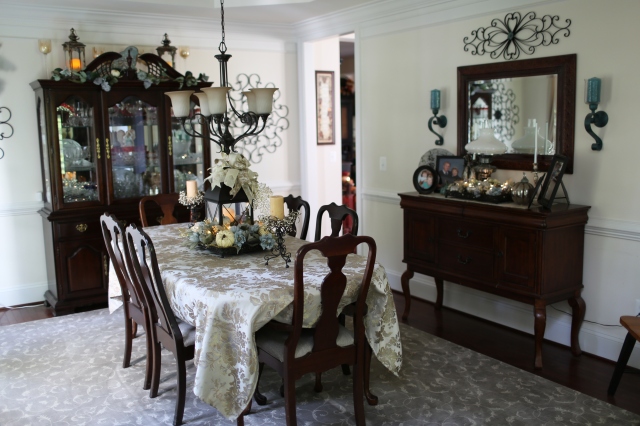
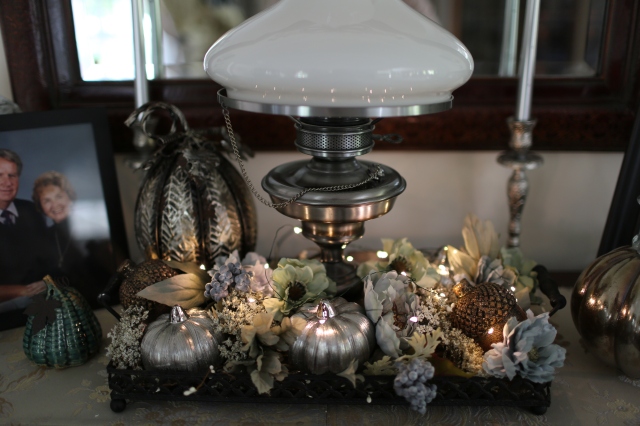
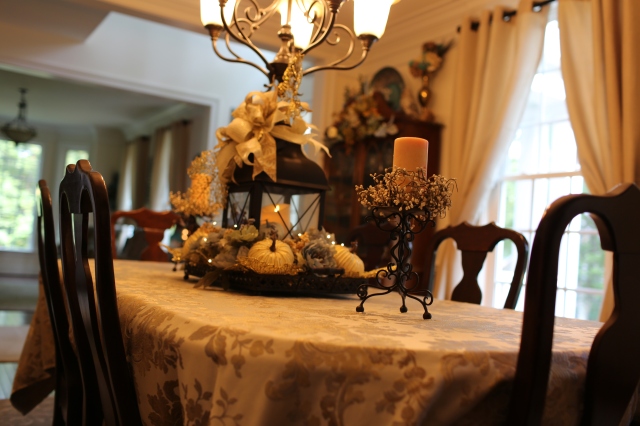
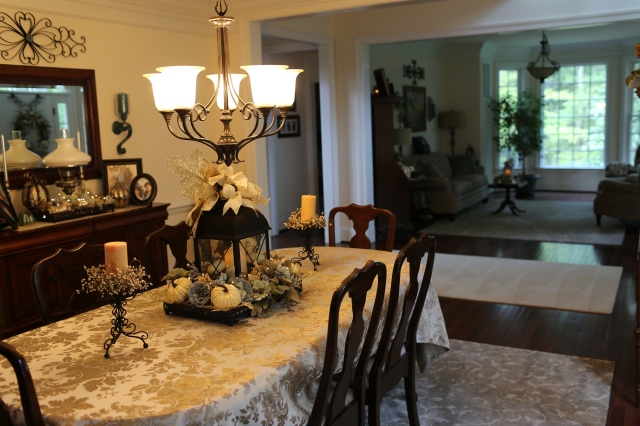
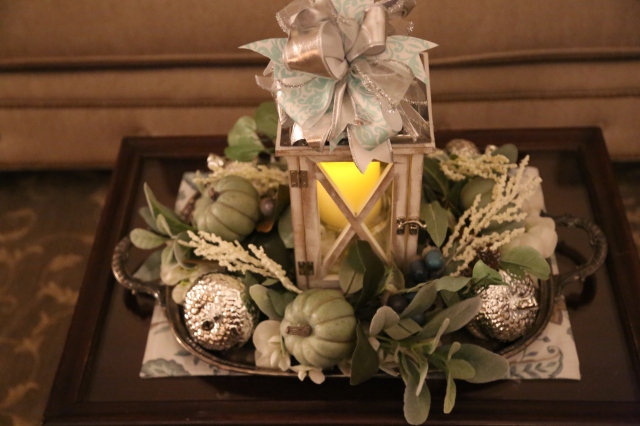
I am diligently working on decorating my living and dining rooms for Christmas and am almost finished, the only thing that I have left to do is to put the white Christmas tree up (and I *might* have a thought in my head to make a new burlap wreath for between the windows in the dining room—that thought has not fully developed yet though…haha). 😉 In this little post, I want to share a few arrangements that I’ve made for these rooms, one large lantern centerpiece for the dining room table, one arrangement that I made to go around a lamp on my sideboard and then one smaller lantern centerpiece for the living room. As y’all know, I always try to incorporate softer color tones into these more formal, yet country looking rooms. So you’ll see a lot of light greens, blues, silvers, and whites…so soft and pretty. I have made a YouTube tutorial video to show y’all how I put these three beauties together and I’ll post that link below. First though, here are some pictures:
This is lantern centerpiece that I made for the dining room table:
The arrangement that I made to go around Mooney’s (my Grandma) lamp on the sideboard:
And a picture of both arrangements:
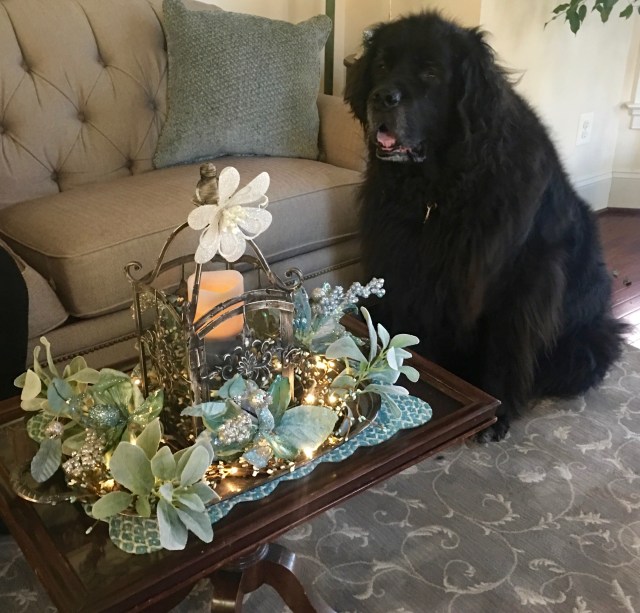
And last but not least, a picture of the small lantern centerpiece that sits on the small living room table:
Sophie was helping me too… ;):
And here is a link to my YouTube tutorial:
I’m so glad that I have climbed out of my “traditional red, burgundy, gold, Christmas box” for these rooms as I really do enjoy the lighter, airier, and softer tones that I’ve incorporated. I hope upon hope that I have given one or two of you a new and different idea for your own Christmas decorating. 🙂
Until next time, y’all take good care! ❤
**In crafting there are no mistake, just unique creations**


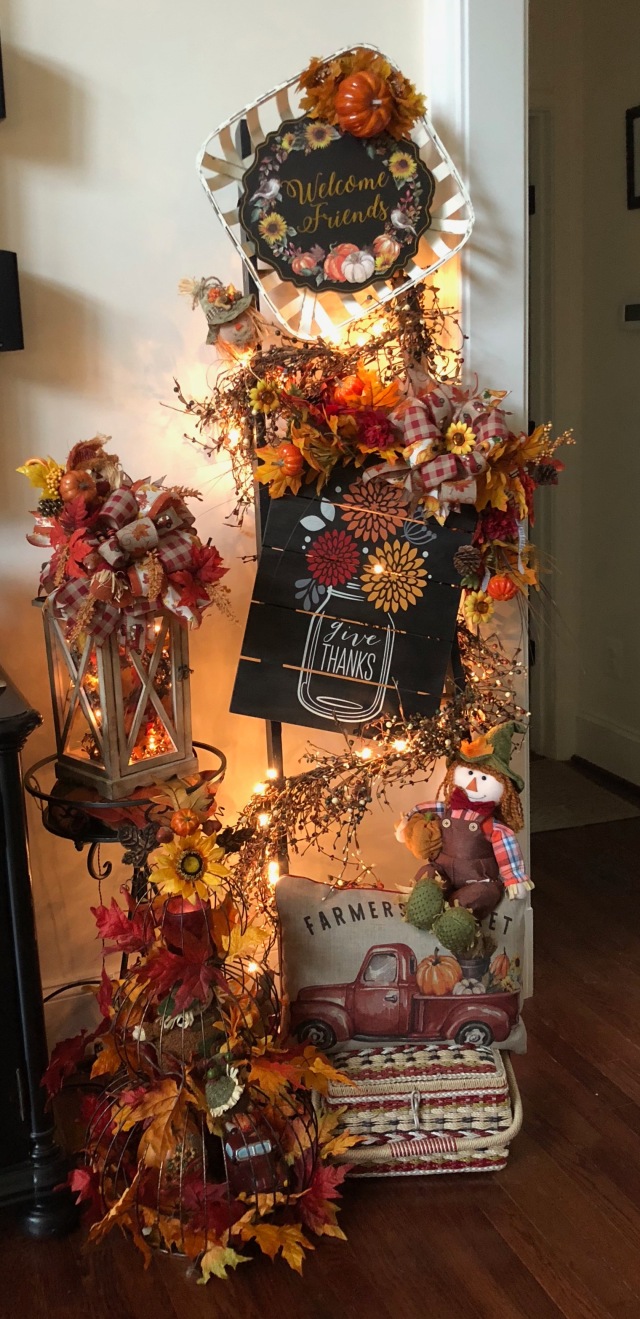


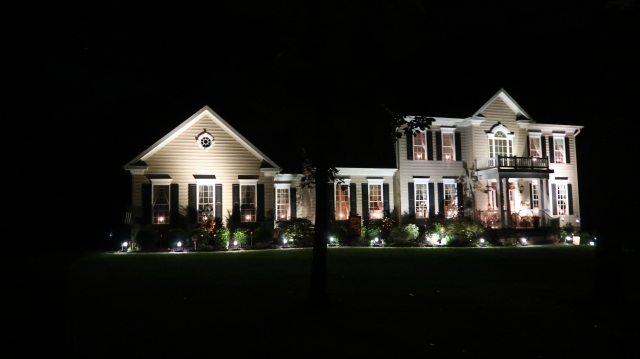
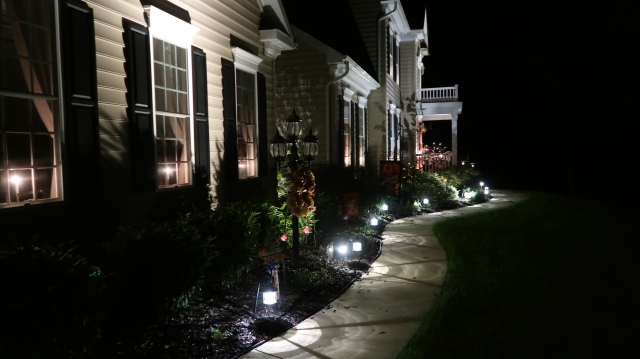
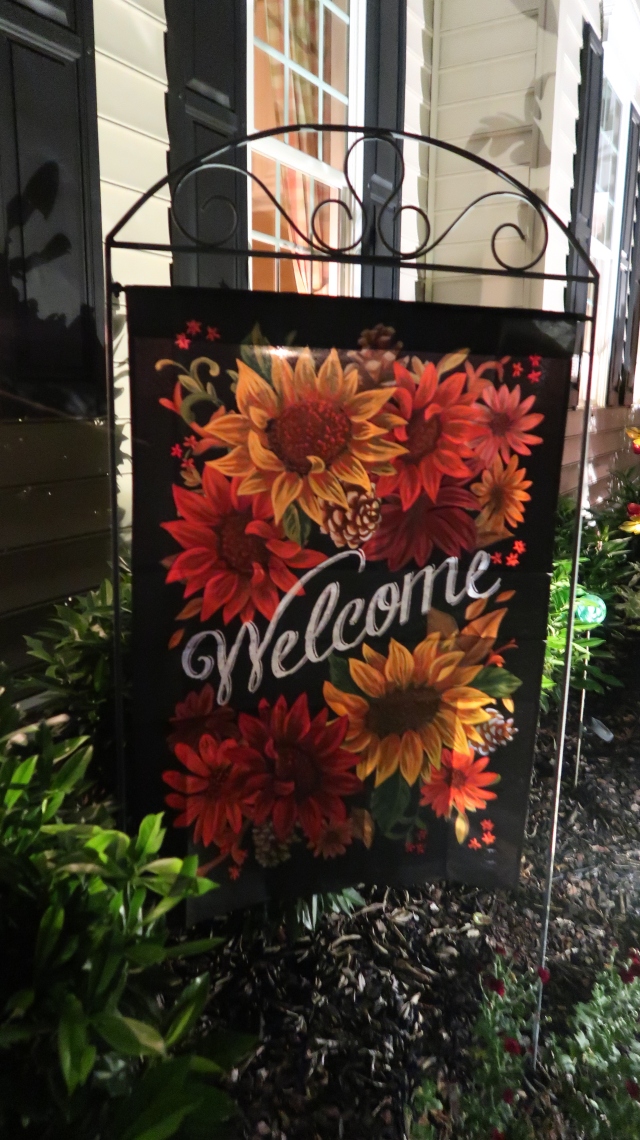
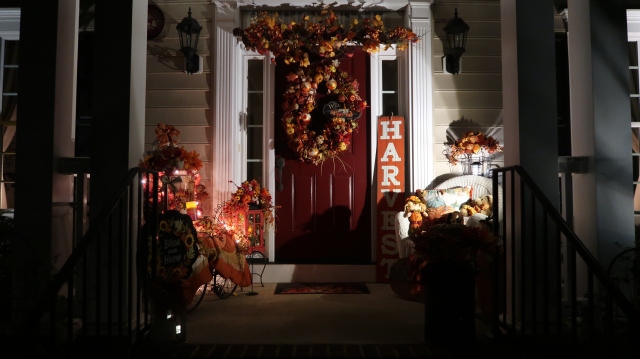
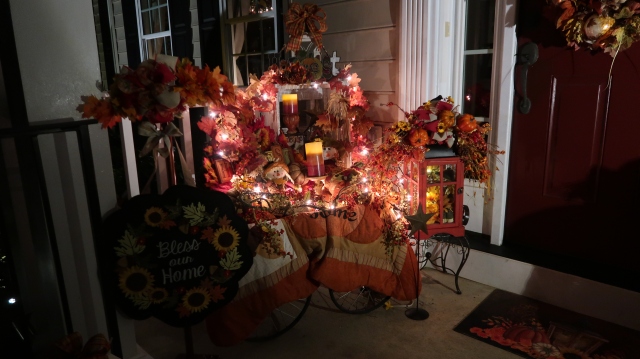
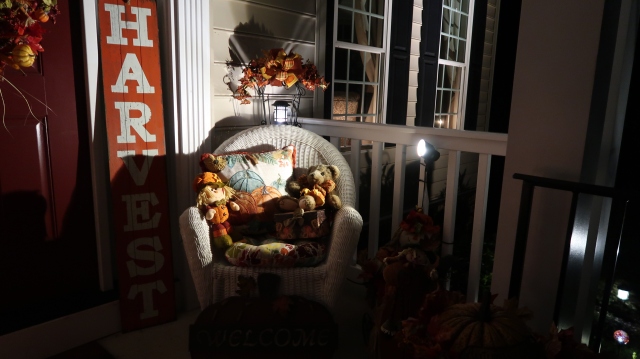
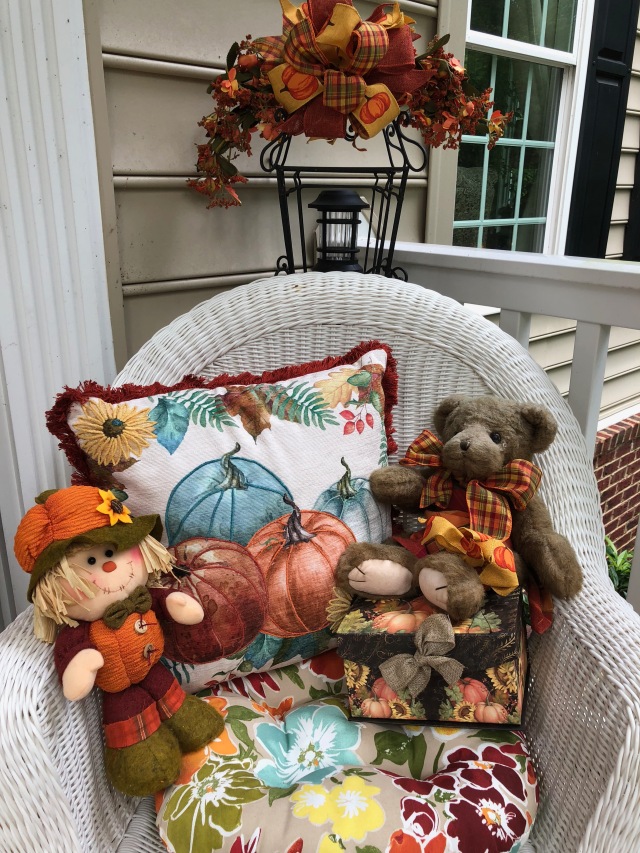
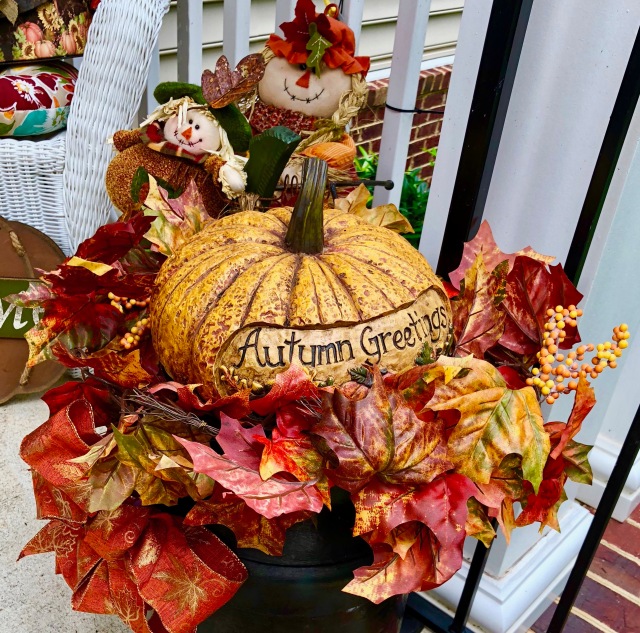
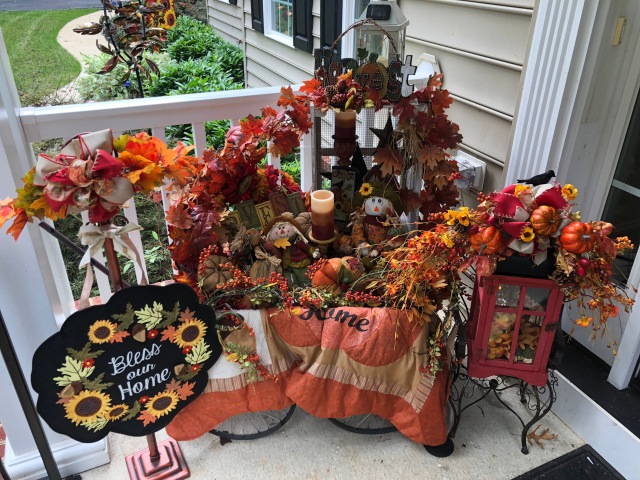
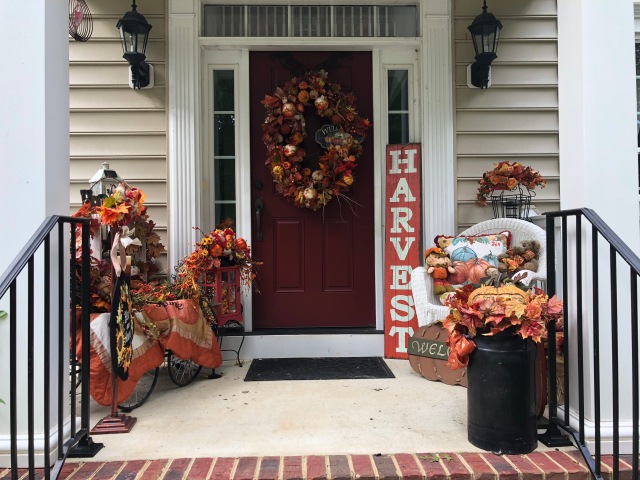
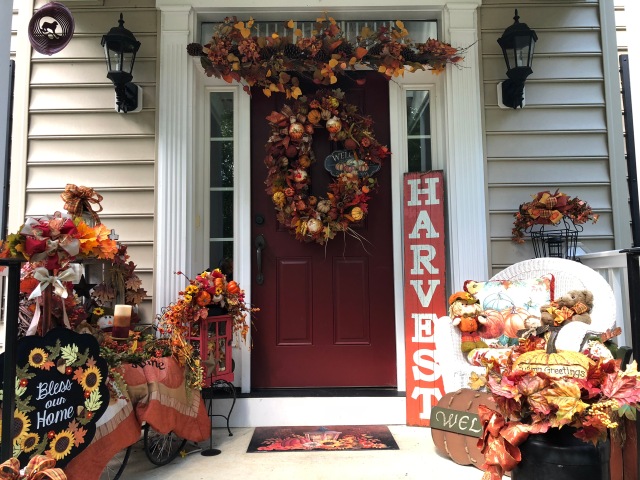
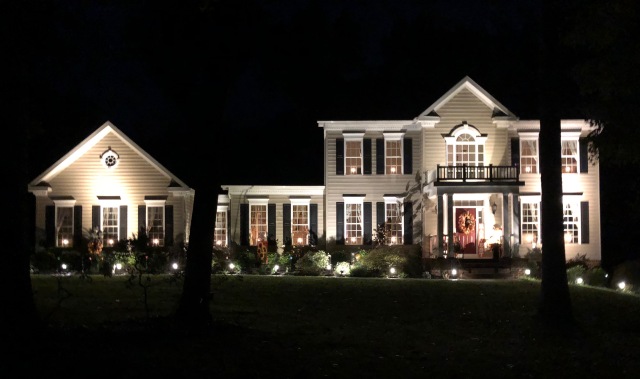
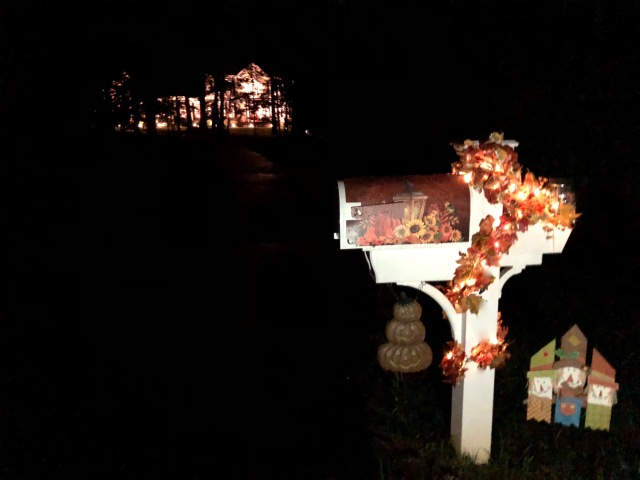
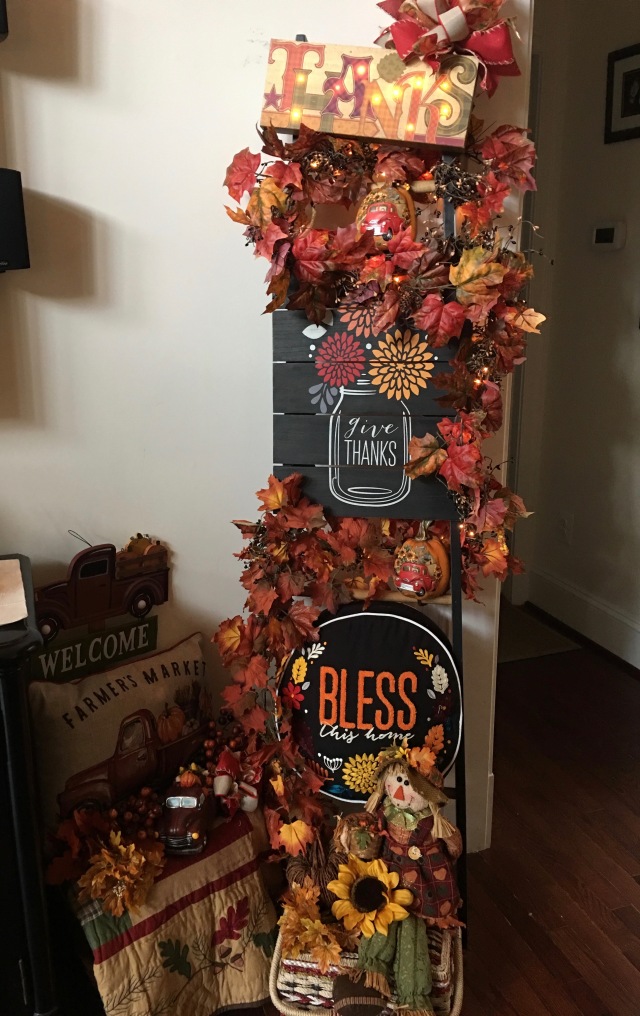
 As I mentioned above, I did all of the decorating that you see in these pictures prior to leaving for our cruise, and when we returned home, I went ahead and finished the outdoor spaces. Here is was I completed just last week:
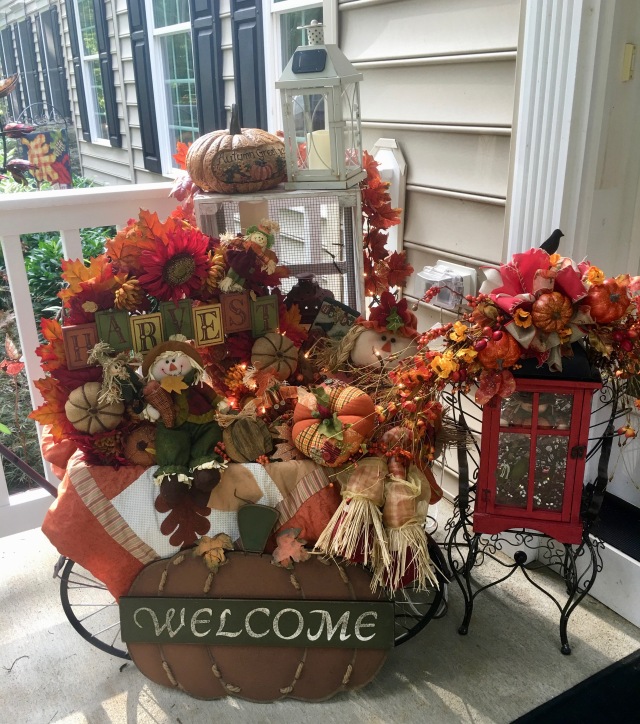


 And then I give you a tour of the outdoor decorations…