Guest Bedroom #2 – The Turquoise Room

Hi All,

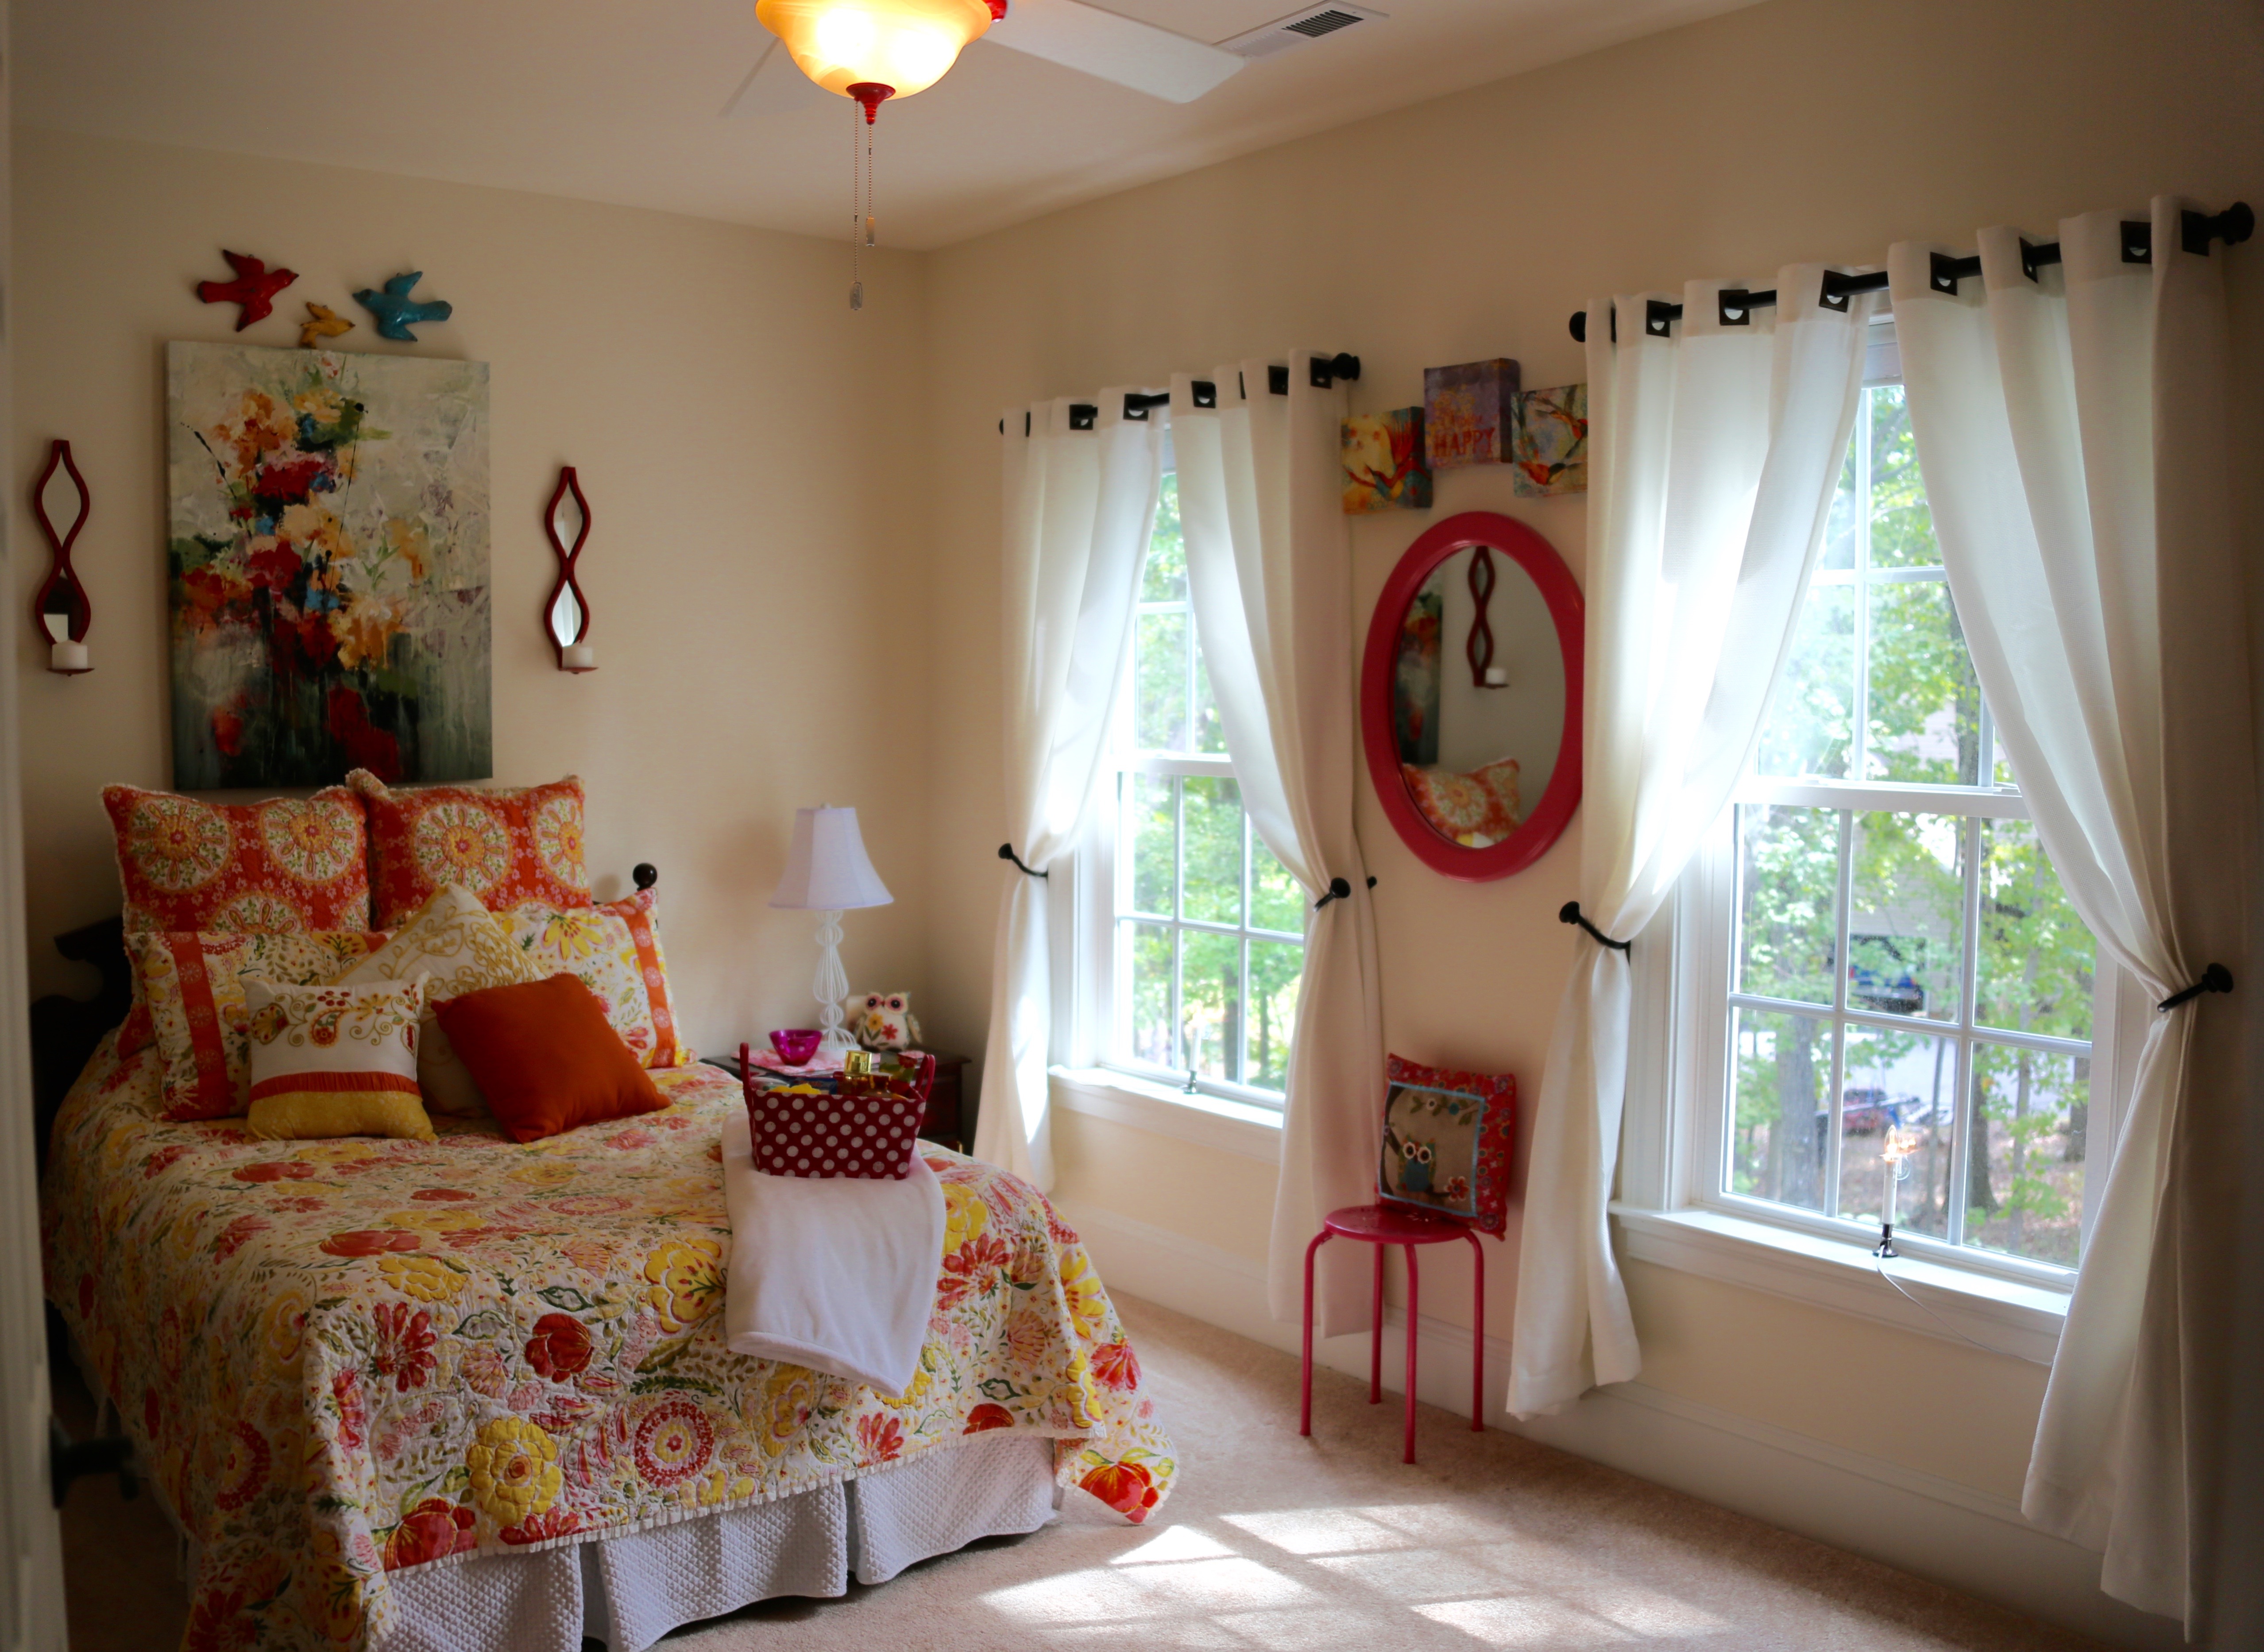
I debated about what I wanted this room to be for months and many options came to mind, how about making it into a craft room? Since it sits on the front of the house and has great light it would make a lovely place to be creative. Or, maybe it would make a great office, or possibly we could turn it into a nice upstairs rec room.  In the end I ended up making it a guest bedroom.  I don’t need that room to be any of those other things, but, now that it is a bedroom it has already been utilized several times to house visitors.  I decided to use turquoise as the accent color because, one, it is my daughter’s favorite color and she had claimed this room as hers when she comes to spend the night, and two, because I love how turquoise pairs with khaki; I had already chosen and hung the curtains in a khaki color (the same curtains that I used downstairs in the living and dining rooms and upstairs in the Happy Room).  In addition, I had found the bedding in Bed, Bath, & Beyond and I wanted to use something that would pop against that choice.

10173585_10203493702733652_7358230111975863156_n

We didn’t have extra bedroom furniture left over from our other home to put in this room, so we needed to buy new, but, we decided not to spend a ton of money creating the wheel (so to speak).  So, one day while looking at the IKEA website, we stumbled across these turquoise bedside tables!

IMG_8701

I knew it was meant to be, so off we went to do a little shopping at IKEA.  We ended up purchasing 2 bedside tables, a queen sized mattress, a white bed frame and headboard, a full length mirror, two white lamps, and a white table to be used as a tv stand.

1V4A2860

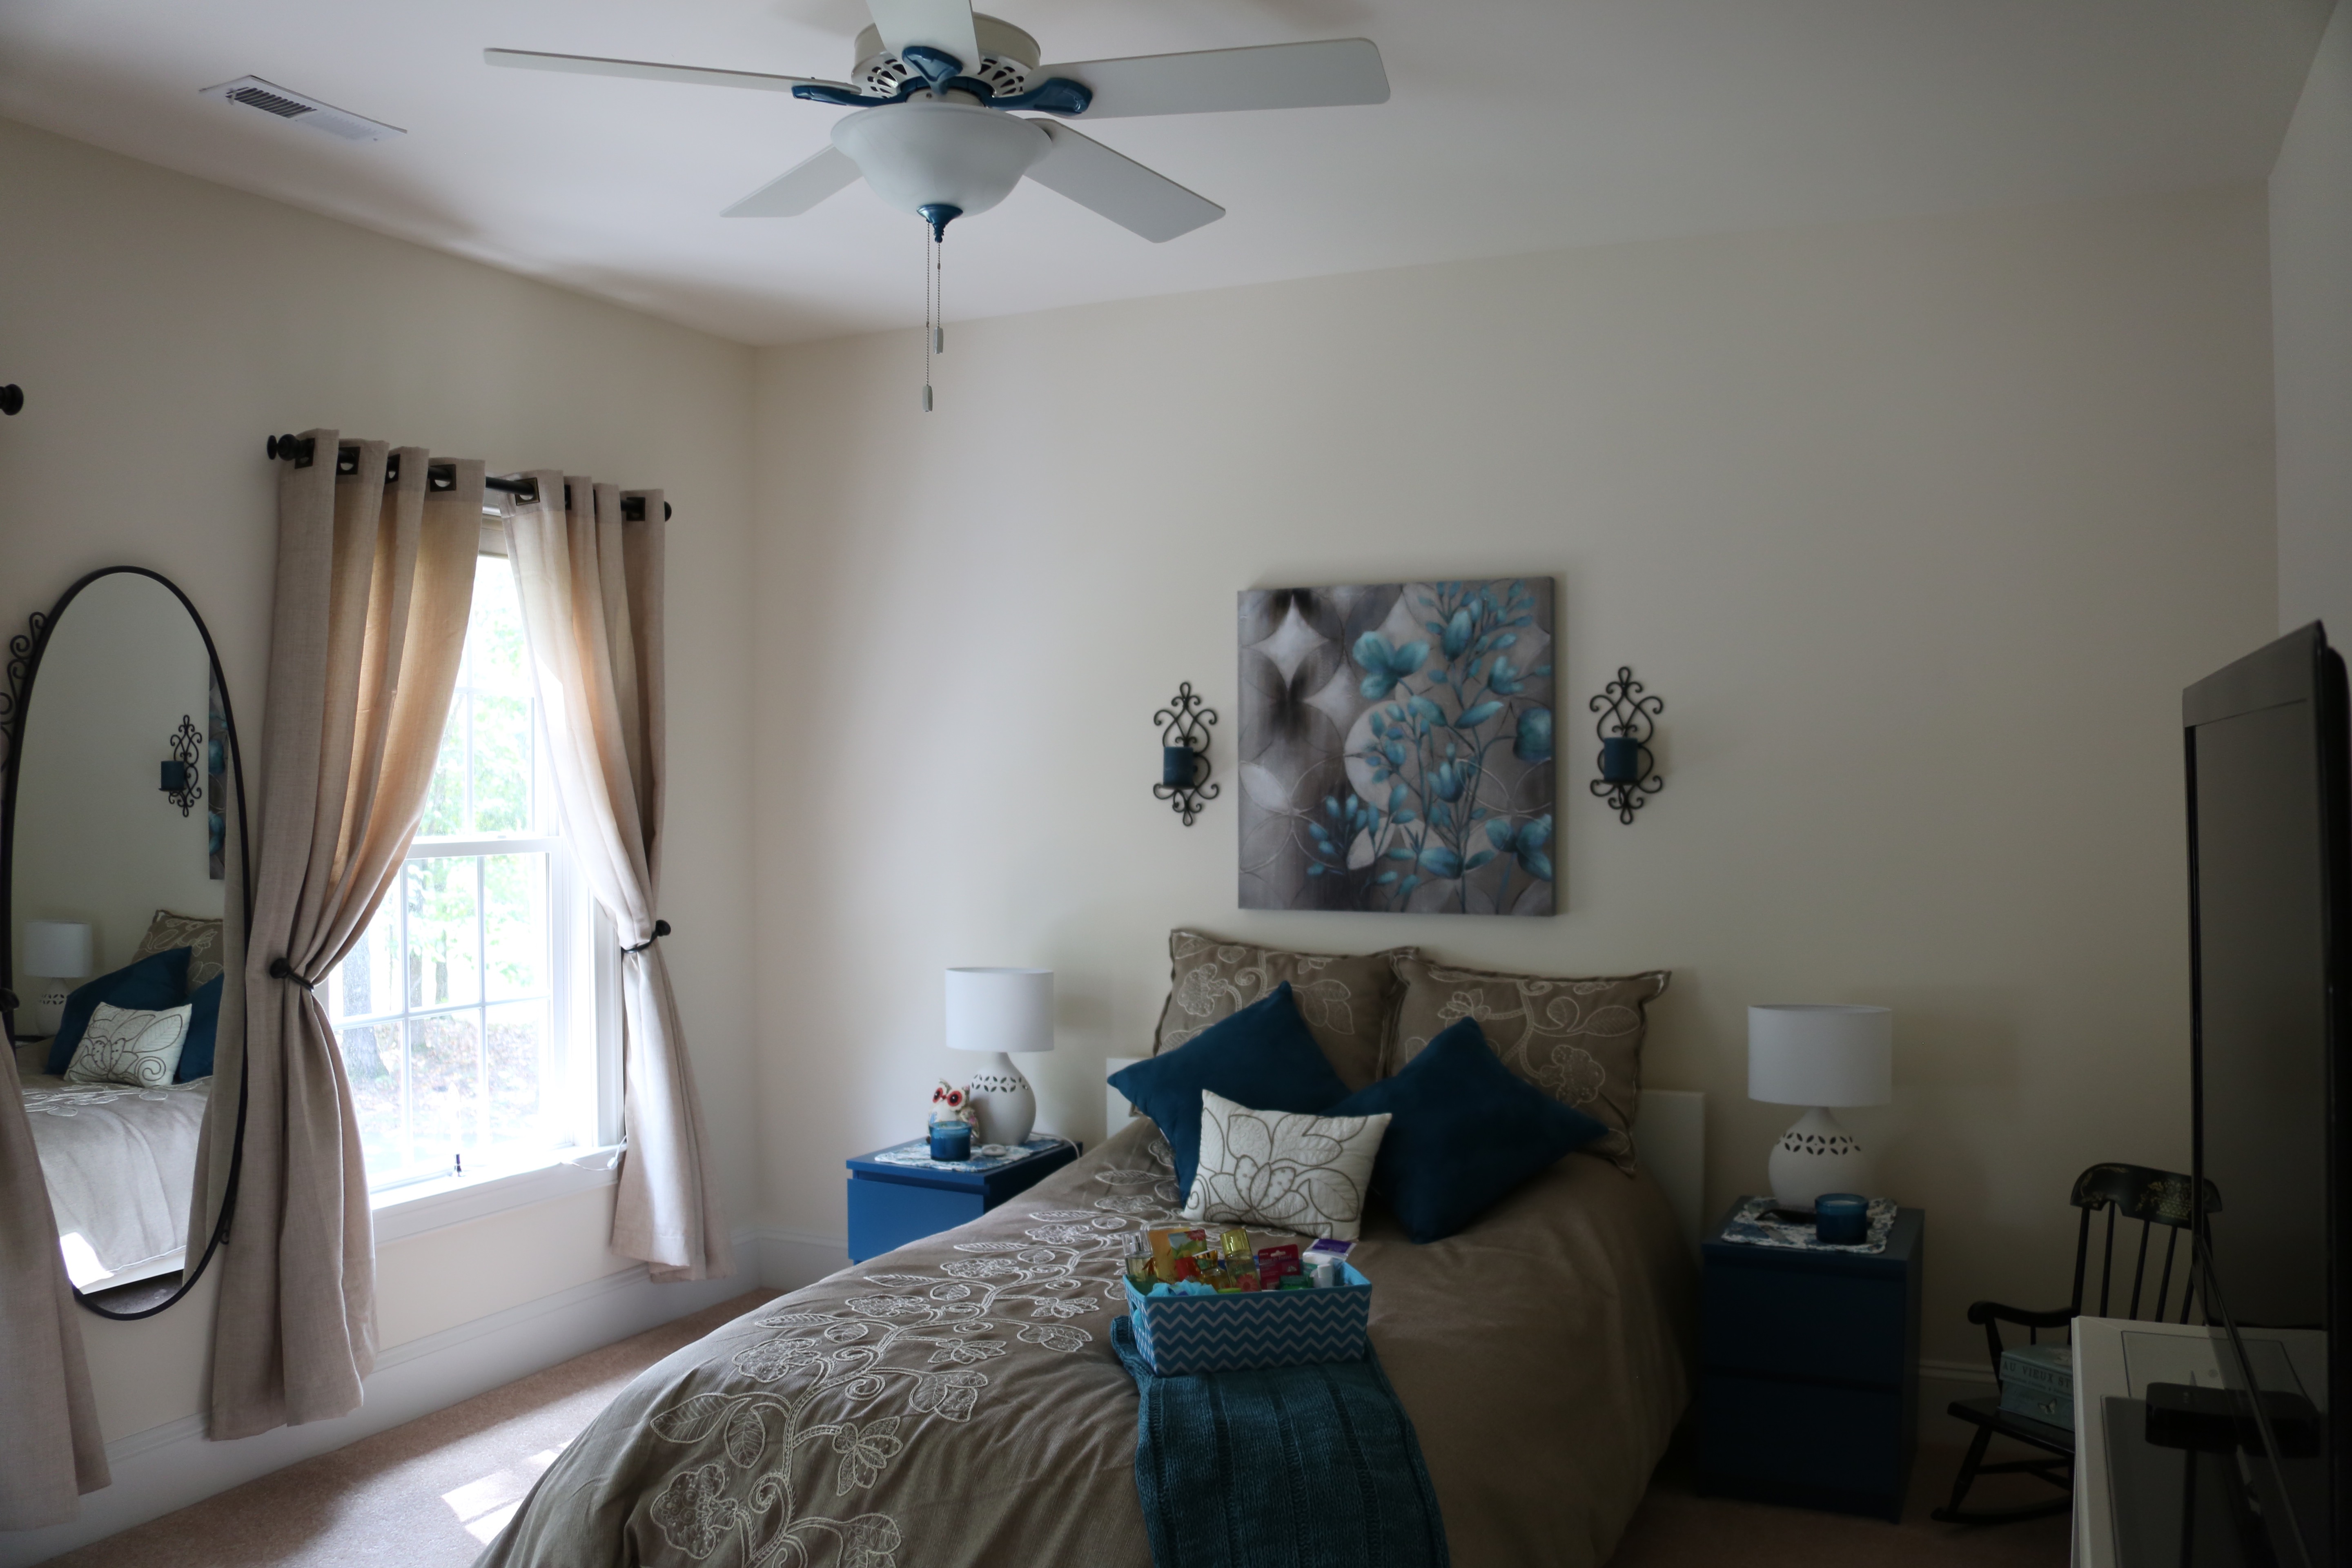
After I had the furniture in place, the bed made up with the comforter, pillow shams, added the throw pillows, and hung mirror on the wall. I started searching for the accent pieces that would help to bring this room to life.

photo 5
Here are some of the turquoise and khaki colored accent pieces that I found one day when I was shopping specifically for this room. These items are from several different stores…World Market, Hobby Lobby, and Bed, Bath, and Beyond.
IMG_8702
We already had that little table, we painted it white and I found that basket that is housing the towels at IKEA on the same day that we purchased the furniture.
IMG_8704
I got the canvas picture that is over the bed at Bed, Bath, and Beyond for 80% off. What a deal!!

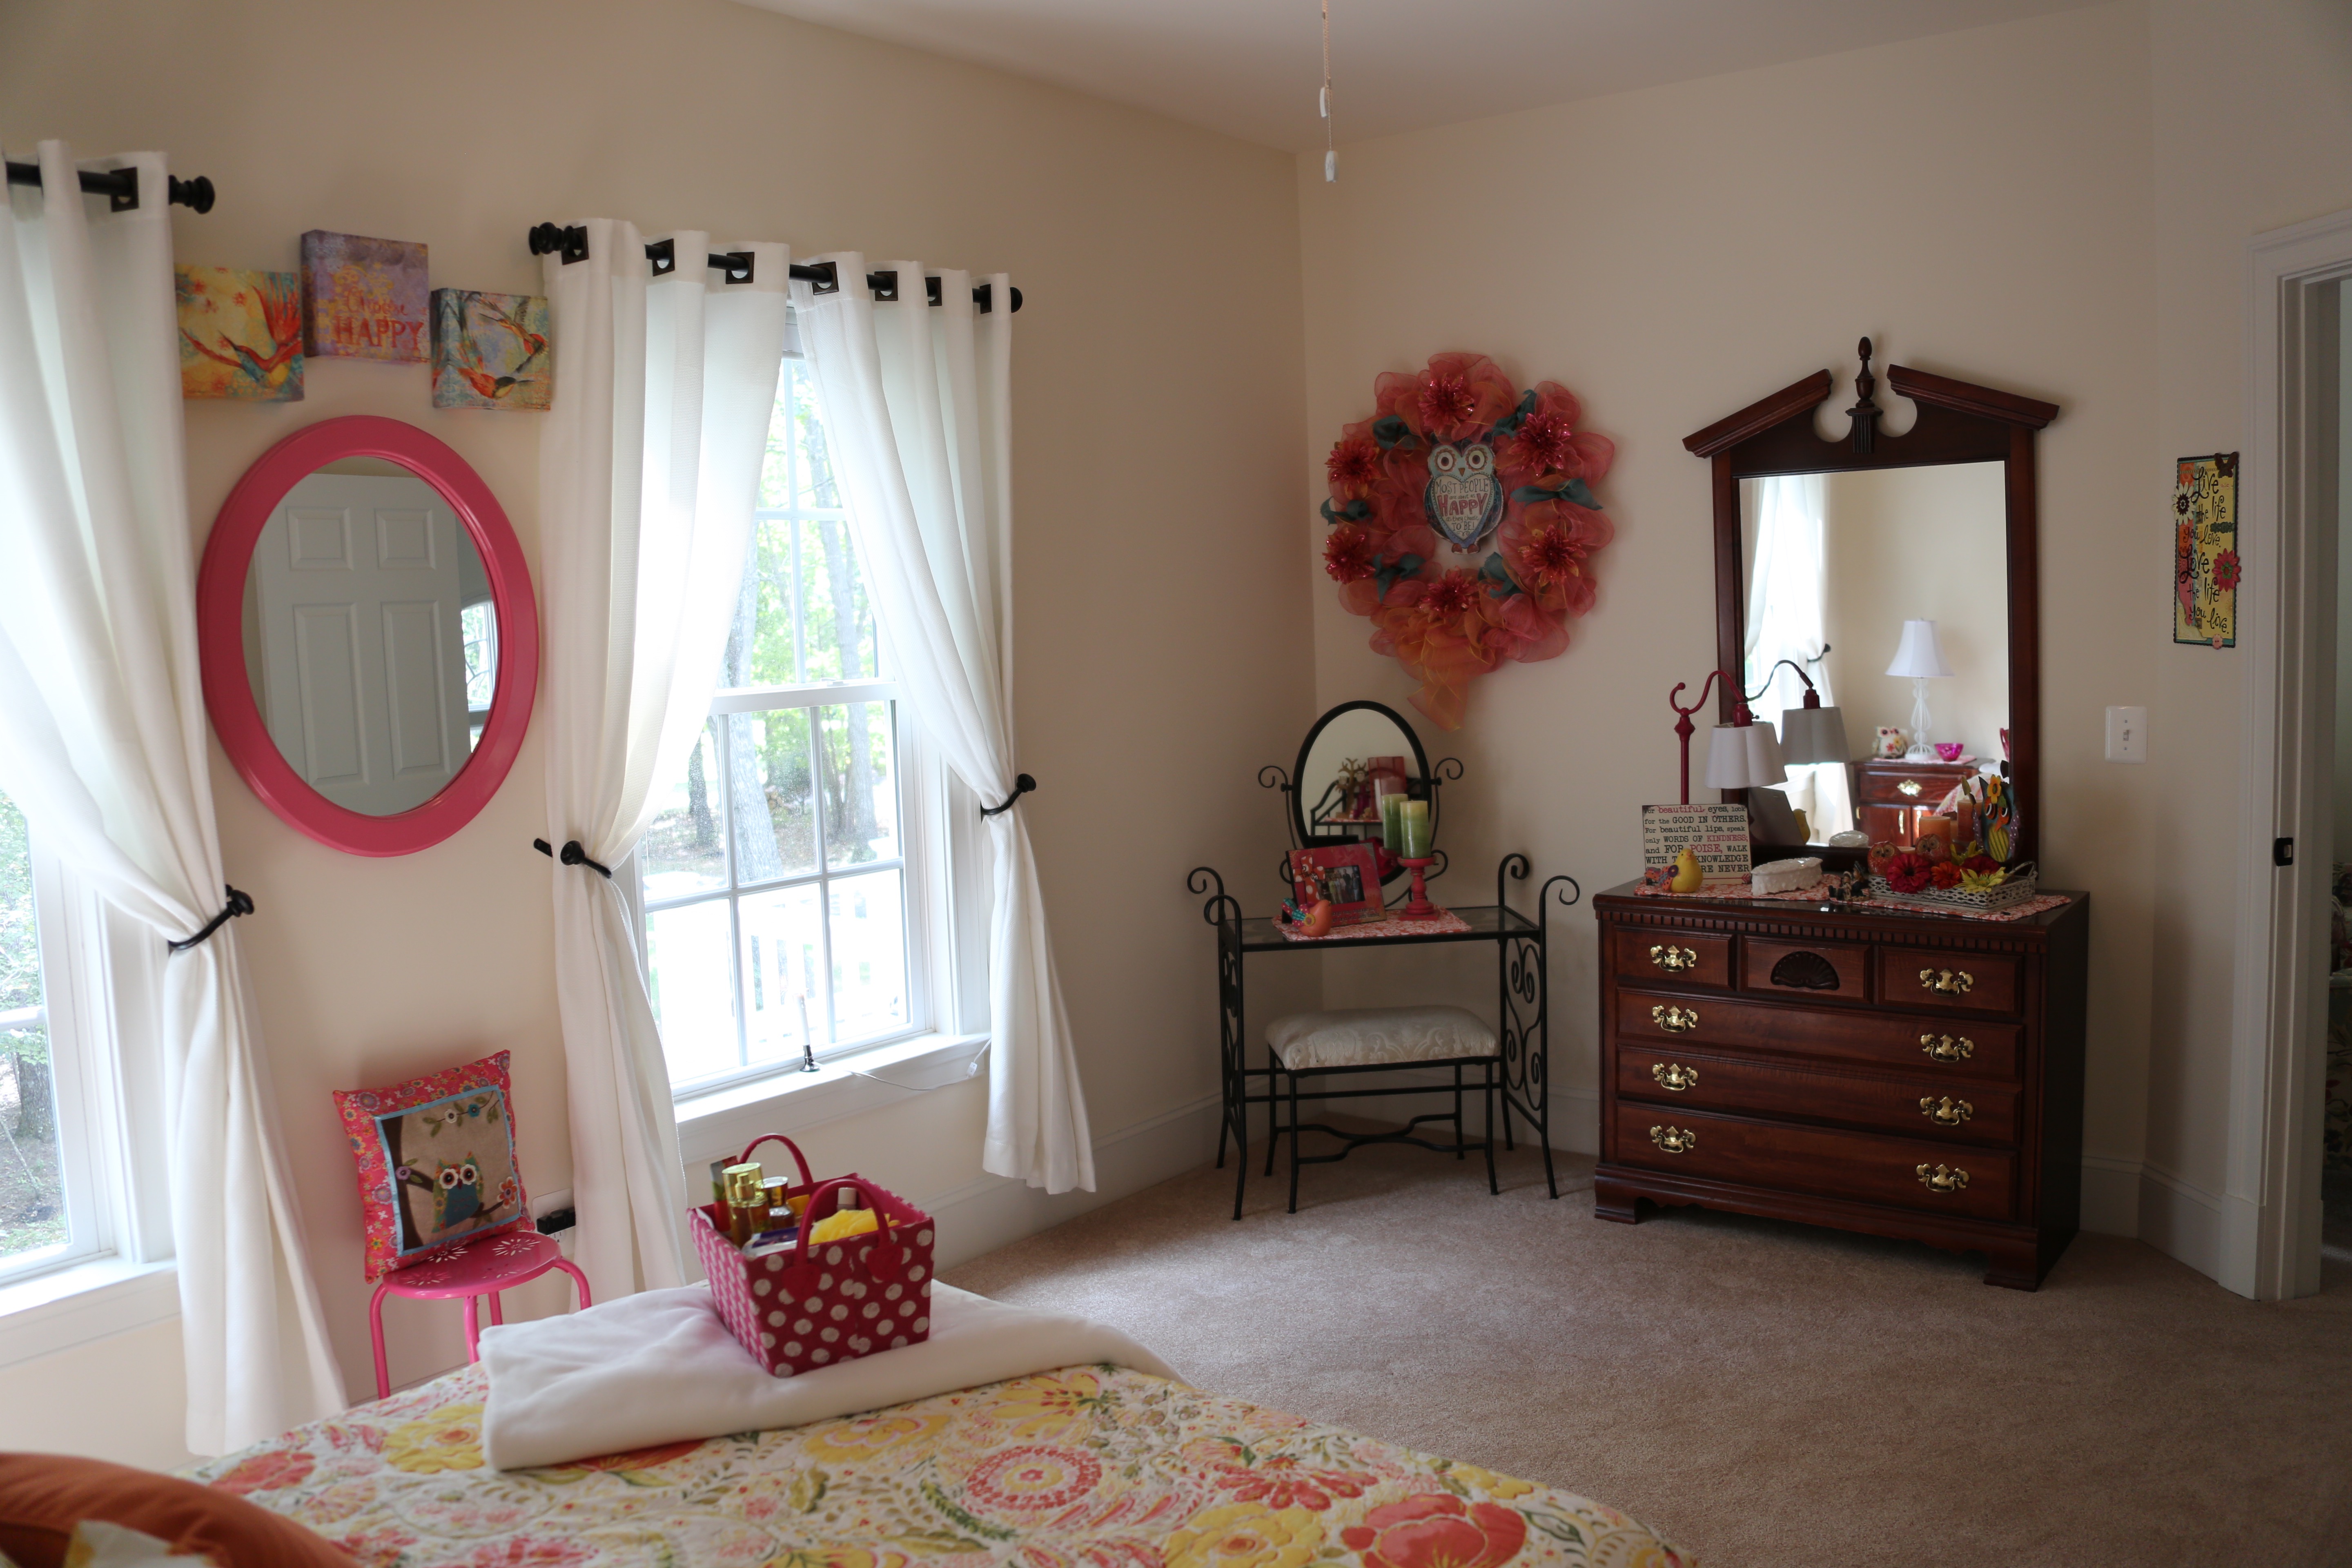
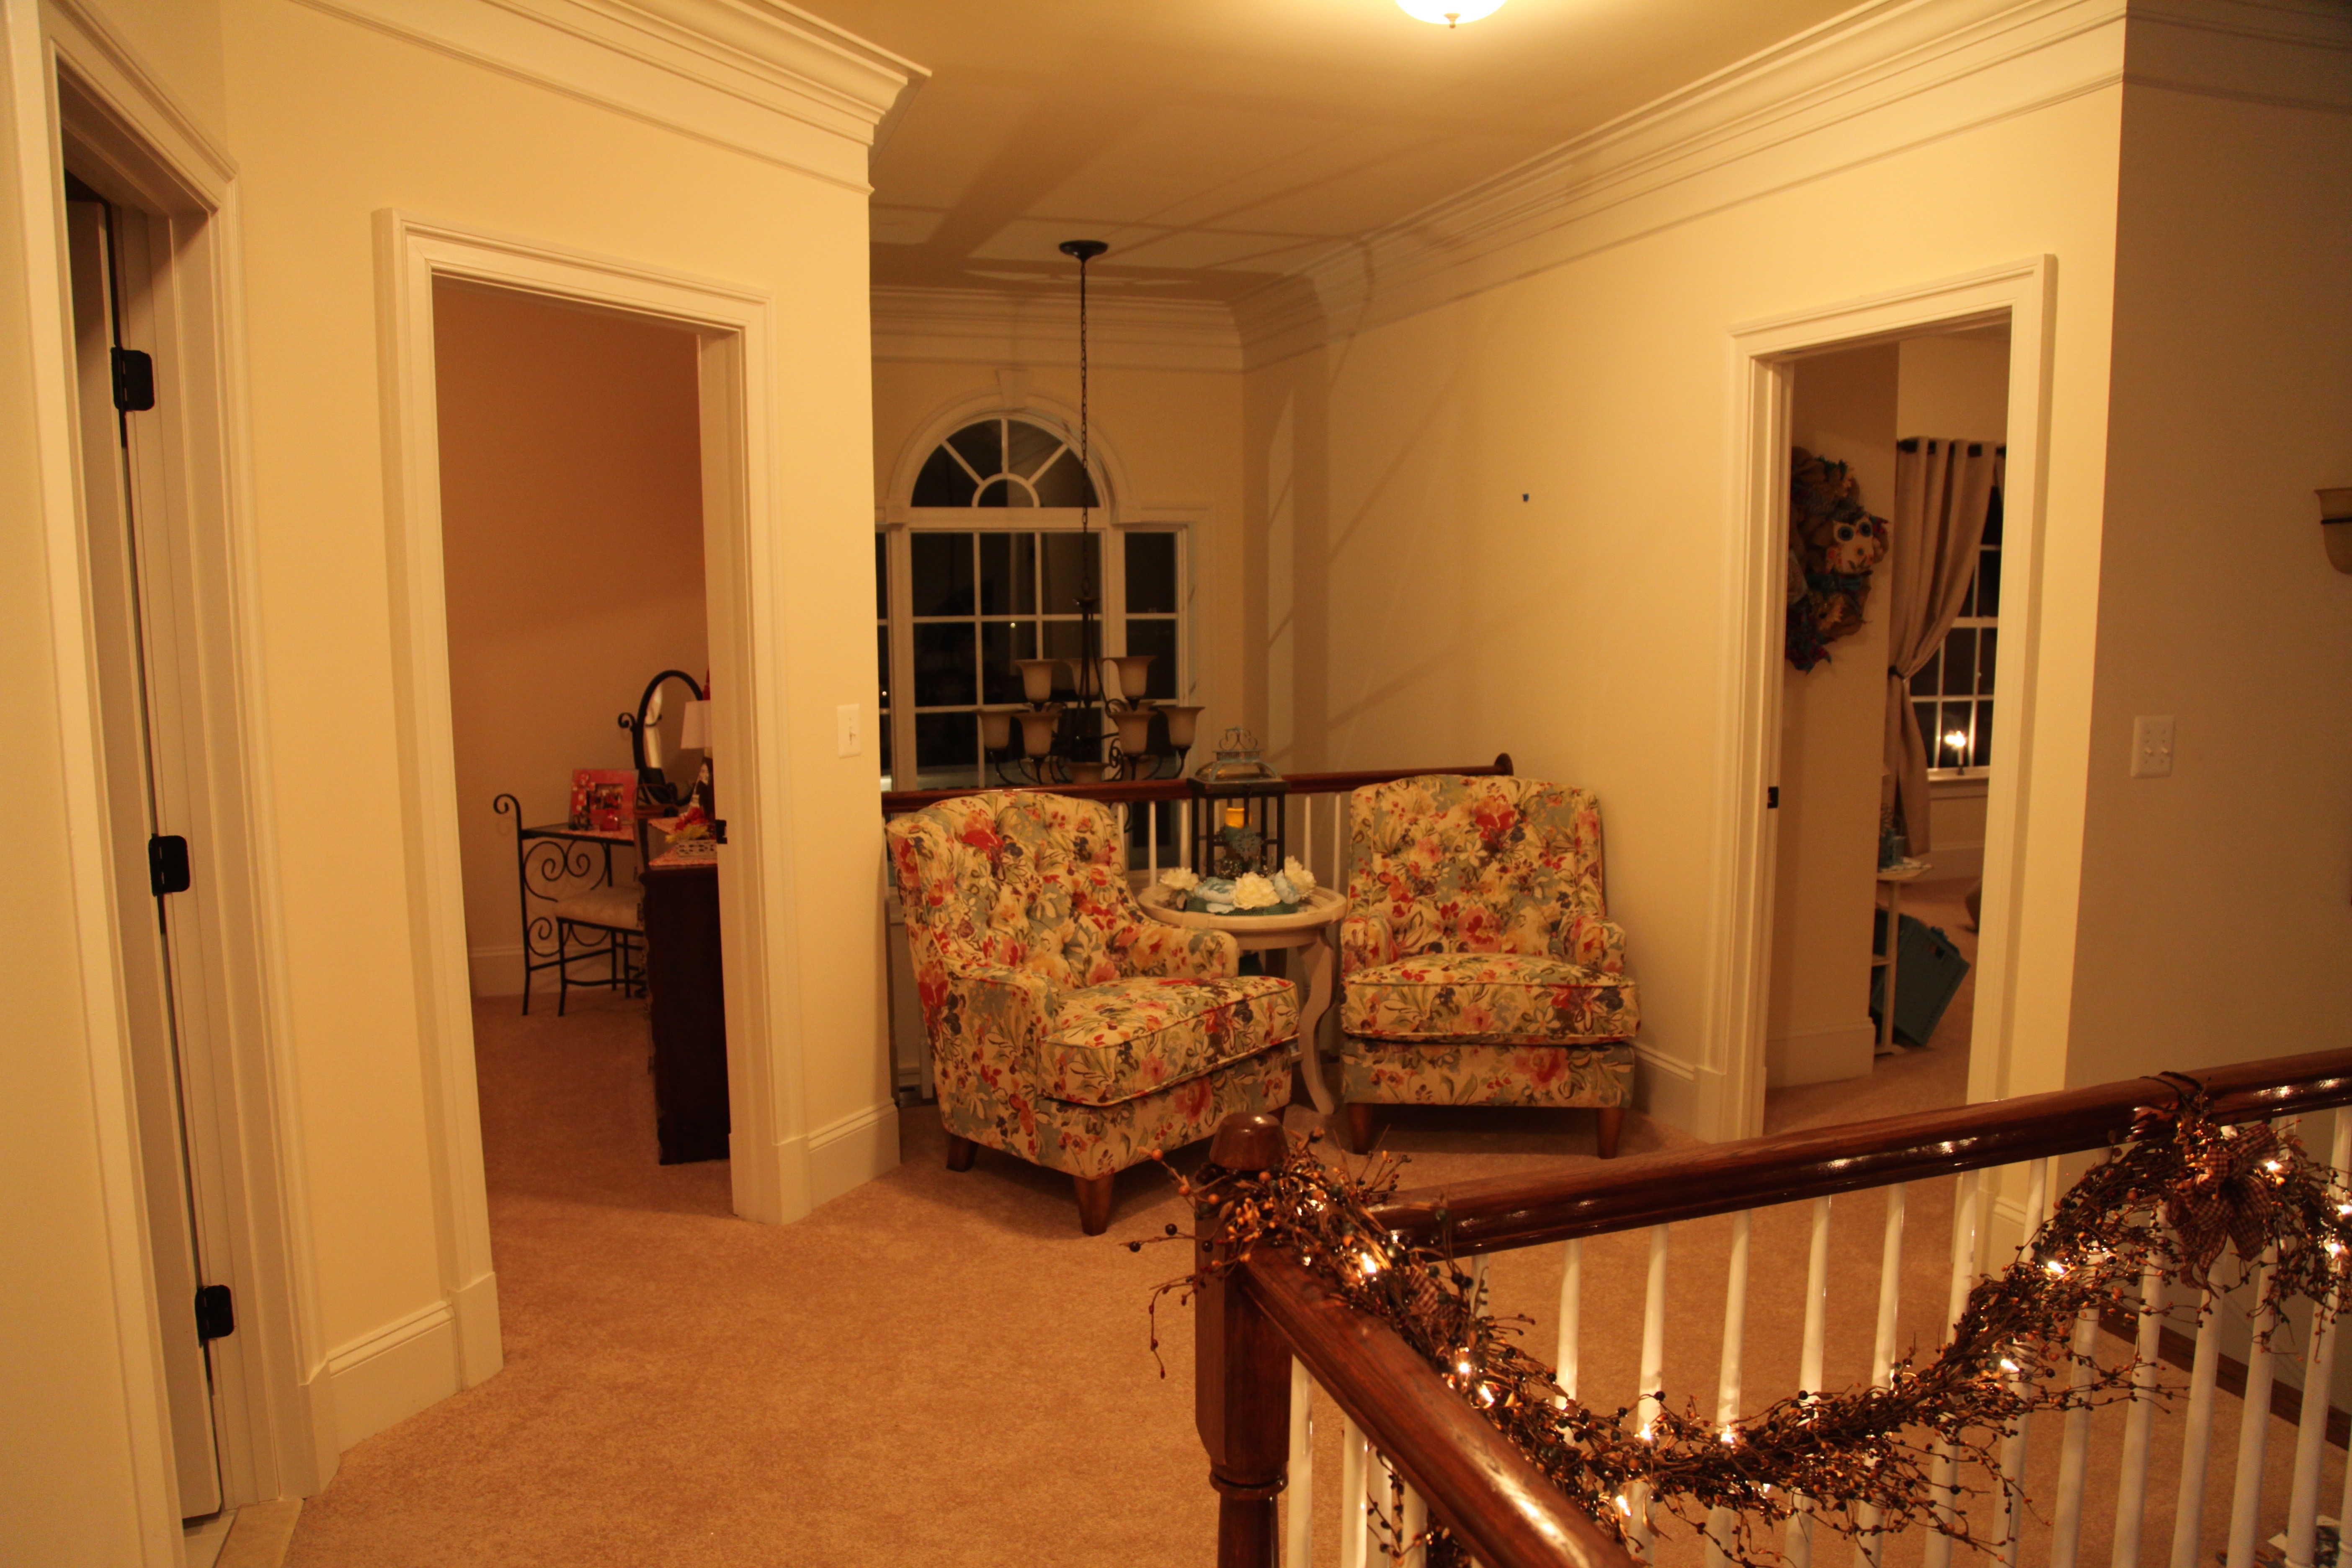
I found this sweet little chair at World Market and I used a $50 off coupon on the day I purchased it and the pillow.

IMG_8781

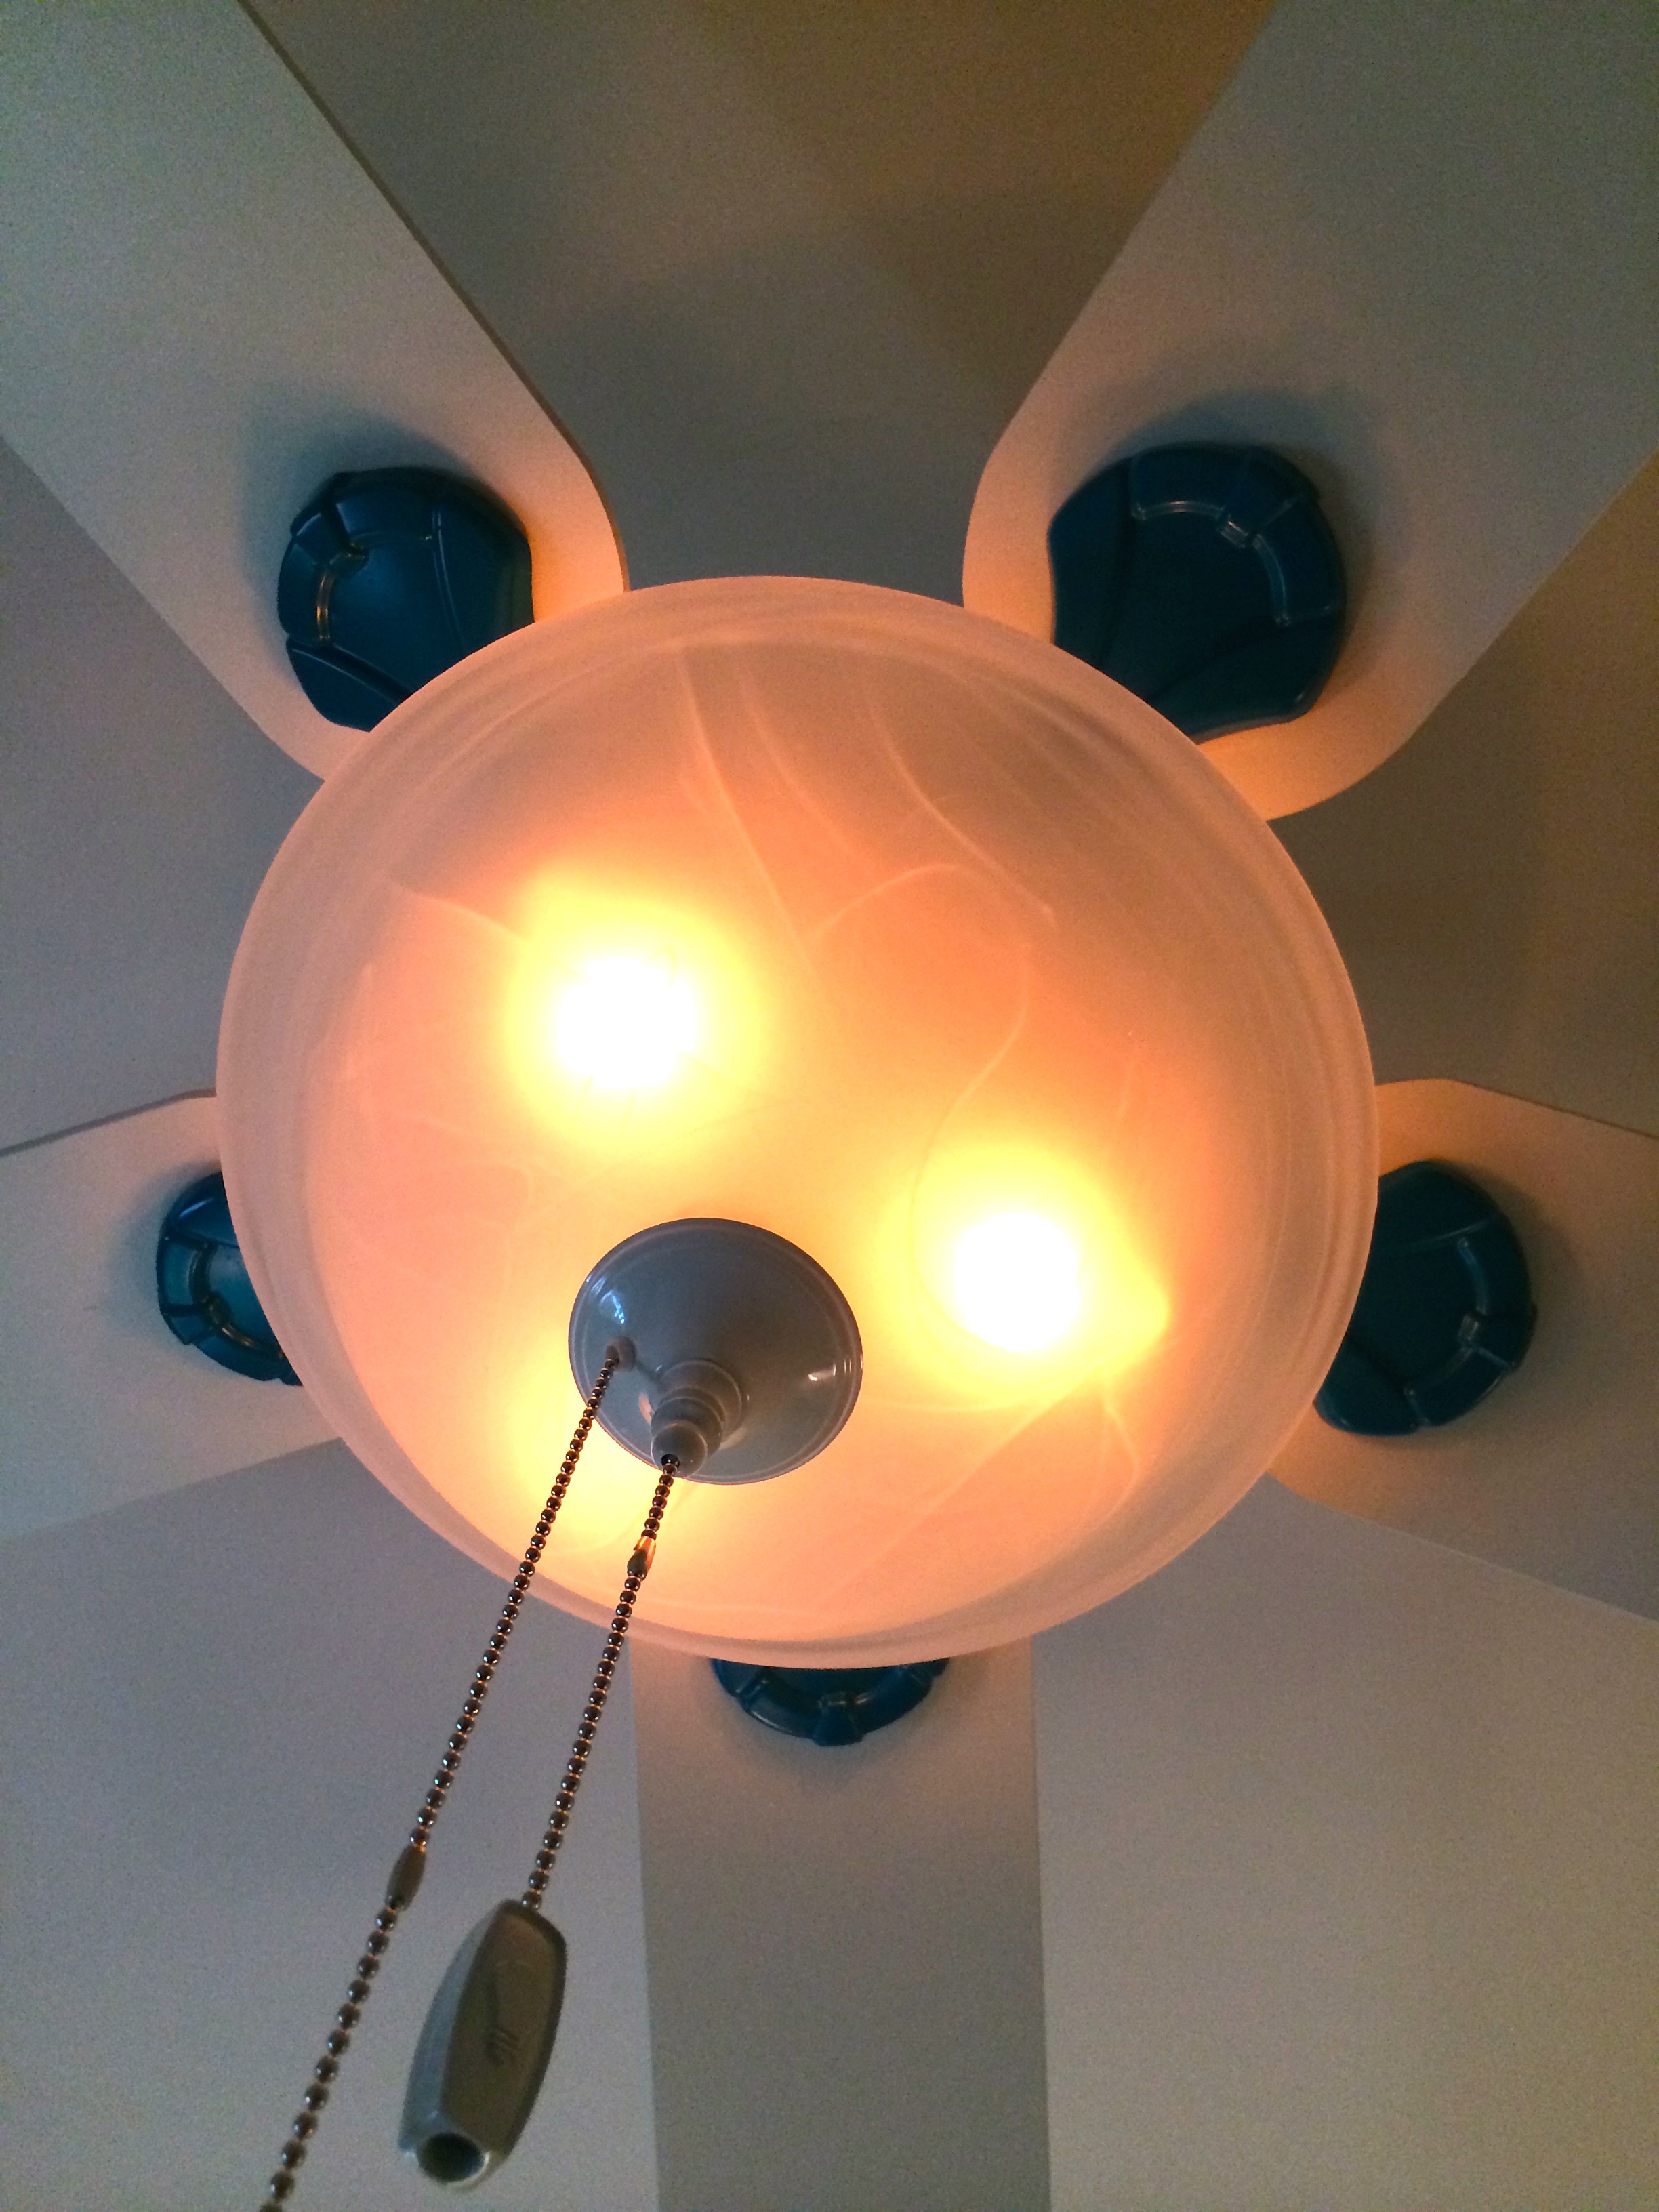
My hubby painted parts of the ceiling fan in a turquoise color…spiffy! 🙂

photo 2

I made this burlap wreath, I absolutely love owls and had already found others to use as accents around the room!  So, when I found that owl in Hobby Lobby, I snatched it up to use in this wreath.

IMG_8806

IMG_8807

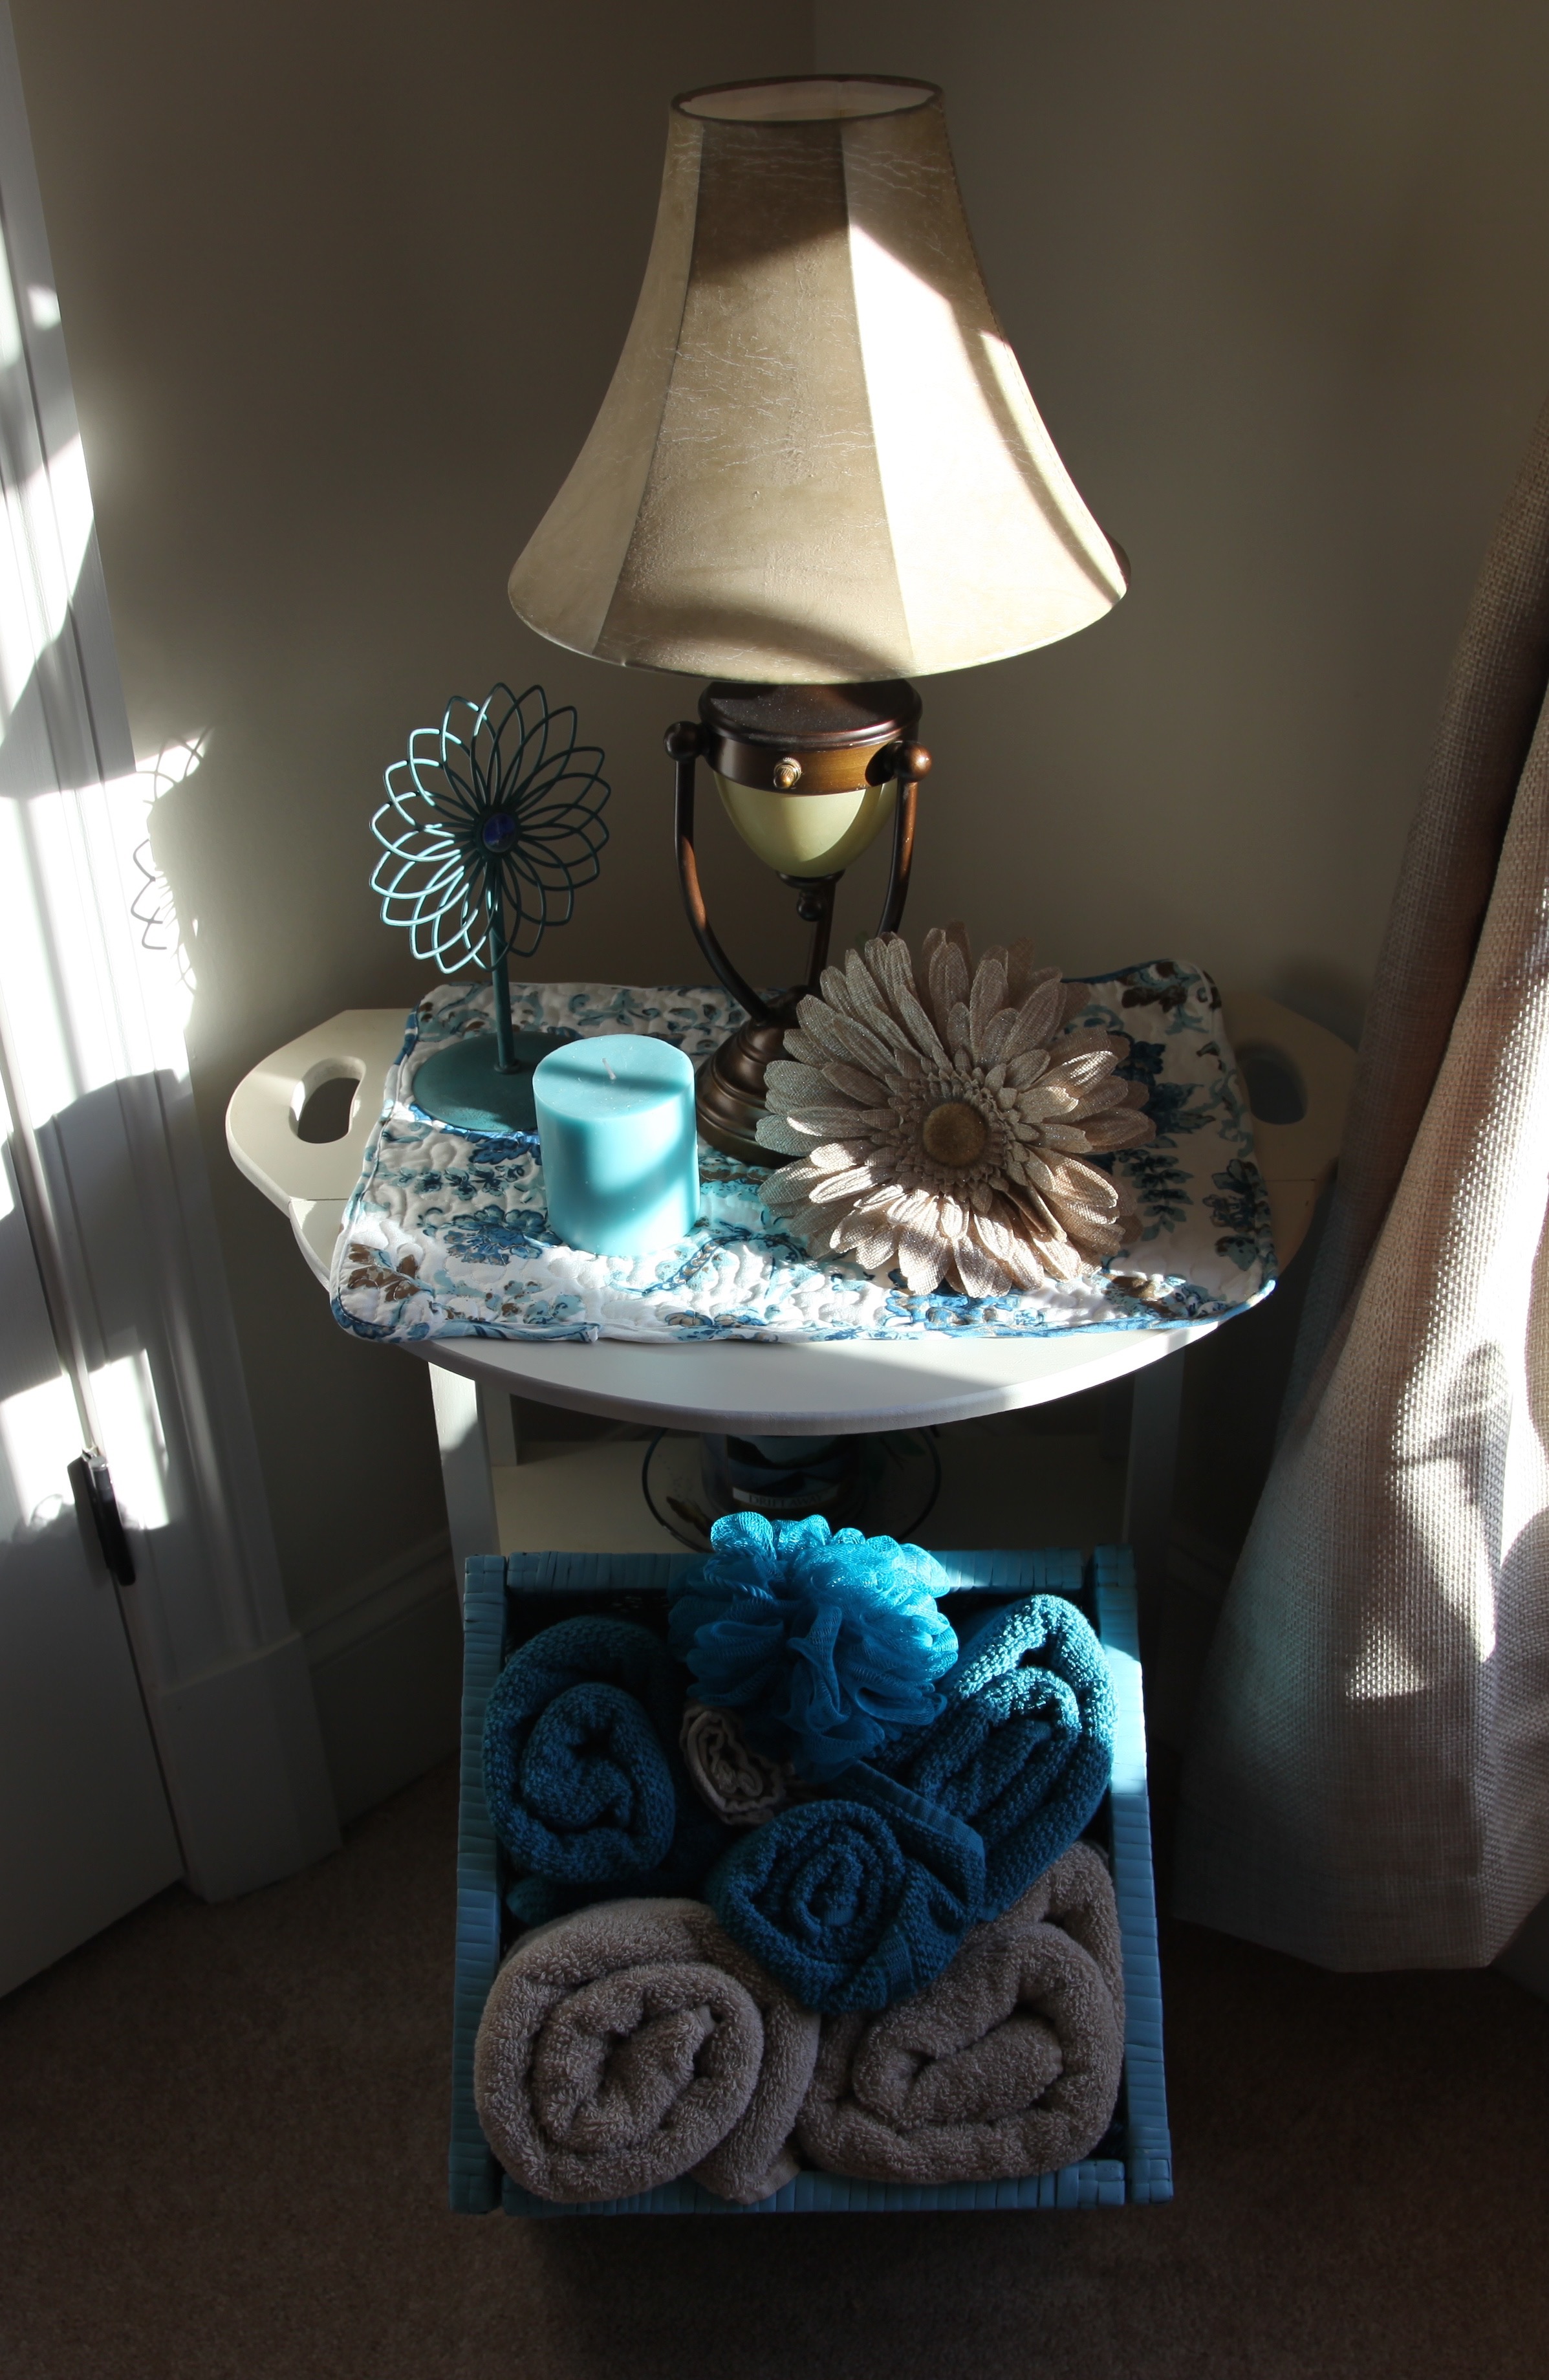
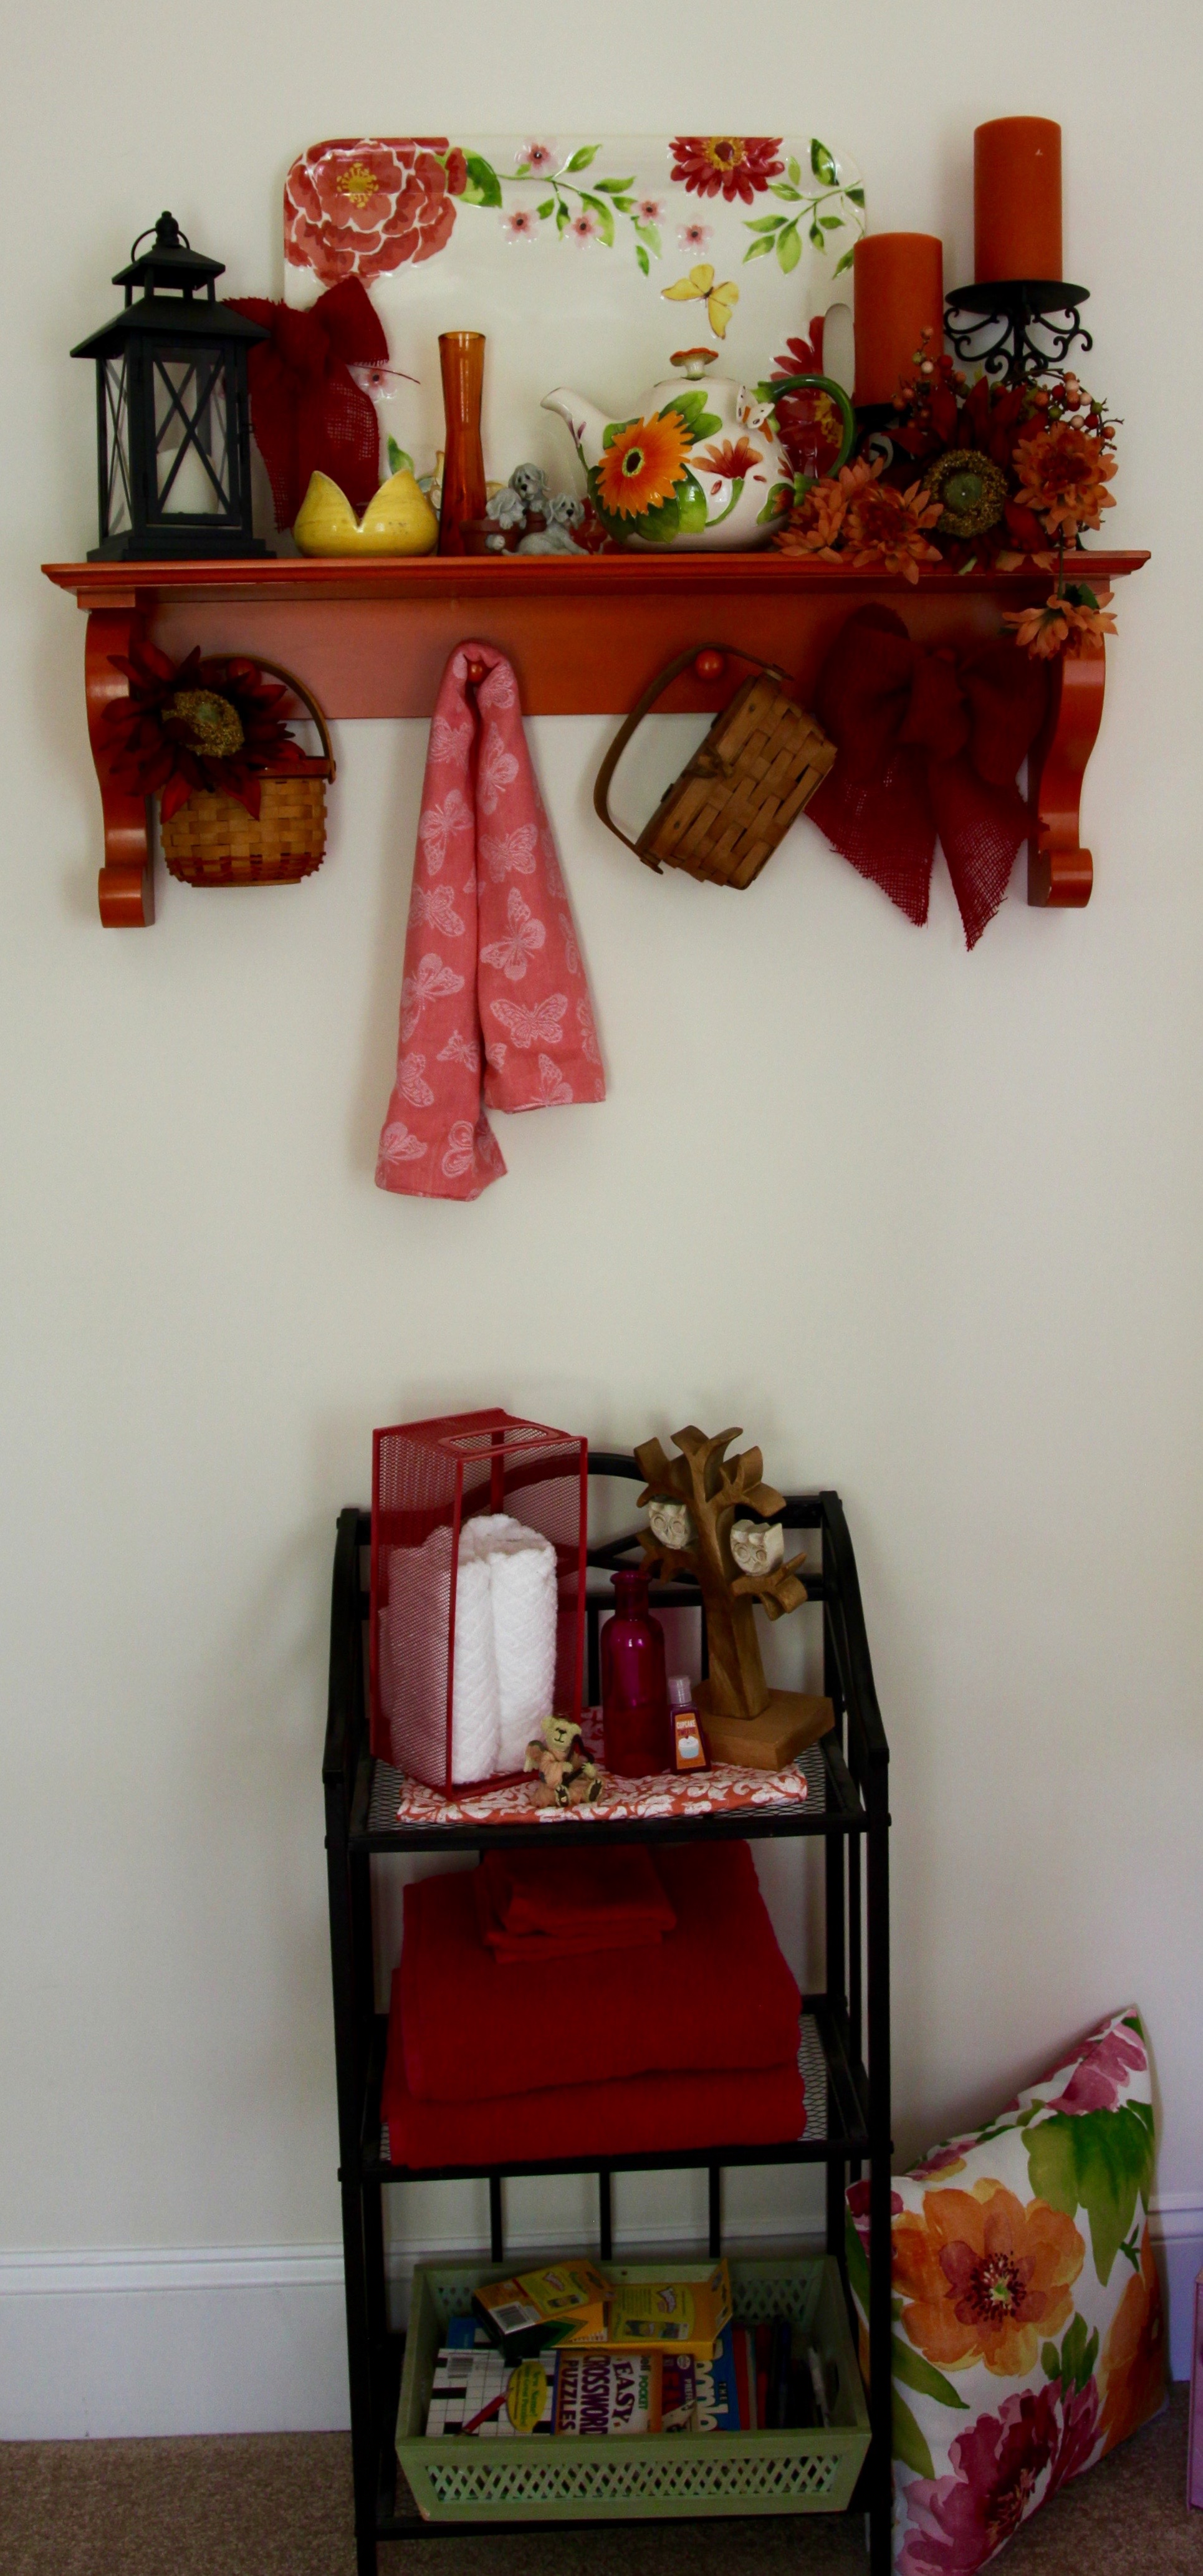
As I do in all of the bedrooms, I leave a little basket of goodies on the end of the bed for those who might forget to pack something.

IMG_0169

1V4A2860

In the end, this turned out to be a lovely room full of warmth and a bit of charm thrown in for good measure. My hope is that anyone who might to stop by to stay for a spell will lay their head down in this room and will feel the love with which it was created engulf them like a warm snuggly blanket.

IMG_8793 IMG_5857

Until next time, y’all take good care! ❤

~Arlynn

Guest Bedroom #1 – The Happy Room

Hi Y’all!

Continuing on with my “Home Tour”,  here I will be highlighting the first of 3 upstairs guest bedrooms.  My hubby and I have dubbed this room “The Happy Room” because of the bright colors and whimsical decor.

1V4A2871 1V4A2872 IMG_1605

I found the quilt, pillow shams, & throw pillows in Bed, Bath, and Beyond and I’ve built the rest of the room’s decor around those vibrant colors; pinks, oranges, yellows, “happy” colors. 🙂  The room’s furniture is kind of a hodgepodge, we’ve had the headboard and dresser for years and years, my hubby made one of the end tables to match.  The other white end table, the vanity, and the ‘towel rack’ were items that we had in our other house and I just decided to incorporate into this room.  I chose panel curtains with oil-rubbed bronze grommets (they are the same as the curtains in the living and dining rooms downstairs only in white); the curtain rods and tie back hooks are also in oil-rubbed bronze.

10846077_10205656296157136_6352492561990070575_n

I found this picture on sale at Bed, Bath, & Beyond and I couldn’t pass it up, the colors match the quilt set perfectly.  I found those three doves at an online store, they are pretty heavy, but they were not expensive at all.

10603594_10205703437775647_1391654389842580740_n

I found these sconces at Hobby Lobby for 50% off one day, they match the picture that I put over the bed perfectly! 🙂

I fill baskets full of little goodies and I leave one on the bed of each guest room. I include items such as shower gel, hand cream, chap stick, a loofa, bandaids, etc…I know when I travel, I invariably forget something, so I want to provide our guests with some little necessities just in case they have done the same. 🙂

IMG_0168

I found that orange shelf at our local Home Goods store along with that sweet tea pot and tulip candle holder.  The glass plate standing up in the back was purchased on the same day that I found the quilt because it matched perfectly and I couldn’t pass it up.  Arranging the items on that shelf was so much fun! I included many different accent pieces, but, I used the same technique that I always use to do my Cozy Corners.

IMG_1606 IMG_1608

1V4A2869

I found these cute little canvas pictures at JoAnns Fabrics on sale (I would never pay what that price tag says for something like those). I got the mirror at Hobby Lobby for 80% off…*Score*!!11904676_10207177669190511_4753264848253983202_n

IMG_6237

I made that deco mesh wreath, this is one of the first wreaths that I made on a 24″ wreath form and it turned out to be huge!  I found that little metal owl plaque with the saying “Most People Are As Happy As They Choose To Be” and that was the inspiration for that wreath.  I think it fits into “The Happy Room” nicely. 🙂  1V4A2985

We decided to install a white ceiling fan in the room; my hubby came up with a great idea, he painted some of the brackets on the fan to match the room colors…sweet! IMG_8885

I have found that when I’m out and about shopping that I stumble across all sorts of things that match this room, so I’ve been picking stuff up here and there–all on sale– for quite a little while.  Here are some of the things that have found their way into this “Happy Room”. 🙂

1V4A2988 IMG_6249 IMG_1671 1V4A2986

I put this little arrangement together to sit on the dresser:

10968504_10205703440015703_884390916971852366_n

This hall bathroom serves 2 of the 3 bedrooms upstairs, but it sits beside the Happy Room, so I went ahead and decorated it to match and gave it a similar feel.

IMG_1613IMG_1614 IMG_3593

My hope is that when folks come to visit and they choose to stay in The Happy Room, that it puts a smile on their face and makes them feel cheerful, content, and comfortable.

Until next time, y’all take good care! ❤

**In crafting there are no mistakes just unique creations**

The Upstairs Landing

Hi Everyone!

We have 3 bedrooms and 2 bathrooms on the upper level of our home and this landing is what greets you as you get to the top of the staircase.

IMG_8450IMG_9405

At first, I wasn’t going to do anything with it up there, but, once I started decorating the bedrooms, I felt as if I wanted to do a little something against the one railing that looks over into the foyer.

IMG_9406

These two chairs are so comfortable and cushy.1V4A2867  
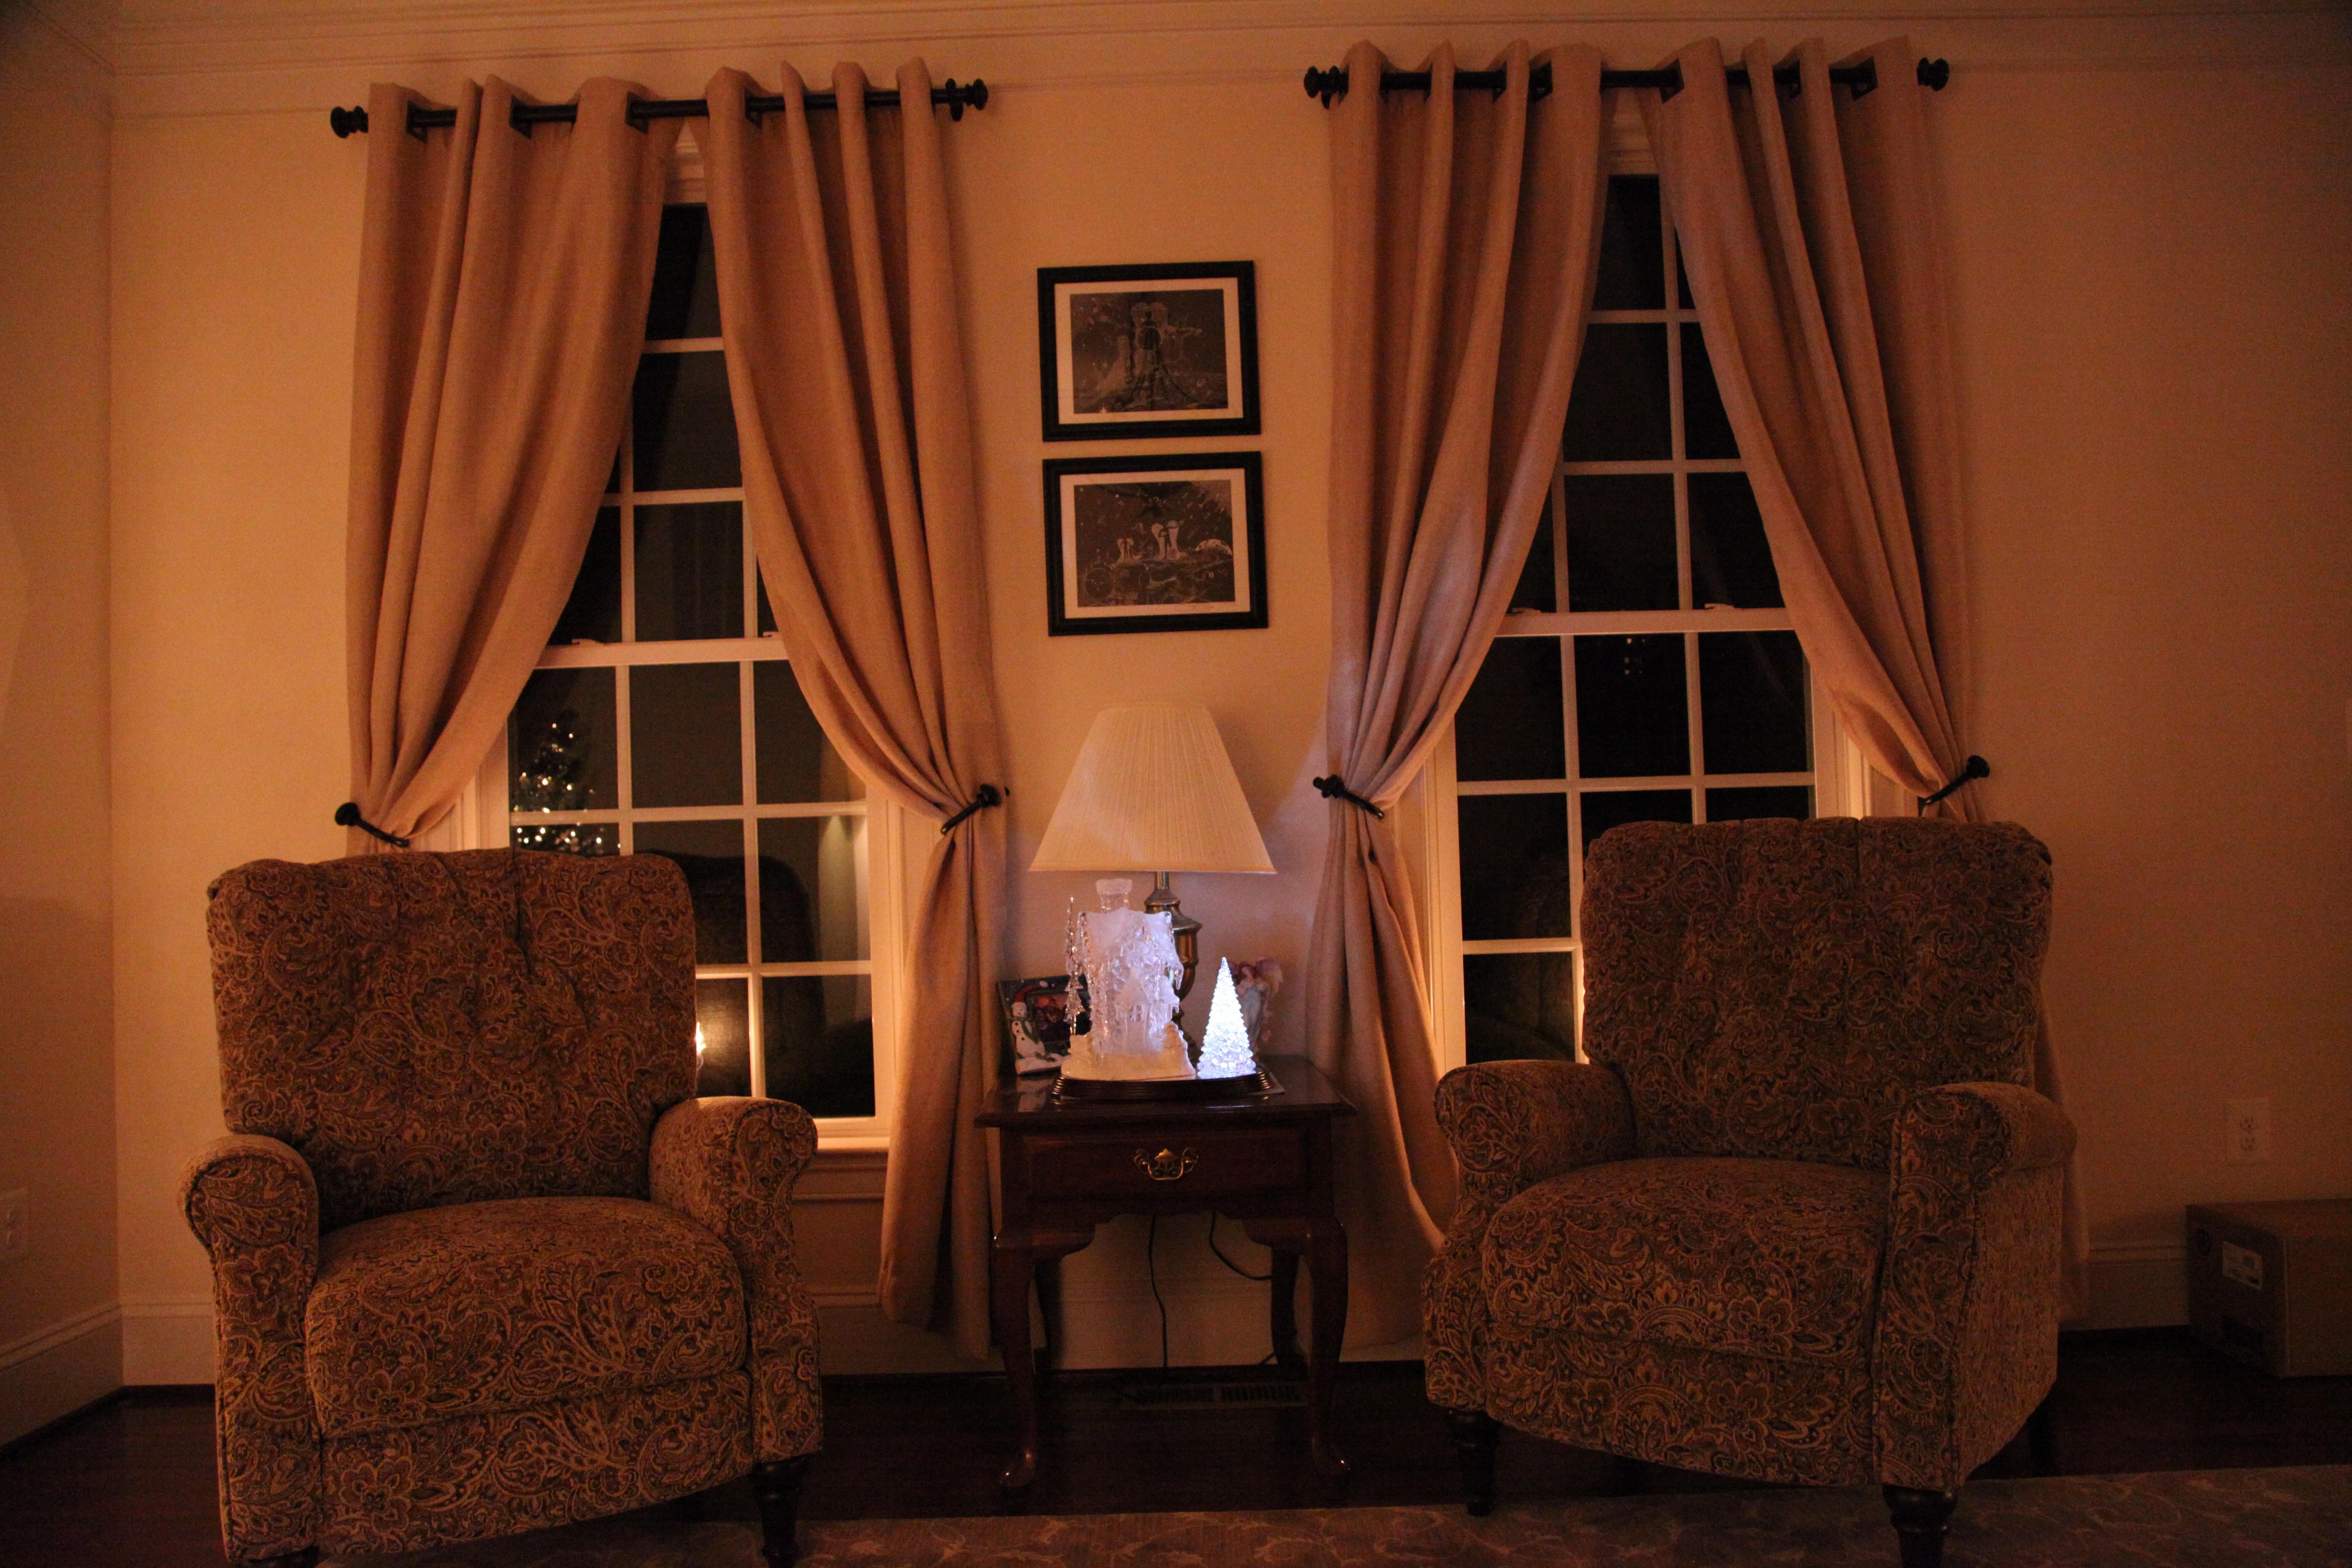
I did special order them and the round wooden table that is snugged between them at a local furniture store.  My hubby thought I was crazy when I chose that whimsical pattern for the chairs, but I loved it and I wanted that space to be completely inviting and those chairs to in effect call you to them inviting you to sit and just relax. 😉

This is what you see when you are sitting in one of those chairs:

IMG_8888

The upstairs landing isn’t a huge space, but it is a comfy space where guests can gather and chat while they get ready.  Again, my goal is to decorate in a way that makes people feel welcome, comfortable, warm, and cozy.  This is one place where I feel that I’ve achieved my goal. 🙂

IMG_9399 IMG_8889

IMG_7762

Until next time, y’all take good care! ❤

**In crafting there are no mistakes just unique creations**

The Living and Dining Rooms

Hi All,

Many people have asked me why we built a home that had a living, dining, *&* family room…”why did we need that much space”? Well, first off, we have had the dining room furniture for a couple of decades and I wasn’t willing to part with that, not to mention the fact that I totally fell in love with these rooms.  They are bright and airy and flow beautifully from one to the other. I wouldn’t say that I’ve created a strong “country” style in these rooms, it is more of a subtle touch of country here and there.   The staircase that you’ve seen in the pictures of our family room separates the front and the back of our house.  The living and dining rooms sit on the front of the house and the picture below shows you the view as you walk into the front door, dining room to the left, living room to the right, and the family room, straight through the foyer separated by a little hallway:

IMG_9186

And if you look straight up, you can see the landing up on the 2nd level:

IMG_1715

IMG_1718

Here is the foyer looking through the family room straight through to the front door:

As I explained in my Mud Room, Powder Room, Kitchen Eating Area, & Family Room post, we purchased these rugs from a local carpet store. We chose a nice piece of carpeting and had rugs cut to our measurements and had them bind the edges.  This soft gray color with a touch of a khaki & cream is what we chose for these two rooms.  We also chose a cream colored piece of carpet for the foyer rugs.

IMG_3202

0023102_LATROBE-EVANSBLACK-FLICKER-212349720023776341_300

IMG_9171
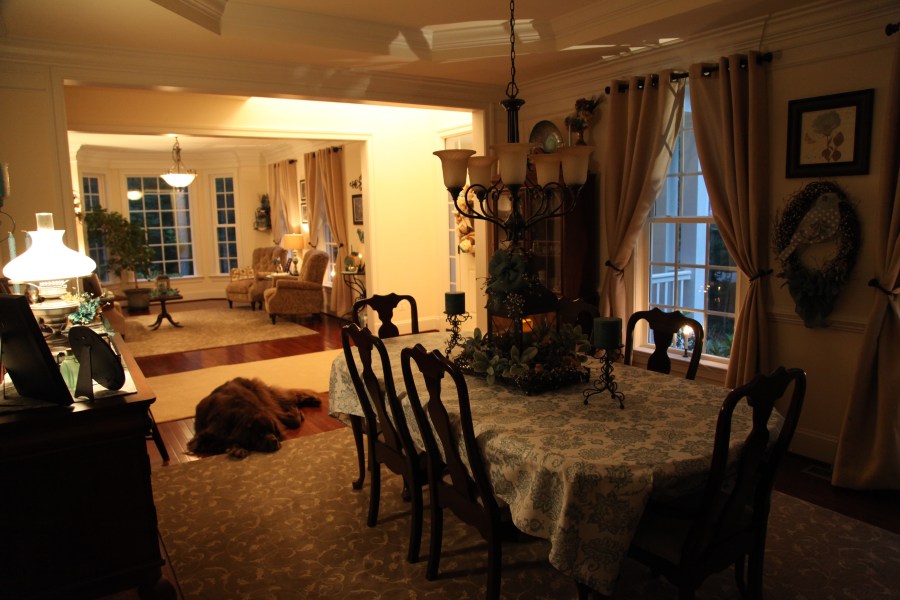
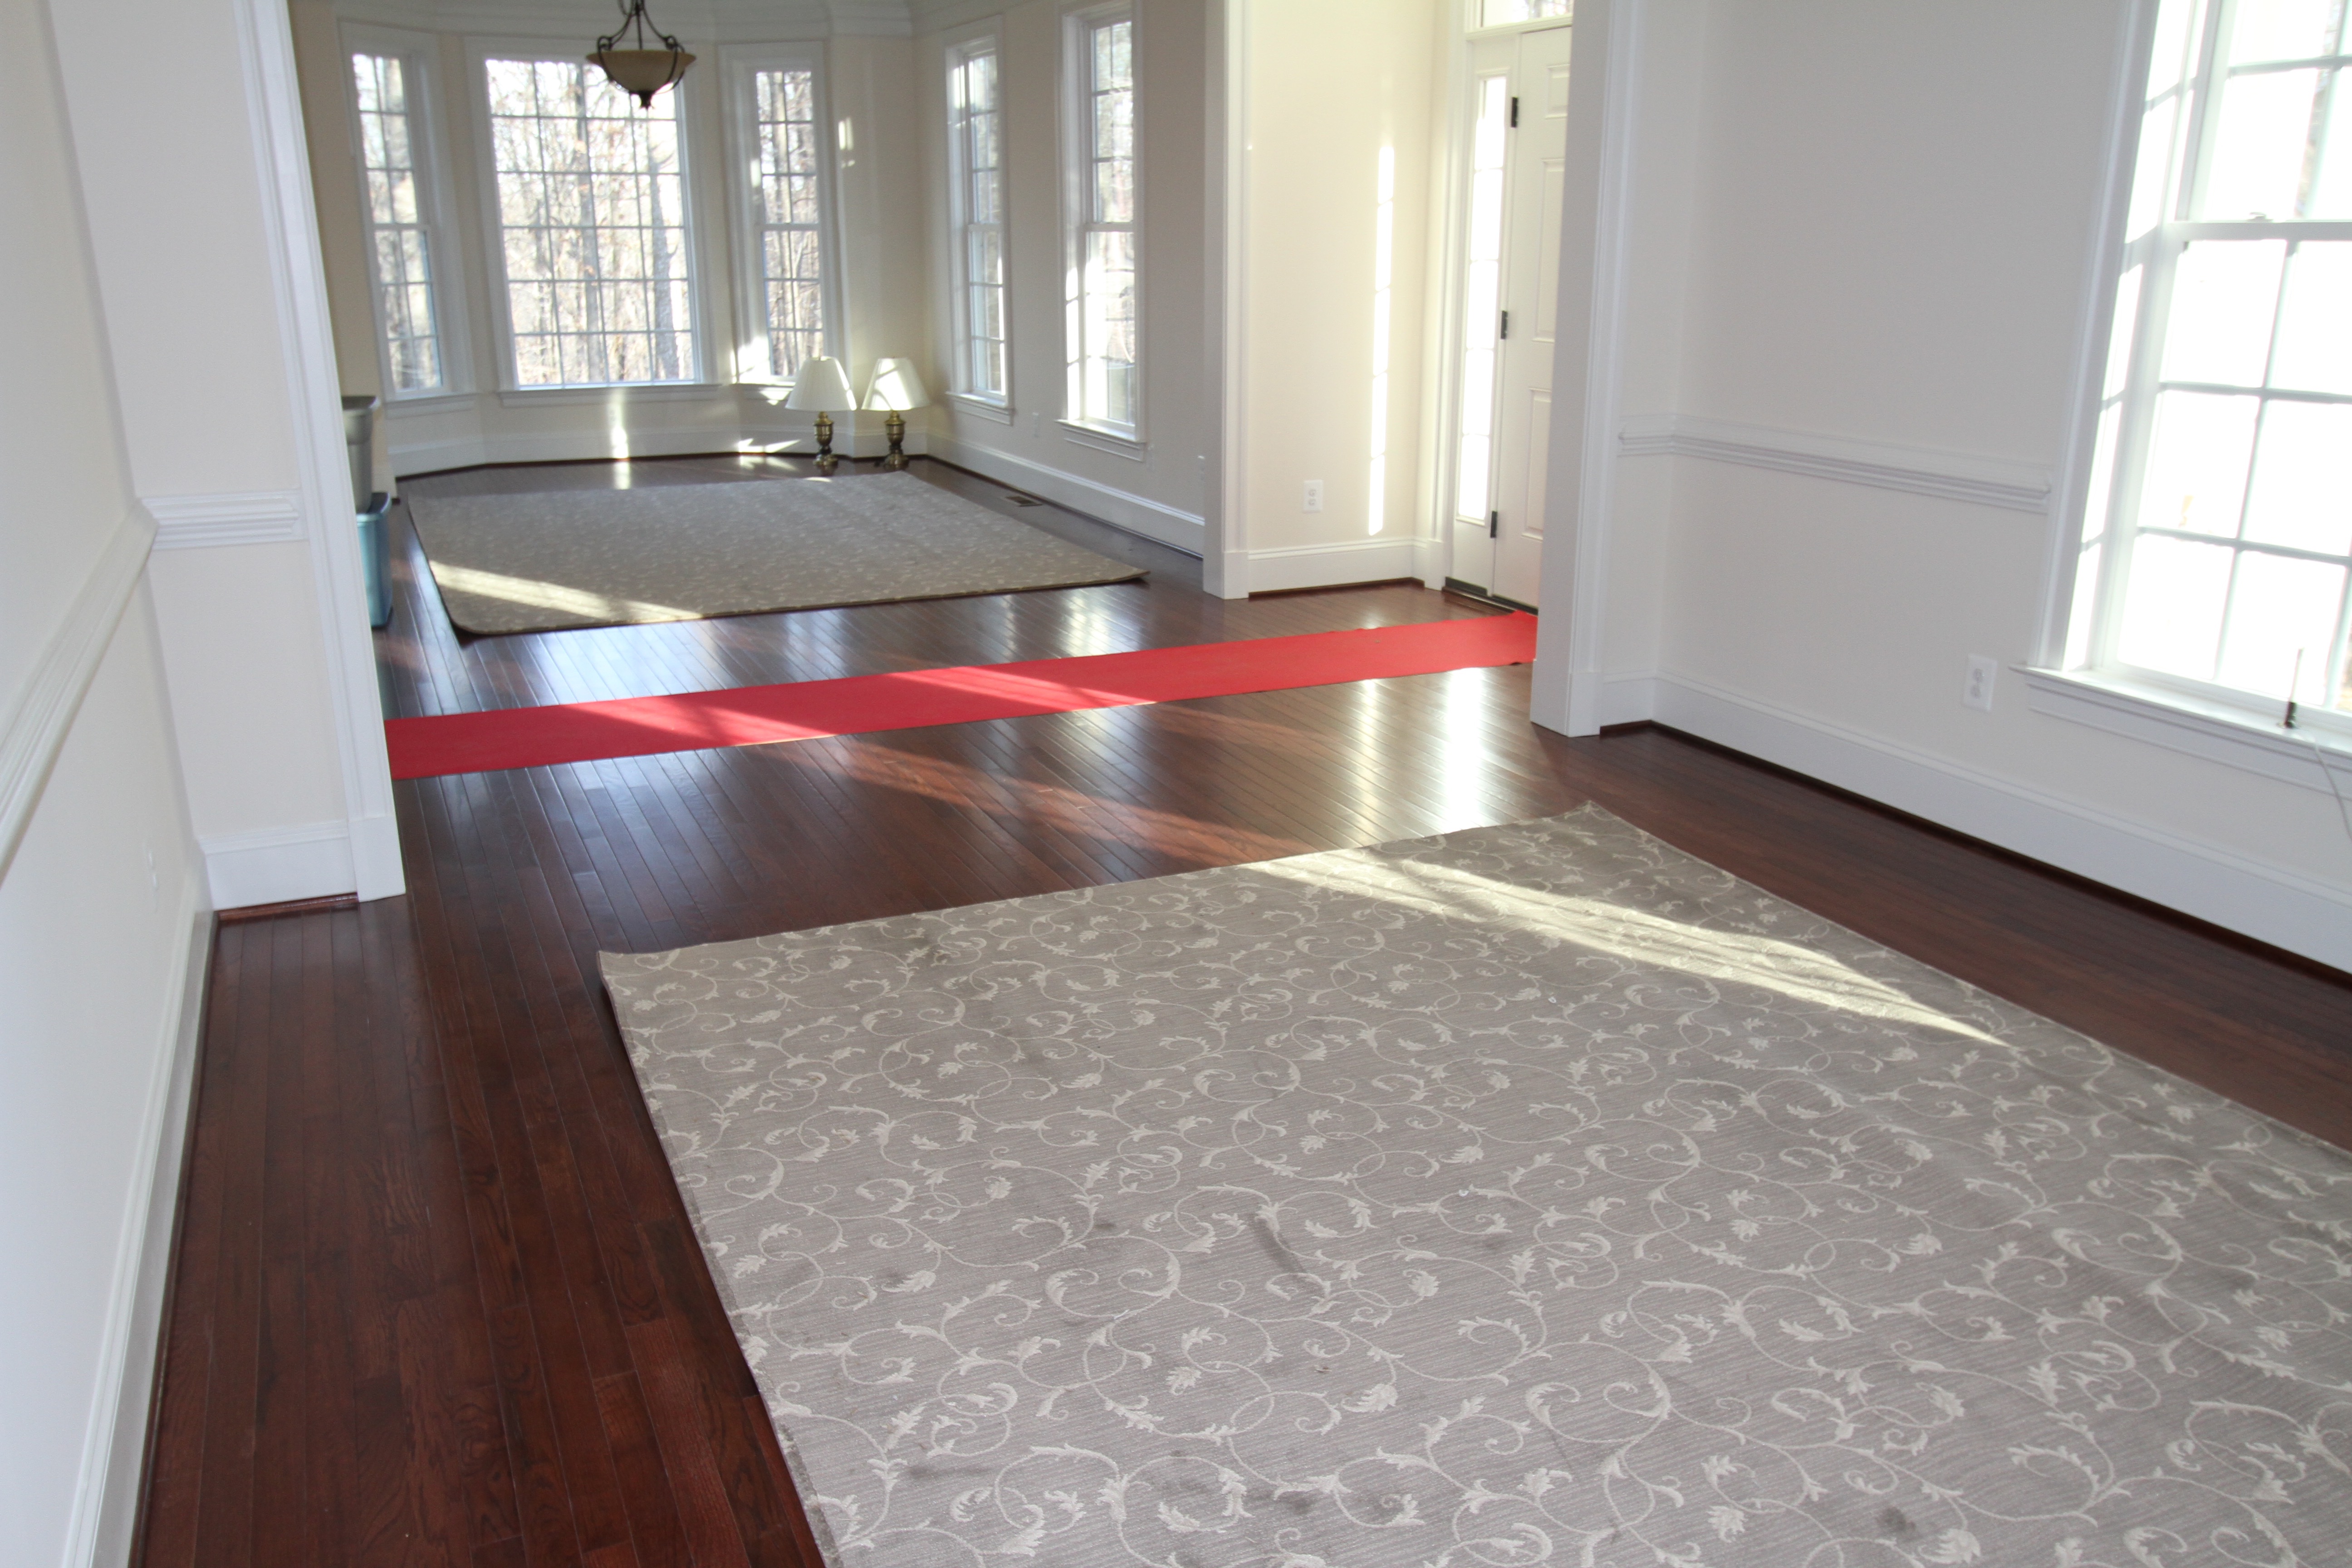
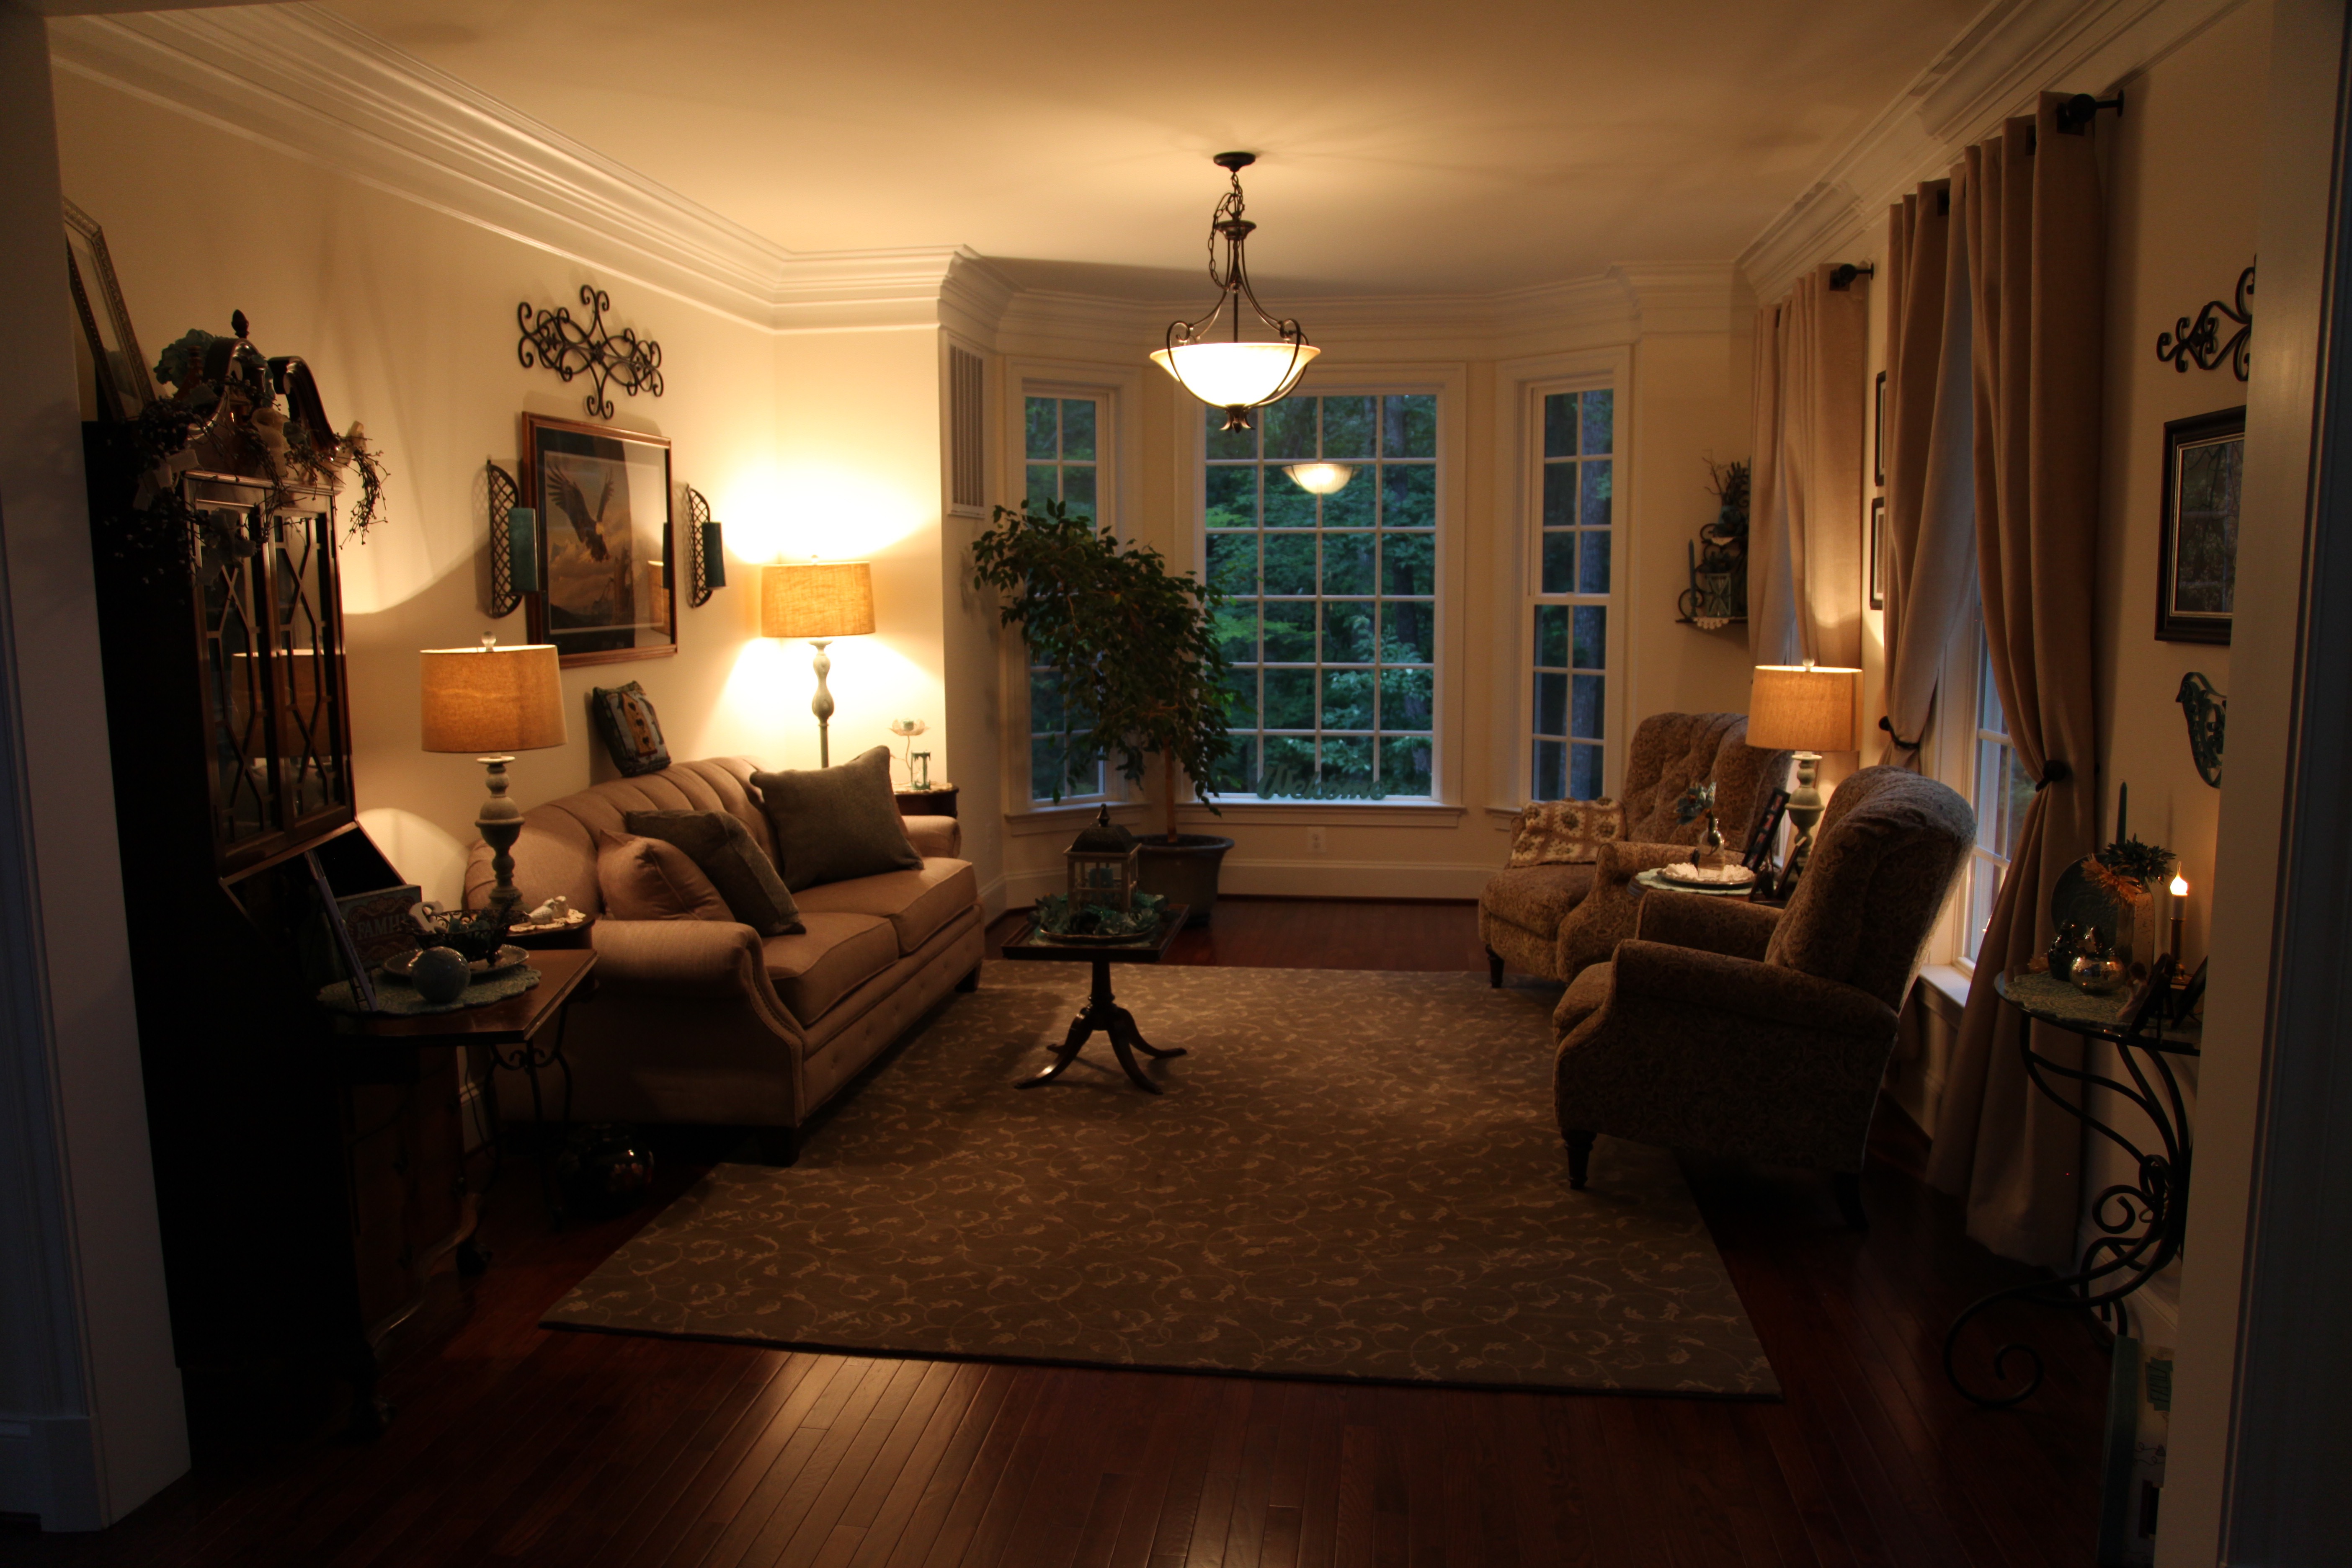
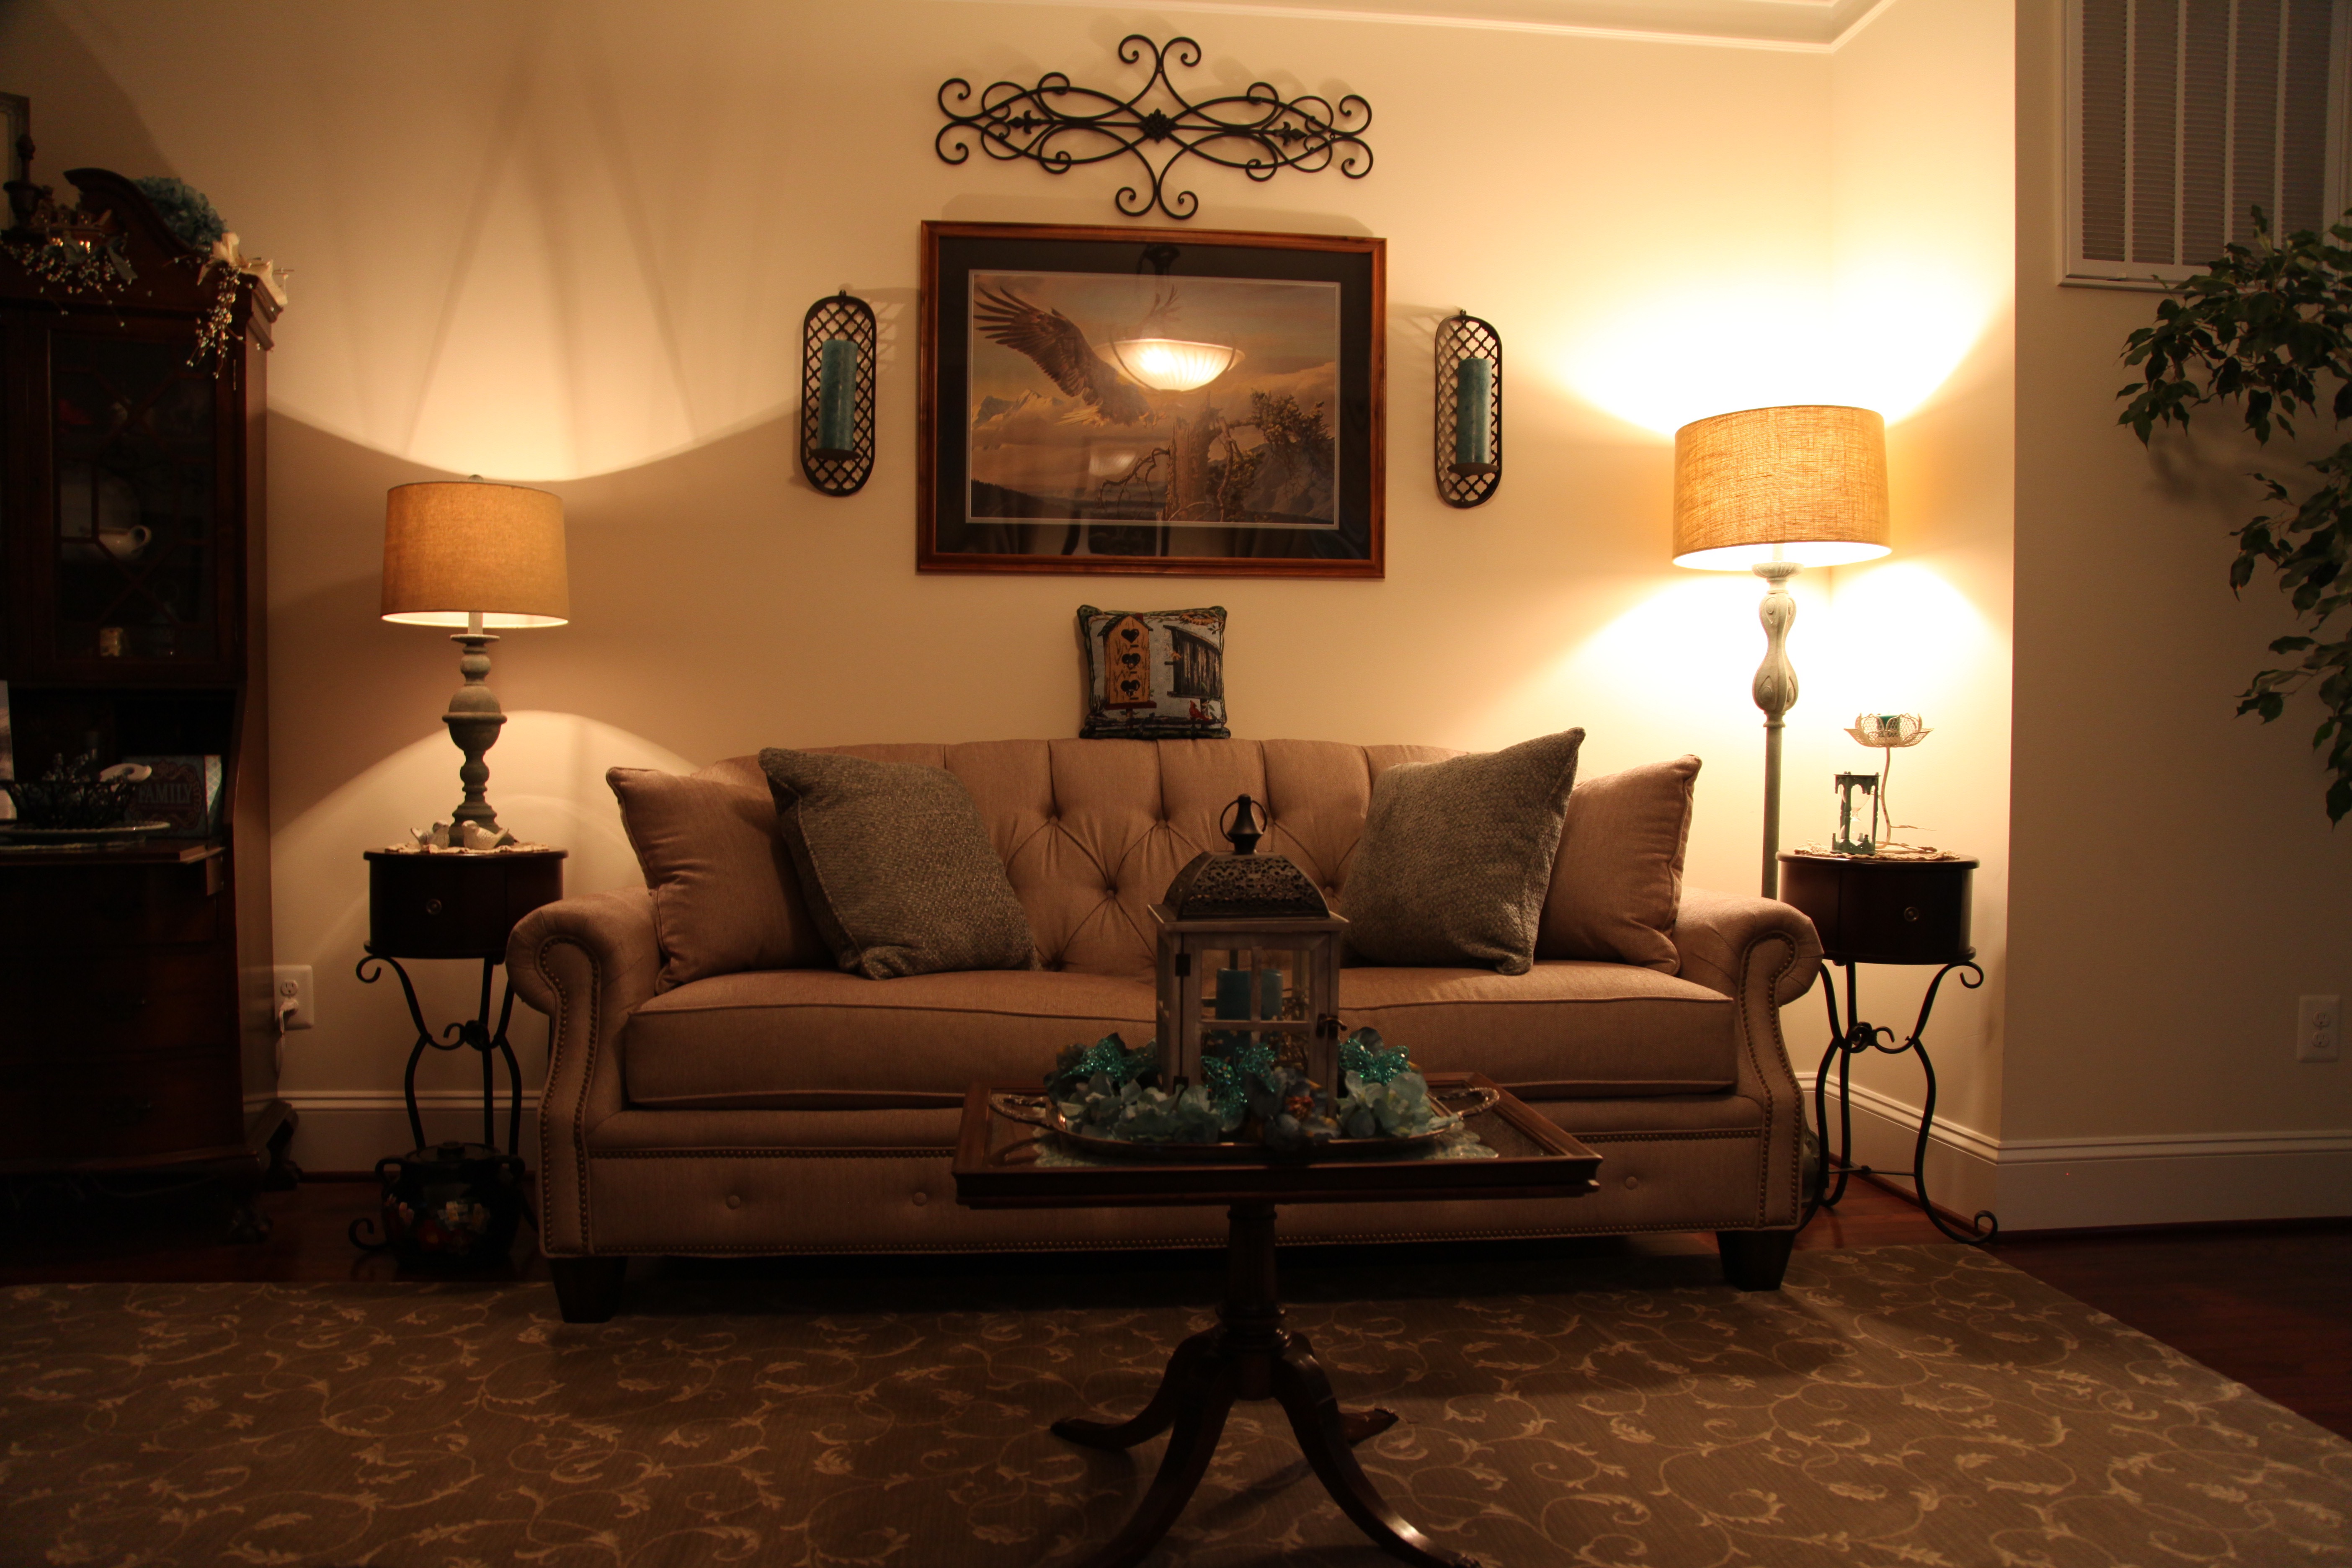
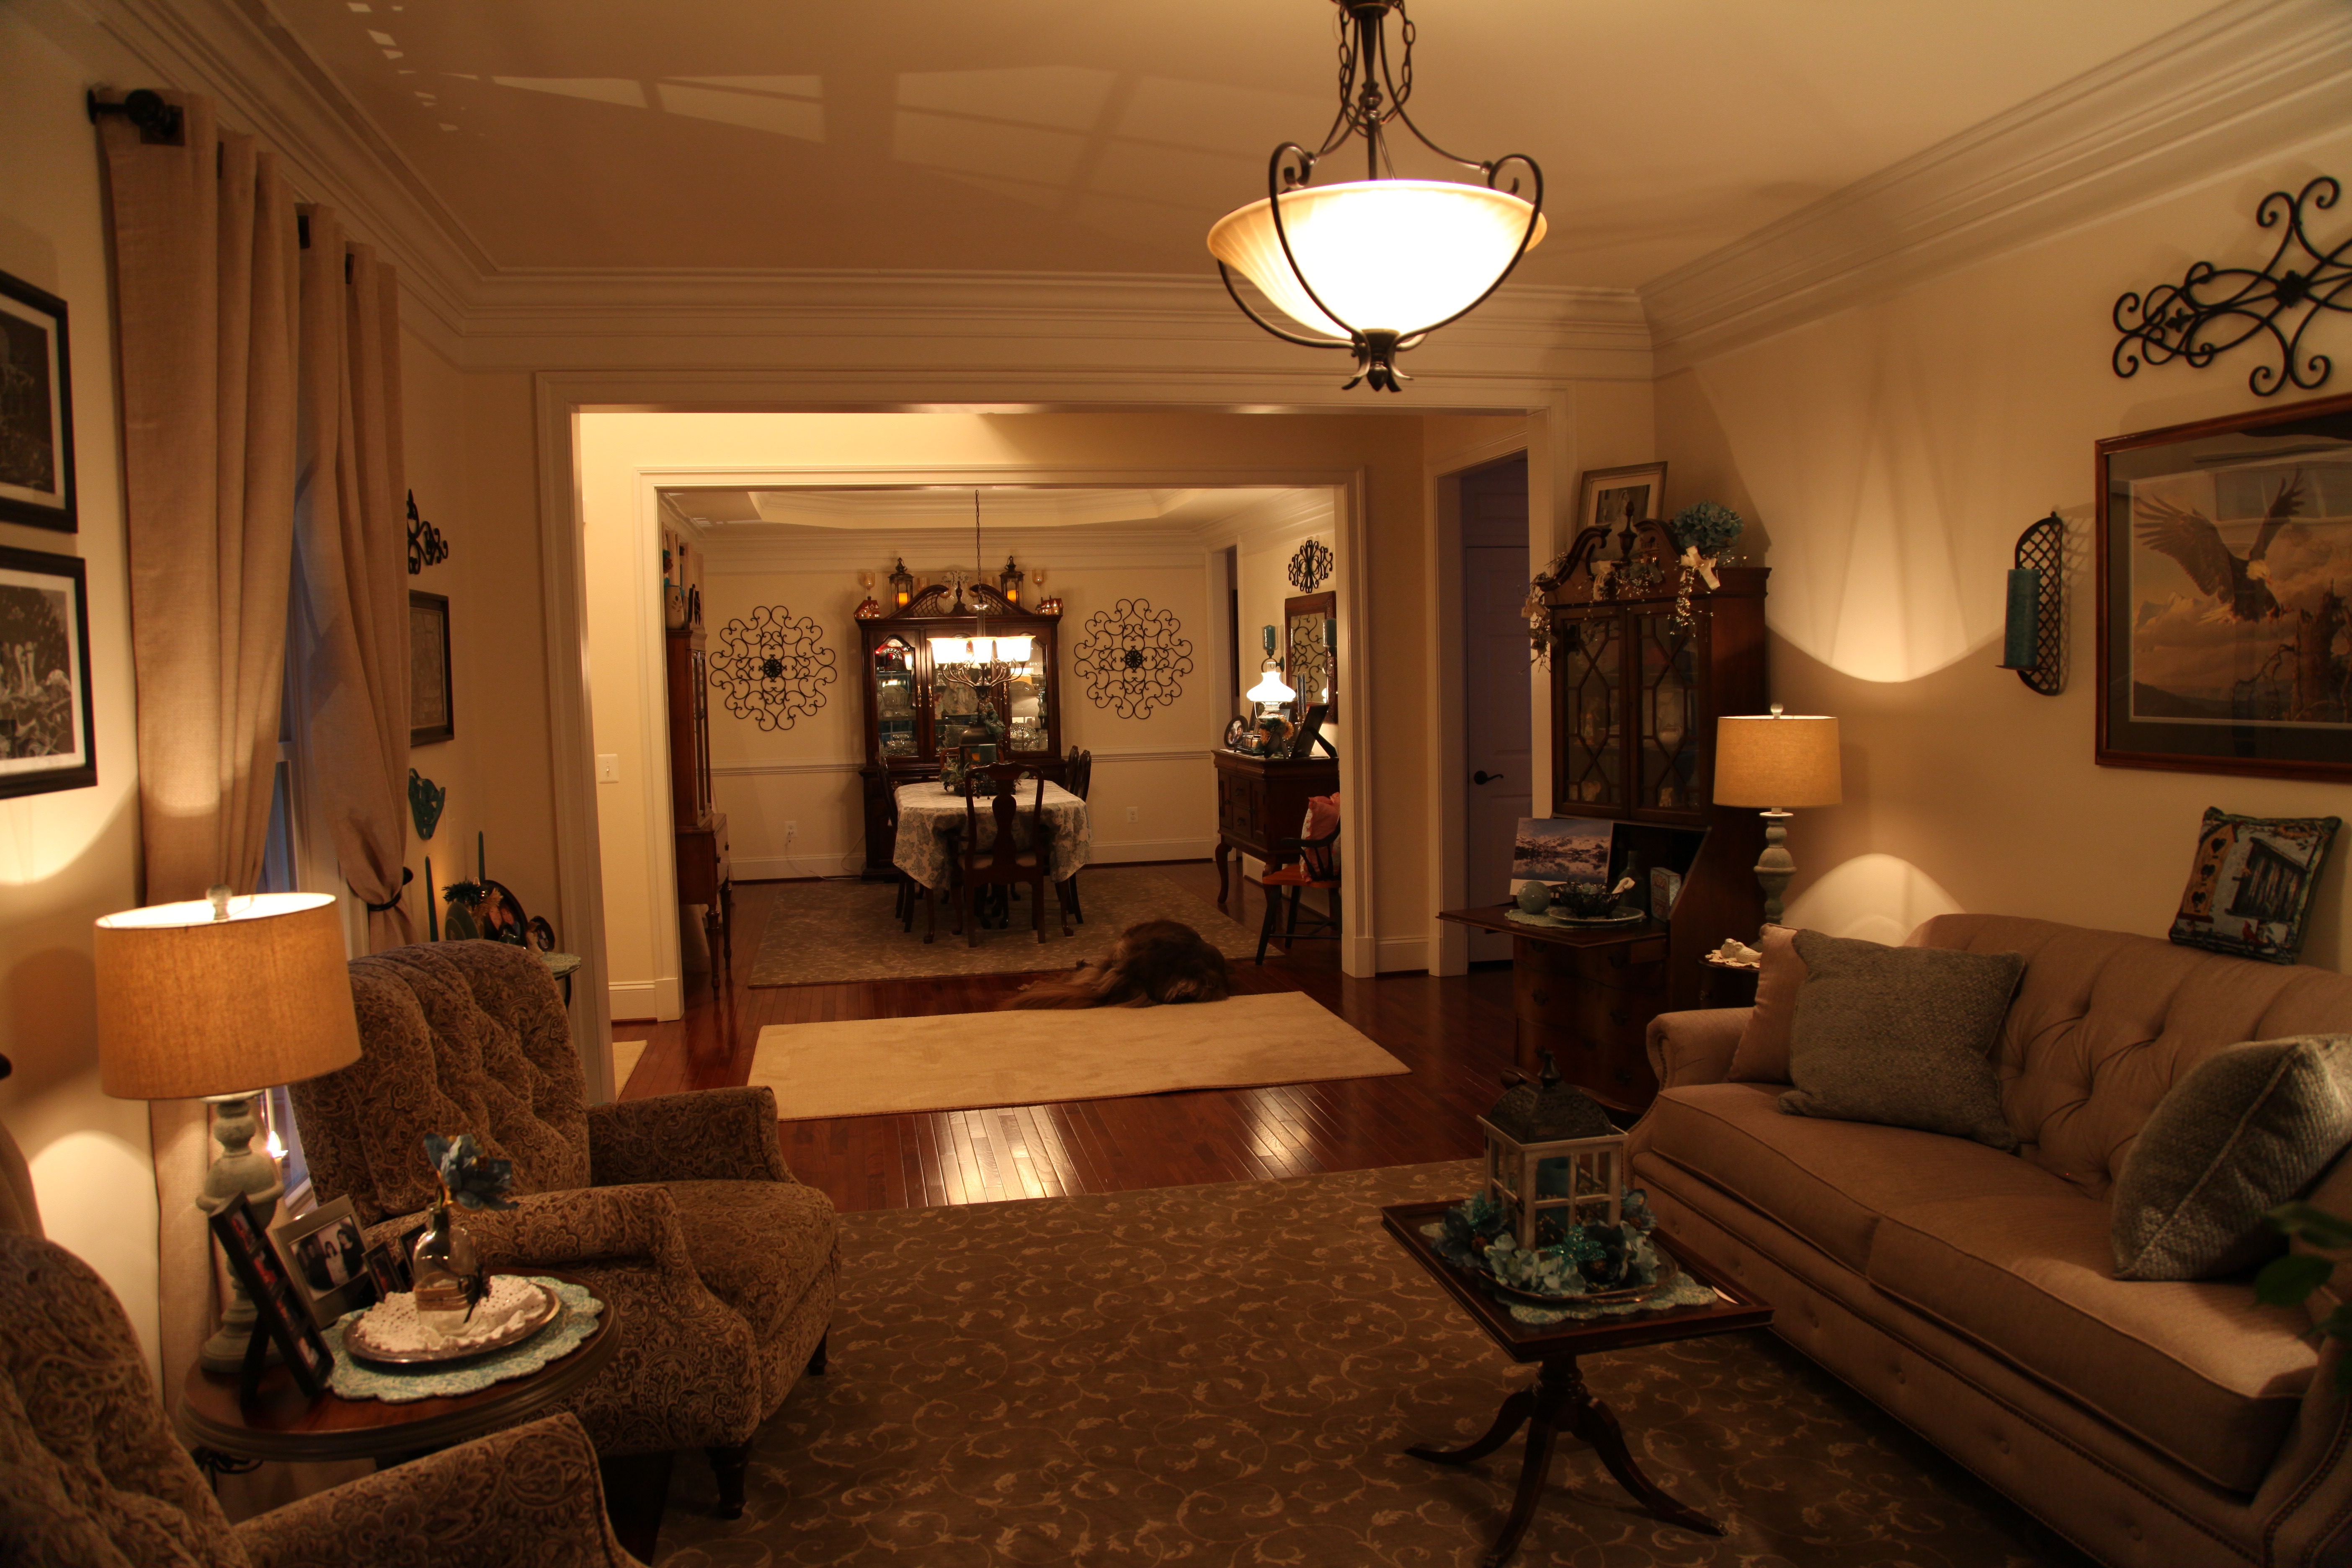
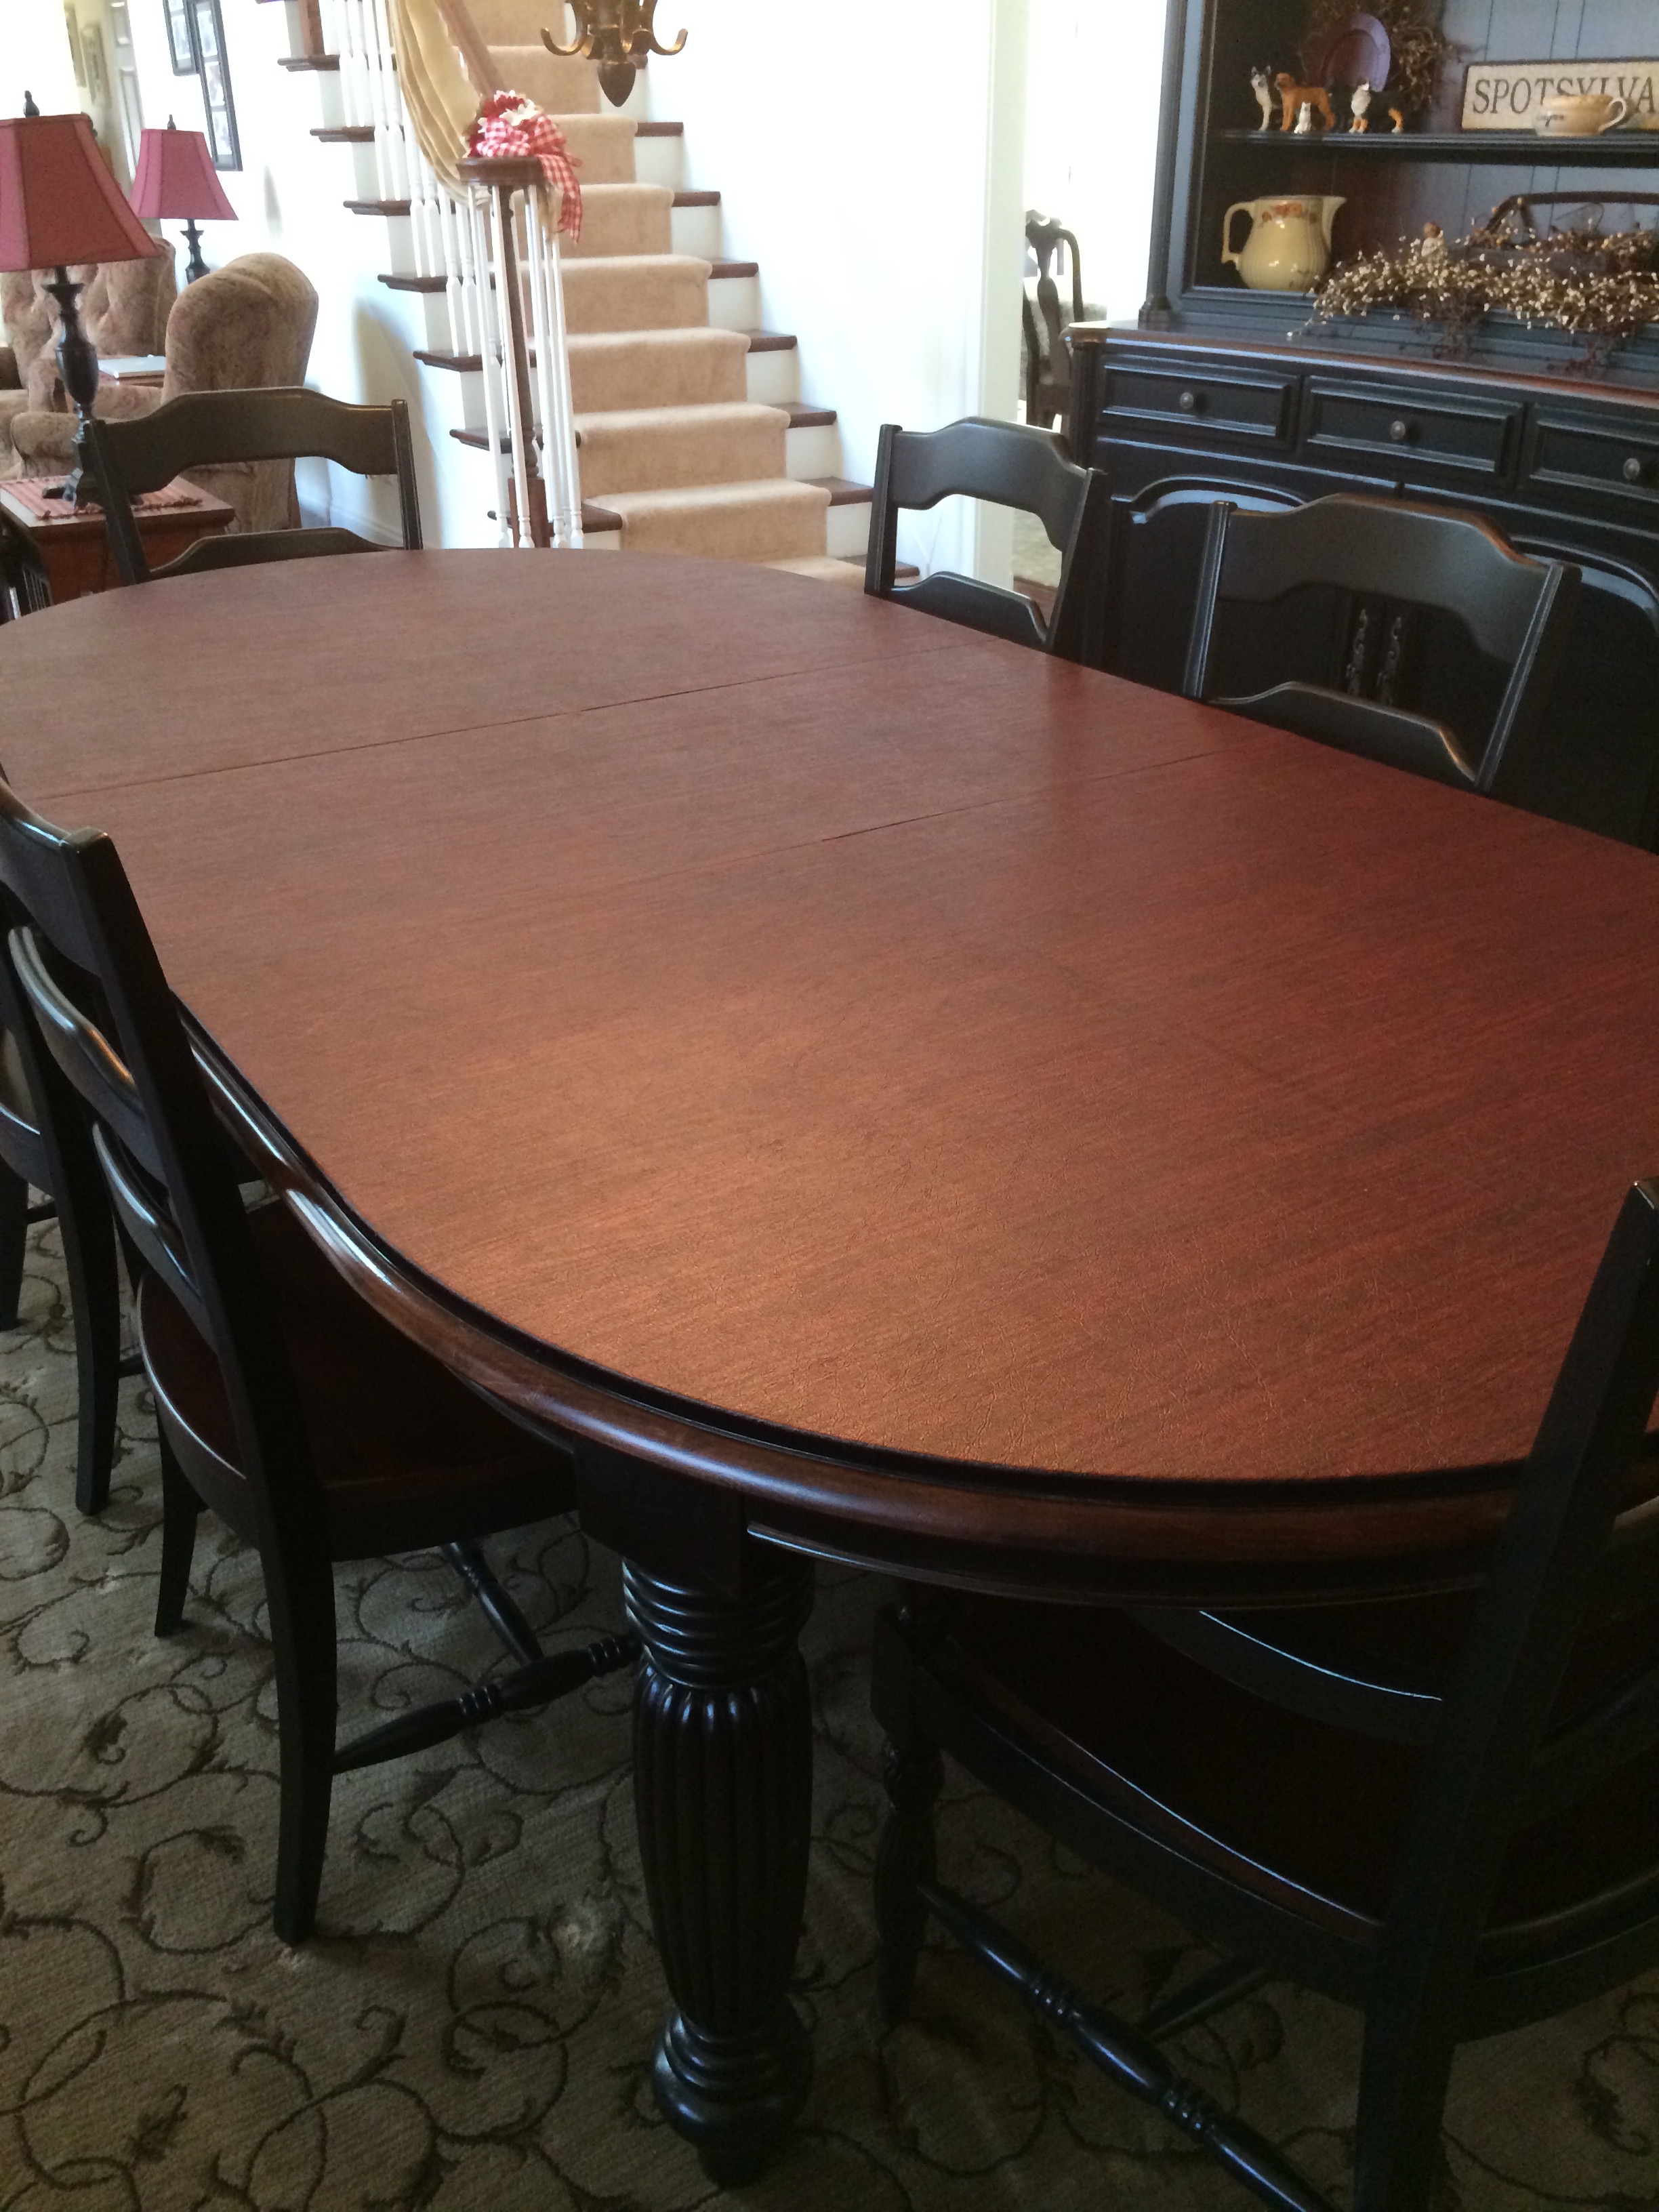
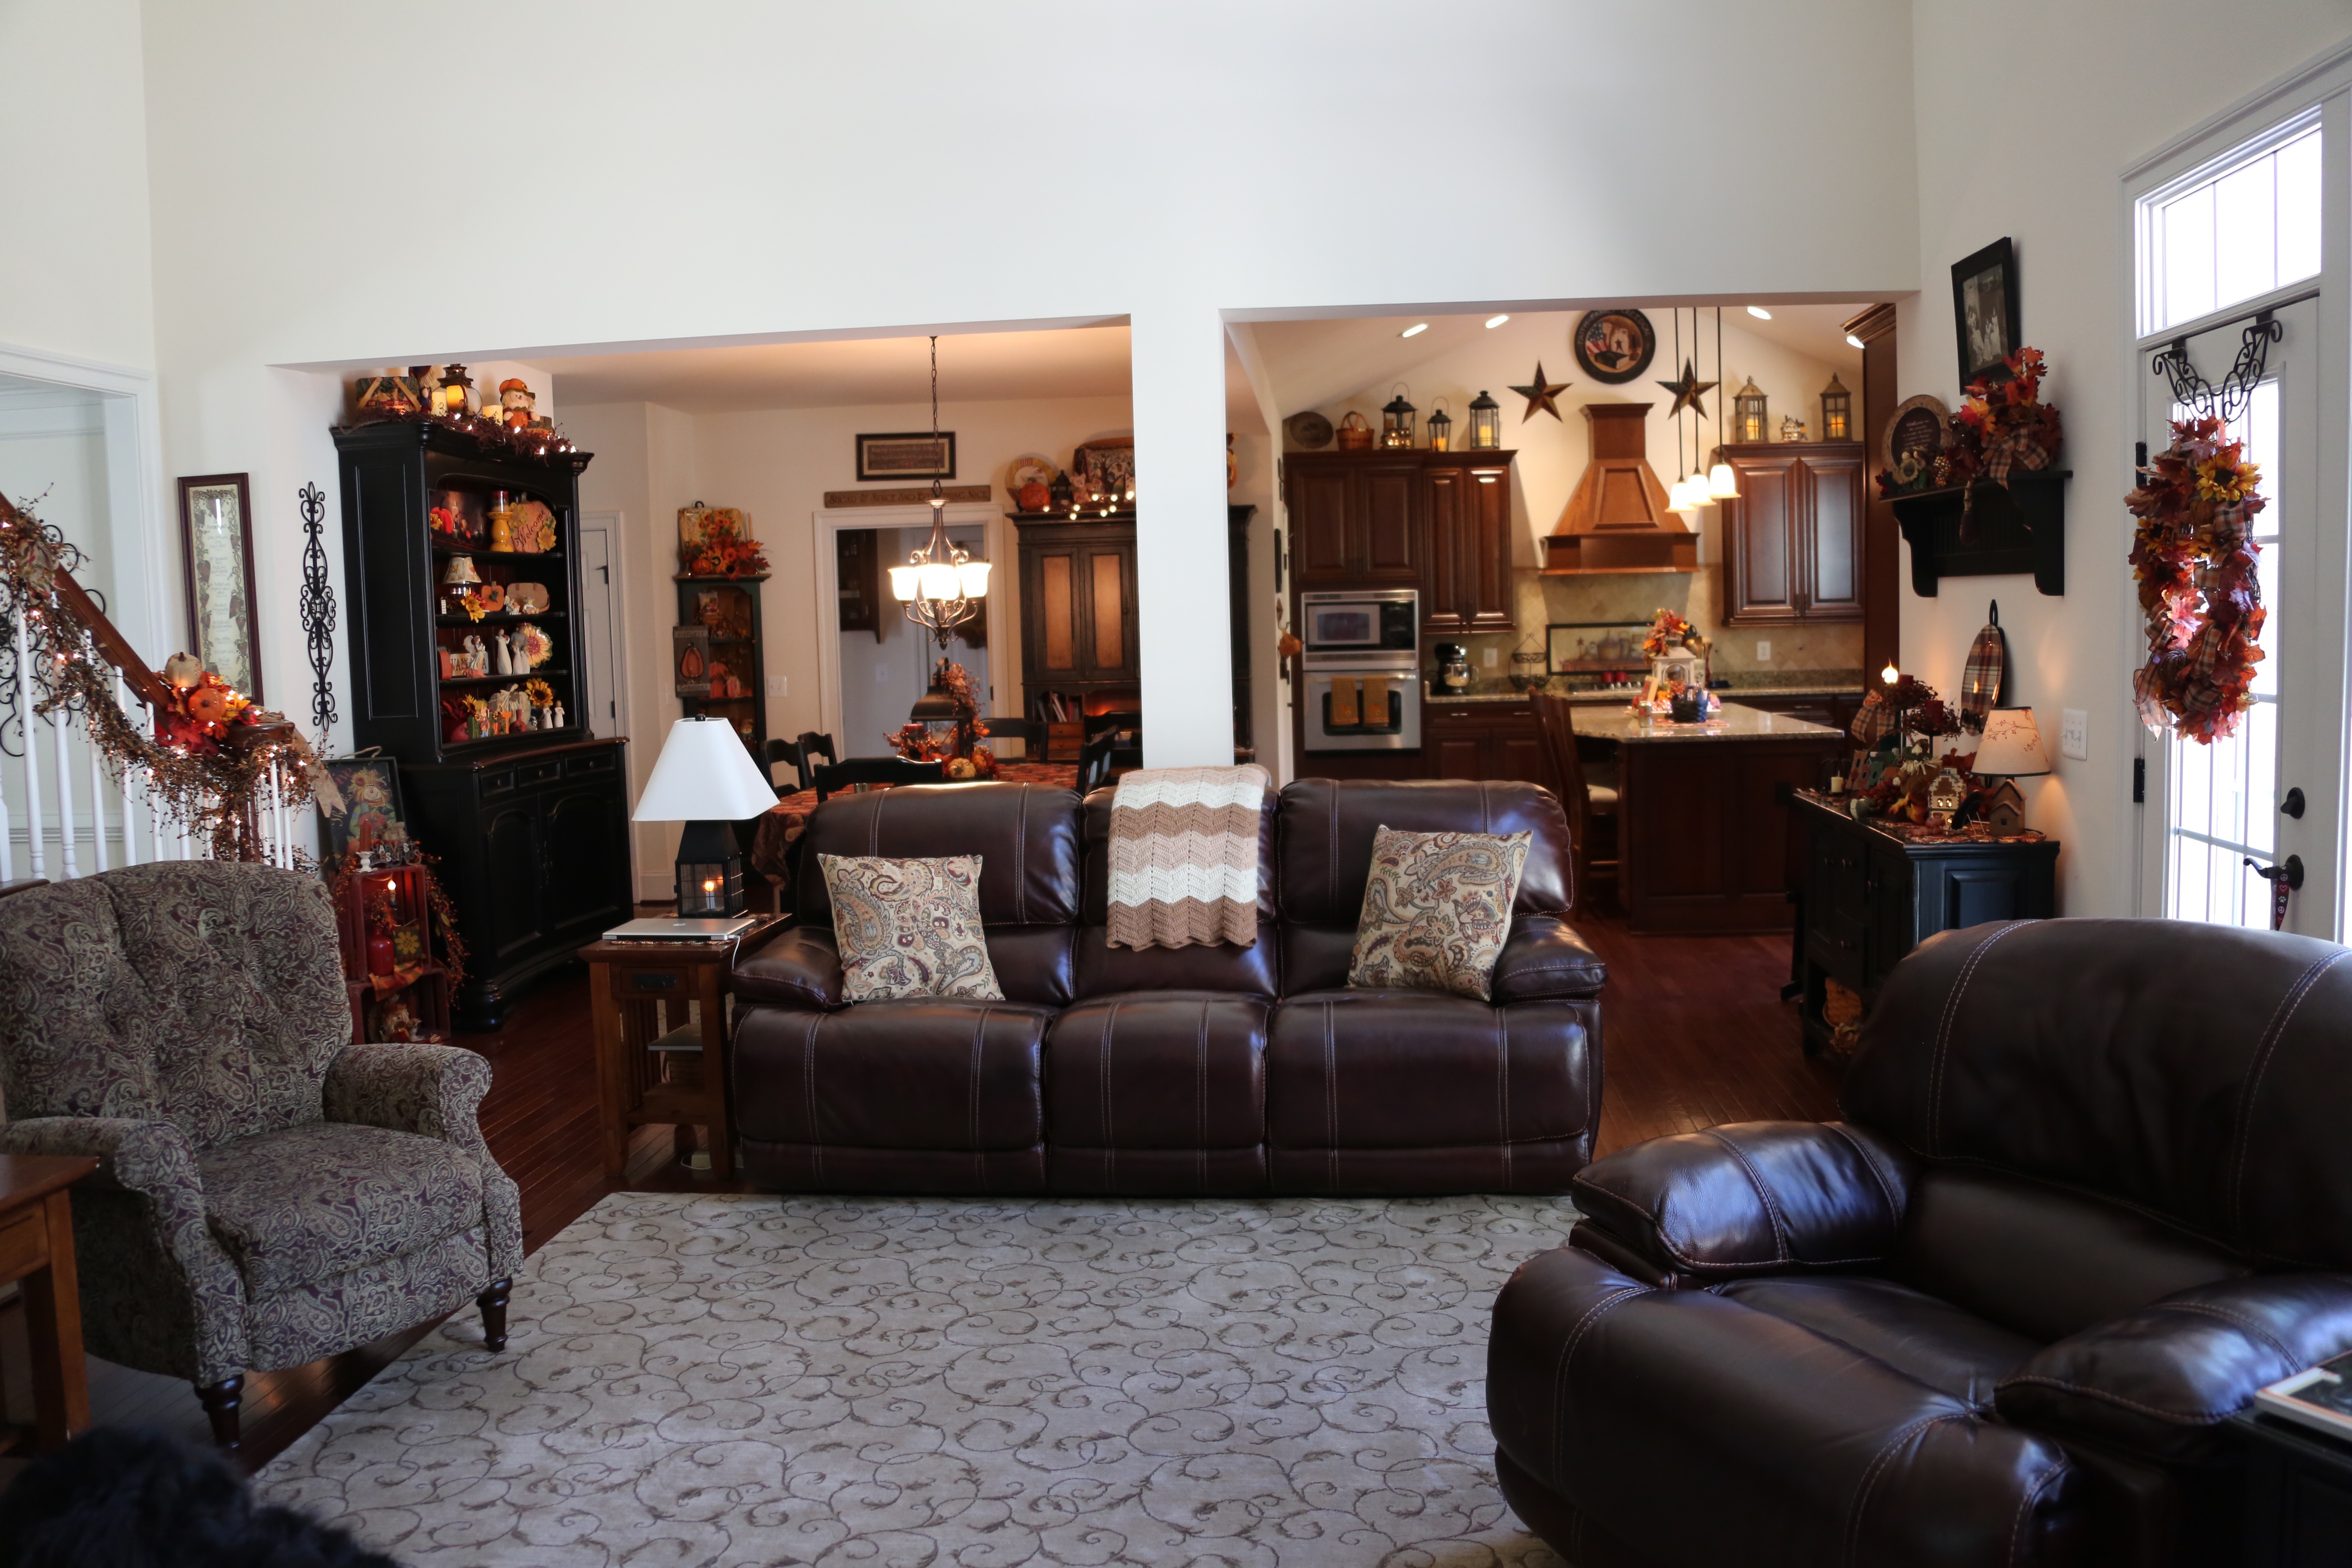
Both the living and dining rooms are pretty much the same size the only difference being that the dining room has a tray ceiling and the living room has a large bay window at one end. The dining room furniture is every bit of 25 years old and because it wasn’t used too much in our other home, it is still in great shape.  We did purchase all new furniture for the living room before we moved into this house and when we did that, I ordered a bolt of the same material that the couch was made from so that we could reupholster the dining room chairs to match.

Here is the dining room, the hutch and the sideboard were mine, but the little hutch on the left was my Grandmother’s:

1V4A2848 1V4A2895

IMG_8880

This lamp is another keepsake that was passed down to me from my Grandmother, it sits atop my sideboard.  I sat it on a tray and decorated around it, this is the arrangement that I created for Fall.

Here is the living room:

IMG_1706 IMG_1703

I especially love it at Christmastime, last year I purchased a white Christmas tree and placed it in the bay window…Trust me, it *will* go back there again this year. 🙂

IMG_7716IMG_7704

IMG_1704

This was my Grandmother’s Secretary, she would always keep it closed and I used to love to play in it when I was a little girl, but one day I had a little epiphany and decided to open the big front door and do a bit of decorating inside of the Secretary. I’ve really enjoyed creating new groupings on top of that opened door.

IMG_8715IMG_1858

IMG_4062

These are the most comfy chairs and they recline! I chose a soft green color to be used as an accent in these rooms, that color runs through the paisley in these chairs. They set the tone for both rooms decor.

I chose very basic curtains for these rooms; they are drapery panels sheered on with square oil rubbed bronze grommets; we chose oil rubbed bronze curtain rods and tie back hooks as well.  I purchased them from Bed, Bath, & Beyond, unfortunately, I am not able to find them and provide you with a link. My apologies!

**Side note:  All of the light fixtures, faucets, and door hardware on this level are in oil-rubbed bronze.**

IMG_8854IMG_2656

Here is a shot of the foyer rugs and the three pups posing so prettily:

IMG_8761

I couldn’t be happier with how these rooms have turned out, I’ll go into the living room to sit in one of those comfy chairs to read, talk on the phone, work on my blogs, or just relax; the ‘feel’ in there is soft and calming.  I’m a pretty high-strung lady at times and these rooms help me to find my “off switch”. 🙂

IMG_1713 IMG_1717

Until next time, y’all take good care! ❤

**In crafting there are no mistakes just unique creations**

The Laundry Room–Our Creation

Hi All,

How about if we take a tour of our laundry room.  I’m sure to most people, the laundry room is about the least interesting room in the house, but to me, well, yes, it meets all of the necessary needs regarding doing laundry, but this room is so much more to me. 🙂  This is also where I feed the pups, do all of my ironing (trust me, I don’t do much of that), where the hubby washes out dirty brushes, or his dirty shoes and honestly we do a myriad of other tasks that I can’t think of at this moment in time. This is more of a utility room than a laundry room…and get this, it sits right on the front of our house. I have to be honest and tell you that I did baulk at that idea when I first saw the floor plans, but we went with this model because we loved the rest of the home so much.  Now that we’ve arranged it just how we want it to be, it is actually located in the perfect place; I can be nosy and look out those the two windows when I iron–not that there is anything but deer and woods to look at, but both things are sure pretty. 😉  Anyway, let me explain how we brought this empty space to life and made it exactly what we wanted and needed it to be. 🙂

First, the color of the ceramic tile floor is almost a terra-cotta color–a bit out of my wheelhouse, but I loved it so much, I went with it and am so that glad I did…it is the perfect color for that room and snugs up nicely to the dark hardwood floor in the hallway. I ordered those curtains to match the floor from Country Curtains and I will say they were pretty pricy, mostly because I needed them to be 96″ long (yikes), but worth the cost, they are such nice quality and I know they will last me a good long time in there.

IMG_6518

IMG_9180

We didn’t pay our builder to put one thing in this room except that we did ask that it be plumbed for a sink on the opposite wall to where the washer and dryer would be located. My hubby installed every cabinet that you see in these pictures; he purchased them online at Kitchen Cabinet Kings, unfortunately, he just told me the other day that they no longer sell these fronts…good thing we got all that we needed.
photo

We chose to go with a cream color cabinet in there because of the dark flooring and to have something a smidge different.  We used the same cabinetry hardware in there as we did in the kitchen.  And best of all, he installed a “trash can” cabinet, but…guess what I keep in there? The dog food!! Yep, what a little bonus! No more hauling around huge bags of dog food (for my huge doggies…Meet the Pups <there).  You would not believe how much that cabinet helps me each and every day. 🙂

IMG_9181 (1)
IMG_9316

Here is the faucet and the counter top:

IMG_9182 (1)IMG_9183 (1)

IMG_9410

Shoot, I even made a wreath to hang in there…lol…I’m shaking my head and chuckling at myself for doing that. 😉

Now that this room is complete, we couldn’t be happier with it, yes, it is a pretty room to look at, but it also functions beautifully. 🙂

IMG_6518 IMG_8915  IMG_9411

***UPDATE- 9/9/16***

My hubby has done a little work in our laundry room as of late and I’m excited to show you what he has completed. 🙂  When he ordered the cabinets he has also ordered crown molding to go across the top and a light rain to go across the bottom of the upper cabinets.  Also, we had purchased ceramic tile a while back, and he installed a backsplash.  Here are some pictures of the *now* completed laundry room:

img_5484img_5486img_5488img_5489

We are thrilled with the final result, the prettiness of this room now matches the functionality; it is definitely one of the most used rooms in the house. 🙂

Until next time, y’all take good care! ❤

**In crafting there are no mistakes just unique creations**

Mud Room, Powder Room, Kitchen Eating Area, & Family Room

Hi All,

One of the reasons that my hubby and I chose this model of home to build was because we loved the open and airy feel of the entire floor plan.  In this little post, I will highlight what you see as you enter our house from the garage.  First, you pass through a mud room and as you enter the main house, you can look past the kitchen table (kitchen is to the left) and on into the family room.  We have 9′ ceilings throughout the entire house, except for the kitchen, it has a cathedral ceiling and the family room’s ceiling soars up to about 18′ (it is completely open up to the second story); the high ceilings really add to the open feeling of the whole house.

Here is the mud room as you enter from the garage:

IMG_2640

IMG_2684
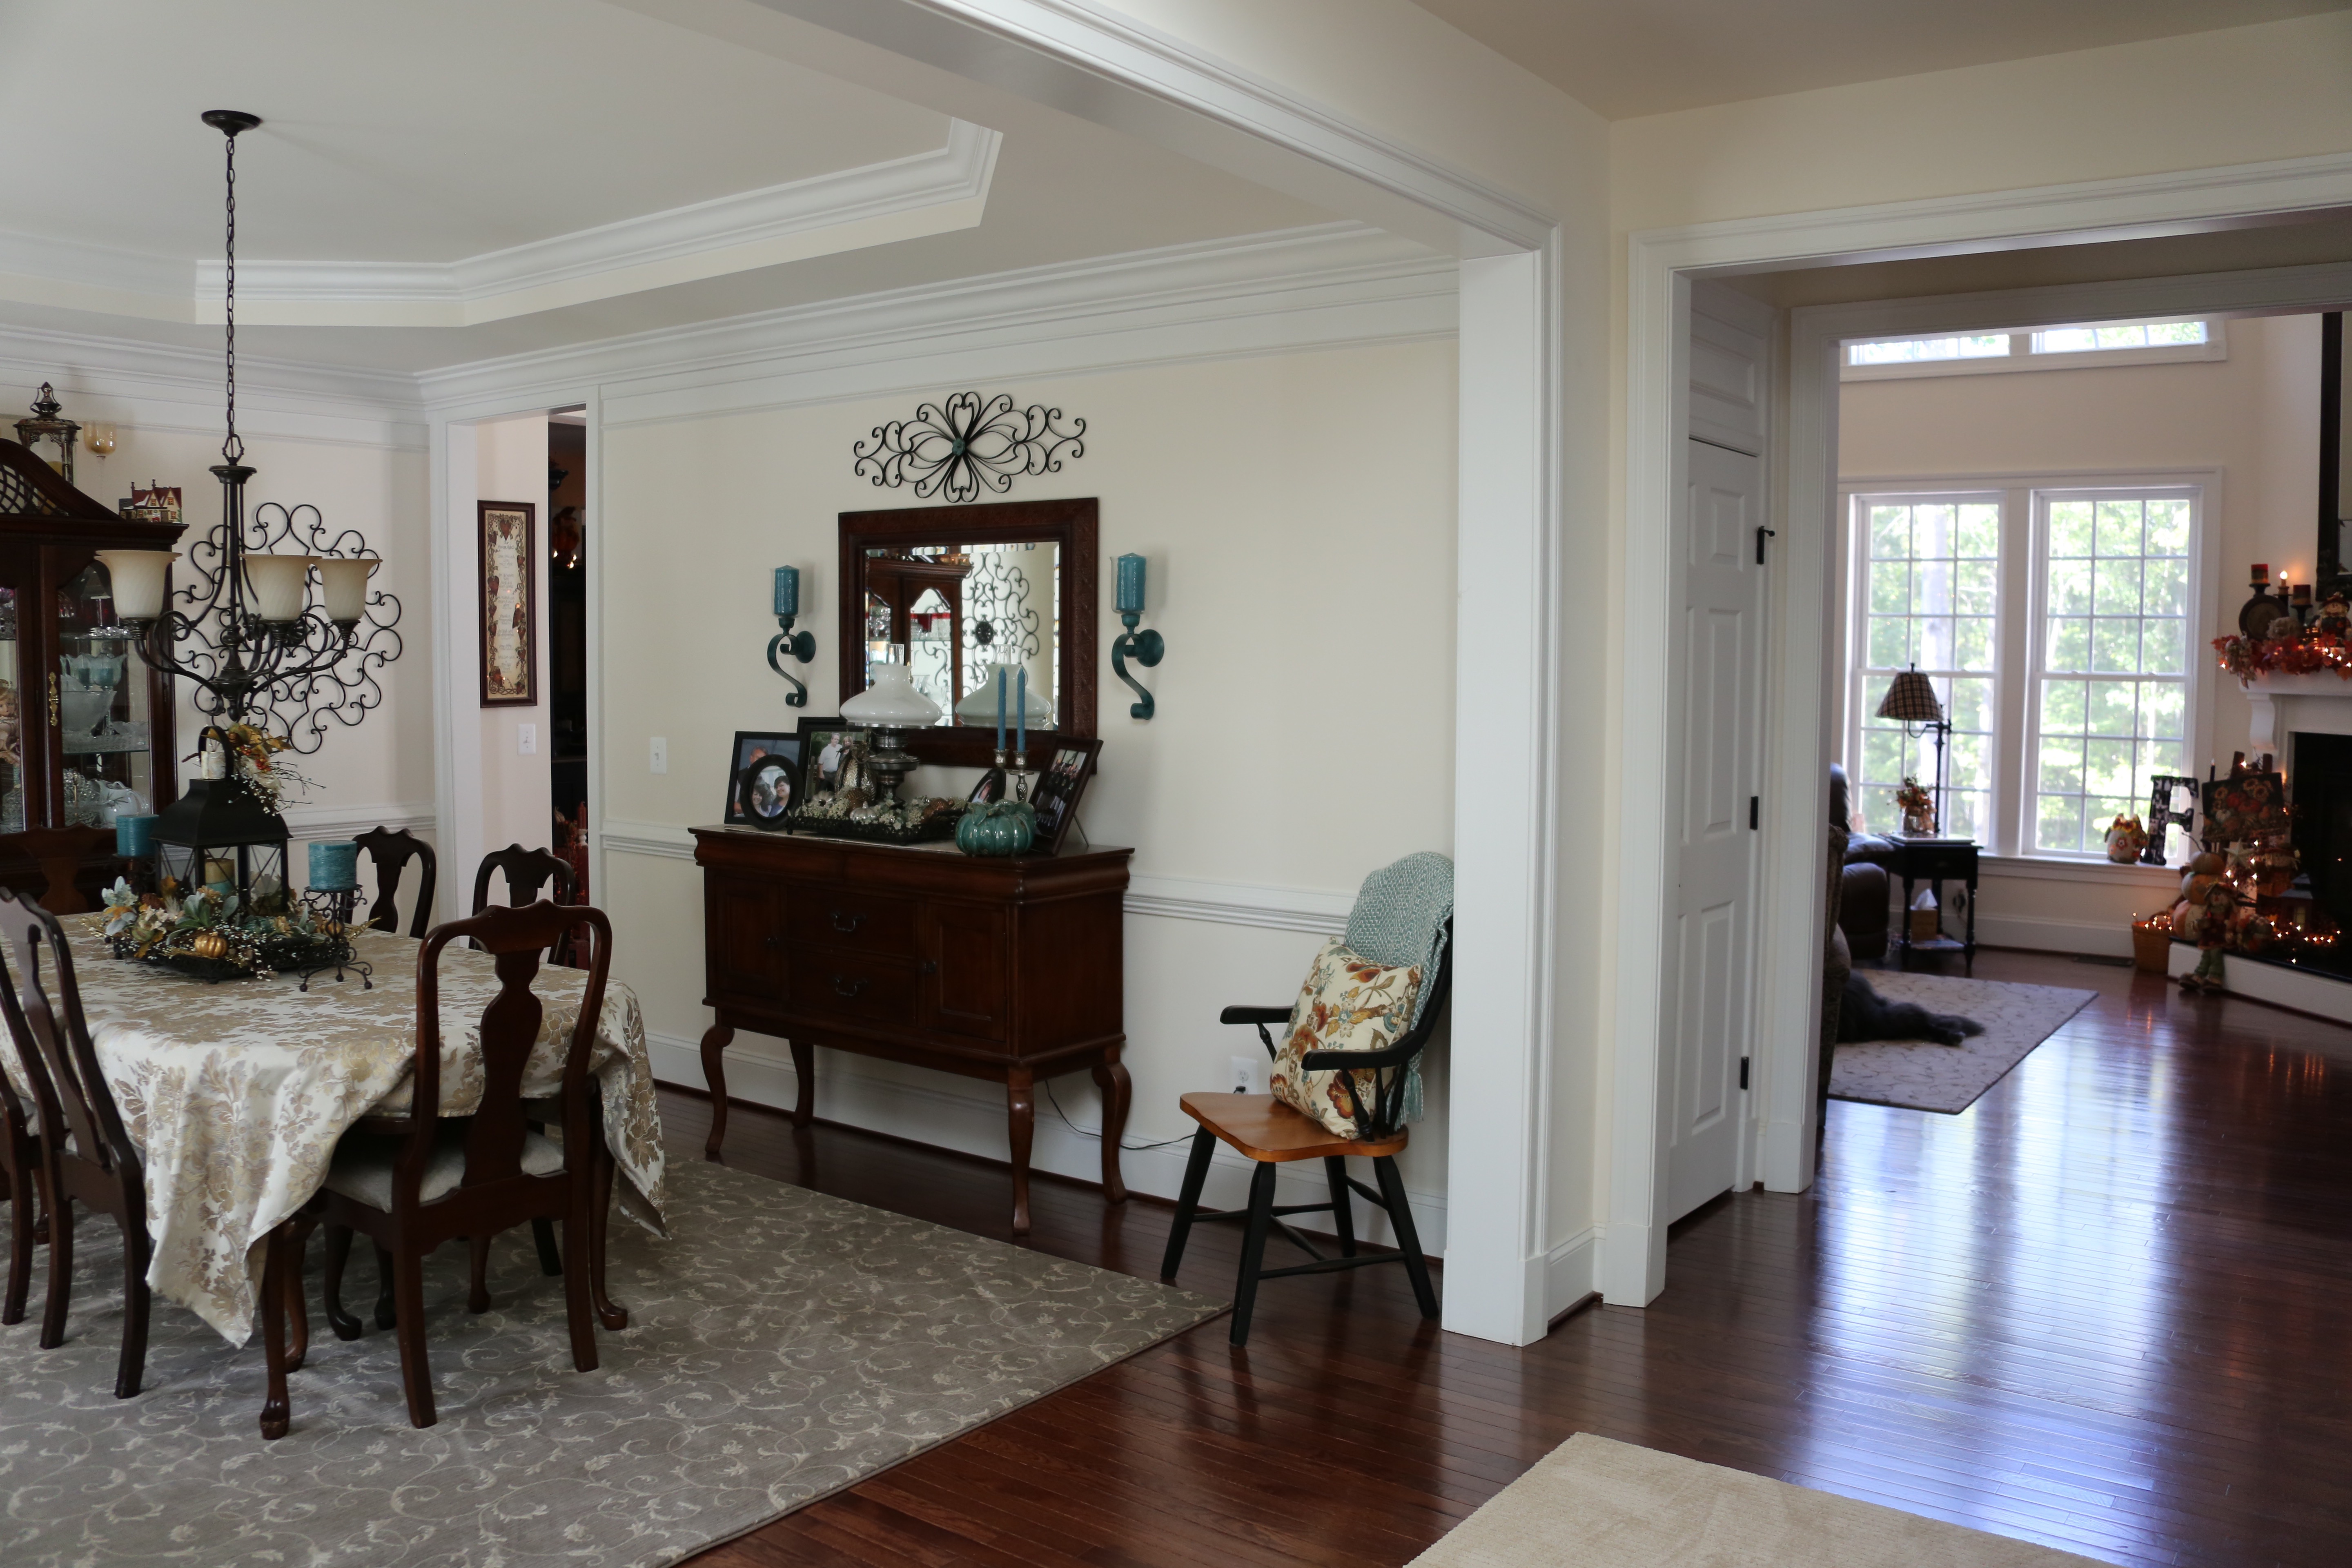
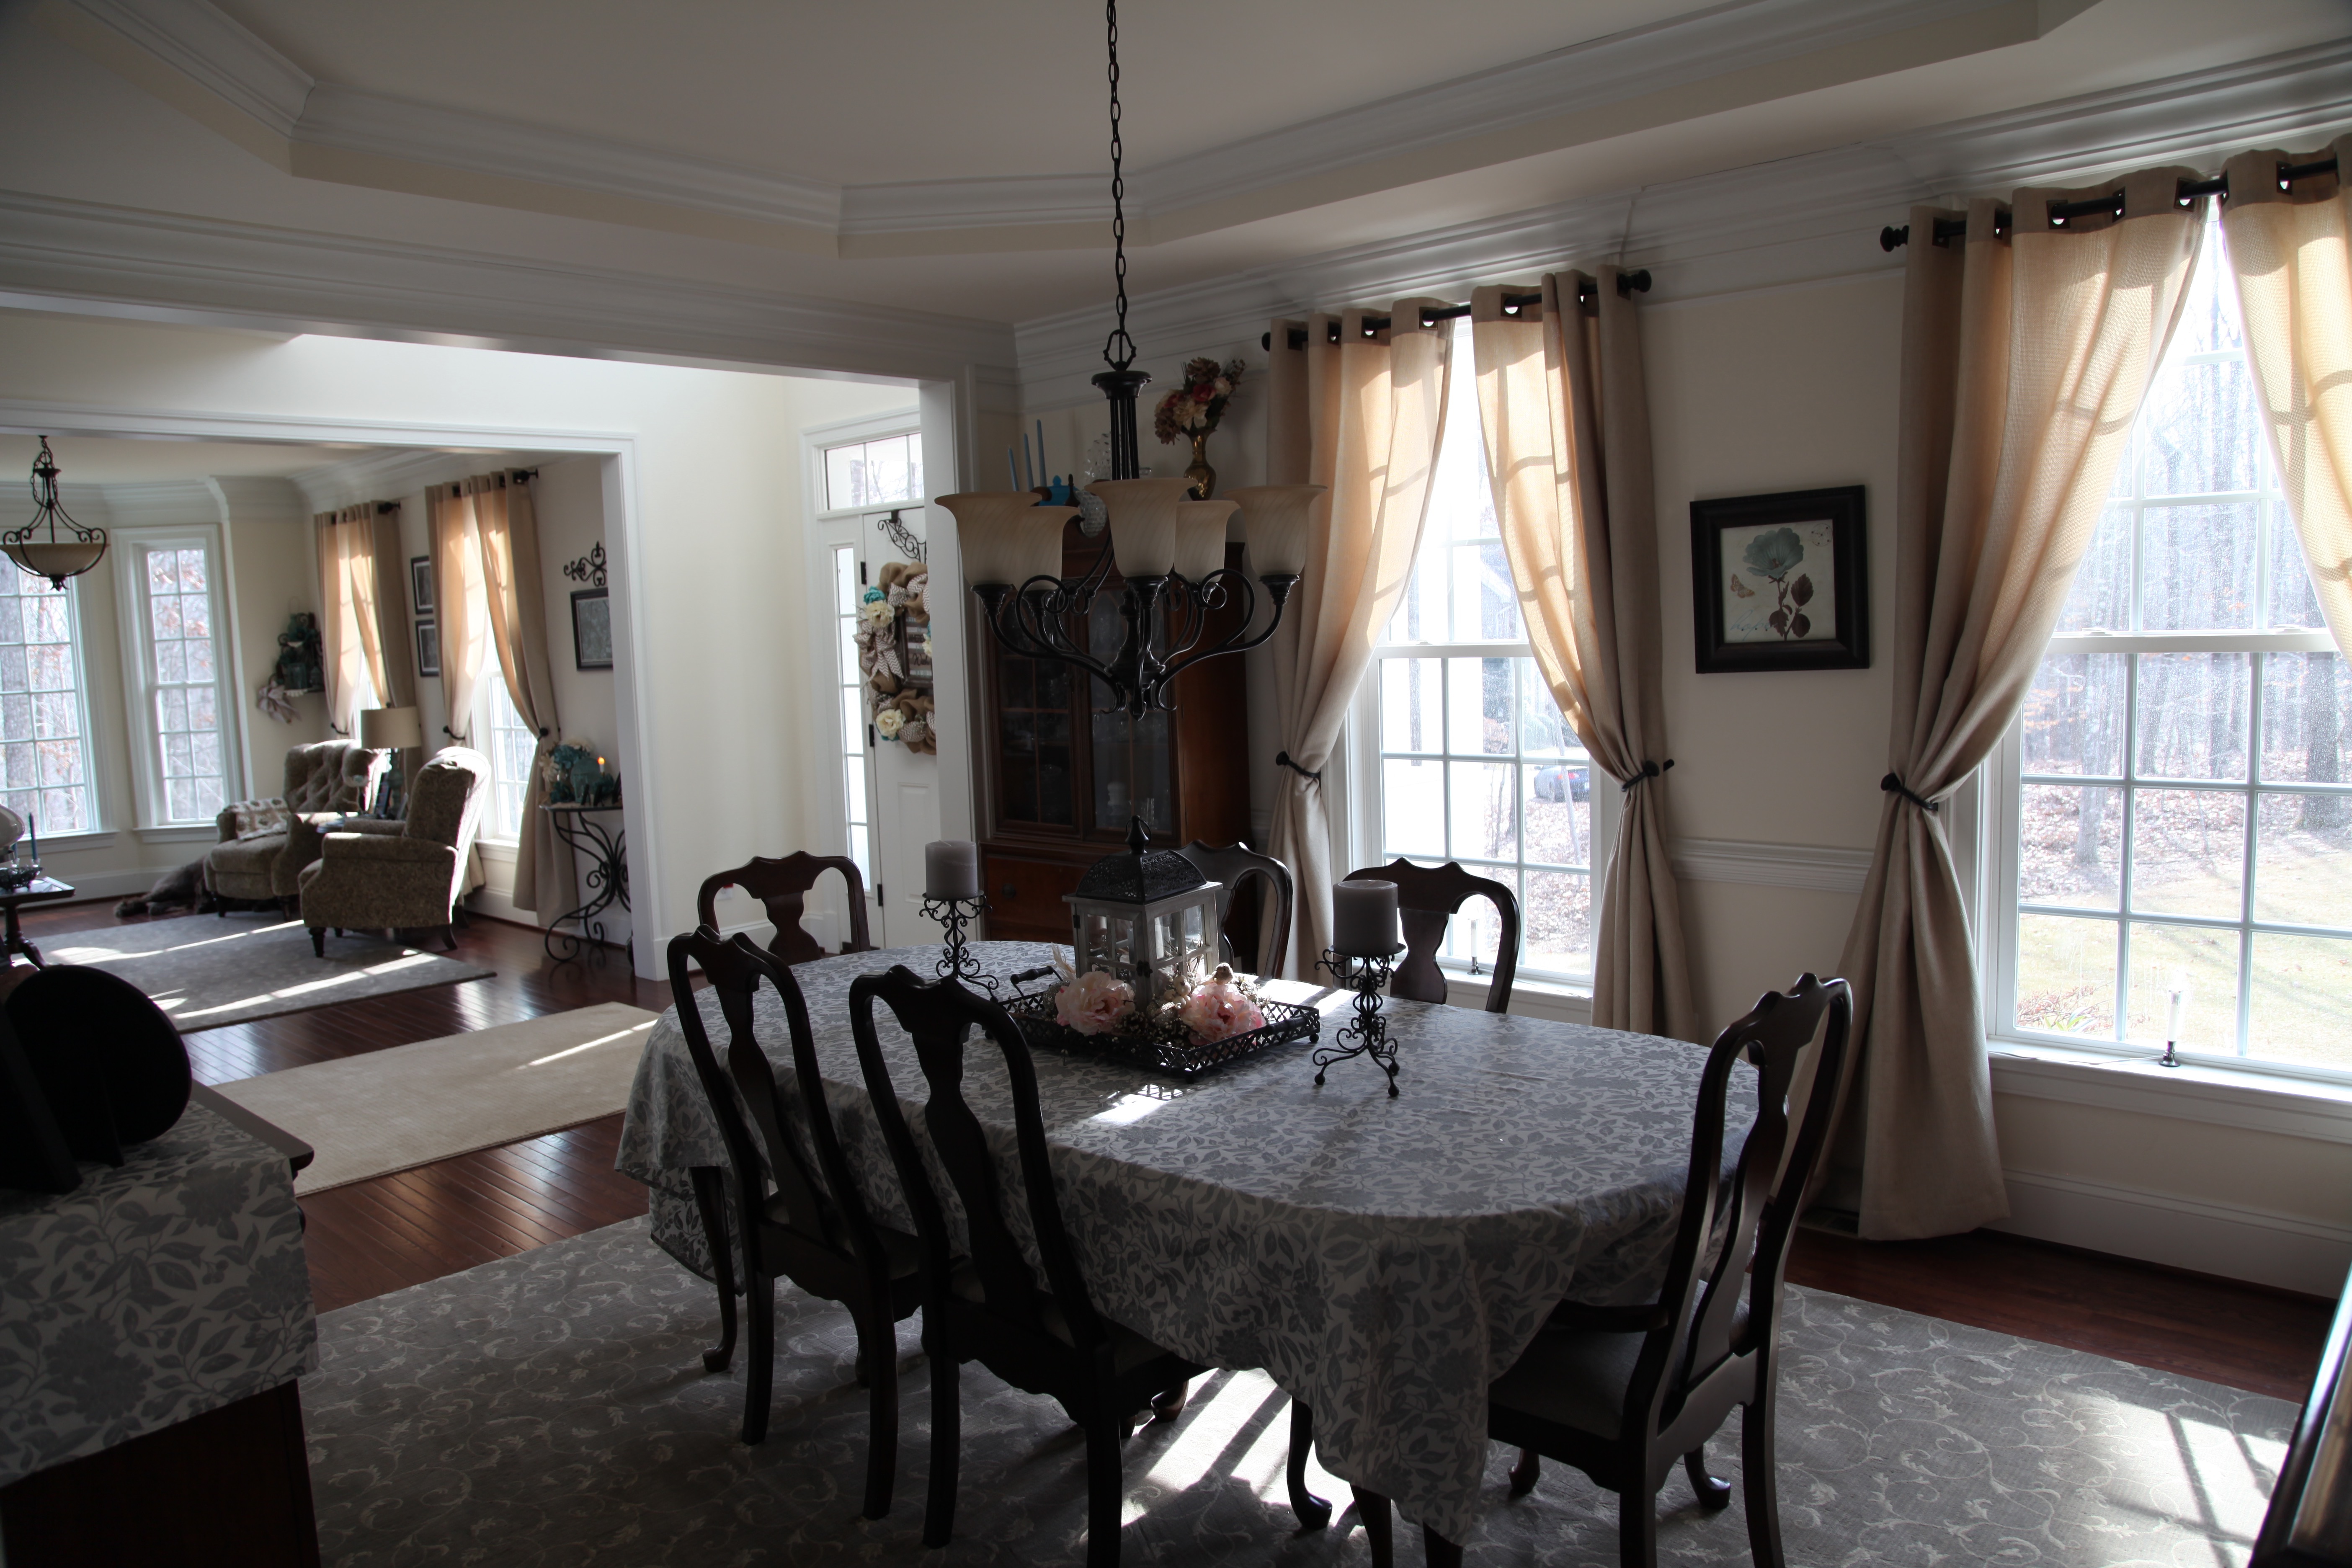
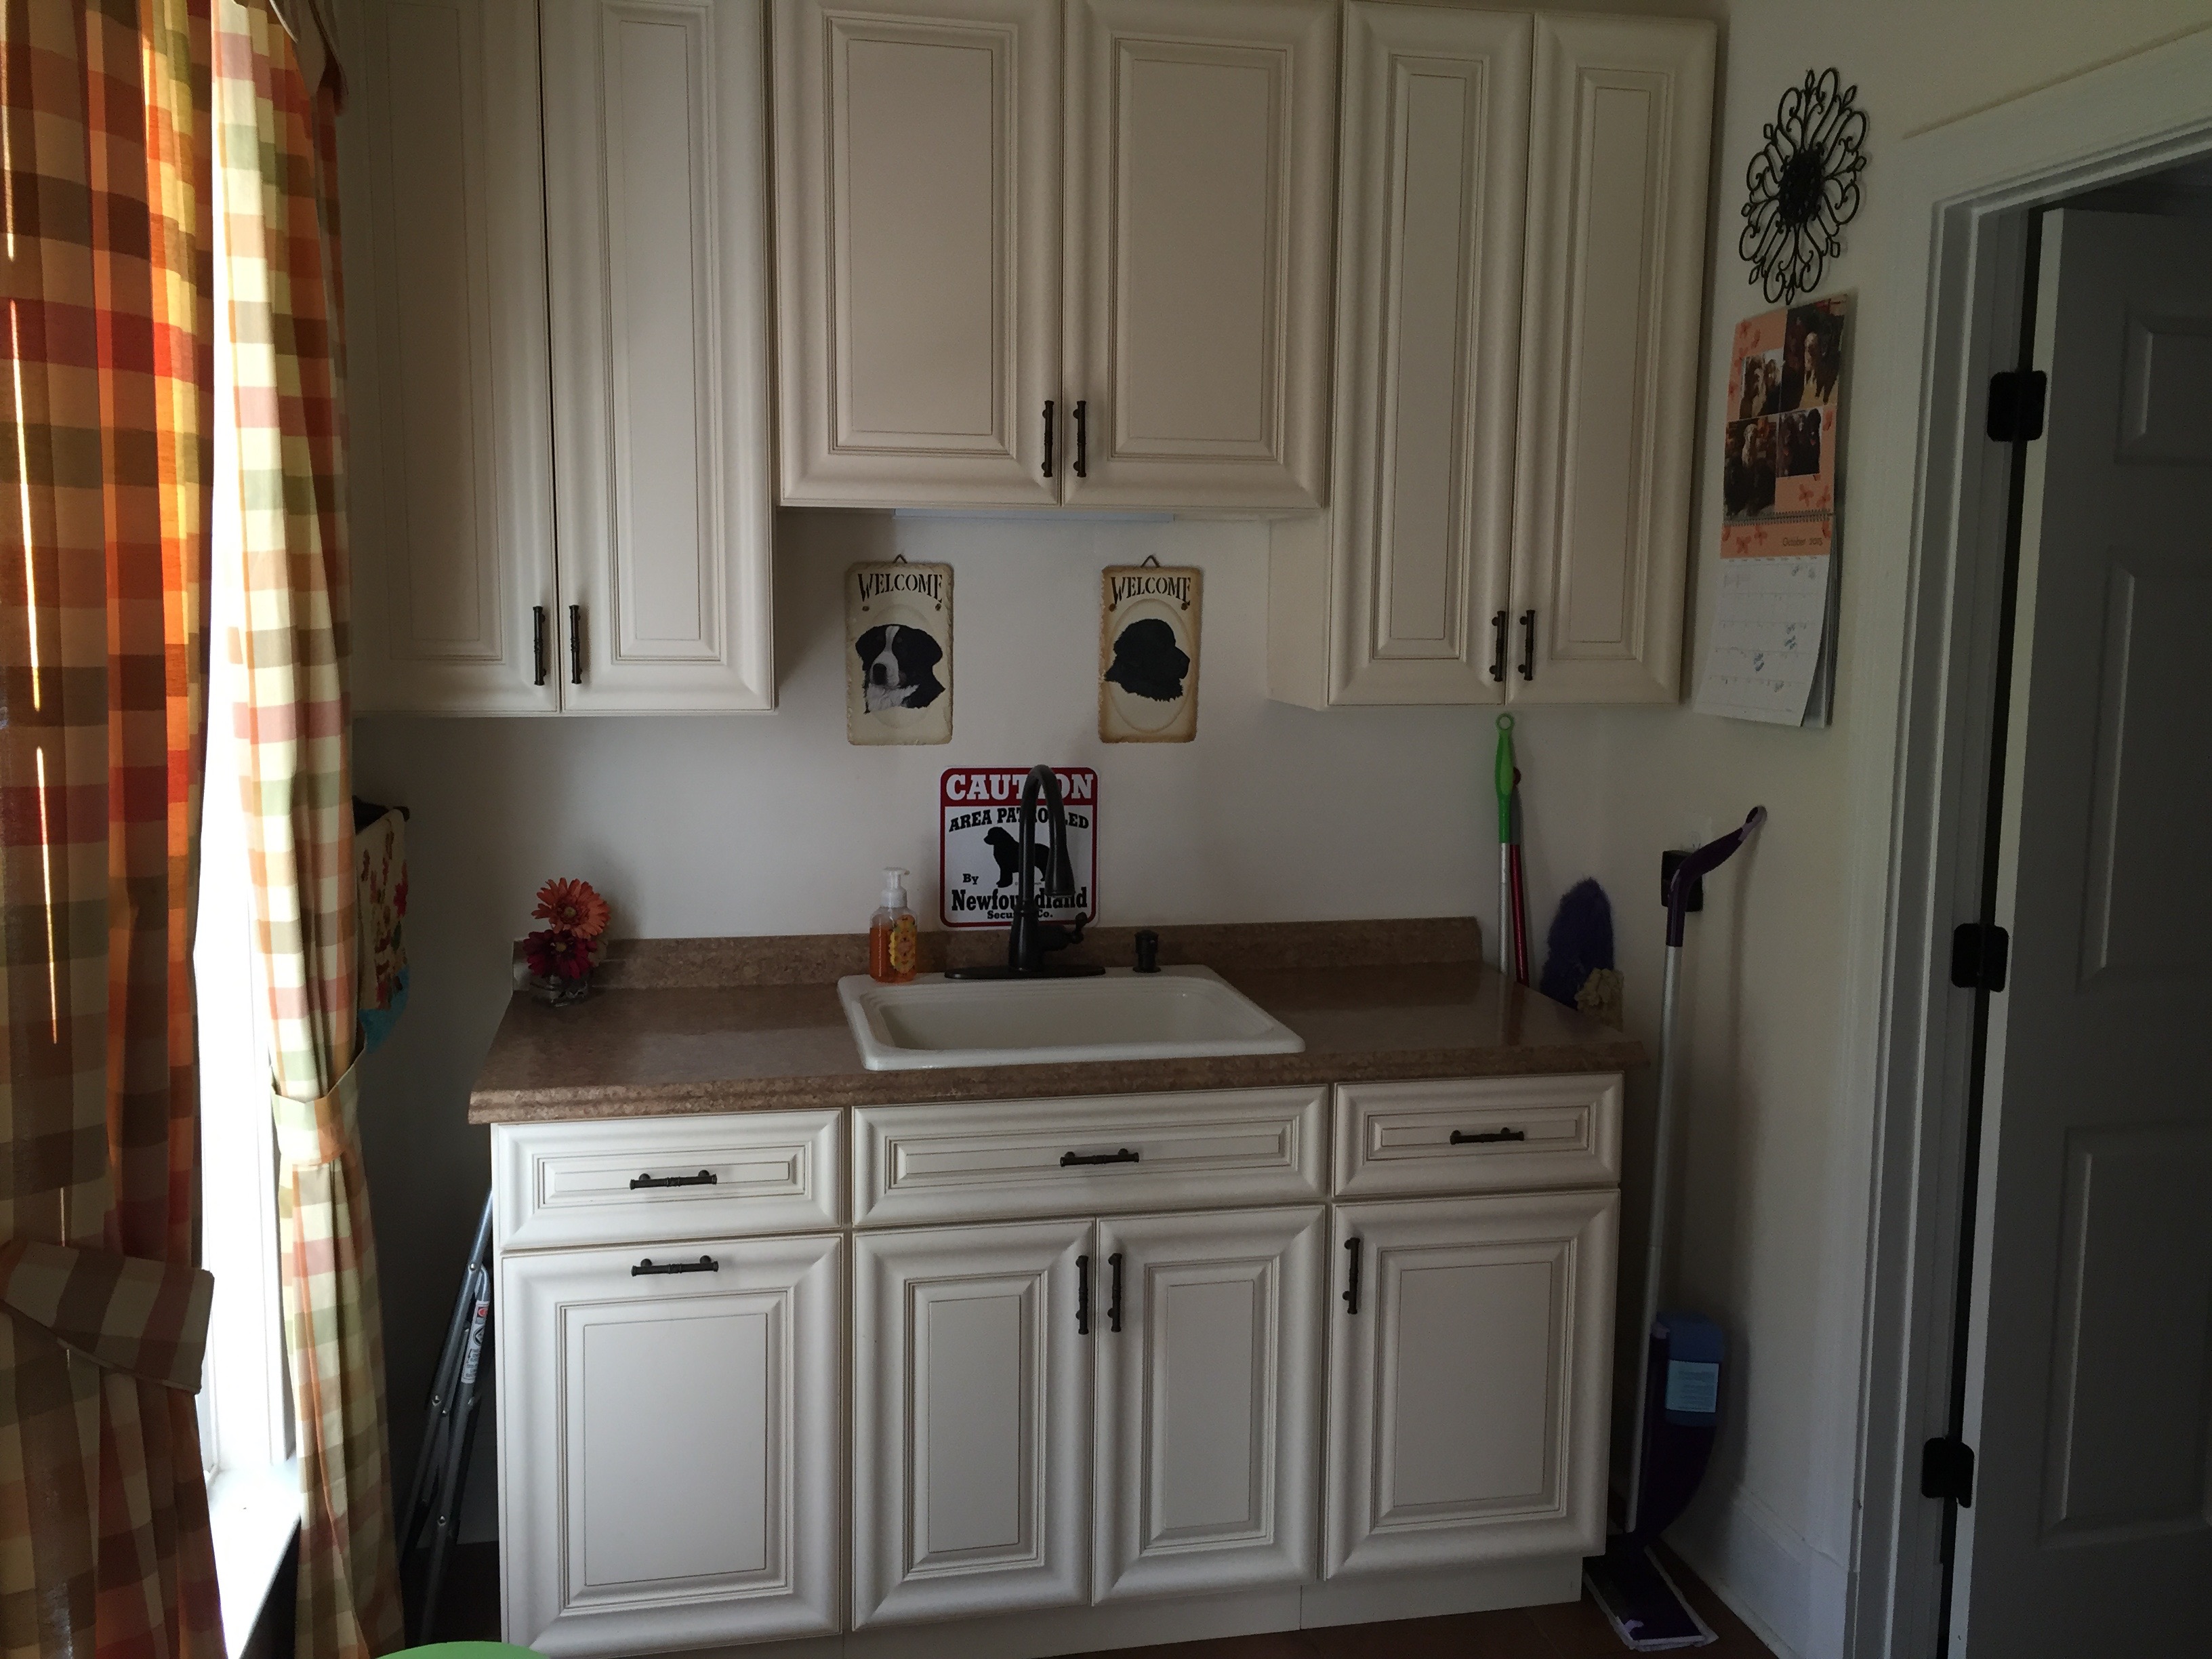
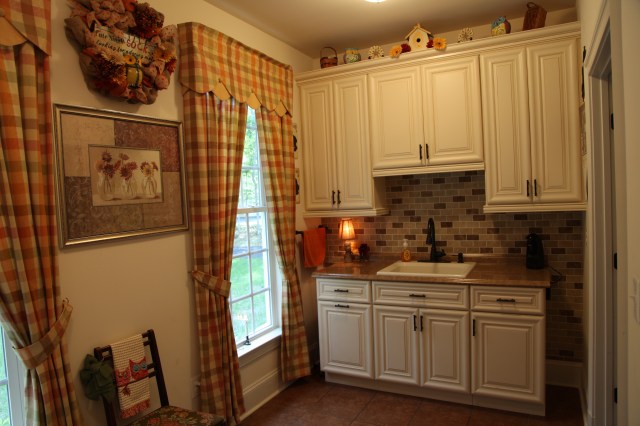
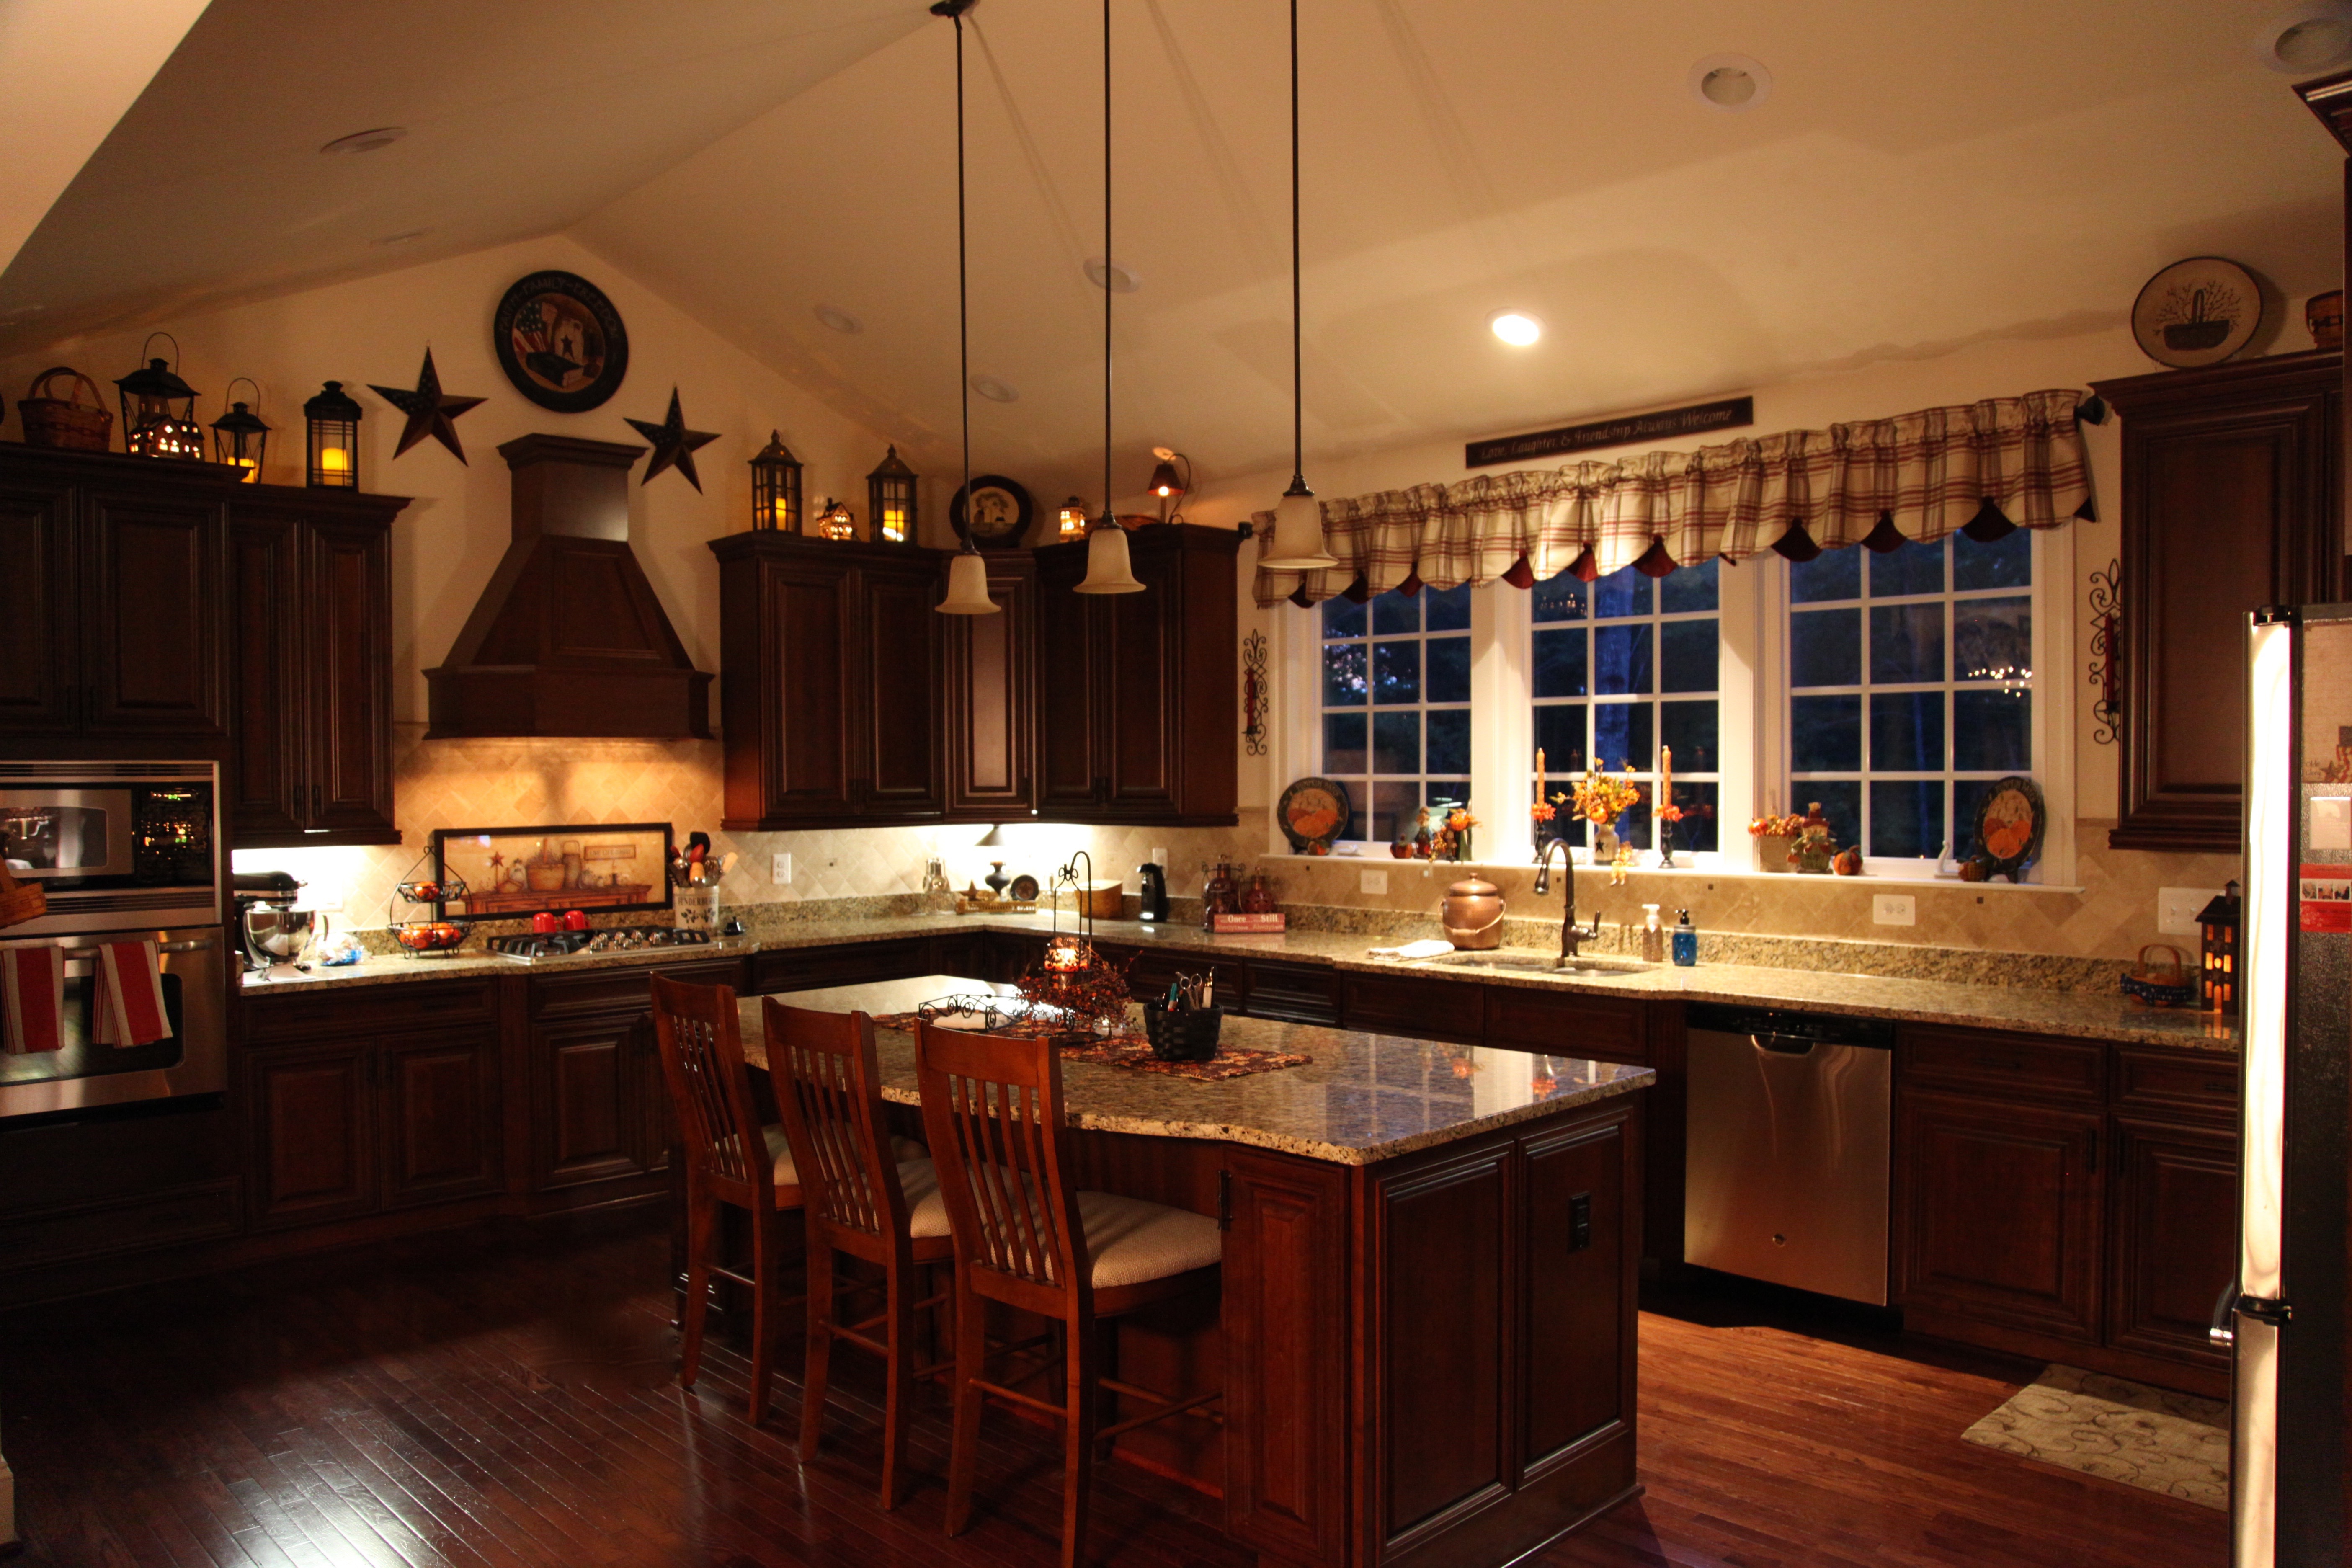
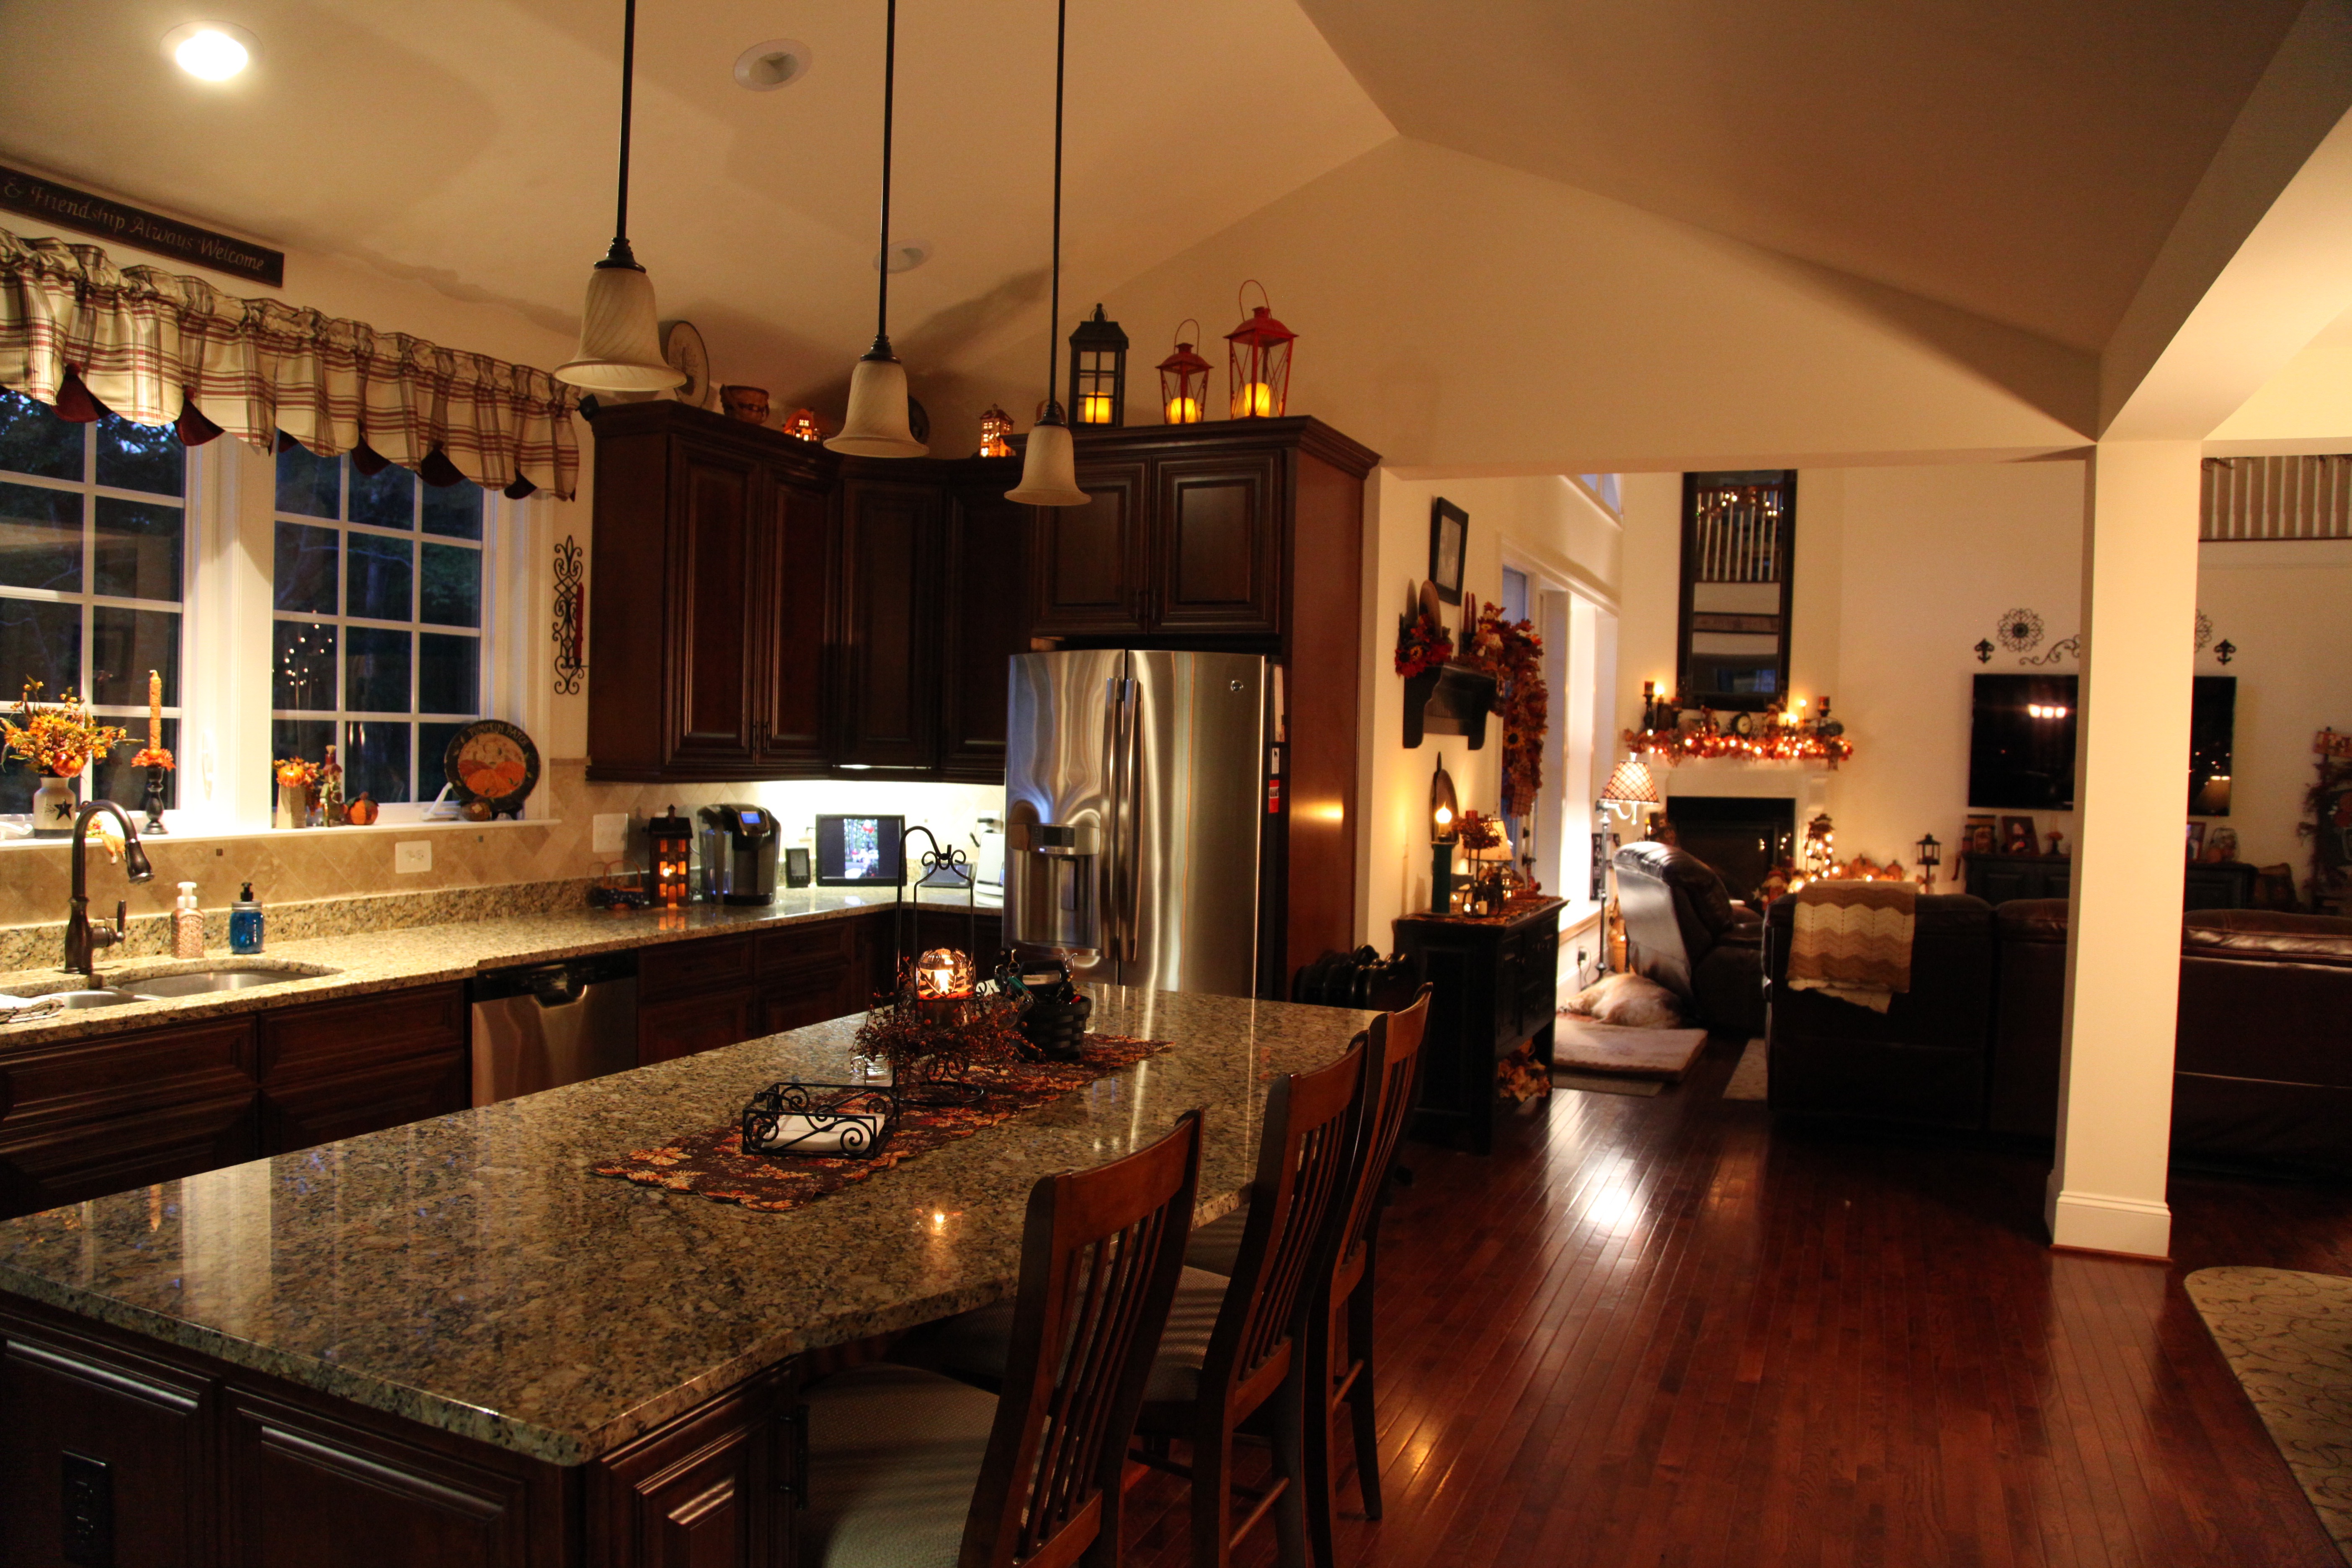
And if you go to the doorway that leads into the kitchen’s eating area and turn around, this is what you see:

IMG_8778

As you enter the kitchen eating area, to the right there is a little hallway with the powder room on one side and a coat closet on the other side and at the end of the hallway you enter the laundry room. You can see the hallway leading to the laundry room to the right in this picture.

IMG_8536

IMG_1816

I’ll talk about the powder room next.  The builder offered a pedestal sink and an oval mirror with a small light above it as their standard. We knew we wanted a little something more substantial in there as it is a pretty large powder room so after we moved in we decided to purchase a new vanity, wood framed mirror and light (from Home Depot).  Here are a couple of before and after shots for you:


IMG_9836
 IMG_1831
IMG_1833IMG_1831

IMG_8534

IMG_8546

Moving on into the kitchen’s eating area, as I mentioned above, if you stand at the mud room door and look through, you can see straight past the kitchen table into the family room. IMG_8534IMG_1815

We purchased a new kitchen table, chairs, and hutch for this home and I wanted to make sure that the kitchen table didn’t get ruined because invariably, things ‘land’ on that table and it was just a matter of time before something sharp landed and scratched that pretty top.  So we ordered a table pad with leaves included from Affordable Table Pads. This table has 2 leaves and we were able to purchase the table pad with two removable leaves (with magnets on the edges so that the leaves stay in place when on the table).  I love it!

IMG_1254

IMG_1255

Here is a view from the staircase of the mud room doorway on the left, the kitchen table and the kitchen .

IMG_1618

Next, let me tell you about the rugs that are under the kitchen table and on the family room floor. We went to a local carpet store (I’m sure that Lowe’s or Home Depot would do this sort of thing as well) and chose a piece of carpeting that we liked with a subtle pattern and neutral color and we had them cut them to a size (we provided them with the exact measurements) and they the bound the edges.  We found that this was much more cost effective than purchasing large rugs.  Admittedly, we had to choose pretty high-end carpeting because they told us that the binding holds up better on better quality carpeting, made sense to us, so we went with it.  We’ve lived in this house for 2 years now and our rugs still look brand new, I am so happy with how they turned out and the design we chose pairs beautifully with all seasons and with our decor. Here is a picture of the pattern and color we chose for the kitchen/family room rugs (the ones in the living and dining room are a slightly different color, I’ll show you those rugs when I write about those rooms):

0023110_LATROBE-EVANSBLACK-SHINE-212349720023776033_300

The family room is one of my very favorite rooms in the house.  I love the open staircase, that wall of windows, and the height of the ceiling.  The gas fireplace serves as a wonderful focal point, and I have so enjoyed decorating it up as the seasons pass.


1V4A2882
1V4A2884

And a couple of shots from the other direction:1V4A2887

1V4A2889

1V4A2890

One of my major concerns when moving into this home was how in the world was I going to make this home look and feel warm with decor. I have worked diligently to *not* over decorate, but, instead to subtly bring Southern warmth and charm into our home with a touch of country but without the cluttered look that I felt I had at my previous home.  I’d love to change the paint color to a warmer color (nothing too wild, just like a sandpiper color or possibly a little darker), but other than that, I’m extremely happy with how things have turned out. 🙂

My hope in showing you these pictures of our home as a whole will help you to ‘see’ my crafts, groupings, and arrangements and how I’ve tried to bring them all together to create one complete decor theme.  By keeping the basic color of the furniture, rugs, flooring, and walls in more of a neutral pallet,  it lends itself to being able to accent with color or design for whatever event or season for which you are decorating.

Until next time, y’all take good care! ❤

**In crafting there are no mistakes just unique creations**

The Kitchen

Hi Y’all!

What better place to start my home tour posts than the kitchen, it is definitely the heart of our home and my very favorite room in our house.  In fact, this kitchen is one of the major reasons why we built this model. We did throw quite a bit of extra money into the kitchen, we upgraded the cabinets, the countertops, the faucet, the appliances, the hood was extra, and we added more recessed lighting (because it has a cathedral ceiling in there and the lighting provided from the builder was not gonna cut it).  The hardwood floors were also an upgrade.

Let’s go through our chosen materials and finishes:

The cabinets are KraftMaid, the uppers are 42″ high, and the color is called “Autumn Blush”.  The cabinet doors and drawers are all “full coverage” meaning it would be next to impossible to open them if they didn’t have handles on them. All of the doors and drawers are “soft close”, there is no way one can slam anything shut. 😉  All you need to do is push and the doors and drawers gently close softly.

IMG_0960

We chose to put a large crown molding around the tops of the cabinets, and a piece of molding around the bottom called a light rail. Those two pieces of molding really make those cabinets pop!

IMG_1227
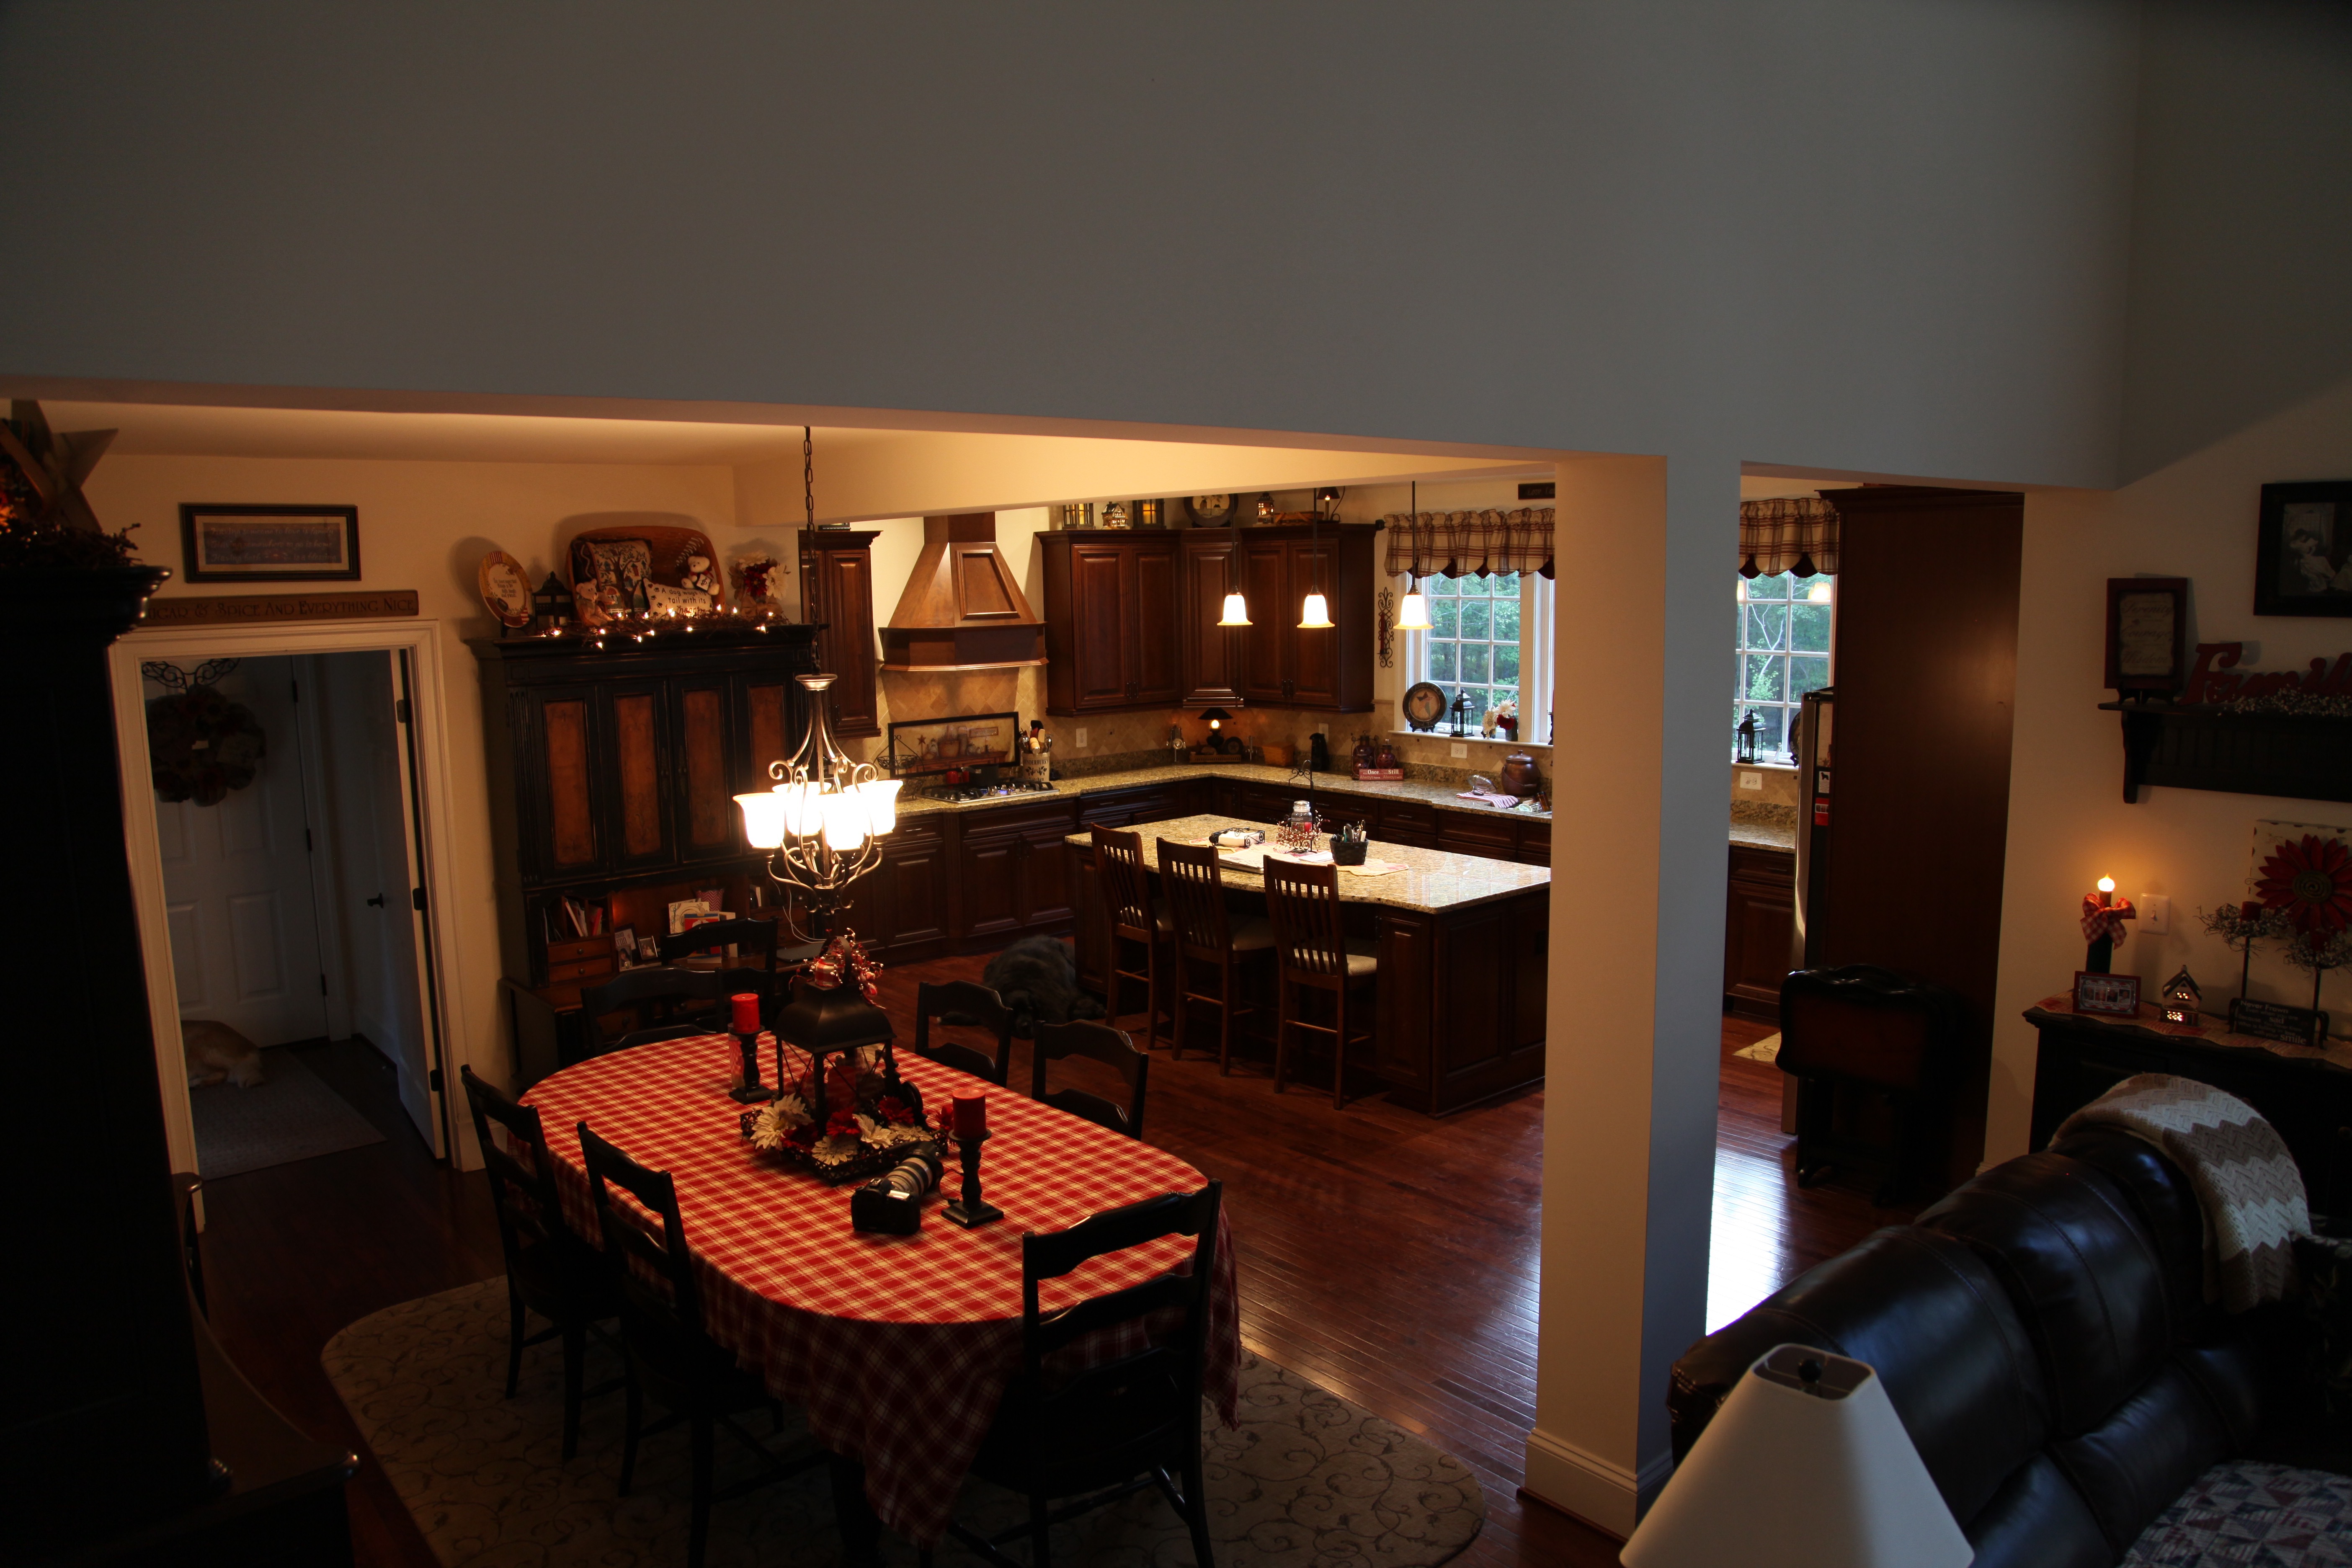
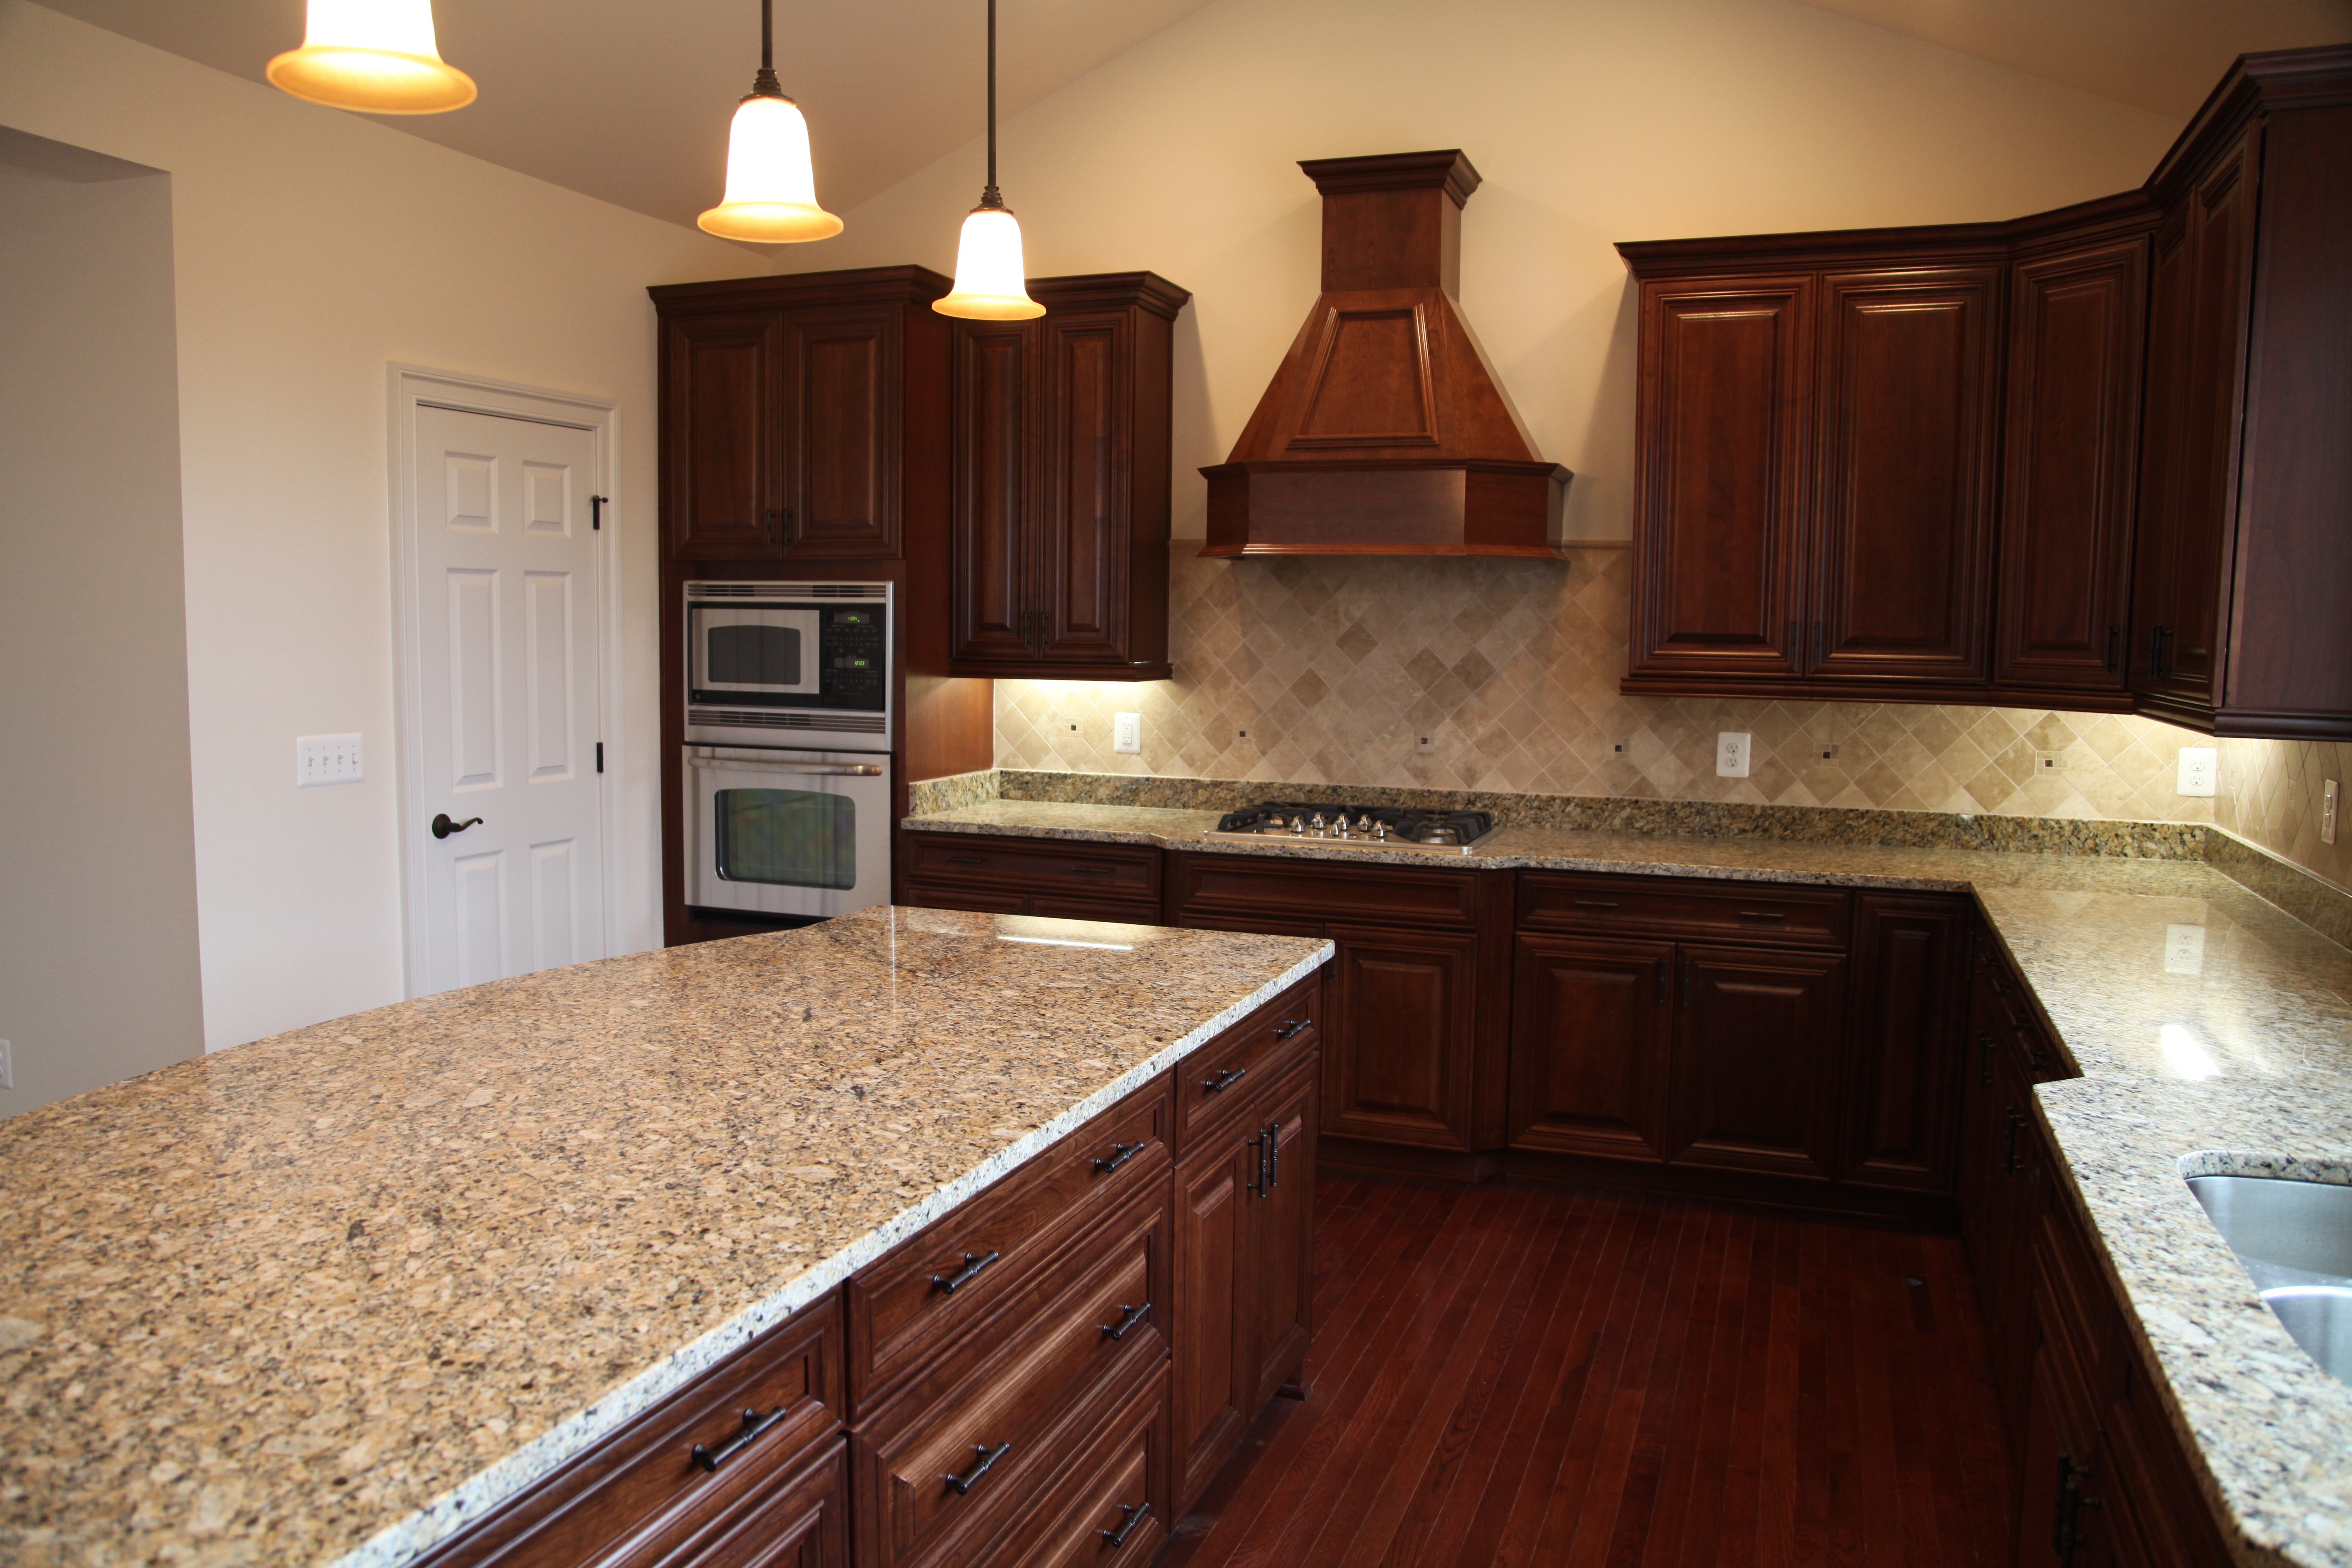
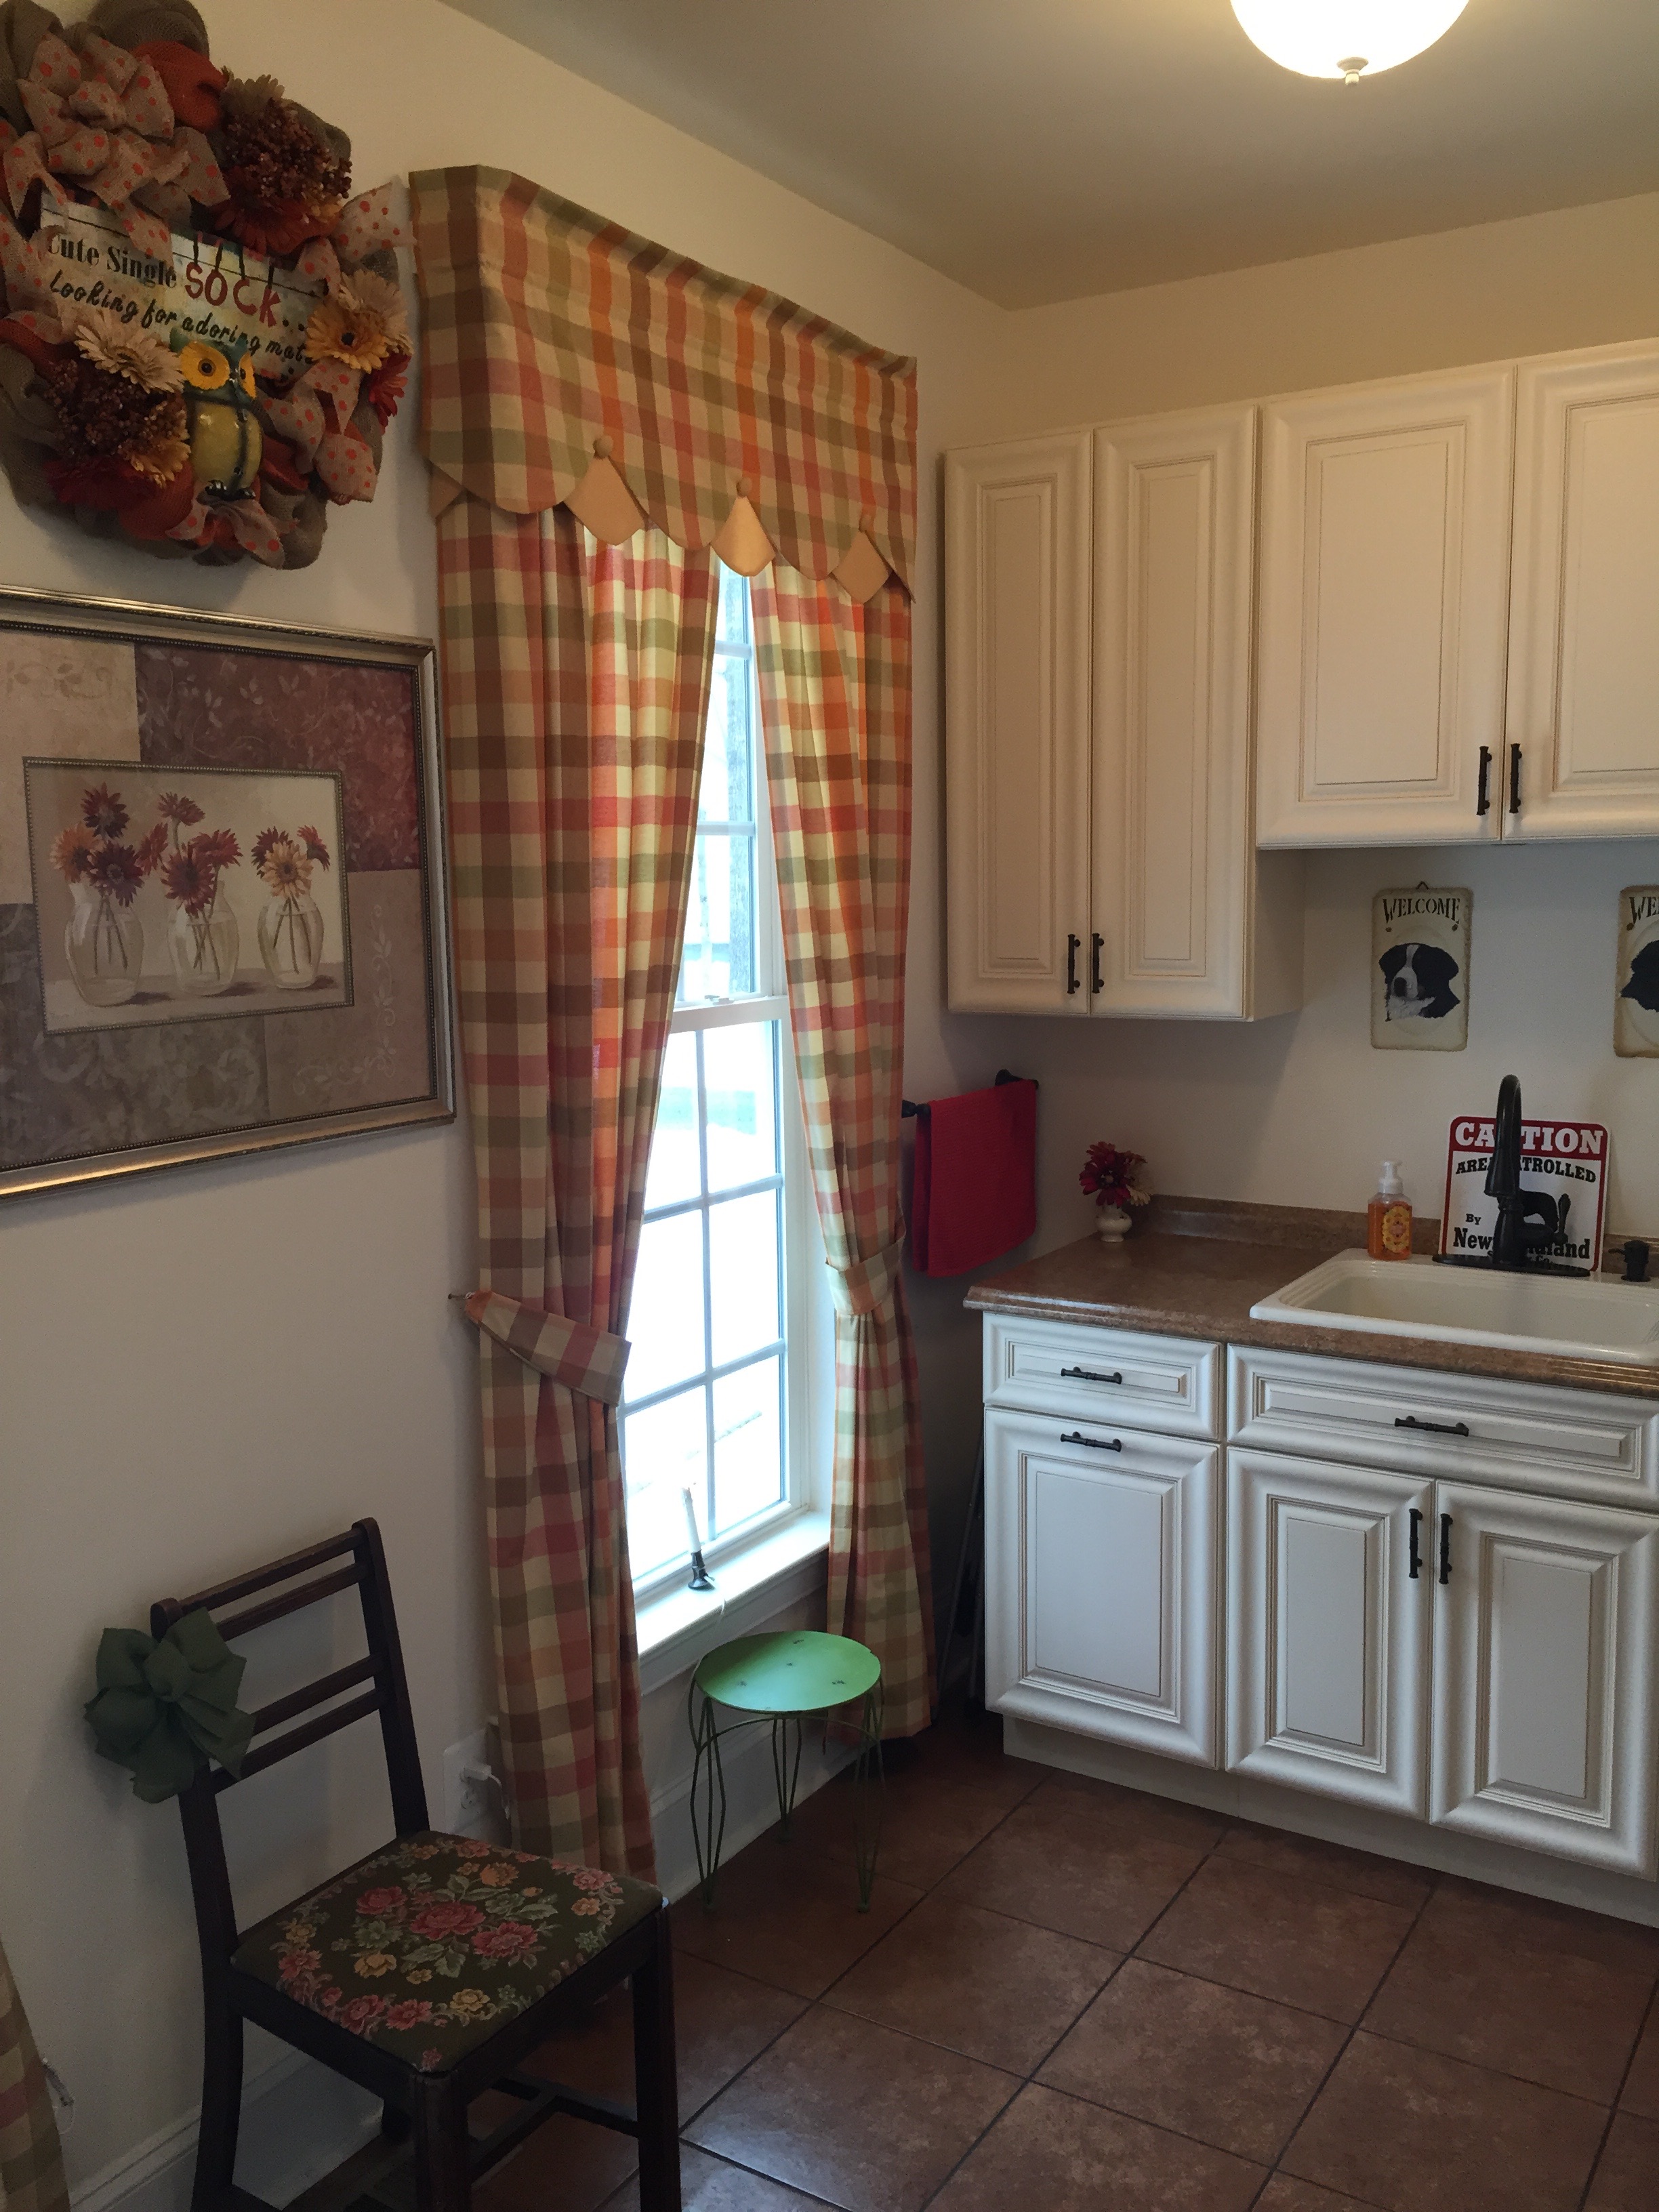
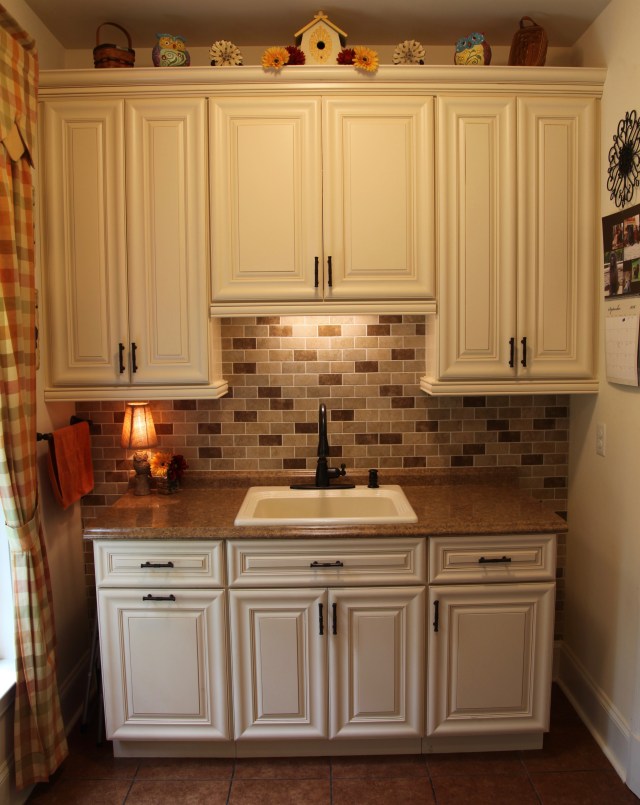
Here is the under cabinet lighting, I’m thinking that eventually we will change it out for more ambient lighting. But, it is fine for now, in fact, the flouresent lights aren’t as harsh as I thought they might be.

IMG_2025

My hubby is quite handy and is a pretty savvy online shopper; he saved us a ton of money with those door pulls.  The cabinet company was going to charge us $25 a piece installed, yes, I said *a piece* for each one of those door pulls. Complete highway robbery in my humble opinion! Yes, they are quite pretty and nice and heavy and they were including the labor for installation in that cost, but $25 a piece? Ridiculous!  My hubby found them online for $7 a piece and purchased enough of them for every door and drawer. Now, I’ve seen in other homes where folks choose a knob for uppers and a pull for lowers, or vice versa.  We chose these pulls for all doors and drawers and I love how they look.   AND **bonus** we didn’t have to pay an installation fee, my hubby made jigs and drilled the holes and installed every single door and drawer pull, 60 in all–better him than me…goodness knows I would not trust myself to drill holes in those pretty cabinets!

IMG_3169One spiffy upgrade that we chose was a trashcan cabinet.  In our other home, I used to keep a trashcan under the sink, I’m not one who enjoys seeing a trashcan sitting out on the floor, so even though we had a small kitchen in our previous home, part of the under the sink space was utilized for a trashcan. So this is a real luxury for me.

Now for the counter top and backsplash choices, to say we struggled with these choices is an understatement.  I wanted to keep the kitchen’s color pallet in a more classic hue.  Adding splashes of color via paint and decor is always a better option in my opinion. So we chose earth tones.  The counter top’s granite is called “Santa Cecelia Gold” and the backsplash is a travertine tile in beige tones. I feel that these colors paired beautifully with one another and also contrasted nicely with the hardwood and cabinet colors. I was glad these choices were finally made; I cannot tell you how many sleepless nights I had while making these decisions. I know how expensive it is to redecorate a kitchen and I didn’t want to have to do that…well, really…ever, so these choices were some of the most important that we made. 🙂

IMG_1410 IMG_1409

The island! I love the island! It has a pretty curved bump-out on one side where three chairs sit utilized by many people as they keep us company while we cook or while I craft. 🙂  It has tons of storage space underneath of it as well. It is 8′ long and 4′ wide at the widest point.  We use this island for tons of things, but, mostly, it is my creative hub. 🙂  I make all of my crafts on this island..of course many other uses are just as important, like setting dinner out, or setting up a buffet for larger gatherings.  It is awesome and I cannot say enough good things about it. 🙂

IMG_2029 IMG_1994

IMG_5822 IMG_5835

IMG_1813

The triple windows along the back wall are another one of my favorite features, I did an entire blog post here showing you how I change the window decor out as the Seasons change.

IMG_9158

There is also a walk-in pantry that holds anything and everything including our wireless router and printer.

I composed a Blog post that describes how I came up with the decor that is arranged on top of the cabinets. Here is a link to that post.

IMG_1820 IMG_1819

I cannot express to y’all enough how much I adore our kitchen, and again, I feel so humbly blessed that we are able to enjoy it from now on, this is definitely the last house we will ever have and we waited for a long time to build exactly what our vision was for our retirement years. 🙂

IMG_1618IMG_1616

Until the next time, y’all take good care! ❤

**In crafting there are no mistakes just unique creations**