Simple Scrumptious Spaghetti Sauce

My hubby texted me this morning and asked me to make spaghetti for dinner this evening.  I hadn’t made spaghetti in literally years because, well, we just don’t eat like that now-a-days. This was going to be a big spurge for us. 🙂  This is one of my oldest and dearest “tried and true” recipes…truly nothing too special, but it always and consistently tastes great. 🙂 Of course, I didn’t have the ingredients that I needed, so off to the store I zipped so that I could make us a special (but simple) little dinner.  Here are the ingredients I use to make my spaghetti sauce, it is nothing too complicated.  I always let this cook for quite a while in the crock pot, oh yes, the house does smell really good while this is bubbling away. 🙂
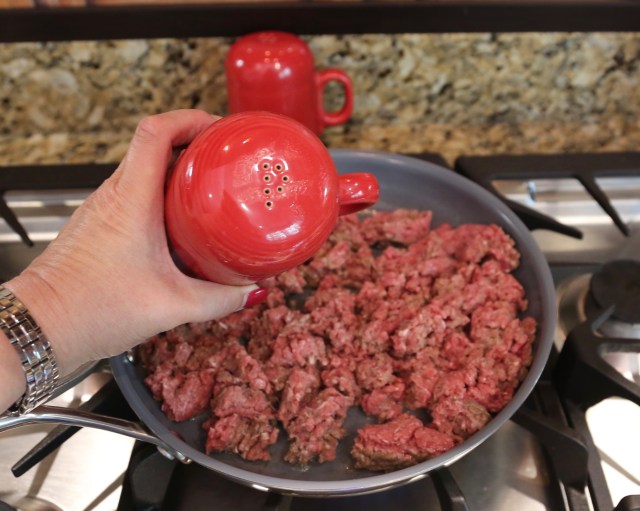
  • 1 lb. ground beef
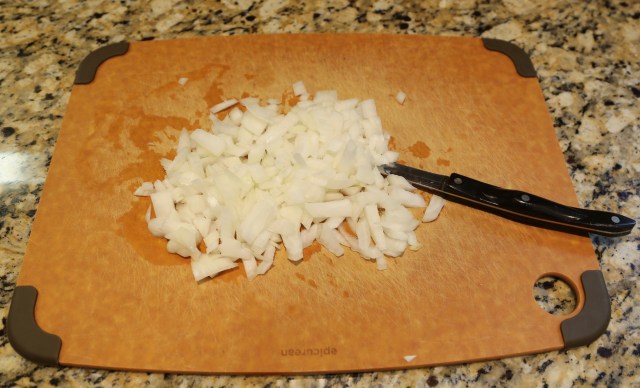
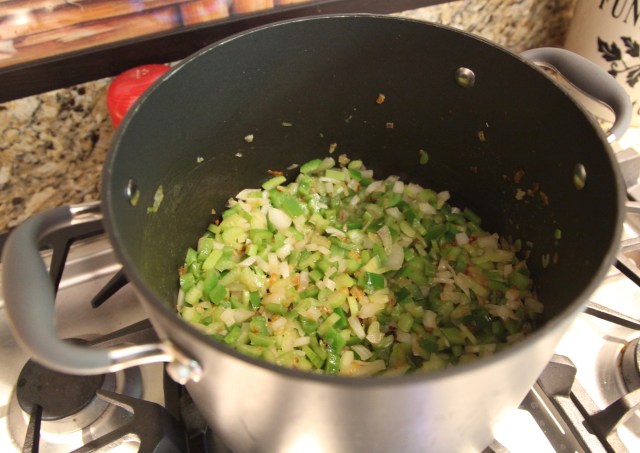
  • 1 medium onion (diced)
  • 1 large 28oz. can diced tomatoes
  • 2 15oz. cans tomato sauce
  • 1 sm. can tomato paste
  • 1 package of McCormick’s spaghetti sauce (Italian-Style, flavored with mushrooms)
  • 1 1/2 t basil
  • 1 1/2 t oregano
  • 2 t garlic powder (in lieu of 2 cloves of fresh garlic minced because I neglected to buy any while at the store…go me…erg…)
  • 2 t sugar – or more if you like your sauce sweeter
  • Salt & Pepper to taste
  • 1 Box of Spaghetti
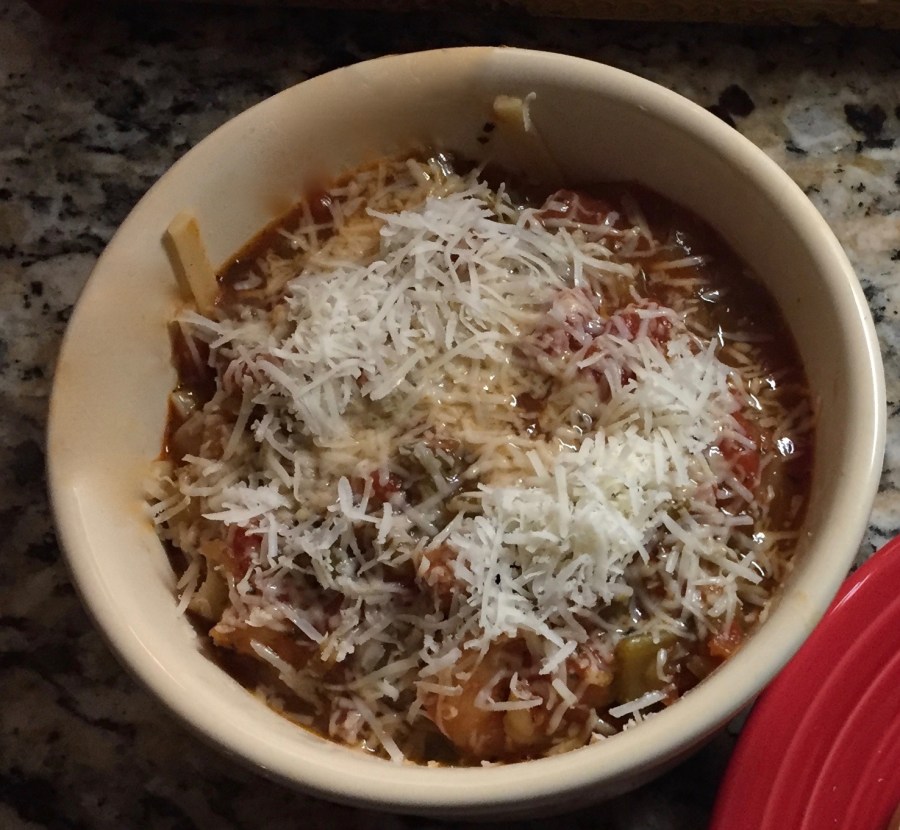
  • Fresh Parmesan (for sprinkling on top when served)

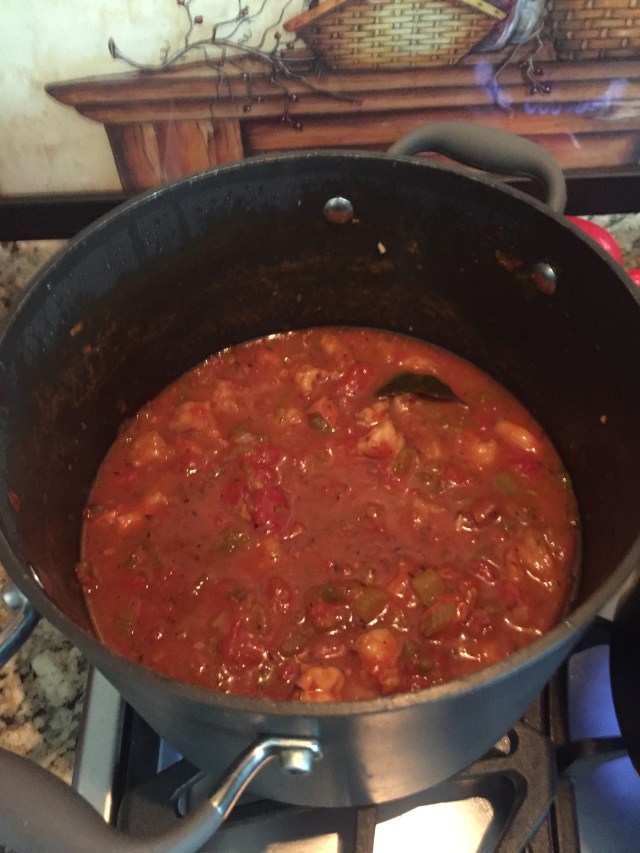
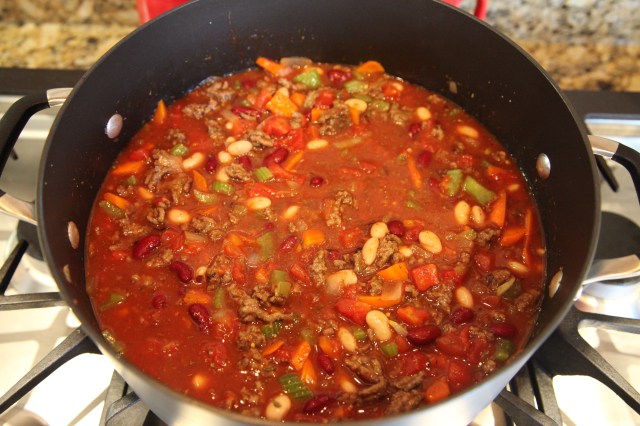
Brown ground beef & onion together (and fresh garlic) along with salt and pepper to taste in fry pan. Drain grease off of the meat and pour into a crock pot.  Add remaining ingredients, stir, and cook for 2 hours on high, then turn to low and cook another couple of hours or until you are ready to eat.

1V4A56951V4A56971V4A56991V4A5702

In the meantime grate up your parmesan cheese and place it in the refrigerator…

1V4A57111V4A5716

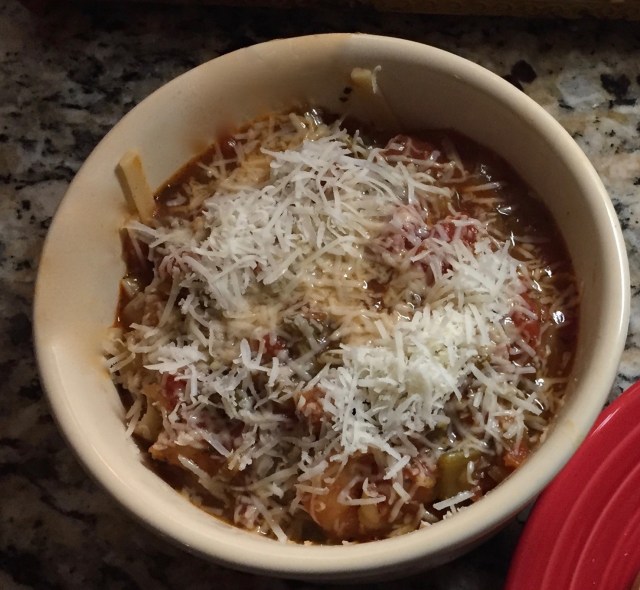
Cook up your spaghetti (or whatever your favorite pasta might be)

Sometimes I’ll serve a small salad with this, but, not this evening, we chose to simply have bread and butter (not my oh so buttery garlic bread–I’ll give you that recipe another day) but, just plain old bread and butter.

1V4A5718

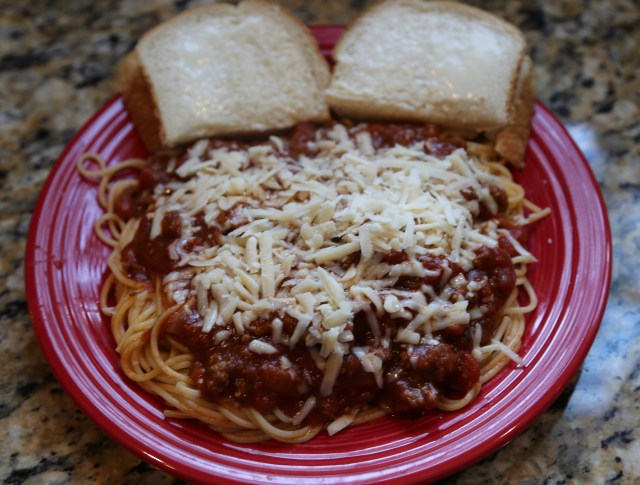
YUM–My mouth was watering!! It was wonderfully good if I do say so myself. 😉

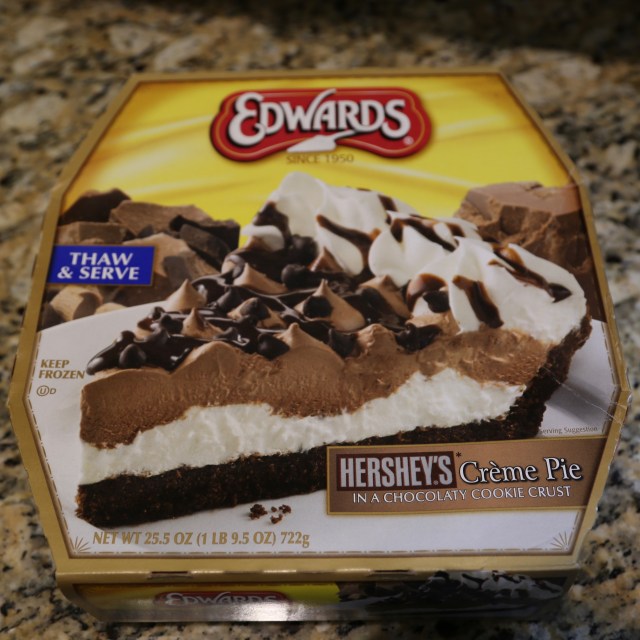
AND get this…I picked us up a decadent little chocolate pie for dessert…I can’t tell you the last time we had one of these either–it’s been a long, long time.

1V4A57051V4A5721

There are days that we just don’t want to watch what we eat, diet, starve <~~~ just kidding…;) We are both now sufficiently stuffed and quite satisfied. 🙂  I think we might just have leftovers tomorrow night!! 😉

Until next time, y’all take good care! ❤

~Arlynn ❤

Shrimp Creole: Hubby’s Famous Recipe

My hubby is a jack of all trades…no seriously, I’m pretty sure that there is nothing he cannot do, i.e. fix anything and everything, create, construct; yes, he is pretty amazing!  To add to his repertoire, he is a wonderful cook!  Yeah, I’m not bad myself, but, I’m known more for the every-day kind of recipe like pot roast or spaghetti or a nice pot of soup…you know, things that Moms around the world cook on a daily basis.  The hubby, well, he cooks much fancier dishes like his version of crab cakes (to die for!!), home-made chicken nuggets (maybe not so ‘fancy’, but, OH so good), along with many other things our family has greatly enjoyed through the years.  His Shrimp Creole is one of my very favorites, so he has graciously said that I can share his recipe with all of you.

Let’s start with the ingredients–And I’ll warn you, there are *many*:

  • Shrimp- Deveined – 4 pounds-26-30 count (if you purchase frozen)
  • Butter – 1 stick
  • Onions – 3- 3-1/2 Cups, finely chopped
  • Green Pepper – 2 – 1/2 Cups, finely chopped
  • Celery – 2-1/2 Cups, finely chopped
  • Andouille Sausage – 4 links chopped into bite-sized pieces
  •  1 T  Fresh Garlic – Minced
  • 1 t – White Pepper
  •  1/4 t – Black pepper
  • 1 t – Salt
  • 2 Bay Leaves
  • 2 t – Basil
  • 4 t – Thyme
  • 2- 28oz. cans of diced tomatoes – drained
  • 1 – 16oz. can of tomato sauce
  • *Shrimp Stock–3 cups

First, here is how the hubby makes his Shrimp stock–He will usually make up a bunch and then he freezes it in individual 3 cup portion sized containers–He used one of said frozen containers of stock to add to his latest batch of Creole (just this past weekend):

Shrimp Stock:  Remove heads and shells from the shrimp, set shrimp aside. Place heads and shells in large pot, add 4 cups of water or just enough to cover the shells and heads. Simmer for 20 minutes. Strain stock into other containers for use as an ingredient.

IMG_5177

Now, here is how he pulls all of these ingredients together to create one amazing tasting dish:

In large pot, brown 1 – 1/2 cup of chopped onions in 1/2 stick of butter.

After browning, add remaining 2 cups of onions & 1/2 stick of butter, green peppers and celery. Cook till softened (5 minutes on medium-high stirring occasionally). Put on medium heat and add salt, pepper, seasonings, garlic and one cup of stock. Mix well and cook on medium for about 3 minutes. Add drained diced tomatoes and simmer for 5 minutes. Add tomato sauce and remainder of stock and simmer for 15 minutes. Add shrimp and sausage and simmer, take off of the heat when shrimp is cooked through–do not overcook the shrimp.

IMG_5169

IMG_5171IMG_5168IMG_5181IMG_5183

IMG_5176

IMG_5180 (1)

My very favorite thing to serve this luscious Shrimp Creole over is Fettuccine & I shred up some fresh Parmesan cheese to sprinkle over the top…mmm, mmm good!! Y’all might enjoy using something different, like rice, or maybe angel hair pasta.  Regardless of what you pour the creole over, trust me, it will be delicious!

IMG_2342

IMG_2331

We usually will have a couple of slices of nice, fresh Italian bread and butter served along with our creole.  IMG_2331 (1)

This recipe is definitely one of my hubby’s tried and very true creations!!

I hope that y’all will give this one a try–Yes, there is a lot of prep work, but, the end result is well worth the time and effort it takes to prepare.

Until next time, y’all take good care! ❤

~Arlynn ❤


My Deviled Eggs

With the 4th of July weekend upon us, I thought this would be a good time to share my Deviled Eggs recipe with y’all.  This is one of my family’s most favorite “tried and true” recipes.  And I will tell you the truth, figuring out the measurements for the mayonnaise, mustard, & sweet relish was interesting for me because I honesty rarely measure anything when I make these yummy eggs. 🙂  This recipe, as several of my recipes have been, was passed down through the generations to me—This is an oldie but a goodie! 🙂

Here are the ingredients:

  • Dozen Eggs (a week or two old, they peel better)
  • 4-1/2 T – Mayonnaise (I use Hellmann’s)
  • 1-1/2 T – Gulden’s Mustard
  • 1-1/2 T –  Sweet Relish
  • 1/4 t – Black Pepper
  • Paprika (to sprinkle onto the top of the eggs)

Here is how I prepare my Deviled Eggs…

Boil eggs for 13 minutes:

IMG_5132

In the meantime, gather up a large bowl and put some ice water into it–I soak my cooked eggs in ice water for 5 minutes after they come off of the heat–this helps the eggs membranes to pull away from the shell.  My daughter Christin actually gave me this trick as she watched me struggle with peeling eggs one time, she researched and found this spiffy little trick.  It works like a charm. 🙂

IMG_5134


IMG_5140

I bought this wonderful Deviled Egg tray several years ago from Pampered Chef, they do not have this particular one any longer, but, instead they now sell this.

IMG_5135

It has an insert that keeps the eggs cool while they are sitting out on the counter…

IMG_5136

After all of the eggs are peeled, cut in half, the yolks are removed and put into a separate bowl, smash the yolks up and start adding your mayonnaise, mustard, relish, & pepper.  By the way, the measurements that I gave can be tweaked to your liking, you may like more or less of any one thing…those measurements depict how my family has always enjoyed them. **Note:  I do not add salt because the mayonnaise is salty enough all by itself.

IMG_5139IMG_5148IMG_5146IMG_5152IMG_5155IMG_5156

I’ve seen people pipe their egg yolk mixture into their eggs, and I have wanted to try that, but, haven’t gotten out to get myself a piping bag and tip..SO I just did it the old fashioned way and used a spoon to place said mixture.

IMG_5161

I promise you that this Paprika is brand new–Don’t you love how my hubby relabeled my tupperware container? lol I THINK we KNOW it is PAPRIKA! 😉 😉 😉  Anyway, the last step is to sprinkle paprika onto the eggs.

IMG_5143

IMG_5164

And that’s all there is to it! 🙂

IMG_5165

These are some very tasty Deviled Eggs, I promise you that. 🙂  They are now in my refrigerator waiting for our cookout to happen and then they will be devoured lickity split.

I hope everyone has a safe and wonderful July 4th weekend!

🇺🇸 GOD BLESS AMERICA!!! 🇺🇸

Until next time, y’all take good care!

~Arlynn ❤

Fruit Salad: Fresh and Canned Ingredients

We try to have a lot of family get-togethers, we are all scattered about, so it makes it difficult to get everyone together in one place.  But, last May, I hosted a Family Reunion here at our new home.  Click on that link to see what craft projects I did and how I changed my decor for that very special day (my theme was red and white gingham, gerber daisies, and mason jars).  ANYway, I had asked my family members to bring food to share, so my sweet cousin Donita walked in with her famous fruit salad!  OH my gosh, can I tell you something?  I’ve had a lot of fruit salad in my day, some okay, some so-so, and some downright bland, but Donita’s fruit salad was fabulous. 🙂  I gobbled a bowl of it down and had seconds, yes, indeed I did!

Here are Donnie and I on the day of our family reunion (I’m in the white blouse):

1V4A0697

Here is just *some* of the food that we enjoyed on that wonderful day–you can see Donita’s fruit salad at the far end of the island…

IMG_0402

Donita has shared her recipe with me and I am fixin’ to share it with you right now. 🙂  It is a mixture of fresh and canned ingredients…

This recipe makes a TON of fruit salad, I made some yesterday and have split it up, some will go to a Craft Day that I’m attending with my girlfriends. 🙂  If you were making this just for your family, I’d probably half the recipe, although, I eat it for breakfast, snacks, a side dish, and dessert, so if you’re like me, go for it and make the entire shebang! 😉

  • 3 large cans of Del Monte cubed peaches – with juice
  • 2 large cans of mandarin oranges – drain juice
  • 2 regular cans pineapple tidbits – drain juice
  • 2 containers fresh strawberries — cut in small pieces
  • 1 jar maraschino cherries – drain juice & cut in half
  • 1 ‘bunch’ of grapes – cut in half
  • 1 small basket of blueberries – rinse well – add just before serving
  • 2 bananas – not too ripe – add them just before serving
  • 4 Tablespoons of sugar

IMG_4407

*Note*:  I used 6 regular sized cans of cubed peaches as opposed to 3 large cans…they were on sale, plus they were out of the large cans…

The first thing that I did was to cut up the strawberries.  I added 3 tablespoons of sugar to them and let them macerate.

IMG_4424IMG_4426

Then I cut up the maraschino cherries…

IMG_4431

Then came the grapes…

img_0732

Okay, I was ready to assemble…I retrieved my HUGE red bowl (just about the biggest bowl that I own…haha) down out of my cabinet and I started pouring the fruit in…

Be sure to add the juice from the peaches into the bowl, but drain the juice from the pineapple tidbits and the mandarin oranges…

Add the strawberries (with the juice that adding the sugar produced) and the cherries and mix everything together well…

IMG_4434

Only add bananas when you are getting ready to serve…**Note** I didn’t not purchase blueberries this time around because they didn’t look too spiffy in the market…

IMG_4432

I packed some up and have it all ready to go to my Craft Day…

img_0734

And I had some for breakfast this morning with my hot tea…

IMG_0677

ALL is right with my world!!

I hope y’all enjoy this.  It is definitely one of my family’s tried and true recipes.

Until next time, y’all take good care! ❤

~Arlynn ❤

Pasta Fagioli

Back in September (2015) I went to visit my cousin Stacey and we had a fun “Cousin’s Craft Weekend” together with our other cousin Donita. 🙂

We took this selfie while we were together (I’m in the black blouse on the right, Stacey is in the middle, and Donita is in the black and white blouse on the left) :

1609597_10207391900306155_6058058579211430500_n

We had a wonderful weekend together and were quite productive.  Stacey contributed to my Blog and wrote two posts describing the Deco Mesh Halloween Ruffled Wreath

IMG_1955

*And* the matching Deco Mesh Halloween Garland that she created…

IMG_1971 *And* I wrote a post describing the Grapevine Fall Wreath that I created while we were all together.

IMG_1934

In addition, Stacey cooked us some wonderful meals! One of my favorites was her Pasta Fagioli, (it tastes just like Olive Garden’s recipe…she found a great “copycat” recipe here).  It has become one of my very favorite comfort foods and it turns out perfectly every single time I make it.  I’ve only been making this since last September, but, it has definitely become one of my “tried and true” recipes. 🙂  **Thanks Stacey** ❤

I made it this evening for dinner, here is the recipe:

Ingredients:

  • 1 pound ground beef
  • 1 small onion, diced (1 cup)
  • 1 large carrot, julienned (1 cup)
  • 3 stalks celery, chopped (1 cup)
  • 2 cloves garlic, minced
  • 2 14.5-ounce can diced tomatoes
  • 1 15-ounce can red kidney beans (with liquid)
  • 1 15-ounce can great northern beans (with liquid)
  • 1 15-ounce can tomato sauce
  • 1 12-ounce can v-8 juice
  • 1 tablespoon white vinegar
  • 1-1/2 teaspoons salt
  • 1 teaspoon oregano
  • 1 teaspoon basil
  • 1/2 teaspoon pepper
  • 1/2 teaspoon thyme
  • 1/2 pound (1/2 pkg.) ditalini pasta

IMG_4379

Instructions:

  • Brown the ground beef in a large saucepan over medium heat.  Drain off most of the  fat
  • Add onion, carrots, celery, and garlic, sauté for 10 minutes
  • Add remaining ingredients, except pasta, and simmer 1 hour
  • Stacey and I both cook the pasta separately and let folks add as much as they’d like to their soup (we feel as if the pasta gets too soft if added to the soup while it is cooking)
  • Serve with Italian bread sticks, bread, or rolls–whatever is your favorite

IMG_4403

IMG_4401

My goodness gracious, it is so good!  And it isn’t all that fattening btw…about 400 calories for a bowl.  I do not feel guilty at all for enjoying one bowl of this luscious soup…yum!

IMG_4405 (1)

Until next time, y’all take good care! ❤

~Arlynn


Crab Souffle

I hope that everyone had a VERY Merry Christmas filled with family, friends, good food, and whatever else your hearts desired. ❤

My hubby and I hosted our family’s Christmas Eve celebration this year. My cousin Stacey and I do a round robin sort of thing each year. 🙂  This recipe for crab souffle has been in our family for decades and is definitely one of my tried and true dishes. One of my parents very good friends shared this recipe with us back in the 70’s and we’ve made it every year since on Christmas Eve.  I’ve also made it for other special occasions throughout the rest of the year.  I am going to make two batches of it next year, we barely had enough for everyone at our Christmas Eve feast this year; there is it in the picture below in the red baking dish. 🙂 IMG_3240 
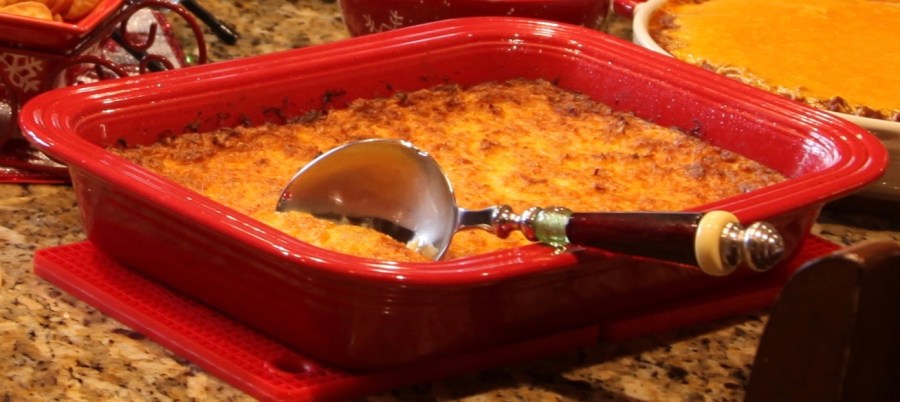
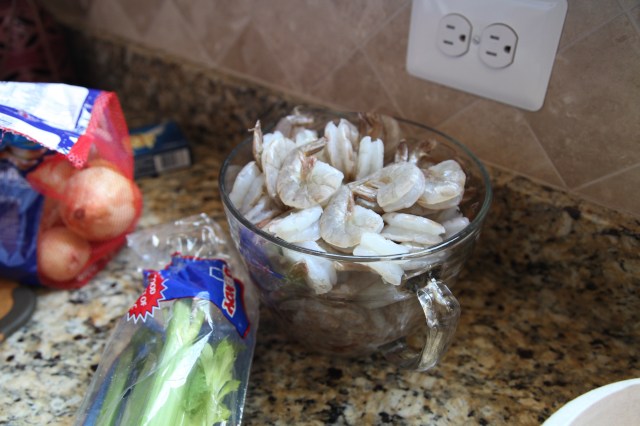
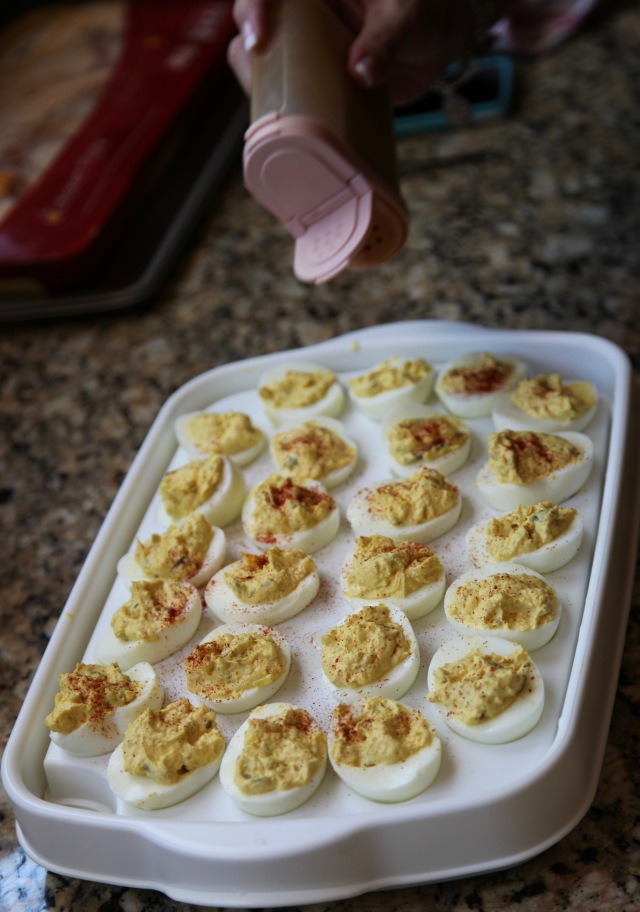
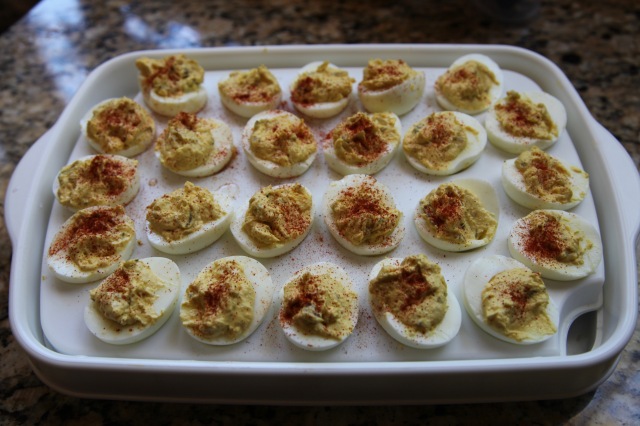
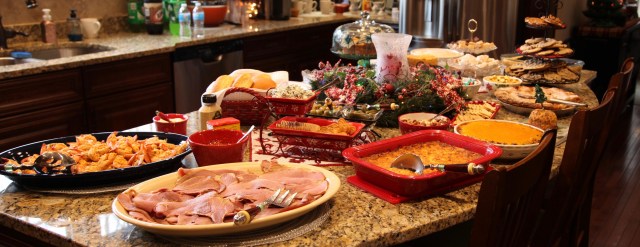
Historically, we’ve always prepared an eclectic array of food on Christmas Eve; we never stick to one theme and we look forward to the same dishes every single year because everyone has their favorite thing and they know that it will be in ‘attendance’ at the buffet.  Crab Souffle is the one dish that everyone loves, without fail, it is always completely gone after our meal is complete.  This year’s menu just like every year’s menu included Shrimp (6 pounds!! Stacey brought that…wow!), Ham, Crab Souffle, Lil’ Smokies wrapped in bacon and topped with brown sugar, Stacey brings those (among many other things..), Meatballs (of some variety, we all have our own recipe so whomever is hosting usually make them–my daughter made them this year with a new recipe that she found using grape jelly and barbecue sauce–so so good). IMG_3243
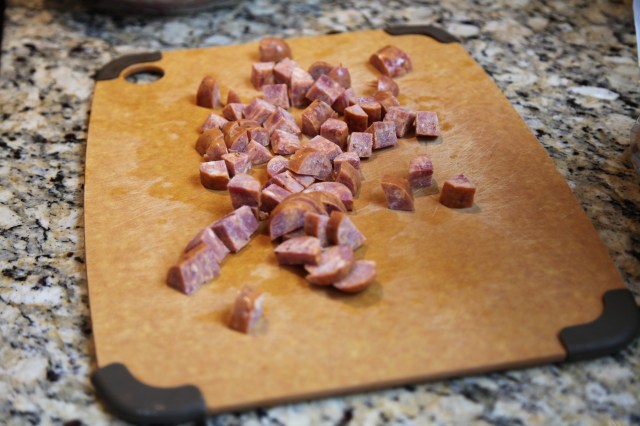
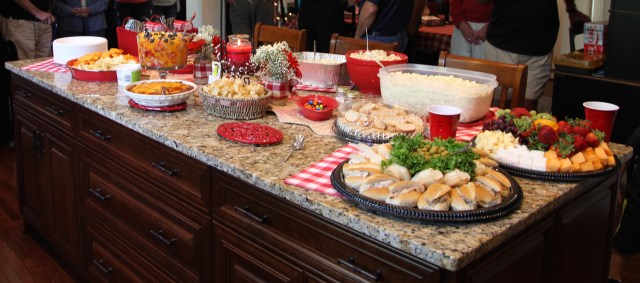
In addition, Buffalo Chicken Dip (a newer addition to the buffet, my other daughter added this to the buffet and it has now become a staple, everyone loves it),  Taco Dip, Spinach Dip, Pasta Salad, Nuts, Gerkins, Olives, and whatever else we have.  My dear friend Karen gave me a lovely cheese ball and summer sausage (and an adorable Santa cutting board with Christmas tree cheese spreader), so I set that out as well.  IMG_3242On the sweet side of things we had, 2 different types of Peanut Butter Fudge & Peanut Butter PieBlueberry Topped CheesecakeFresh Apple Cake, <~~~ links to my blogs with those recipes. We also made several varieties of cookies, and a few other goodies.

SO, all that said, here is the recipe for

Crab Souffle

1V4A3283

Soak Overnight:  6 Slices of buttered bread and 2 Cups of Milk 

  • 3 eggs
  • 1 teaspoon salt
  • 1 teaspoon dry mustard
  • 1 lb. grated sharp cheese
  • 16oz. can of crabmeat (from the seafood section)

Beat 3 eggs well, add to the buttered bread mixture.  Add 1 teaspoon of salt and 1 teaspoon of dry mustard.  Mix until smooth.  Blend in the grated cheese; gently fold in the crabmeat.

 Bake in uncovered greased 13” x 9” baking dish at 300 degrees for 1 ¾ hours.

**Note:  I always use that Italian bread, real butter, & Kraft “sharp cheddar” cheese (the recipe calls for ‘sharp’ cheese).  Also, I found this Chicken of the Sea premium crab meat this year and I didn’t have to ‘pick’ the shells out of it, there were none to find!!  Wow, was that ever a nice little bonus. 🙂 **

1V4A3280

I hope that this becomes a favorite of yours too and that your family enjoys it as much as mine does! 🙂

Version 2

Until next time, y’all take good care! ❤

~Arlynn ❤

Blueberry Topped Baked Cheesecake (Made With a Duncan Hines Yellow Cake Mix)

I have been making this cheesecake for 25+ years, Mooney (my grandma) found this recipe on the side of a Duncan Hines cake mix box back in the 70’s and it was passed down from her to my mom, then on to me, through the family and beyond. Everyone who makes it raves about it, it always turns out beautifully and it tastes so good, it is always moist, and it is a favorite in this household. I make it for our Christmas Eve family gathering every year and many other times throughout the year. We don’t just save this one for Christmas, it’s way too good. 🙂

I just found out something very interesting about this recipe about 2 weeks ago.  As I mentioned in another Blog entry, my Aunt Carole just sent me Mooney’s old Better Homes cookbook, copyright 1942…

IMG_9616

Well, stuck inside of this cookbook (along with many other old recipes) was the original recipe for this cheesecake; Mooney had cut it off of the side of a Duncan Hines Yellow cake mix box…Wow!! What a find!! 🙂

IMG_9825
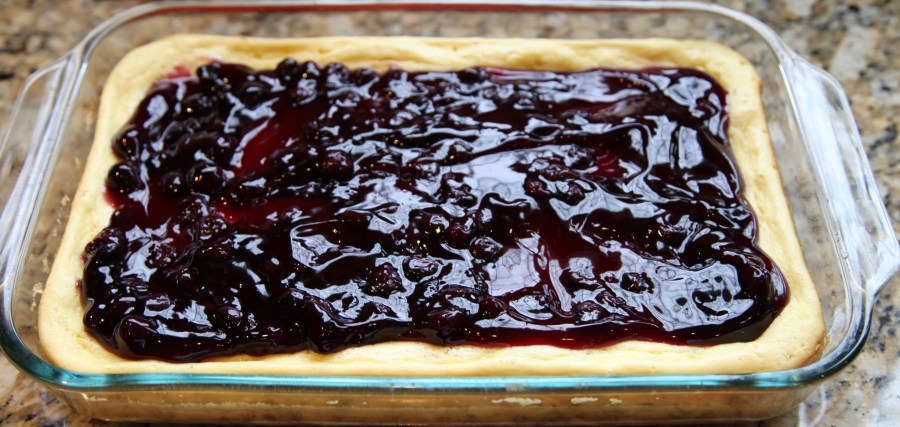
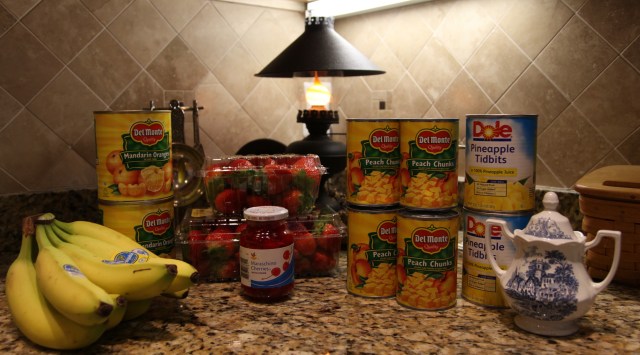
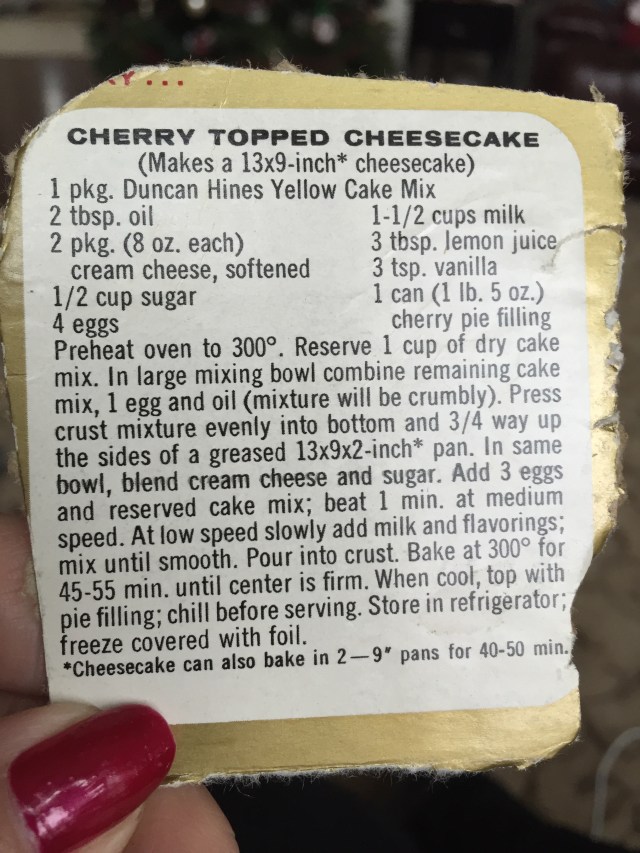
As the recipe has been passed along in the family, we’ve done a little tweaking.  For one thing, I didn’t realize that there was supposed to be lemon juice in the cake…haha…and we’ve always topped it with blueberries (I do switch the topping out if I know that someone likes another fruit topping better than blueberries).

Here is the recipe that I’ve always used:

IMG_3172

Anyway, the recipe is pretty self explanatory, but I’ll quickly show you the steps that I take to make this dreamy cake…

IMG_3171

The first thing to do is to grease a 13×9 baking dish…

IMG_3174 
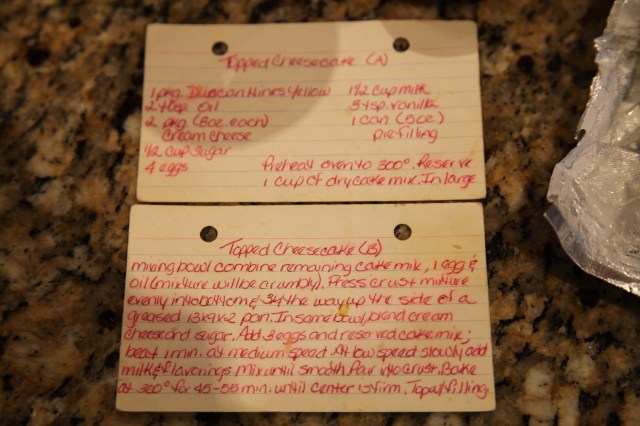
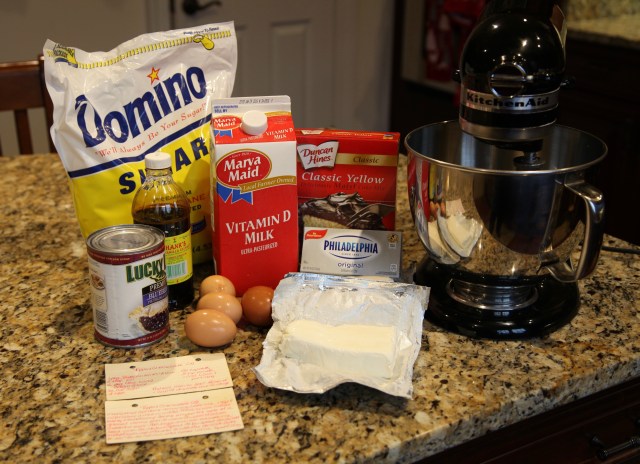
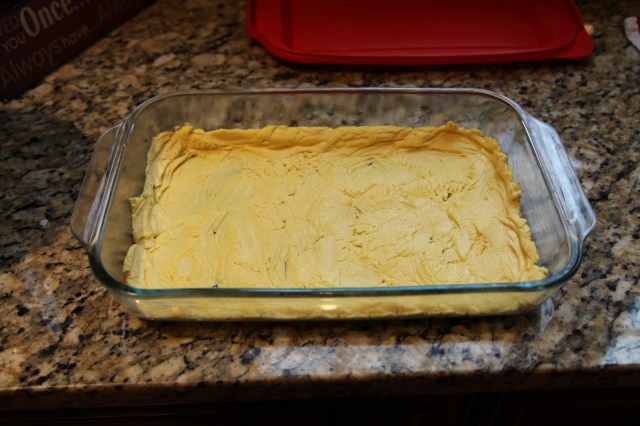
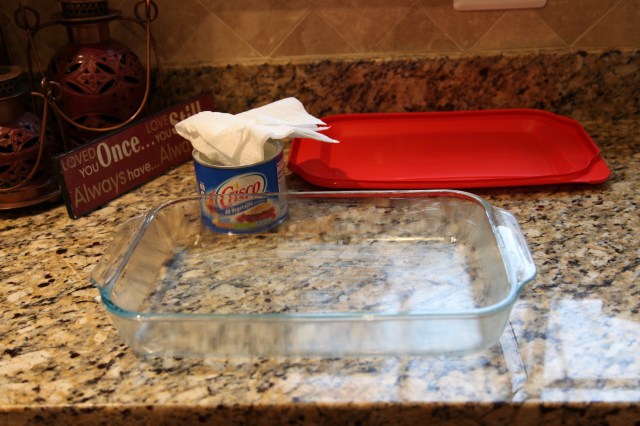
Then reserve 1 cup of the cake mix (it will be used in the body of the cake), and pour the rest of the cake mix into the mixing bowl–to it add 1 egg and 2 Tablespoons of oil.  When mixed, it will make a soft crust, carefully spread it into the bottom of the baking dish.

IMG_3175

IMG_3181

After that, mix all other ingredients together making the milk and vanilla the last two ingredients added.  When everything is blended, the batter will seem “thin” but have no fear, it will turn out to be light and fluffy and yummy!

IMG_3197

Place it into the pre-heated 300 degree oven; I cooked mine for exactly 48 minutes…

IMG_3199

And it came out perfectly fluffy and wonderful…I waited until it was completely cool and then I poured the blueberry pie filling all over the top.

IMG_3200

You can be sure that I *will* be having a piece (or two) of this luscious cake in a few days. 🙂 This is definitely one of my tried and true recipes, one that seems and is so easy to make and *bonus*, it tastes great every single time.

Until next time, may peace be your gift at Christmas and throughout the rest of the year. ❤

~Arlynn ❤


Caramel Corn

It is that time of the year when I cook so many things that I wouldn’t dare cook at other times of the year because I am *always* watching my weight and when I see all of these goodies sitting around, well, my good eating habits get lost. 😉  I especially have a hard time keeping my fingers out of this yummy Caramel Corn, it really is quite tasty, but my family loves it and so I make it. 🙂

A friend of mine gave me a version of this recipe years ago and I’ve literally doubled the amount of butter and brown sugar for my recipe.  In my humble opinion it is much better with more caramel on that popcorn! 😉 I’ve tweaked and tweaked this recipe and I’ve now gotten it just the way we like it.

Here is my recipe:

  • 6 Bags of Microwave Popcorn (I use Pop Secret Movie Theatre butter)
  • 1/8 t salt
  • 1/8 t baking soda
  • 4 sticks butter 
  • 4 cups brown sugar

Pop all popcorn and pour into a large roasting pan(s) being careful to make sure that all un-popped kernels are discarded.

Mix all but popcorn in large saucepan.  Cook over medium heat until sugar is dissolved.  Pour over popcorn in roasting pan.  Mix well.  Bake at 250 degrees for 40 minutes, stirring after 20 minutes.

**I use real butter and cook and stir the brown sugar, butter, salt, and baking soda mixture until the oily butter that rises to the top blends in with the sugar.  It only takes a couple of minutes after it starts bubbling**

IMG_3139

~Note: I hadn’t gotten the baking soda or salt out yet hence the reason why they are not in the picture above…

The first thing I did was to get the brown sugar, butter, salt, and soda into a large 8 quart saucepan onto the stove and turned the burner onto medium…

IMG_3142

Then I turned the oven on and started popping the popcorn…

IMG_3140

It is very important that you allow the brown sugar and butter to blend together completely, you’ll have the very best result.  Trust me, I am not a very patient person, so I must force myself to wait until they are nicely combined. 🙂

IMG_3146

After the butter, brown sugar, soda, and salt mixture is well blended, remove it from the heat and immediately pour it onto the popcorn.  I needed that red roasting pan and another medium sized roasting pan to hold all of the popcorn.  I split the caramel mixture between both pans of popcorn and I took a little extra time to really stir the popcorn after I poured the caramel mixture all over it.  I then placed both roasters in the pre-heated 250 degree oven.

IMG_3147

I took them out after 20 minutes and stirred them well and stuck them back in the oven for 20 more minutes.

I purchased this very large clear jar at Walmart several years ago specifically to hold all of the Caramel Corn.

IMG_3143

I allowed the Caramel Corn to cool completely before I filled my big jar to the brim…

IMG_3150

And I even had enough left over to make up a few favor bags…

IMG_3159

I have to say that this is absolutely one of my tried and true recipes as I’ve definitely tried and tweaked and tried and tweaked this recipe until it is truly what I am showing to y’all.  We all love this, I hope that y’all do too!! 🙂

Until next time, may the spirit of Christmas bring joy to your heart and happiness to your home. ❤

~Arlynn