
Hi Everyone!
It’s time for Part 3 of our Cousins Craft Weekend series; I’m excited to let Stacey take the proverbial wheel and explain how she brought this beauty to fruition!

Click this link to Part 1 Deco Mesh Halloween Wreath to see how Stacey describes how she made that wonderful Halloween wreath that matches this garland. 🙂
Take it away Stacey!
“Yes!! You have now made a pretty sweet wreath! You NEED a garland to match!
You will first need to measure your doorframe and decide how long you want your garland. Once that’s decided, you will also need two large rolls of deco mesh (21” x 30’) and one roll of the small. (5.5” x 45’) You will need pipe cleaners to attach everything and all the decorations and ribbons to finish it off and jazz it up. (Again, I cannot stress enough. Stick with your theme!!)
I didn’t want to go back out to buy a pre made form or wire to create my own. So, down to my honey pot (the basement storage) to see what I could re-purpose.
AH HA!! I found some old pre lit Christmas garland that would do nicely!! I used two 9’ lengths of garland. If you don’t have any old garland lying around, it can be found in any mega store. This is just the plain old indoor/outdoor kind. I think the garland with the long twisty branches would be awesome as well. Then you could use the branches themselves as the twist ties and save needing pipe cleaners!
First thing I did was lay my garland out and plug it in. Man, how mad would I have been to finish this thing and the lights not work! Grrrr!! Thankfully, everything was in working order and I could get down to business!

I got out my trusty tape measure again, and laid it down beside the garland.
Every foot or so, I would lay a pipe cleaner under the garland. These are the points at which I will attach my deco mesh.
I then went back and gave each one a little twist so that they would stay attached to the garland and not lose their spacing.


I found the easiest way to attach the deco mesh was to unroll it and leave a bit at the end to make a little tail. This helped me to see just how much mesh I had to play with. I used the entire roll. My mind is a strange place, so I started in the middle and worked out from there. Once I had one color attached, I moved onto the next color. 

My sweet lab Piper is a crafter as well. She was checking to see if I had enough volume in my “Poofs” and that they were secured properly.

Piper seemed satisfied that I was doing a good job. She suggested I use a back and forth pattern with the two colors. I agreed!! Good idea pup!

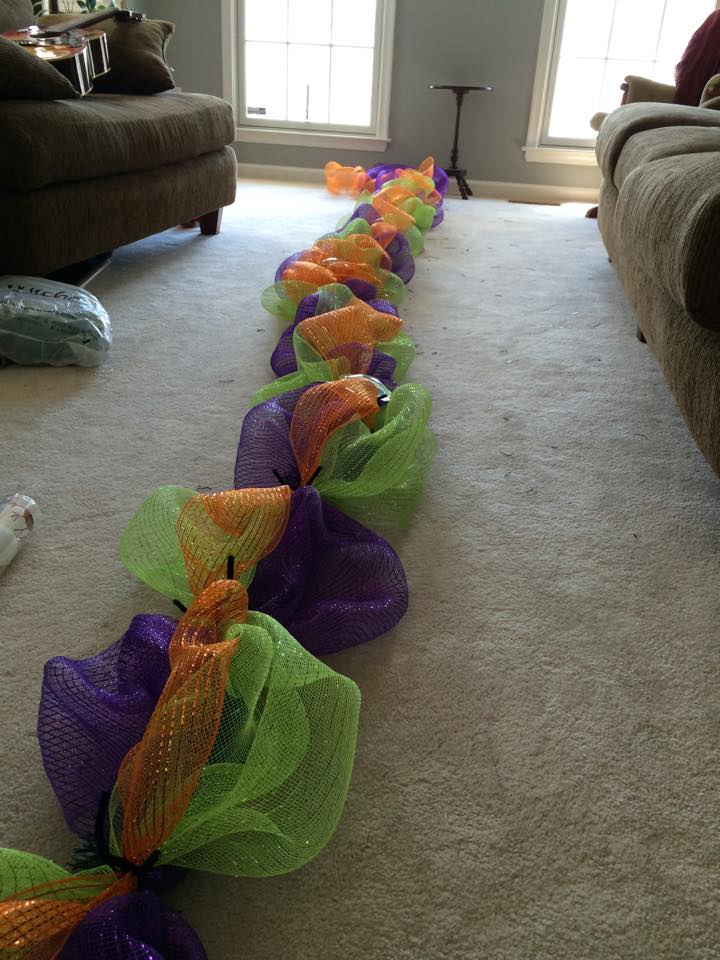
Here it is with both colors attached with the back and forth pattern and then below, you see it all stretched out!

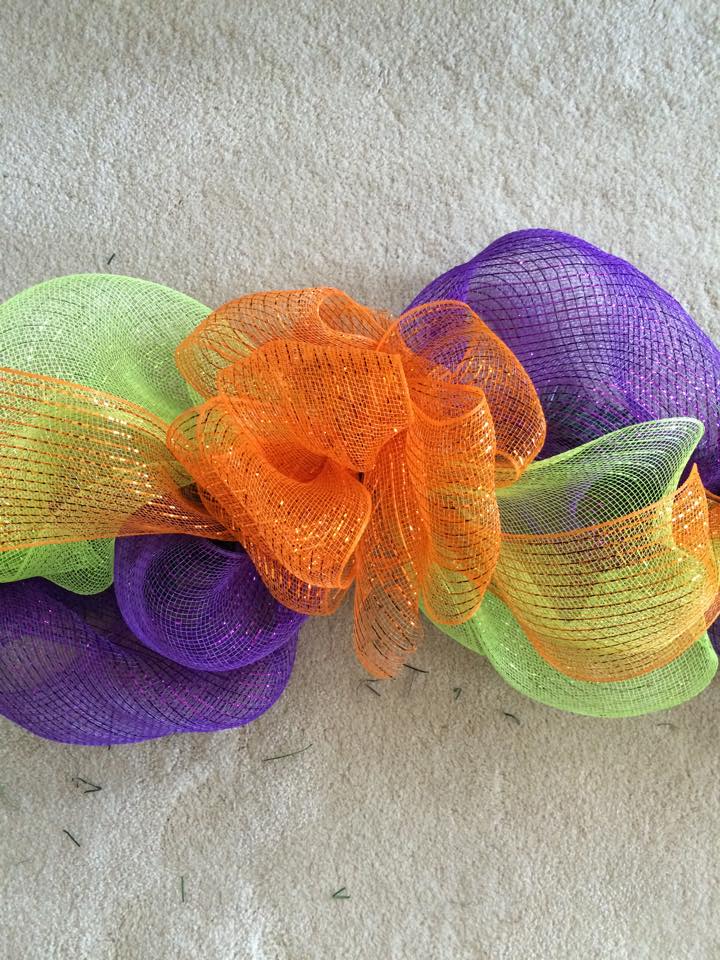
Lastly, I took the small roll of orange deco mesh and went straight down the middle. Making poofs and attaching where I felt it looked best. I had just a smidge of the orange left, so I made a little bow and found the center of my garland and attached it there.
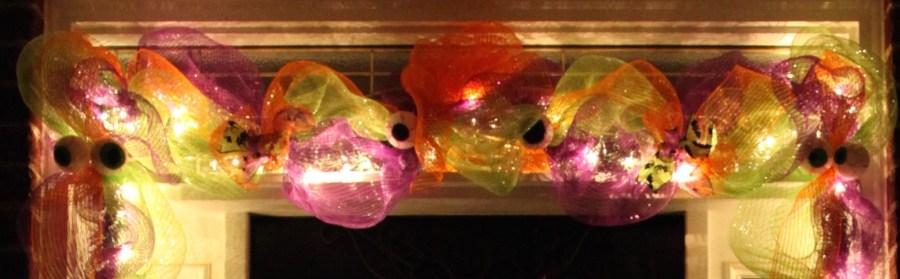
Here is the garland with all three colors and ready for ribbons and eye balls!!
And here is the garland all lit up, wow!

I decided on Monster Eye Balls as a theme. I had found some sweet little eyeball ornaments for the wreath I made. Unfortunately, they were not going to be large enough for the garland. I purchased some plain white Styrofoam balls and painted them like giant eyes! I used my red Sharpie marker to make the creepy veining.


Now it was time to take the finished garland out to the front porch and figure out how to hang it up, I decided to use command strip hooks, very large ones. But, first I laid it down in the yard to find the center point. As I mentioned above, that is how my brain works, I find the center and work out in either direction from there. As you can see, Piper arrived to assist me in my endeavors…she is quite the helper! 😉
Once the center was found, it was time to get it hung up and ready to receive those monster eyes and other ribbon accents.

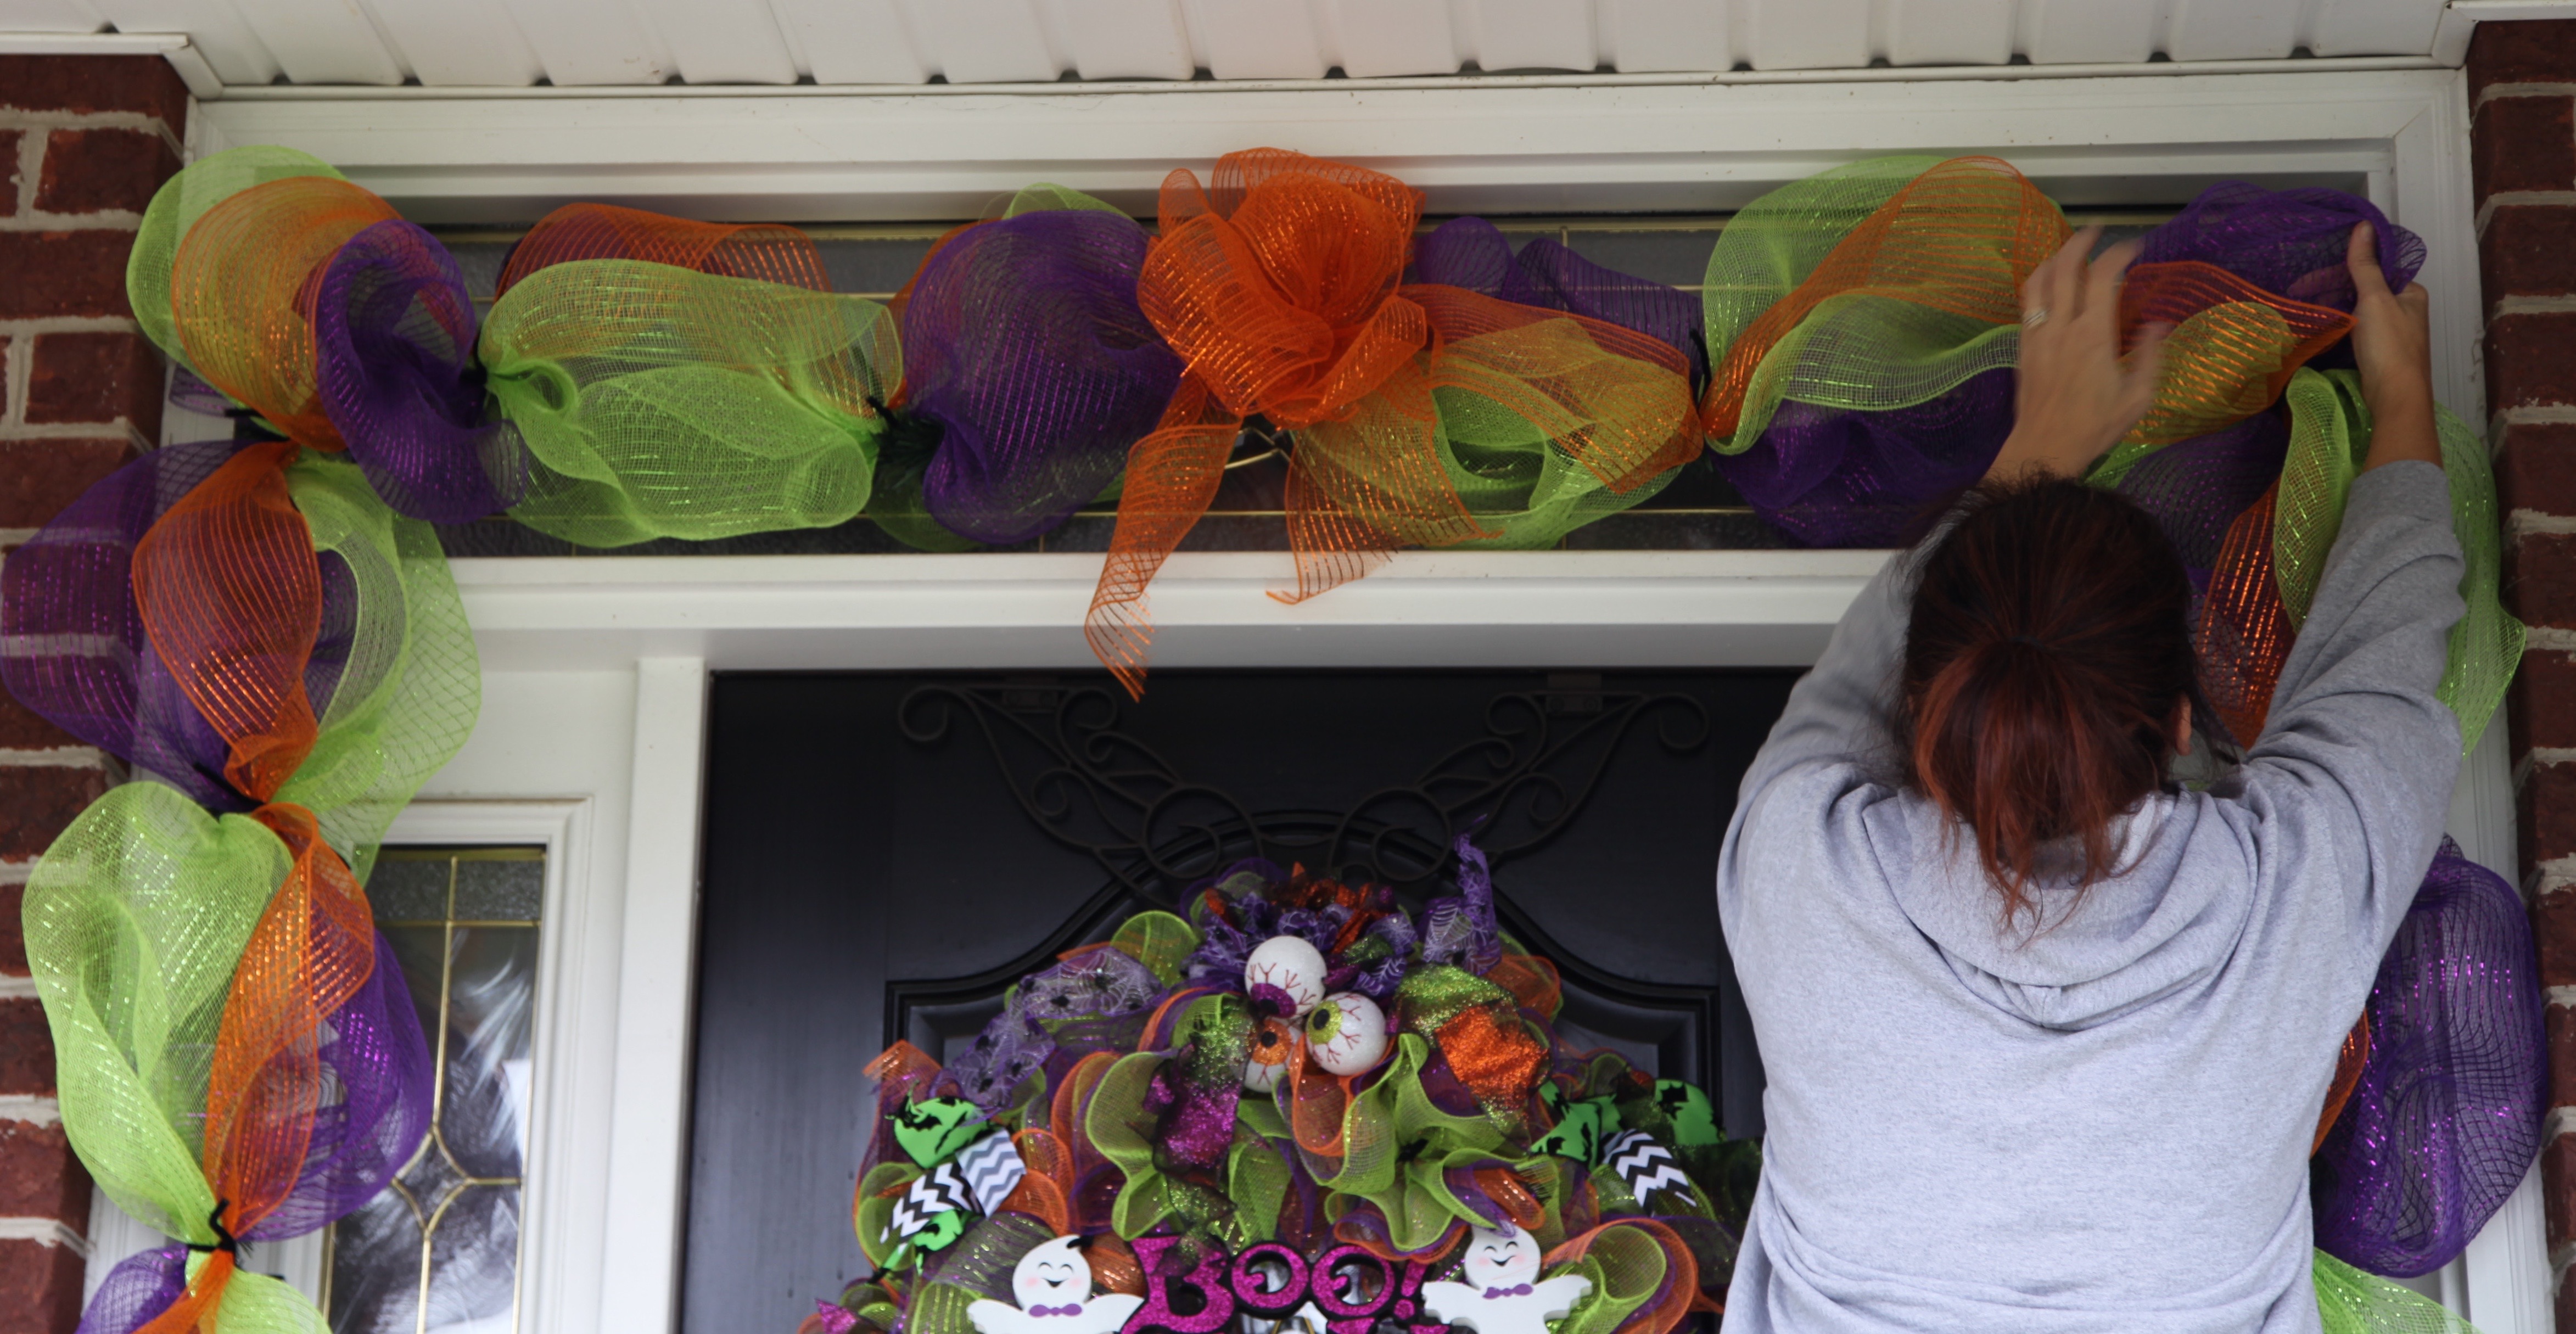

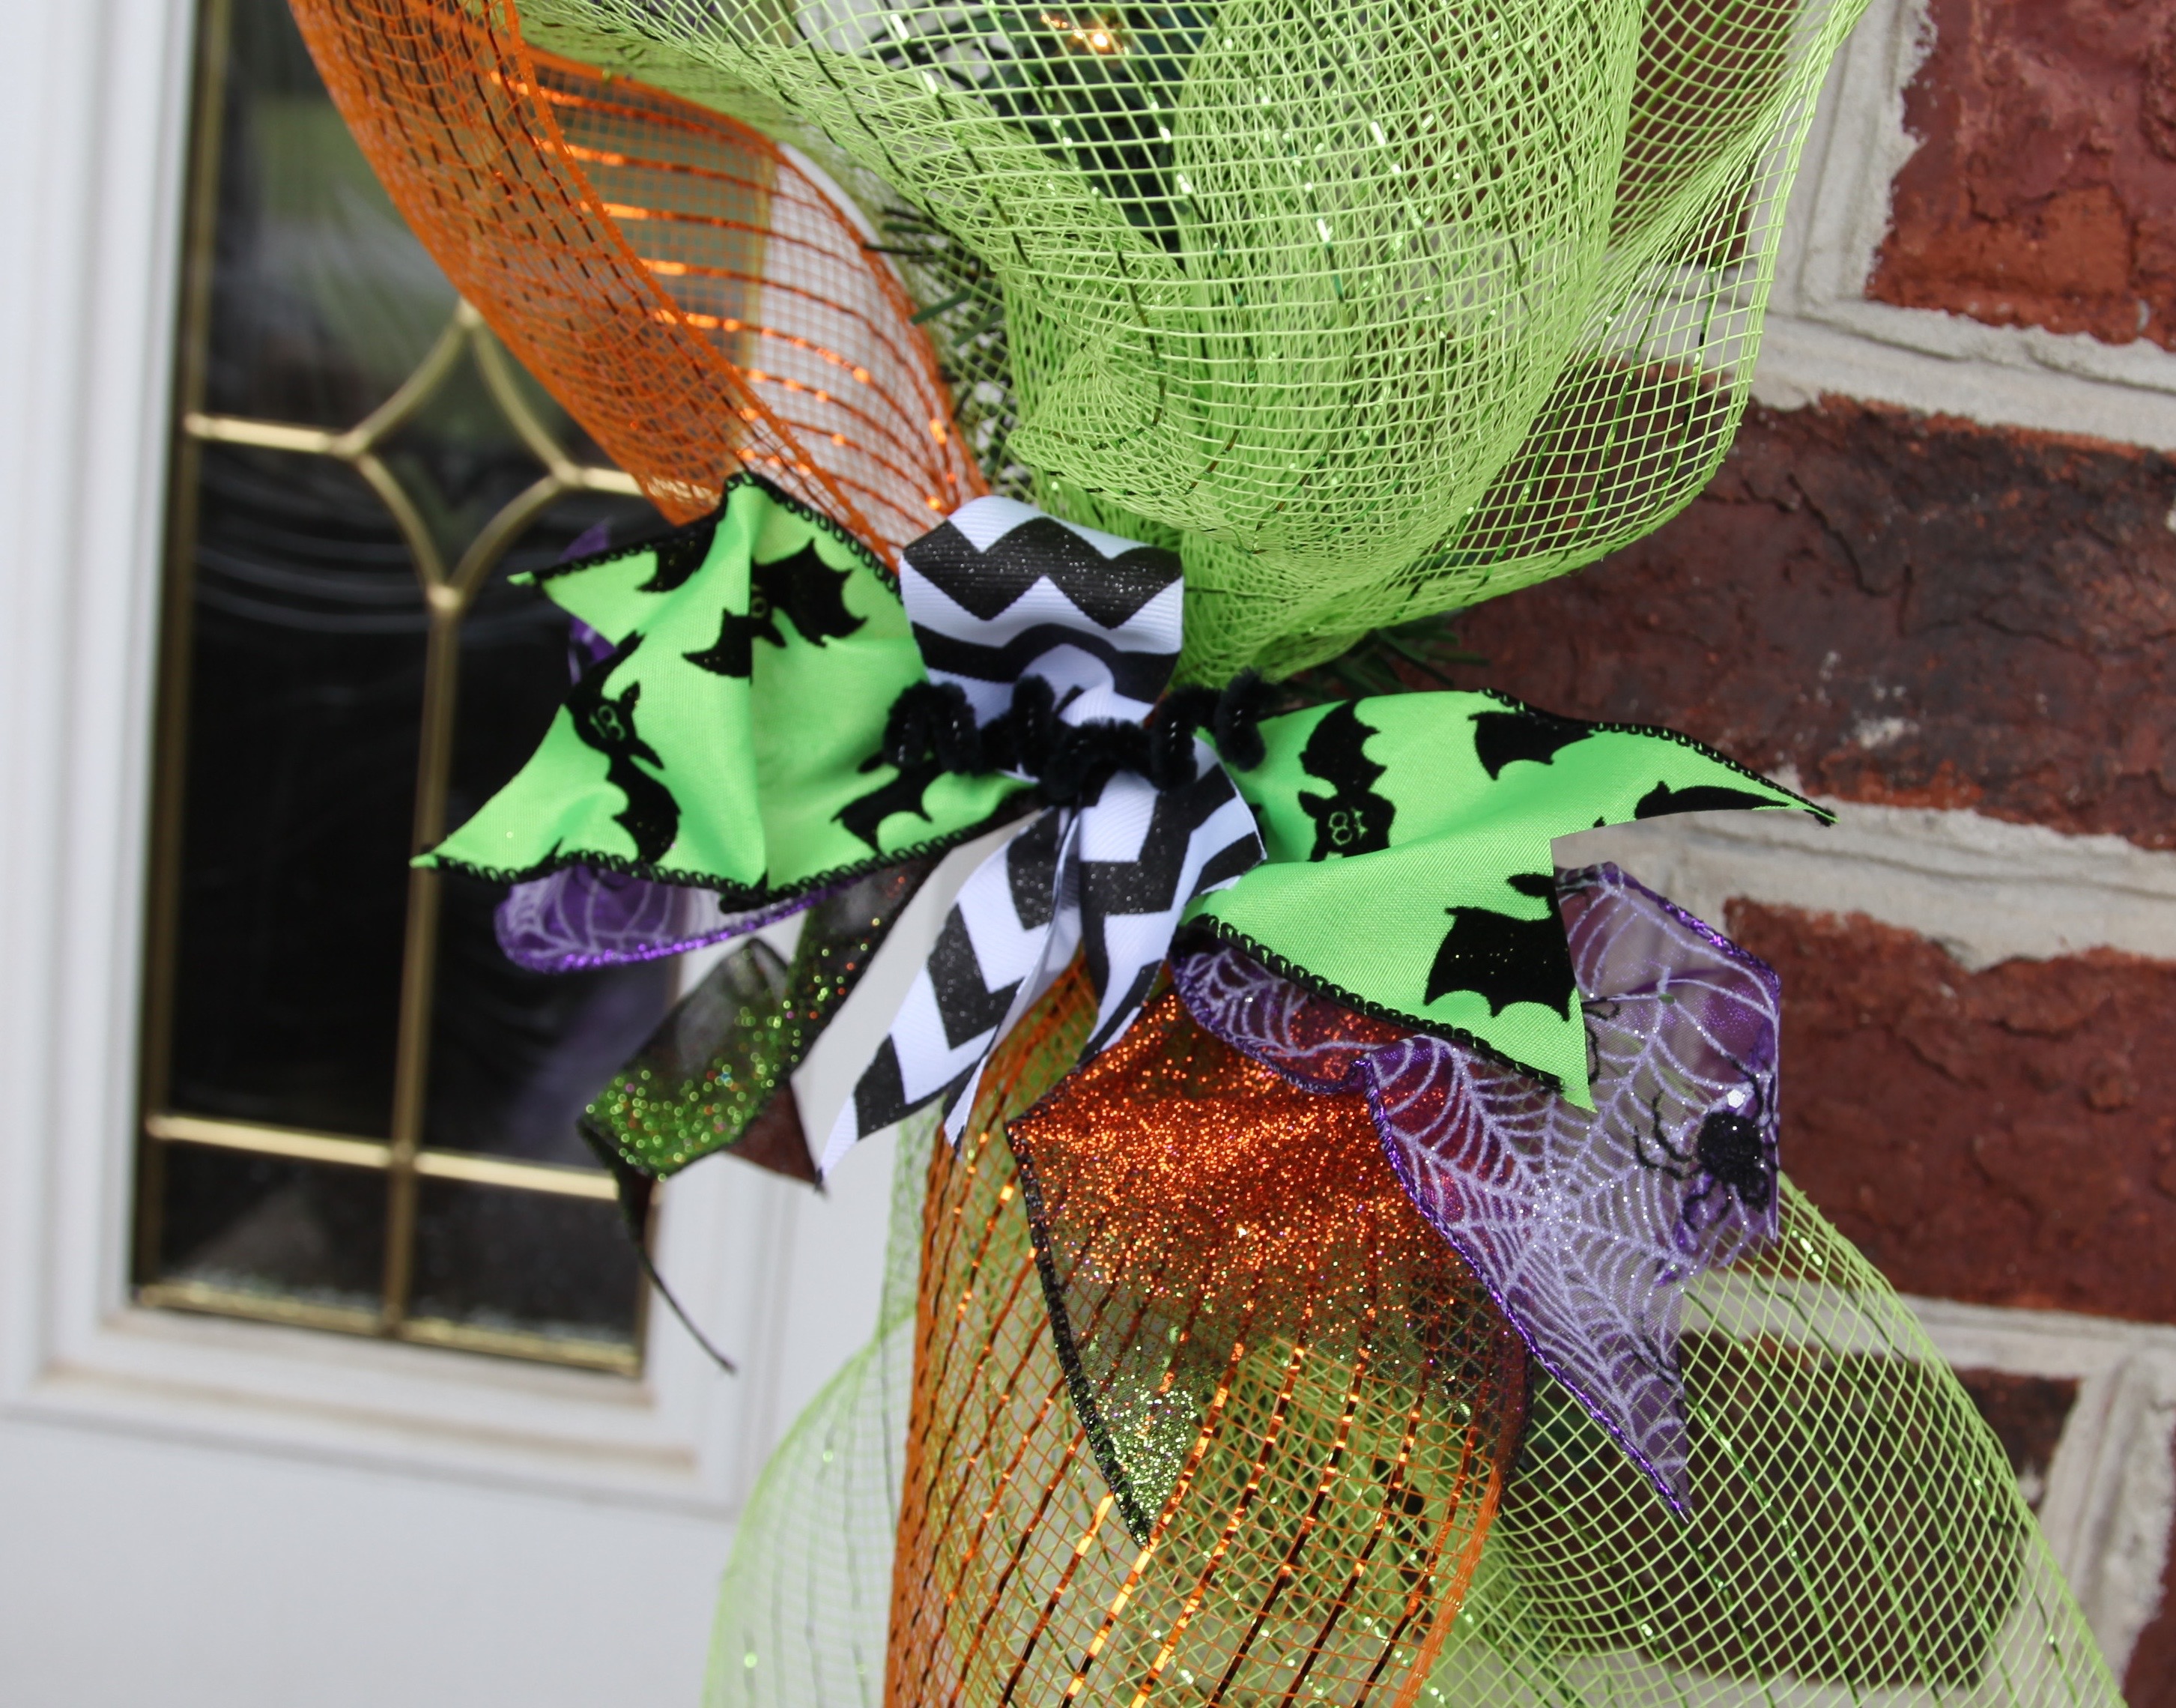
Okay, once that garland was sturdily in place, the first accent pieces that I added were those spooky eyeballs. To attach the eyes I just folded over and twisted the pipe cleaner (at every other swag point where I caught the deco mesh) to make it sturdier and then just poked the eye ball onto to them.

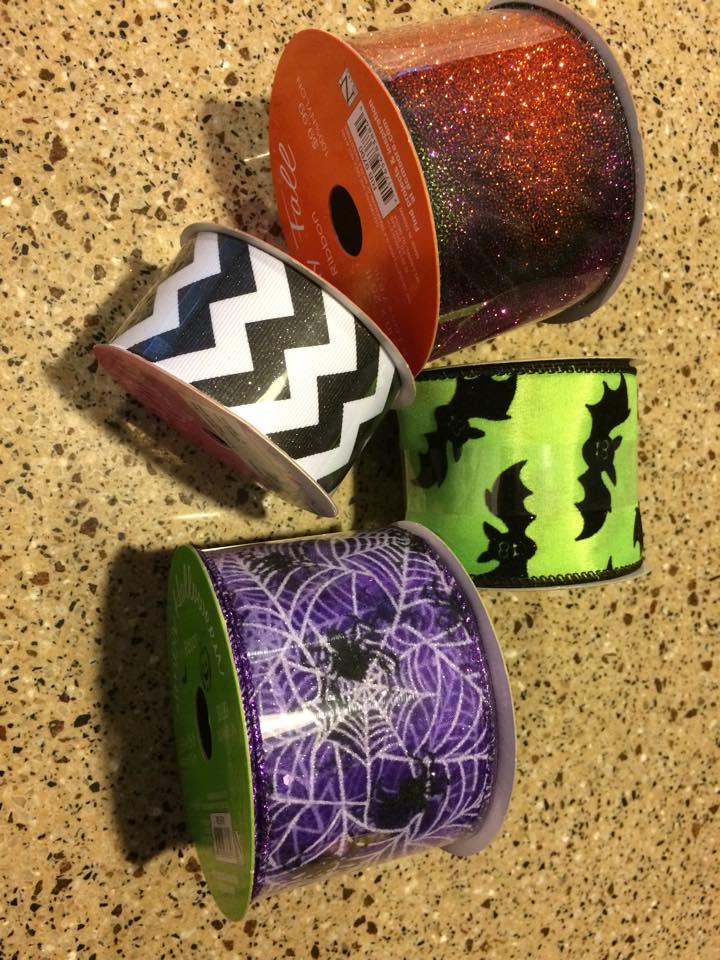
After all of the eyeballs were attached Arlynn filled in the rest of the swag points with a ribbon cluster. She just took whatever ribbon I had leftover from making the wreath and cut pretty edges on them, piled them up, cinched them together with her fingers and then attached them to the garland using the pipe cleaners. Then she wrapped the ends of the pipe cleaner around a pencil to finish off the look. 🙂

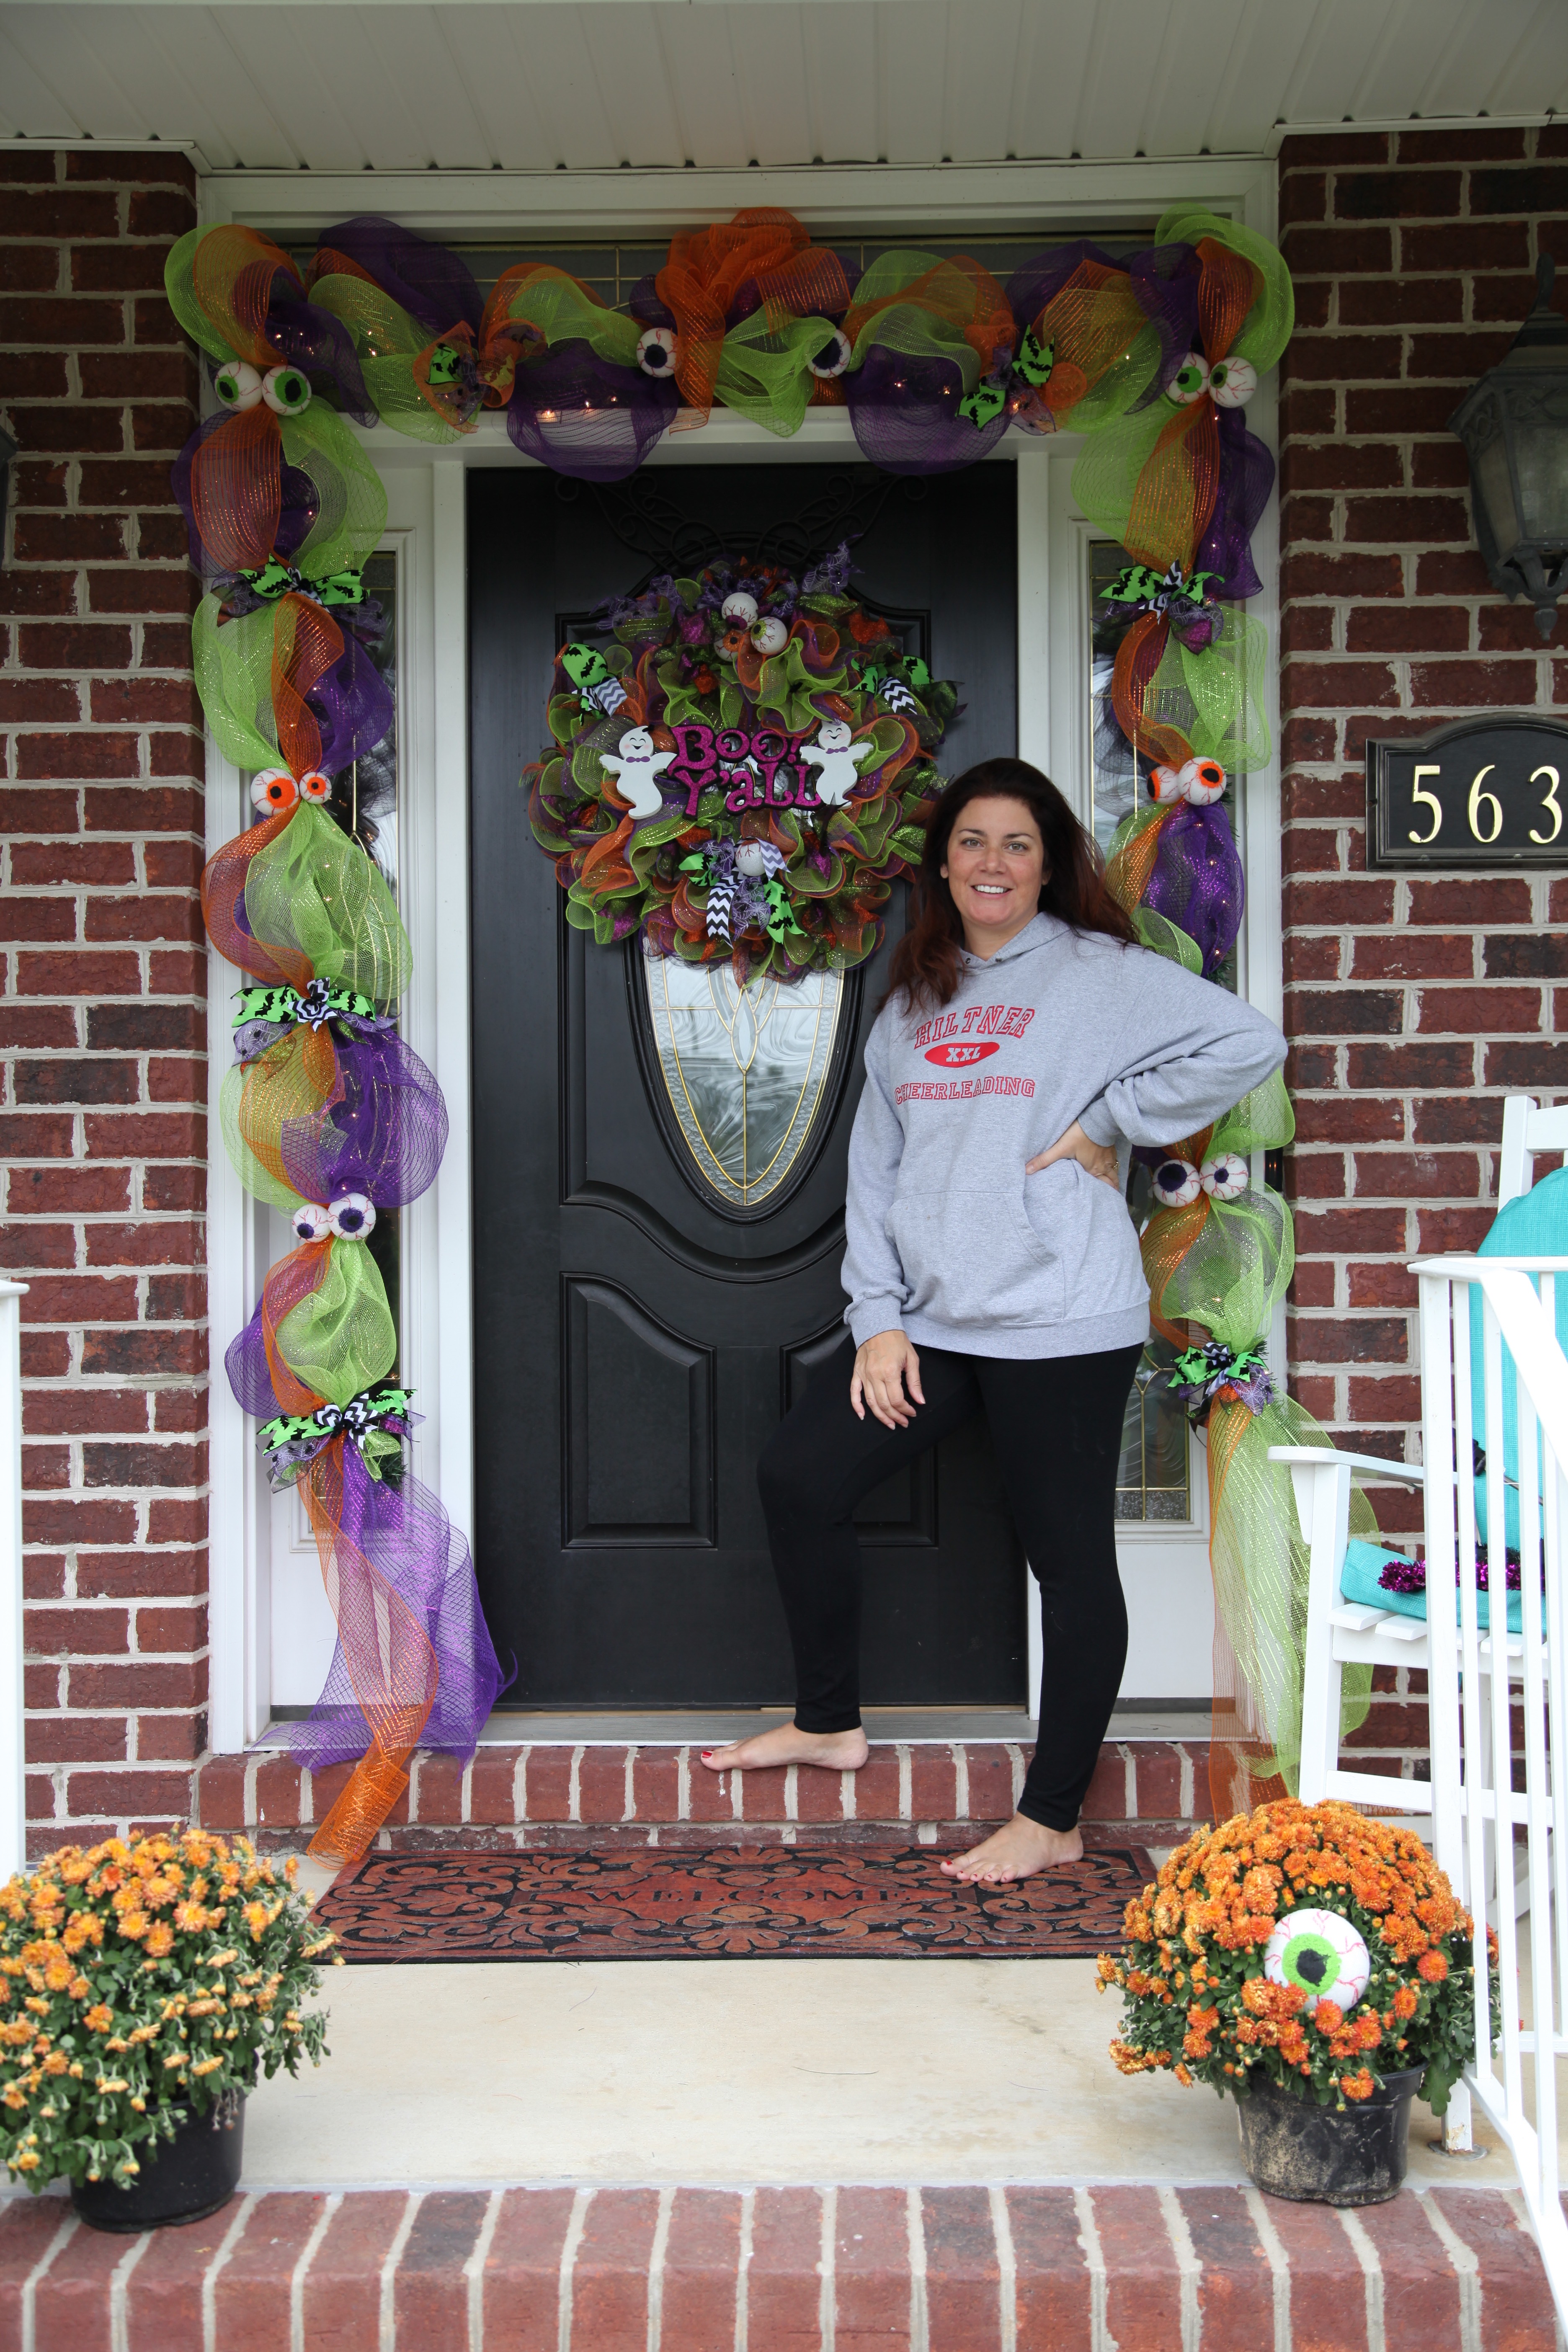
Once all was said and done and I had it hung in place, we all stood back and admired our work! What a fun project this turned out to be! And my front porch looks so festive and we’re all ready to receive the little Trick or Treaters!! I can’t wait!”
Arlynn here again, I cannot express to you what a wonderful time I had with these two ladies! (Left to right, Donita, Stacey, and me).

Spending time with family is something that we never take for granted; working on these crafty creations just added to the excitement of our visit. We are happy to share our final products with all of you and if any of you have any questions please don’t hesitate to leave them in the comments section below and I (or Stacey) will try and answer any and all queries. 🙂
As I was leaving Stacey’s house, I was sure to take a picture of her awesome wreath and garland. Her porch looks amazing and will be so very welcoming as the weather cools and the leaves start to fall. Here is the last thing I saw as I was driving away (in tears because I missed my sweet cousins so very much already). ❤

Let me take a moment to thank Stacey for adding her amazing talents to my Blog, I’m sure she’ll be my guest many more times in the future as she has a plethora of creations to share. **Love you Stacey!!**
Until next time, y’all take good care! ❤
**In crafting there are no mistakes just unique creations**
