Happy Fall Y’all 2016 Series: Family Room Fireplace/Mantel & more–Video Included

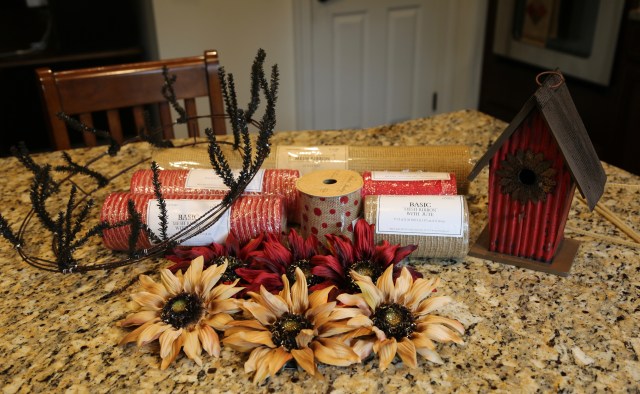
Happy Fall Y’all!! Yeah, I know, it’s not quite Fall *yet*, BUT, it is September, so that is close enough for me. 😉  I love Fall decor, the warm and cozy feeling that comes with this sweet decor is something that I so enjoy creating each and every Autumn. 🙂  This year is no different, although, now-a-days, in our new home, it takes me a bit longer to get everything accomplished. 🙂 I always start with the fireplace hearth and mantel, and this year was no different.  I was so excited get started too because I had broken down and purchased a gorgeous new mantel swag and candle rings from Grandin Road–They are so pretty and wow, do they ever make a huge statement!  I LOVE the final look. I also purchased 3 new black candle sticks (only because they come in a set of 3–and I already owned 3 but needed more to accommodate those lovely candle rings)… Here is a link for those candle stick holders.

I created a little video to go along with this post…And will more videos as I work my way around the house in my decorating frenzy…Here are some pictures of what I highlight in the video:

IMG_0055 (1)

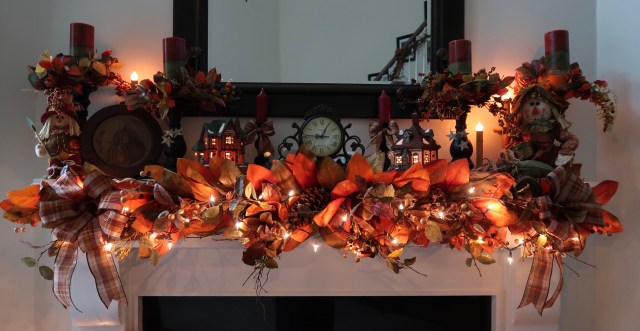
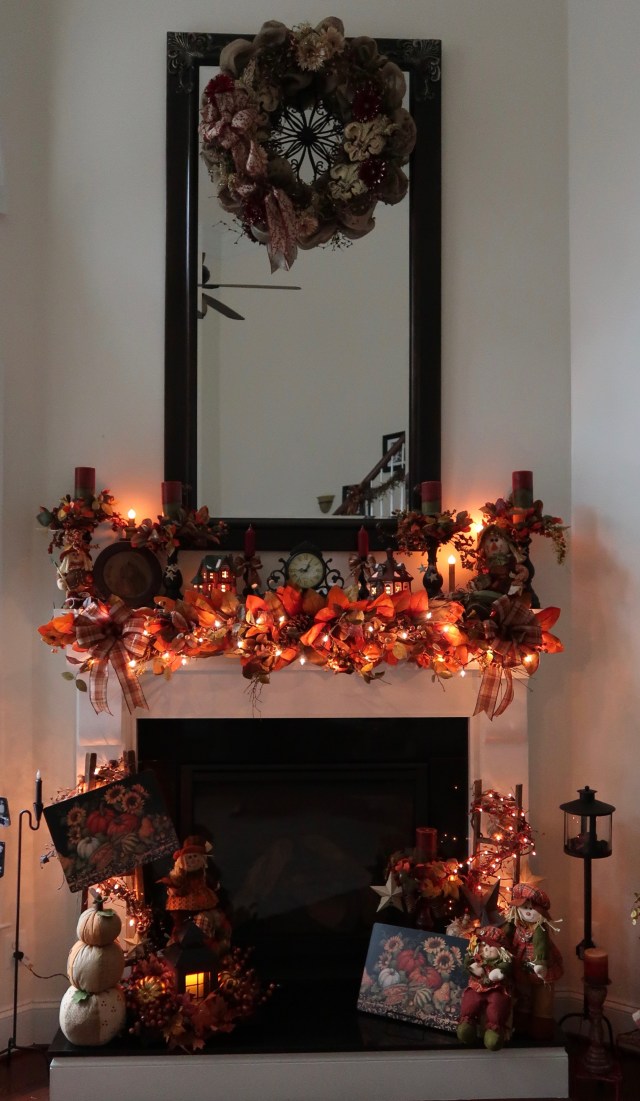
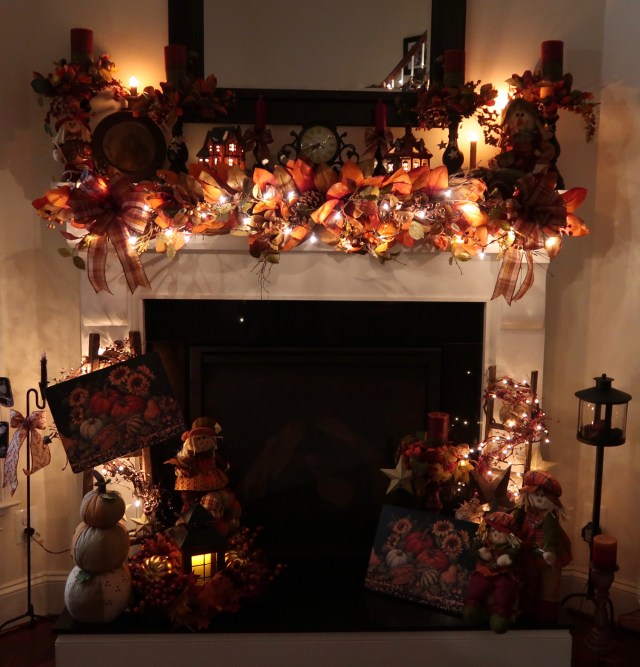
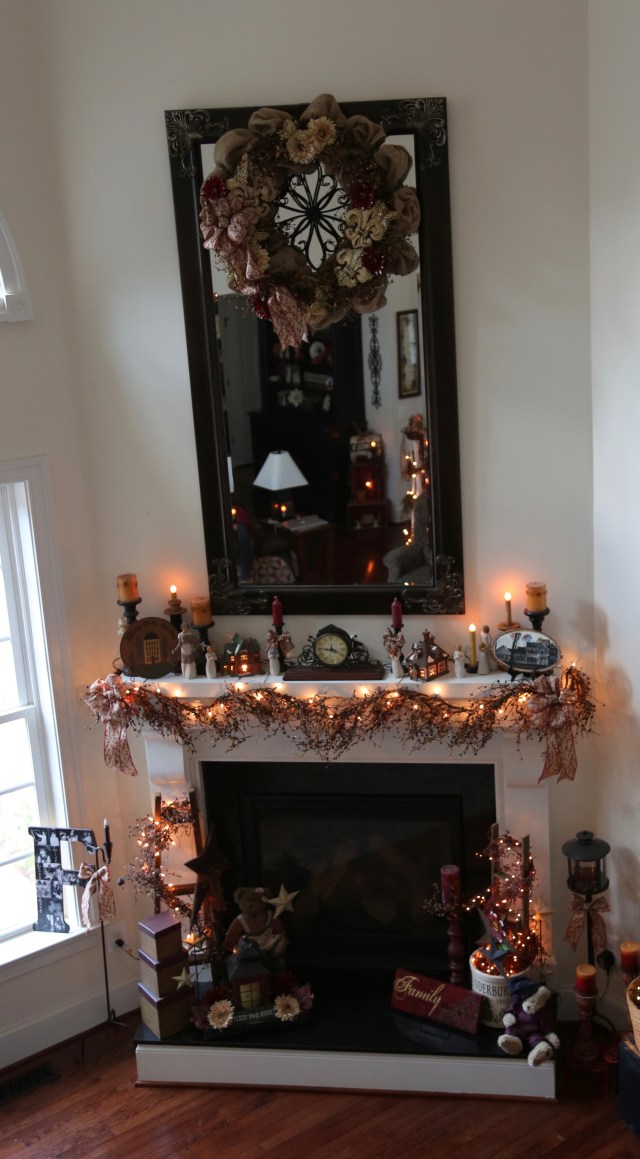
As I tell y’all in the video that I always replace most of my generic decorations with my Seasonal decor.  I do leave some of the “staple pieces” (for lack of better descriptive words) in place…like the Dickens houses and the clock on the mantel, and the ladders w/pip berries and just a few other items on the hearth.  So basically, I truly do recreate the wheel for Fall and then for Christmas.  And this year, I had to go out and purchase a couple extra bins to accommodate the generic decor that I remove I won’t use again until January–All of the Fall decor will be replaced by Christmas decor and that will stay up till the end of December. 🙂  It took me quite a few years to collect all of this decor for both Seasons; I’ve done it a little bit at a time.

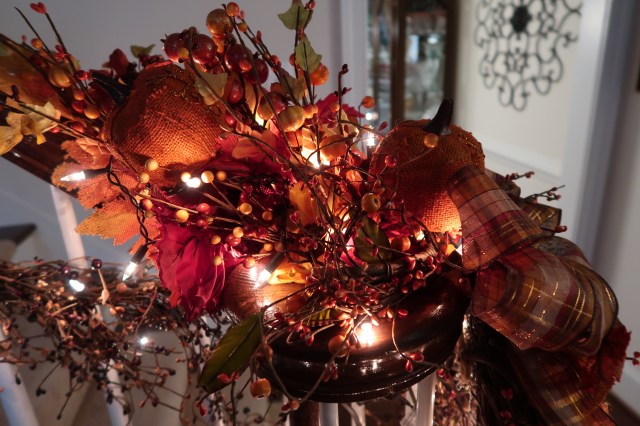
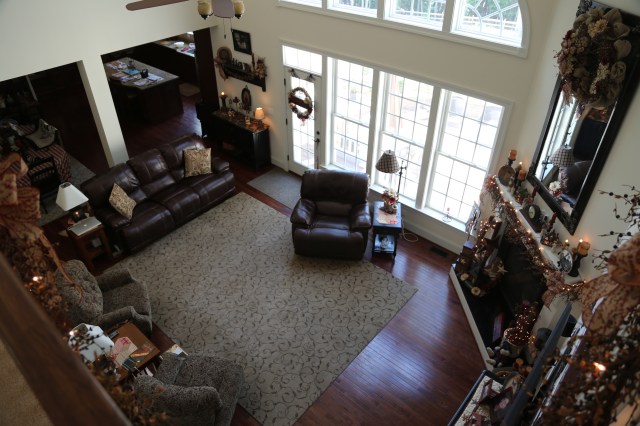
Here is the fireplace completely changed over to Fall. Whew, I was bushed after doing just this…No, it’s not hard physical work, but, I use a lot of whatever brain power I have left to create this look…haha. 😉  JUST kidding, y’all know that I LOVE this sort of thing…I honestly do thrive on the creative process.

IMG_0054 (1)IMG_0046IMG_0048IMG_0049

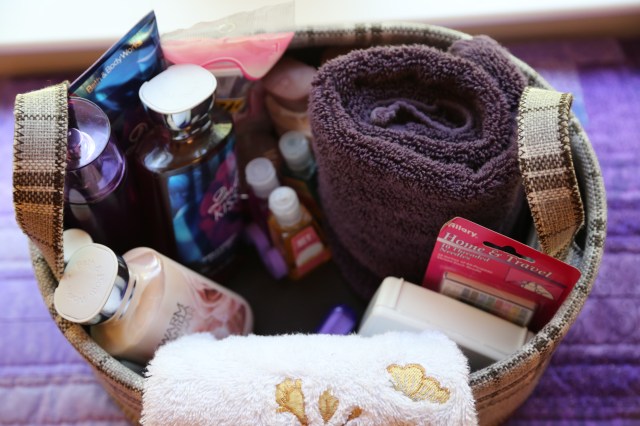
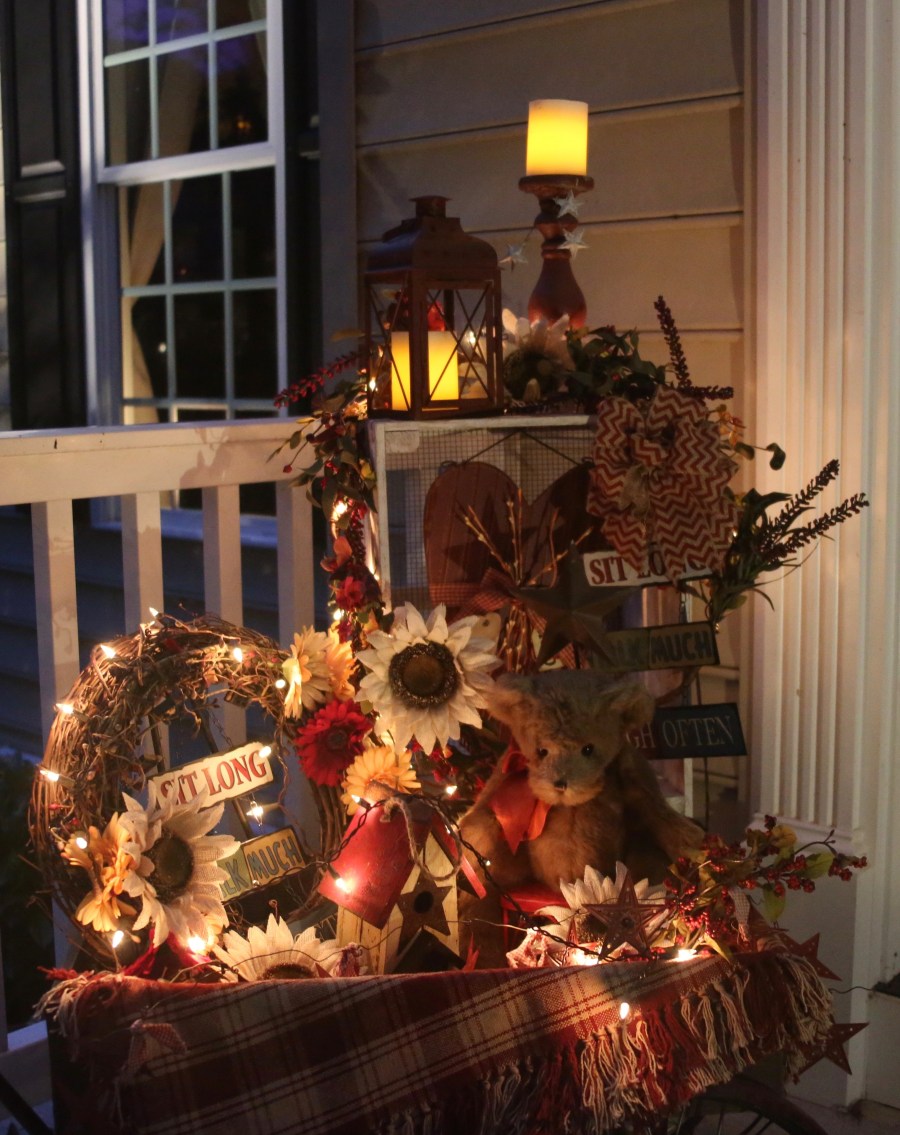
Another one of my staple pieces that stays in place and that I use as a base for my Seasonal decor is this large Longaberger basket.  Here is how I decorated it up for Fall this year:

IMG_0050

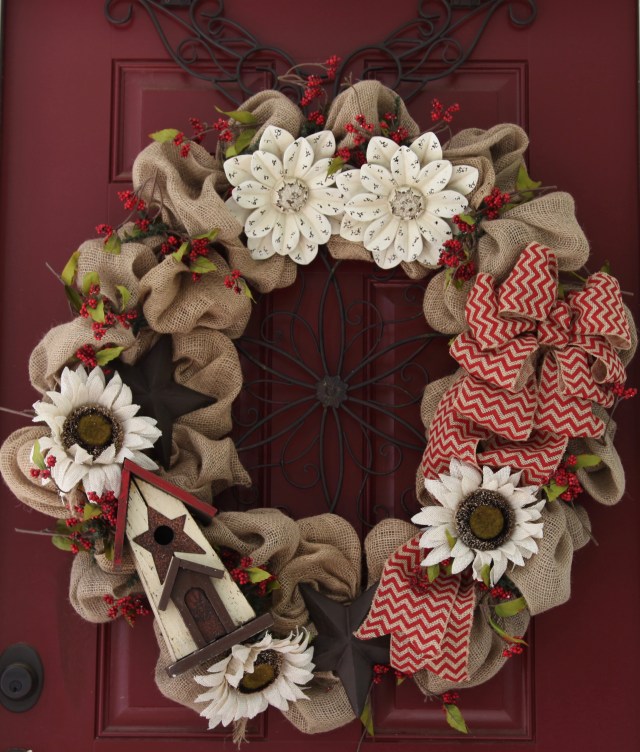
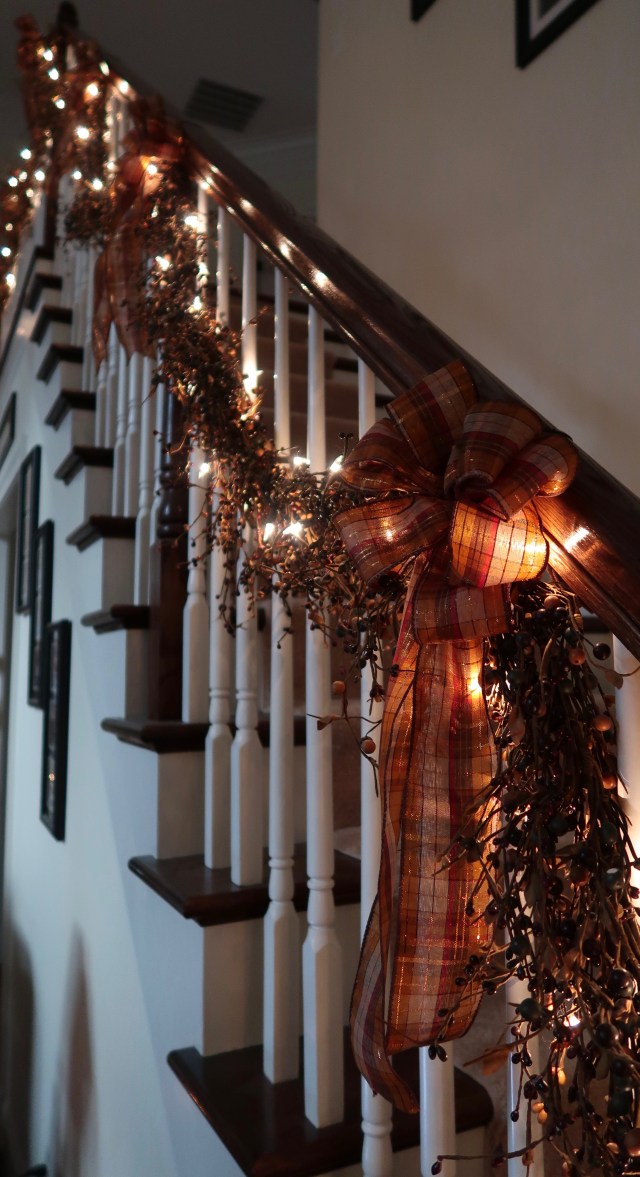
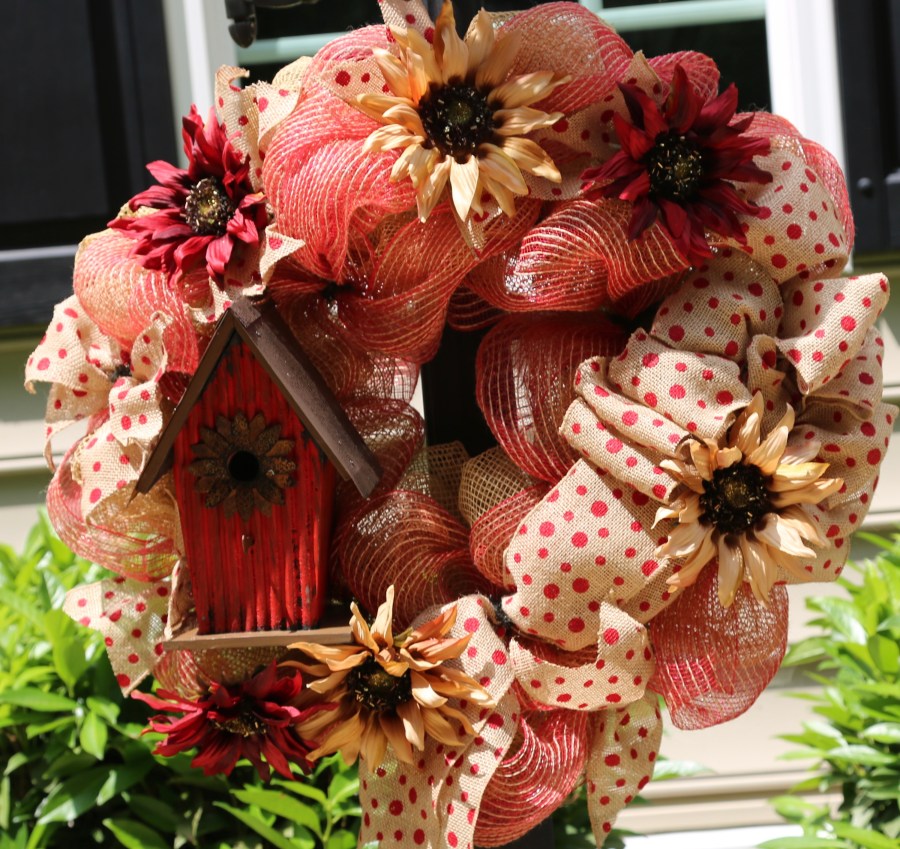
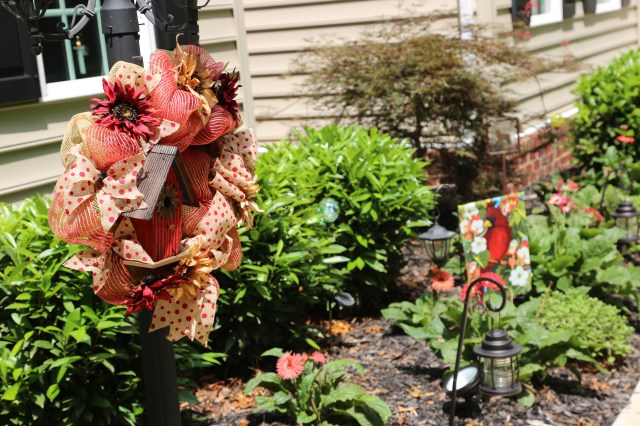
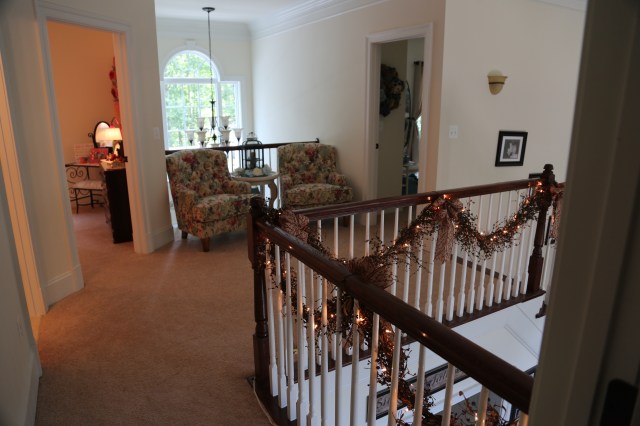
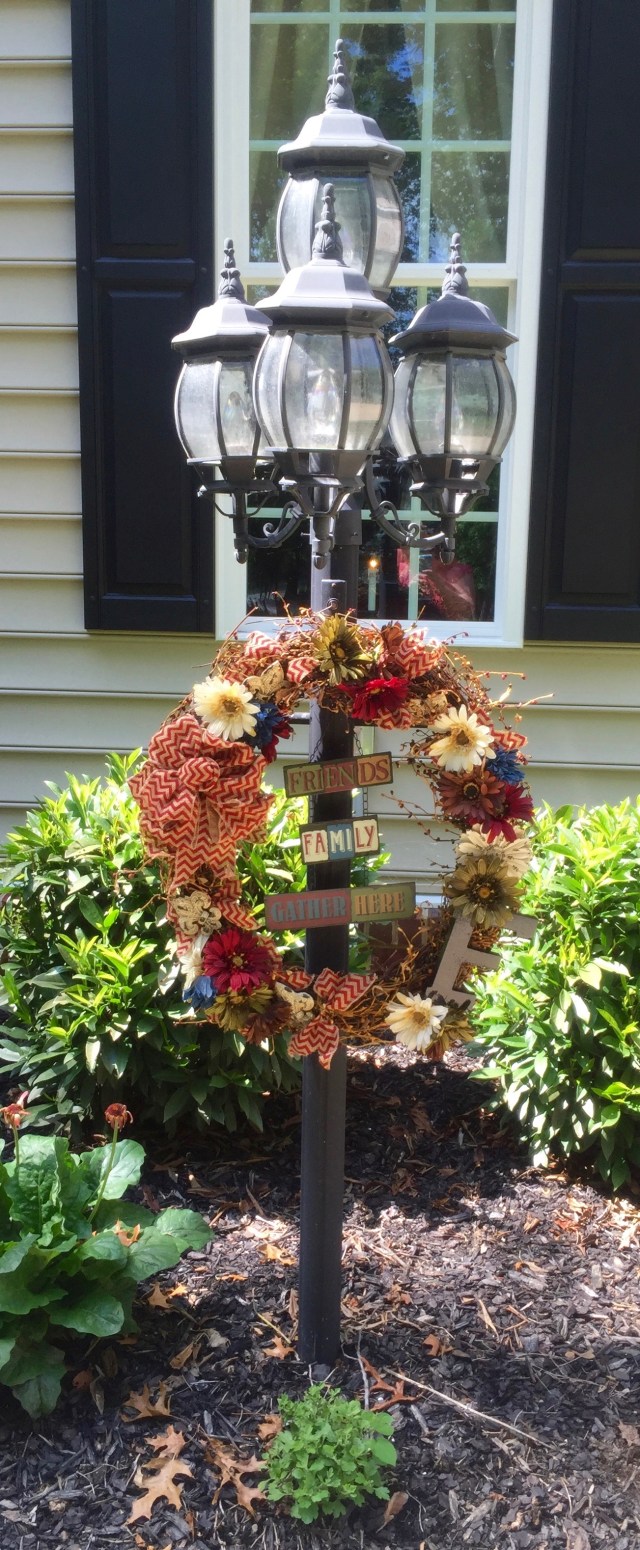
And the last thing that I highlight in the video is the staircase–I made all new plaid bows for the swag points this year as well as a new “spray” for the bullnose.  I also added a little fall wreath to the bullnose…I had written a blog about that little grapevine wreath showing you many different ways in which it could be used…Here is a link to my blog post highlighting that little wreath:  “Not Just a Fall Grapevine Wreath”.

IMG_0044

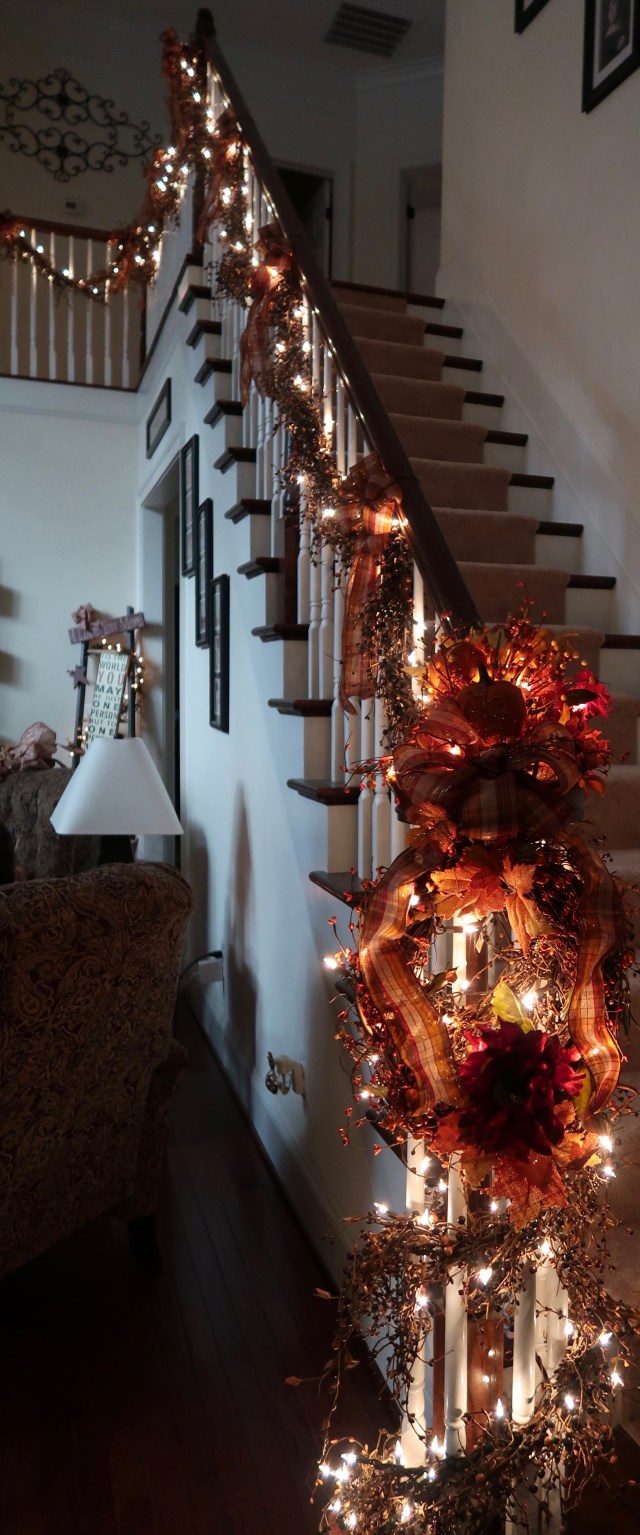
As you’ll see in the video, I did trim down those crazy bow tails…hahaIMG_0041

IMG_0045IMG_0042

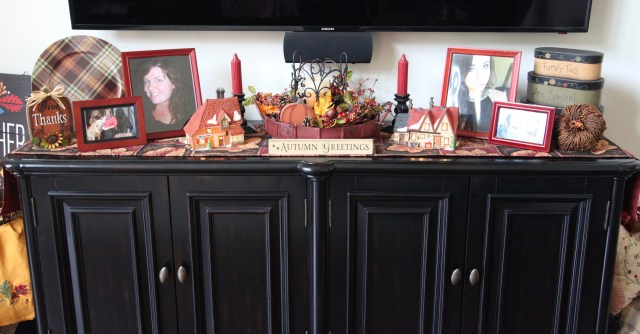
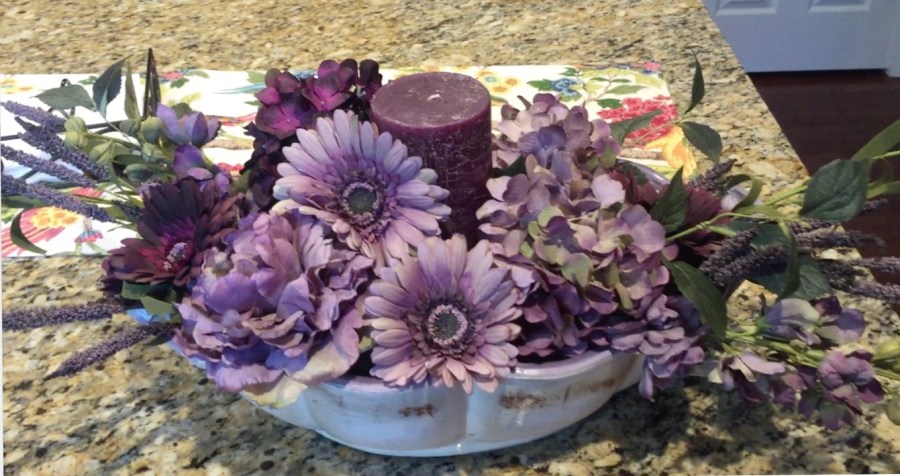
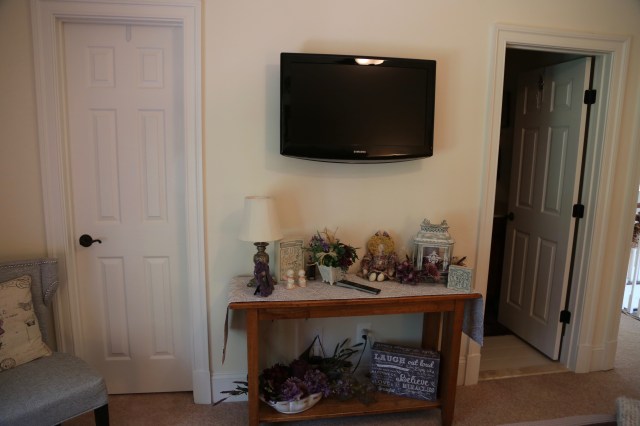
Here is the top of the Credenza that sits under the tv; I did create the centerpiece:

IMG_5370IMG_5372

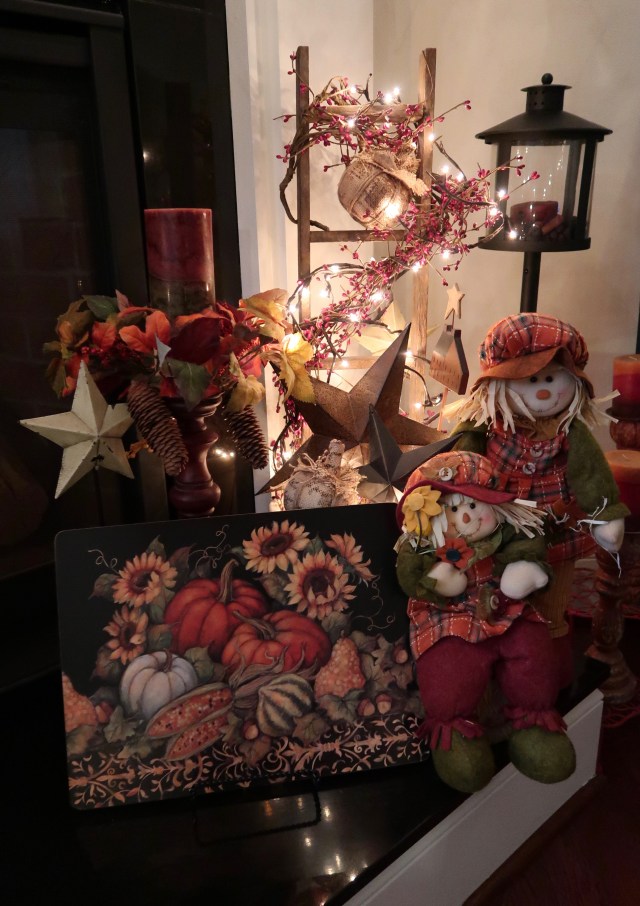
One last thing, I mention in my video are some quilted Fall placemats that I utilize on the family room end tables, and then they also sell a runner that I purchased, one for the kitchen’s Island and one for one other table.  I purchased them last year, but, here is a link for a set of four quilted placemats–UNfortunately, they are not available at this moment in time but, if you check back, they might come available later in the Season.

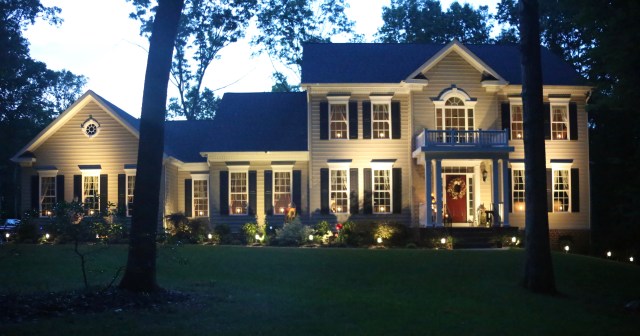
ANYway, I plan on trying to finish the rest of the back portion of the house today and I will do a walk-thru video of everything in this part of the house. And then I’ll transition into the living and dining rooms and use some of that pretty green color to create the Fall decor  in those rooms.  For now, here is a video of what I’ve created up to this point. 🙂


*In decorating there are no mistakes, just unique creations!*

Until next time, y’all take good care!! ❤

~Arlynn ❤


Packing – 8 Day 7 Night Series: “What’s In My Carry-On”

Continuing on with my 8 Day 7 Night Series of blogs here with my What’s in my Carry-On entry.  Truly, I do not take any less in my Carry-on bag on an 8 day cruise than I would on a longer cruise; but, I’m going ahead and writing this post so that folks don’t have to peruse through that massive-all encompassing-rather overwhelming other post of mine…haha. 😉

Let’s get started.  This is one of my most important pieces of luggage and one that stays with me from the moment we leave the house until the moment we arrive at our destination and beyond because I will use this on Excursions and such as well.  It is never out of my sight.  Now for a little discussion about the type of bag I prefer to carry.  On our last cruise to Hawaii, I took a Vera Bradley Campus Backpack <~~~That is a link to Amazon as it seems that the Vera Bradley website isn’t carrying this particular bag in the pattern that I have.  Regardless, this bag worked out perfectly:

IMG_4668

And yes, I have placed all of my Captain Circle Pin’s on my bag:

IMG_5215

This is also the bag that I will be taking on our next cruise to Canada and New England–We will be driving to that port thank goodness–I cannot tell you how thrilled I am that we don’t have to fly–my long legs do not care for that attribute of traveling–flying that is.  You know when we were kids and it was an exciting adventure to get on a plane and jet off to wonderfully fun places.  Yeah, well, I still love to go to the wonderfully fun places, I just wish I could do it without being made to feel like a sardine smashed in a can…lol. 😉 (I will admit that the last couple of times we’ve flown, Chris, bless his sweet heart, has upgraded us to 1st class for a nominal fee (he watched the price of the seats each day and when he saw them drop, he jumped on them and moved us—I was SO grateful!!)

ANYway, I digress, I loved that ^^^ bag when I carried it to Hawaii, but, I do want to show you one other type of bag that I will utilize as a Carry-On every now and again.  This bag is a Trimmed Vera Tote <~~ Again an Amazon link to a different pattern than I have.  Here is a picture of my bag in Parisian Paisley–IF you go to order this bag, please, please, please be careful and be sure to get the Vera Tote that measures: 18″ Wide, 15″ High, & has a 12″ Strap drop (Vera has many totes, most of which are smaller than this one).  Here is mine:

IMG_0219

As you can see, it has tons of pockets inside to hold all of your goodies and beyond. 🙂 IMG_0221

This bag also holds my 13″ MacBook Pro very easily and that is always my consideration when choosing a Carry-On bag. Don’t judge please…:)

IMG_4669

Here are the other things that I routinely take in my Carry-On, I’m sure your list will vary slightly to meet your needs. 🙂

When flying  we all have to adhere to the TSA’s liquids rules, so I always take a quart-size ziplock bag to utilize for our liquids:

IMG_0218

This is the bag I use for my computer and iPhone chargers, it is a Vera Bradley Double Zip Cosmetic Bag:

IMG_0222

I take a catch-all bag to carry small possible necessities. 🙂 The bag I use is a Vera Bradley Medium Zip Cosmetic Bag:

IMG_0788

Of course I take a wallet with cash, credit cards, ID, and Passport…This is a Vera Bradley Kisslock Wallet:

IMG_1139

My Kindle Paperwhite:

IMG_1090

Earphones:

IMG_4612

A crossword puzzle book—I’m always trying to do something to stimulate my brain, I really love doing crosswords and I even play a game on my iPhone called Words With Friends…I’m constantly working on expanding my vocabulary and challenging myself–a girl is never too old to do that right? 😉 🙂

IMG_4656

I take one of these Pocket Folders with me to carry all of our travel documents, i.e. travel insurance papers, boarding passes, and the like.  I do carry the other couple of folders in my checked baggage and I use them to save our daily cruise paperwork like the Princess Patter, port informational sheets, etc…

IMG_4652

I take a pencil case…Vera Bradley Brush and Pencil:

IMG_0224

IMG_0225

Let’s face it, we all could use a little something to freshen our breath and clean our teeth when traveling…I try to take something like this along:

IMG_0226

And that about does it…Other than I will throw in a small packing cube with some unmentionables—*just* in case we have any flight delays and such.  I don’t usually take an entire outfit though–unless we’re heading somewhere where I couldn’t go and buy a quick outfit if absolutely necessary.

I hope that this little post will help those of you who are getting ready to head out on a trip. Whether it be by plane, train, or automobile, these little items should suffice nicely to help get you to your destination.

Happy Traveling ALL!!

Until next time, y’all take good care! ❤

~Arlynn ❤


Packing – 8 Day 7 Night Cruise Series: “My Must Haves”:

Yes, yes, I know, I have already written a extremely long blog post expounding in great detail about *all* of the things that one might need to pack for any length of cruise. And when I wrote it we were preparing for a 15-Night Hawaii cruise, so those were the parameters in which I was working, 15 days seemed like an eternity to be away–well for this country girl anyway.  Admittedly, there is a plethora of information in that one post and it might be a smidge over-whelming. 😉  All that said, since most of our cruises are 7 day adventures, in this new “Series” I want to show how I’m planning to downsize that extreme list and share how I am going to try like crazy to consolidate everything into one large suitcase.  In that other blog monstrosity, I covered “What’s In My Carry-On Bag”, tons of “Must Haves”, and I even included my “Packing Tips & Tricks”.  I thought it was time to break up the monotony of that long post into several separate, shorter, more succinct, and a bit easier to peruse through posts, especially since I’m going to be downsizing the amount of ‘stuff’ I take which will work well for a 8 day cruise–yes, I do count embarkation day as Day 1 and disembarkation day as Day 8–I’m talking Saturday to Saturday cruises here (or whatever other day of the week a cruise starts on and ends on exactly a week later).  For Hawaii, I took a small’ish’ Spinner suitcase ***just*** for my “Must Have” items.  Here is how that suitcase looked right before I closed it up:

IMG_4702

Whew–I took A LOT on that cruise…I will admit though, I did utilize every single item I took. BUT, my goal is to downsize a bit considering 8 days isn’t that long to be gone, so,  I have gathered the following items to take along with us on our next cruise which will be to Canada & New England on the gorgeous Regal Princess this Fall.   So let’s get started.

Disinfectant Wipes:

The very first thing that we do when we enter our Stateroom is to wipe down all surfaces, door knobs/handles, the telephone, the tv remote, the balcony railing, etc…

img_4603

Hand Soap:

img_46301

Bar Soap:

We do not care for the shower gel that they provide in pumps in the shower, so we bring our own favorite bar soap…

img_4654

Odor Eliminating Spray:

 I think the reason that I take this is obvious… *wink*…

(there are no exhaust fans in the bathrooms on a cruise ship)…

img_4667

I never use Tums off of a cruise, but I always use Tums while on a cruise…

img_4607

A Pop-Up Folding Laundry Hamper

This fits nicely into the Stateroom’s closet and collects all of the dirty laundry so that it is not spread all over the floor–Compact to pack too…

img_1054img_1055

Clothes Peg Clip Pins

I mostly use these to hang up my shower cap on one of the towel racks inside the shower, but, they could also come in handy to hang things up on their provided clothing line (that is located in the shower–you can pull it out from a receptacle on the shower wall and attach it to the other end of the shower–I’ll show you a picture below:

img_4639

DSCN1028

Here is that clothesline:

DSCN1069DSCN0776

I always take my own hairdryer,  yes, Princess does provide a hairdryer in every room, but, for my hair which is fine but rather thick, well, it just doesn’t do the job in a timely fashion.  

img_07831

Here is the hair dryer Princess provides on all ships I’ve been on so far:

(I do hear that on the Royal and Regal, there is a hair dryer in the drawer at the desk, I’ll let y’all know when we get back from our cruise how that puppy works)

Screen Shot 2016-07-13 at 9.14.07 AM

Tide Pods and Downy Dryer Sheets:

Yes, I normally will do laundry onboard, yes, even on a 8-day cruise, so I throw a few pods and some dryer sheets into a zip-lock bag because they don’t take up much room or add much weight and I’d rather our clothes smell like I like them to smell rather than how they smell using the products that you can get on the ship…

img_4604IMG_2621

Here are the laundry rooms on board the Star Princess’ Dolphin deck, most of the laundry facilities on board are pretty much the same and are on several of the Stateroom decks (check your ship’s deck plans to find specific locations for laundry facilities).  On the Coral’s Dolphin Deck the washers and dryers were stacked, on the Star they weren’t.   You use your cruise card to purchase tokens, one color of token that will start the washer and dryer and if you choose to purchase their products, another color token can be used in the vending machines–See pictures below:

Image 3

Image 2

Magnet Clips

The walls in the Staterooms are metal–I usually will hang up the day’s Patter or my Card Lanyard, etc…

img_07841

img_1670dscn0976

A Flashlight

Just in case we lose electricity, one never knows you know…

img_4672

Scissors

img_1018

Travel Illuminated Clock

I like to be able to see what time it is if I happen to wake up in the middle of the night…

91zr9k0oyhl-_sl1500_

Sewing Kit

img_1052

Zip-Lock Bags

img_1142

We purchased these coffee, and in my case, tea thermos cups on board our last couple of cruises.  Chris is so sweet, every morning, he takes these cups and goes and gets me hot tea and himself a cup of coffee from the Horizon Court’s self serve counter.

IMG_2620

Image 4

Now, I know y’all are going to chuckle at me with this next item, but, I usually will take a small bottle of dawn with us so that I can wash up those cups each day–Yeah, my anal retentiveness rearing its ugly head…;) 

IMG_2622

And believe it or not all of that stuff (minus the cups and the hair dryer) fit inside this Vera Bradley Grand Cosmetic Bag and will fit into my one large suitcase (hopefully, the jury is still out on whether or not I can fit everything into one large suitcase; if necessary I will add one Vera Bradley Weekender Bag).

BTW–As an extra precaution, I will put any bottle that could potentially leak into ziplock bags before placing them in my Vera Bags.  Even though the Vera’s are lined and I doubt if leaks would escape, I don’t want to take the chance. 🙂

IMG_2635

Now to finish up this post, there are two other things that I always take with us…

 Small first-aid kit

img_1051

And

A grab bag with different OTC medications, these things can cost you a pretty penny if you go to buy them at the Sundries shop on board, so I just take a smattering of things, pain relievers, cold meds, anti-nausea meds (we’ve never been sea-sick, but, this girl likes to be prepared) That Vera Bradley bag is a Large Cosmetic Case:

IMG_2624

Well, that does it, I feel pretty good that I’ve been able to downsize the amount of items that I’m planning to take with us on our 8-day Canada and New England cruise.

I’m trying to wrap my mind around what other smaller more succinct posts to create, I do know that I will be doing these specific posts moving through the next several days/week:

  • What’s In My Carry-On
  • Tech’y’ Stuff
  • Packing Tips & Tricks

Beyond that, well, we’ll see what I come up with…haha. 🙂

Until next time, y’all take good care!! ❤

~Arlynn ❤


Video Home Tour: Evening Lighting & Pups (at the end of the video)

Here is the last installment of my Video Home Tour series (for the time being).  I’ve had a really great time compiling all of these for (hopefully) your viewing pleasure. 🙂  This one is 10 minutes long and I take you on a short tour of the main level giving you different views of the accent lighting and at the end, you’ll get a good view of the pups and the patio while we go through our nightly routine. 🙂

Thank you all for your wonderful comments on all of my posts, here on my blogs and on Facebook when I put my links in there as well.  Y’all are awesome!!!

All right, here is that link…

~Until next time, y’all take good care! ❤

~Arlynn ❤


Video Home Tour: Mud Room, Garage, Backyard Patio

Continuing on with my video home tour, in this my 4th installment, I show y’all our “Mud Room” which is my little catch-all room and the one we breeze through when entering through the garage.  I then move on out into the garage for a bit of commentary–I don’t linger too long in either place. 🙂  Then I move on out to the backyard patio.  I explain a bit about the patio in the video, but, I wanted to share with y’all the original design drawing that we were given–the patio was created exactly to these dimensions and matches this design except that we opted to only have one exit off of the patio as opposed to the two that you see depicted in this picture.  PROJECT DESIGN LAYOUT

If you’d like to read about the entire process and see pictures of this patio in its varying stages of construction, here is my Backyard Patio entry.  Also, in the video I speak about how we hosted a family reunion here; I thought I’d give you a link to my Family Reunion Decor and Craft Projects  blog entry–My colors were red and white accenting with red and white gingham, gerber daisies, and mason jars. 🙂

Also, you’ll see our sweet Gracie at the end of this video, and I tell you that she had to have a procedure done on one of her eyes.  Let me lament a little further on that statement here.  She had been diagnosed with Glaucoma in her left eye and we had been aggressively treating it with several different eye drops–meant to reduce the pressure in her eye. I’d been taking her to the vet for regular eye pressure checks and despite all of the eye drops, her eye pressure was still up pretty high; she was not acting as if she was in pain, and even though she was on daily pain medication for her arthritis, she still *might* have been feeling poorly (research likens the pain of Glaucoma in dogs to the pain one might feel from a migraine…As a migraine sufferer, I know first hand how that feels and I didn’t want her to have that pain daily). So, we decided on a procedure called “Chemical Ablation of the Cilary Body” (instead of having her eye removed). This procedure involved a Gentomycin injection into the affect eye that required mild sedation.  Gentomycin is toxic to the ciliary body and it in effect ‘kills’ the eye, which in turn decreased the intraocular eye pressure thus taking any pain that she might have been feeling completely away and it resolved the glaucoma.  Gracie did beautifully through the procedure and we now know that she is no longer in any pain, her eye may look a little funny, and she is definitely blind in that eye, but, she gets around wonderfully well and is such a blessing to us. 🙂 ❤


Here she is before that procedure, you can see that her left eye is quite swollen and bulgy. 😥

10388677_10207857253979706_2427529863194281170_n

And here she is now-a-days, I took this picture a couple of weeks ago, her eye is much less swollen–As you can see, she is a happy girl and we now know for sure that she isn’t in any pain because of Glaucoma. ❤

1V4A5615.jpg

ANYway <~~~Another one of the words that I use A LOT in my videos..erg…haha, here is my little home tour video, I managed to stay comfortably under 15 minutes with this one. 🙂

Until next time, y’all take good care! ❤

~Arlynn ❤


**Here is a link to the next installment**:

Video Home Tour:  Master Bedroom, Upstairs Landing, and 3 Guest Bedrooms


Deco Mesh & Birdhouse Wreath w/Video Tutorial

To say it has been hot in our neck of the woods is an understatement! It has been so hot that one of my outdoor wreaths has been losing its glued on accent pieces…<sigh>.  A couple of weeks ago, I had redecorated the Little Red Wagon (<link to video tutorial showing you how I created that decor) that sits on the front porch. In addition, I had made a new Burlap & Birdhouse  (<~~ link to video tutorial) front door wreath.  Red, cream, and khaki were some of the colors that I incorporated into the decorations.  I just happened to have a grapevine wreath already made and decided to go ahead and hang it on the front light post…welllllllll…That has ended up to ***NOT*** be one of my brighter ideas as the temperatures have soared and so has the humidity with it…that poor wreath that was held together by hot glue started to lose its accent pieces, they were literally melting off.  I knew I needed to make a new heartier wreath to hang out there asap.

So, I decided to make a Deco Mesh wreath to replace my poor, pitiful, mess of a grapevine wreath. 😉  Here are the supplies that I gathered so that I could create a new, tougher, wreath that would be able to handle the heat, humidity, and occasional thunder storm.

1V4A5674

  • 16″ Work Wreath
  • 1 Roll Large Deco Mesh (burlap color)
  • 1 Roll of Medium Deco Mesh (red and burlap color)
  • 2 Rolls of Burlap & Polka Dot ribbon
  • Red and Khaki colored daisies with clips on the back
  • 1 Wooden Birdhouse
  • Pipe Cleaners 


After watching my grapevine wreath literally melt in the heat, I did not want to use any glue on this wreath, so those flowers have clips on the back and my hubby drilled holes in the back of the birdhouse and fed tie wraps though them so that I could then loop pipe cleaners through them and tie the birdhouse onto the wreath.  I show you all of that in the video, so here is a video tutorial showing you how I created my new sturdier front light post wreath:

Here is a close-up of the finished wreath:

1V4A5682

1V4A5683

1V4A56861V4A5685

In the end, I’m much happier with how this wreath looks out there on that light post, and now I know I’m not going to come home and find different accent pieces strewn about in my flower bed. 😉 lol All in all, it was a very productive day!

Ohhhh hang on a sec…I promised in the video that I would provide a link that explains about those lights in our windows (and all about our outdoor accent lighting).  Here is a link to my Special Outdoor Lighting Blog post, and here are a couple of pictures of our house at night:

IMG_4510IMG_4507


Until next time, y’all take good care!!

**In crafting there are no mistakes just unique creations**

~Arlynn ❤

ONE more little thing…haha…I make a sculptured bow in this video, here is a link to my “How to Make a Bow” tutorial.

A Purple Centerpiece (Video Tutorial)

When I am out and about shopping, I always keep my eyes open for good deals and man oh man did I find one a couple of weeks ago.  As I’ll tell you in my little video tutorial below, I found a huge, heavy bowl for 90% off (!!!) at Hobby Lobby, it just so happened that it had a bit of purple on it and well, my mind started to whirl wondering if there was *something* that I could do with that find.  First, I knew that it would look really pretty in our “Purple” guest bedroom that is made up with that most beautiful of colors. And, second, I knew that I had a bit of a bare spot on the bottom of a table shelf that needed a little something. *Even* if I hadn’t have had a spot with which to utilize that bowl, I’d find one!  So, I snatched that bowl right on up and I will now show you how I put together an easy centerpiece to add to that room’s decor.

Below the little video box, I’ll show you the finished project and where I placed it in the Purple room.

Screen Shot 2016-07-17 at 4.46.52 PM

Here is where I placed it:

1V4A56251V4A56421V4A5627

As you can see, this bedroom has a bathroom attached, it is not very big at all, but it serves its purpose…

1V4A5628

1V4A5630

I always have a little care package sitting in all of the guest bedrooms so that folks who come to stay will have a little selection of things from which to choose that they might have forgotten…

1V4A5632

1V4A5640

I made that wreath utilizing one of my daughter’s old Boyd’s Bear Bunnies.

1V4A5639

This is the view of the upstairs landing as you exit the purple bedroom…You can see the Turquoise Room to the right, and the Happy Room  to the left <~~~ Links to show you how I put those two rooms together, i.e. bedding, decorations, curtains, decor, etc…And here is a link to the Purple Room‘s blog post.  I also have a blog post here showing you how I put together that little chair and table grouping on the landing.

1V4A5644

Here is a peek at the Turquoise Room…

1V4A5650

And the Happy Room:

1V4A5651

And here is the hall bathroom upstairs, it sits right next to the Happy Room so I kind of brought that same feel into the bathroom…Again, it is a very small bathroom, but it serves its purpose:

1V4A5646

And the family room as you look down over the railing:

1V4A5638

And the fireplace as you walk down the staircase…haha…:)

1V4A5657

All righty, that centerpiece is now in its rightful place and the upstairs is ready for a couple of guests who might just be coming to visit in the coming days. 🙂

Until next time, y’all take good care! ❤

~Arlynn ❤


Little Red Wagon Decor–Video Tutorial

I’ve been working diligently to make up a few tutorial videos for y’all, in this post, I will highlight how I switched out my Little Red Wagon decor yesterday.  As you will see in the video my wagon is starting to look ‘well used’, ‘rustic’, ‘a bit rough’, but, I love it so much that it looking a wee bit rustic is going to be okie dokie fine with me. When gathering items for this little project, I tried to mimic the Burlap & Birdhouse Wreath that I made for the front door last week.  Okay, I’m not going to yammer on any longer here in the body of this blog post other than to give you a link to my How To Make a Bow tutorial (because I promised I would in the video). 😉 🙂

Here are a few pictures of the finished product and then there will be a link to the tutorial below that:

1V4A55251V4A55261V4A5530

While I was at it yesterday, I also switched out my decorative flags that I have hanging in our front flower bed and added one Grapevine Wreath creations:IMG_2319

As you’ll notice the Grapevine wreath matches the front porch decor…:)

IMG_2320IMG_2321

And I redid the mailbox decor…If you’d like to see an entire post talking about how I change my mailbox decor out Seasonally, click here :

IMG_2300

All righty, here is that tutorial:

If y’all have any questions at all, please don’t hesitate to leave them in the comments below…

Until next time, y’all take good care! ❤

**In crafting there are no mistakes just unique creations**

~Arlynn ❤

Burlap & Birdhouse Wreath (With Video Tutorial Included)

I tried something new today, my hubby got me all set up with a little video camera and I recorded myself while I put this new front door wreath together.  So I don’t have to do a ton of explaining here in words, I’ll tell y’all all about in the video. 🙂  I will list and show a few pictures of the supplies that I gathered to make this wreath.

IMG_5098Here goes:

  • 24″ Metal Work Wreath Form
  • 2 1/2 Skeins of Burlap Runner
  • 1 Bolt of Burlap Ribbon (Wired)
  • Scroll’y’ piece
  • 3 Cream Sunflowers
  • 2 Resin Daisies
  • 2 Metal Stars
  • Wooden Birdhouse
  • Red Berries

You will also need pipe cleaners, a hot glue gun, and a spool of floral wire:

IMG_5111

IMG_5117

And the hubby got me all set up with our new little video camera and this tripod–It was quite the operation. 😉

IMG_5099

Here is the finished wreath and below these pictures will be a link to my tutorial video. I tried really hard not to ramble! lol  I hope that it will help to inspire y’all to try and make one of these for yourself!!!

IMG_5121

IMG_5131IMG_5129

Here’s that link:

***Update:  Well, I wasn’t completely happy with my wreath, so I did a little work on it today–Here is a little video update for y’all. 🙂

Until next time, y’all take good care! ❤

~Arlynn ❤

A Lantern Centerpiece Tutorial (Video)

My daughter Christin took a video of me making a Fall Lantern Centerpiece last year, I’m going to go ahead and load it onto my little blog site here — I just recently upgraded my account and now have unlimited space for which to load more media (pictures and videos).  I hope that this gives those of you who might want to try to make one of these the courage to do so. 🙂  Of course, if you have any questions, please feel free to leave them in the comments and I’ll do my best to try and answer them. 🙂

Until next time, y’all take good care! ❤