Deco mesh has become one of my favorite things with which to make my outdoor wreaths. It holds its shape and handles rainy or snowy days beautifully. 🙂 I have been making wreaths for my front light post as the seasons pass since last winter, so I decided to go ahead and get my Christmas wreath made today. Honest to goodness, I wish I could find my “off switch” sometimes, I truly am like the energizer bunny and I am rarely idle. I shouldn’t complain huh? I should be very grateful that I can still put my feet on the floor in the morning and go through my day with an exorbitant amount of energy. 😉 🙂
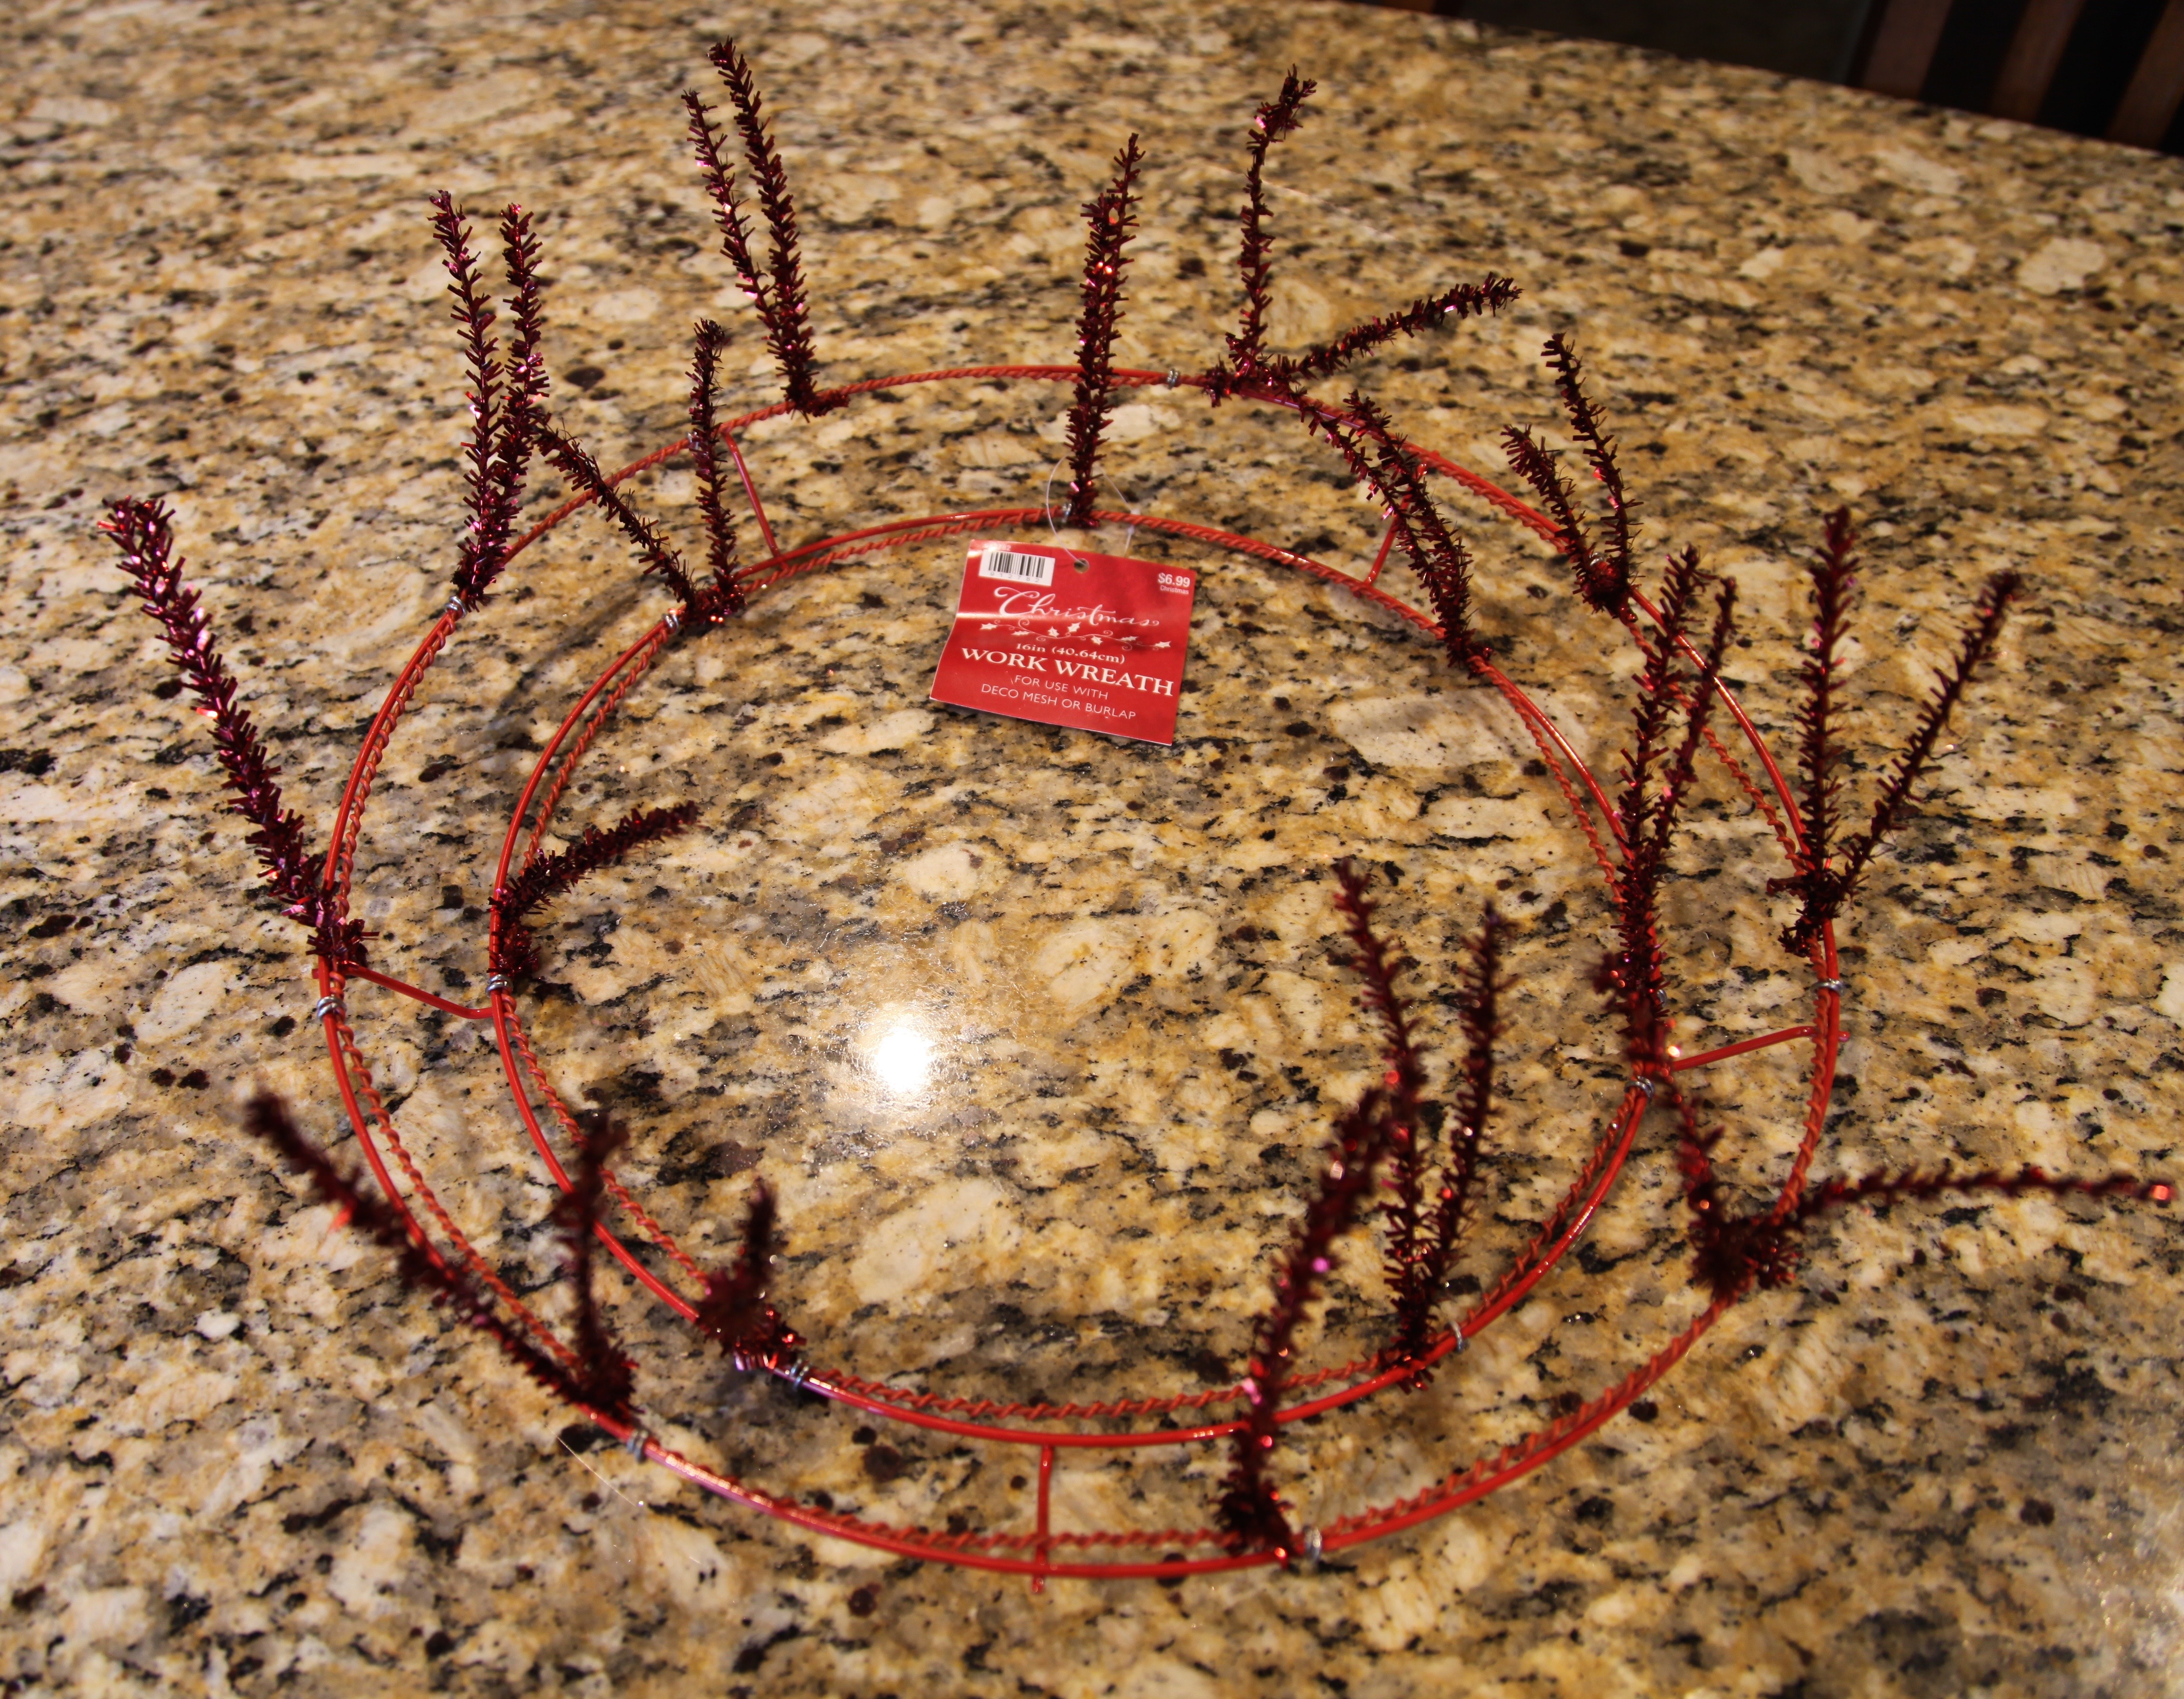
So, here we go…I used a 16″ “work wreath” which only means that it is a metal form with chenille twist ties already attached. I actually was able to find one with red twist ties on sale at Hobby Lobby in the Christmas department.
I was able to do this entire wreath with one roll of deco mesh:
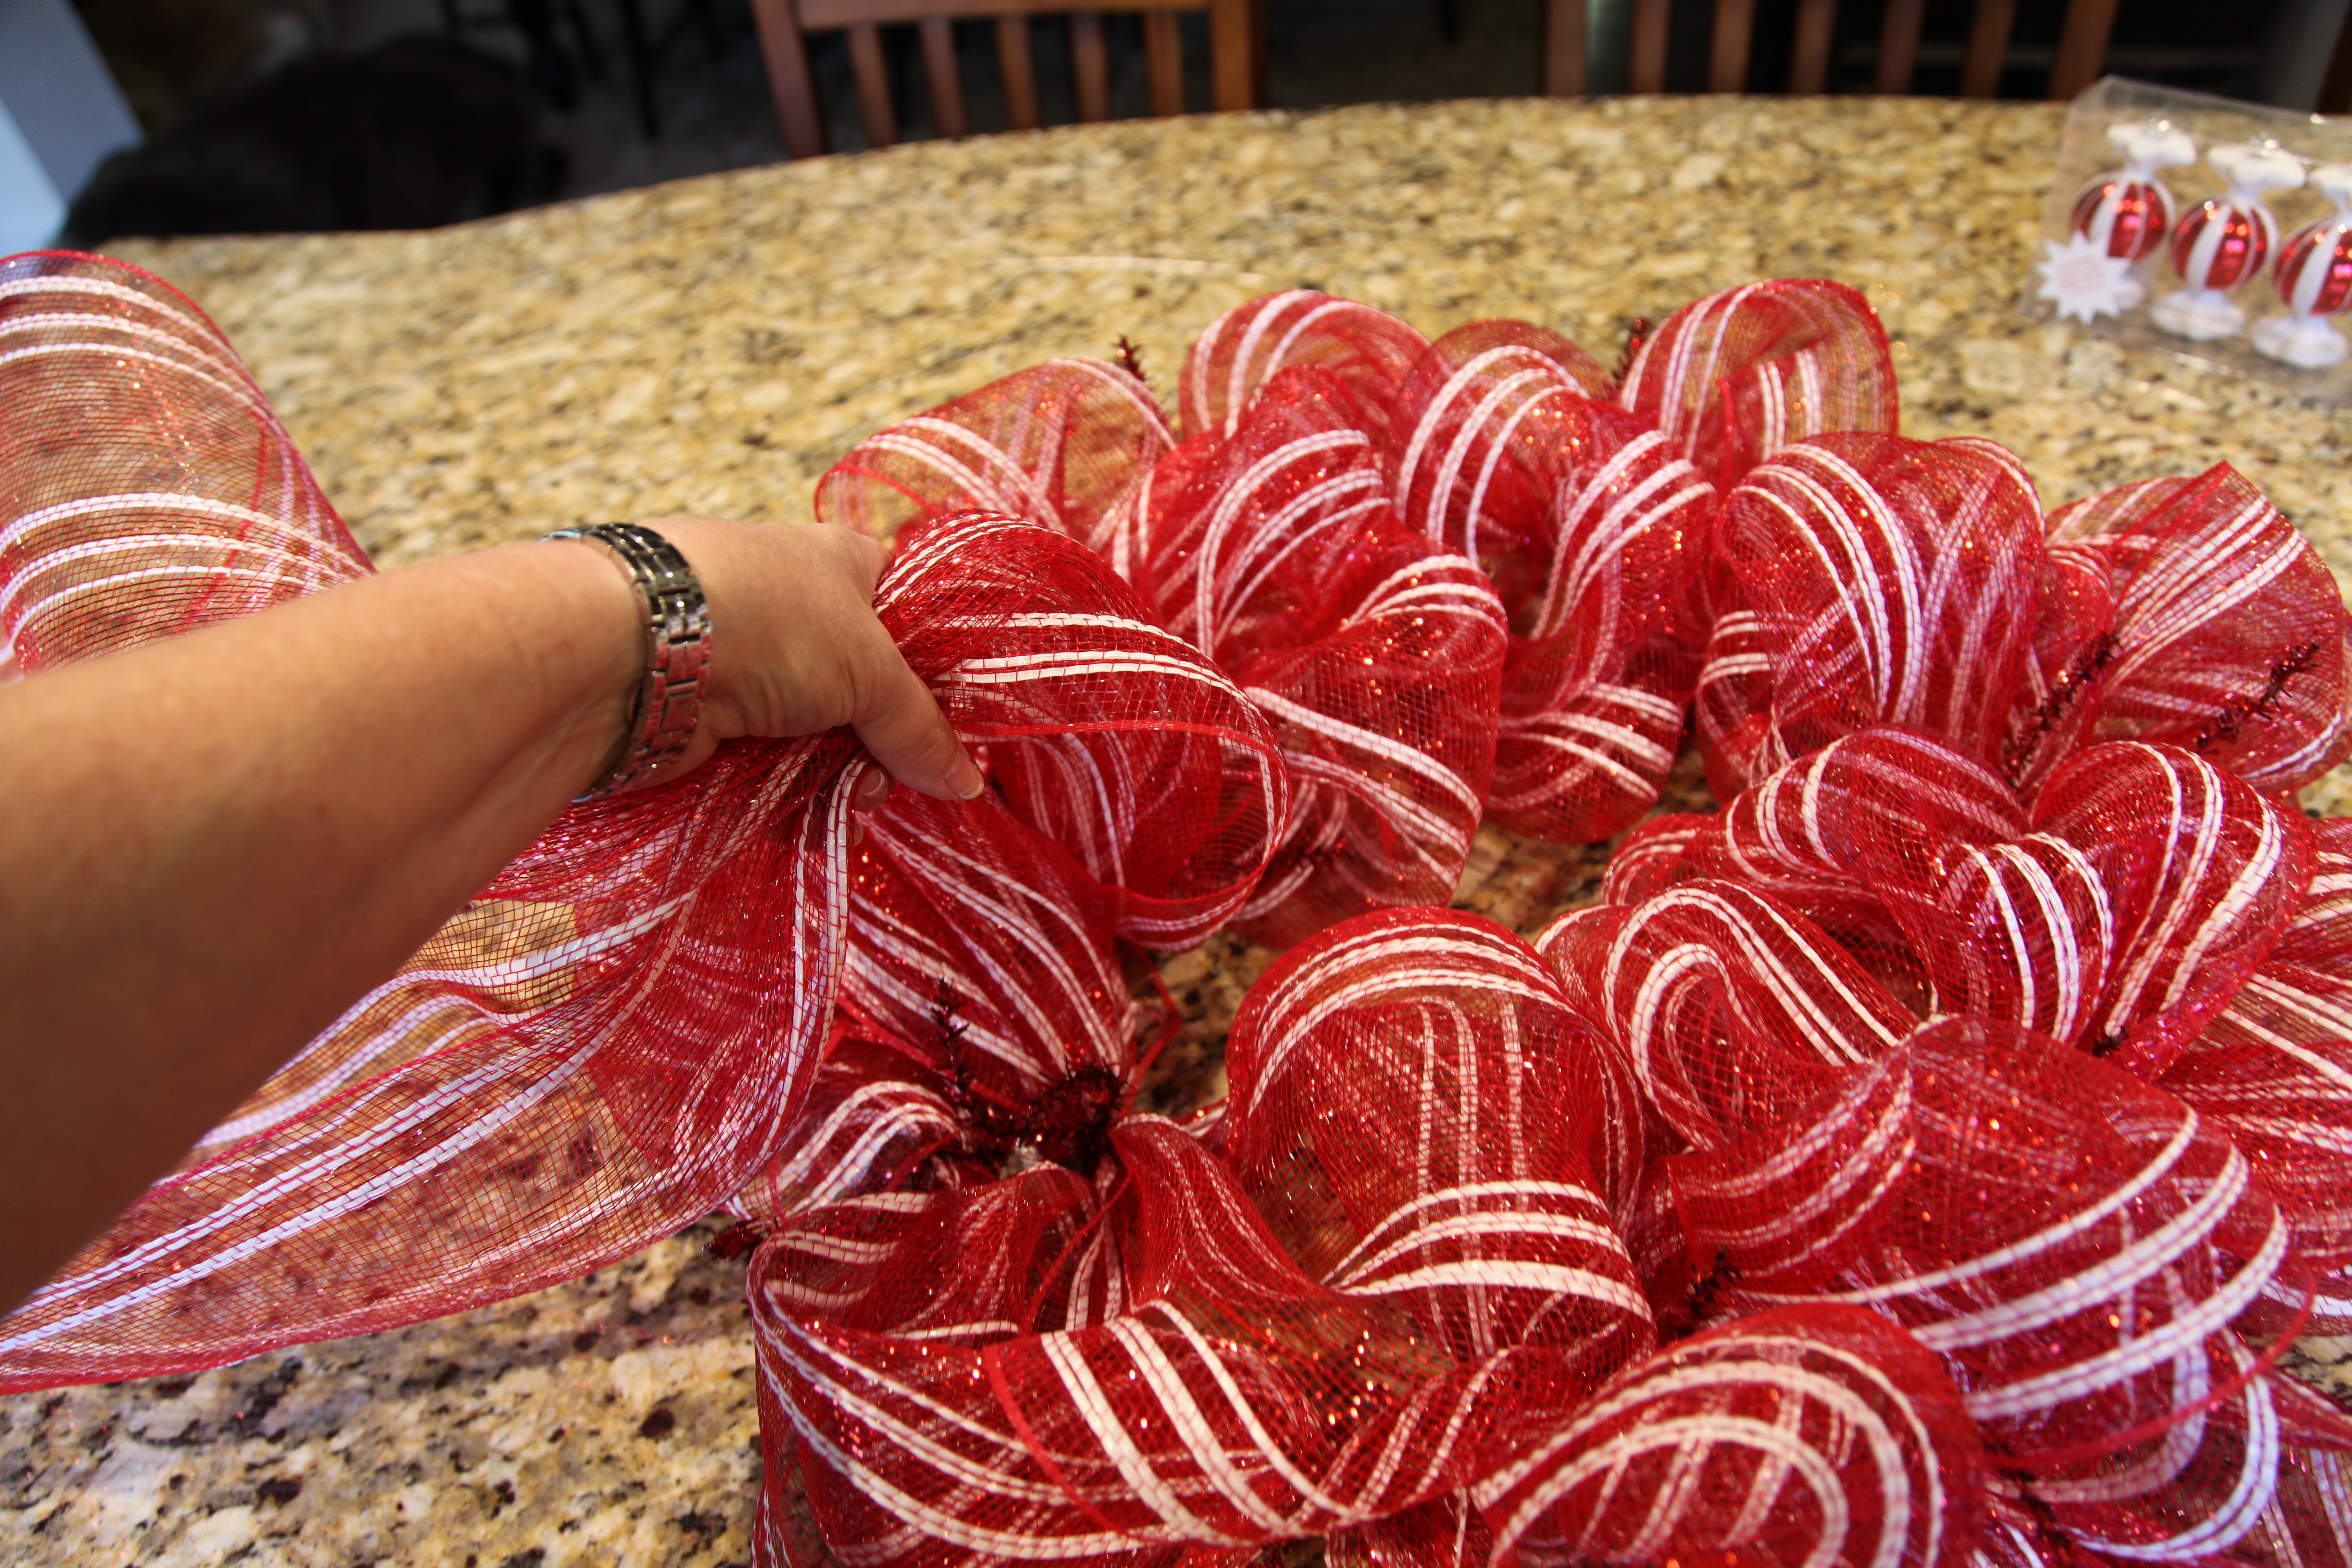
I started this wreath by unrolling a good bit of the deco mesh and start attaching it to the outer ring of the work wreath. I then started to make loops using about 10″ of mesh for each loop. I followed that pattern all the way around the outer ring and then transferred to the inner ring and did the same thing until I had filled all of the twist ties…
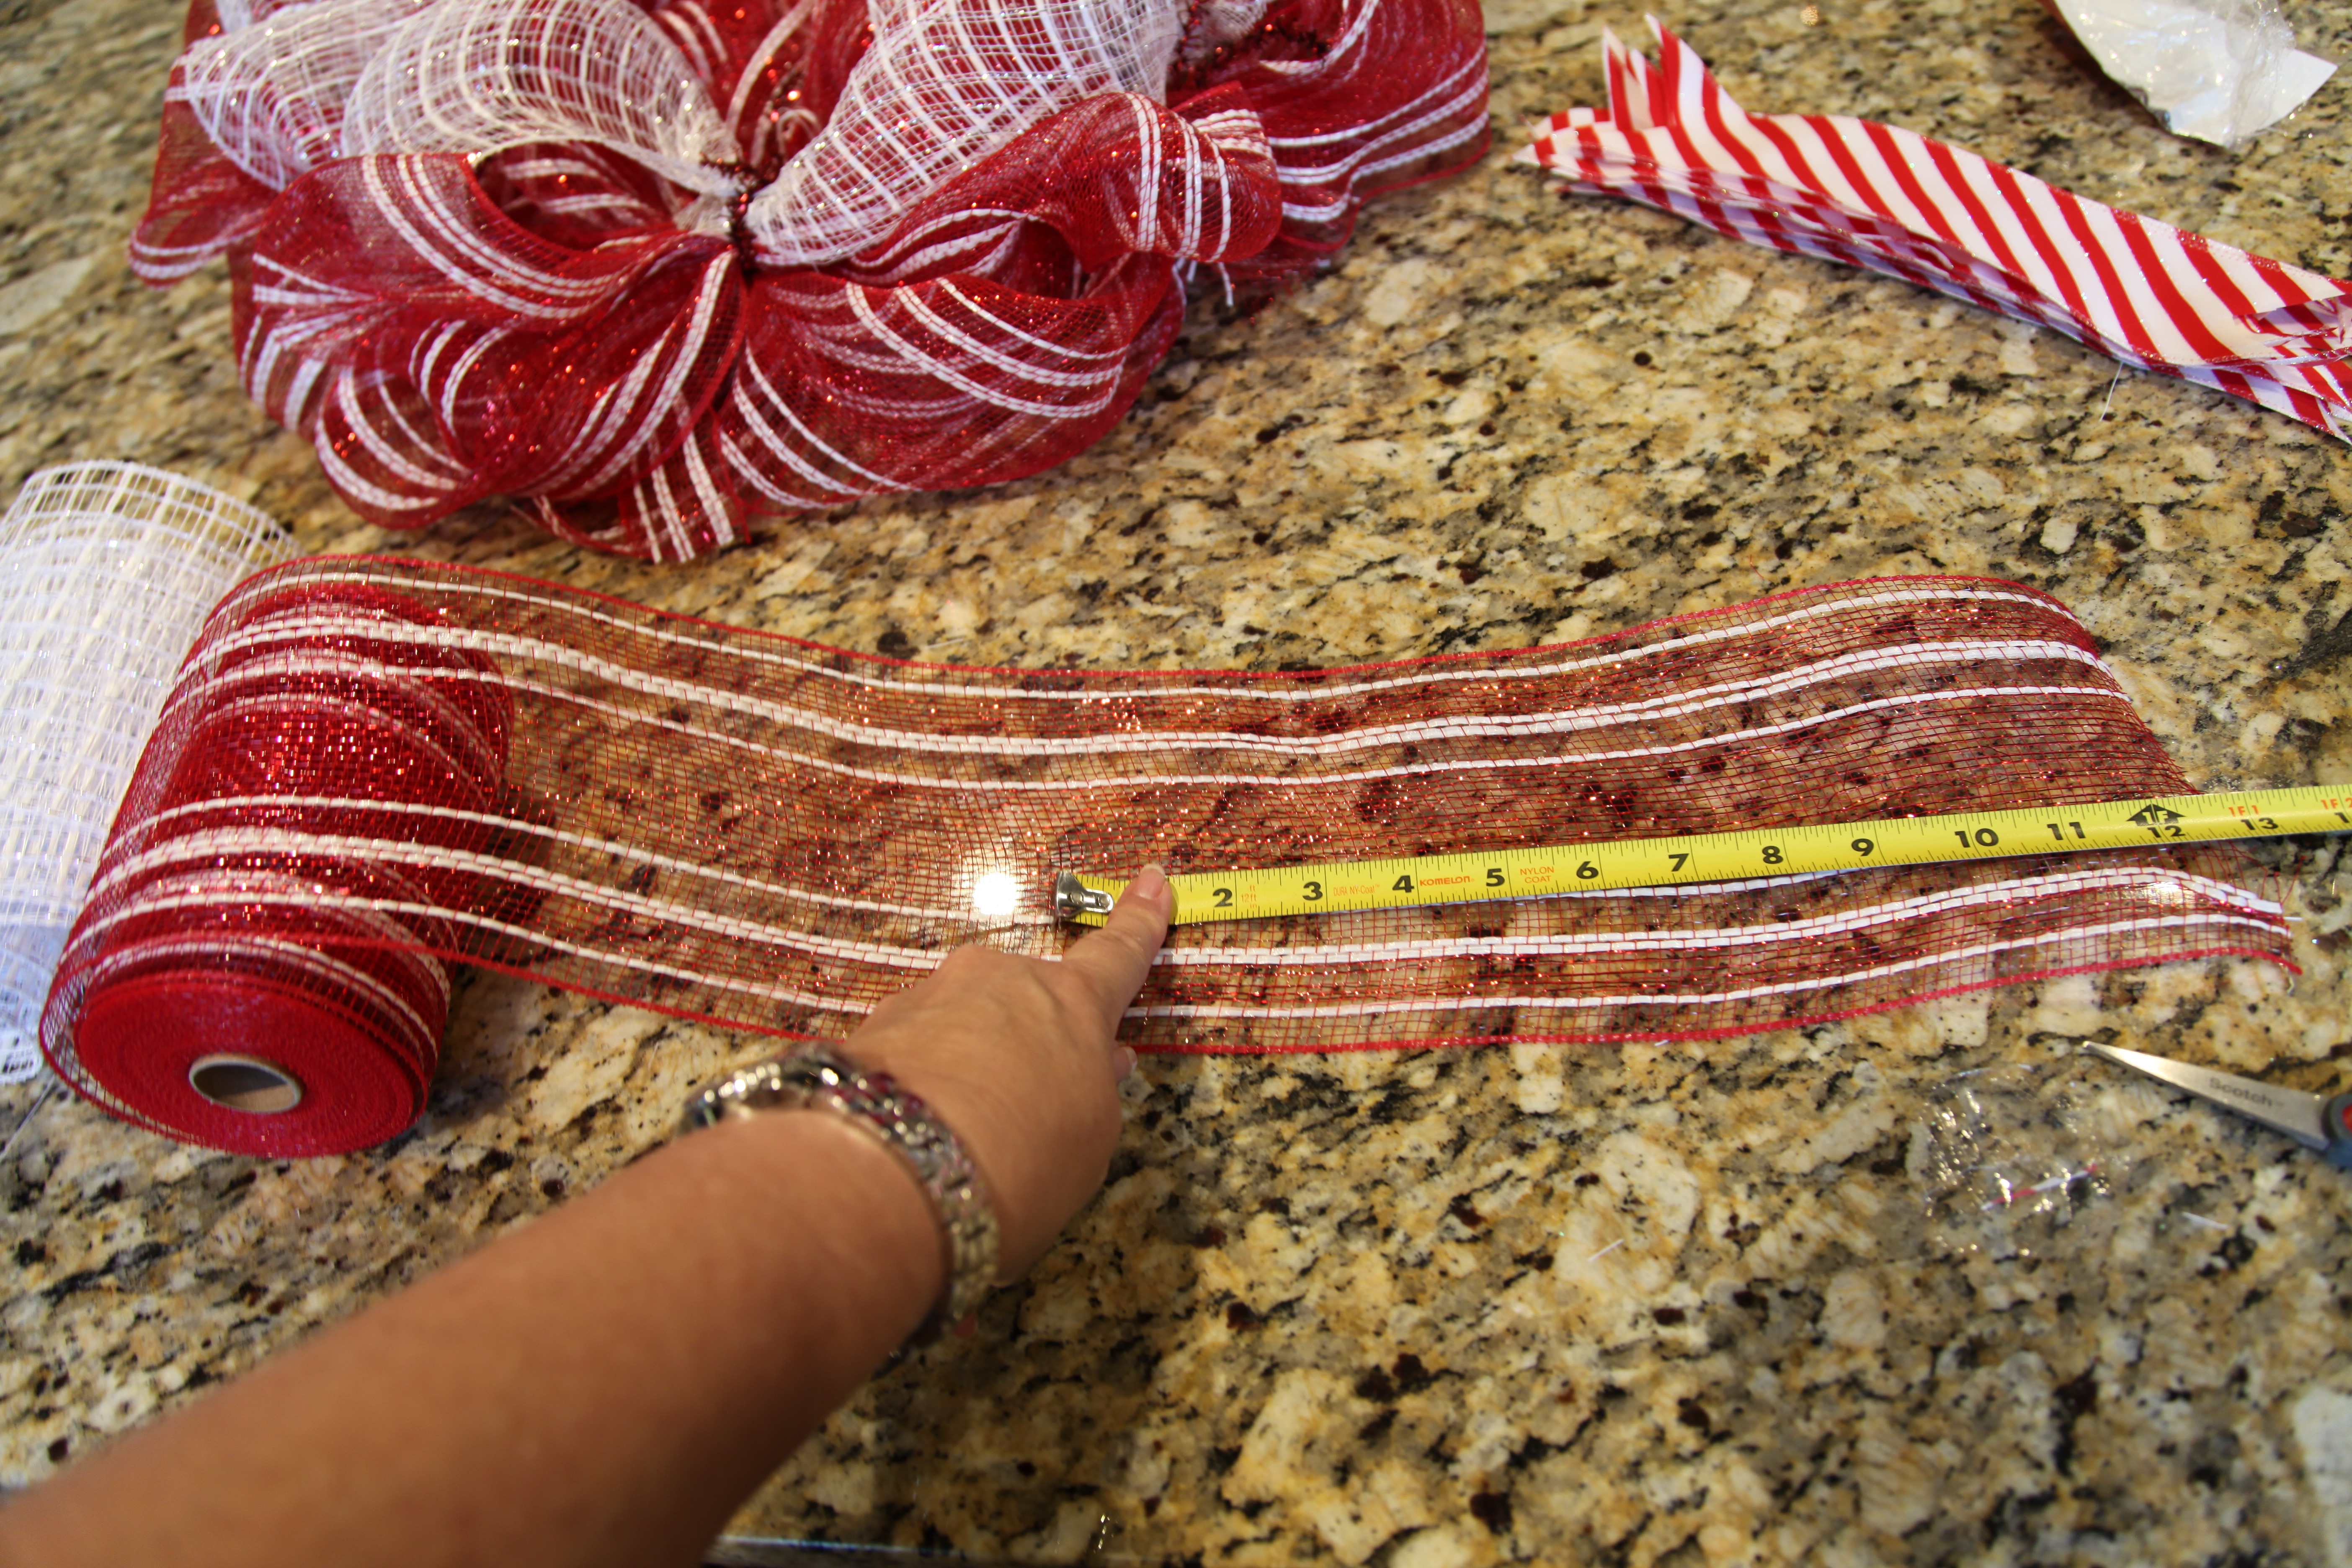
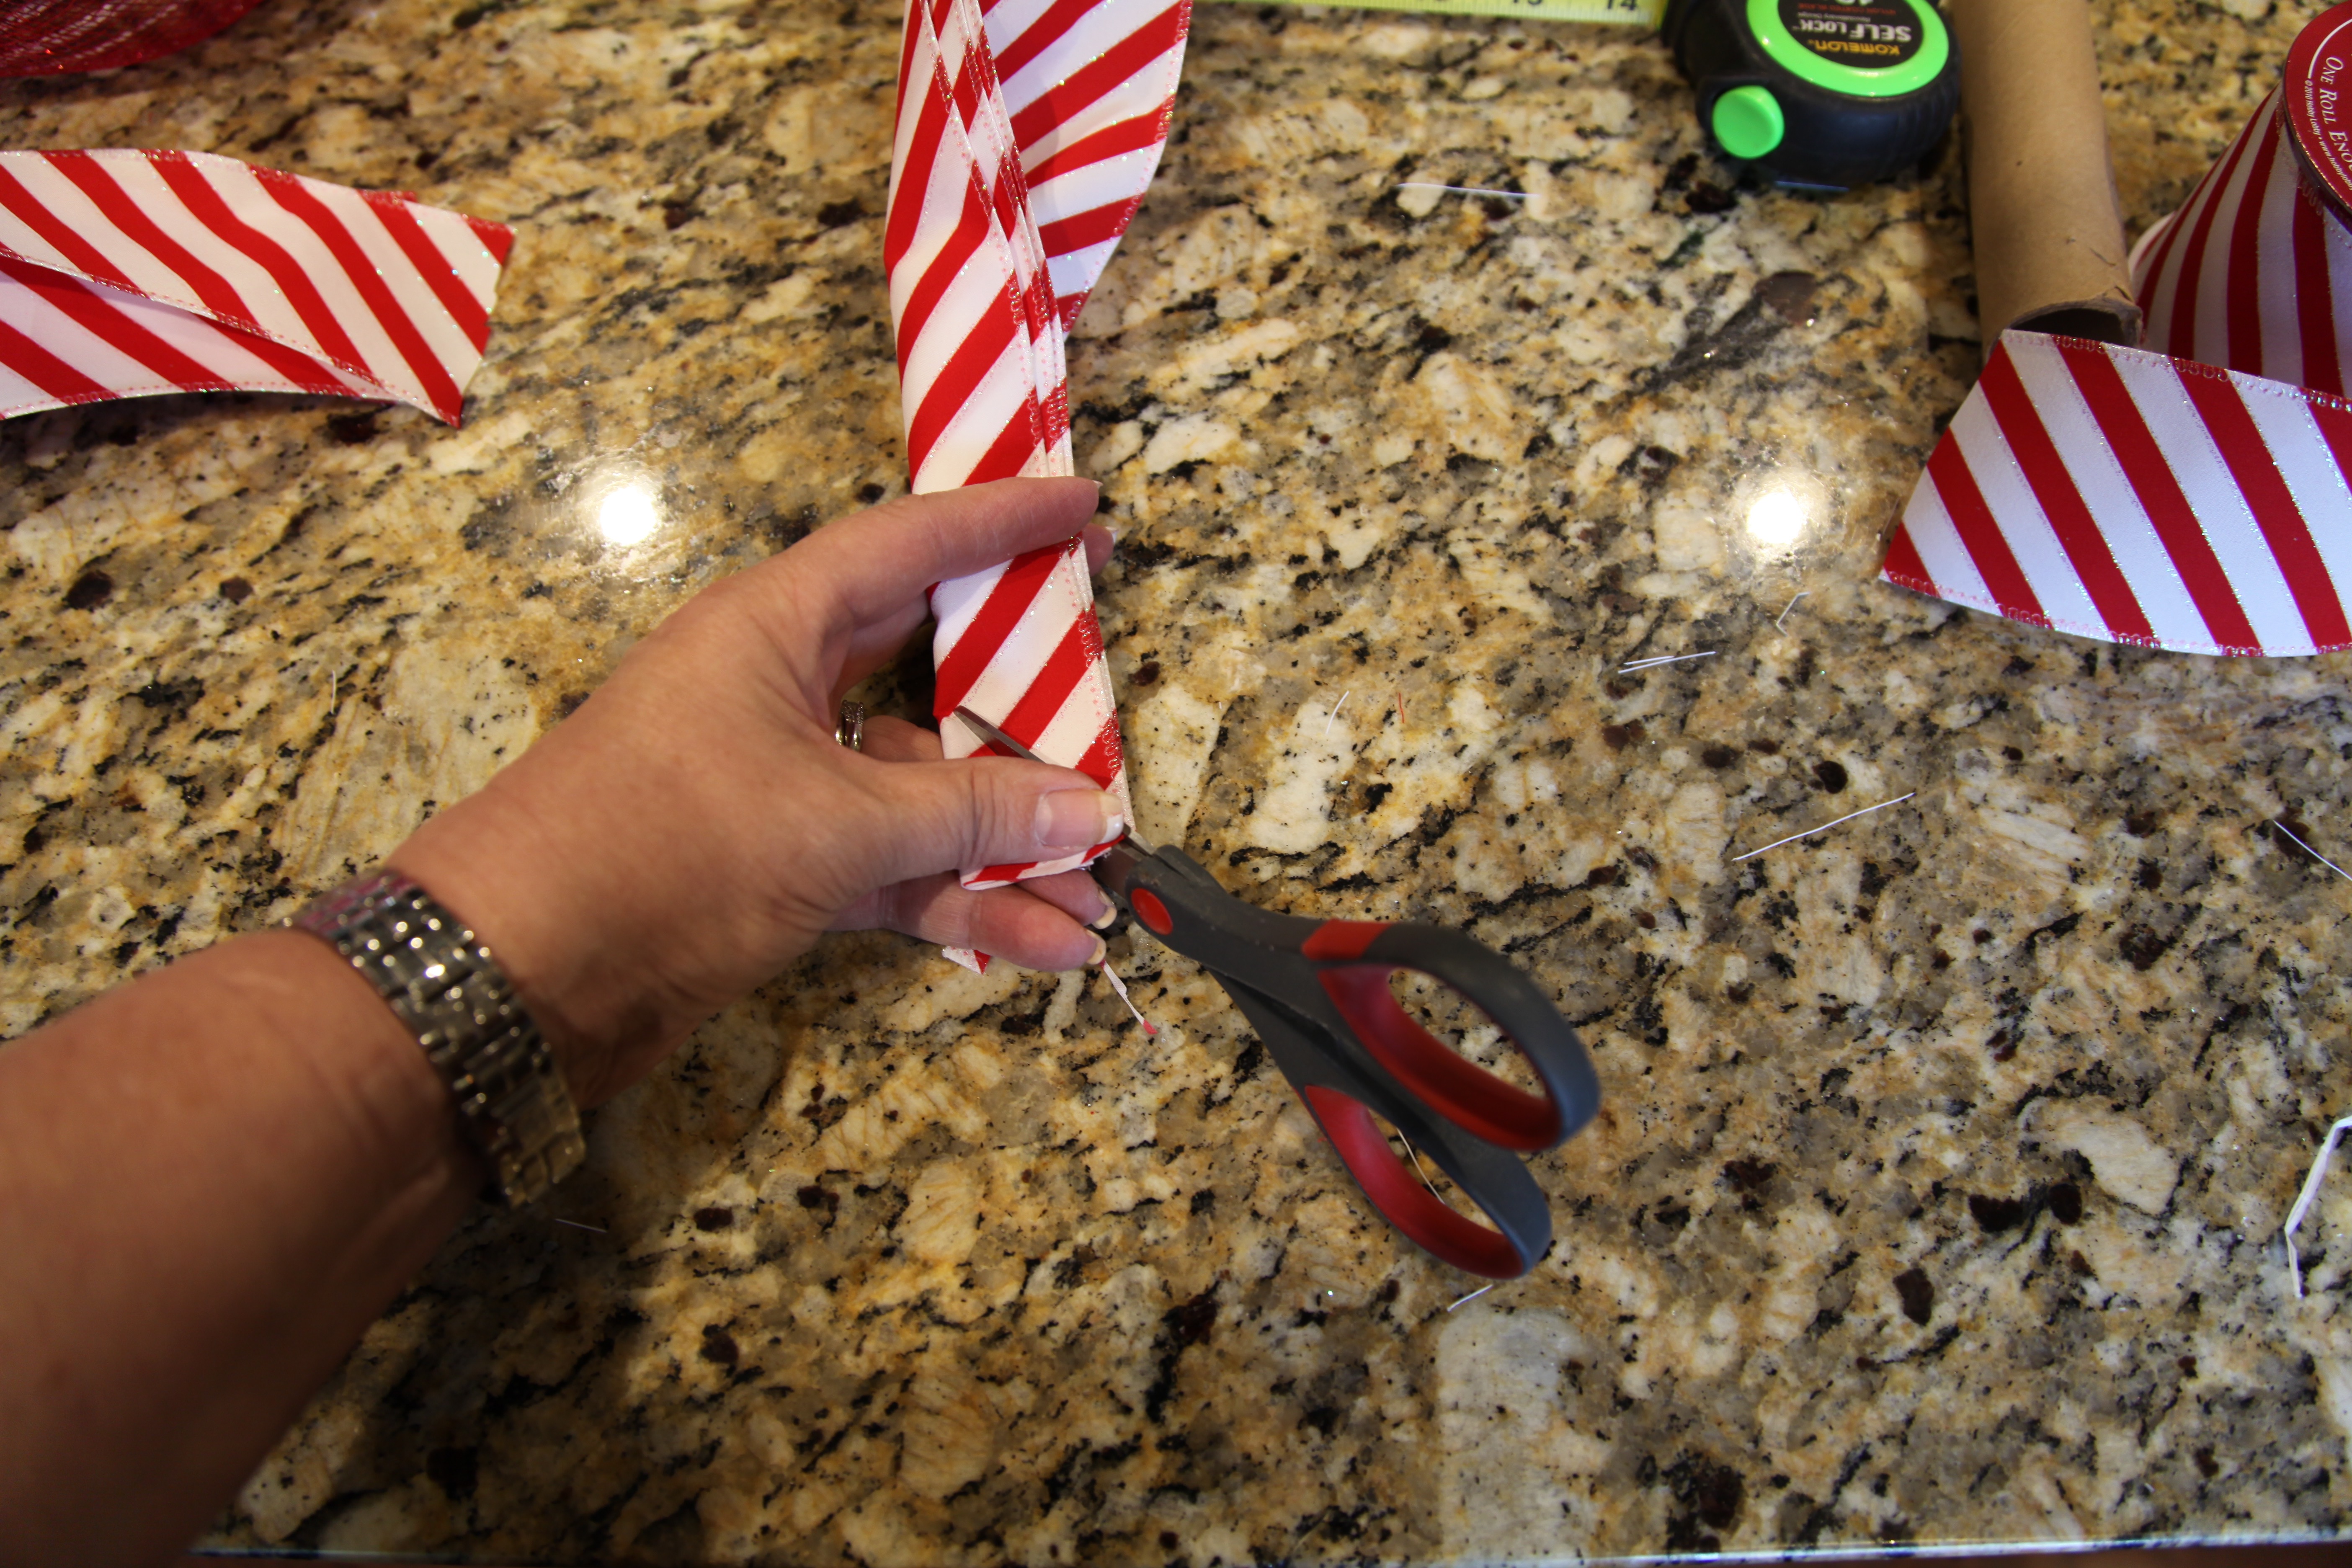
Now to add a few extra adornments to the wreath, I took some 5″ deco mesh ribbon in the same pattern that I used for the wreath and I cut 4- 12″ strips, and I did the same thing with some red and white striped wired ribbon.
Then I made a little pile consisting of one piece of the cut deco mesh, one piece of the red and white ribbon, and I added a white “snowflake” pick and bundled them all together and placed them into one of the twist ties on the wreath. I did that 3 more times strategically placing the 4 tufts around the wreath.
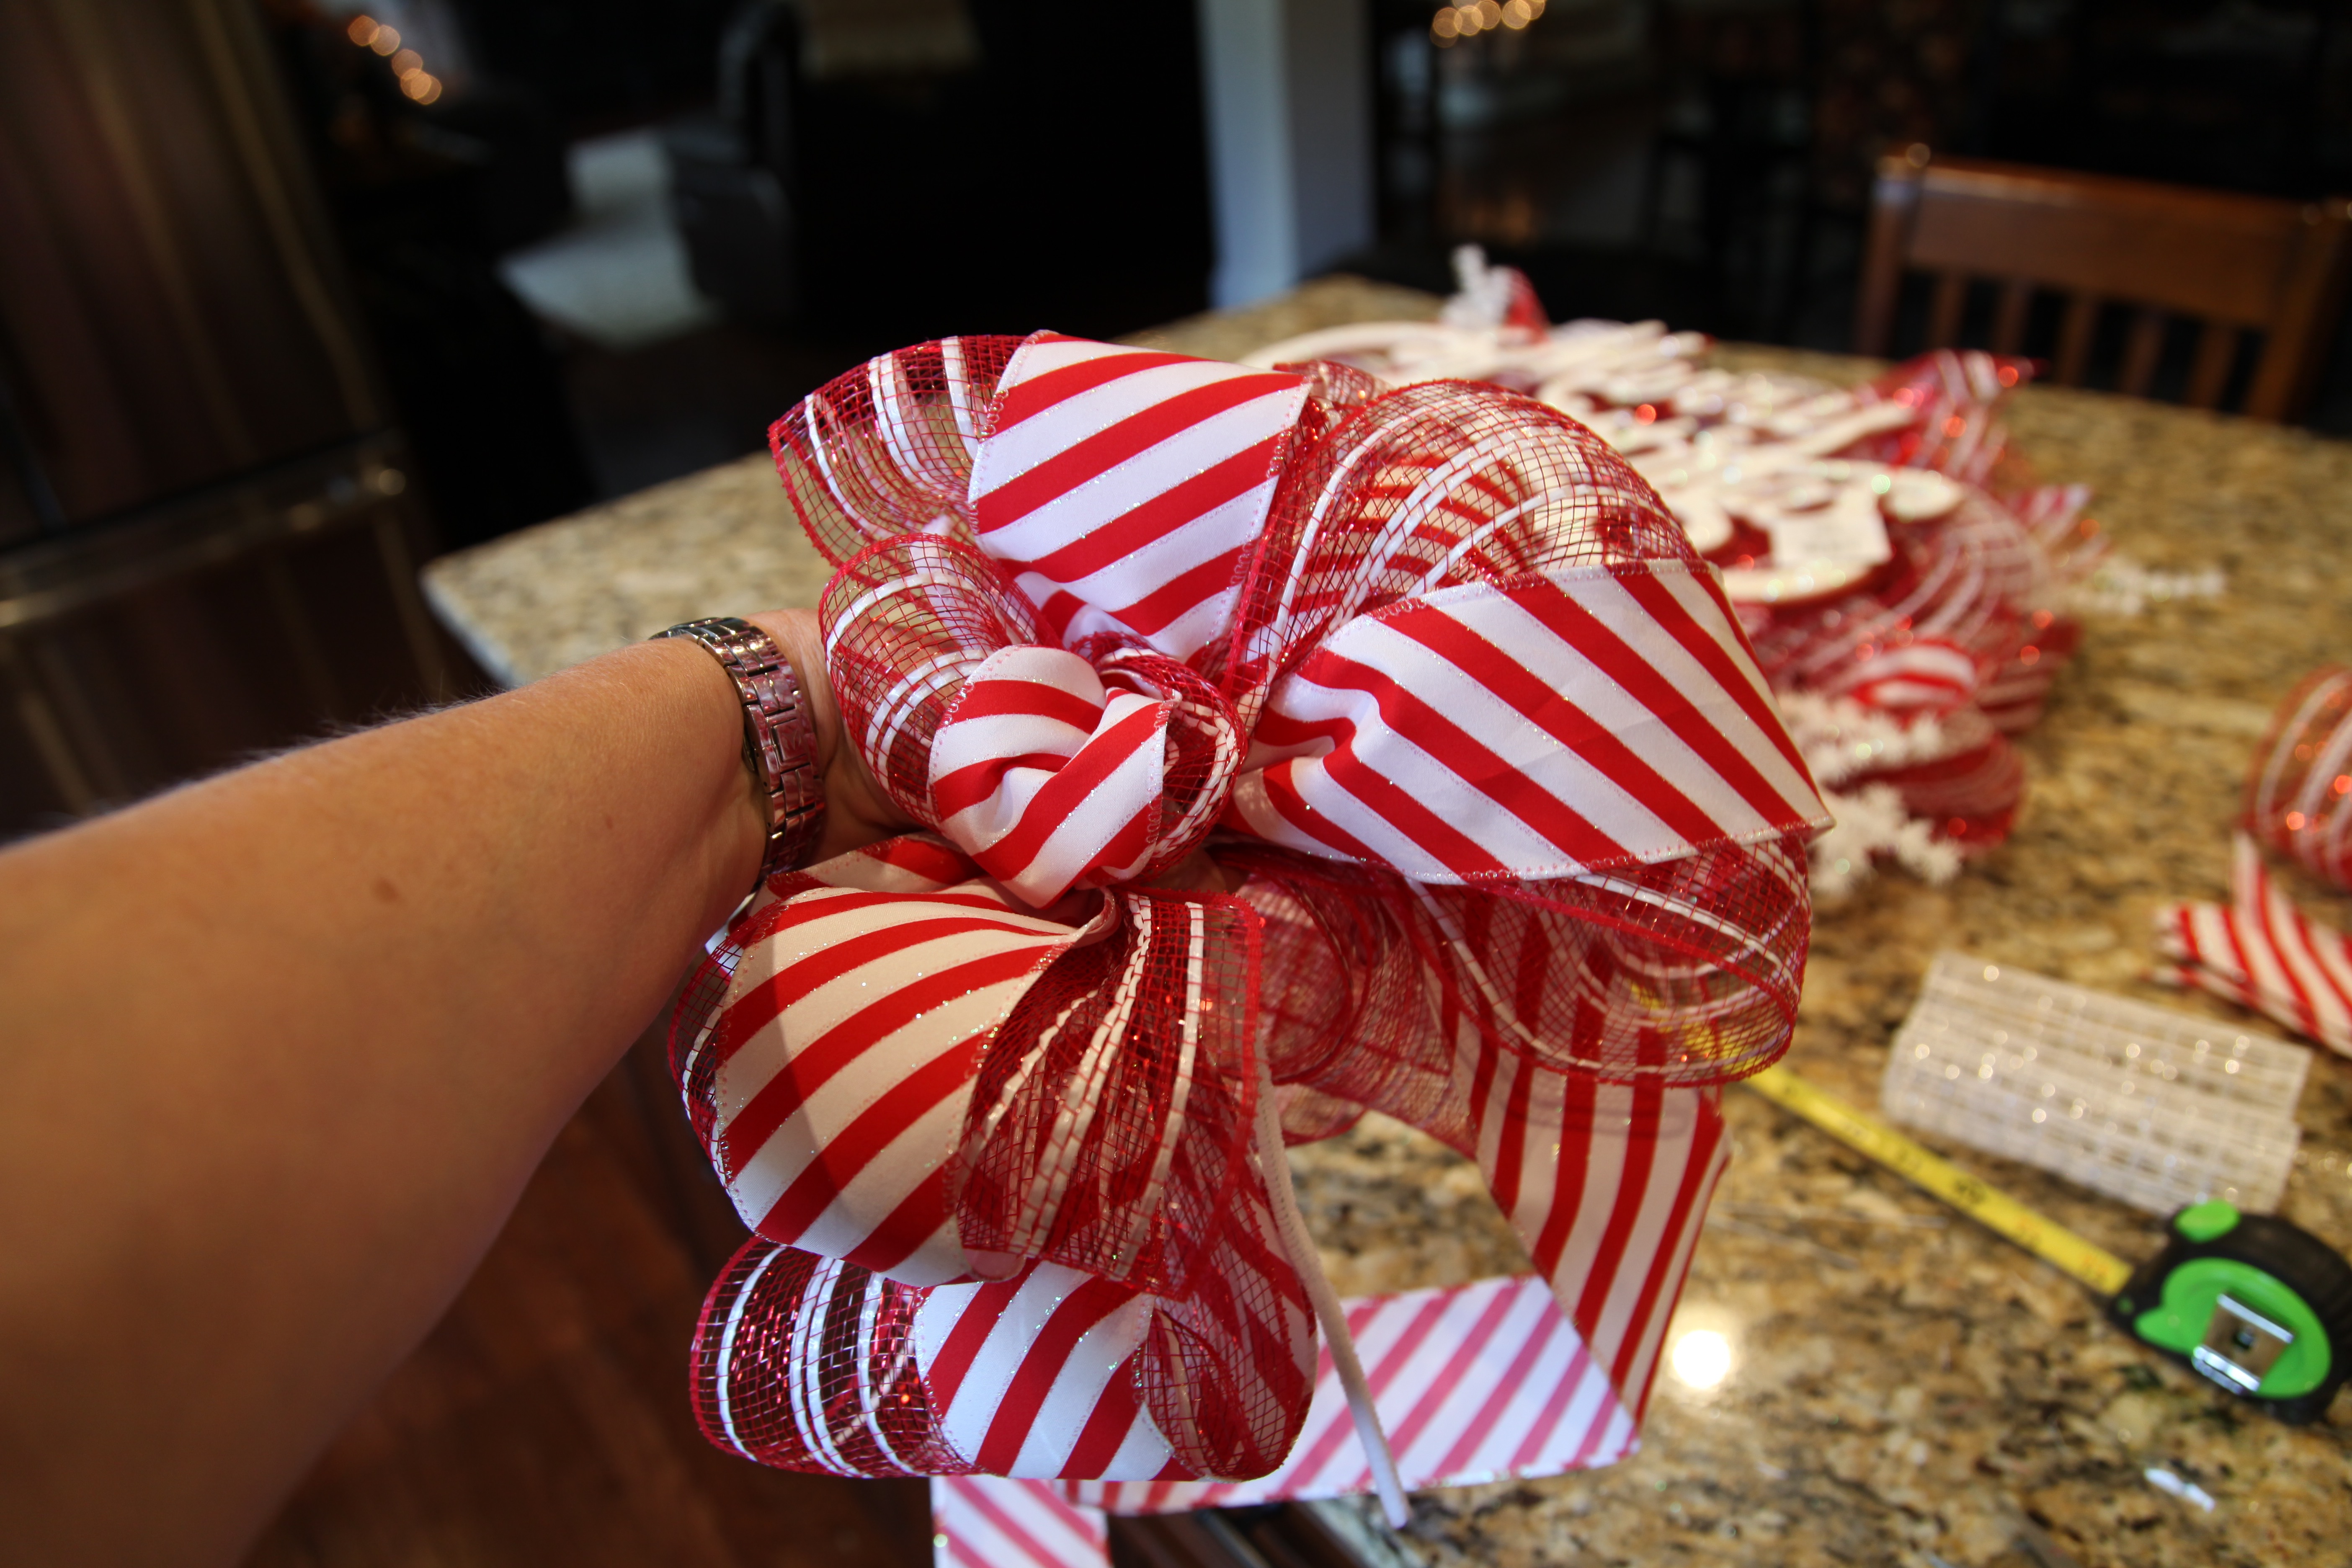
A bow was next, I made it out of the same 5″ deco mesh and red and white ribbon that I had used for the little tufts. Here is a link to my “How to make a bow tutorial” (video)…
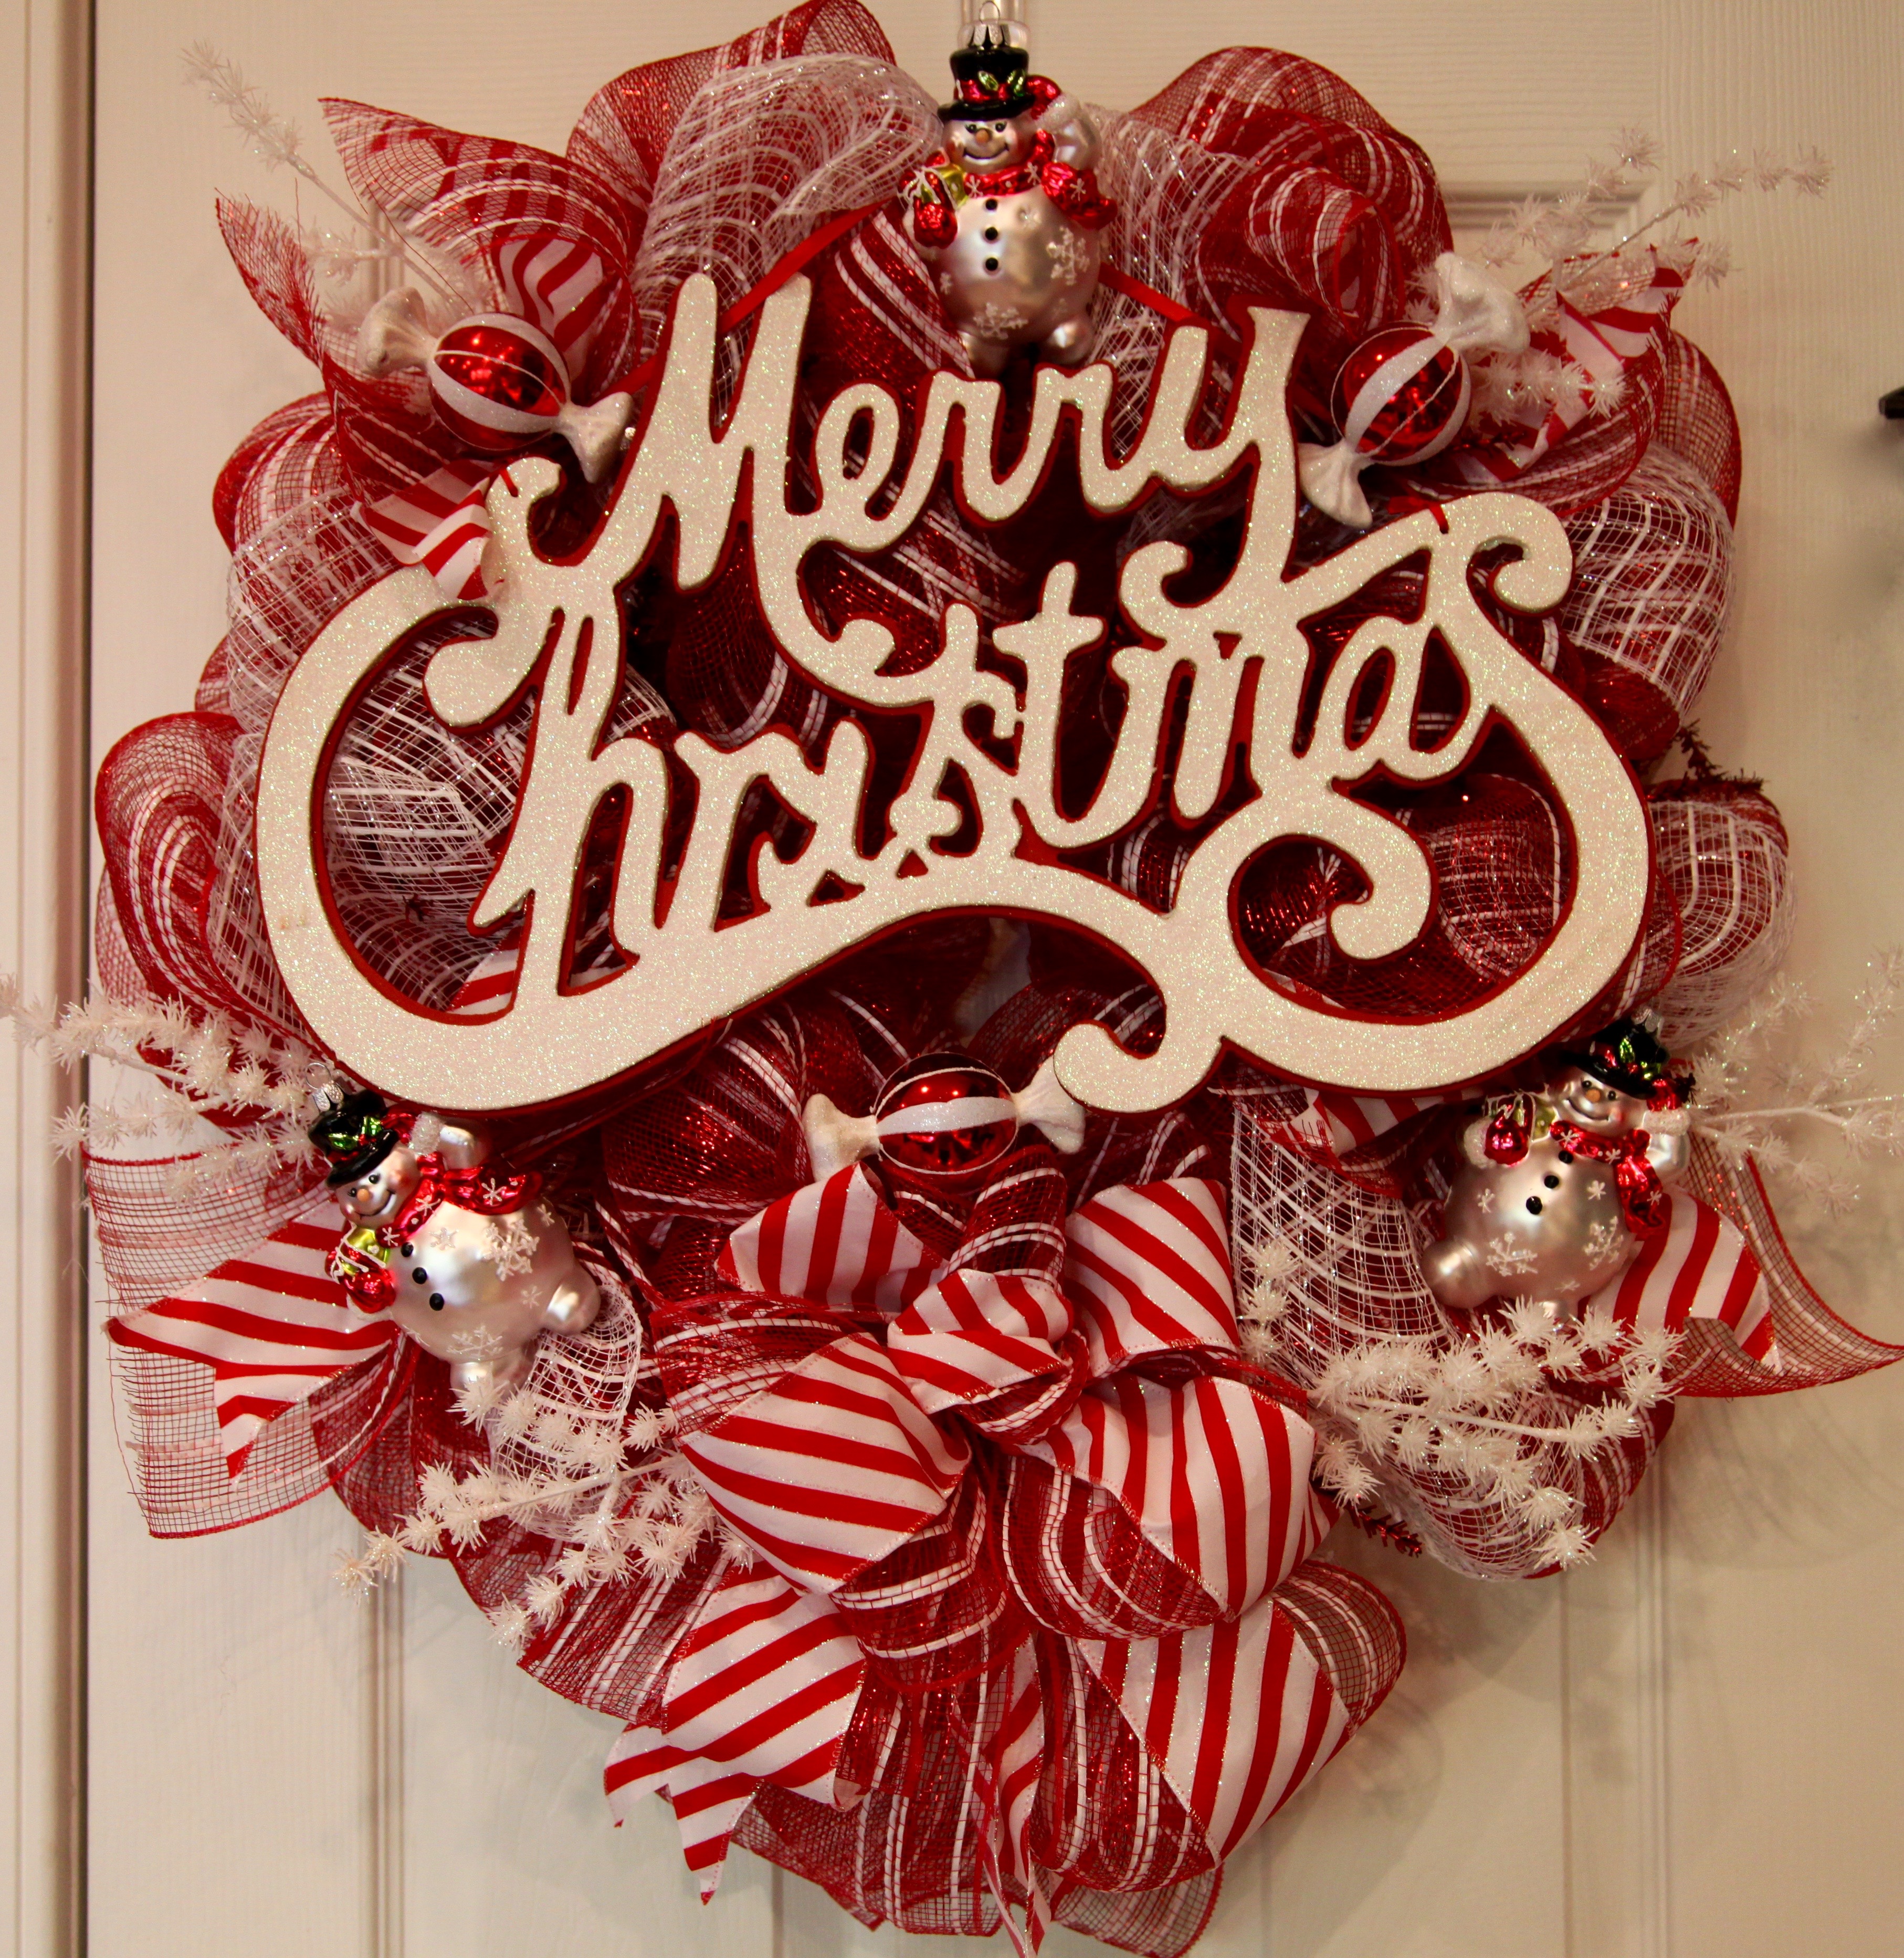
I found a “Merry Christmas” worded sign with glittery white lettering, I was able to tie that into the twist ties; I did glue it in a couple of places as well…
Next, it was time to place a few snowmen and candy Christmas ornaments; I hot glued them into place and called it done.
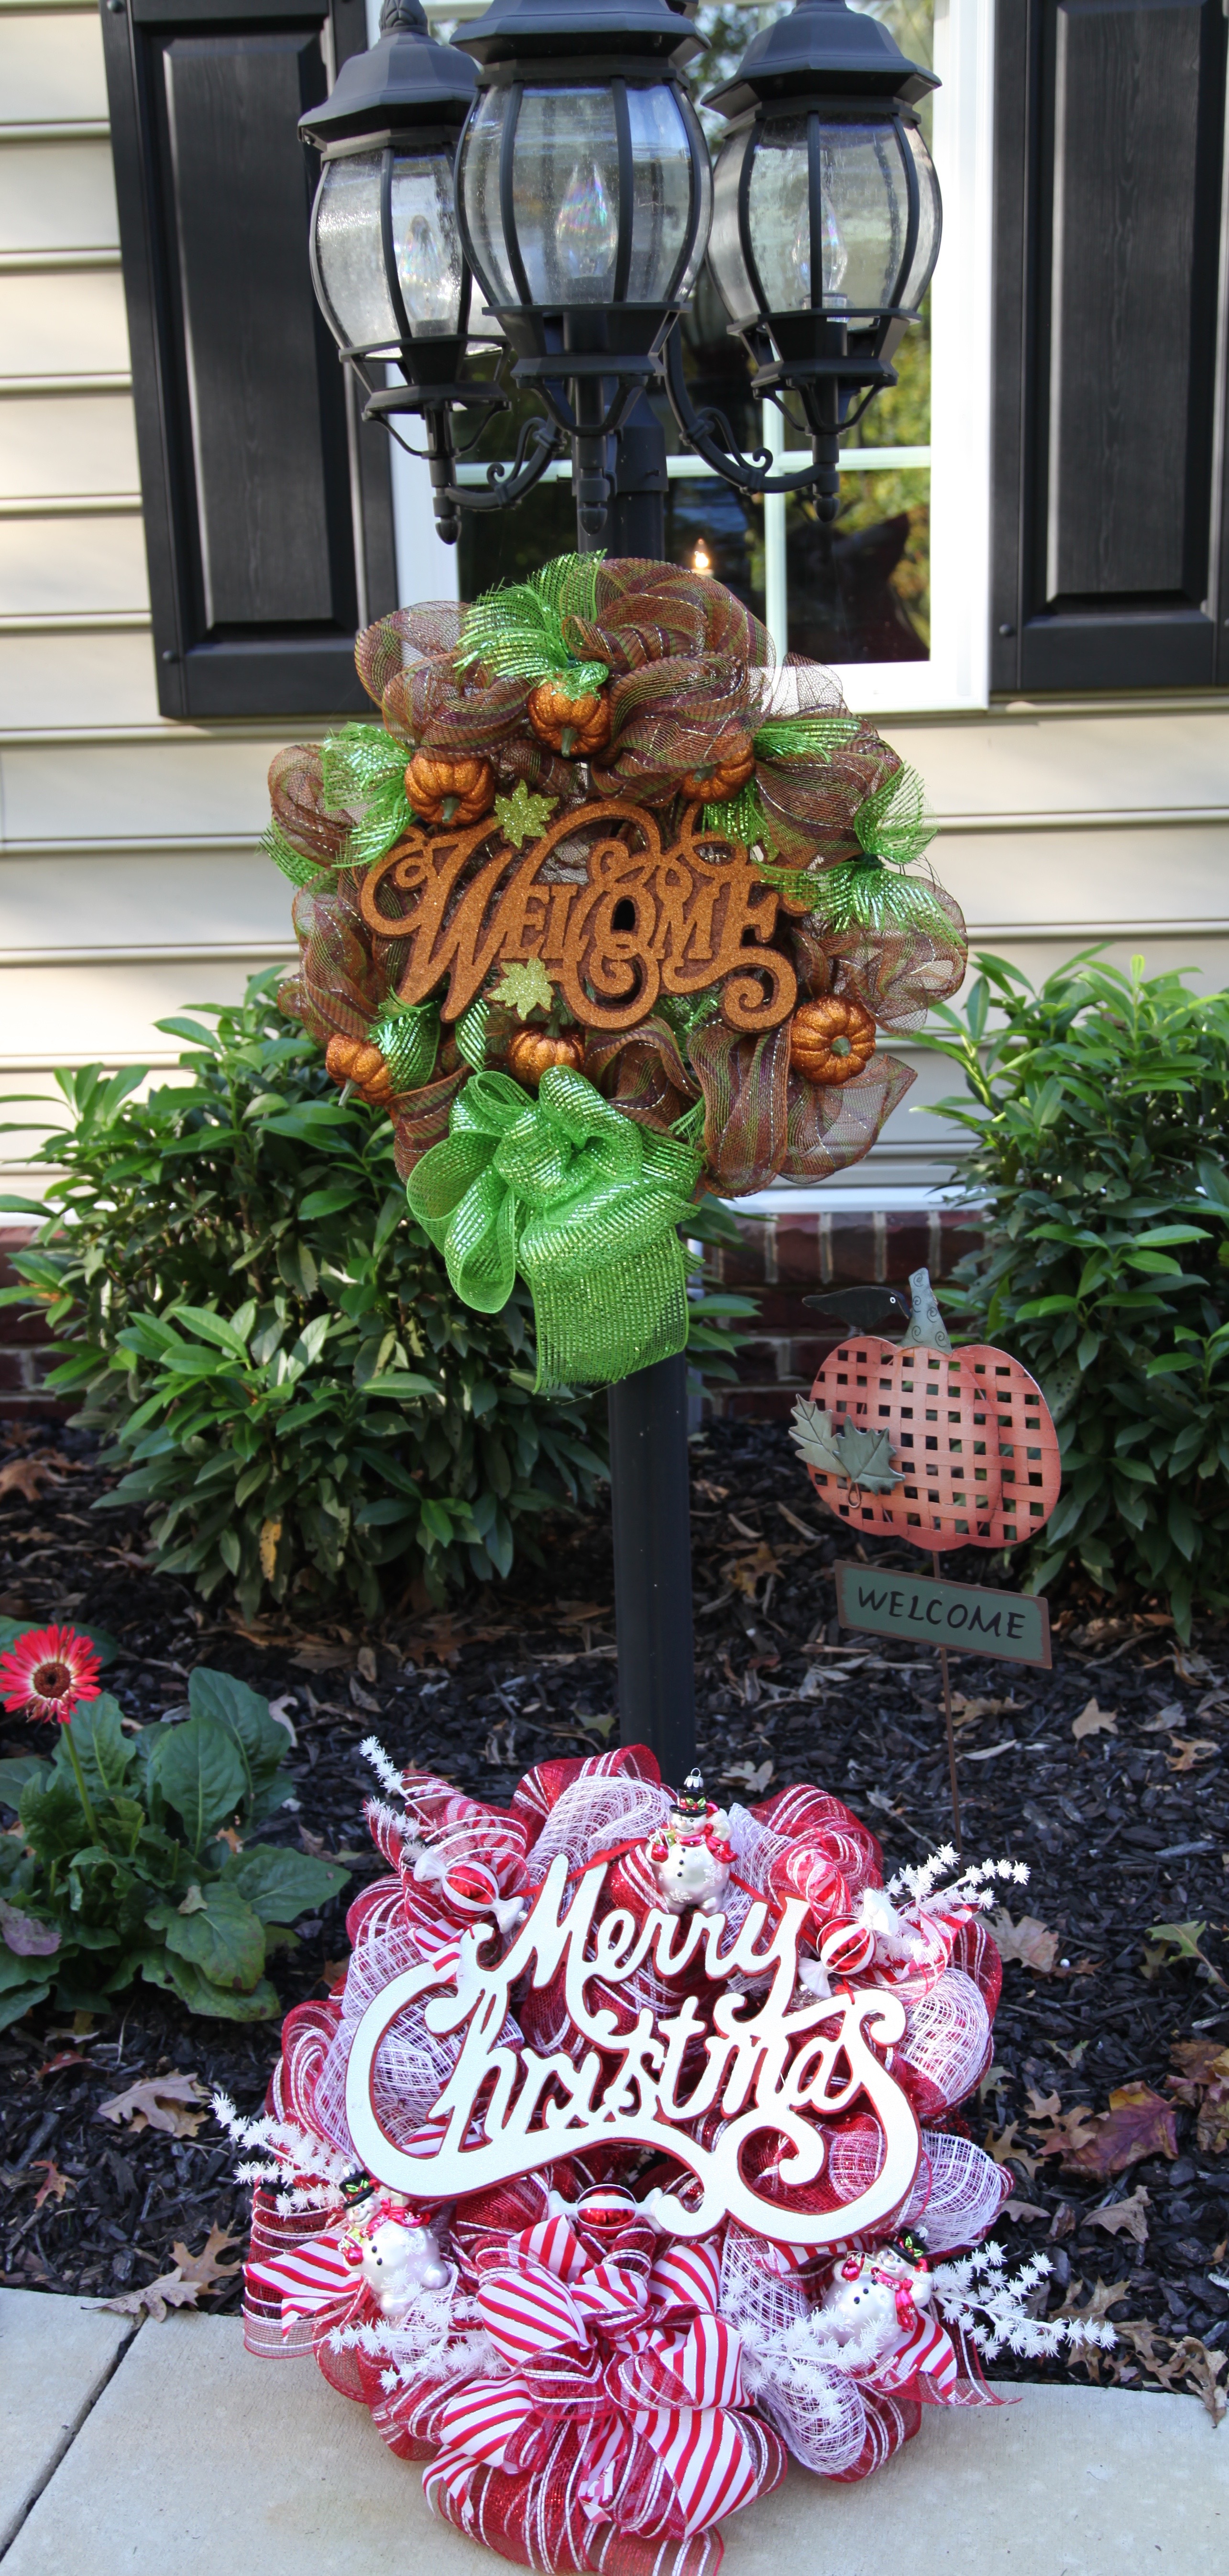
When it is time to decorate for Christmas, this wreath will replace my Fall wreath on the light post…
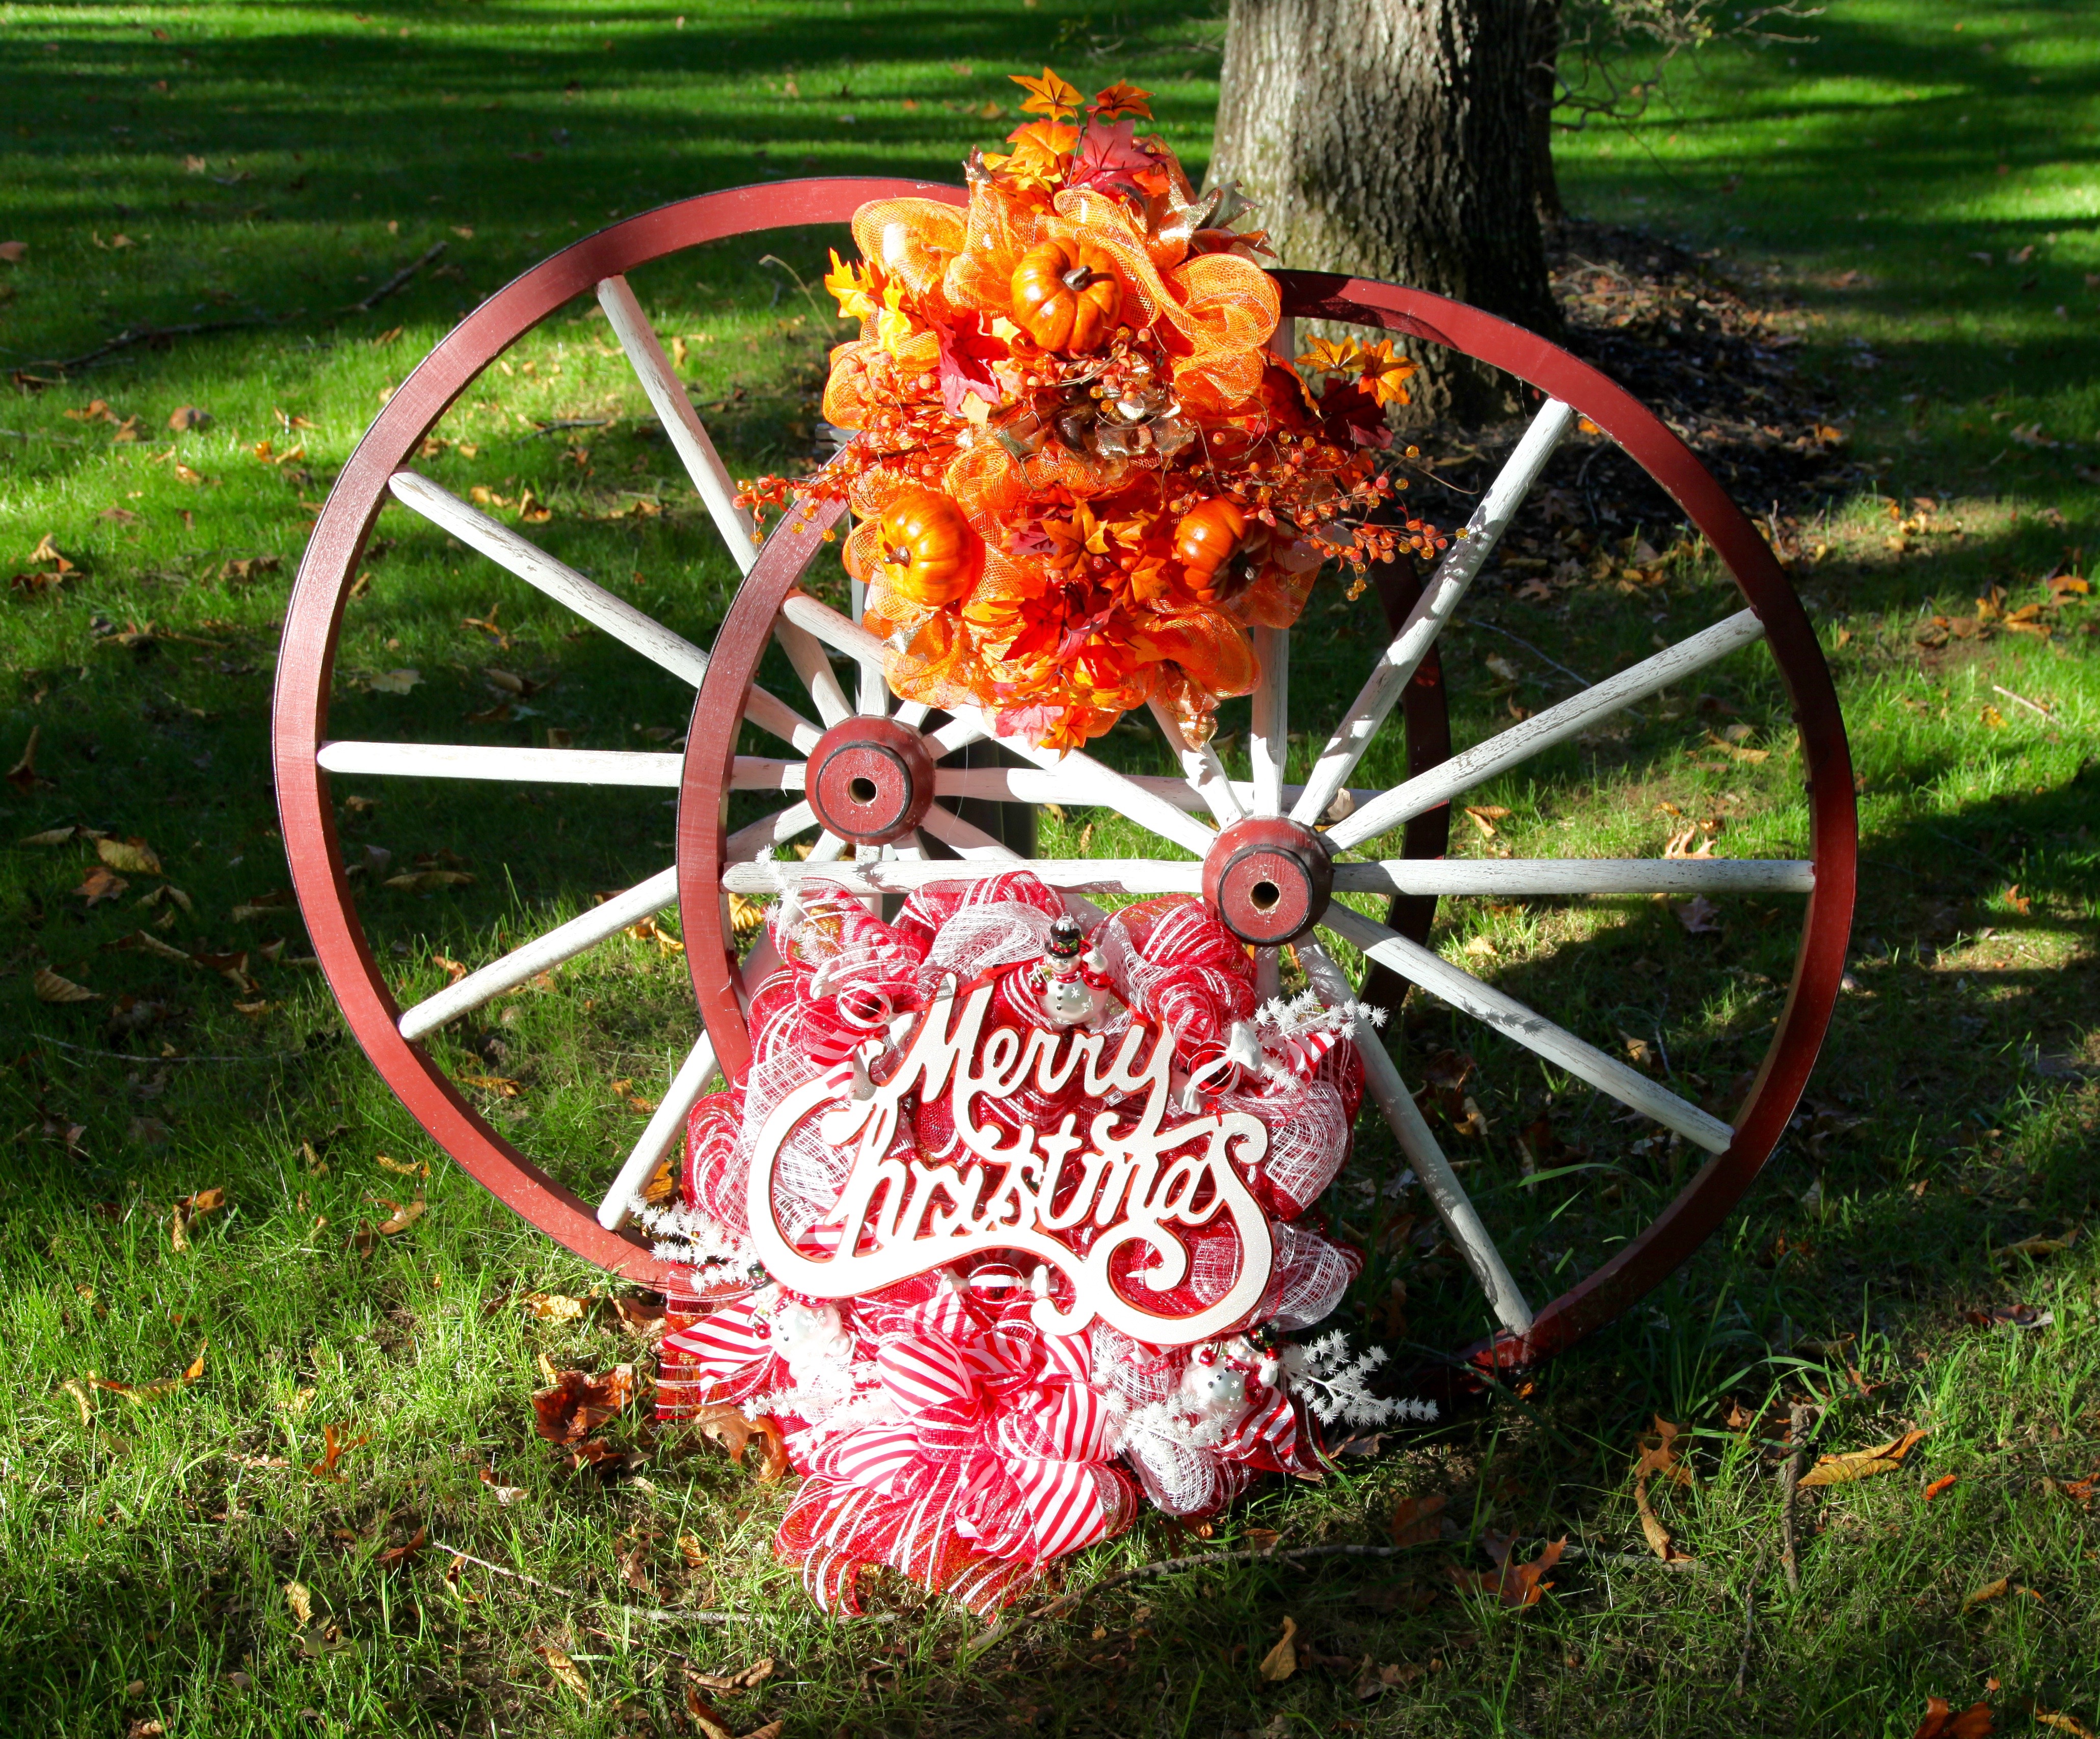
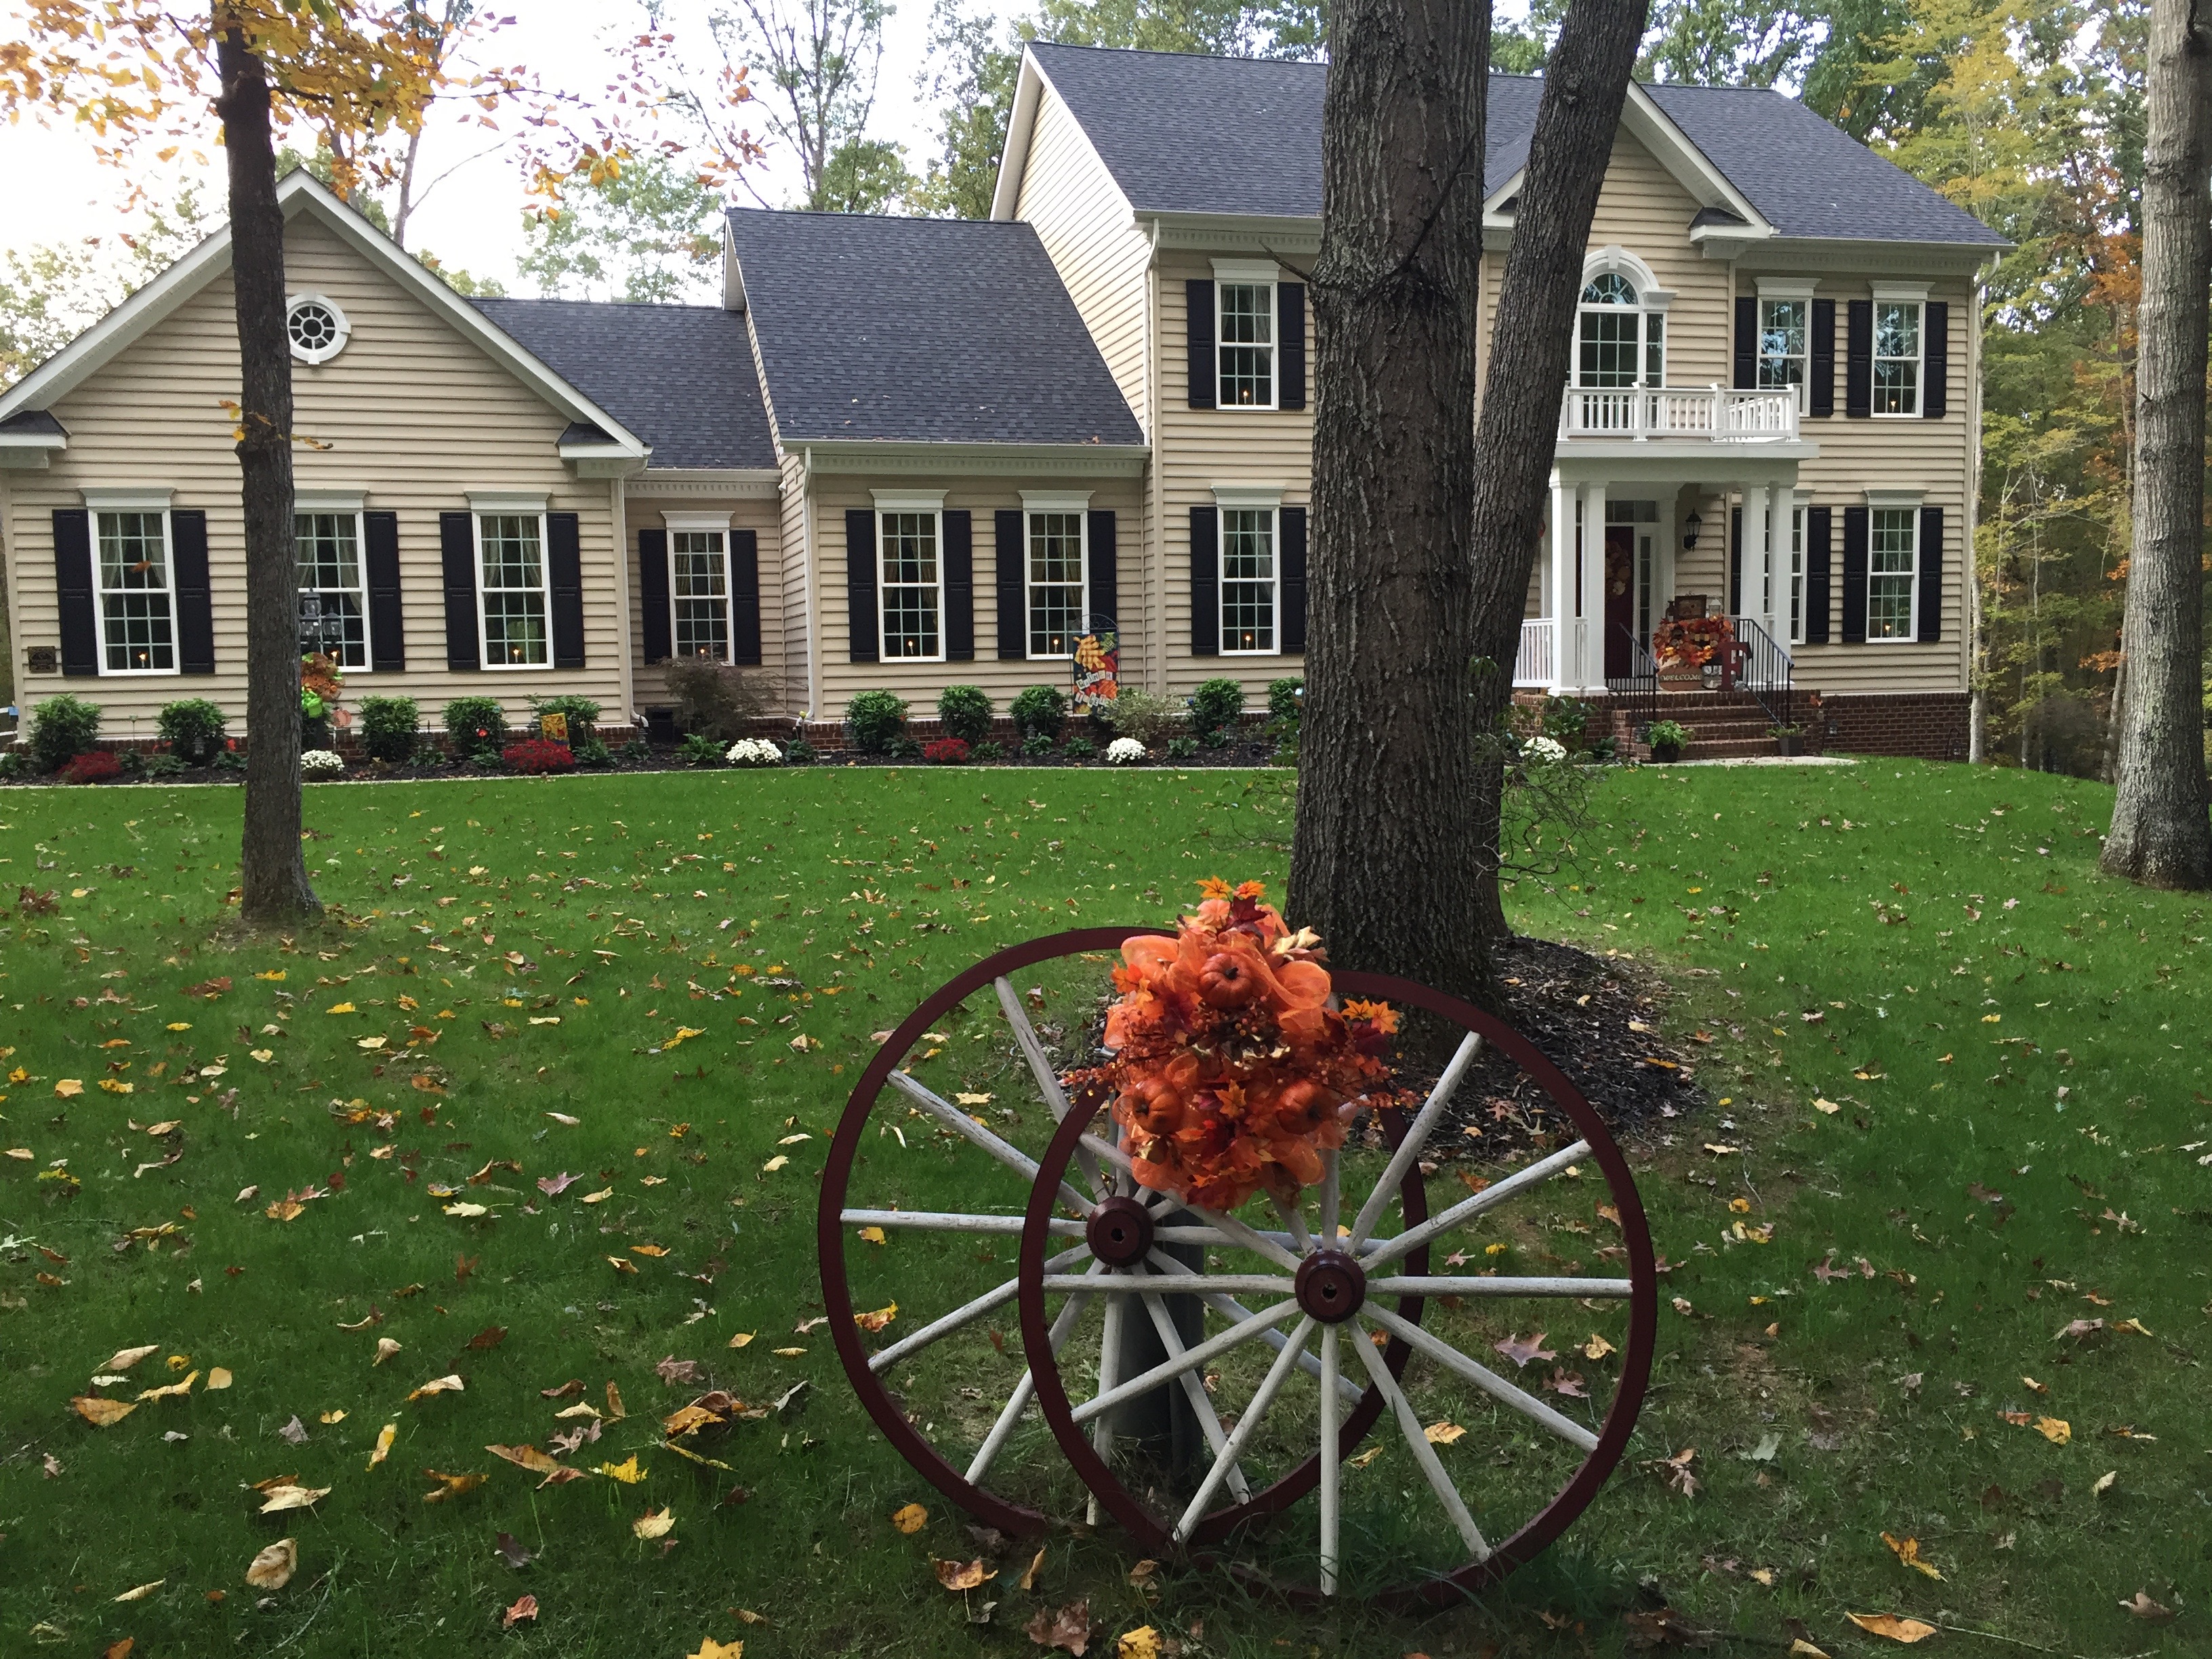
Or possibly, it will replace the spray on the wagon wheels…
I’m extremely happy with how this wreath turned out and *bonus* it only took me 45 minutes to make from start to finish; I hope that this will inspire someone out there to try one for themselves. You can do it!
Until next time, y’all take good care! ❤
**In crafting there are no mistakes just unique creations**
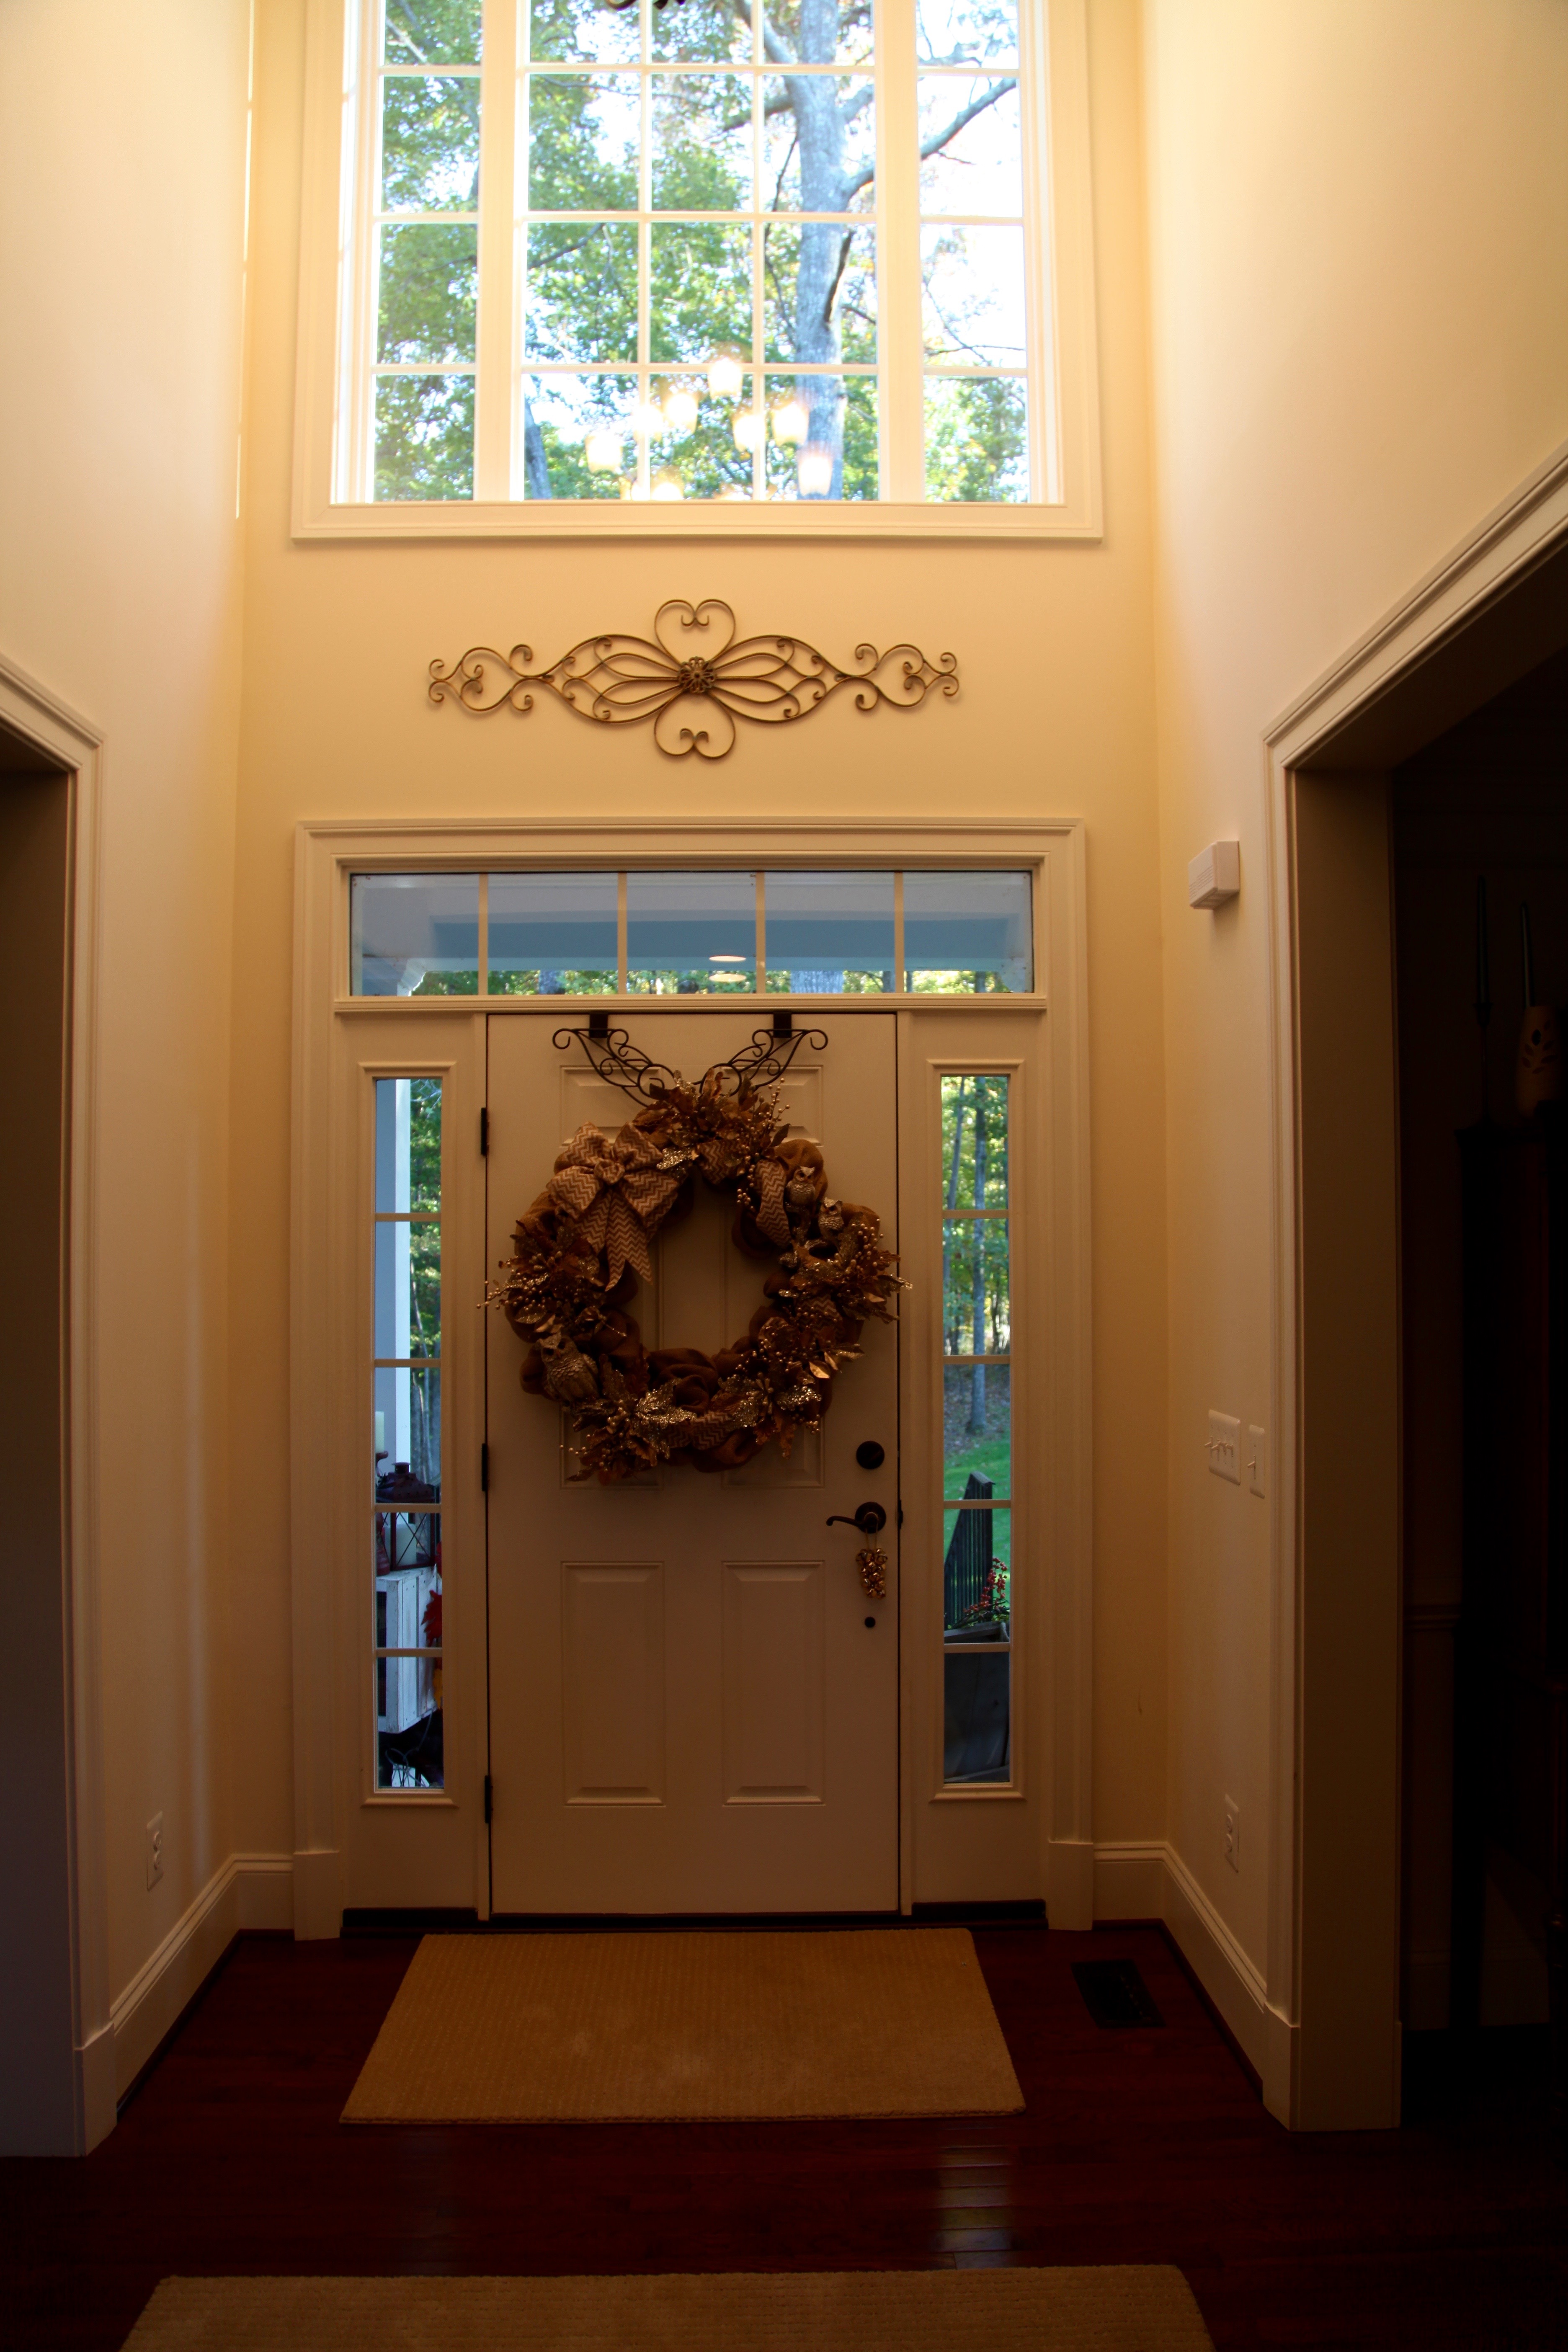
It is that time of the year when I start gearing up to make a few things to add to my Christmas decor and since we’ve only lived in this new house for a couple of years, I’m still gathering, creating, and building up choices with which to decorate for the Holidays. I headed to my happy place Hobby Lobby today to gather materials to make a wreath for the inside of my front door to be used with my Christmas decorations.
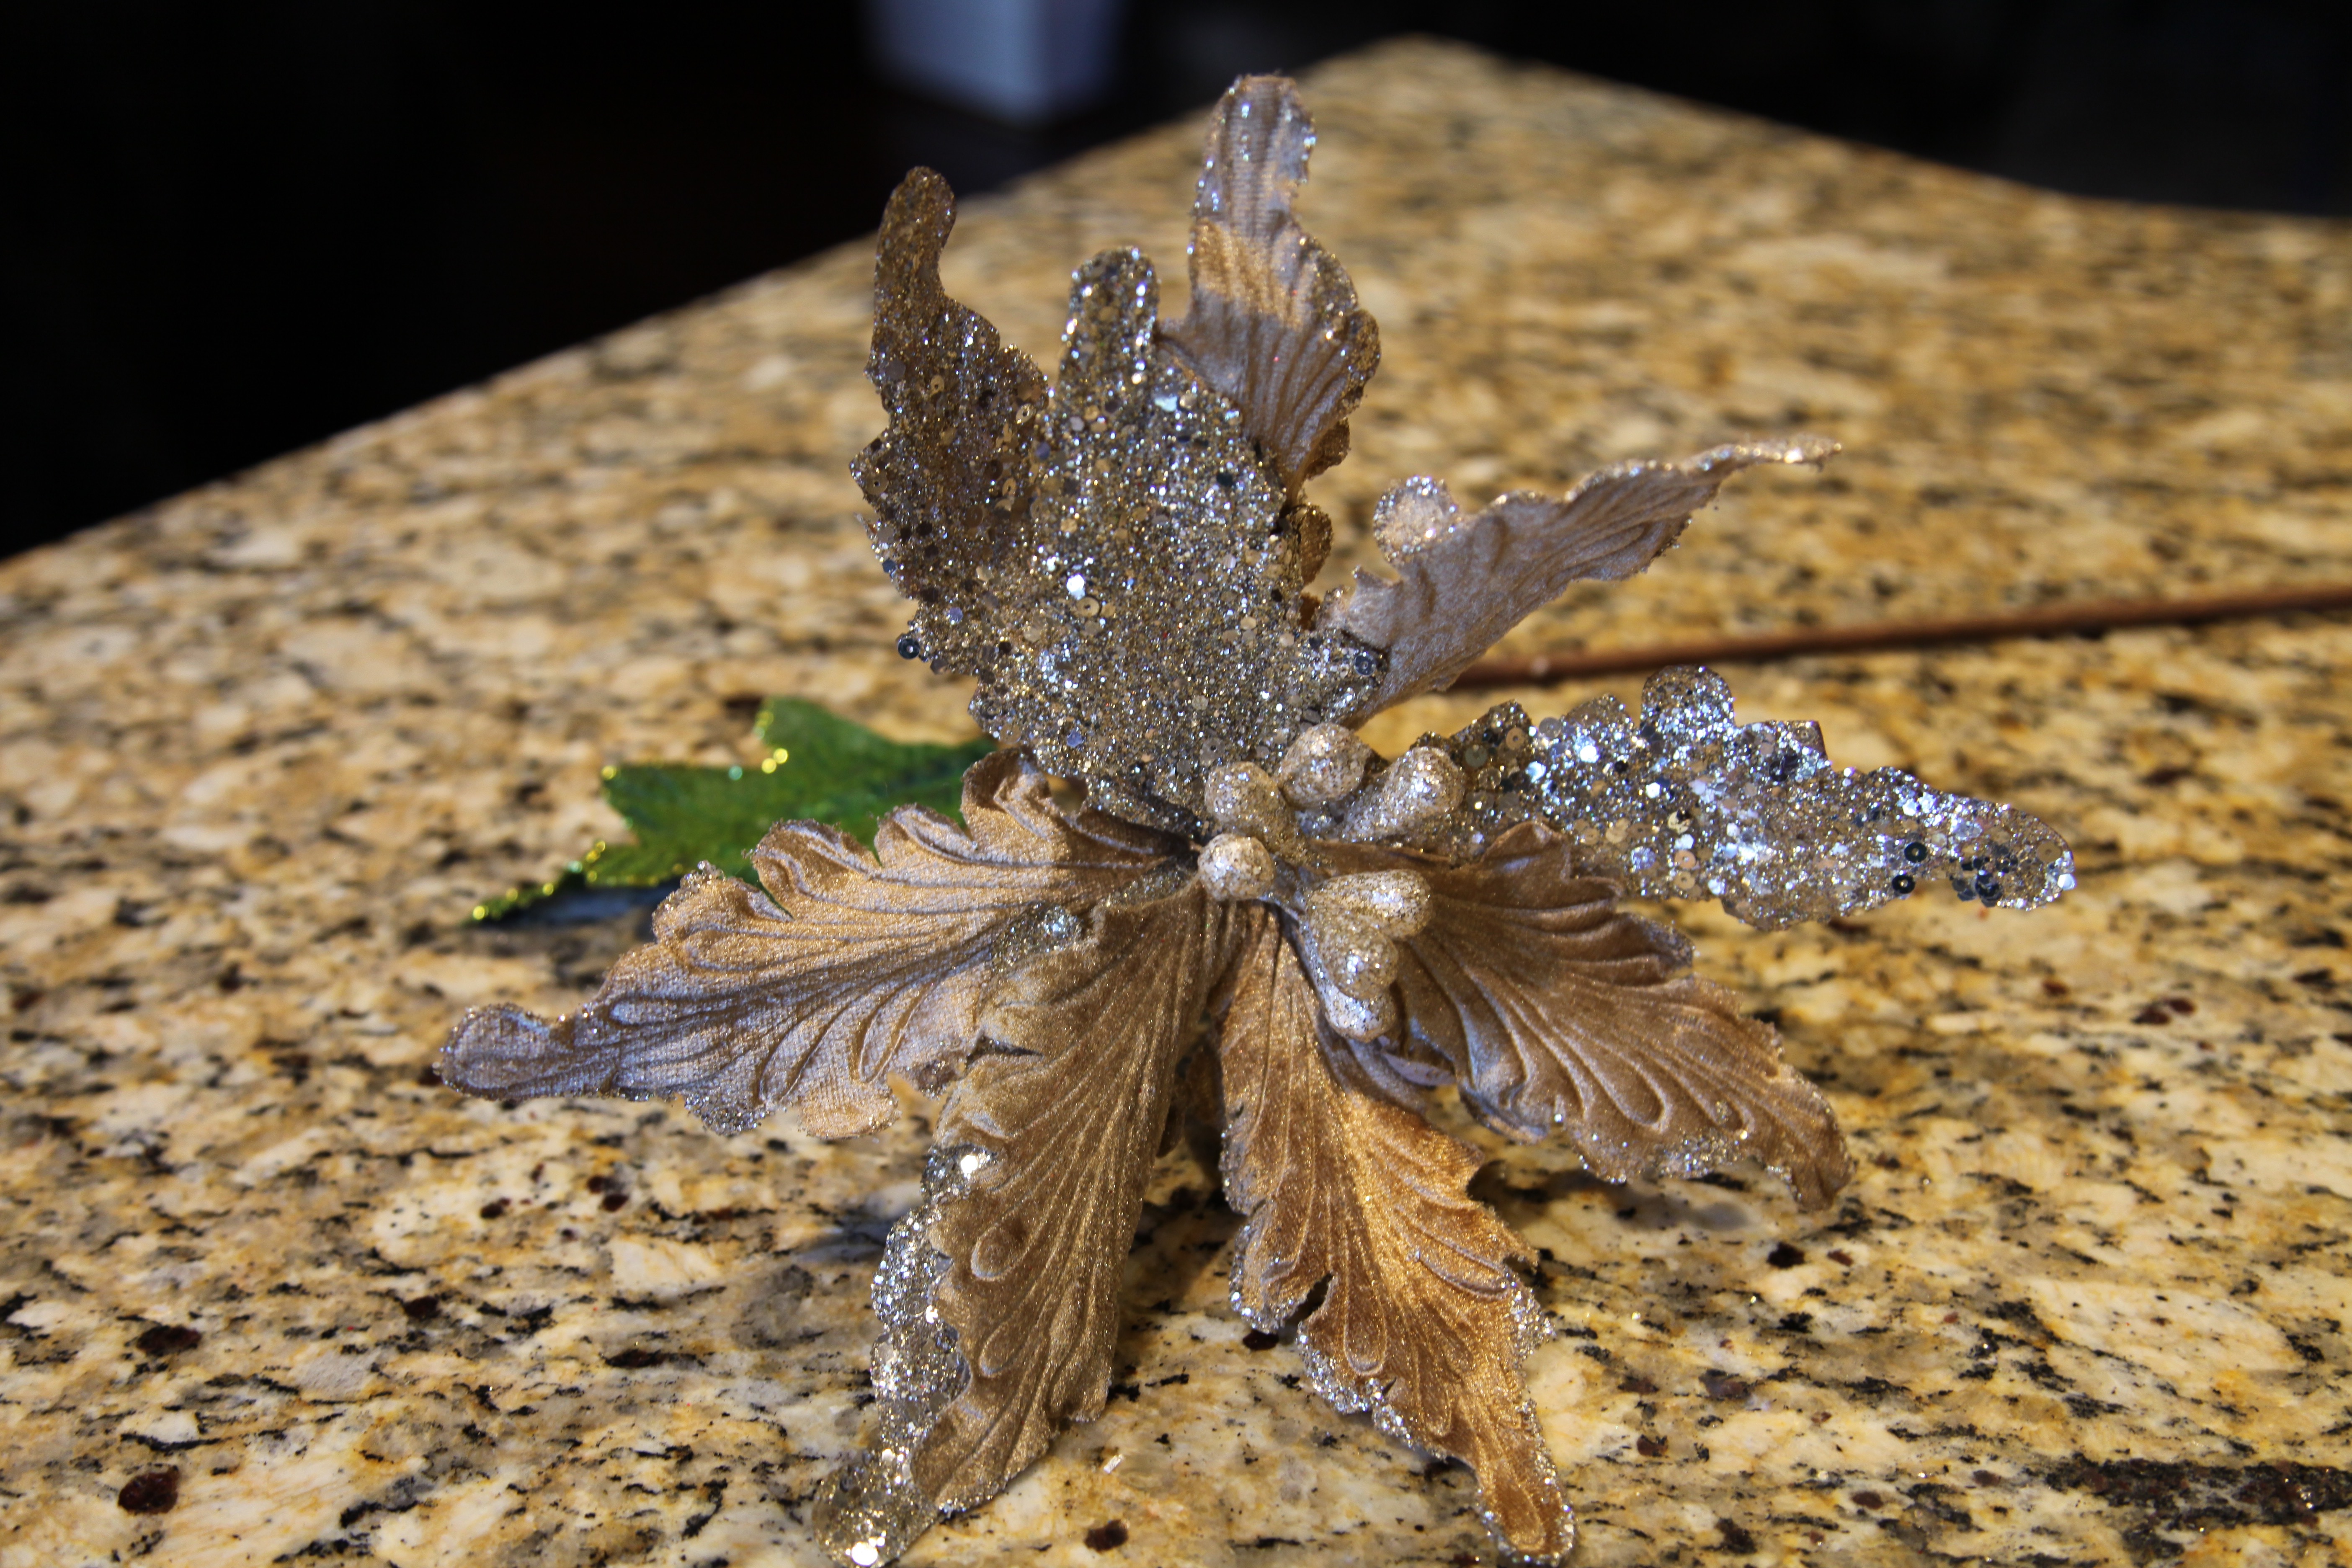
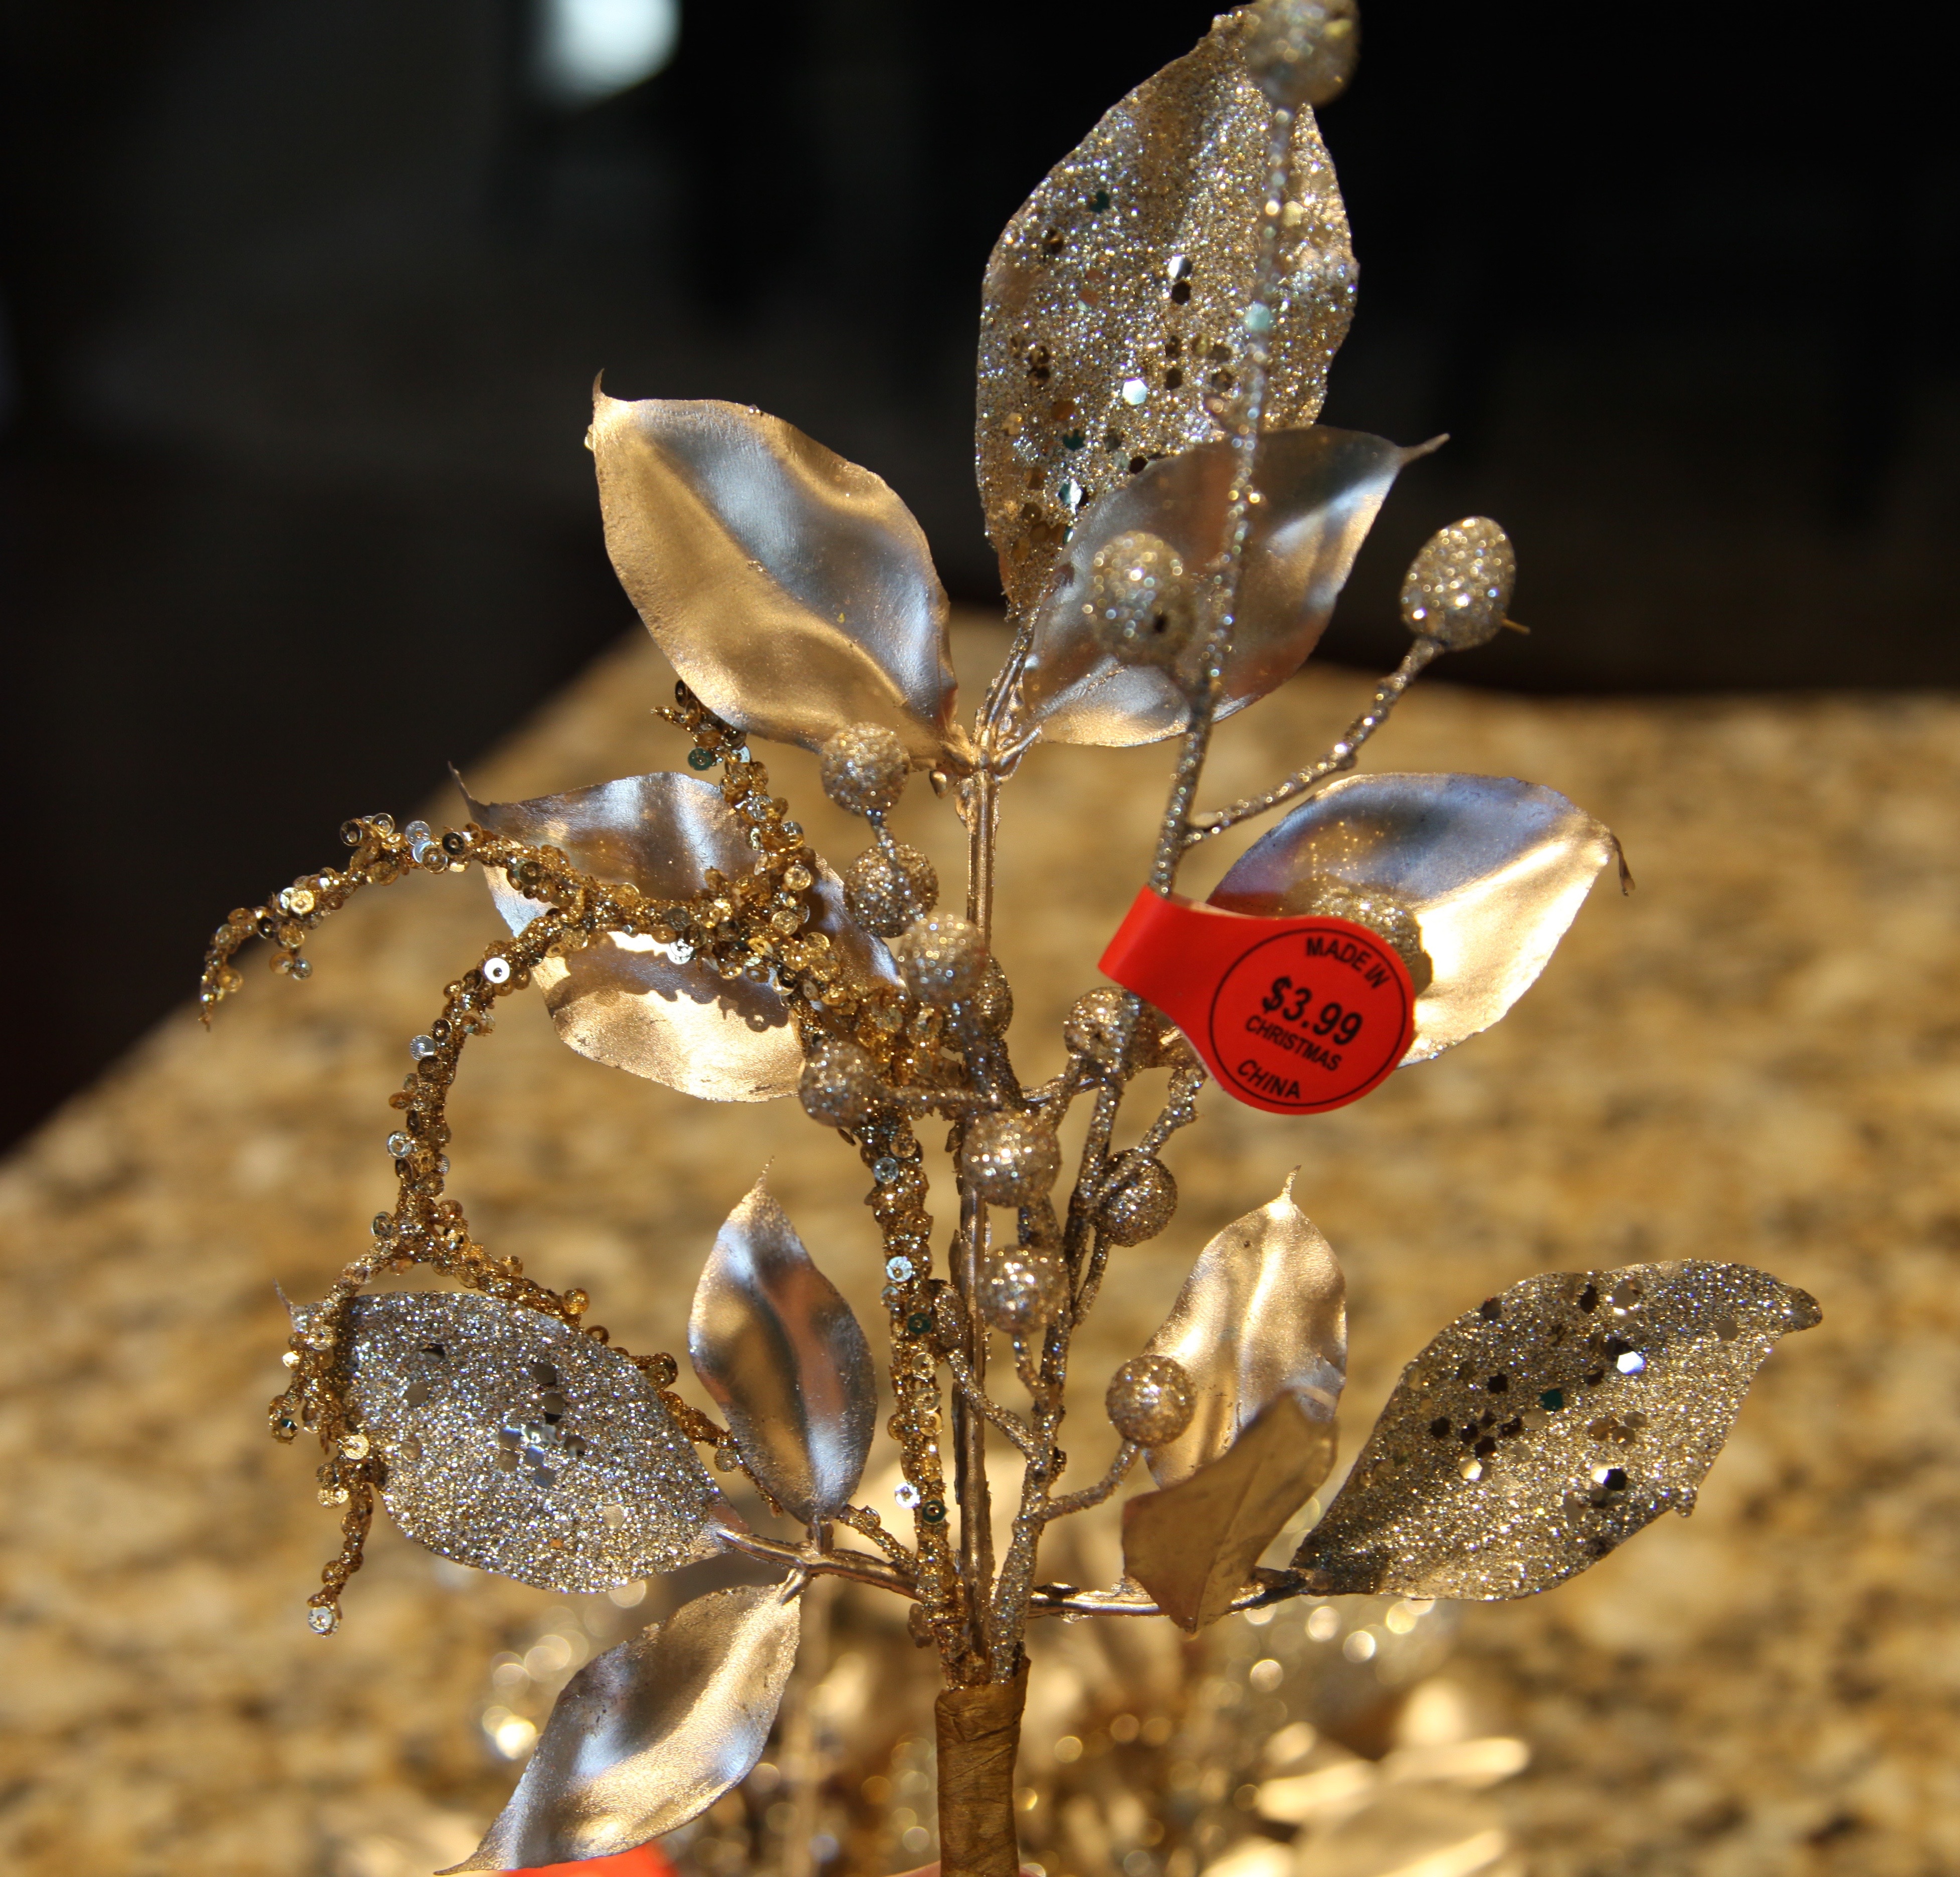
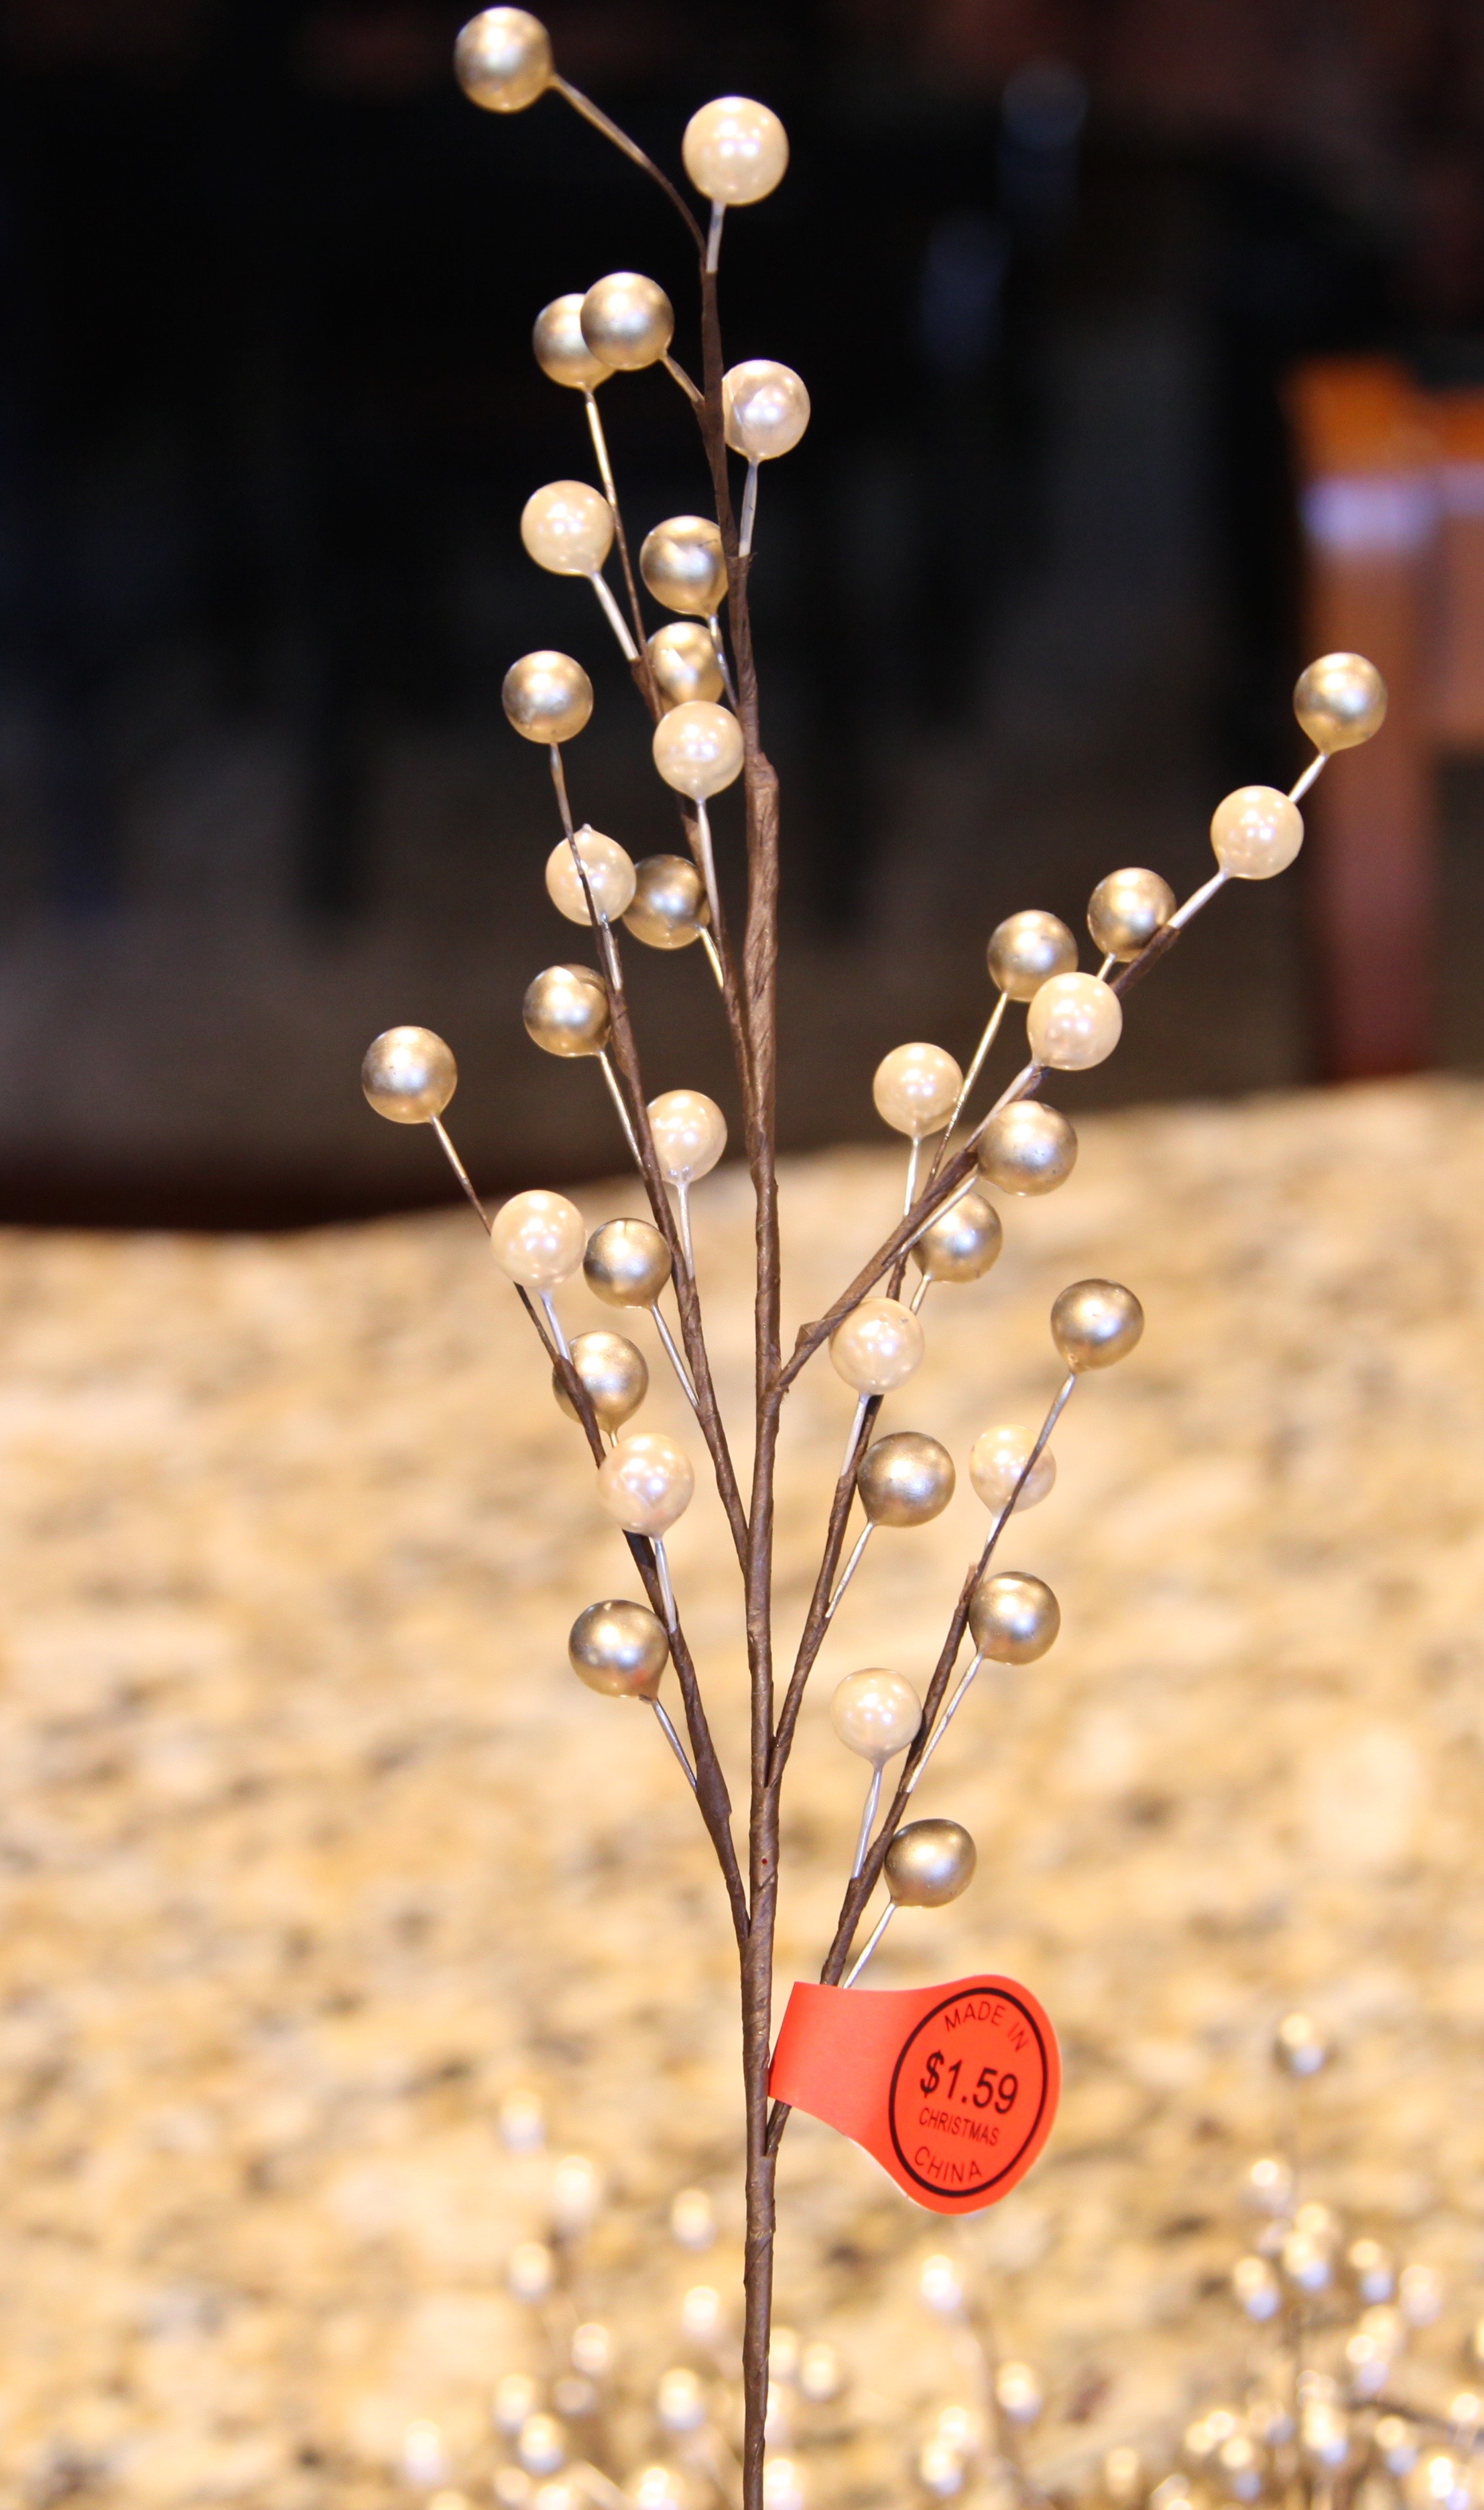
As I was searching–really wandering around aimlessly– I came across these platinum gold’ish’ flowers that looked kind of like poinsettias, the same color beads, and a pick with leaves and sparkly beads. Every single thing that I bought was 40% off today…
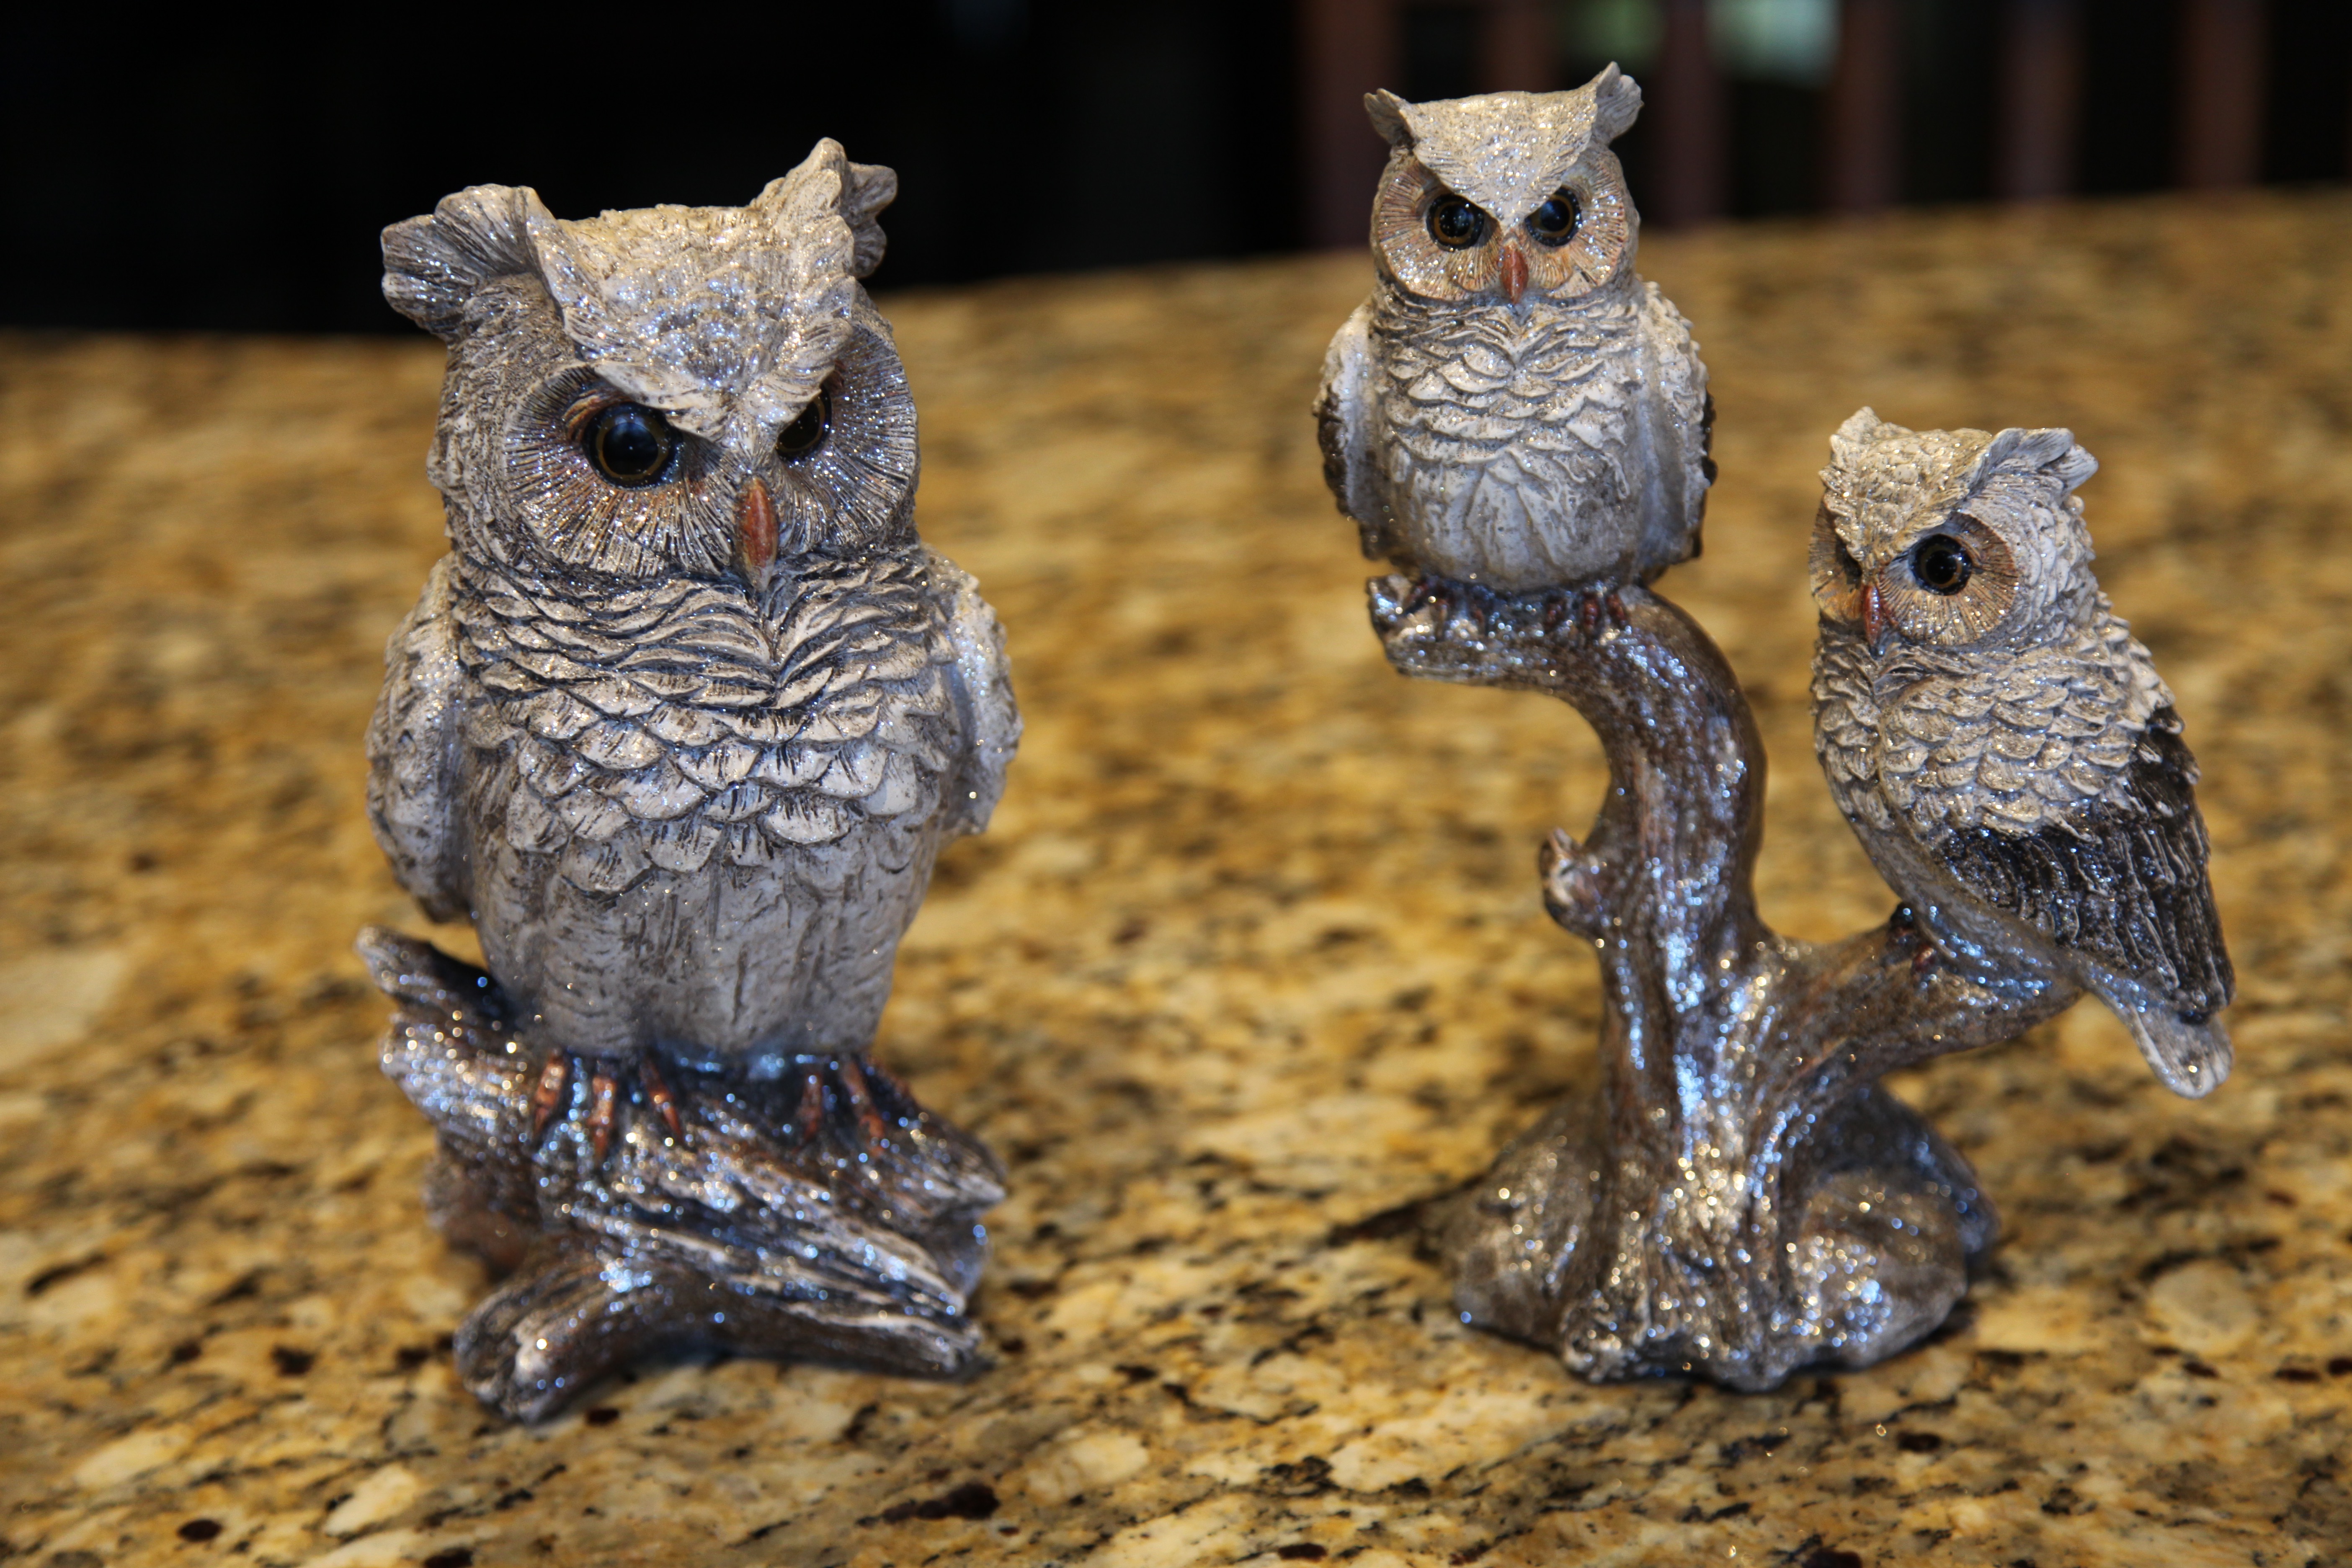
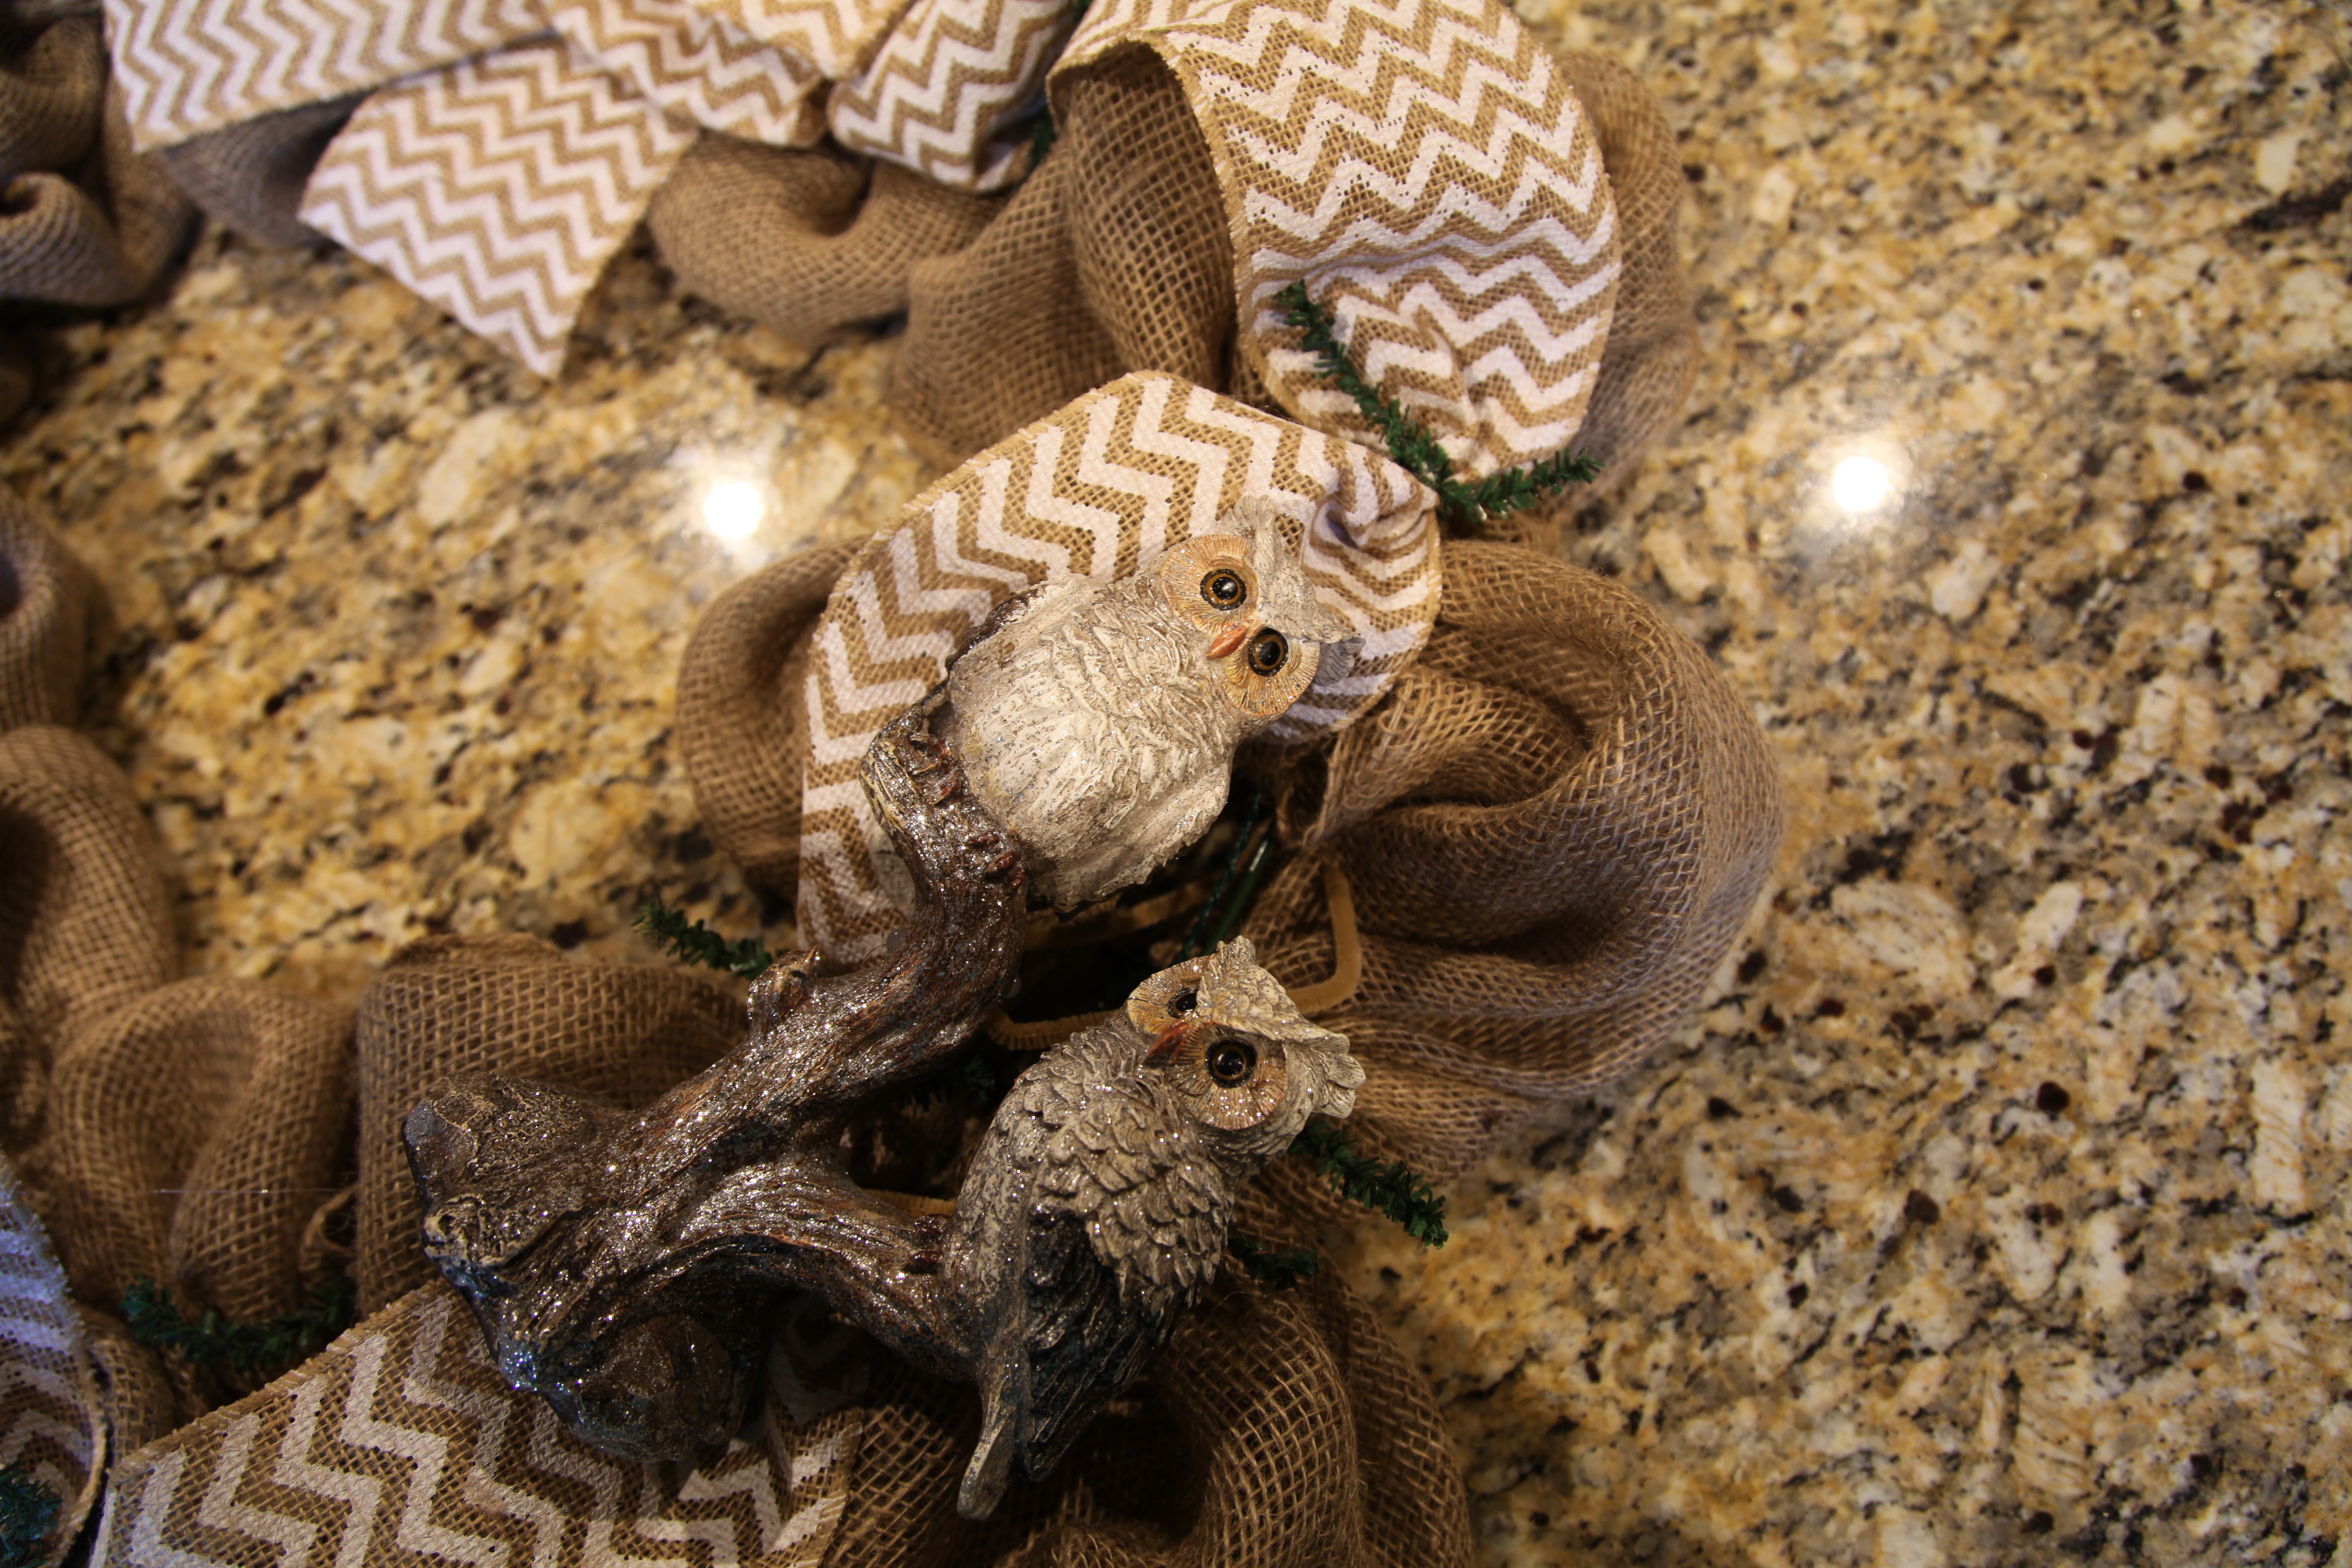
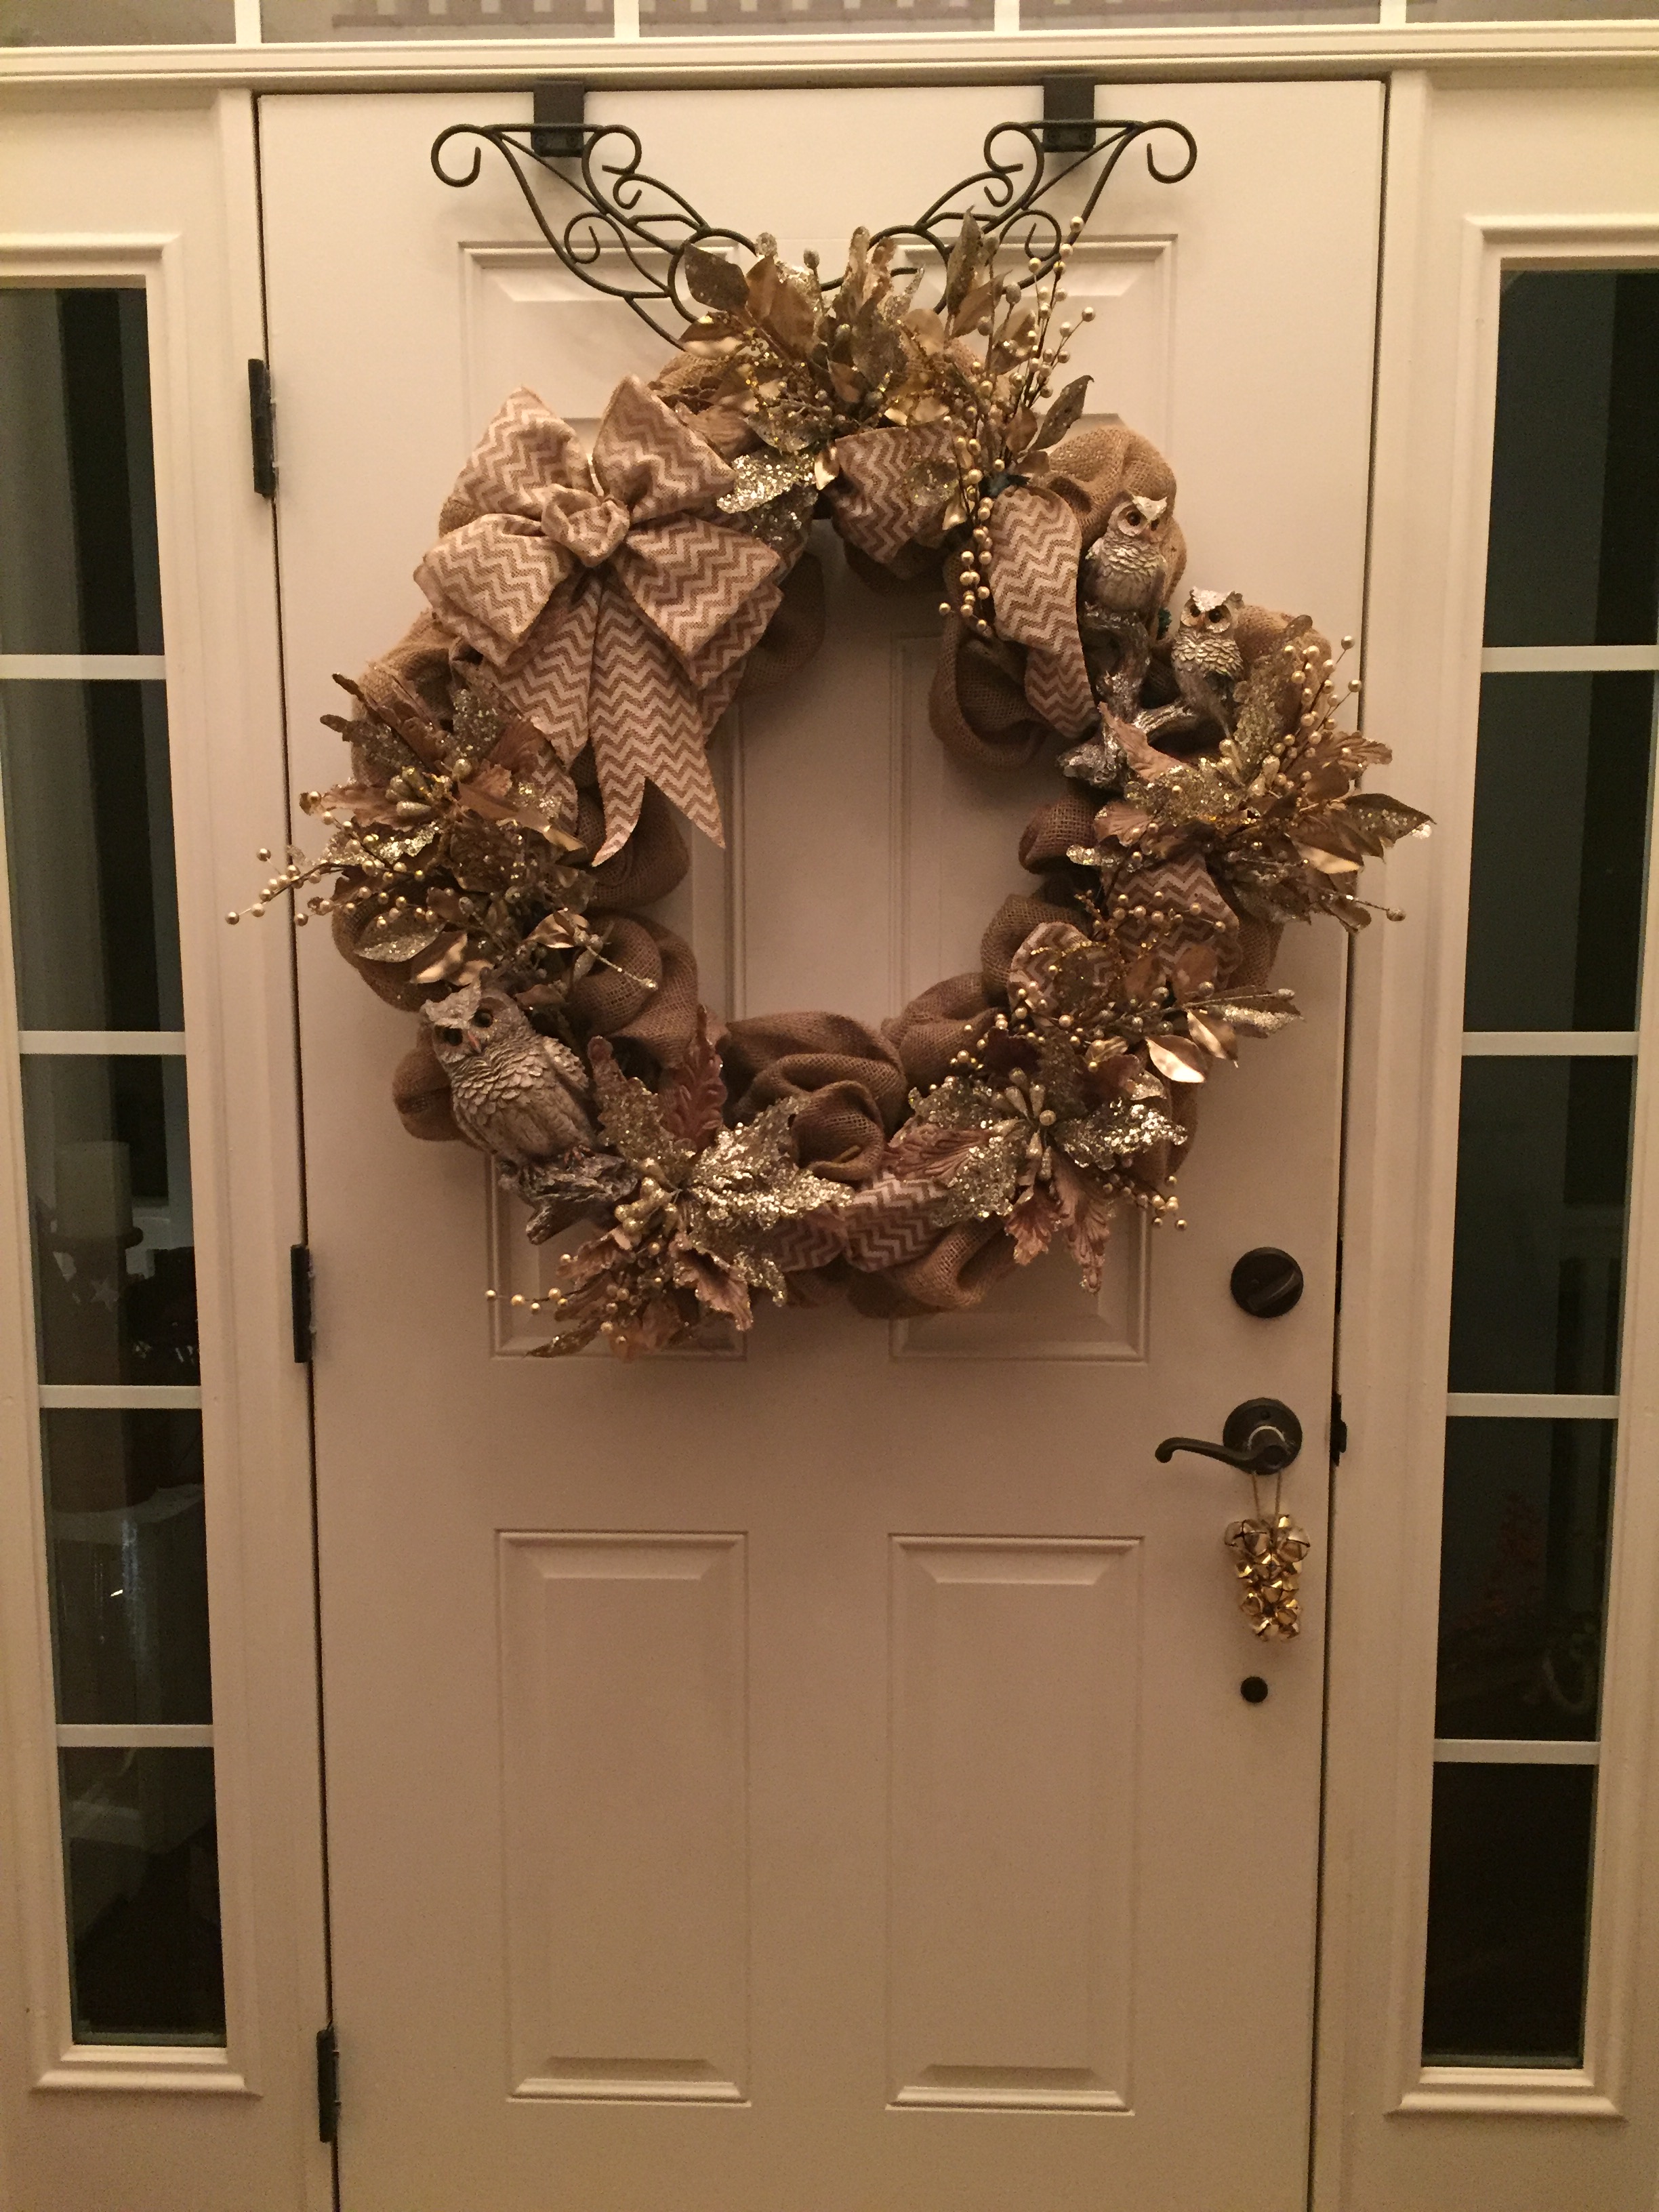
Then I found these really cute resin owls in the same color scheme:
I fell in love with all of that stuff so my entire plan for that wreath changed. Instead of me making an ‘in your face’ Christmas wreath (using that pretty country green that I use as an accent color in that part of the house), it turned into kind of a “Woodlands” wintery wreath which I think will pair beautifully with all of my Christmas decor. I can always incorporate some of the green color later if I want to do so, but for now, I’m completely pleased with how it turned out. 🙂
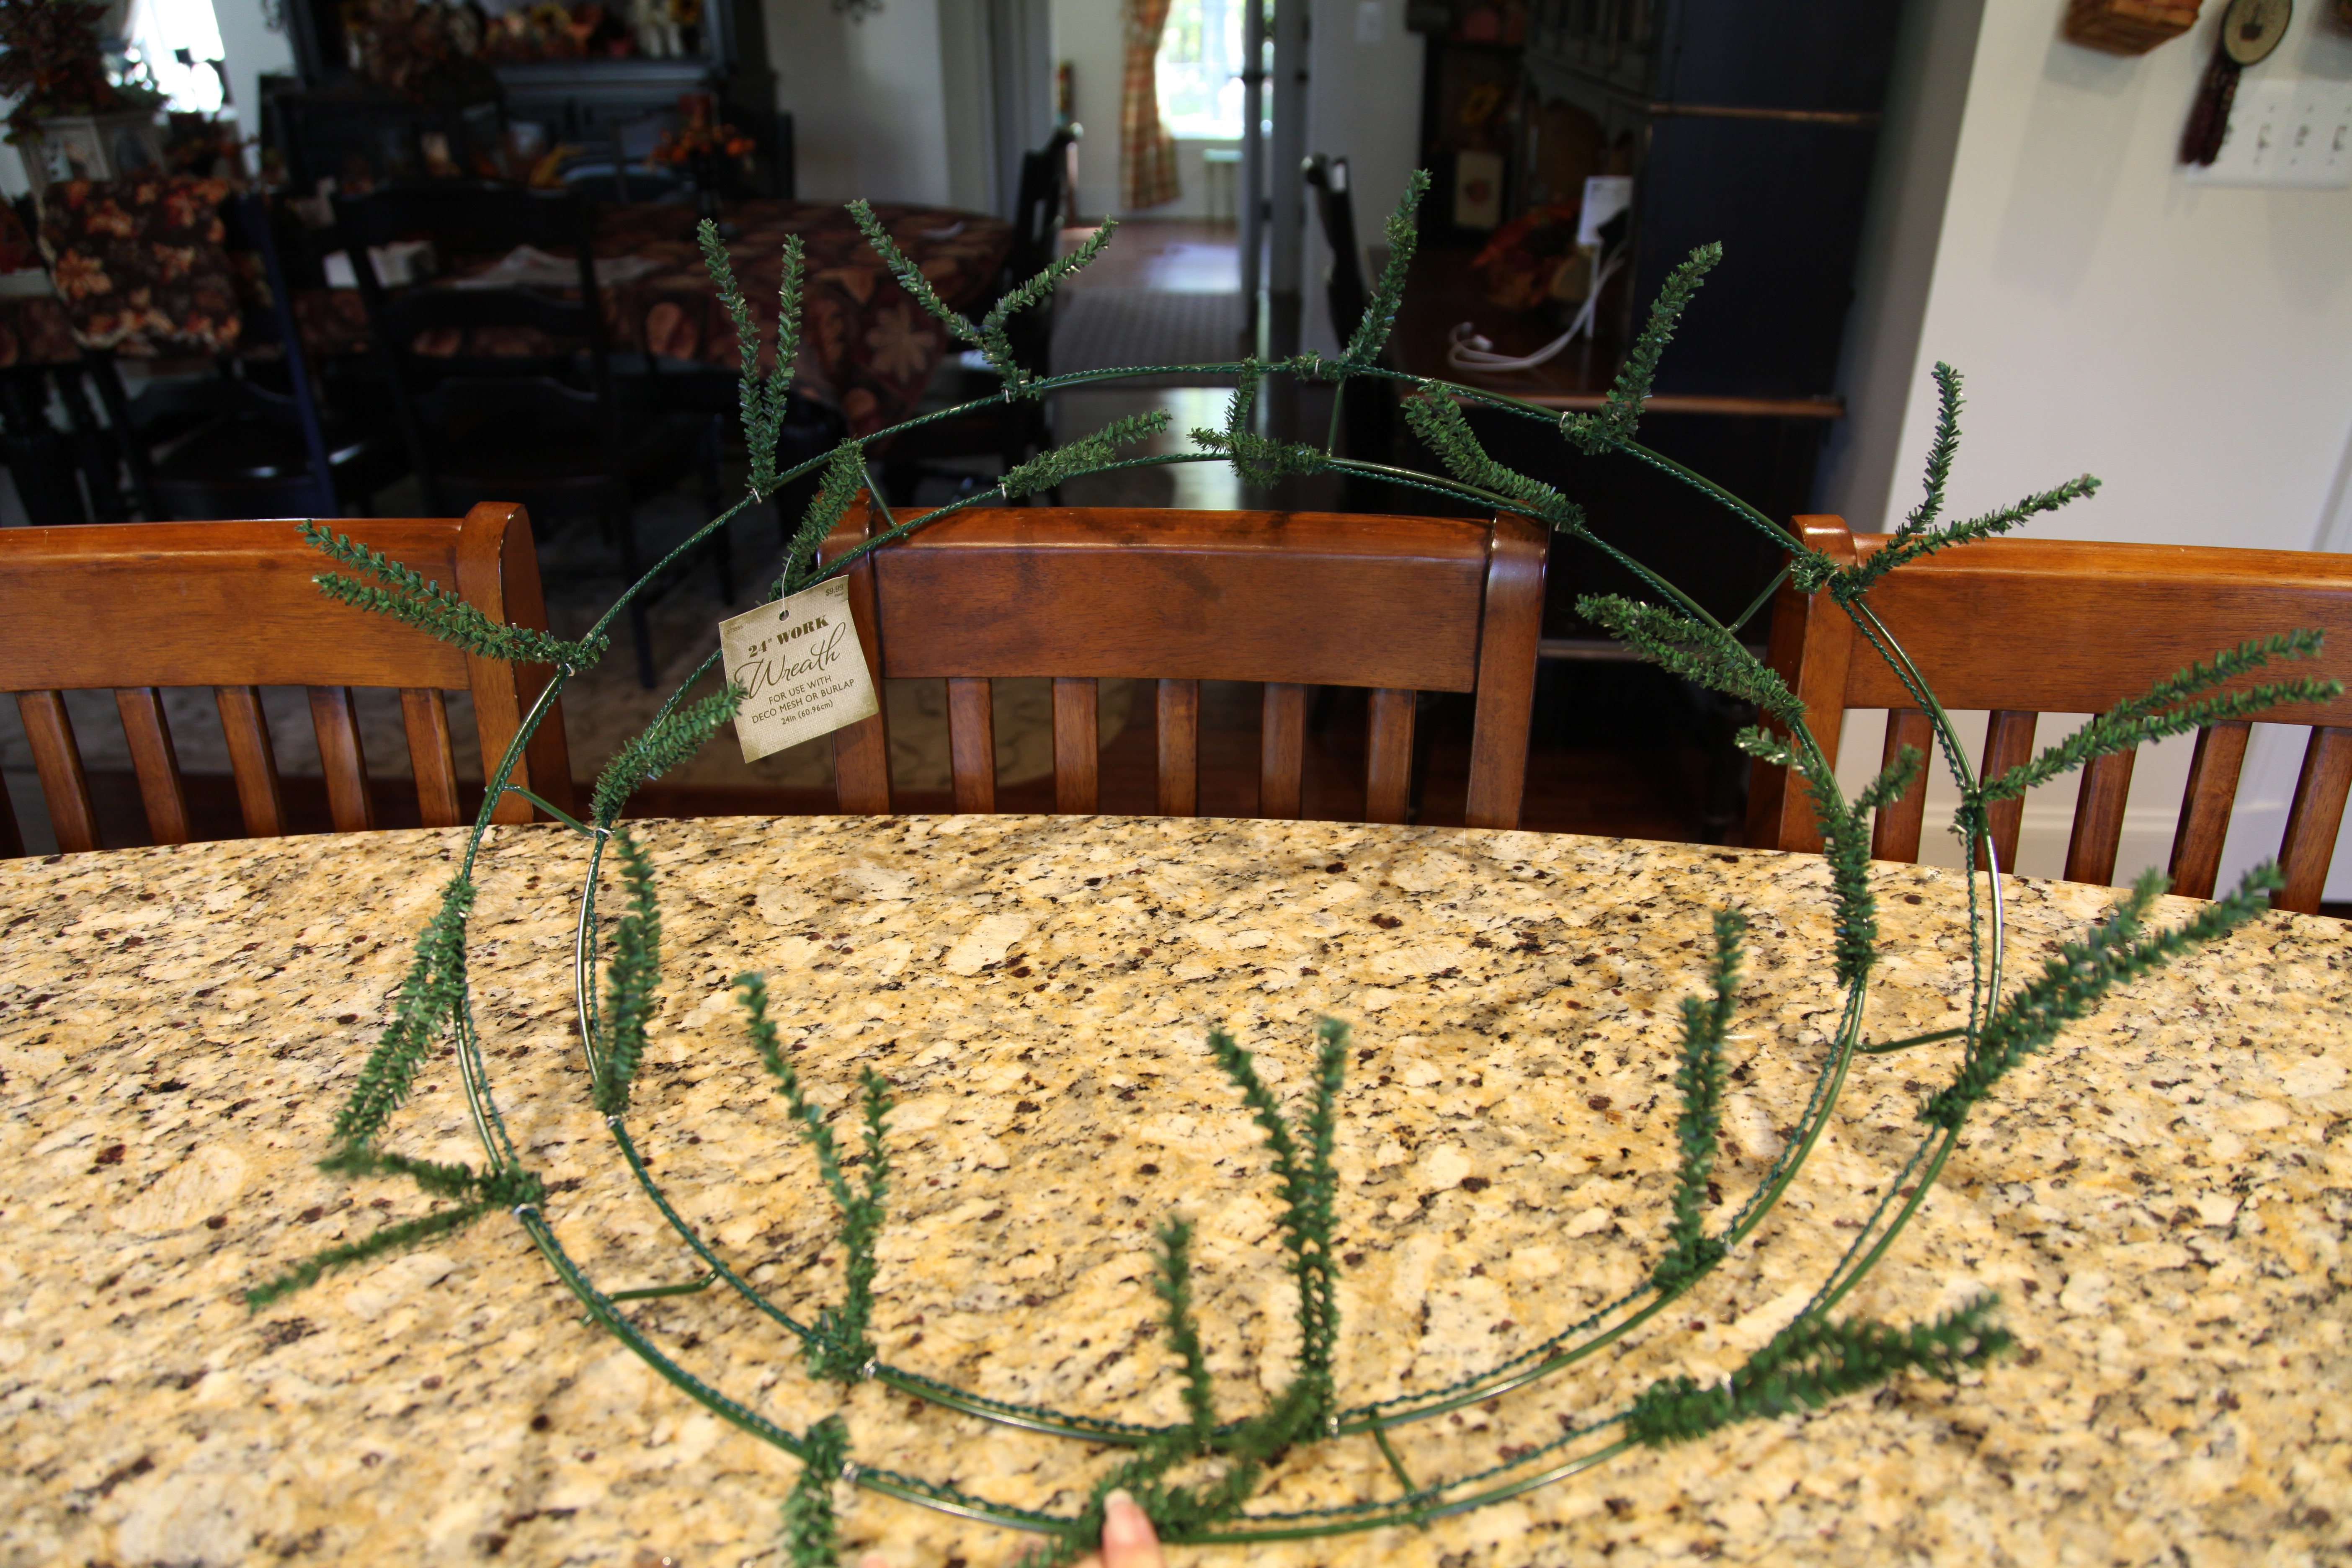
Here is how I made this wreath:
I used a 24″ wreath form with the pipe cleaners already attached:
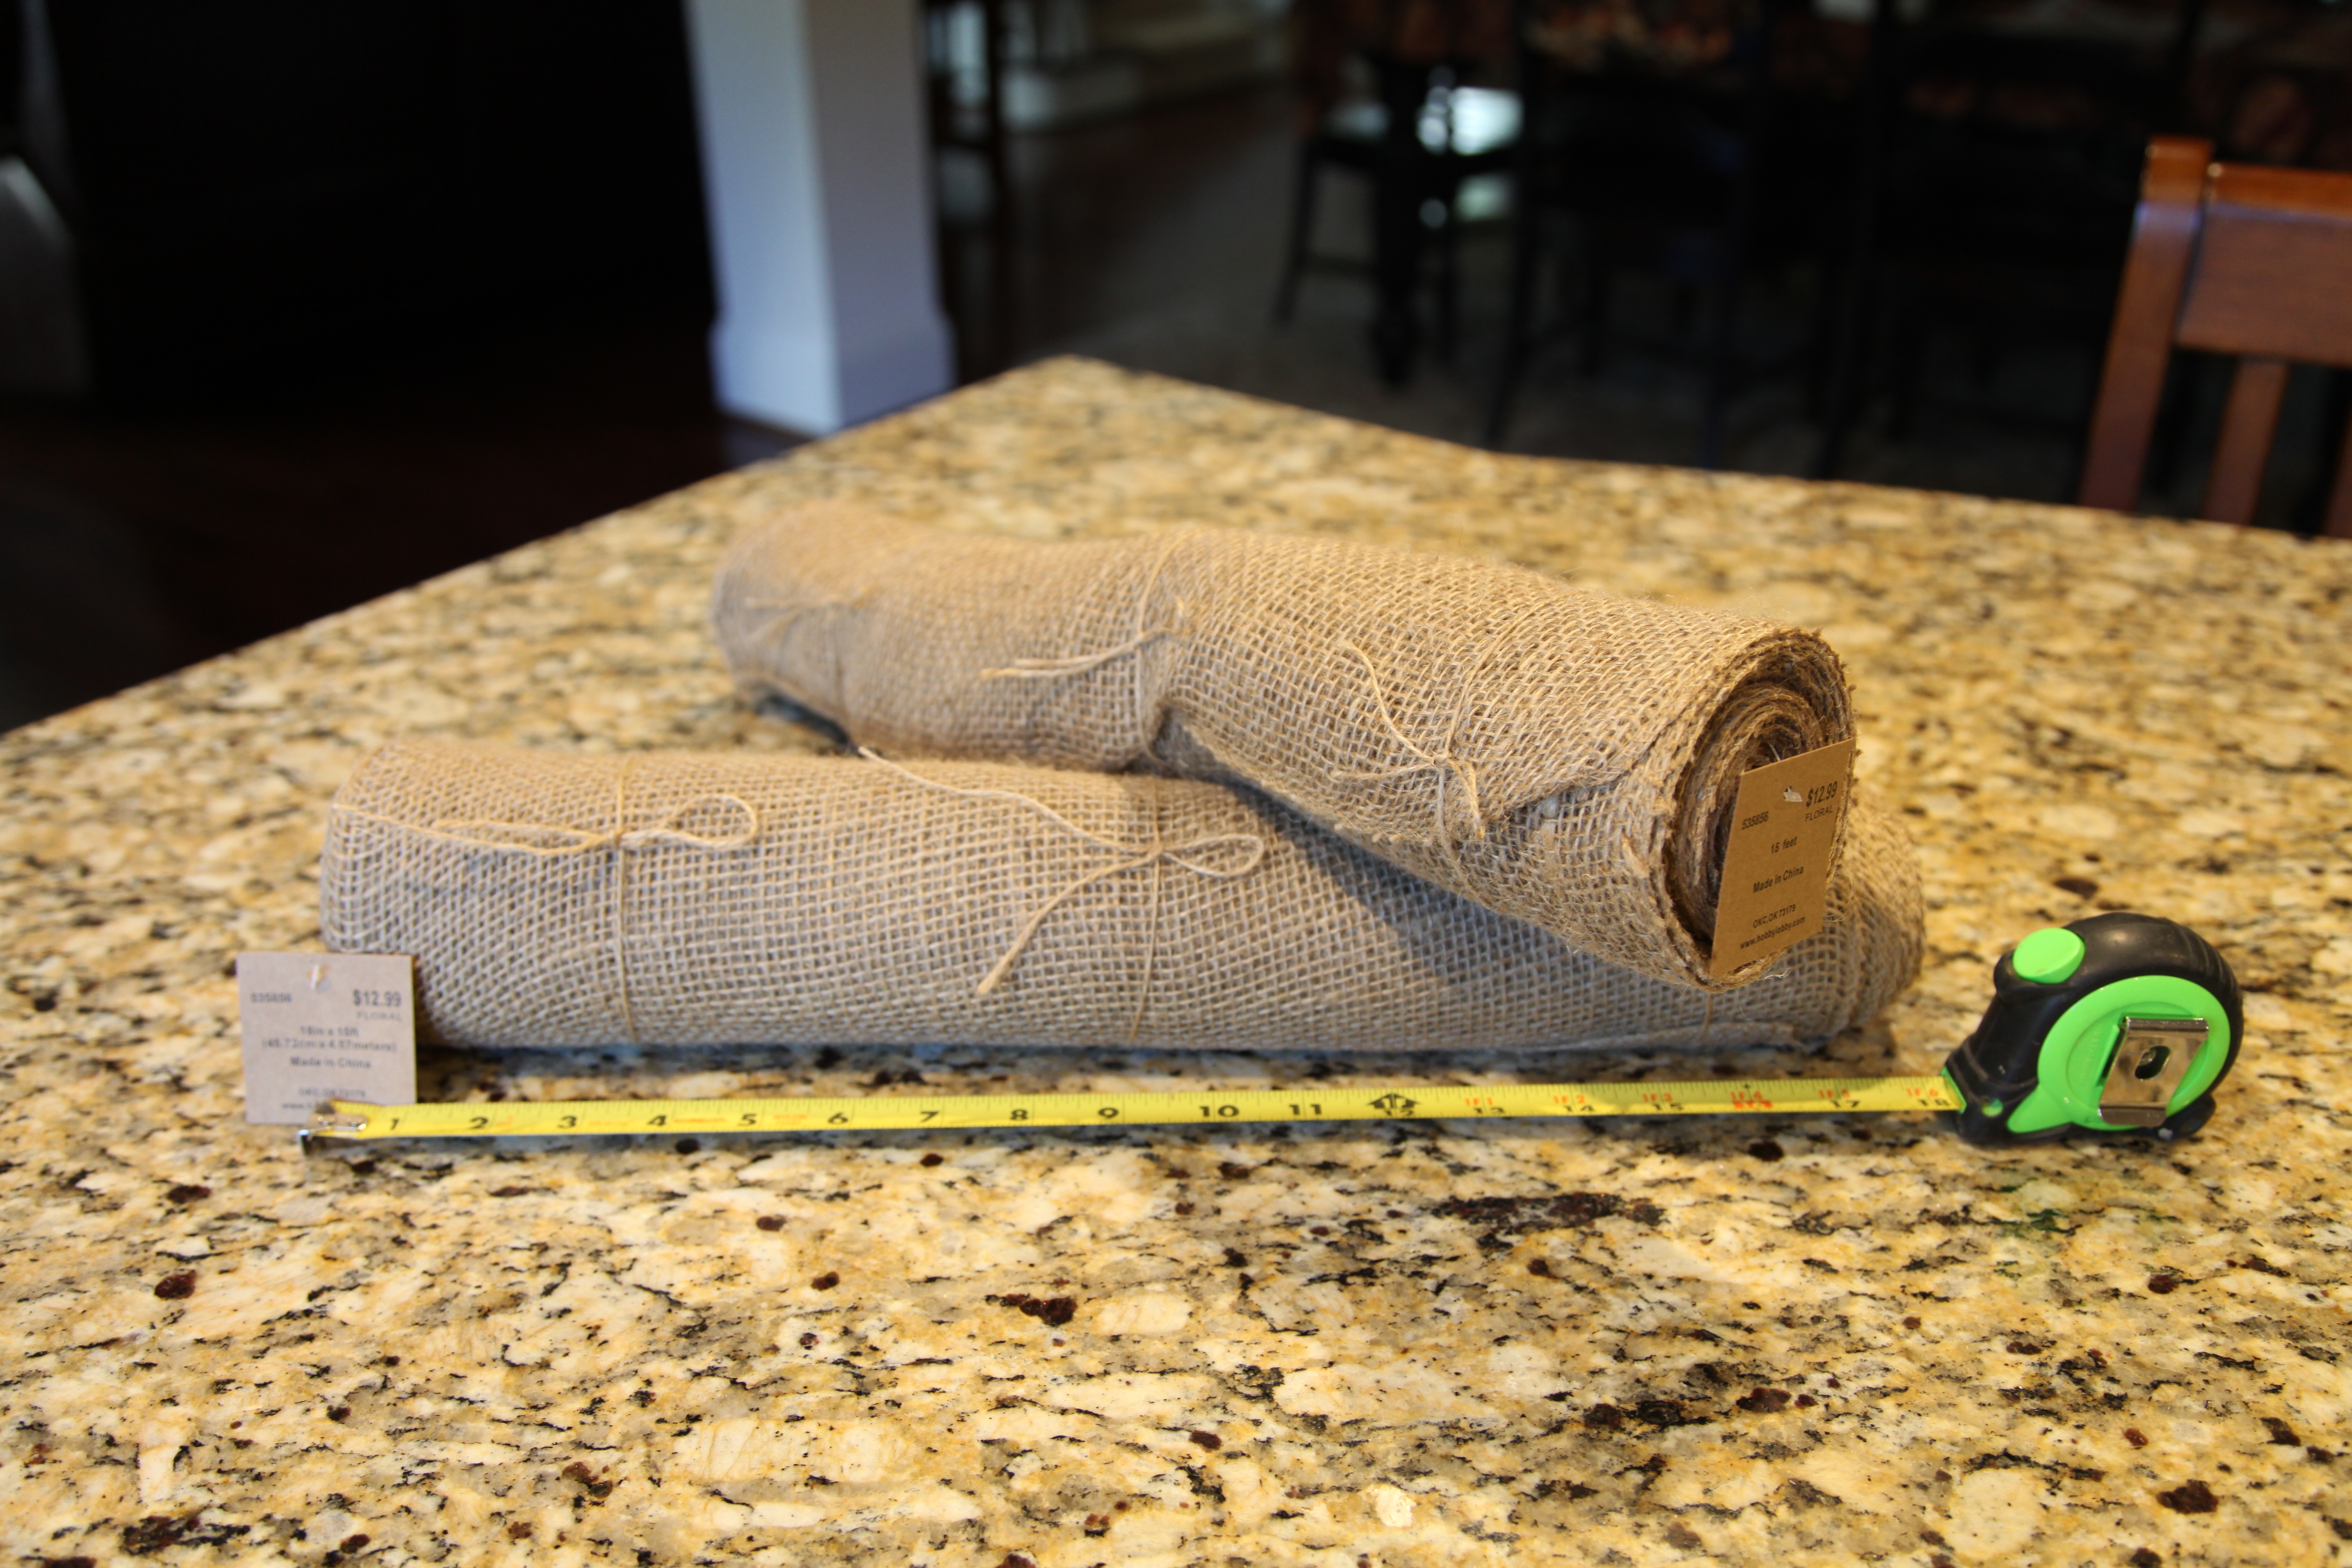
You’ll need 2 skeins of Burlap ‘runner’ for this sized wreath form…
I hot glued pipe cleaners on the back of both owls so that I could ‘tie’ them onto the wreath–I knew that they’d be too heavy to glue into place…
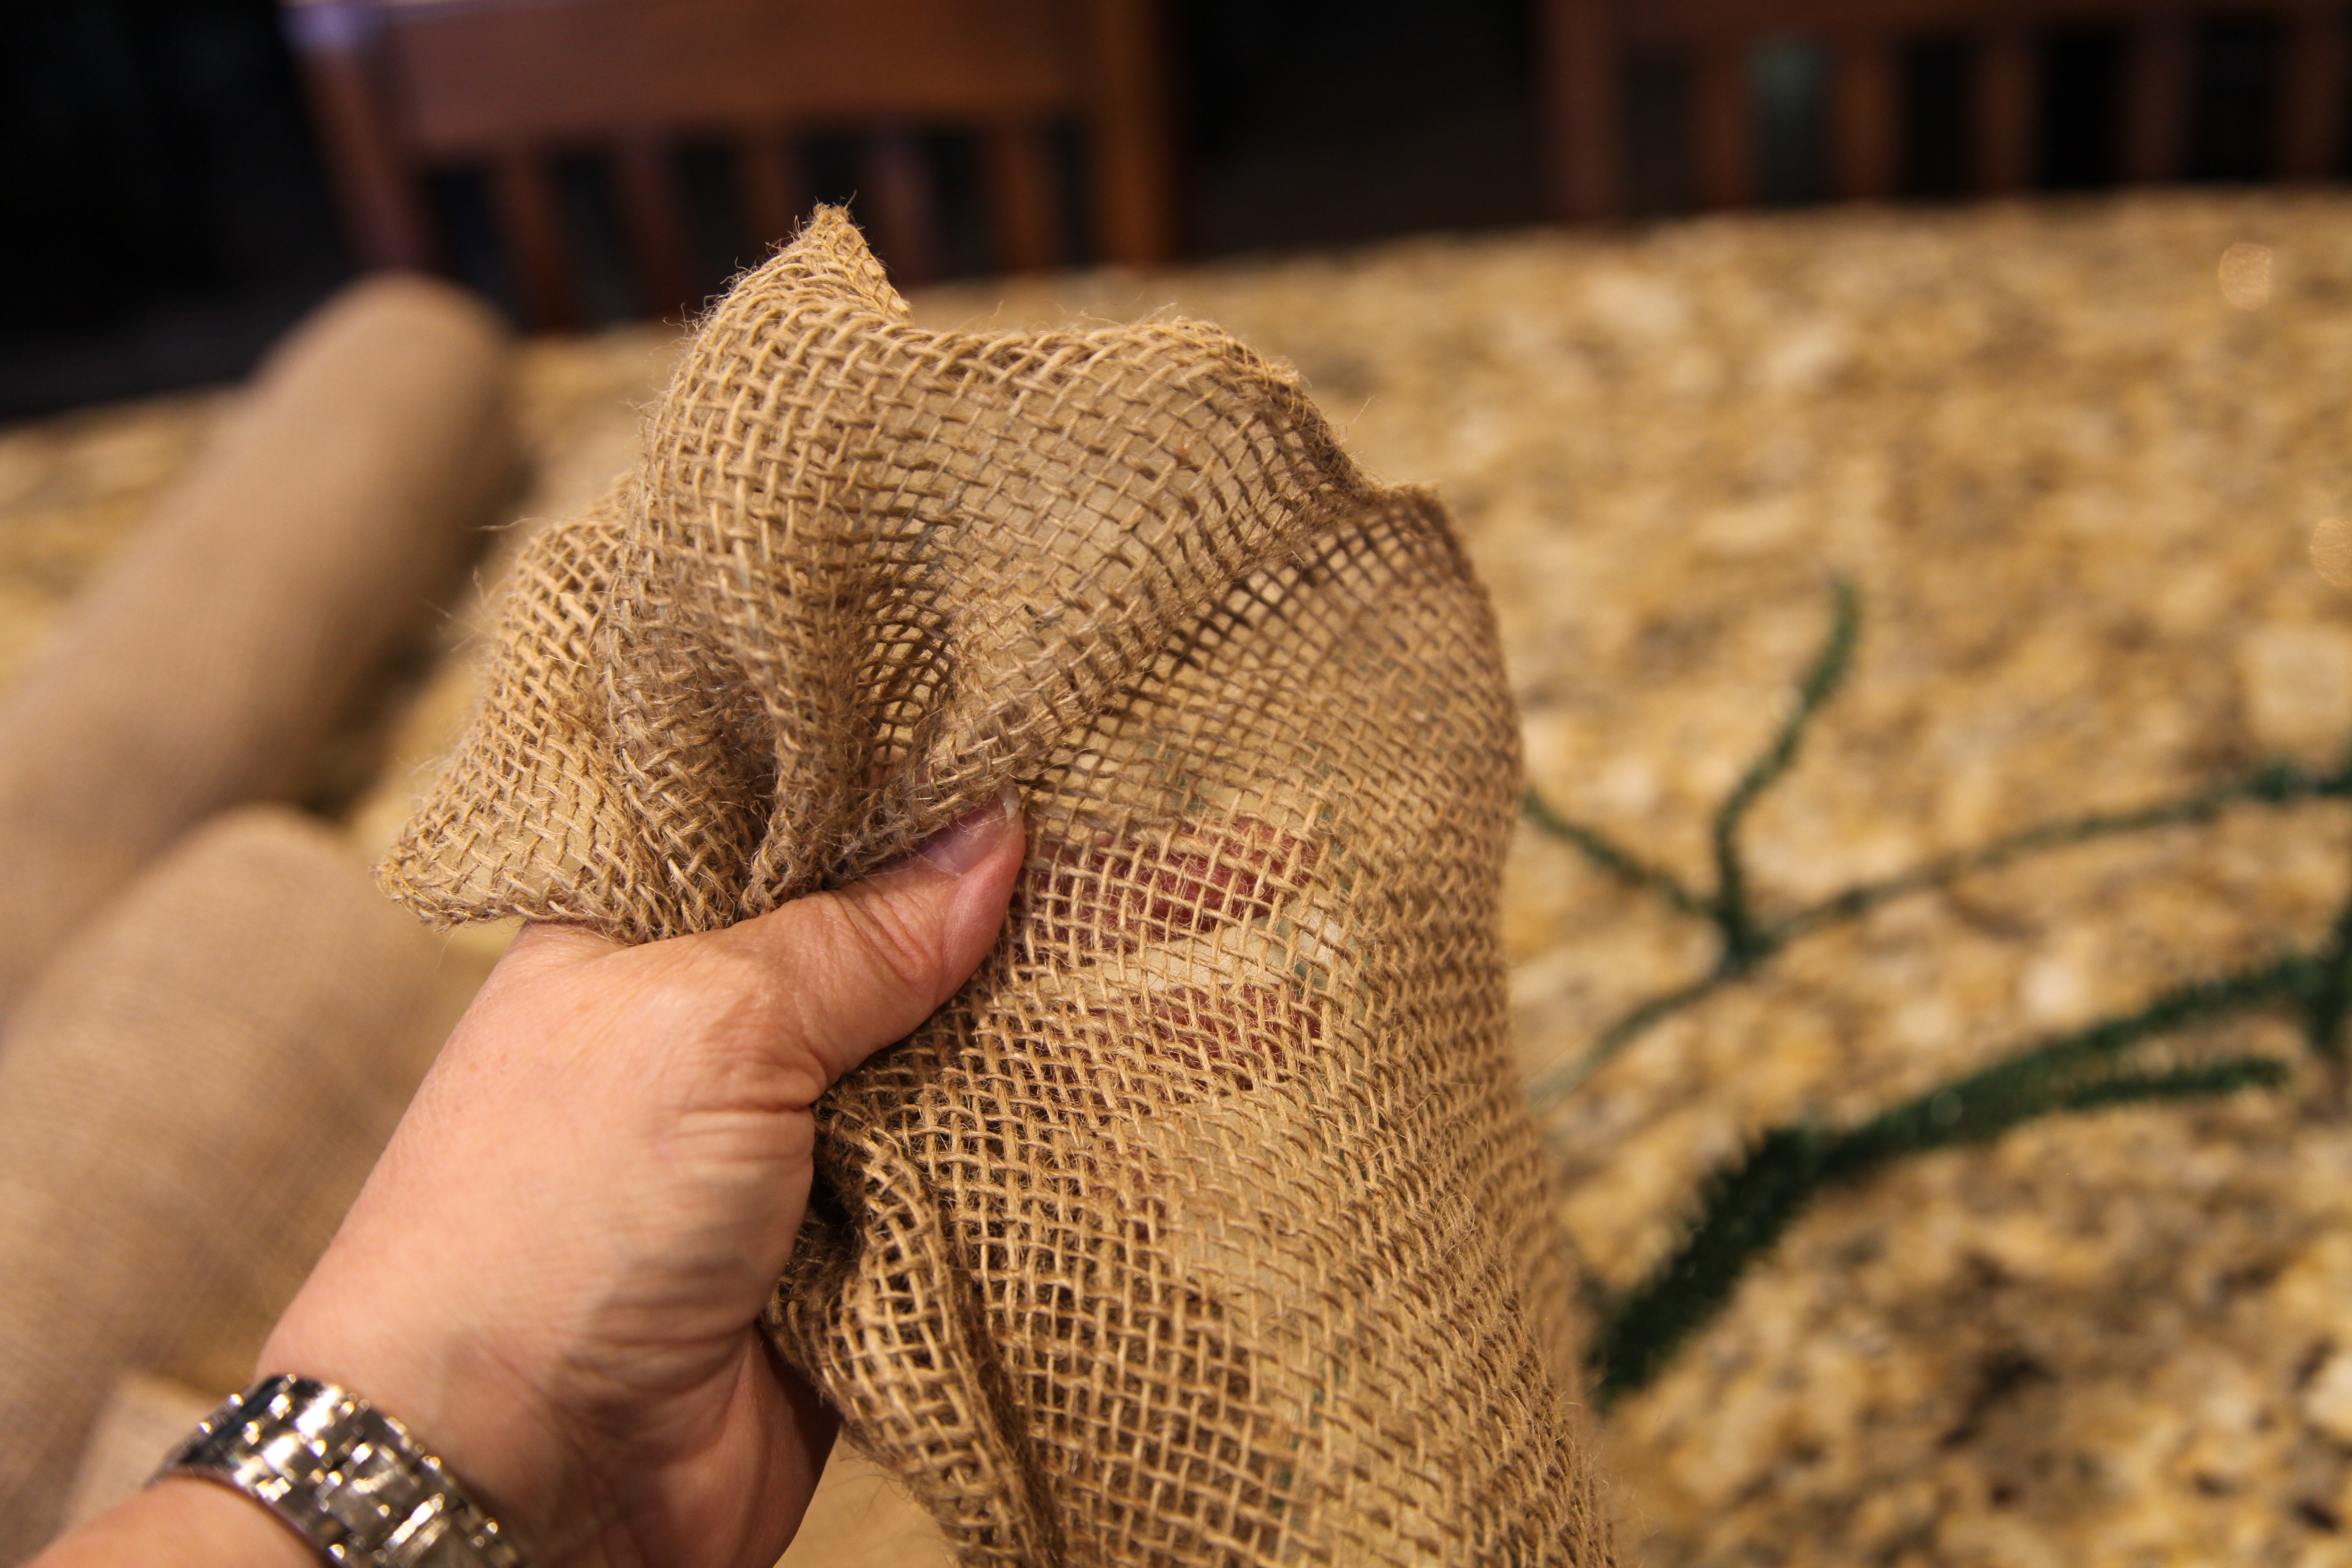
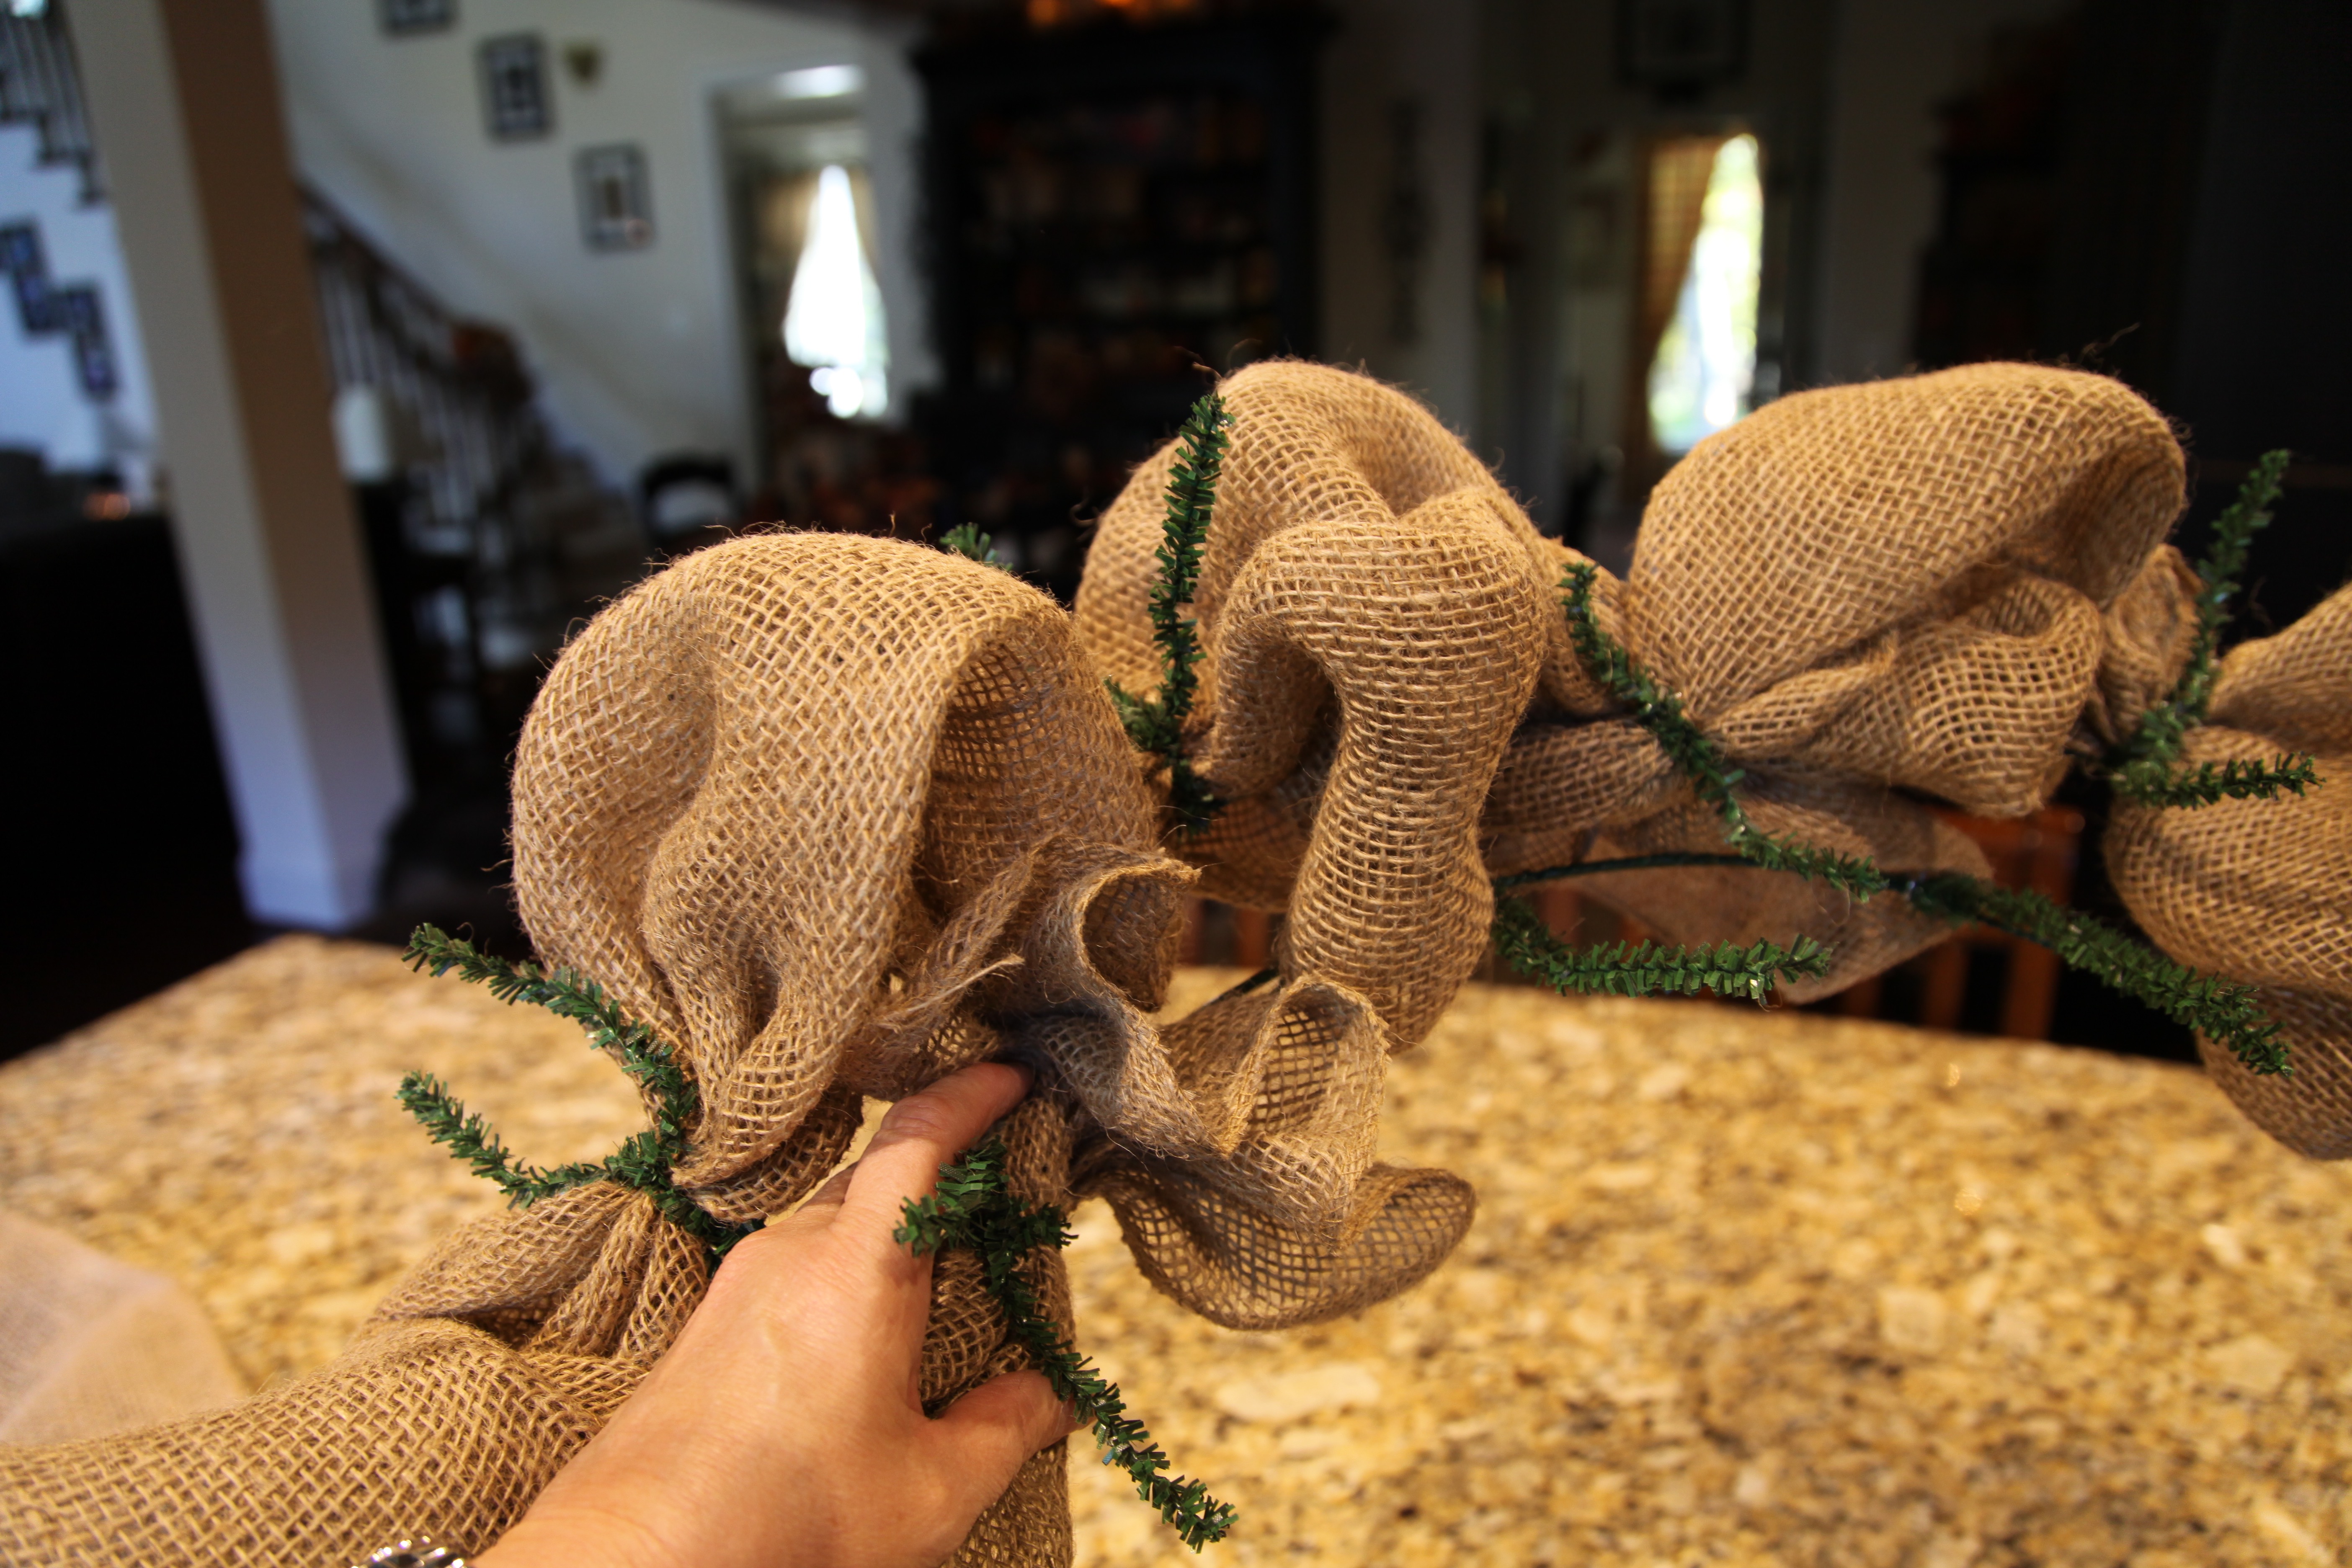
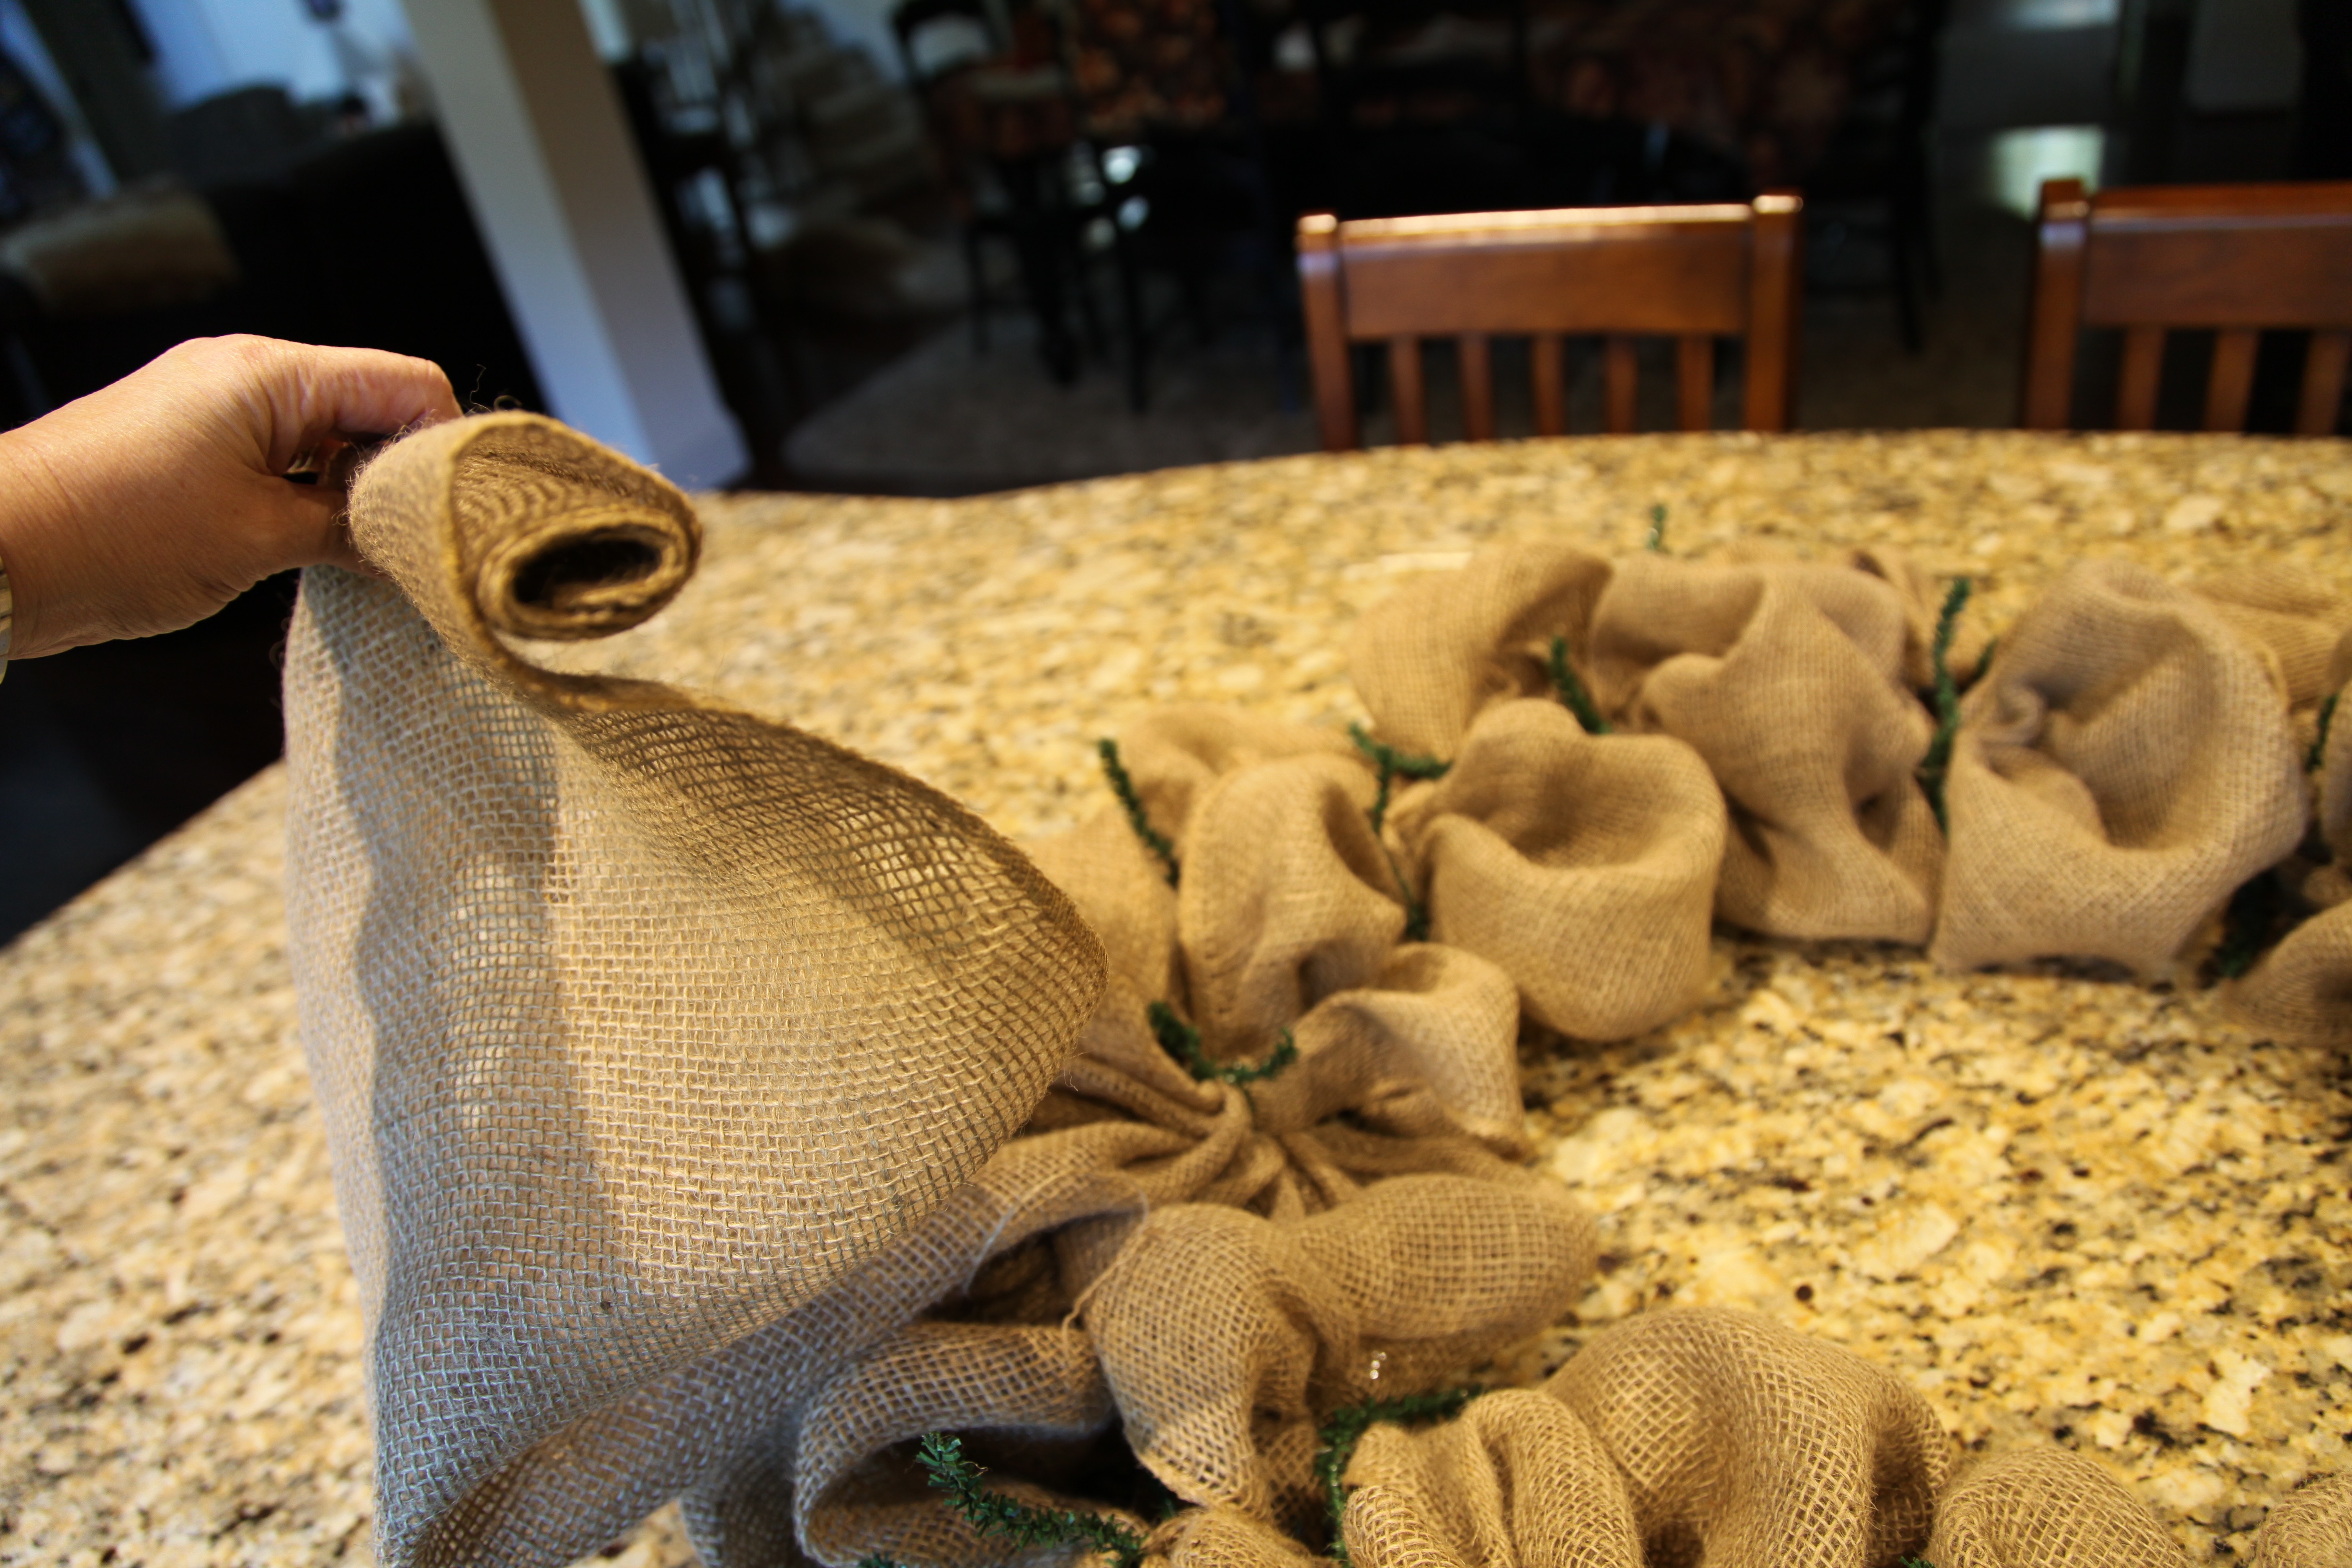
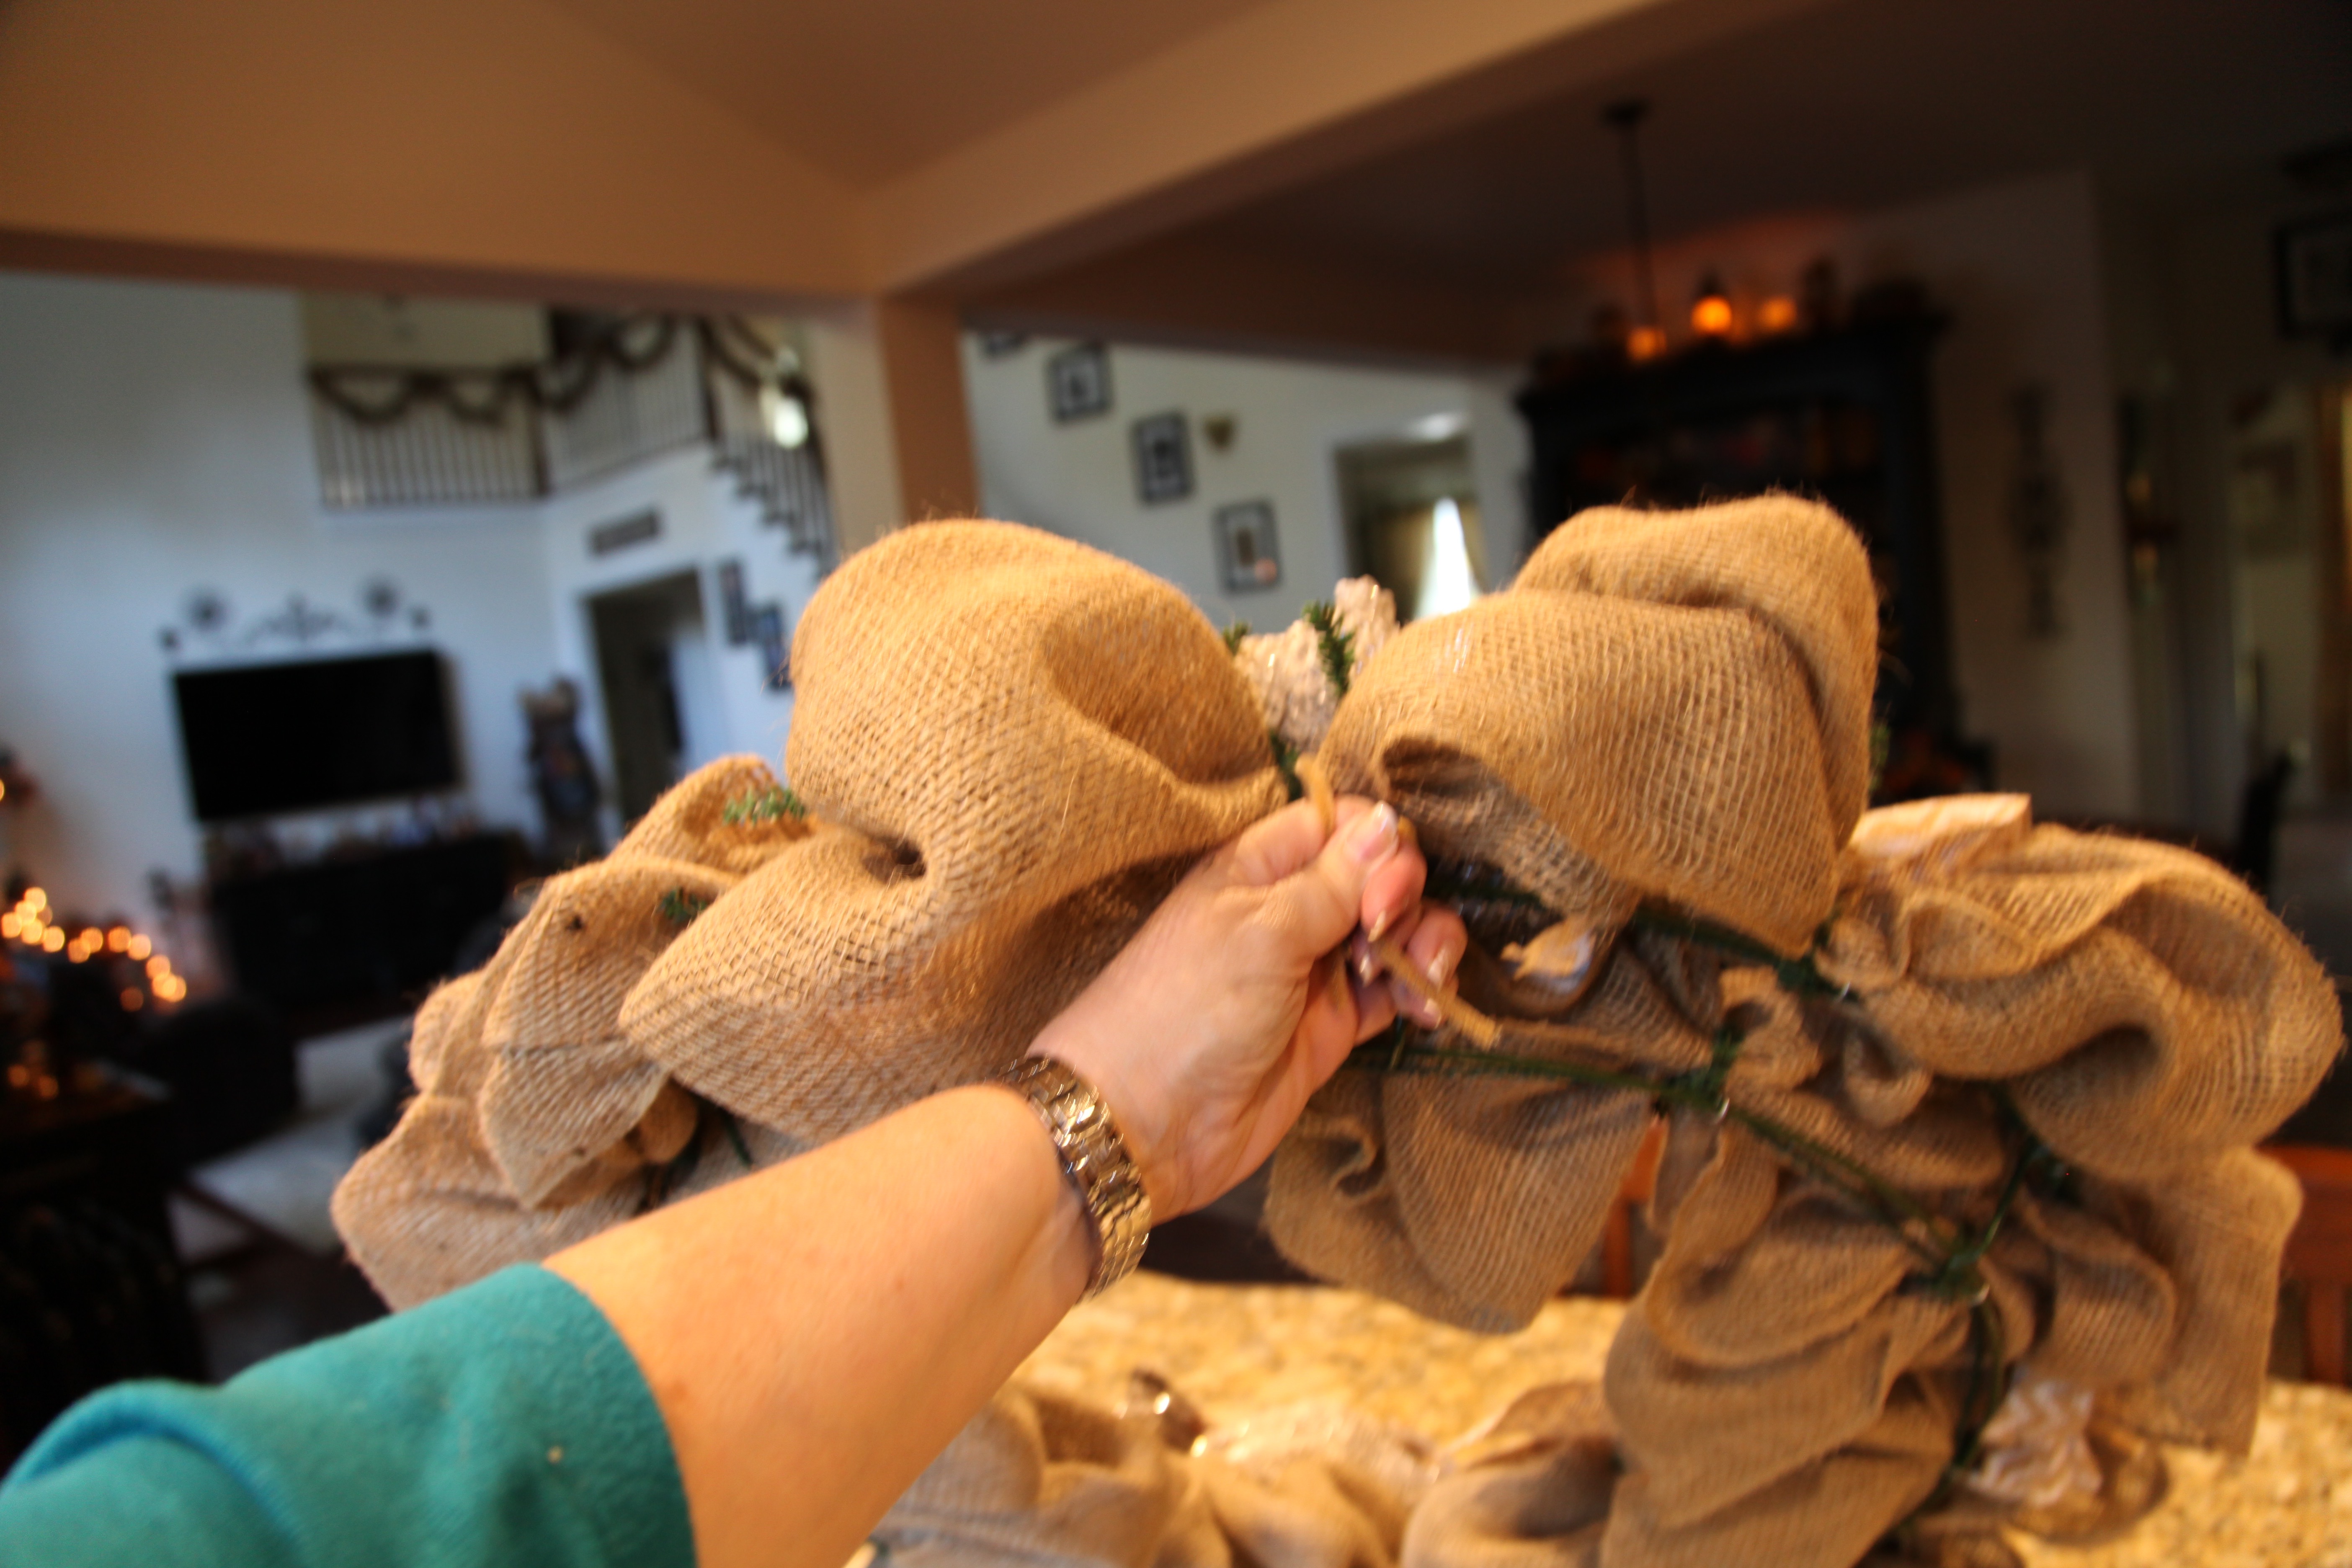
The first thing I did was to attach the burlap, I unrolled most of the skein, gathered the end and started placing it into one of the pipe cleaners on the outside of the wreath form. I then made a large loop (probably at least 10″ long) and caught it into the next pipe cleaner on the outer ring of the wreath form. I continued making loops around the entire outer ring of the wreath form; I used an entire skein for this row…
I then opened the other skein and started working in the same manner around the inner ring…
I used most of the 2nd skein on the inner row; you can see in the picture below how much I had left over…
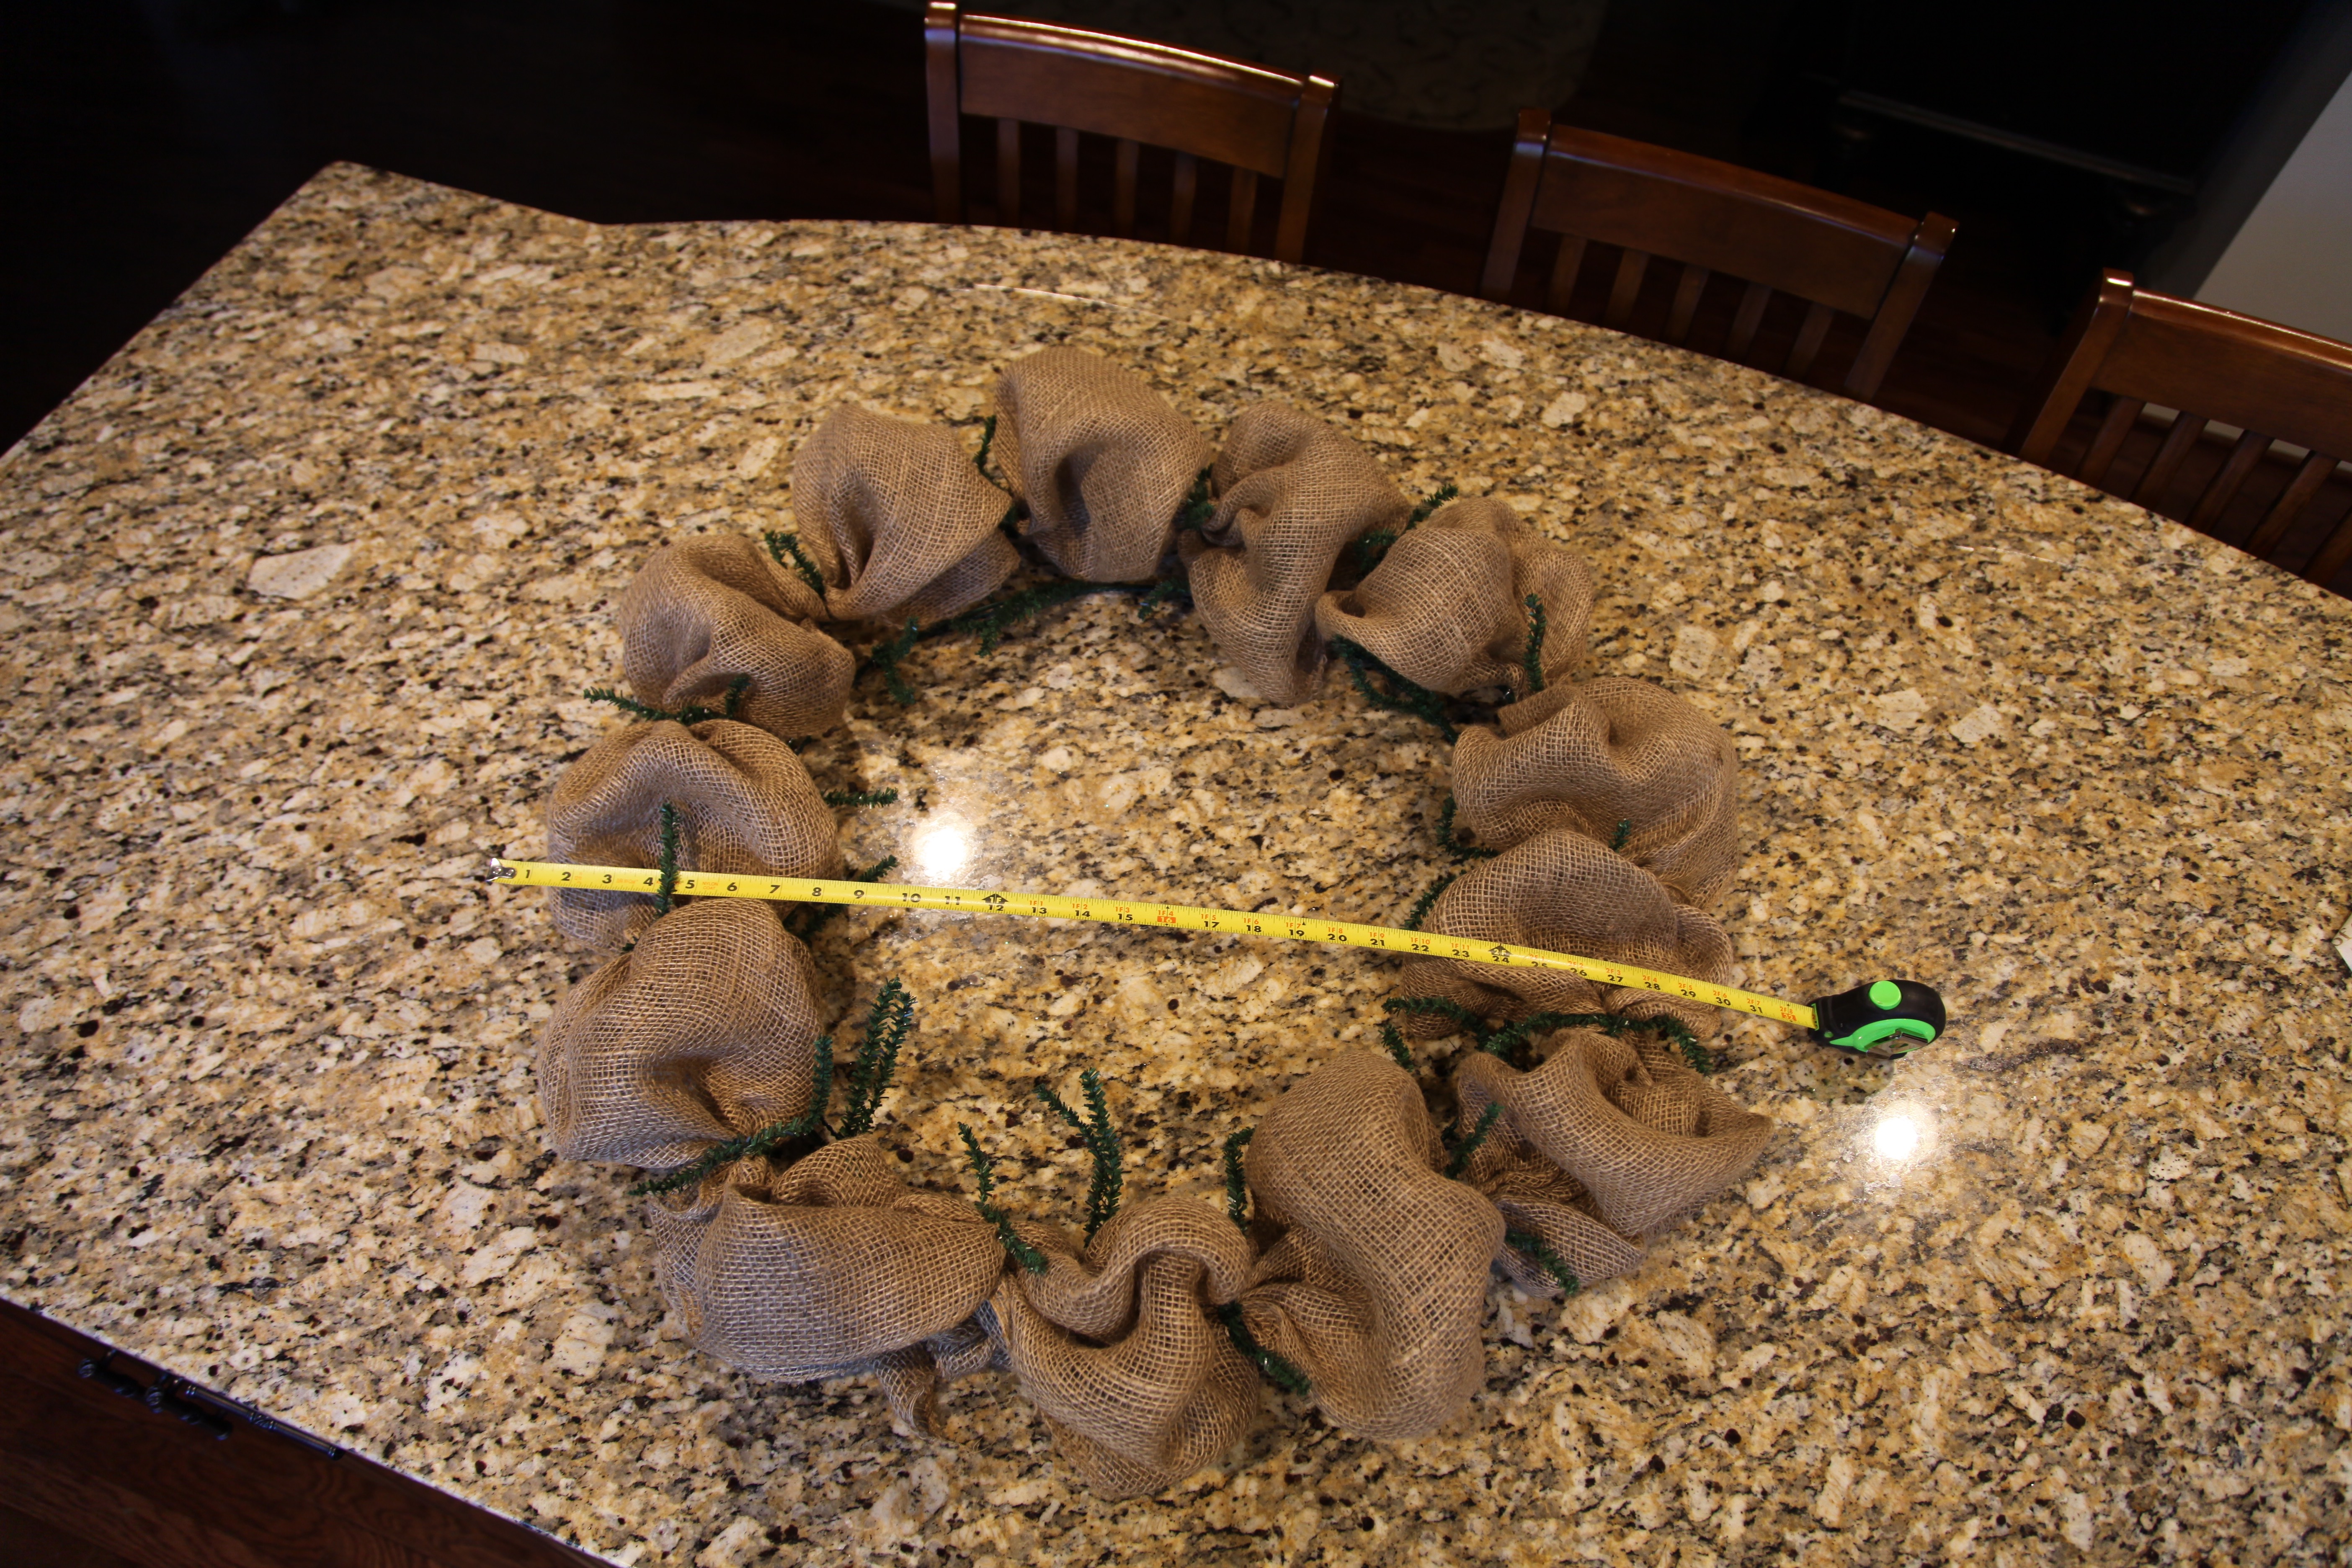
This size wreath form makes a huge wreath, it literally is almost as wide as my front door and it measures 30″ around…
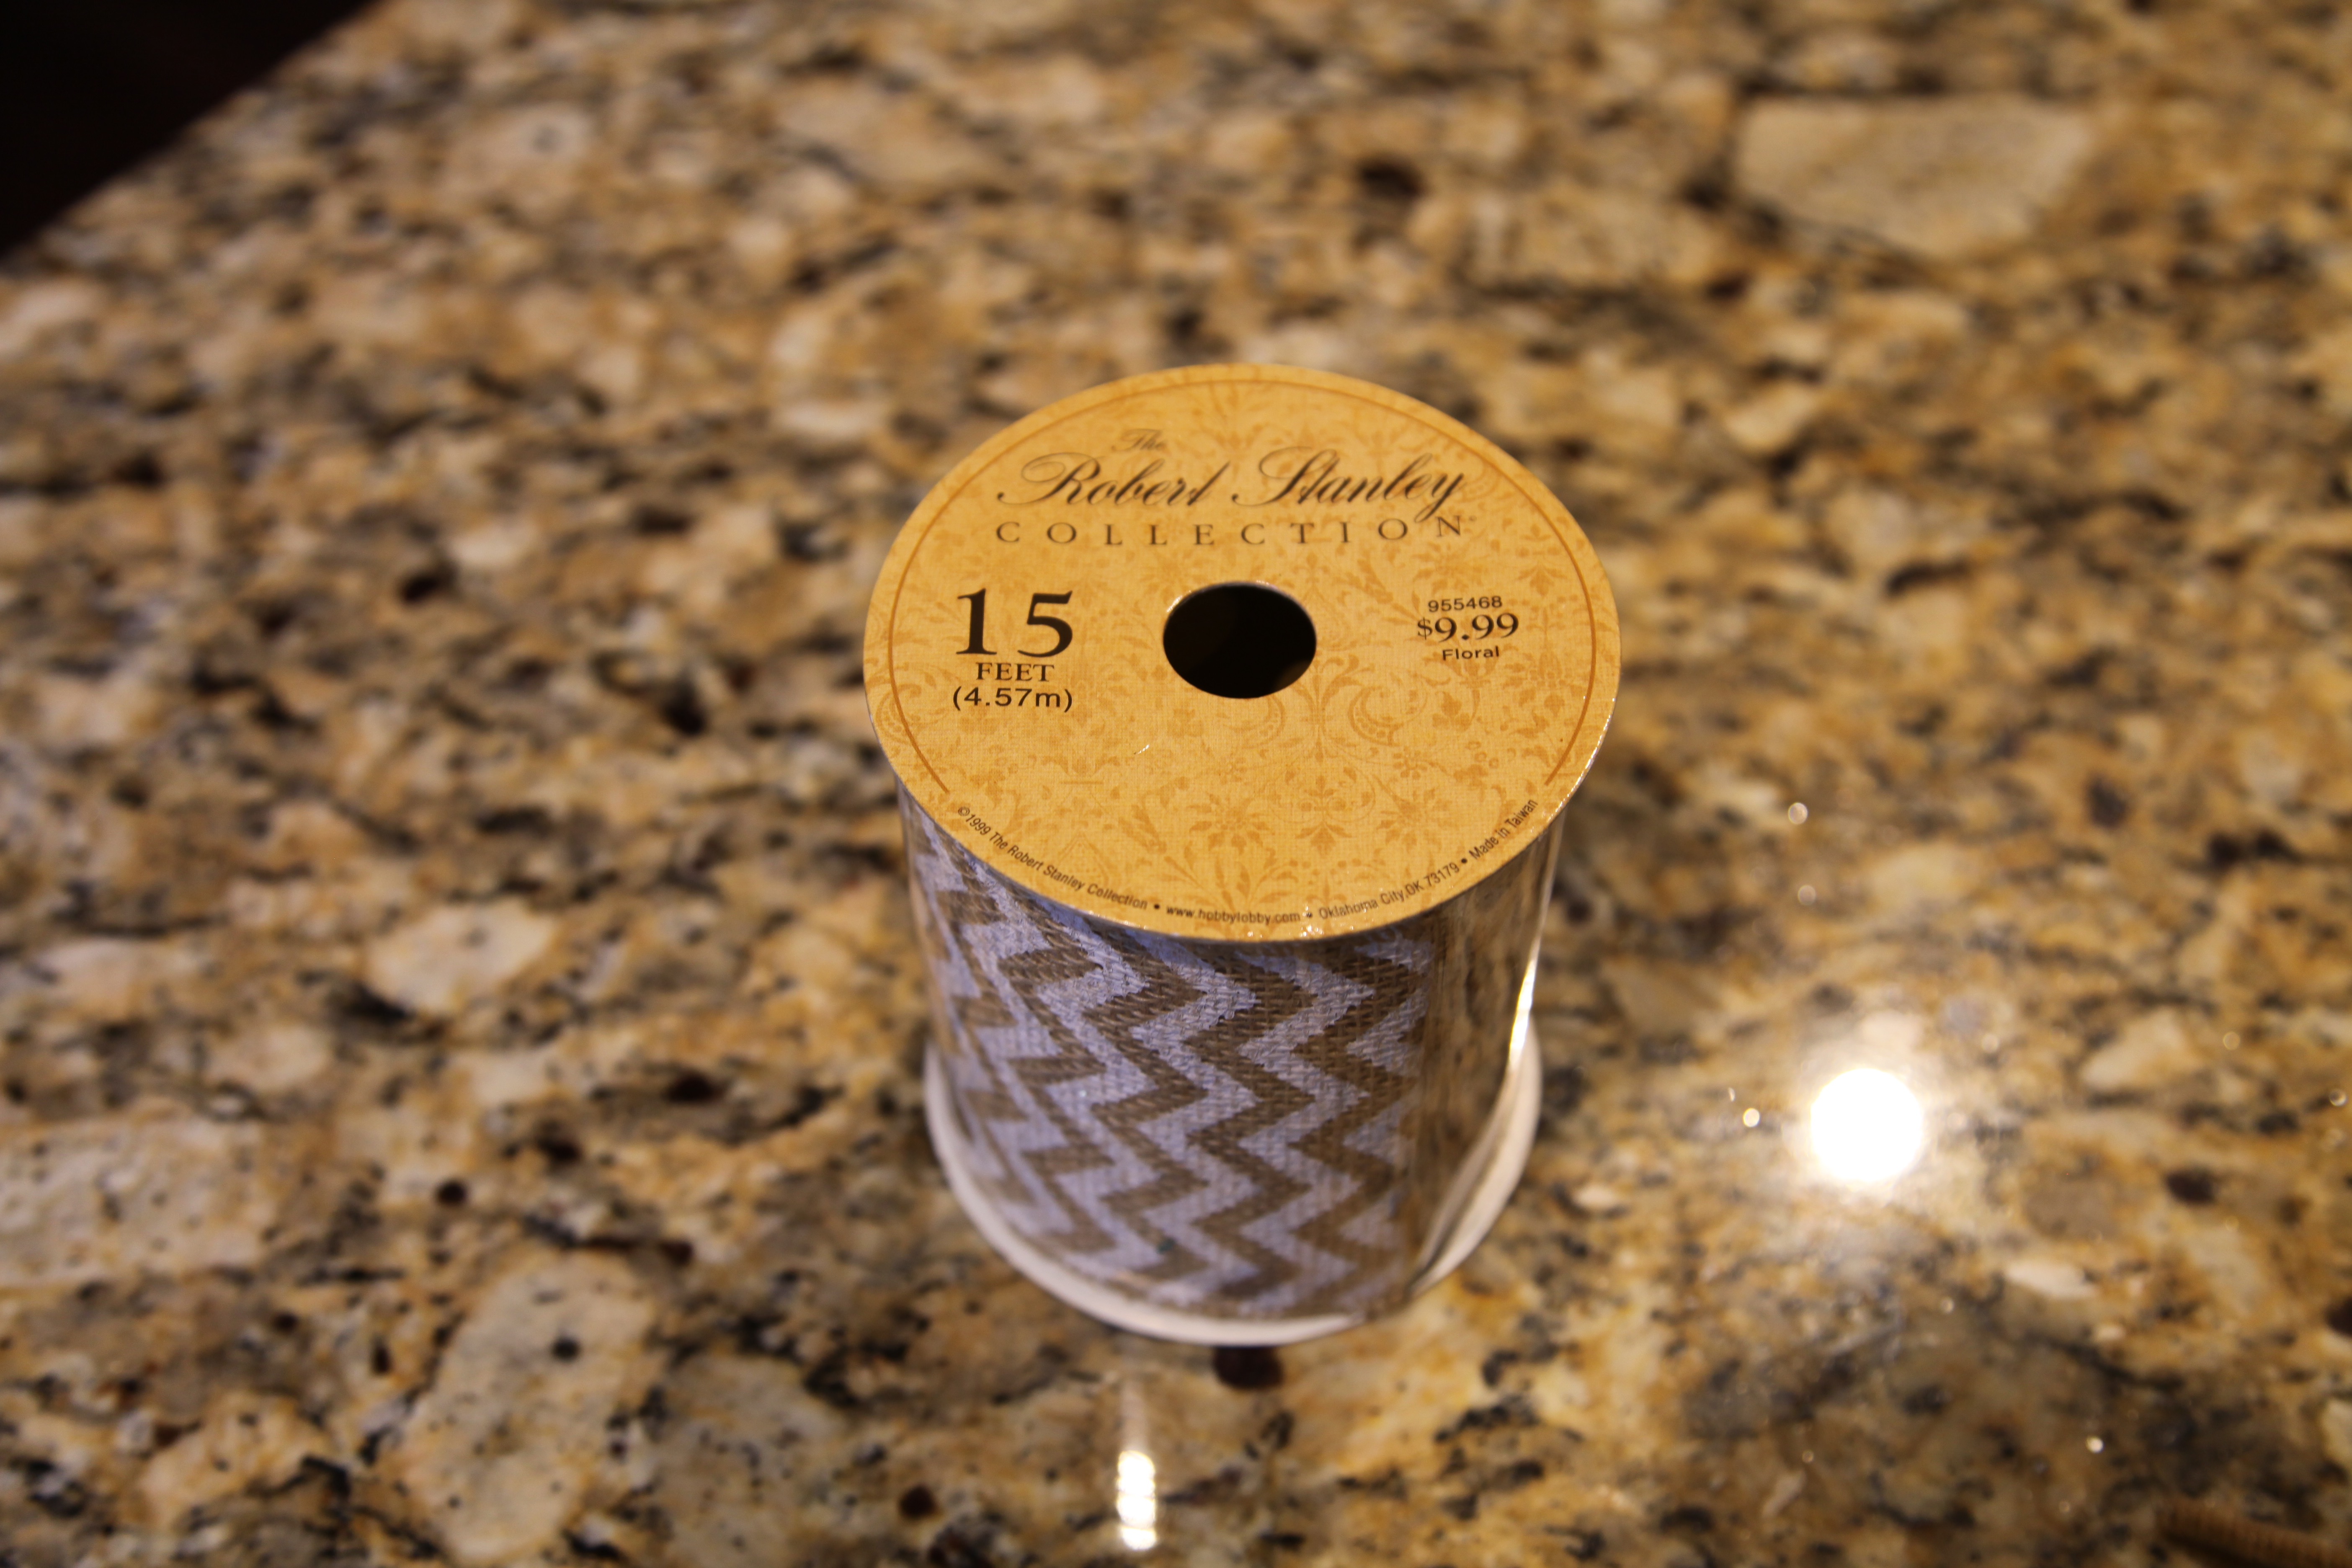
I then made a bow out of this chevron burlap ribbon…Here is a link to my “How to make a bow tutorial” video…
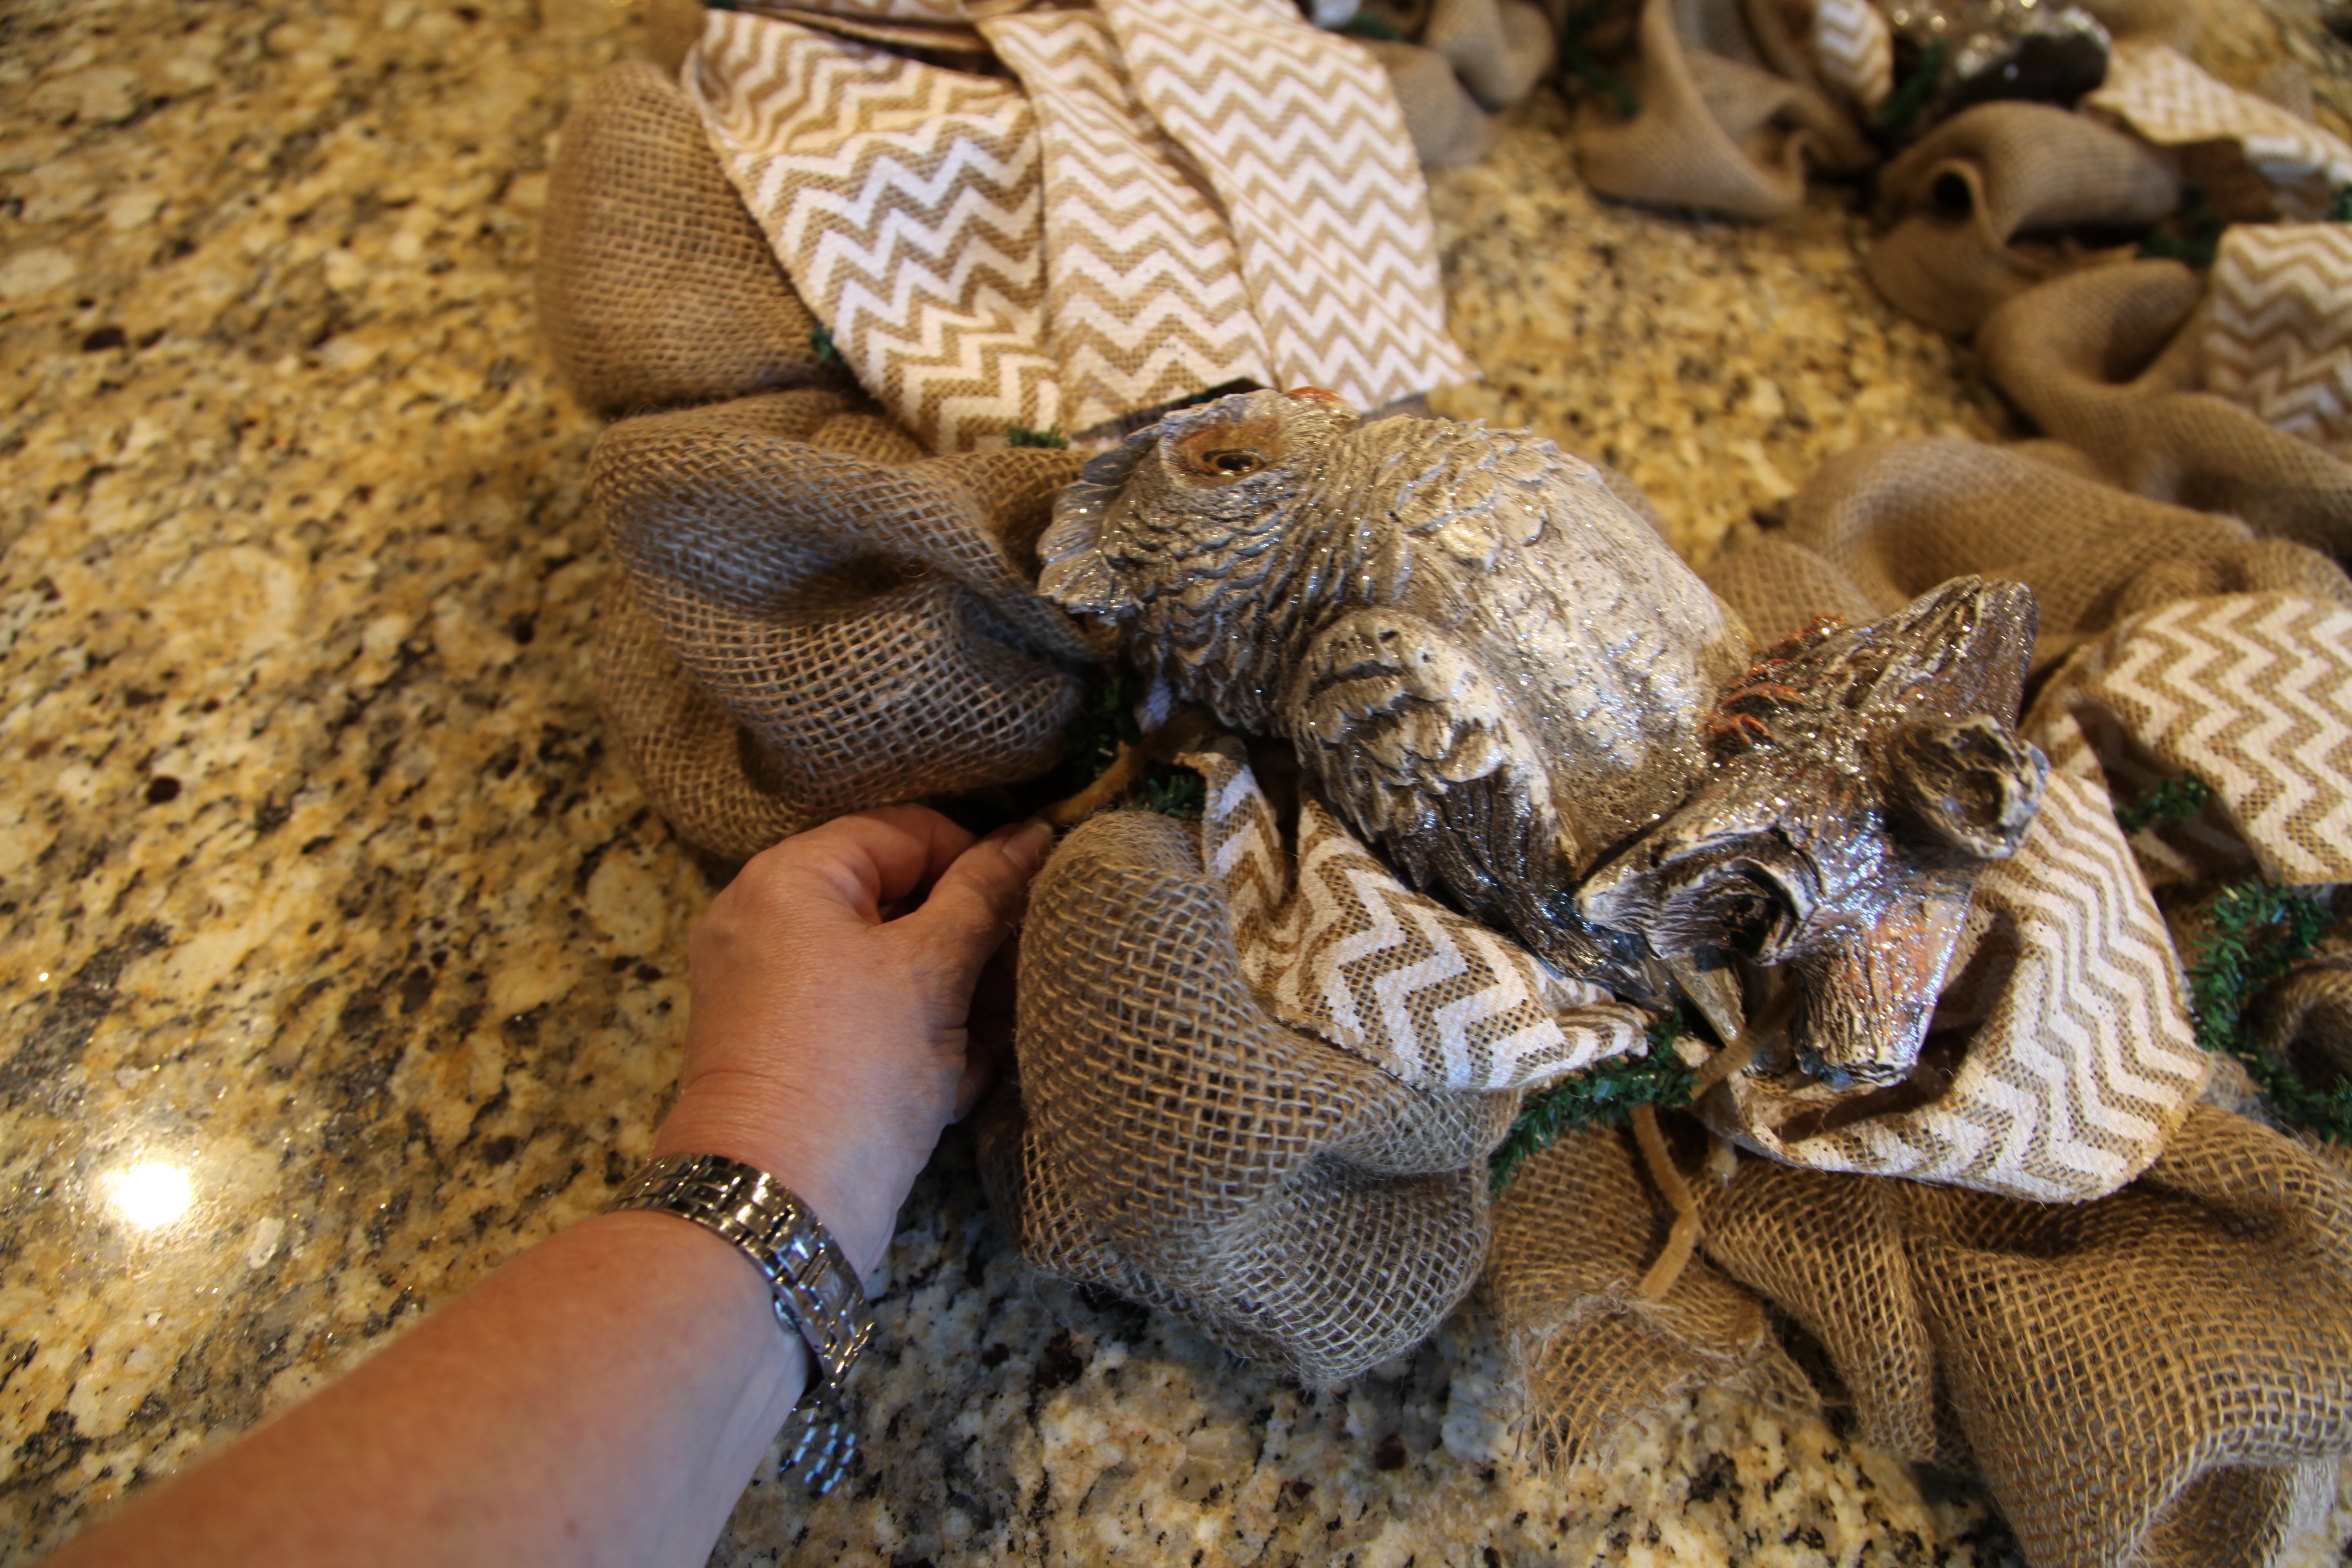
And then I proceeded to catch the remaining chevron ribbon in pipe cleaners. I caught it in every other twist tie moving from the outer ring to the inner ring then back out to the outer ring’s pipe cleaners working my way around the entire wreath.
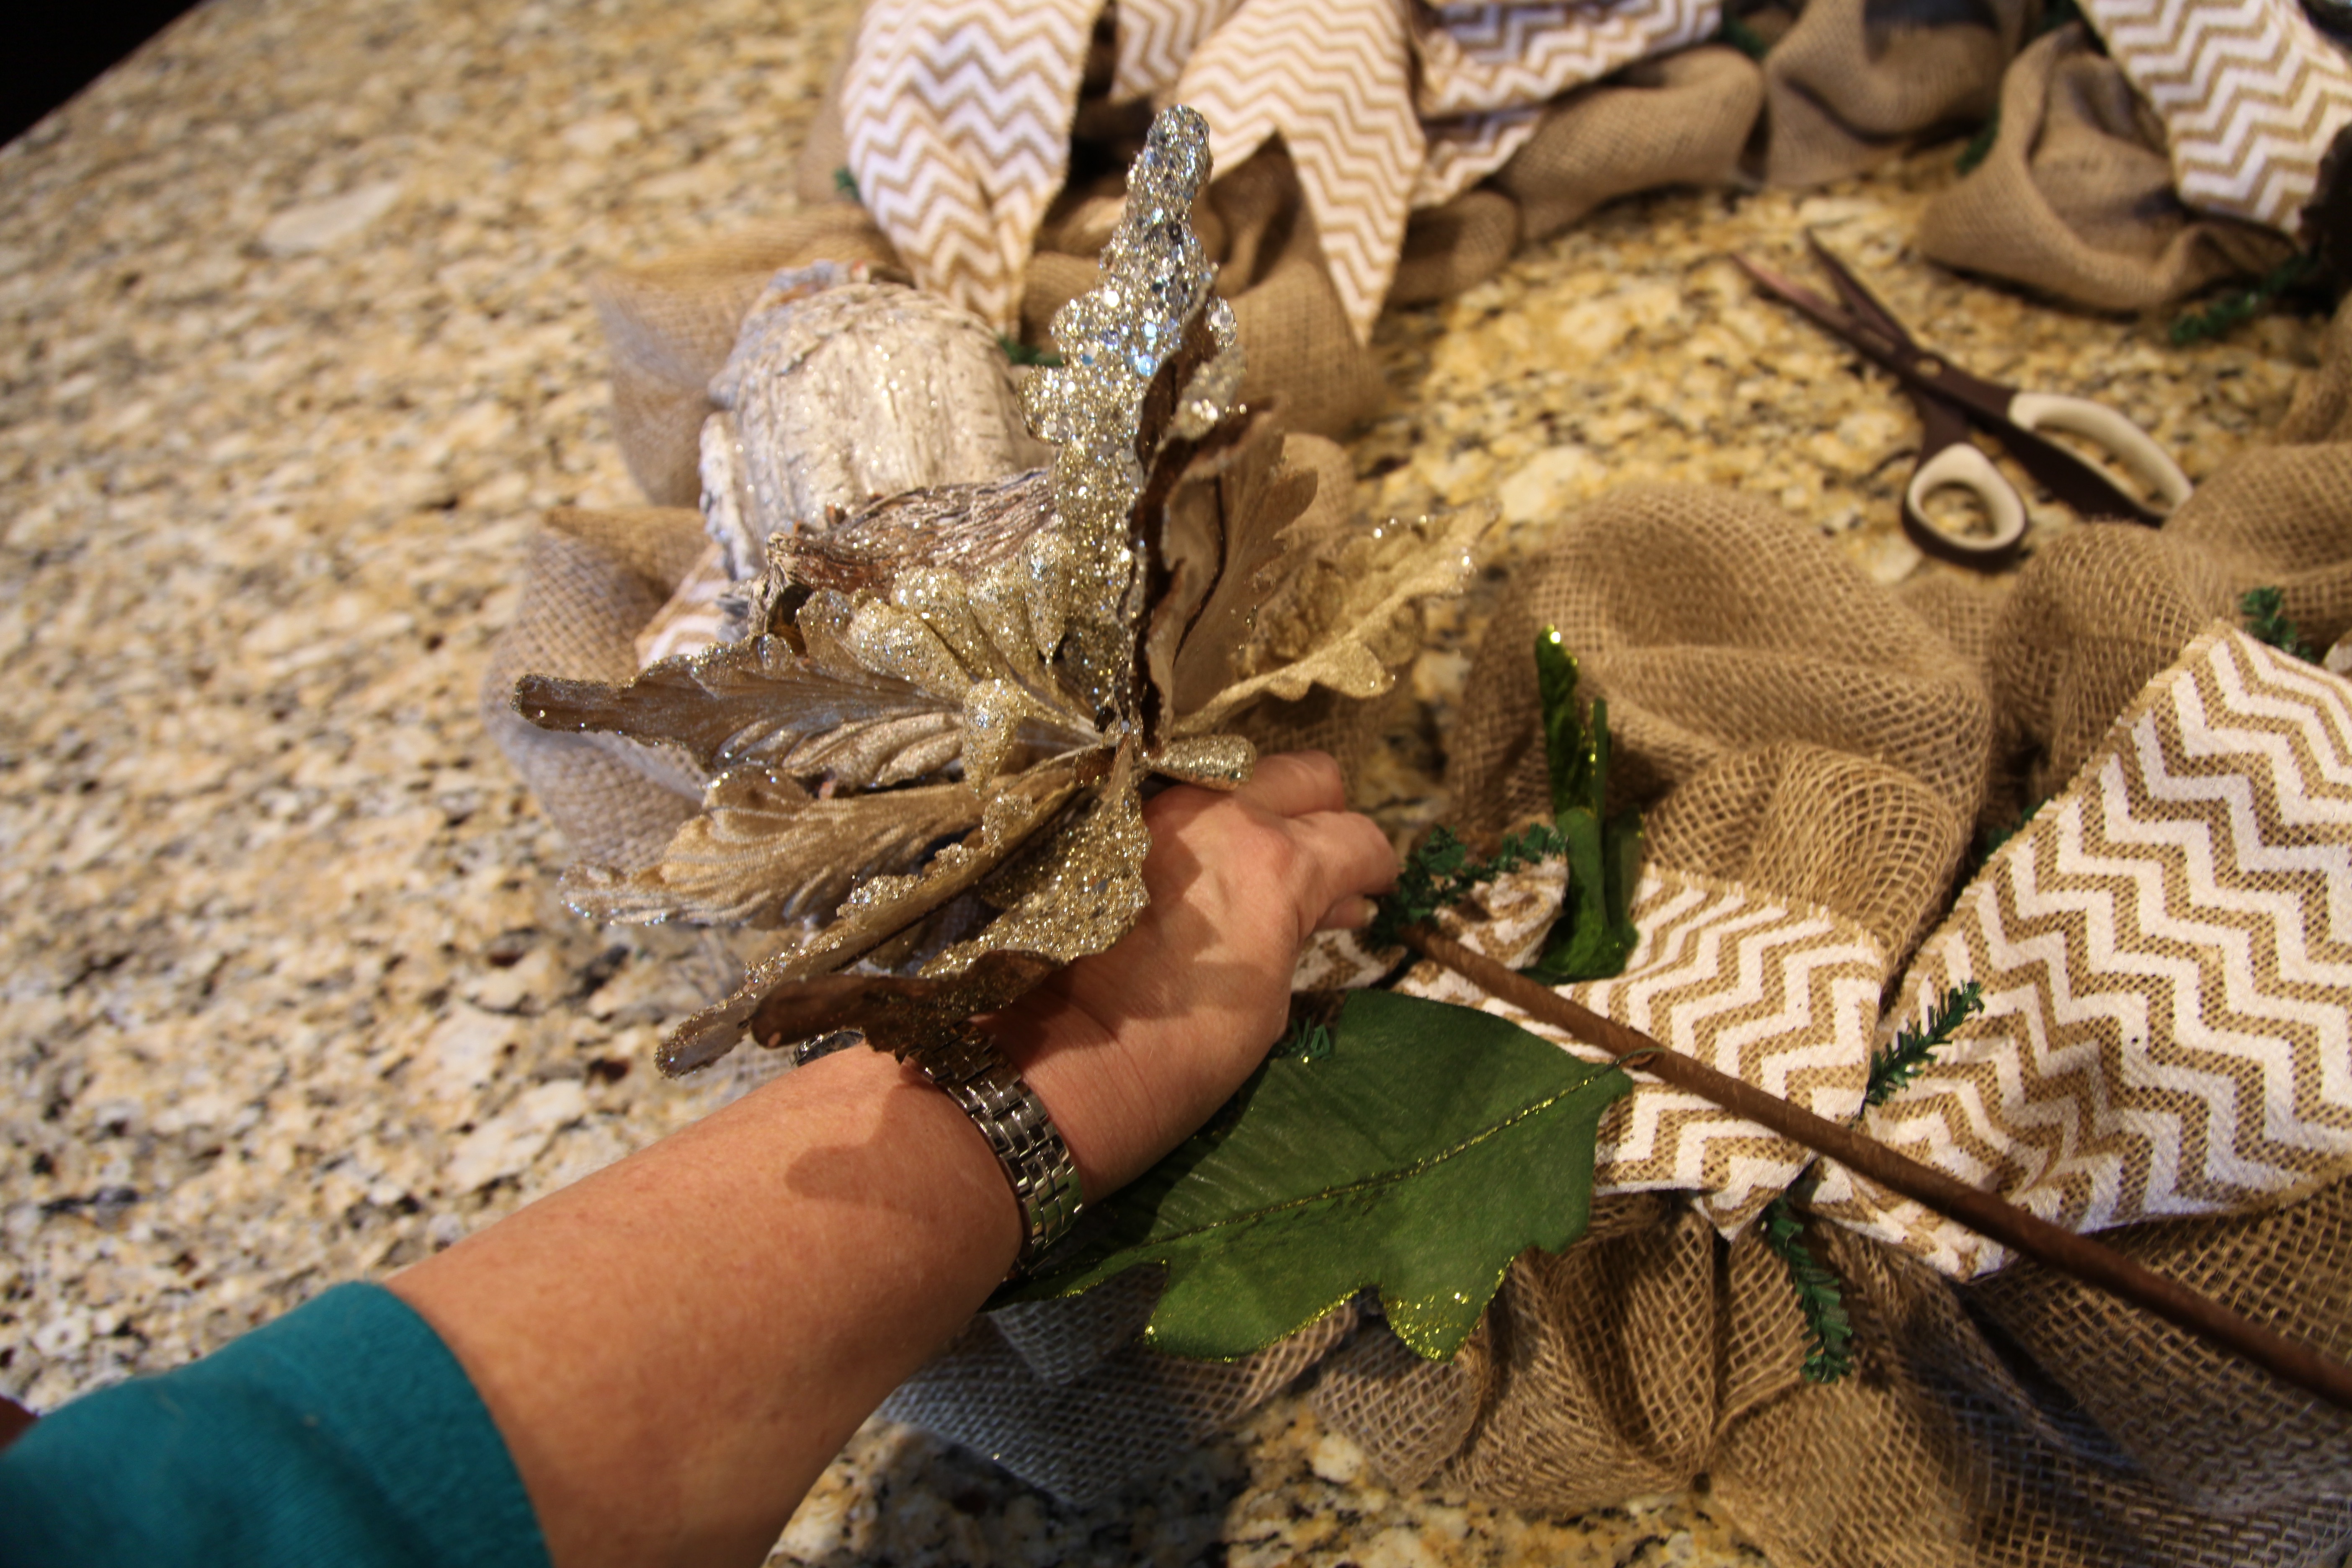
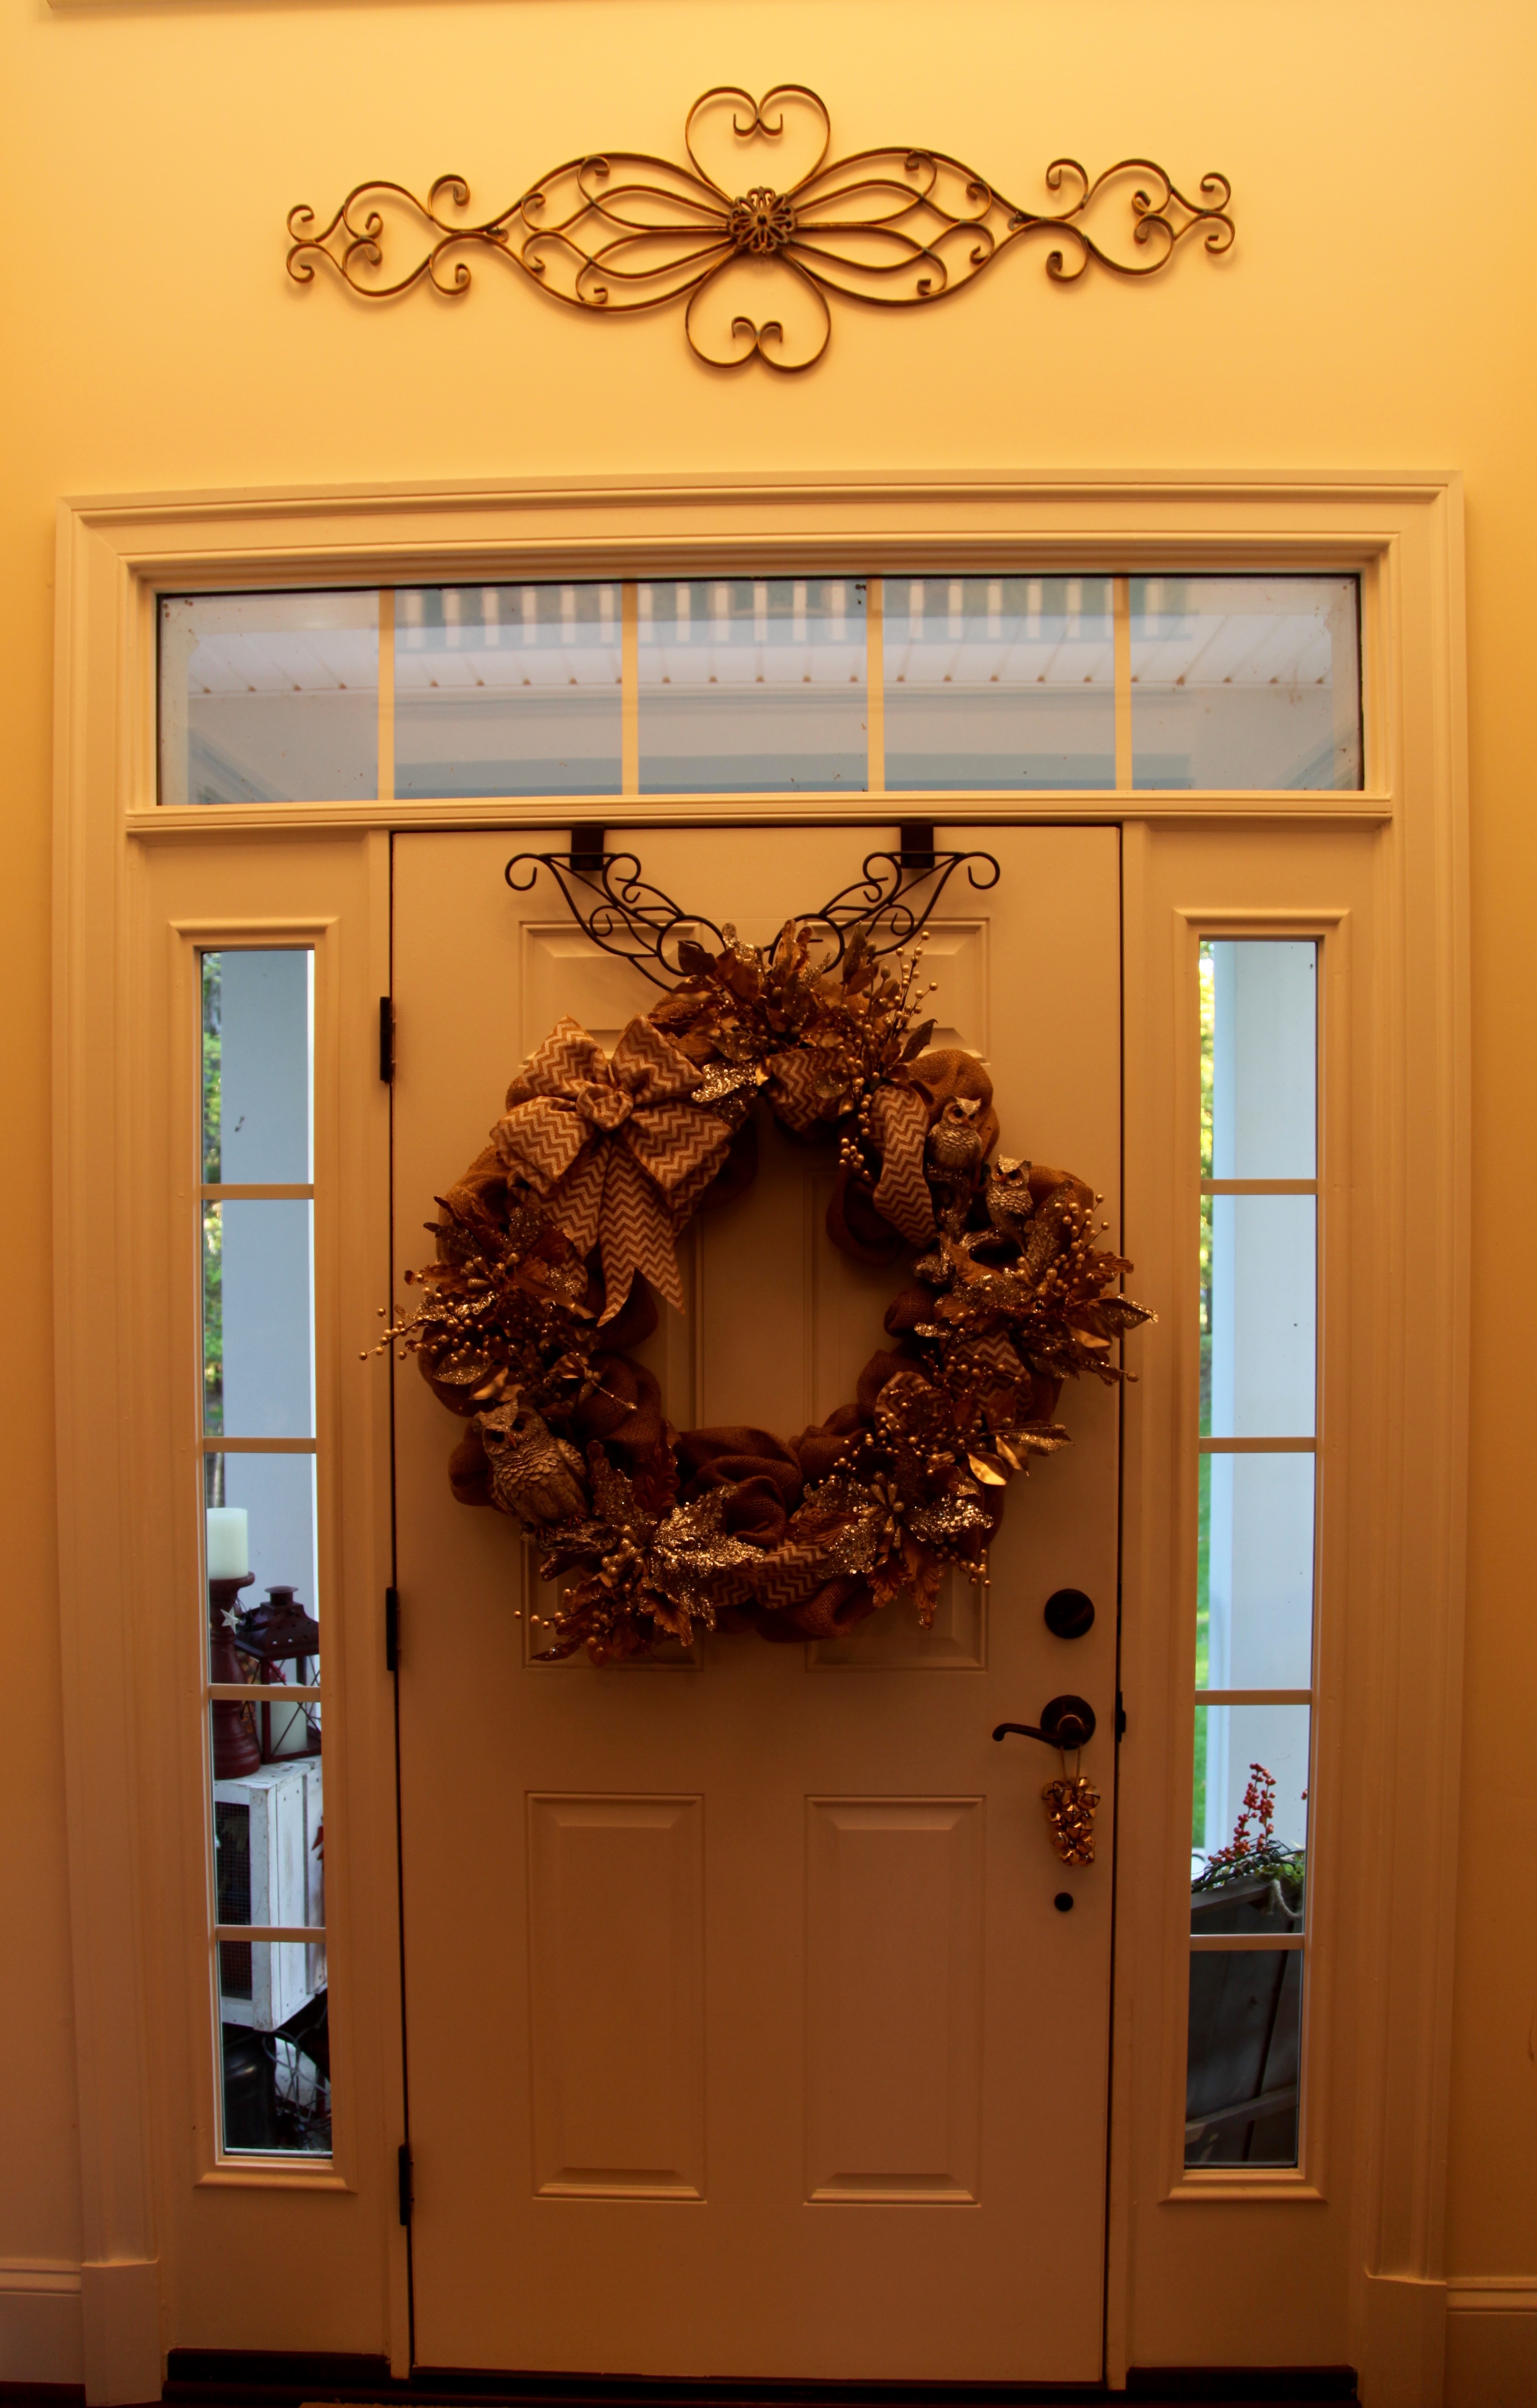
After I was finished adding in the chevron ribbon, I placed my bow where I wanted it on the wreath, then I tied the owls on, and started placing the flowers. There is no rhyme or reason or pattern to this part of the wreath making process, you just need to let your creative juices flow and place the flowers where you think they look pretty. I then hot-glued everything in place for security (sometimes I won’t do that, but those poinsettias were rather heavy and I didn’t want them to fall out)…
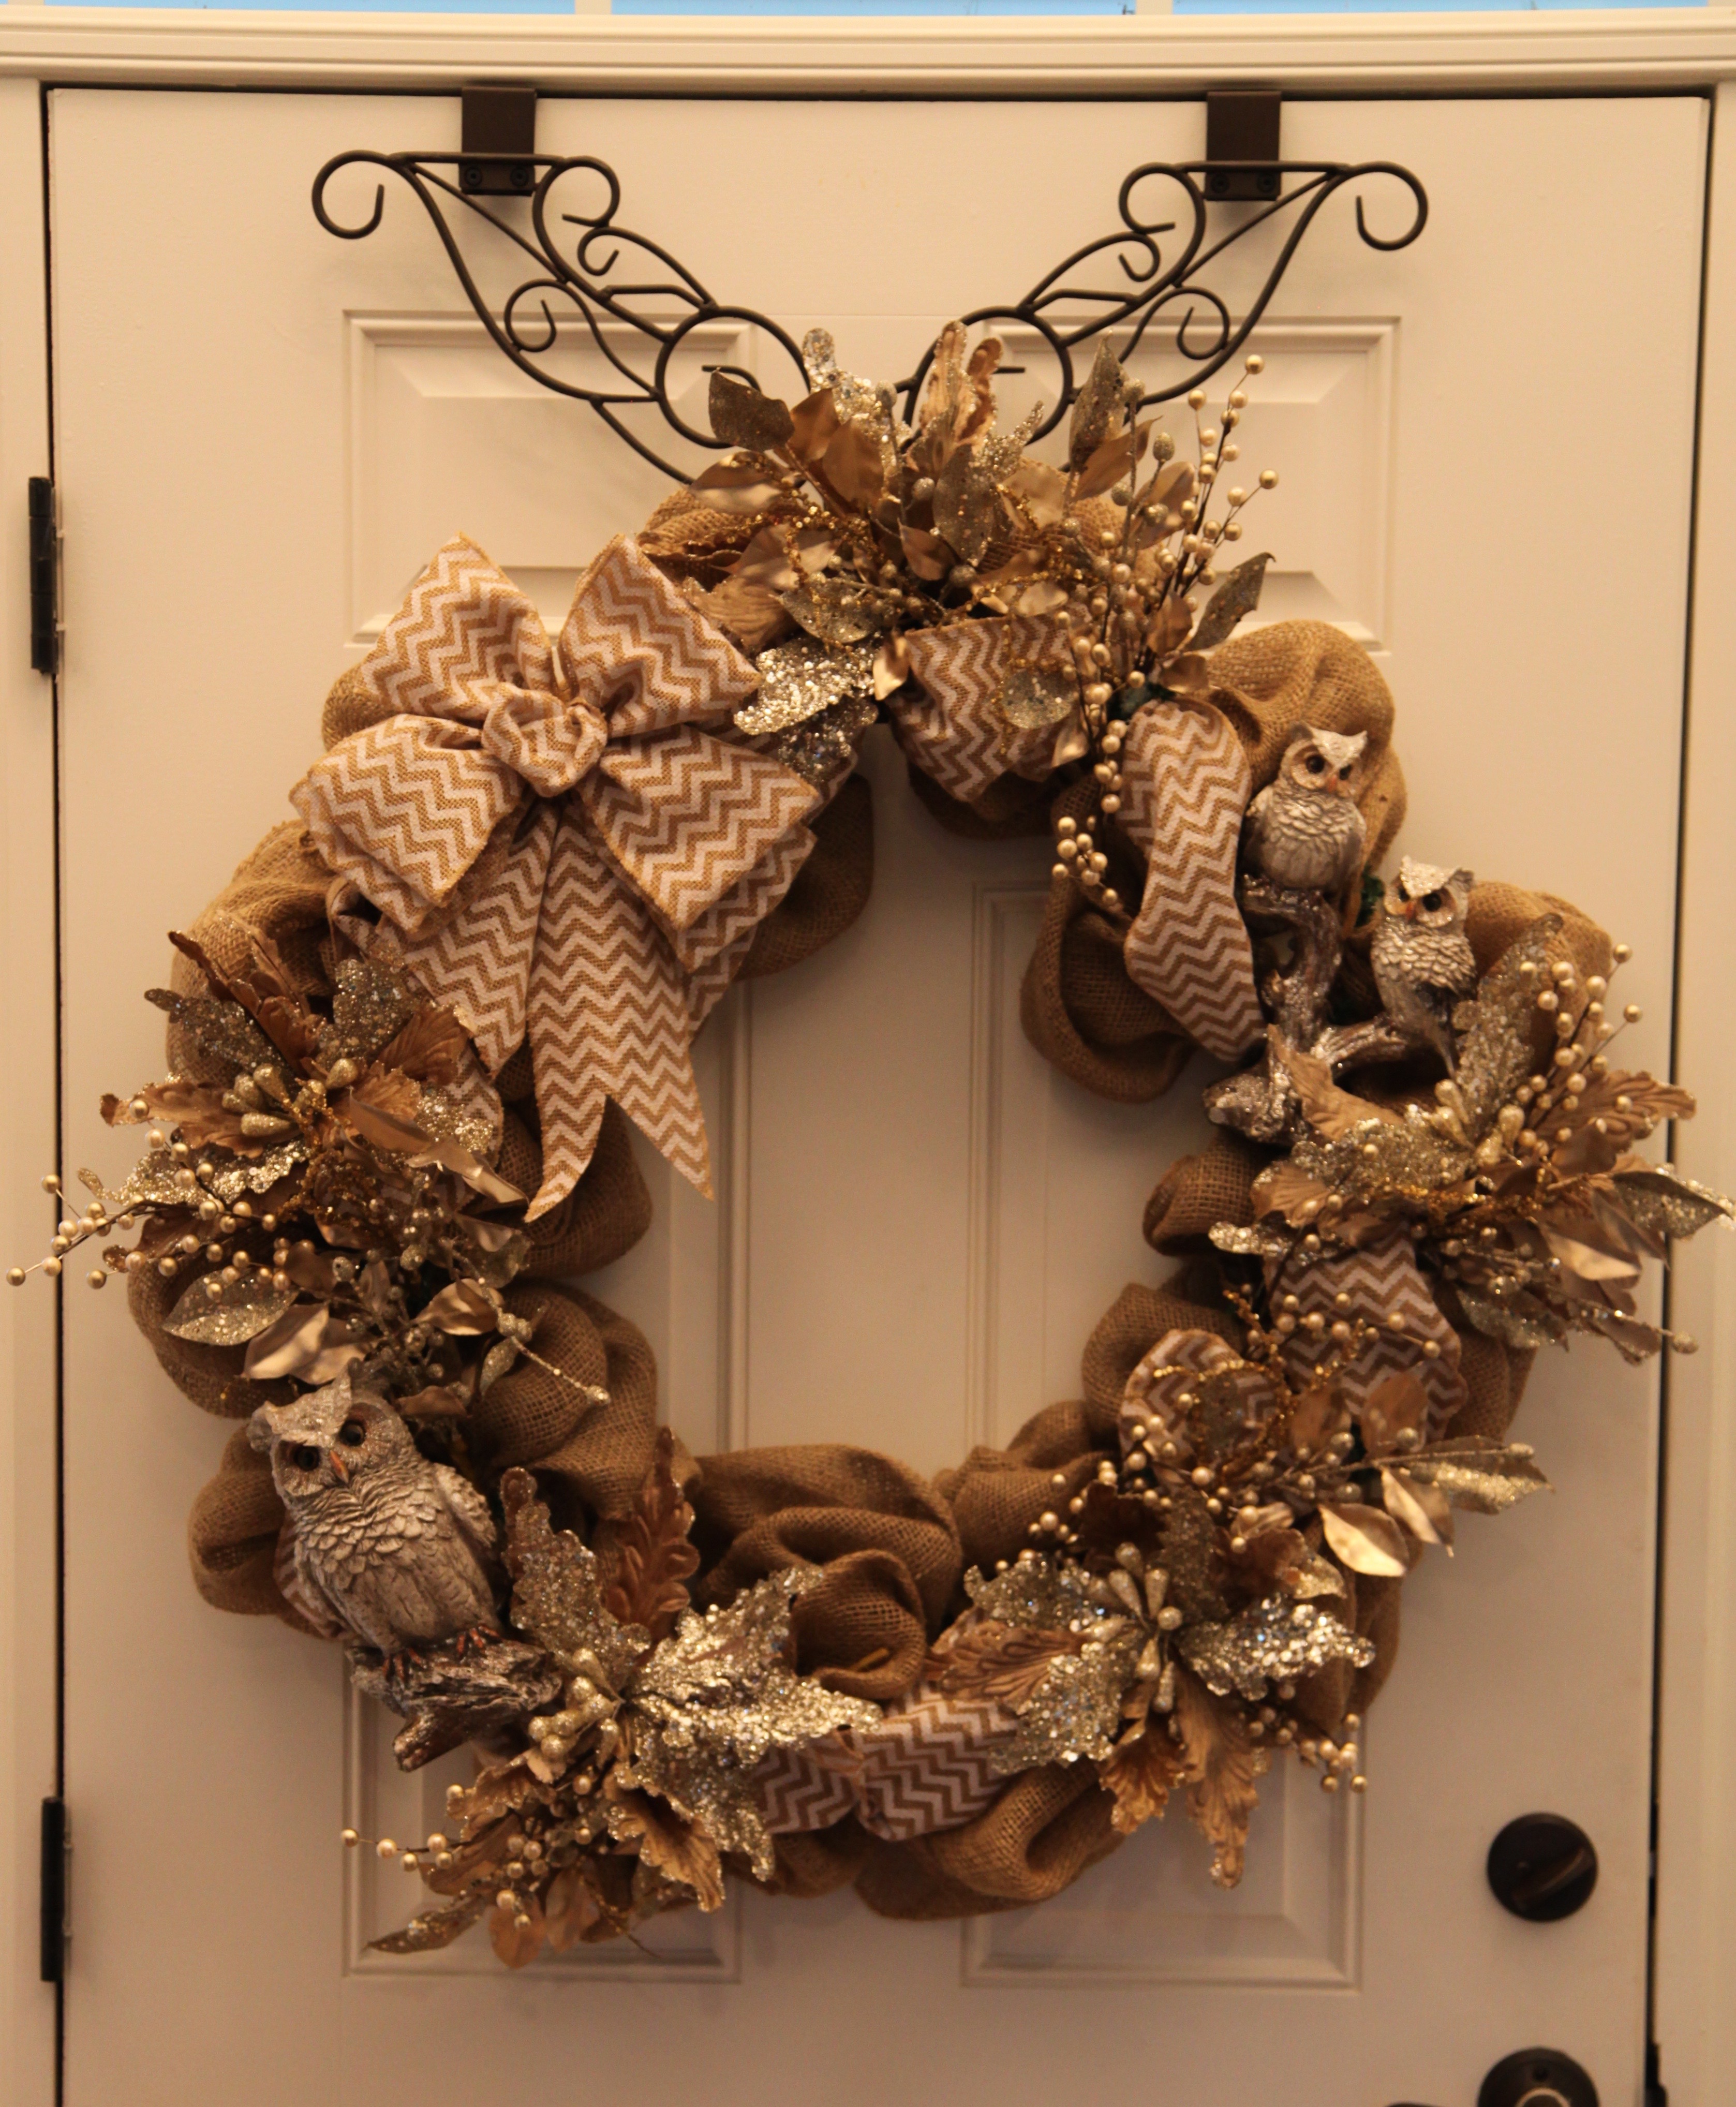
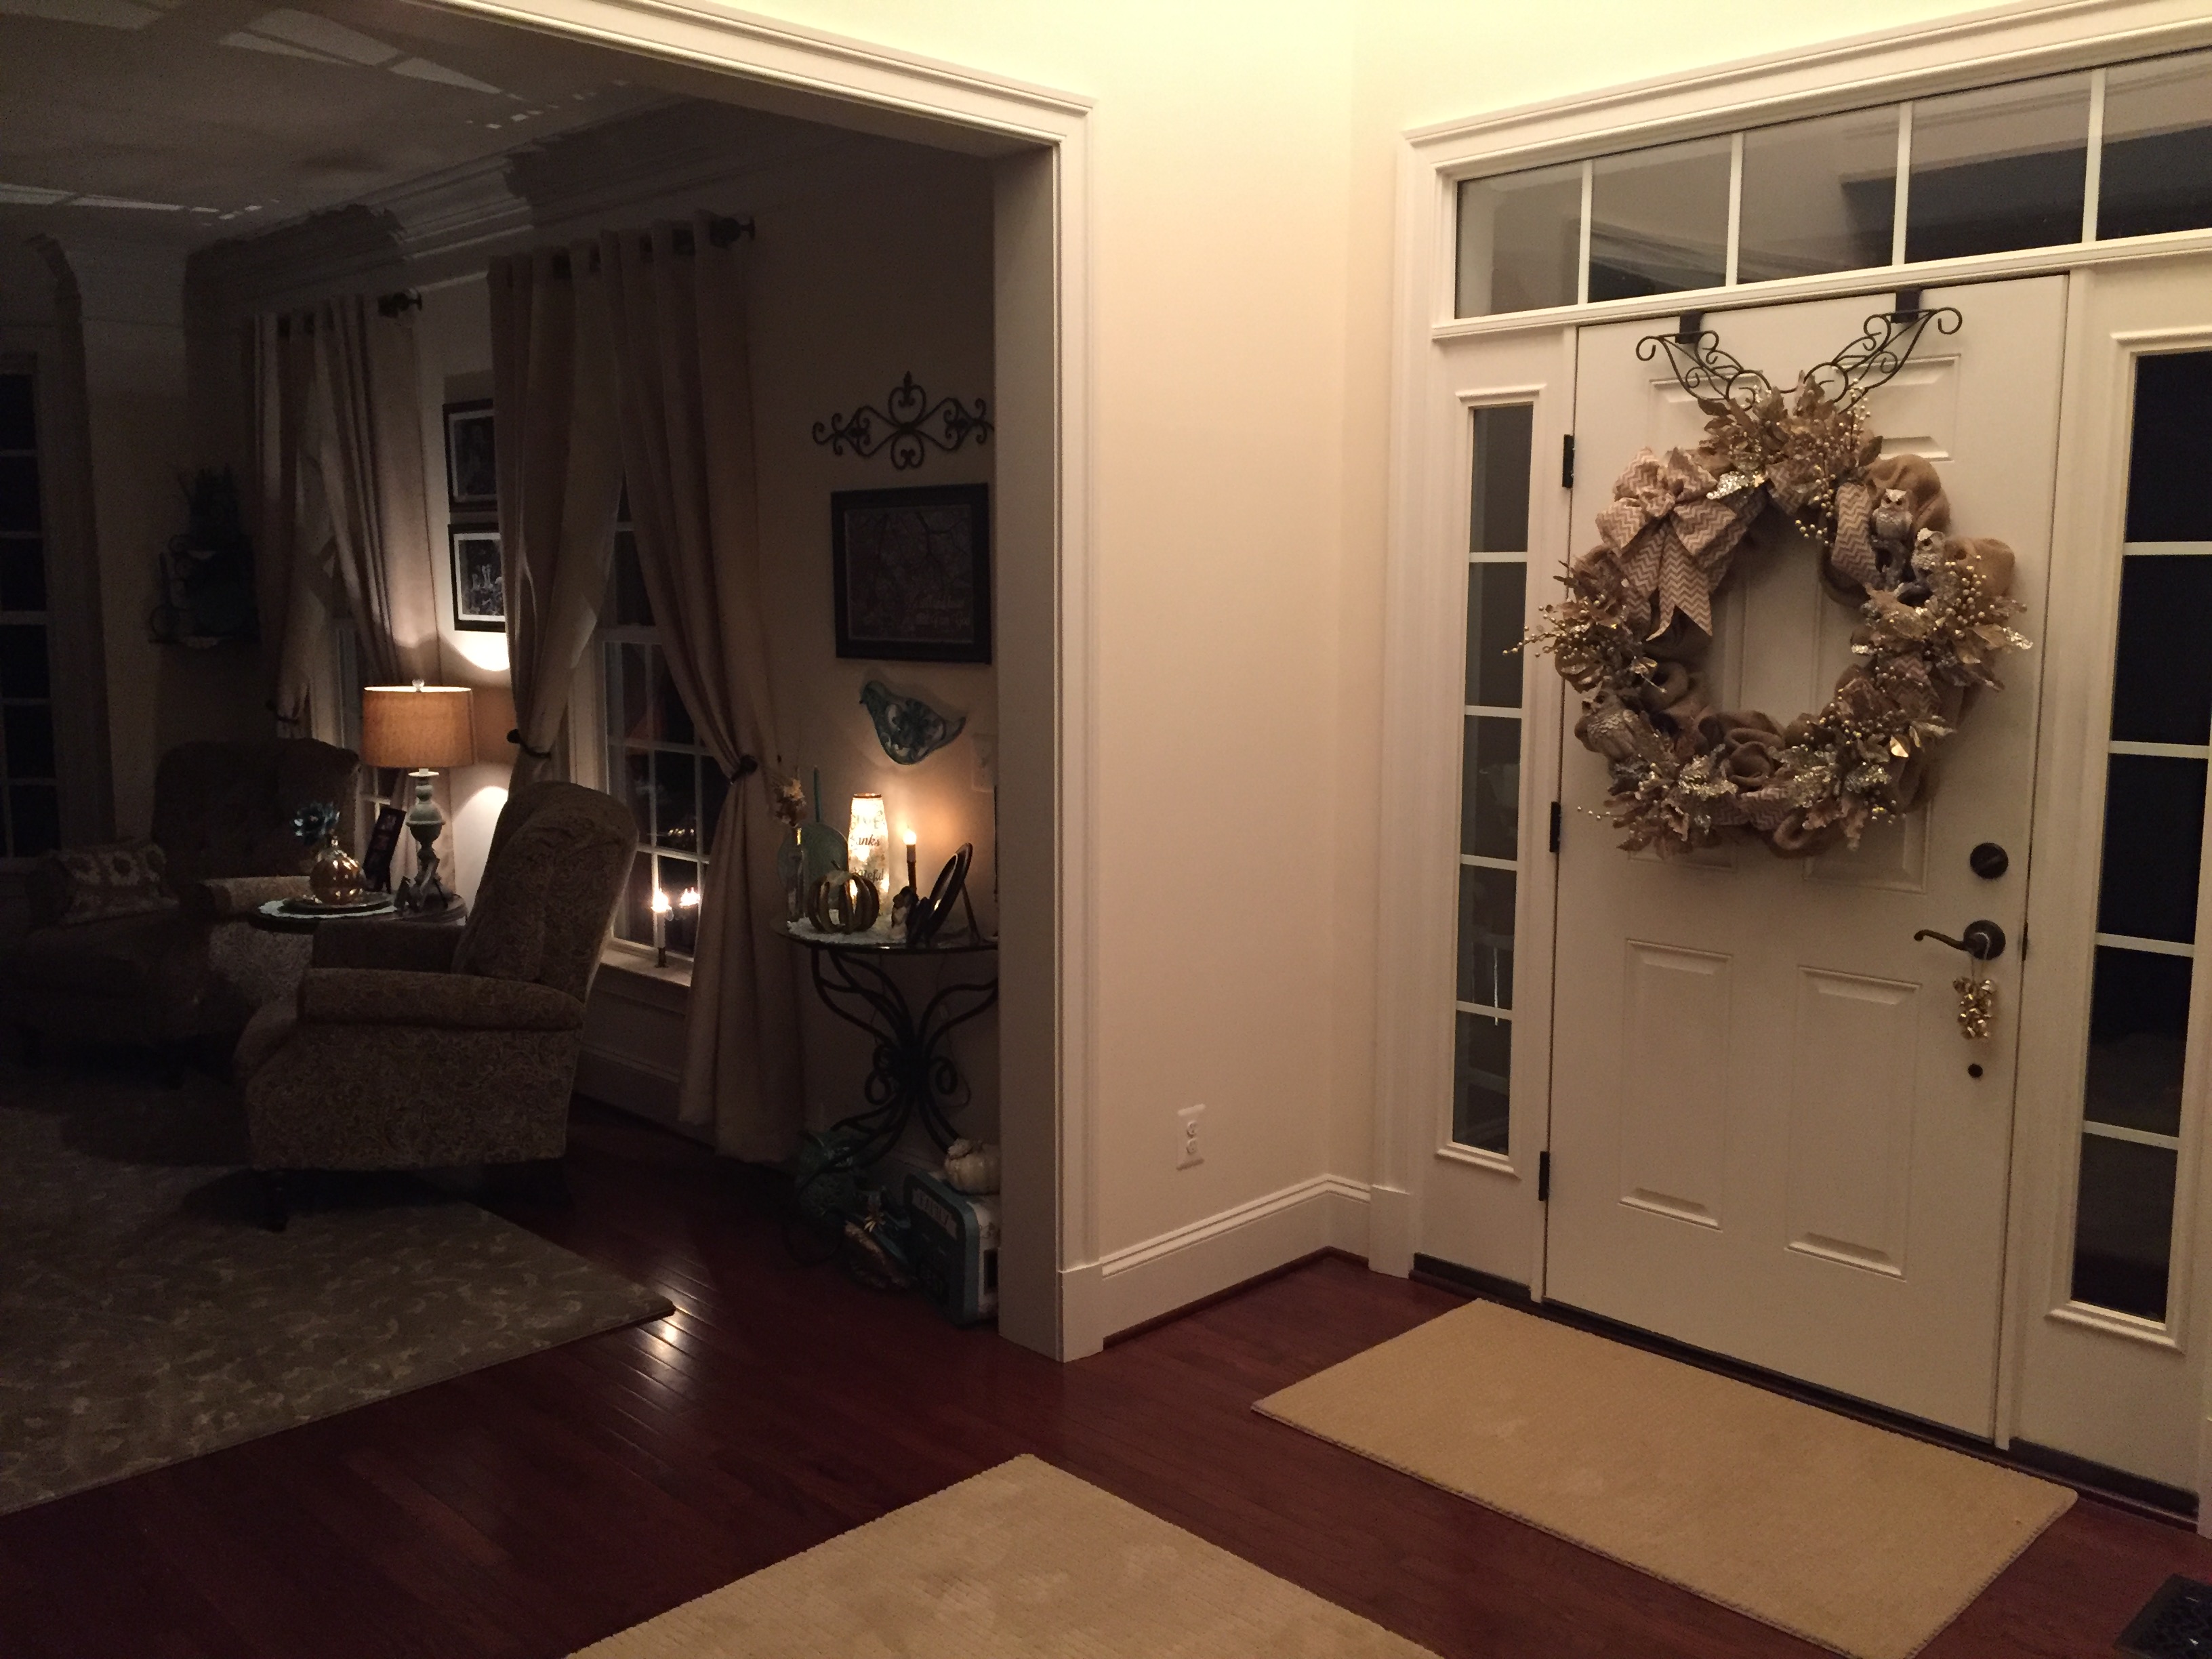
After I was finished tweaking it–took me a few minutes to get it exactly how I wanted it, I hung it up on my foyer door. I’m completely happy with how it turned out and I will probably leave it up there through Christmas and the Winter months.
It just goes to show you that even my best laid plans can turn into something completely different. I’m happy that I let myself step out of my original thought process regarding this wreath. Go me! 😉
Until next time, y’all take good care! ❤
**In crafting there are no mistakes just unique creations**
I remember waking up on the morning that we pulled into Juneau (the State capital that is only reachable by plane or boat) with butterflies in my stomach because I was excited for our planned excursion. We were going to be taking the Mendenhall Glacier and Whale Quest Tour. Again, this was our 4th Voyage of the Glaciers cruise and yes, this would be our 4th time doing this very same excursion…*that’s* how much I love it. So we disembarked the Coral Princess and found our motor coach for this day’s excursion–we had a lady bus driver who thought she was “all that and a bag of chips”…okay, okay, she was slightly entertaining…slightly. 😉 She could sing nicely though and she directed in a sing-along…okay, so you had to be there…haha. 😉
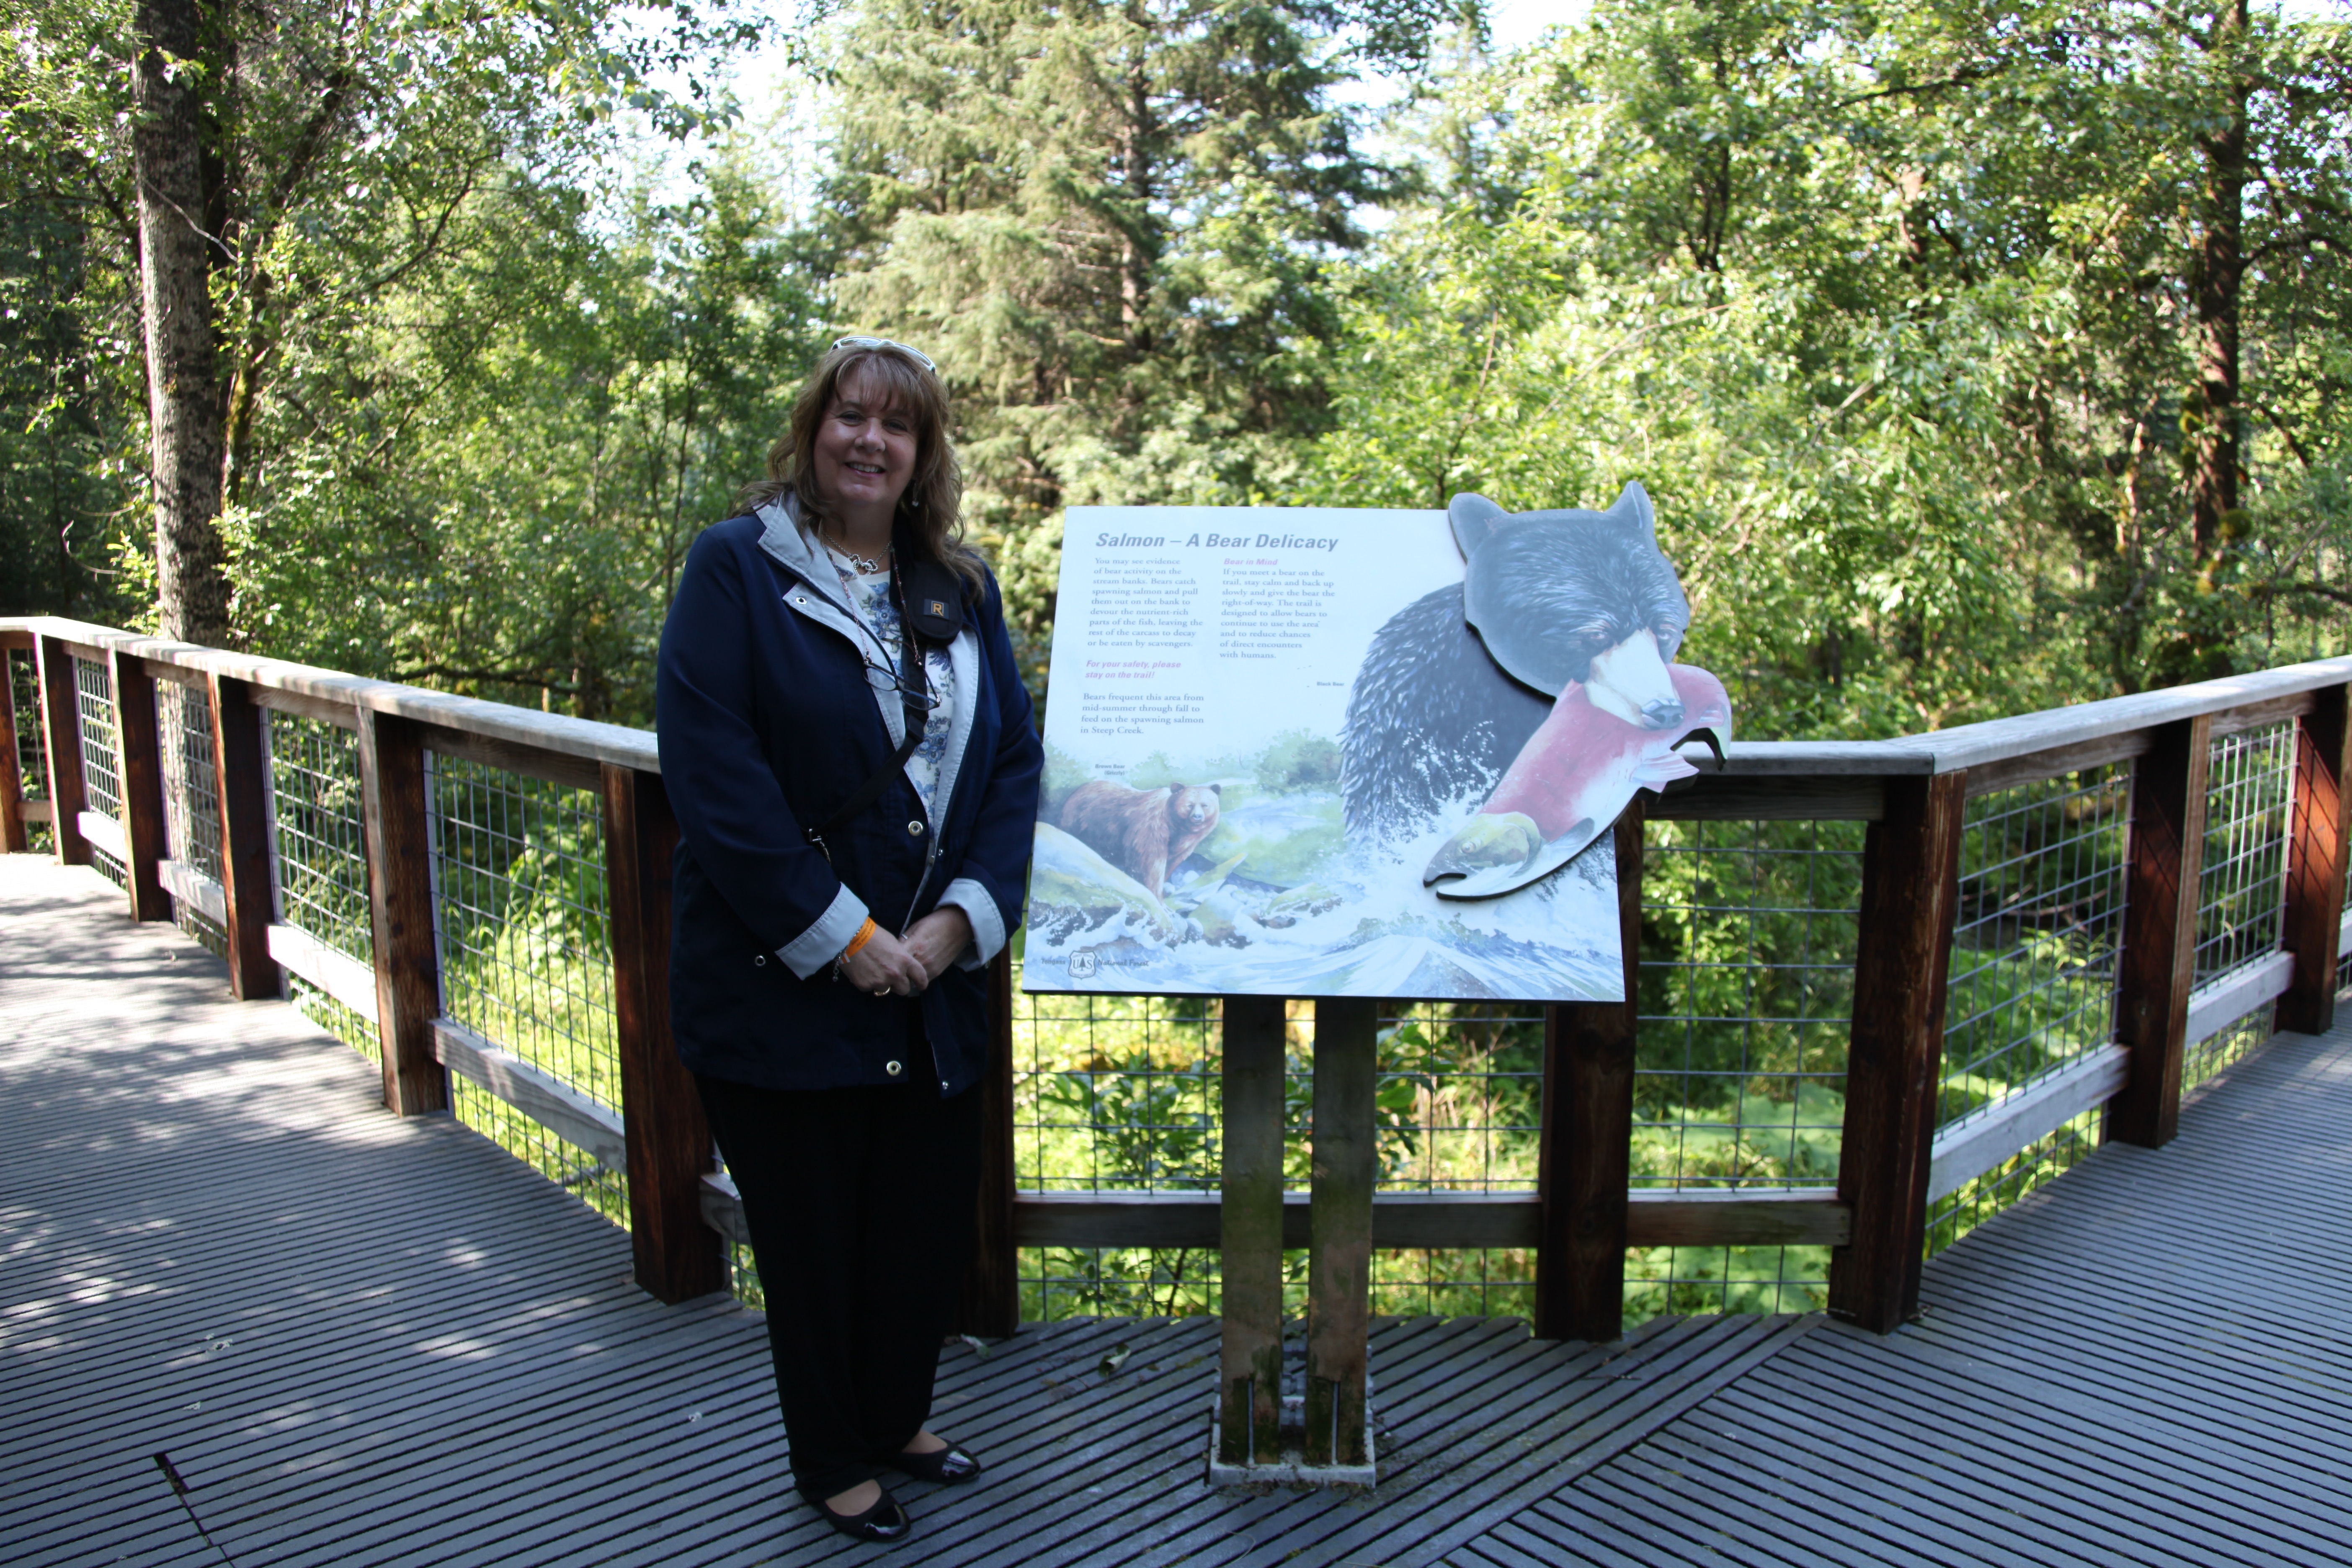
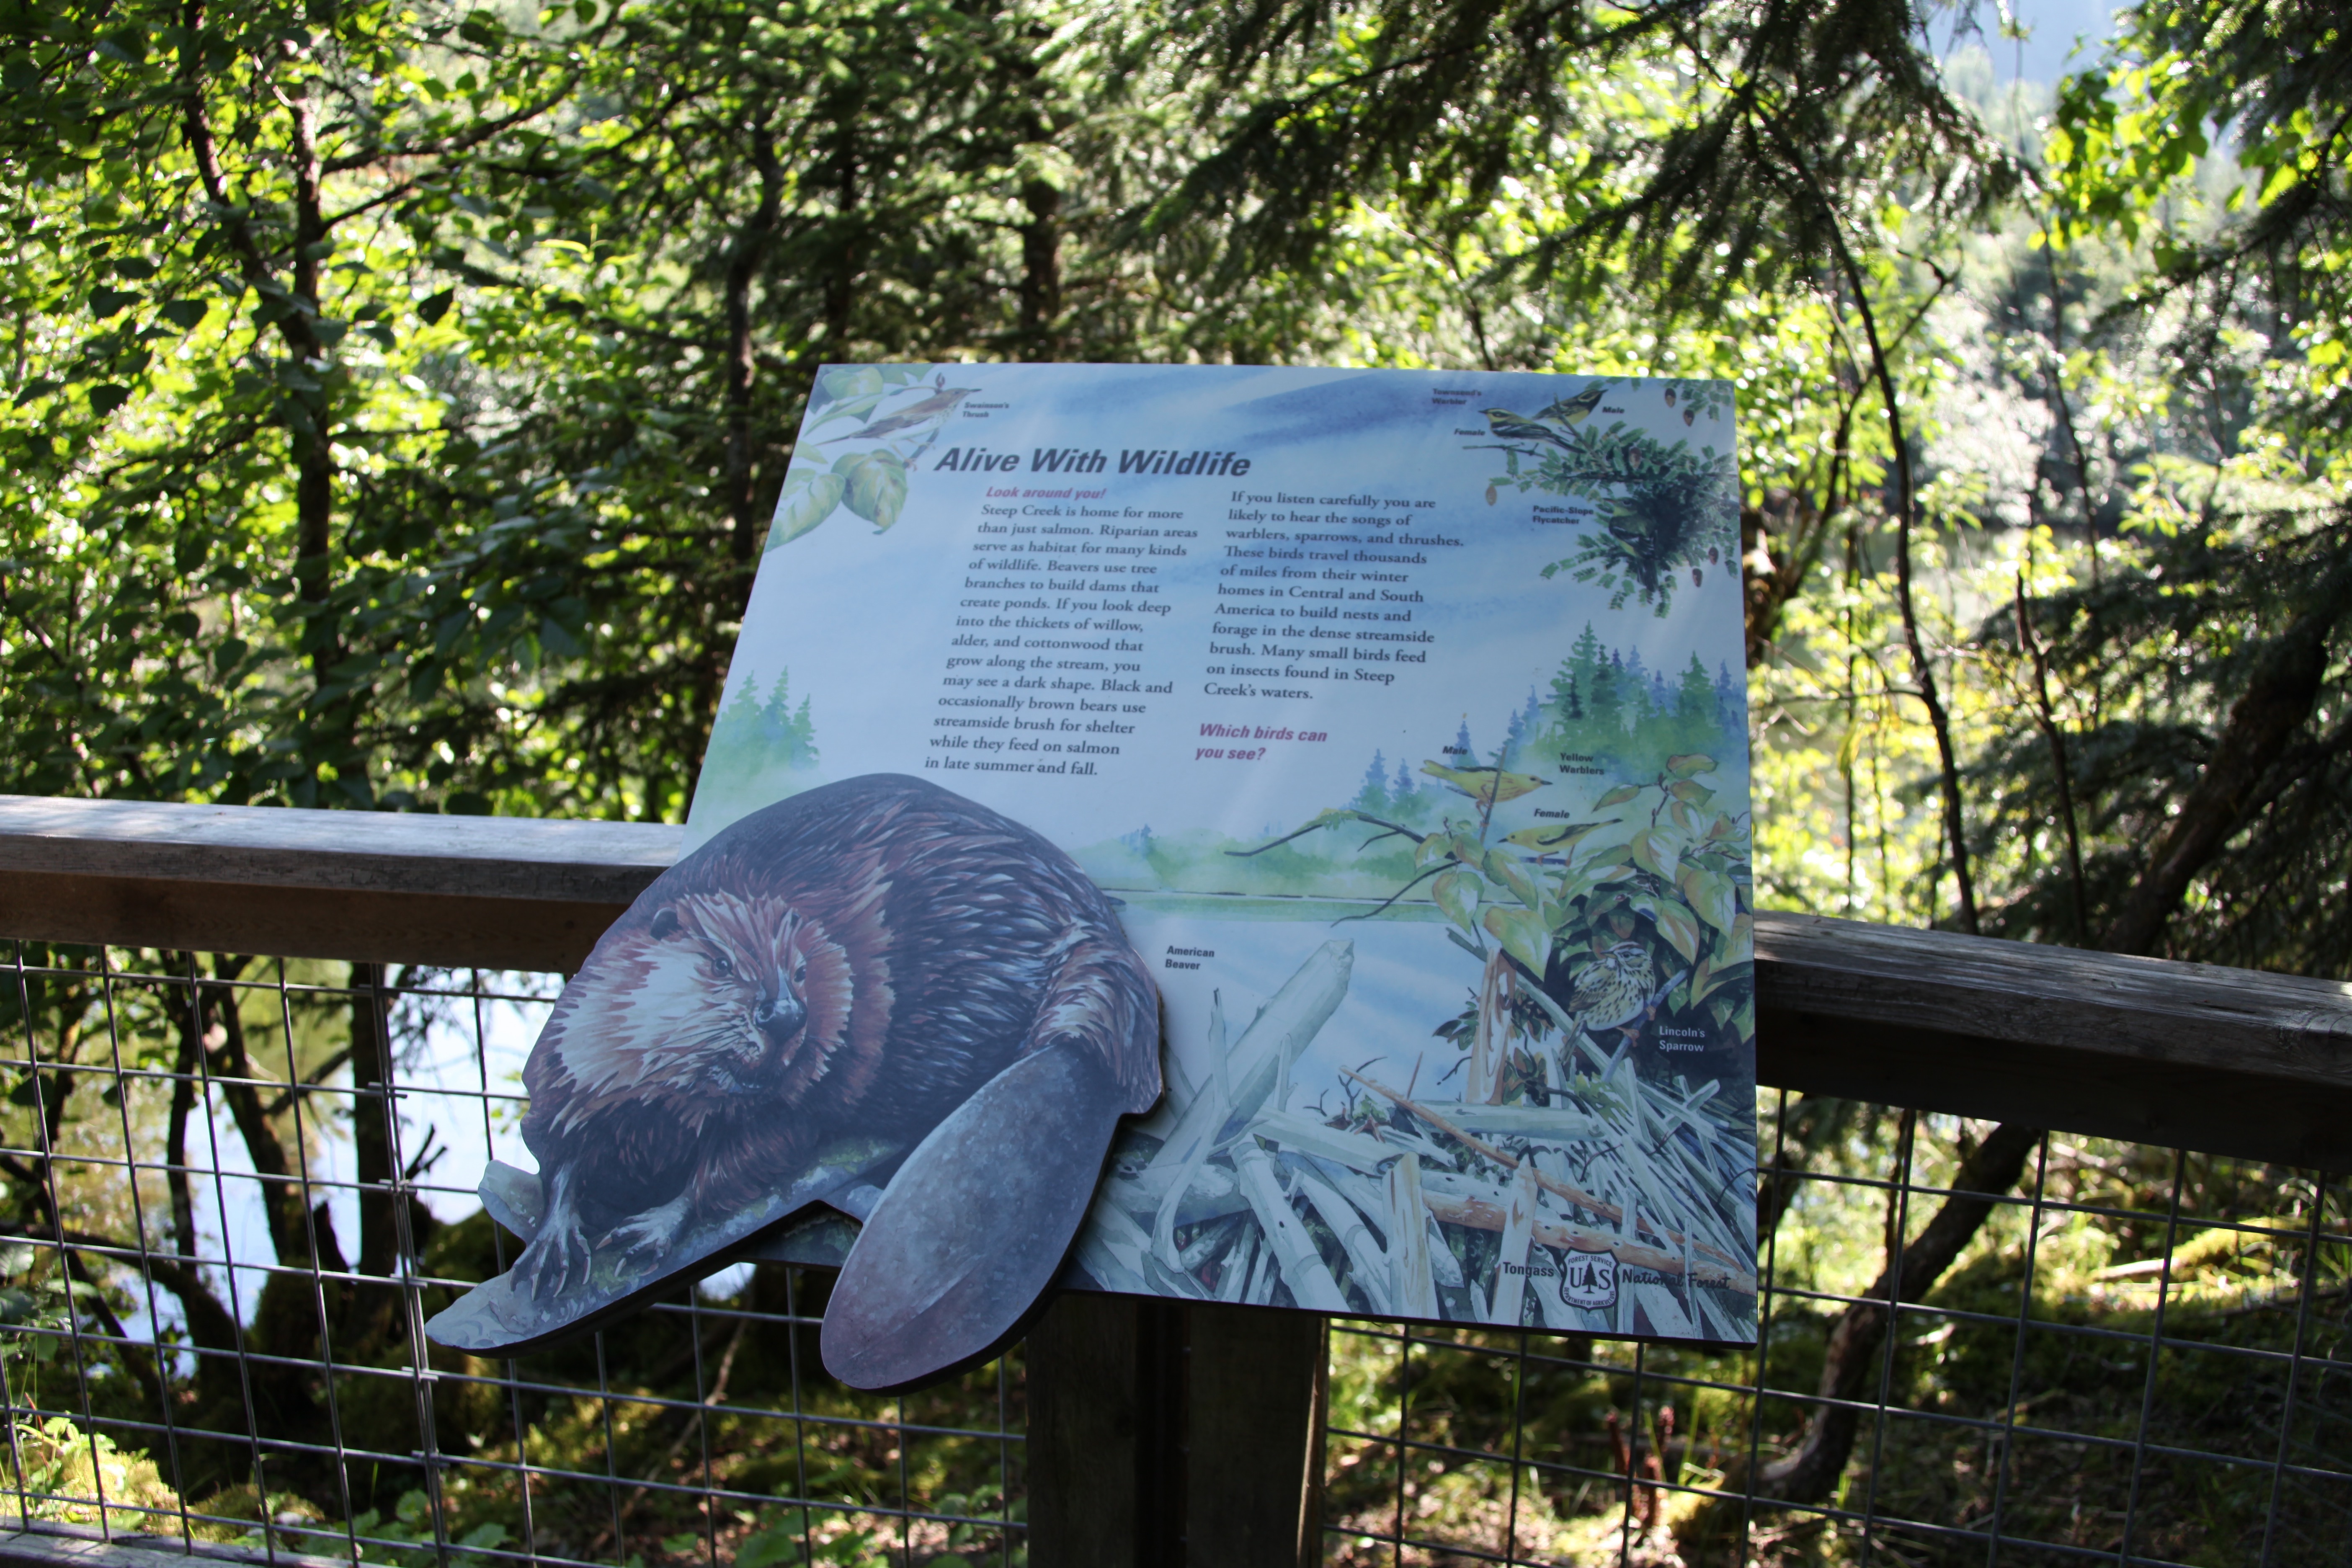
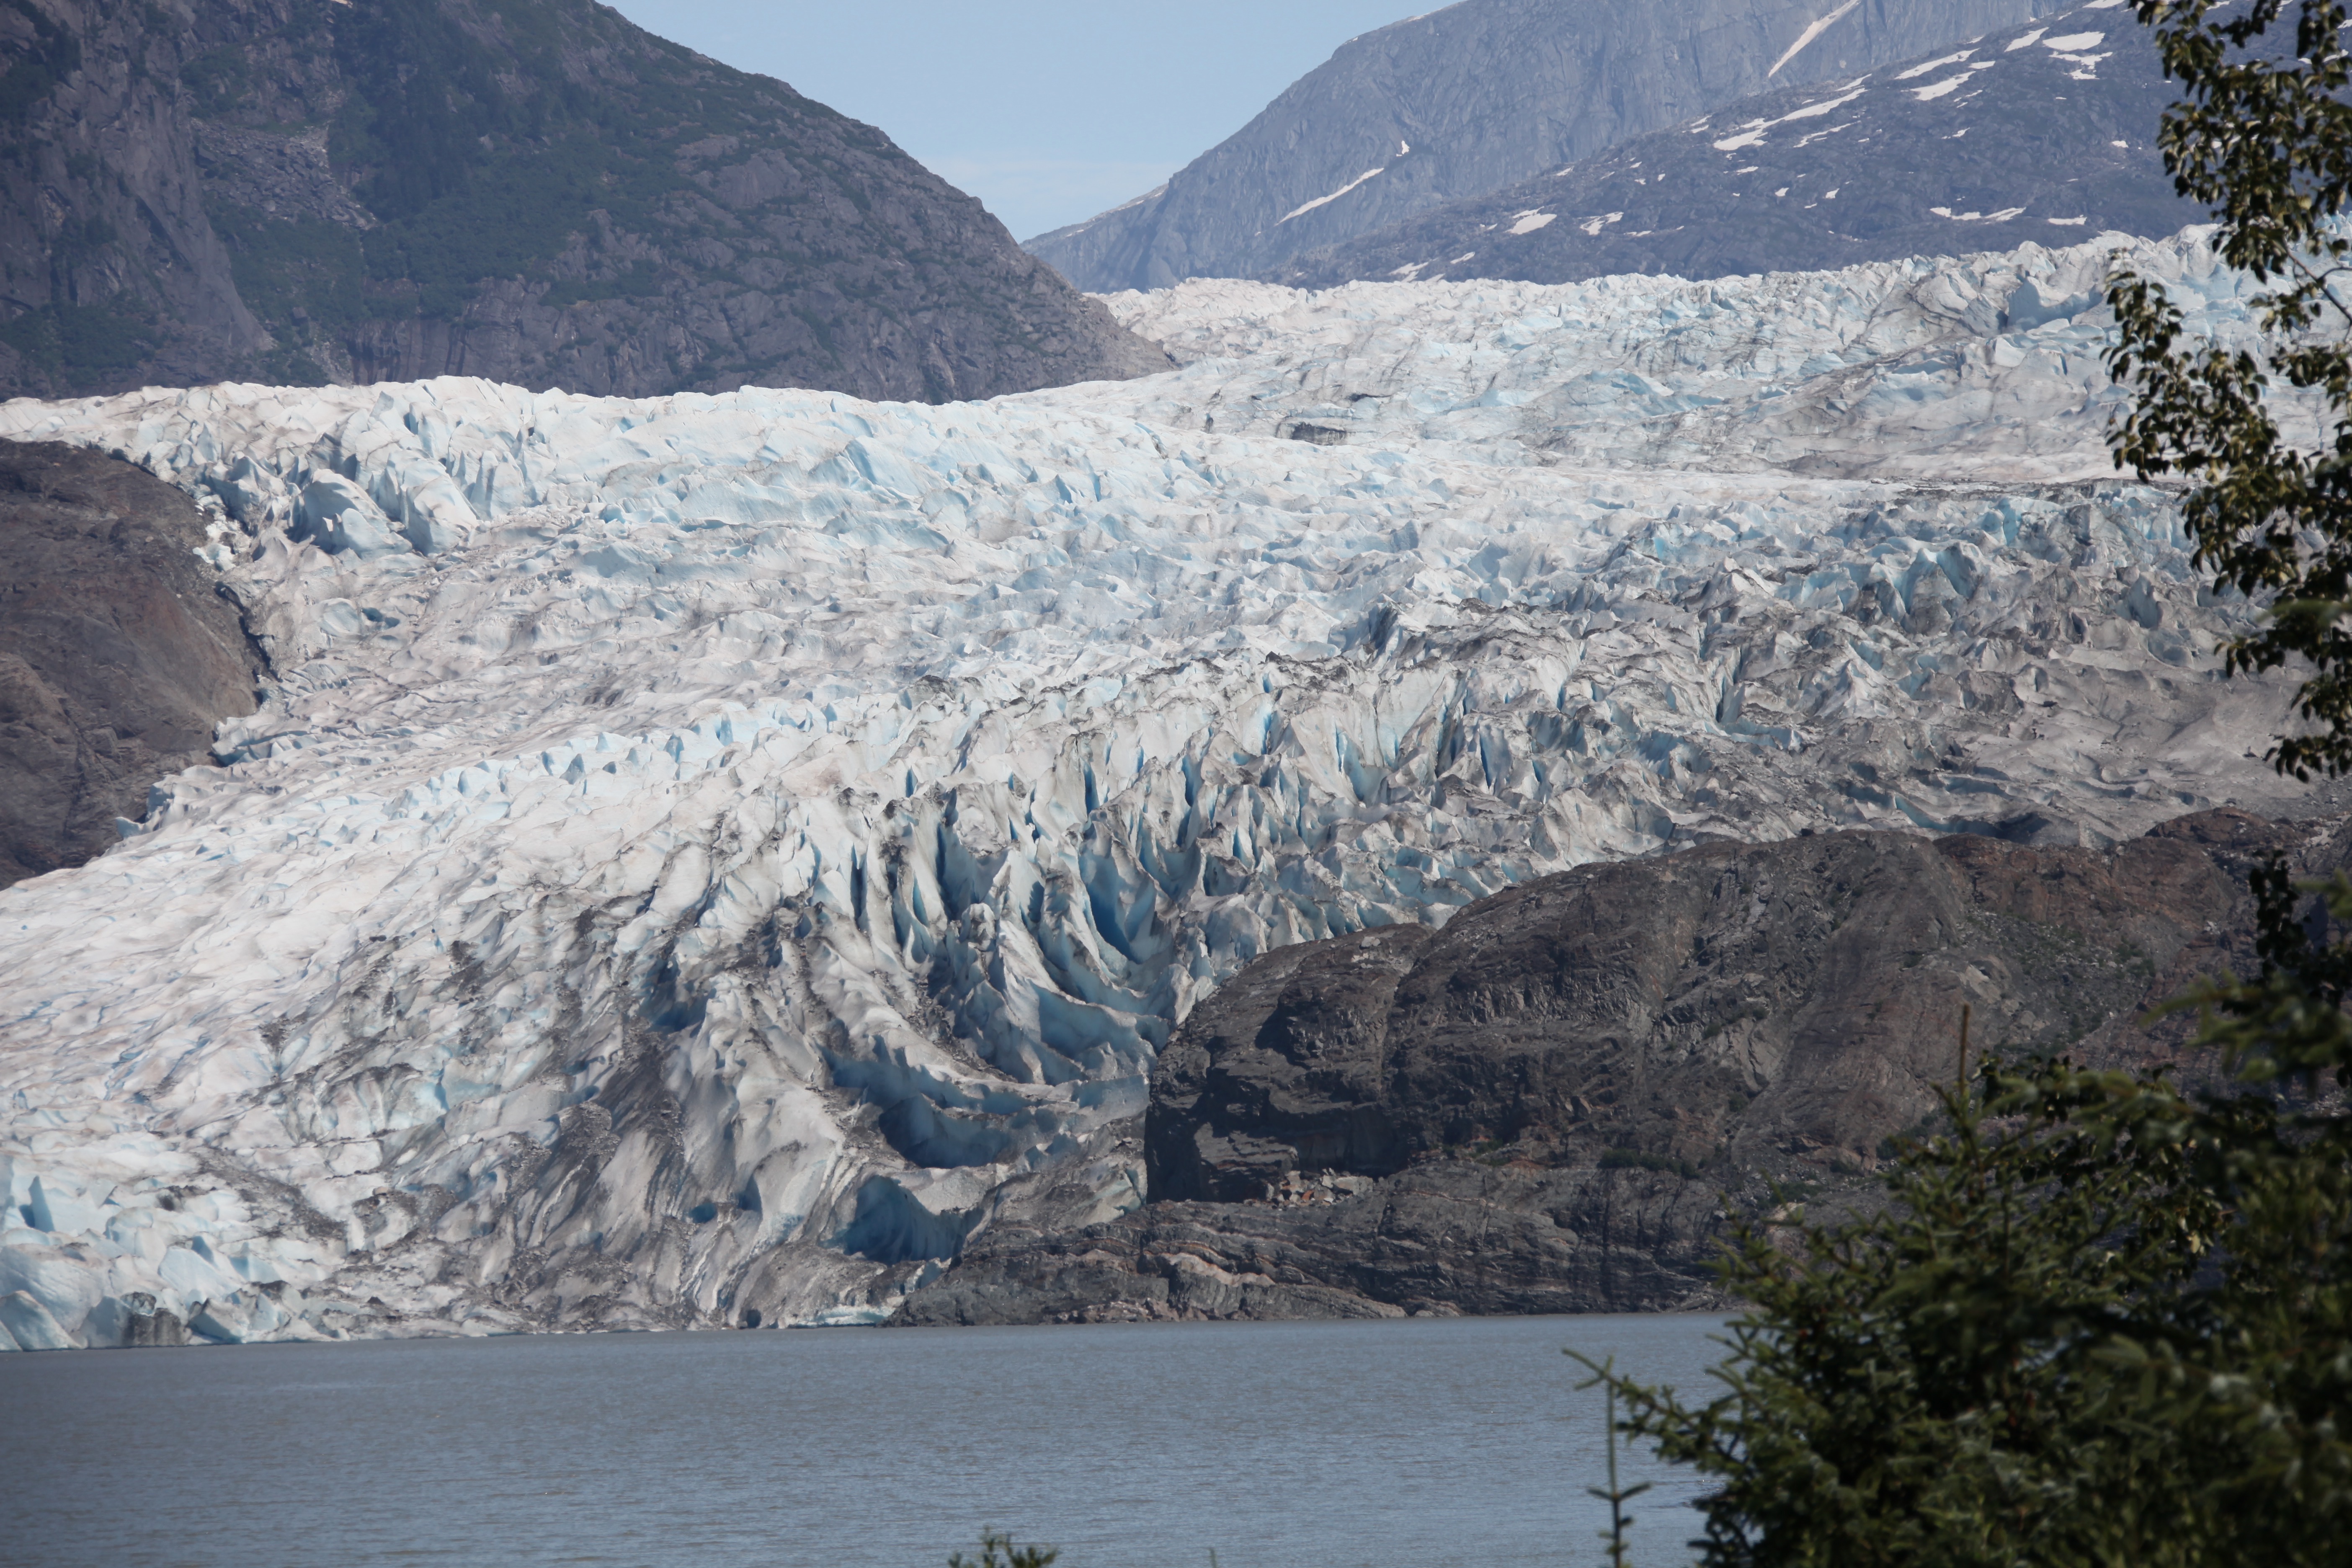
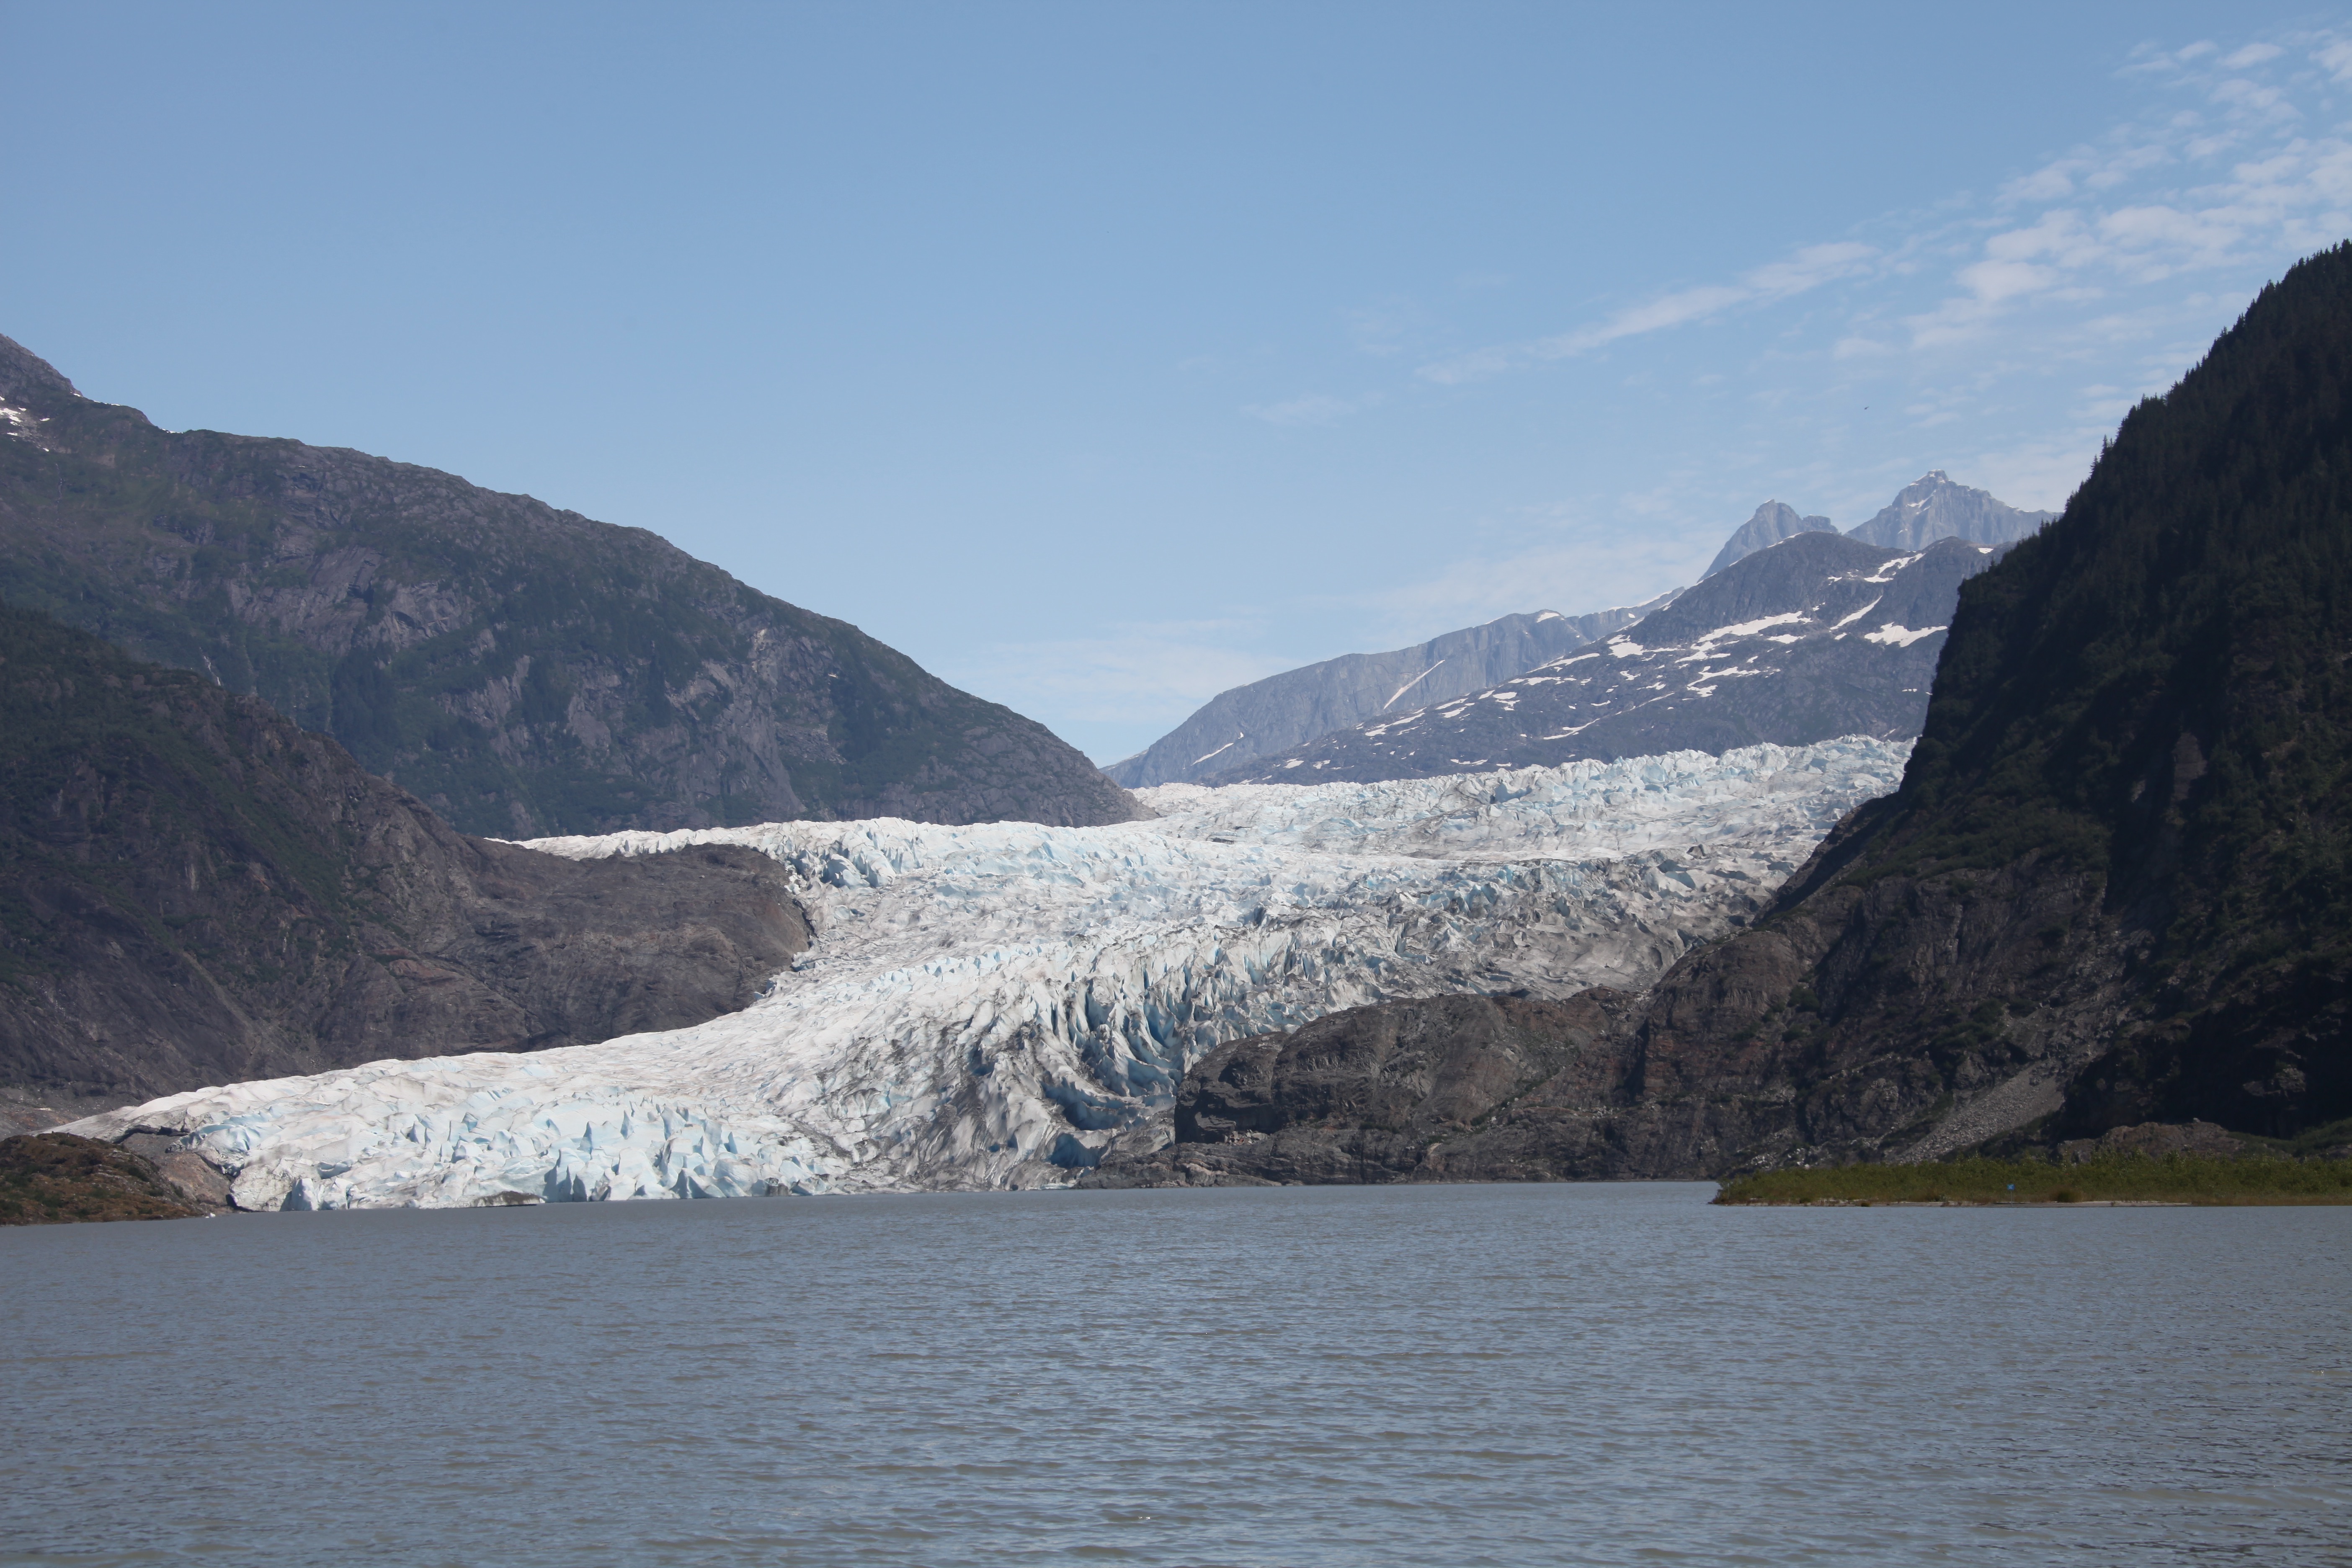
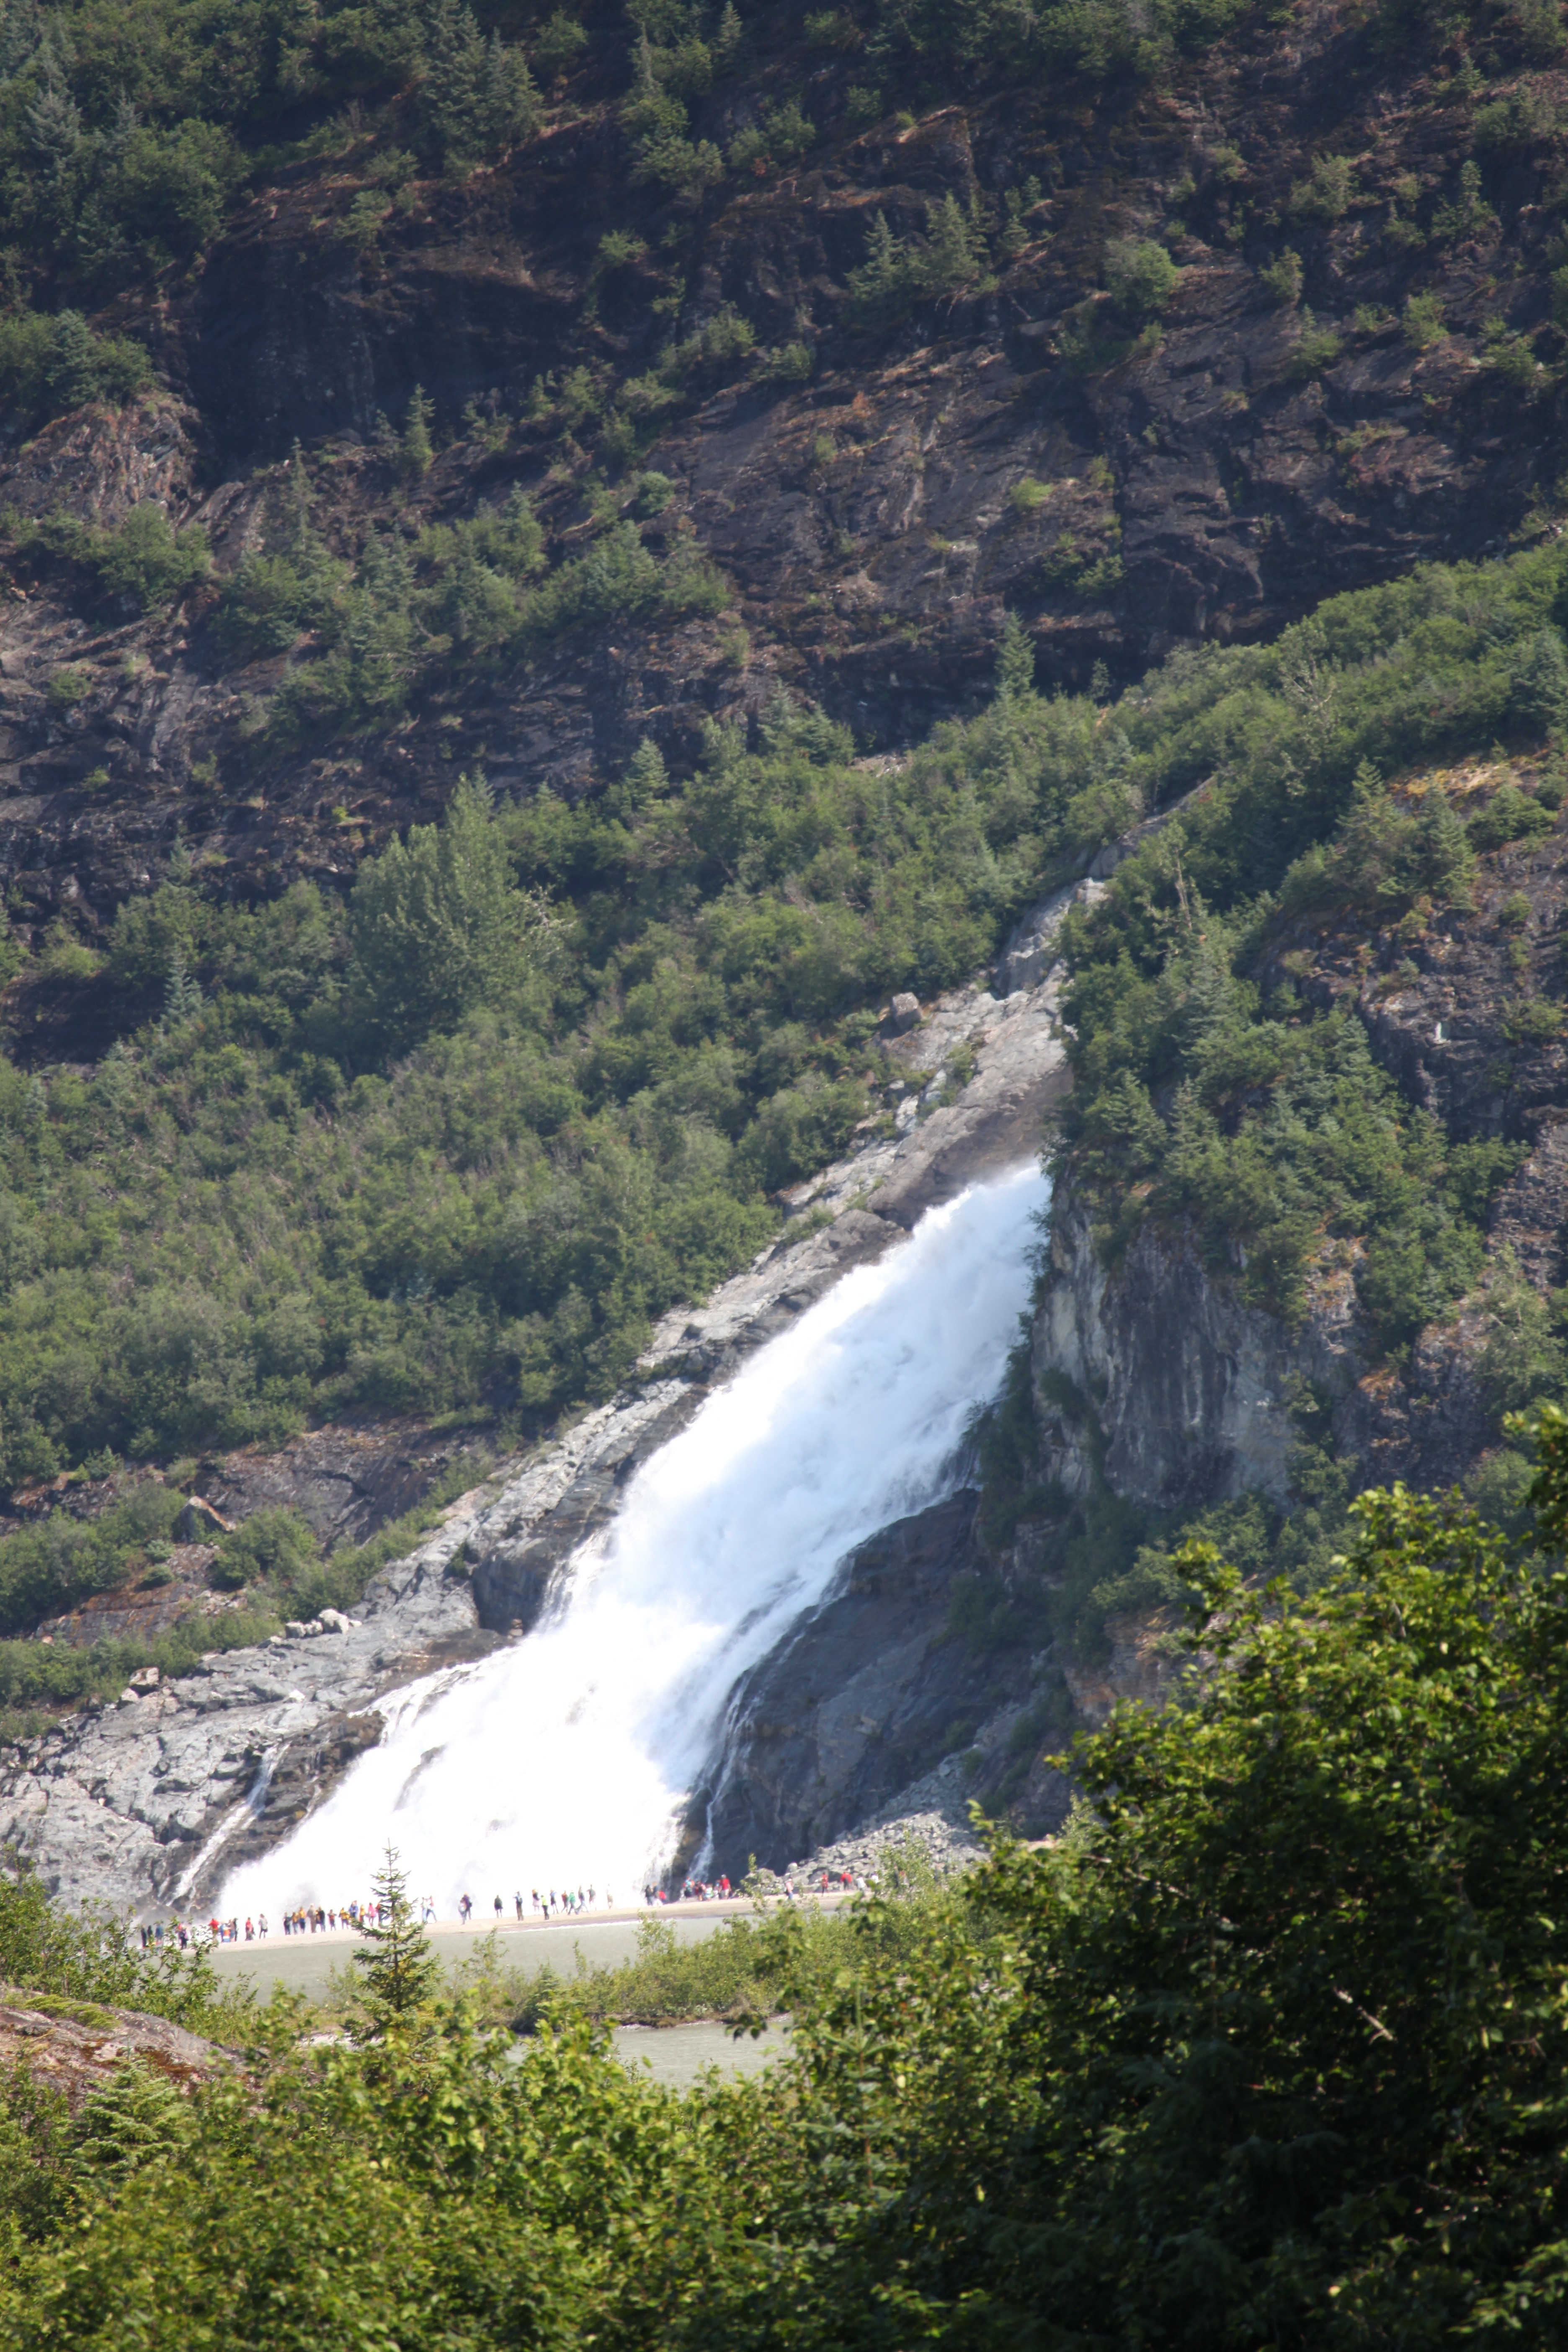
Yes, I love to see glaciers and on this excursion, our first stop was at the very pretty Mendenhall Glacier; there is also a lovely nature trail that you can follow that winds around a stream and shows you some of prettiest foliage in the State. My hubby and I always take a leisurely stroll on that trail first, there are signs along the way to tell you about the wildlife and salmon, etc…For this geeky girl, Heaven! 😉 🙂
I believe this flower is called “Jacobs Ladder”:
And one year (2010), we got to see a Mama bear and her two cubs munching on a salmon…now *that* got my heart pumping. 🙂
I took a video of this encounter too, here it is:
Mendenhall Glacier is a glacier about 12 miles long located in Mendenhall Valley, about 12 miles from downtown Juneau. It is one of two glaciers that can be seen from Juneau’s road system. Mendenhall flows from the massive Juneau Ice Fields and is a retreating glacier. If you’re interested in knowing more about Mendenhall Glacier and other glaciers in and around Juneau, click here.
Check out Nugget Falls…My hubby took a quick video…It is pretty impressive!
Okie dokie, as always, we enjoyed our time at Mendenhall Glacier, but, it was now time to go to my favorite part of the excursion, whale watching! So back onto our motor coach we climbed and off we went taking the scenic route (because we were early and the whale watching catamaran wasn’t quite ready for us) with Ms “All that and a bag of chips” chattering the entire way. 😉 Again, she wasn’t *that* bad, but I think these motor coach drivers think that need to entertain you every second that you are on their buses when in reality, all you need to do is look out the window and you can be completely entertained by the breathtaking scenery in Alaska. Regardless, we finally arrived at the dock and climbed aboard our boat and off we went…it didn’t take us long to find our first humpback whale–you are guaranteed to see whales on this excursion or you get $100 cash returned to you.
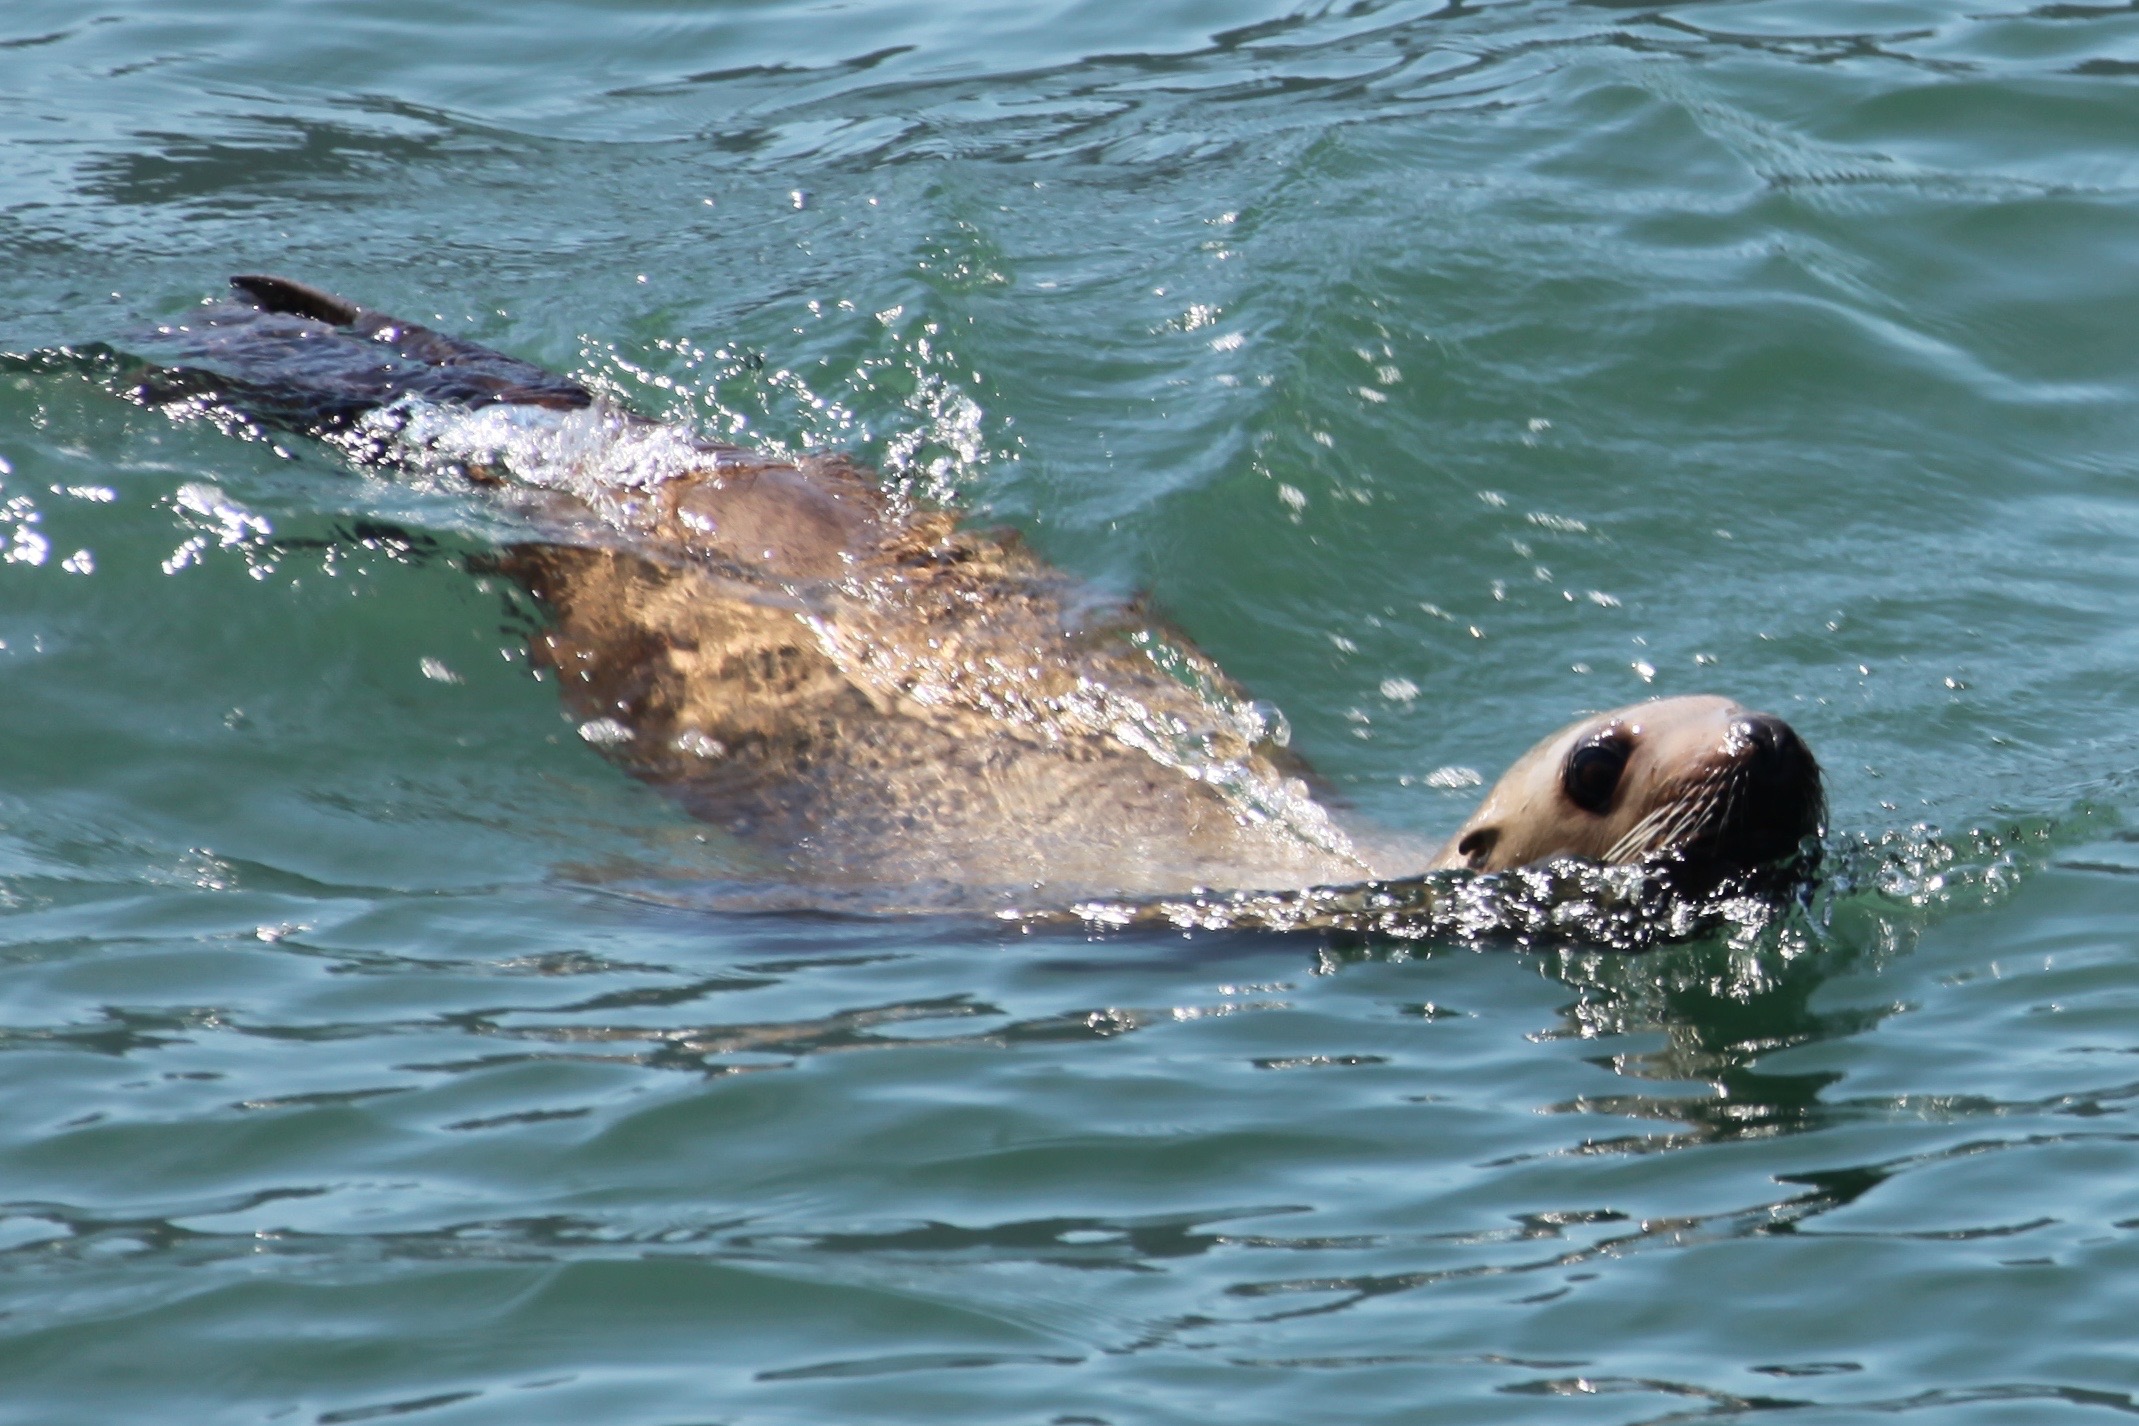
OH wait, we also saw some steller sea lions, one in particular came right up to our catamaran, curious little dude:
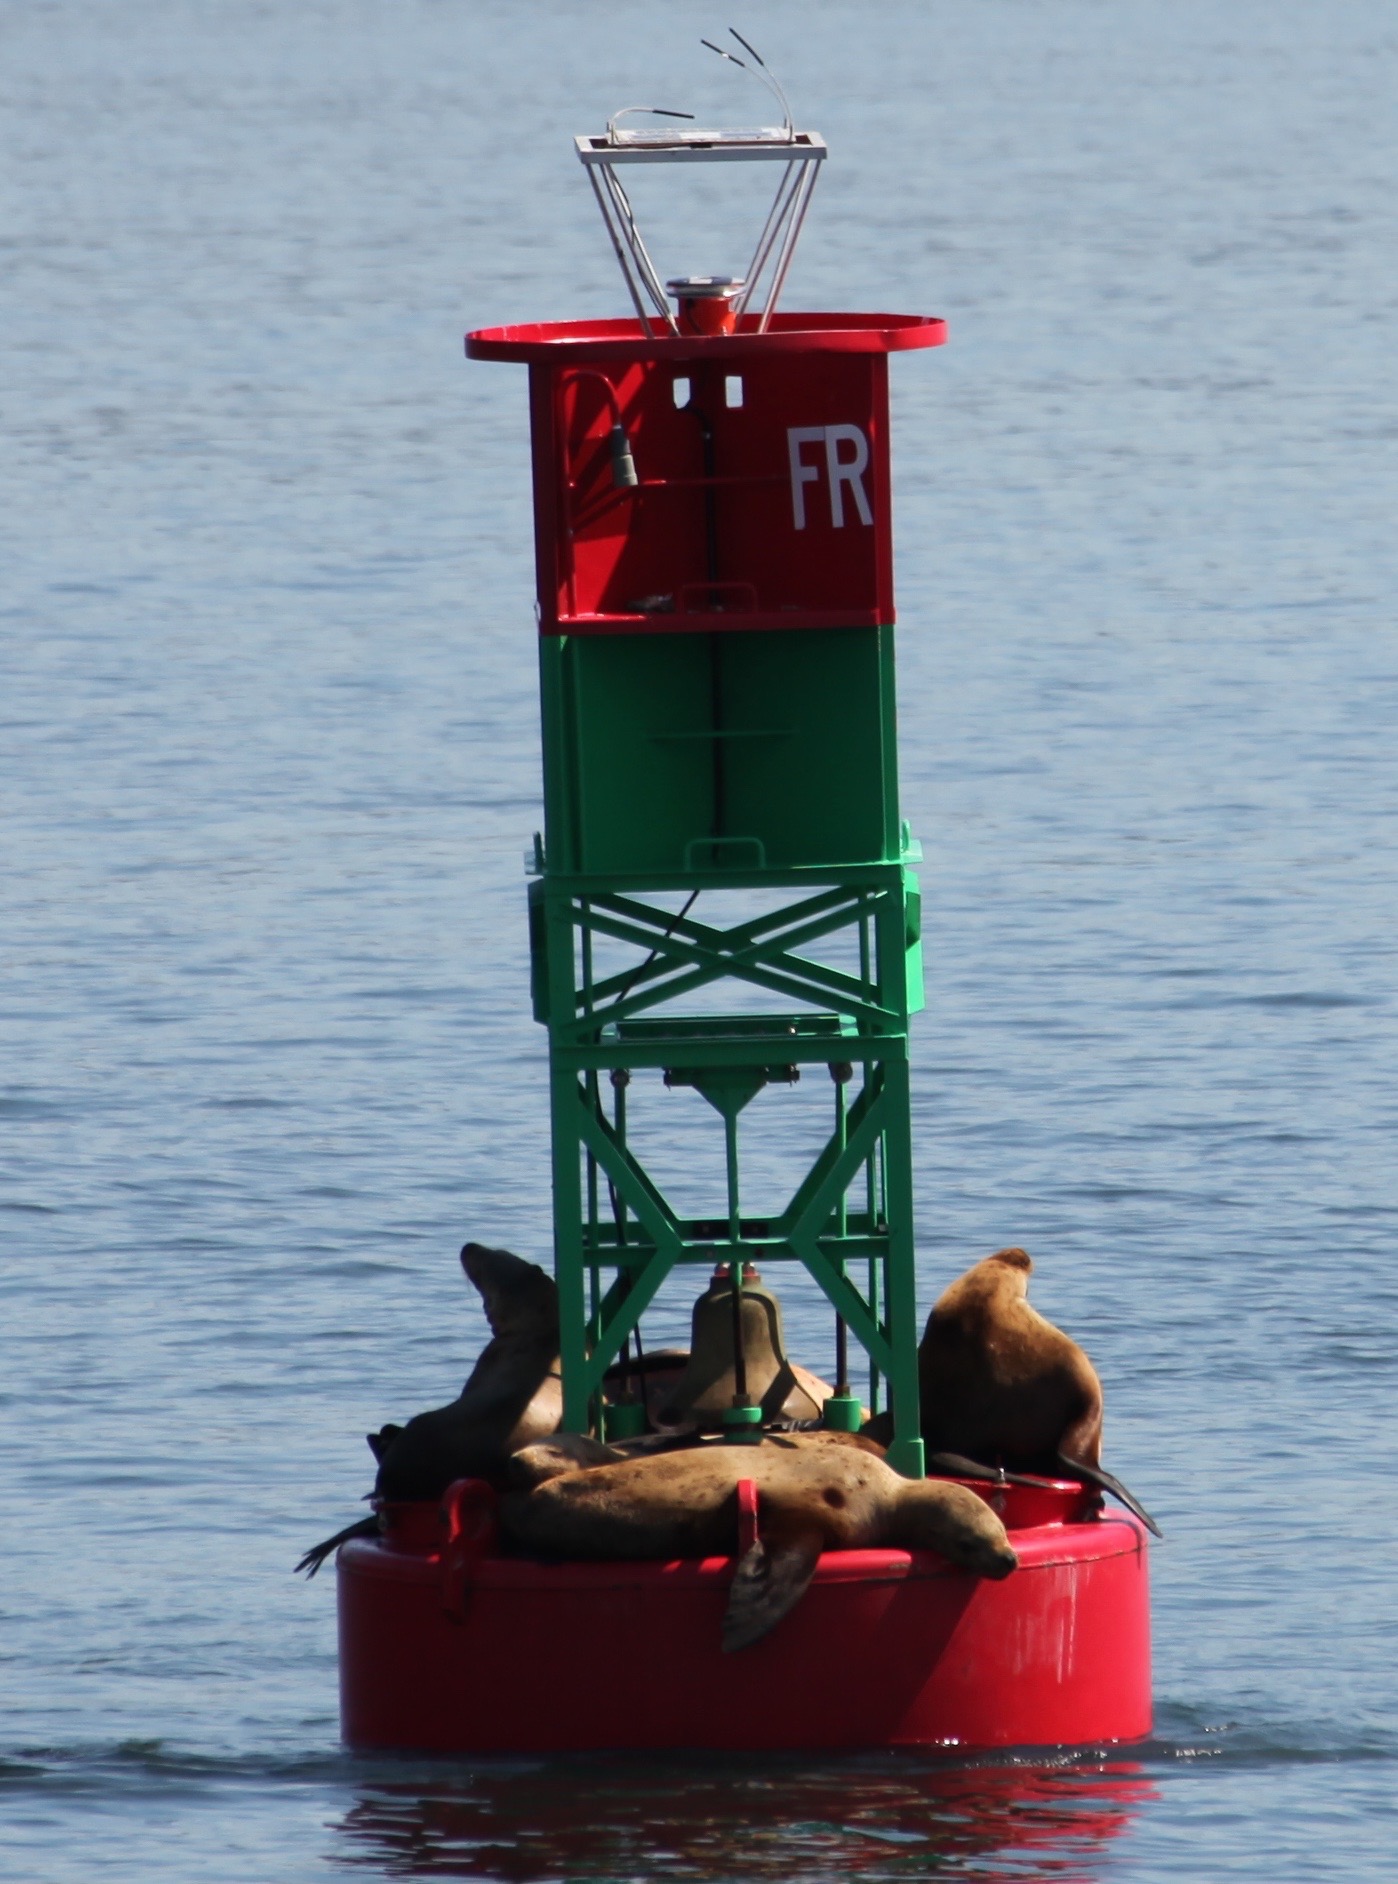
This is a coastguard buoy and the steller sea lions are lounging on top if it sunning themselves. They are too cute and they are quite entertaining to watch. There is definitely some jockeying for position happening, but all in all they share the space well. 🙂
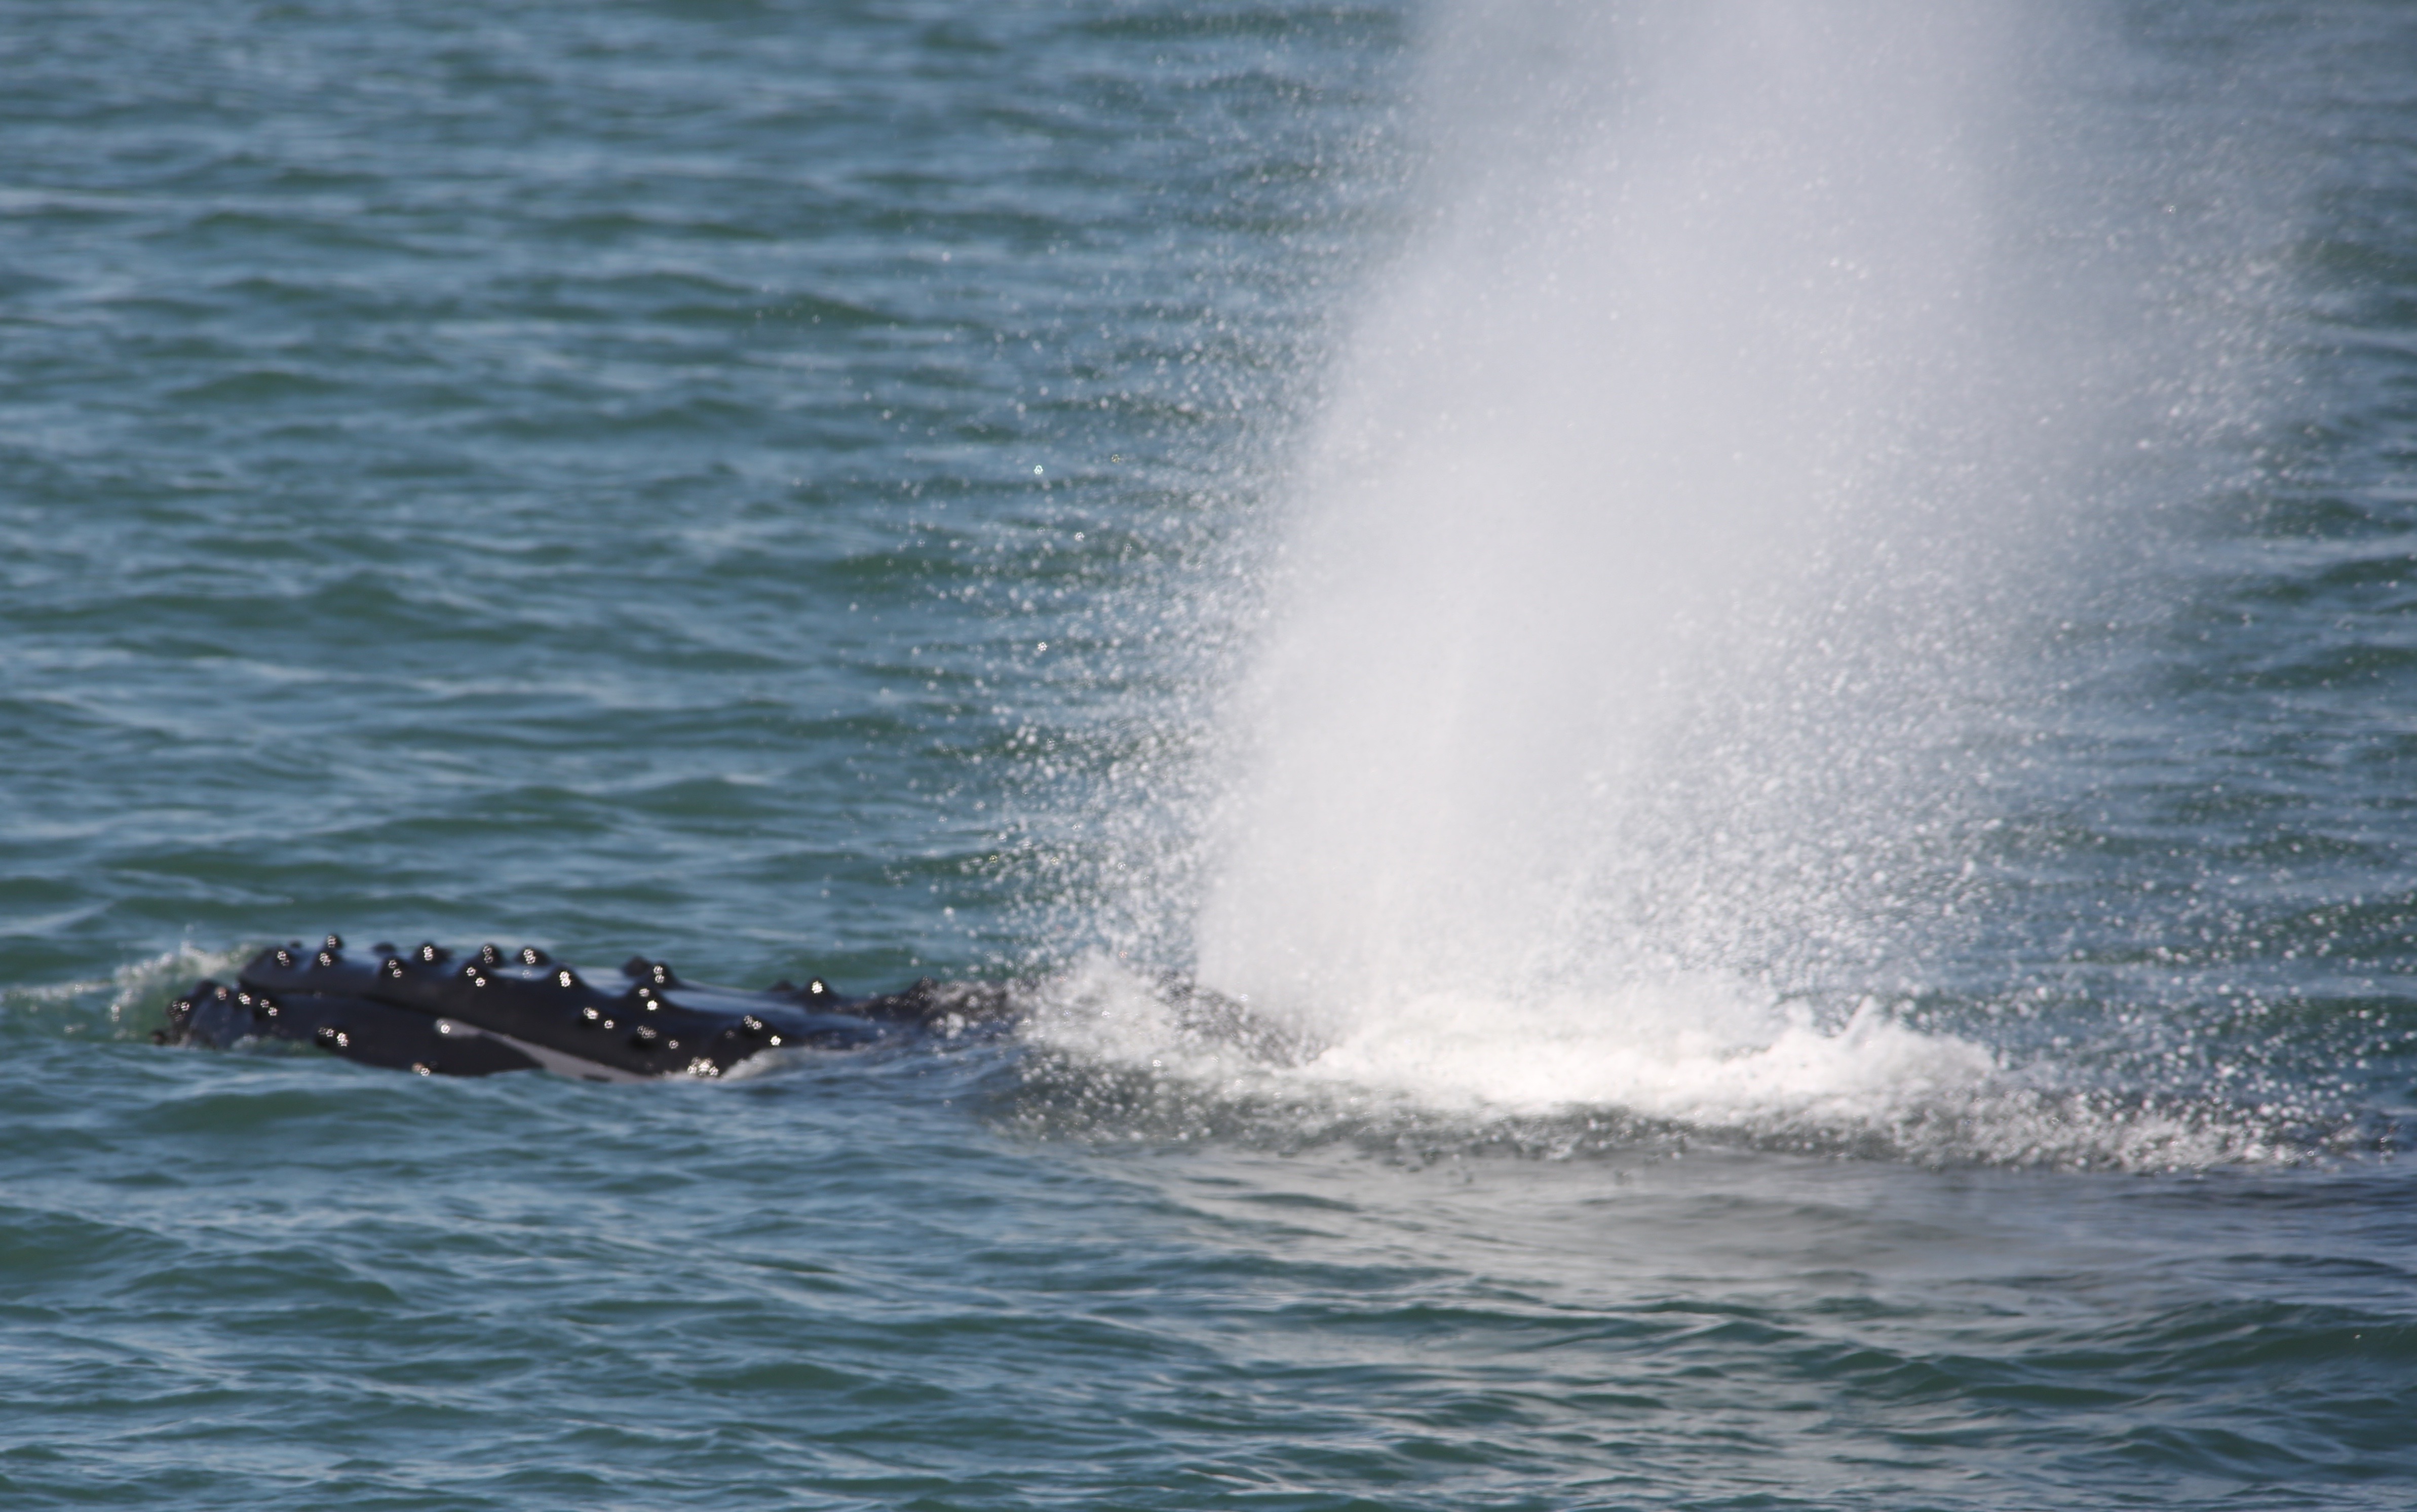
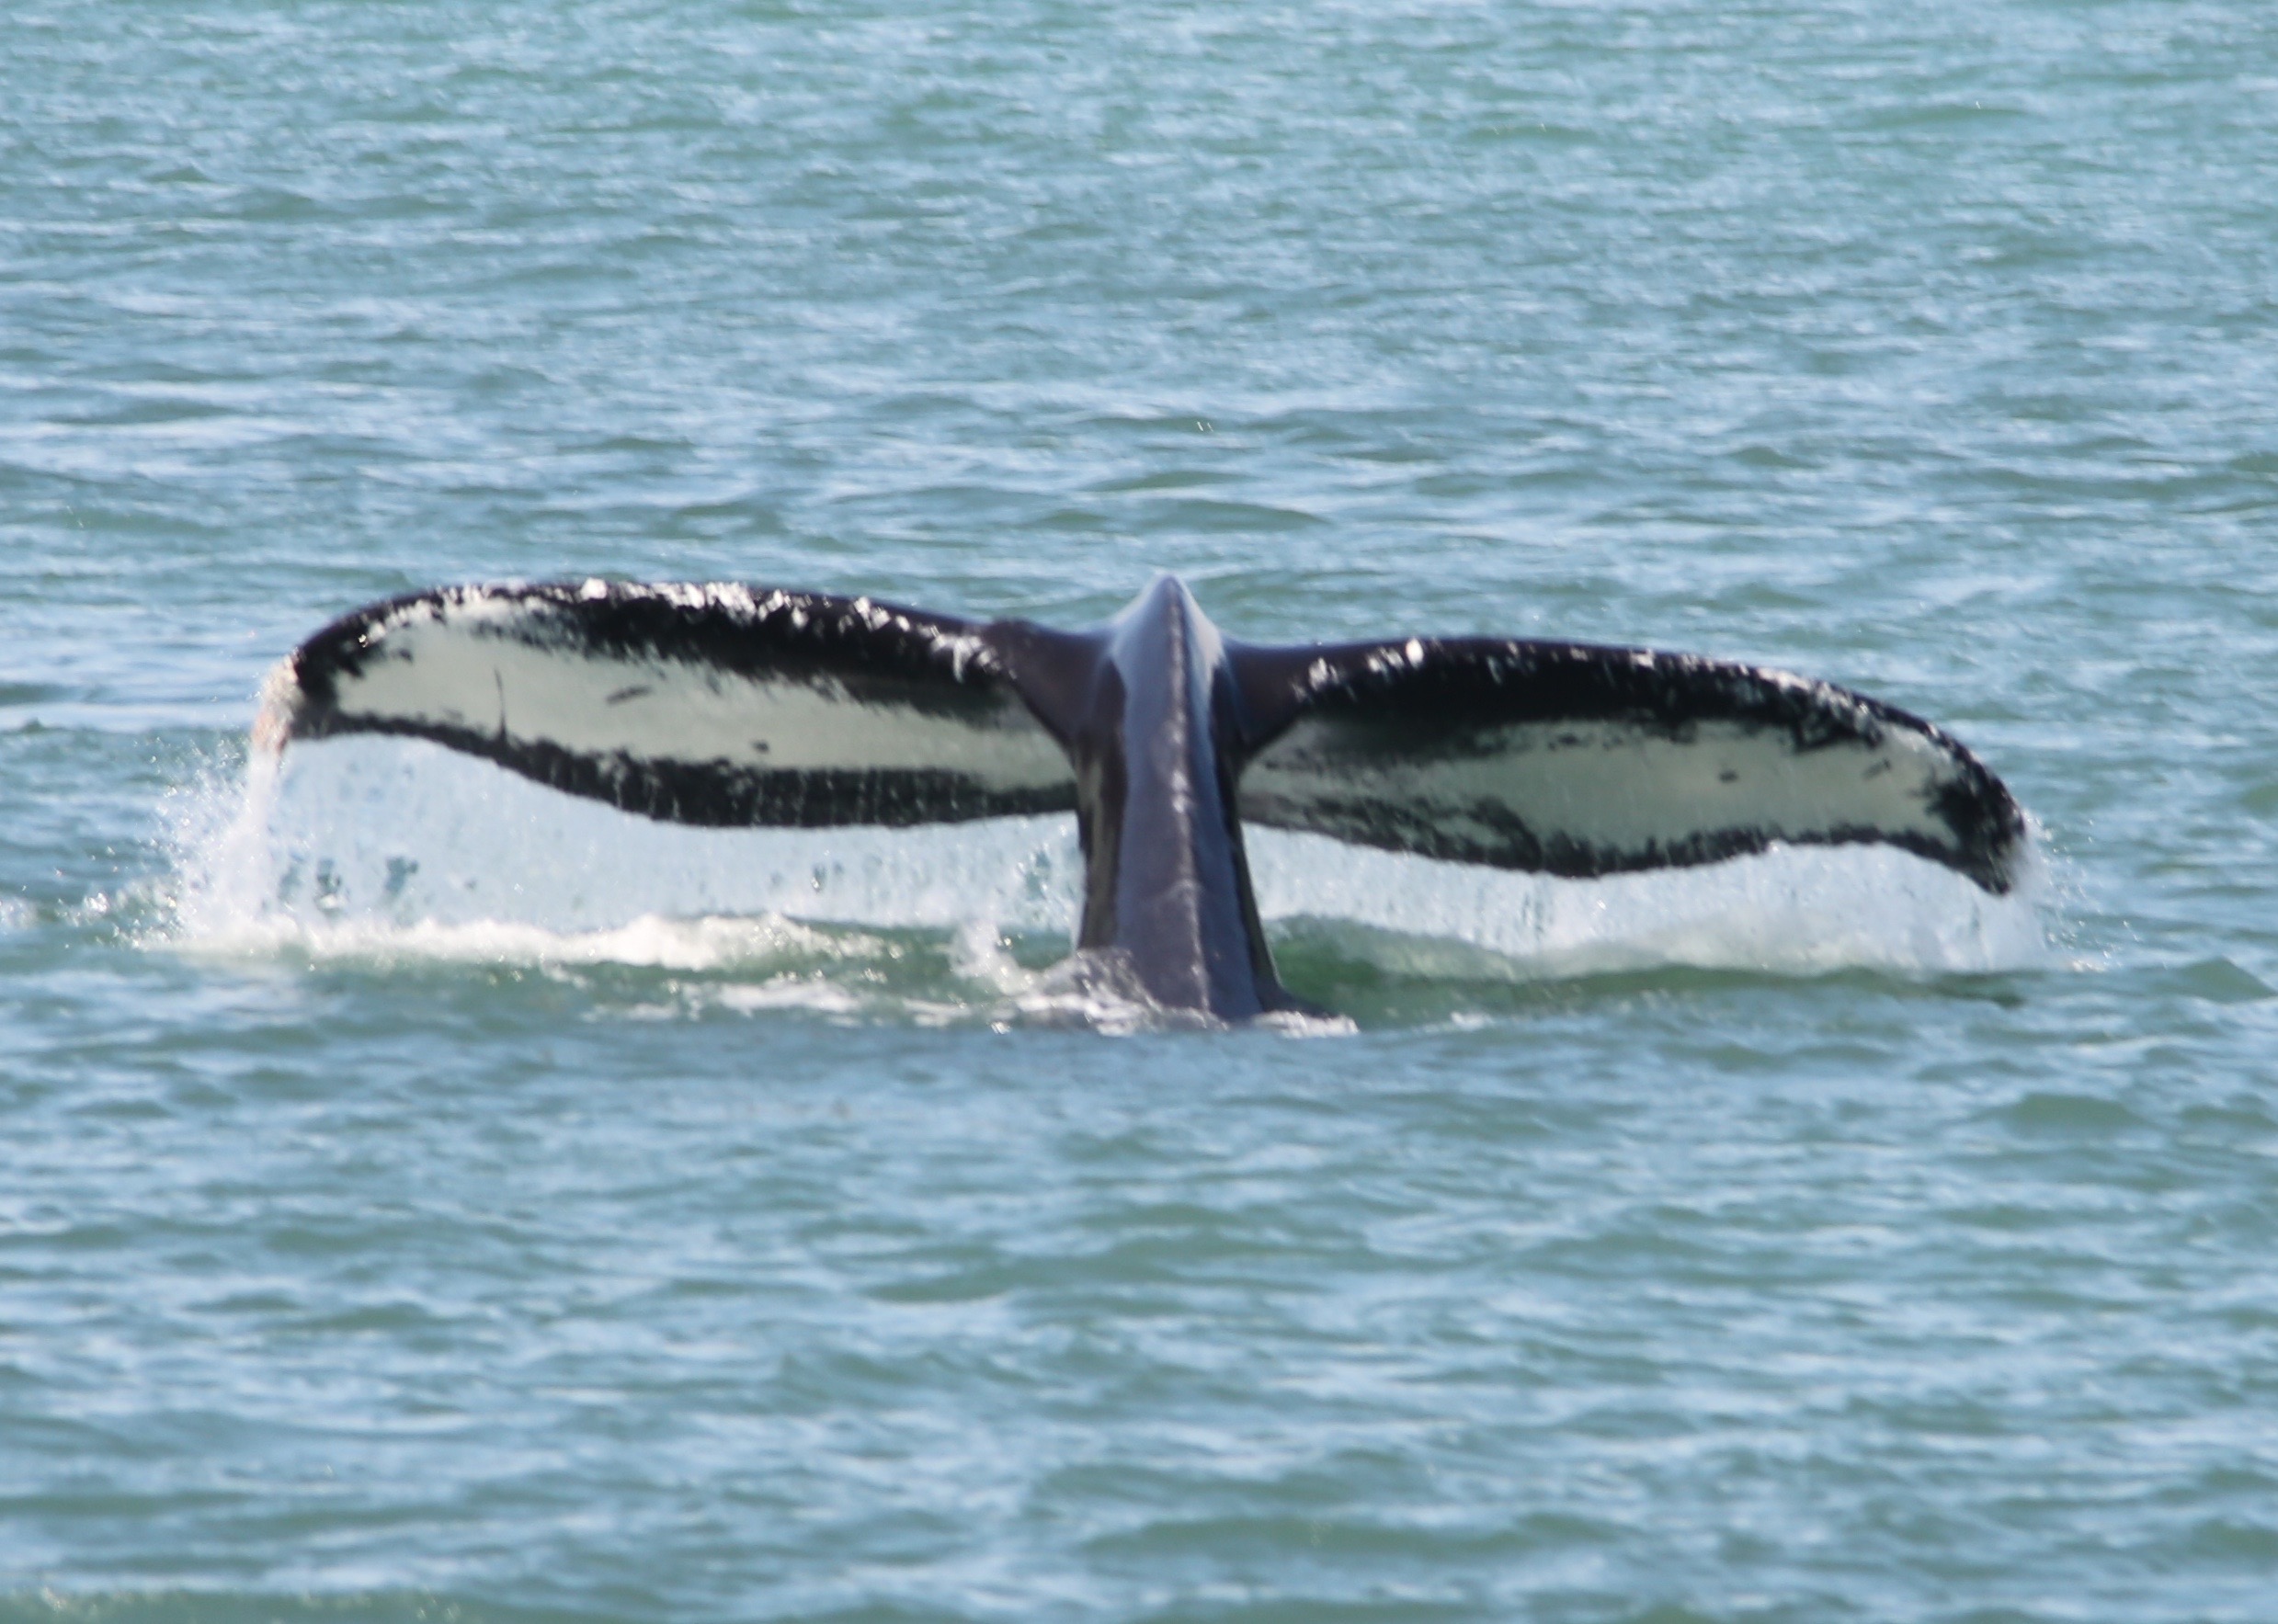
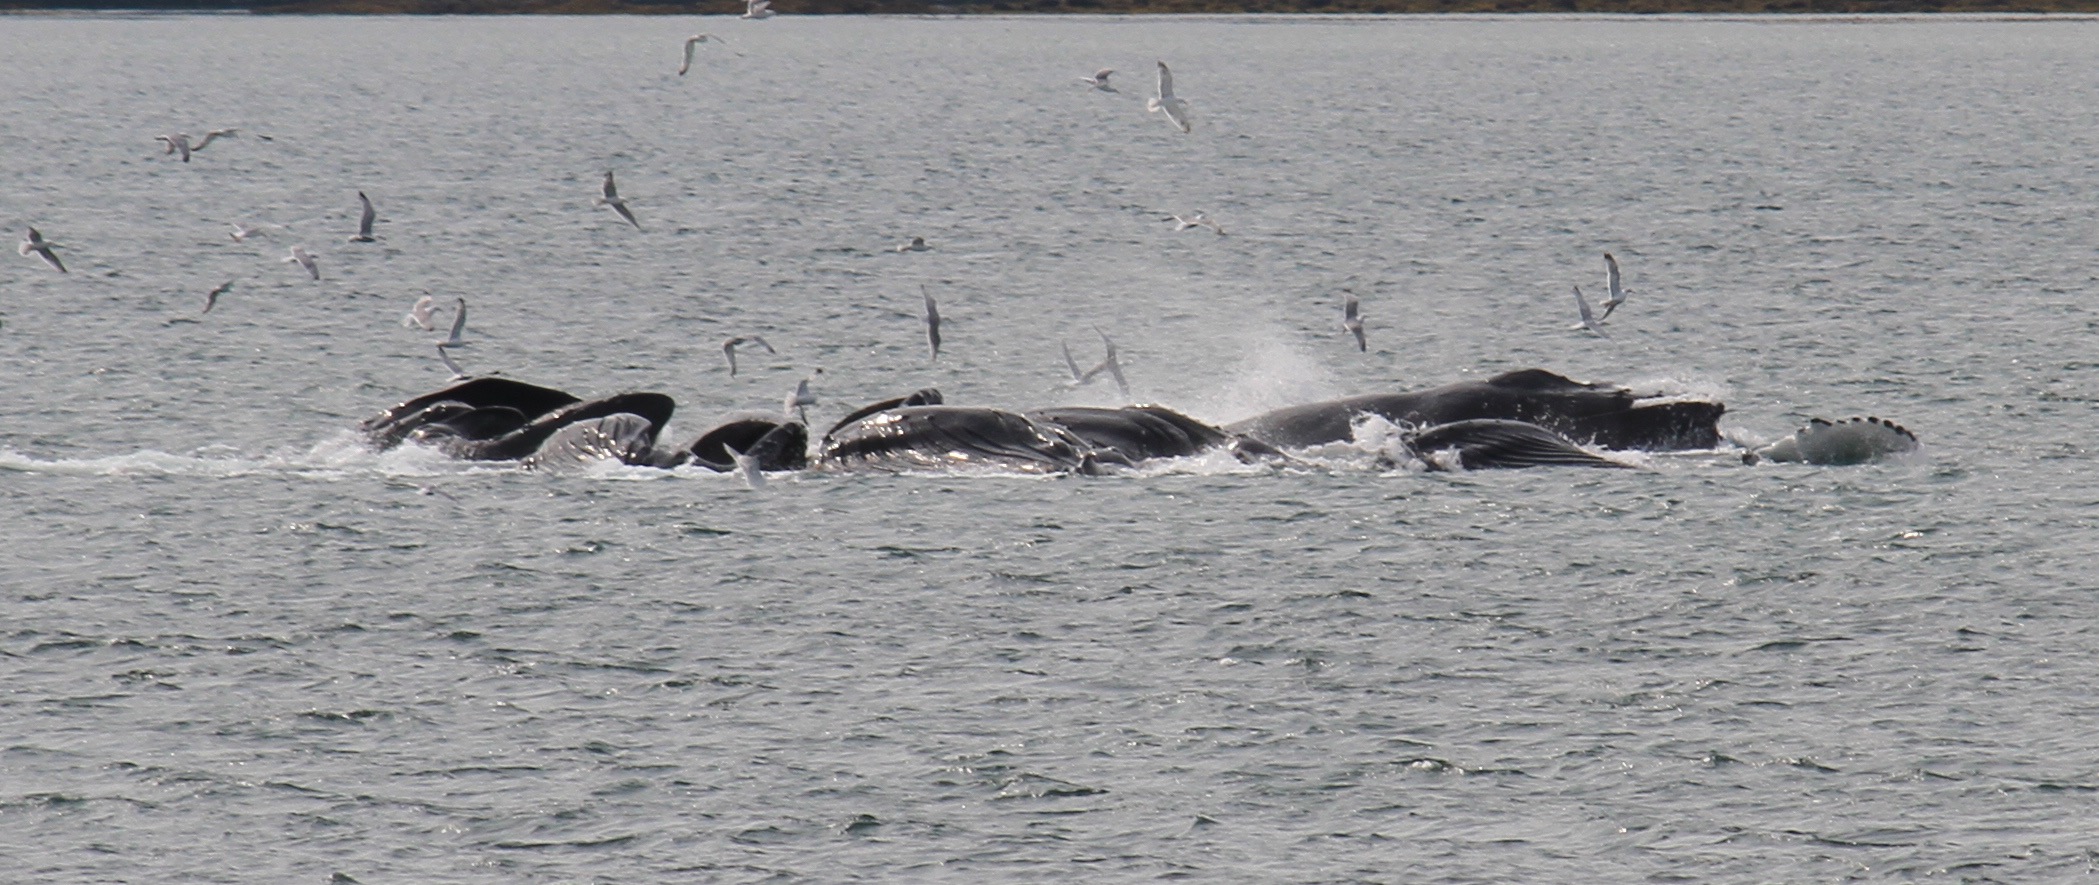
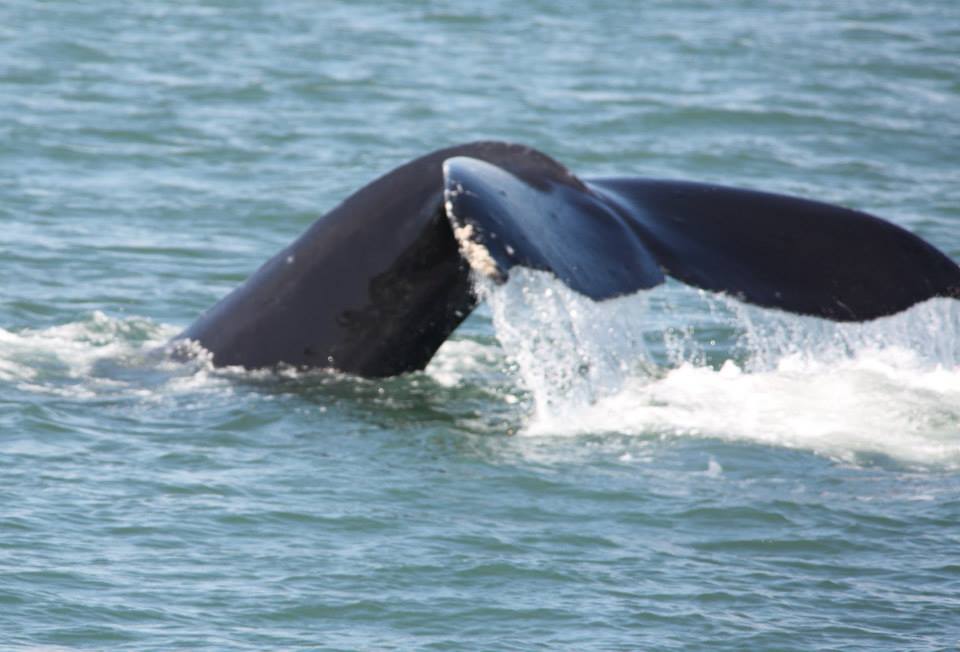
But, the stars of the show were the humpbacks, they are amazing!
One year we even got to witness Bubble Net Feeding <~~Great link from National Geographic…
This is a sign that they had hanging in the catamaran, it shows all of the humpback whales that routinely come back to this same body of water every year to feed and to raise their calfs. The humpbacks split their time between Hawaii and Alaska, calfs are born in the warmer waters of Hawaii and then mama, who hasn’t eaten since she left Alaska, and baby make the harrowing journey (about 2800 miles) back here to Alaska so that they can feed…amazing!
Once again, we were not disappointed with this excursion, seeing those humpbacks had made my day, I was once again contented and reminded about just how small we are and how big our world is and how wondrous it can be.
We were almost finished with our cruise, day 6 (of the cruise, day 7 of our adventure) would find us in Ketchikan and on the Bering Sea Crab Fisherman’s Tour–A fantastic experience!
***Update*** I’ve now completed all of my installments in the Voyage of the Glaciers Series and have included links to the next post in line (so to speak) at the end of each posting. So, here is a link to the next post and it covers our time in Ketchikan… 🙂
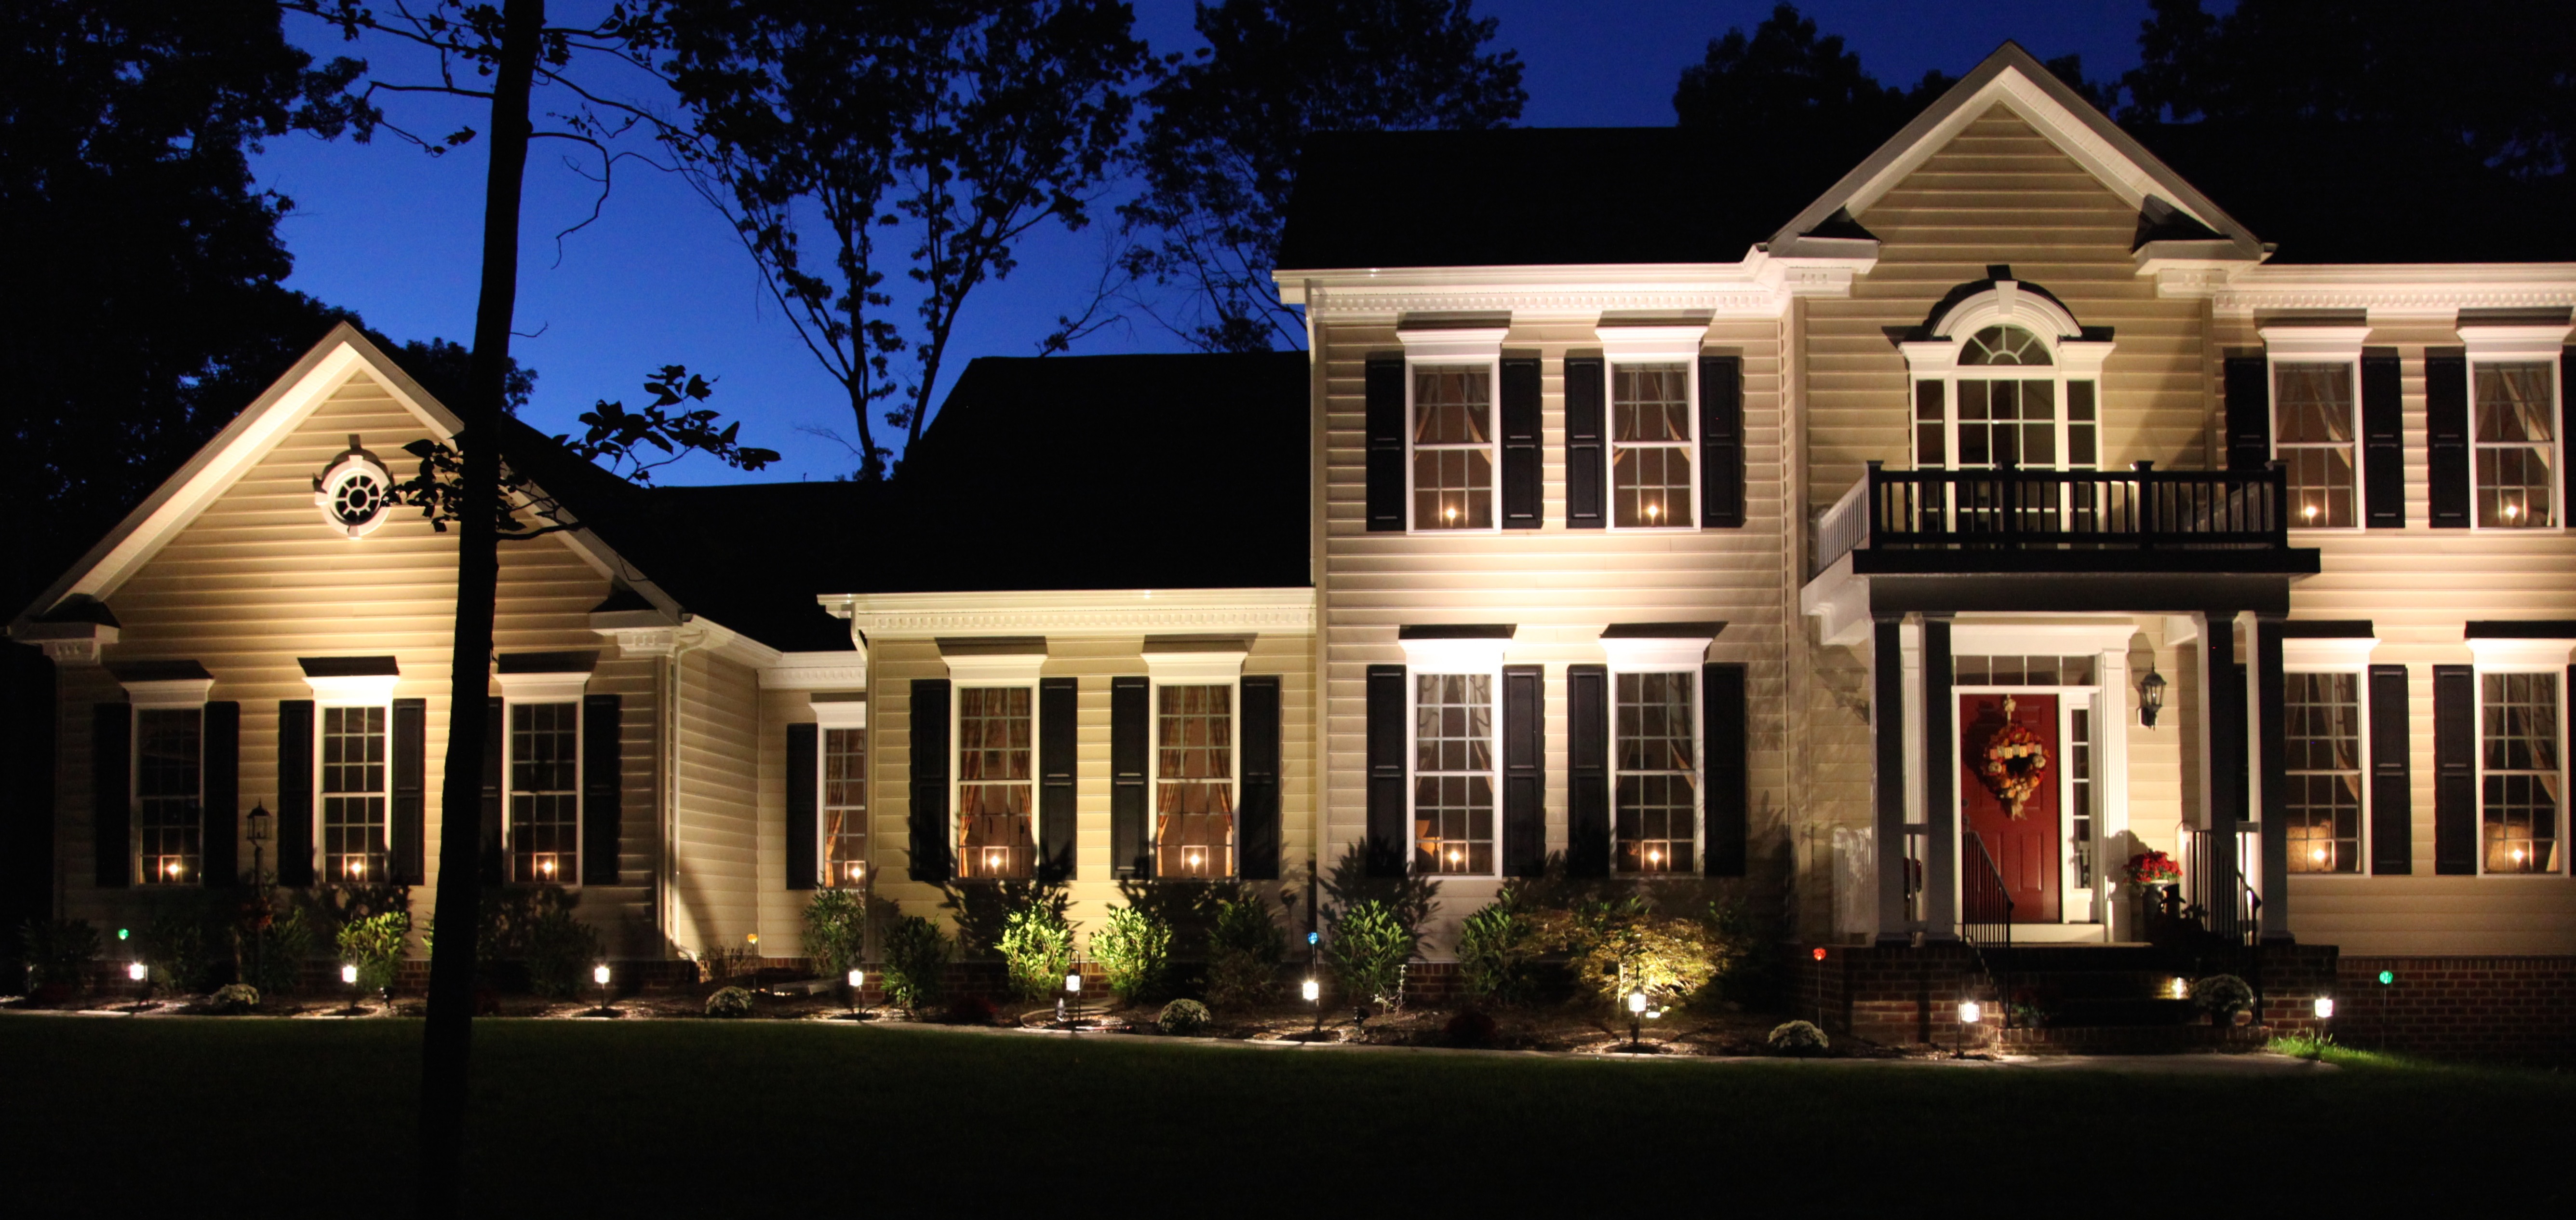
I will be completing my “Home Tour” series of blog entries with this post describing the outdoor lighting that we chose to brighten up the front of our home. My hubby and I worked in tandem to choose and arrange said lighting; he did do all of the installing though, but, I was definitely there for moral support. 😉
The first lights that I want to tell you about are the candles in the windows.
Here in the South, many of us leave lights lit in our windows throughout the entire year; I have done this for years and years now (even in our old house before we moved here). Old traditions tell us that the candle was often placed in the window when a member of the family was away. The lit candle was also placed in the window as a sign of good news or as a welcome to weary travelers. Candles also represented friendship and were seen as a sign of welcome to others. One of my favorite schools of thought regarding placing candles in the window was that it served as a beacon to solders who were away at war, kept ever burning so that they could find their way back home to their loved ones. For all of these reasons, we keep candles lit in all of the front windows day and night. We took advantage of a spiffy lighting package that our builder offered, a “Holiday Light Package”, this package provided us with an extra outlet at each window and all of those outlets lead to one switch, so when on the rare occasion that I do turn out all of the candle lights all I need to do is flip that one switch.
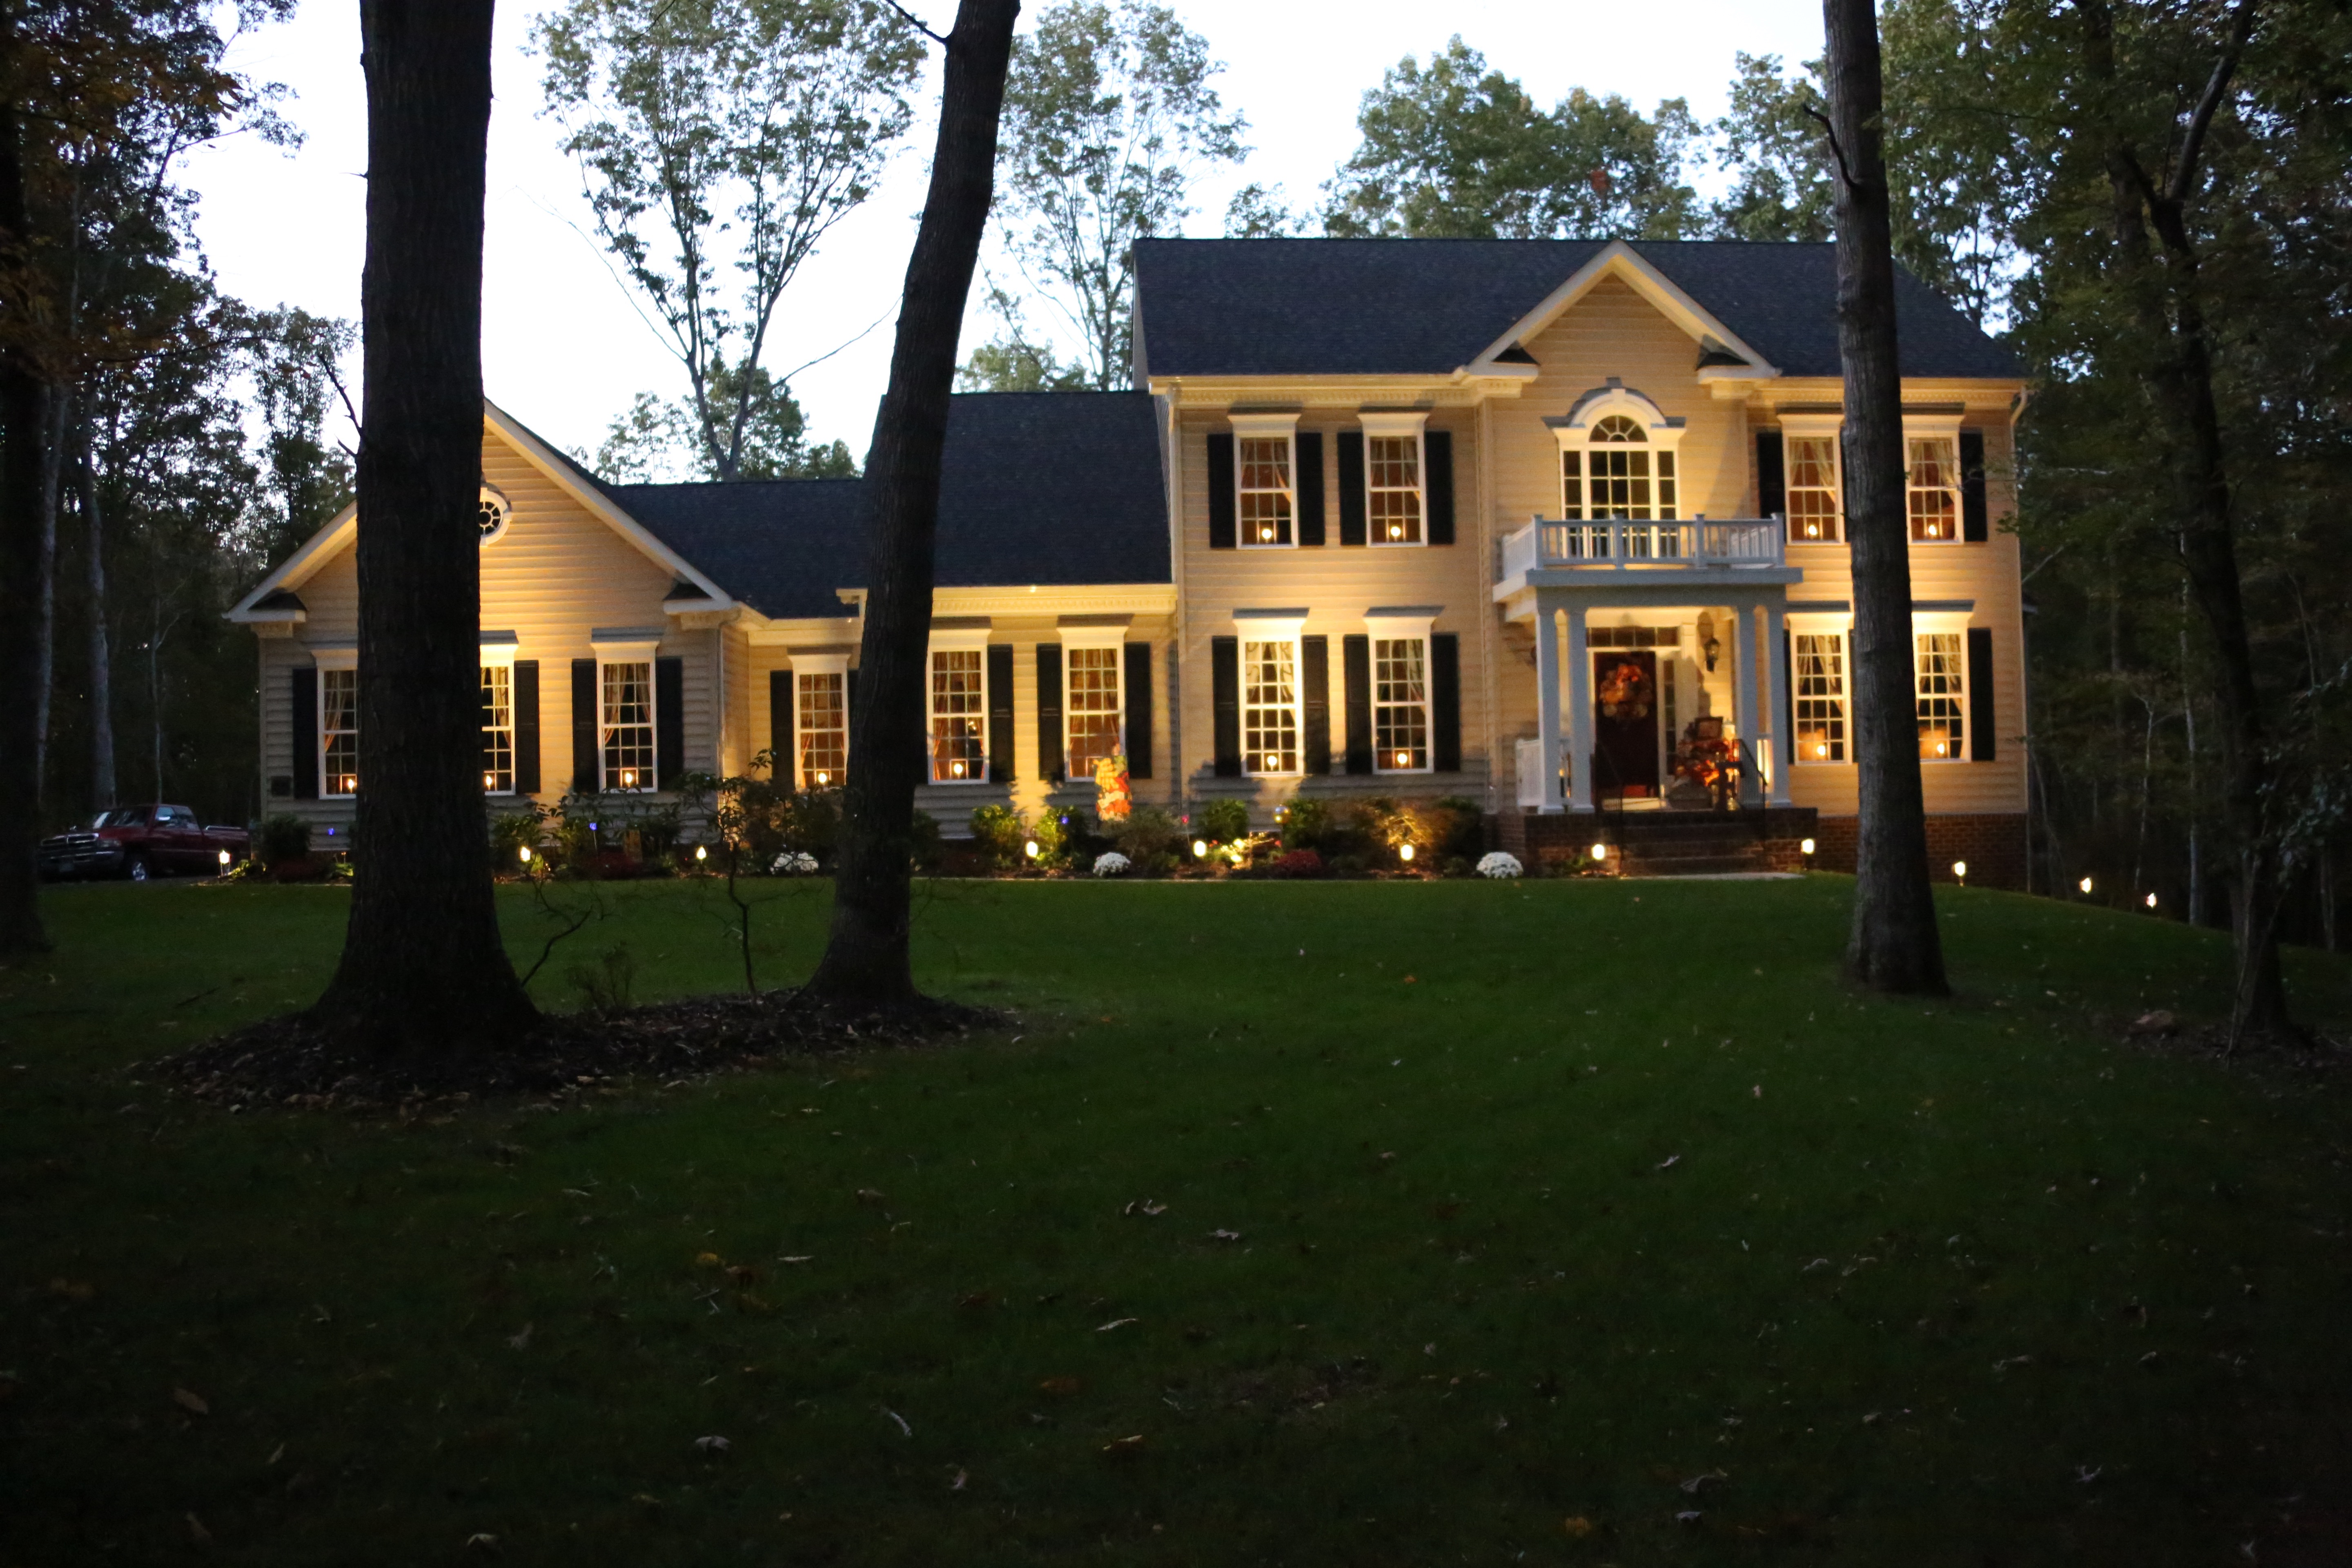
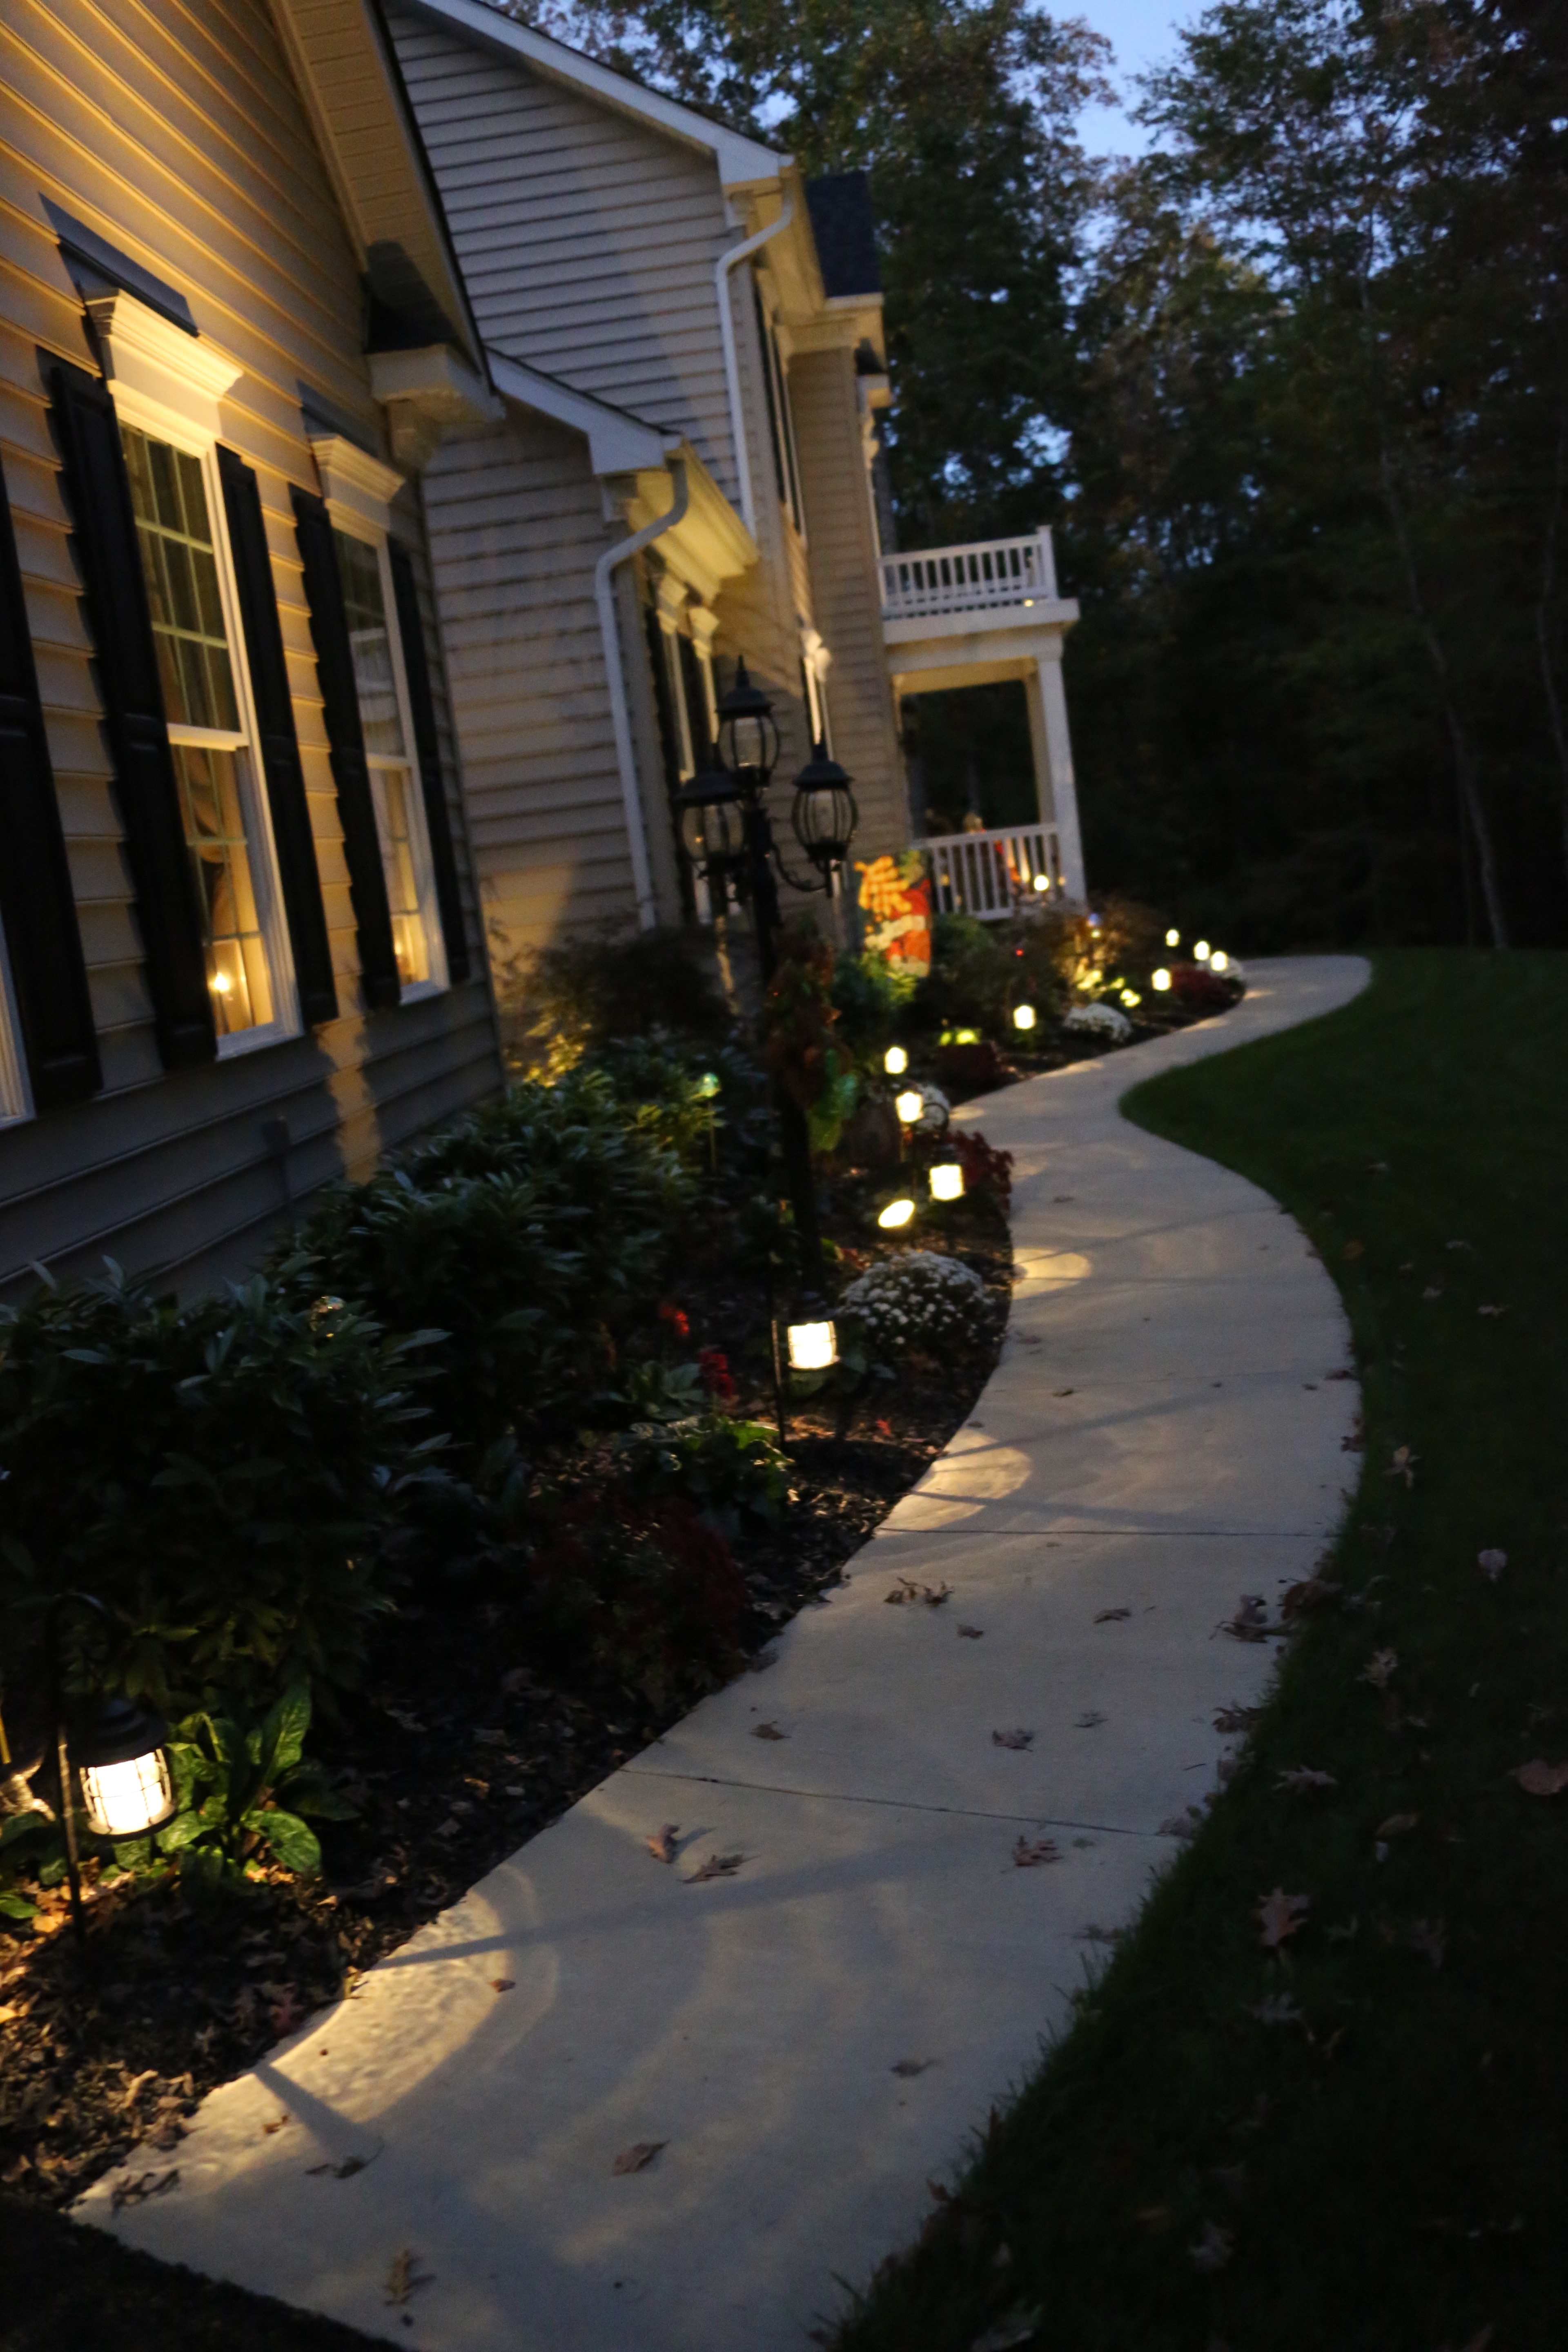
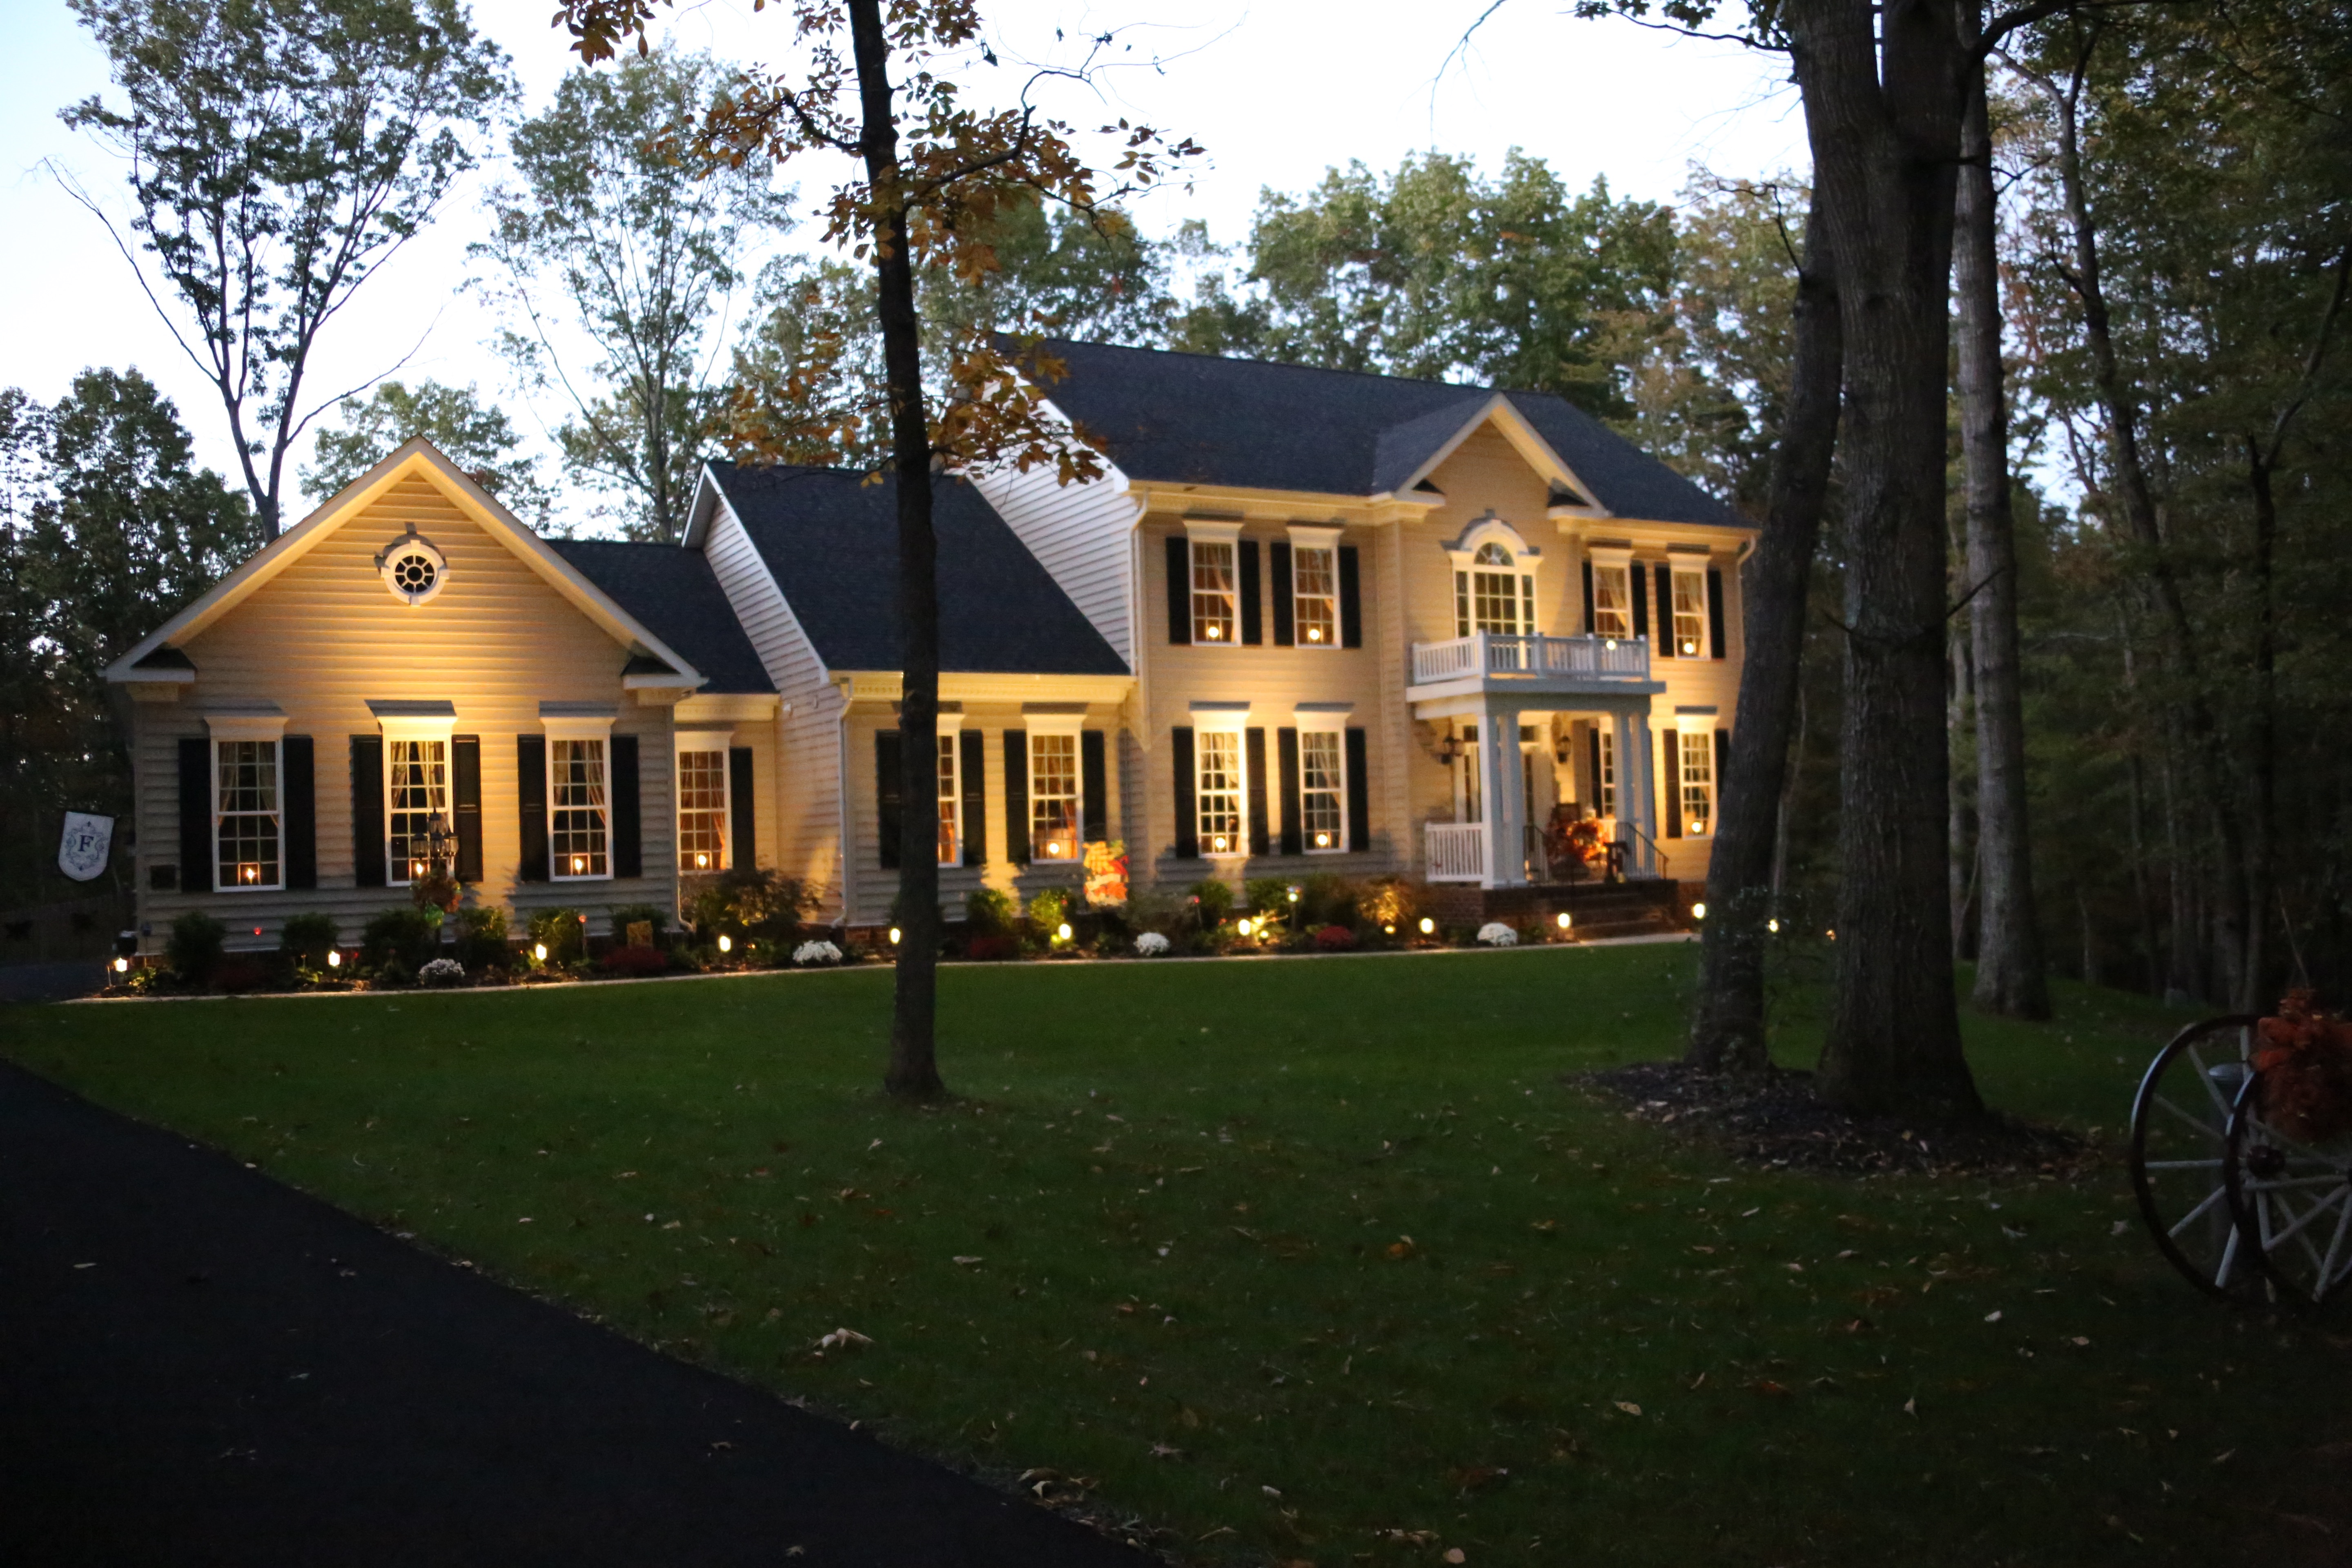
I’ve always loved the look of a home subtly lit at night so we went on the hunt for lighting that would highlight the different rooflines and ‘sections’ of our home. All of these lights are on a timer, they come on at dusk and remain on for 6 hours then magically turn out all on their own. 😉 🙂
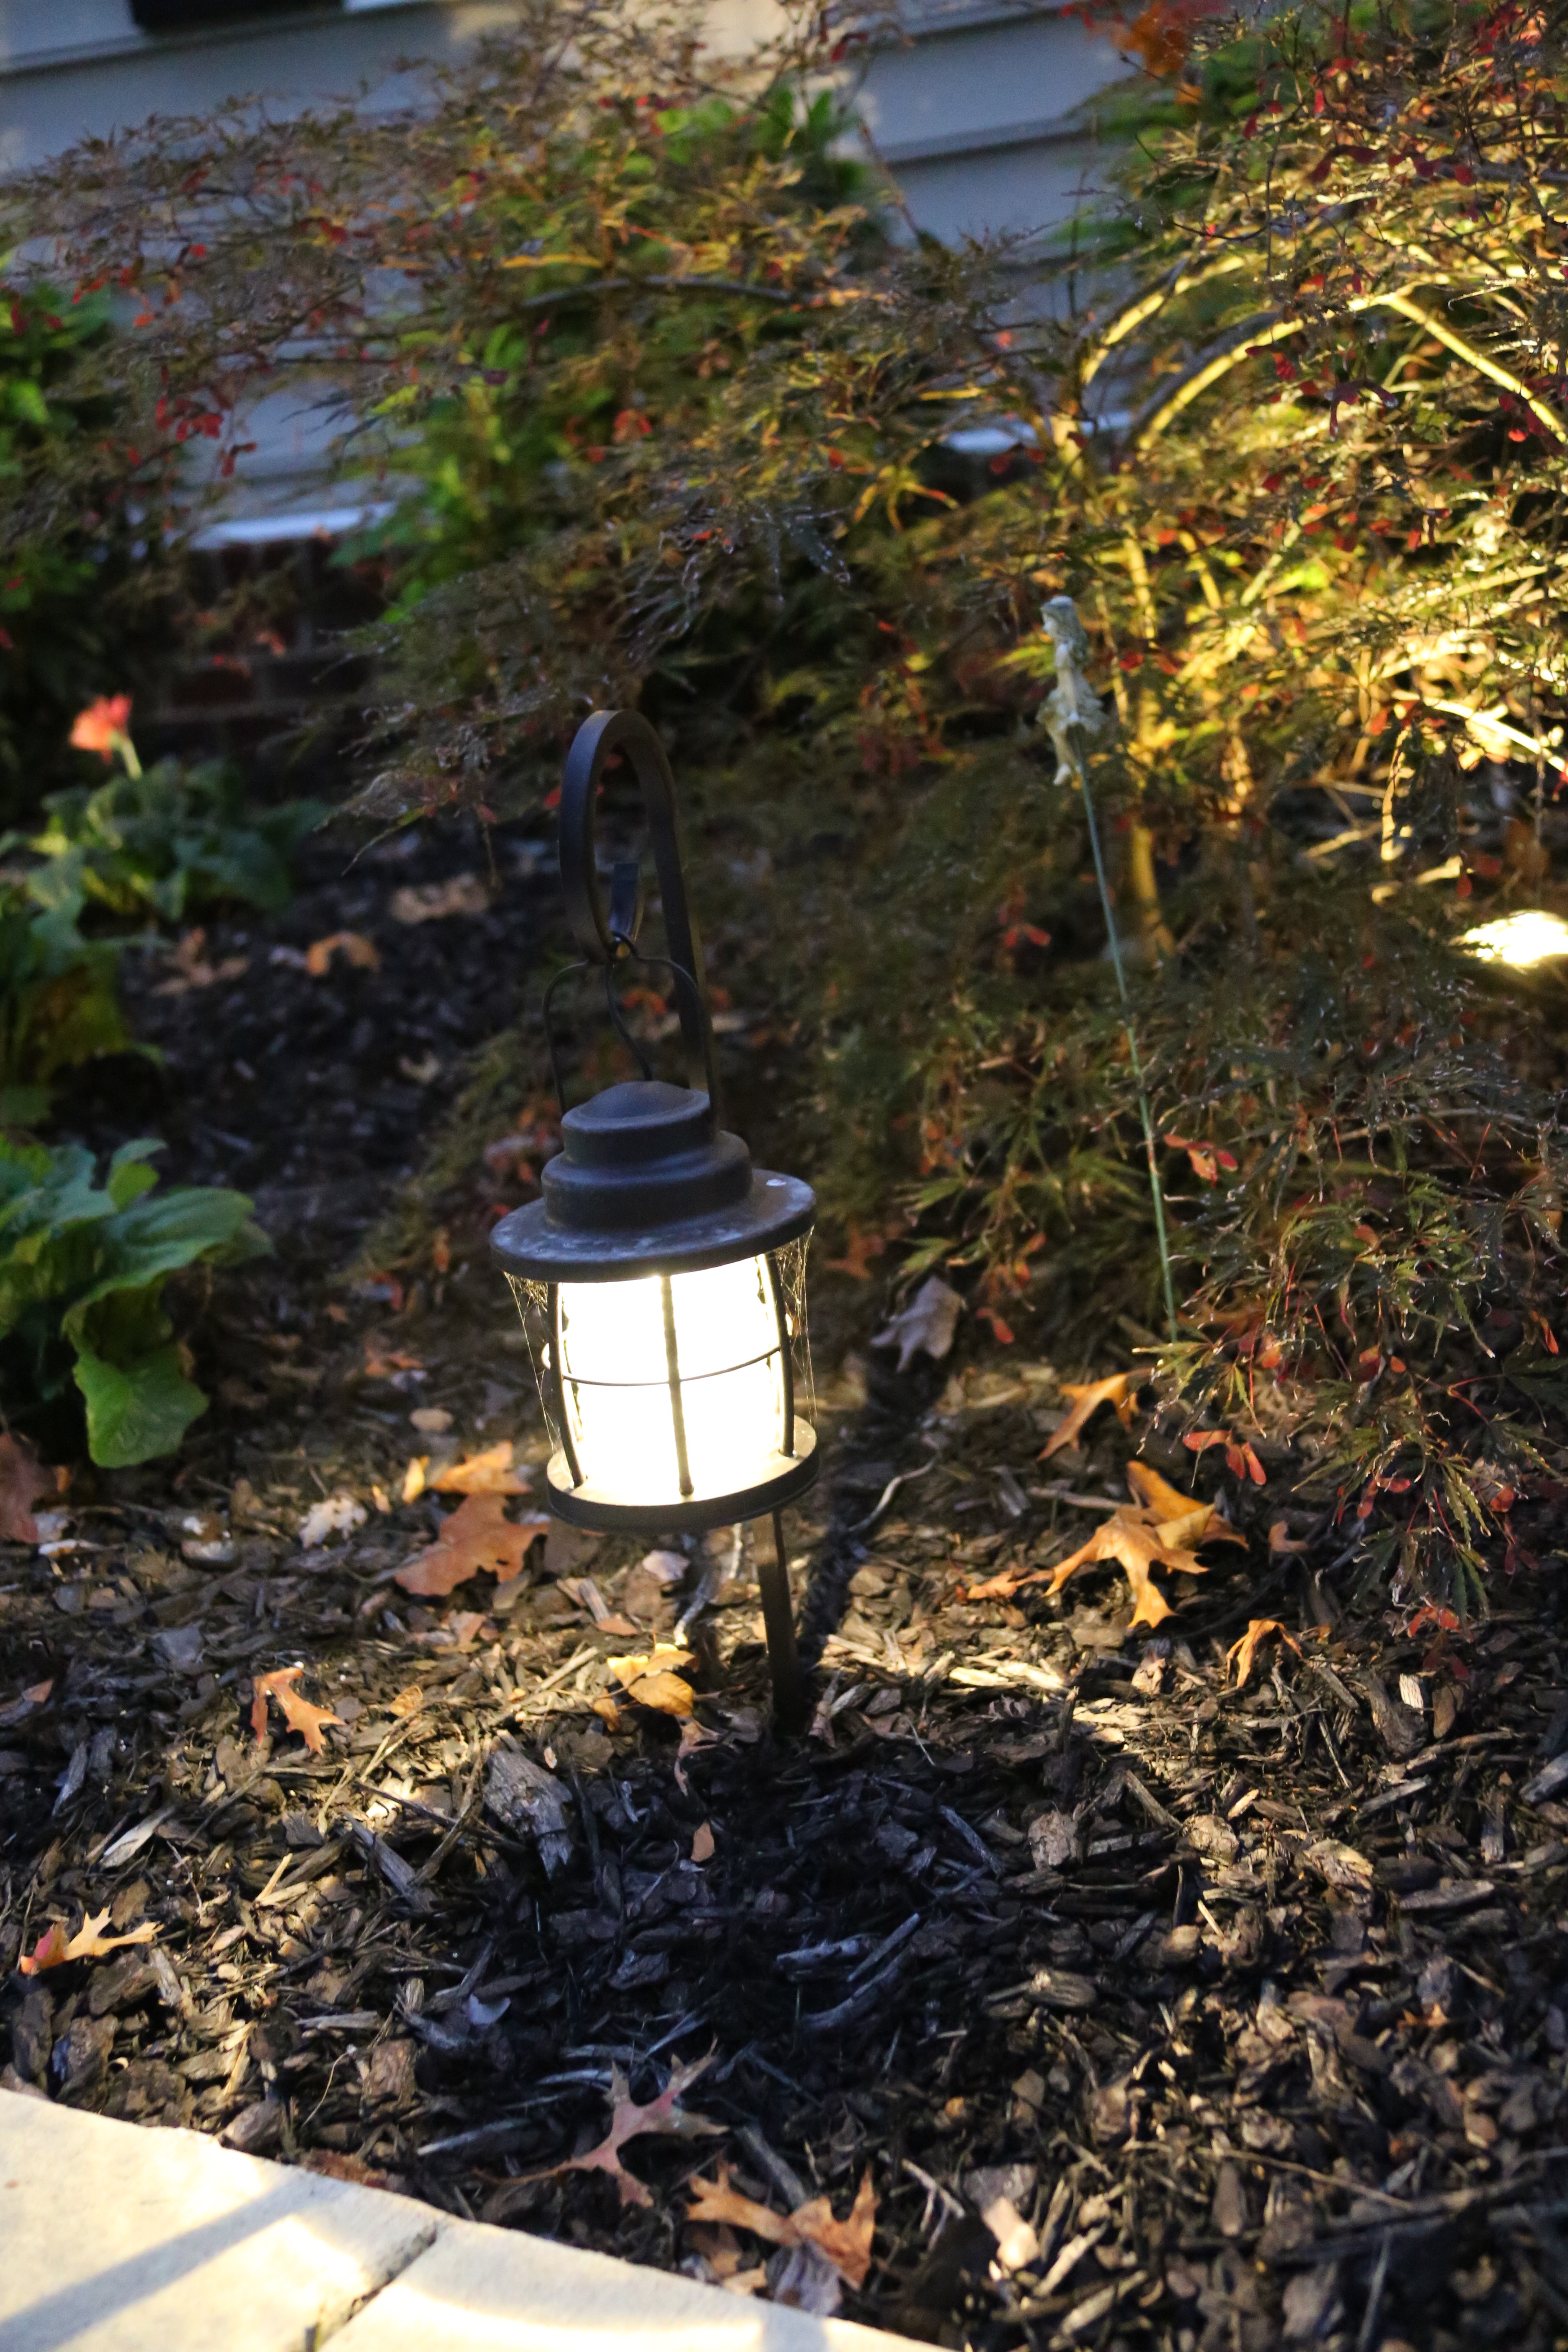
We purchased pathway lights:
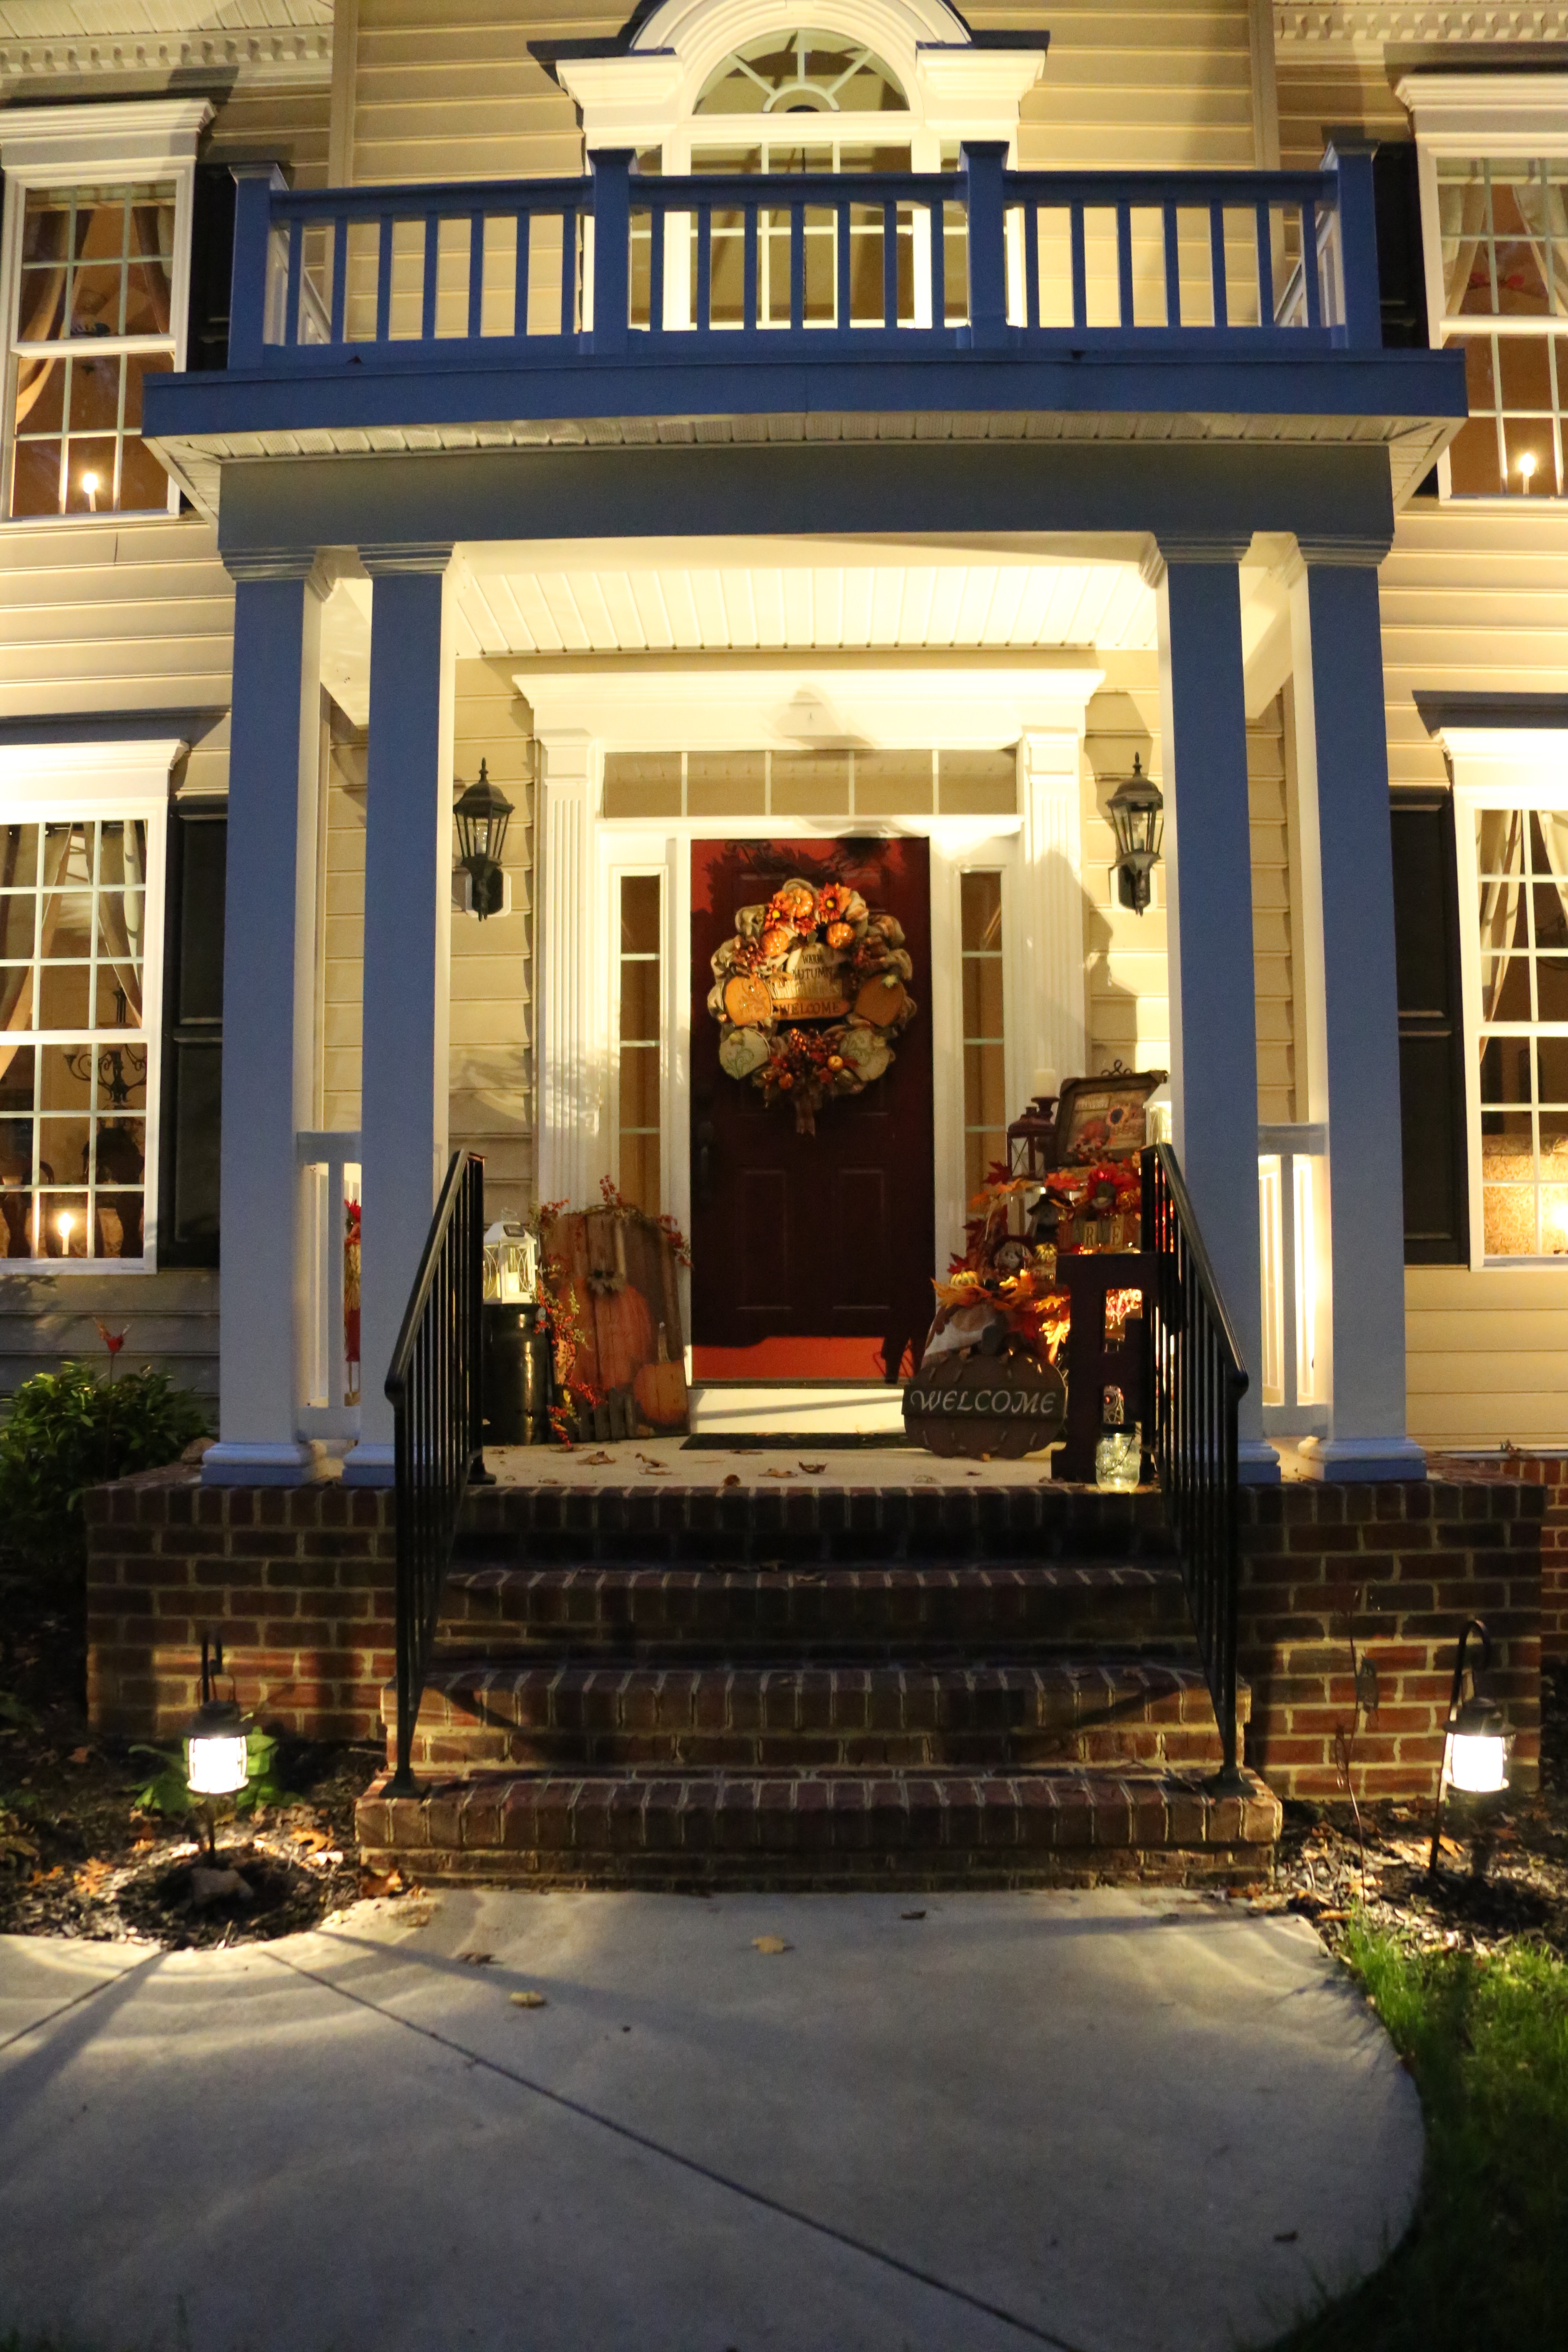
And “wash” lights, that softly light parts of the front of the house:
My hubby installed wash lights up on top of the porch and on the porch itself as well:
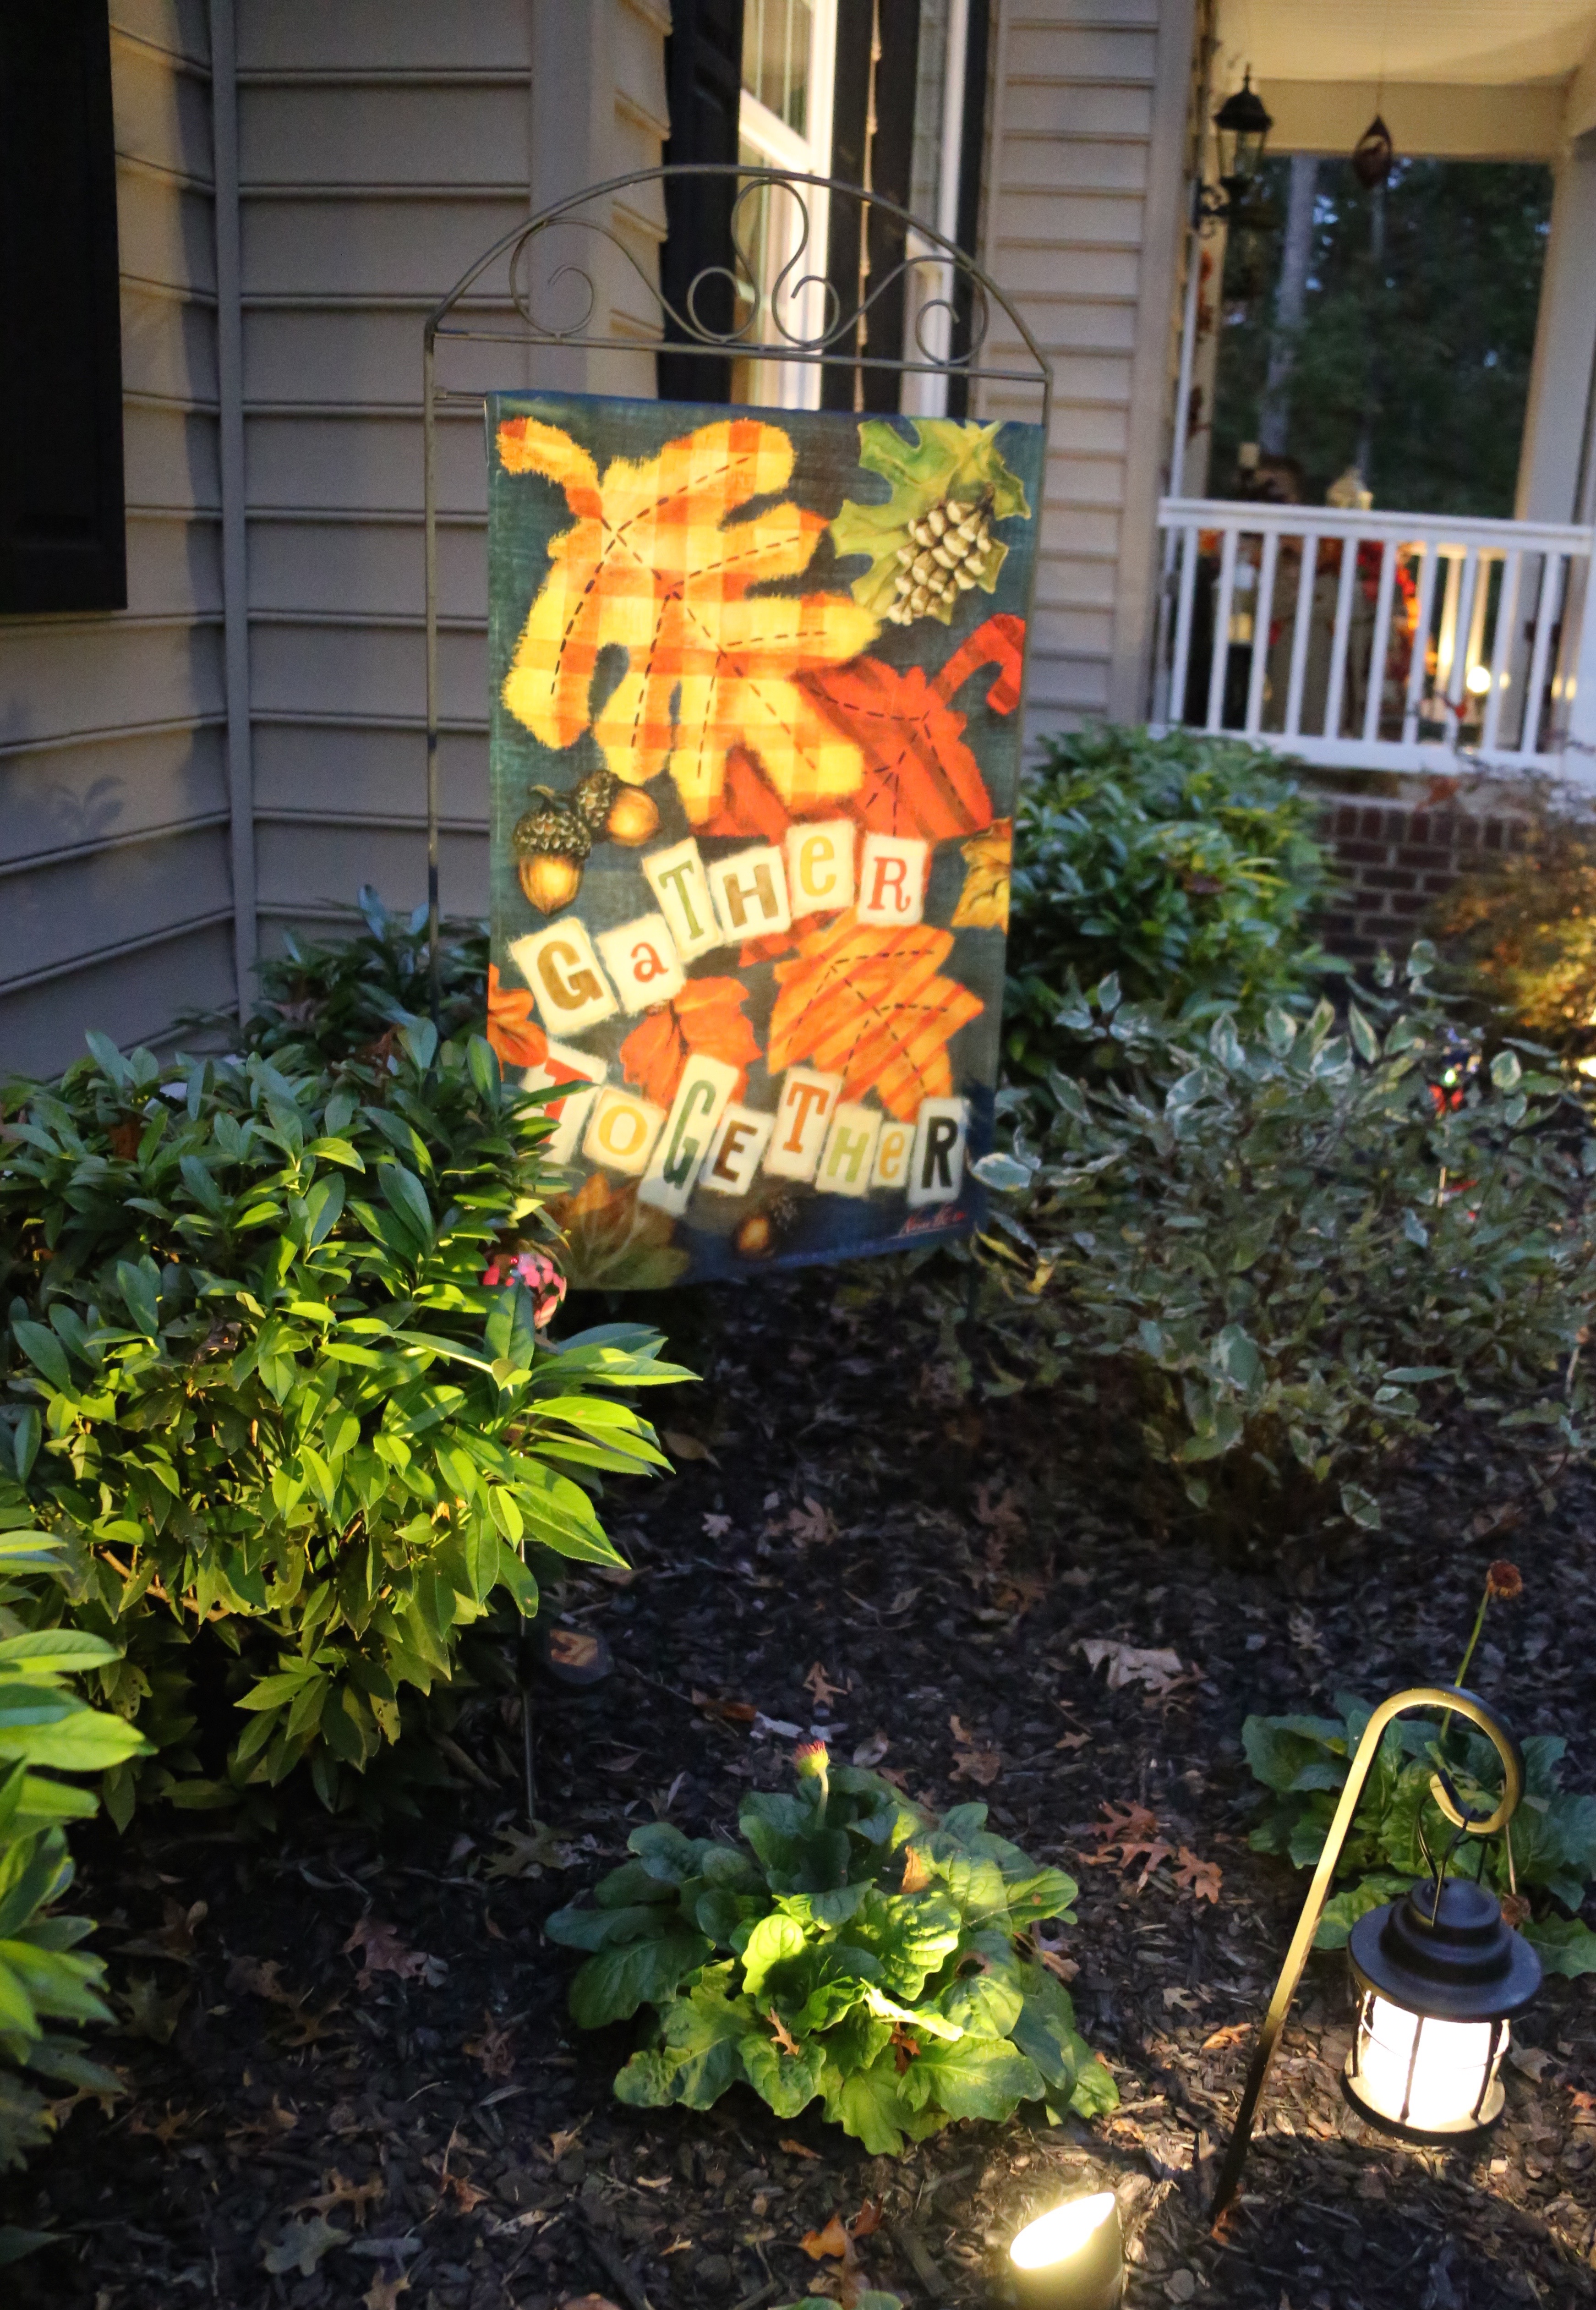
We chose “up” lights to highlight whatever decorative flag I have on the flag stand and some of the prettier trees and shrubs in the flowerbed. (I purchased the flag stand from Plow and Hearth):
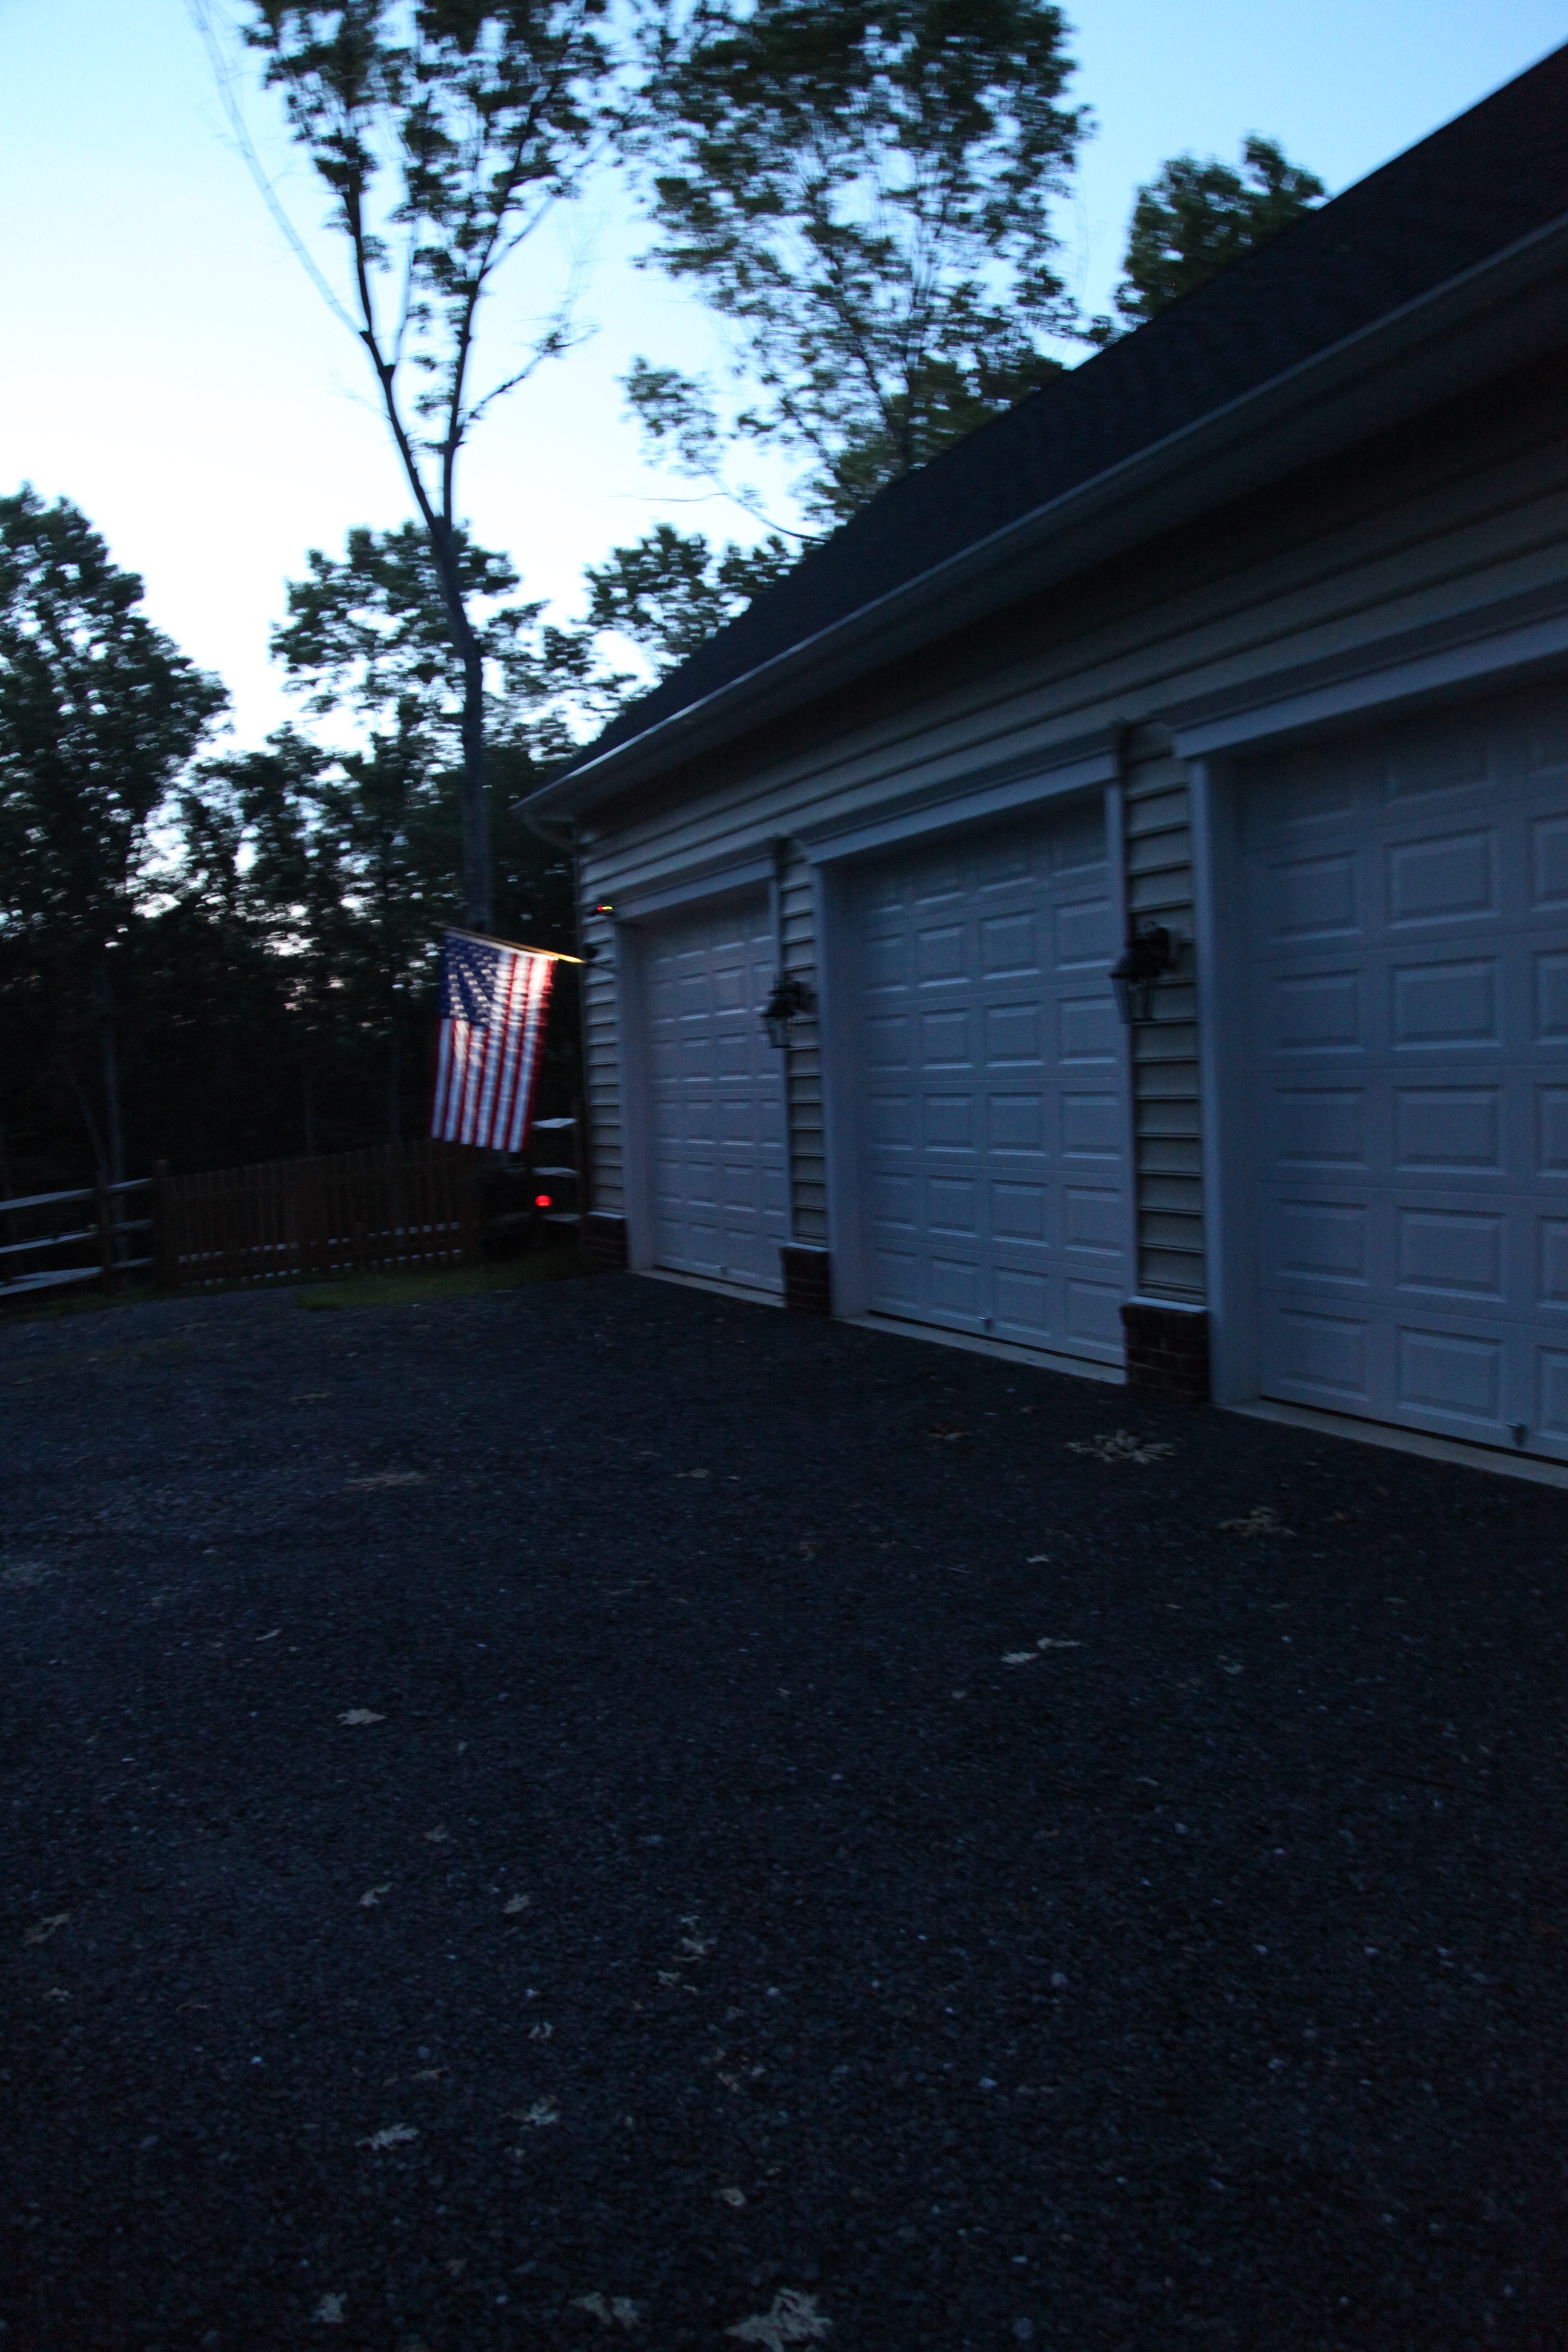
We even found a flag pole with a solar light attached, that way the flag that we have flying will always be lit as well. This is especially important when we have the American Flag flying, it is not supposed to be flown at night without it being lit:
Last, but not least, we have several solar lights dotted throughout the flowerbed, they change colors very slowly and subtly and add a little touch of whimsy:
The lighting is pretty throughout the entire year, but it is especially pretty right after a snowfall:
Well, there we go, with the completion of this blog entry, you’ve now had a tour of pretty much the entire house. My hubby and I work every day to turn this house into a home, a home that will provide a warm and cozy haven to family and friends. My greatest hope is that when folks stop by that they feel welcome and like they can sit down, put their feet up, relax, and enjoy their time here in our country home.
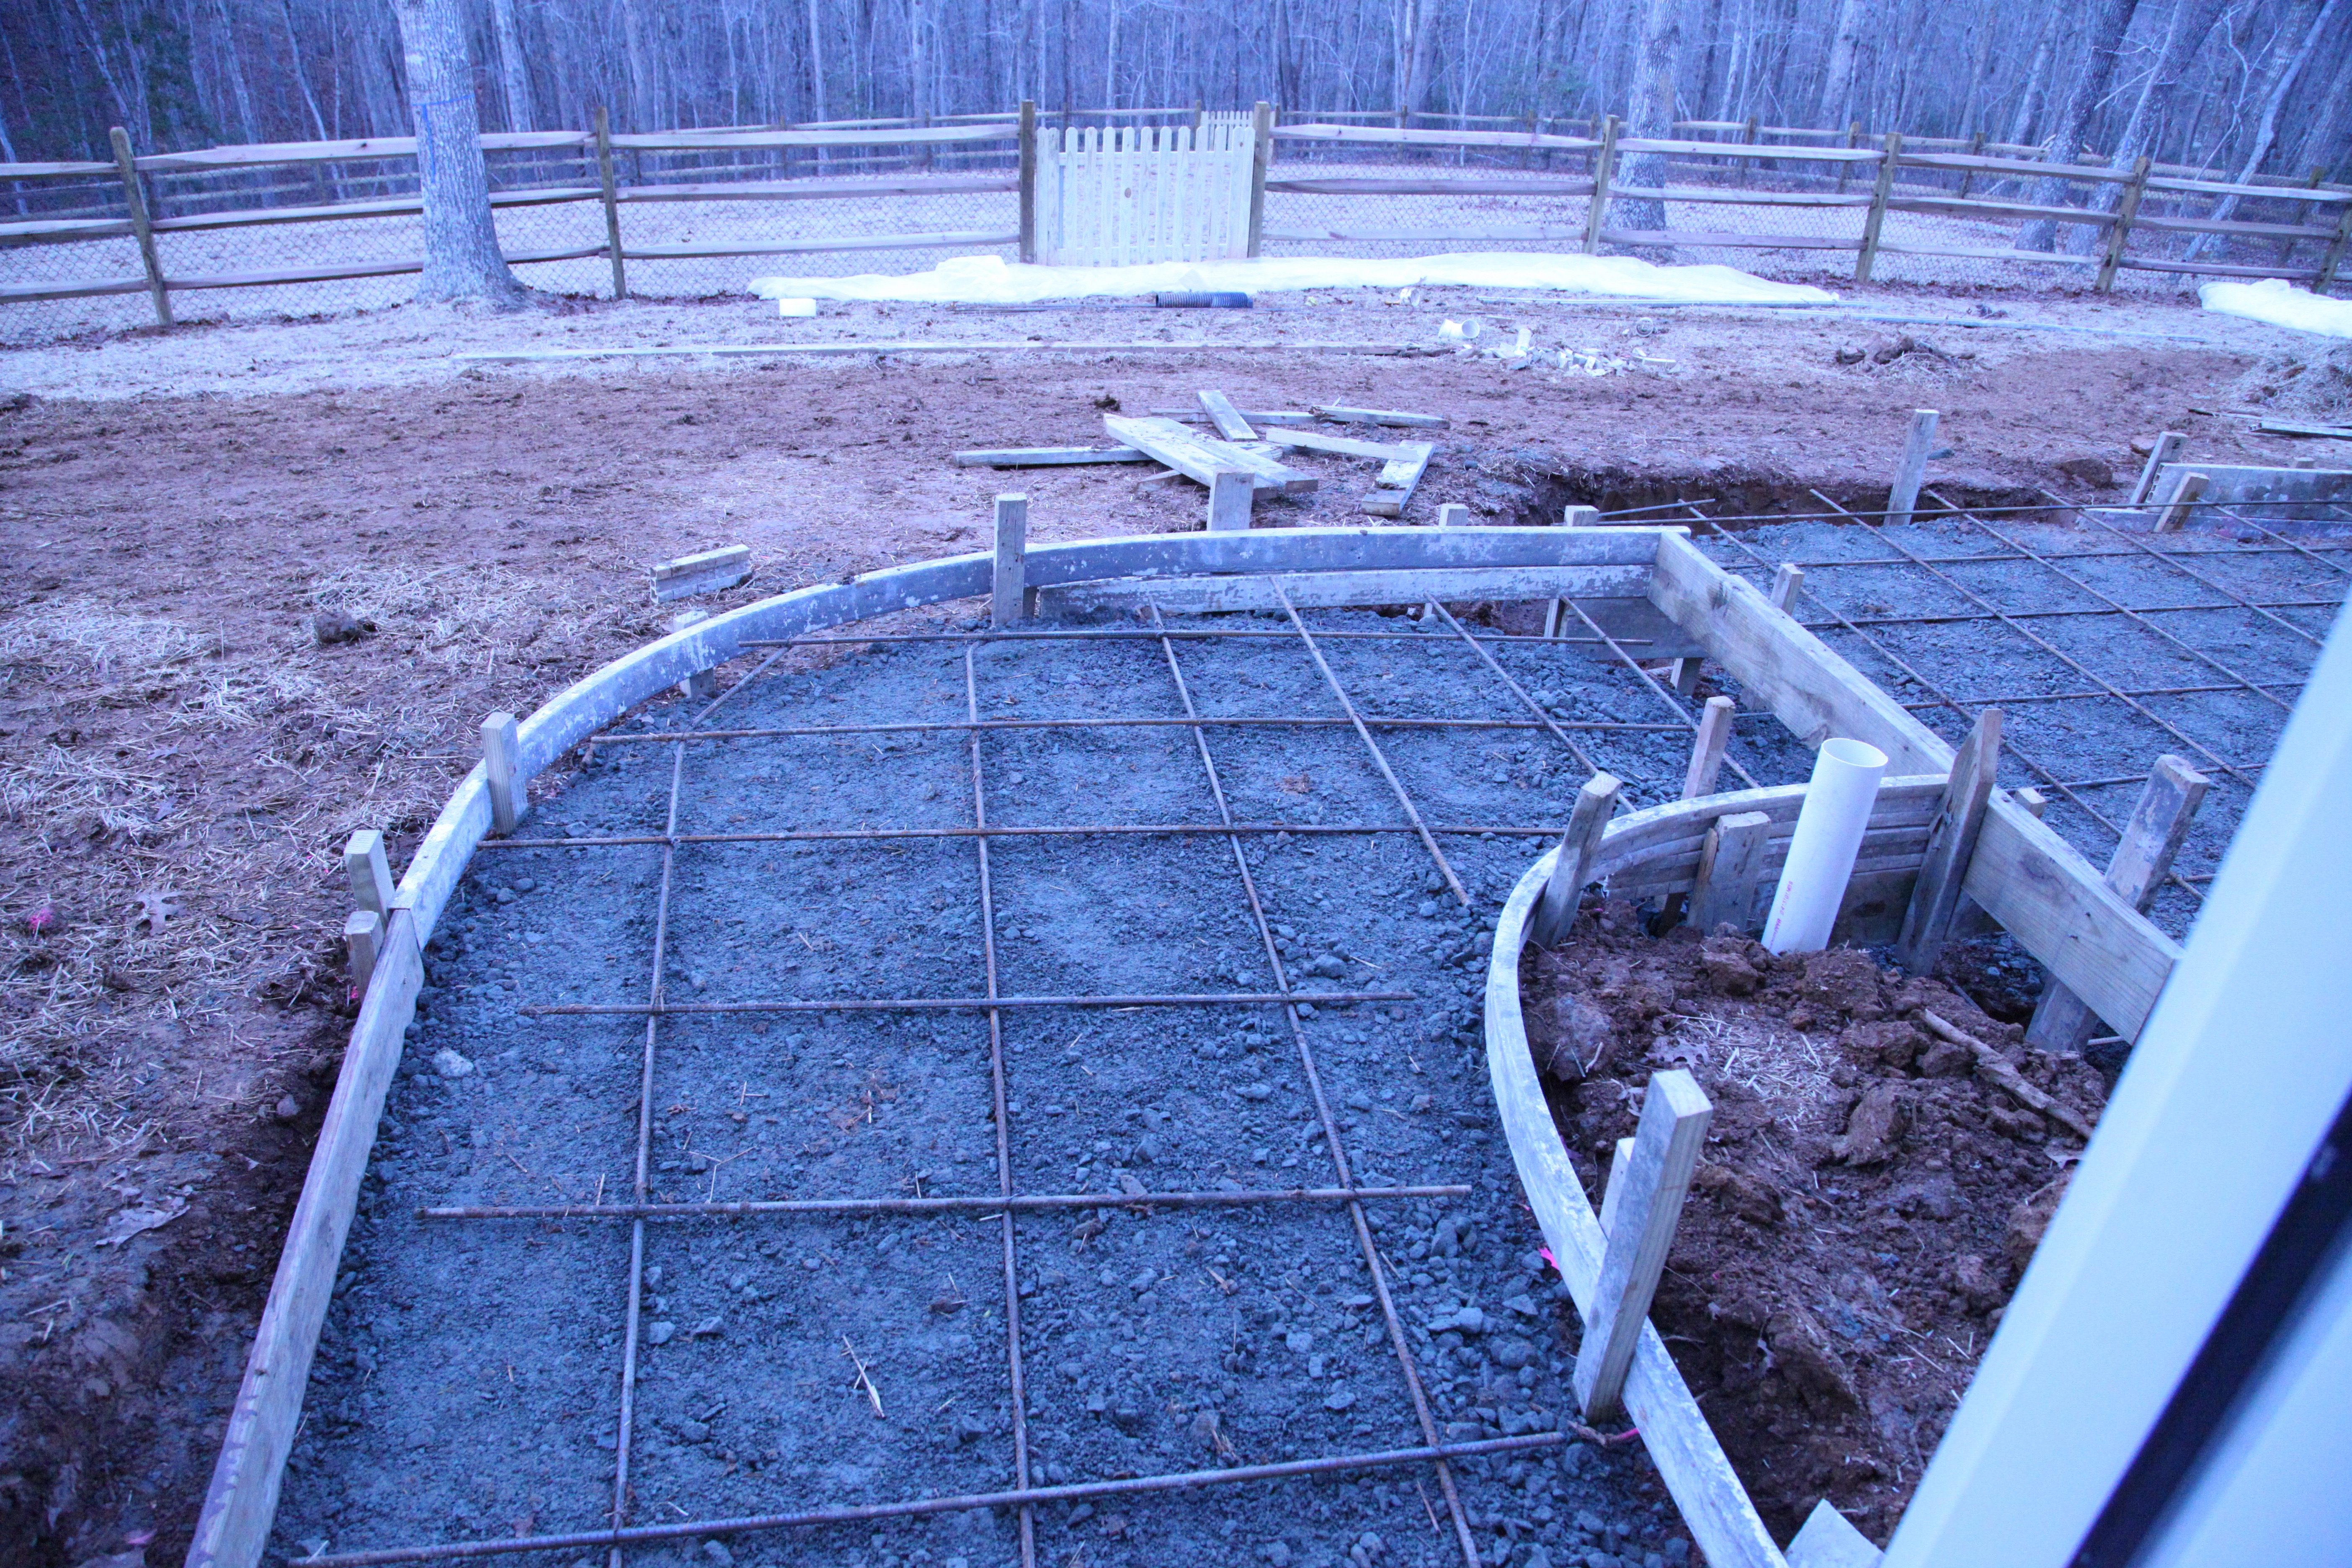
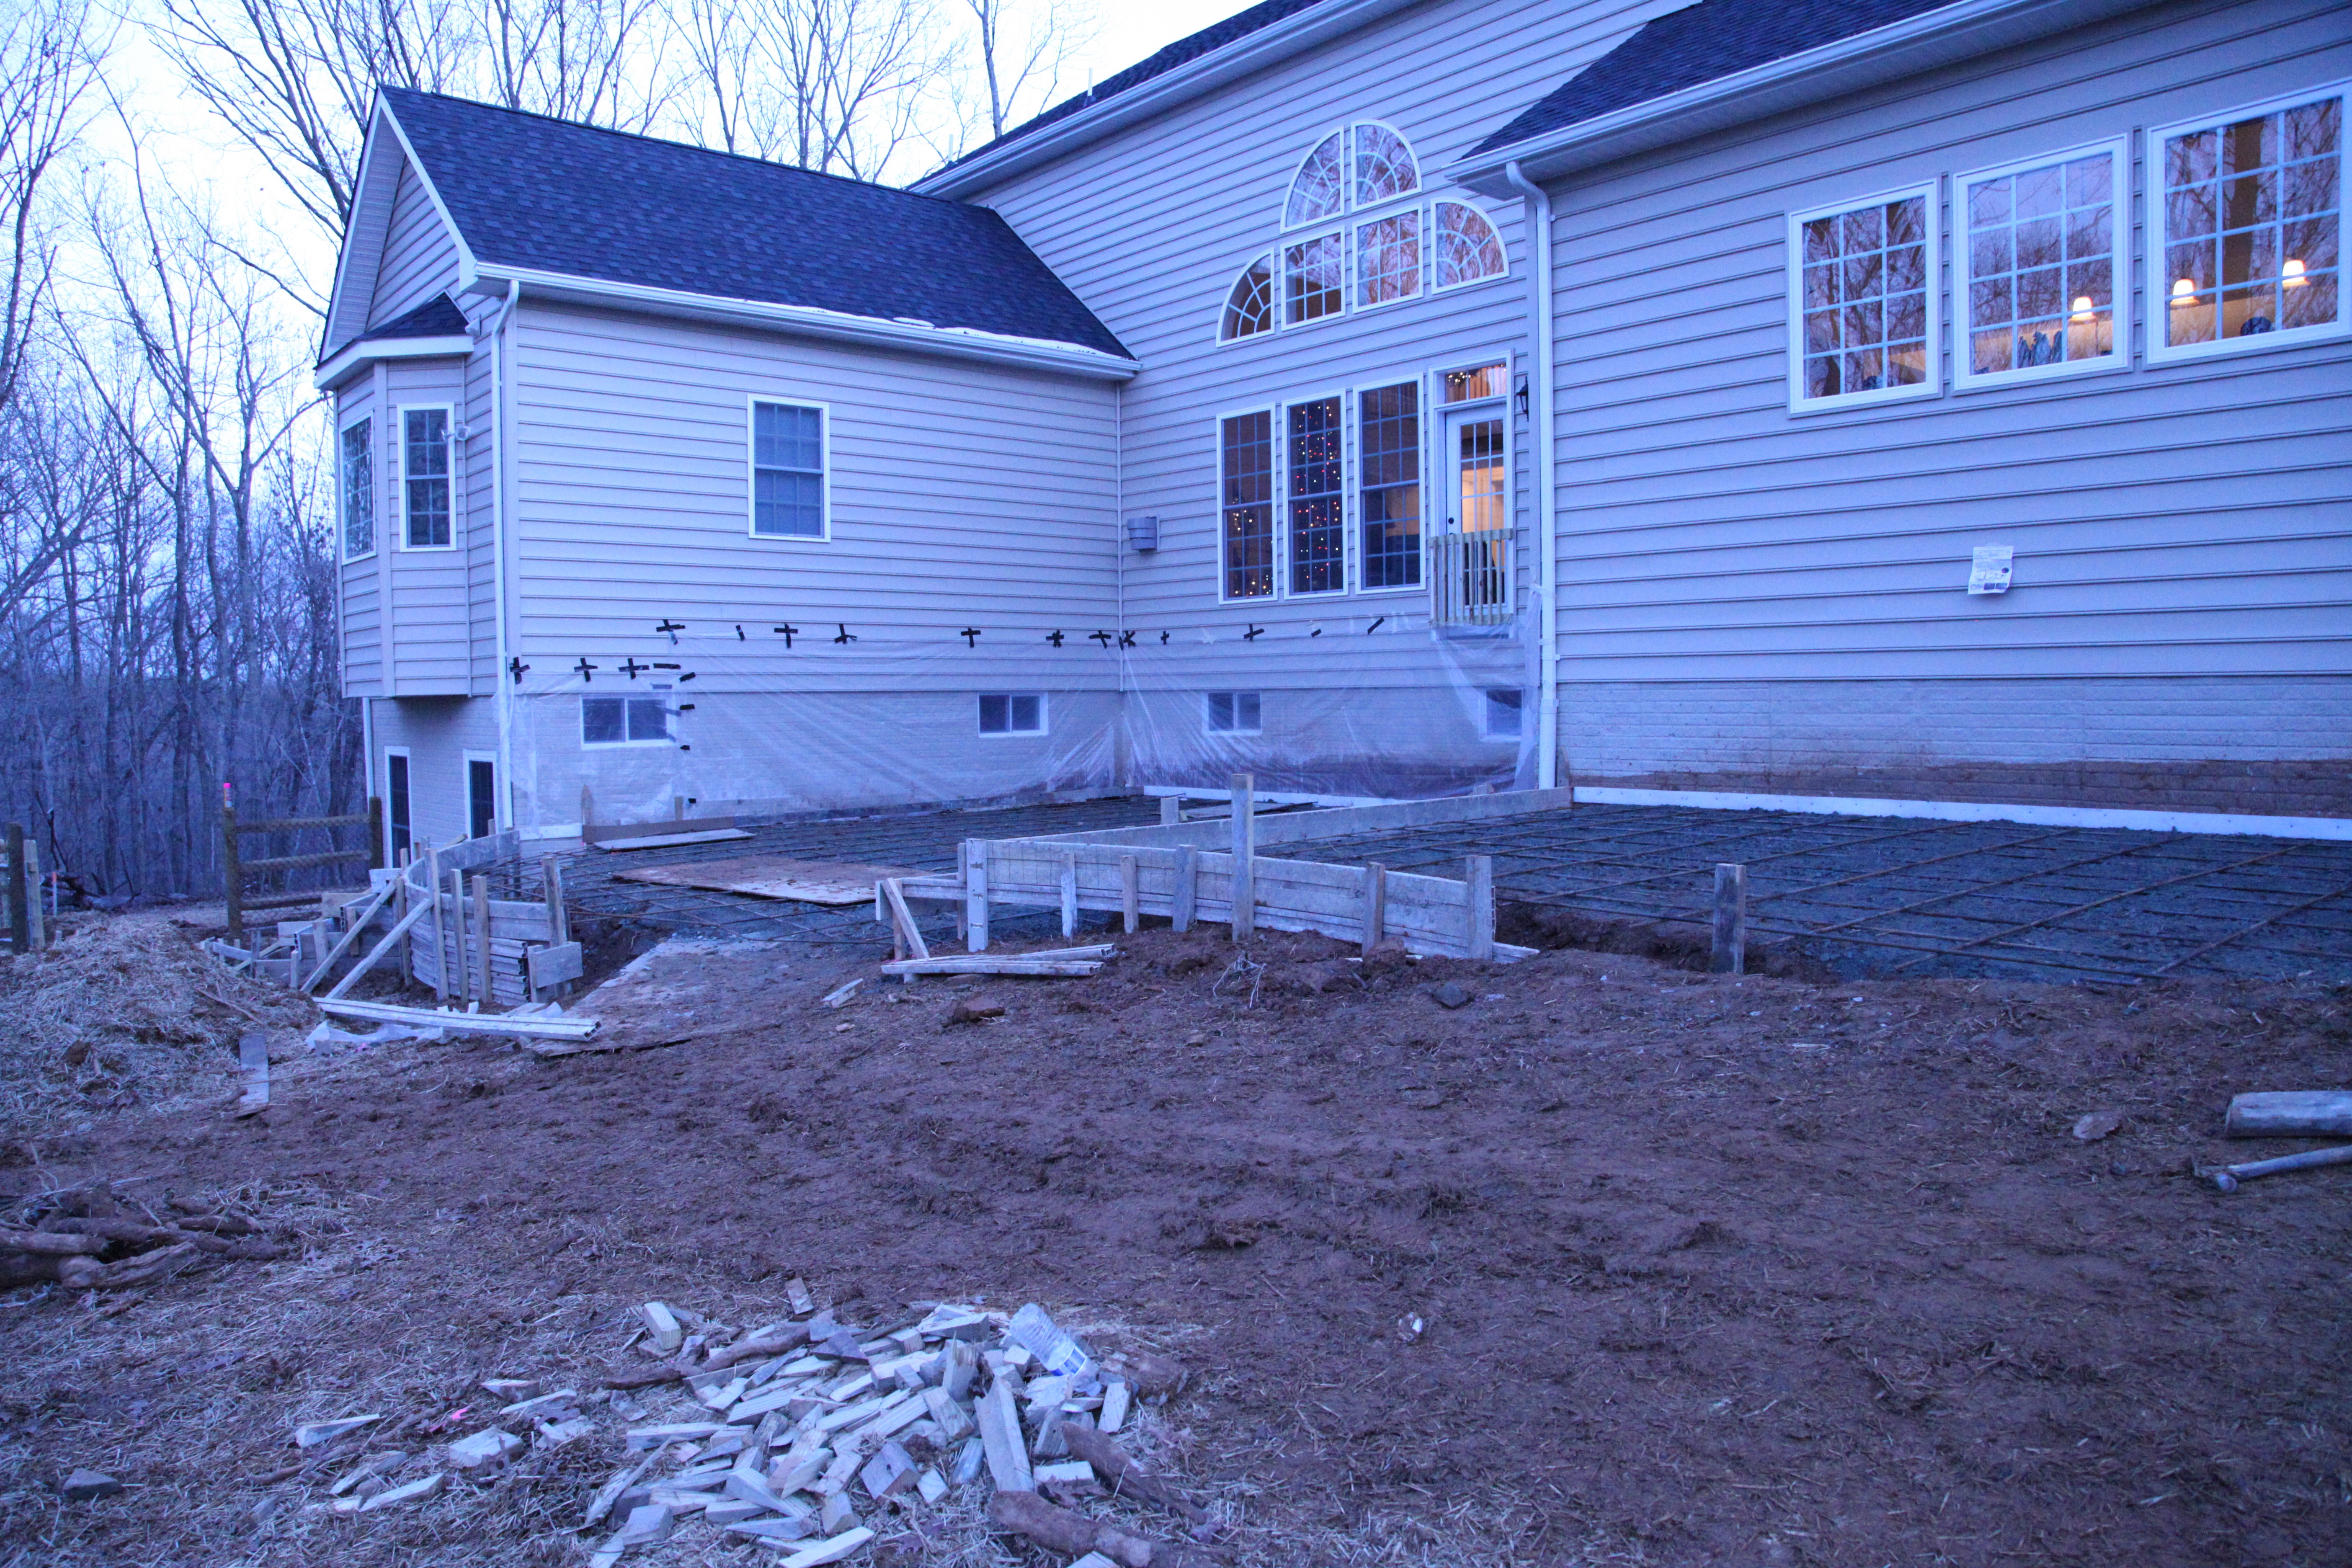
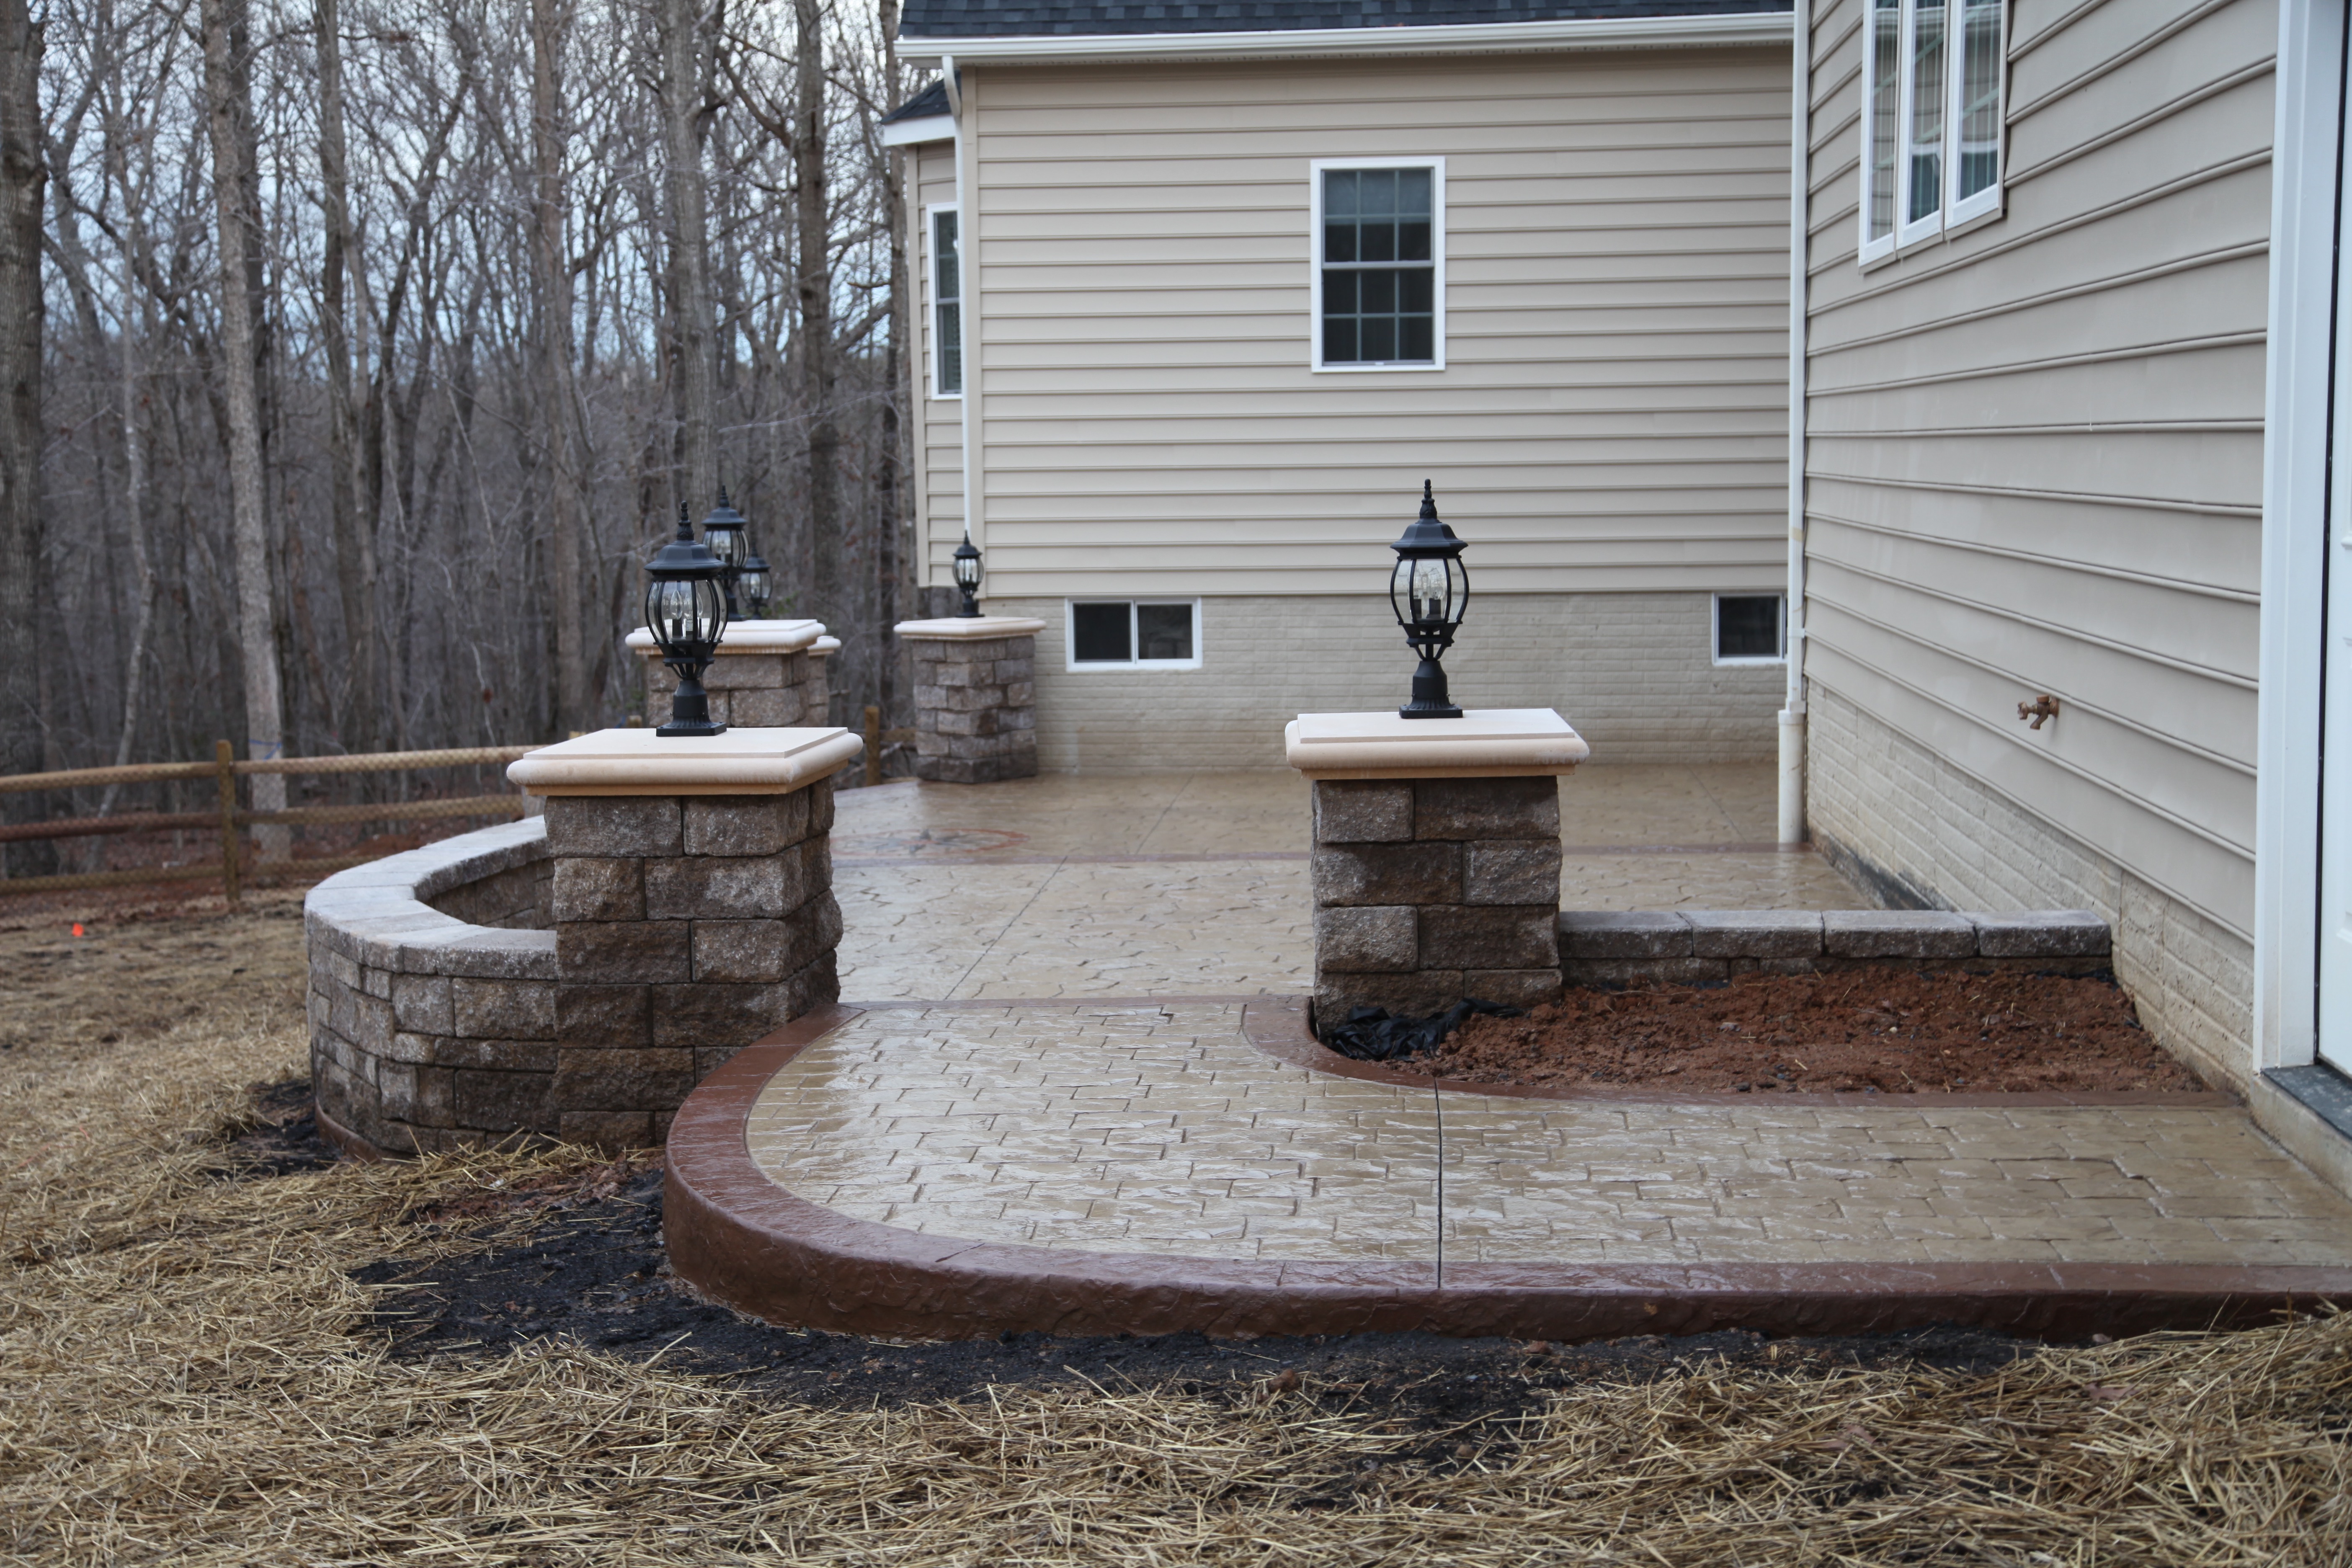
We moved into our house on the Monday before Thanksgiving a couple of years ago, we only had a few weeks to get moved in and kinda settled before the masonry company started to construct our stamped concrete patio. I have to admit, it was a rather stressful project because it took them a couple of months to complete; the temperature had to be above 50 degrees for them to come and work–it was winter and well, you get the picture. Not to mention the fact that our backyard was nothing but…well mud and hay. In fact, the reason we went ahead and had the patio put down then was so that it would be done by Spring and we could then grow some pretty grass. 🙂
Here is the original design and all of the different colors and attributes that we chose. The finished product differs a bit:
We ended up choosing to have only one set of stairs coming off of the patio versus two as depicted in the rendering.
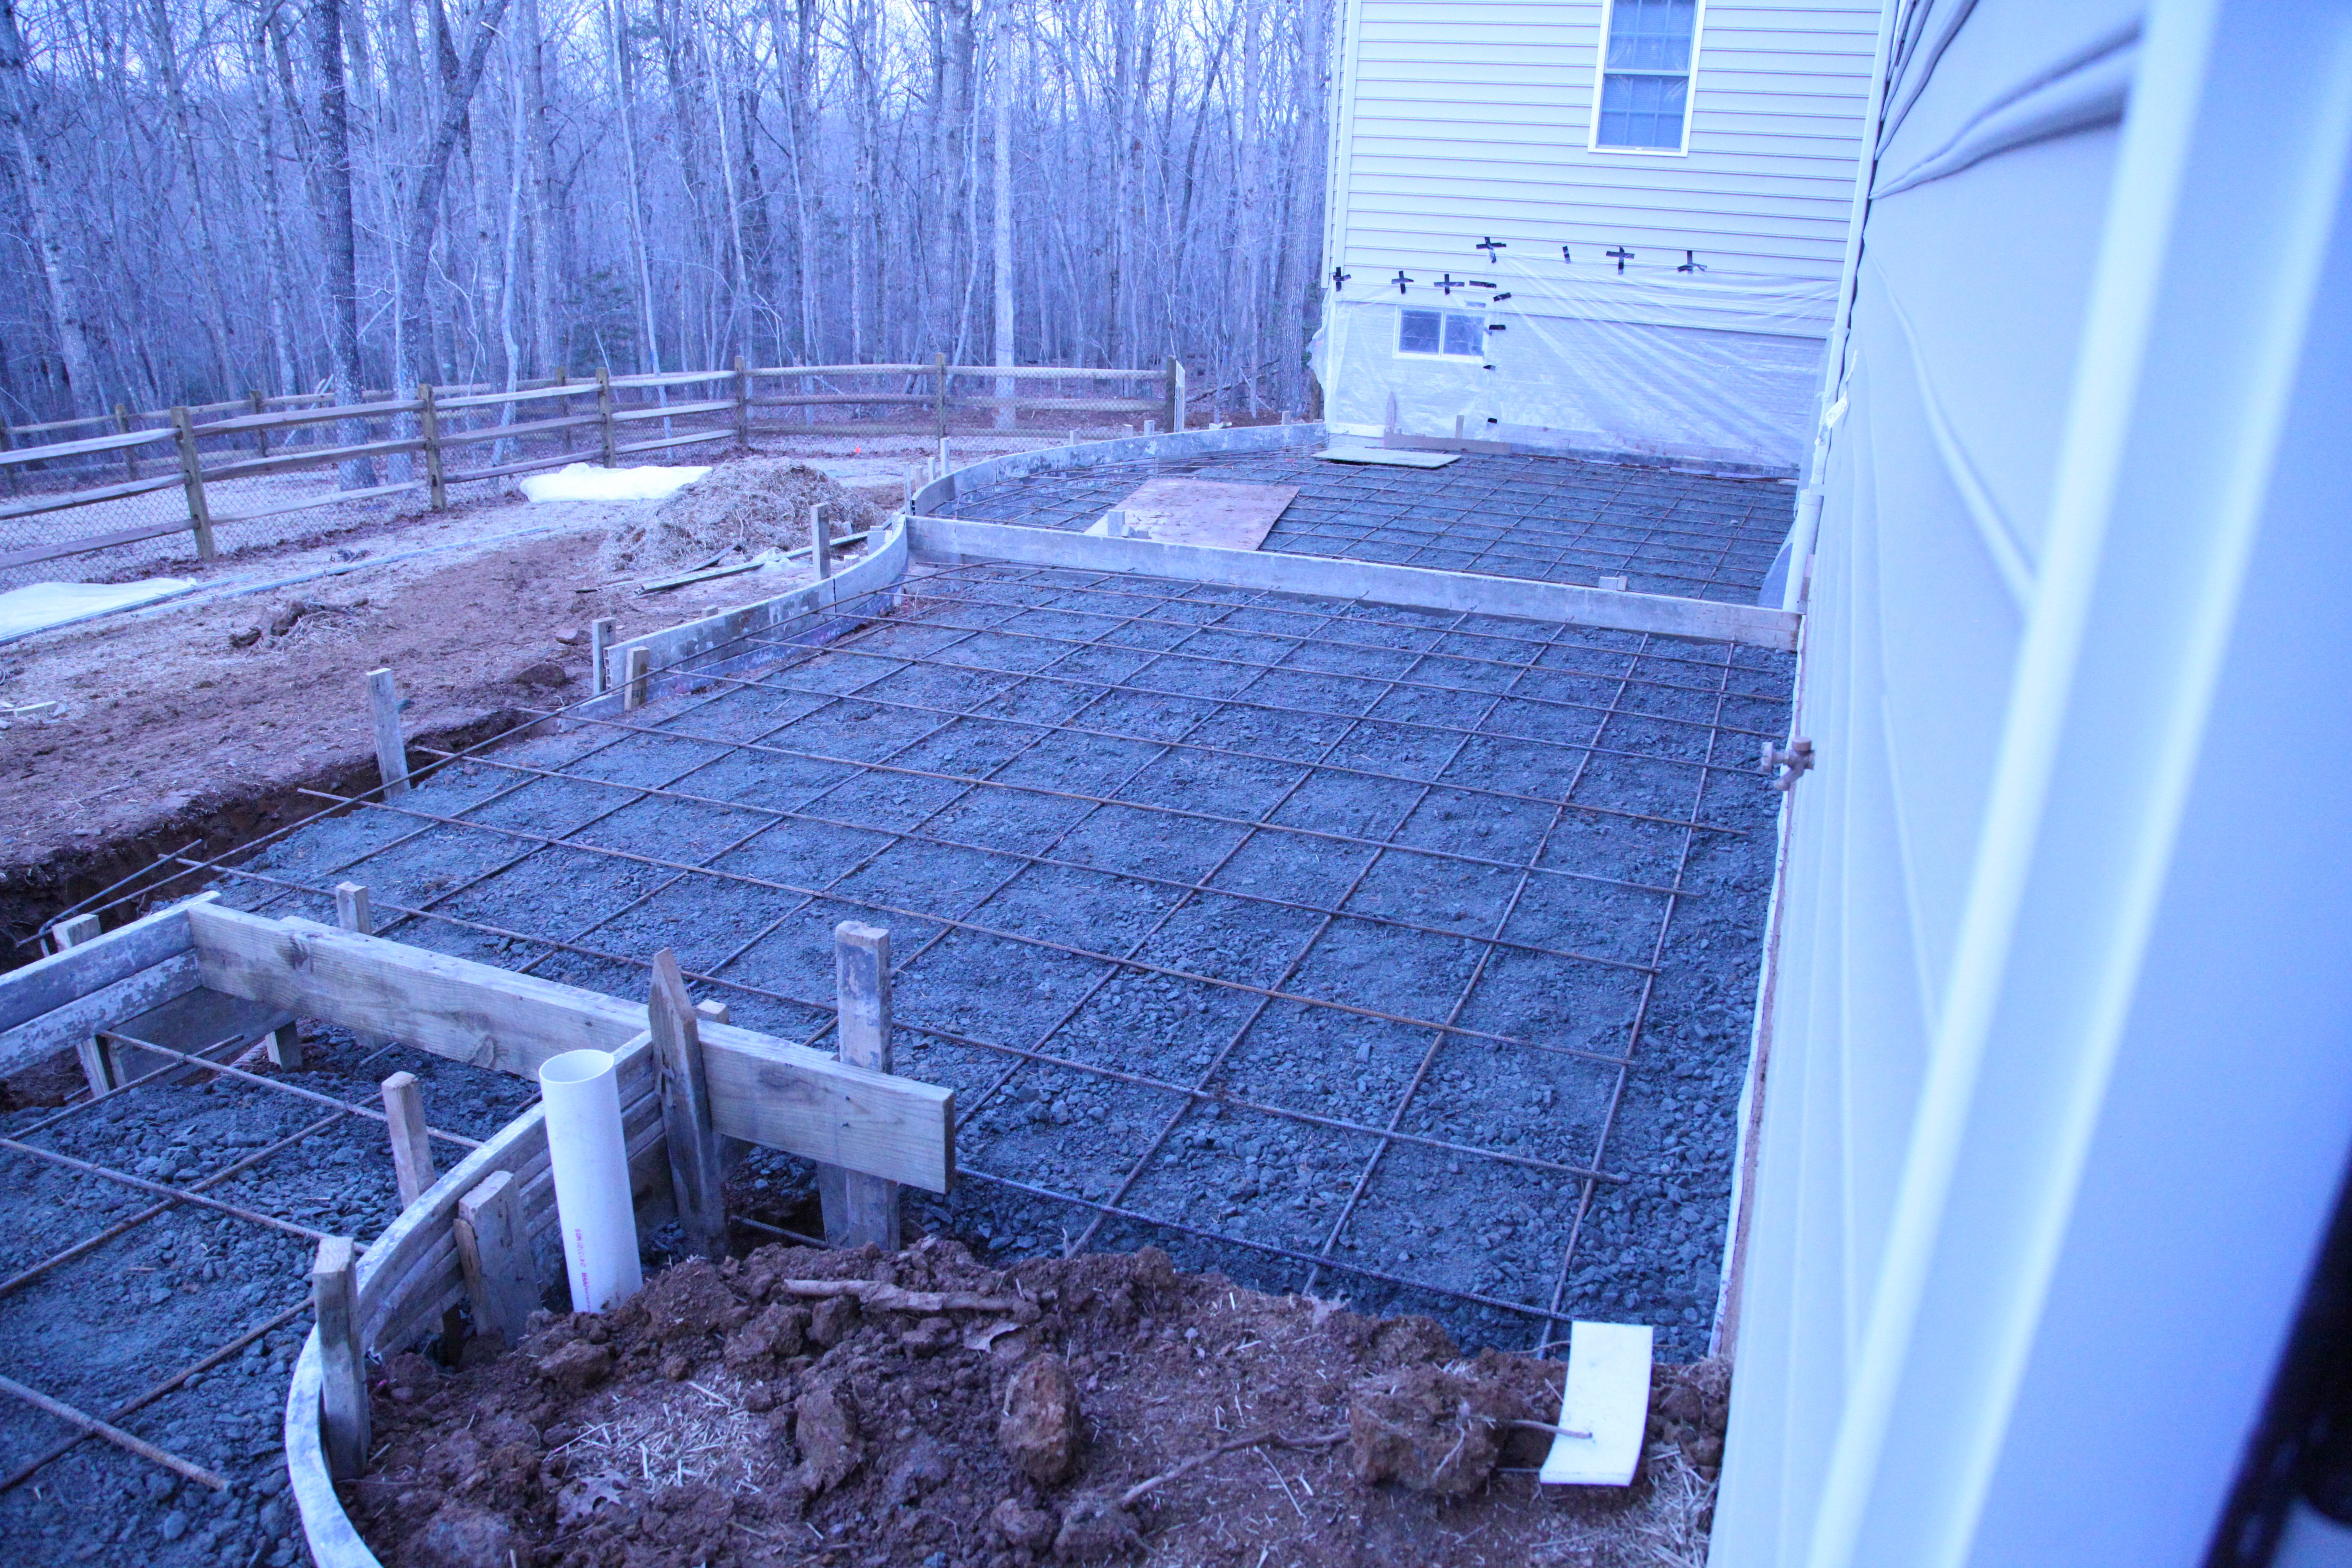
Preparing the space took upwards of a week:
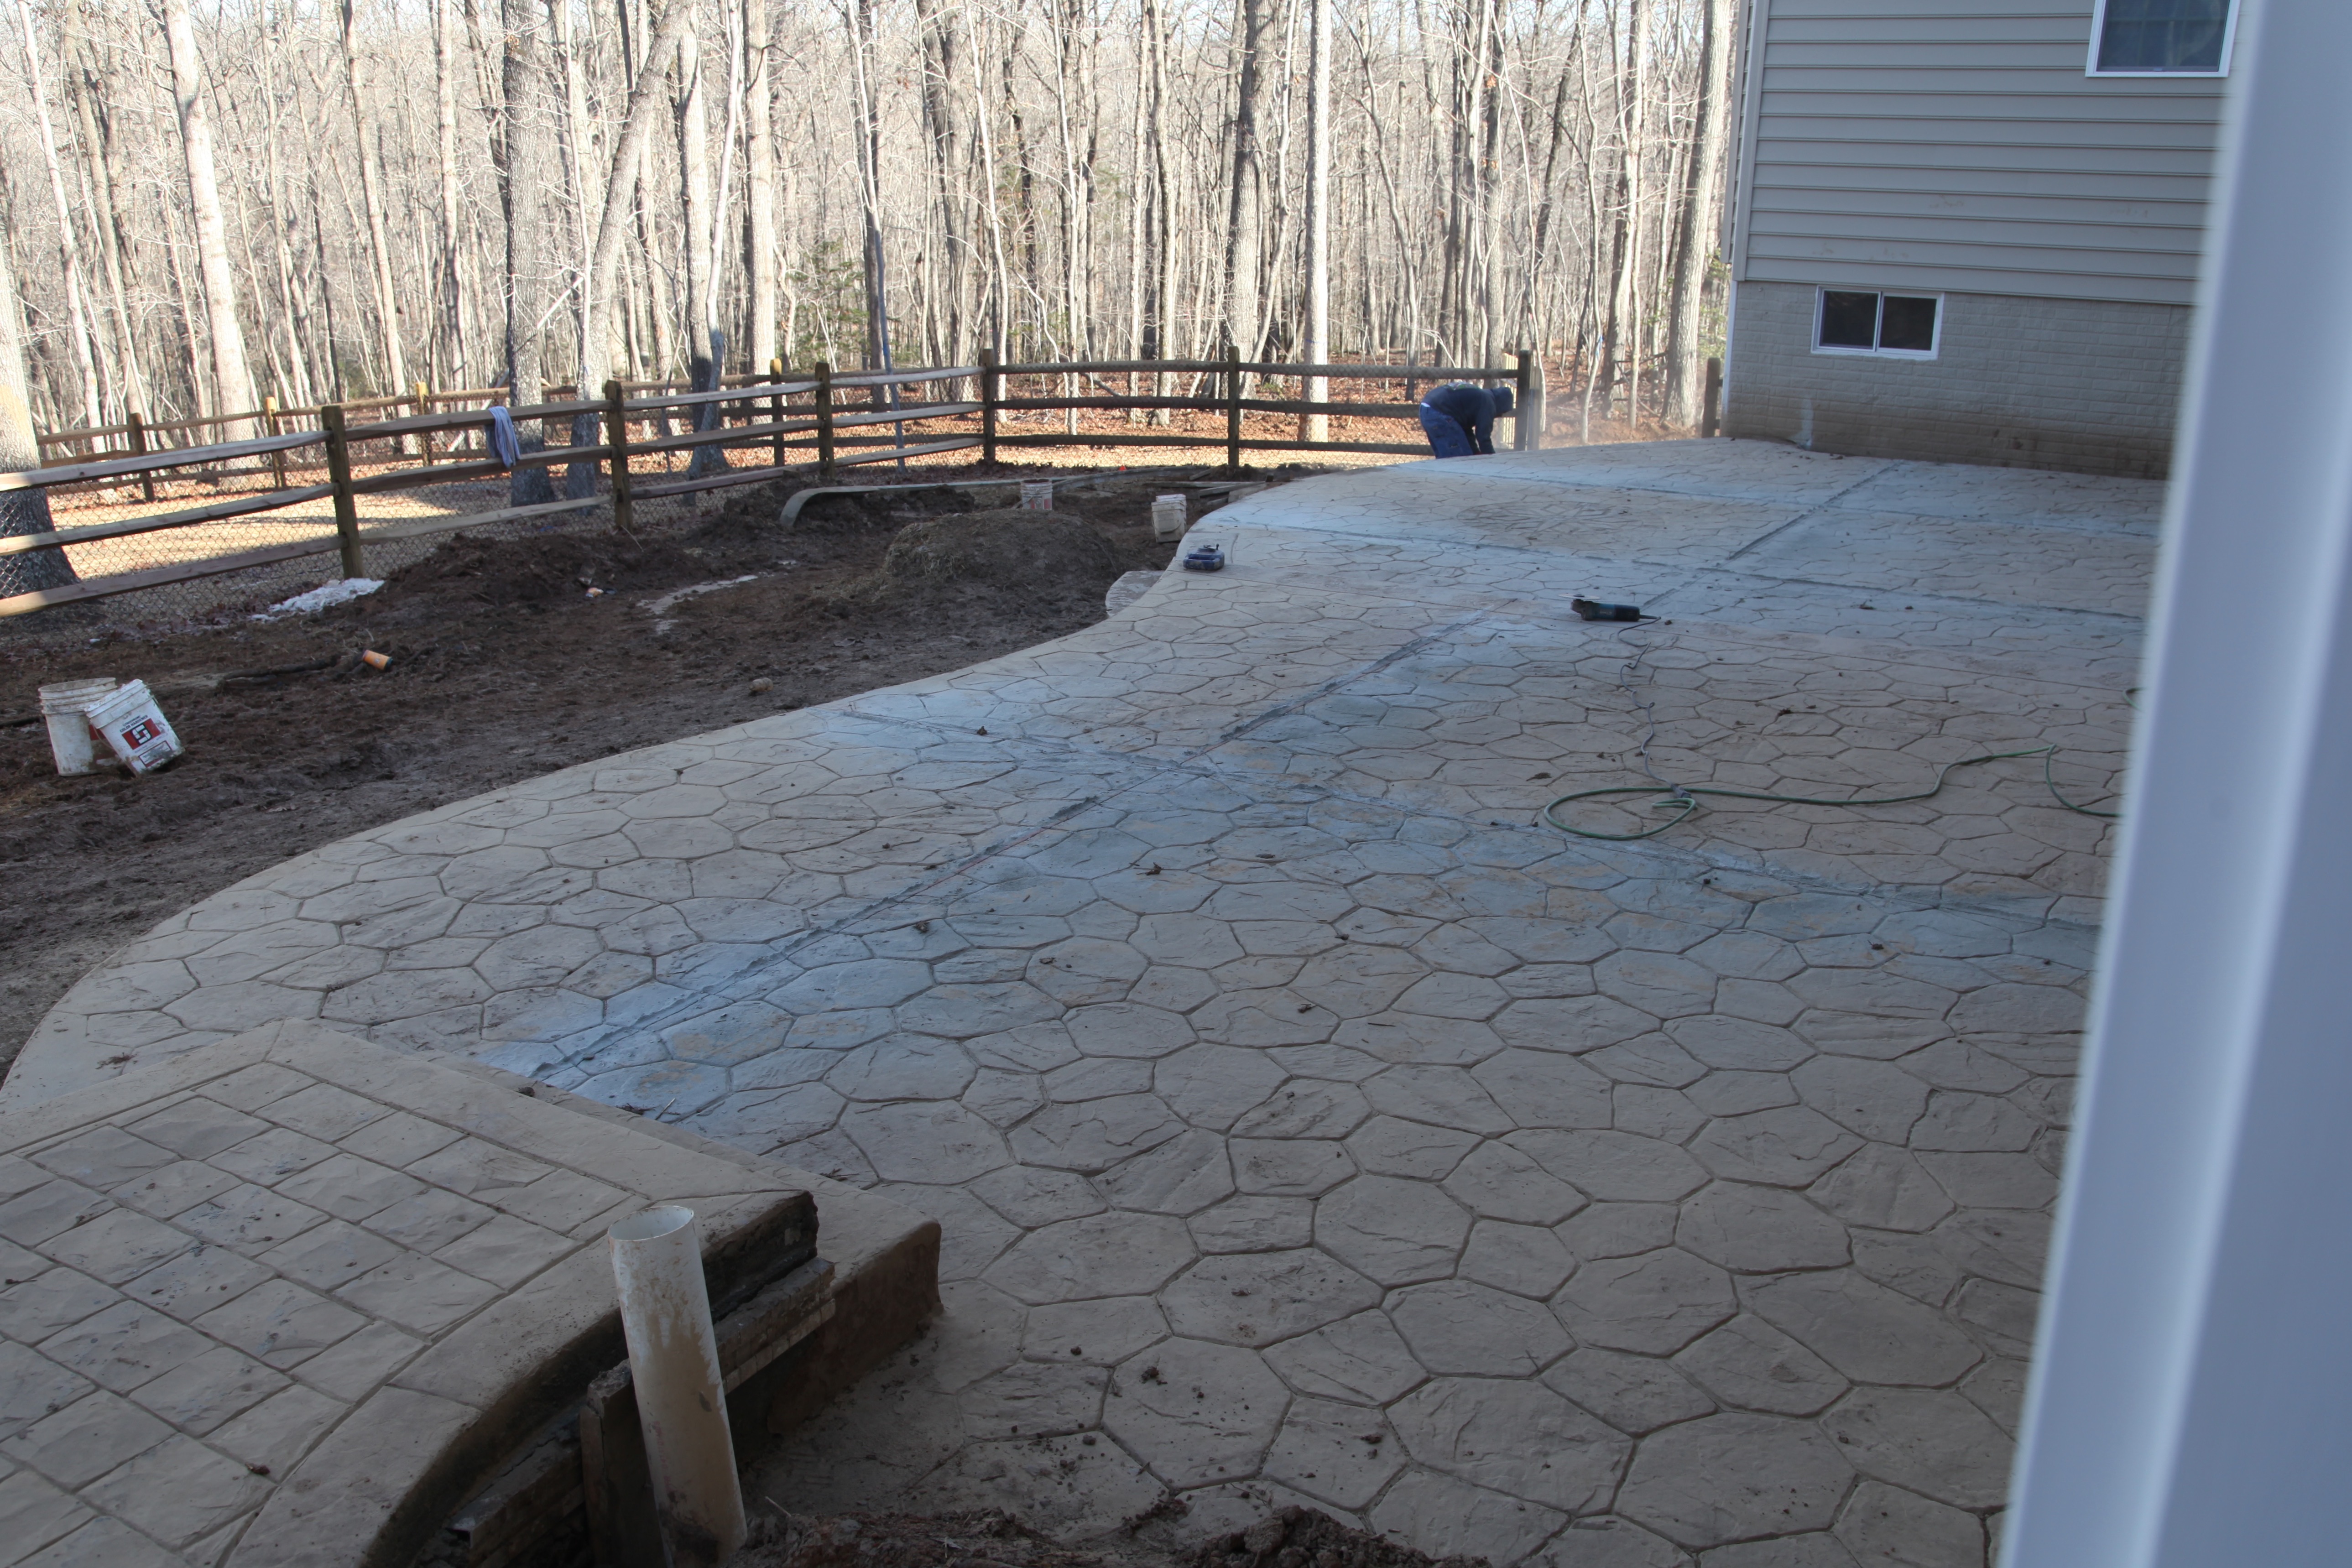
I neglected to get pictures of them pouring the concrete because I was mesmerized by them running their little bobcat that carried the concrete in and out of our yard and how they spread it out and evened it all out…it was quite the process. Then the stamping began, they truly are artisans, all of our choices started to come to life.
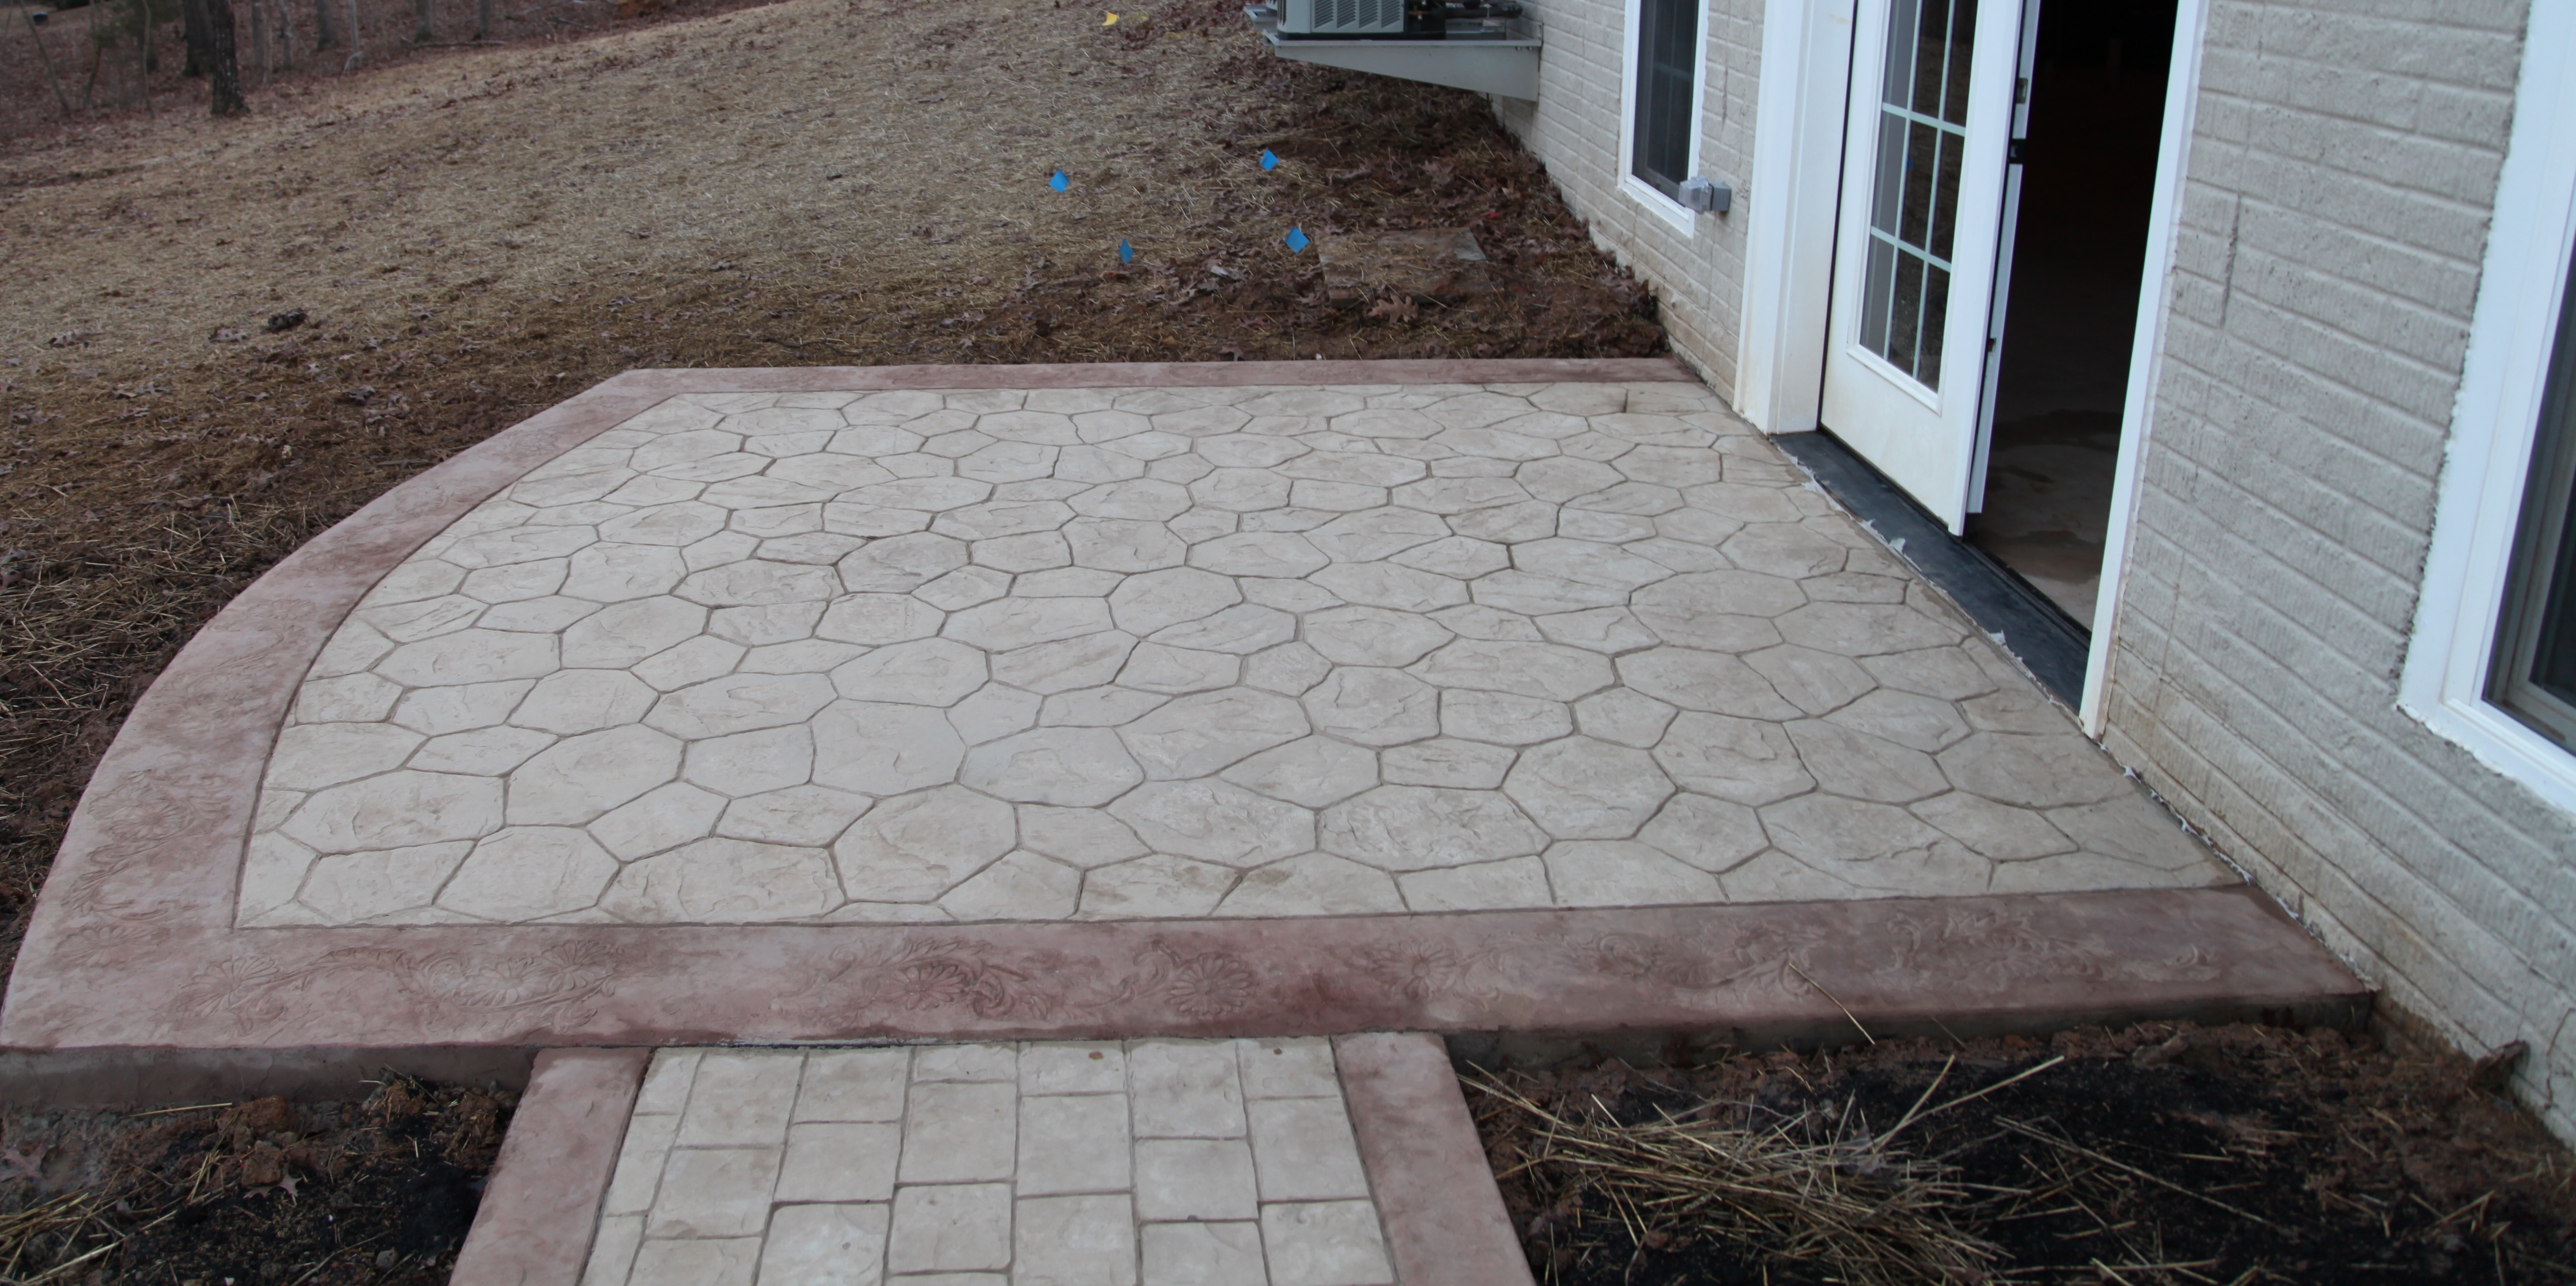
We chose two different patterns, one for the main body of the patio and a different one for the walkways:
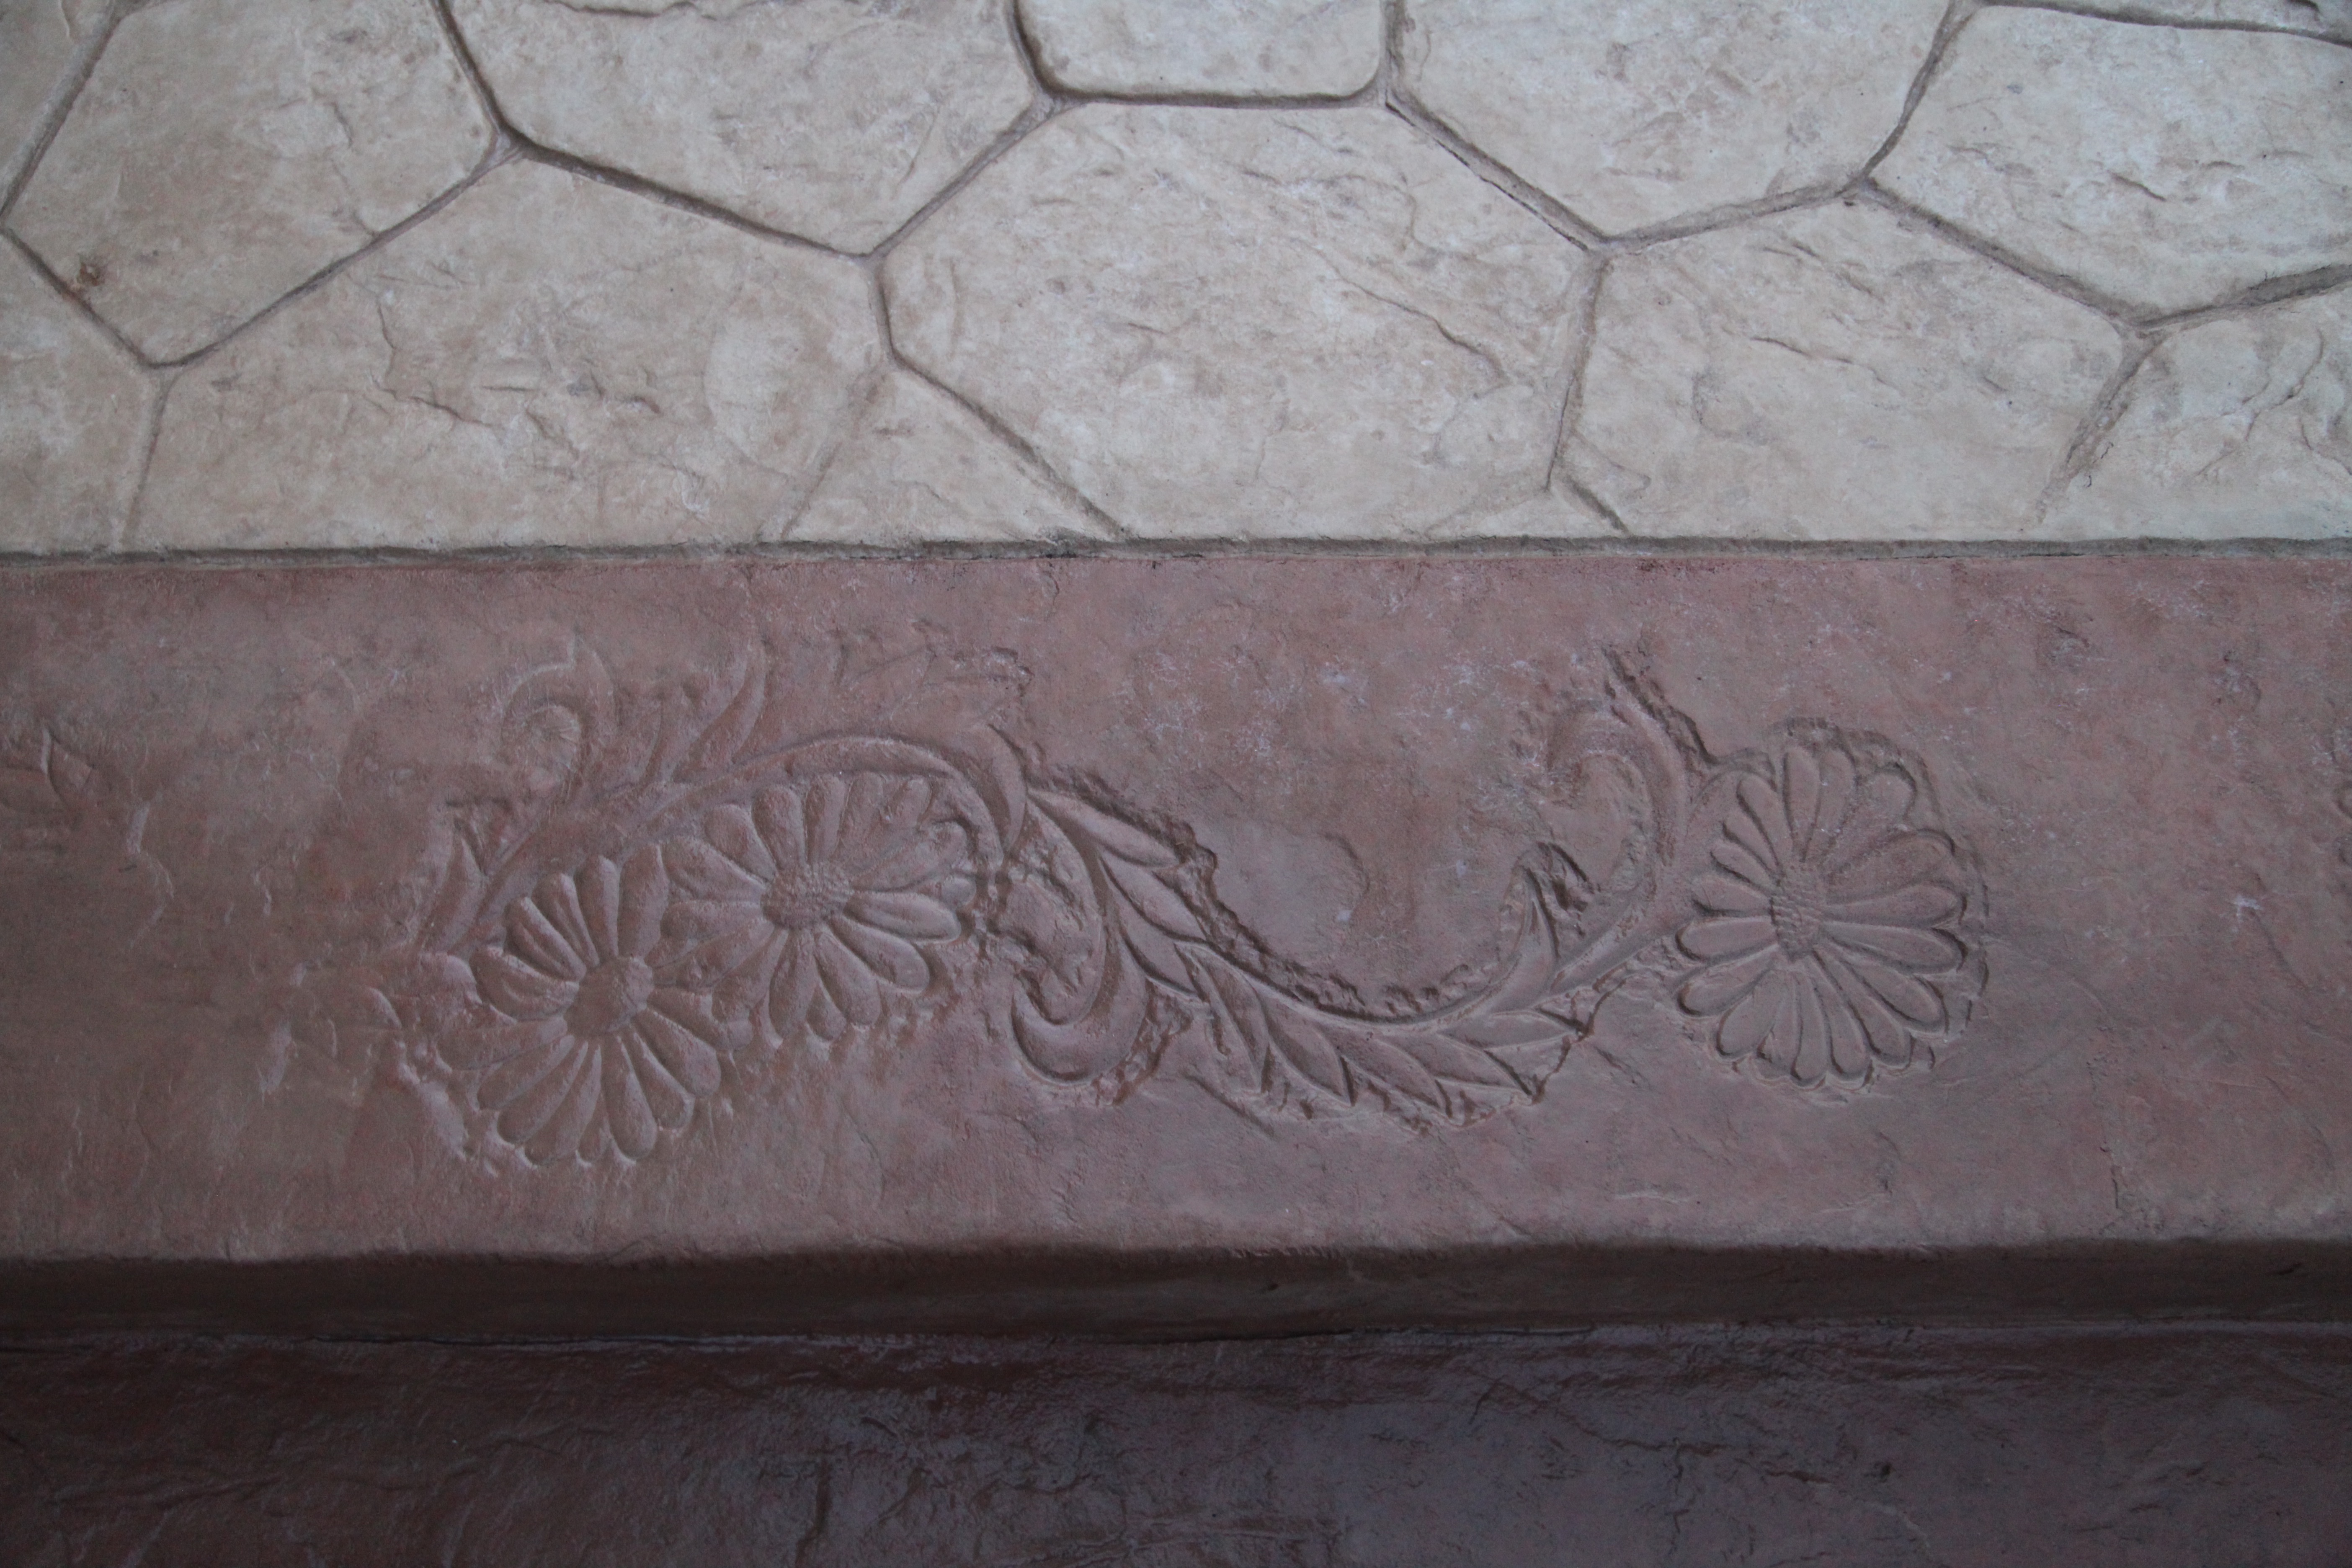
We chose a pretty daisy pattern for the borders; have I mentioned before that gerber daisies are my very favorite flower? 🙂
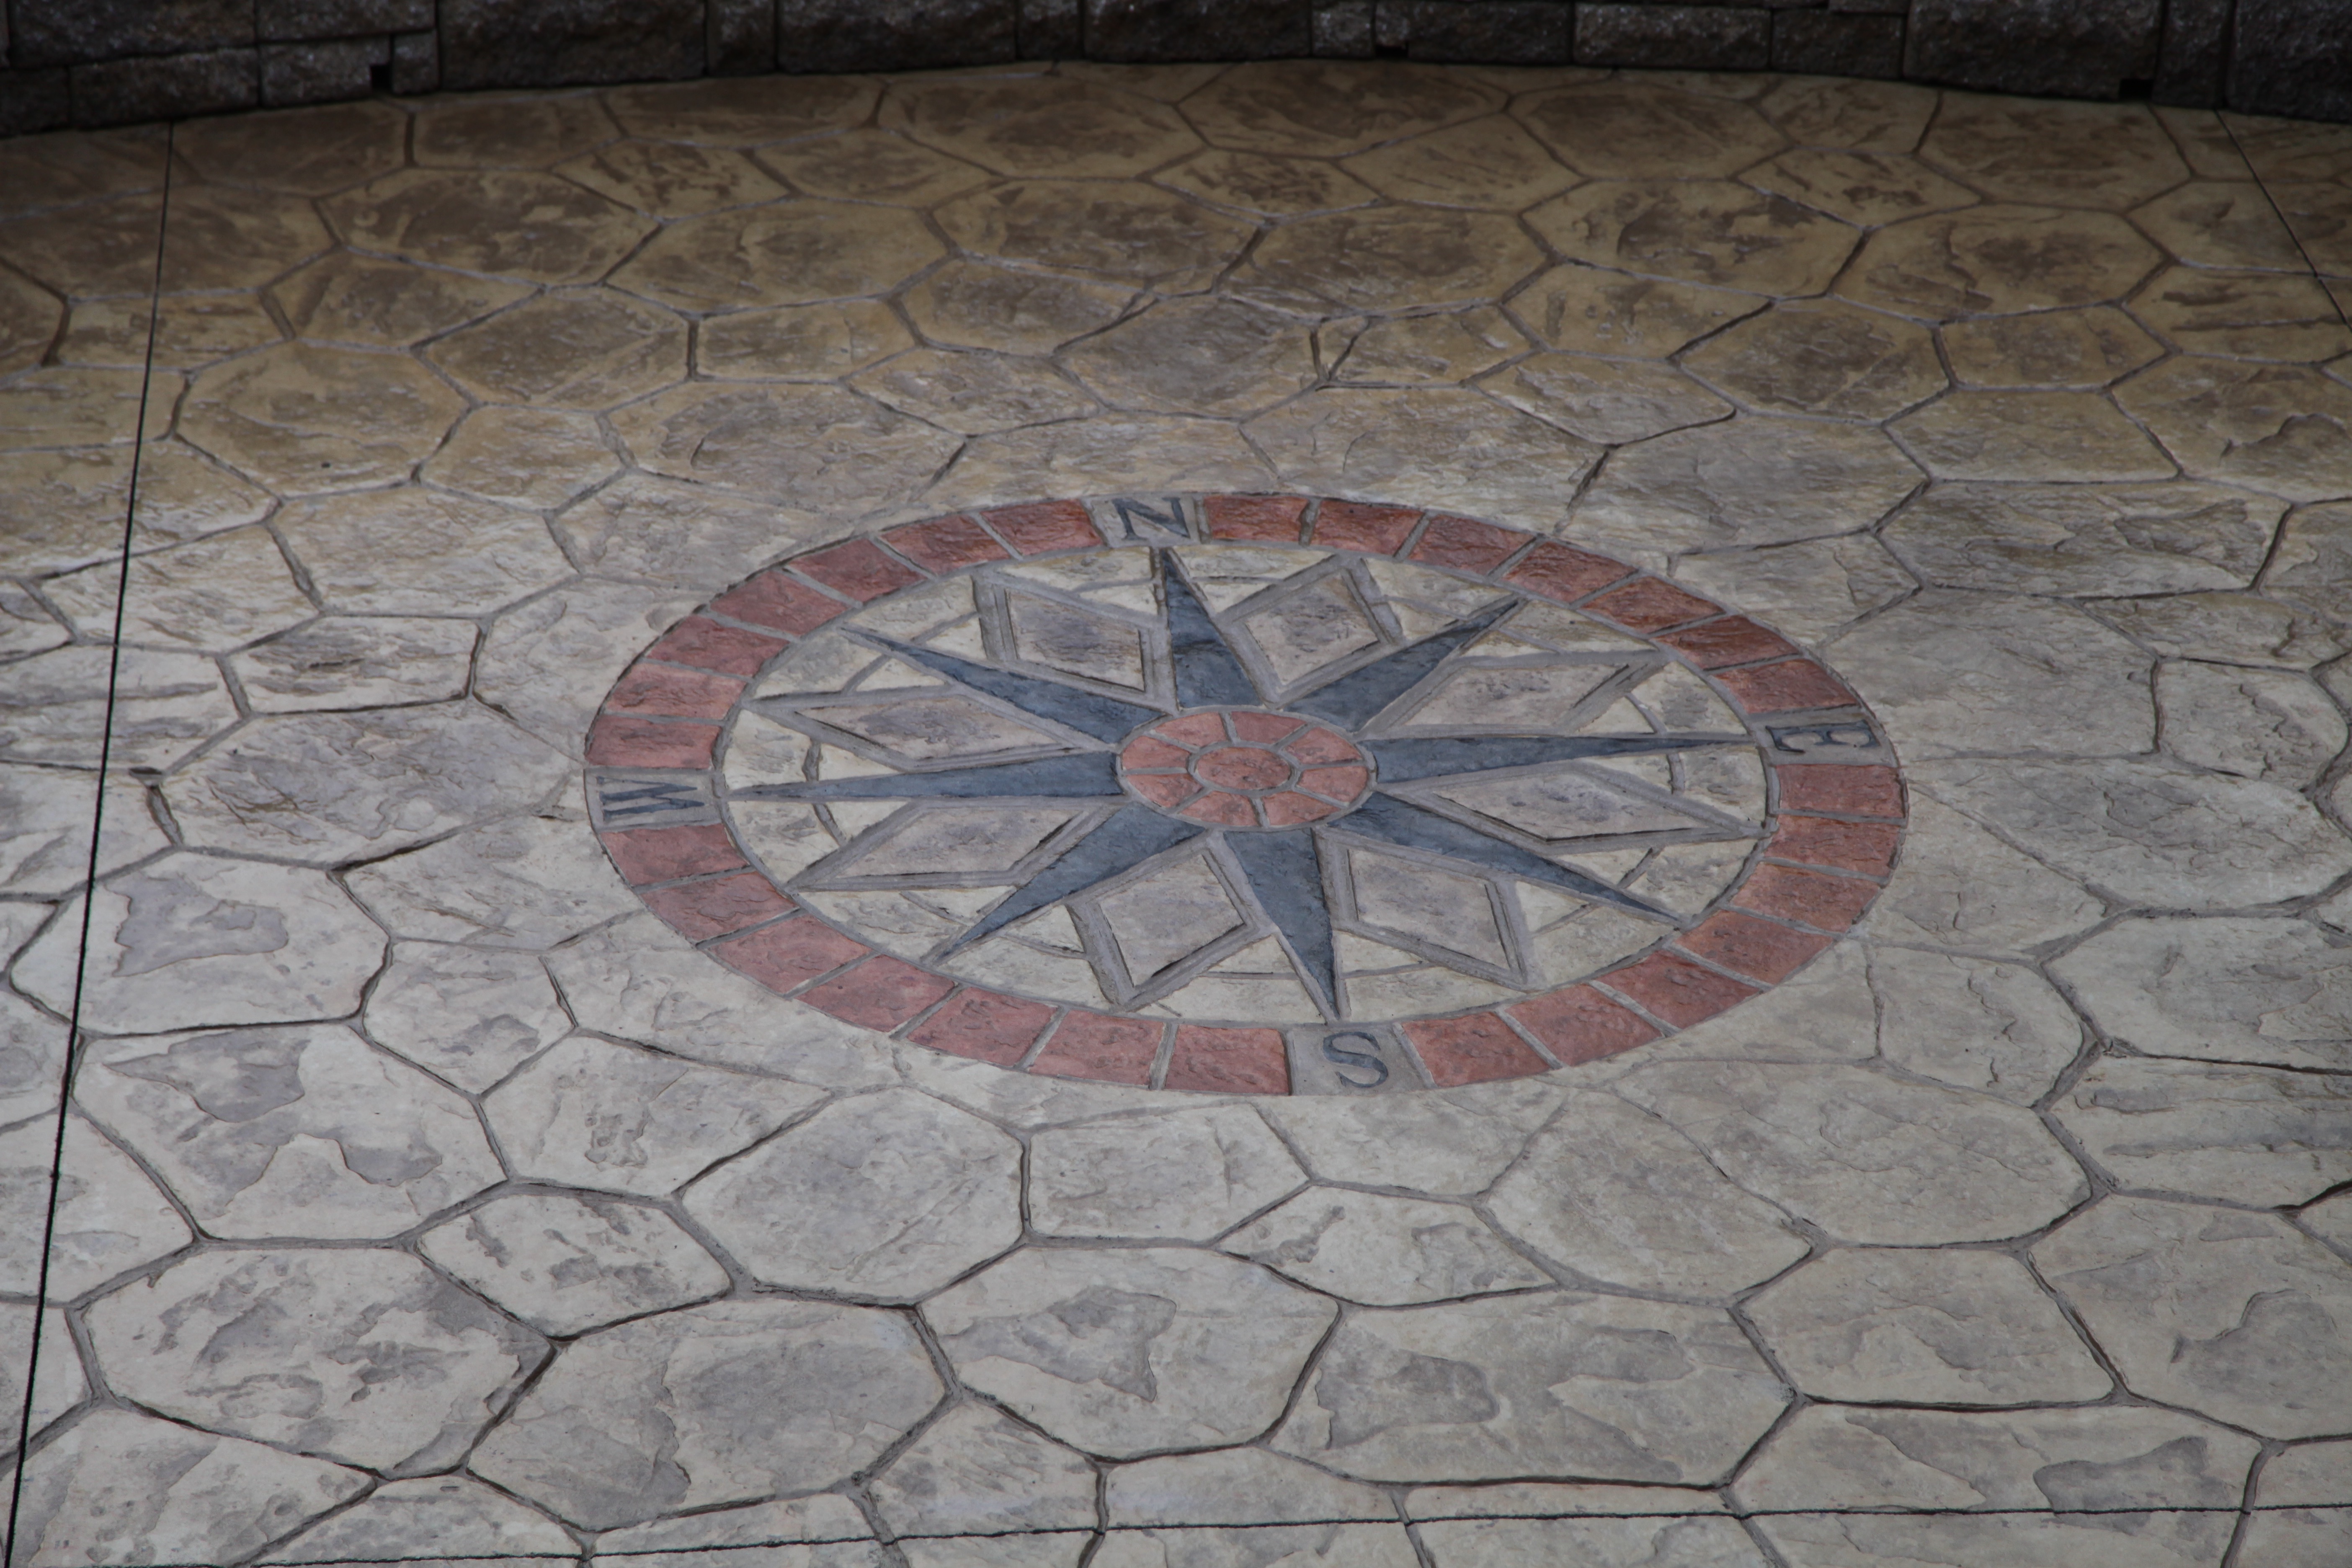
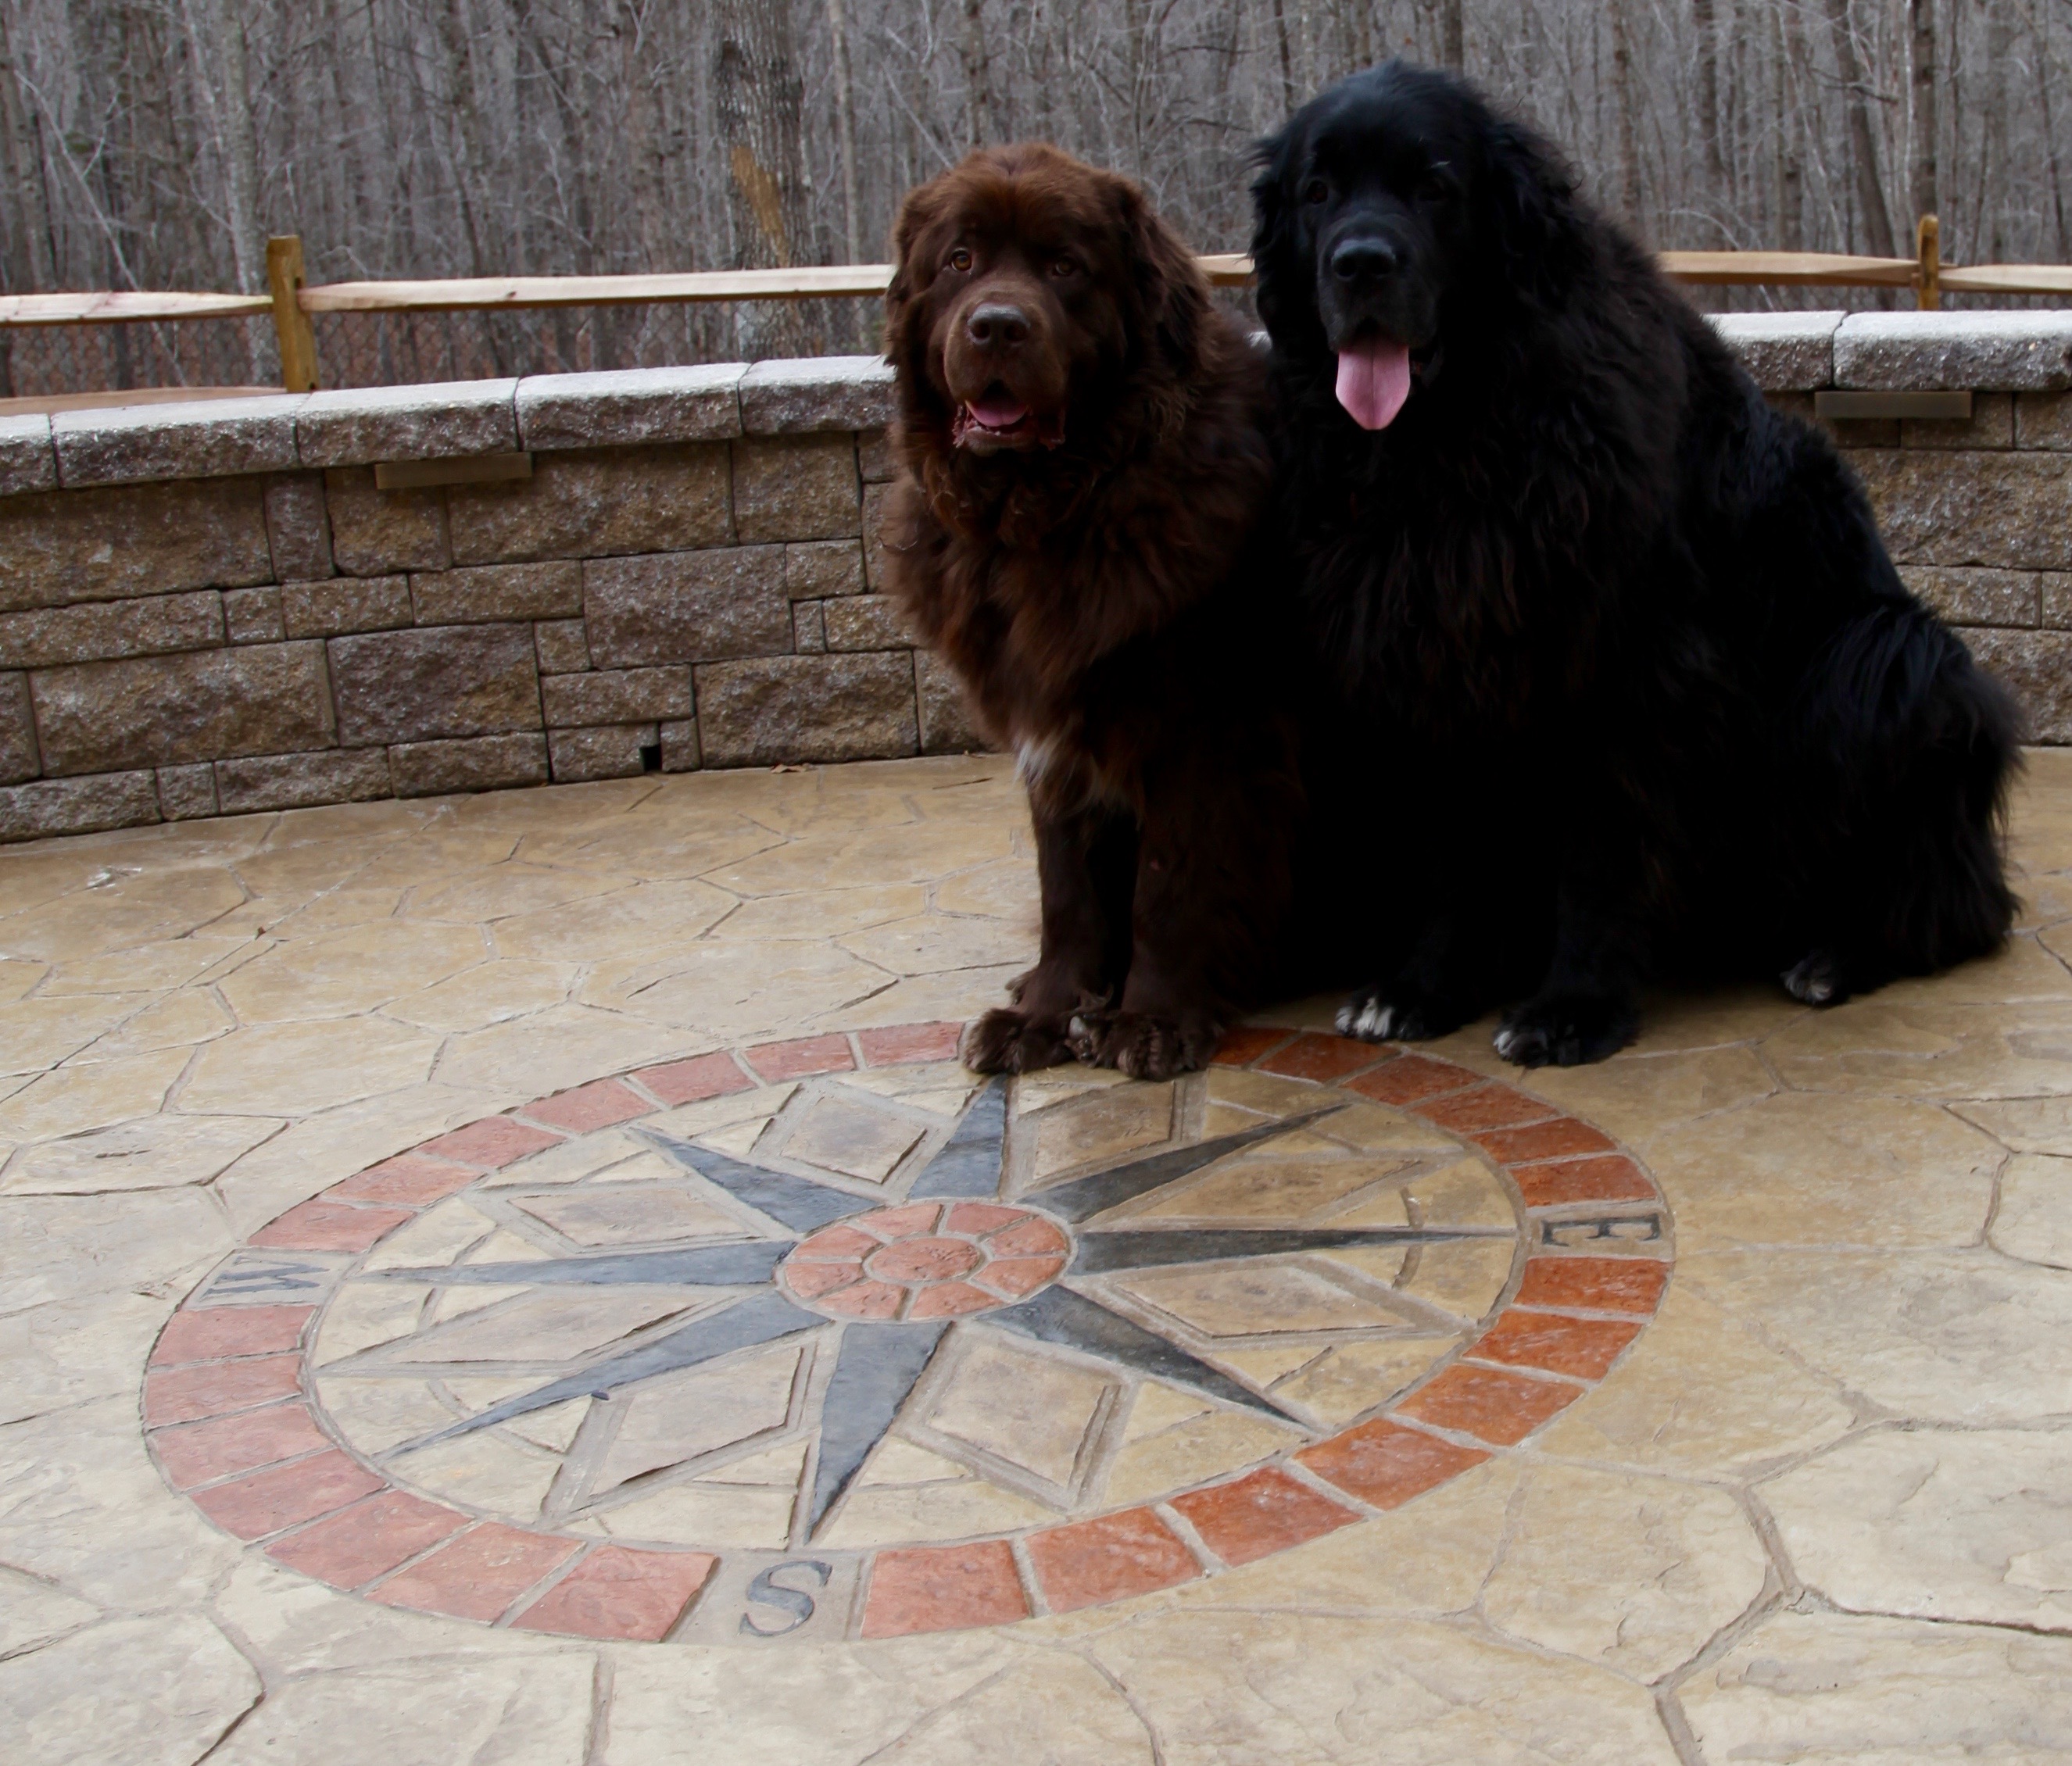
We chose to put a compass rose on the largest part of the patio:
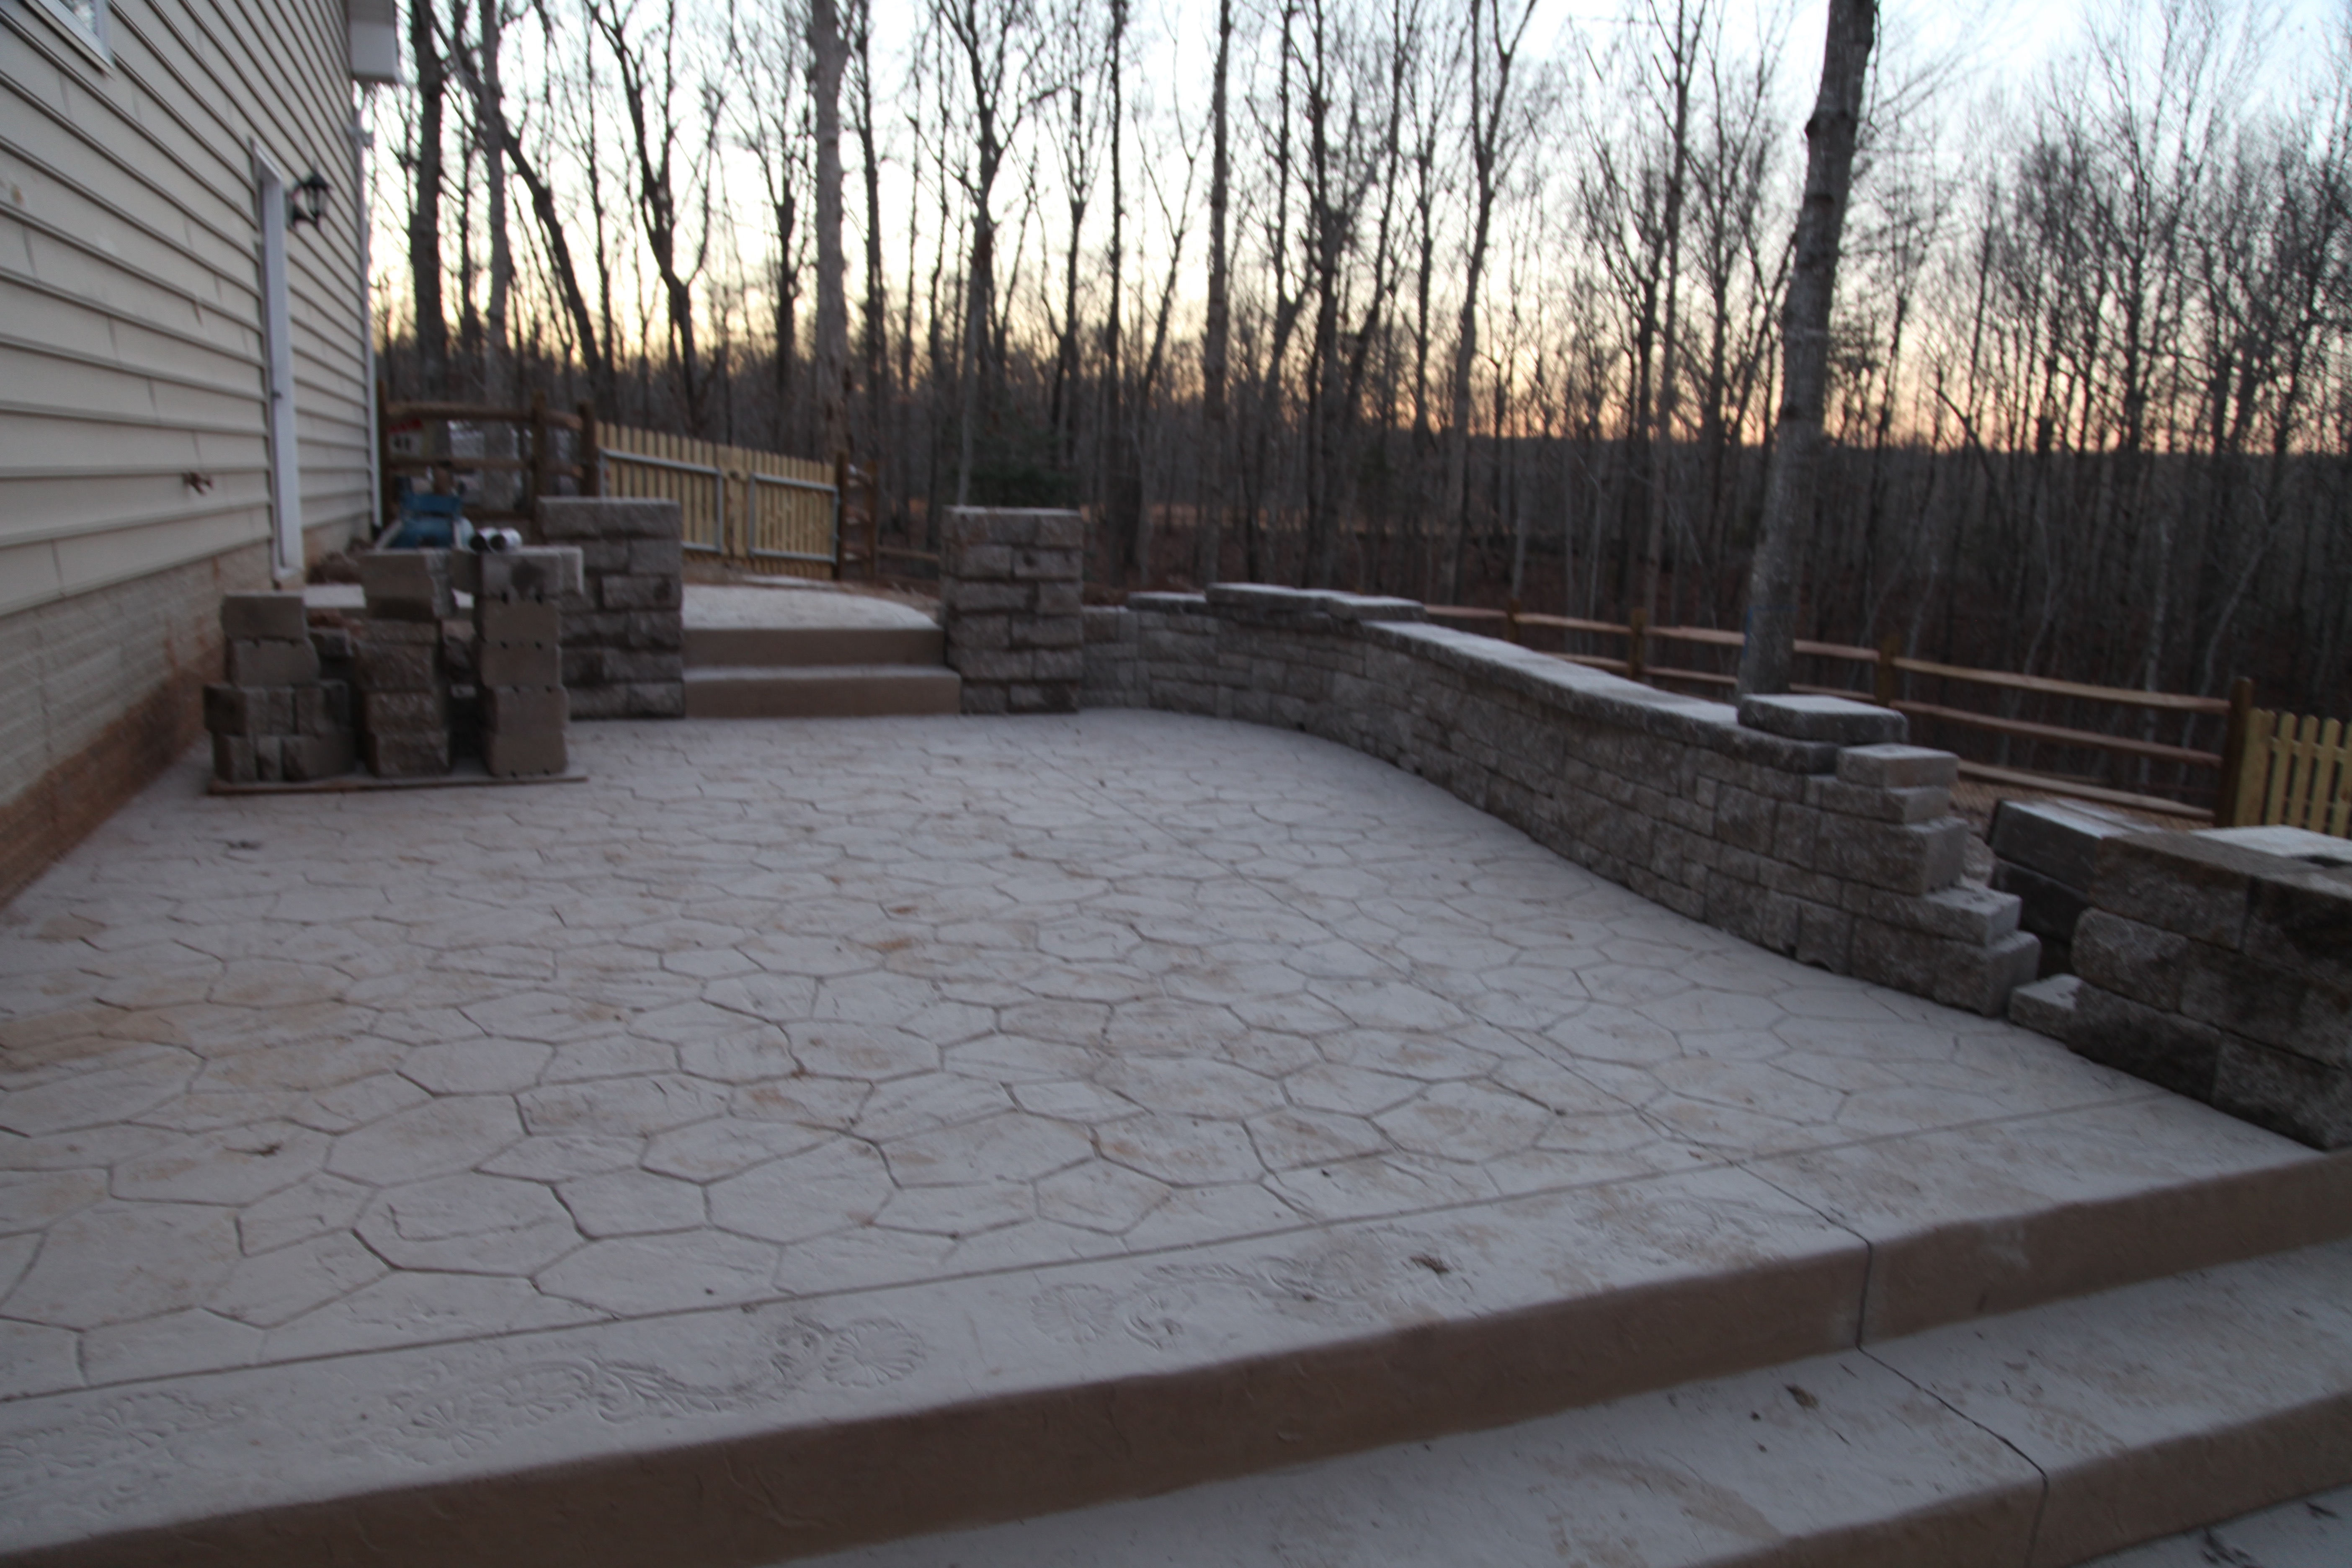
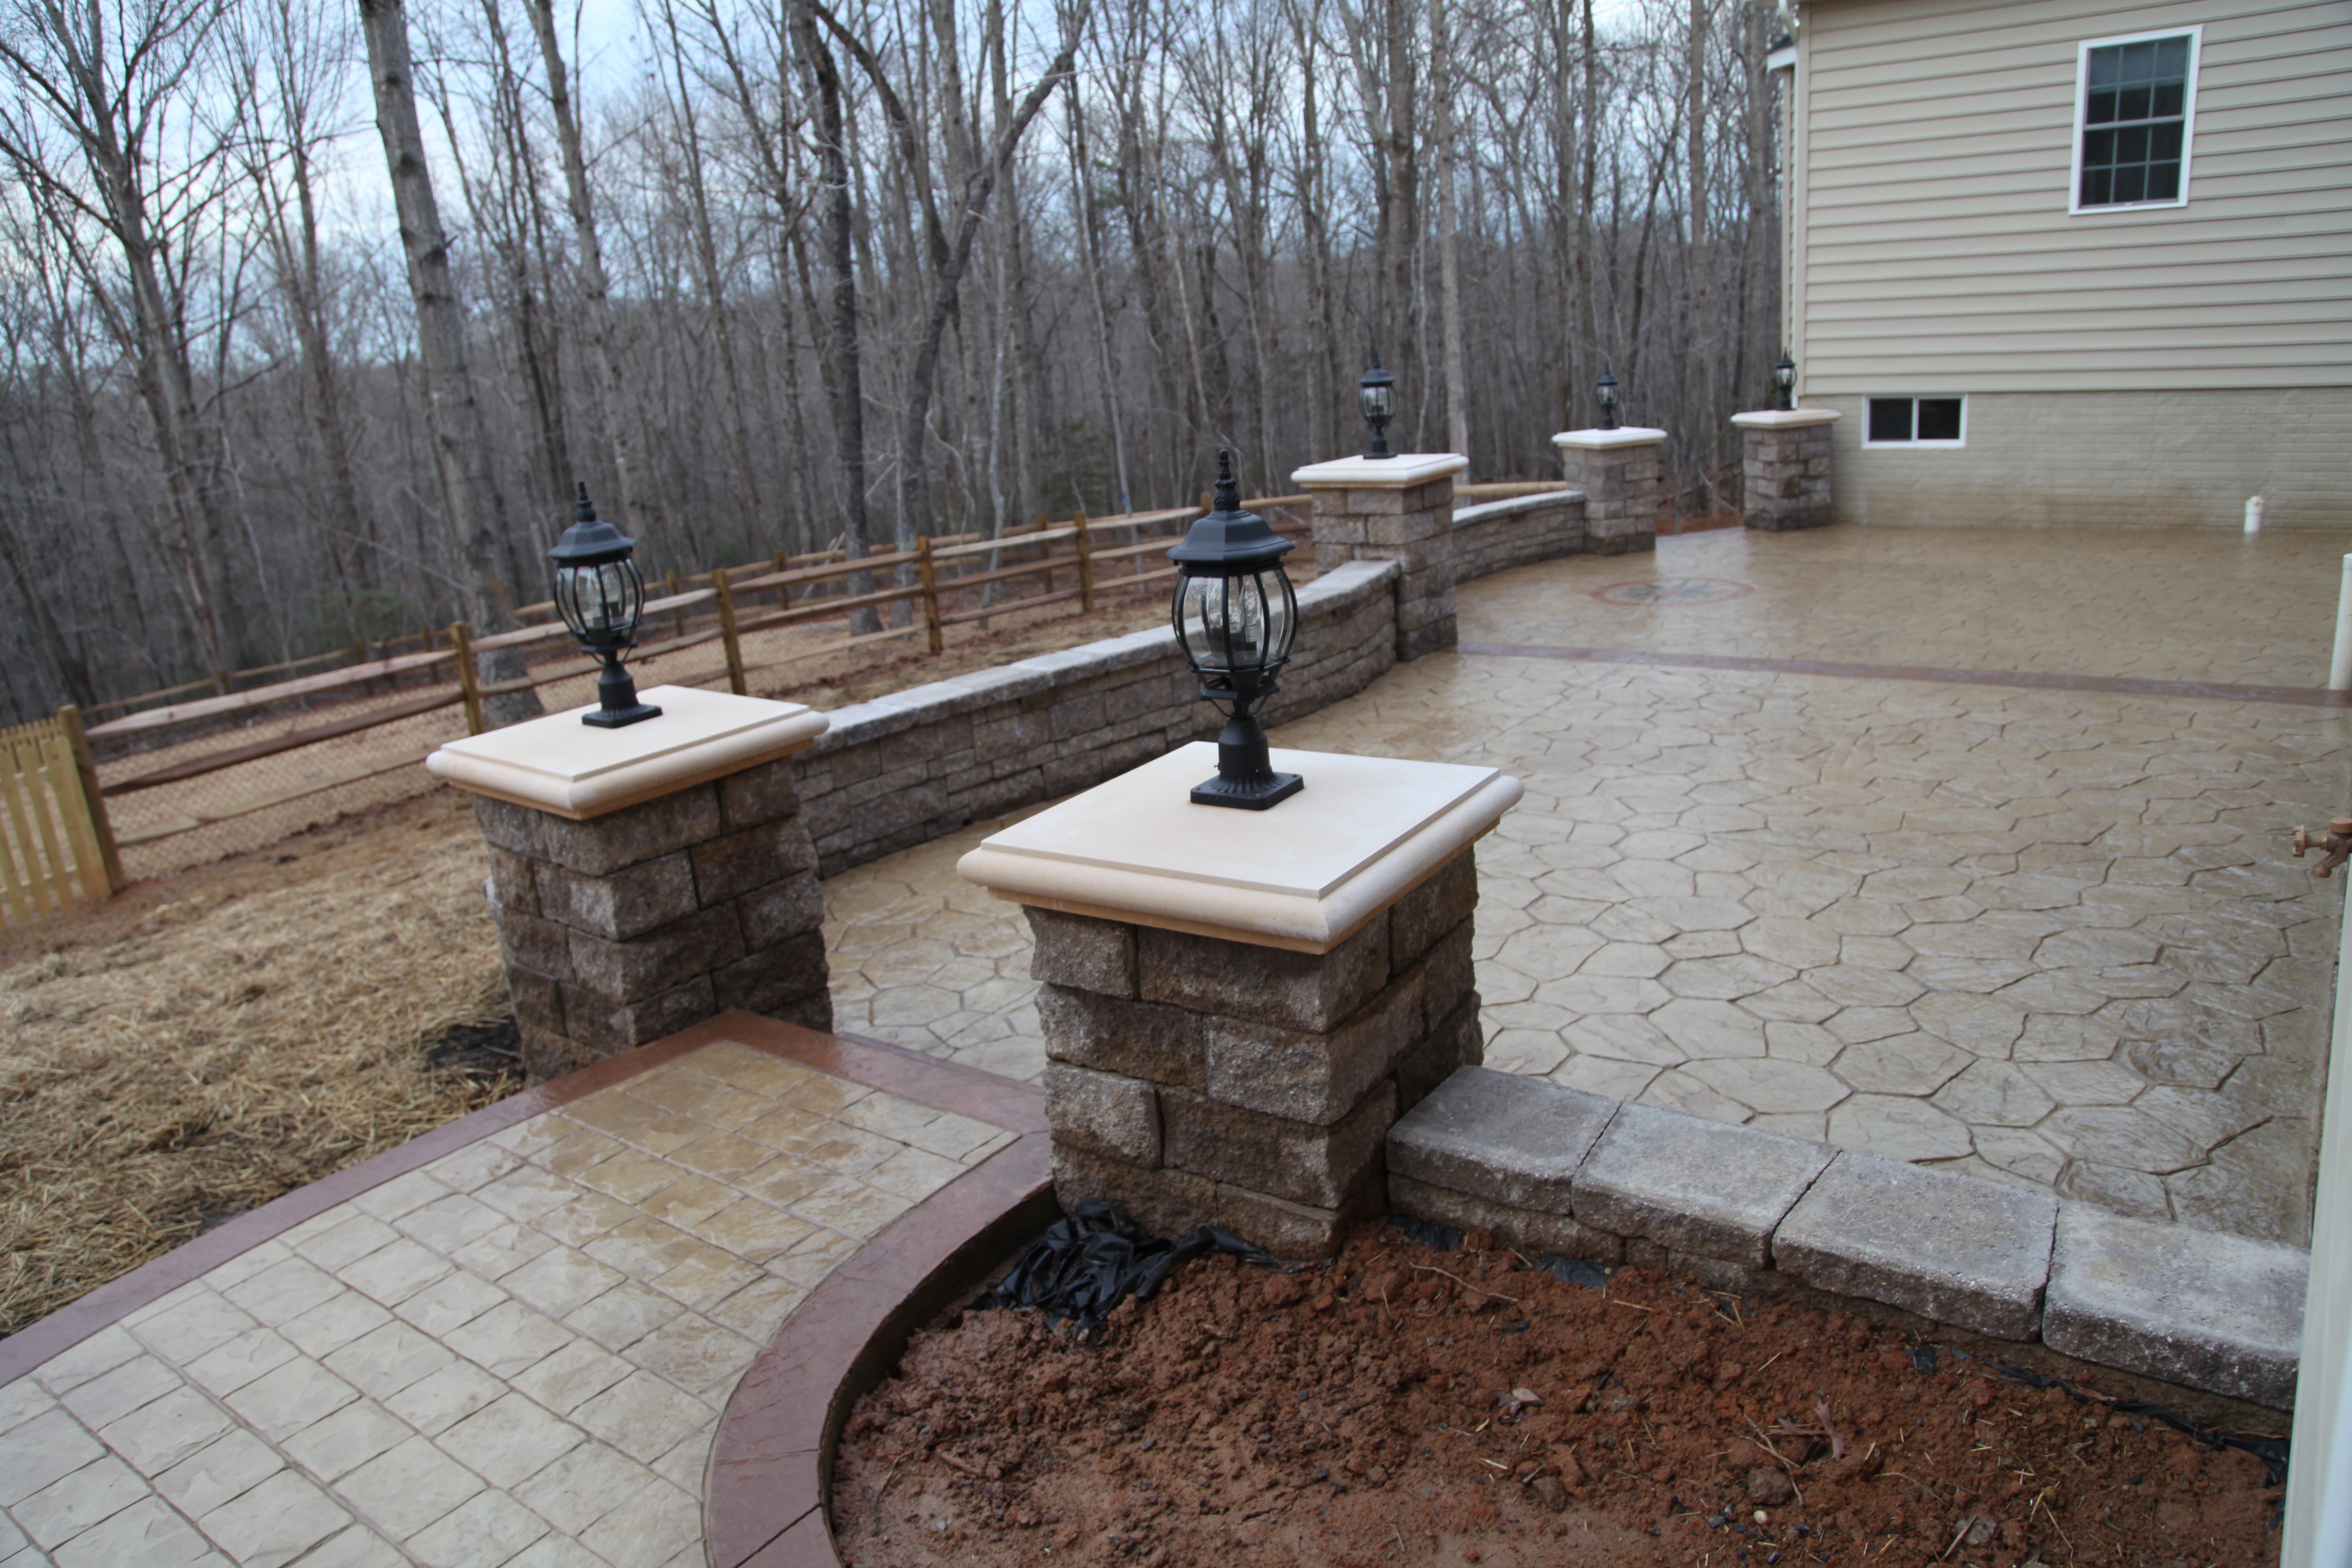
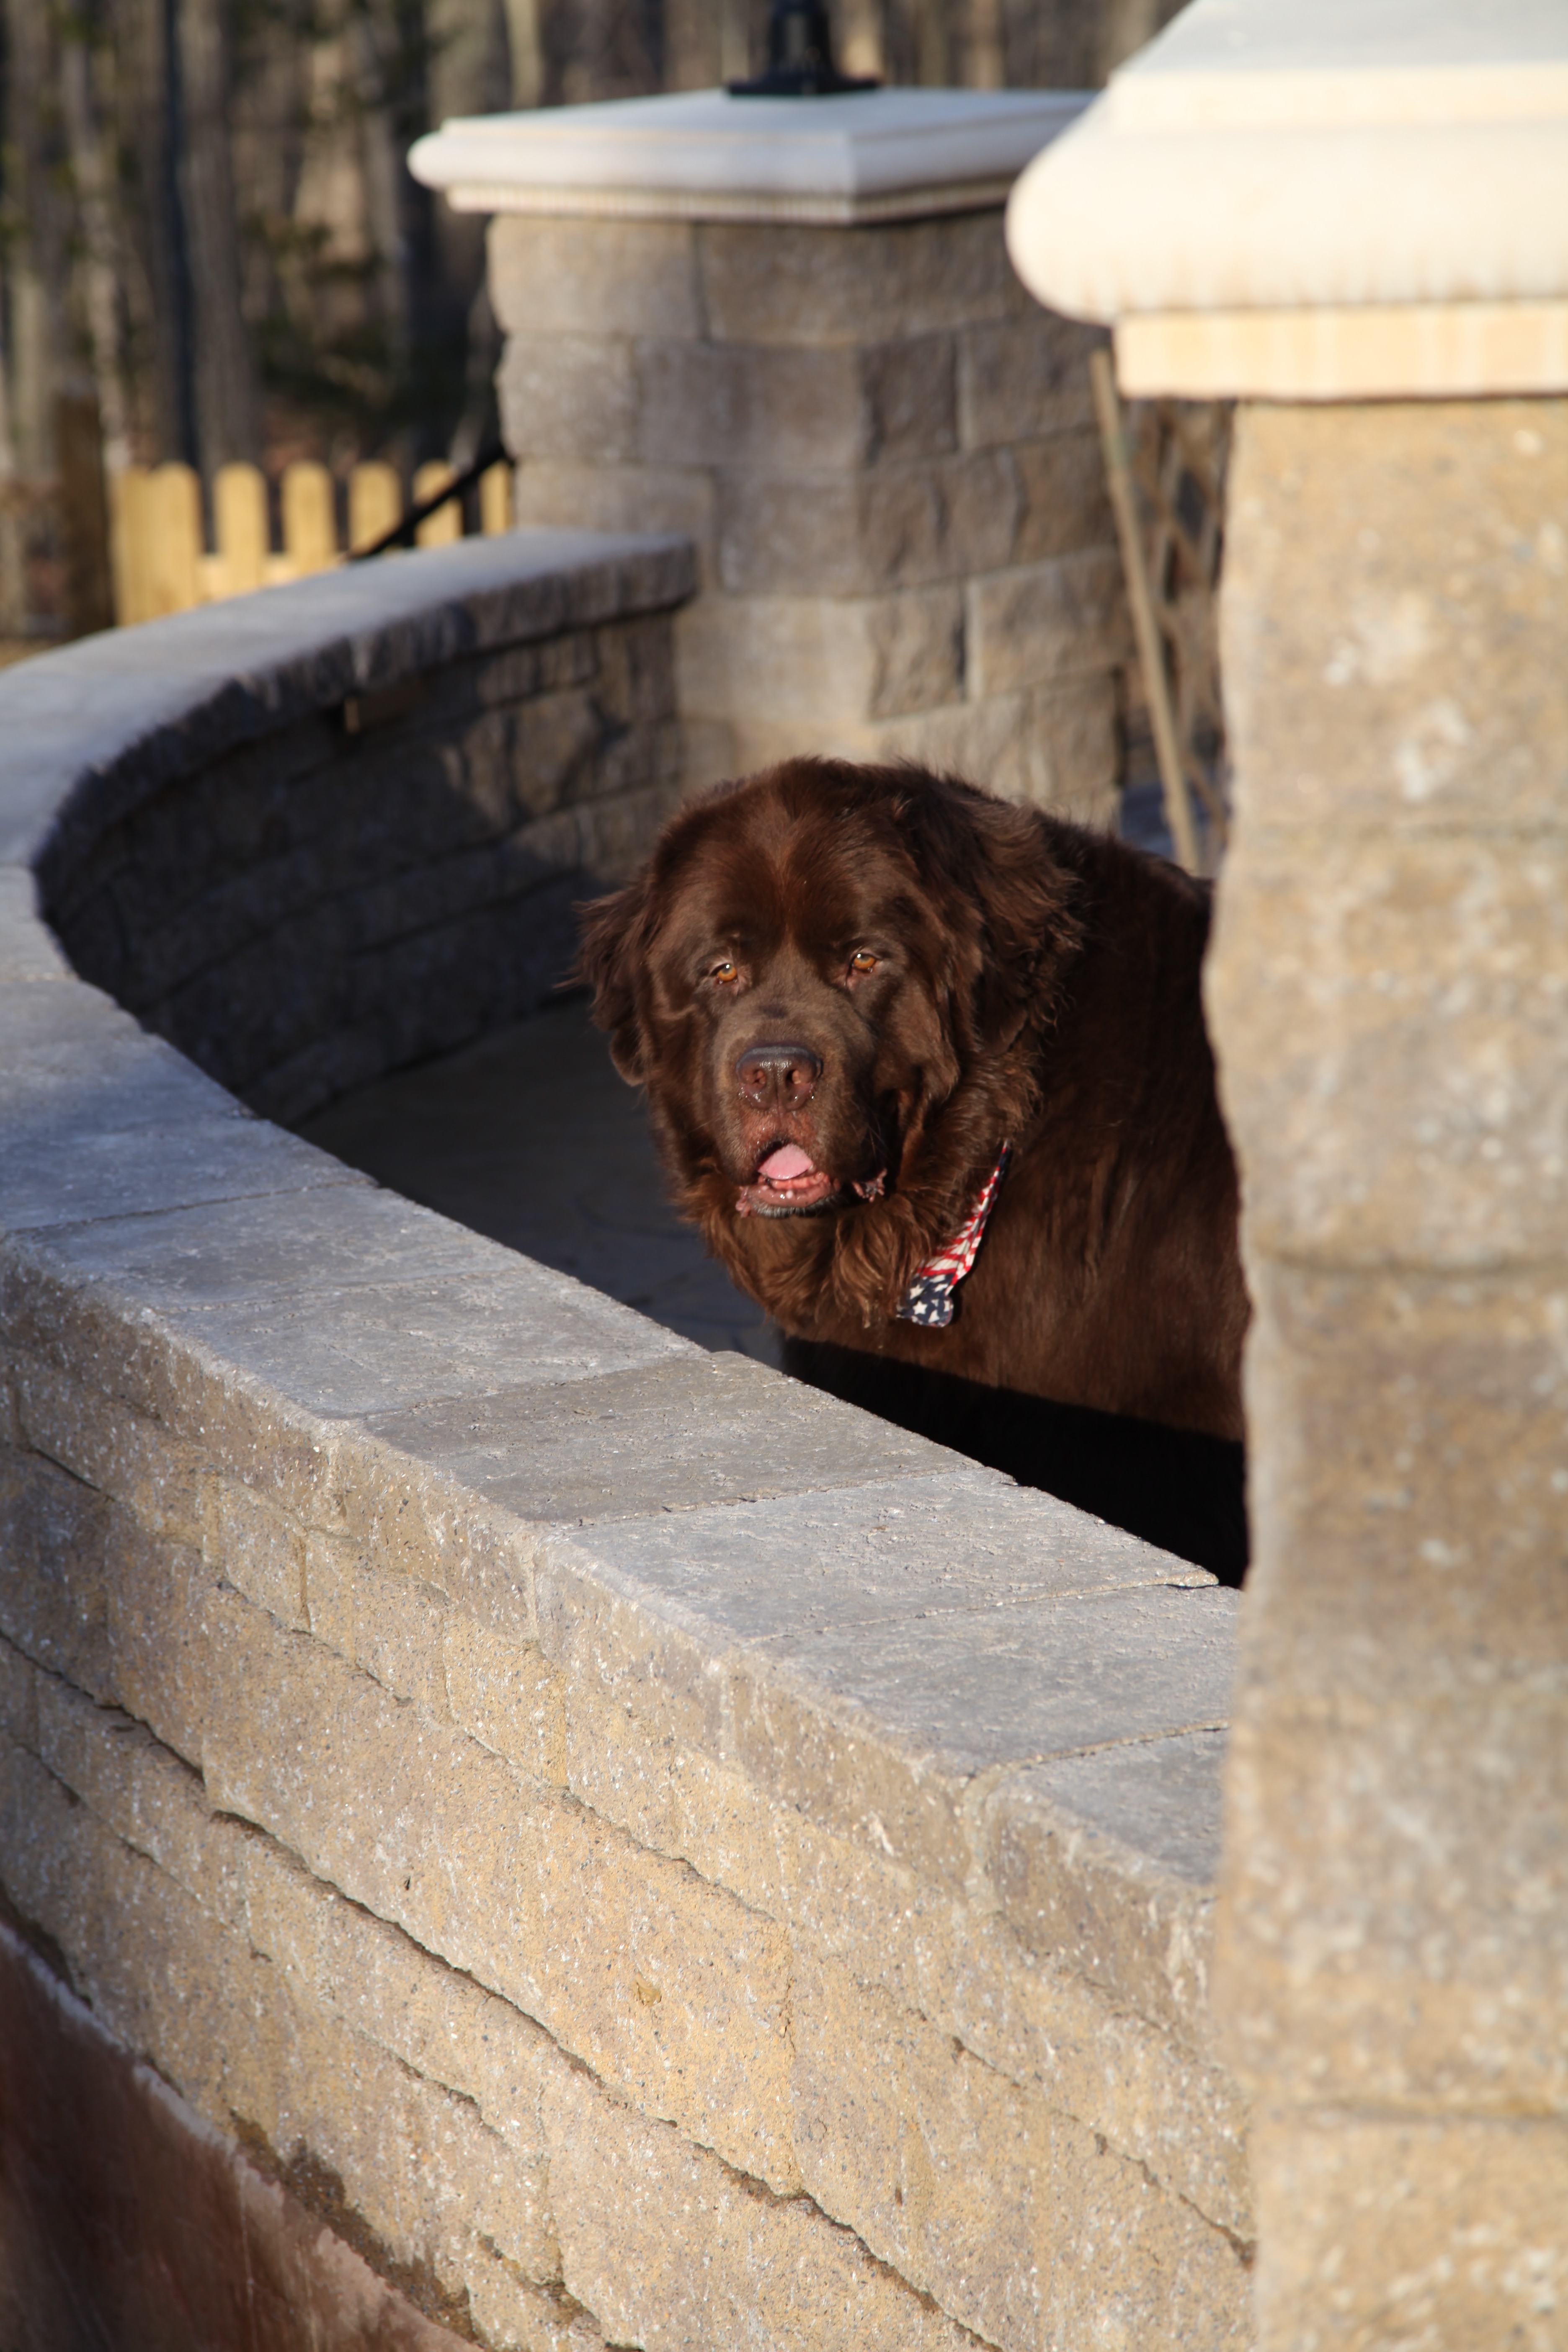
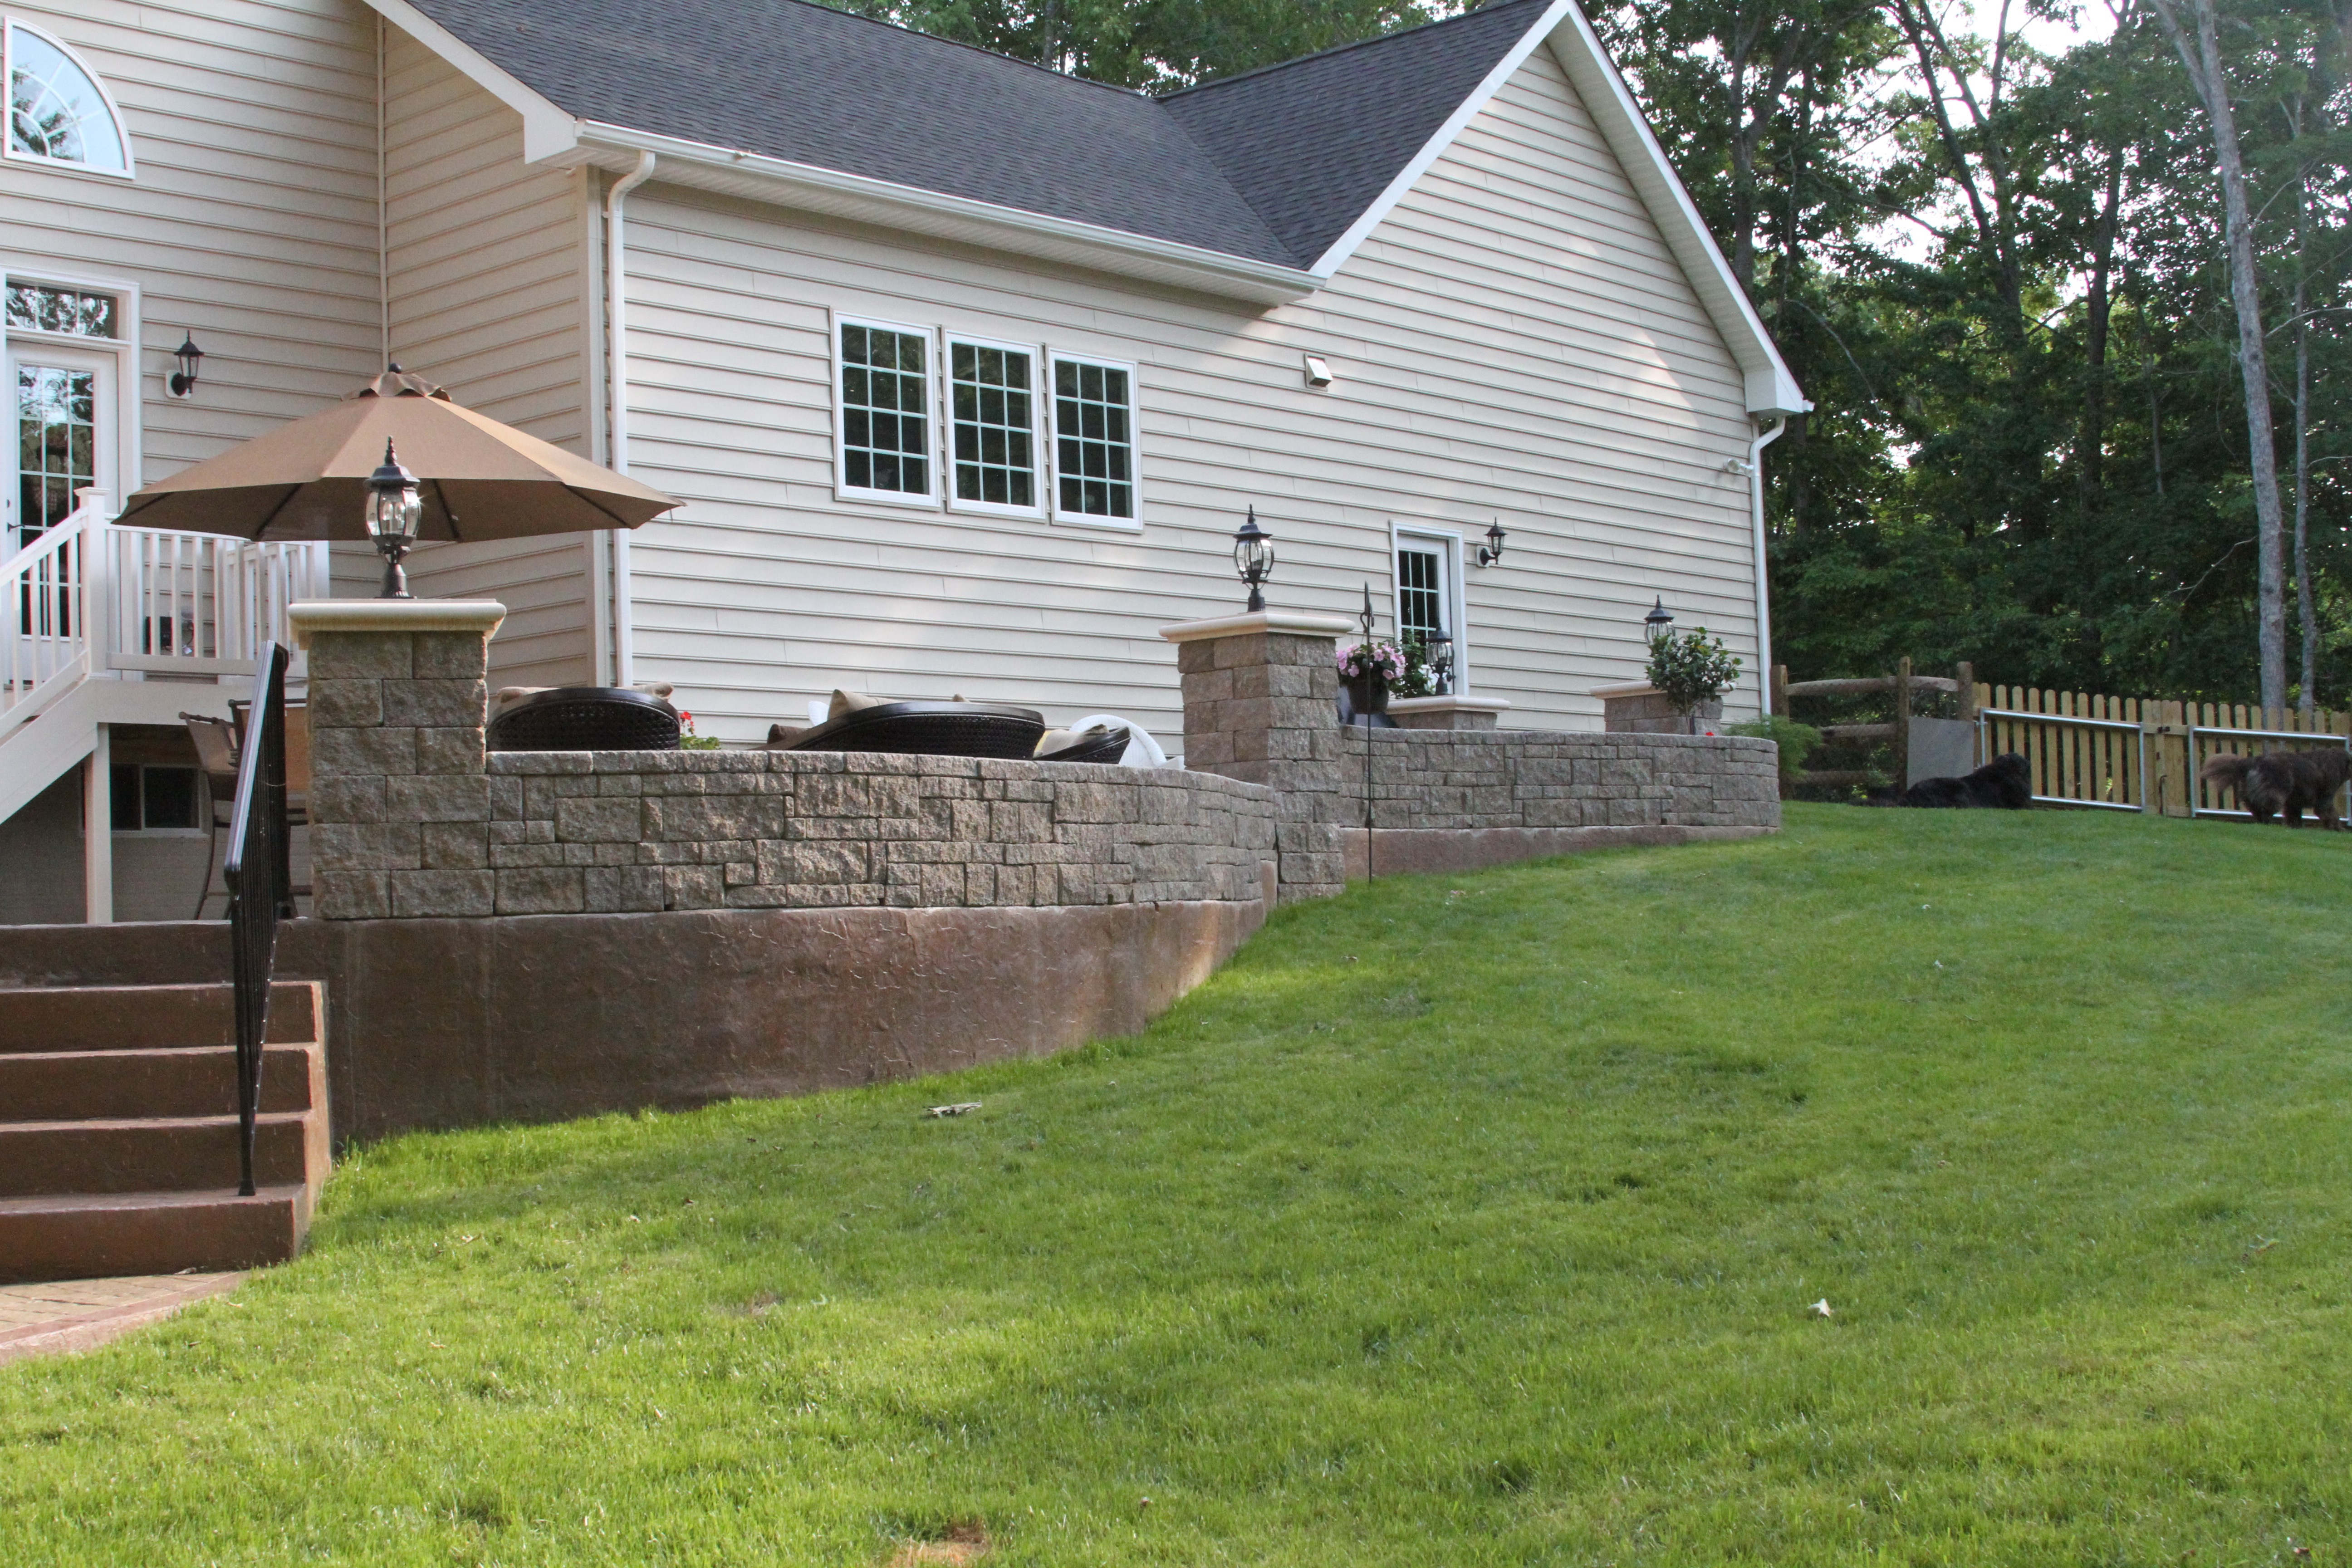
The next thing they did was construct the knee wall and the light columns, this took every bit of a week to complete:
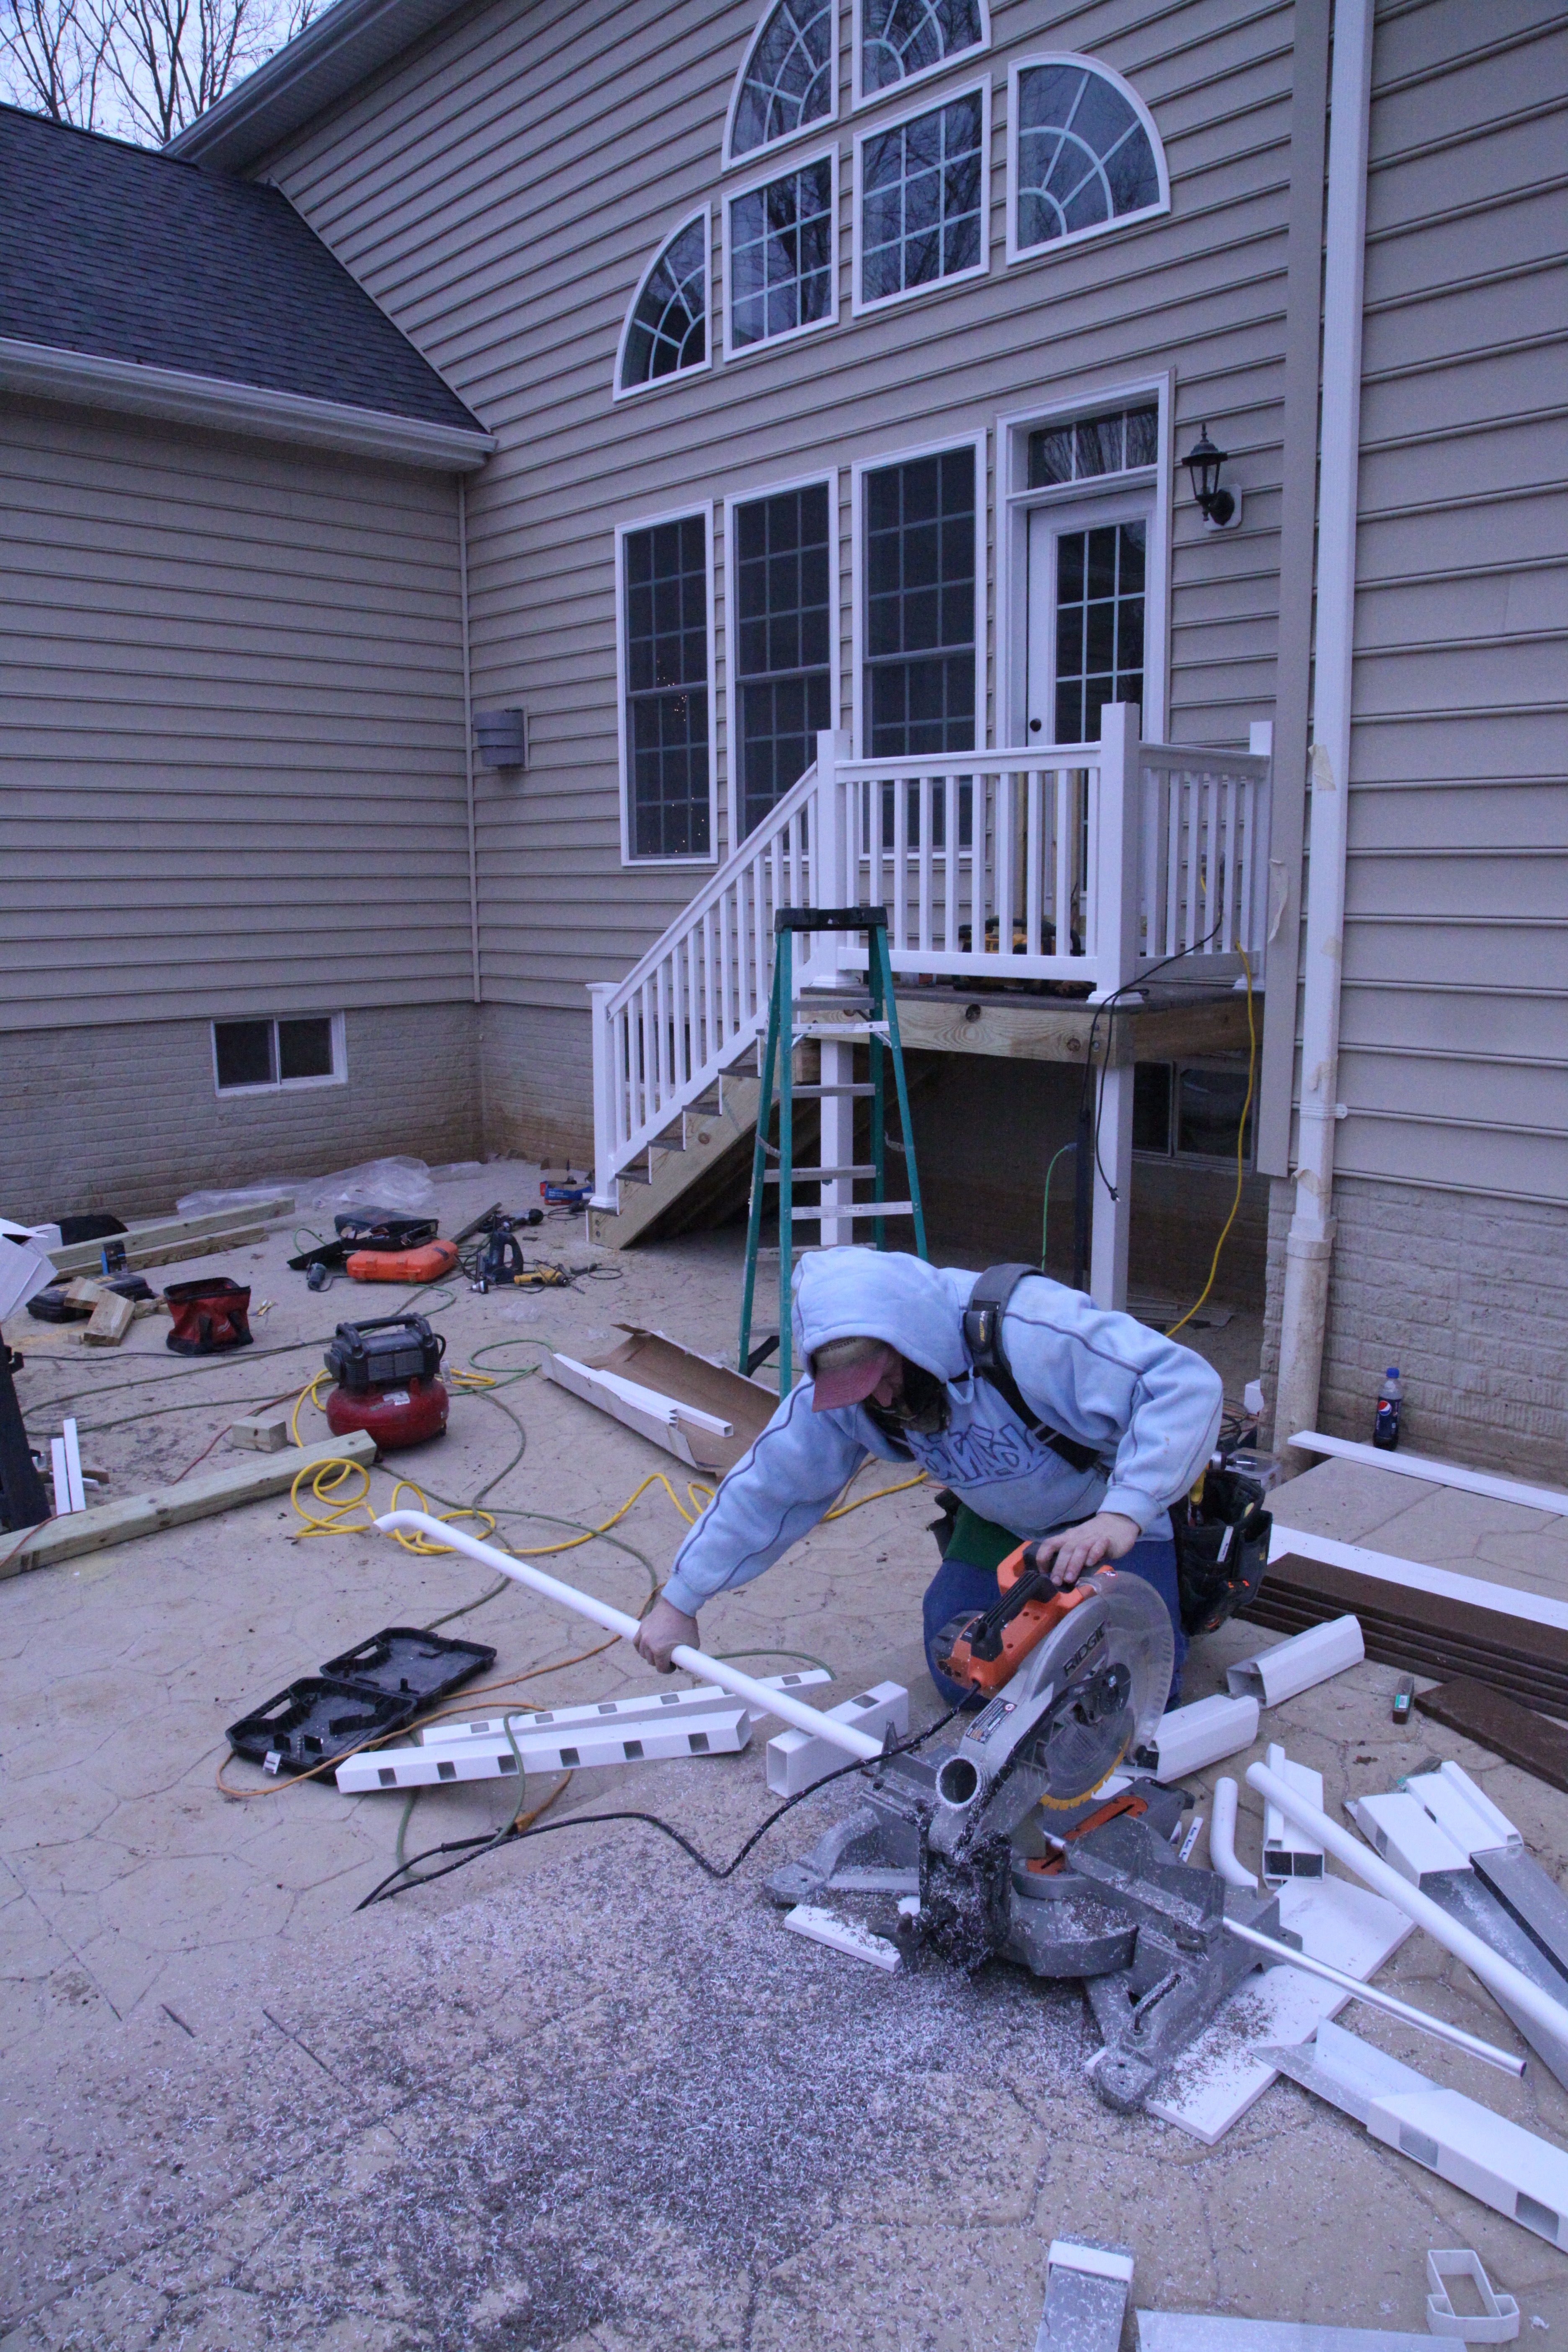
Then it was time to build a little deck and stairway; composite materials were used…
The next and one of the most tedious tasks was the staining process. We chose a neutral color for the main body of the patio and the walkways. The borders were stamped with the daisy pattern; the borders and the steps were stained a terra-cotta reddish color. They hand painted the compass rose:
We chose the same lights for the patio that the builder put on the front of our house and there are also lights under the lip of the knee wall and on the deck stairs. (I’m all about the lighting…I love the lighting!)
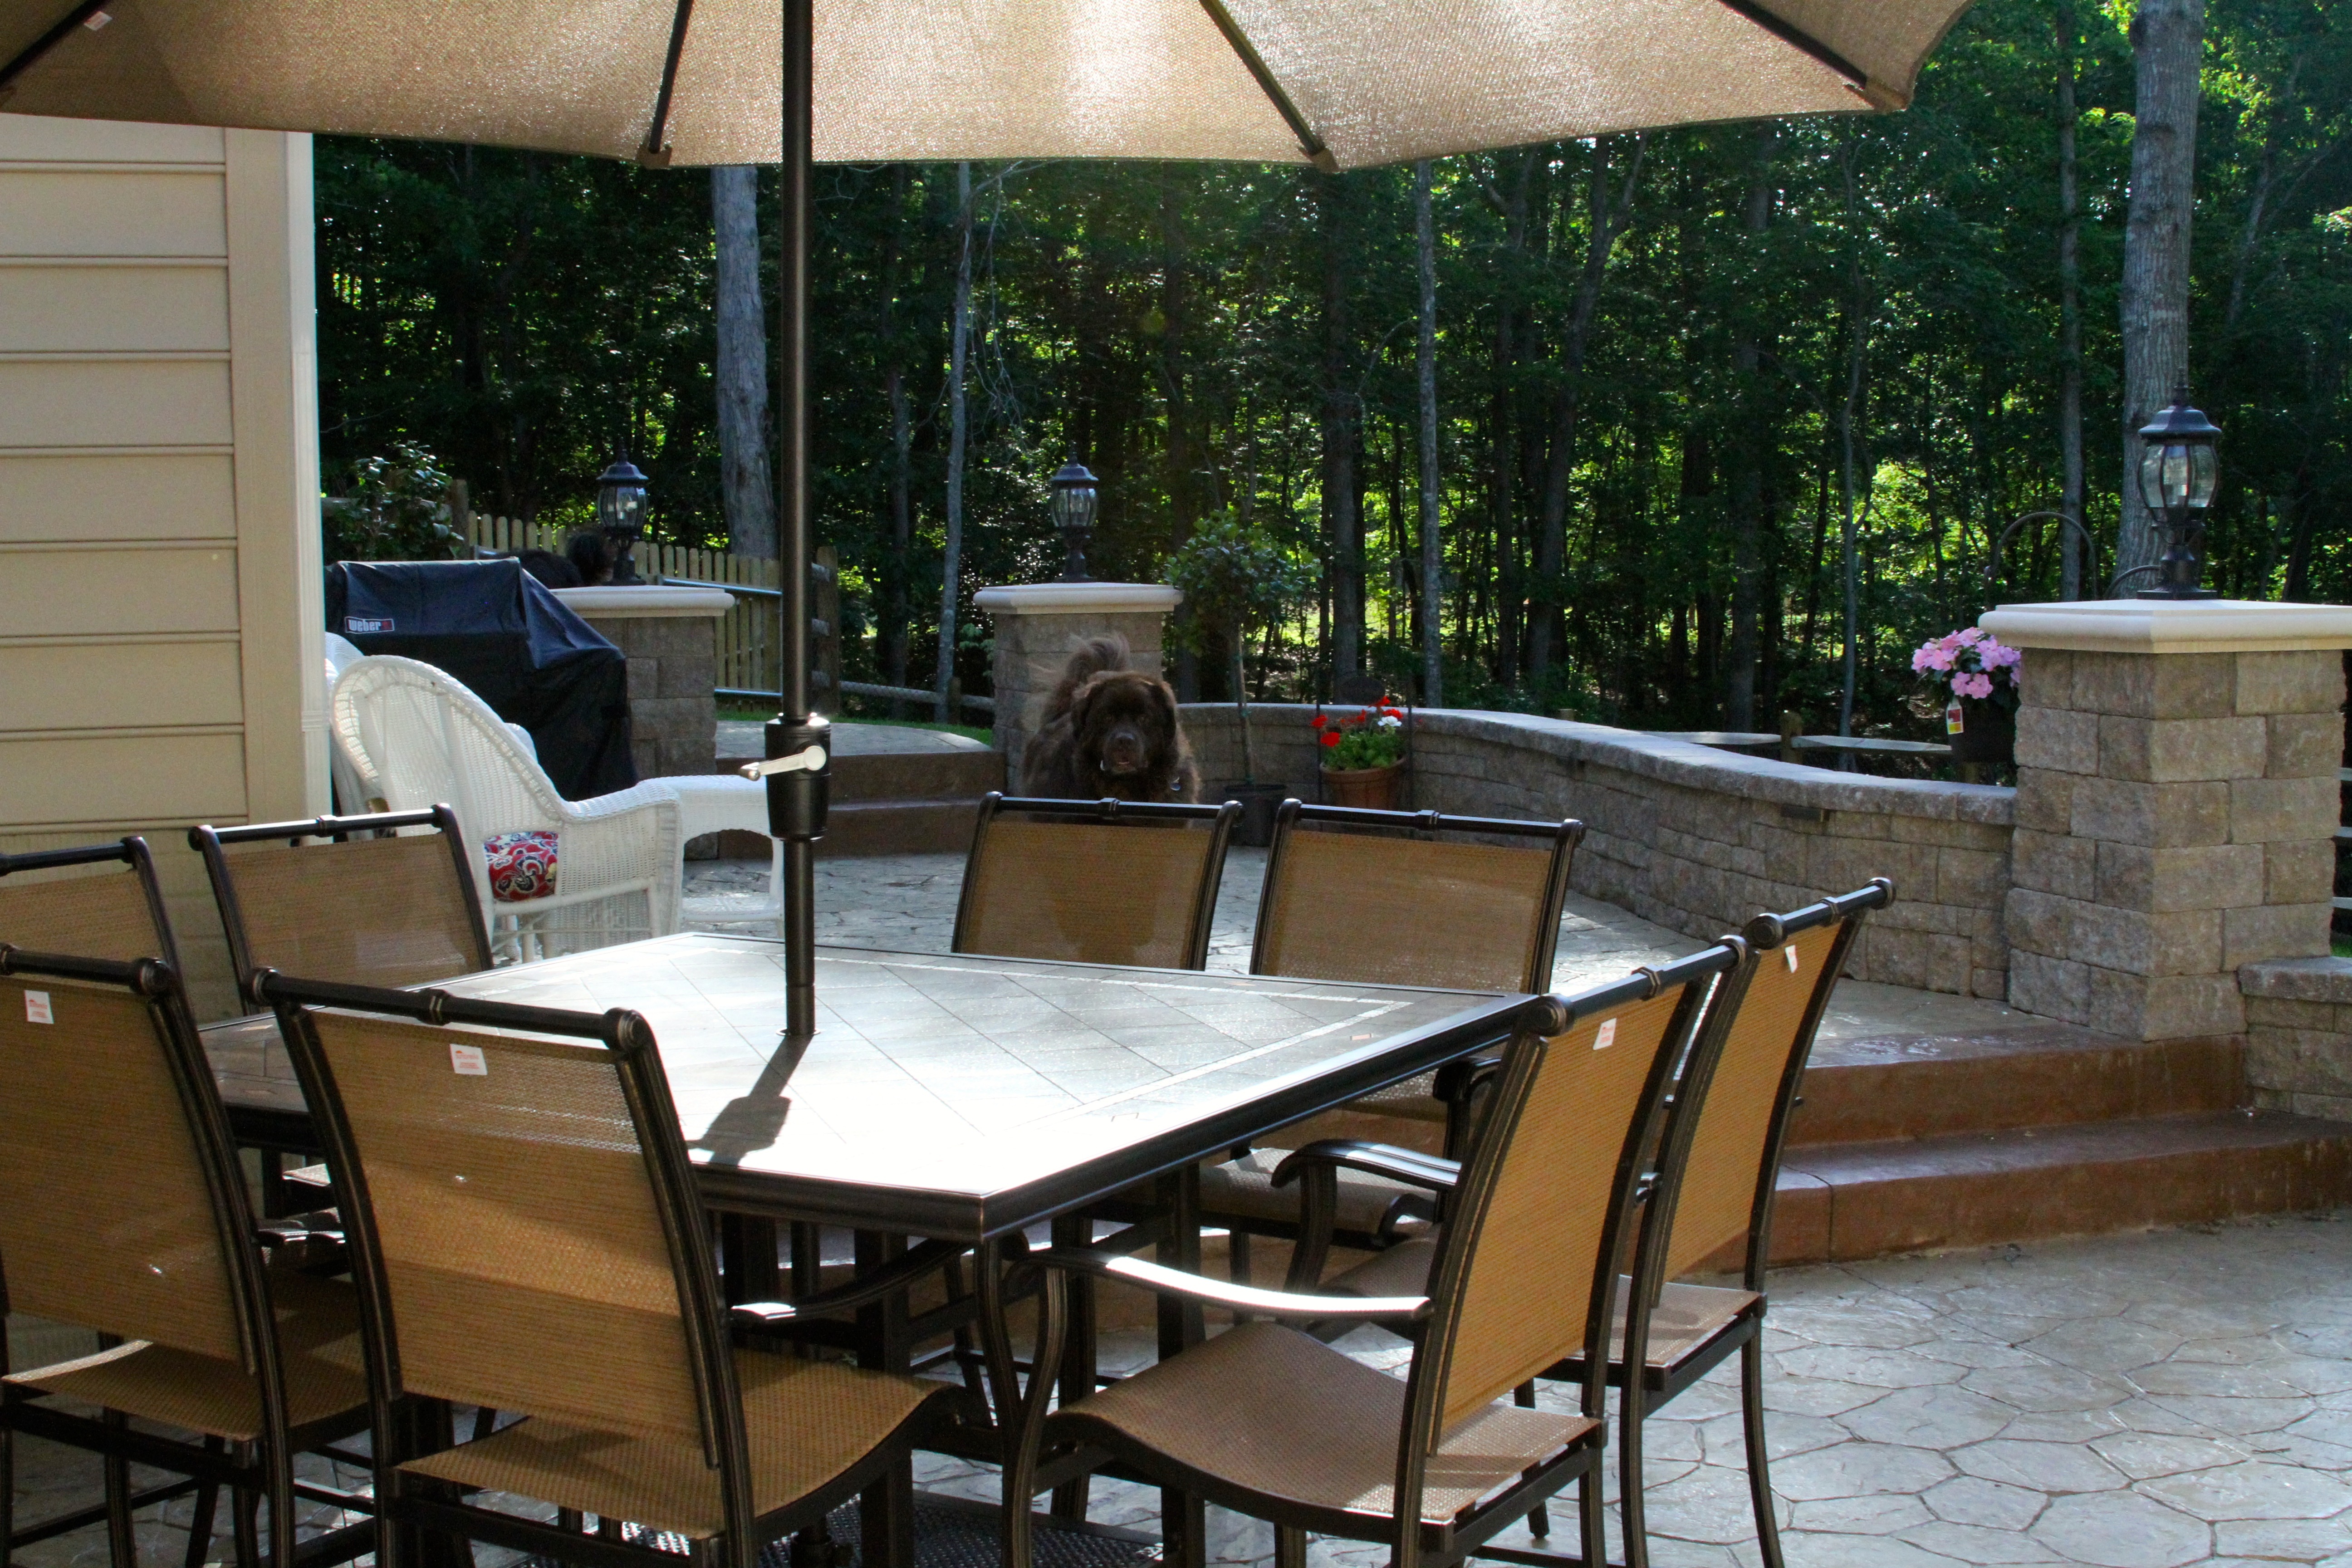
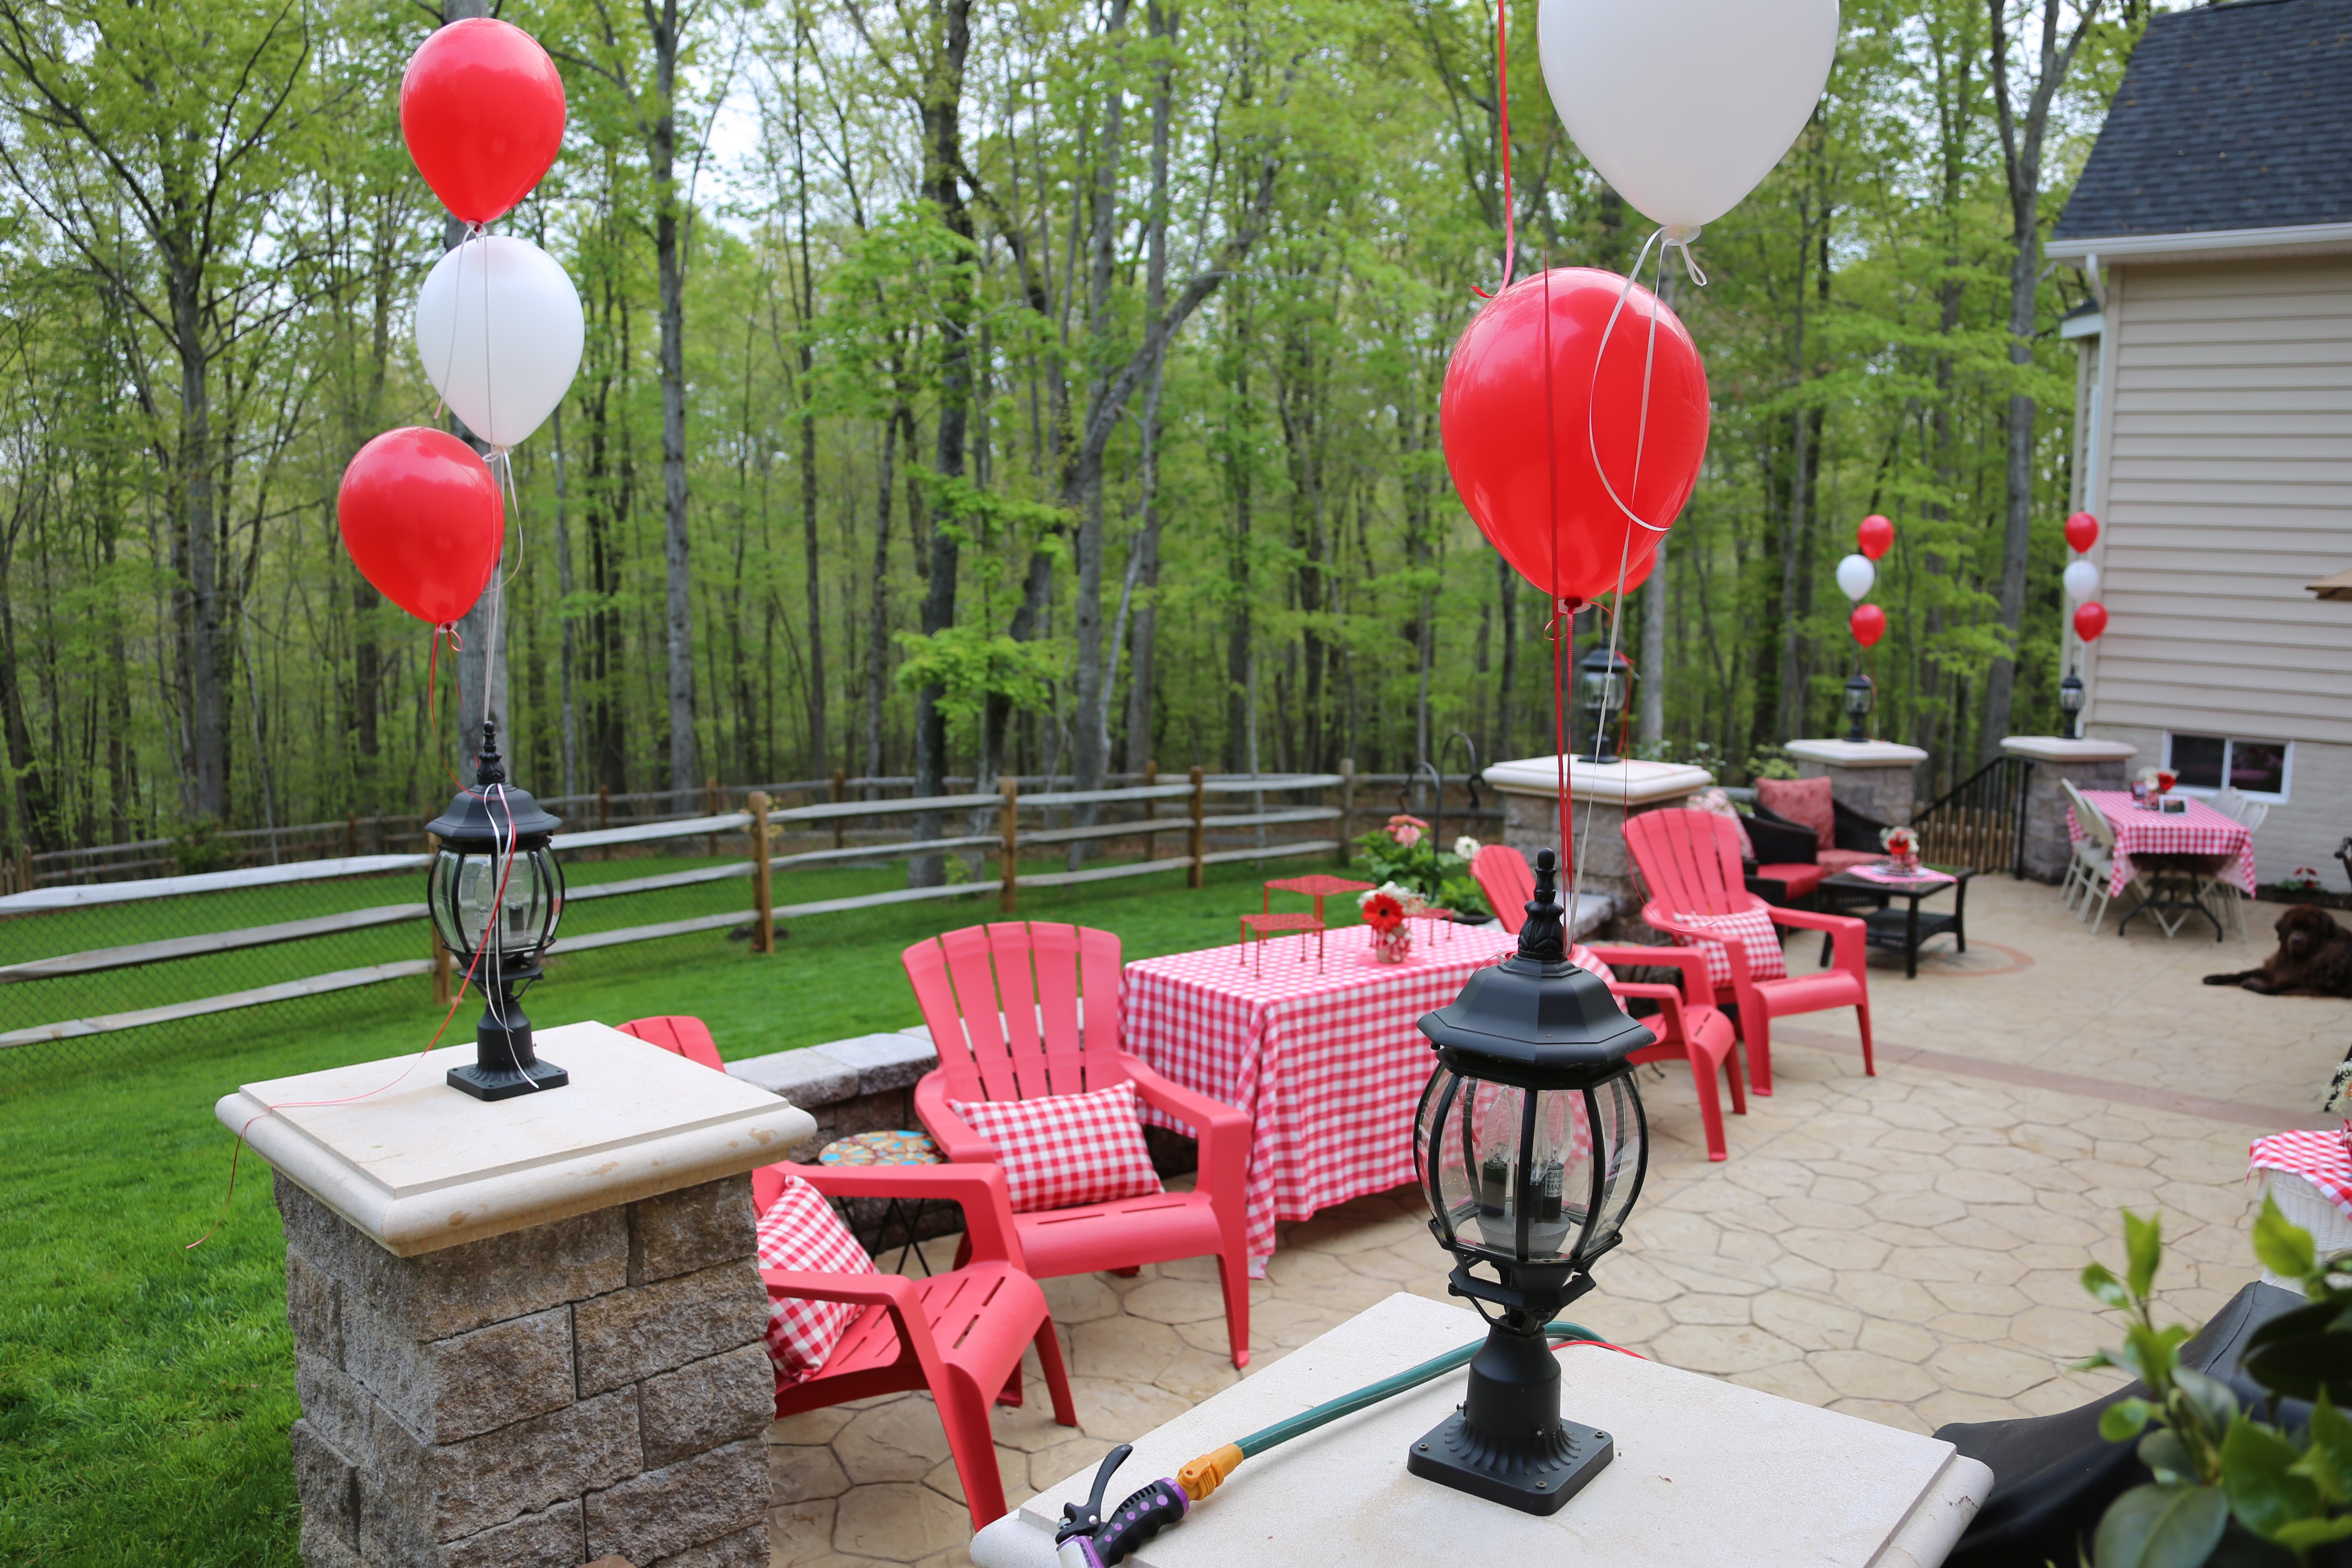
When all was said and done, they did a lovely job on our patio! We utilize it all of the time in all Seasons. 🙂
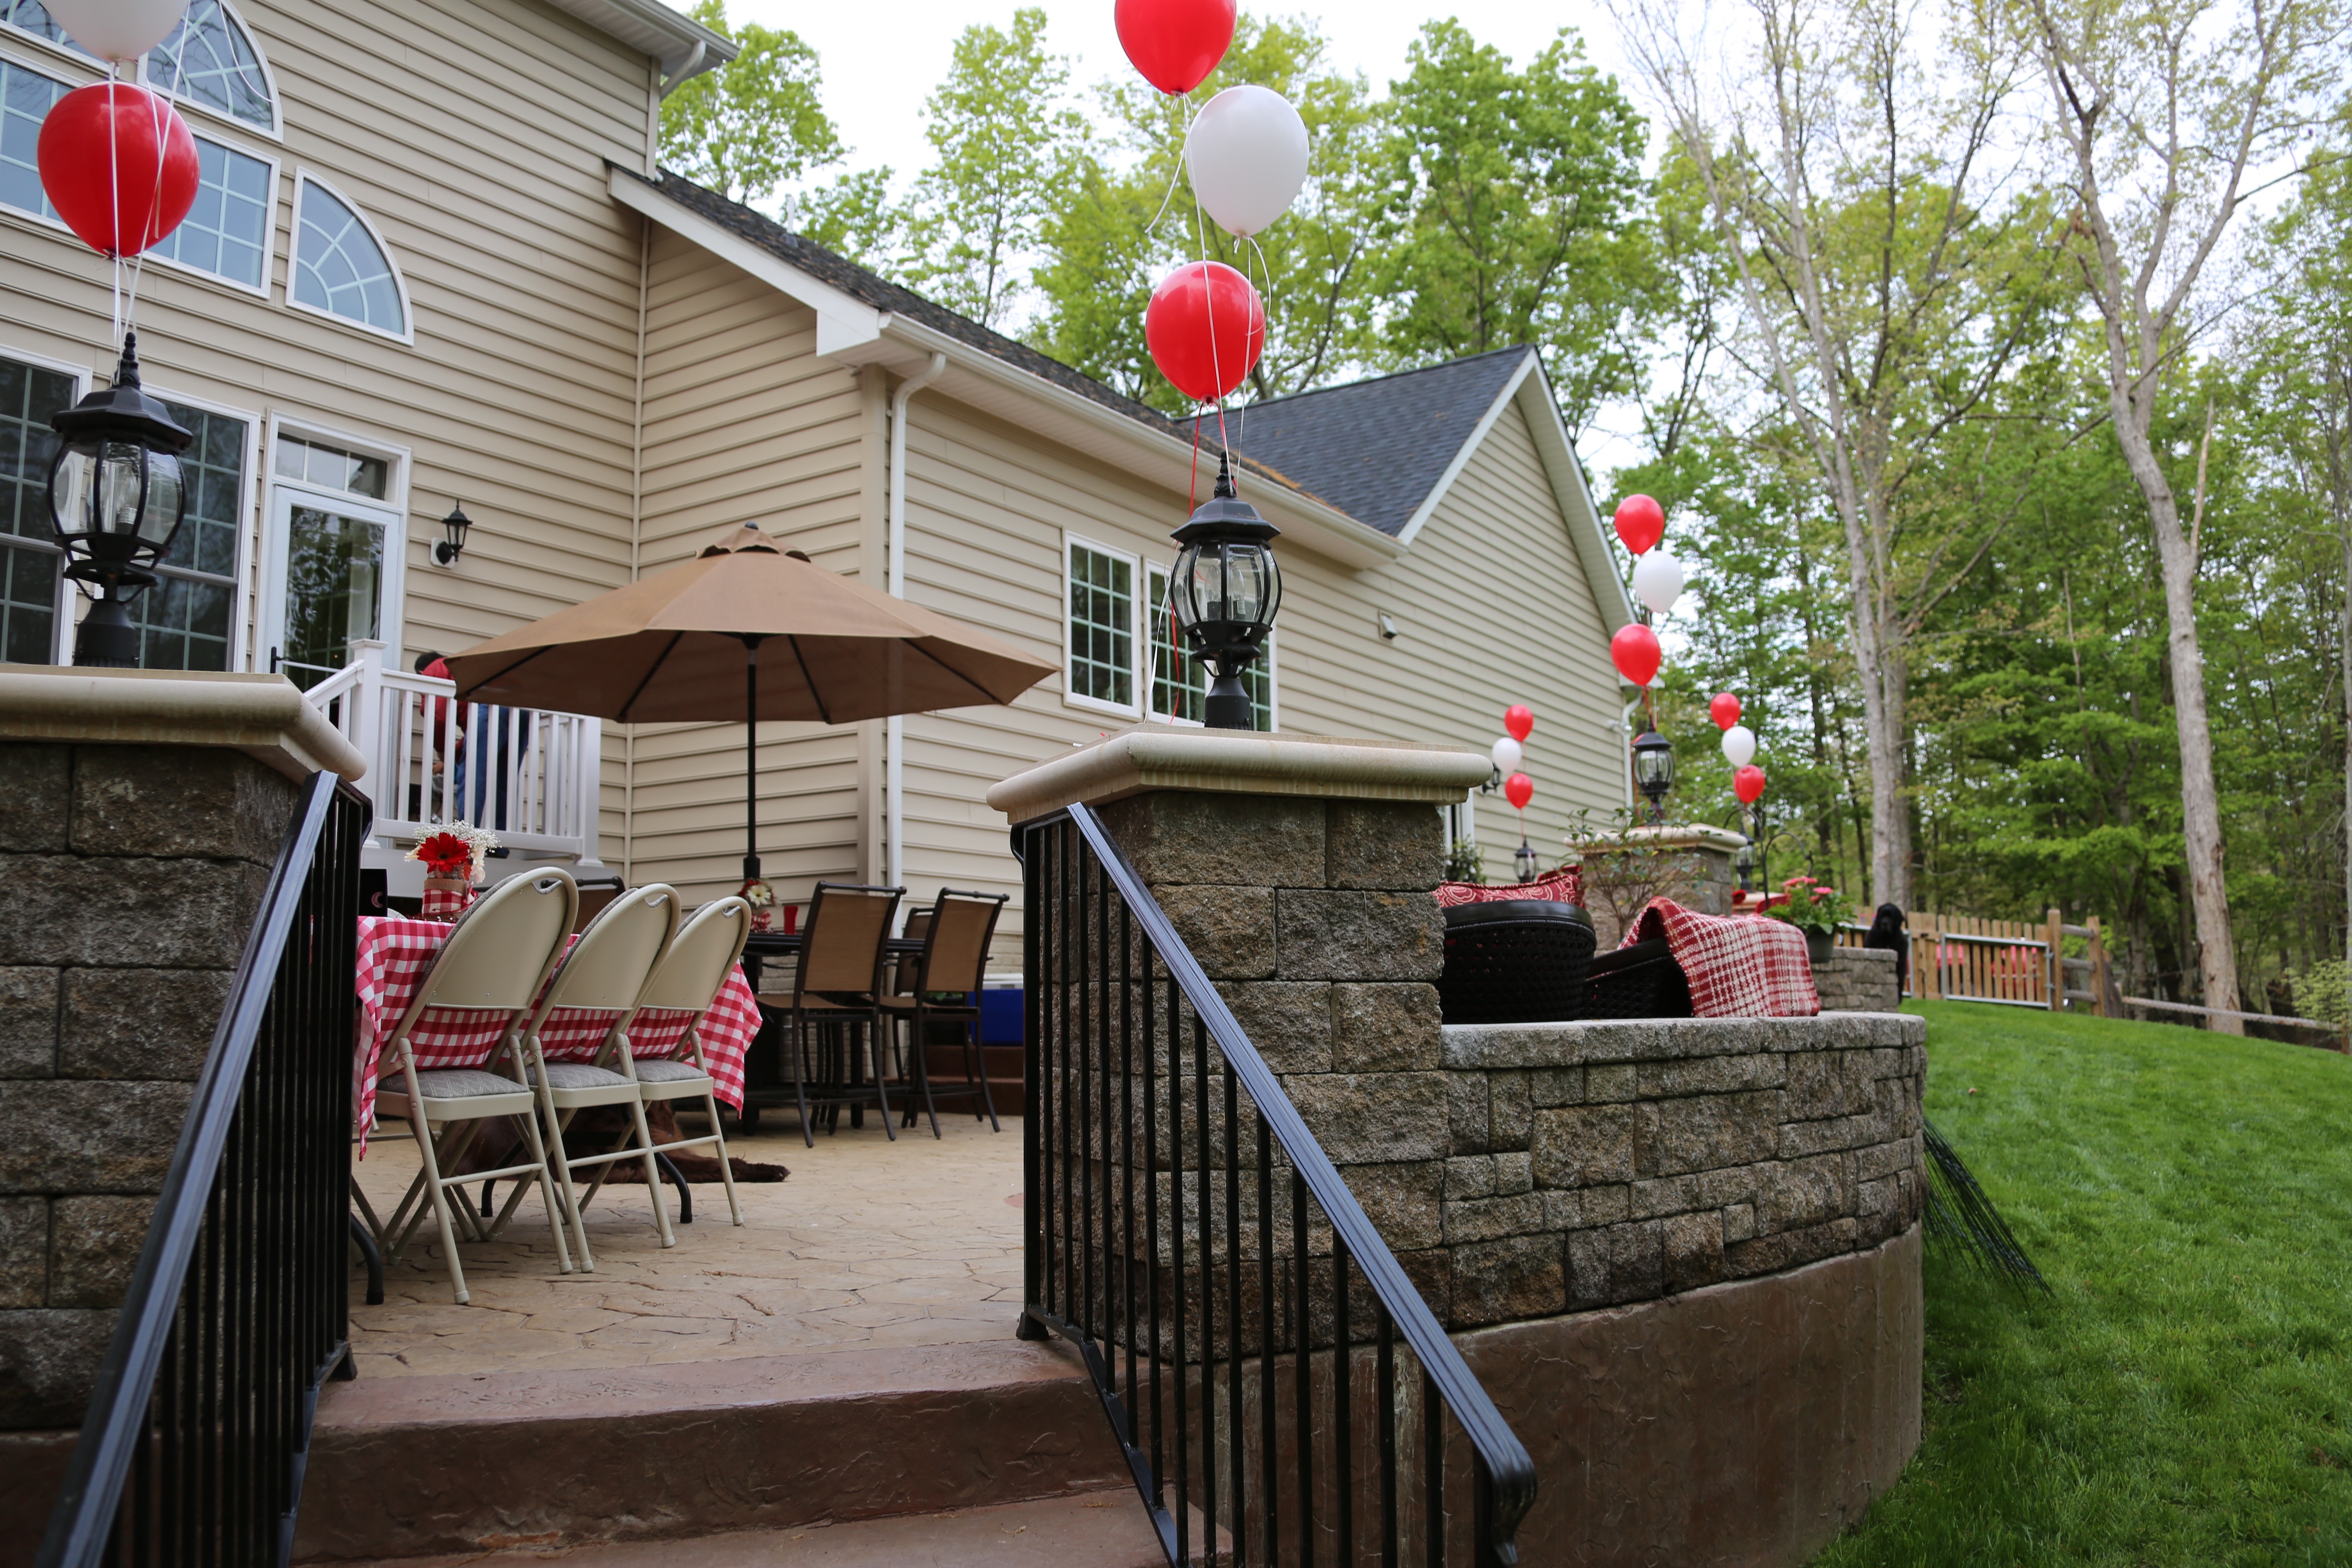
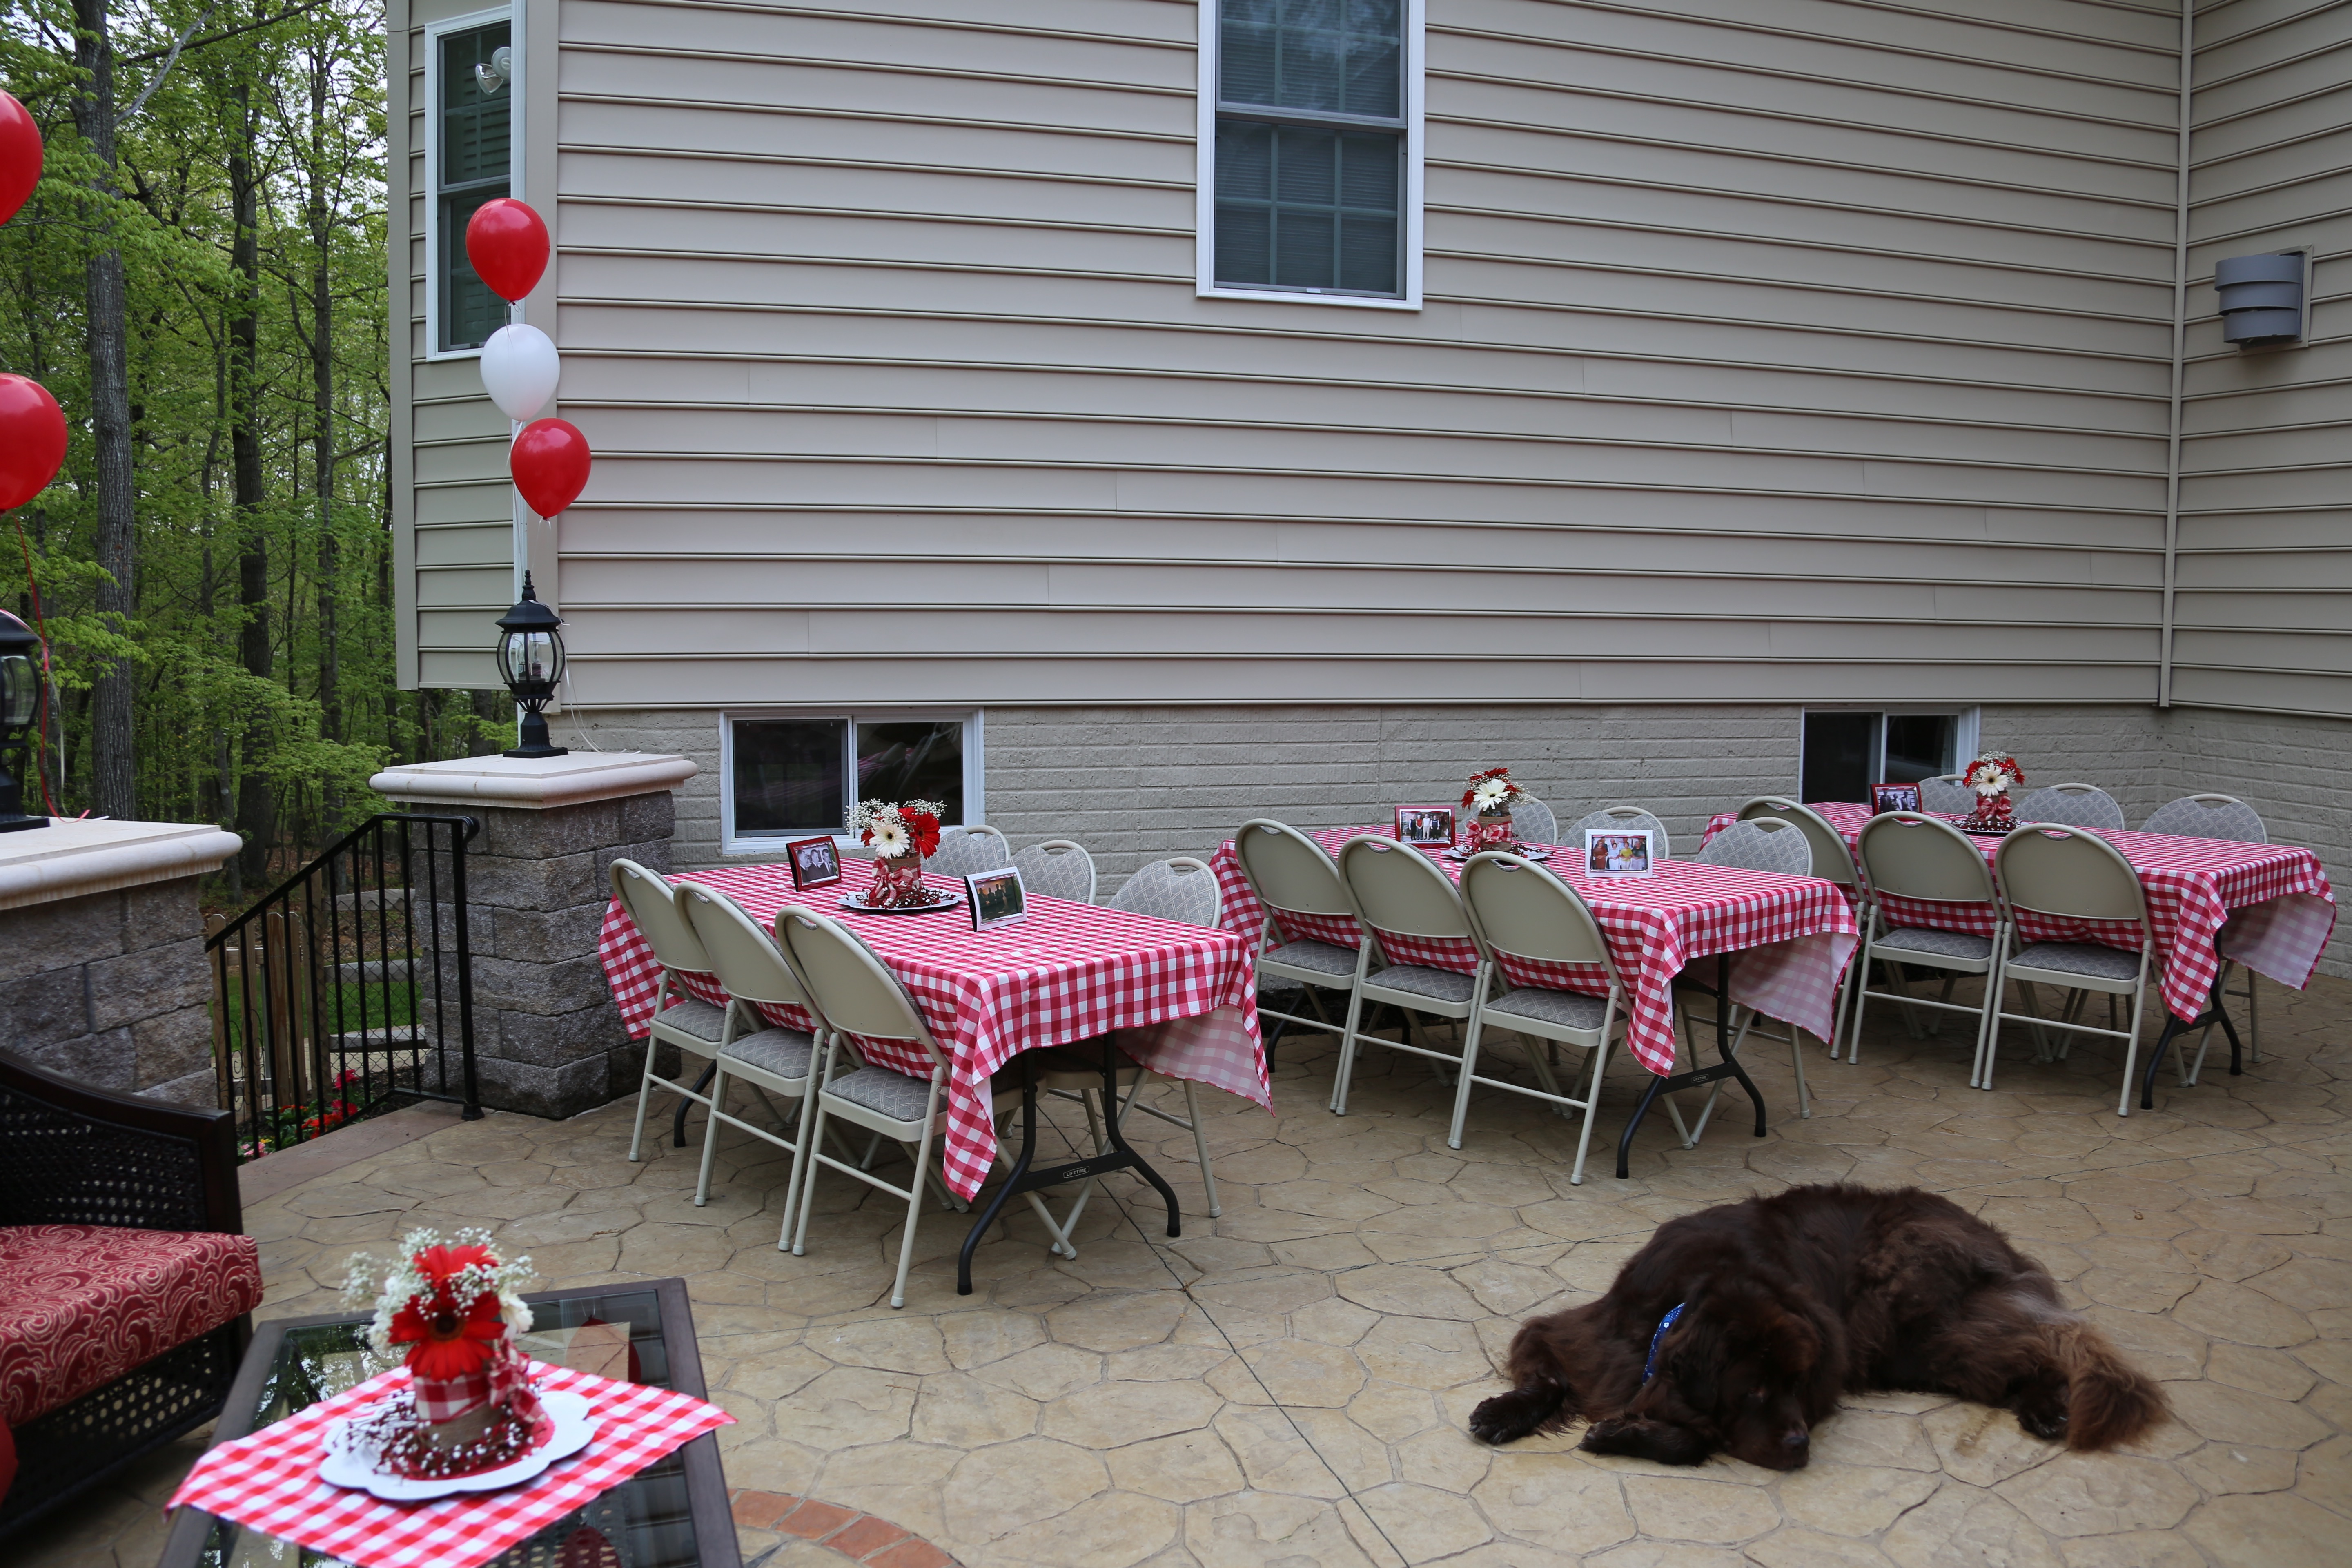
We have hosted a few cookouts for our kids here and we’ve also hosted our Family Reunion and this patio has worked out beautifully for all events:
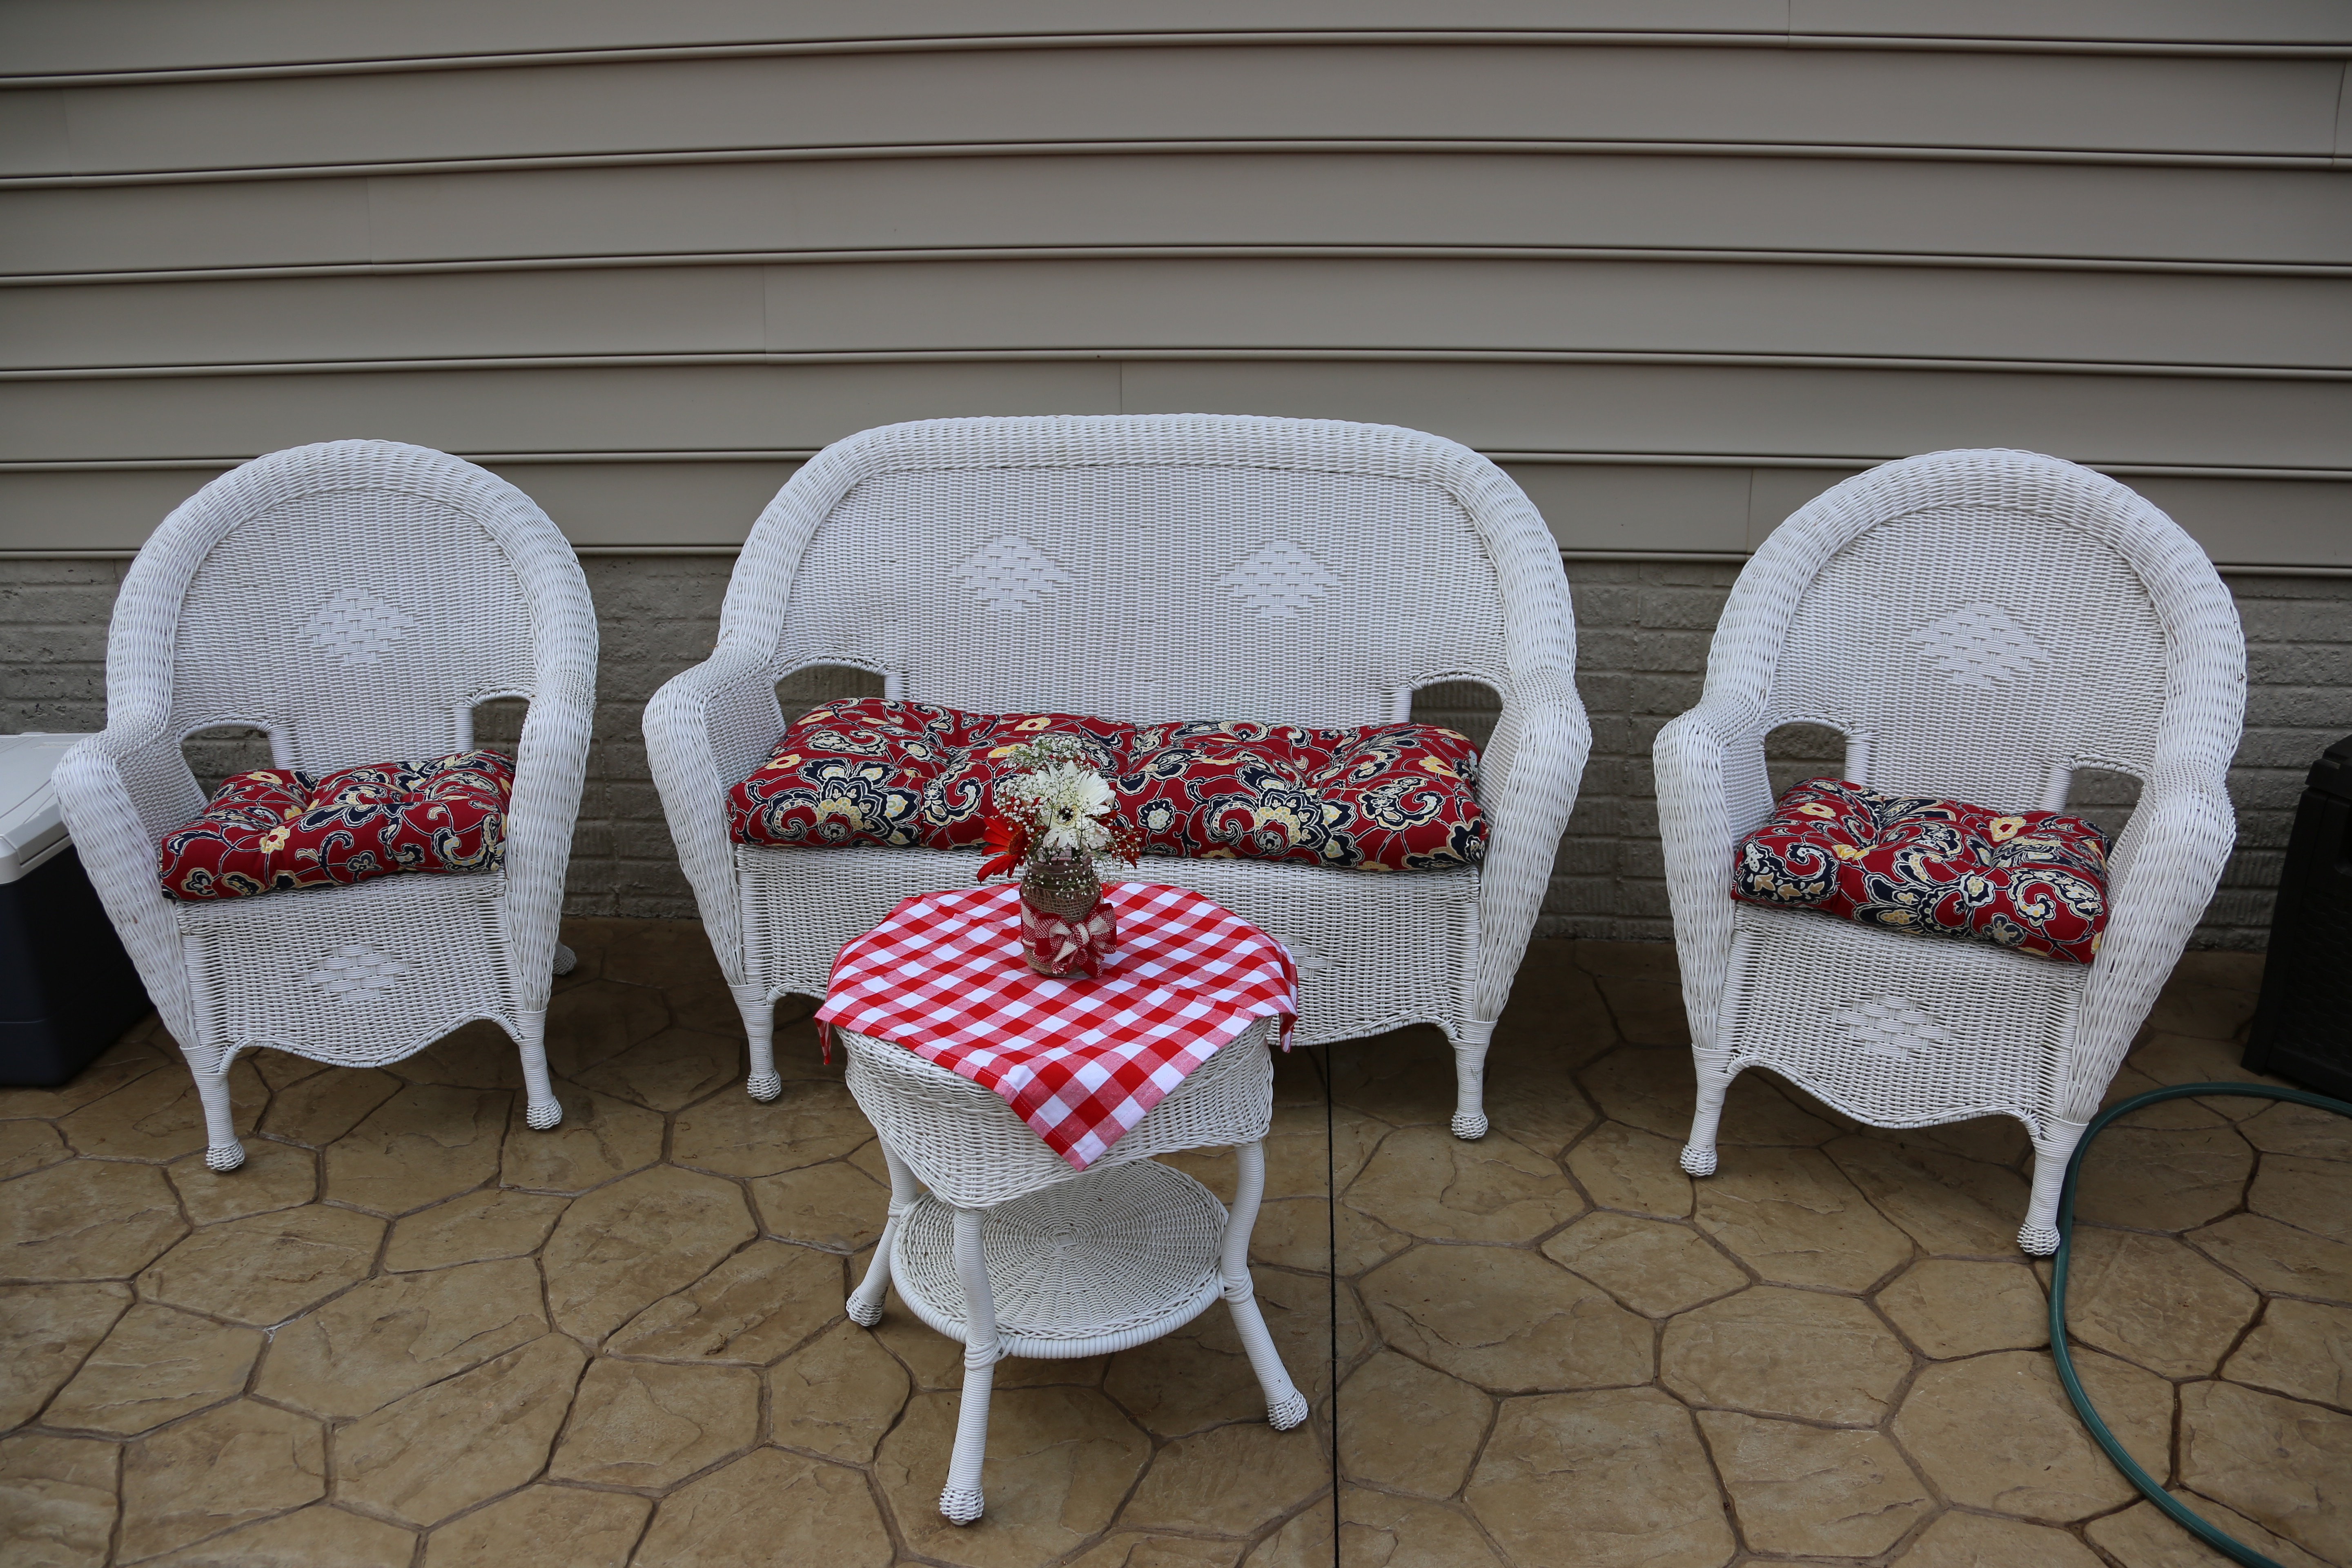
My hubby has now been able to grow himself a gorgeous lawn to go with the patio, so all is right with his world. 😉 All is right with my world as well, it is really nice to be able to have an outdoor space that provides comfy seating to be used for conversing, drinking hot cocoa, and helping people feel cozy and welcome. 🙂 Again, I have to stop and say how blessed we feel to have this lovely home…
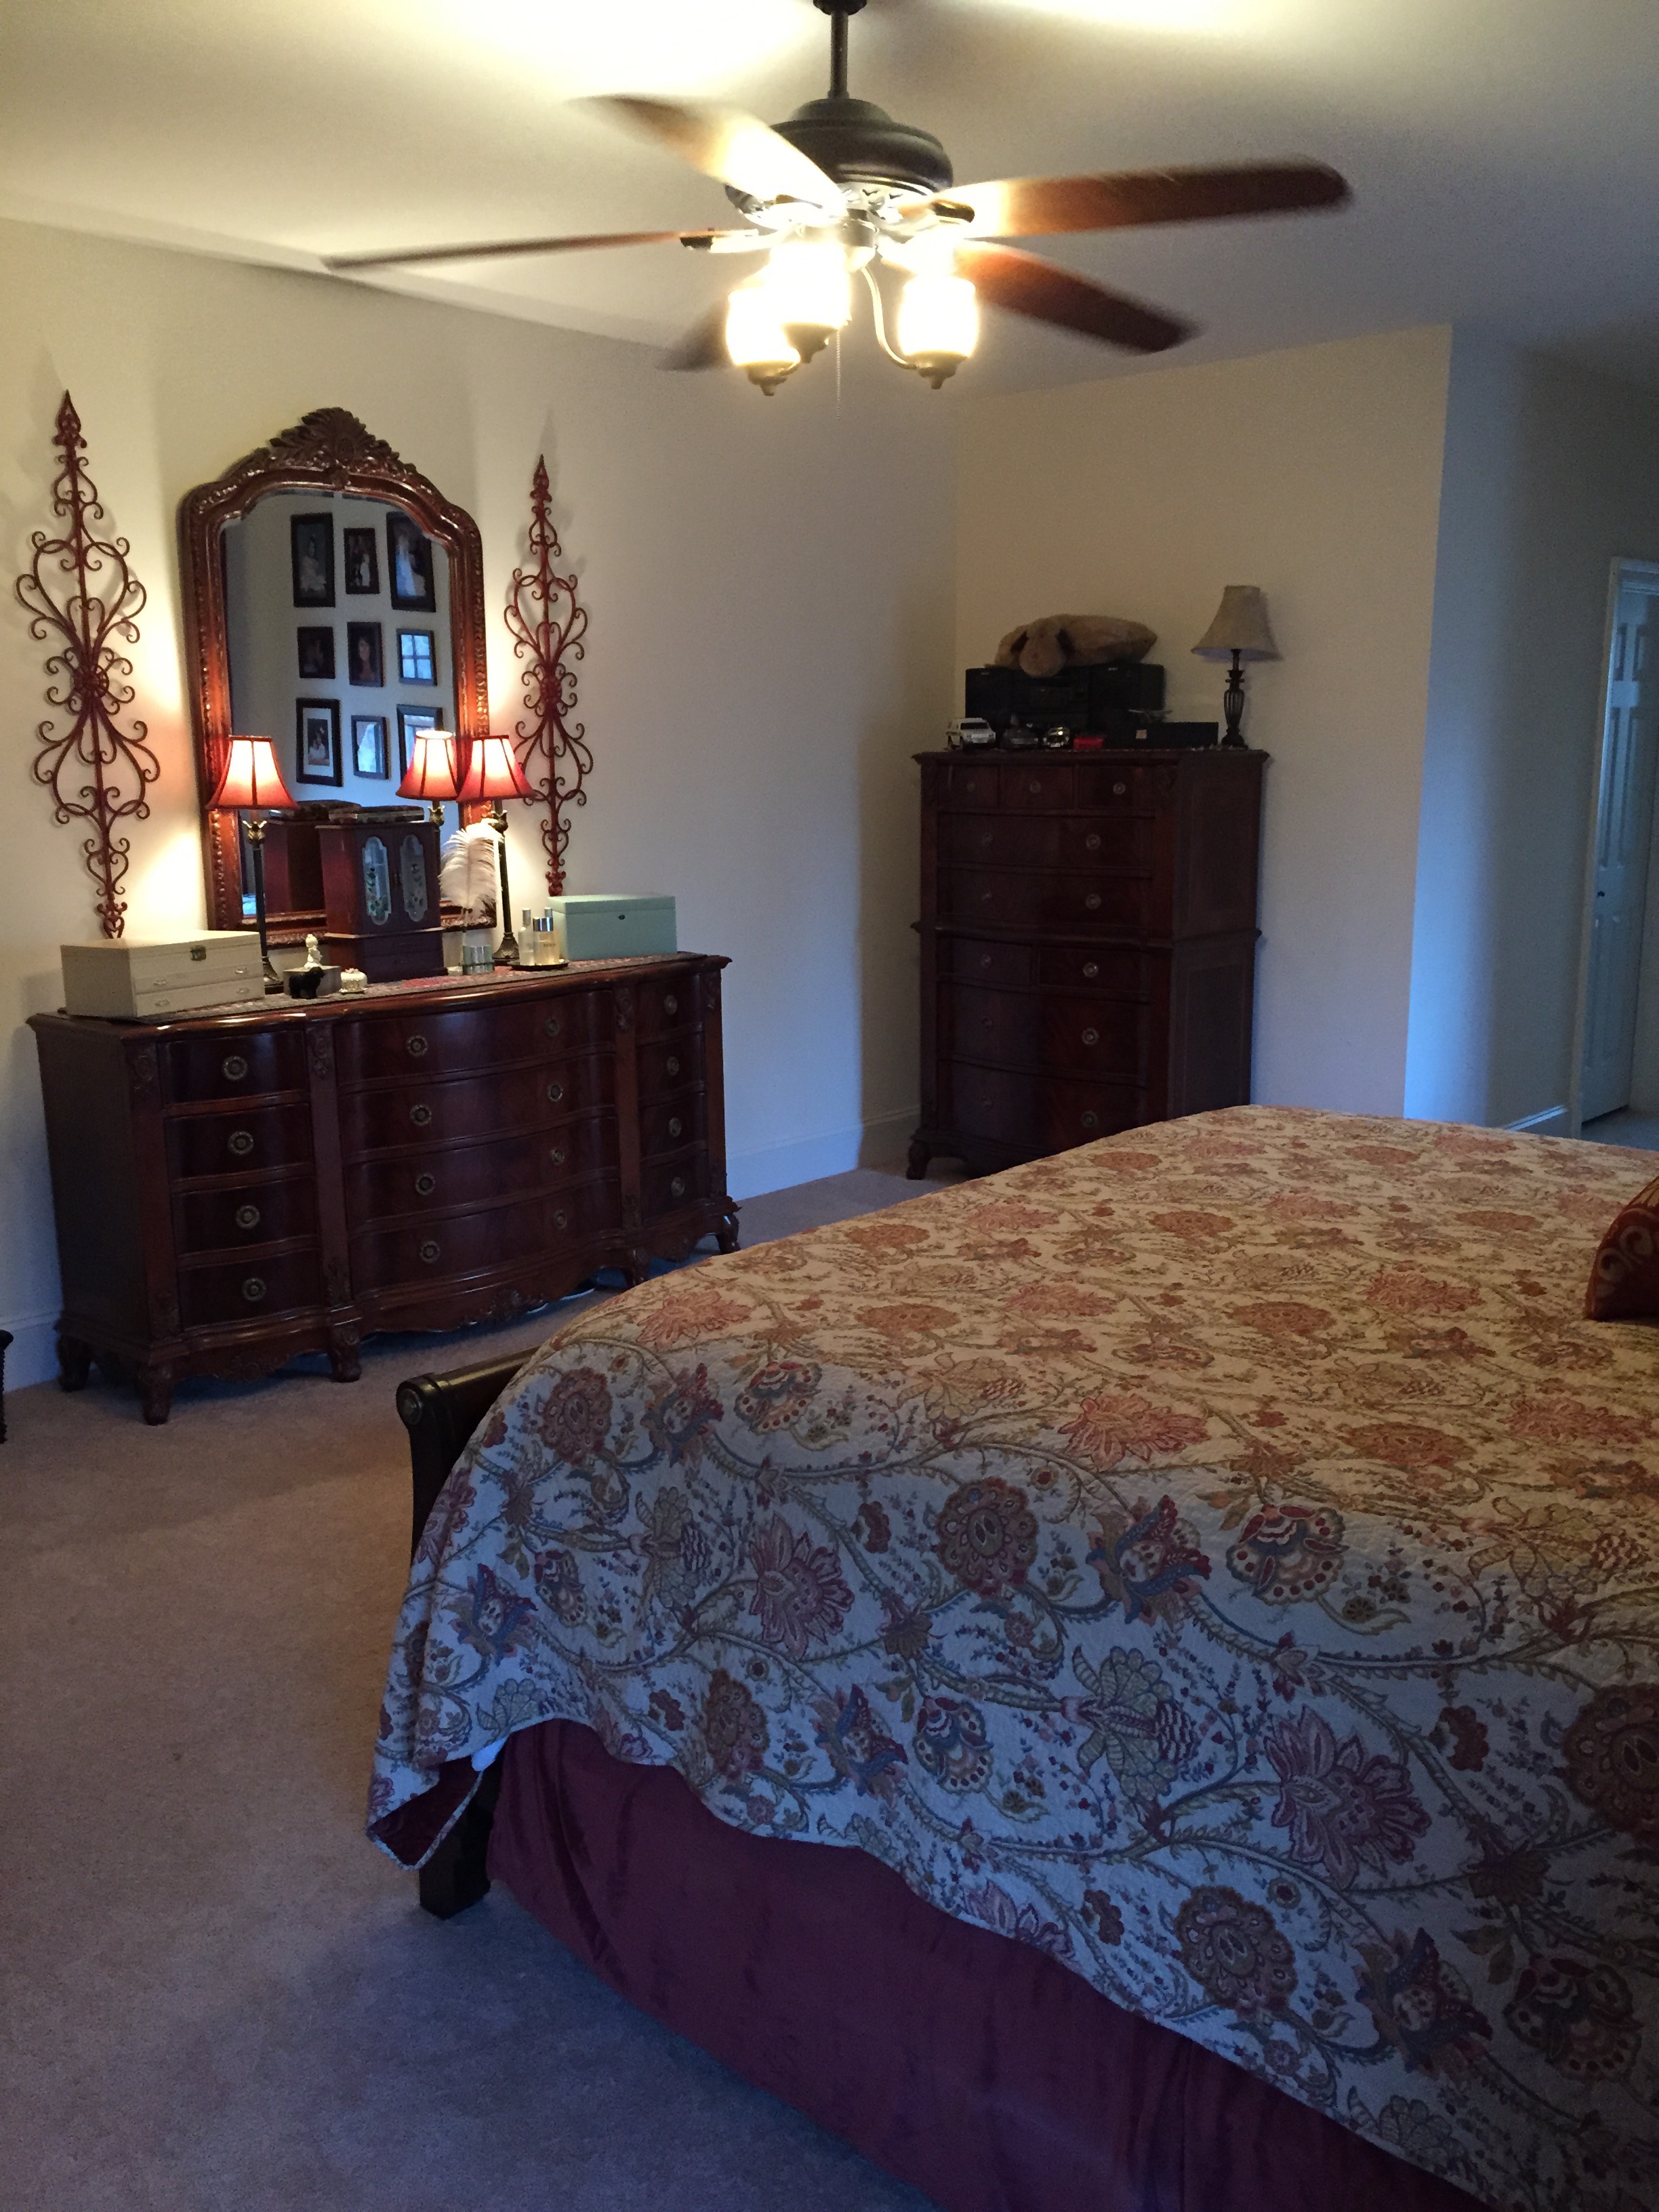
I would have to say that our bedroom is the least decorated of all of the rooms in the house, but, regardless, I’ll go ahead give you a little glimpse. When we built this house, we had this room extended by 4 feet which makes this quite a large room–25′ x 16′ (or thereabouts). We have a king-sized bed, two bedside tables, two dressers, a corner shelf, two chairs with a stand in between them, and my cedar chest and we still have tons of room. We have two walk-in closets and master bath as well.
The master bathroom is quite large as well, and I must admit that I do love it. We had a master bathroom in our other house, but it was tiny (not complaining, at least we had one). We have a separate soaker tub in there, I’ve never had one of those in my life. 🙂 Also, we did special order those plantation shudders for on the bay window; I will admit, they are wonderful and I’m so very glad that we bit the bullet (they were pricey) and purchased them.
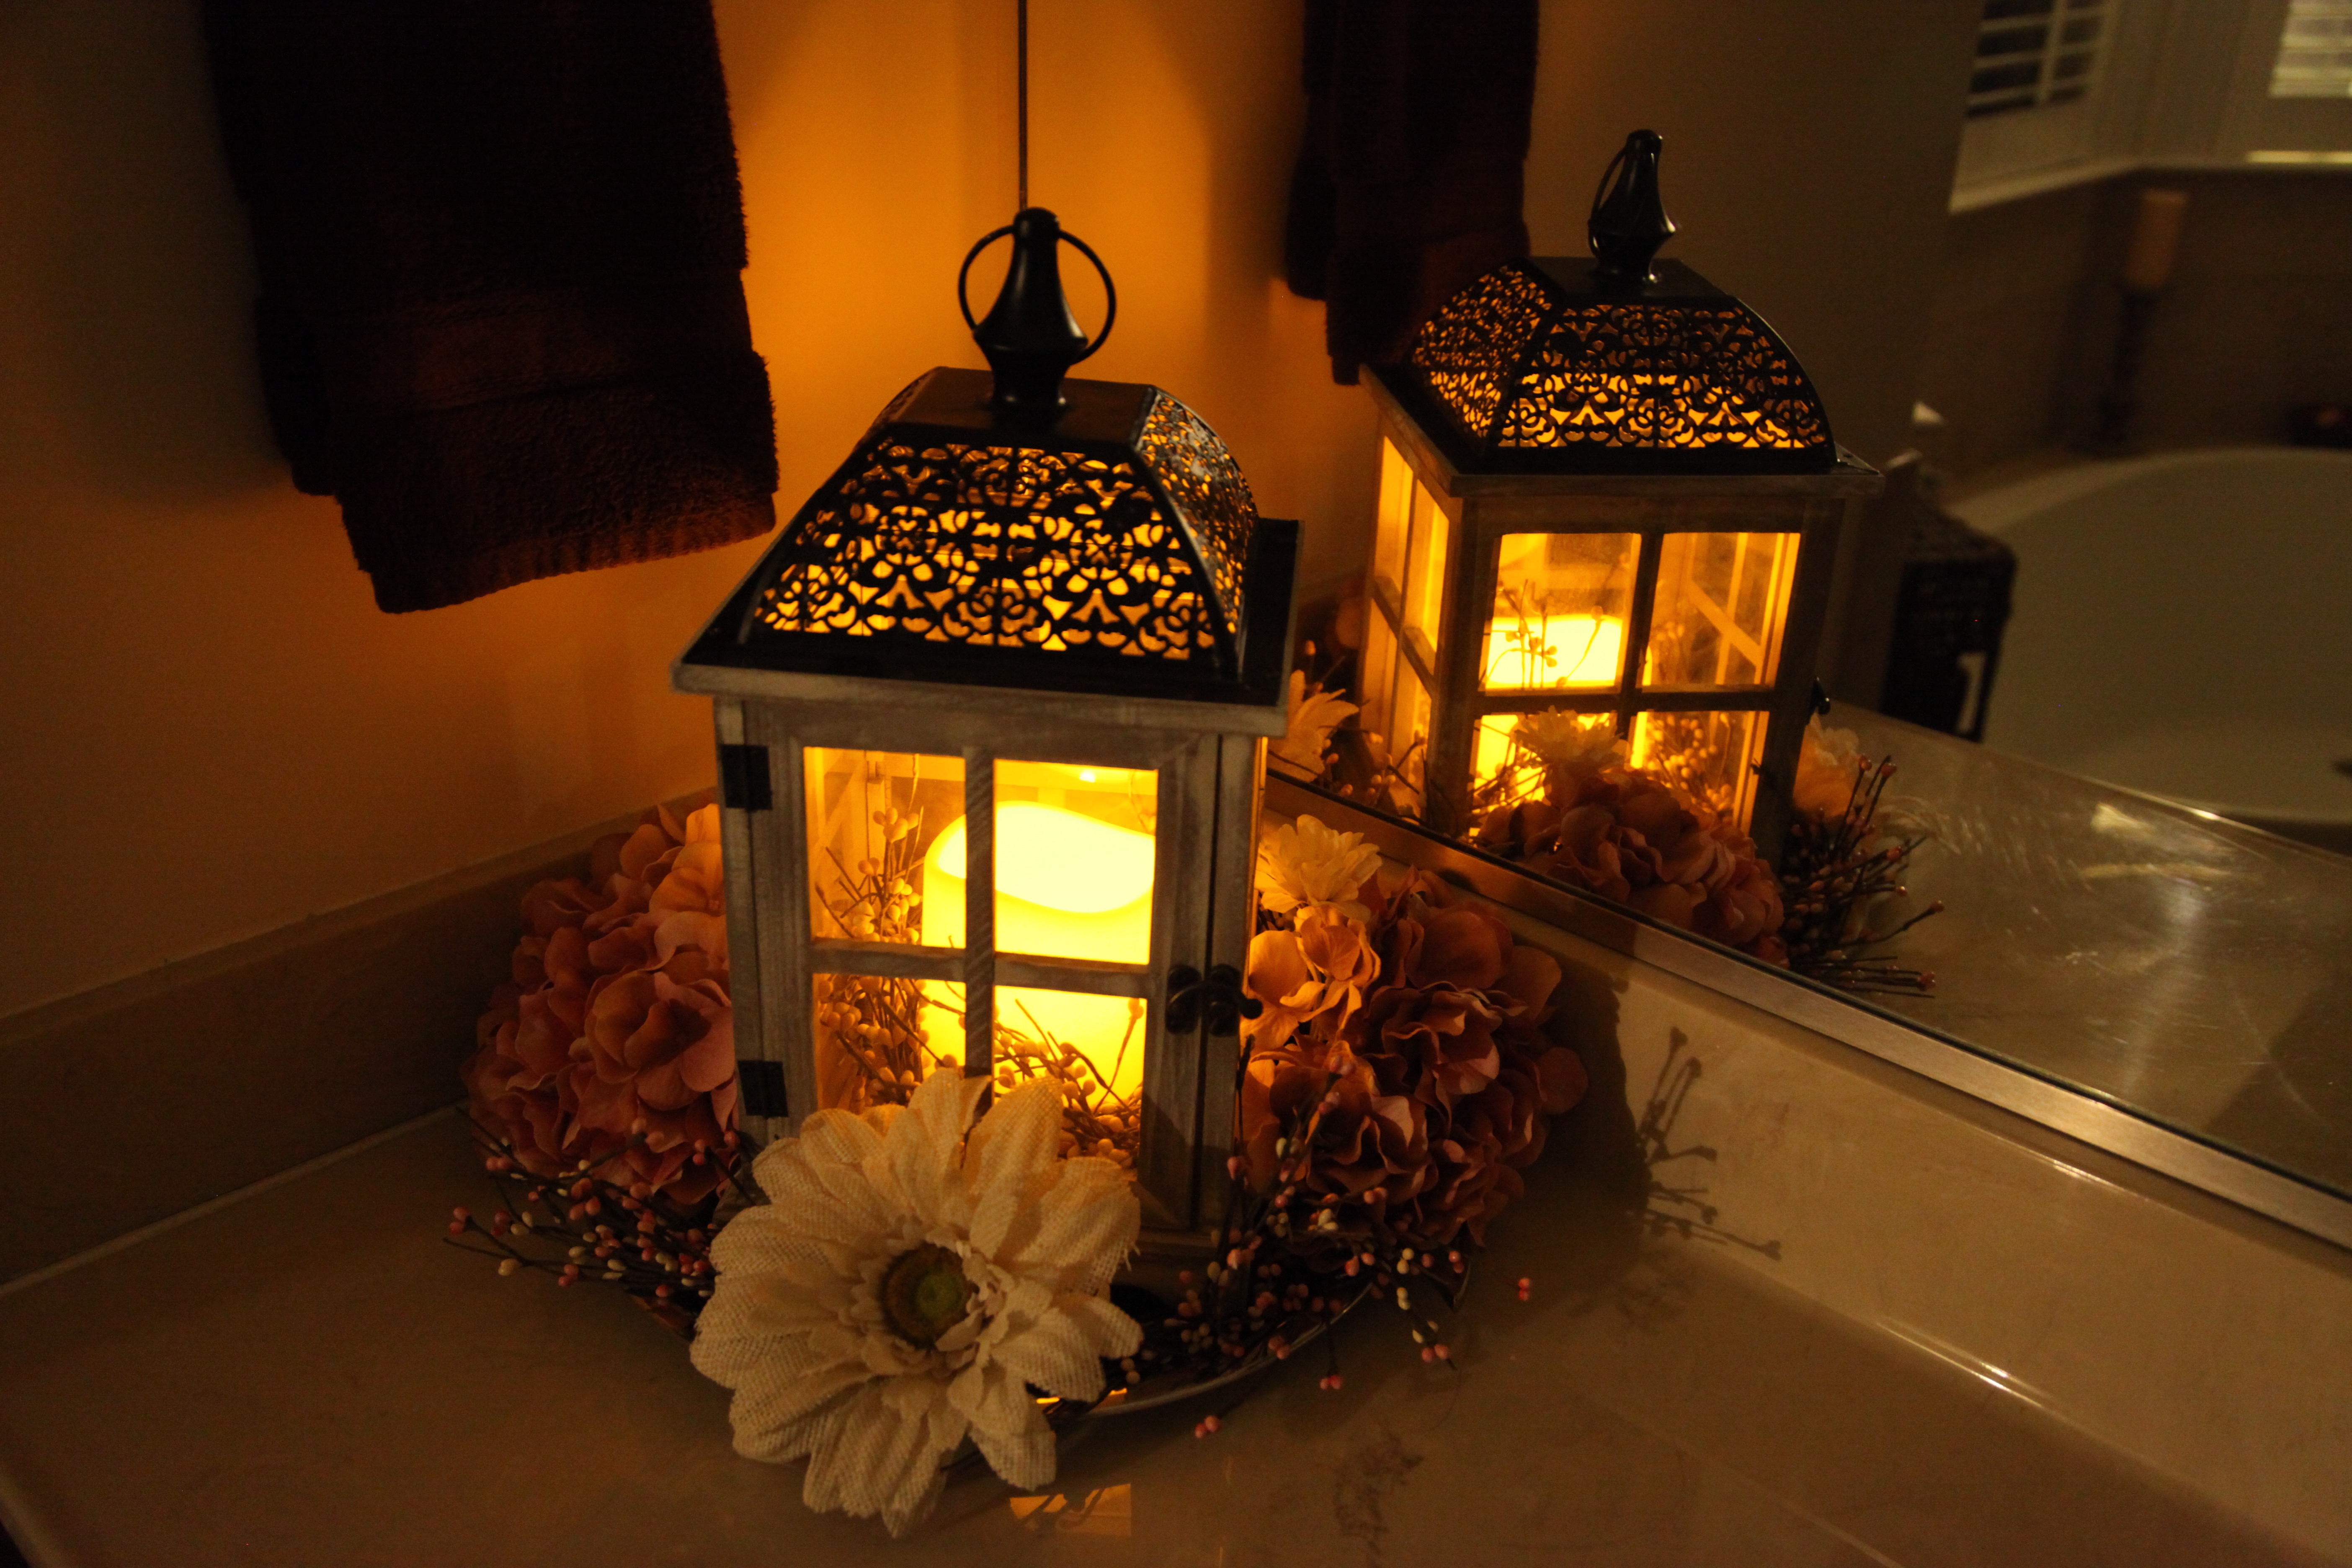
We each have our own vanity…Of course, I had to make a little something to sit on mine. 😉
A couple of extras are that the tiles in the shower go all the way up to the ceiling and the shower door is a very heavy piece of glass (devil to clean too…haha).
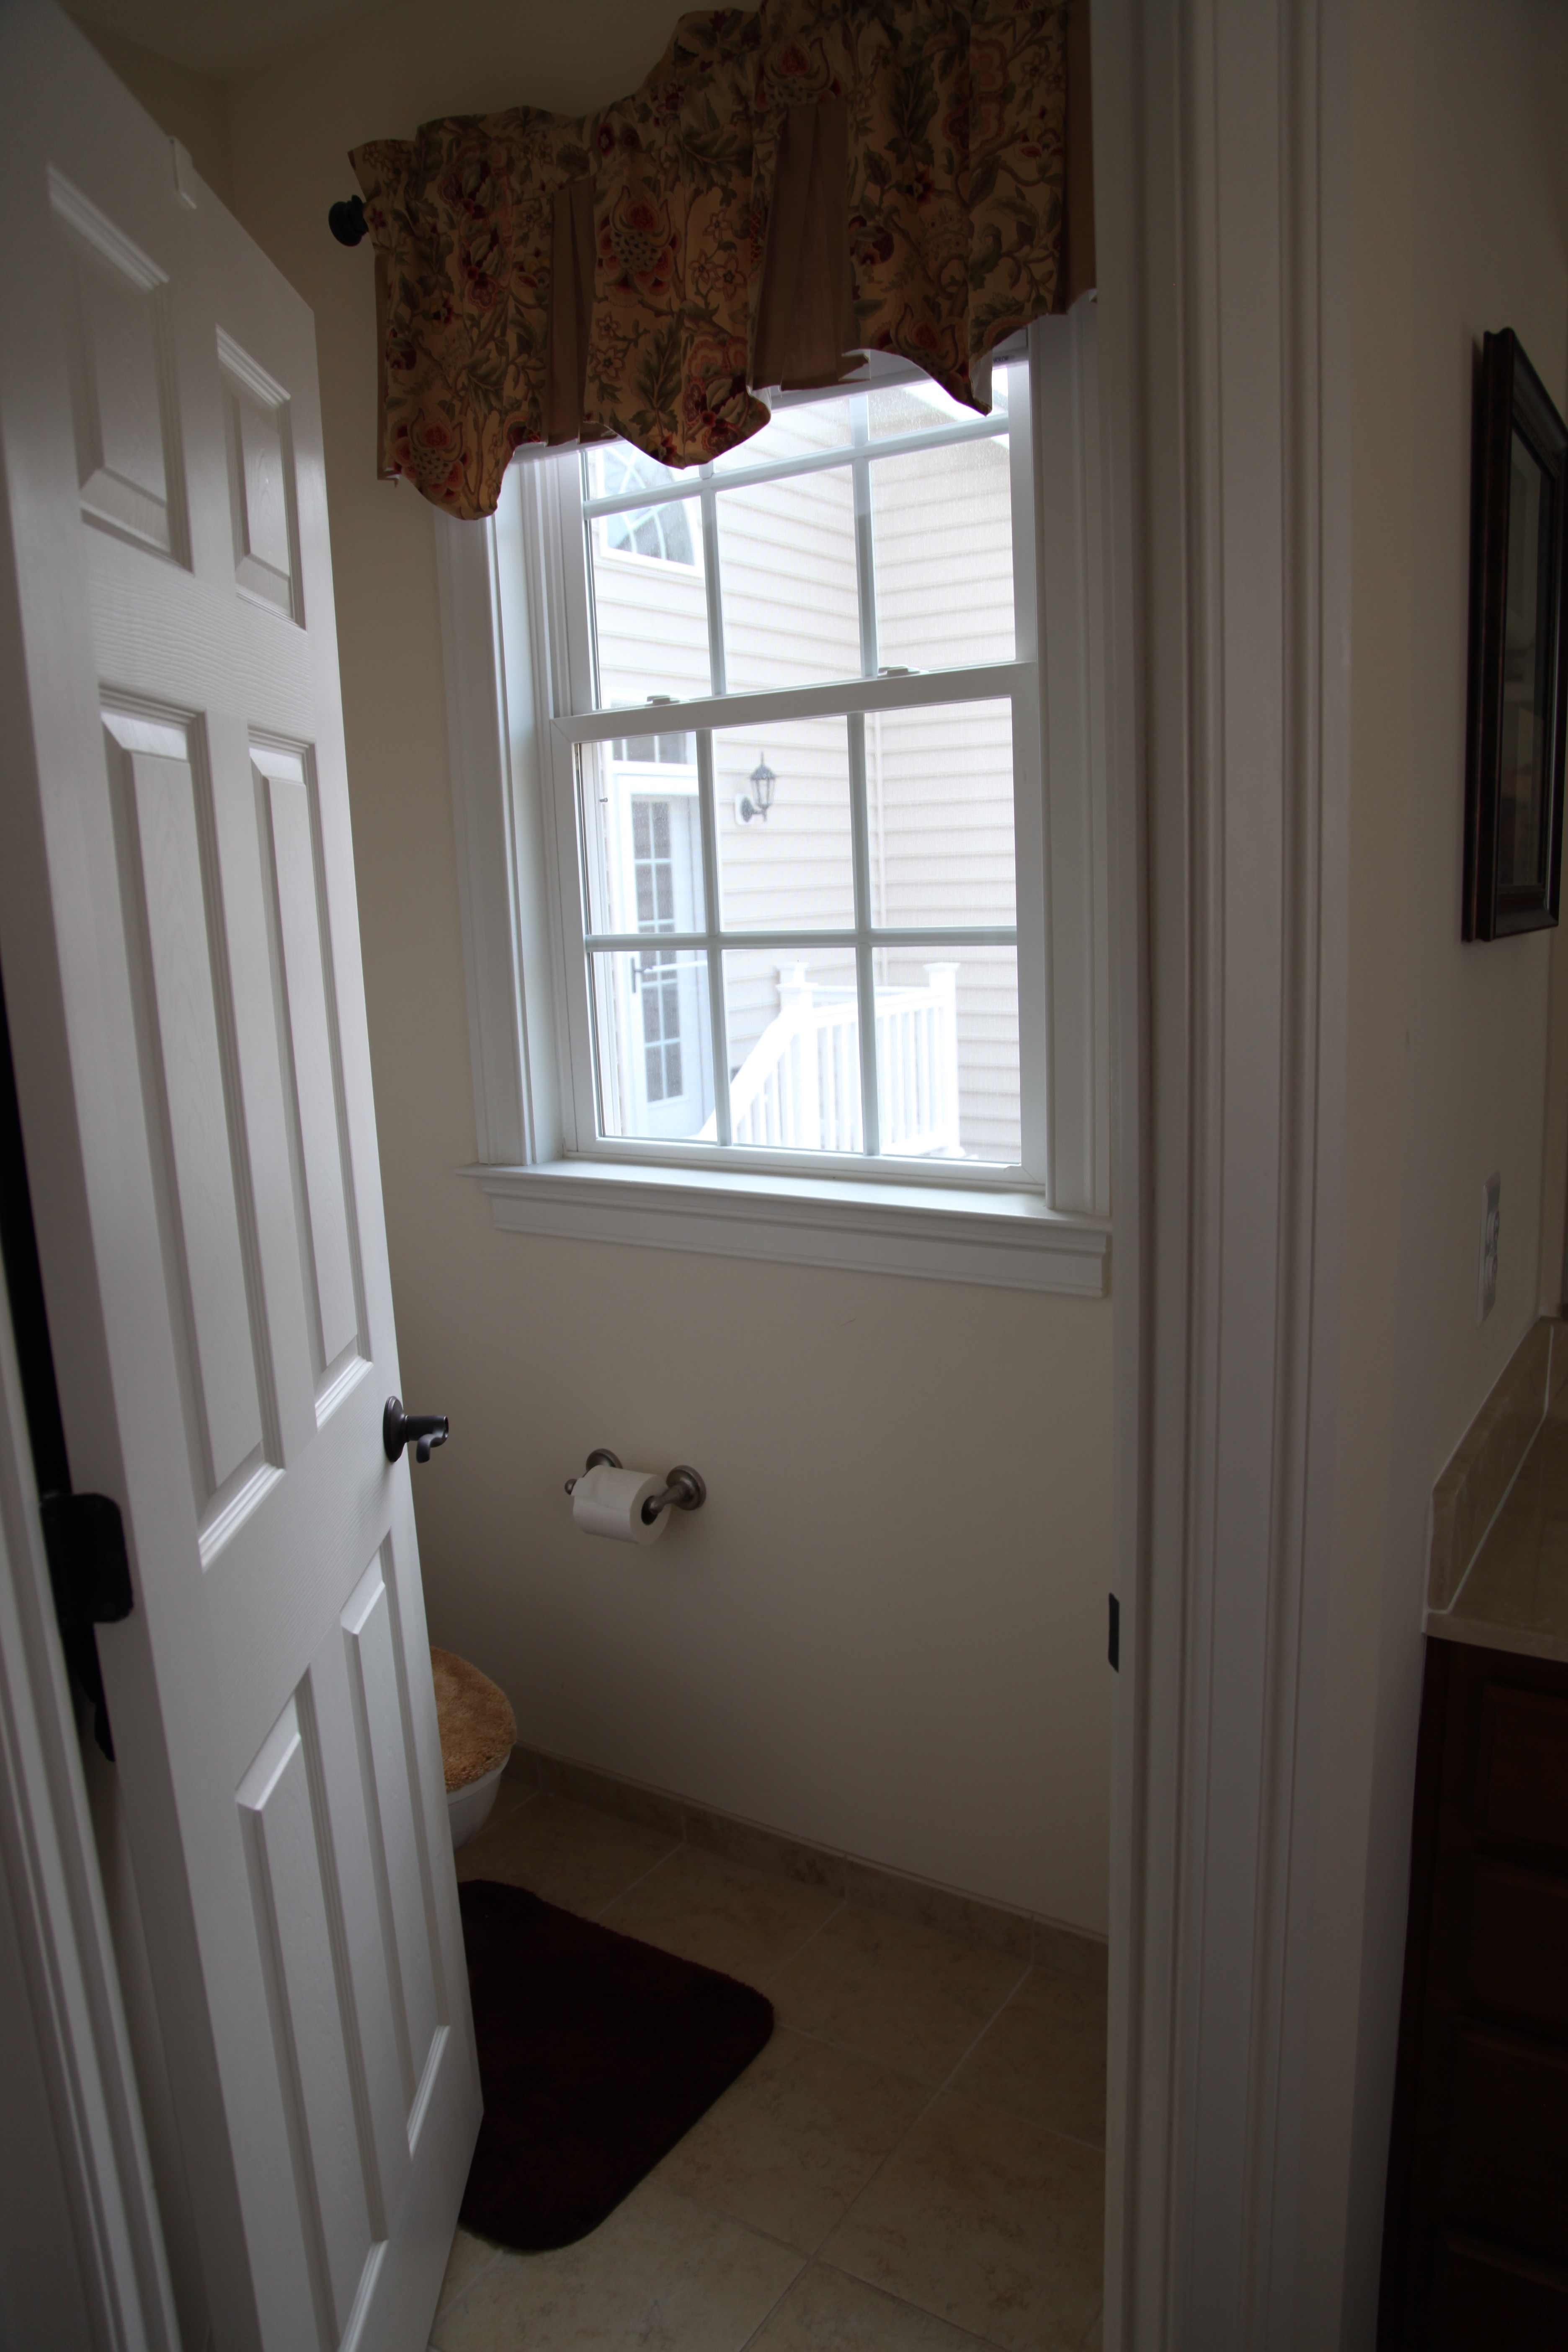
We also have a toilet room…goodness gracious! 😉 Of course I had to do a little decorating in there…
Well, that does it for the interior of our home, except for the basement and I’m not going to show that to you…haha. Stay tuned for a couple more Home Tour entries describing our backyard patio and the front of the house lighting. 🙂
Sneak peek of the patio:
I must say one more time how blessed we feel to have this home; we waited and saved for a very long time to have it and we honestly will never build or move to another one. 🙂
I woke up this morning thinking about making a mailbox spray, that said, I’ve never made a mailbox spray, so I thought I would go to the craft store and buy some materials and try my hand at making one for myself. So, off to my happy place I ventured (Hobby Lobby), and I started to search for something that might work; I was definitely winging it and really didn’t have a clue what I might come up with.
Okay, I’m driving home, and as I’m pulling into my driveway, I looked at my mailbox and decided that I was quite happy with how I had decorated it already and I decided that it didn’t need a Spray…
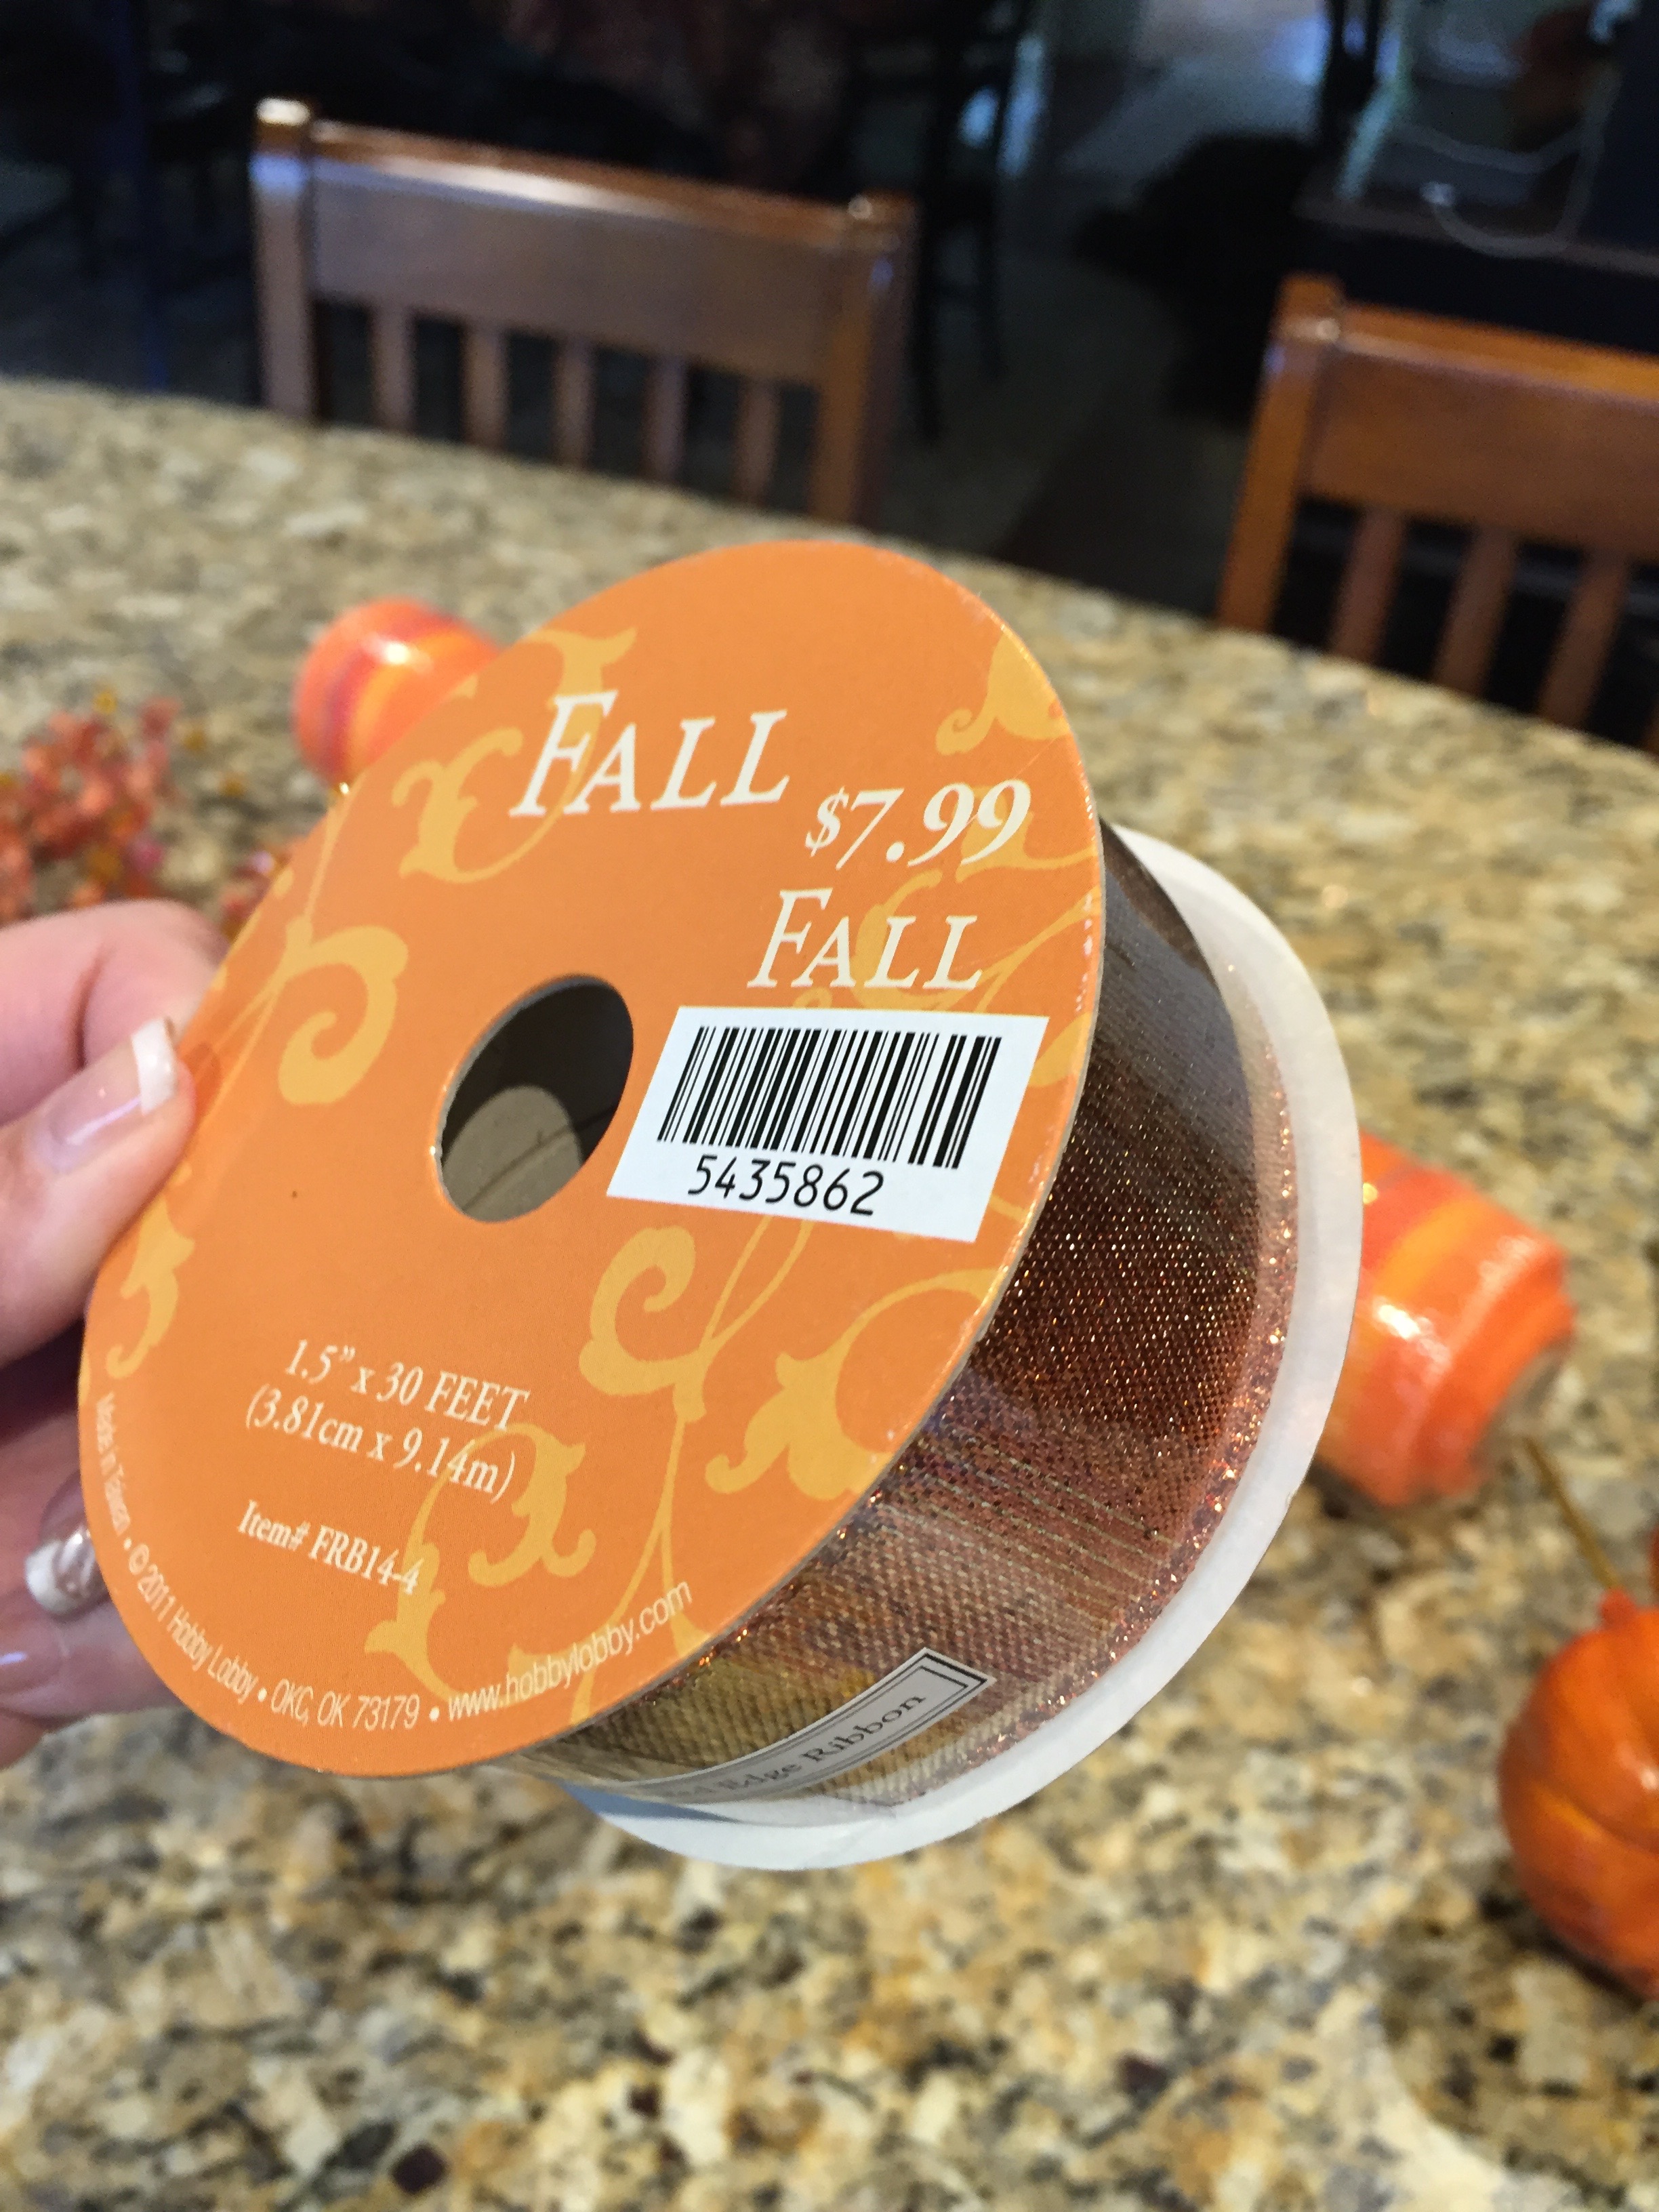
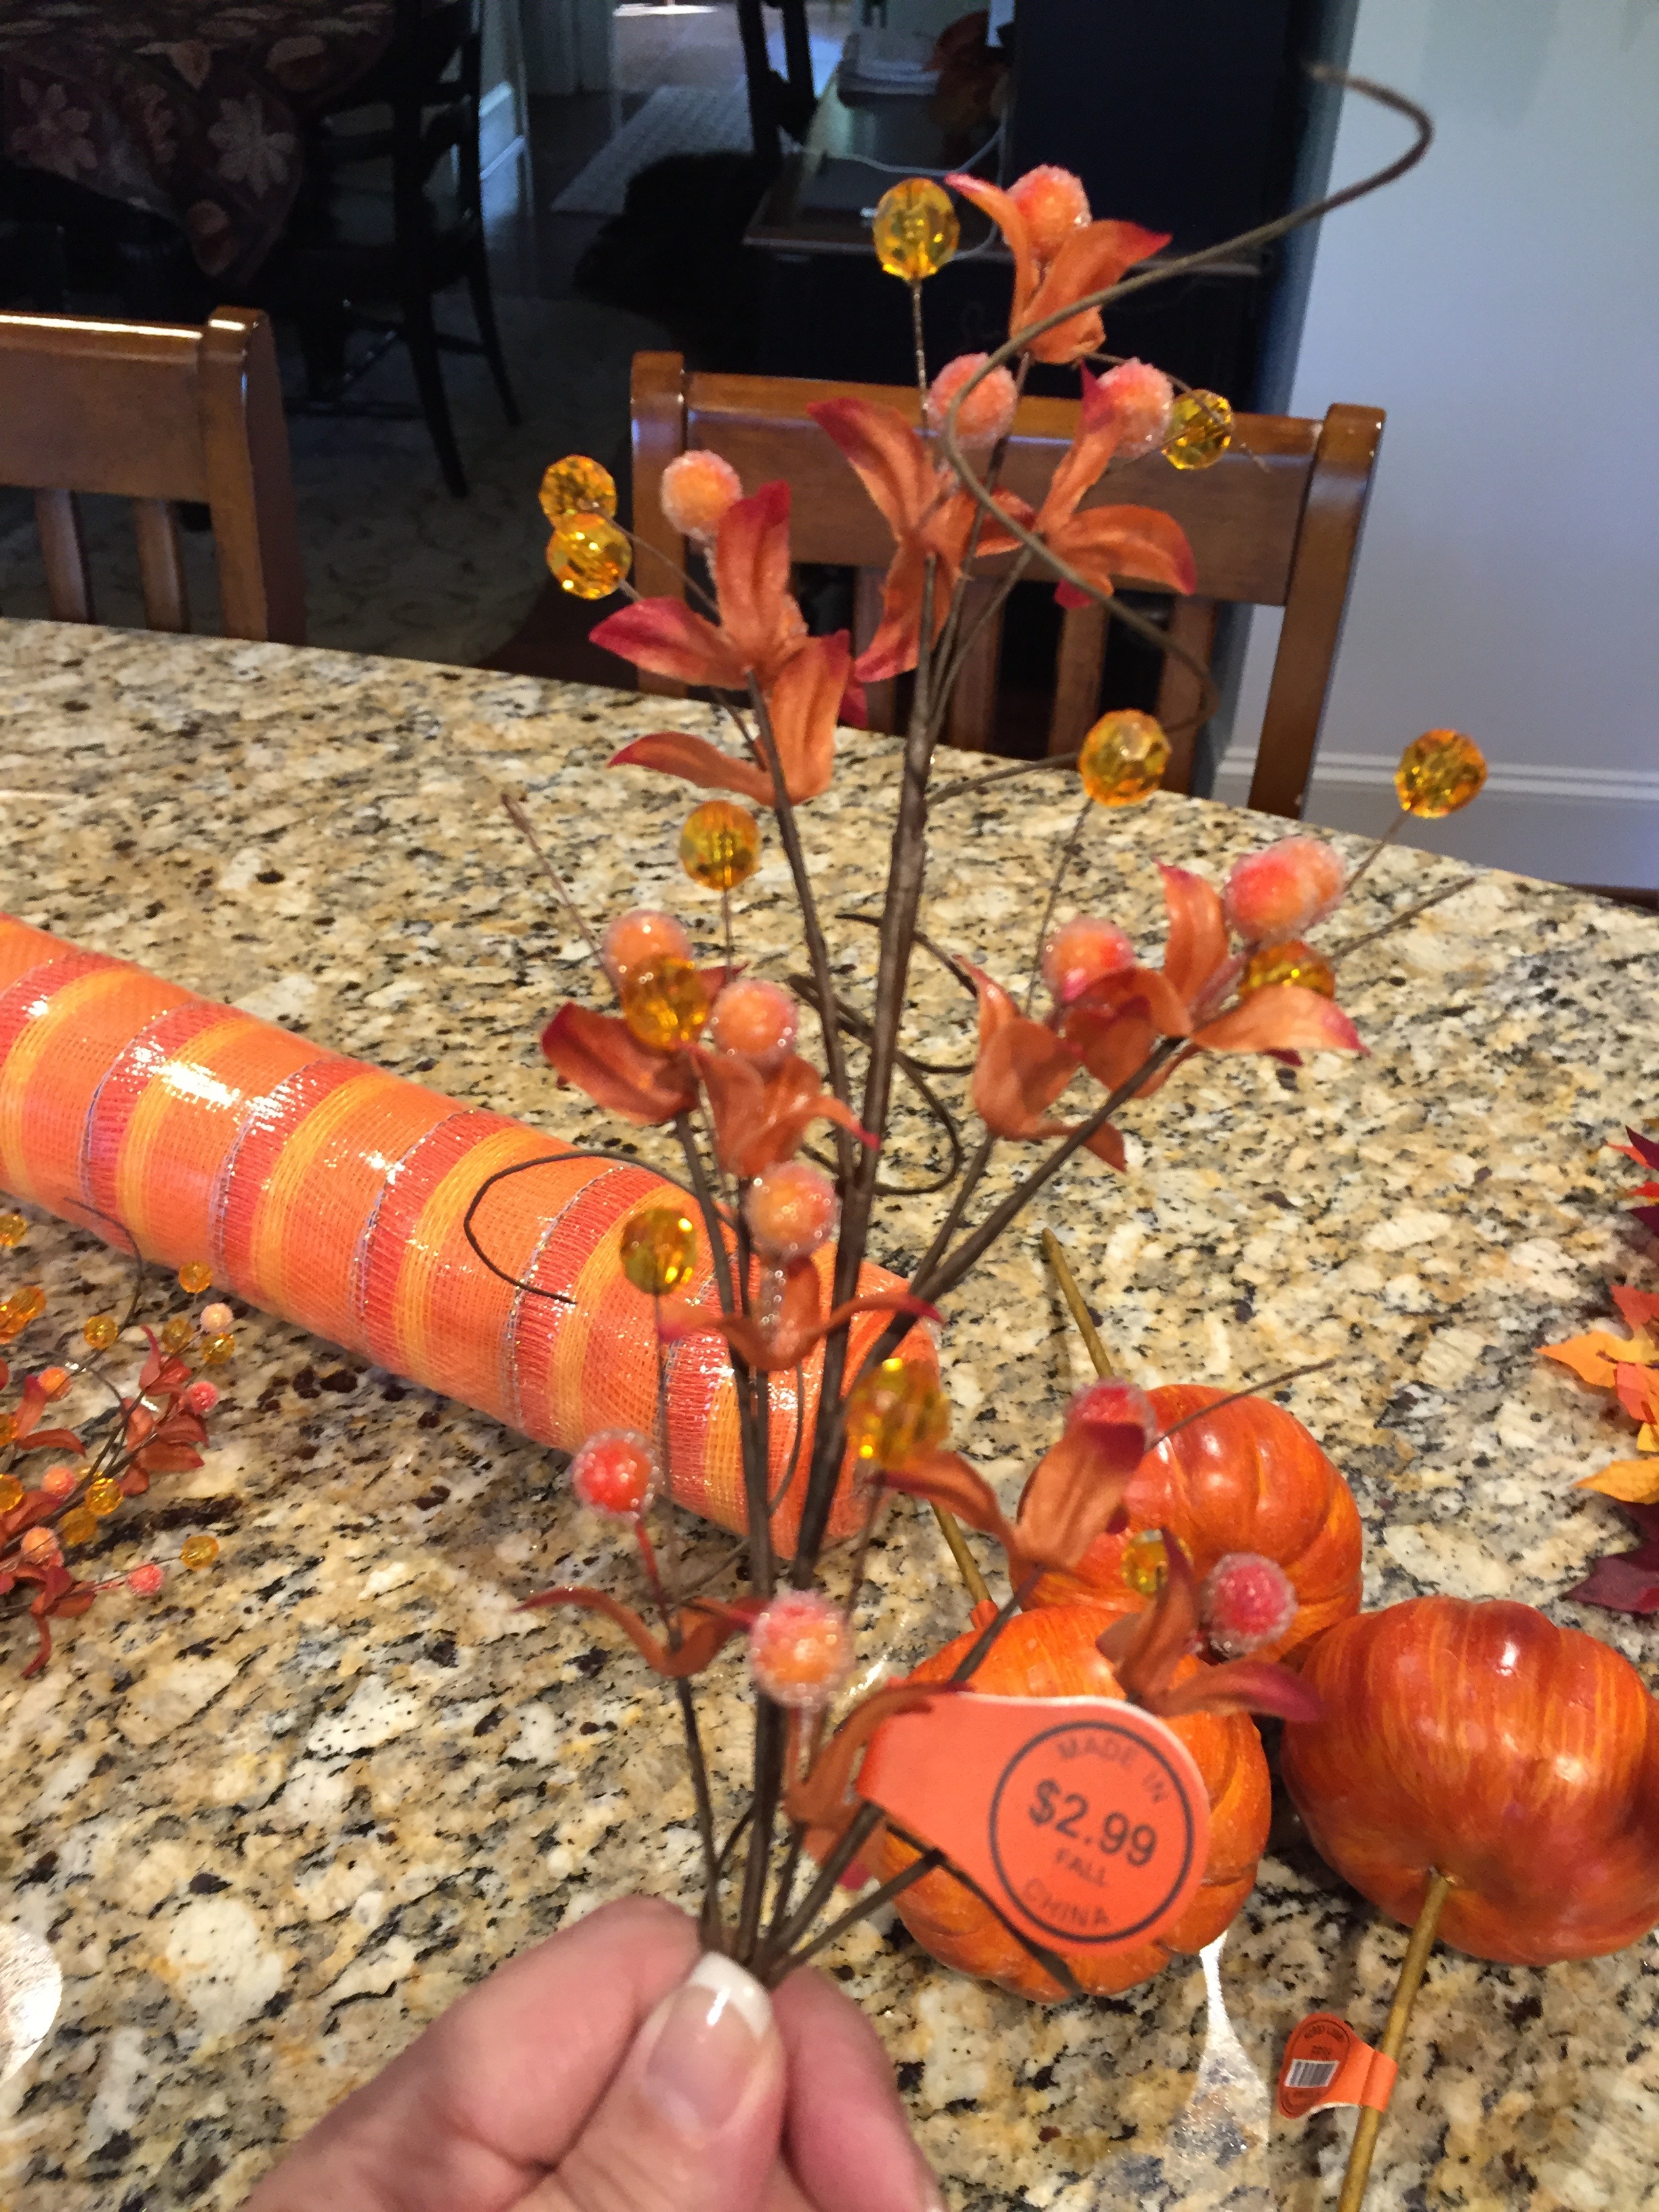
So I decided that instead of a Mailbox Spray, I’d make a spray and hang it on our wagon wheels (that hide our well pipe/head). Of course, again, I really had no idea what I’d come up with, but here are the materials that I purchased (all on sale for 40% off) and that I would be working with:
This ‘wreath’/’mailbox’ form:
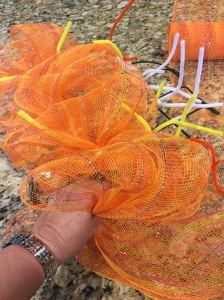
One roll of deco mesh and one roll of Fall ribbon:
Leaf, Berry and Leaf, and Pumpkin picks:
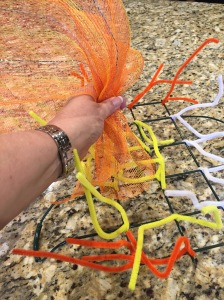
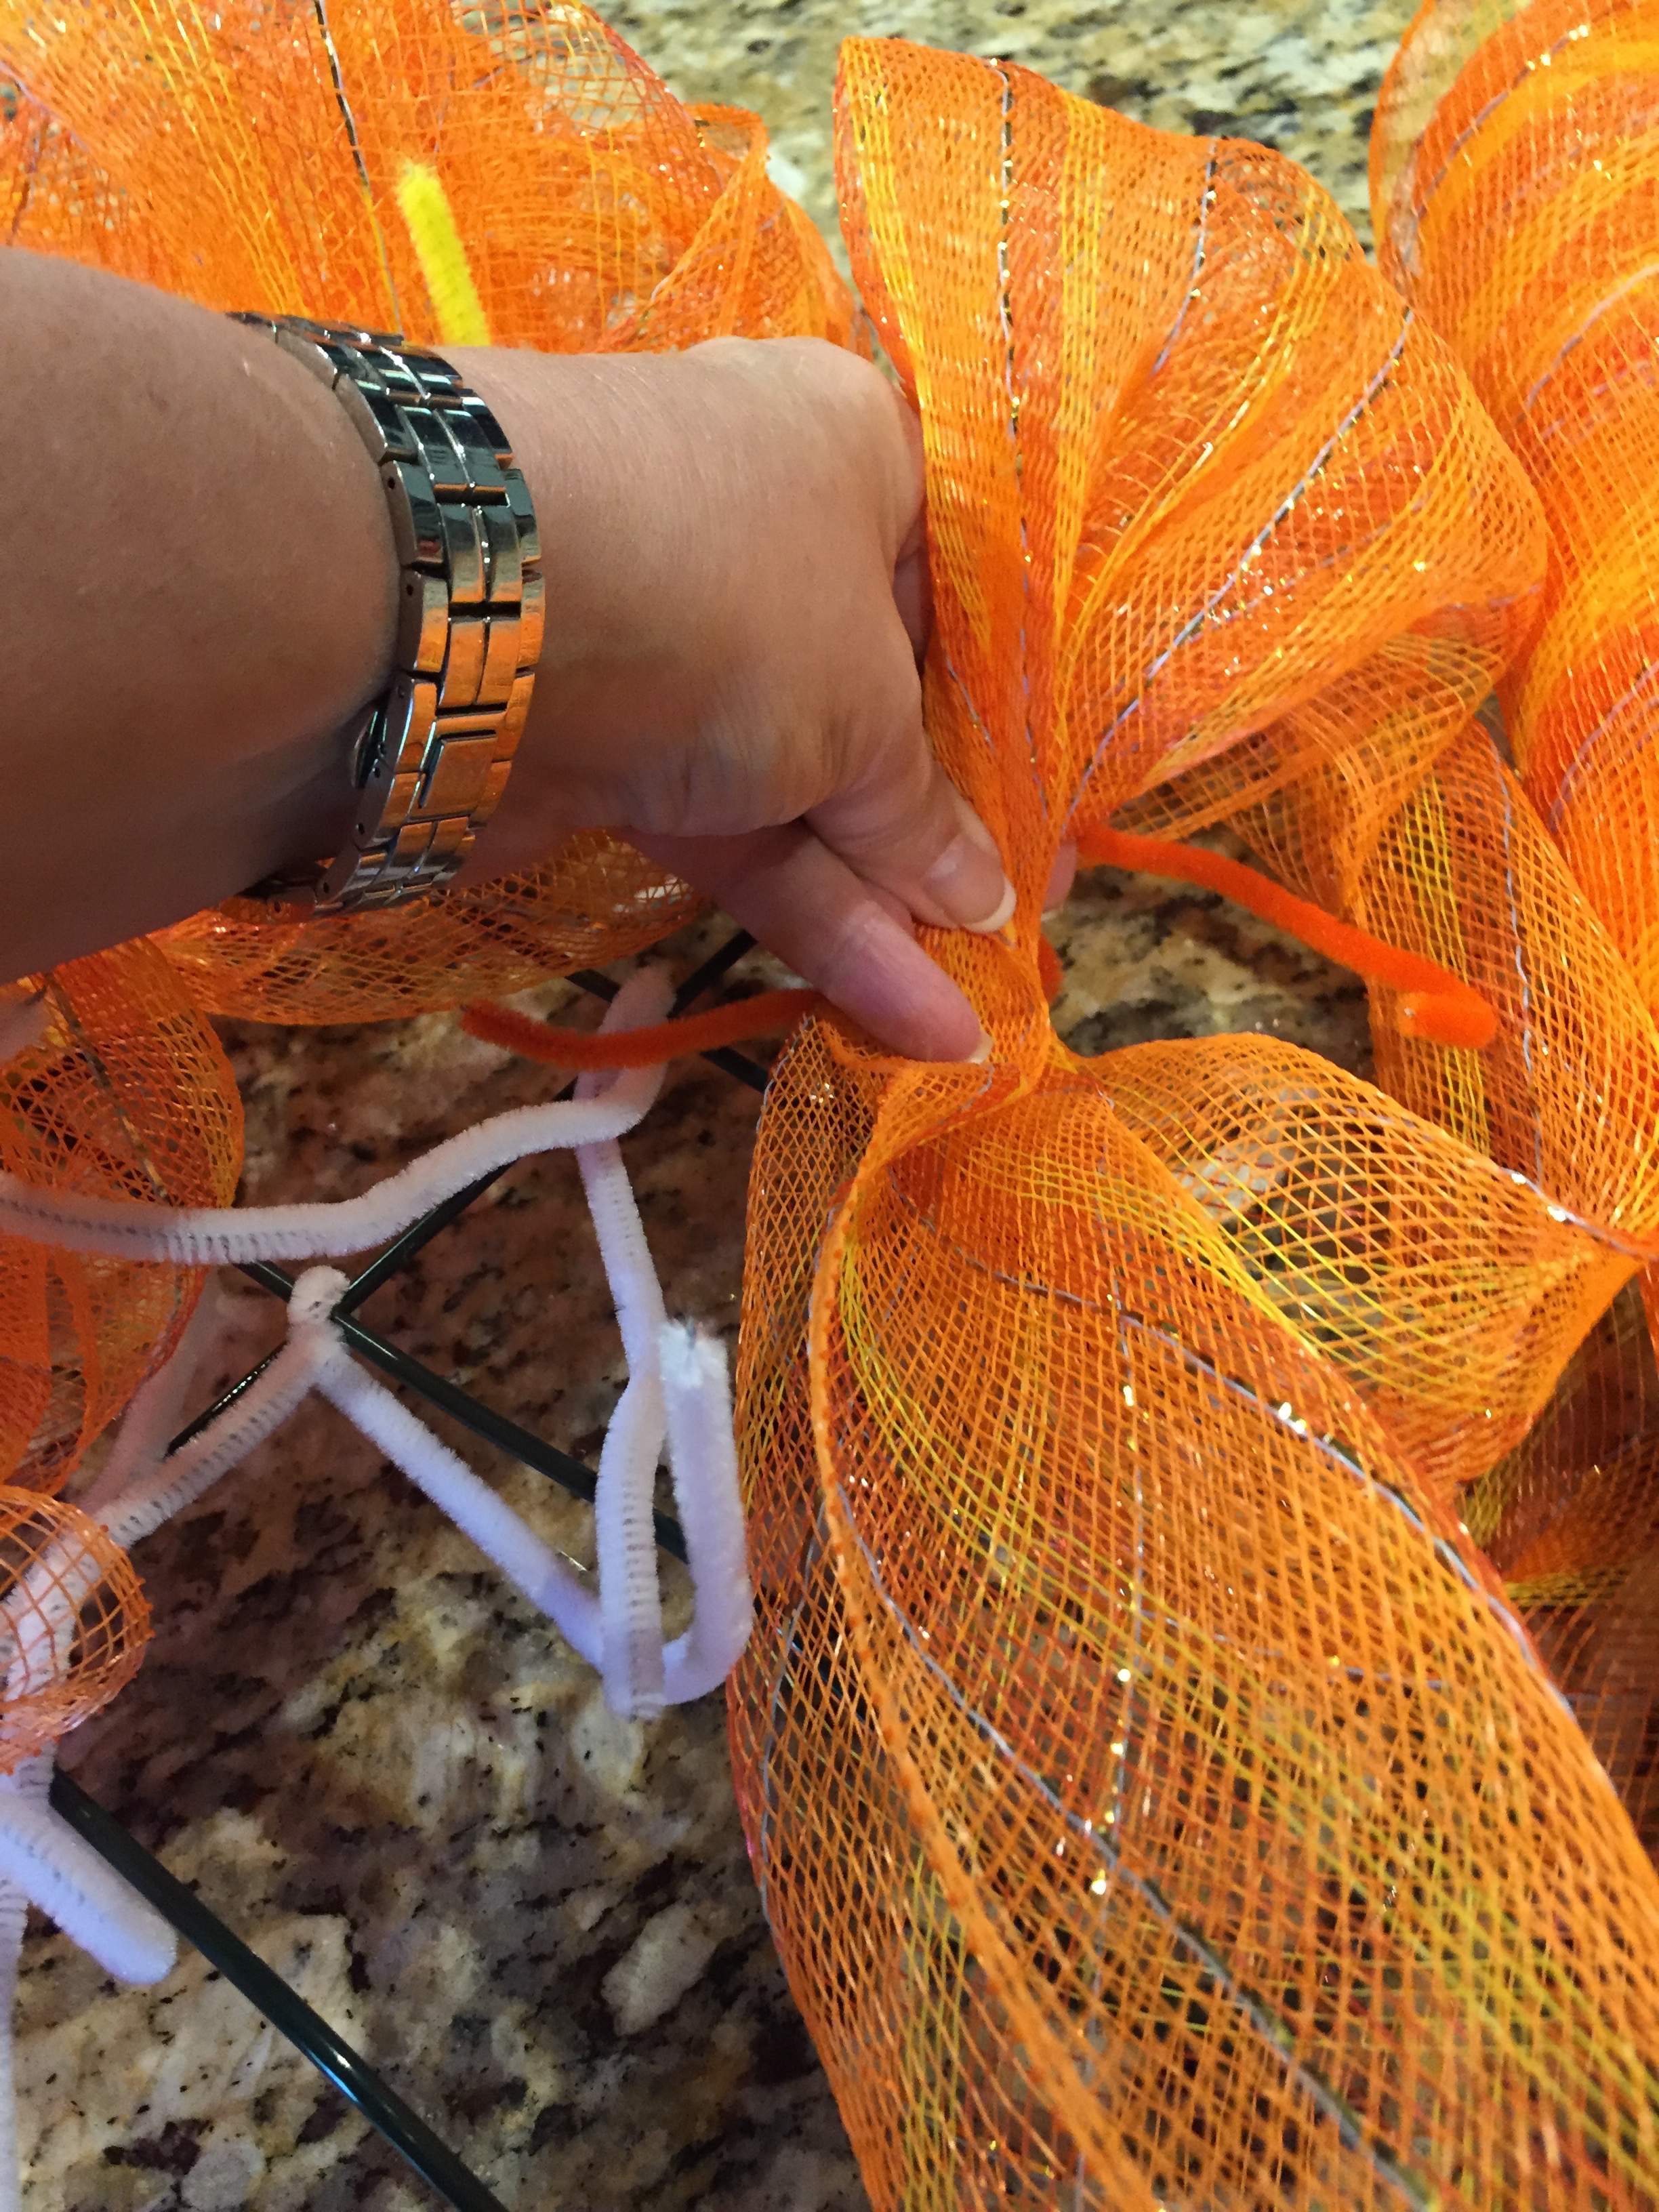
I also went and collected some pipe cleaners from my craft supplies and I dove right into this project. The first thing I did was twist pipe cleaners around each crossbar of the ‘mailbox’ form..Like this:
Once all of the pipe cleaners were in place, I started to attach the deco mesh in each pipe cleaner…making pretty large loops as I worked my way down one row…
Then working my way to the next row until I completed all three rows…If you try this, don’t be afraid to make your loops large, the bigger the better in my opinion…it gives you more to work with and manipulate.
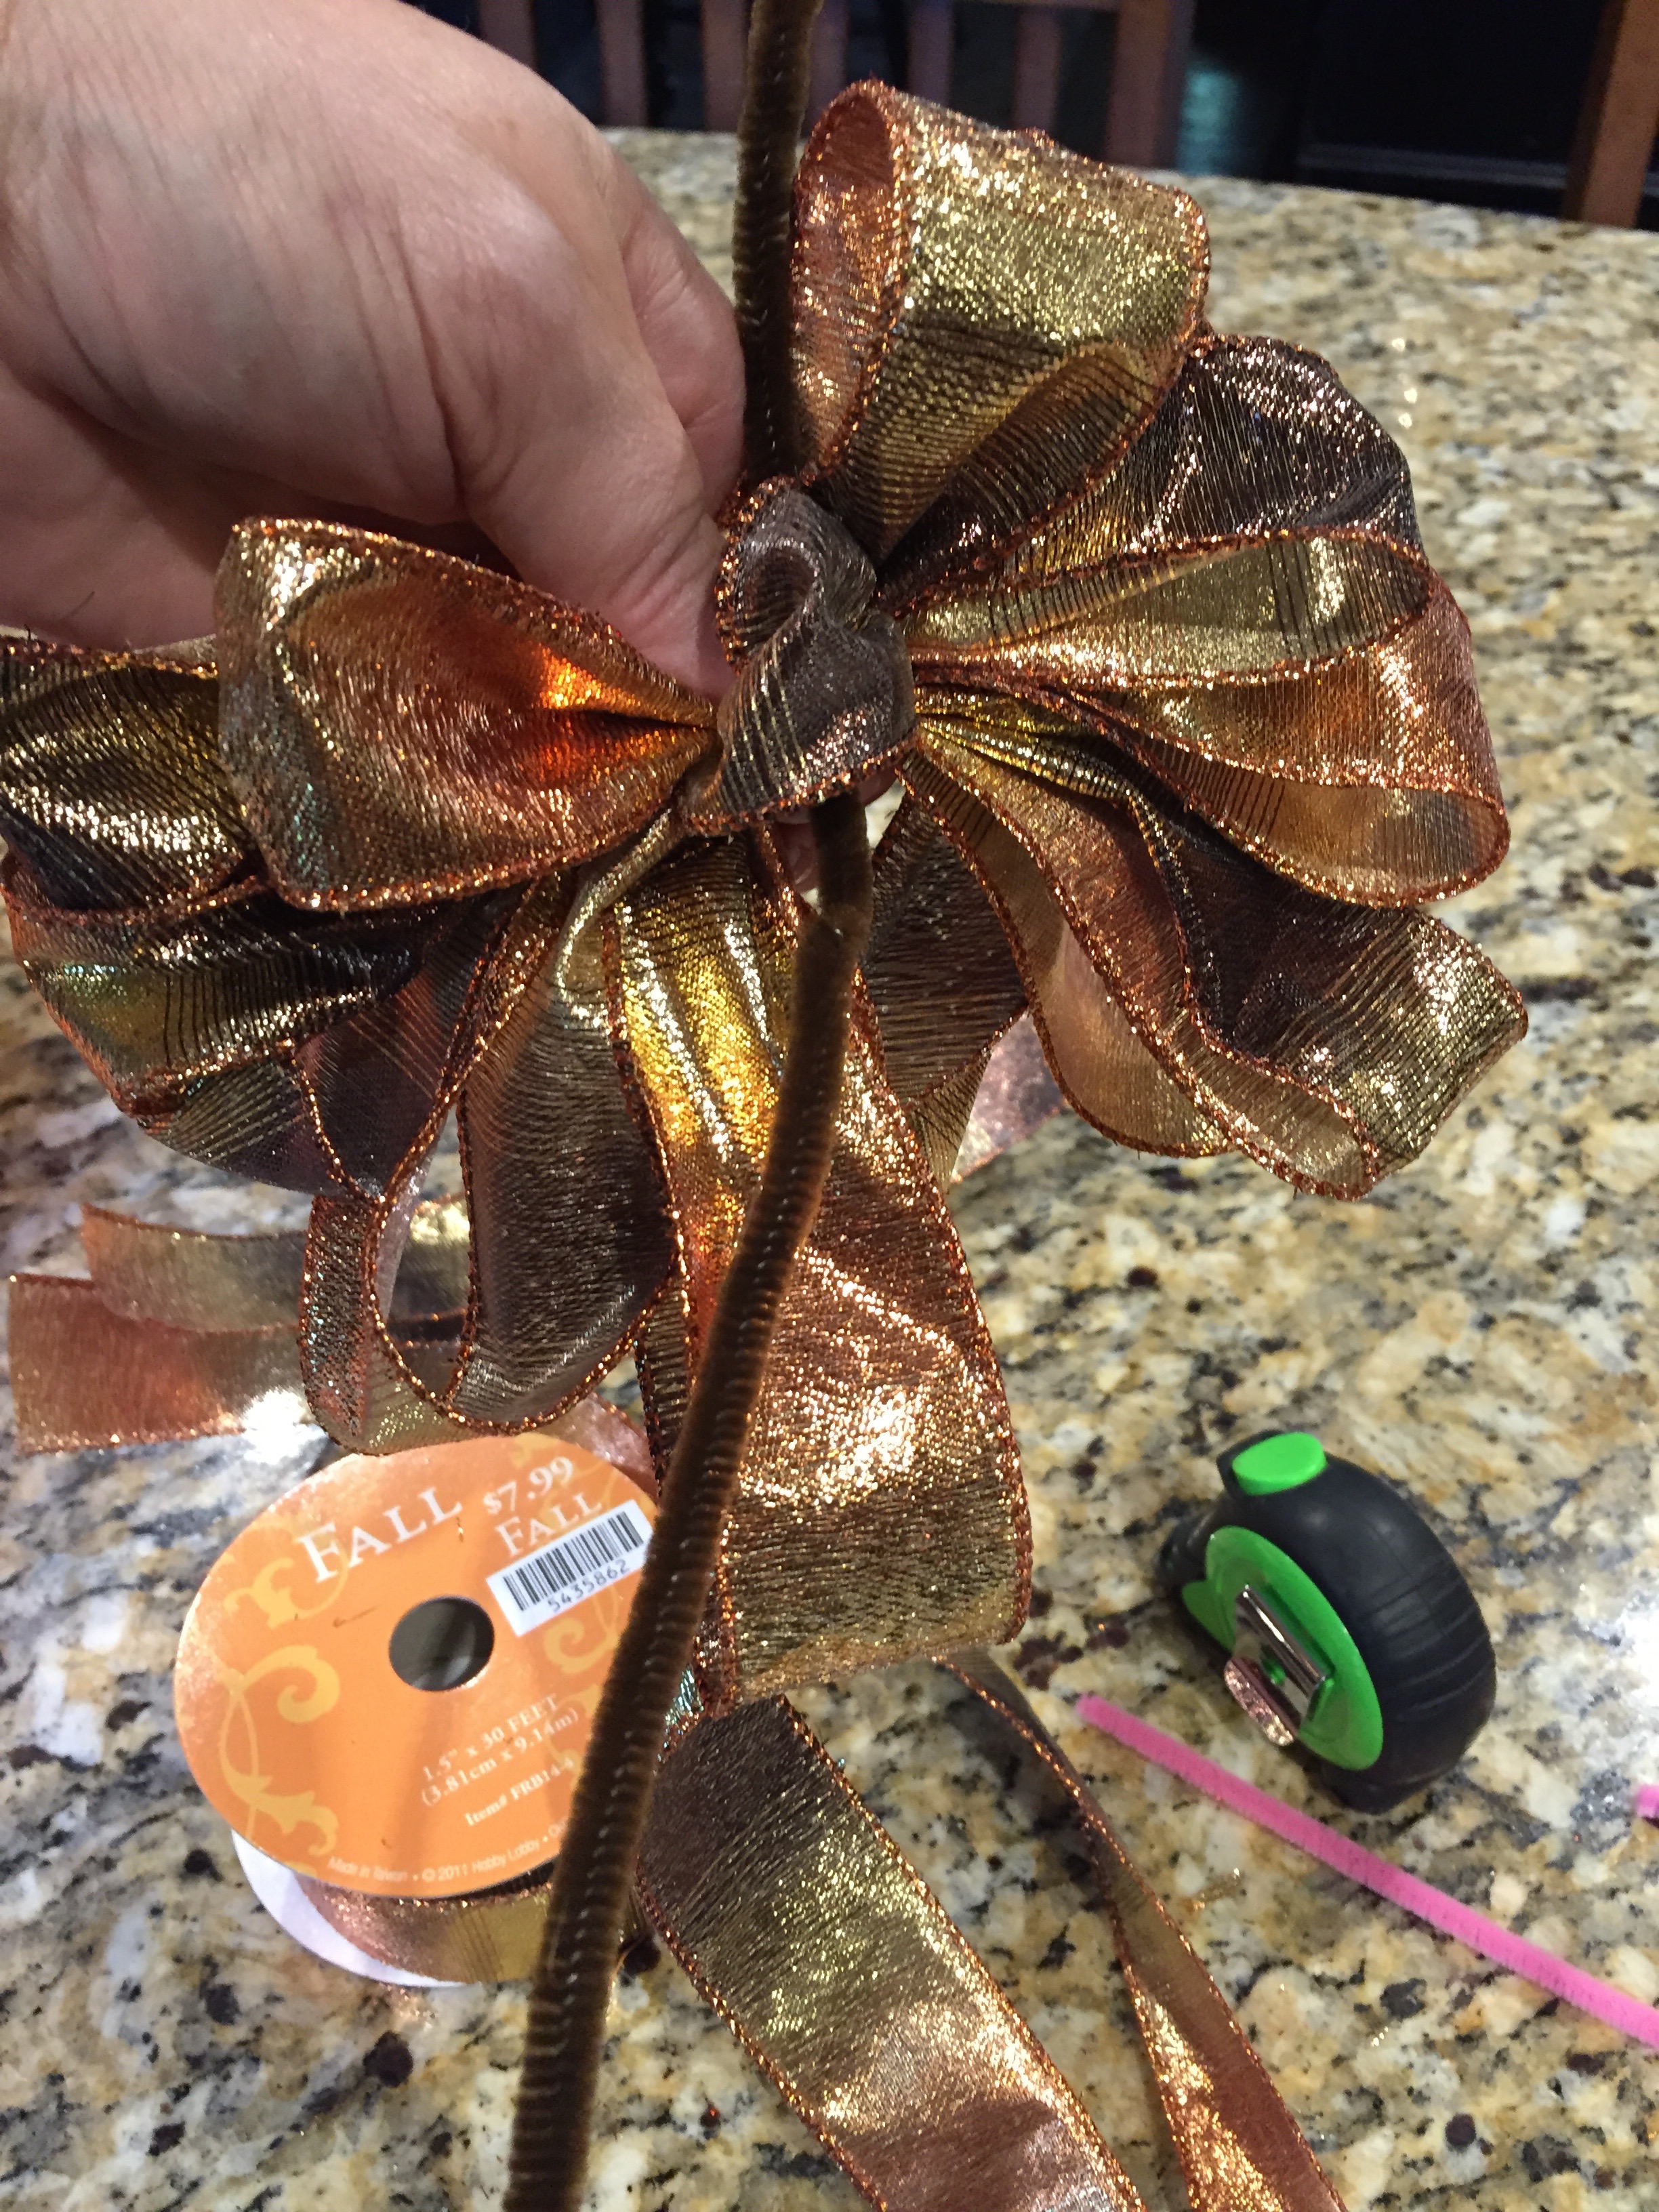
Okay, so that worked out well, I was ready to start adding a bit of the coordinating ribbon. The first thing that I did was cut 12-12″ strips:
Then I cut points into the ends of each side of the ribbon strips…
I then put them in 4 piles of 3 and tied a pile into each corner’s pipe cleaner–spreading them out once they were attached.
I then made a bow (see my Bow Tutorial Video) and attached it to the center of the spray by using the pipe cleaner that I used to close the bow…
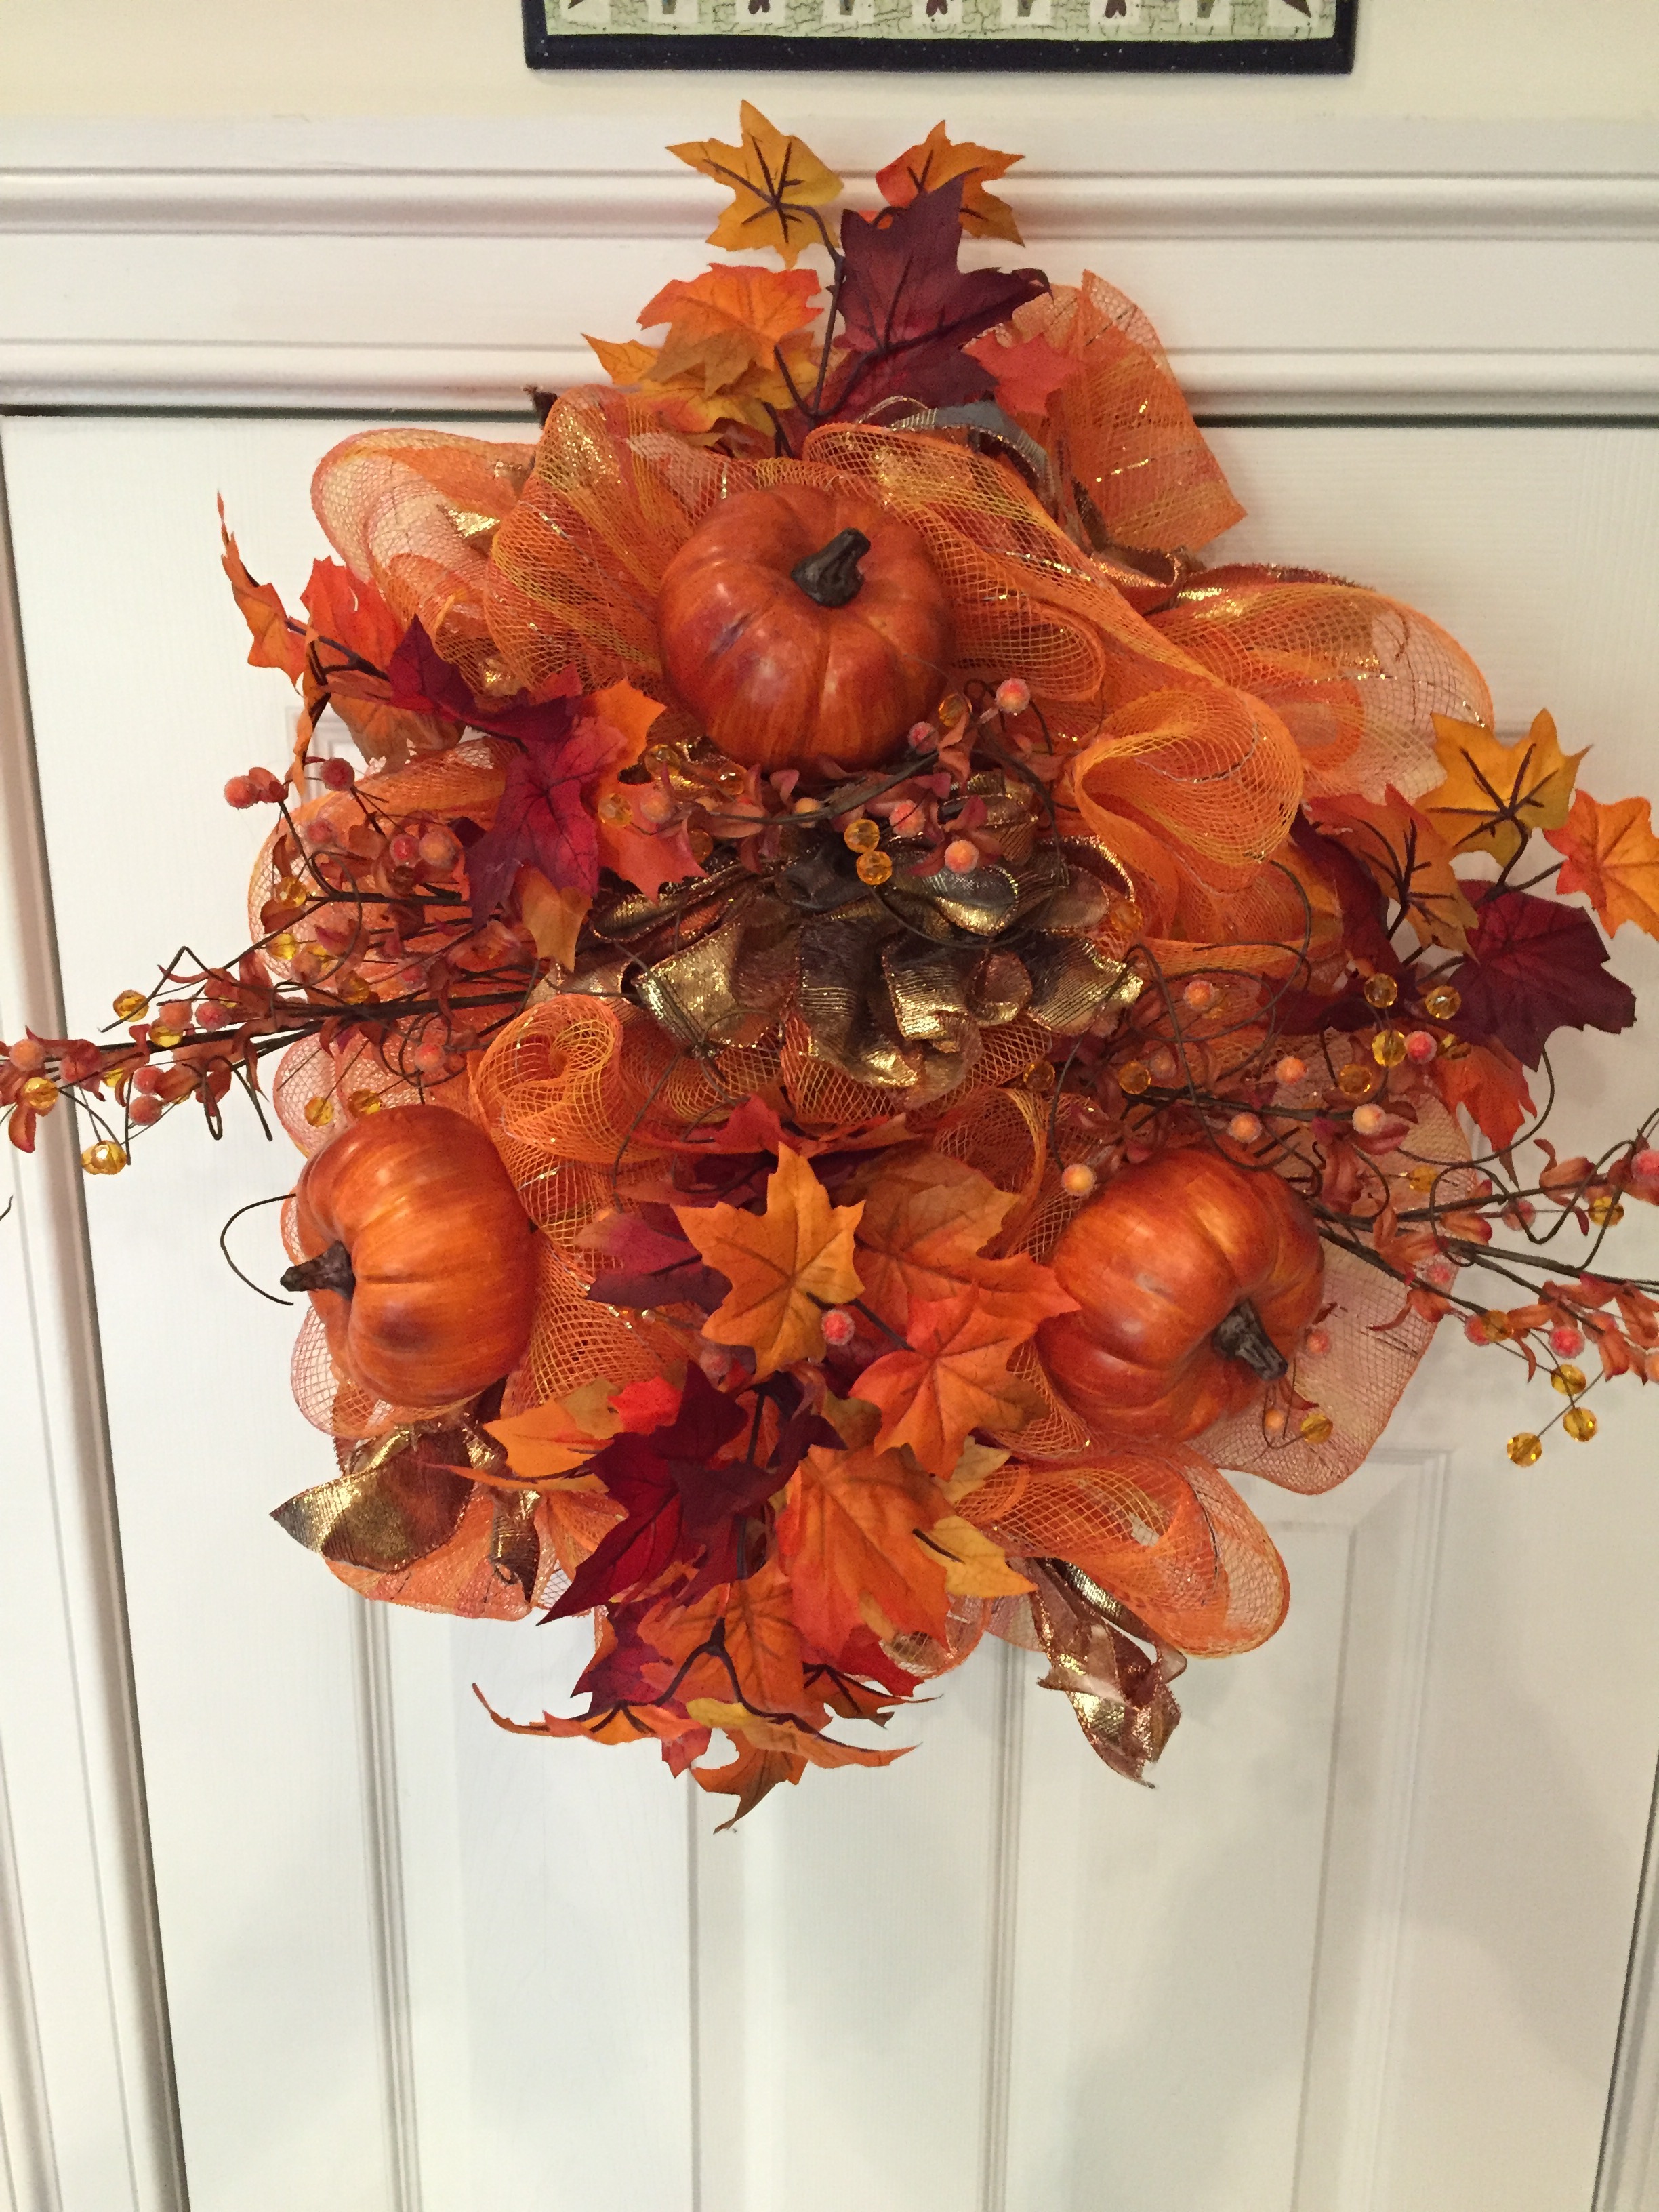
Now it was time to add in the Fall picks, I quickly realized that I was going to need to hot glue them into place, it was way too poofy for me to add them into the existing pipe cleaners (which is what I sometimes do on my Deco Mesh Wreaths).
There was no rhyme or reason to how I arranged the picks, I just stuck them where I thought they looked nice and then I put glue on the stems and that held them in place very nicely.
And this is what I came up with, I was pretty happy with myself… 😉
I used tie wraps to attach the Spray to the wagon wheels:
And here it is on the wagon wheels:
Considering that I had never made what I’m dubbing a “Spray”, I was pretty pleased with my accomplishment. It just goes to show you, if you just give it a try, you might surprise yourself as to what you come up with in the end. 🙂 Please don’t hesitate to leave me any questions that you might have in the comments below. 🙂
Until next time, y’all take good care! ❤
**In crafting there are no mistakes just unique creations**
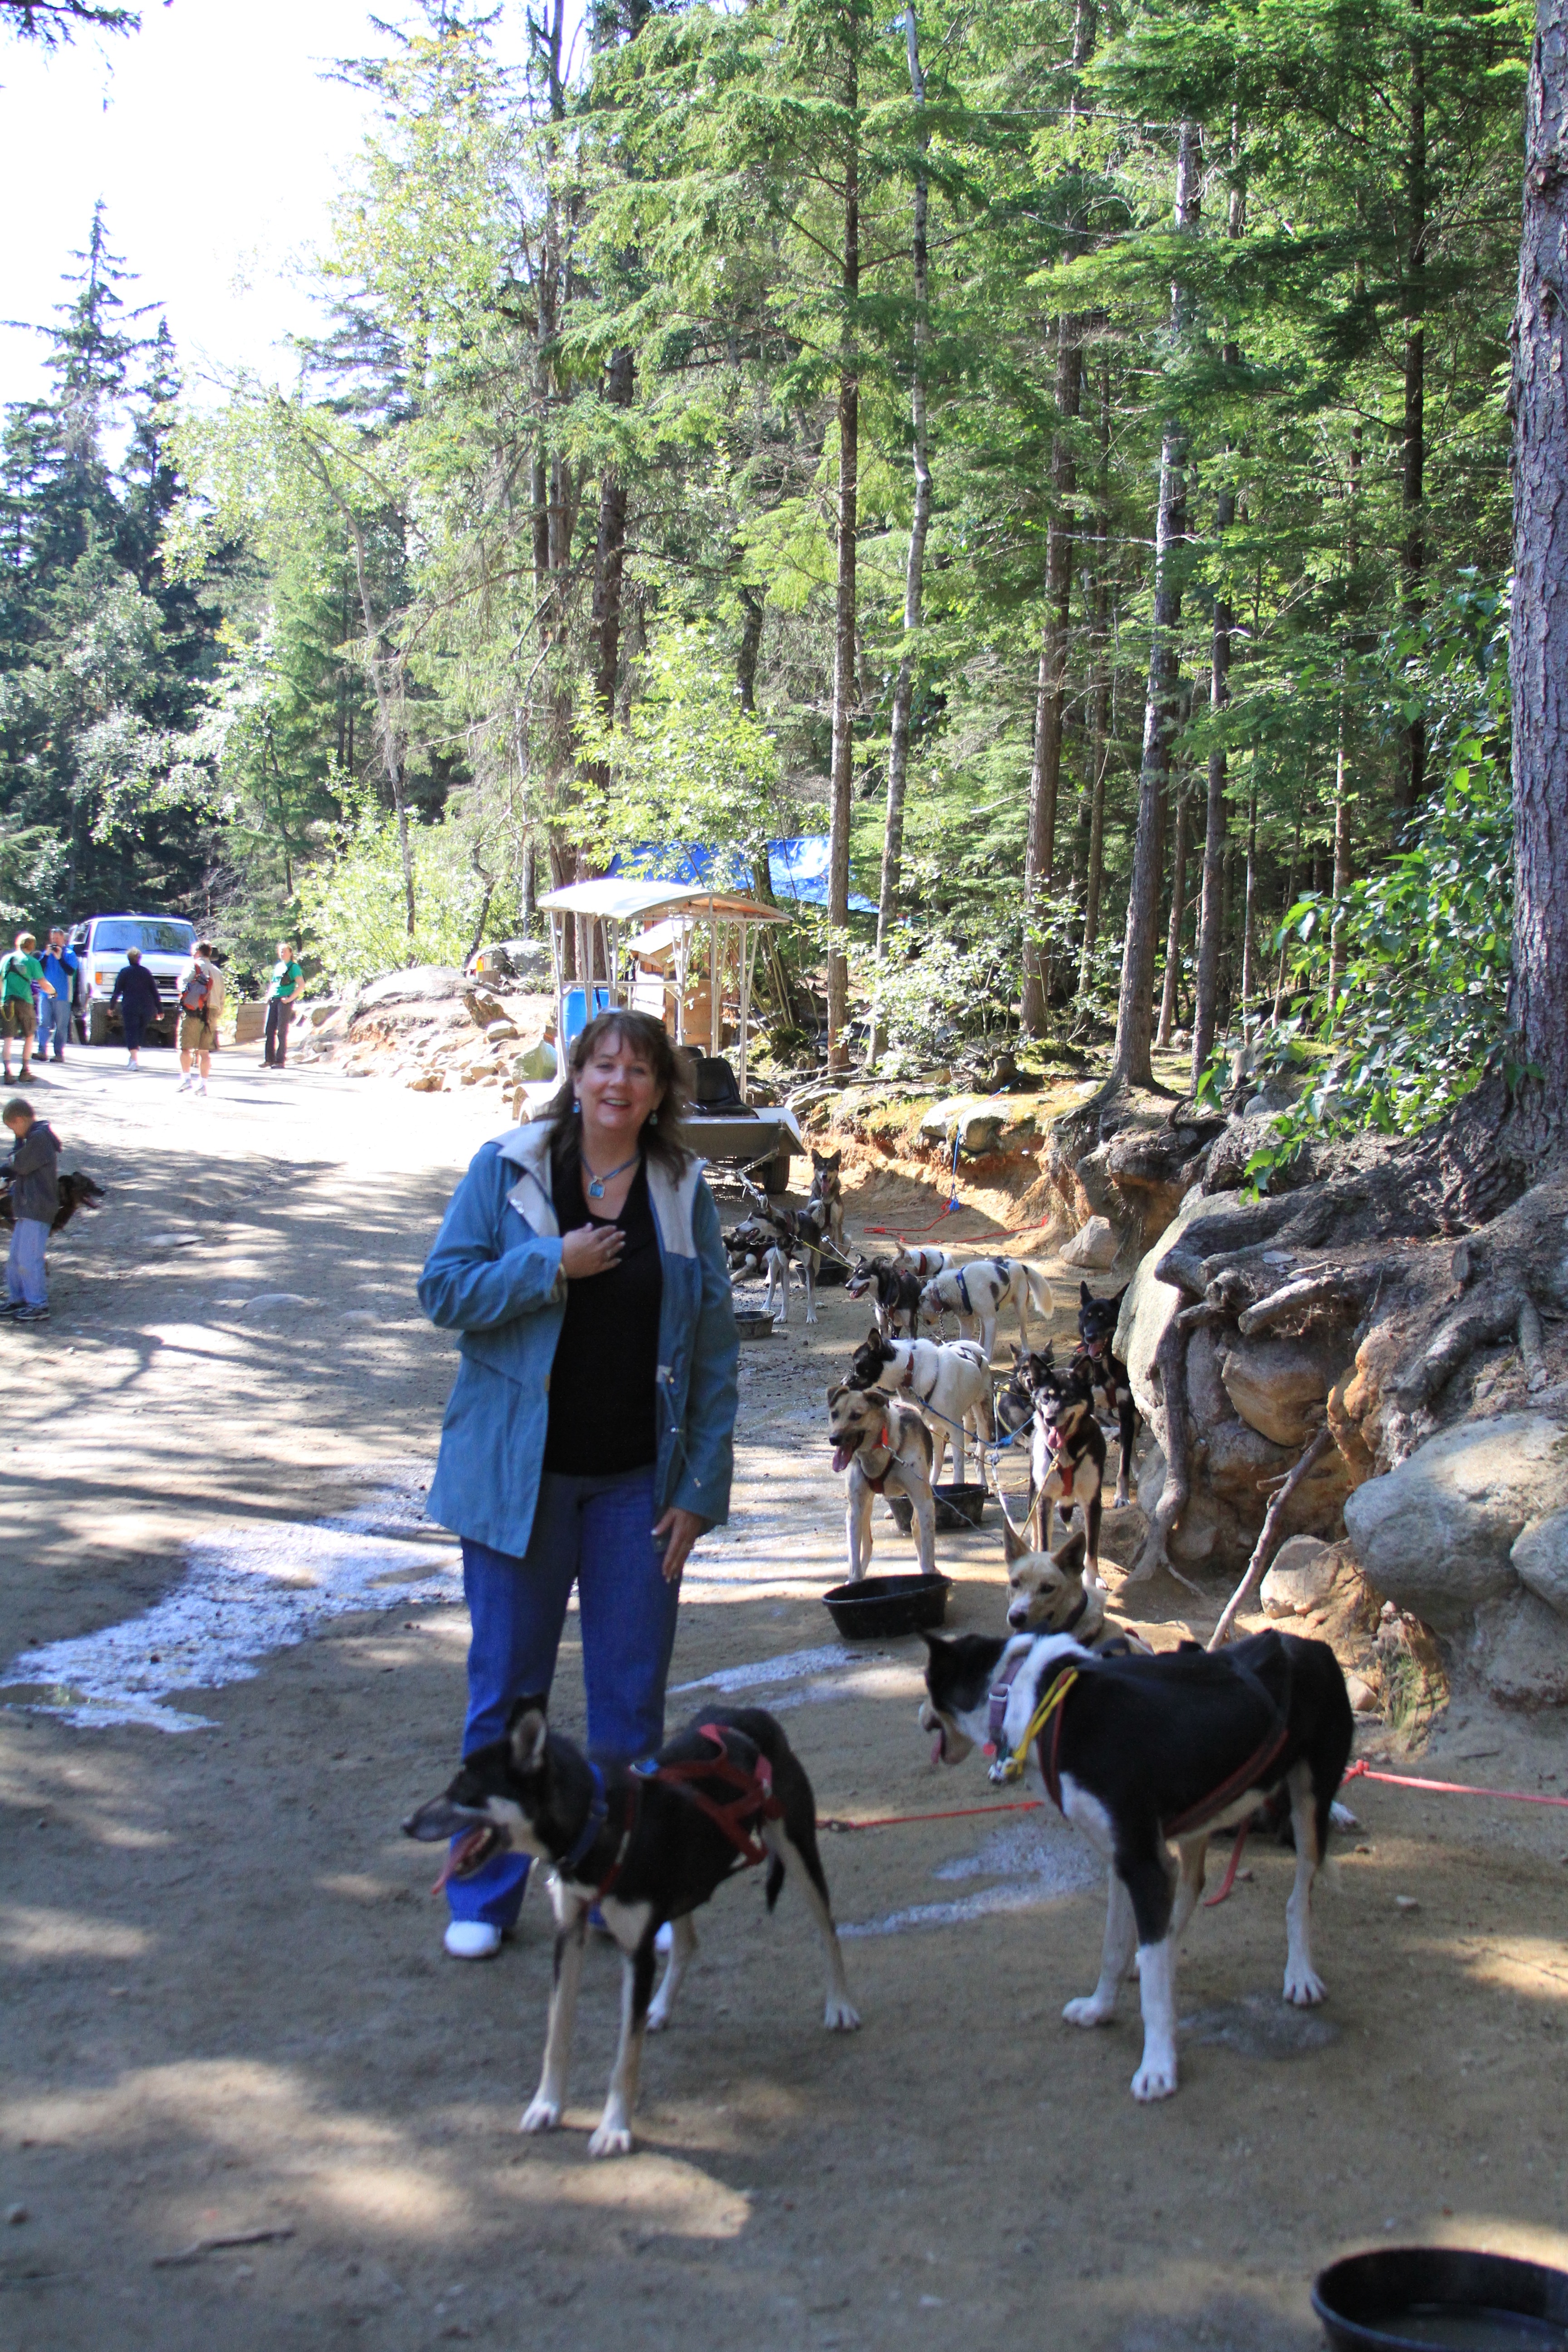
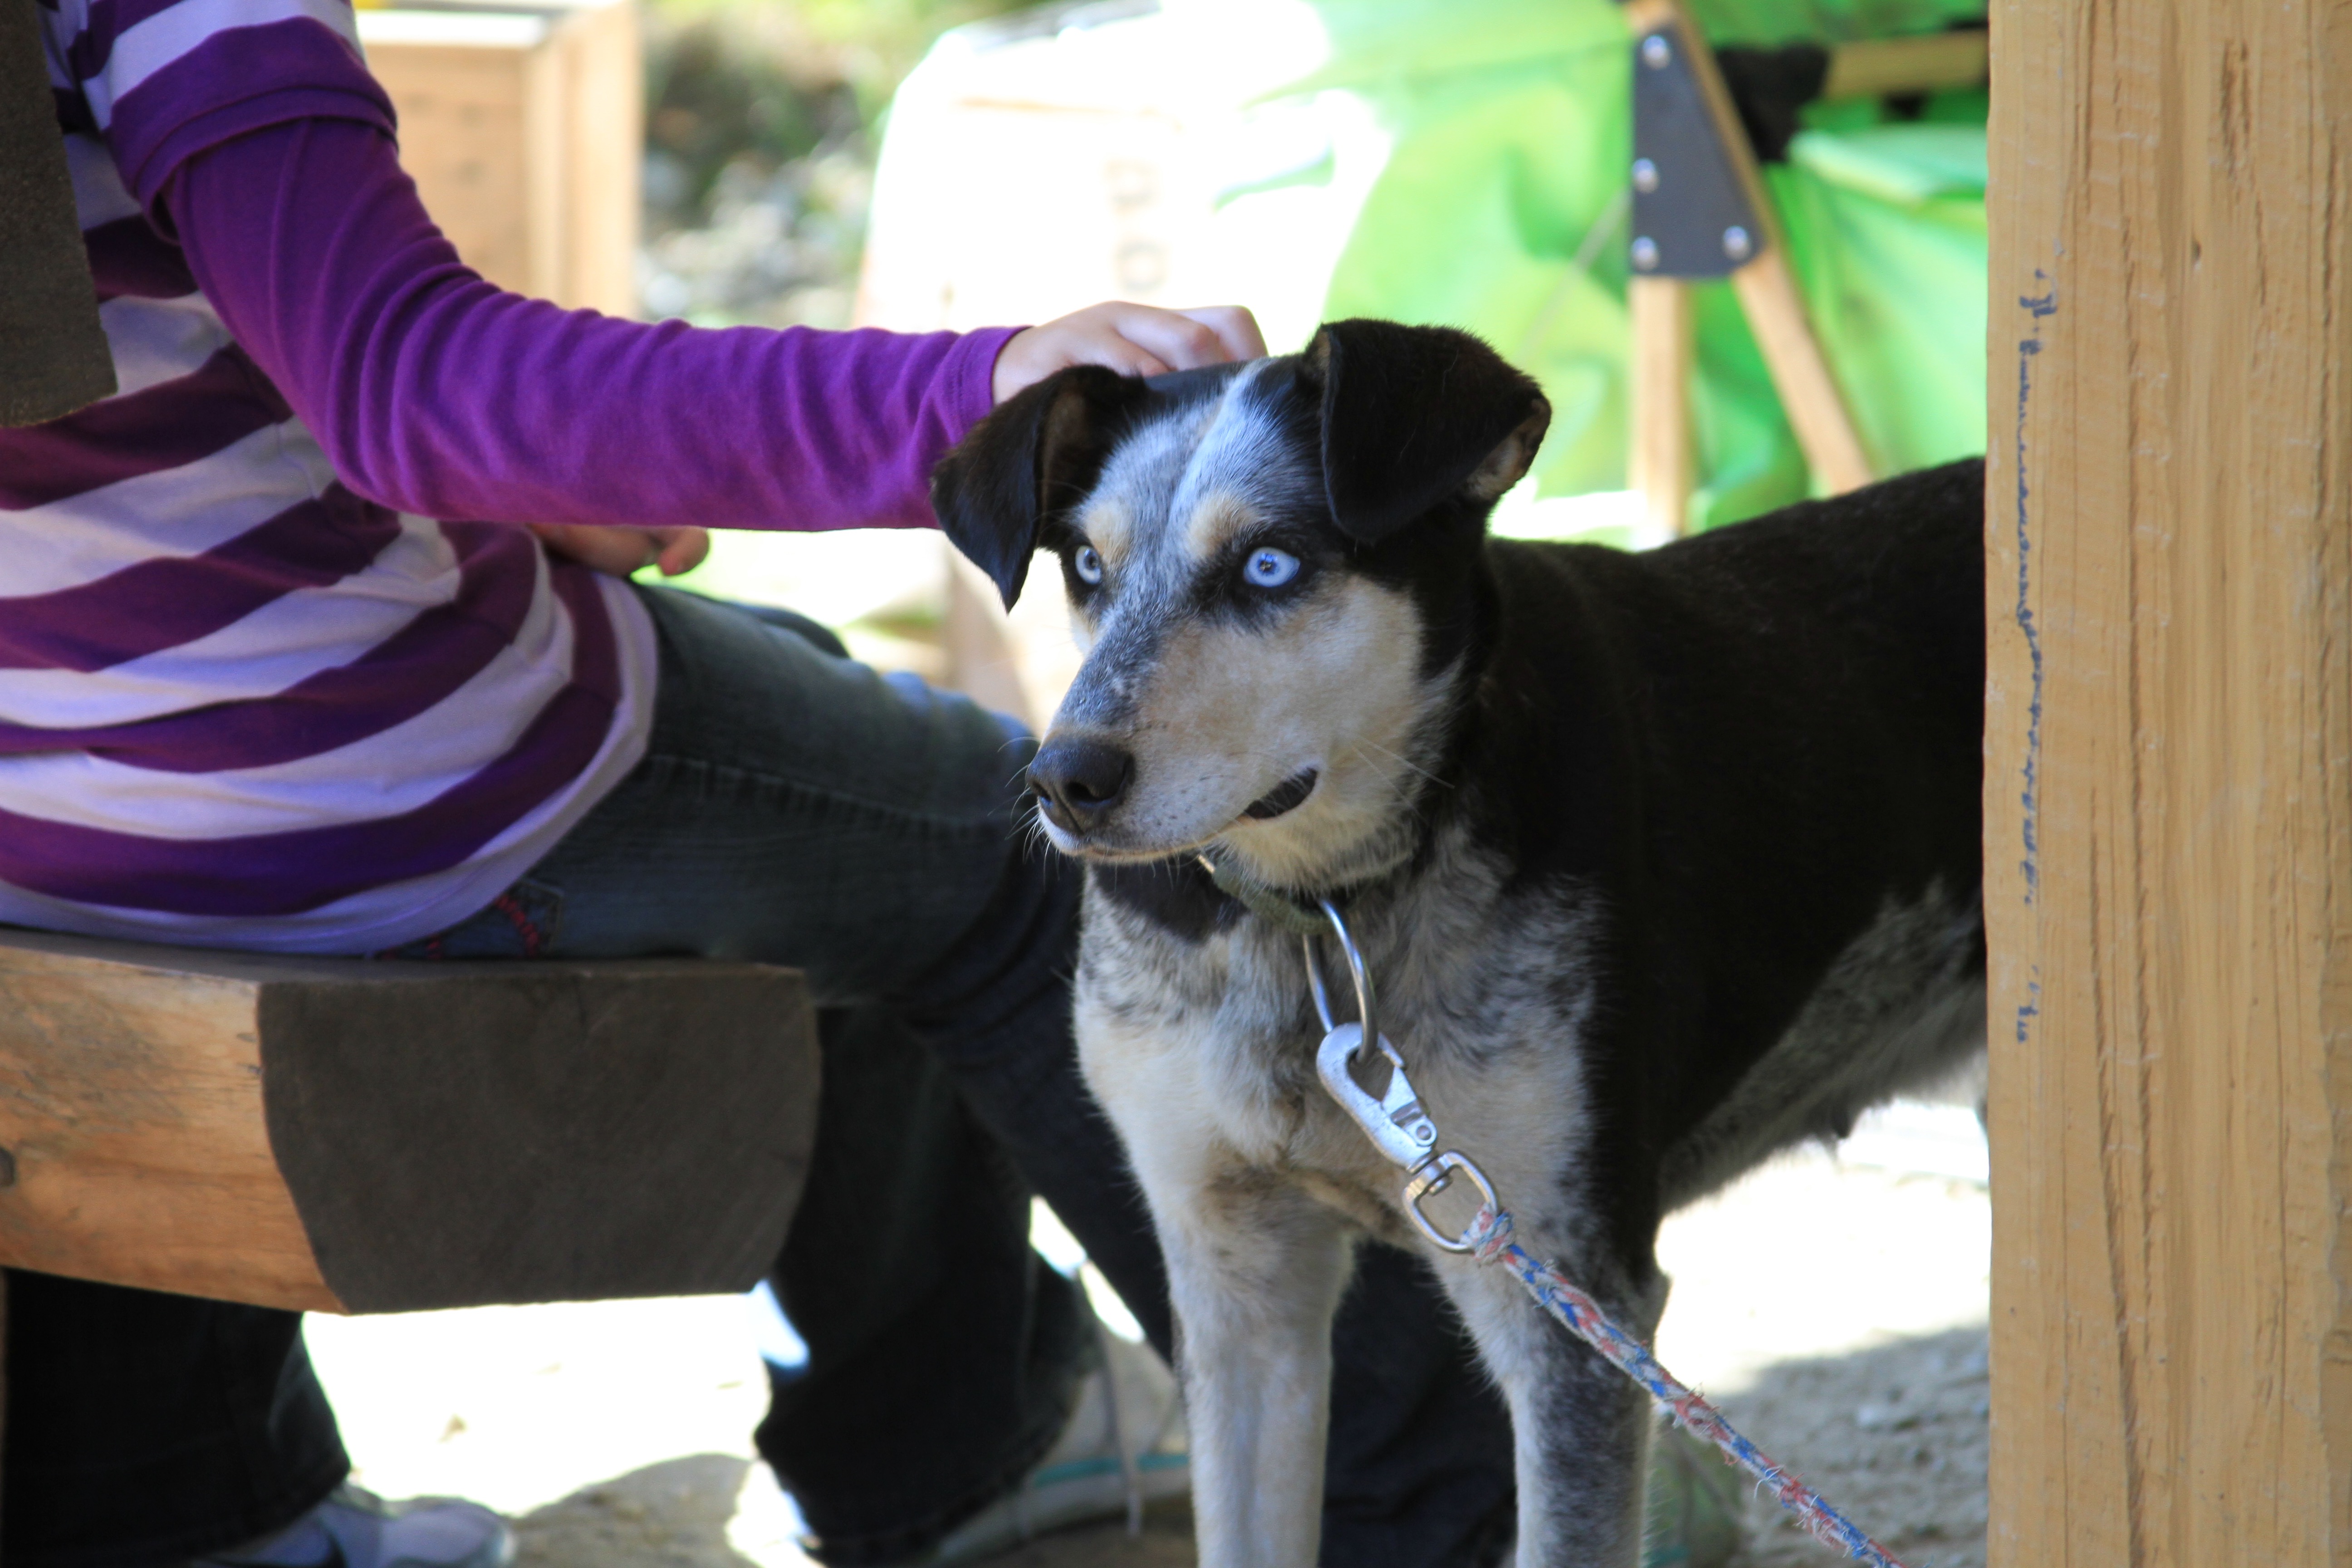
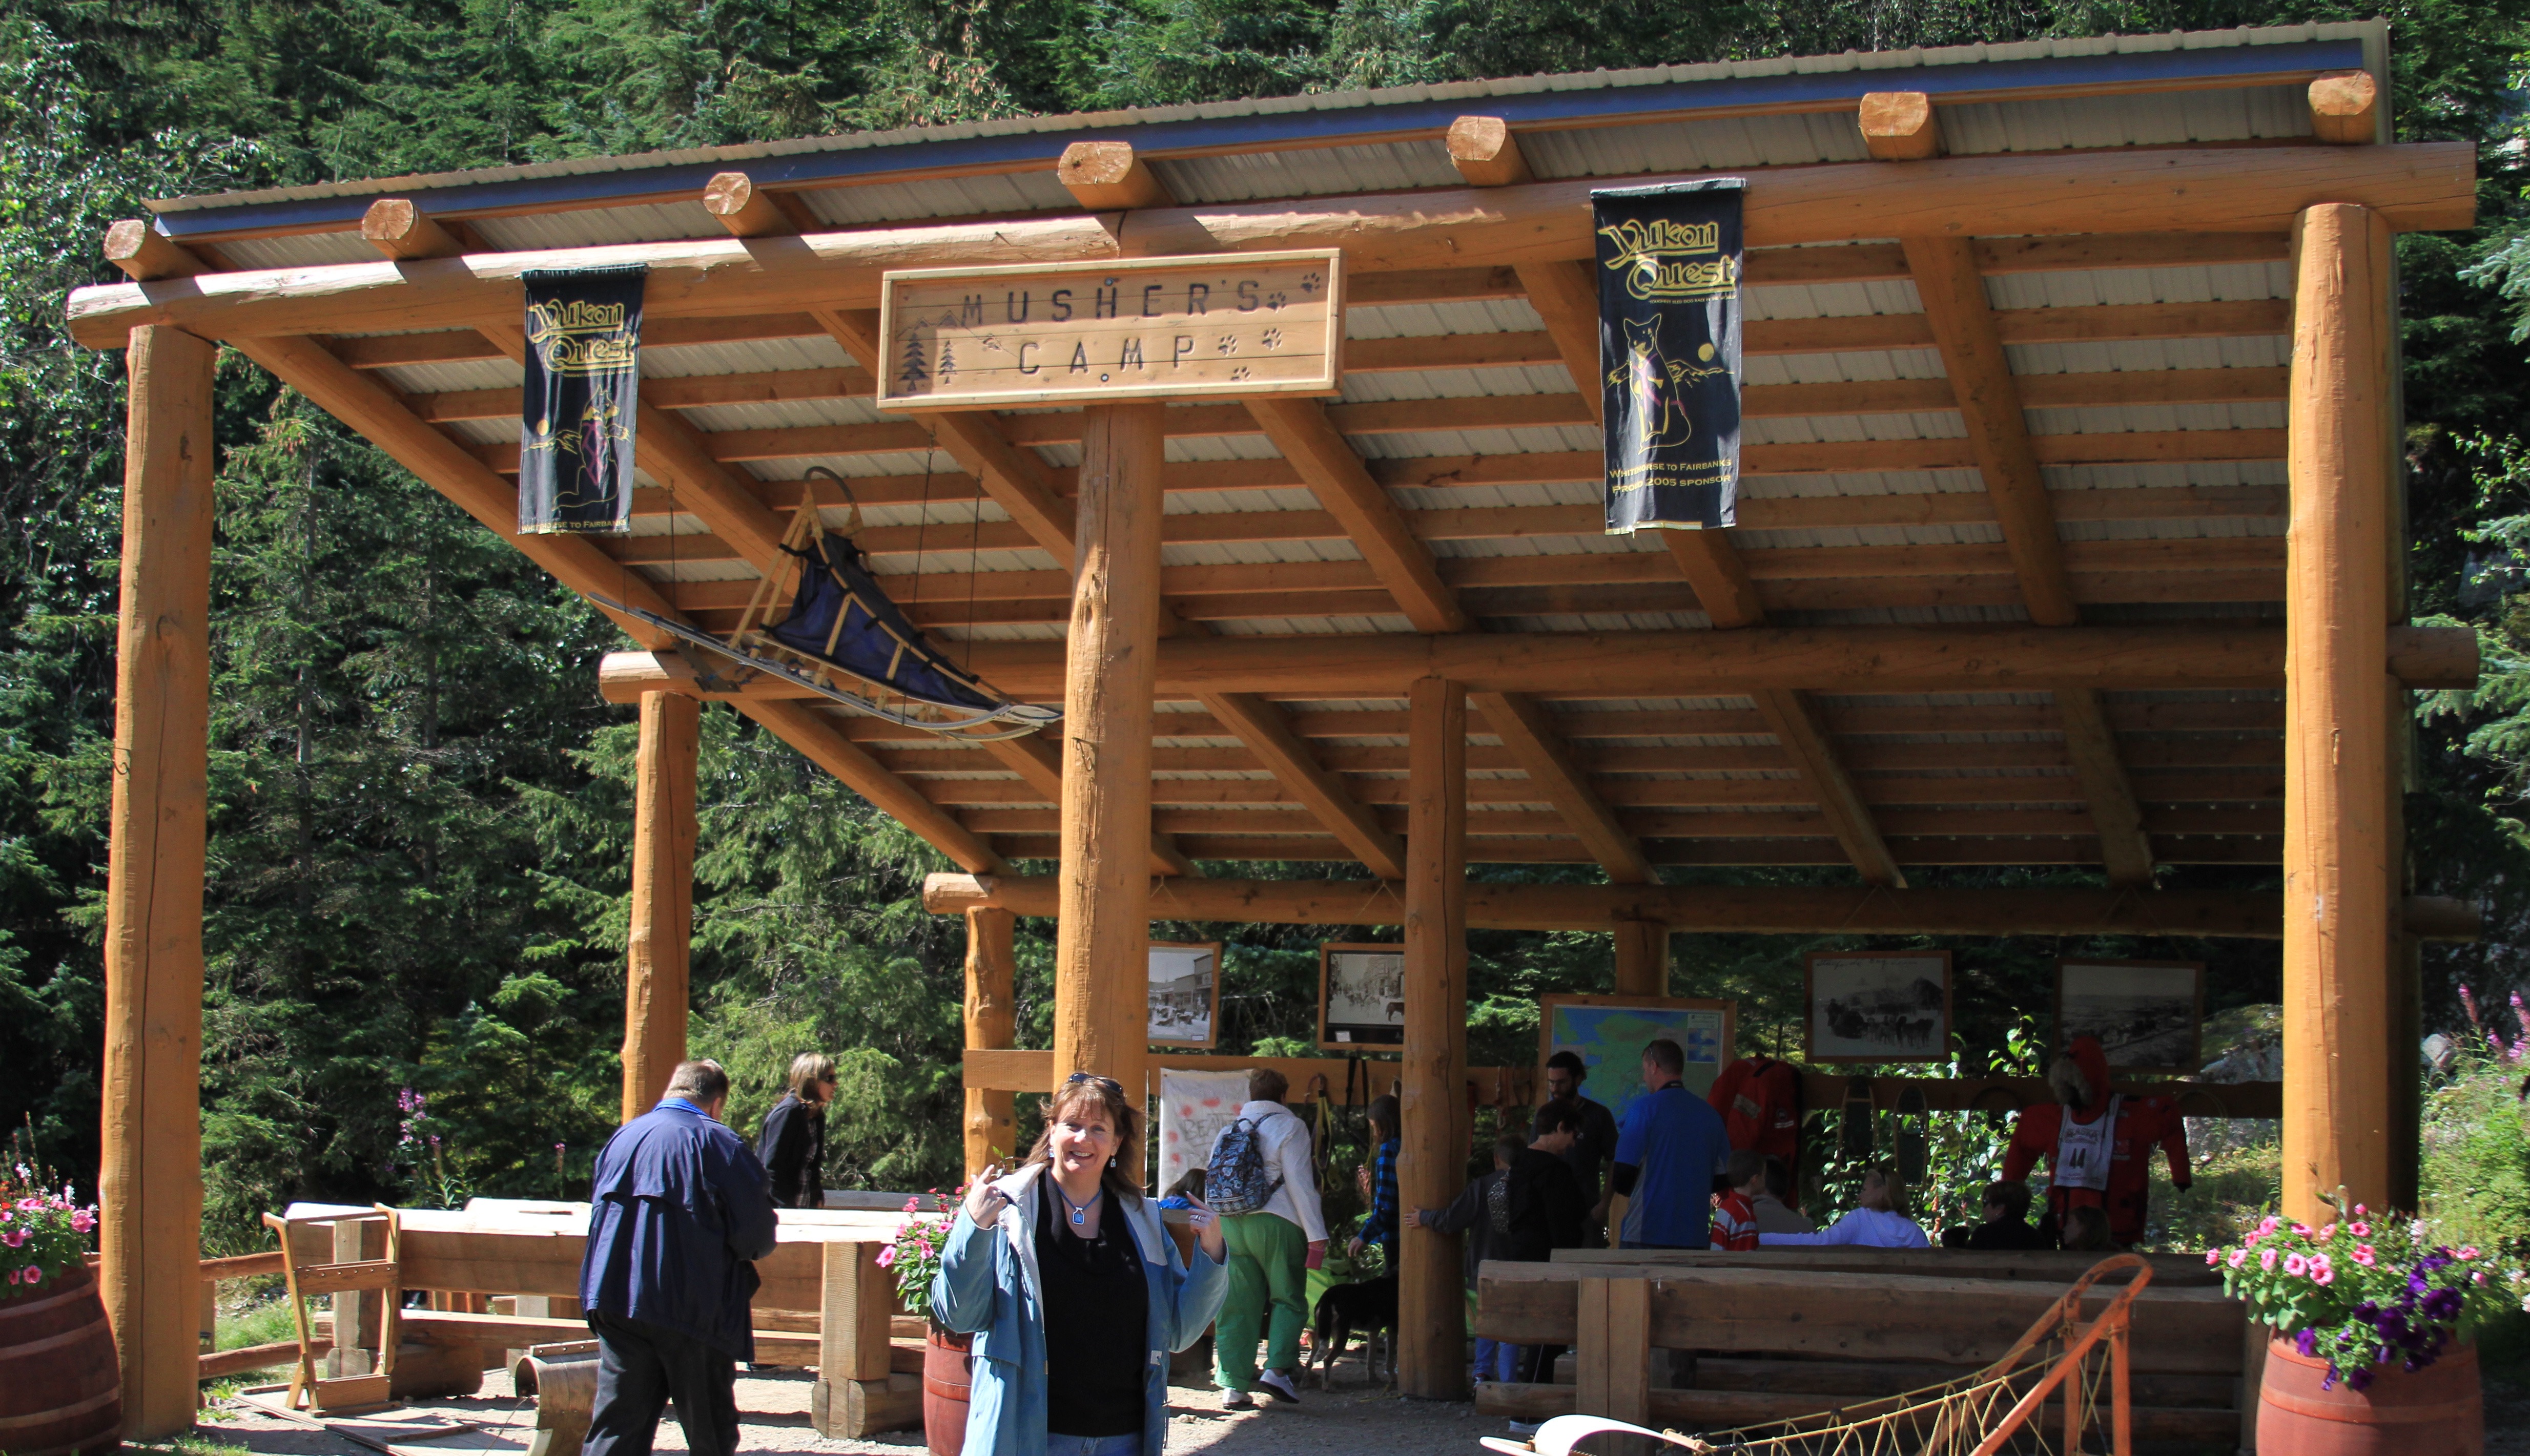
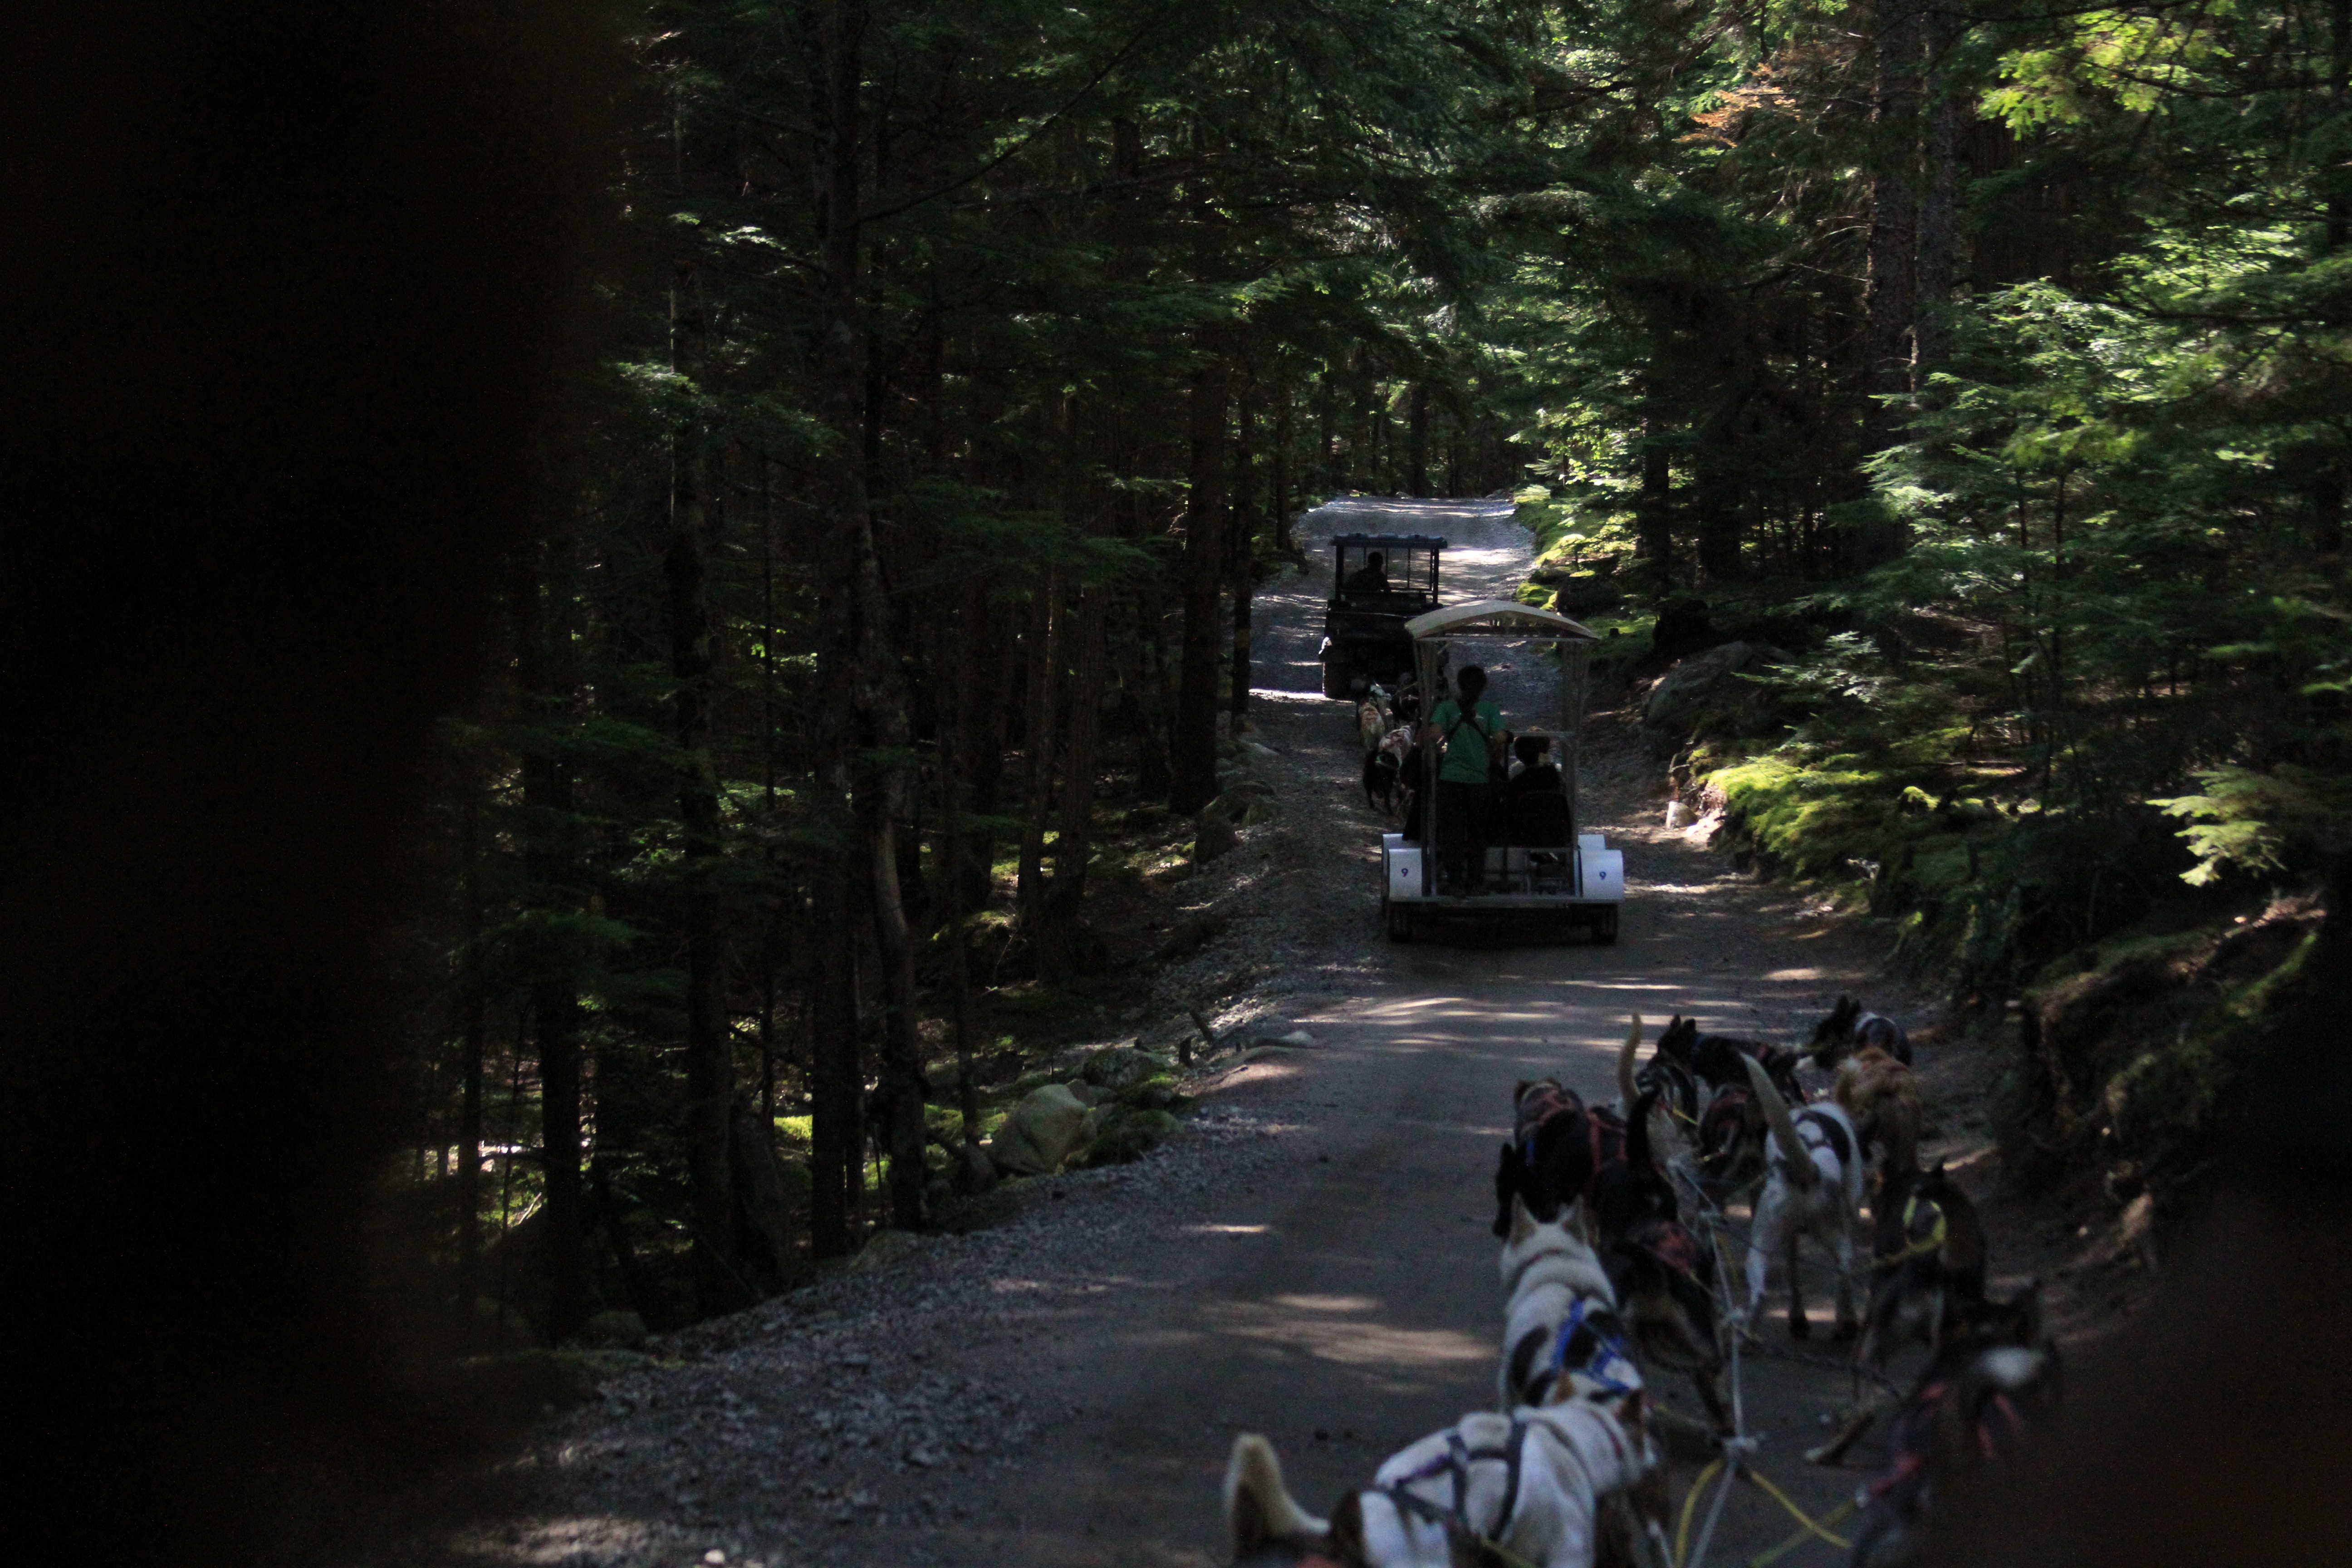
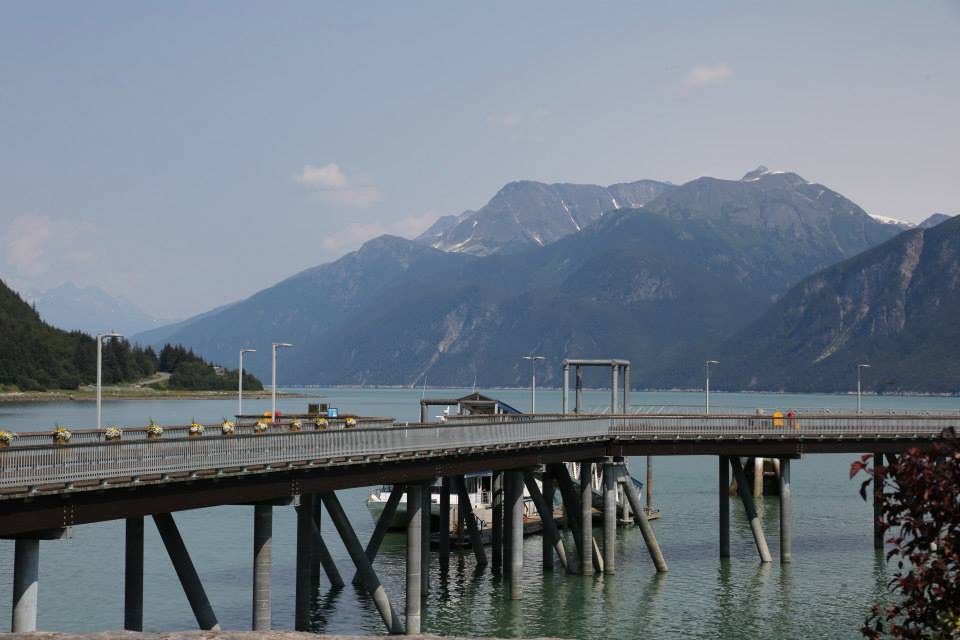
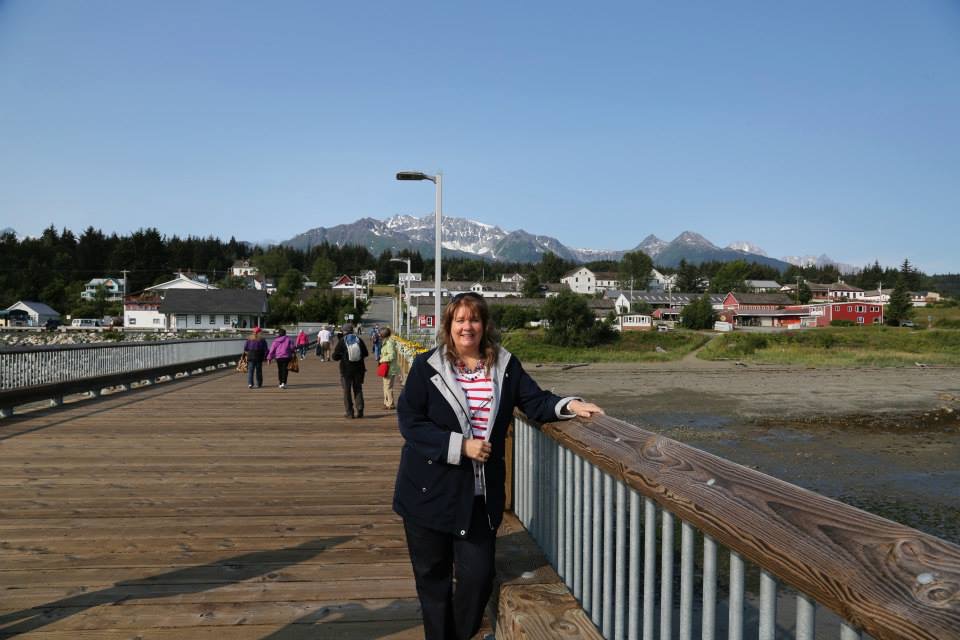
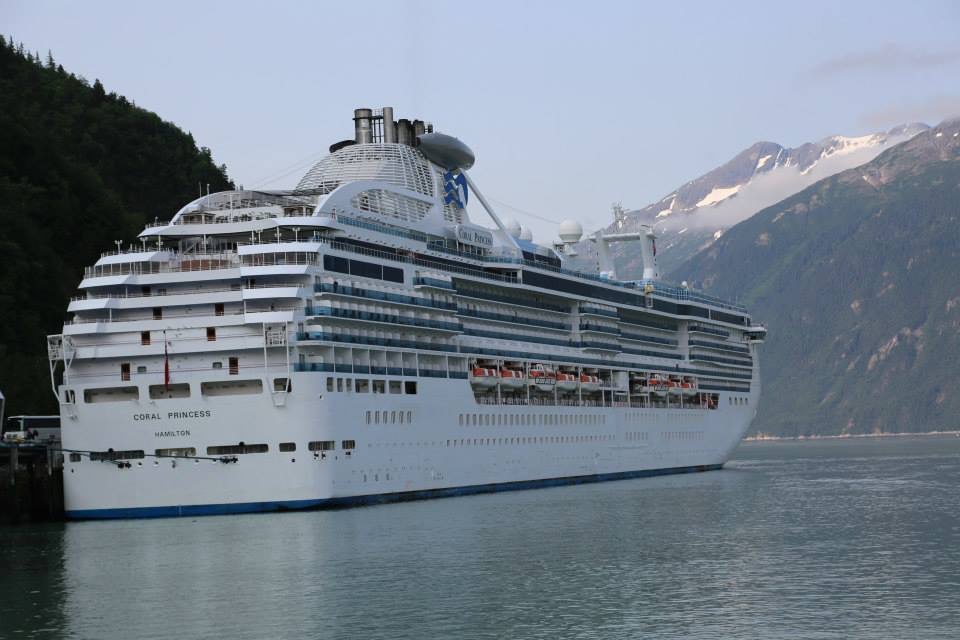
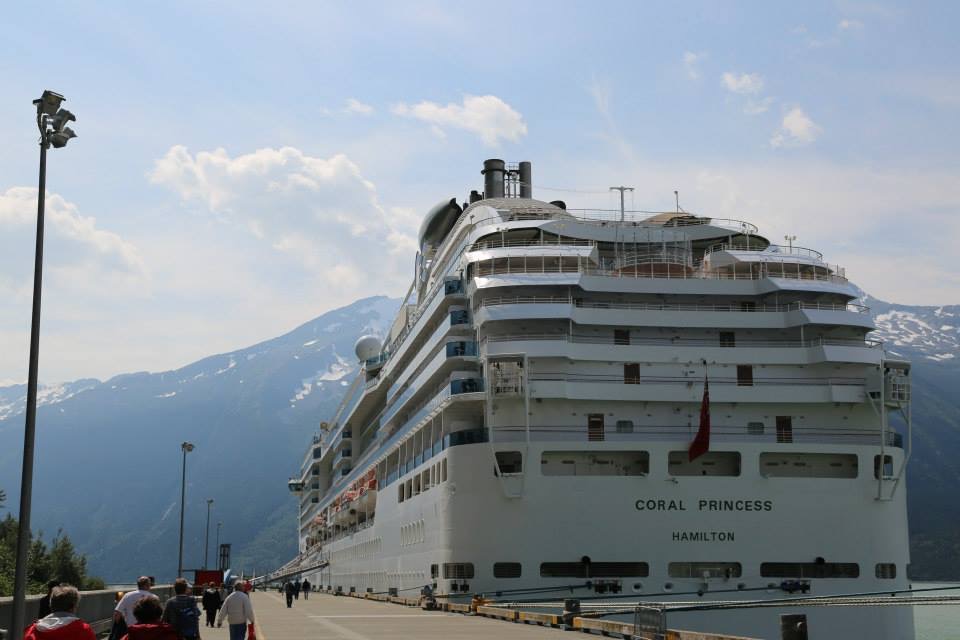
Skagway, Alaska was our first port of call on our Voyage of the Glaciers cruise with Princess. As I’ve mentioned before, this was our 4th time taking this exact same cruise; in years past, we had done a couple of wonderful excursions out of Skagway. Two of our favorites were, one, the White Pass and Yukon Route Railroad trip; talk about some amazing scenery! Wow, that was a great experience! And two, the “Discovery and Animal Planet Recommended” Musher’s Camp and Sled Dog Experience through Princess (sometimes we’ll book our excursions through Princess and sometimes we book them on our own). As y’all know, I am a dog lover, so this excursion was right up my alley, I had such a wonderful time meeting all of the dogs, hearing the stories about the Iditarod, riding in a cart and being pulled by these awesomely trained dogs, and best of all, meeting all of the new puppies.
On this last trip, we decided to go with another one of the Animal Planet recommended excursions. Once docked in Skagway, we disembarked the Coral Princess and went to meet the Haines Skagway Fast Ferry that would take us to that day’s excursion at the Kroschel Wildlife Center (voted the best tour in Southeast Alaska). The ferry ride was lovely and a naturalist was aboard and narrating the entire trip. We spied an eagle perched high atop a tree:
It took us about 45 minutes to get to Haines on the Ferry and once we arrived, we met up with our next mode of transportation…an old charter bus and its very eccentric driver, “Bob”. Unfortunately, I didn’t get any pictures of that charter bus or Bob, but, I can tell you that he had some interesting stories to tell while traversing up mountains on our way to Kroschel’s. He was a hoot and quite entertaining; he told us one story of how he dressed up in a bear costume and went to Skagway to try and scare the people! And I don’t doubt for one second that he did do just that, but, I think he is pretty well known in those parts, so my thoughts were that he provided entertainment and wasn’t all that scary. 😉
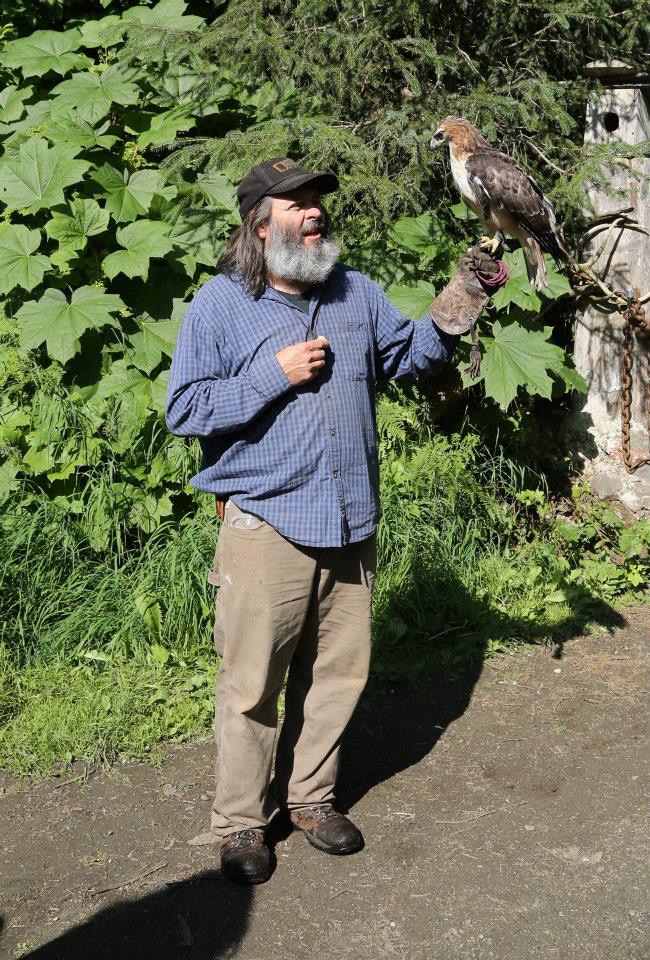
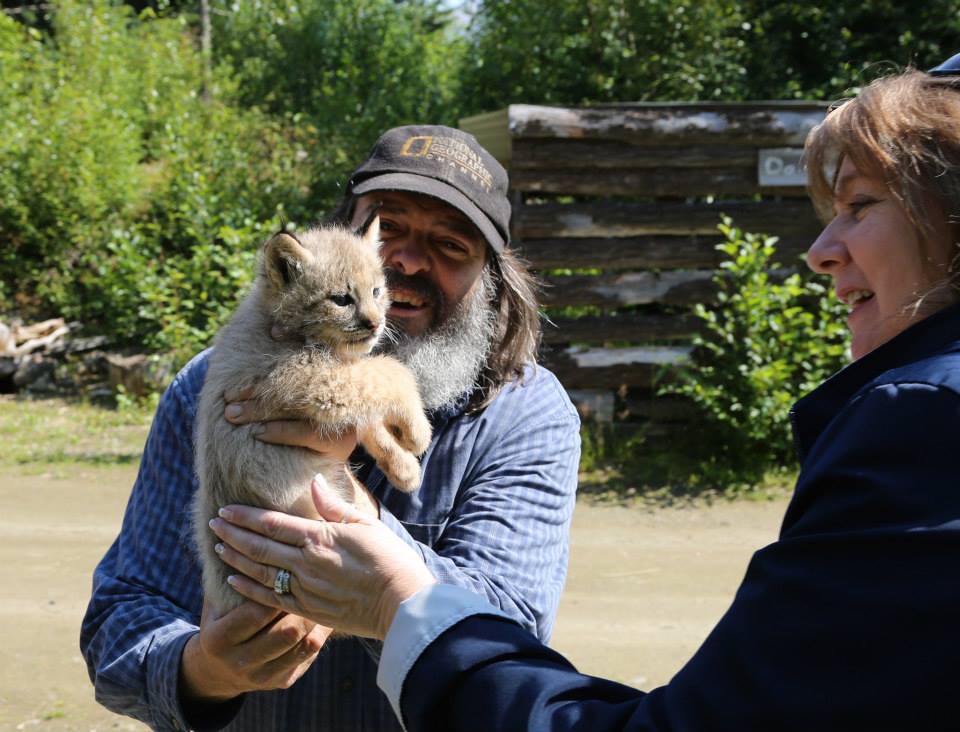
ANYway, we finally arrived at our destination and were greeted by our guide for the day, Mario, and he was holding a Hawk; this was just a small glimpse of the wonder that was yet to come. The Kroschel Wildlife Center shelters rescued, abandoned and injured animals. Steve Kroschel is one very special individual and has devoted his life to educating people and bringing awareness to the dwindling wildlife population through his documentaries and his wildlife center (unfortunately, Steve wasn’t there on this day, but Mario was wonderful).
And then we met the red-tailed Hawk…
From the moment we climbed off of that school bus I was mesmerized by Mario’s stories as he led us around this very special place.
After we met the Hawks, we met a gorgeous wolf named Isis–We were howling with her in this picture…haha:
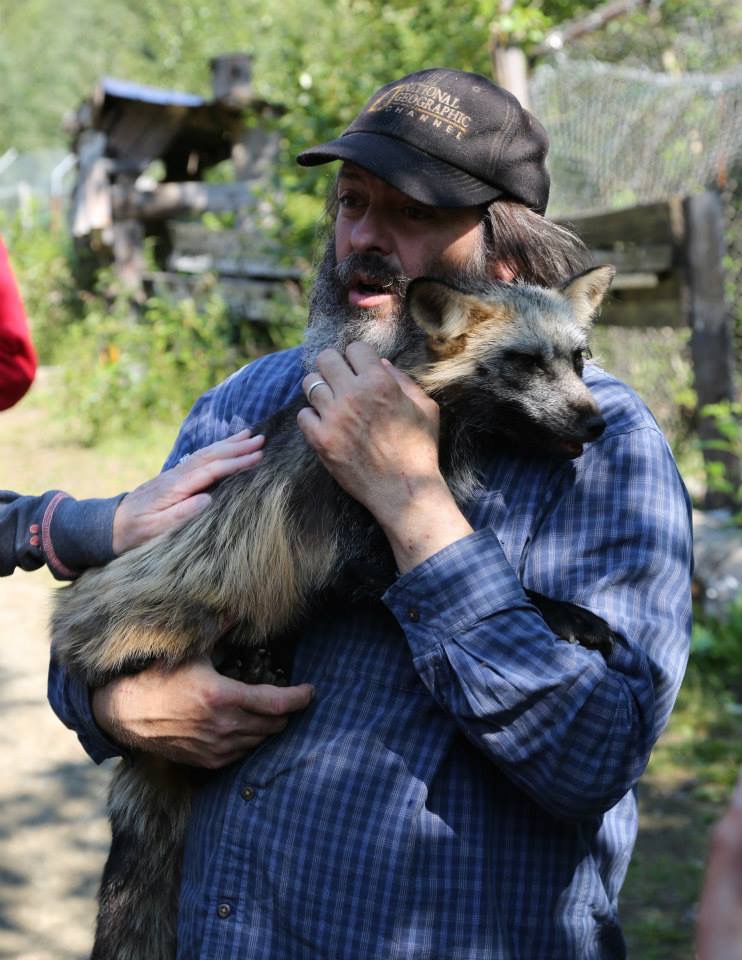
And then it was time to meet a fox:
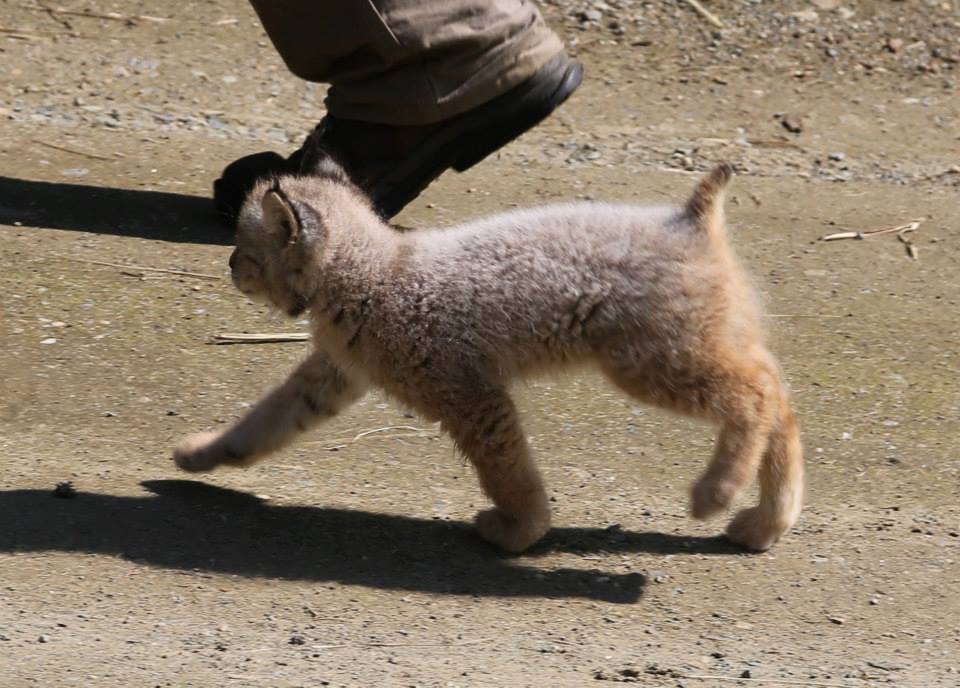
Then Lennox the Lynx and her cub:
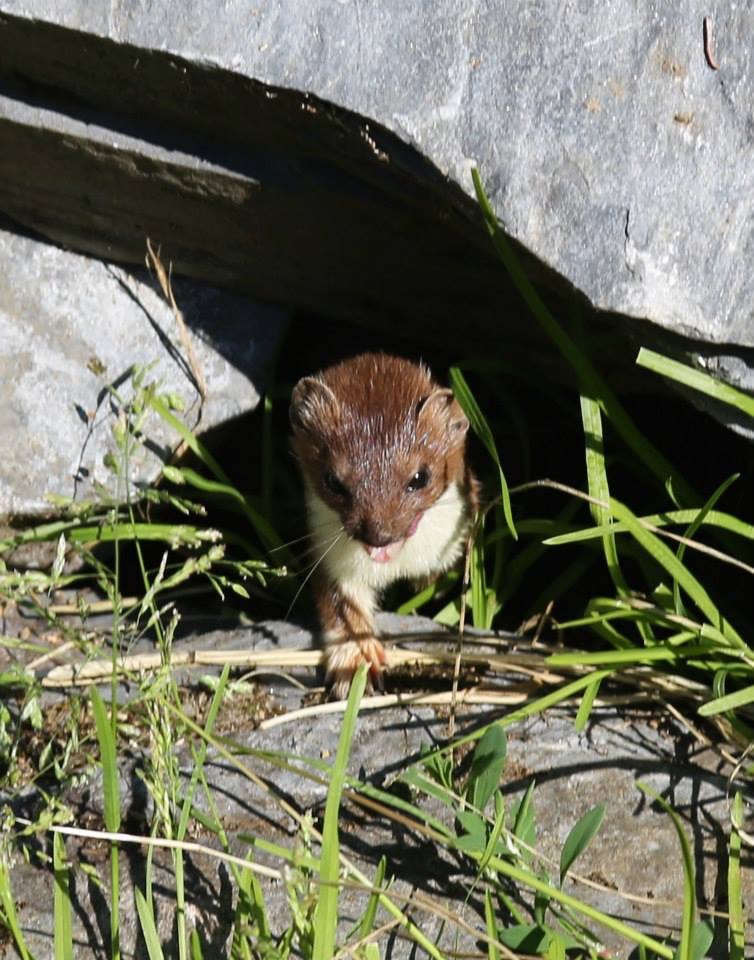
Then this little weasel…talk about fast, that little thing zooms around like crazy! (He was tiny too, I don’t know why I thought weasels were much bigger, but this fella was the size of a large mouse)
I believe this was a mink, it wasn’t the friendliest little creature, but it sure was pretty. 🙂
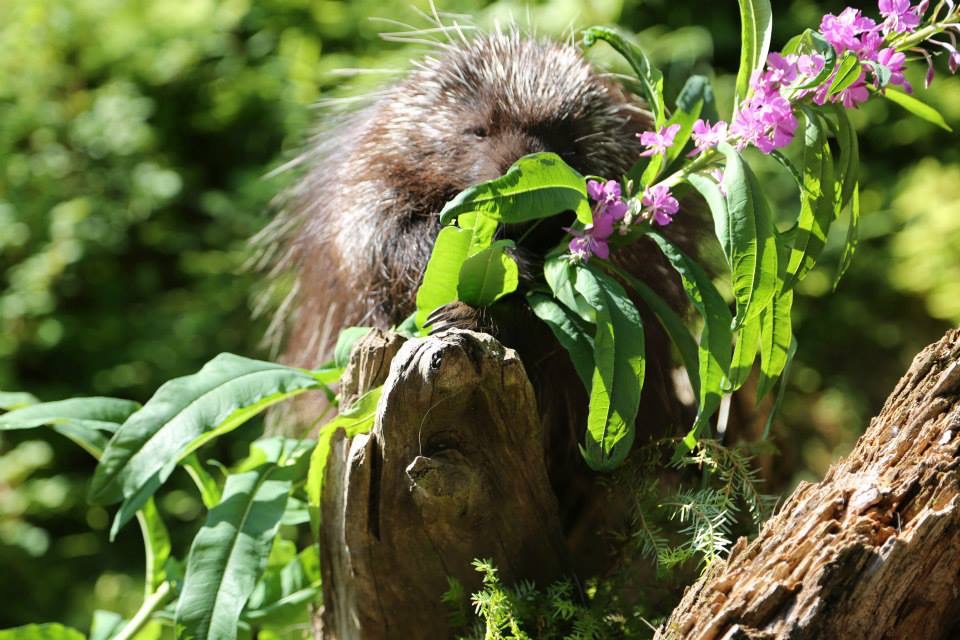
And then there was the Porcupine…Pretty, very gentle, little lady. 🙂
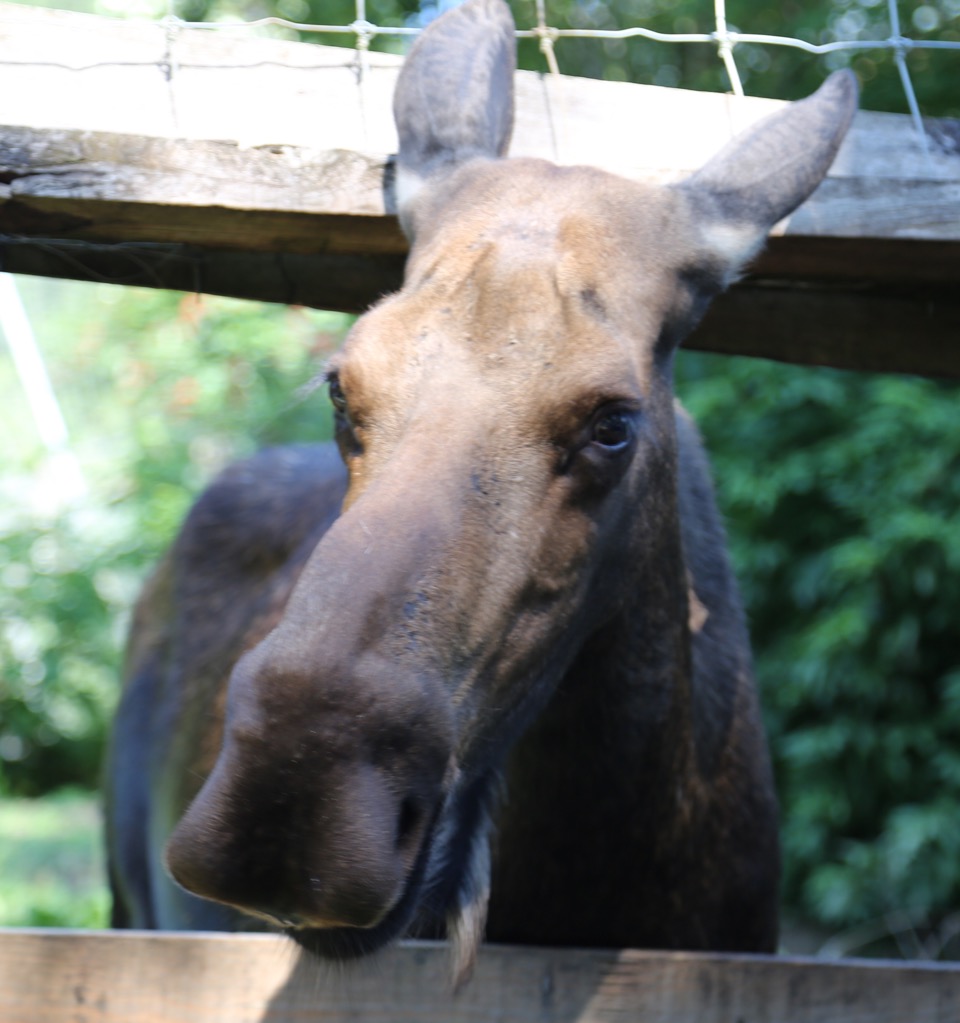
Below is Sue the Moose and I couldn’t believe that I got to kiss her sweet muzzle! (That older gentleman in the picture is Rocky, he is a staple at the Center, he was an integral part of the tour, he didn’t say much, but you could tell that all of the animals just adored him).
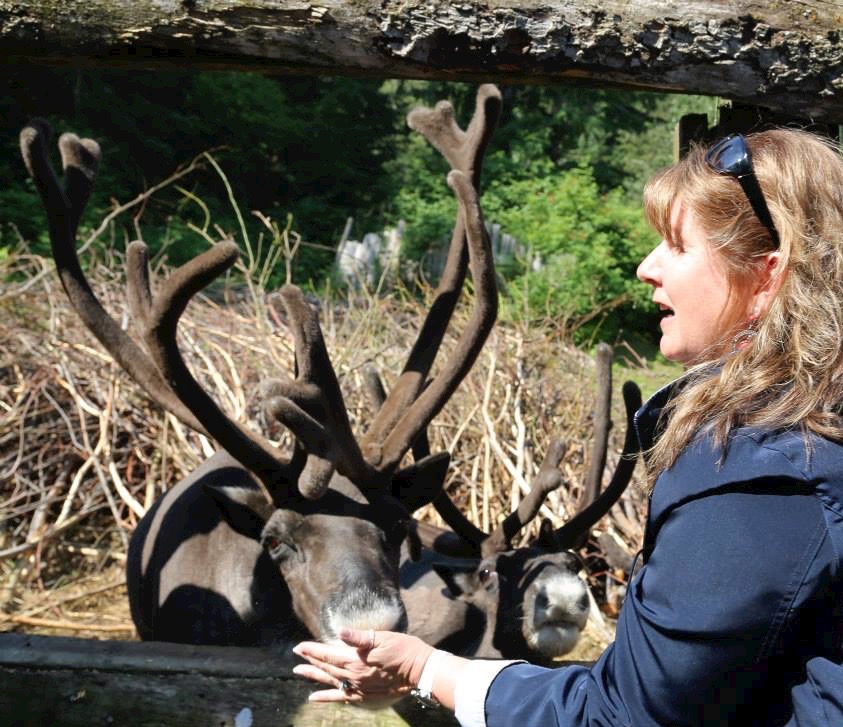
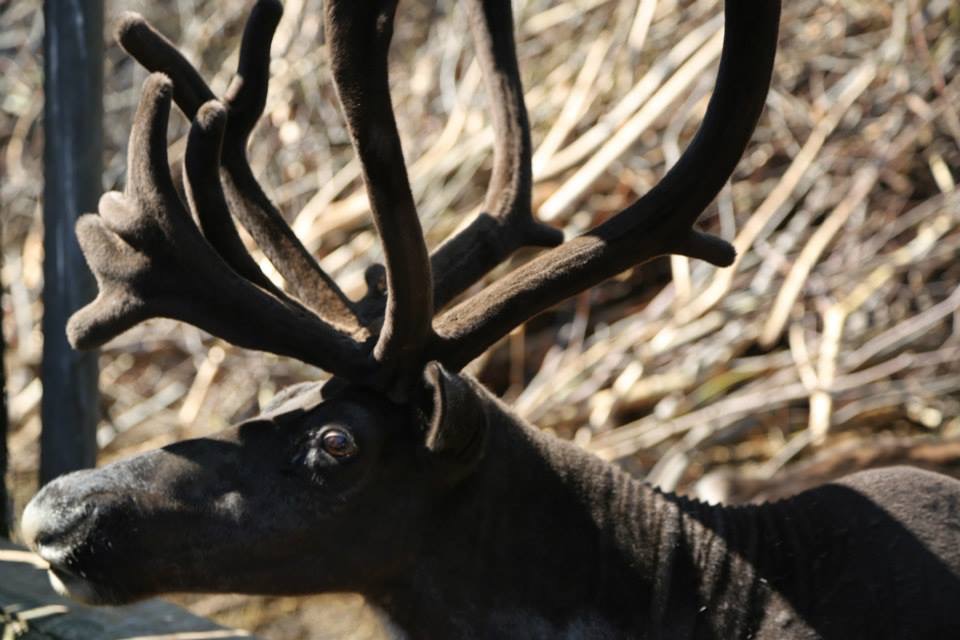
Next, we got to feed the reindeer…those antlers are as soft as can be and they were h-u-n-g-r-y, but oh so gentle when they took the dry oatmeal from my hand!
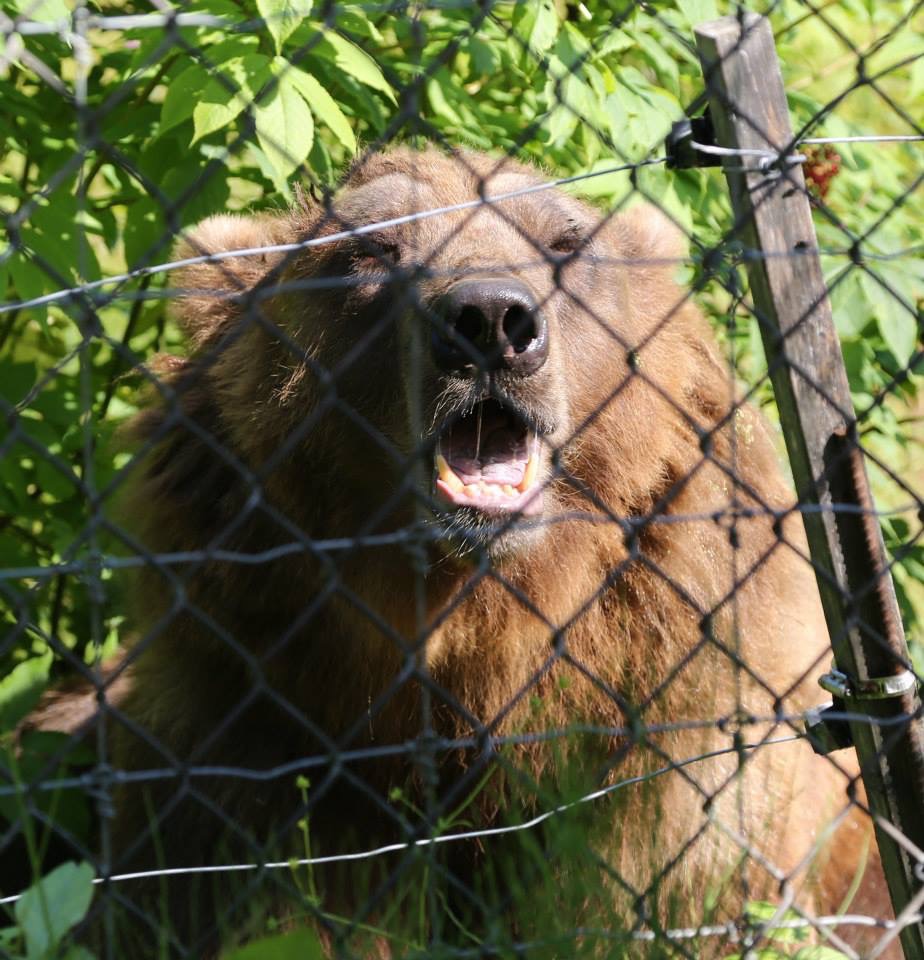
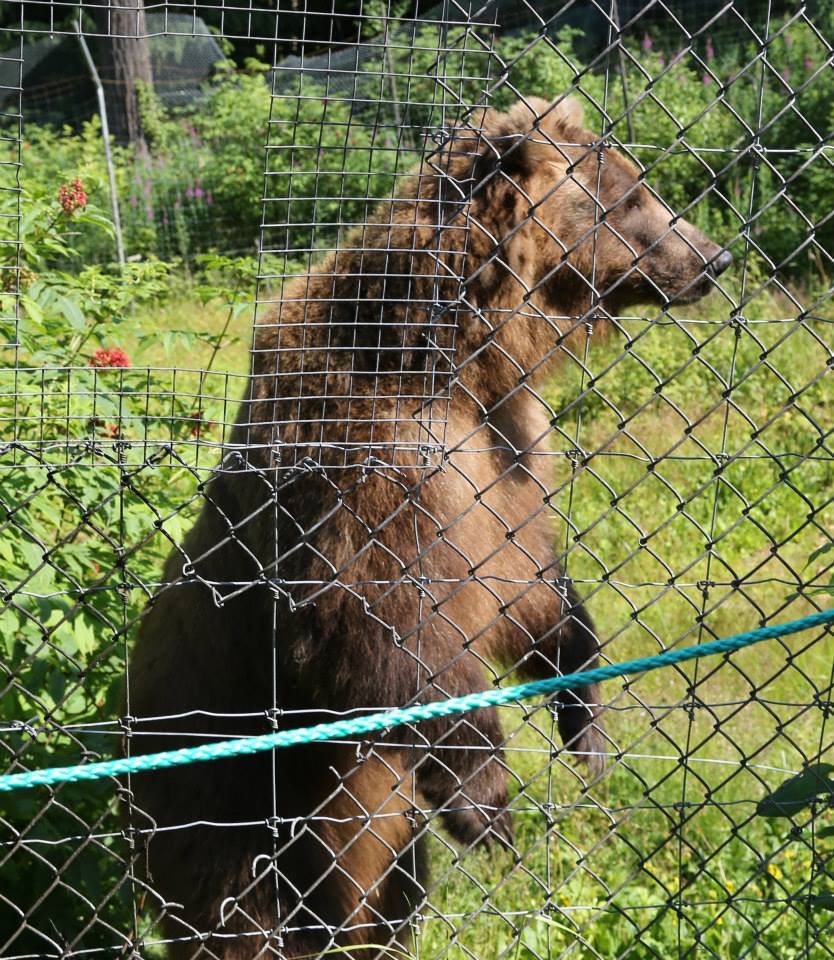
And finally, we got to meet Kitty the Grizzly bear! Unfortunately, Kitty’s is a sad story, her Mama was killed by a hunter who didn’t realize that she had a cub, so Kitty who needed shelter and care was delivered to the Center in a 5-gallon bucket and has obviously thrived since then. They were not able to release her in the wild because her Mama was killed before she could teach Kitty survival skills. So she will live out her life at the Center being lovingly cared for and sufficiently spoon fed with quite the sweet concoction of honey and oatmeal (among other things).
ALL of these animals are so very well treated and loved so much; this is an amazing place with which to get an up close and personal view of some of Alaska’s wildlife. They also give you ample opportunities to get some great pictures and they take their time and tell wonderful stories as you travel around the Center. What an awesome experience! I would totally go back again if we ever find ourselves in Haines, Alaska. 🙂
Sadly, it was time to debark and head back to the Ferry
And we were headed back to our awaiting cruise ship…
Here is a video that I took of our Kroschel’s Excursion:
As always, Skagway didn’t disappoint and as we were pulling away from this port I again got a little misty-eyed because I might not ever get to see those majestic mountains that hold some very fascinating, very special folks.
***Update*** I’ve now completed all of my installments in the Voyage of the Glaciers Series and have included links to the next post in line (so to speak) at the end of each posting. So, here is a link to the next post and it covers our time in Juneau… 🙂
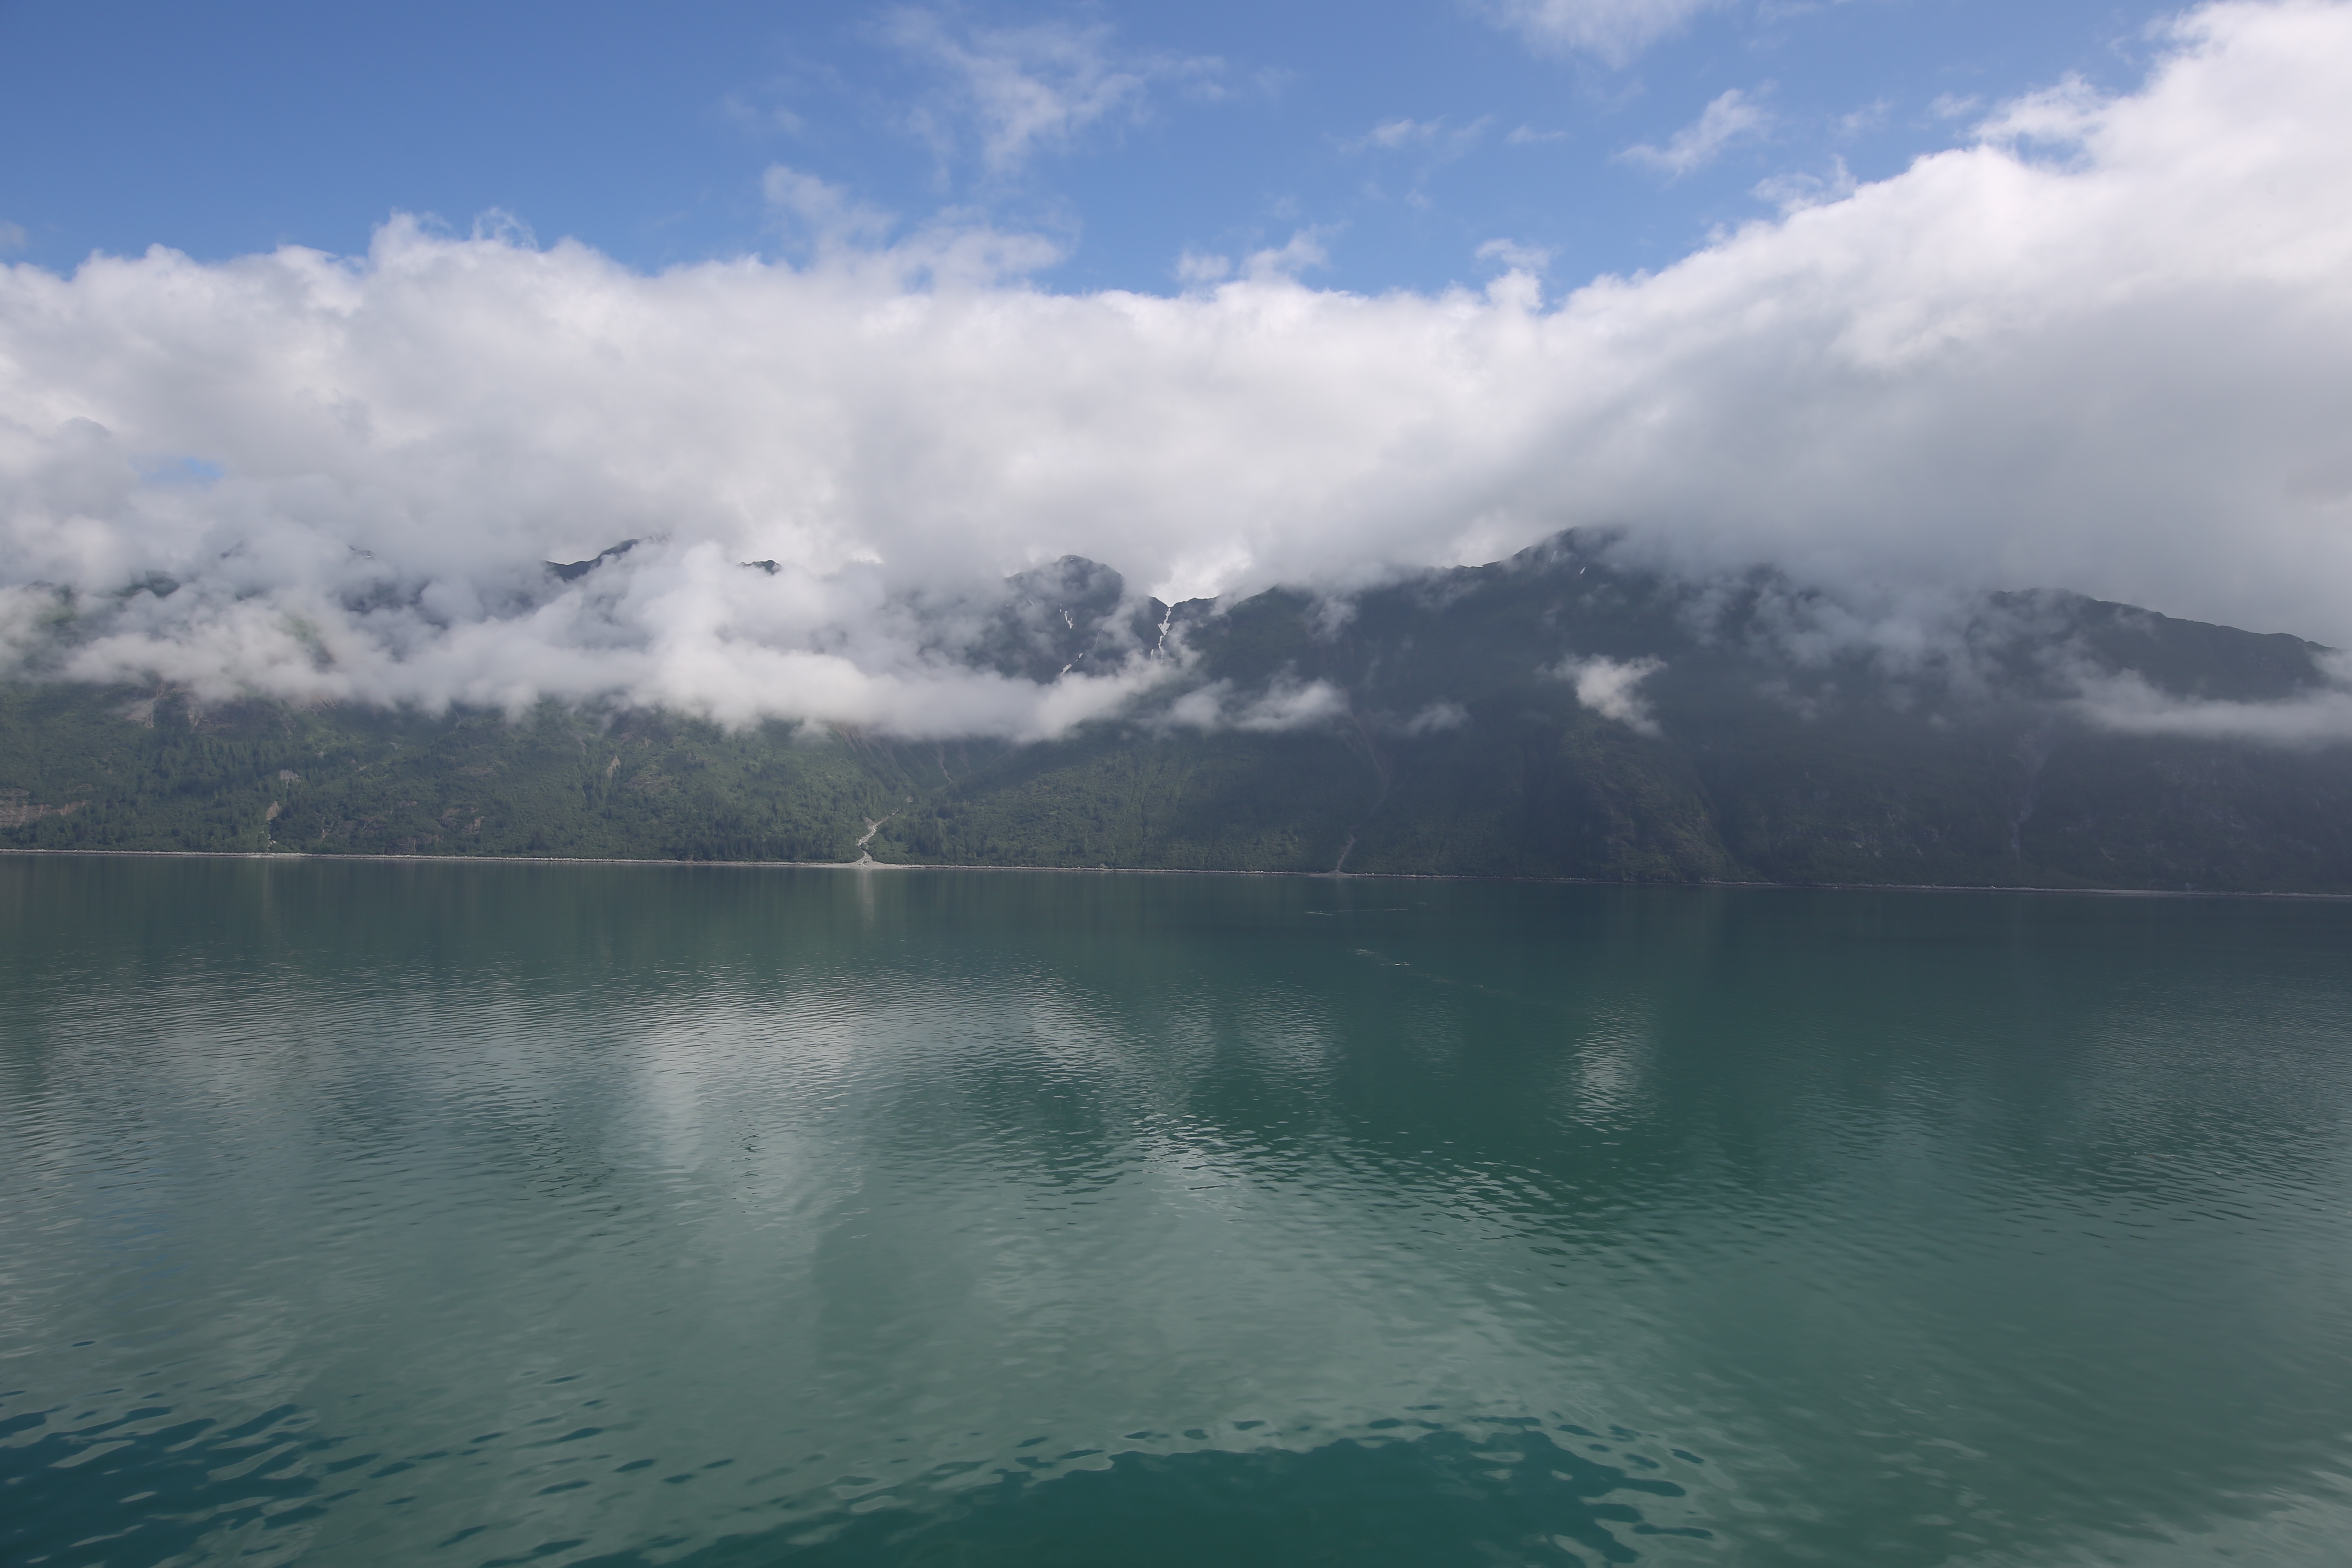
Onward we go with our Alaskan adventure! I will be highlighting days 3 and 4 in this post, the days that we did our “Scenic Cruising”, first into Disenchantment Bay to see Hubbard Glacier and then the next day we traveled into Glacier Bay. We saw many glaciers in our travels, but we stopped, looked, and listened to two wondrous glaciers on each day, Hubbard on the first day and Margerie on the second.
The ship takes its time getting back to where Hubbard Glacier is located, but you know you’re getting close when you start seeing the little (which are actually rather large) ice bergs in the water surrounding the ship and the temperature starts dropping.
I’ll tell you a little about Hubbard Glacier, I’m thinking there are some out there that are as geeky as I am when it comes to nature and this sort of thing…haha…;) Nooooooo, I am not a tree hugger, I just honestly possess a deep rooted appreciation for pristine beauty such as this. Okay, anyway, Hubbard is the longest tidewater glacier in Alaska extending 76 miles from its source on Mt. Logan in the Yukon. The cliff face is at least six miles wide and it towers 3 to 400 feet from the water level and plunges 300 feet at the front of the glacier from the water level to the bottom. As Hubbard is advancing, it creaks, cracks, and moans as it travels and is a very actively calving glacier. This makes for memorable moments when the huge chunks of ice crash into the bay creating a wonderful sound coined “white thunder” by the Tlingit people. BTW, I don’t just inherently know that information, there was actually a Naturalist on board with us and his commentary was broadcast around the ship and into staterooms via the tv and yes, I was *that* woman that took copious notes. 😉 The Captain of our ship the Coral Princess was fantastic, we pulled up really close (close is relative–we got to about 1/2 mile away) to the glacier and then the captain turned the ship so that the folks on one side of the ship could gaze at the glacier, he stayed there for 30 minutes and then spun the ship around so that the other side of the ship could watch it for another 30 minutes.
Here is a little video I took one year of Hubbard Glacier:
Okay, so that was an awesome day! Hubbard Glacier was amazing and the scenery to and from the glacier was breathtaking.
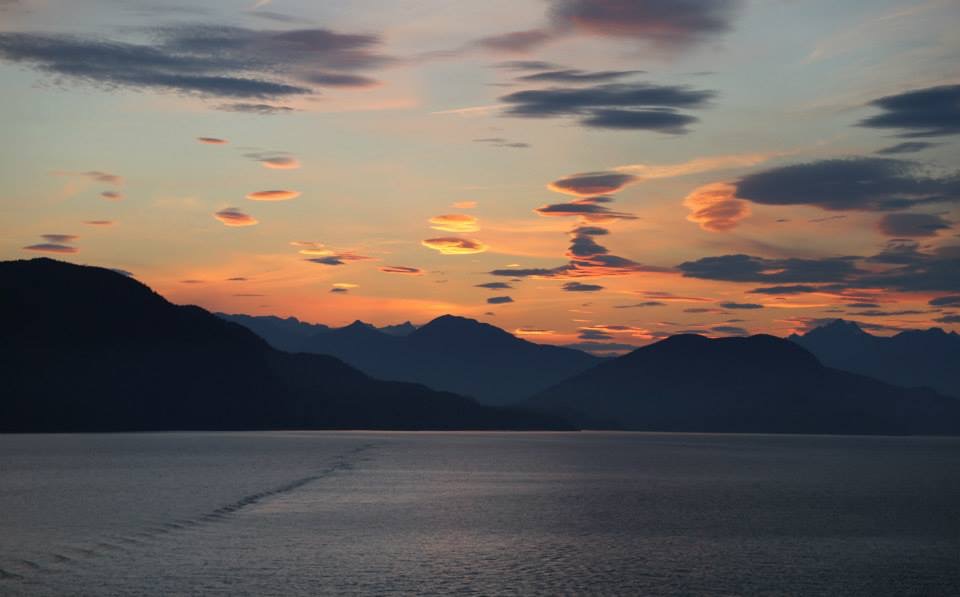
But, now let me tell you about day 4, and what we saw in Glacier Bay; it took my breath away and it alone is what brought us back to Alaska for our 4th time. I cannot express to you the beauty that is held within this pristine, magnificent place, I would venture to guess that it is one of the most gorgeous places on this planet.
Glacier Bay is a National Park so Park Rangers came on the ship and set up a “Ranger’s Station” where one could go and ask questions about Glacier Bay and purchase books and souvenirs. In addition, a Park Ranger’s commentary was broadcast around the ship and into all of the staterooms giving us a plethora of information about all of the glaciers and wildlife that we were seeing as we made our way in and out of the bay. The sky was rather overcast on this morning, but the later it got and the further we got into Glacier Bay the prettier the day got, the sun came out and blue sky could be seen. My hubby and I actually got a bit of a sunburn on this day.
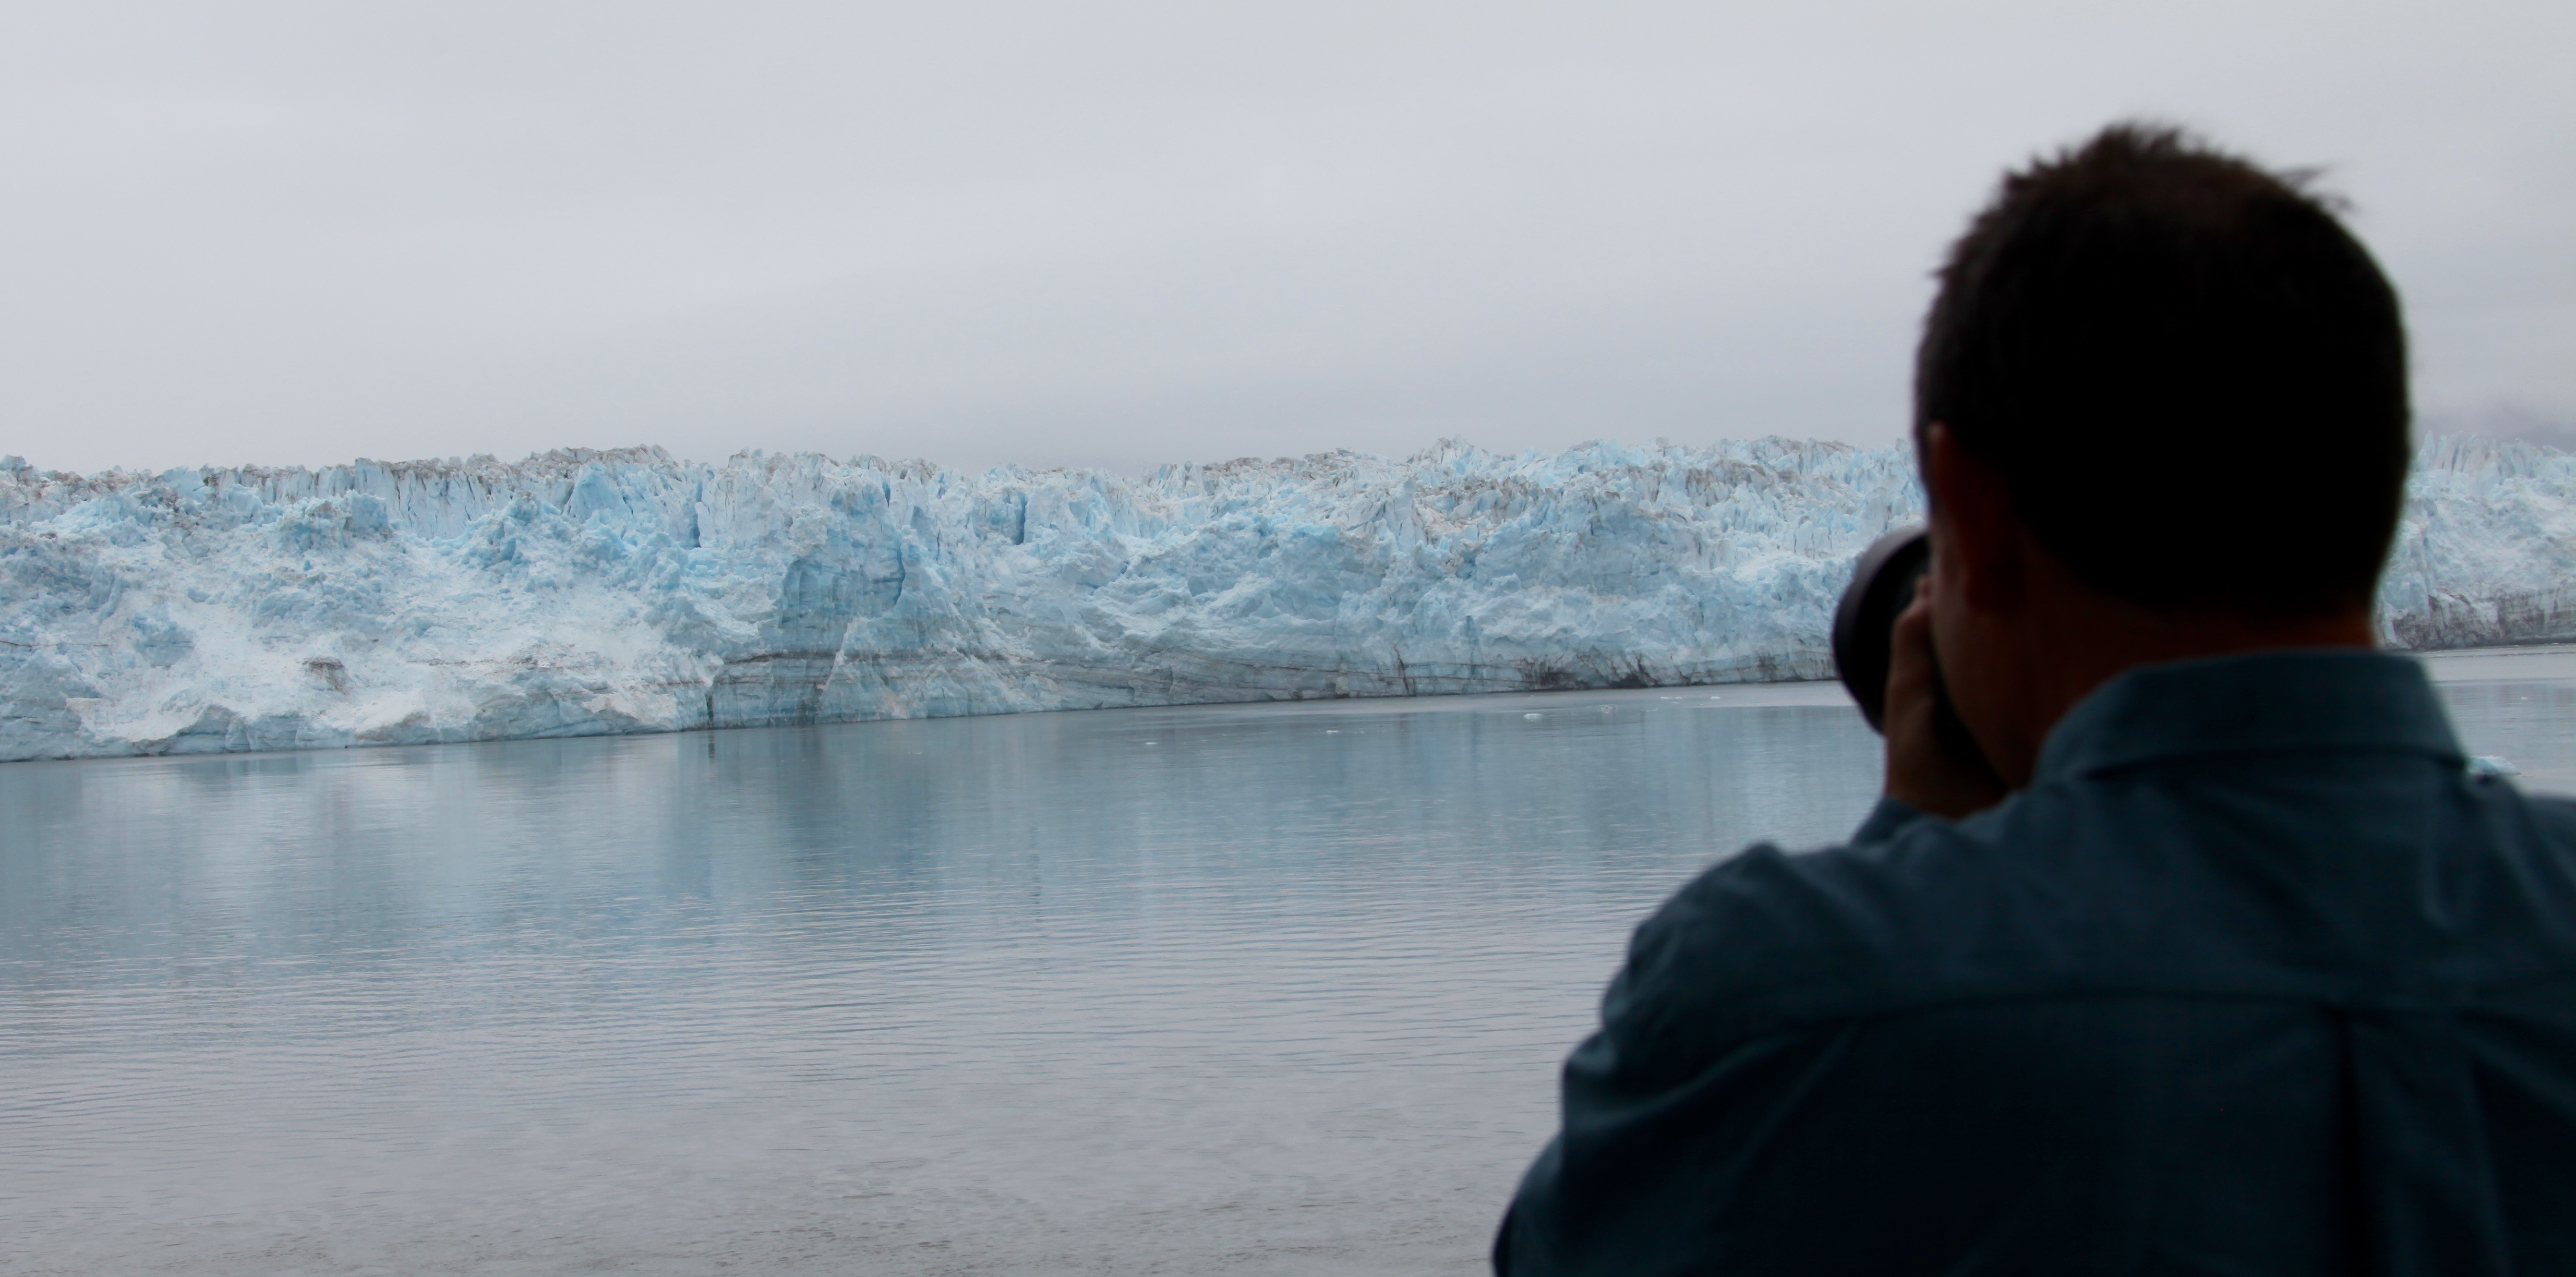
There were many beautiful sights to see on our way into the Bay but the most impressive sight was Margerie Glacier.
Here are some more of those geeky facts for you: Margerie Glacier is a 21-mile-long tidewater glacier, it soars 250 feet above the sea level, and 150 feet below and it is an activity calving glacier. This one was much louder than Hubbard and it was calving almost twice as much.
See that piece of ice in the middle of that picture above? It looks kind of like a triangle, only it is the size 12 story building!
Watch this!
Oh my goodness gracious! We couldn’t believe our luck, we definitely felt as if we were in the right place at the right time. You should have seen the wave that that huge chunk of ice generated, it was quite impressive. 🙂 Wow!
Here are a couple of close up shots of the glacier itself, the crevasses were ridiculous!
Here is a video that I took of Margerie Glacier one year:
It was so hard to say good-bye to Margerie Glacier and I was quite sad to turn away from it because I truly don’t know if we will ever return to that exact spot again. It is a very, very special place, one that just brings calm to one’s very soul. Incredible!
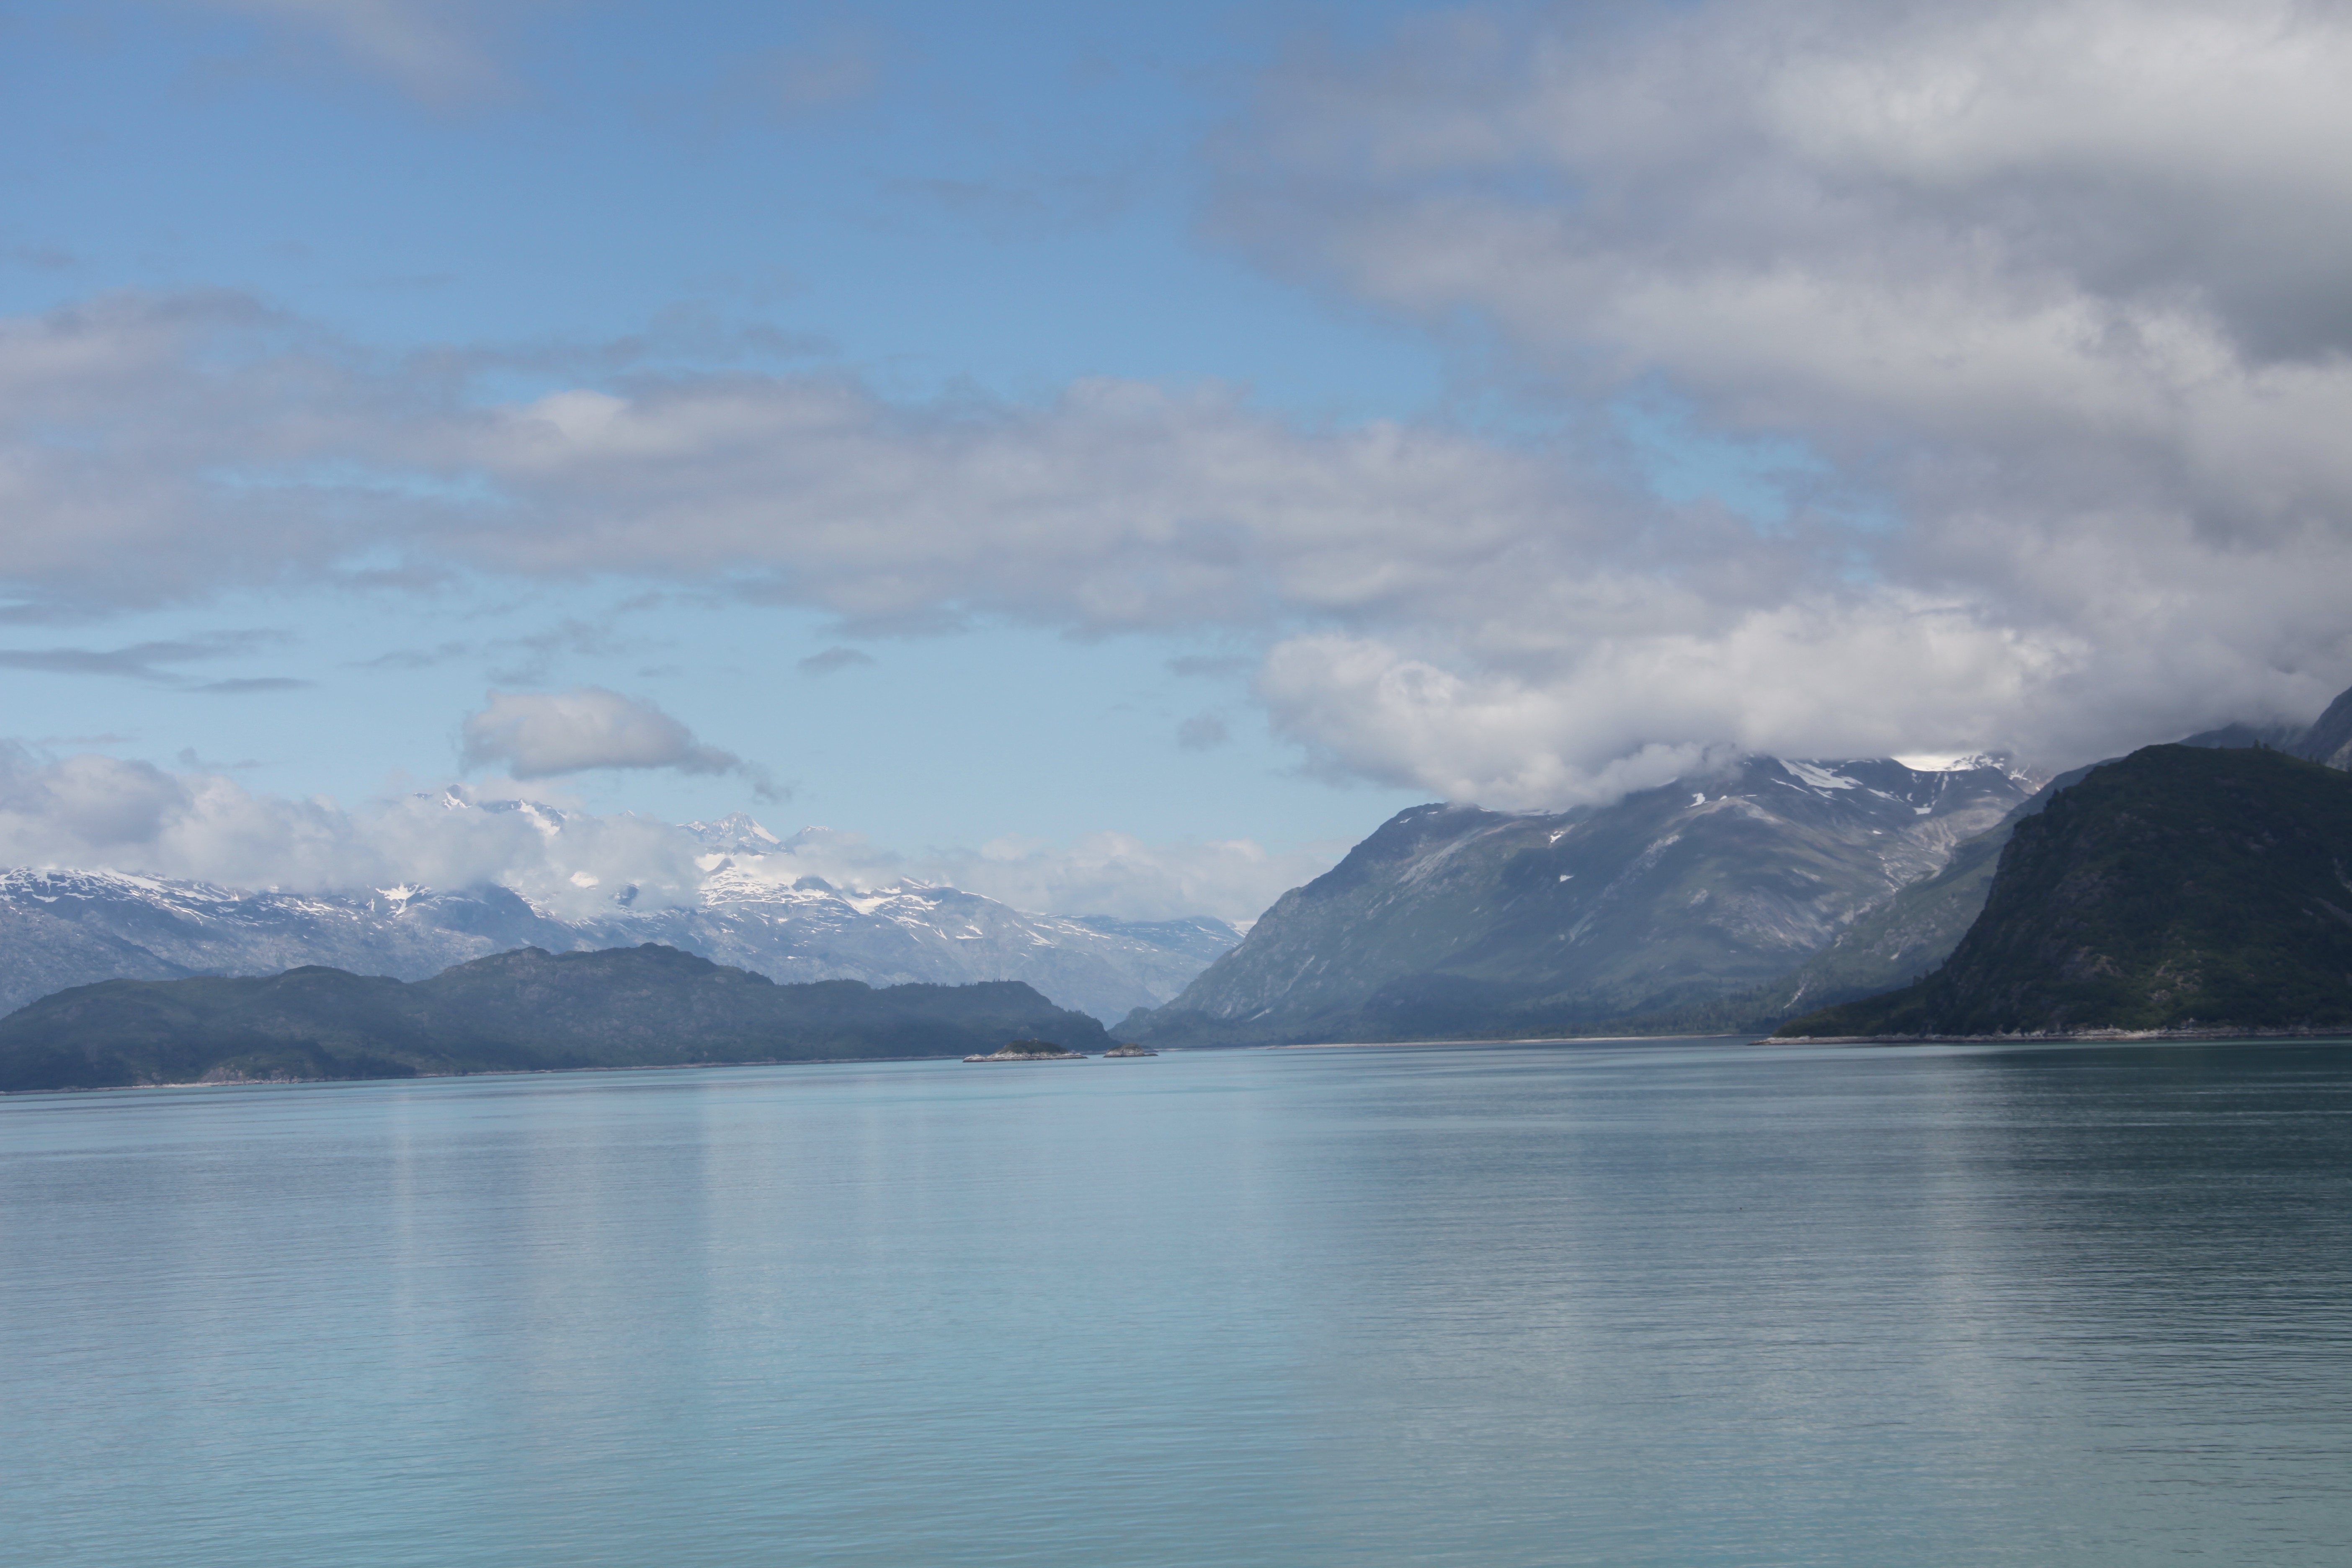
Of course we had more beautiful scenery to behold on our way back out of the bay, check out this quartet… 😉
This is John Hopkin’s Glacier; we couldn’t go back to get a closer look at it because that is where seals go to have their pups and we had to keep our distance. 🙂
Here is a video that I took while in Glacier Bay one year:
Of course, we were fed very well while in Glacier Bay, that is, once we pulled ourselves off of our balcony and away from the gorgeous scenery–trust me, that wasn’t an easy task. But, we did partake in the Taste of Alaska Buffet:
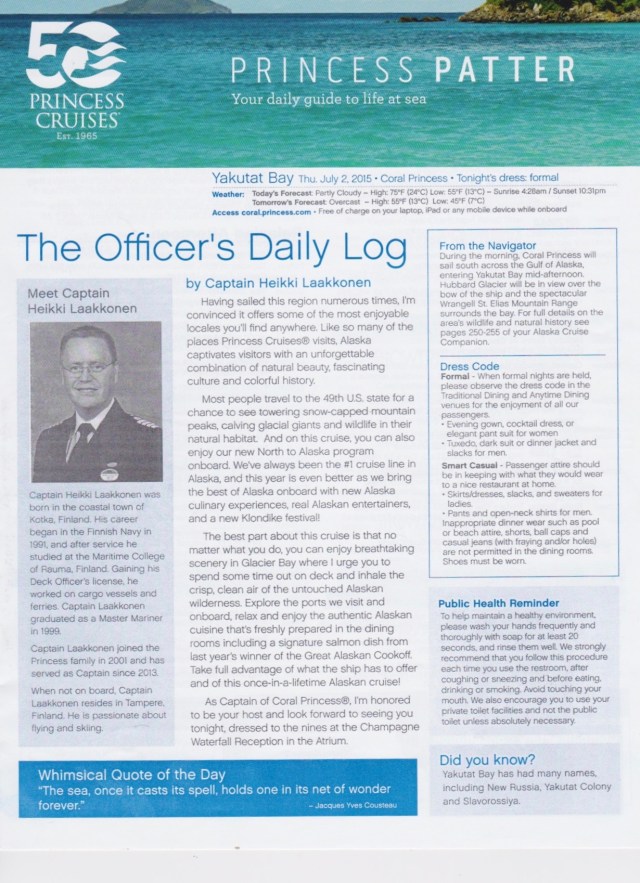
***Update*** I’ve taken a moment to scan the Princess Patter for Glacier Bay day:
Days 3 & 4 flew by way too quickly, but now we were headed to our next destination Skagway, Alaska, oh what an adventure we went on while visiting Skagway; I can’t wait to share it with you…
***Update*** I’ve now completed all of my installments in the Voyage of the Glaciers Series and have included links to the next post in line (so to speak) at the end of each posting. So, here is a link to the next post and it covers our time in Skagway…:)
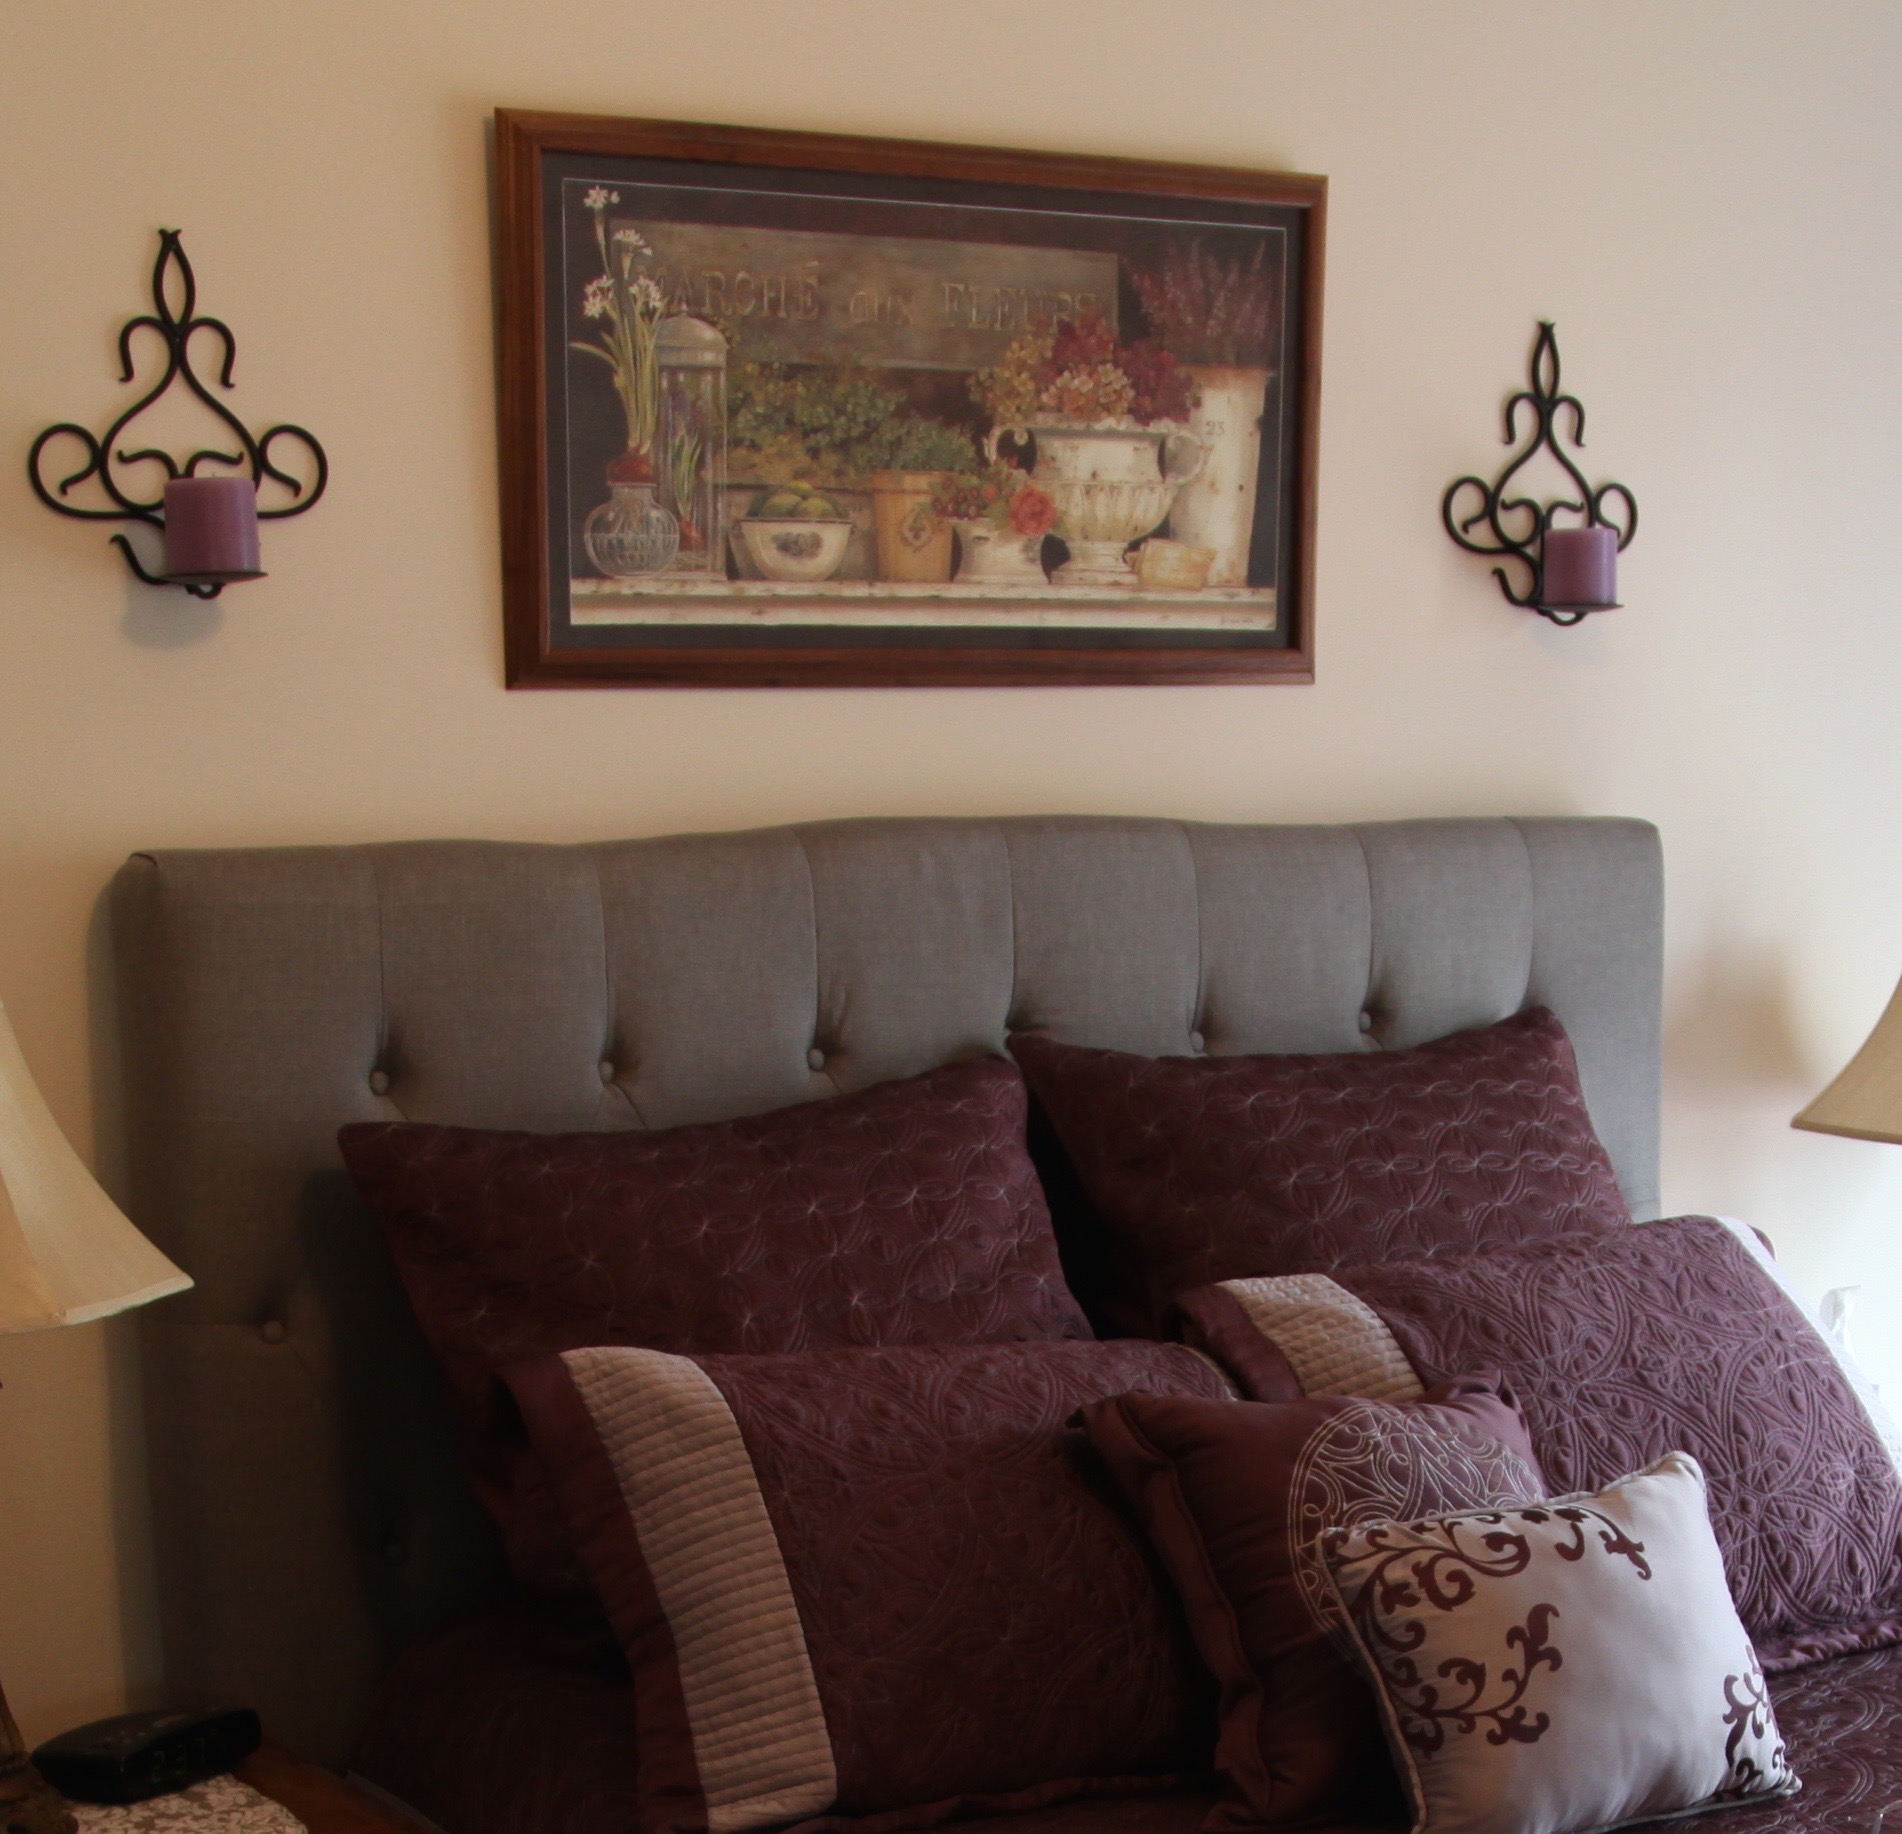
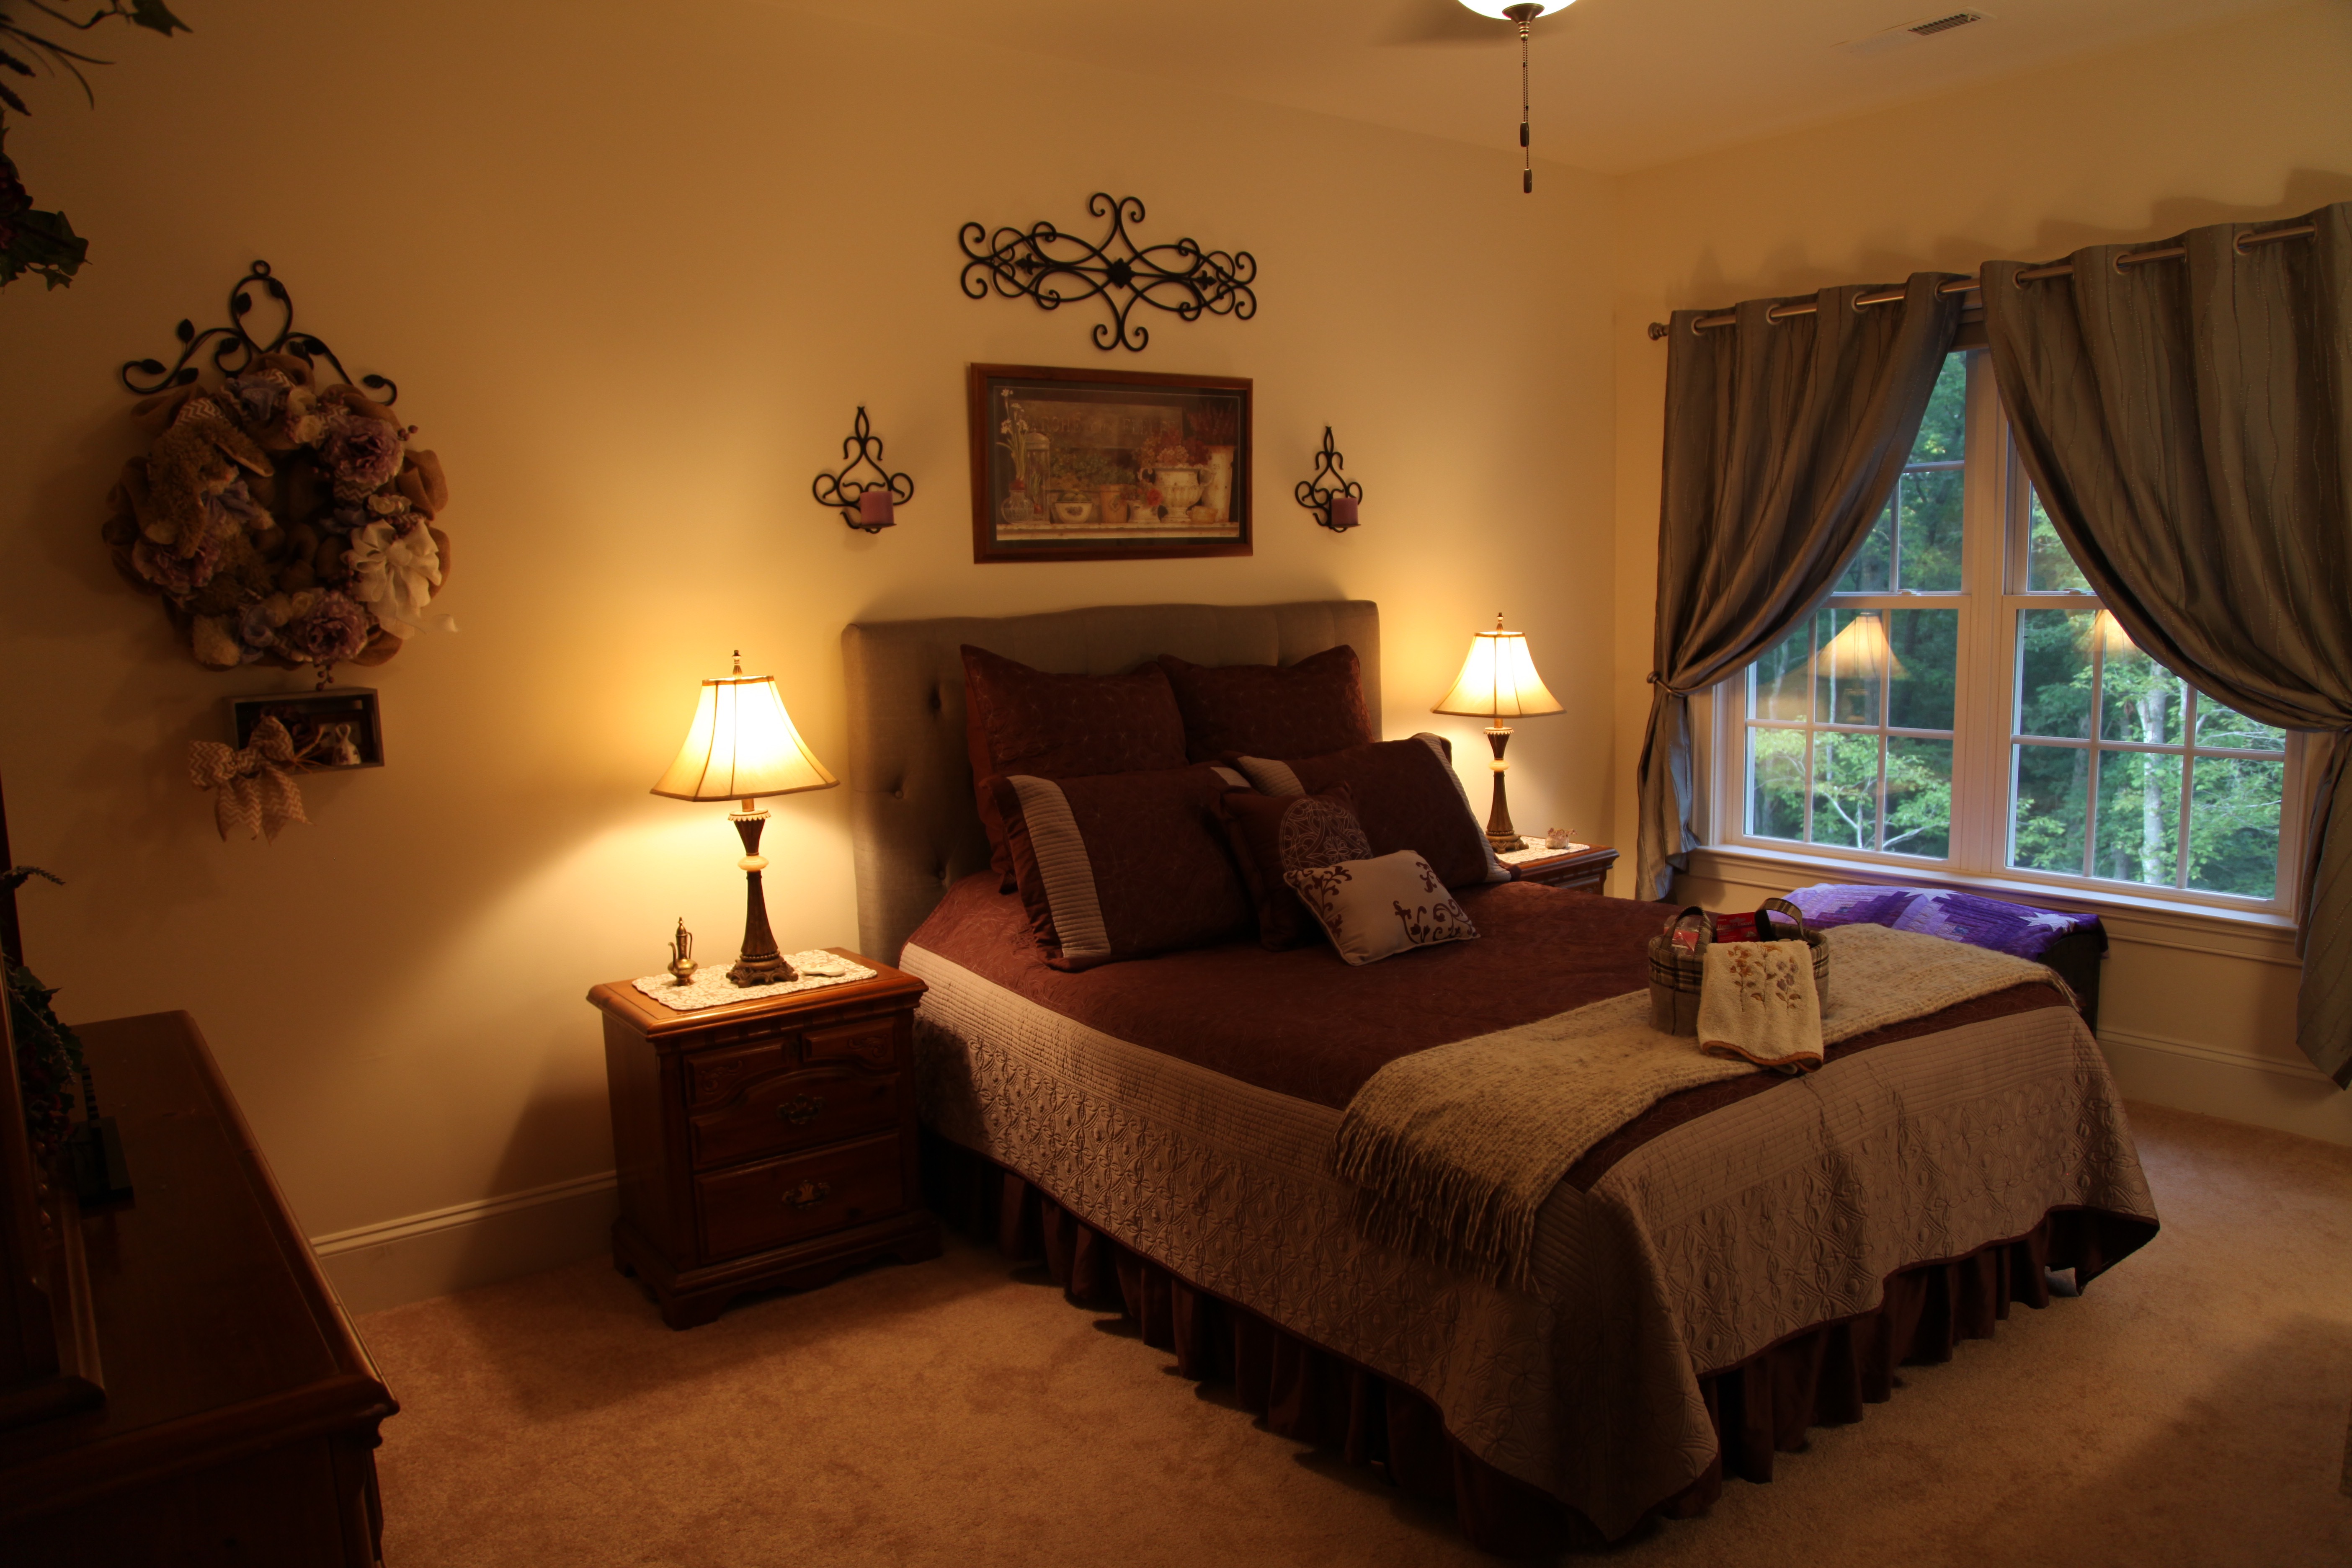
Now to to finish the upstairs part of the home tour; our third and final guest bedroom upstairs is what I’ll be highlighting in this entry; it is the only bedroom that has an ensuite bathroom. The dresser and bedside tables in this room are ancient, and I don’t mean “pretty” ancient as in they are collectors pieces, I mean, 1980’s soft pine, beat up like crazy ancient…haha. My hubby and I used them in our master bedroom for years and years and we’ve just never gotten rid of them. One of these days, we will most likely refurbish them in some way, we just haven’t gotten around to doing that yet…not high on our “to-do” list I guess. 😉 Regardless, they are quite sturdy pieces and anchor this room nicely. I have no earthly idea what ever happened to the headboard, so we did find this gray fabric covered and tufted headboard on Overstock.com, and I will say that I love it so much. 🙂
We’ve dubbed this space “The Purple Room” for the obvious reason, the color of the bedding and accessories. I love the look of gray and purple together, so when I found this comforter set in Bed, Bath, & Beyond, I scarfed it up and set to the task of collecting and making the accessories with which to bring this room to life. 🙂
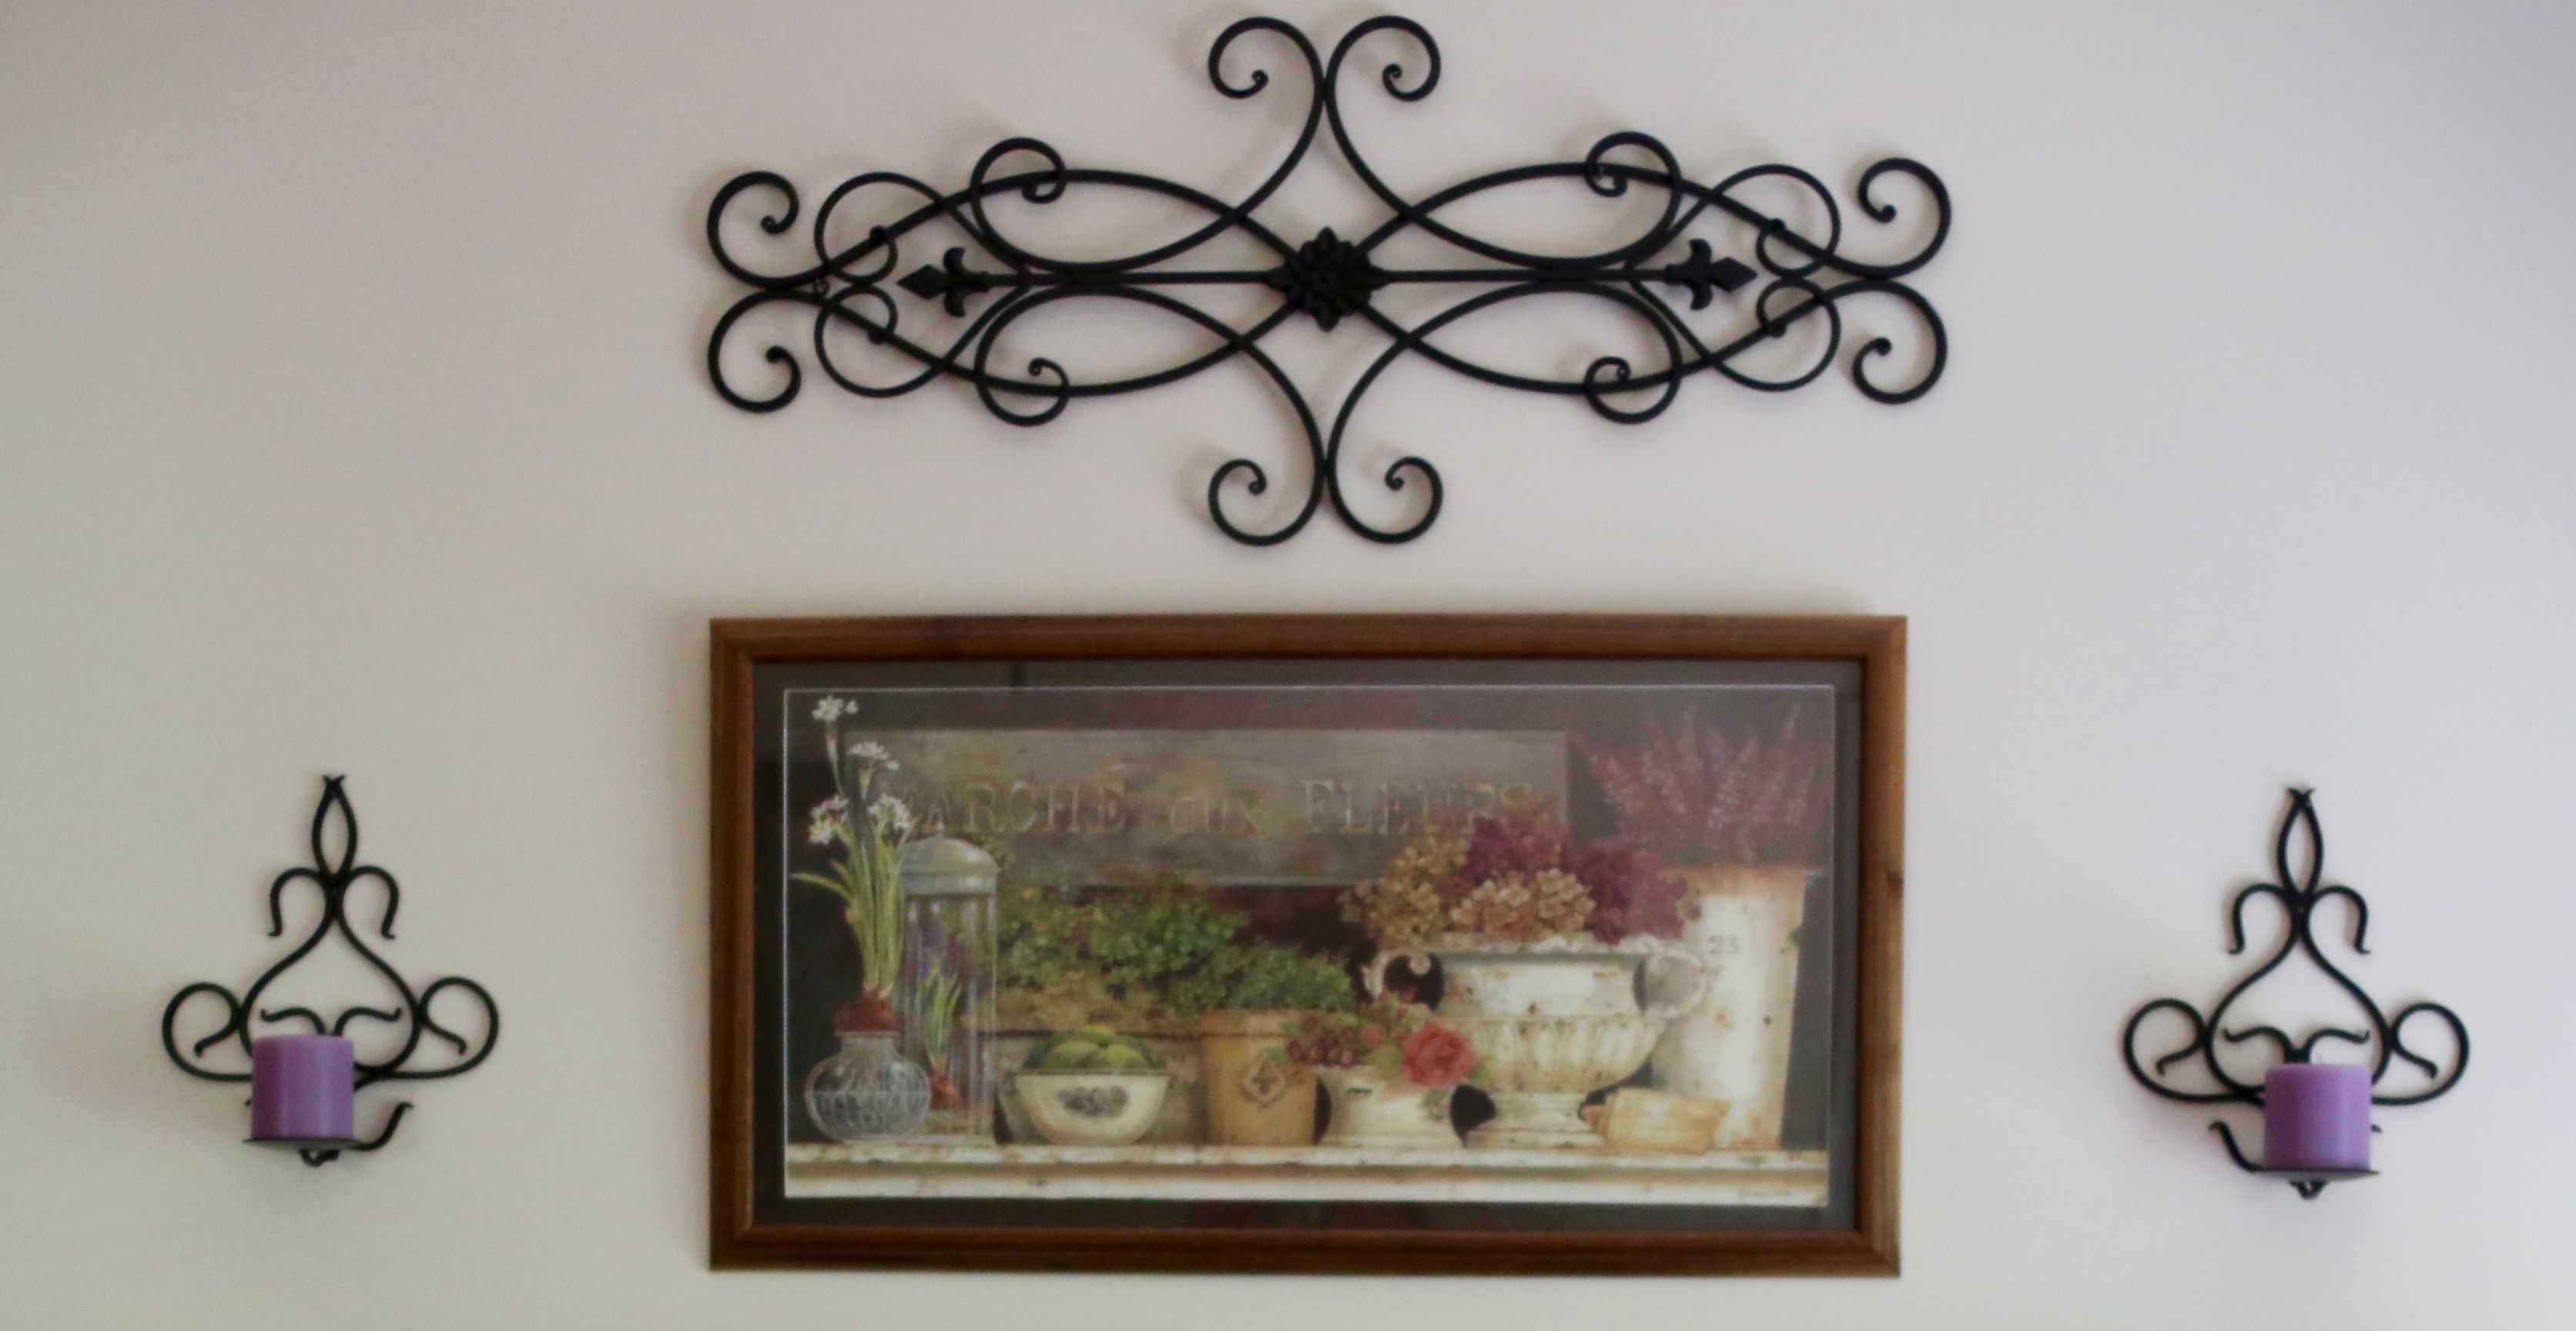
Let’s start with the picture over the bed:
We found that picture in Michaels one day; it was in a cardboard ‘frame’. My hubby constructed the wooden picture frame and cut the matting to fit and framed it up in no time; it turned out so pretty and fits nicely in this bedroom. I love to accent with those black scrolly wall pieces, I found all 3 in Hobby Lobby, on sale of course, I honestly don’t buy too much home decor that isn’t on sale.
We decided to go with a black ceiling fan in this room with silver accents…classic…
I made this burlap wreath and I actually utilized one of our daughter’s old Boyd’s Bear bunnies into the design replacing his worn out neck ribbon with a pretty purple ribbon. I found some purple silk flowers in lavender and cream and made a cream burlap bow to finish it off. I can’t for the life of me remember where I got that wreath hanger, but it is metal and quite sturdy. I found that little shadowbox under the wreath on sale and filled it with things that I already had here at the house.
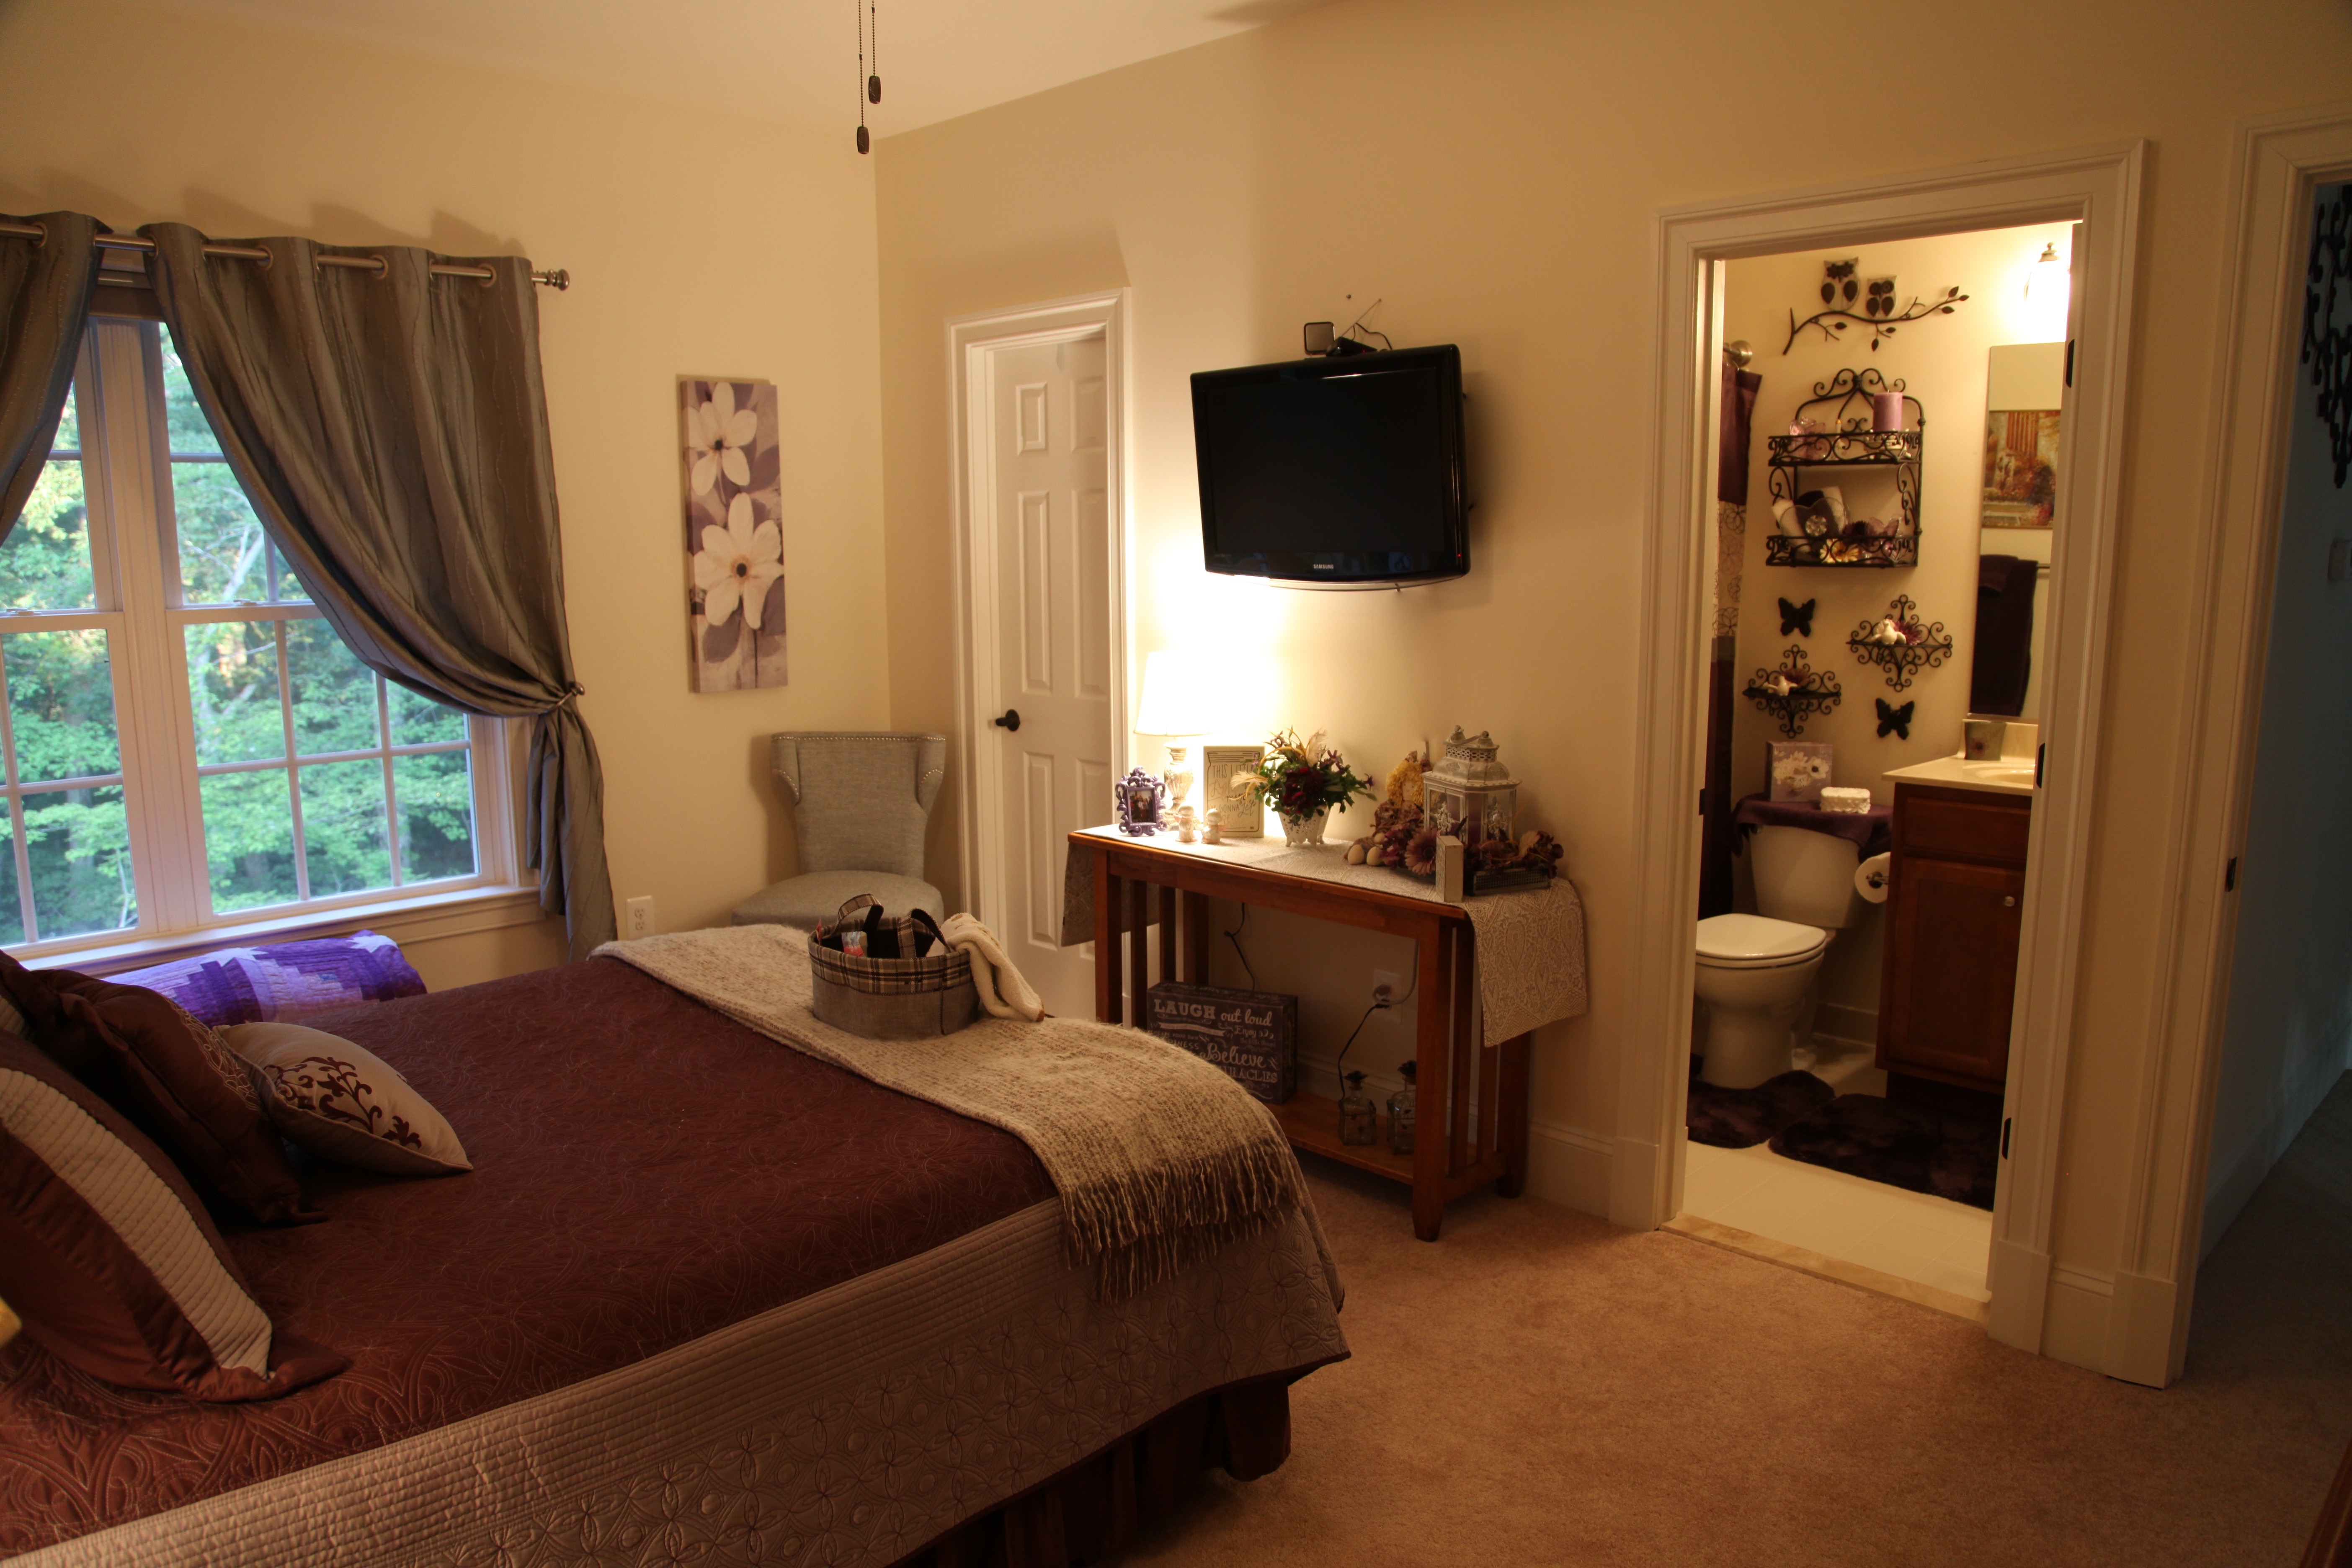
We decided to put a tv in this room just in case we have a guest that might like to watch a little tv before retiring for the night. 🙂 The table that sits under the tv is another piece that has been around for decades, although, this one is a really nice oak table that when purchased was unstained and my hubby stained it to the exact color that we wanted.
I honestly didn’t buy too many things to utilize in this room–I just went down into my basement bins that hold my extra ‘stuff’ and started collecting everything in the purple/gray/silver color scheme. I carried it all into the room, put it on the bed and just started putting little groupings and arrangements together. 🙂
Here is the bathroom:
This is a very small space, but, it is private and I know that those who stay in this room appreciate that attribute. 🙂 I really enjoyed doing that little wall grouping. Actually, my hubby helped a lot, we had the 3 shelves, the owls, and the butterflies laid out on the floor in Hobby Lobby one day; we were arranging and rearranging those items until we finally got it like we wanted it…that process took a while…haha. Once we got everything home and hung up, I put all of the other stuff together on the shelves pulling from the stash that I had retrieved from the basement.
Just as I did in the other two rooms, I have placed a basket of goodies on the bottom of the bed. I think it adds a nice touch, makes guests feel welcome, and also provides them with necessities if they happened to forget anything.
I used the very same type of curtain in this room as I did in the Happy room and in the Turquoise Room the only difference being that I used a silver curtain rod and tie back hooks. The grommets in the curtains are silver as well.
All three bedrooms are pretty large upstairs, and one of my goals was to make them feel cozy and comfortable without cluttering the room up with extra furniture and such; it is a task that I believe I have completed in all three spaces. 🙂 I’d love to stay in any one of these rooms if I were a guest here. 😉


