Cousins Craft Weekend – Part 2 – Grapevine Fall Wreath

Hi Everyone!

As I mentioned in Part 1 of this little “Cousins Craft Weekend” series of posts, I was able to spend a few fun-filled and very productive days with a couple of my sweet cousins.  Here is a picture of all three of us at Stacey’s house (left to right – Donita, Stacey, and me (Arlynn):

12011279_10206378790982446_1568453601999785254_n

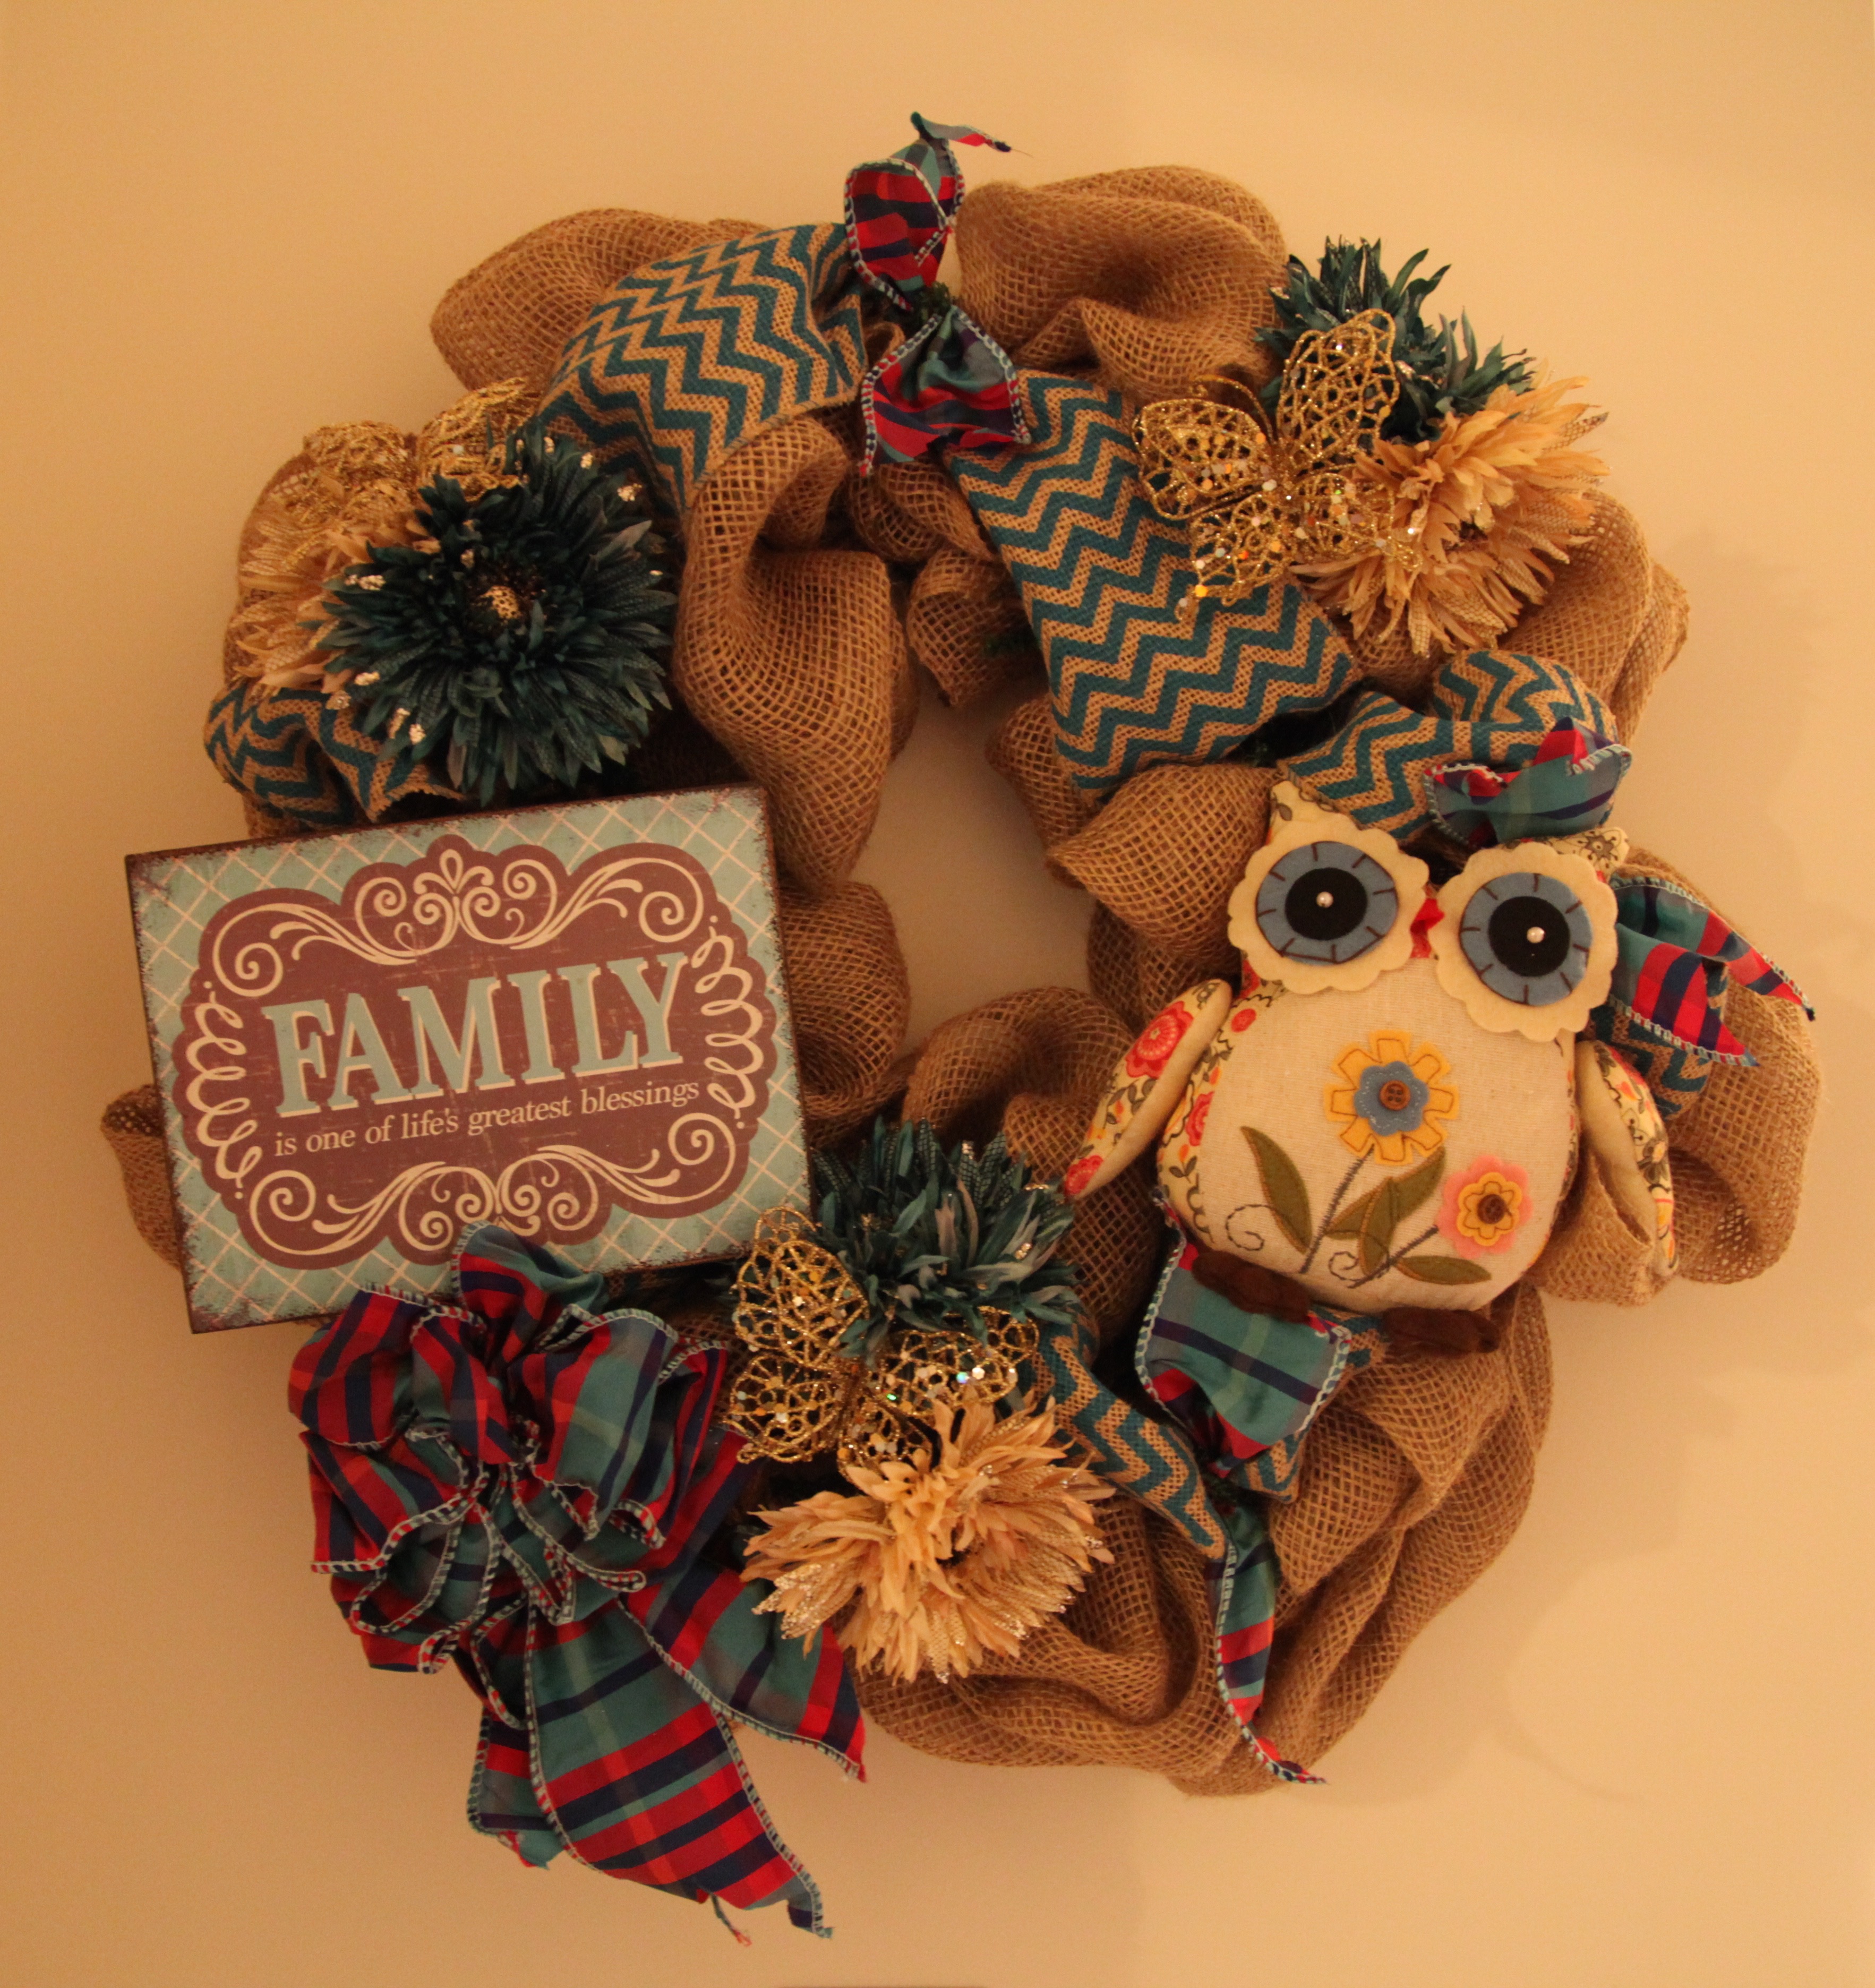
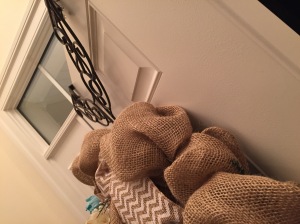
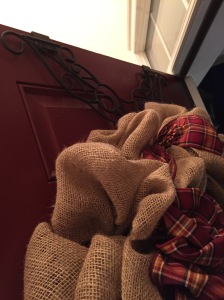
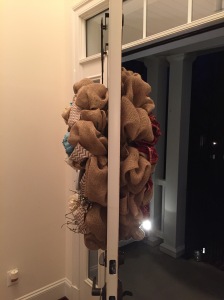
Stacey composed Part 1 of this series and explained how she created a deco mesh ruffle Halloween wreath and she will be composing Part 3 in which she will be describing how she created a deco mesh lighted garland to pair with her wreath. I can’t wait for y’all to see how she created that beauty; here is a sneak peak at just a piece the finished garland (that is Stacey’s gorgeous lab Piper sitting and posing so prettily):

IMG_2018

I will be handling this “Part 2” entry and I will be describing how I made Donita a Fall wreath for her to hang in her home.

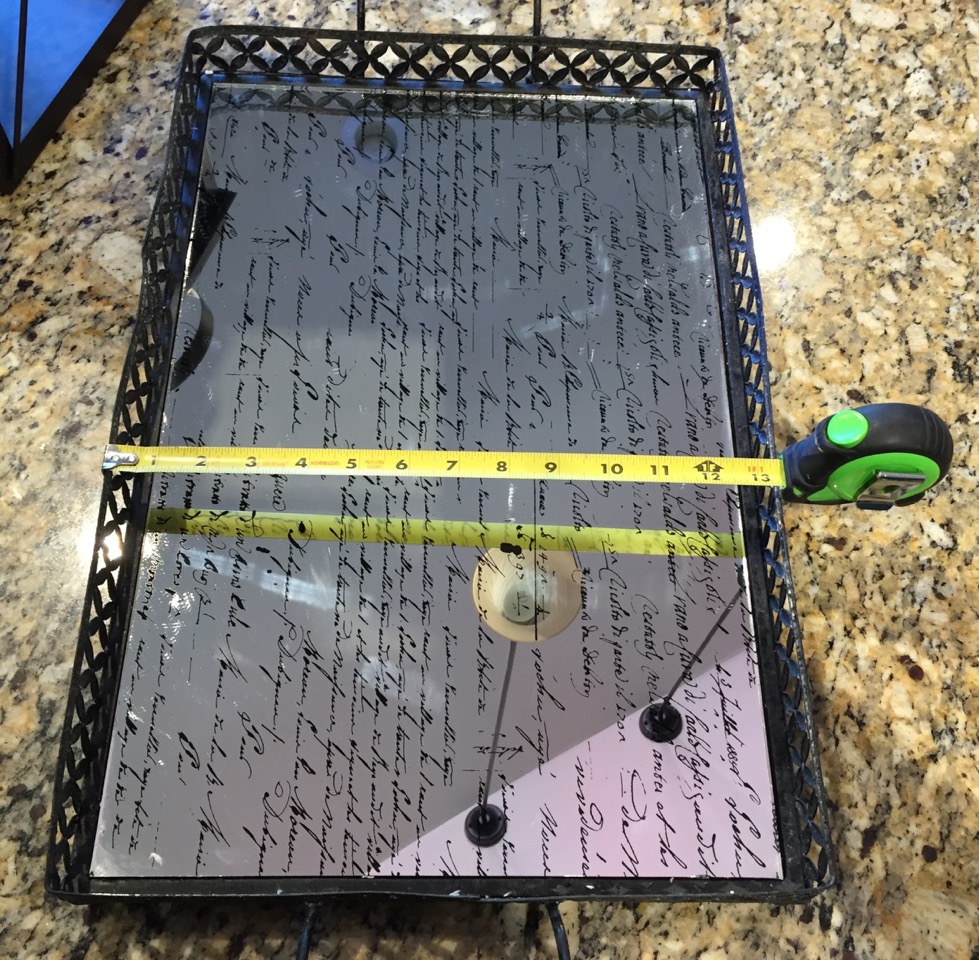
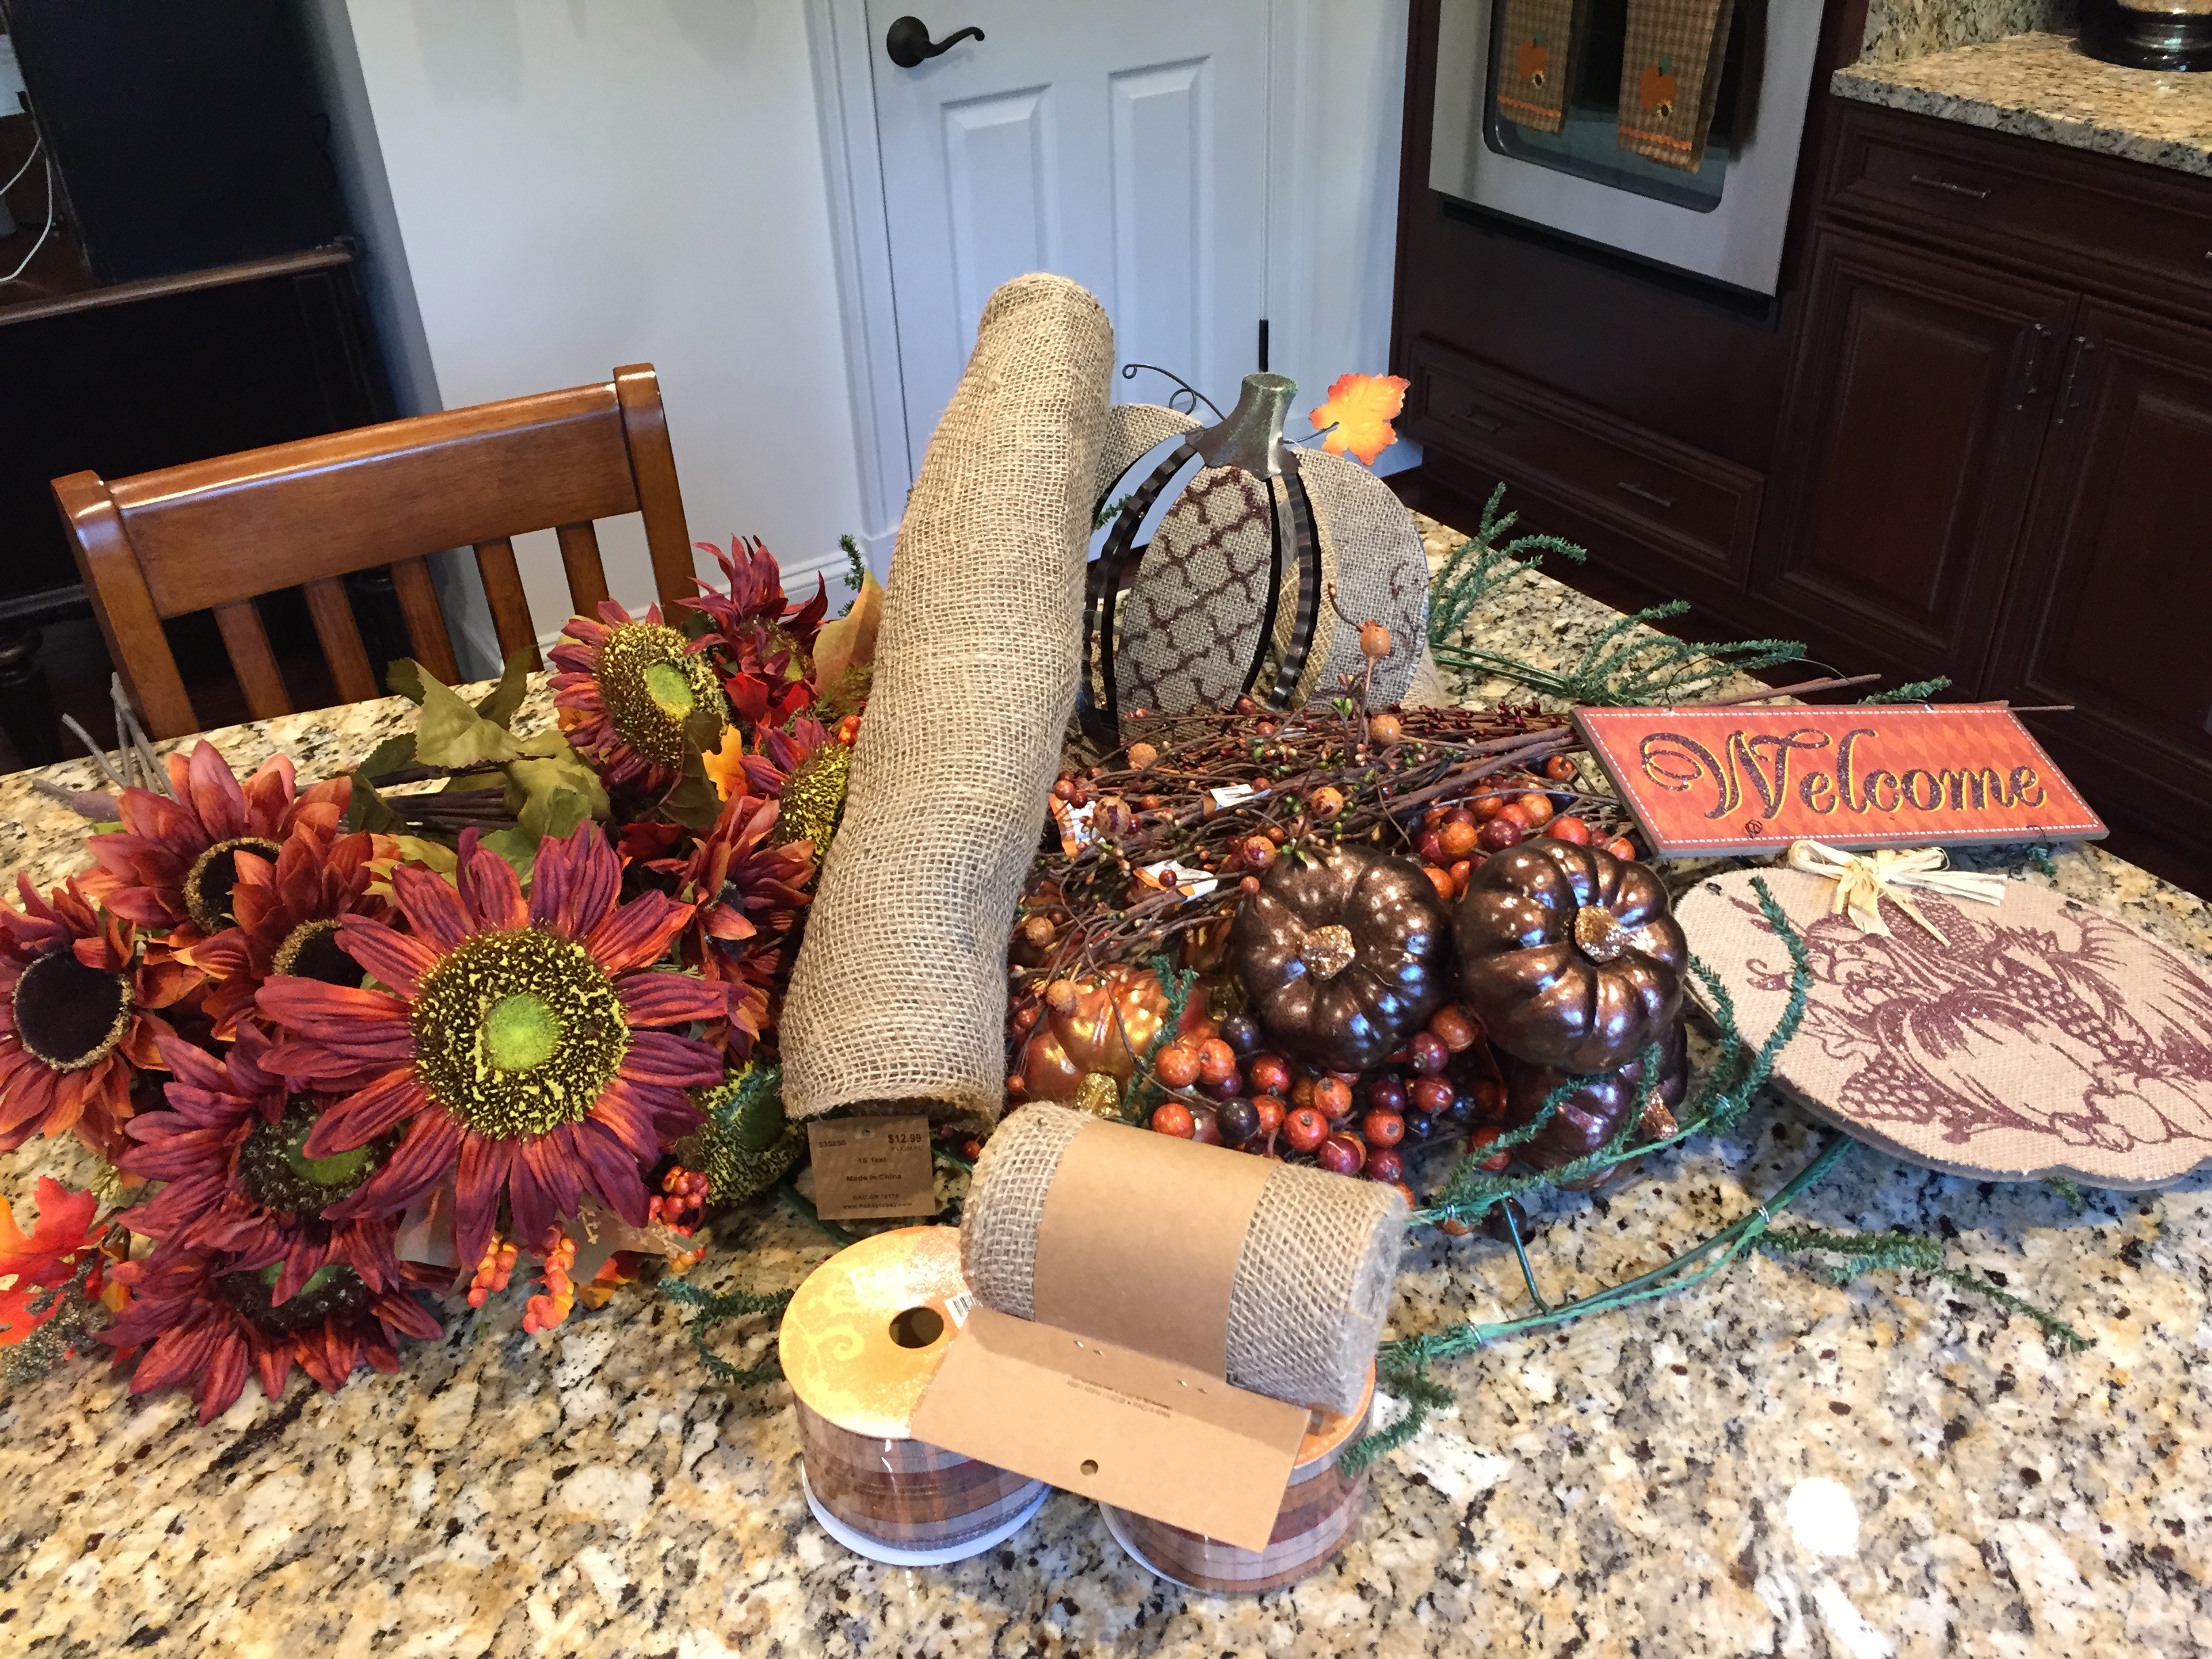
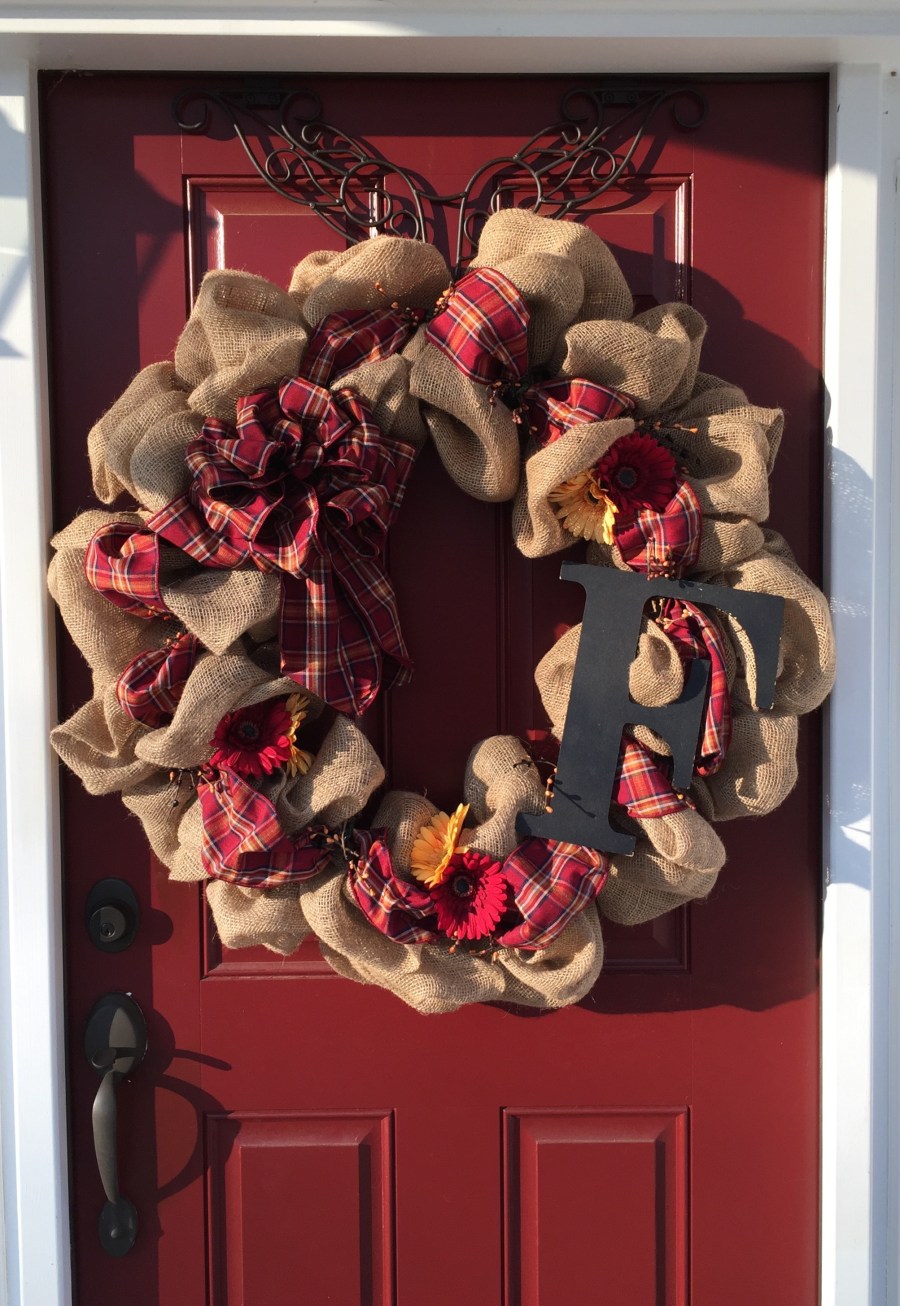
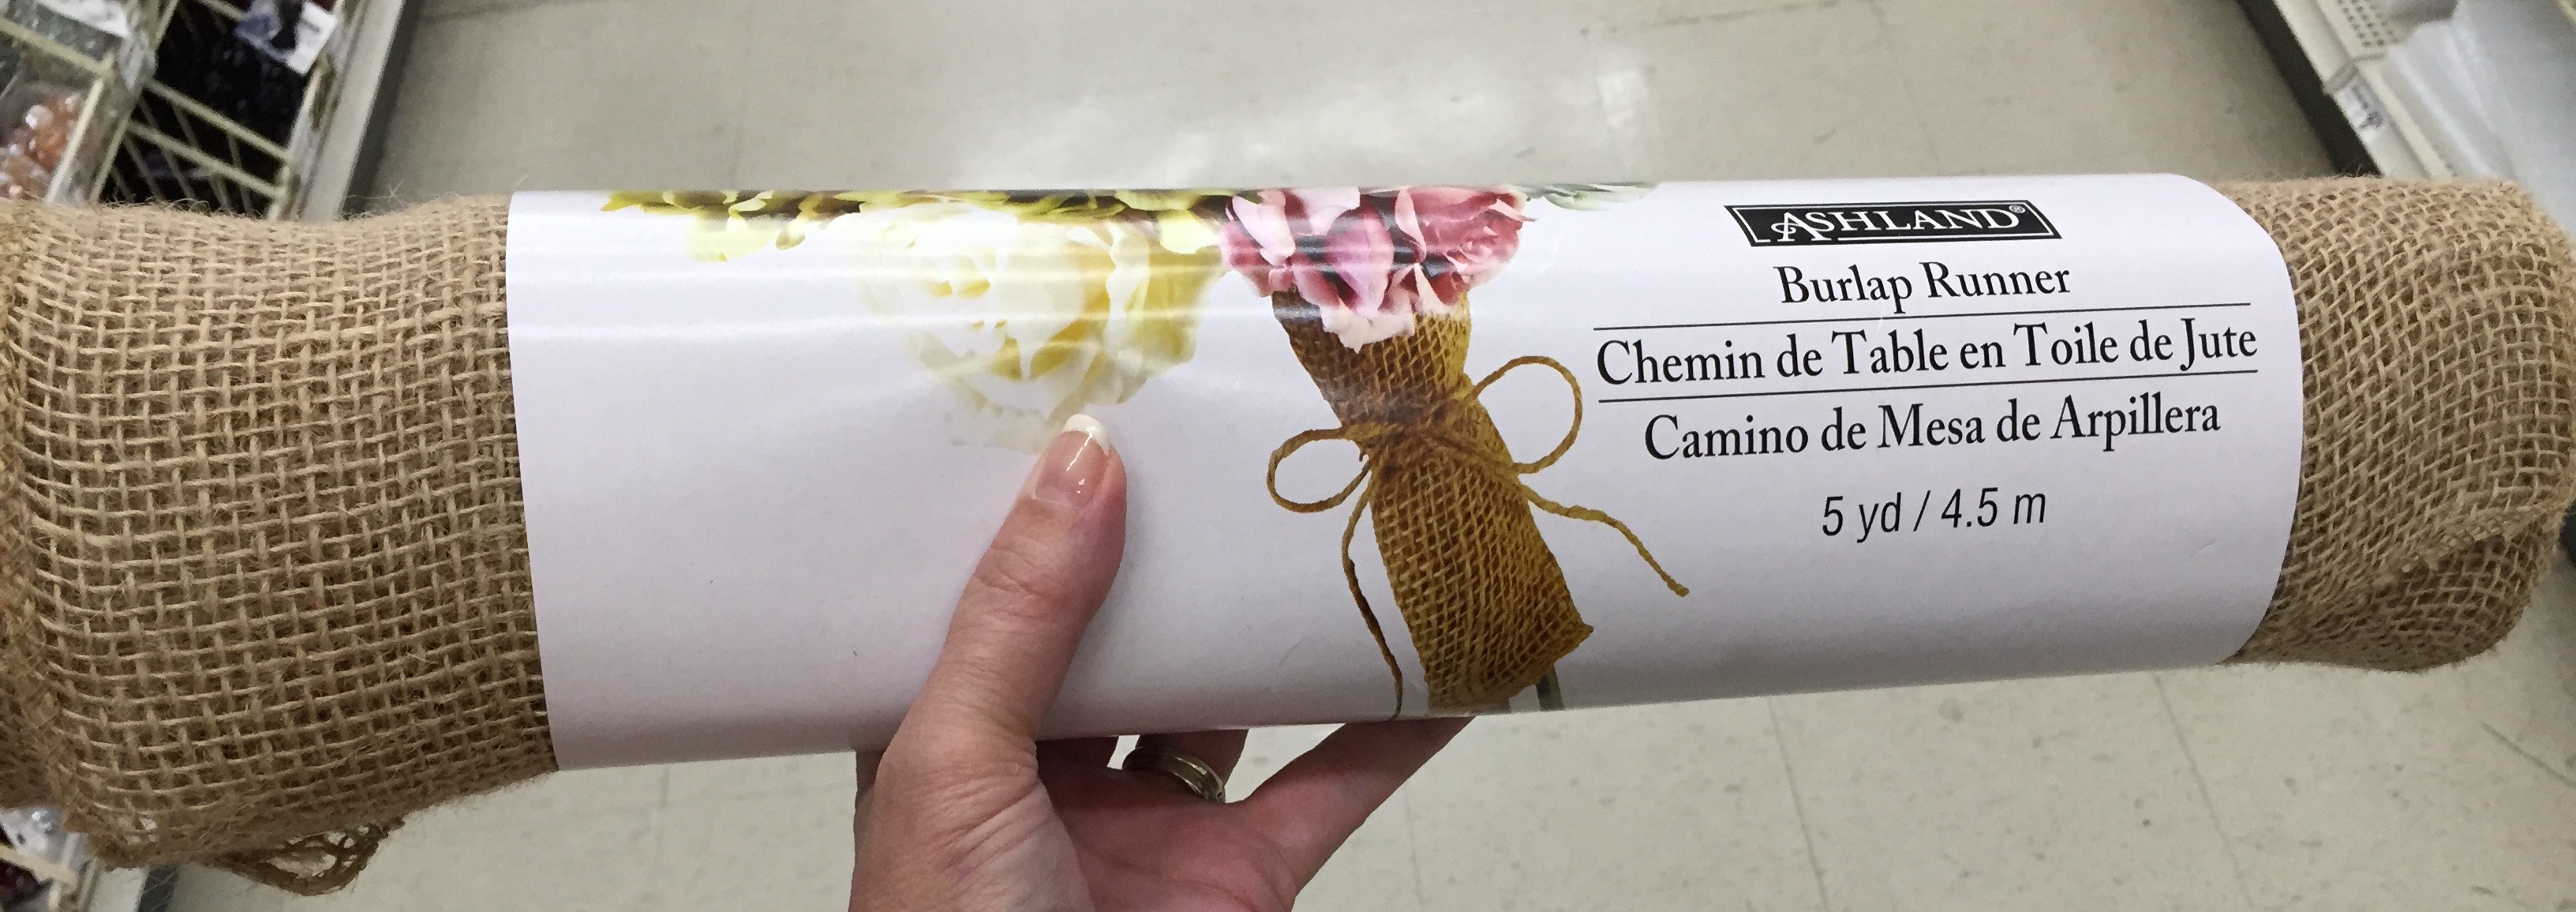
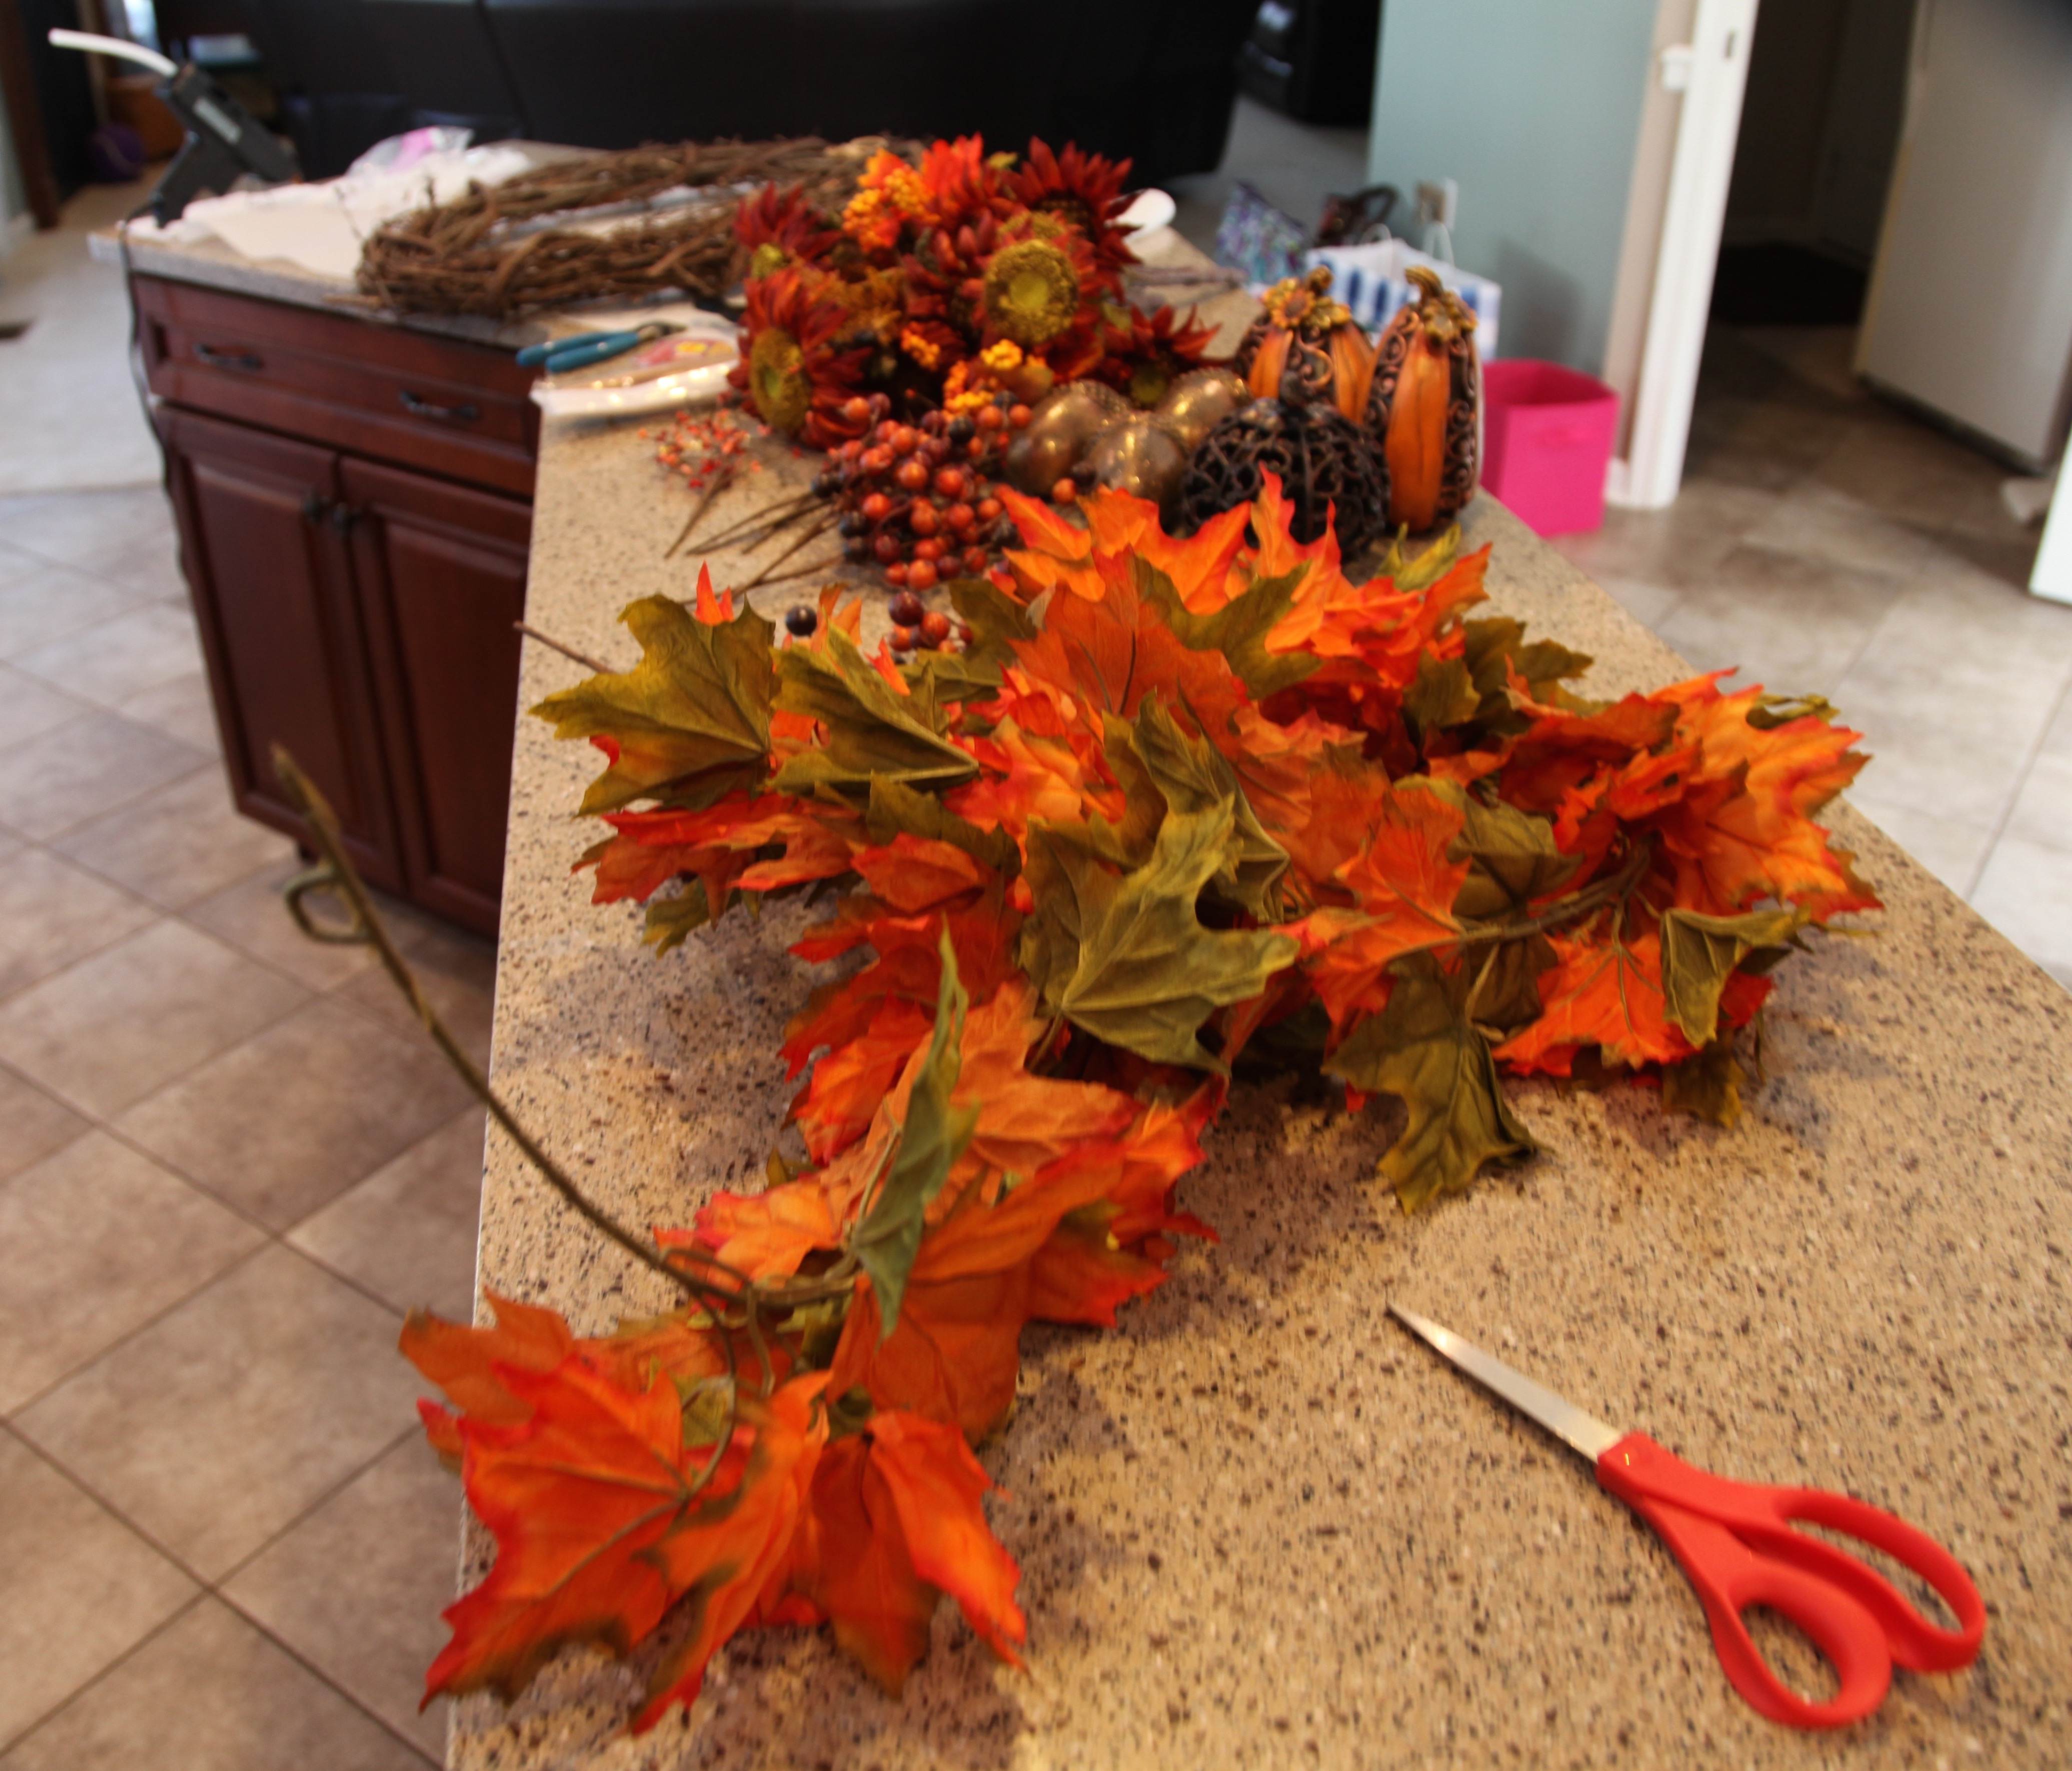
I started out with an oval shaped grapevine wreath; I was so happy that I found the oval shaped wreath at Hobby Lobby, it really made for a pretty finished product. All of the Fall decor craft items were on sale for 40% off so I was able to pick up all of the components that I used for the wreath for a great price.

IMG_1924 (1)

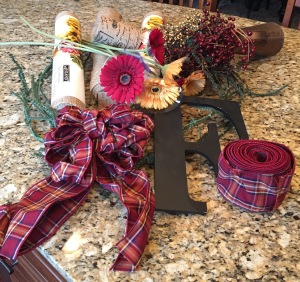
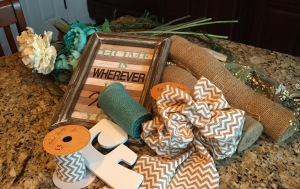
Here is my haul, admittedly, I purchased a few extra items that I didn’t end up using, but Stacey was able to use a couple of things in her home and the rest, well, I will always be able to incorporate them into my other Fall decor:
IMG_1922

IMG_1921
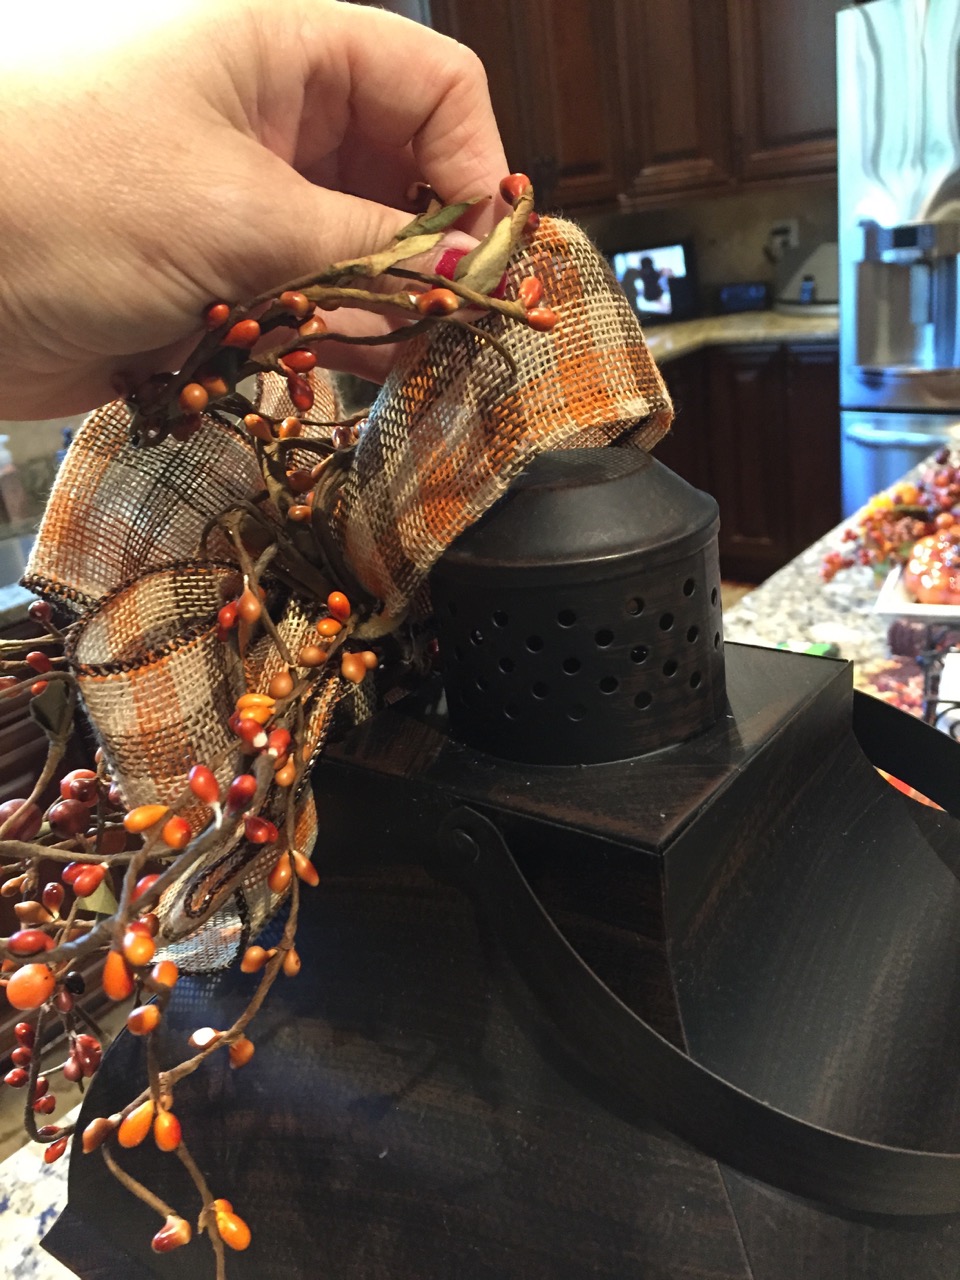
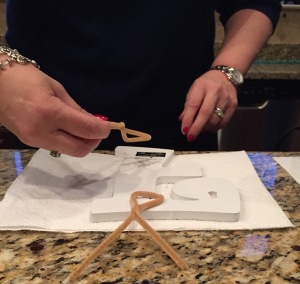
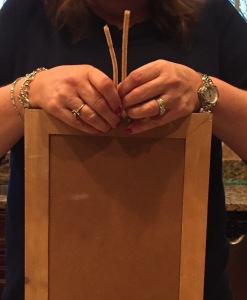
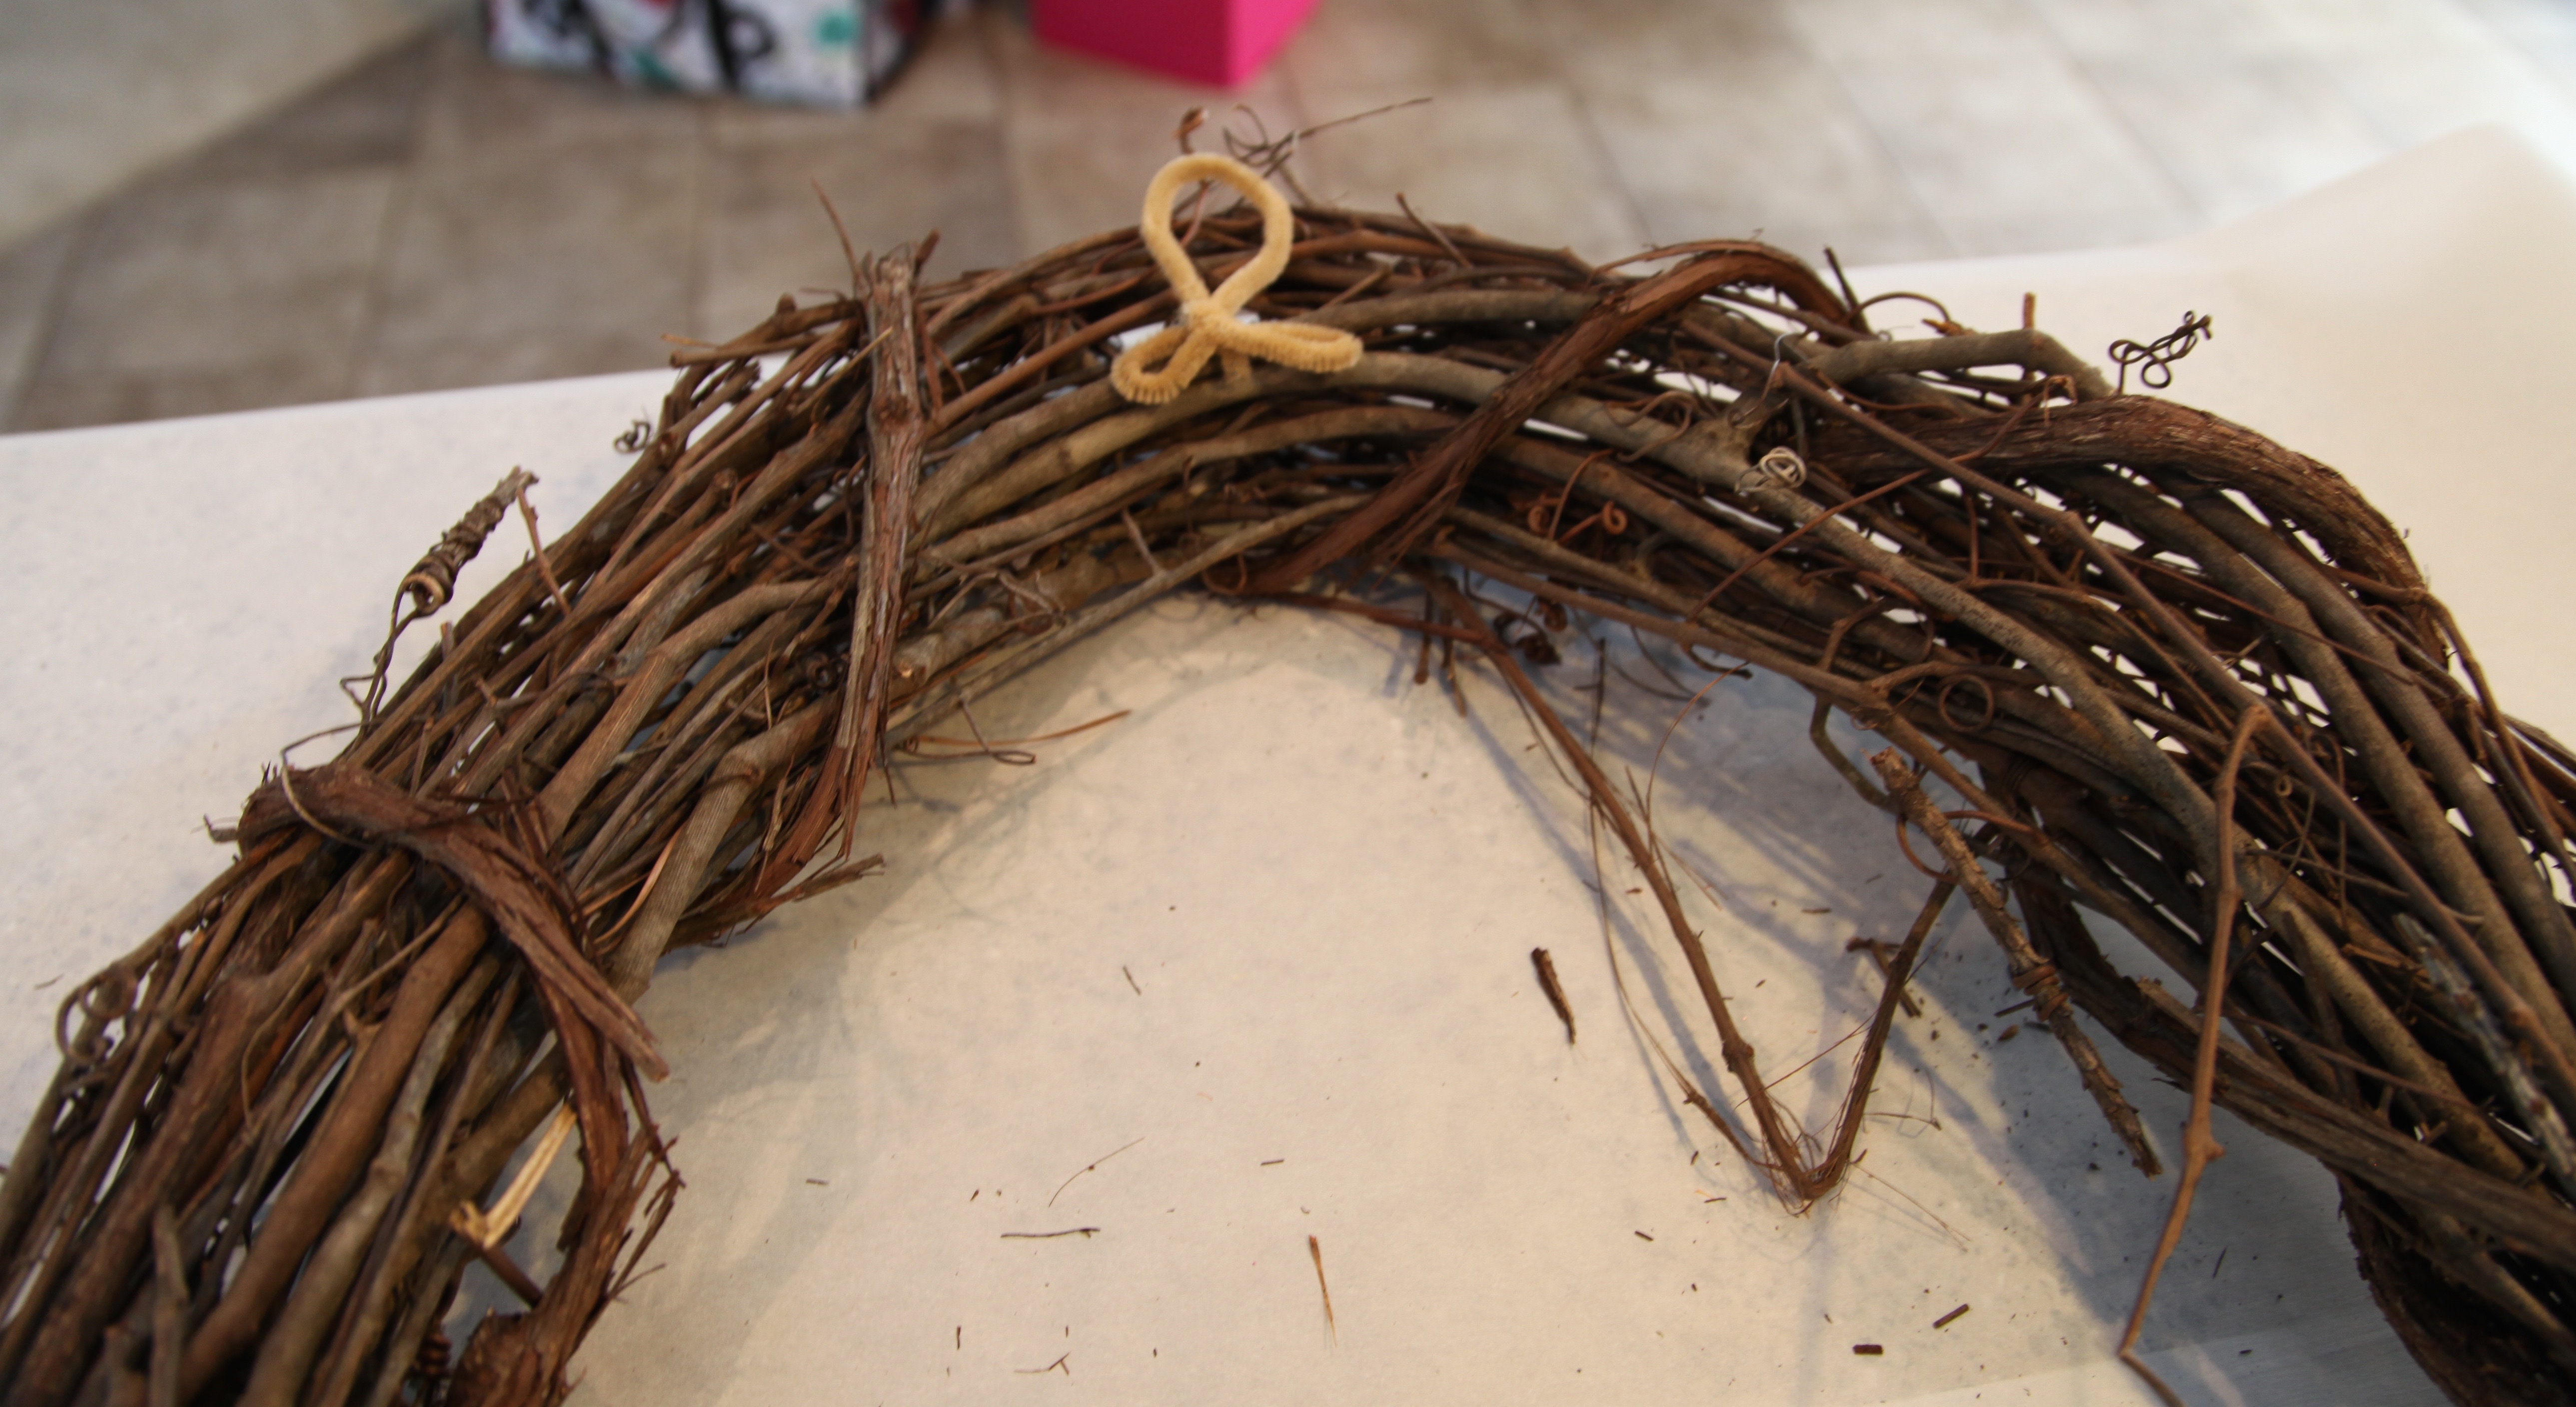
The very first thing that I did was to make a “wreath hanger” out of a pipe cleaner.  I try to always hot glue one of these to the back of all grapevine wreaths as most wreath hangers aren’t large enough to accommodate a grapevine wreath. Then I made a bow…IMG_1923

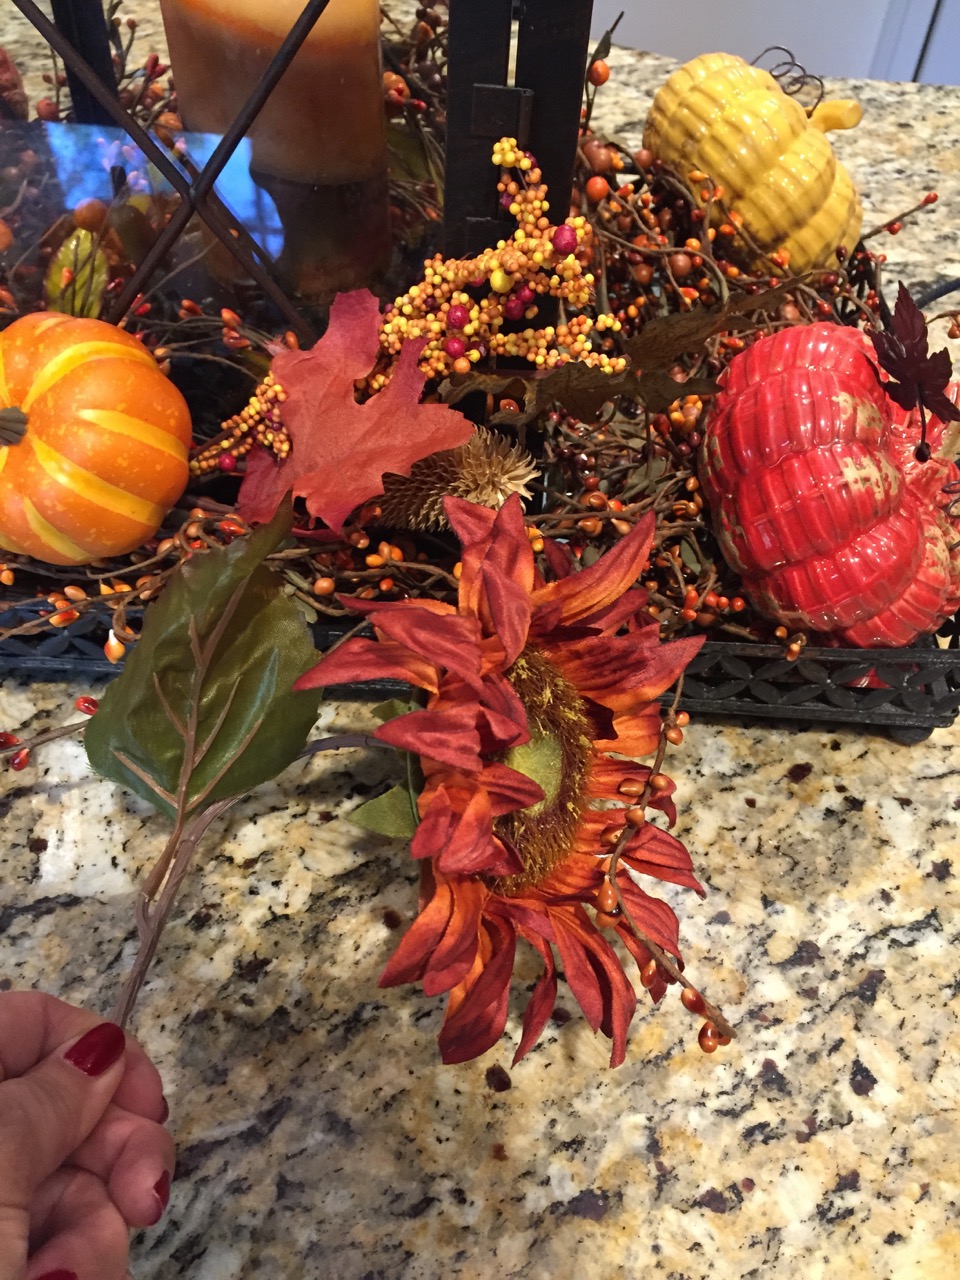
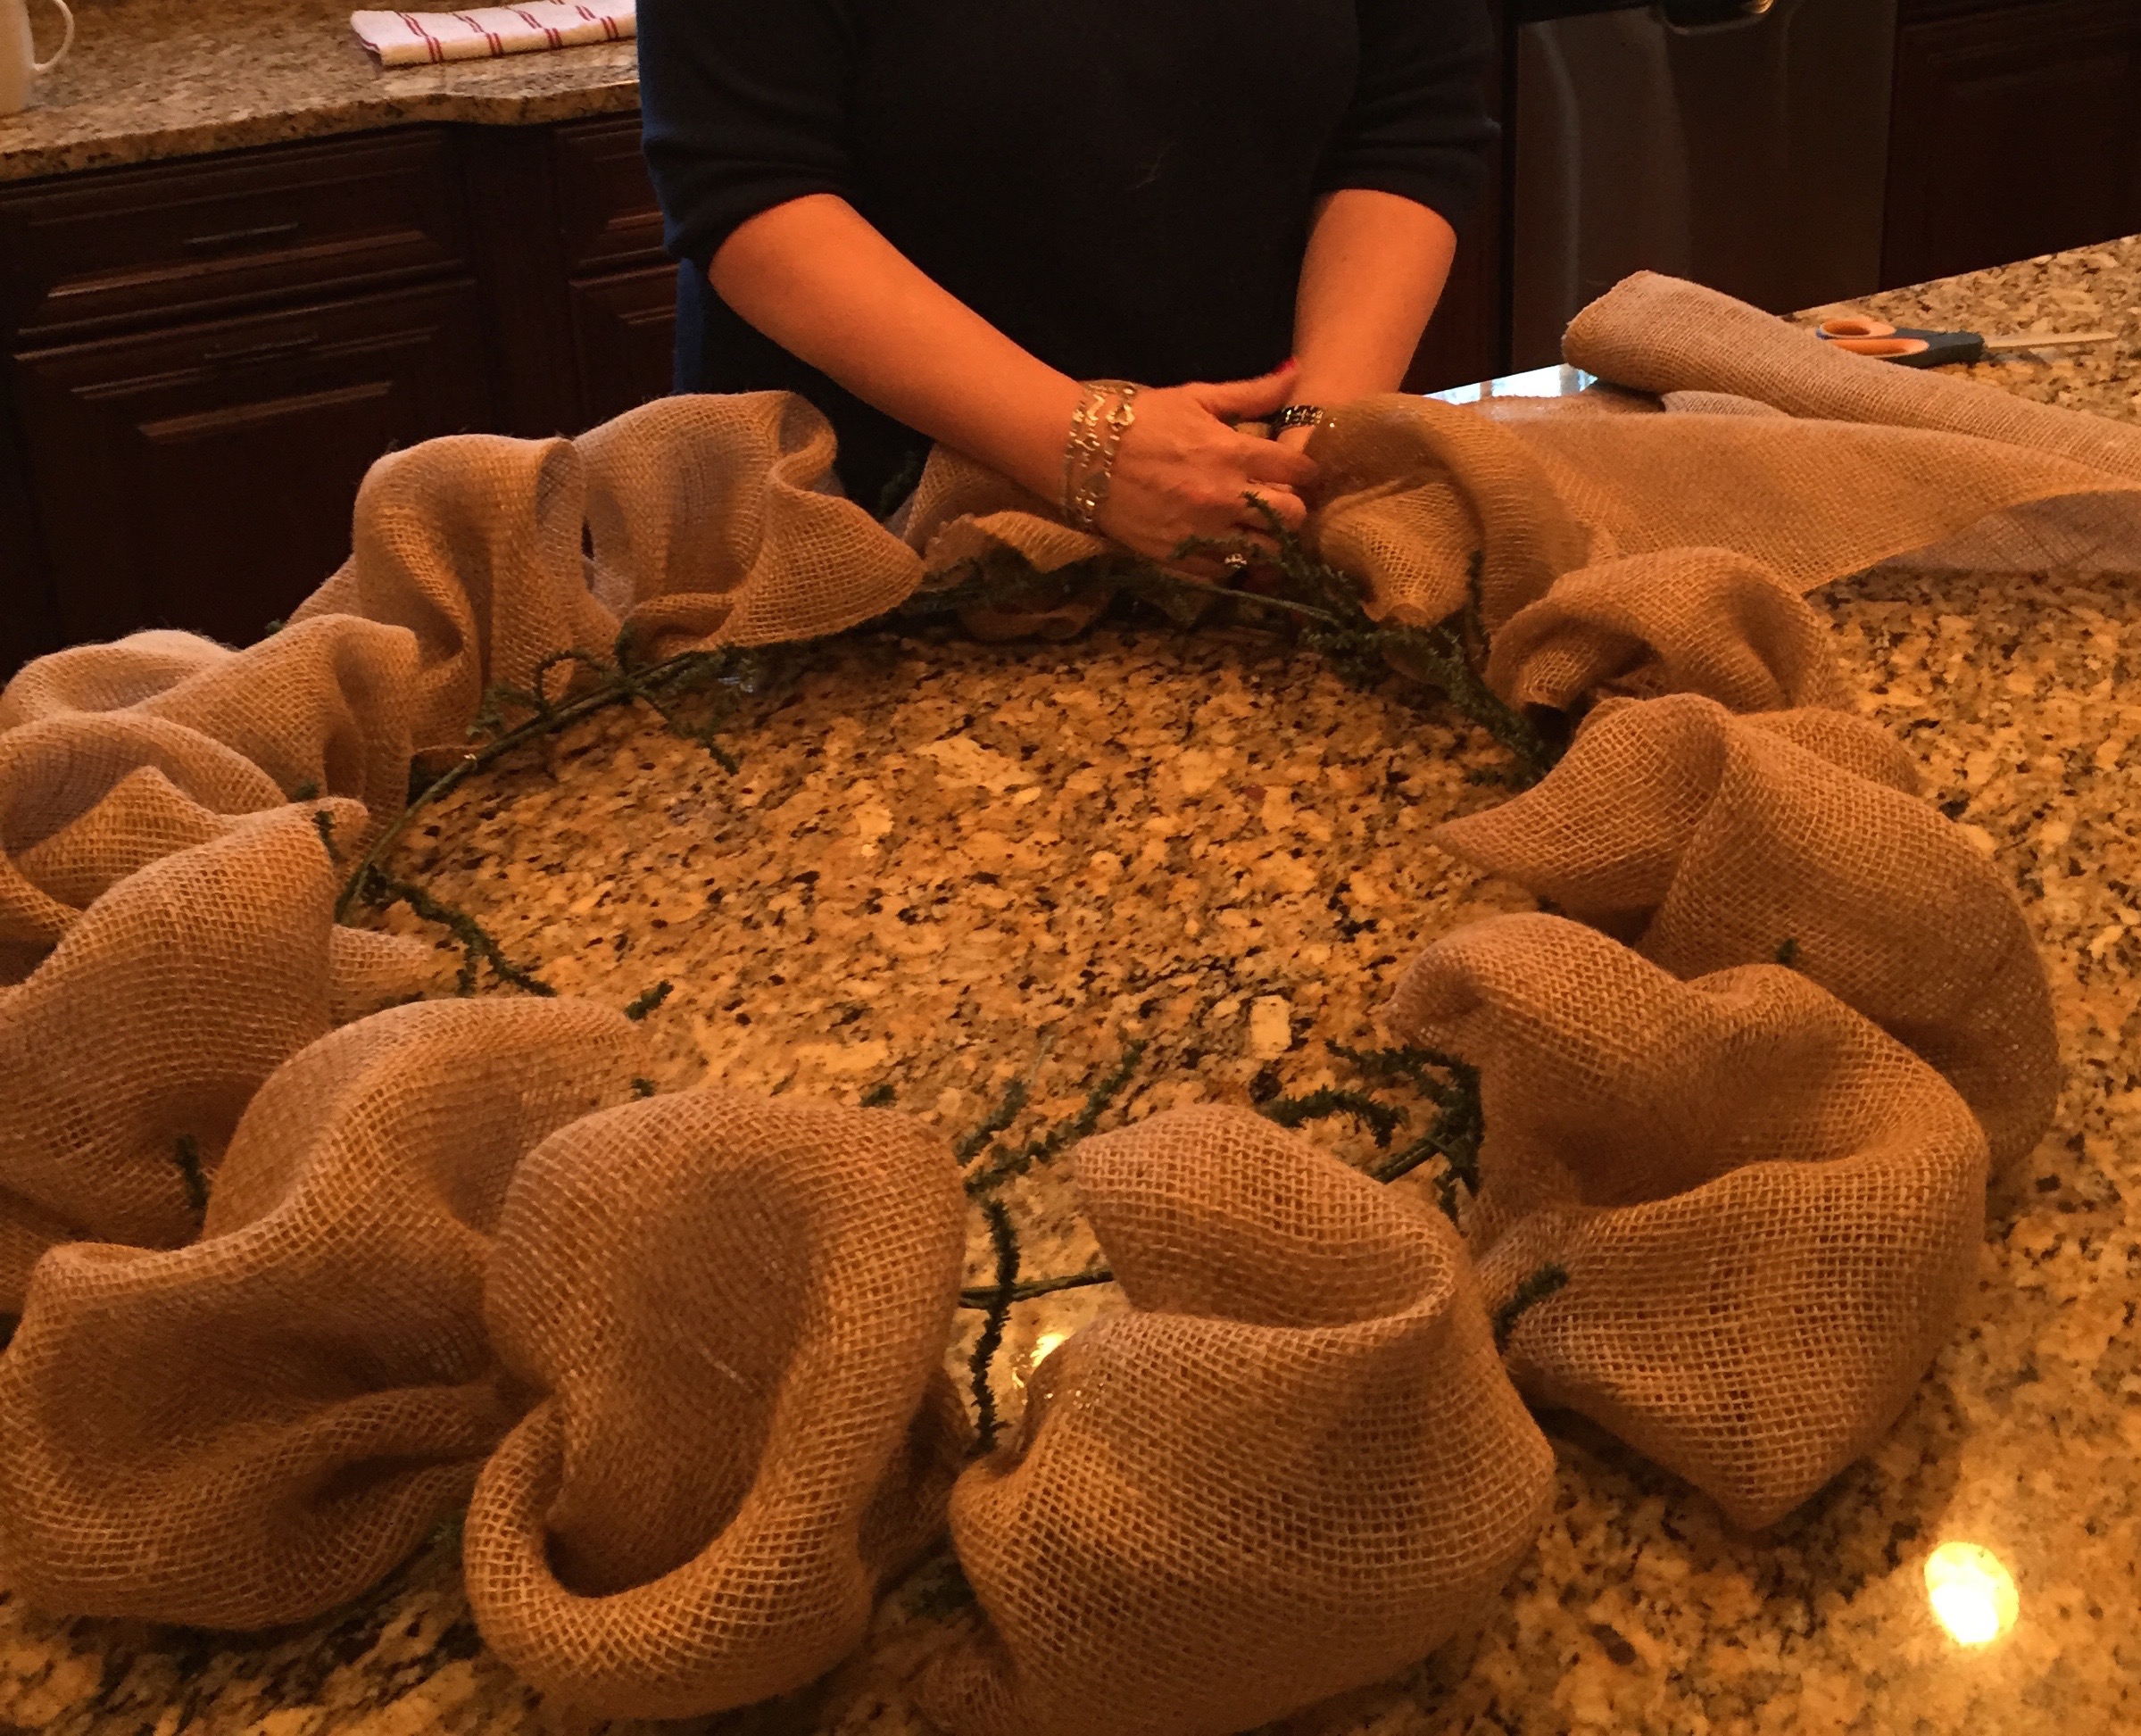
Next I took a leaf garland and laid it on top of the wreath and started to glue it into place…this process took a while because waiting for that glue to dry was frustrating.  This probably wouldn’t be an issue for y’all but, my hot glue gun is like a weapon and the hot glue that comes out of it practically melts things instead of glues things…haha.  I really should invest in one that isn’t quite as dangerous! 😉

IMG_1925
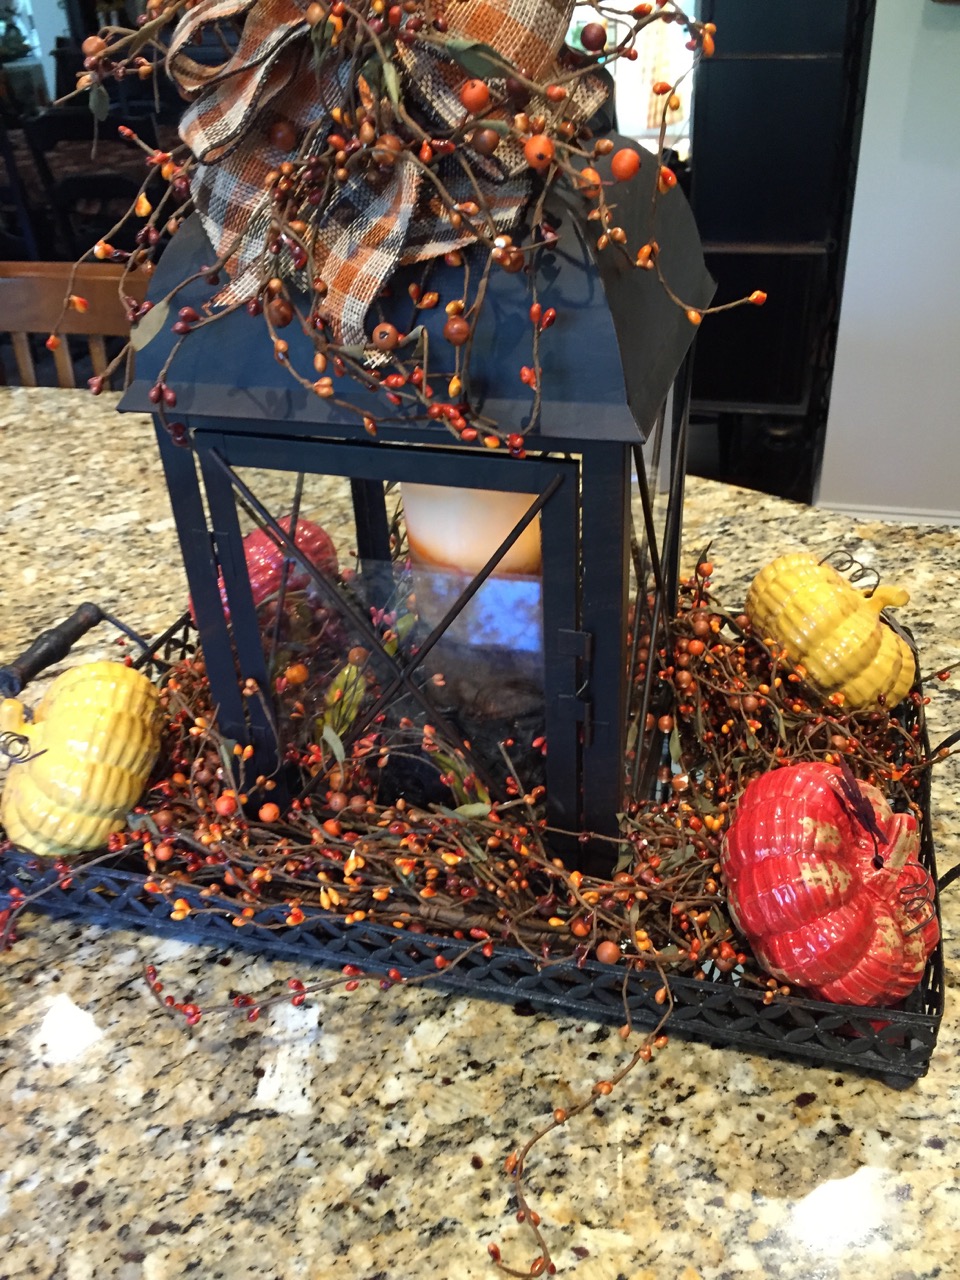
While the glue was drying on the wreath and garland, I took the opportunity to glue pipe cleaners to the backs of those pumpkins, they were pretty heavy and I knew that hot glue–even my industrial strength glue wasn’t going to hold them in place on the wreath.

IMG_1927

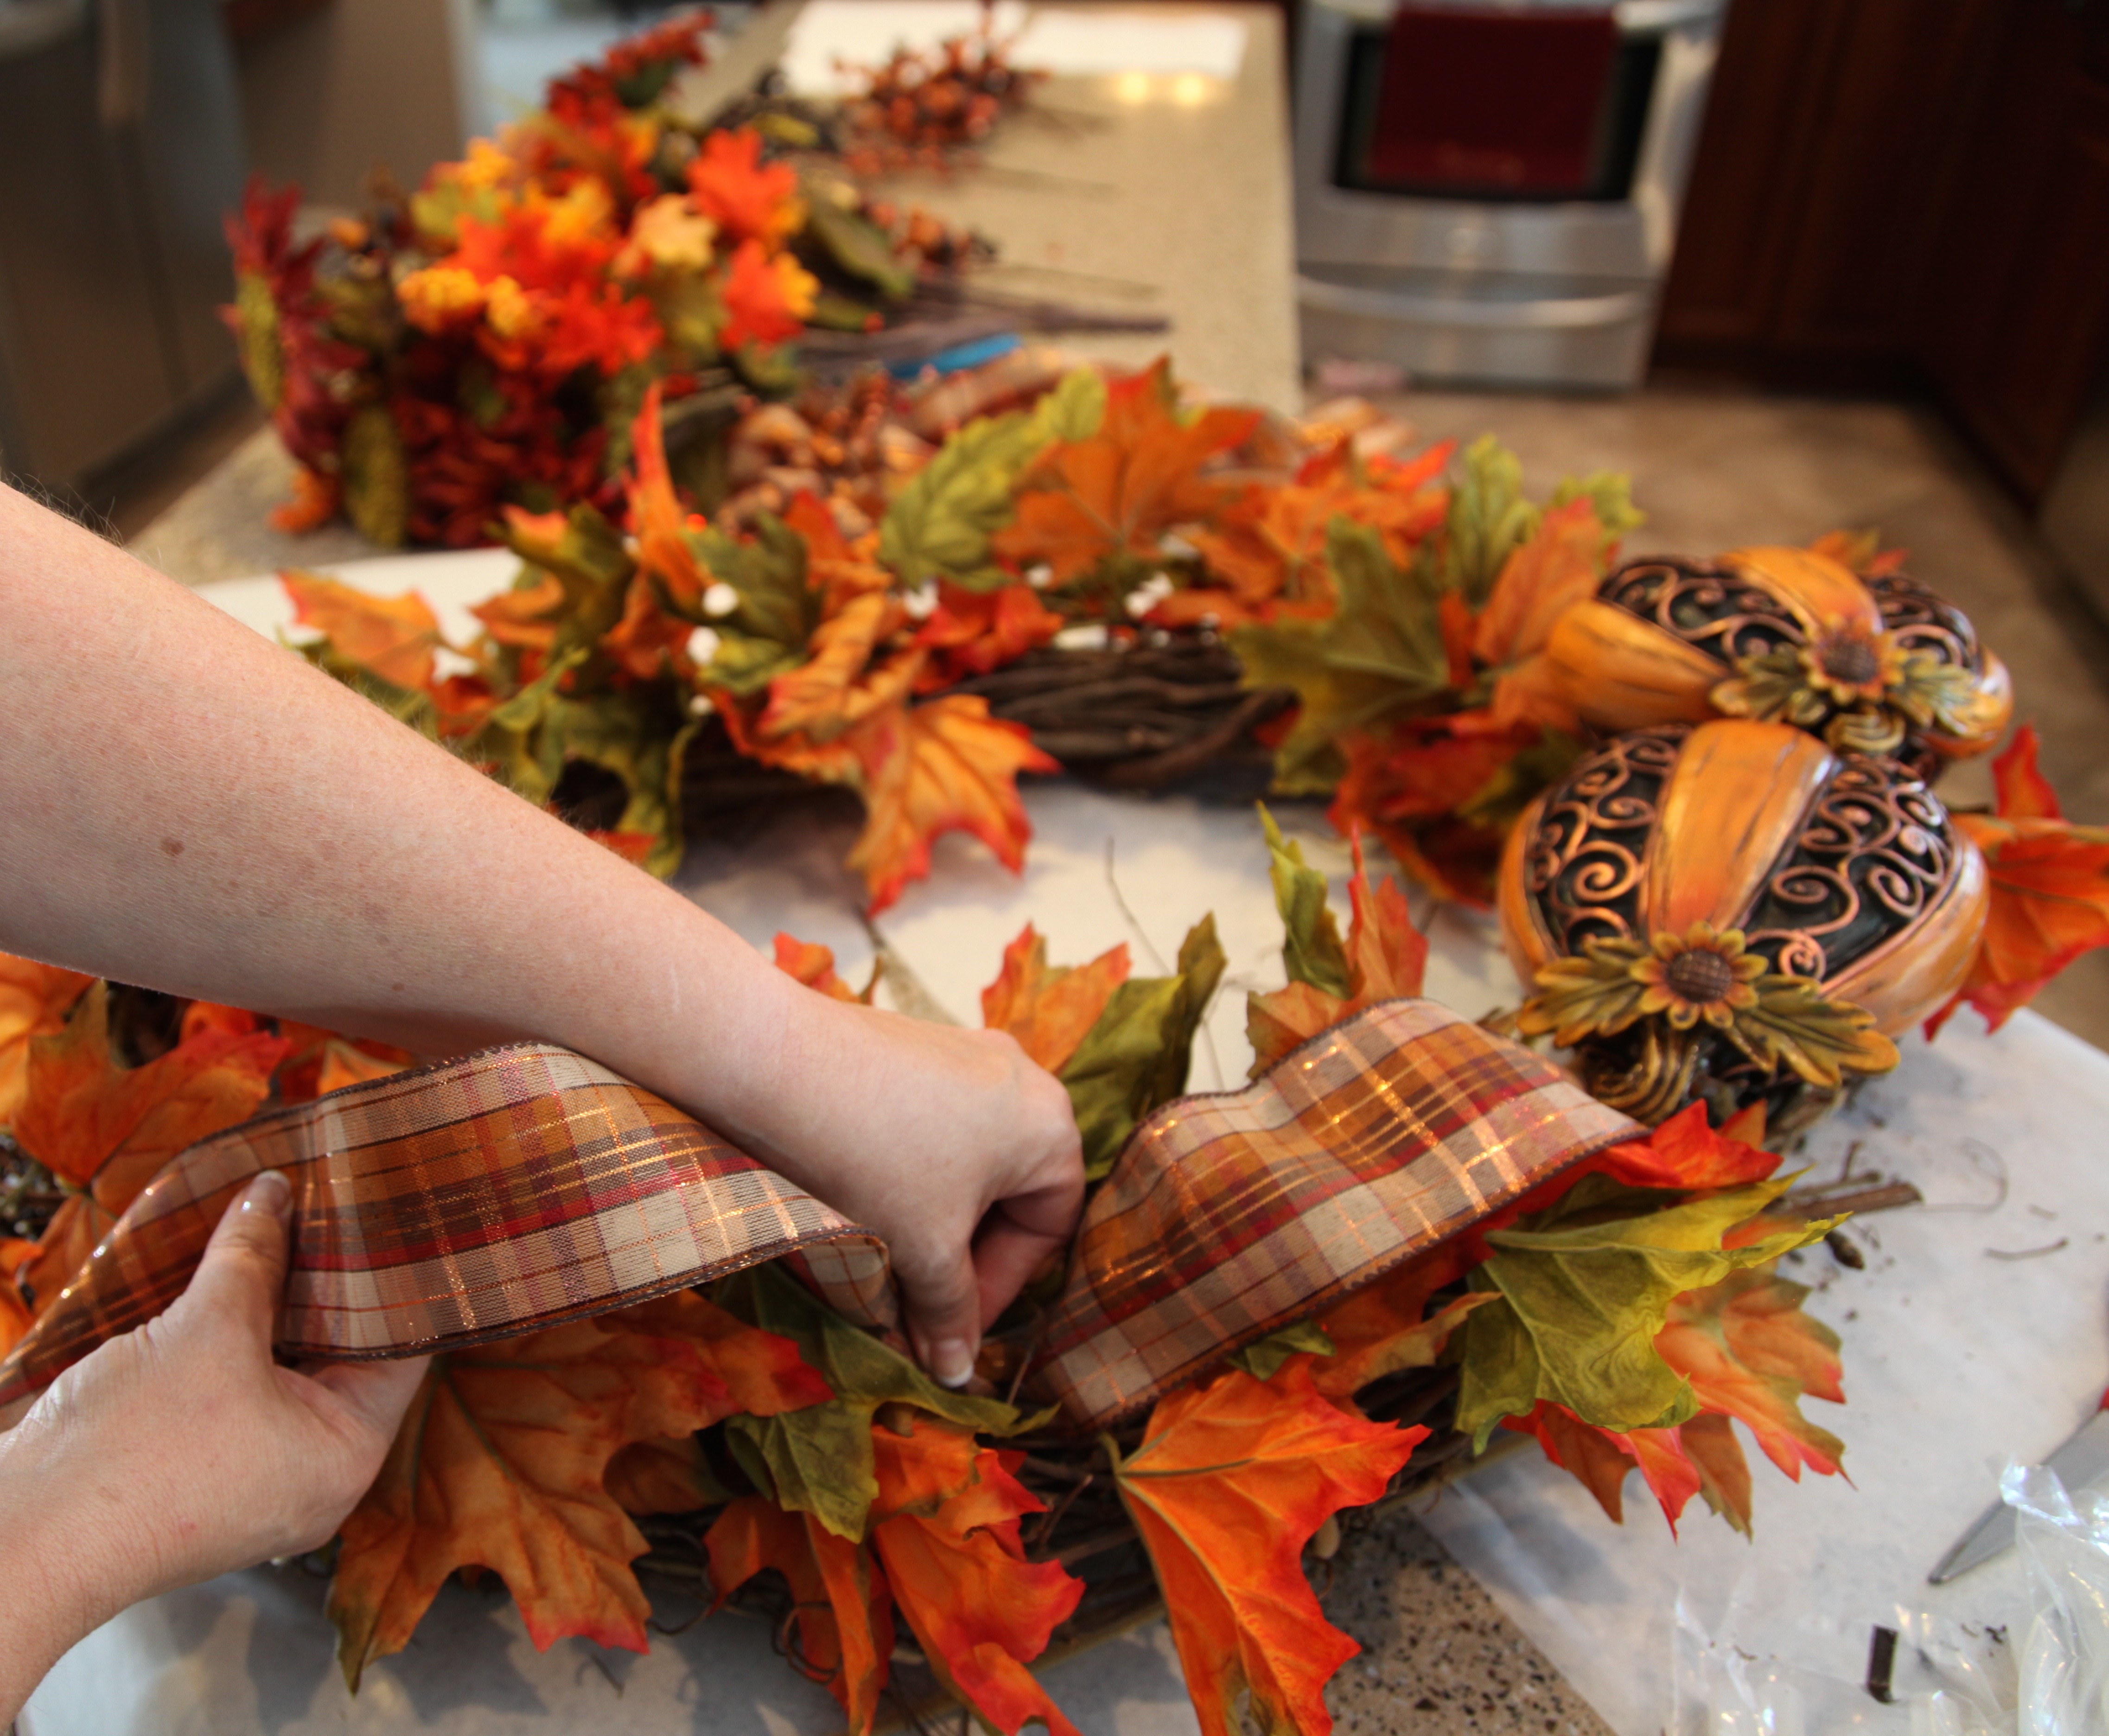
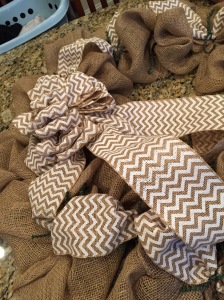
Since I/we had such a lovely time <rolling eyes and oozing sarcasm> trying to get the leaf garland to stay put (Stacey and Donita took their turns at holding said leaf garland in place along with me), I decided to add to the fun by looping some of the bow ribbon around the wreath and over the garland.  It sure looked pretty so I was determined to get it to work but that stupid glue was giving me issues again; to say that  I was ecstatic is an understatement when Stacey provided me with a wooden skewer to be used to hold the ribbon in place while the HOT glue dried!  Goodness gracious, what a little task, but we were laughing and joking all the way through the process which made it a bit easier.

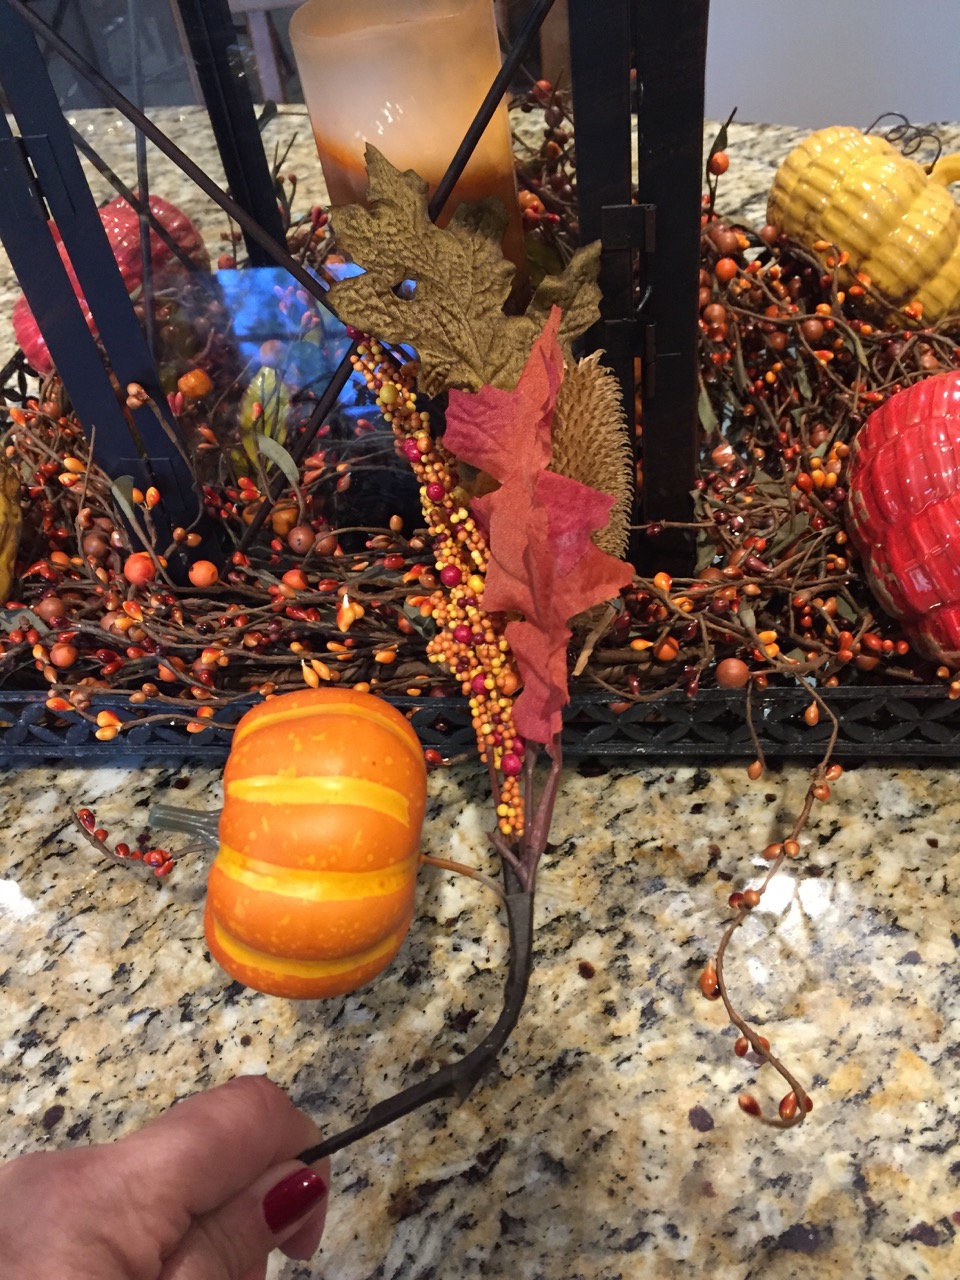
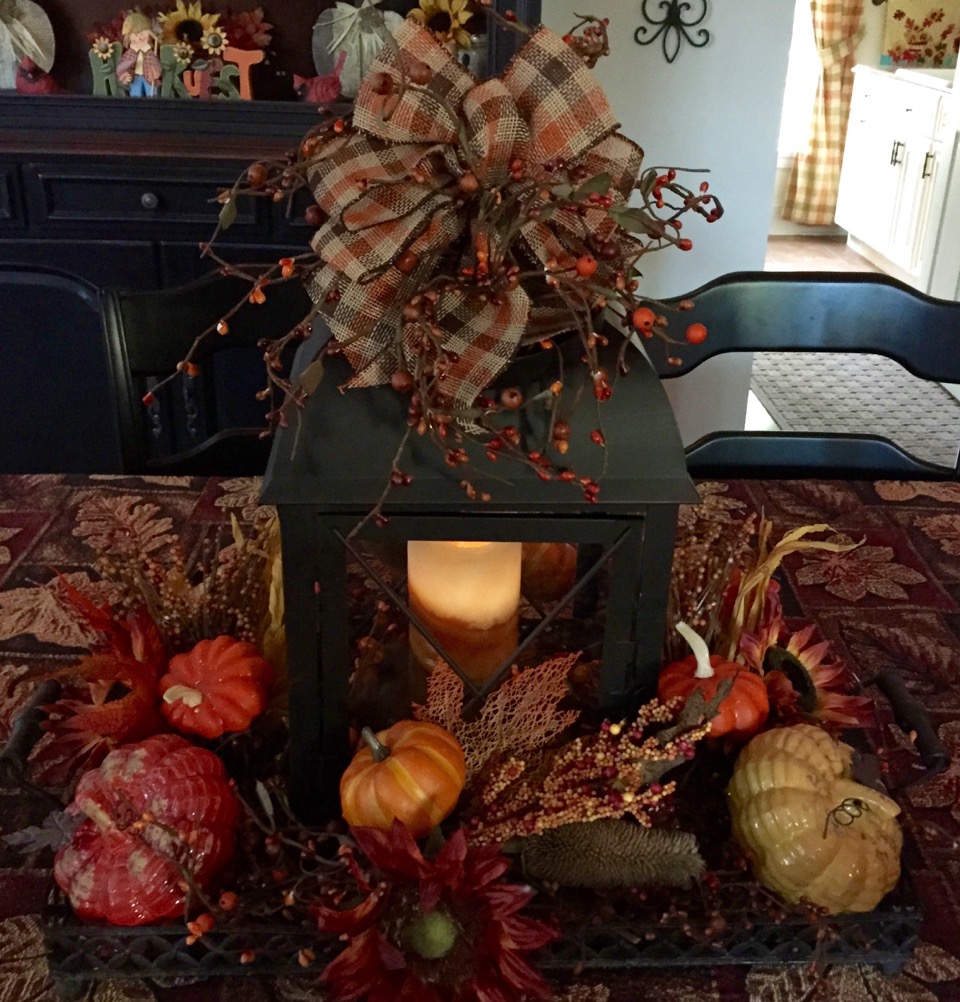
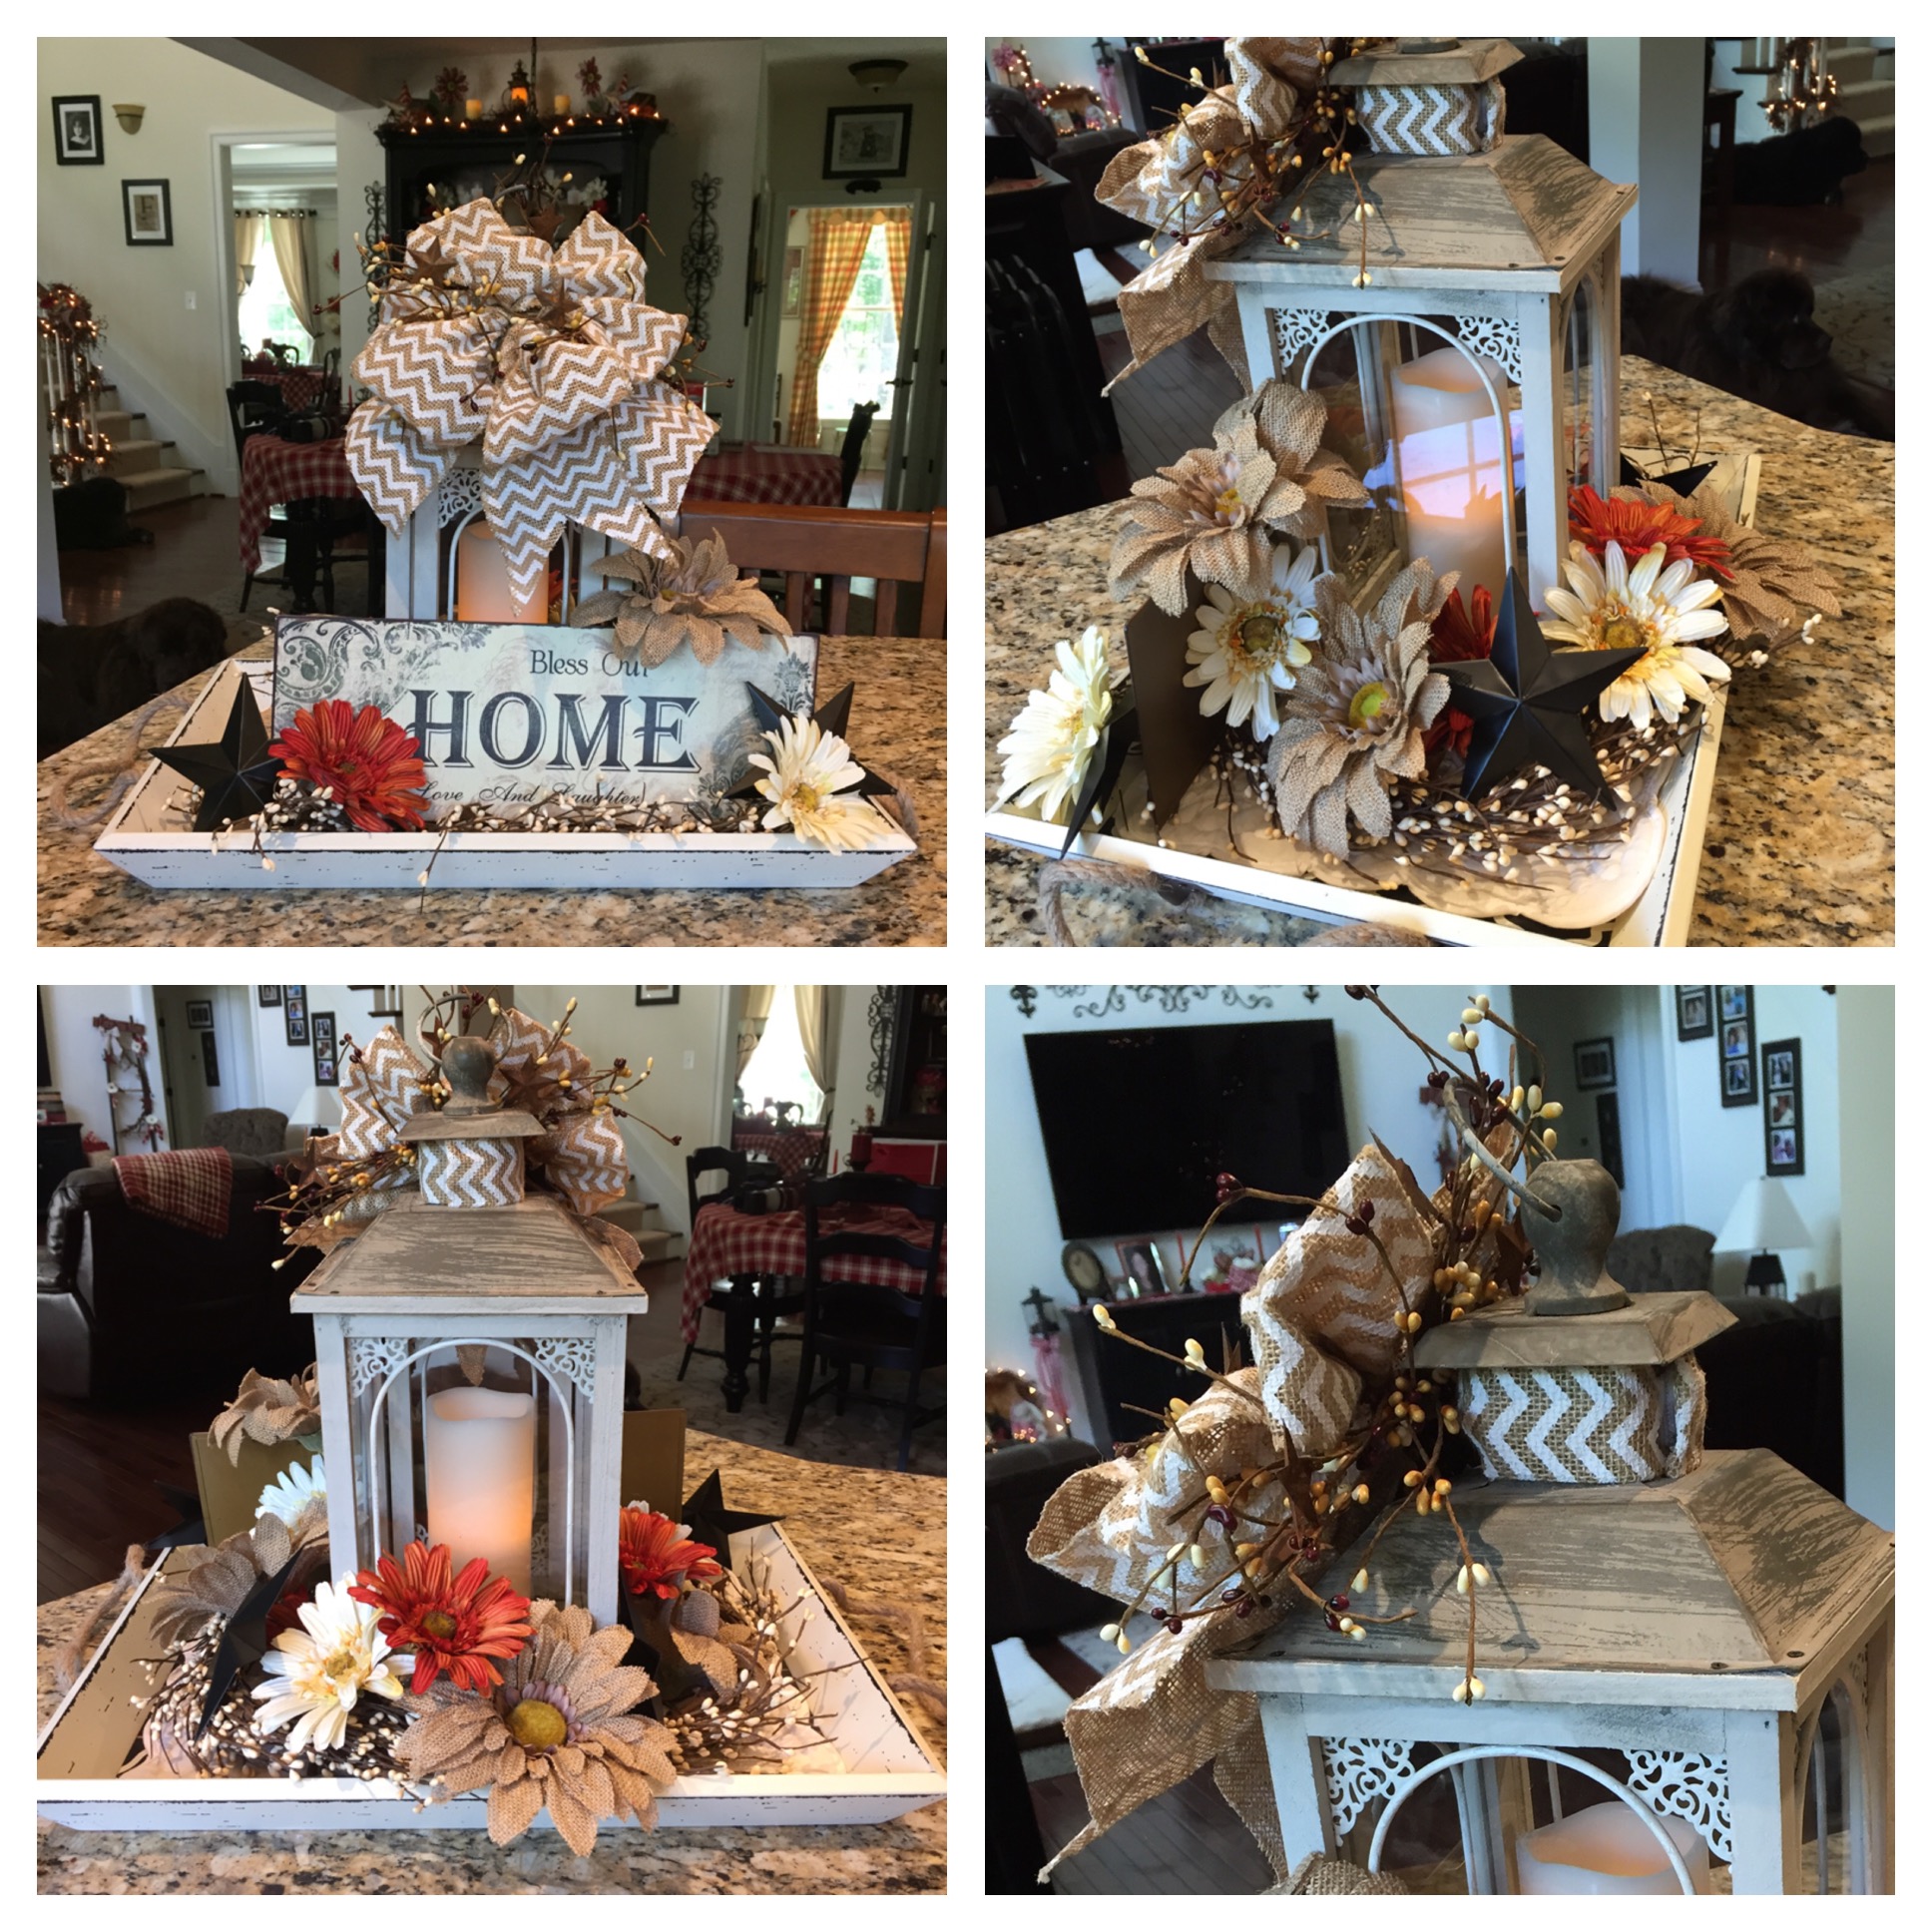
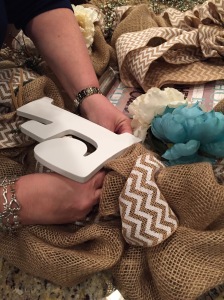
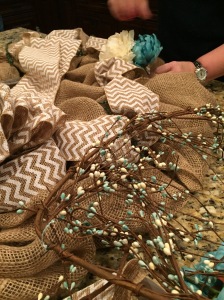
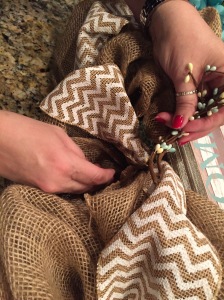
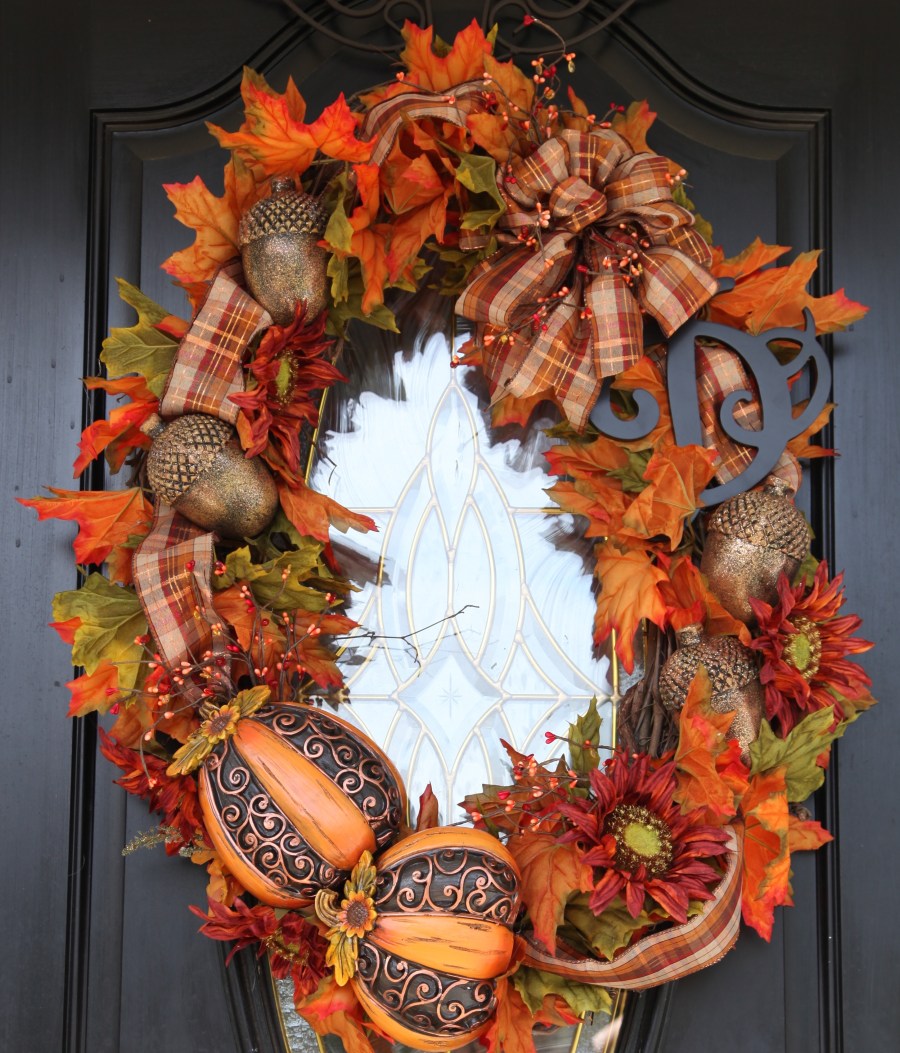
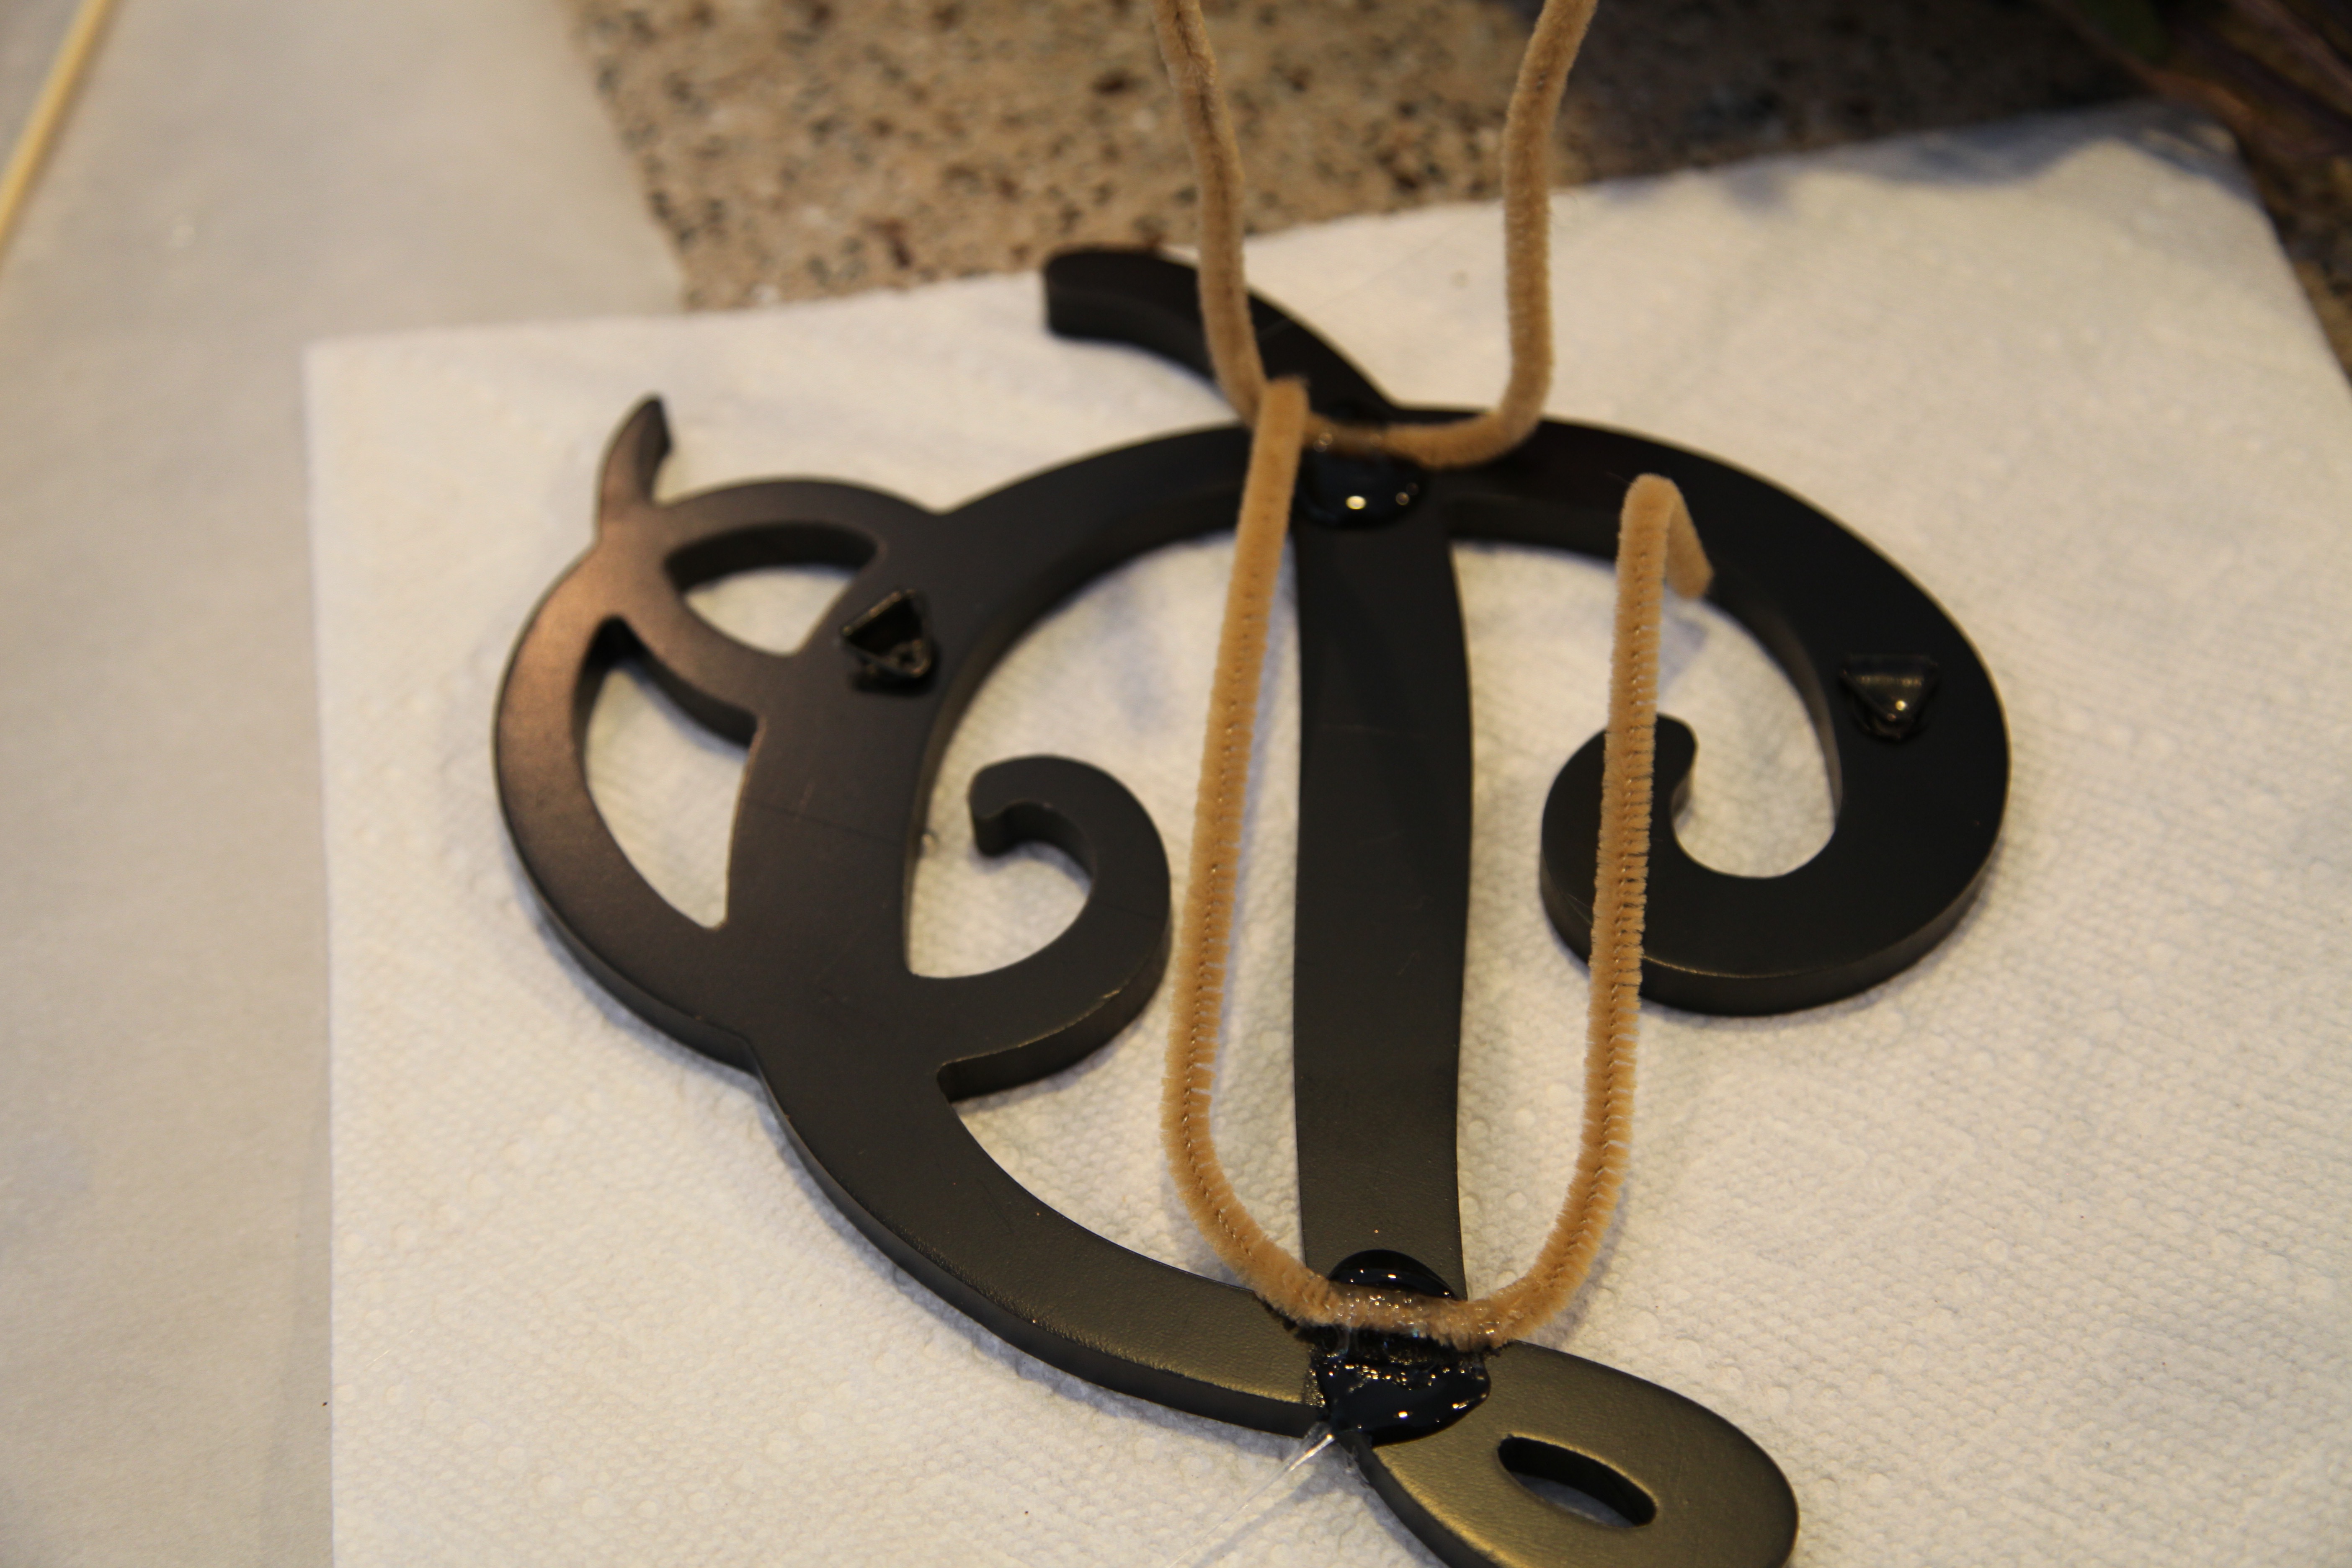
Next, I glued pipe cleaners to the back of an initial and while that was drying, I started to place some other accents into place on the wreath.  I used acorns, pip berry picks, a few Fall colored sunflowers and added the bow;  it all came together beautifully.

IMG_1930IMG_1929

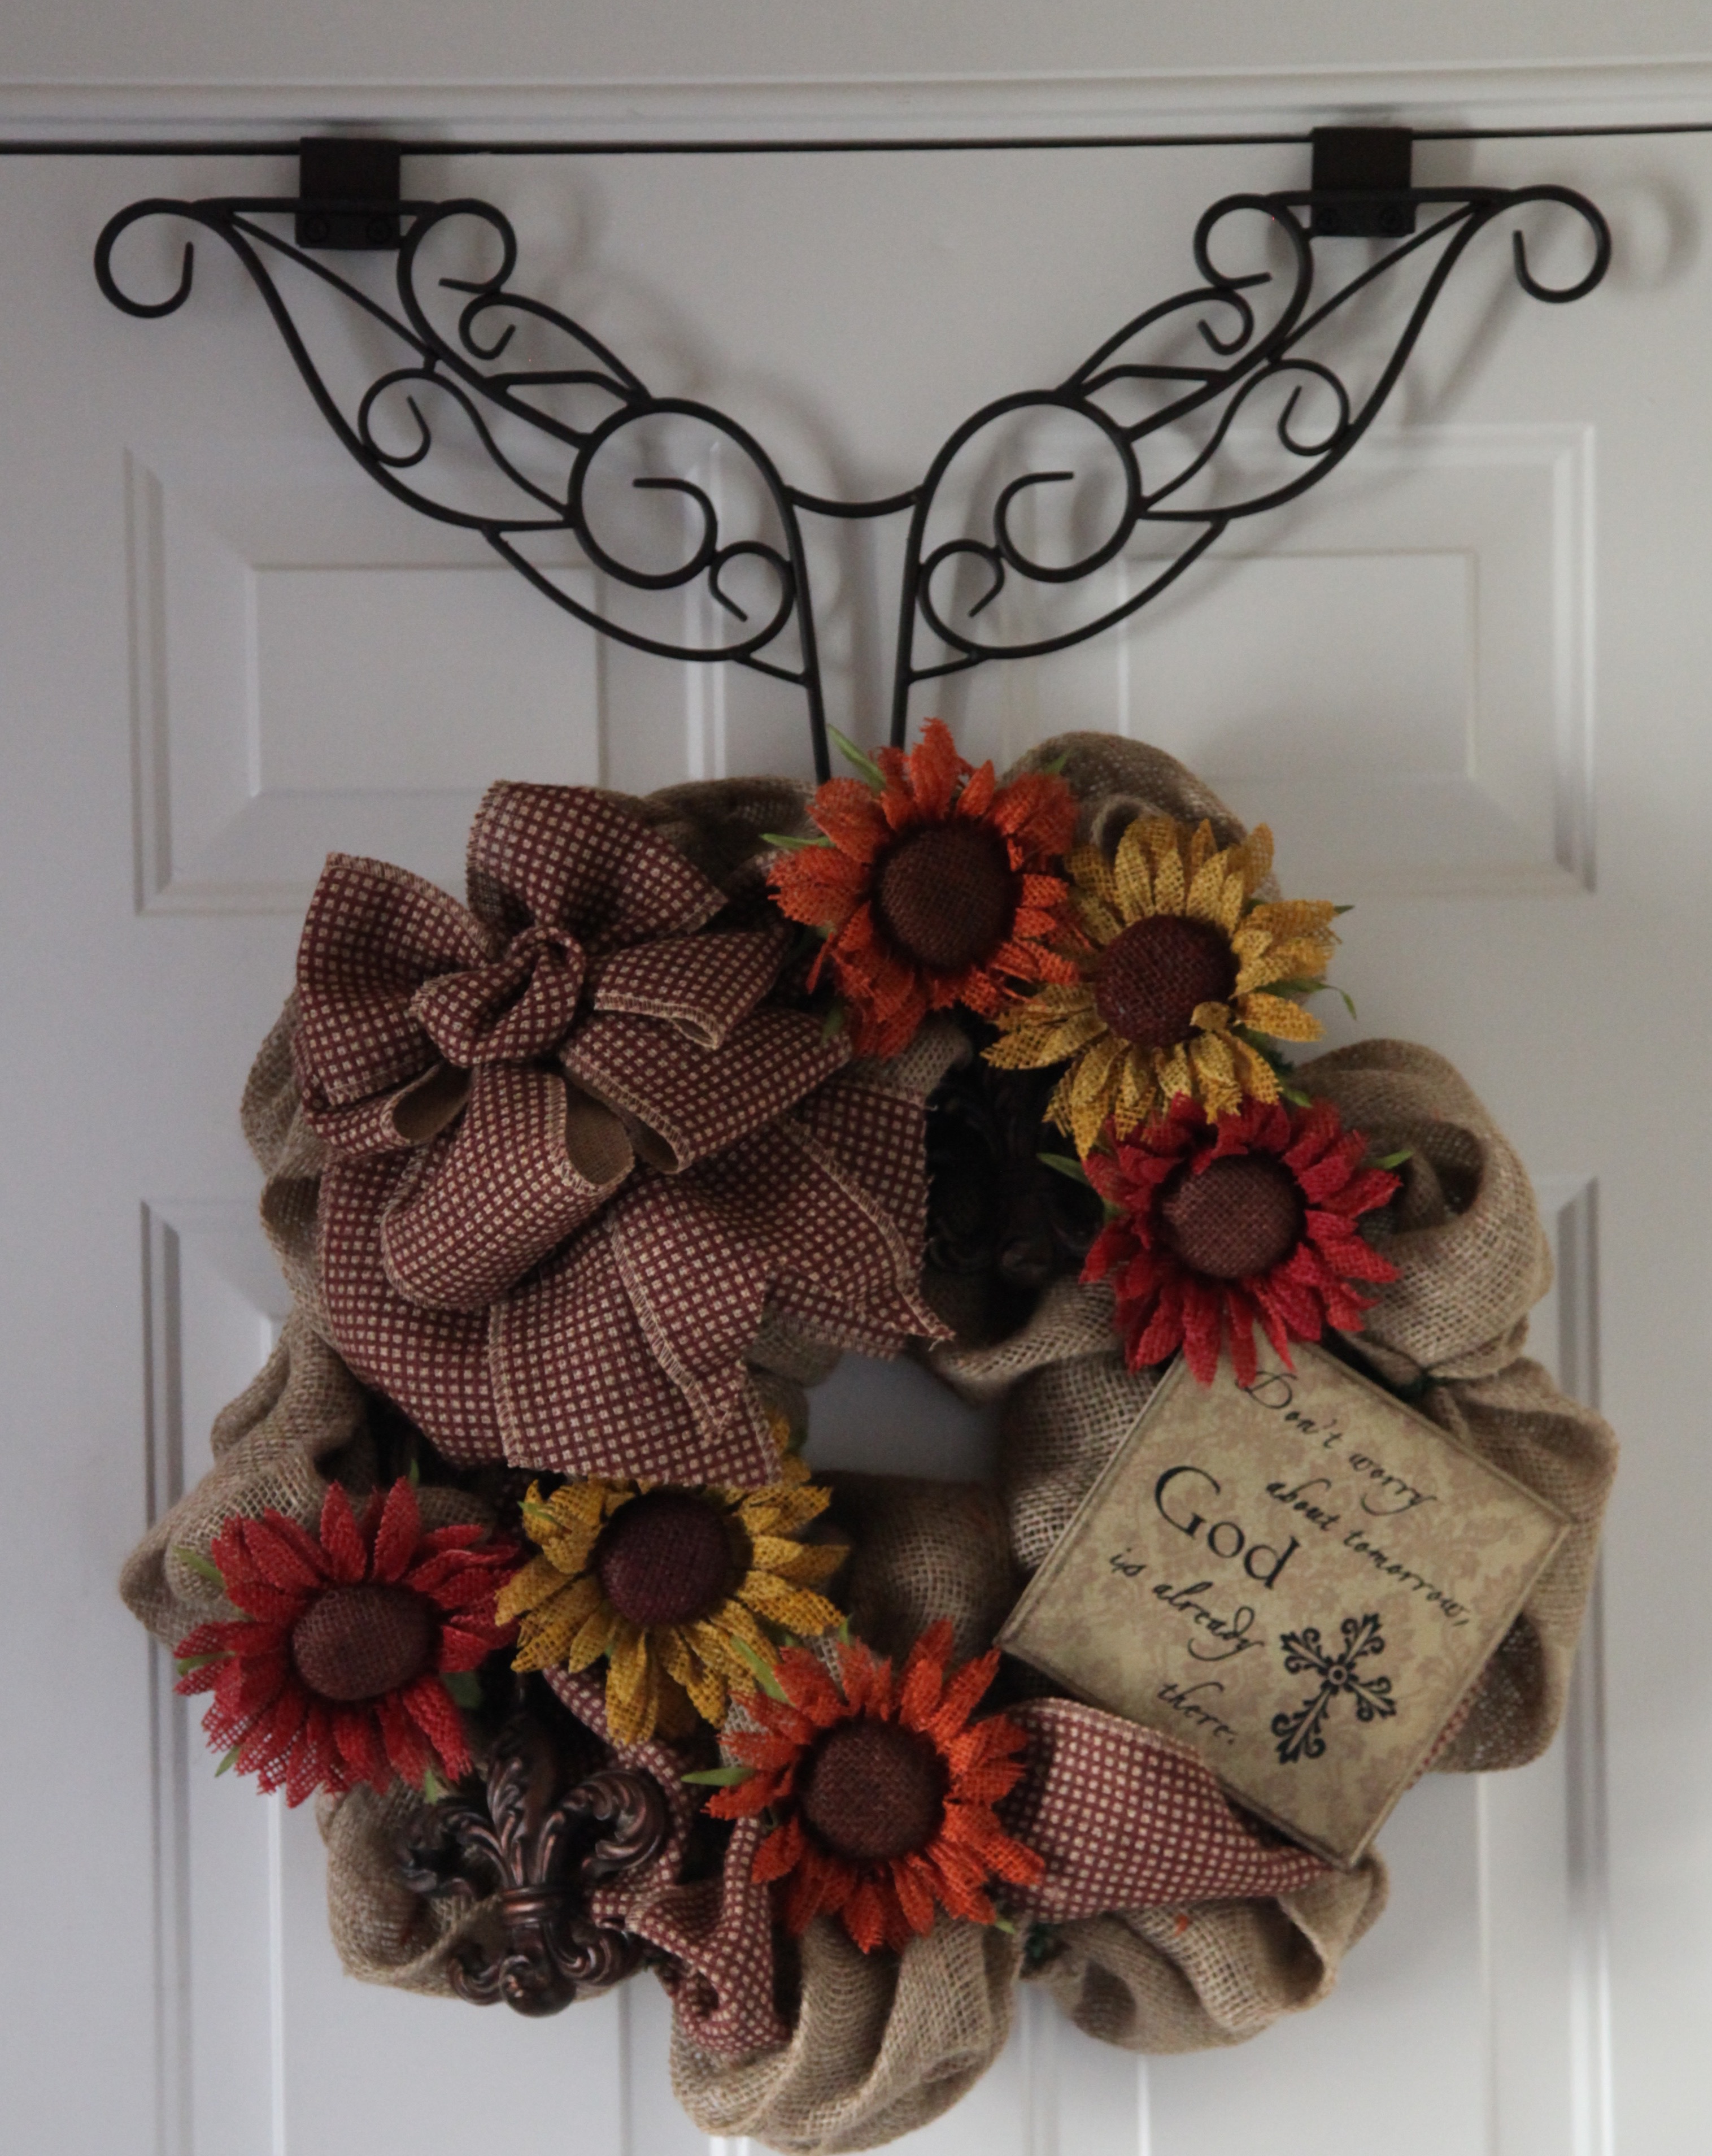
Here is the finished wreath all ready to travel home with my cousin Donita and to take it’s rightful place in her home. 🙂  She absolutely loves it which of course warms my heart! I would much rather give than receive any day of the week!! ❤

IMG_1934

And that completes Part 2 of our little “Cousins Craft Weekend” series.  Stay tuned for Part 3!  I can’t wait for y’all to see how Stacey put together her lighted deco mesh garland; trust me, it turned out so nice!!

Until next time, y’all take good care! ❤

**In crafting there are no mistakes just unique creations**

A Dressier Lantern Centerpiece

Hi Everyone!

It is a rainy, rather dreary Monday afternoon here in Virginia so I thought I’d sit down and put together this little post about my dining room lantern centerpiece and also show you how I transform it to match the season or Holiday. I found the large lantern featured in this post in a local country store and for its measurements, please refer to my “A Lantern Centerpiece For All Seasons” blog post; where along with the lantern’s measurements, I also give a bit of a tutorial showing you how to put one of these centerpieces together.

I’ve been using a very pretty country sea foam green as my accent color in the dining and living rooms; I love the light and airy touch that it adds to a room.  I have been pairing it with grays and taupes and have been very happy with how it has all come together.  It has been a bit of a challenge for me to stay in my country comfort zone while using that accent color, but I do believe I’ve successfully kept my decor warm and have created some cozy groupings, arrangements, wreaths, and centerpieces to keep within the country theme.

Here is the first lantern centerpiece I created for the dining room table:

11229371_10206418622294813_3374812849677624591_n

I purchased the same mirrored tray that I used for the kitchen lantern centerpiece to go under this lantern and it is used to build all of the arrangements featured in this post

Easter was the next Holiday, in years past, I haven’t typically decorated for Easter, but this lantern inspired me to create a new centerpiece.

11025802_10205867980249106_6163841860063345285_n
10996801_10205867980289107_192302559589102839_n

I also made that wreath that is hanging on the wall…it didn’t stay there for long though as I moved it out onto the porch and added it into a grouping that I put together out there.  There it is added to the front porch grouping…

1V4A0229

Next, I needed something to go with our family reunion decor, so I switched out the tablecloth and a few other decor items that helped me incorporate my red and white gingham, gerber daisies, and mason jars reunion theme.

IMG_6979 IMG_6983 IMG_7041

This centerpiece and the red and white accents only stayed in there for the day of the reunion.

After the reunion, I went ahead and changed the dining room decor back to its softer color tone, here is the centerpiece that I chose to make to complete the room’s transformation back to ‘normal’:

IMG_1708

This arrangement stayed in place until it was time to decorate for Fall. I was very happy with how this one turned out, I just love to add that bow/pip berries topper. 🙂

Fall has arrived and here is the dining room with the Fall decor including the lantern centerpiece in place:

IMG_1866

And here is the bow, pip berries, fall pick topper:IMG_1867

The Fall decor in this room is quite subtle, but I’m happy with how it looks. I feel that it still looks warm, inviting, and cozy despite not using all of the typical Fall colors.

IMG_1869  1V4A2894 1V4A2848

I cannot tell you how much I am enjoying working with these lanterns and creating all of these different centerpieces.  I do use lanterns in other capacities as well–a subject for another blog post. 😉  I do feel as if the softer green color lends itself to a ‘fancier’ centerpiece; I don’t want it to be too formal in the dining room, but I do want it to be a bit lighter and airier in design.

Well, it’s time for me to get myself in gear and to make my hubby and I some dinner, so, until next time, y’all take good care! ❤

**In crafting there are no mistakes just unique creations**

A Lantern Centerpiece For All Seasons

I cannot express to y’all just how much I love lanterns; they provide a wonderful basic piece with which to create so many pretty groupings.  I use them to accent my decor inside and outside as well.  I felt so fortunate when I stumbled upon the lantern that I will be highlighting in this post; actually I own two of the exact same lanterns and I purchased them in two different local craft stores, unfortunately, I cannot find these lanterns anywhere online or I’d leave y’all a link…my sincere apologies… <sigh>.  I buy my share of lanterns in places like Hobby Lobby, Home Goods, and Michaels, all three stores usually have a wonderful selection and I can almost always find one on sale. I use them in several different ways; some for centerpieces, some for accents in groupings, and some for side or accent tabletop decor.  For the purposes of this post, I am going to focus on this one type of lantern and show you how I use it to create my kitchen table centerpieces.

I will start with the very first lantern centerpiece that I created; last January. In addition to the lantern, I’ve used a metal mirrored tray, and a black candle holder as the anchors of every one of the centerpieces.  Here is the lantern, (it is metal btw), I’ve measured it for you so that you can see that it is quite large, I love to have a big centerpiece on my kitchen table, I’ve also measured the tray for you:

IMG_8984 IMG_8985 IMG_8986 IMG_8987 IMG_8988

The first thing that I did was to place the candle holder and a battery operated candle inside of the lantern, then I started to build the surrounding decor.  I realize that gerber daisies are more of a Spring flower, but I love them so much and I found some made out of burlap, so I went ahead and used them along with a few burgundy and gold ones, and I added a resin cream colored daisy at each corner as well.  I nestled all of the accent pieces in a bed of pip berries–I used a pip berries garland that matches my stair decor highlighted in my Staircase Railing Ideas blog post. OH, btw, I did cut a section of pip berries off of the garland and I wrapped it around the candle holder inside of the lantern before I started to create the surrounding decor. (I plan to give you a basic step by step “how-to” below):

IMG_8533 IMG_8534IMG_8537

That centerpiece stayed up through the winter months until it was time to switch out the centerpiece accents to match my Easter decorations.  Here is what I came up with:

1V4A03201V4A0347

As you can see, I used the very same lantern, tray, and candle holder…and I actually did use the same pip berries garland as well. I changed out the battery operated candle and the flowers. I purchased the tablecloth, the plates, and napkins at our local Home Goods store. I made the little napkin rings as well, I chose a pretty ribbon and tied a bow around the napkin and then hot glued little flowers to the tips of the bow…easy peezy. 🙂

A close up of the Easter lantern:

1V4A0341

After Easter, I simply removed the “Happy Easter” words, but I did leave the rest of it alone until it was time to switch things out for the family reunion/summer centerpiece:

IMG_6960

I changed out all of the decor accent pieces for this centerpiece and I created and added a top bow/pip berries piece which I’ve found that I love now. I feel as if it pulls it all together. I used a red and white pip berries garland (trimming a section off to go inside the lantern and another small piece that I added to the bow topper), gerber daisies,  a “Family” wooden word sign, and I threw in a couple of burlap birds for something a little different.

IMG_0287

That centerpiece stayed in place until it was time to decorate for Fall. Now, I will walk you through how I created that Fall centerpiece…Here goes:

Here is the lantern, tray, and candle holder. I used a new pip berries garland for this arrangement and again, I trimmed off a section so that I could wrap it around the candle ring inside of the lantern and another small section to be used on the bow topper:

IMG_8993IMG_8994IMG_8995

Next, I wrapped the rest of the pip berries garland around the lantern:

IMG_8996

Then I created the bow topper and pip berries design:

IMG_8998

I made the bow and simply attached the small section of pip berries into the pipe cleaner that I used to hold the bow together (behind the bow). Then I took a piece of the same ribbon and attached it to the back of the bow with the pip berries.  I kind of held it up to the lantern and figured out how big of a “loop” I wanted and then hot glued it shut to that size. I then slid the entire bow topper onto the top piece of the lantern.  You can see what I’m talking about here:

IMG_8999 IMG_9002   IMG_9004

Then I arranged some glass pumpkins at each corner and filled in the spaces in front, back, and on either side with Fall floral picks and a few Fall colored sunflowers:

IMG_9006-1

IMG_9007-1 IMG_9008 IMG_9009

And here is the finished centerpiece:

IMG_9012 IMG_8977 2 IMG_8976

I have really enjoyed creating a new centerpiece as each Season has passed while utilizing the same basic designs and design pieces. I will admit that I spent a good chunk of change on this particular lantern (and I use one just like it on my dining room table, but, it was so worth the cost. I’ll write another post showing you all of the different Seasonal centerpieces I’ve created for the dining room table).   I was able to get the tray for 1/2 off at Hobby Lobby, and I’ve been able to get each Season’s accent pieces for a discounted price. It hardly costs me anything to change out the decor and of course from now on, it won’t cost me a penny because I will reuse the same accent pieces in the coming years.  That said, I know myself and I’m sure I will be adding or changing some things out for new things, but, I’ll already have all of the basics that I need. 🙂

Fast forward 3 months and I have now completed a lantern centerpiece for Christmas utilizing the basic pieces that I’ve used for all of the other centerpieces.  Here is a link to my new Blog post describing how I created the Christmas Lantern Centerpiece.  Here is a picture of the finished product:

I hope upon hope that one of these ideas inspires y’all to try something like this for your home. They are not hard to create and all you need to do is to trust yourself to choose accents pieces that look pretty to you and hence would look amazing in your home.  I’m always here if anyone has any questions, feel free to leave them in the comment section. 🙂

Let me take a moment to thank every one of you who has stopped by to take a peek at this blog, feel free to look around at my other posts; I have found that I am really enjoying sharing my creations with you and if one person is inspired to try their hand at creating something similar to what they’ve seen here…well, that would just touch my heart of hearts!!

Until next time, y’all take good care! ❤

**In crafting there are no mistakes just unique creations**

Burlap Wreaths and More Burlap Wreaths

Hi to all of you lovelies out there!

I am like the energizer bunny, I hardly ever sit still and I am always planning my next project, event, trip, decor change, etc…  One of my hubby’s nicknames for me is “The Planner”; I know I must drive the poor man crazy at times! 😉  So, when I was gathering pictures for this blog post, I surprised myself with the sheer number of wreaths that I’ve made this past year .  I’ve created some of these for my own use here in our home, and I’ve created a few to give as gifts. My plan for this blog entry is to just *show* you the different wreaths, if you would like to know how to make one you can reference one of my earlier blog posts here. 🙂

So here goes:

This one hangs in our “mud room”, I hung it on the door leading to the garage–I added that wreath hanger that you see in the picture on the left, it is awesome.  You can find it online here:

IMG_8779 IMG_6048

I made this one for one of our guest bedrooms…

IMG_8806 IMG_8807

I threw this one together because I wanted a little something more for on that corner shelf:

IMG_8455IMG_6473

I made this one for a dear friend who loves owls:

IMG_6229 IMG_6231 IMG_8938

I made this one for a friend…She asked me to make her something to hang on her Mom’s nursing home room’s door:

IMG_6252IMG_9256

I made this one for another one of our guest bedrooms, I actually utilized an old Boyd’s Bear Bunny that had been stuck in a box in my basement for years:

IMG_9537IMG_1665 IMG_1595

I hung this one in the laundry room…:)

IMG_9343IMG_6517IMG_6519

I made this one to go with the family reunion decor (red and white gingham, gerber daisies, and mason jars):

IMG_6471

This one was to add to an Easter grouping that I had put together out on the front porch:

IMG_9580 1V4A0229

I made this one to be hung on the front door from Memorial Day through July 4th. You’ll also see our pups in one of the pictures below. The Newfoundland dogs names are Sophie and Samson (brown), and the Golden’s name is Gracie. I love them like crazy! ❤

1V4A0847 1V4A0860 1V4A0849

And last but not least, I just made this one the other day.  This is for a very dear friend of mine who lives in another State.  My hubby is constructing a box for me to pack it up in for shipping…it is 30″ in diameter (as wide as some front doors, in other words, it is huge). 🙂

IMG_8837 IMG_8847 IMG_8849 IMG_8850 IMG_8857

Well, that does it for the burlap wreaths that I’ve made in the past year.  I’ve also made some grapevine and deco mesh wreaths as well–subjects for another blog. 🙂 I hope that one of these wreaths will inspire one of you to try to make one for yourself. You can do it! And I’m right here if you have any questions at all, feel free to leave me any questions in the comments.  Happy Crafting!! ❤

**In crafting there are no mistakes just unique creations**

The Lantern Centerpiece Gift

Hi Everyone!

I always enjoy giving homemade gifts to people that I know will appreciate the planning, preparation, and plethora of work it takes to create an entirely new concept just for them. My dear friend Karen is one such person. Karen and I have been friends for over a decade now, our daughters were in the high school marching band together and Karen and I were very involved in the Band Parents Association.  She and I had much more in common than just our girls though, she is also a crafter and she can create beautiful things that I admire greatly. So, when she and her hubby built a beautiful new home my wheels started turning and I tried to come up with a new and different Housewarming gift.  What does a crafter give another crafter?  It can be tricky…luckily, our ‘talents’ lie in different realms of the crafting world.  Karen herself actually gave me the idea of what I ended up making for her.  She texted me one day to ask me if she could borrow my red gingham tablecloth to use for an upcoming get-together.  Well, when she asked me that the light went on in my head and the bells started ding, ding, dinging, I knew exactly what I wanted to make for her; a lantern centerpiece 🙂  First, I purchased her a red gingham tablecloth of her own. Then I made a lantern centerpiece with a red gingham bow, pip berries garland, red and white gerber daisies, black metal stars, a red battery operated candle, and a “Family” wooden sign, all arranged in and around a cream colored wooden tray and cream colored wooden lantern.  I also put a red gingham placemat in the tray to serve as a nice decorative base for the design.

**Side note–I love arranging my lantern centerpieces in trays, the tray provides an anchor for the entire design and *bonus* it is easily picked up and moved from place to place**

Here is that finished centerpiece:

picstitch 2

I then thought, well, I don’t want to pigeonhole her into having to use the red gingham accents all of the time, so I took it a step further and supplied her with the necessary materials with which to change out the red gingham accents and insert a more neutral design; utilizing the same metal stars, lantern and tray.  I made a new bow out of chevron and burlap ribbon and supplied a different colored pip berries garland, a cream colored battery operated candle, different colored gerber daisies, a different “Home” sign, and a neutral placemat. Also, I made it so that she could easily change out the bows by hot gluing velcro on the ends of a piece of the same ribbon and attaching it to the bows;  they were then secure when in place, pretty, and functional. 🙂

Here is that version of the centerpiece:

picstitch

I packed up all of the neutral design materials along with a picture of how she might want to switch out the red and white gingham elements and replace them with the more neutral elements.

IMG_7526

I delivered the red gingham version of the centerpiece to her with the neutral version packed in a gift bag.  I immediately knew that I had chosen right in giving her a homemade gift because when I handed it to her, her sweet eyes welled up with tears and I got the very best hug ever! My day was made, completely made!

In my opinion, it is *always* better to give than to receive, and when it comes from your heart and is made with love and with the receiver in mind,  it makes for a good day all around.

**LOVE you Karen** ❤

Front Door Burlap Wreaths

Good Afternoon!

As is typical of me, I woke up one morning with the idea in my head that I wanted to make something. What I chose to do on that particular day was to make my aunt a burlap wreath for her front door.  The only problem with that was that I had never tried to make a burlap wreath and I had no idea where to start.  So, I took to google search (one of my best friends…lol) and I started reading and watching tutorials; this gave me the basic idea of how to, at the very least, *start* to make my wreath.  I will admit that I spent a bit too much time searching “how-to” blogs and videos and not enough time trusting my own abilities to accomplish my goal on my own.  So, I put my computer down, got in my car, and headed to my local go-to craft store Hobby Lobby.  We also have a Michaels and an AC Moore here in our town, but I am usually successful at finding exactly what I need to bring a project to fruition at Hobby Lobby.  So, anyway, I started walking through the store collecting my needed supplies.  When all was said and done, I was successful at making my aunt a wreath and then I made my cousin one too; I gave them to them for Christmas last year.  But, I wasn’t exactly satisfied with those two wreaths even though my aunt and cousin loved them and were so sweet with their compliments regarding just how much they loved them. Here are pictures of those two wreaths:

IMG_7986 IMG_5153

I decided I would try again (I am nothing if not determined to try and try again until I’m satisfied with the end result) and so I set myself to the task of making a burlap wreath for our front door, I wanted it to be quite large because our home sits pretty far back from the road and I wanted to be able to see the wreath on the front door from our cul-de-sac. So off to Hobby Lobby I went yet again and I began to gather my supplies.  The first thing I picked up was a 24″ metal wreath form with the twist ties already attached. I then collected all of the other things that I thought I might need to make my wreath.  I will try my best to put into bulleted form how I constructed not one but 2 burlap wreaths for my front door…yes, I said 2…lol…I made one for the inside of the door too. We found a wreath hanger that we could manipulate over the door that provided a hook on either side of the door.  I was very happy with what I ended up with and I have made many other burlap wreaths since, so many that my hubby has made me a wreath hanging station in our basement.  In another blog, I will post a bunch of pictures of the burlap wreaths that I’ve made, some for my own use, a few for gifts, and one or two for friends who sweetly asked me to create one for them.

The two specific wreaths featured in this blog are wreaths that hang on my front door at times of the year when we are not celebrating a Holiday or for times when I am not using a specific seasonal decor…in other words, these are my “everyday” wreaths. I switch out the outside front door wreath A LOT… 🙂 Here are pictures of the finished wreaths:

IMG_5993 IMG_5840

Here is how I put all online tutorials out of my head and created my own version of a burlap wreath:

*Supplies needed for a very large burlap wreath: 24″ wreath form with the twist ties or pipe cleaners already attached, or you can attach your own pipe cleaners at regular intervals around the form–not hard, 2 rolls of burlap–for these extra large wreaths, I used burlap “runner” rolls, a coordinating colored burlap or ribbon, any accents that you might like to add such as pip berries, silk or dry flowers, wooden words, wooden or metal ‘pictures’, wooden or metal initials, seasonal decor, and so on…Let your imagination run wild

IMG_8834IMG_5829IMG_5918

*Find a large surface with which to work and lay out all of your supplies

*Plug in your hot glue gun–I try not to use too much glue on these types of wreaths, but I do glue pipe cleaners to the backs of pictures and/or other accents (wooden initials, pictures, etc…) so that I can tie them onto the wreath frame. And when necessary, I do glue certain things into place if they just won’t stay by attaching them with the pipe cleaners

*Work your way around the wreath form starting on the outside ring gathering and  catching burlap into each pipe cleaner and then moving to the inside ring and doing the same thing. I’ve seen some people online who measure the length of burlap that they put between each pipe cleaner, I do not do that, I just eyeball it and go for it. So once you have your outer and inner rows of burlap attached to the form, add your coordinating colored burlap or ribbon catching it into one of the outside pipe cleaners (by untwisting the pipe cleaner and adding it to the burlap that you already caught) and working to the next inside pipe cleaner, then back to the outside and so on all the way around the wreath.

IMG_5927IMG_5830IMG_5933

*Take a moment to glue pipe cleaners to the back of anything you might want to attach to the wreath form as you see me doing in the picture below.

IMG_5963

Instead of gluing, I just threaded a pipe cleaner through the metal clasp on the back of the picture

IMG_5948

*Then start attaching anything else that you’d like to put on your wreath either via the pipe cleaners that you attached, or directly into some of the pipe cleaners (you’ll see what I mean in the pictures below–SO hard to explain).  I chose slightly different things for each wreath, I chose to put our last name initial on both wreaths as well as a bow (that I made…I’ll need to do another blog about how to make a bow huh?) on both. Then I chose other specific items for each wreath consisting of pip berries, gerber daisies for the outdoor wreath to match our red door and the coordinating ribbon, other silk flowers and a wooden framed picture for the indoor wreath to match my room decor.

IMG_5837IMG_5976

IMG_5944IMG_5966IMG_5972IMG_5951

Here is a link for the  Wreath Hanger that we used

IMG_5996IMG_5995IMG_5994

So there you go, I was finally successful at making burlap wreaths that met with my own approval…haha. Give a burlap wreath a try! Nothing is perfect in the crafting world, that’s what makes it so much fun and unique to just you! 🙂

IMG_5842   IMG_8856           IMG_5992 - Version 2 IMG_5840

**In crafting there are no mistakes just unique creations**