Easter & Springtime Transitions

“Lazy” is not a word that is *ever* used to describe me, “procrastinator” is not either, but, this year, the thought of switching my decor around for Easter and then Springtime has evoked both of those words into my swirling brain.  My hubby and I are leaving for a Hawaiian cruise in April and well,  I’d have to decorate for Easter then tweak said decor for Springtime all before we left.  NOT interested in doing that in any way, shape, or form, not to mention the fact that I am quite enjoying the redecorating that I did after Christmas, truly, I’m loving it ‘as-is’.  SO, I will show you what I did for Easter/Springtime last year. 🙂

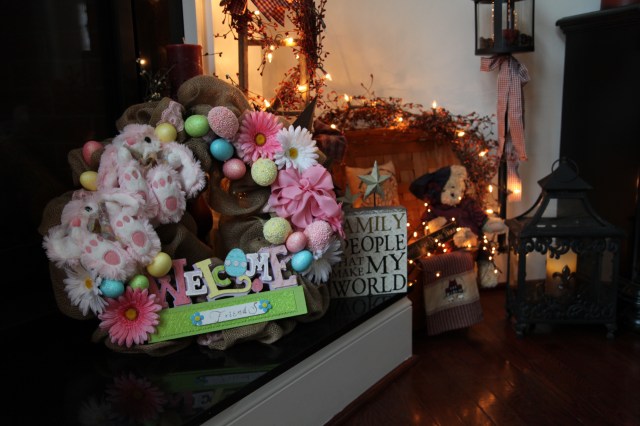
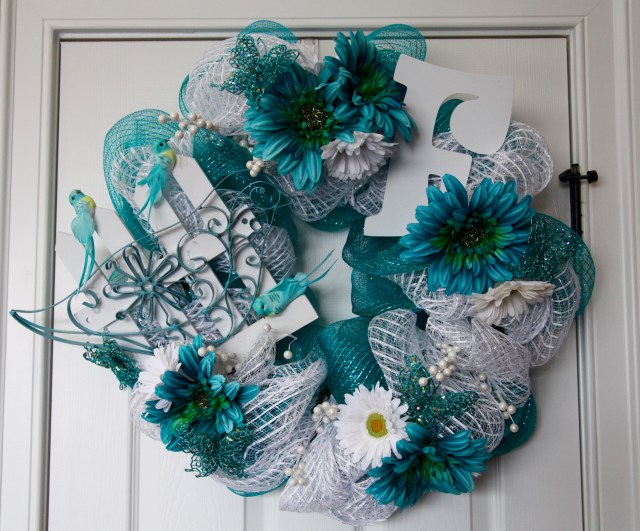
The first thing that I did last February was to create a new Easter wreath:

11054306_10205861410564868_3204616970637005082_nIMG_9580

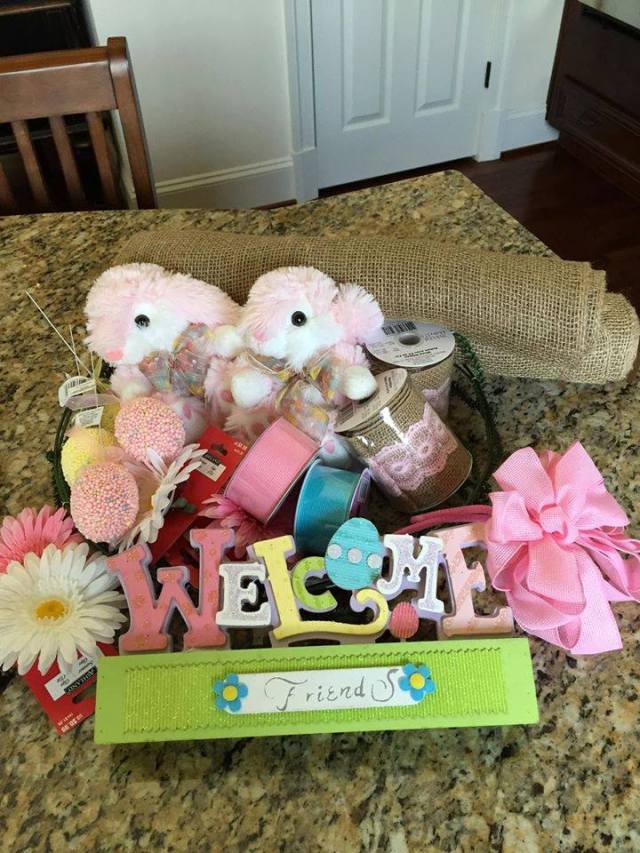
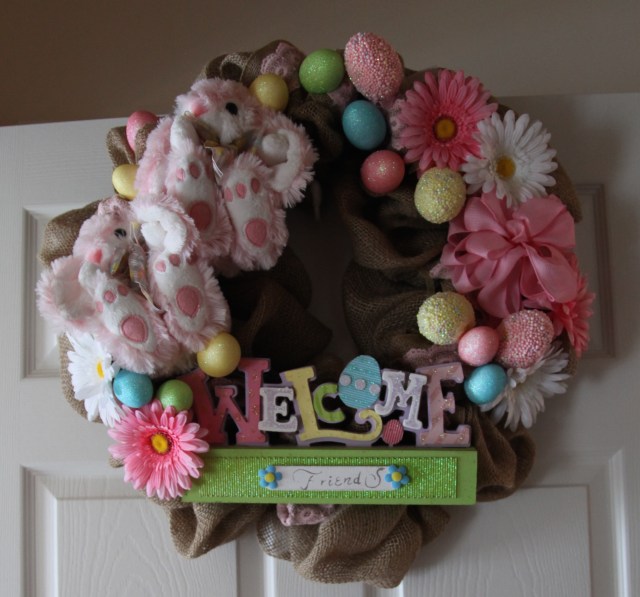
I will not bore you with the details as to how I made this wreath, but if you’d like to know the basic process by which I create a burlap wreath, click here and that will take you to one of my burlap wreath entries with a bit of a tutorial included. 🙂

When I made this wreath, I wasn’t sure where it would end up, as you’ll see in this post, it made it’s way from here to there until it landed on it’s final resting place through Easter. 🙂

This is the very first place that I place it:

IMG_9585

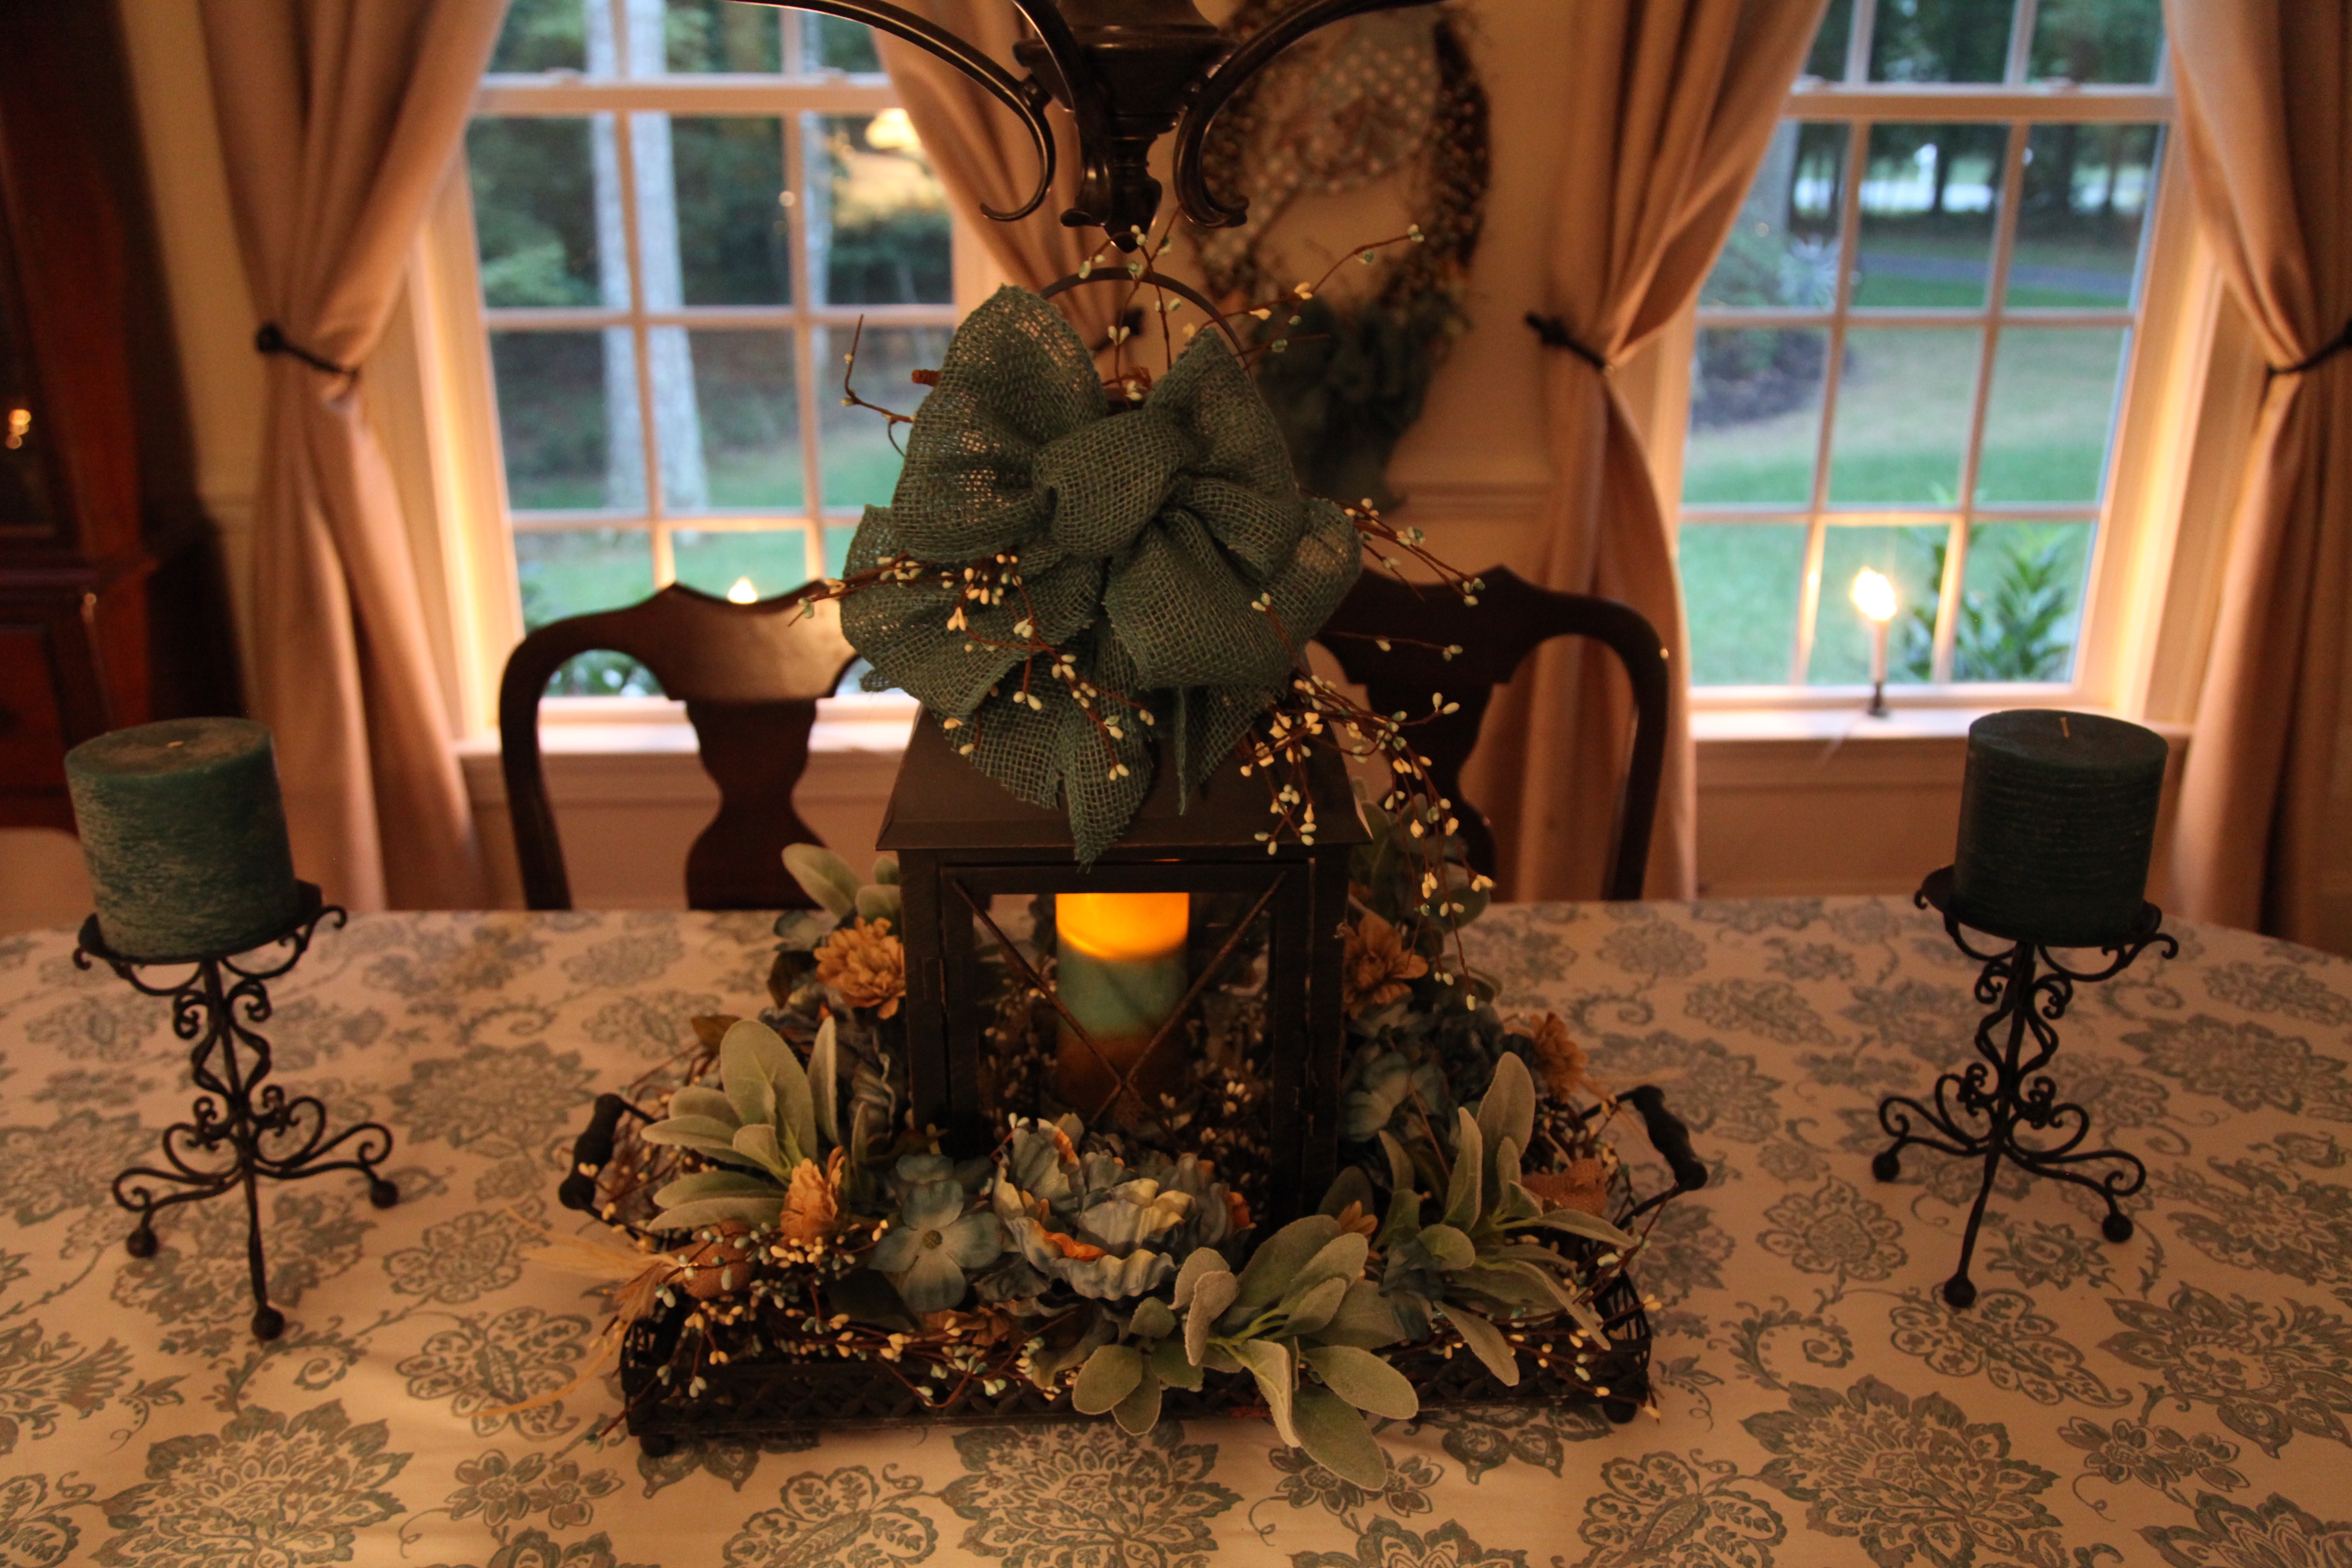
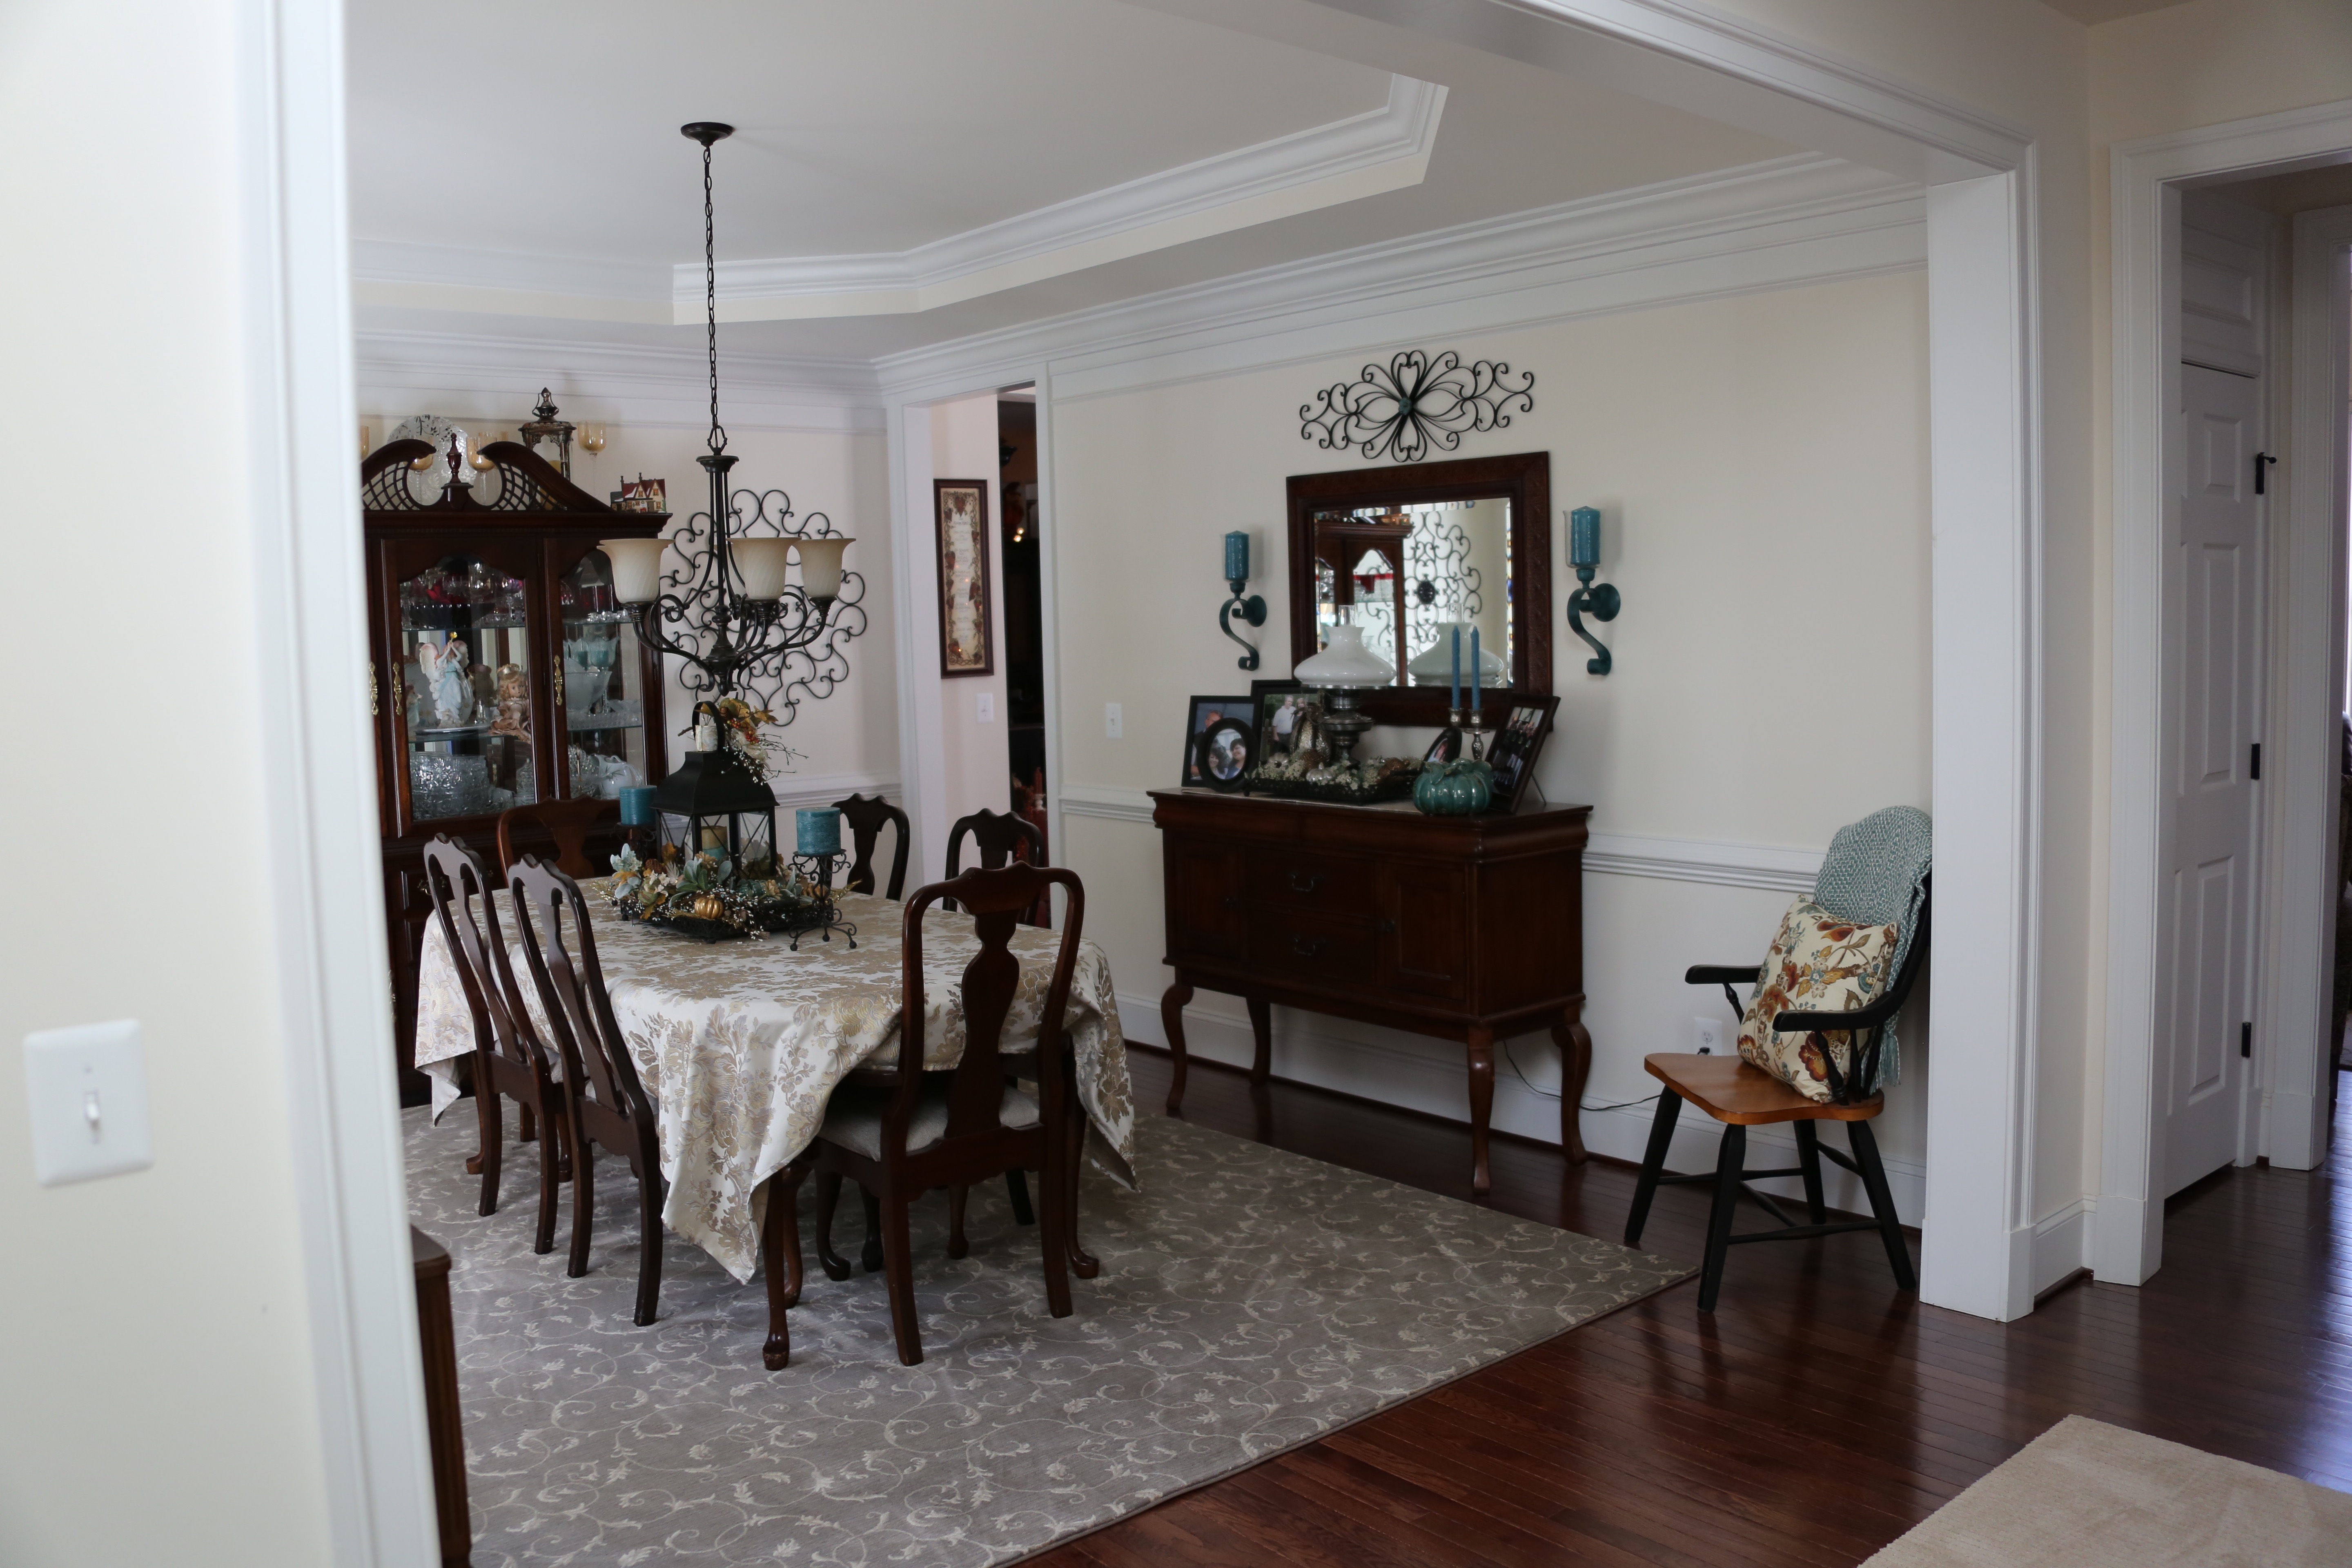
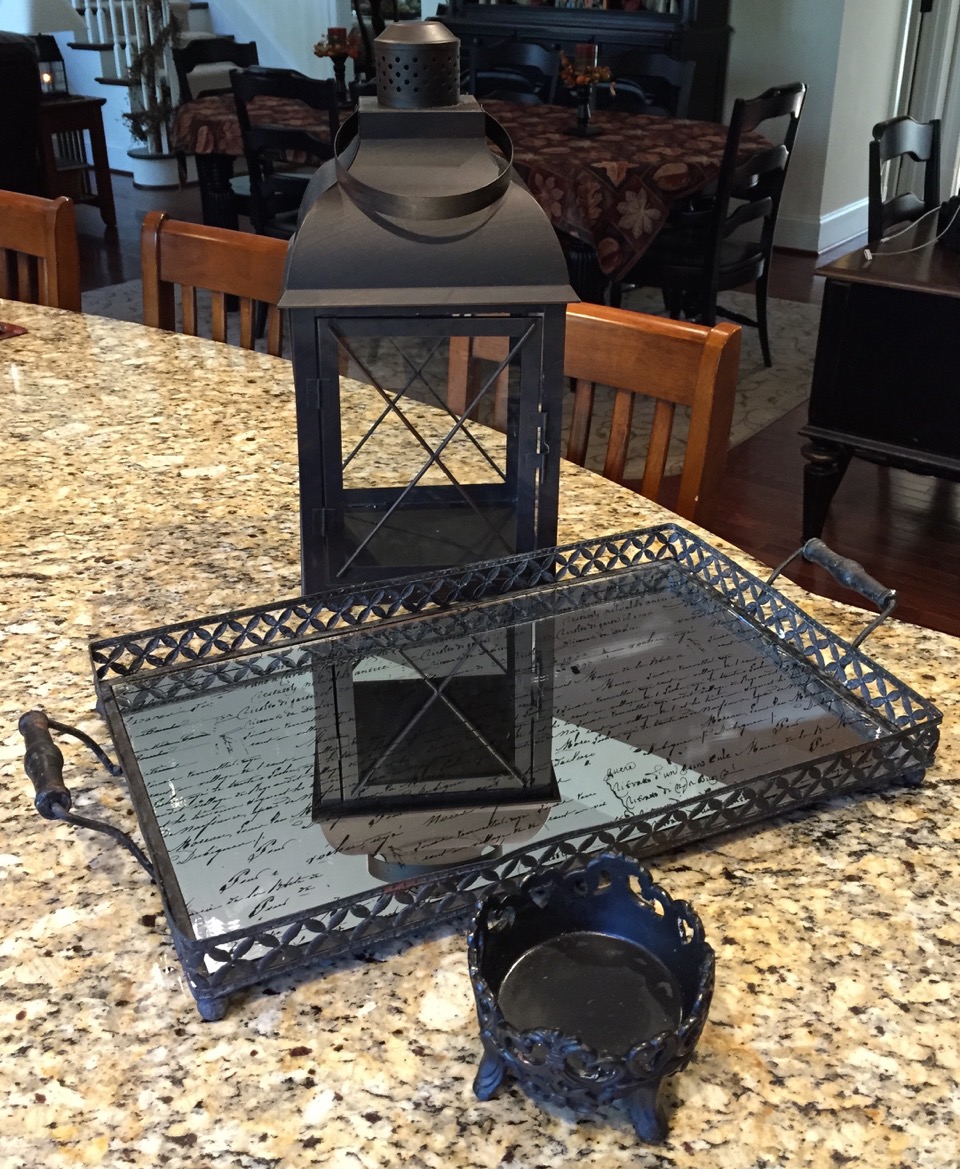
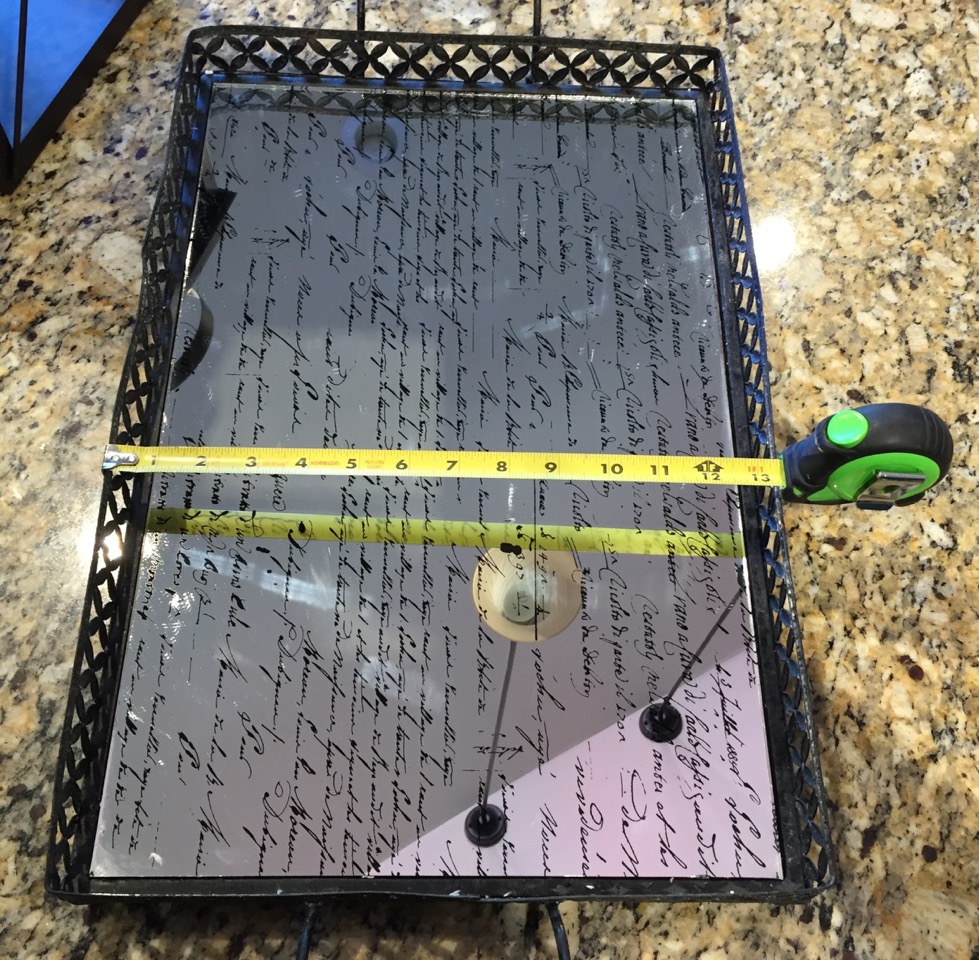
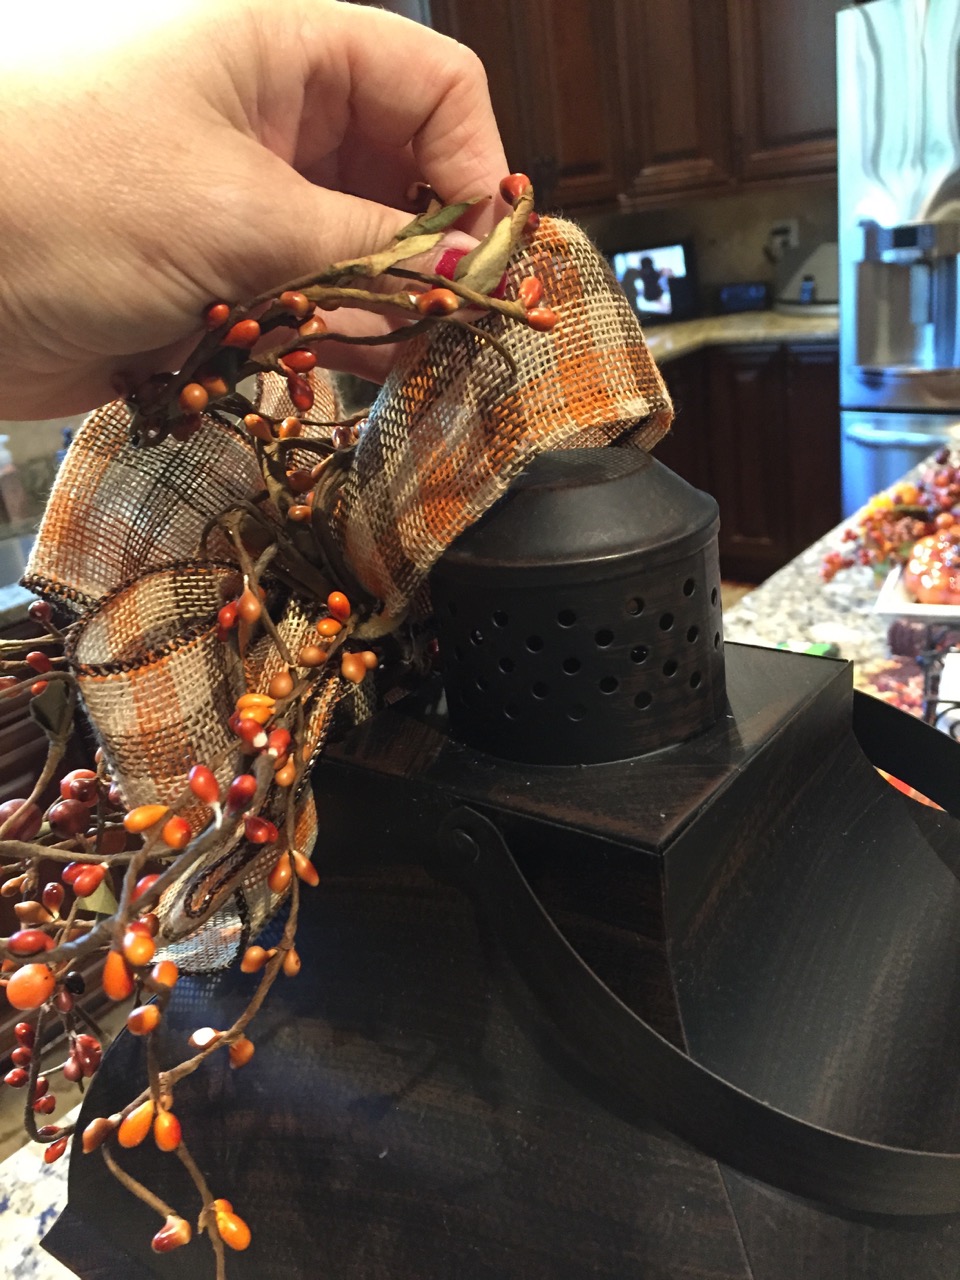
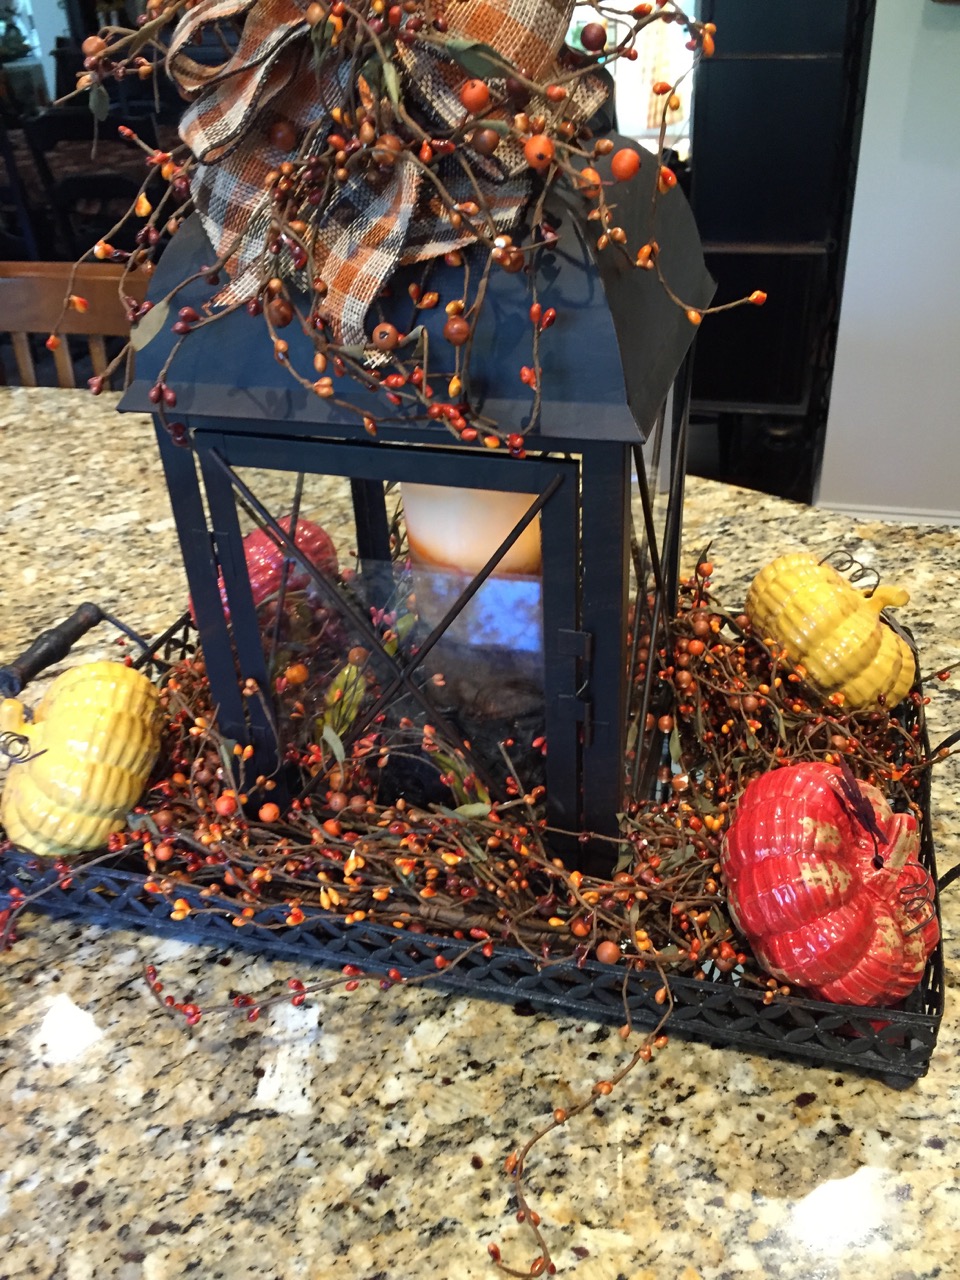
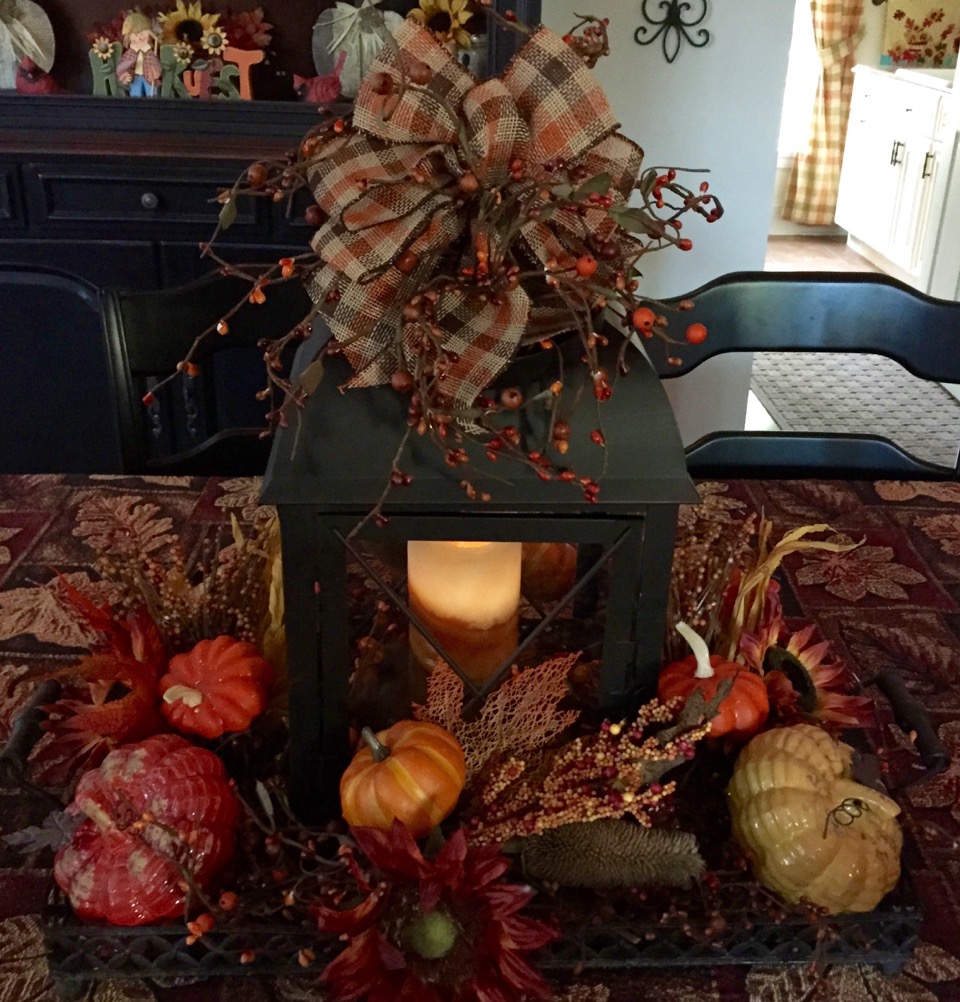
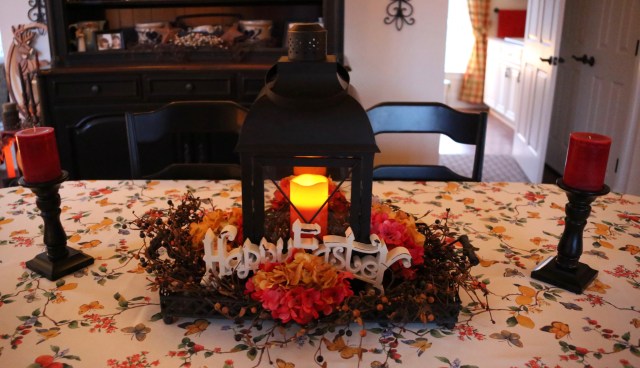
It didn’t take me long to move it to another location, it was way too bright (for lack of a better descriptive word) for the fireplace space.  So I moved it to my dining room and I made a lantern centerpiece to match…

IMG_6595

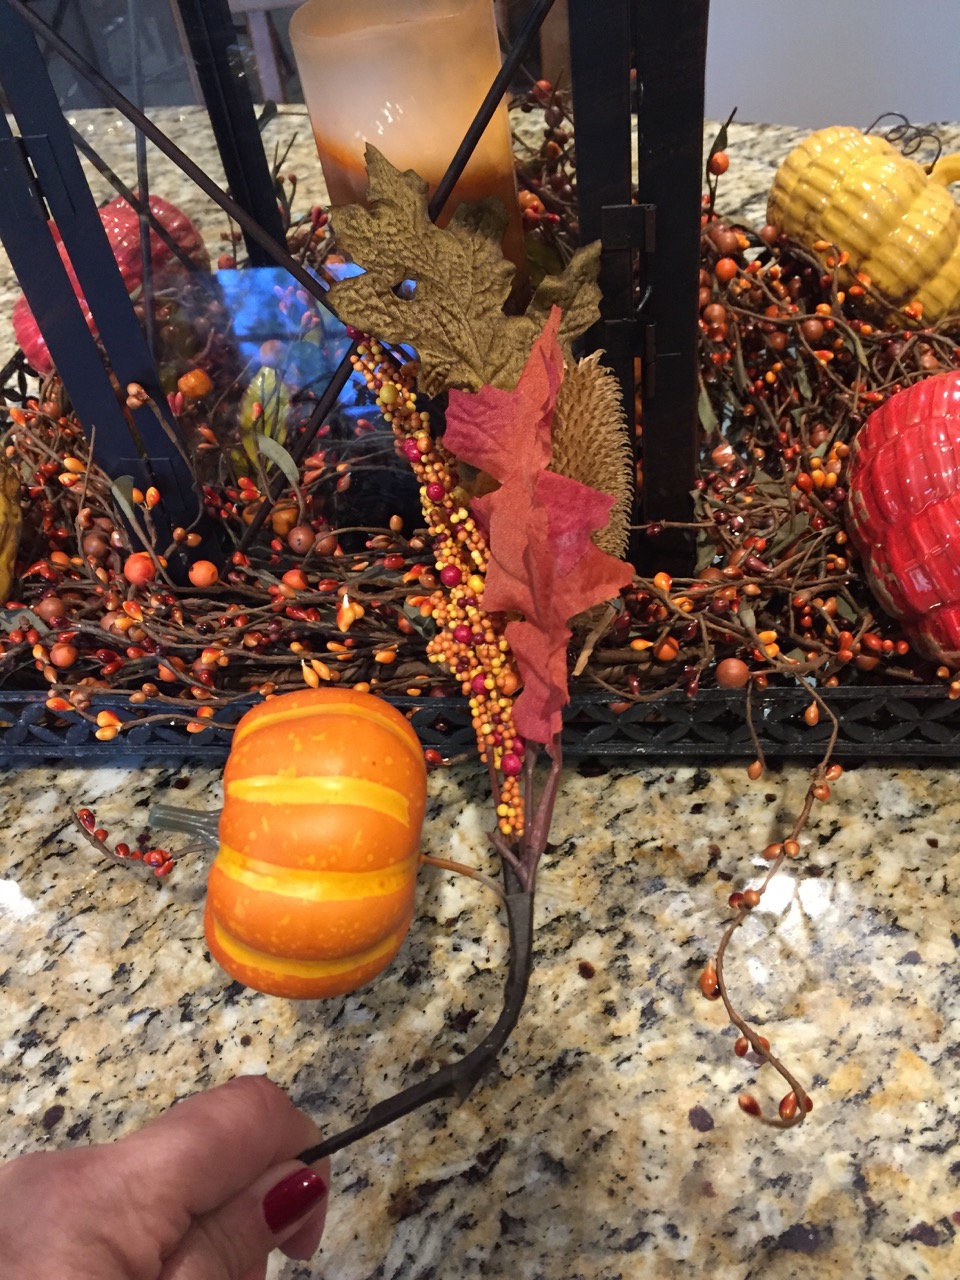
Here is a closer look at the centerpiece…

11025802_10205867980249106_6163841860063345285_n

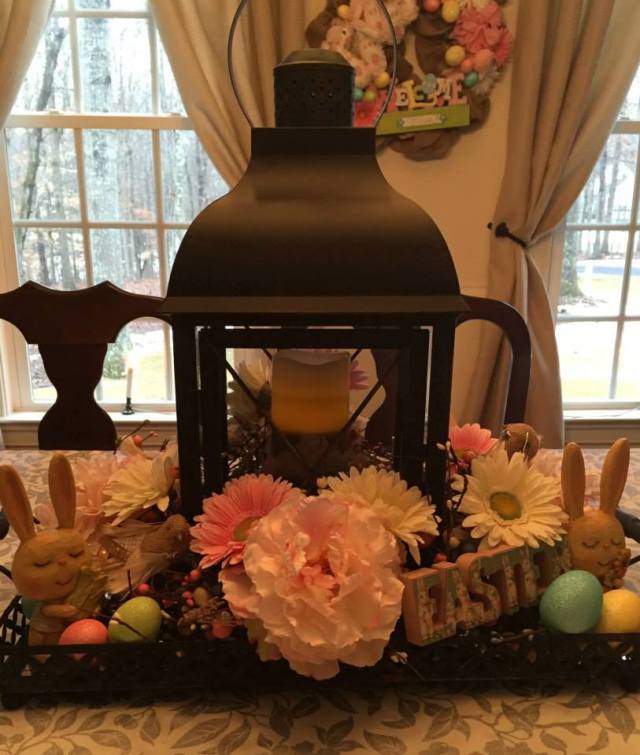
Again, I will not bore you with all of the details as to how I put this centerpiece together, but, if you’d like to do one for yourself, click here for some more detailed instructions. I was really happy with how this turned out; so airy and whimsical, it sure brightened up that room.

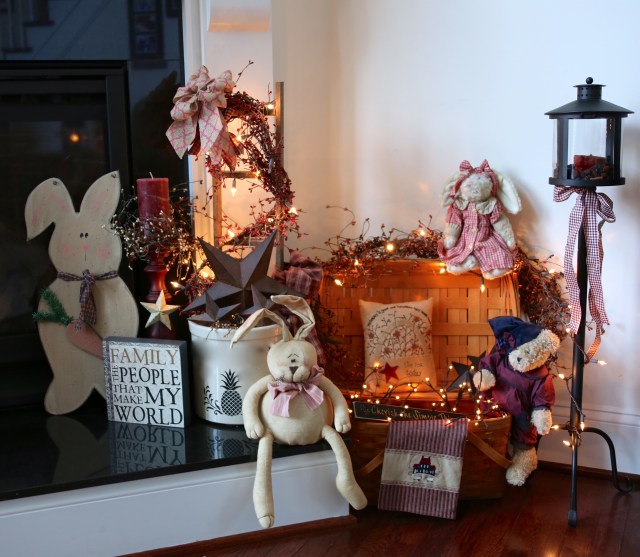
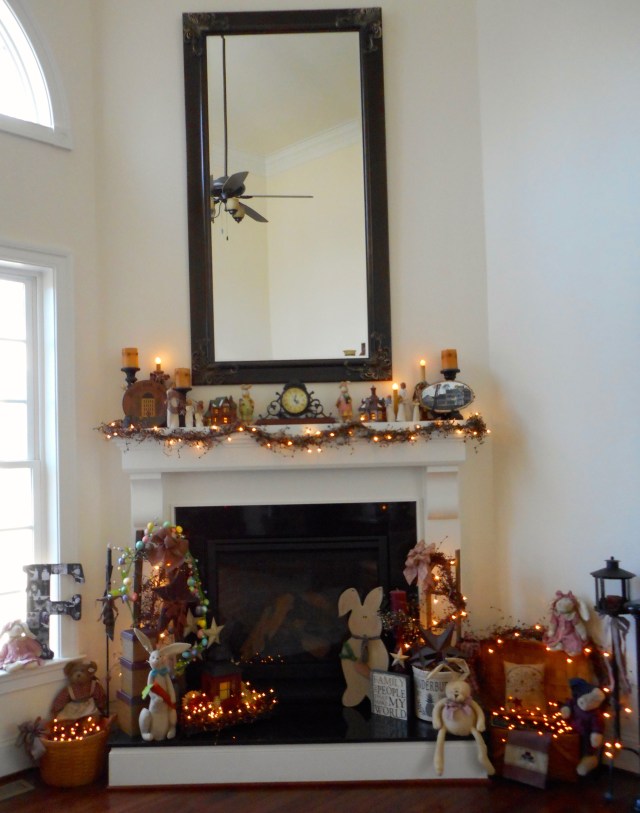
Next, I moved to the family room and to the hearth and mantel…

1V4A0202

This decor lends itself to more of a country feel and I honestly didn’t remove any of my everyday accent pieces, I simply moved things around to accommodate a few bunnies (ceramic, wooden, stuffed, and muslin), an easter egg garland, and I made a bow or two to match…

1V4A01991V4A0198

DSCN0026

Next, I moved over to the kitchen table…

11091296_10206077559888466_6839792587462378512_n

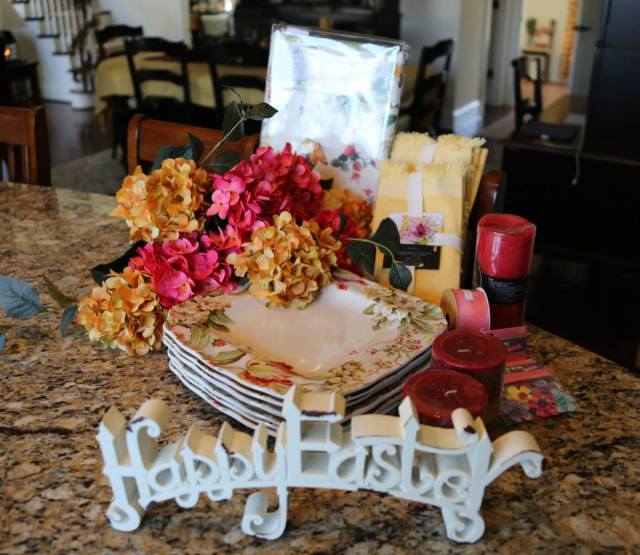
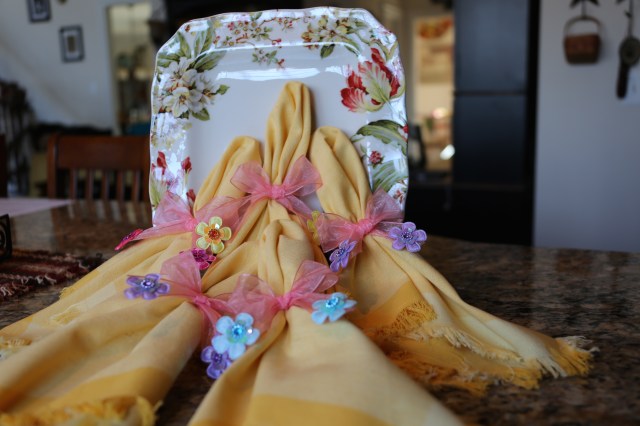
I had never purchased “Spring” dishes before in my life. But, last year I found these plates at Home Goods for $5 a piece, the tablecloth for $15 (60×104), and the napkins for $5 for 8…awesome prices. I went to Hobby Lobby and picked up some flowers (to redo the lantern centerpiece to match the tablecloth and napkins) all of which were 50% off that week. Oh yes indeed, I made out like a bandit.  I also made the little napkin rings…easy peezy, I just tied a ribbon around the napkin and hot glued sweet little silk flowers to the tails of the bow.

1V4A0348

1V4A03381V4A03461V4A0348

After Easter, the tablecloth remained on the table for the month of April and I replaced the “Happy Easter” sign in the centerpiece with some pretty metal birdies and some wooden daisies…

1V4A0413

Okay, so the inside was tweaked for Easter and a wee bit for Springtime (although honestly, my basic decor doesn’t change all that much for Spring except for that all of the gerber daisies that I have scattered about starting at right after Christmas finally come into Season…haha). 😉  I DO love me some gerber daisies!! 😉

ANY hoot, I digress, I set my sites on the outdoors…The first thing that I did was make a pretty Spring deco mesh wreath to hang on our light post.  Again, I’ll not bore you here with the ‘how-to’ details, but if you’d like to see how I put my deco mesh wreaths together, click here… These are the materials that I gathered up for this particular deco mesh wreath:

10407351_10205861410604869_7747308601039633720_n

And here is what I created:

IMG_95751V4A0260

I also replaced the decorative flag to match that wreath.

1V4A0233

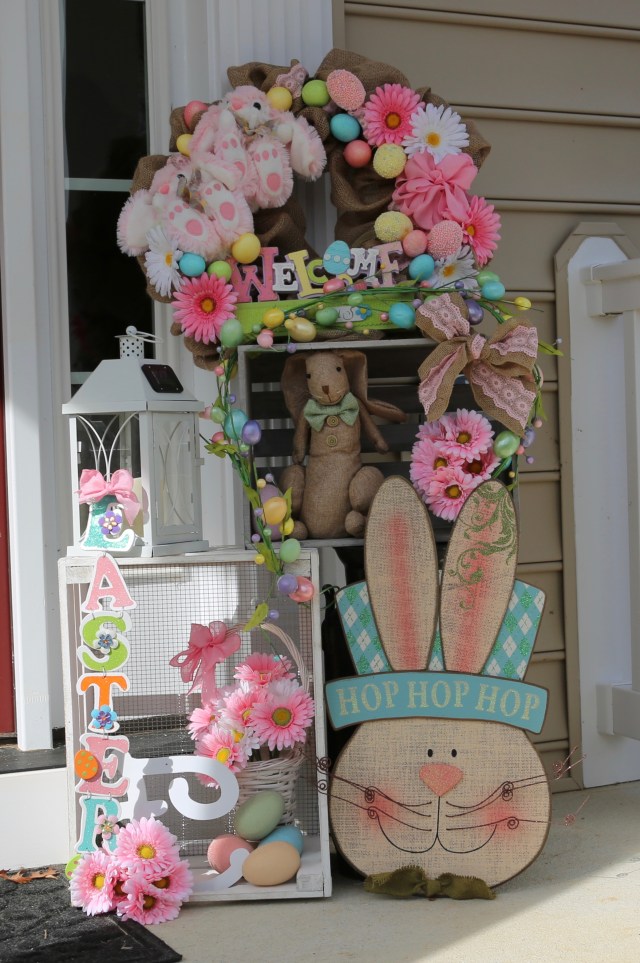
Next, I decided that I wanted to add a little Easter’y’ somethin’ somethin’ to the front porch.  So, I grabbed that wreath off of my dining room wall (replaced it with a picture) and grabbed up some crates from my basement and utilized my grandmothers milk can that is always sitting out there and created this little “cozy corner”.  (If you would like to see my basic instructions for cozy corners, click here). Here is what I came up with, that wreath had found it’s final resting place…;) …

1V4A02281V4A0231

I did this before I purchased my little red wagon.  Click there if you’d like to see my little red wagon and how I switch the decor out to match the Season. That little wagon will be an awesome tool when I go to decorate for Spring *next* year. 🙂

Last but not least, I redecorated my mailbox utilizing the same basic idea that I describe in my Seasonal Mailbox Decor post.

1V4A0215

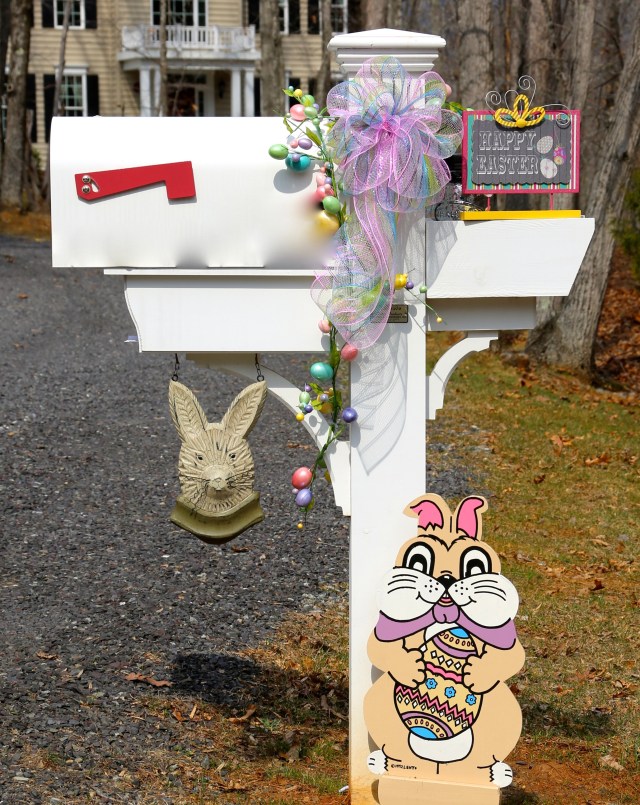
As you can see, we didn’t have our driveway paved last Spring, that big project happened this past summer. 🙂

1V4A0236

Here is the house with the driveway paved…IMG_3570

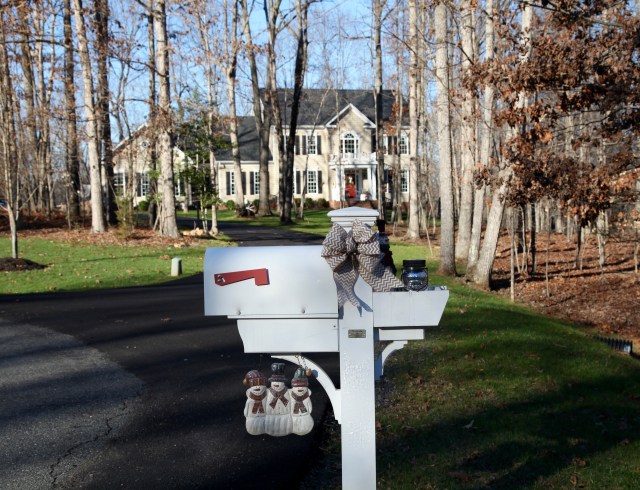
I’m a little bit sad that I won’t be switching things out for Easter/Springtime this year, but, some years are just busier than others, and this year we have other things happening.  Thankfully, our daughter will be staying here while we are away watching the house and the pups…I’m sure they won’t mind that the decor is going to be staying in the more generic realm. 😉

IMG_3482

Until next time, y’all take good care!! ❤

**In crafting there are no mistakes, just unique creations**

~Arlynn ❤


A Dressier Lantern Centerpiece

Hi Everyone!

It is a rainy, rather dreary Monday afternoon here in Virginia so I thought I’d sit down and put together this little post about my dining room lantern centerpiece and also show you how I transform it to match the season or Holiday. I found the large lantern featured in this post in a local country store and for its measurements, please refer to my “A Lantern Centerpiece For All Seasons” blog post; where along with the lantern’s measurements, I also give a bit of a tutorial showing you how to put one of these centerpieces together.

I’ve been using a very pretty country sea foam green as my accent color in the dining and living rooms; I love the light and airy touch that it adds to a room.  I have been pairing it with grays and taupes and have been very happy with how it has all come together.  It has been a bit of a challenge for me to stay in my country comfort zone while using that accent color, but I do believe I’ve successfully kept my decor warm and have created some cozy groupings, arrangements, wreaths, and centerpieces to keep within the country theme.

Here is the first lantern centerpiece I created for the dining room table:

11229371_10206418622294813_3374812849677624591_n

I purchased the same mirrored tray that I used for the kitchen lantern centerpiece to go under this lantern and it is used to build all of the arrangements featured in this post

Easter was the next Holiday, in years past, I haven’t typically decorated for Easter, but this lantern inspired me to create a new centerpiece.

11025802_10205867980249106_6163841860063345285_n
10996801_10205867980289107_192302559589102839_n

I also made that wreath that is hanging on the wall…it didn’t stay there for long though as I moved it out onto the porch and added it into a grouping that I put together out there.  There it is added to the front porch grouping…

1V4A0229

Next, I needed something to go with our family reunion decor, so I switched out the tablecloth and a few other decor items that helped me incorporate my red and white gingham, gerber daisies, and mason jars reunion theme.

IMG_6979 IMG_6983 IMG_7041

This centerpiece and the red and white accents only stayed in there for the day of the reunion.

After the reunion, I went ahead and changed the dining room decor back to its softer color tone, here is the centerpiece that I chose to make to complete the room’s transformation back to ‘normal’:

IMG_1708

This arrangement stayed in place until it was time to decorate for Fall. I was very happy with how this one turned out, I just love to add that bow/pip berries topper. 🙂

Fall has arrived and here is the dining room with the Fall decor including the lantern centerpiece in place:

IMG_1866

And here is the bow, pip berries, fall pick topper:IMG_1867

The Fall decor in this room is quite subtle, but I’m happy with how it looks. I feel that it still looks warm, inviting, and cozy despite not using all of the typical Fall colors.

IMG_1869  1V4A2894 1V4A2848

I cannot tell you how much I am enjoying working with these lanterns and creating all of these different centerpieces.  I do use lanterns in other capacities as well–a subject for another blog post. 😉  I do feel as if the softer green color lends itself to a ‘fancier’ centerpiece; I don’t want it to be too formal in the dining room, but I do want it to be a bit lighter and airier in design.

Well, it’s time for me to get myself in gear and to make my hubby and I some dinner, so, until next time, y’all take good care! ❤

**In crafting there are no mistakes just unique creations**

A Lantern Centerpiece For All Seasons

I cannot express to y’all just how much I love lanterns; they provide a wonderful basic piece with which to create so many pretty groupings.  I use them to accent my decor inside and outside as well.  I felt so fortunate when I stumbled upon the lantern that I will be highlighting in this post; actually I own two of the exact same lanterns and I purchased them in two different local craft stores, unfortunately, I cannot find these lanterns anywhere online or I’d leave y’all a link…my sincere apologies… <sigh>.  I buy my share of lanterns in places like Hobby Lobby, Home Goods, and Michaels, all three stores usually have a wonderful selection and I can almost always find one on sale. I use them in several different ways; some for centerpieces, some for accents in groupings, and some for side or accent tabletop decor.  For the purposes of this post, I am going to focus on this one type of lantern and show you how I use it to create my kitchen table centerpieces.

I will start with the very first lantern centerpiece that I created; last January. In addition to the lantern, I’ve used a metal mirrored tray, and a black candle holder as the anchors of every one of the centerpieces.  Here is the lantern, (it is metal btw), I’ve measured it for you so that you can see that it is quite large, I love to have a big centerpiece on my kitchen table, I’ve also measured the tray for you:

IMG_8984 IMG_8985 IMG_8986 IMG_8987 IMG_8988

The first thing that I did was to place the candle holder and a battery operated candle inside of the lantern, then I started to build the surrounding decor.  I realize that gerber daisies are more of a Spring flower, but I love them so much and I found some made out of burlap, so I went ahead and used them along with a few burgundy and gold ones, and I added a resin cream colored daisy at each corner as well.  I nestled all of the accent pieces in a bed of pip berries–I used a pip berries garland that matches my stair decor highlighted in my Staircase Railing Ideas blog post. OH, btw, I did cut a section of pip berries off of the garland and I wrapped it around the candle holder inside of the lantern before I started to create the surrounding decor. (I plan to give you a basic step by step “how-to” below):

IMG_8533 IMG_8534IMG_8537

That centerpiece stayed up through the winter months until it was time to switch out the centerpiece accents to match my Easter decorations.  Here is what I came up with:

1V4A03201V4A0347

As you can see, I used the very same lantern, tray, and candle holder…and I actually did use the same pip berries garland as well. I changed out the battery operated candle and the flowers. I purchased the tablecloth, the plates, and napkins at our local Home Goods store. I made the little napkin rings as well, I chose a pretty ribbon and tied a bow around the napkin and then hot glued little flowers to the tips of the bow…easy peezy. 🙂

A close up of the Easter lantern:

1V4A0341

After Easter, I simply removed the “Happy Easter” words, but I did leave the rest of it alone until it was time to switch things out for the family reunion/summer centerpiece:

IMG_6960

I changed out all of the decor accent pieces for this centerpiece and I created and added a top bow/pip berries piece which I’ve found that I love now. I feel as if it pulls it all together. I used a red and white pip berries garland (trimming a section off to go inside the lantern and another small piece that I added to the bow topper), gerber daisies,  a “Family” wooden word sign, and I threw in a couple of burlap birds for something a little different.

IMG_0287

That centerpiece stayed in place until it was time to decorate for Fall. Now, I will walk you through how I created that Fall centerpiece…Here goes:

Here is the lantern, tray, and candle holder. I used a new pip berries garland for this arrangement and again, I trimmed off a section so that I could wrap it around the candle ring inside of the lantern and another small section to be used on the bow topper:

IMG_8993IMG_8994IMG_8995

Next, I wrapped the rest of the pip berries garland around the lantern:

IMG_8996

Then I created the bow topper and pip berries design:

IMG_8998

I made the bow and simply attached the small section of pip berries into the pipe cleaner that I used to hold the bow together (behind the bow). Then I took a piece of the same ribbon and attached it to the back of the bow with the pip berries.  I kind of held it up to the lantern and figured out how big of a “loop” I wanted and then hot glued it shut to that size. I then slid the entire bow topper onto the top piece of the lantern.  You can see what I’m talking about here:

IMG_8999 IMG_9002   IMG_9004

Then I arranged some glass pumpkins at each corner and filled in the spaces in front, back, and on either side with Fall floral picks and a few Fall colored sunflowers:

IMG_9006-1

IMG_9007-1 IMG_9008 IMG_9009

And here is the finished centerpiece:

IMG_9012 IMG_8977 2 IMG_8976

I have really enjoyed creating a new centerpiece as each Season has passed while utilizing the same basic designs and design pieces. I will admit that I spent a good chunk of change on this particular lantern (and I use one just like it on my dining room table, but, it was so worth the cost. I’ll write another post showing you all of the different Seasonal centerpieces I’ve created for the dining room table).   I was able to get the tray for 1/2 off at Hobby Lobby, and I’ve been able to get each Season’s accent pieces for a discounted price. It hardly costs me anything to change out the decor and of course from now on, it won’t cost me a penny because I will reuse the same accent pieces in the coming years.  That said, I know myself and I’m sure I will be adding or changing some things out for new things, but, I’ll already have all of the basics that I need. 🙂

Fast forward 3 months and I have now completed a lantern centerpiece for Christmas utilizing the basic pieces that I’ve used for all of the other centerpieces.  Here is a link to my new Blog post describing how I created the Christmas Lantern Centerpiece.  Here is a picture of the finished product:

I hope upon hope that one of these ideas inspires y’all to try something like this for your home. They are not hard to create and all you need to do is to trust yourself to choose accents pieces that look pretty to you and hence would look amazing in your home.  I’m always here if anyone has any questions, feel free to leave them in the comment section. 🙂

Let me take a moment to thank every one of you who has stopped by to take a peek at this blog, feel free to look around at my other posts; I have found that I am really enjoying sharing my creations with you and if one person is inspired to try their hand at creating something similar to what they’ve seen here…well, that would just touch my heart of hearts!!

Until next time, y’all take good care! ❤

**In crafting there are no mistakes just unique creations**