Pioneer Woman Inspired Decor

Late last summer I had ventured into Walmart and was tootling around just looking to see what was what. I knew that the Pioneer Woman (Ree Drummond) had her entire line of loveliness available for sale, so I tripped on over to where all of her bright and beautiful items were displayed. The colors that she highlights in her items and the way she mixes up said colors really excited and inspired me so I picked up several items to bring home try and figure out how to incorporate into my decor. When I got my goodies home where at that time my “Cozy Country” decor (soft and subtle burgundies and khakis) were abounding, I just couldn’t figure out how to incorporate all of the brightness that the Pioneer woman line offered. Right then, I promised myself that in my next “Spring Decor Series” I would try my best to give a nod to the Pioneer Woman. Below I will show you a smattering of pictures of what I came up with this Spring to recreate the wheel and transform our home into my “Pioneer Woman *Inspired* decor. I walked *way* outside of my comfort zone with this decor, BUT, I completely enjoyed the challenge and I do feel as if I succeeded in transforming my home into a bright and fun place to dwell all the while giving that not to the Pioneer Woman.

Here we go with some pictures and below I will put a link to my entire “Pioneer Woman Inspired Decor Series” playlist that I’ve posted on my “Arlynn’s Country Craft Corner” YouTube Channel so you can go and check out exactly how I brought this new decor series to fruition.


31514559_10215716759742438_3224673218342158336_oIMG_2692IMG_2693IMG_2694IMG_2697IMG_2717IMG_2727Version 2IMG_2729IMG_2740IMG_2754IMG_2758IMG_2761Version 2

IMG_2759IMG_2767IMG_2770IMG_2772IMG_2776IMG_2798Version 2IMG_2800IMG_2801IMG_2803IMG_2808IMG_2812IMG_2813IMG_2933IMG_2938IMG_2941IMG_2947IMG_2958IMG_2968IMG_2976

And here is a link to my “Pioneer Woman Inspired Playlist” that shows you how I created all of these spaces and includes tutorials for my lantern centerpieces, funky bows, that wreath, and much more. 🙂

Thank you all for stopping in to see what I’ve been up to lately!

***In Crafting, there are no mistakes, only unique creations!***

Until next time, y’all take good care!

~Arlynn

Transitioning: Patriotic–Memorial Day – Labor Day

It is a miracle! Before doing this bit of Patriotic decorating, I hadn’t decorated one thing since January when I had put all of the Christmas decorations away and transitioned to my more generic every-day decor.  I *always* decorate *something* around Easter/Spring time, but, I didn’t do it this year because of our Hawaiian cruise <~~ Getting ready for that kept me crazy busy for quite a while.  Well, our next cruise isn’t until October–Yes, we’re booked on another cruise!! (Woohoo!!) Canada and New England on the Regal Princess…OMGoodness, I’m excited.  ANYway, I digress, back to the subject at hand.  I decided to add a bit of Americana into my decor for the rest of the Spring and let it take me through the Summer months straight through to Labor Day.  I didn’t do an extreme amount of ‘creating’ in that I didn’t redo centerpieces, nor did I create a new wreath.  Instead, I just added a touch of the Patriotic here and there pillaged from my past creations and my storage bins.  Admittedly, I did purchase just a few new items…

Here we go:

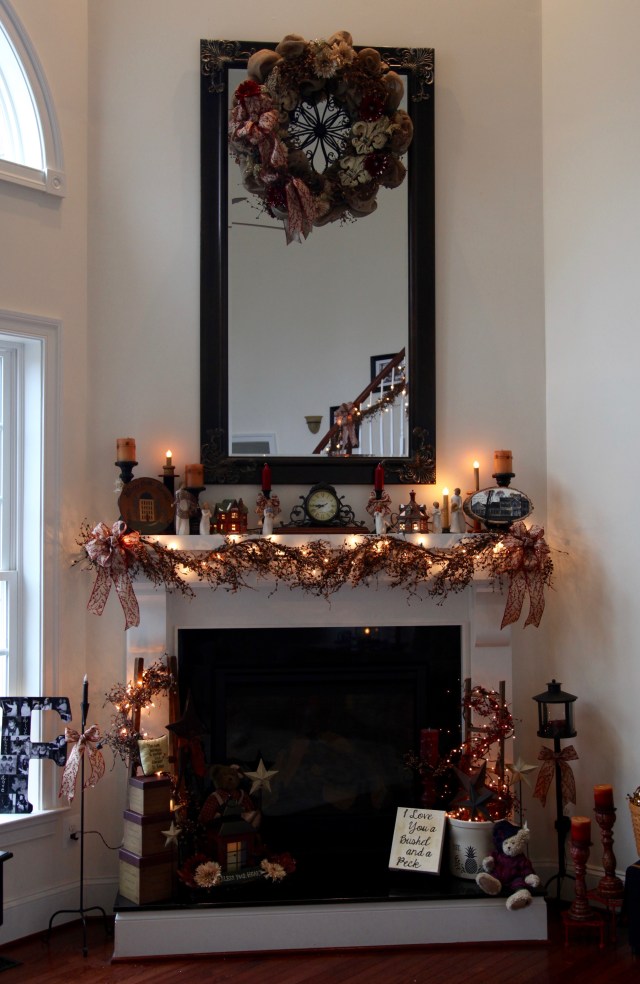
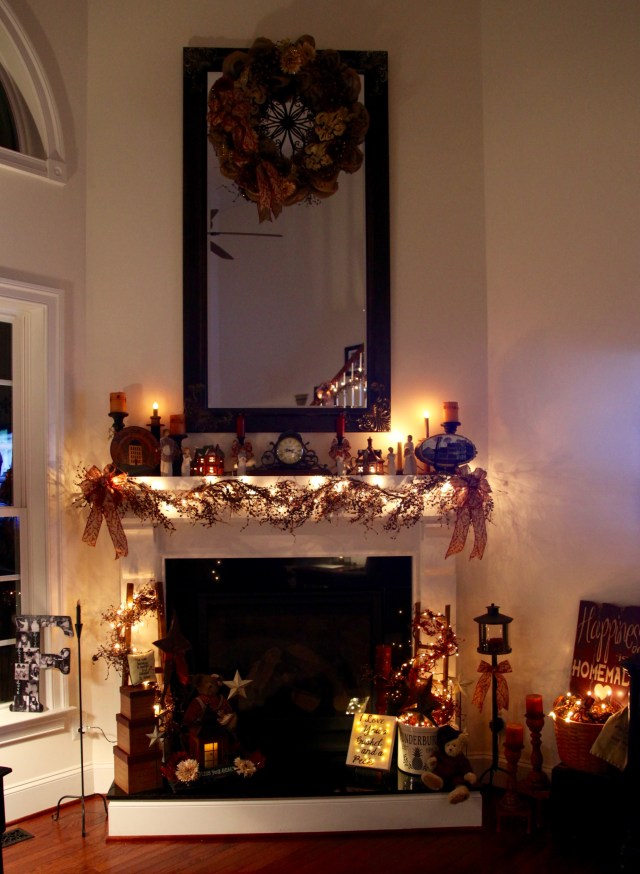
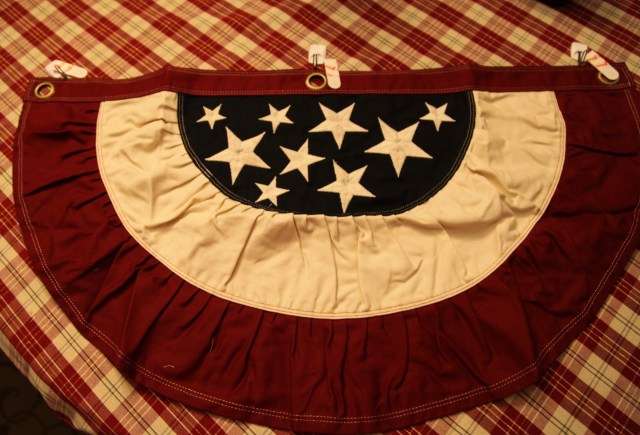
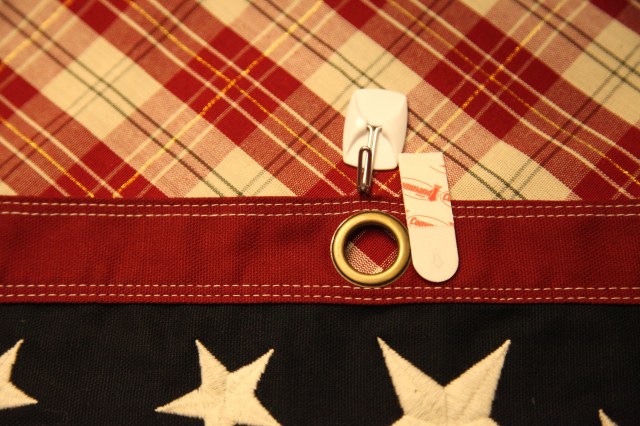
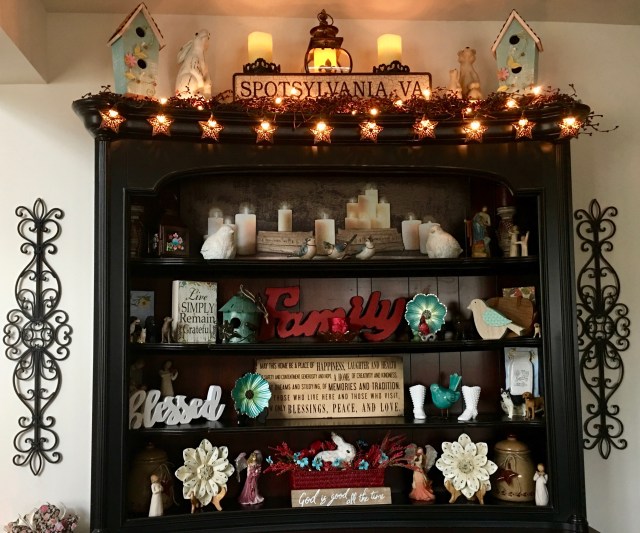
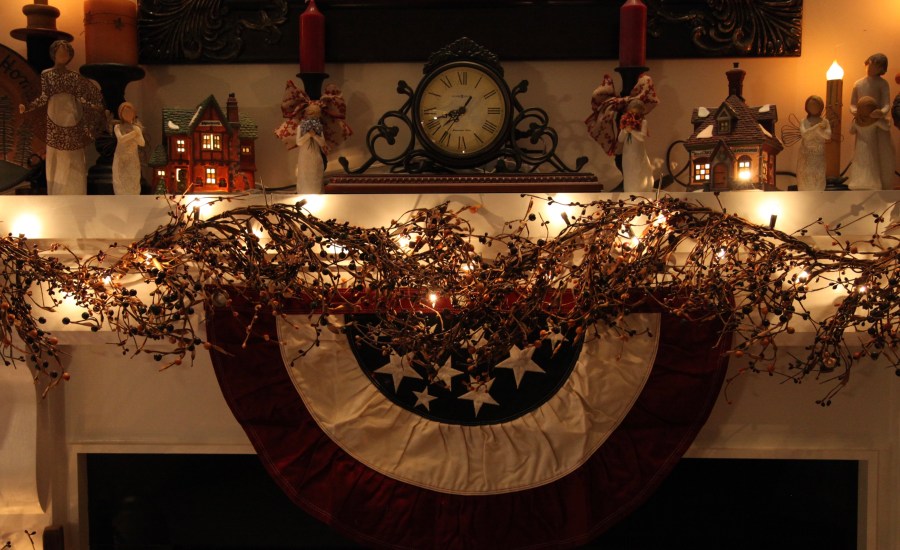
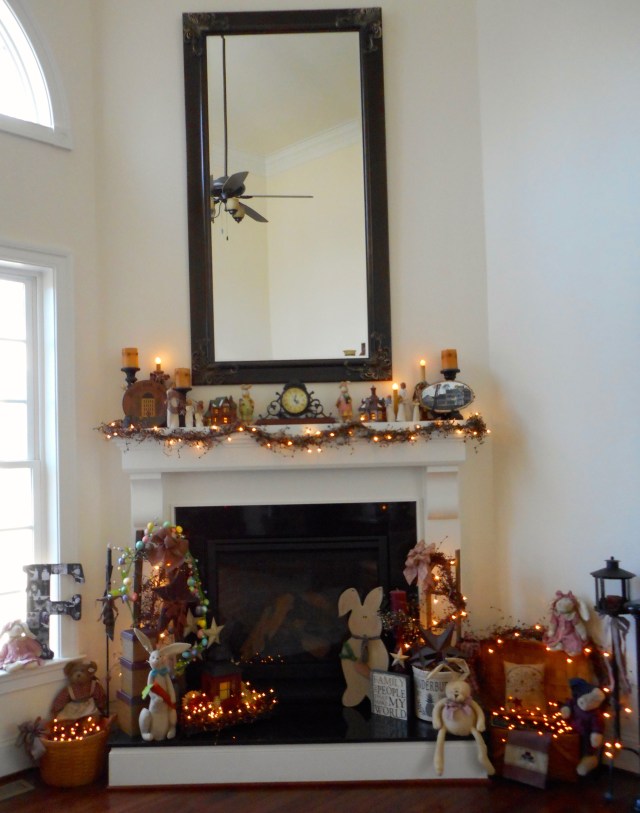
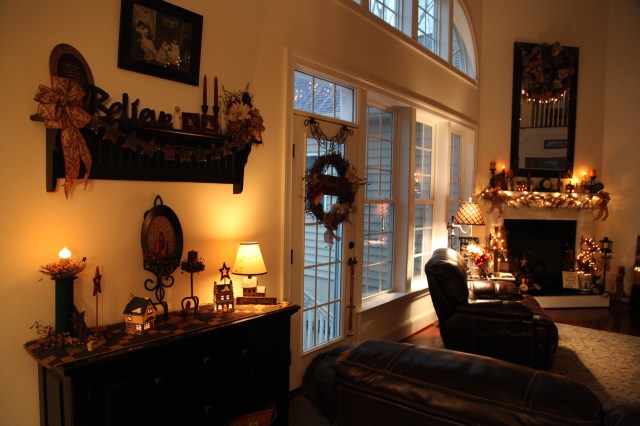
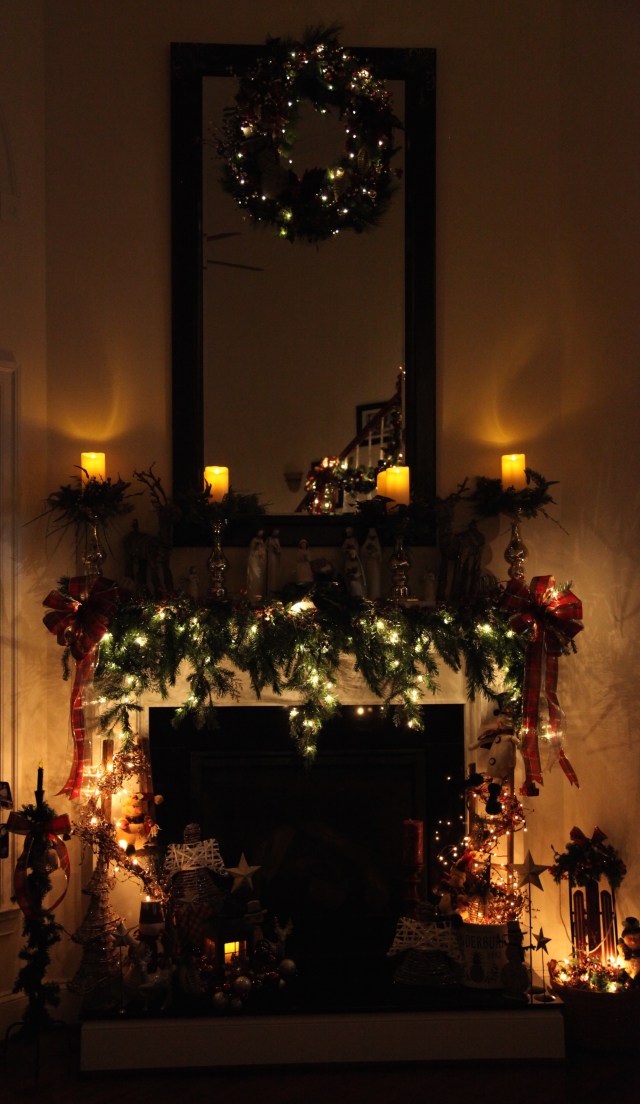
I had found this bunting on sale at Plow and Hearth after July 4th last summer, it was still in the bag when I opened up my “Patriotic” Bin.  I decided that I’d hang it right under the mantel…I used those spiffy diffy Command Strips to easily accomplish that job…

IMG_4720IMG_4721IMG_4723

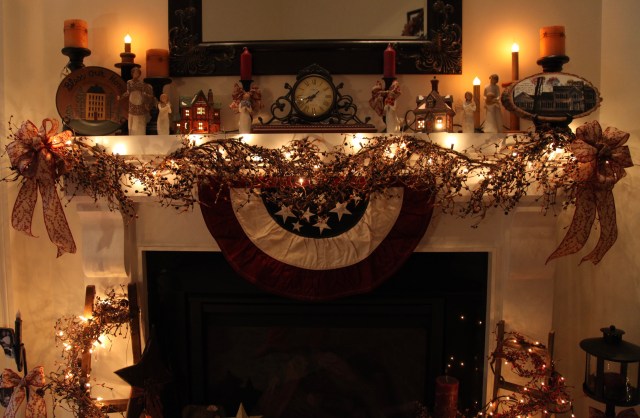
And that set the tone…Here are the other touches I added around this back portion of our home (family room, kitchen eating area, kitchen).  I won’t put anything in the front rooms of the house, they are just fine as is.

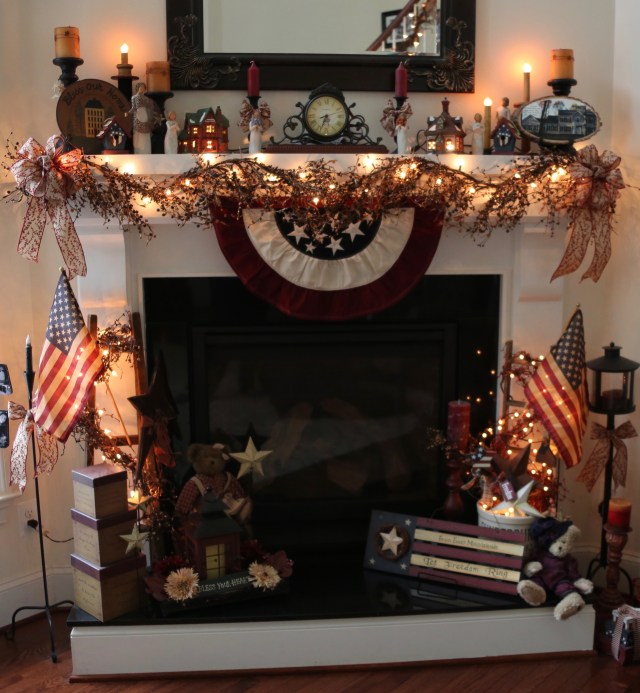
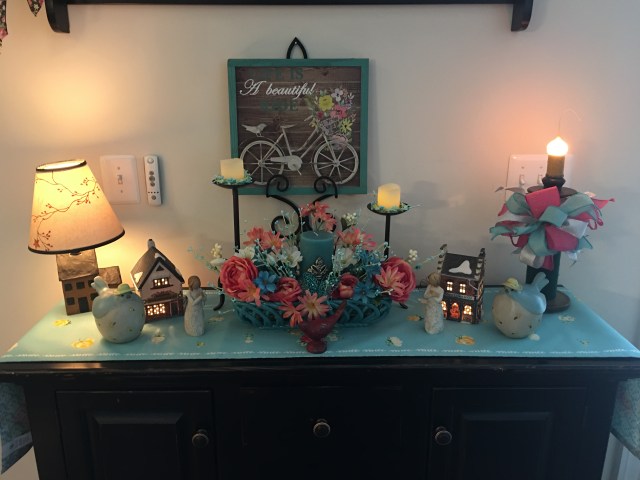
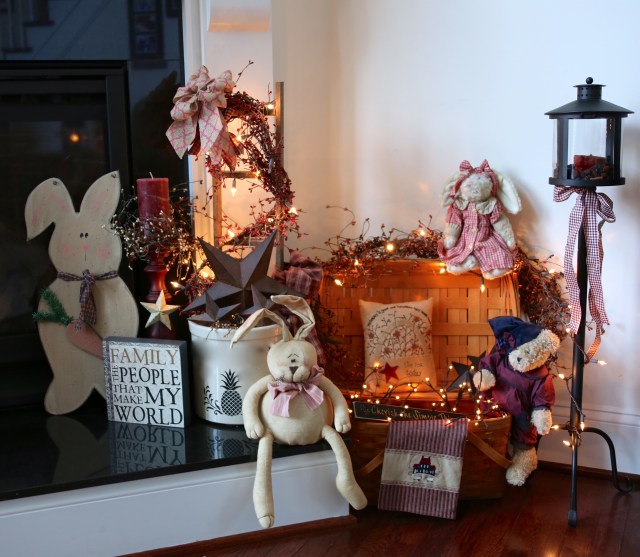
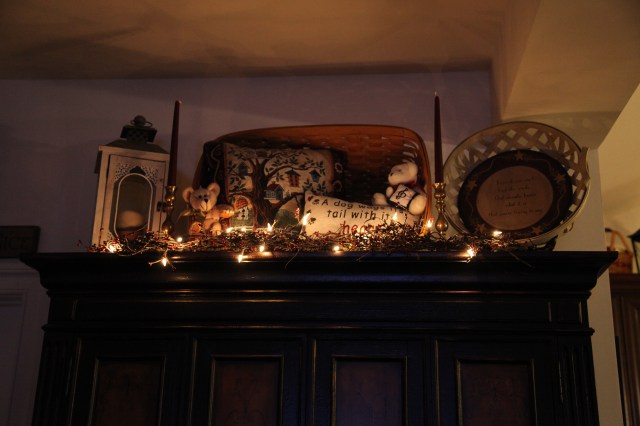
I added a couple of tea dyed flags on either side of the hearth, as well as a patriotic plaque along with some wooden and metal picks stuck into the crock. I also added a couple of little wooden bird houses up on the mantel,  All of the other decor on the mantel and hearth blended in nicely and that was by design–Burgundies, Blues, Greens, & Khakis are my chosen colors for this portion of the house all year round.

1V4A4748

1V4A4751

1V4A4781

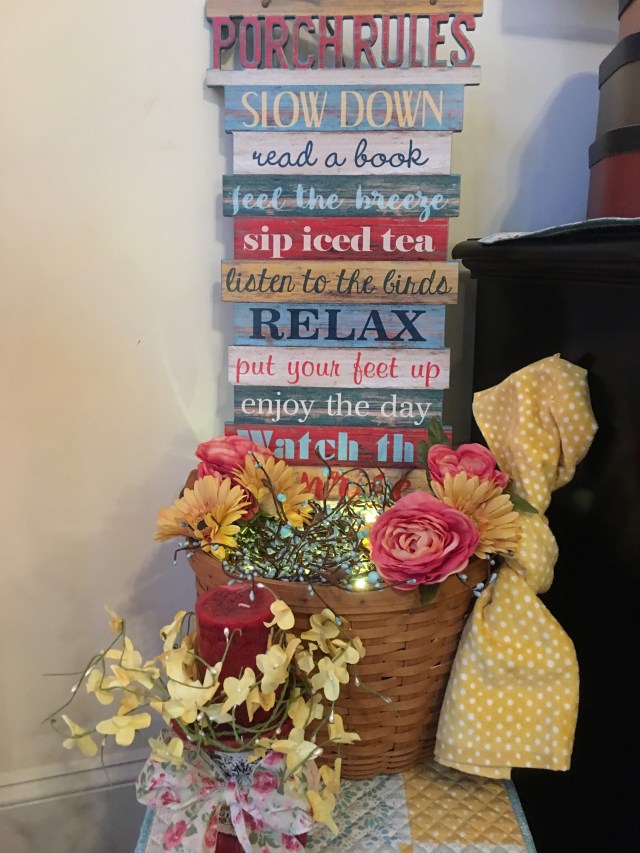
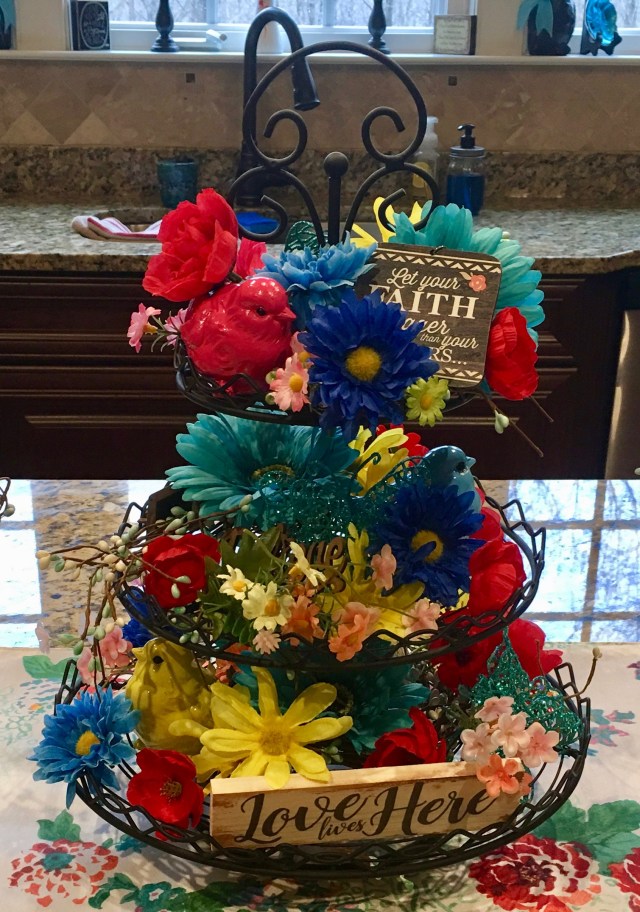
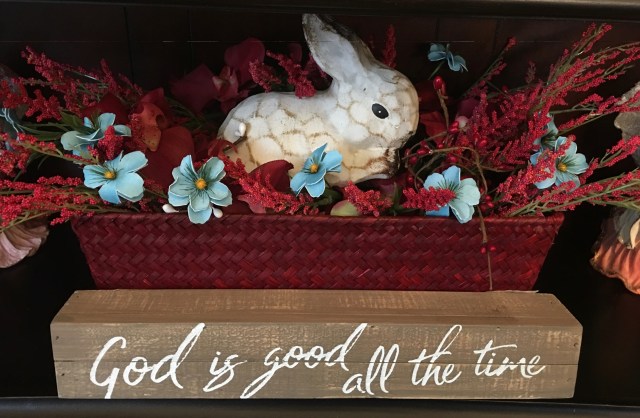
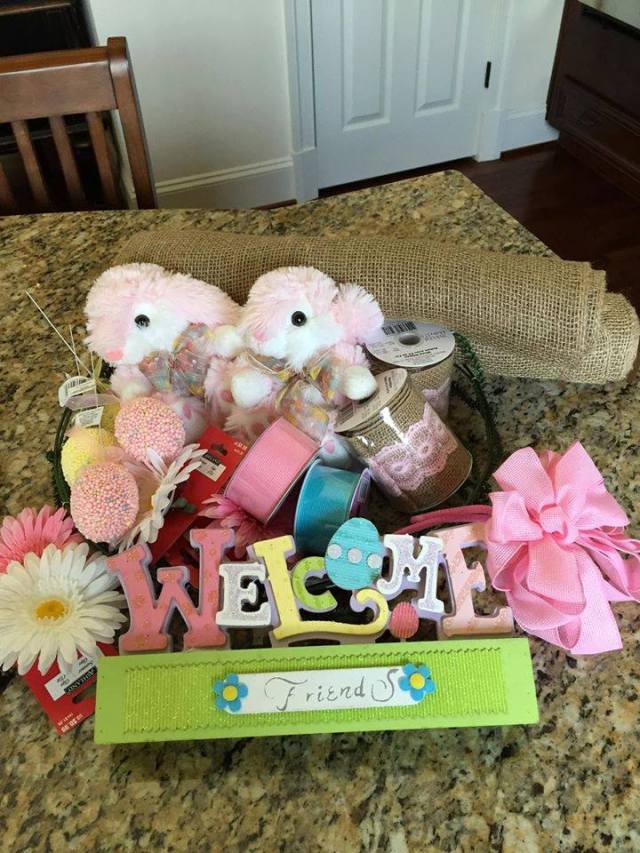
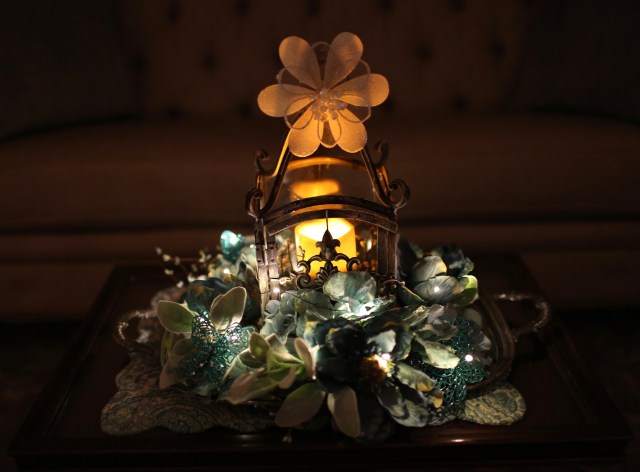
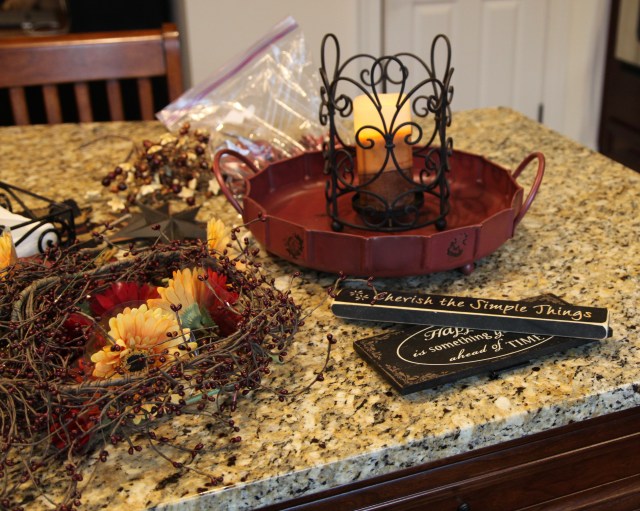
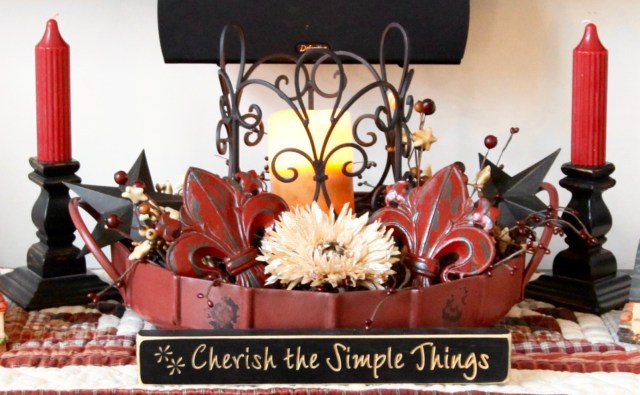
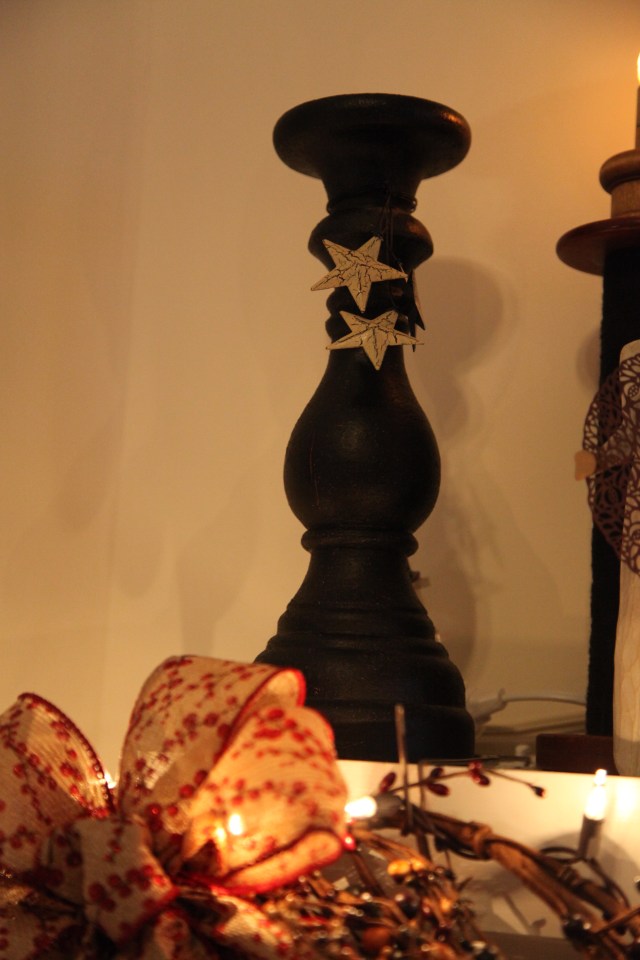
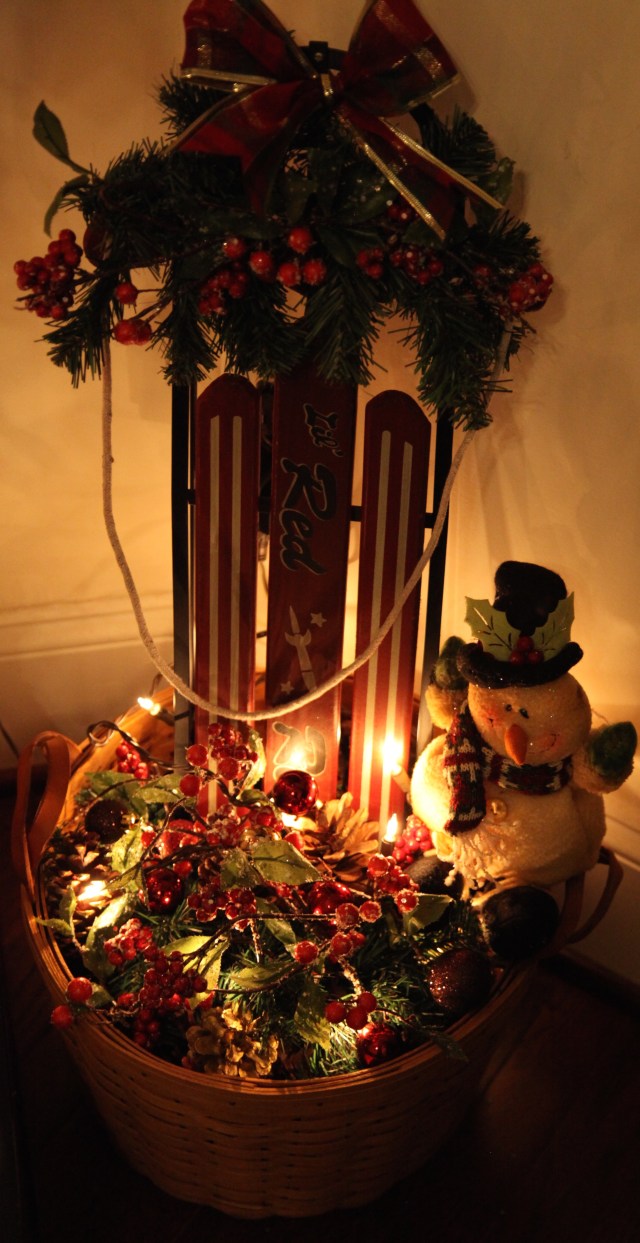
Next, I moved over to that little basket that I’ve been decorating and redecorating since Christmas…Here are the other two ways in which I’ve done up this basket in the past:

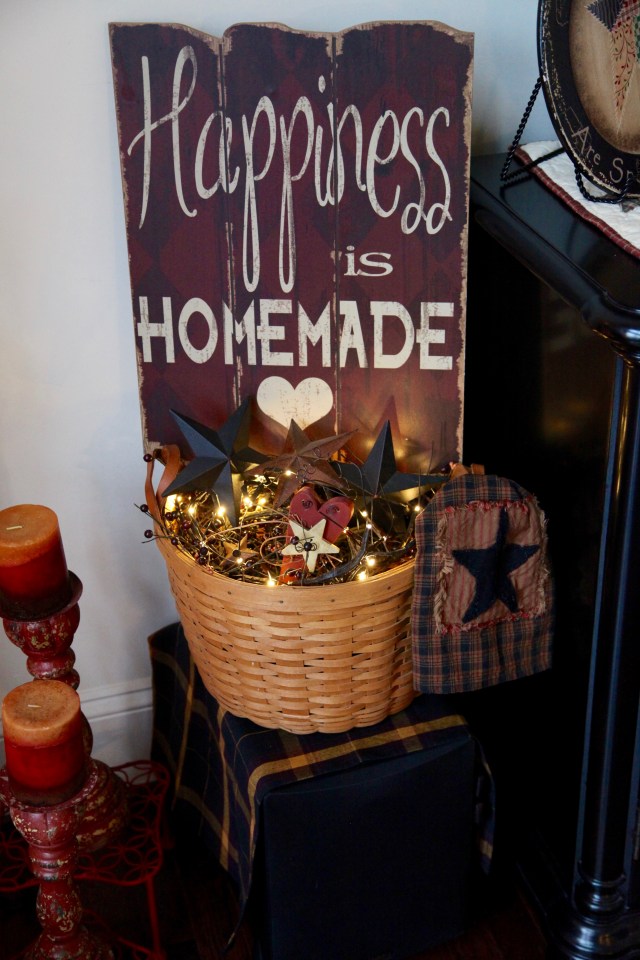
And here is how I did recreated it with a couple of Patriotic accents:

1V4A4750

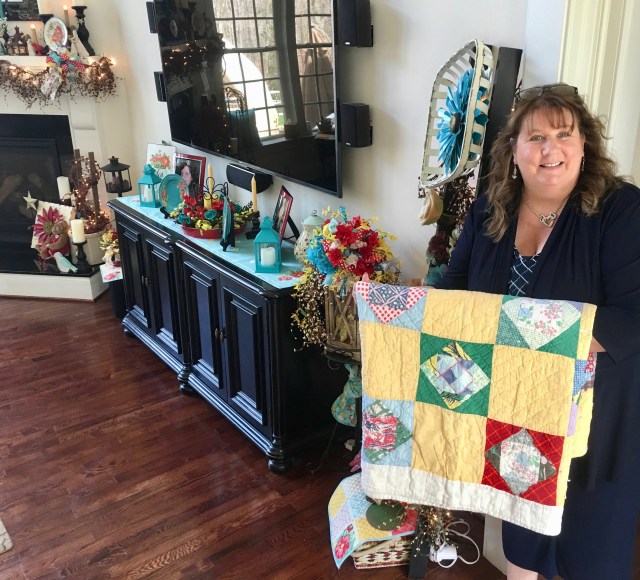
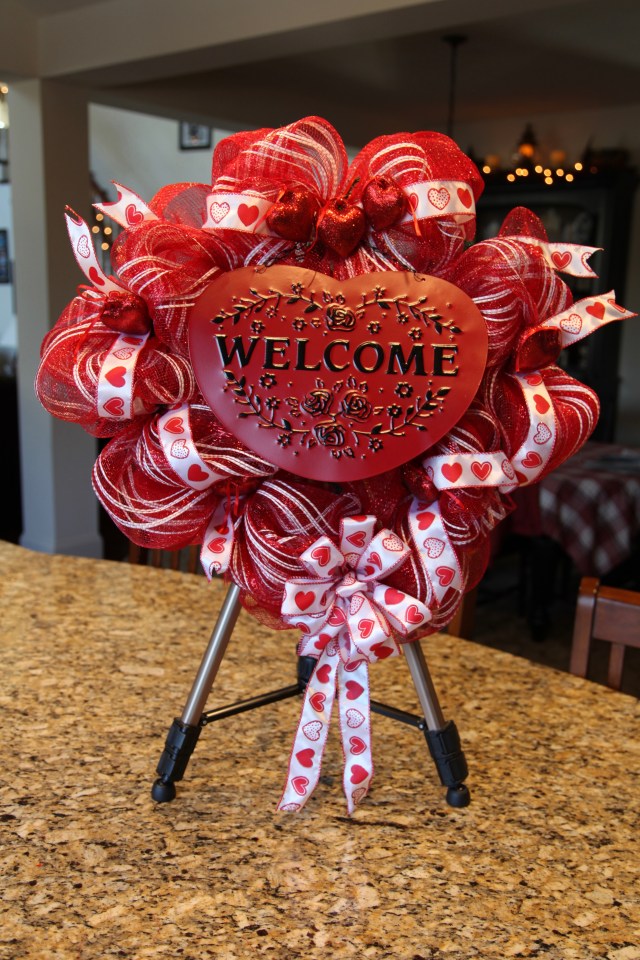
I moved on over to the credenza next…I truly only added a couple of pillow’y’ Patriotic hearts and a wooden birdhouse to the existing centerpiece…And then I plopped that “Welcome” plaque in front of the centerpiece…Whew…tough work there huh?  Again though, my everyday decor lends itself beautifully to just inserting different ‘seasonal’ items to bring in a new and fresh ‘feel’.  Go me…LOL. 😉

1V4A4782

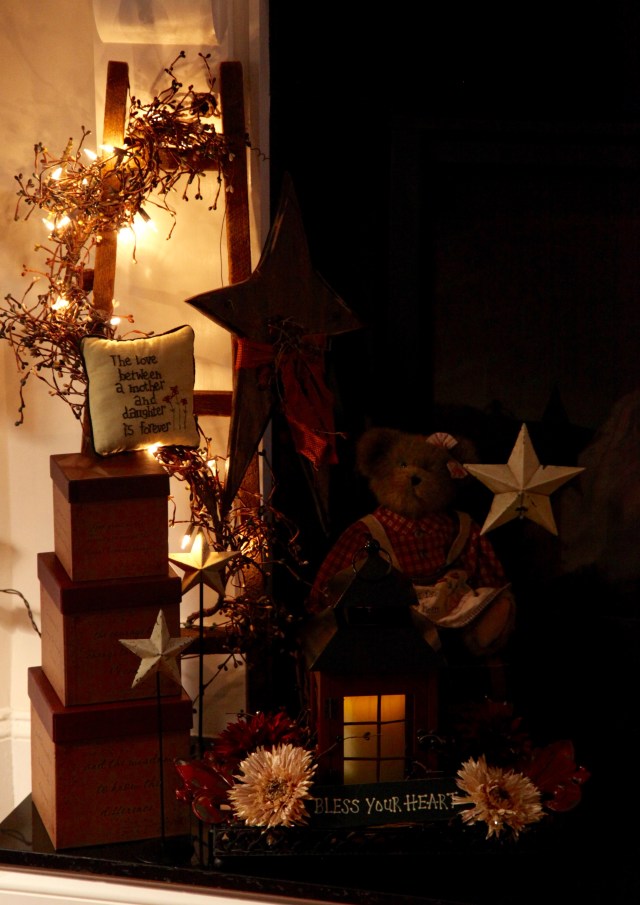
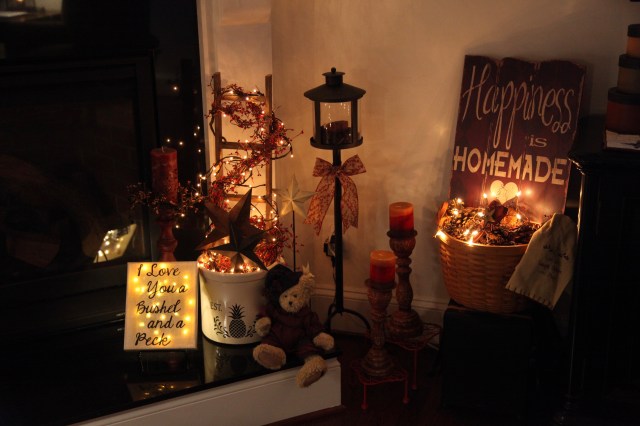
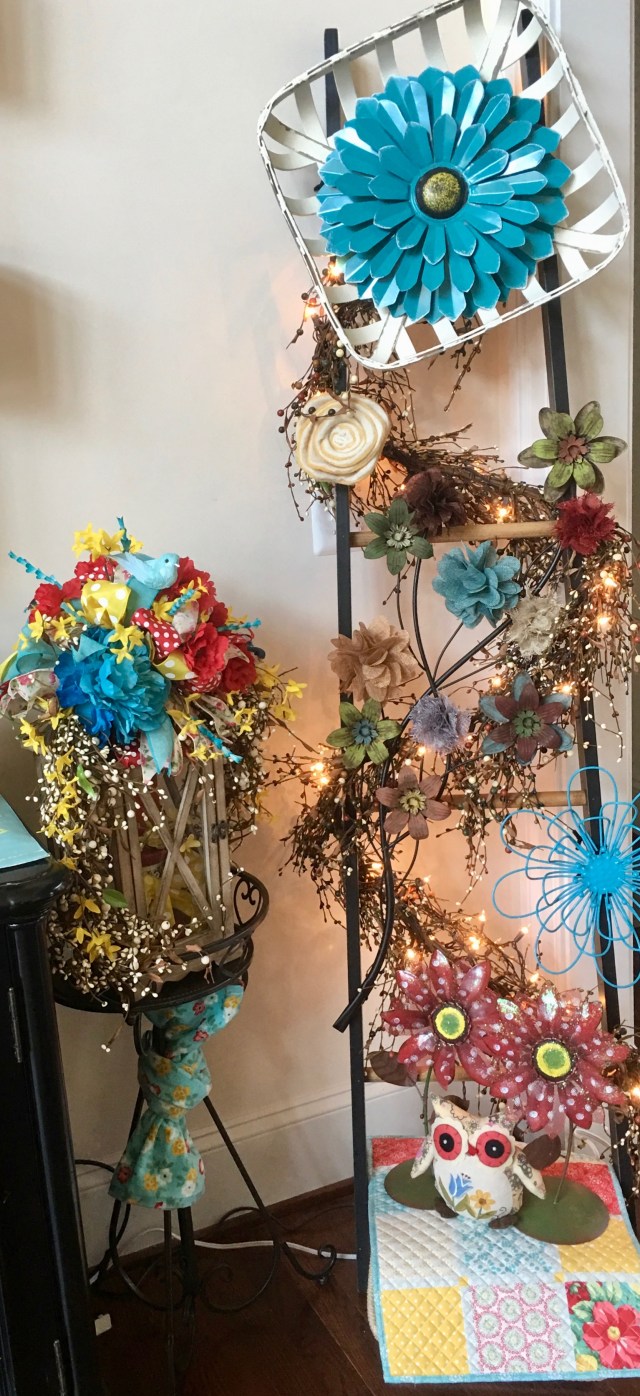
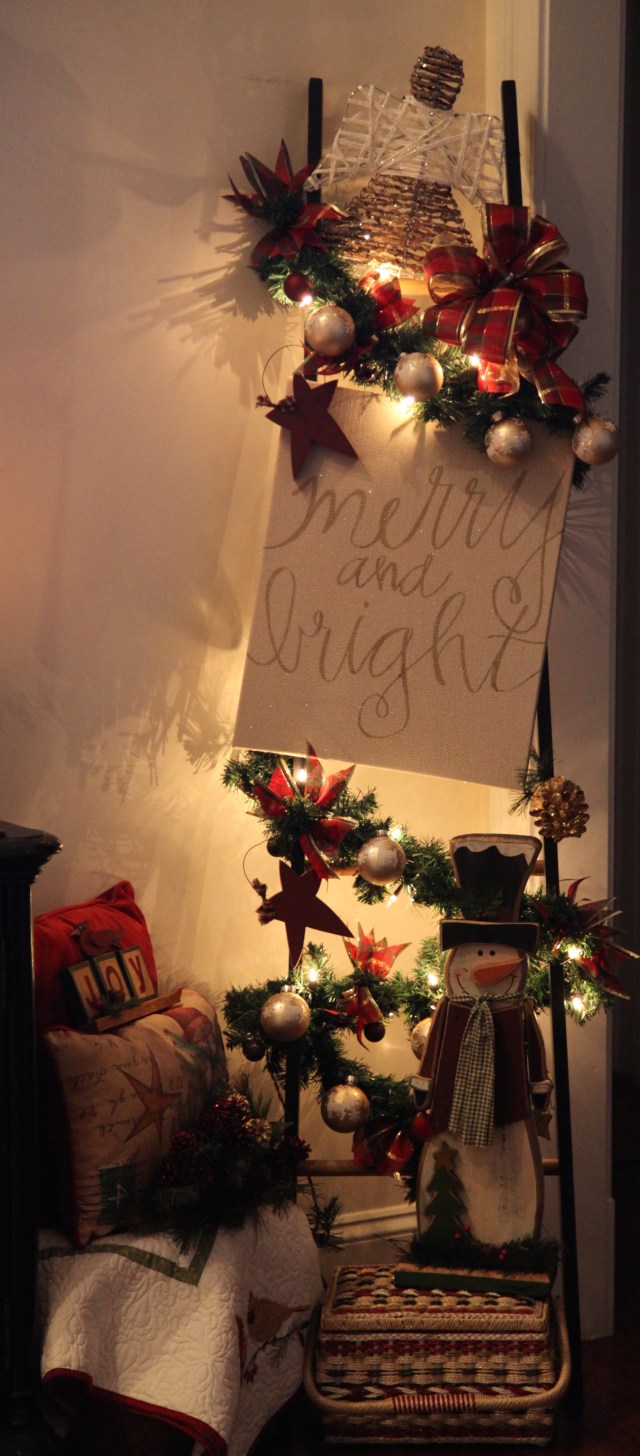
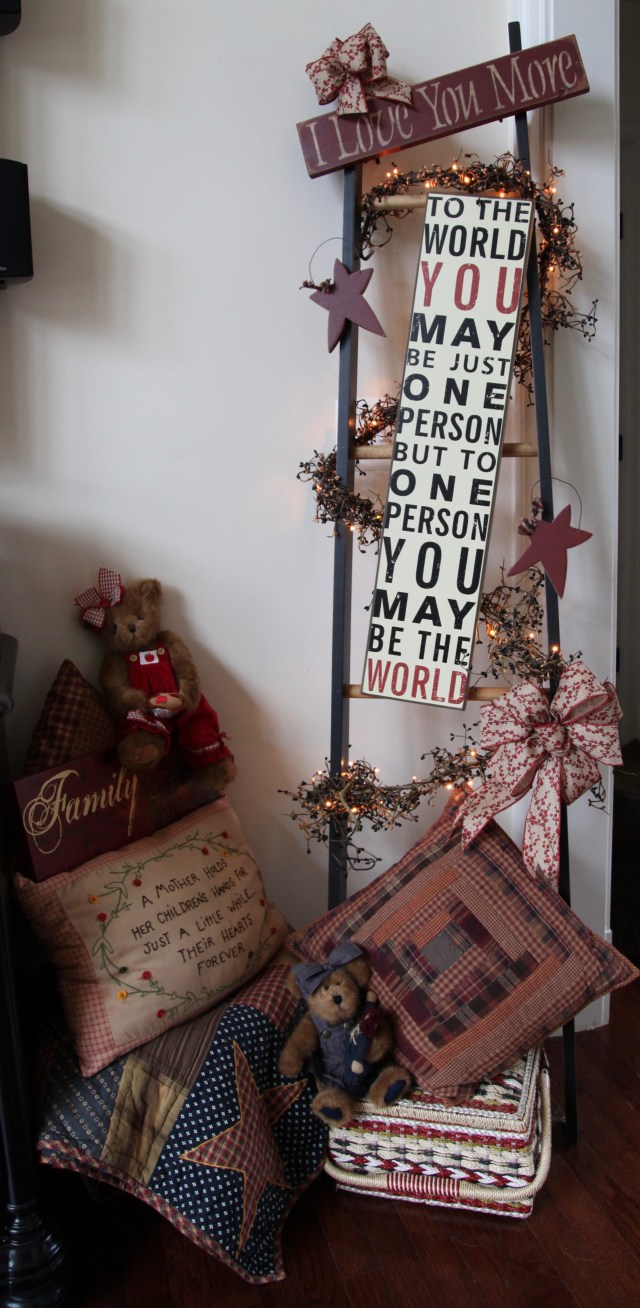
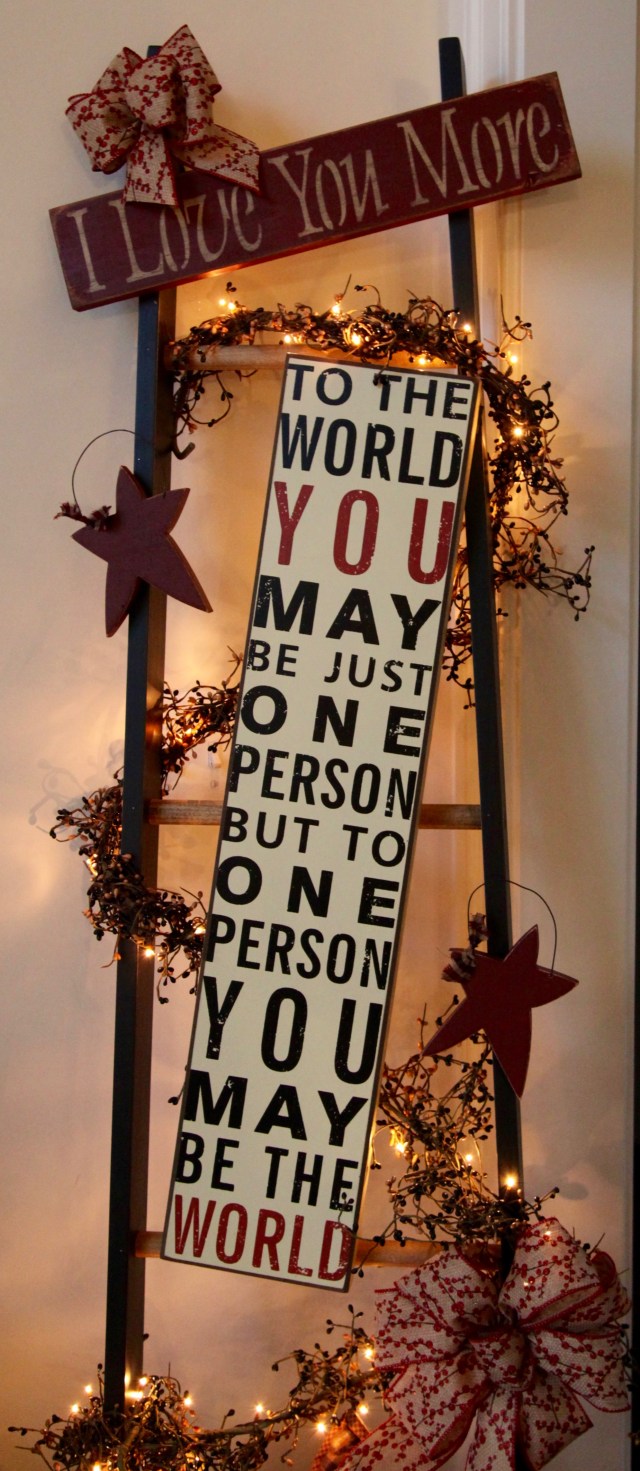
Now moving on to the corner decor on the other side of the credenza–I found those pretty pillows, wooden plaque, and that throw in our local “Home Goods” store.  As I began to create this ladder decor, I did remove the other pillows and generic accent pieces that I had there on the basket, but I didn’t touch the stuff on the ladder–I simply tied the throw onto a rung, arranged the pillows to my liking, and added my little bears back into the mix.  I love how this turned out in the end–I will admit, that I messed with this for quite a little while before I got it to where I was satisfied.

1V4A4745

As for the rest of the the spaces, I honestly just added a pop of the Patriotic here and there…

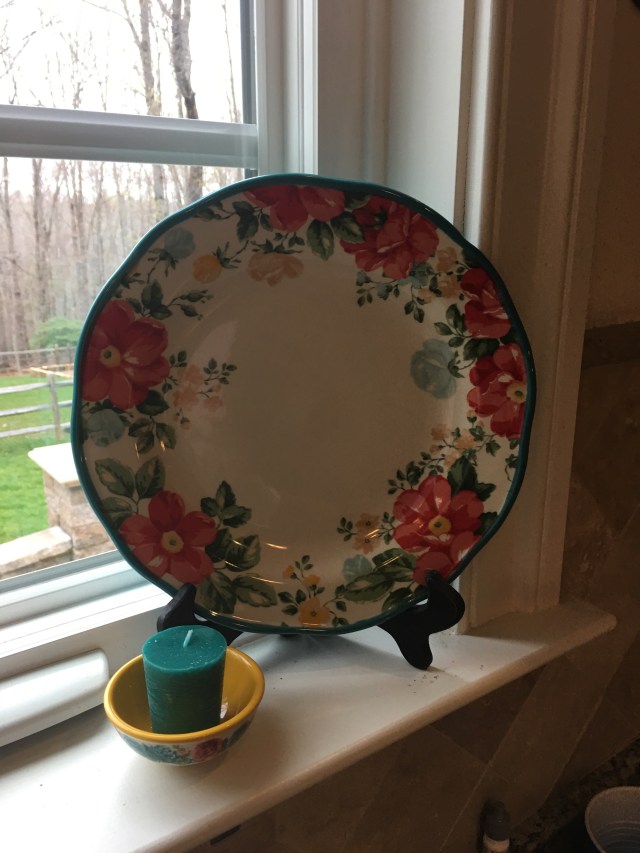
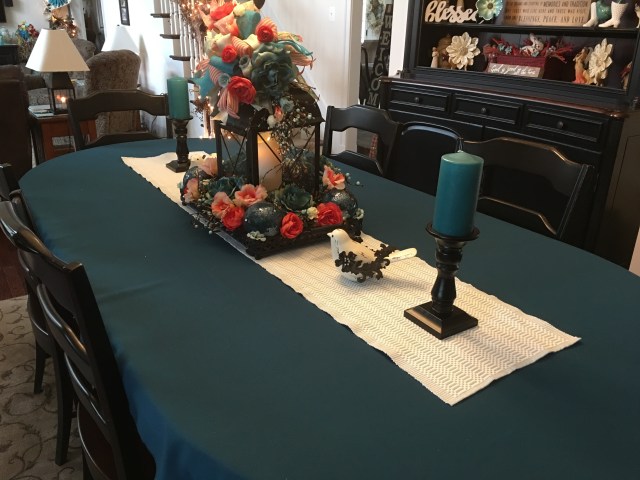
First, I changed out the table runners on the end tables in the family room and on the island in the kitchen, not that they are all that Patriotic, but they blend in nicely:

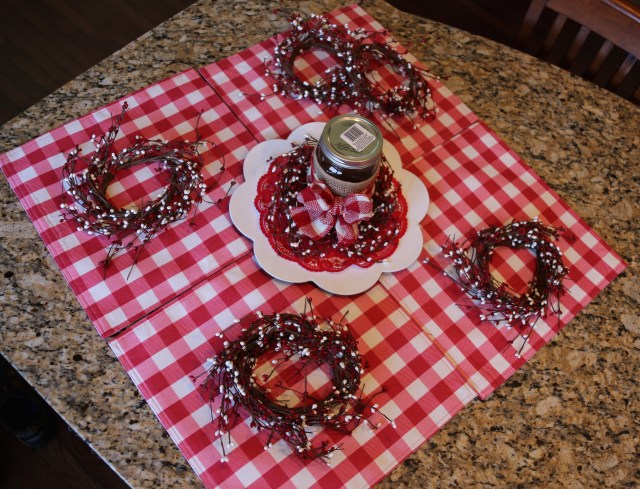
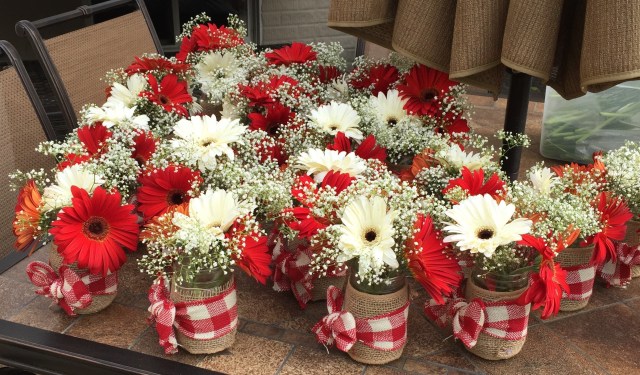
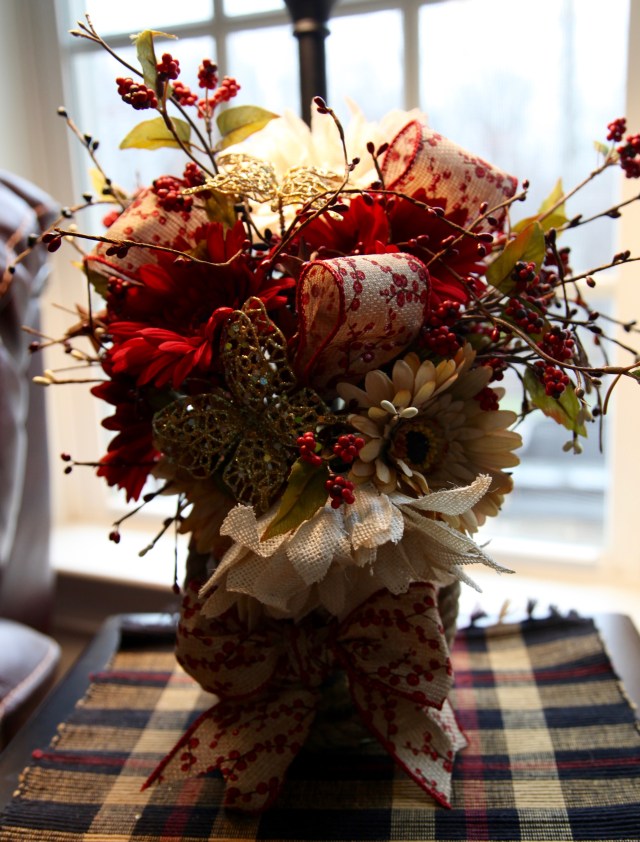
To the island, I added a red candle and put a red and white pip berry candle ring that I had made out of part of a pip berry garland simply by cutting a portion of length off and tying it together with floral wire.  I had made several of them last year to go around my mason jars & gerber daisies centerpieces that I used as part of our Family Reunion Decor And Craft Projects:

1V4A0509

IMG_7200

1V4A4774

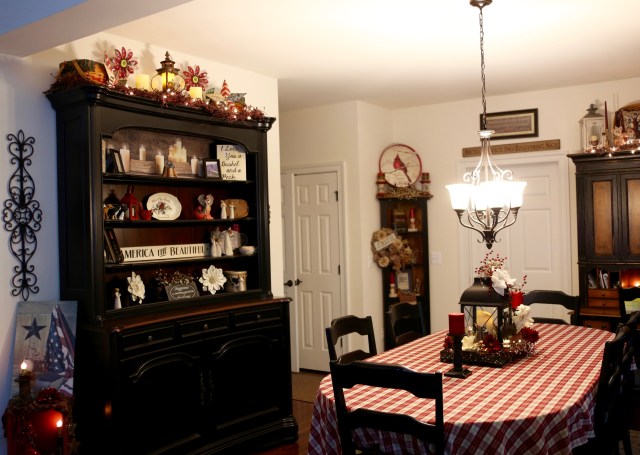
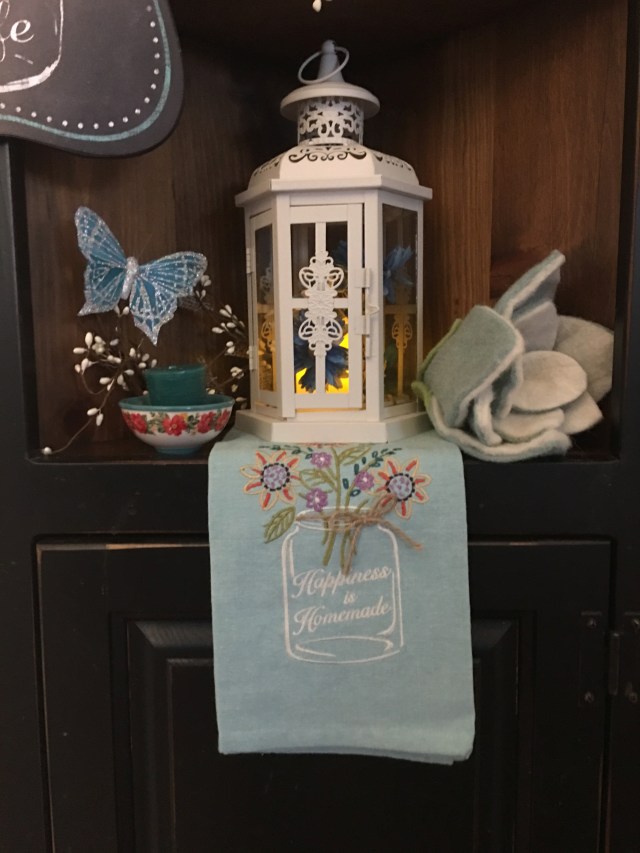
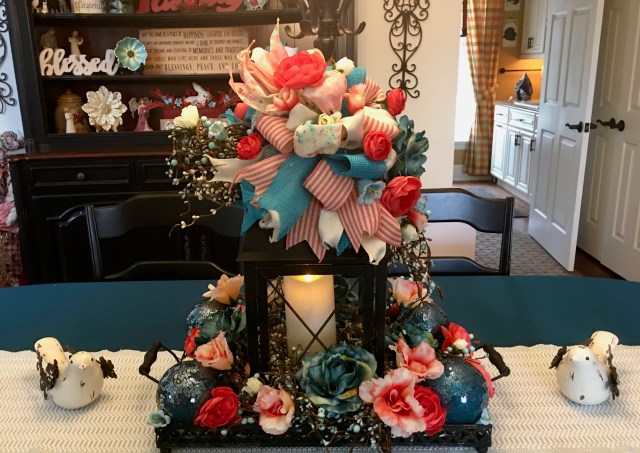
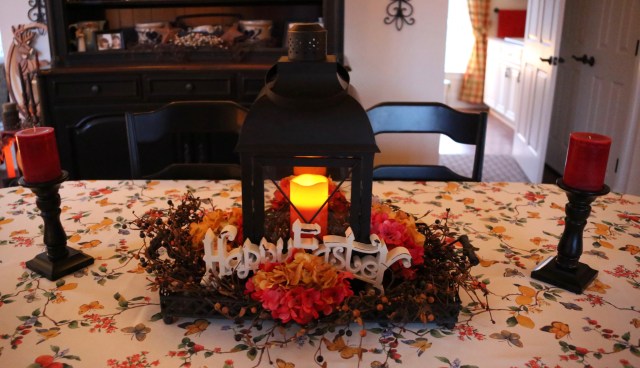
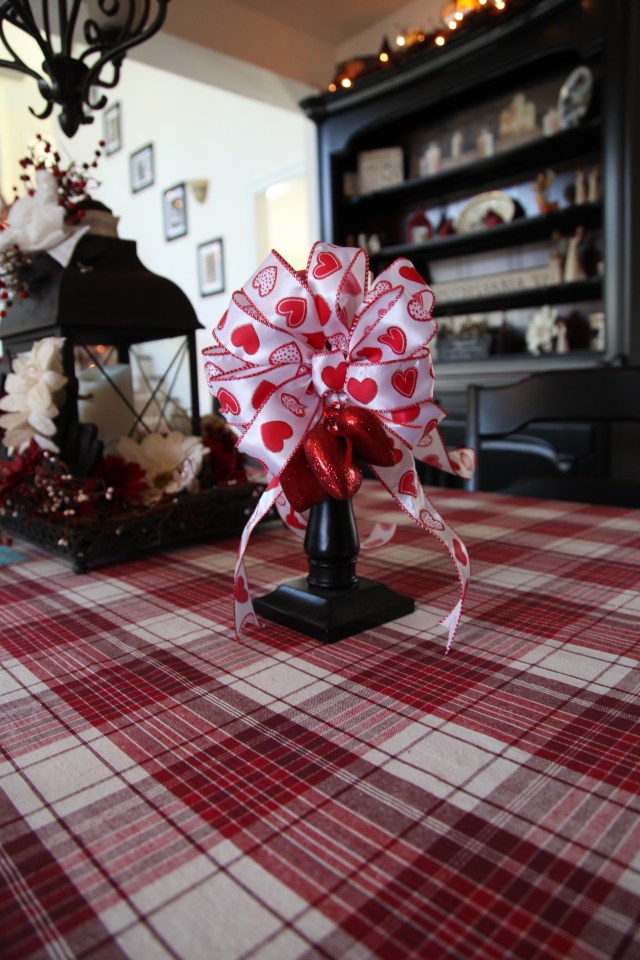
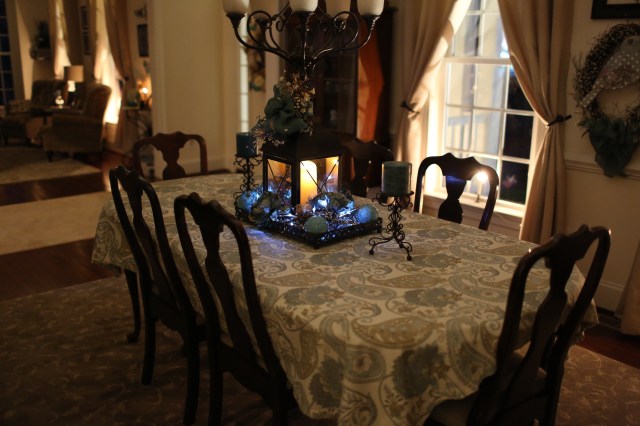
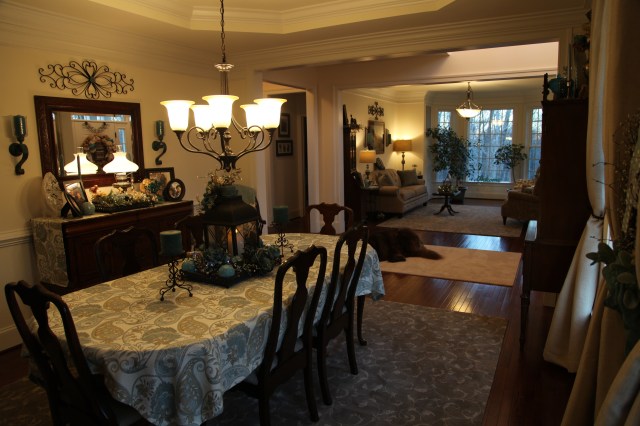
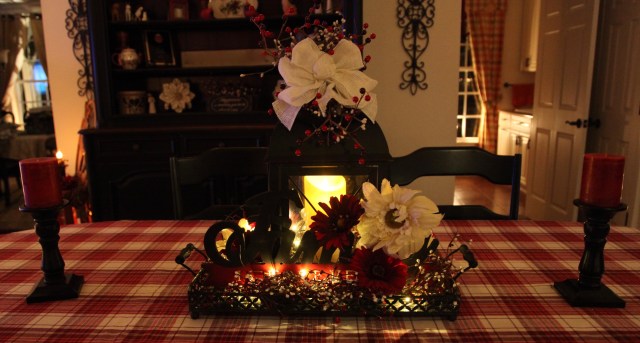
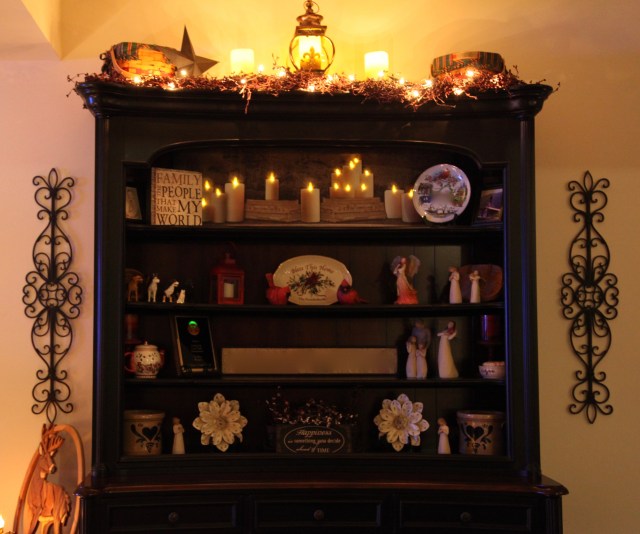
Next I moved to the kitchen table & hutch:

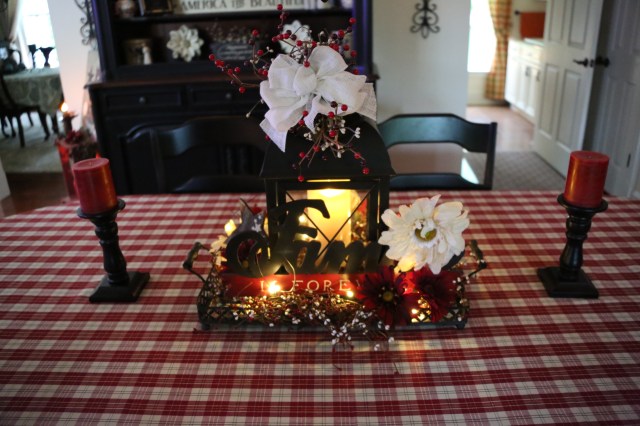
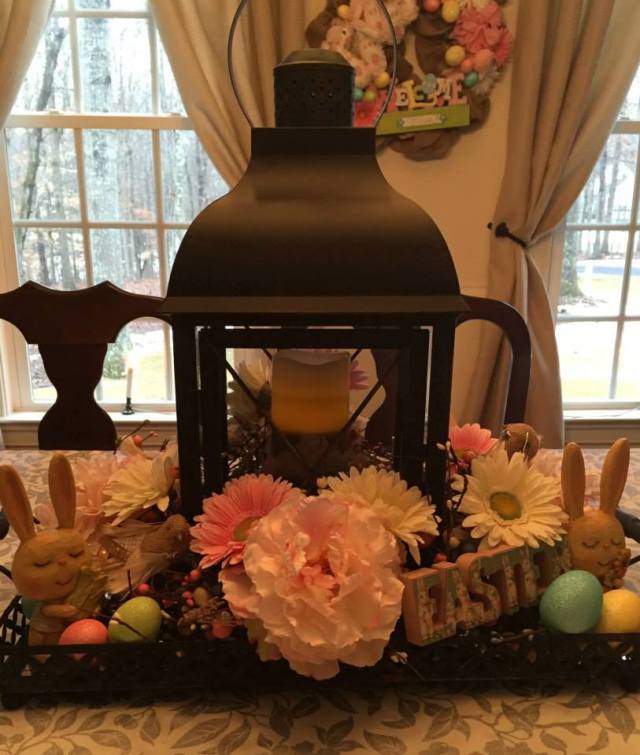
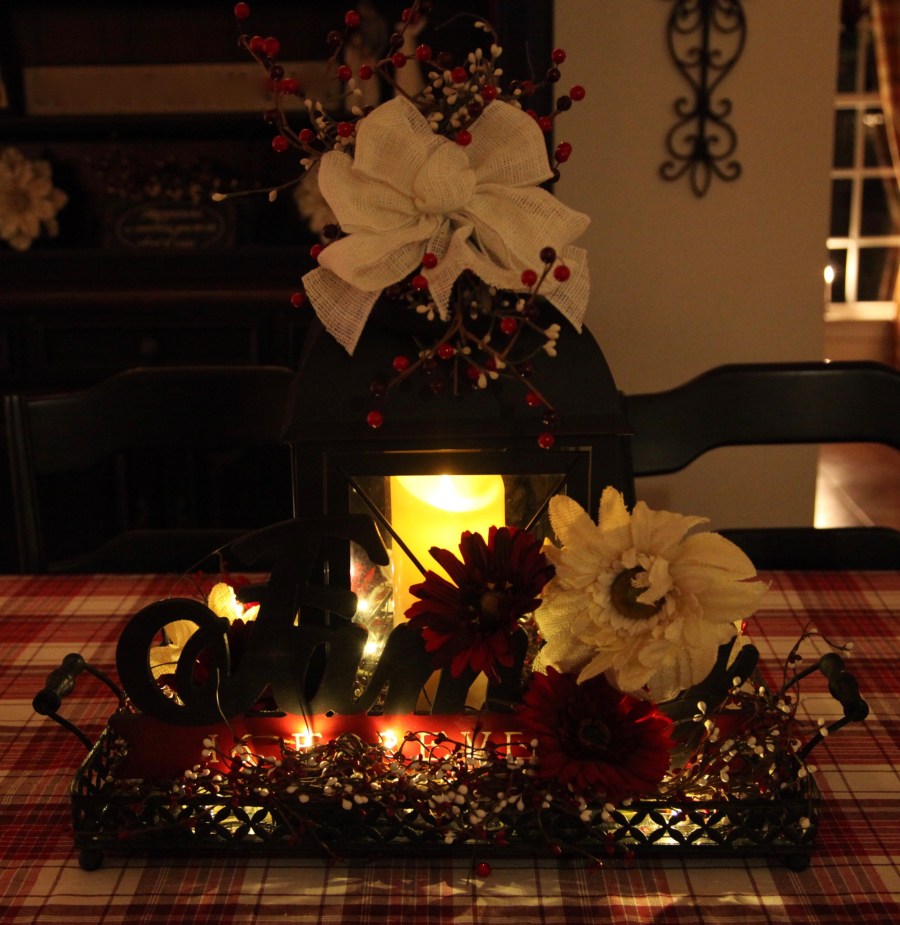
I switched out the tablecloth and added a couple of wooden stars to either side of the lantern centerpiece.  Here is a link to my A Lantern Centerpiece for All Seasons post if you’d like to make one of these for yourself, it is easy peezy to do, I promise! 🙂

1V4A4772

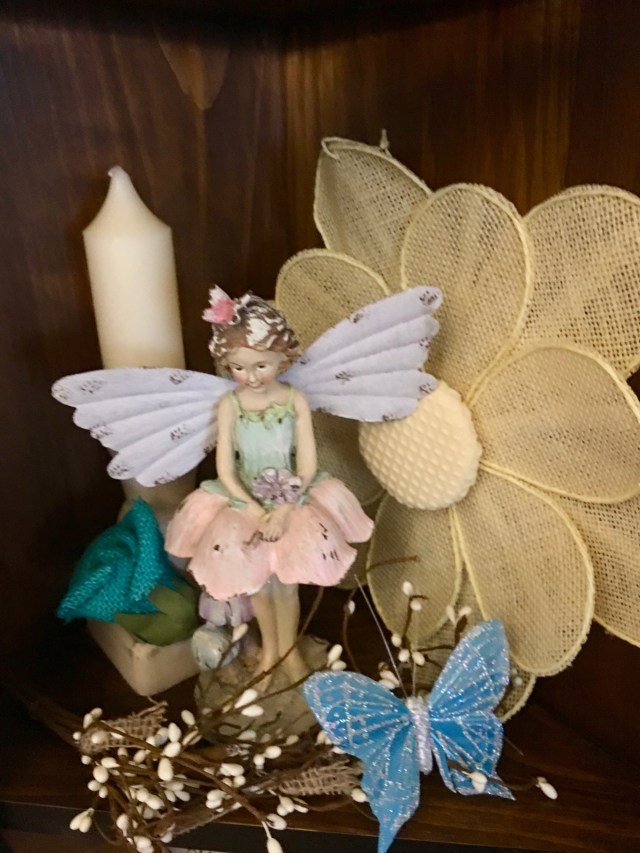
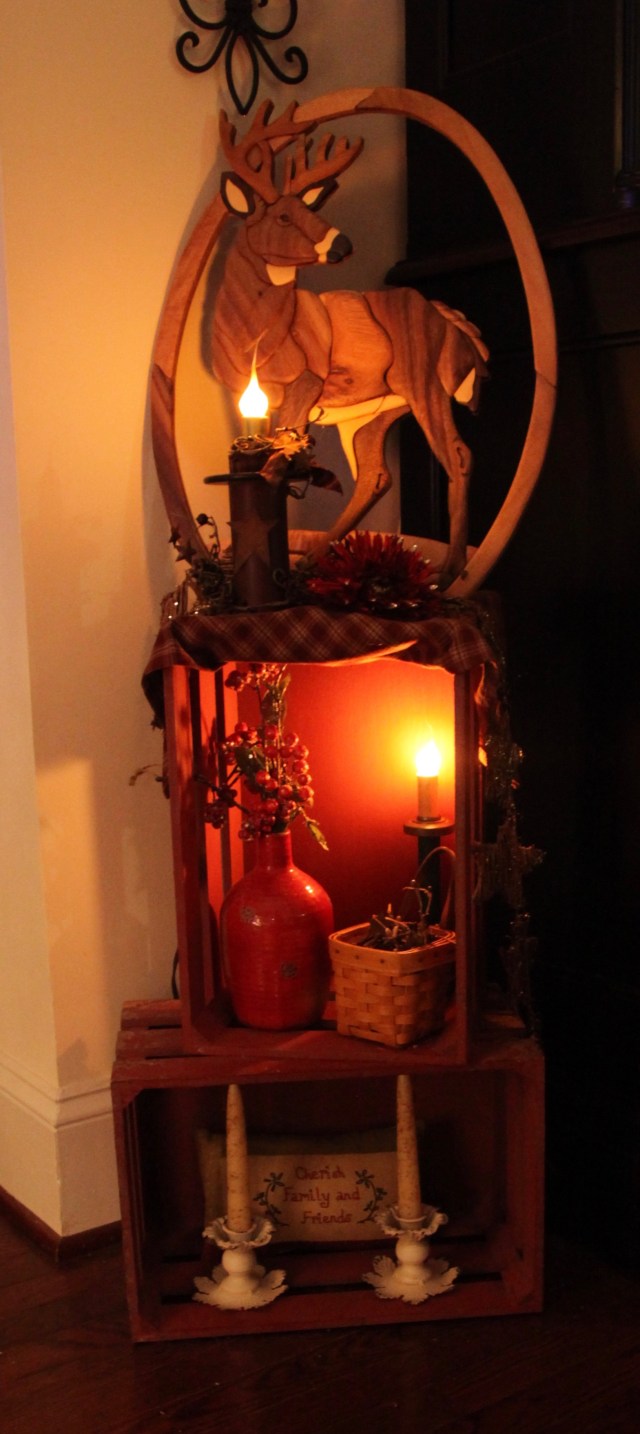
I added a couple of Patriotic stars, a plaque, and just a few other touches to the hutch and the crate corner decor (to the left of the hutch):

1V4A4771

And that did it for the inside, I didn’t want to recreate the wheel, but, I was ready for a bit of a change, and I love, love, love Patriotic touches…Now, moving outside for just a few more touches…

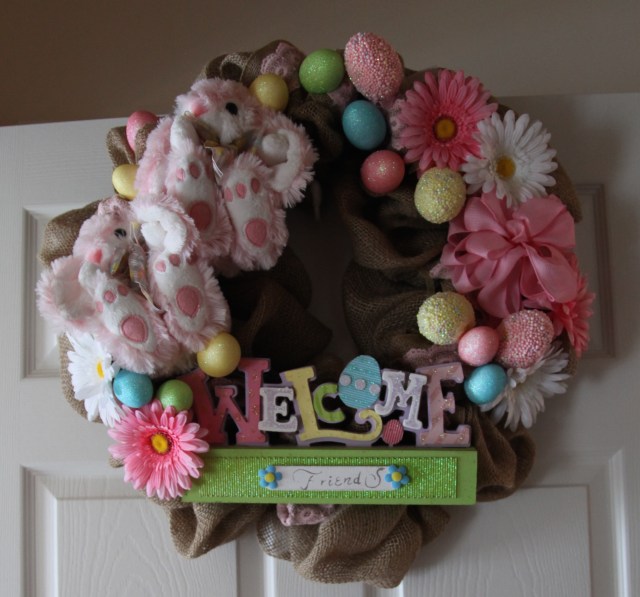
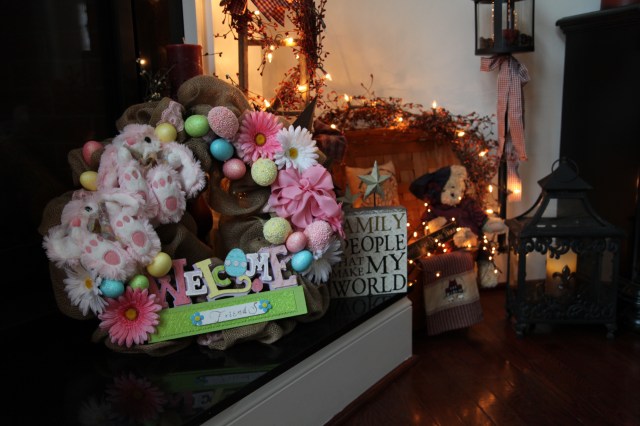
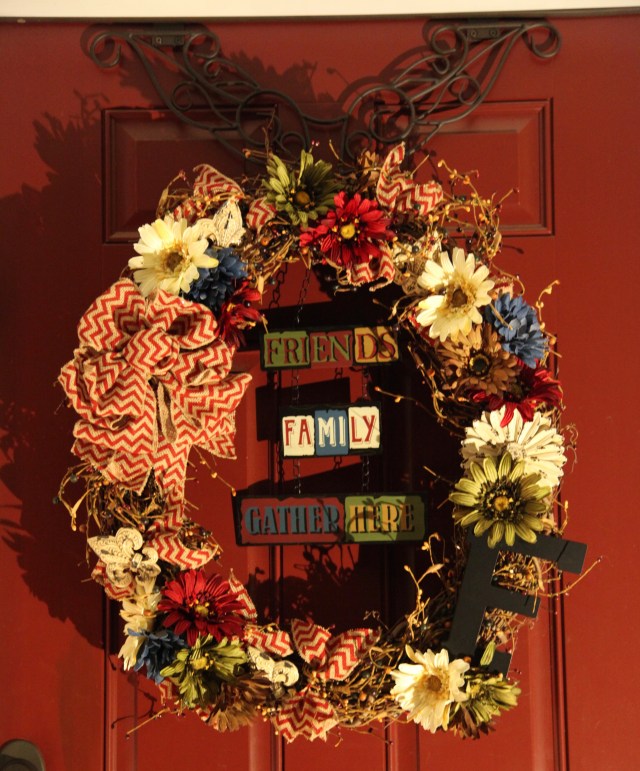
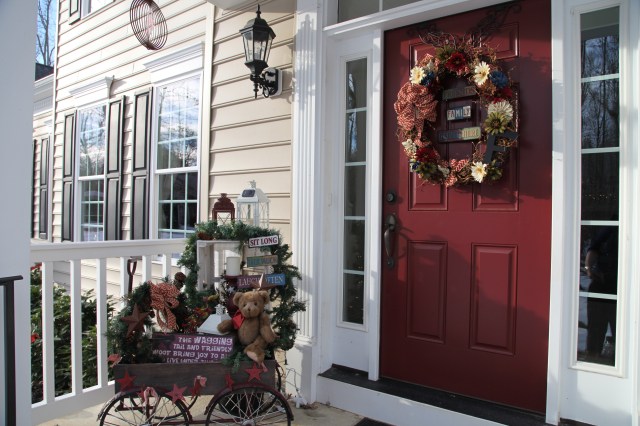
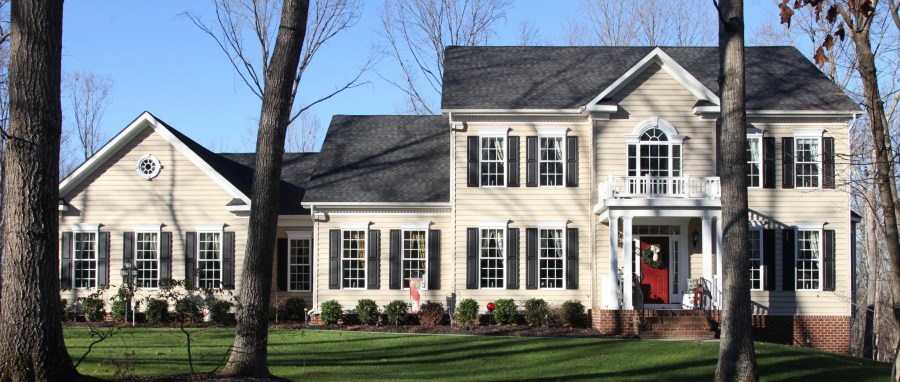
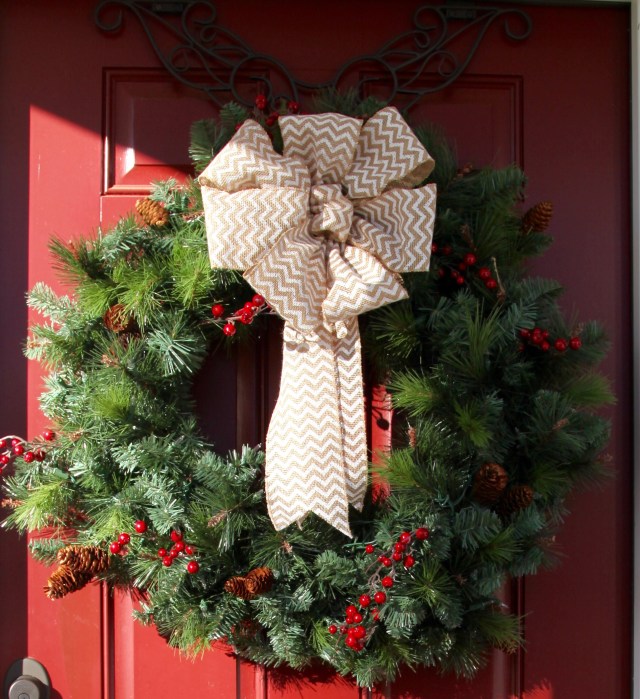
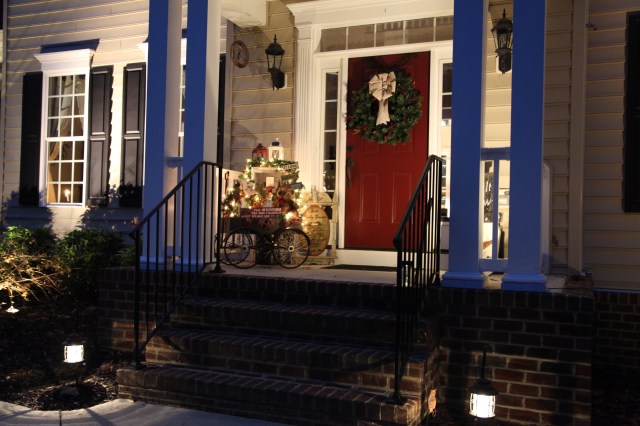
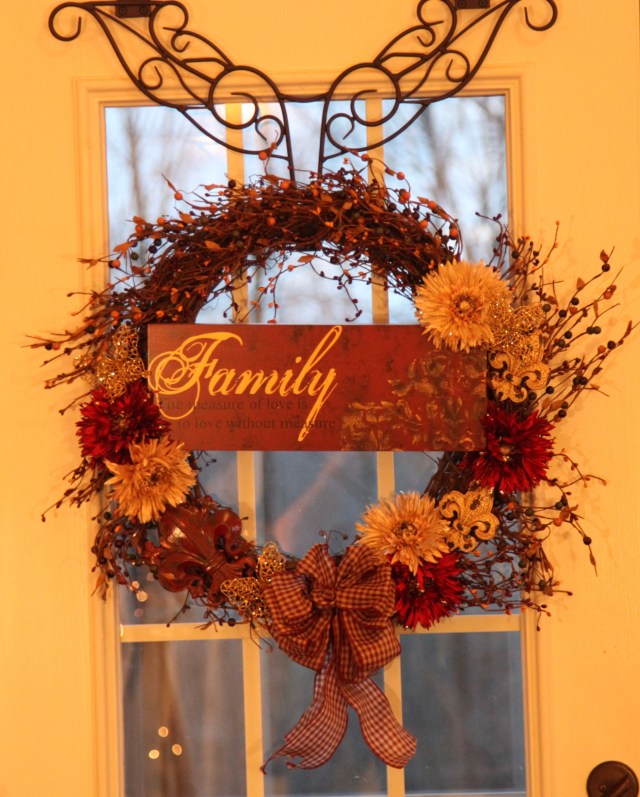
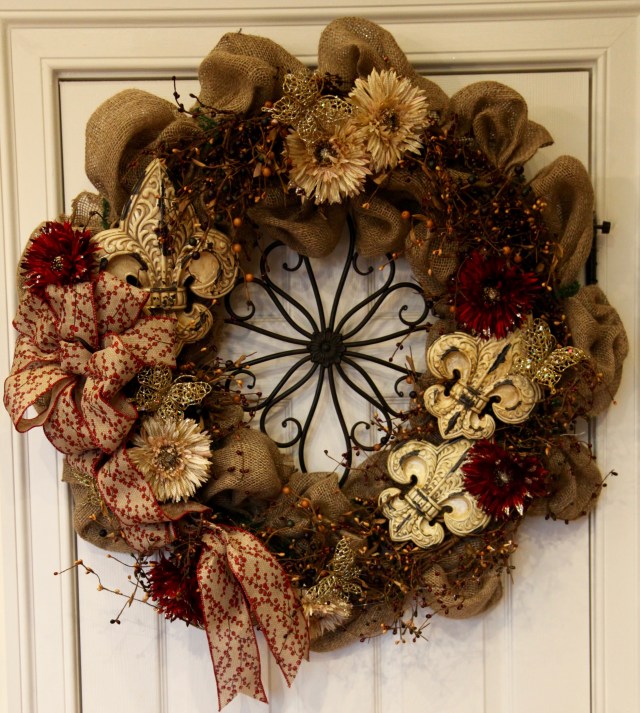
I had made this burlap wreath last year, so I hung it on the front door…

1V4A0847

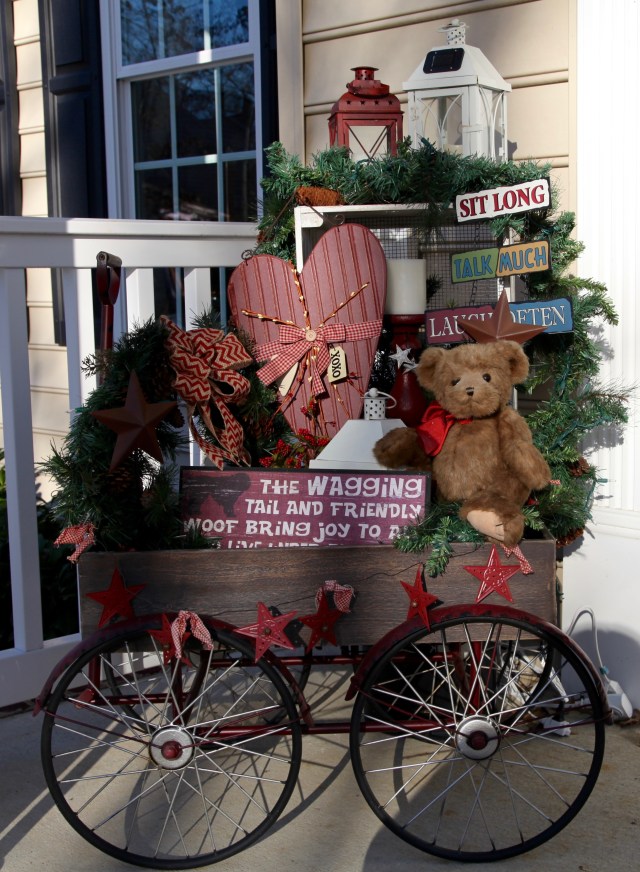
And I added just a few things to my Little Red Wagon:

IMG_1943

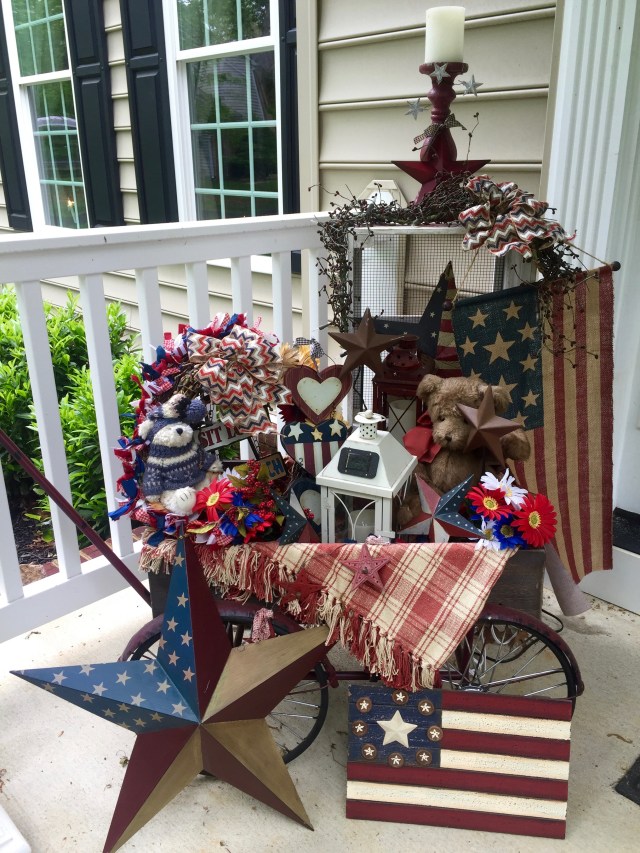
I found that wooden American Flag last year at Hobby Lobby, and I saw yesterday (5/13/16) that they still have it again this year:

1V4A4758

And that completed the front porch transformation:

IMG_1944

After that, the only other things that I switched out were:

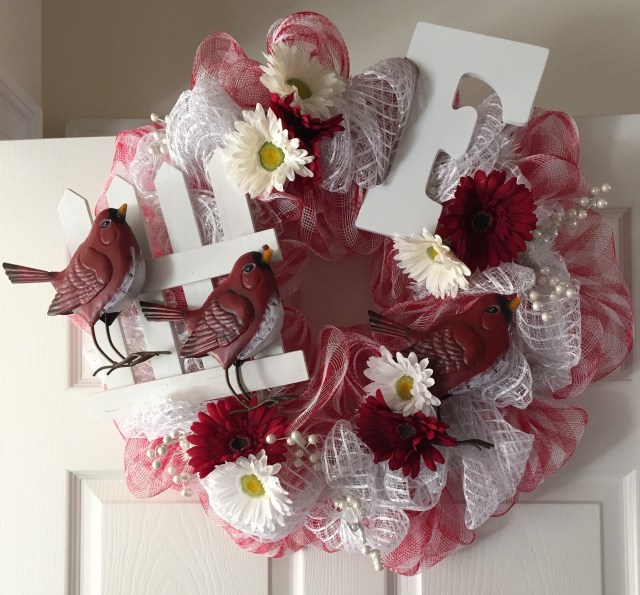
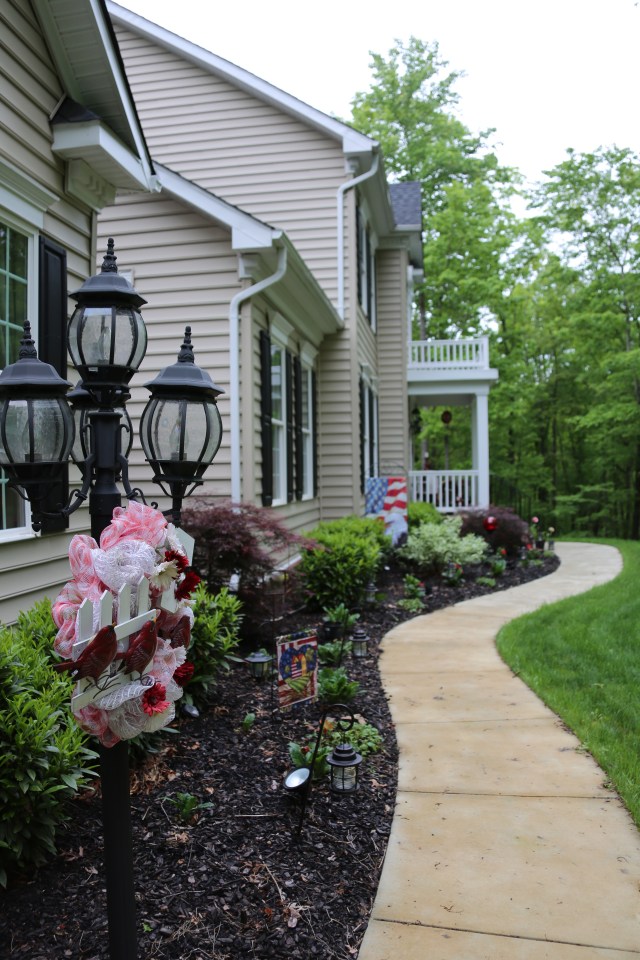
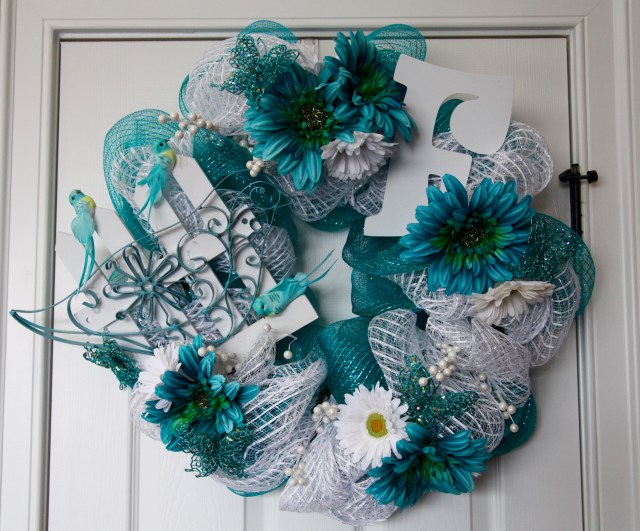
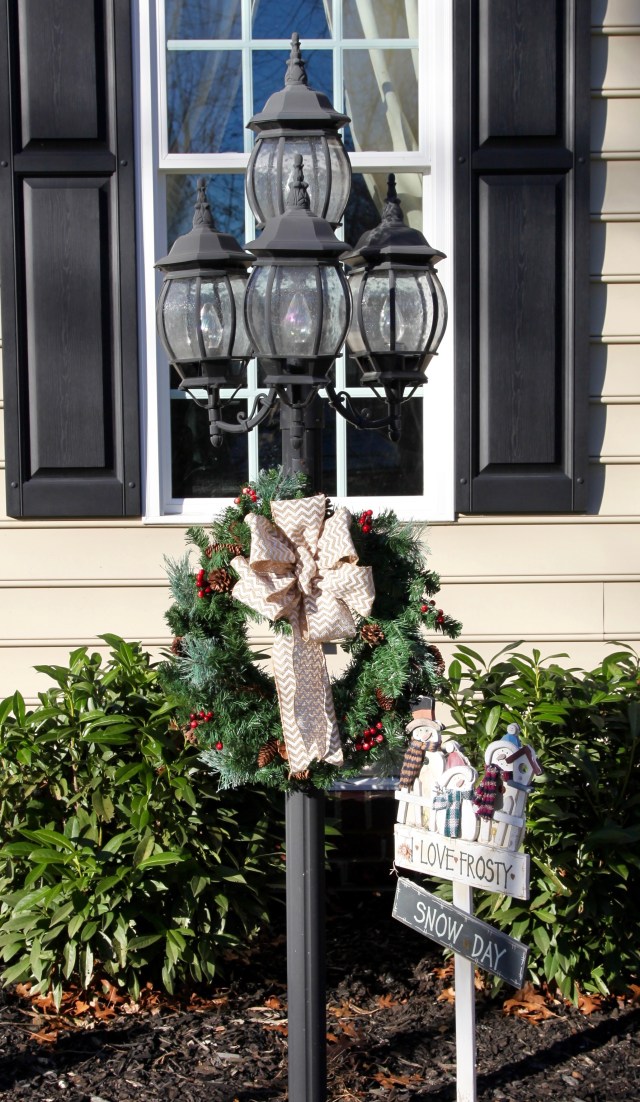
The deco-mesh wreath for the lamp post, I made this last Spring:

IMG_6906

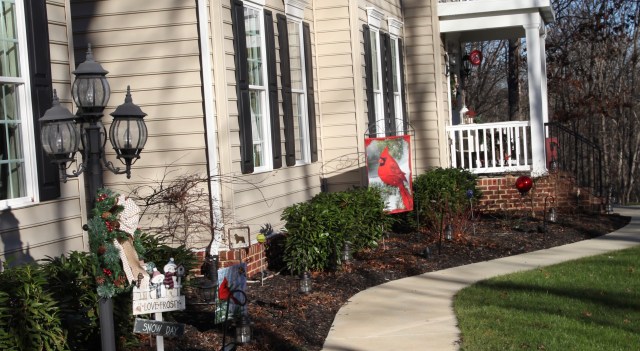
And I switched out my decorative flags and gazing ball:

1V4A47601V4A4762

And then I stood back to see if I had enough of a pop of the red color & Patriotic for my liking…And I was satisfied…

1V4A4763

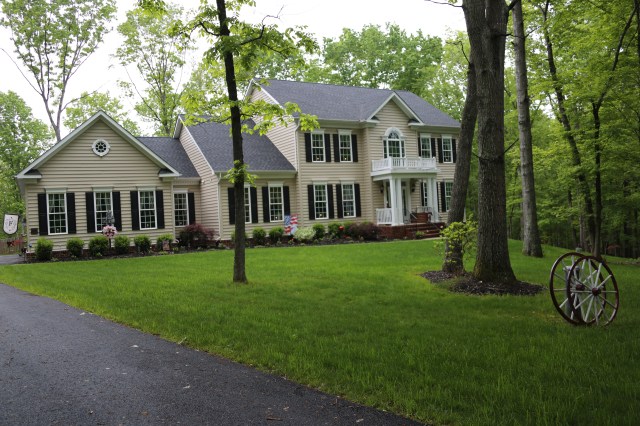
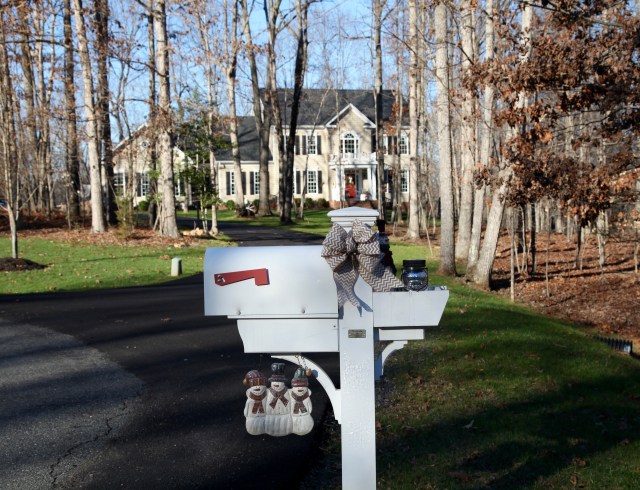
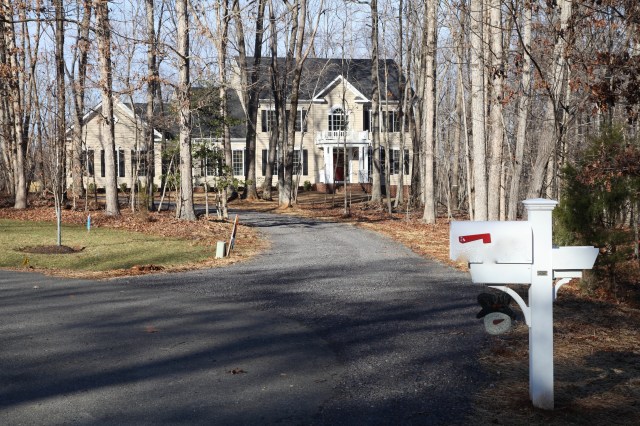
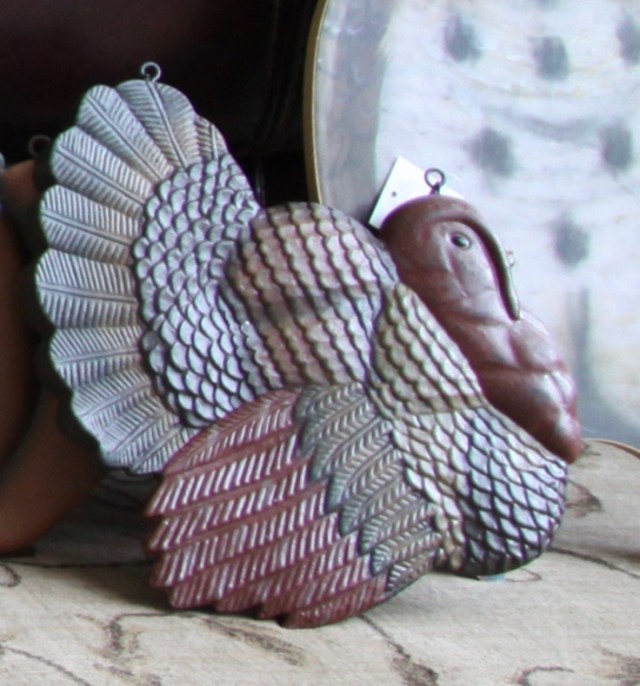
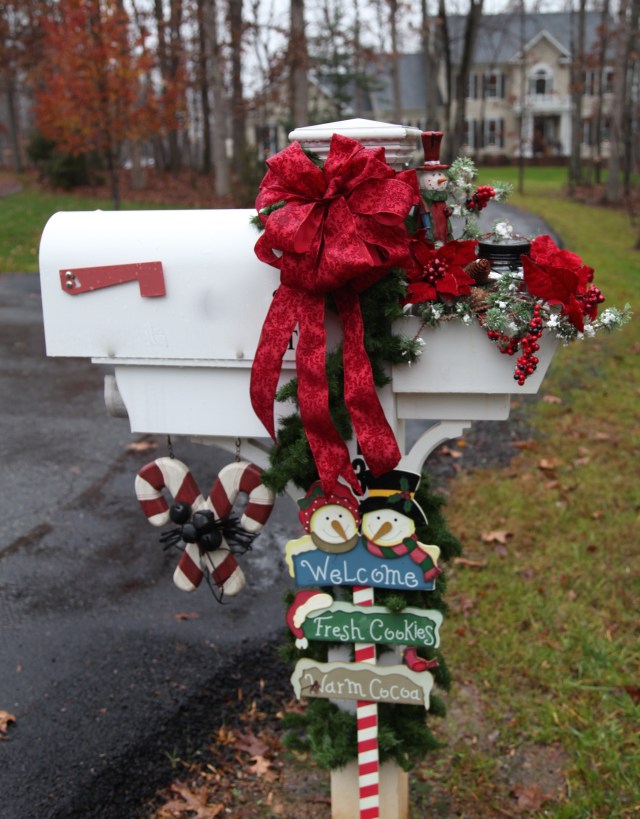
I accomplished all of these little things in just one day…The only thing I haven’t changed out yet is the mailbox decor, it will eventually look similar to this though.

IMG_7725

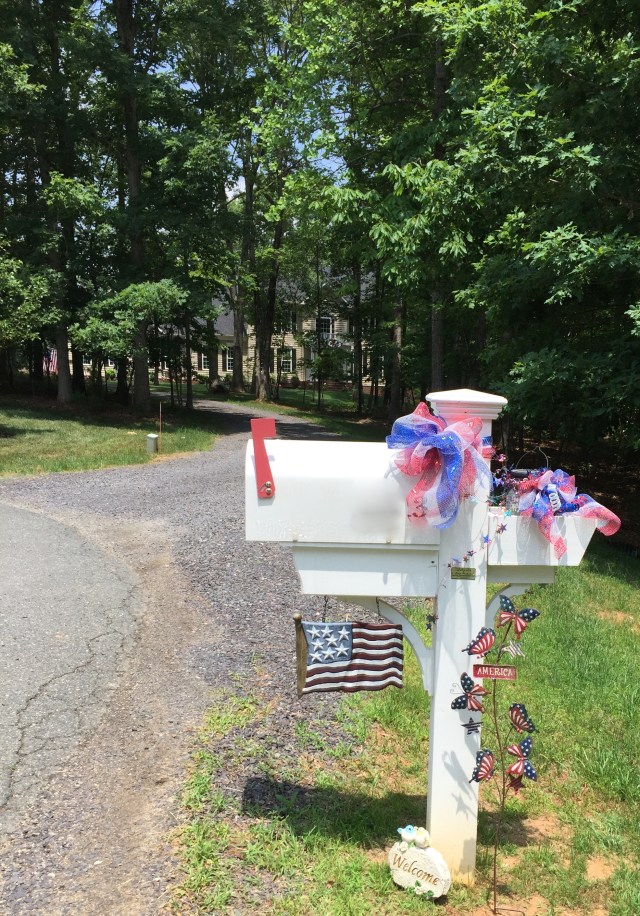
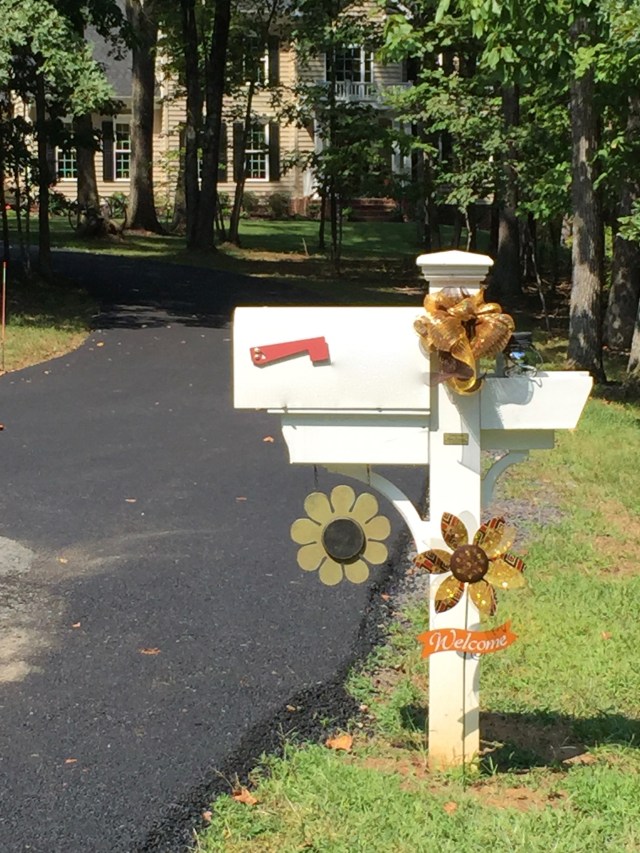
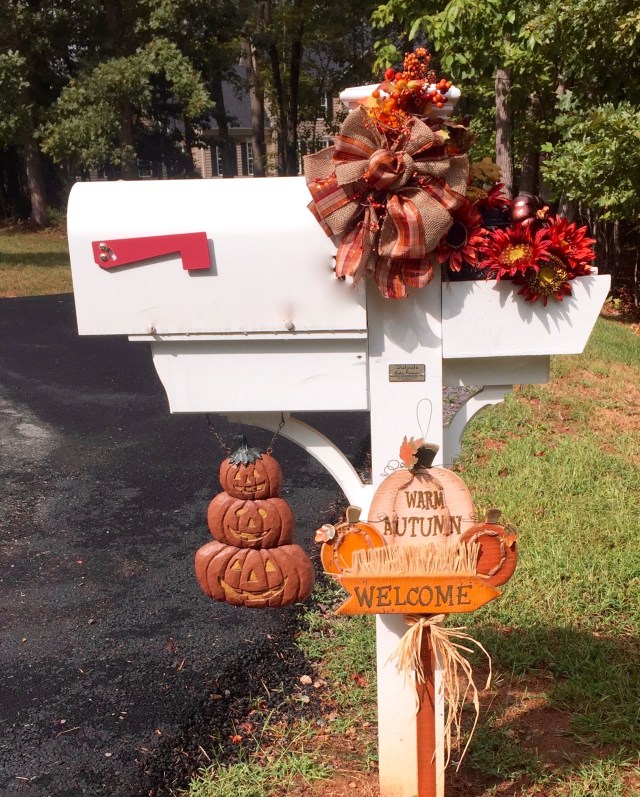
Here is a link showing you all of the different looks that my mailbox takes on…Seasonal Mailbox Decor


I feel much better now that I’ve done a little bit of tweaking to my inside and outside decor.  As I said above, this ‘look’ will take me through the summer months. NOW, if it will *just stop raining*! I thinks we’ve had 16 straight days of rain…I’m ready for some sunshine!! 🙂

Until next time, y’all take good care!

~Arlynn ❤


Easter & Springtime Transitions

“Lazy” is not a word that is *ever* used to describe me, “procrastinator” is not either, but, this year, the thought of switching my decor around for Easter and then Springtime has evoked both of those words into my swirling brain.  My hubby and I are leaving for a Hawaiian cruise in April and well,  I’d have to decorate for Easter then tweak said decor for Springtime all before we left.  NOT interested in doing that in any way, shape, or form, not to mention the fact that I am quite enjoying the redecorating that I did after Christmas, truly, I’m loving it ‘as-is’.  SO, I will show you what I did for Easter/Springtime last year. 🙂

The first thing that I did last February was to create a new Easter wreath:

11054306_10205861410564868_3204616970637005082_nIMG_9580

I will not bore you with the details as to how I made this wreath, but if you’d like to know the basic process by which I create a burlap wreath, click here and that will take you to one of my burlap wreath entries with a bit of a tutorial included. 🙂

When I made this wreath, I wasn’t sure where it would end up, as you’ll see in this post, it made it’s way from here to there until it landed on it’s final resting place through Easter. 🙂

This is the very first place that I place it:

IMG_9585

It didn’t take me long to move it to another location, it was way too bright (for lack of a better descriptive word) for the fireplace space.  So I moved it to my dining room and I made a lantern centerpiece to match…

IMG_6595

Here is a closer look at the centerpiece…

11025802_10205867980249106_6163841860063345285_n

Again, I will not bore you with all of the details as to how I put this centerpiece together, but, if you’d like to do one for yourself, click here for some more detailed instructions. I was really happy with how this turned out; so airy and whimsical, it sure brightened up that room.

Next, I moved to the family room and to the hearth and mantel…

1V4A0202

This decor lends itself to more of a country feel and I honestly didn’t remove any of my everyday accent pieces, I simply moved things around to accommodate a few bunnies (ceramic, wooden, stuffed, and muslin), an easter egg garland, and I made a bow or two to match…

1V4A01991V4A0198

DSCN0026

Next, I moved over to the kitchen table…

11091296_10206077559888466_6839792587462378512_n

I had never purchased “Spring” dishes before in my life. But, last year I found these plates at Home Goods for $5 a piece, the tablecloth for $15 (60×104), and the napkins for $5 for 8…awesome prices. I went to Hobby Lobby and picked up some flowers (to redo the lantern centerpiece to match the tablecloth and napkins) all of which were 50% off that week. Oh yes indeed, I made out like a bandit.  I also made the little napkin rings…easy peezy, I just tied a ribbon around the napkin and hot glued sweet little silk flowers to the tails of the bow.

1V4A0348

1V4A03381V4A03461V4A0348

After Easter, the tablecloth remained on the table for the month of April and I replaced the “Happy Easter” sign in the centerpiece with some pretty metal birdies and some wooden daisies…

1V4A0413

Okay, so the inside was tweaked for Easter and a wee bit for Springtime (although honestly, my basic decor doesn’t change all that much for Spring except for that all of the gerber daisies that I have scattered about starting at right after Christmas finally come into Season…haha). 😉  I DO love me some gerber daisies!! 😉

ANY hoot, I digress, I set my sites on the outdoors…The first thing that I did was make a pretty Spring deco mesh wreath to hang on our light post.  Again, I’ll not bore you here with the ‘how-to’ details, but if you’d like to see how I put my deco mesh wreaths together, click here… These are the materials that I gathered up for this particular deco mesh wreath:

10407351_10205861410604869_7747308601039633720_n

And here is what I created:

IMG_95751V4A0260

I also replaced the decorative flag to match that wreath.

1V4A0233

Next, I decided that I wanted to add a little Easter’y’ somethin’ somethin’ to the front porch.  So, I grabbed that wreath off of my dining room wall (replaced it with a picture) and grabbed up some crates from my basement and utilized my grandmothers milk can that is always sitting out there and created this little “cozy corner”.  (If you would like to see my basic instructions for cozy corners, click here). Here is what I came up with, that wreath had found it’s final resting place…;) …

1V4A02281V4A0231

I did this before I purchased my little red wagon.  Click there if you’d like to see my little red wagon and how I switch the decor out to match the Season. That little wagon will be an awesome tool when I go to decorate for Spring *next* year. 🙂

Last but not least, I redecorated my mailbox utilizing the same basic idea that I describe in my Seasonal Mailbox Decor post.

1V4A0215

As you can see, we didn’t have our driveway paved last Spring, that big project happened this past summer. 🙂

1V4A0236

Here is the house with the driveway paved…IMG_3570

I’m a little bit sad that I won’t be switching things out for Easter/Springtime this year, but, some years are just busier than others, and this year we have other things happening.  Thankfully, our daughter will be staying here while we are away watching the house and the pups…I’m sure they won’t mind that the decor is going to be staying in the more generic realm. 😉

IMG_3482

Until next time, y’all take good care!! ❤

**In crafting there are no mistakes, just unique creations**

~Arlynn ❤


Seasonal Mailbox Decor

I was so excited to move into our new home a few years ago for many reasons not the least of which was where our mailbox was located and that in our neighborhood it seemed to be a *thing* to decorate on and around mailboxes. YaY!!   Of course this idea fell right into my wheelhouse so the creative juices started to flow and I started to plan out how I would be changing my mailbox decor as the Season (or in most cases the months) change.  The first thing that I came up with was that I was going to utilize all of my wooden hanging signs that I’d been collecting for over a decade.  I used to hang them on a bracket off of the front porch of our other home.  Here is a link to where you can find the sign bracket.  I do not use the bracket on my mailbox, but you could use it on your front porch, on a fence, or on any number of other places. Here is a picture of the bracket–that is not my sign though..;)

5126

Here is a picture of all of my signs save for the wooden heart that is hanging out on my mailbox right now:

IMG_4230

If you’d like to purchase them they can be found at here at PiperClassics.com…

C-Hook-Wood-Screw


All of the signs come with little chains attached to the top of them so we screwed little hooks into the underneath wooden portion of our mailbox.  This made the signs super easy to change out.


You’ll also notice that our mailbox has a trough that juts out of the back; that is a pretty spiffy little addition and it provides me with another receptacle with which to decorate. 🙂

IMG_3509

I found this solar mason jar to sit in that trough at Home Depot, gosh it does look pretty in the evening hours.

10355472_10204061567129907_2990622319743943291_o

For a little while, I had two of them sitting in and on the trough…

photo 3

I’ll now show you how I change out the mailbox decor as we go through the months and seasons of the year. 🙂

Both of these pictures were both taken the very first January that we resided in our new home:

IMG_3509

There are our Newfoundland doggies Sophie and Samson. ❤

IMG_0191

February:IMG_6057

March:IMG_0104

April:1V4A0215

May and June:1V4A0407

July:IMG_7725

August:IMG_8724

September:IMG_6821

October:IMG_8940

November: **I received Mr. Turkey this past Christmas, so he’ll take his rightful place on the mailbox next November**IMG_4228

December 2014:IMG_7722

December 2015:IMG_2901 (1)IMG_2900

And then back to January again:IMG_3570

And just the other day, I changed things out for February:IMG_4198

For years and years…actually for decades…when we lived in our other home, our mailbox was located across the street from our house and it was situated immediately next to another mailbox.  Its location didn’t lend itself to festive decorating hence my excitement about being able to decorate this new mailbox.  My hope is that this silly mailbox might provide folks with a warm, welcoming feeling as they enter our driveway; as y’all know, bringing forth a “warm & welcoming” feeling through my decorating is always my goal. 🙂

Until next time, y’all take good care! ❤

**In crafting there are no mistakes, just unique creations**

~Arlynn ❤


A Few Outdoor Changes for Valentine’s Day

February has arrived and as often happens when a new month arrives (especially one with a spiffy Holiday included) I get inspired to do just a few little decor tweaks outside.  I typically do not redecorate the inside of my home for Valentine’s Day or St. Patty’s Day, but I do try to be a bit festive outside. As y’all know, I made two Valentine’s Day deco mesh wreaths, one in pink and white with just a touch of red and one in red and white… <~~~Those links will show you how I put both wreaths together quickly and easily. 🙂IMG_4169

IMG_4188

First, I had to decide where I wanted to place that pink and white wreath because, let’s be truthful here, it really was completely different than the red one and would not look all that wonderful paired with my other red accent pieces that I have scattered about outside. So I chose to hang it on the wagon wheels that sit out in the front yard (they camouflage our well pipe)…

IMG_4200

I feel that it sits far enough away from the house that it doesn’t compete too too much with the rest of the red decor…

IMG_4203

The sidewalk’s light post is where I chose to place the red wreath, it pairs nicely with the cardinals on the flags and the red gazing ball…

IMG_4204IMG_4206

Then I moved to the front porch…I didn’t put any Valentine’s Day accent pieces on there, but, I did change out the front door wreath for one that I had made last summer right before I started writing this Blog–therefore, I did not take pictures of the creative process when I made this wreath…my apologies.  My idea with this wreath was to create something that I could hang up anytime of the year…in other words a more generically accented wreath.

IMG_4220

Then I moved to the little red wagon that I have sitting on my porch…

IMG_4215

Here is a link to My Little Red Wagon blog post showing you all of the different ways that I utilize this one “staple” accent piece…

IMG_4217IMG_4209

I love how it looks in the evening hours too…

IMG_4223IMG_4225

If you’d like to see how we came up with the accent lighting (up lights, wash lights, walkway lights, and the lights in the windows and the story behind those), check out my Special Outdoor Lighting post.

The morning after I took these pictures, the sun was shining beautifully and I was doing some organizing and came across this cute wooden heart…I went ahead and added it to my red wagon arrangement….

IMG_4226

I also took a minute to take a picture of my sweet Brown Newf Samson. 🙂

IMG_0328

Last but not least, I did make a bow and added some sparkly hearts to it and I tied it onto our mailbox…

IMG_4192IMG_4198
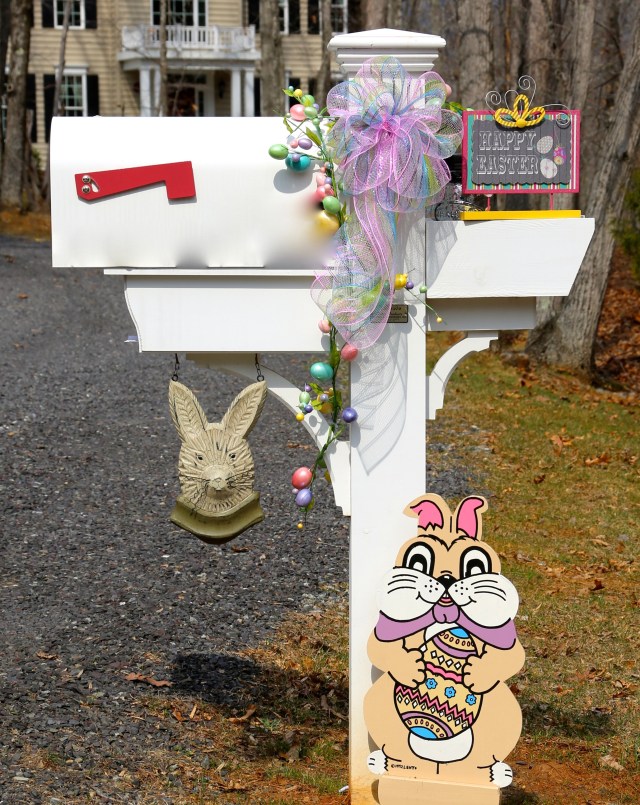
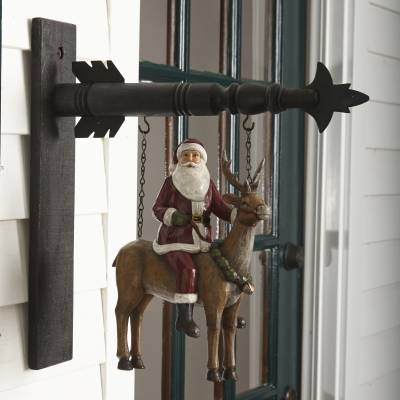
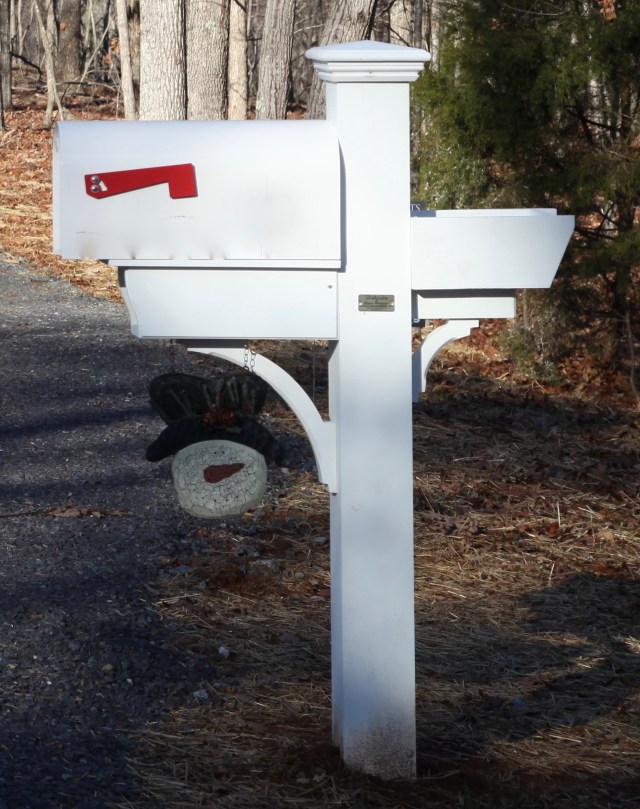
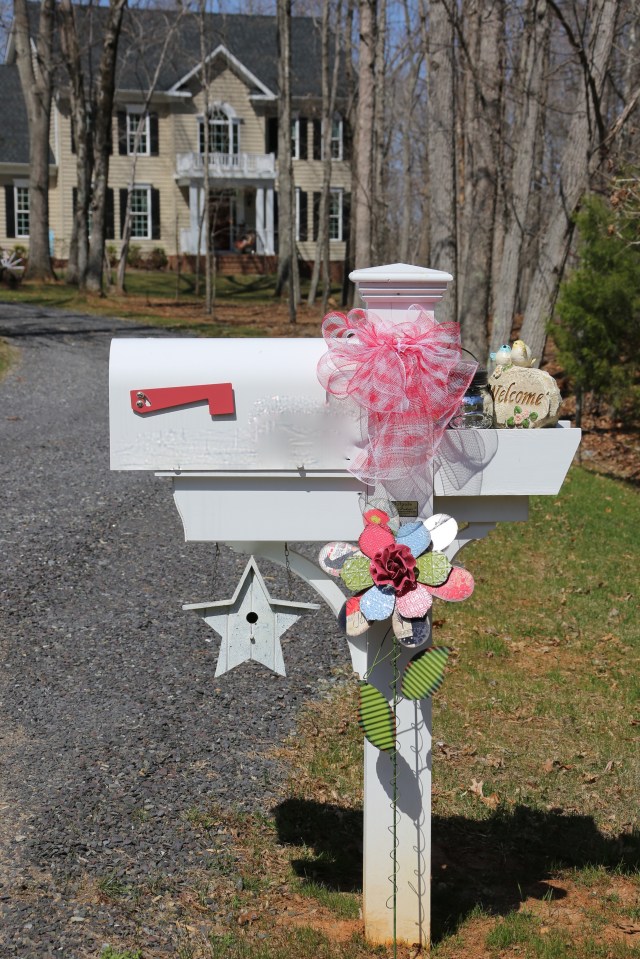
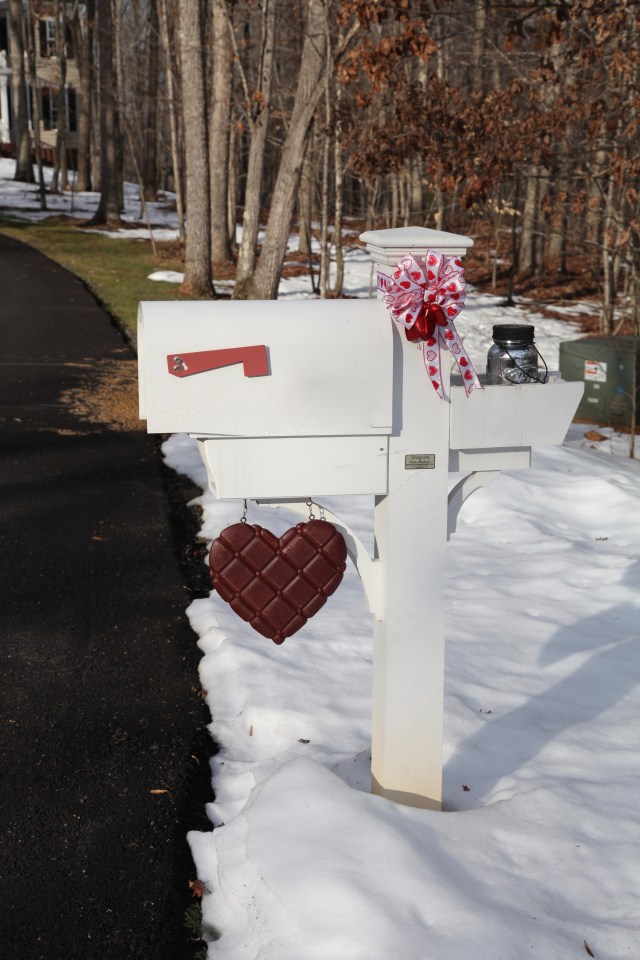
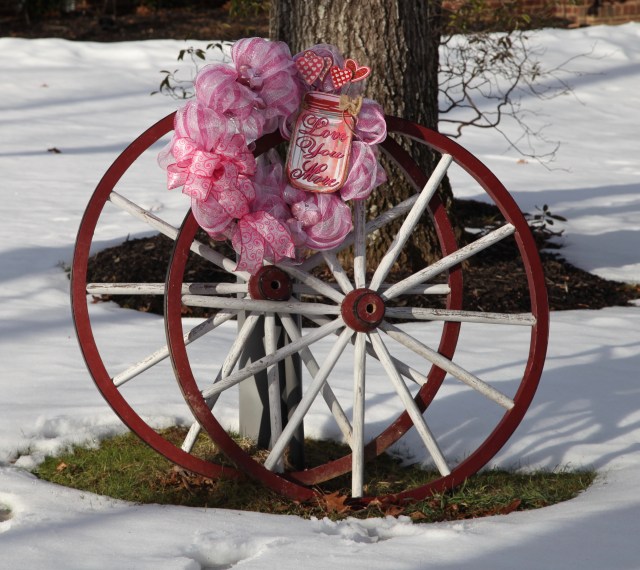
See that wooden heart hanging under the mailbox? That is actually meant to be hung on a little decorative pole (I had it hanging on the front porch of our other home).  I didn’t have a place that I wanted to hang the decorative pole here at this house, but, I’ve been using all of the “signs” that I collected throughout the years to augment my mailbox decor.

IMG_4199

So, now, I’m all set for the month of February, I truly don’t do too much redecorating inside of the house through the winter months so adding just a little somethin’ somethin’ to our outdoor spaces keeps me tapping on those creative juices. 🙂

Until next time, y’all take good care! ❤

**In crafting there are no mistakes, just unique creations**

~Arlynn ❤


Transitioning: Outdoor Touches

I try to be a positive, upbeat person all of the time, I figure I have so much to be thankful for and I’m extremely grateful that I can put my feet on the floor each morning and traverse through my day with only a semblance of pain (in my knees…stupid things).  Regardless, I would be fibbing if I said that I am a lover of the winter months because honestly, looking at the trees devoid of leaves is not my favorite site to behold. 😉  SO, I try to brighten my world a bit by adding some pops of my favorite color red into my outdoor decor, nothing too over the top just a little bit of somethin’ somethin’ here and there.

This was the house all decked out for Christmas:

IMG_2898

We had wreaths on all of the window, and I decorated the front porch with little lit trees flanking the front door, lit garland around the door, and with my little red wagon filled with Christmassy accents.  I also added that great “Let It Snow” Snowman:

I was completely thrilled with those decorations, and transitioning over to a more generic decor was going to create a less festive approach to the front door.  Regardless, I soldiered on…The first thing I did was make several bows to go on the front door wreath along with the light post wreath, wagon wheels wreath, and mailbox.  I didn’t want to go and buy new ribbon for this task, so I went to my honey hole (where I keep all things crafty) and found that I had enough of this white and burlap chevron ribbon:

IMG_3562 (1)

I didn’t change out all of the wreaths out from my pine wreaths, instead, I just changed out the bows:

IMG_3562IMG_3564IMG_3568IMG_3570

I did hang up that snowman trio — I change out that sign with each season, I’ve gathered quite the collection of these signs over the years.  They are actually meant to hang on their own holder; I get them from Piper Classics, check out that link and you’ll see what I’m talking about.  I choose to hang my signs on my mailbox though as here in our neighborhood it is the *in* thing to decorate up one’s mailbox…well, I’m all over that! lol 😉

I changed out the decorative flags in the front flower bed to ones with a wintery scene and with cardinals <~~A pop of that red color that I mentioned above….

IMG_3565

Then I set to the task of tweaking the little red wagon decor, I certainly didn’t recreate the wheel here, instead I did more removing of the Christmas decor.  I left the pine wreath and the lit pine garland (looks pretty in the evening), and I added back in my favorite doggie sign (pop of red), a bear (his bow is red), and a few other little items that add a bit of interest and they have touches of red as well–the little sign that is hanging on the crate and the red star ‘garland’ hanging on the front of the wagon. I really do love red and tend to gravitate toward it a lot. 🙂

IMG_3561

I chose to leave the Snowman sign on the other side of the porch…

IMG_3563

Gracie the Golden and Samson and Sophie the Newfoundlands approve. ❤

IMG_3482

IMG_3473 (1)

Here is the wagon in the evening hours:

IMG_3494

And here are a few pictures of the house in the evening hours.  My hubby worked really hard on all of the outdoor accent lighting, if you’d like to see what he did with up lights and wash lights, check out my blog entry entitled Special Outdoor Lighting.

IMG_3501

IMG_3498

So, now that everything is redecorated for the winter months, I think I might take a little break…uh huh, sure I will! 😉  Honestly though, I’m not positive what I’ll get into next, but, I’m sure it will have something to do with making something to add to this house that is gradually becoming a home filled with warmth, love, and cherished memories with each passing day.

Until next time, y’all take good care! ❤

**In decorating there are no mistakes, just unique creations!**

~Arlynn ❤


Transitioning: Living & Dining Rooms

Now that the decor in the back of the house including the staircase was completely transitioned over to my every-day decor, it was time to tackle the two rooms that sit on the front of our home, the living and dining rooms that are separated by a foyer.  I was able to complete these rooms in one day.

The first thing that I did was to change out the dining room table’s tablecloth and the sideboard’s table runner.  I was thrilled that I found a matching set last Spring (I found the tablecloth at Home Goods and the table runner at World Market). 🙂

IMG_3512IMG_3503

IMG_3513

I love the paisley pattern, it pulls in all colors that are in the room and highlights the green color that I use in most of my accents; they couldn’t be more perfect. 🙂

The first thing that I decorated was the sideboard, I started with that pretty lamp…

**A bit of a back story on the lamp, it was my Grandmother’s and she passed it down to my Mom who cherished it for many years.  My Mom, bless her heart, passed away a few years ago and now the lamp belongs to me and I will cherish it for the rest of my time on this earth.  It is a very special family heirloom**

That said, I placed the lamp on a mirrored tray and I built a flower arrangement around the lamp, much like I do with my lantern centerpieces.

IMG_3522

As you can see, I also added a strand of timed battery operated mini warm white lights…Here is a better look at it in the evening hours:

IMG_3530

I added some family pictures, a lovely bowl displayed on a plate holder that my aunt and uncle got us as a housewarming gift, and I threw together a little flower arrangement in a mason jar to match the arrangement around the lamp:

Then I moved on to a lantern centerpiece that I would place on the dining room table.  I won’t go into great detail as to how I put it together here, but if you’d like to know more about the ins and outs of creating a lantern centerpiece, check out my A Dressier Lantern Centerpiece post.

That said, there is one thing that I want to tell you about before showing you pictures of the completed centerpiece.  I found these LED bendy branch lights at Michaels and I just couldn’t pass them up.  They glow a blueish green color and look beautiful lit up in the evening hours. 🙂

Here are the lights that I purchased (if you search for these, please be careful to make sure that the the branches bend, they do sell ones where the branches are stiff and those of course wouldn’t work in a flower arrangement):

IMG_3515

I decided to use one of my Luminara battery operated candles in this lantern, it came with a remote control, but, actually I have set the timer on the candle itself, it comes on in the evening and stays on for 5 hours…

IMG_3516

Here is the finished centerpiece:

IMG_3518

And in the evening with those pretty bluish lights on:

1V4A3305 (1)

1V4A3310

Then I moved to the foyer, I simply replaced the Burlap Snowman Wreath with this one:

IMG_5993

If you’d like to know how I put this wreath together, check out my blog post entitled Front Door Burlap Wreaths:

IMG_3537
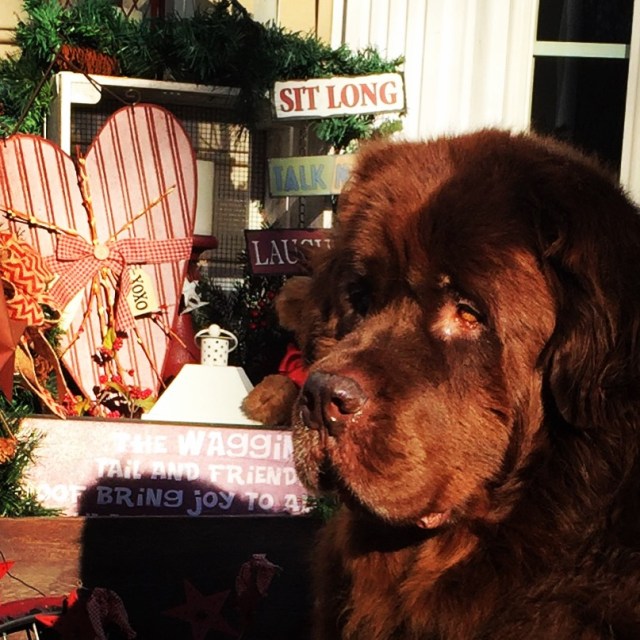
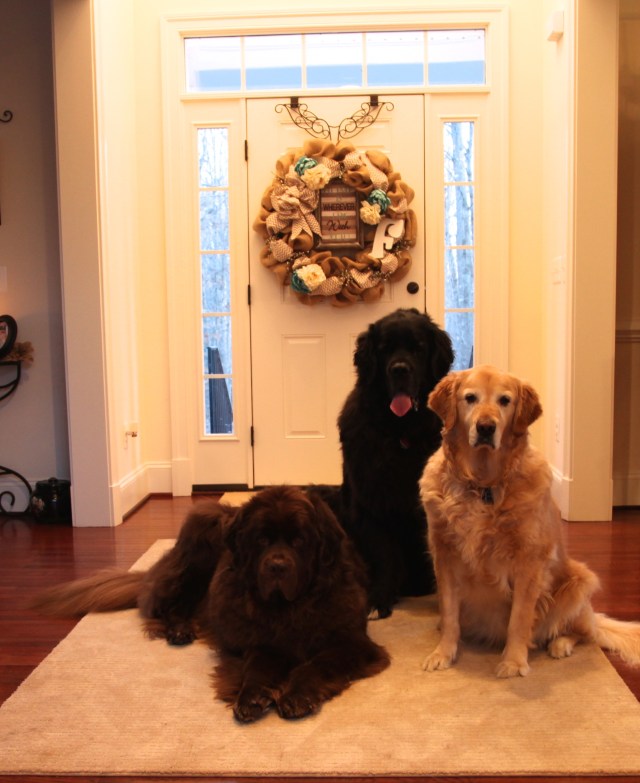
Here is my ever vigilant helper Samson the Newfoundland, this boy is never too far from my side, he is great company and I just adore this fella!!

IMG_3533

And here are all three of our pups, the Newfoundlands Sophie and Samson and the Golden Gracie. ❤ ❤ ❤

IMG_8761

I finished my decorating by moving to the living room and placing just a few accent pieces and pictures on my secretary and on a glass table grouping. I also redid the lantern centerpiece on our little coffee table:

IMG_3532

1V4A3309

IMG_9984IMG_3538

Here is a look at the finished rooms:

IMG_3534IMG_3535

And with that, I had completely transitioned all of my indoor decor from Christmas back to my every-day theme.  I do love Christmas but, I will admit that I was quite happy to get everything back to normal. 🙂

I have one more post to do in this little block of entries and that is one describing what I did outside…and that wasn’t all that much honestly, but, it did include redoing my little red wagon decor…

There it is from a distance:

IMG_3502

Until next time, y’all take good care! ❤

**In crafting there are no mistakes just unique creations**

~Arlynn ❤


Seasonal Transitioning: Kitchen & Surrounding Area

The hard part of my transformation from Christmas to my every-day decor was finished.  The Staircase DecorFireplace Decor, & Family Room (along with the surrounding corners and shelves) always takes the most time and effort. (I inserted posts that describe those specific spaces).  In this post, I’ll be highlighting the kitchen, kitchen eating area and surrounding area including a couple of cozy corners.  I will not bore you with the “how-to” details in this post.  I will provide you links to my “how to” posts along the way and they will show you how I put together my cozy corners and lantern. 🙂

Here we go…I started by switching out my tablecloth on the kitchen table and then I created a lantern centerpiece…

IMG_3432 (1)IMG_3433

Here is a link to my A Lantern Centerpiece For All Seasons post, in that post I describe how I take this same lantern and tray through the Seasons. 🙂

Next, I worked on my kitchen hutch:

IMG_3434

And then a cozy corner that sits to the left of the hutch:

IMG_3436

I have a lovely corner shelf, that is what I worked on next:

IMG_3410

And then I moved into the powder room:

I added a few little things to this grouping that sits on top of the kitchen desk:

IMG_3411

And then I moved on to the kitchen windows:

After I got those windows finished, this side of the house was done!!!

IMG_3439

Yippee Skippee!!  I did the “Happy Dance”!!  It felt so good to get all of that accomplished.  🙂

IMG_3441

Here is that link that I promised to provide y’all to my How To Create Cozy Corners and More post. There is a plethora of info included in that link. 🙂

I still had the living and dining rooms left to do, and I did a little tweaking to the outside of the house as well.  Both of those posts will be coming up in the next couple of days…stay tuned. 🙂

Here is a sneak peek of the living and dining rooms:

IMG_3535

Until next time, y’all take good care! ❤

**In crafting there are no mistakes just unique creations**

~Arlynn

Family Room: Cozy Corner & More

Now that the staircase bannister and the fireplace decorations were transitioned over to a more every-day sort of look, I started to work my way around the rest of the family room.  The first project that I took on was this “Cozy Corner” <~~~My name for a grouping of decor that is well thought out and planned to go into a certain space>>>.  I have many such corners in my home but, in this case, this is the corner that I was fixin’ to transform:

IMG_2471

I hated to take that apart as I was really happy with how the Christmas decor turned out (this year was the first time I had decorated that ladder for Christmas).  Anyway, I disassembled this grouping and packed it away for safe keeping and I started to gather the items that would make up my new grouping.

The first thing that I did was to wrap a pip berry garland with a set of 50 deco lights; they are teeny tiny and are so pretty peeking out from the pip berries.

IMG_3383

IMG_3376

Let me pause here and provide a link for y’all.  I wrote up an entire blog post describing how I put my Cozy Corners together, here is the link to my Cozy Corners & More post.  I *will* let you know for this project that I did have to glue some pipe cleaners on the backs of those plaques so that I could tie them onto the rungs of the ladder…Note:  I had tried to use Command Strip Velcro, but it just wouldn’t hold.

IMG_3396

That said, I’ll just show you how this turned out in the end. 🙂

IMG_3416

As you can see, I folded a lap quilt nicely and placed it over an old basket, piled some pillows on top, and placed a plaque (that matches a grapevine wreath that I made–I’ll show you that in a minute), and a couple of old Boyd’s Bears.  That sewing basket was my grandmother’s and it serves as a nice little piece with which to add a bit of interest.

In the evening hours, those little lights twinkle so nicely–BTW, those wooden stars are held onto the ladder with velcro…

IMG_3400

So, that little corner was complete and I moved onto the top of the credenza that sits in front of the tv and in between the fireplace and the cozy corner that I highlighted above.  I started by making up a quick little centerpiece…Here is what I came up with:

IMG_3391

As you can see, I gather a bunch of accent pieces but, I don’t always use every single piece, here is the finished centerpiece (I chose not to use one of the plaques and I took the yellow all gerber daisies save for that one fluffy one in the front out of the mix)…

IMG_3394 (1)IMG_3394

Here is how that end of the room looks now that it is all transitioned over to a more generic country decor:

IMG_3402

Then I made an arrangement to put on a side table…

IMG_3373

Next I moved on to a table and shelf that separate the kitchen and the family room…IMG_3404

This will give you a bit of perspective as to where these pieces are located:

IMG_3406

And here is that grapevine wreath that I referred to above:

IMG_8680

I absolutely love to decorate and as I have mentioned before, I have no formal training, but gosh, I really do get a feeling of accomplishment when I, little ole me, can actually pull a room together through decor.  I’ve had decades of practice and I’ve spent a ton of time honing my skills; at 50+ years of age, I finally feel as if I’ve found my niche. 🙂

Here is the entire family room completely redecorated for the winter months (and possibly beyond)…the big black blurb close to the fireplace is our Newfie Sophie…haha:

IMG_3442

In my next post, I’ll highlight the kitchen and eating area where I created a new lantern centerpiece for the table…Here is a sneak peek:

IMG_3432 (1)

I did a few other things in this area too, so stay tuned…and thanks a bunch for joining me as we transition my home from Christmas to every-day decor. 🙂

Until next time y’all take good care! ❤

**In crafting there are no mistakes just unique creations**

~Arlynn ❤

Fireplace: Mantel & Hearth

The fireplace is usually where I start when I’m transitioning my decor from one Season to the next.  I have to admit though, that I was so happy with how my Christmas decorations turned out that I almost hated to change it.  BUT, in the end, I’m *just* as happy with how it all turned out using my everyday accents pieces.

Here is how I had the fireplace decorated for Christmas:

IMG_2441

The first task was to take all of Christmas decorations down and pack them away, that took 1/2 a day in and of itself…not kidding…:)  This is what I started with  IMG_3331

The first thing that I had replaced was the wreath on the mirror.  Here is a link to show you how I made that wreath, Burlap, Pip Berry, & Rod Iron Wreath

IMG_3327

There it is in place…

IMG_3344 (1)

The next thing I tackled was the mantel…

IMG_3362

I started with a pip berry garland that matches the staircase garland and I wrapped a set of 35 white lights around it;  I always purchase my pip berry garland from The Pip Berry Barn.  Then I made two burlap bows that I have on the staircase (here is a link for my Staircase: Lit Pip Berry Garland post). After that I added black wooden candlesticks and topped them with candles with metal stars wrapped around them.

IMG_3343

I got the candlesticks and candles from Piper Classics

Next, I added a couple of Dickens houses, a few electric spool candles with silicone light bulbs, a couple more plain wooden candle sticks (that I tied a bit of the ribbon around), and some pieces from my Willow Tree collection.   I stood back and took a look see and was happy with what I’d created.

Then I moved on to the hearth, the first thing that I did was to recreate a basket decor that I’d had sitting next to the hearth at Christmas; here is a picture of how I had it decorated up for Christmas…

IMG_2436

And here is how I recreated it using more generic accent pieces:

IMG_3392

I found the “Happiness is Homemade” plaque at Hobby Lobby for 40% off, and I already owned the rest of the accents which included an old pip berry garland, metal stars, a little wooden heart, and a country themed towel that I tied to the basket.  I did add a set of lights to the very top.  I found these spiffy sparkl’ies’ at Michaels, they are battery operated and have a timer (although, I will say that my hubby rigged them up with a little transformer and mine are plugged in and never go off).

IMG_3385

After that little project was complete, I moved to the hearth.  As I’ve explained in this How To Create Cozy Corners post, I started to build the decor on either side of the fireplace box.  If we want to have a fire these pieces are easily slid out of the way.

First, I took a moment to put together a quick little lantern centerpiece…

And then I just built the rest of the decor…I ended up with this.

IMG_3361

Then I moved to the other side, here is what I came up with there…

IMG_3359

See that “I Love You a Bushel and a Peck” lit canvas plaque? My cousin Stacey made that for me and gave it to me for Christmas (and yes, I cried like a baby when I opened it…that saying is very special to us because our Grandma used to say it to us all of the time).  If you’d like to see how she made that, here is a link to her Light Up Christmas Canvas blog entry.  Stacey is sweet enough to be a guest blogger for me every now and again. 🙂  I will cherish that piece forever and ever!! ❤

So when all was said and done, here is a look at how everything turned out…

IMG_3412 (1)

And how it looks in the evening hours…

IMG_3360

Yes, I can honestly say that I am just as happy with this look as I was with the Christmas look.  And it was so much fun to create, I truly thrive on this sort of thing. 🙂  This fireplace design set the tone for what the rest of the decor would look like. In my next post, I’ll describe how I put together that cozy little corner to the right of the tv…along with a few other little creations…

IMG_3402

Until next time, y’all take good care! ❤

**In crafting there are no mistakes just unique creations**