The Laundry Room–Our Creation

Hi All,

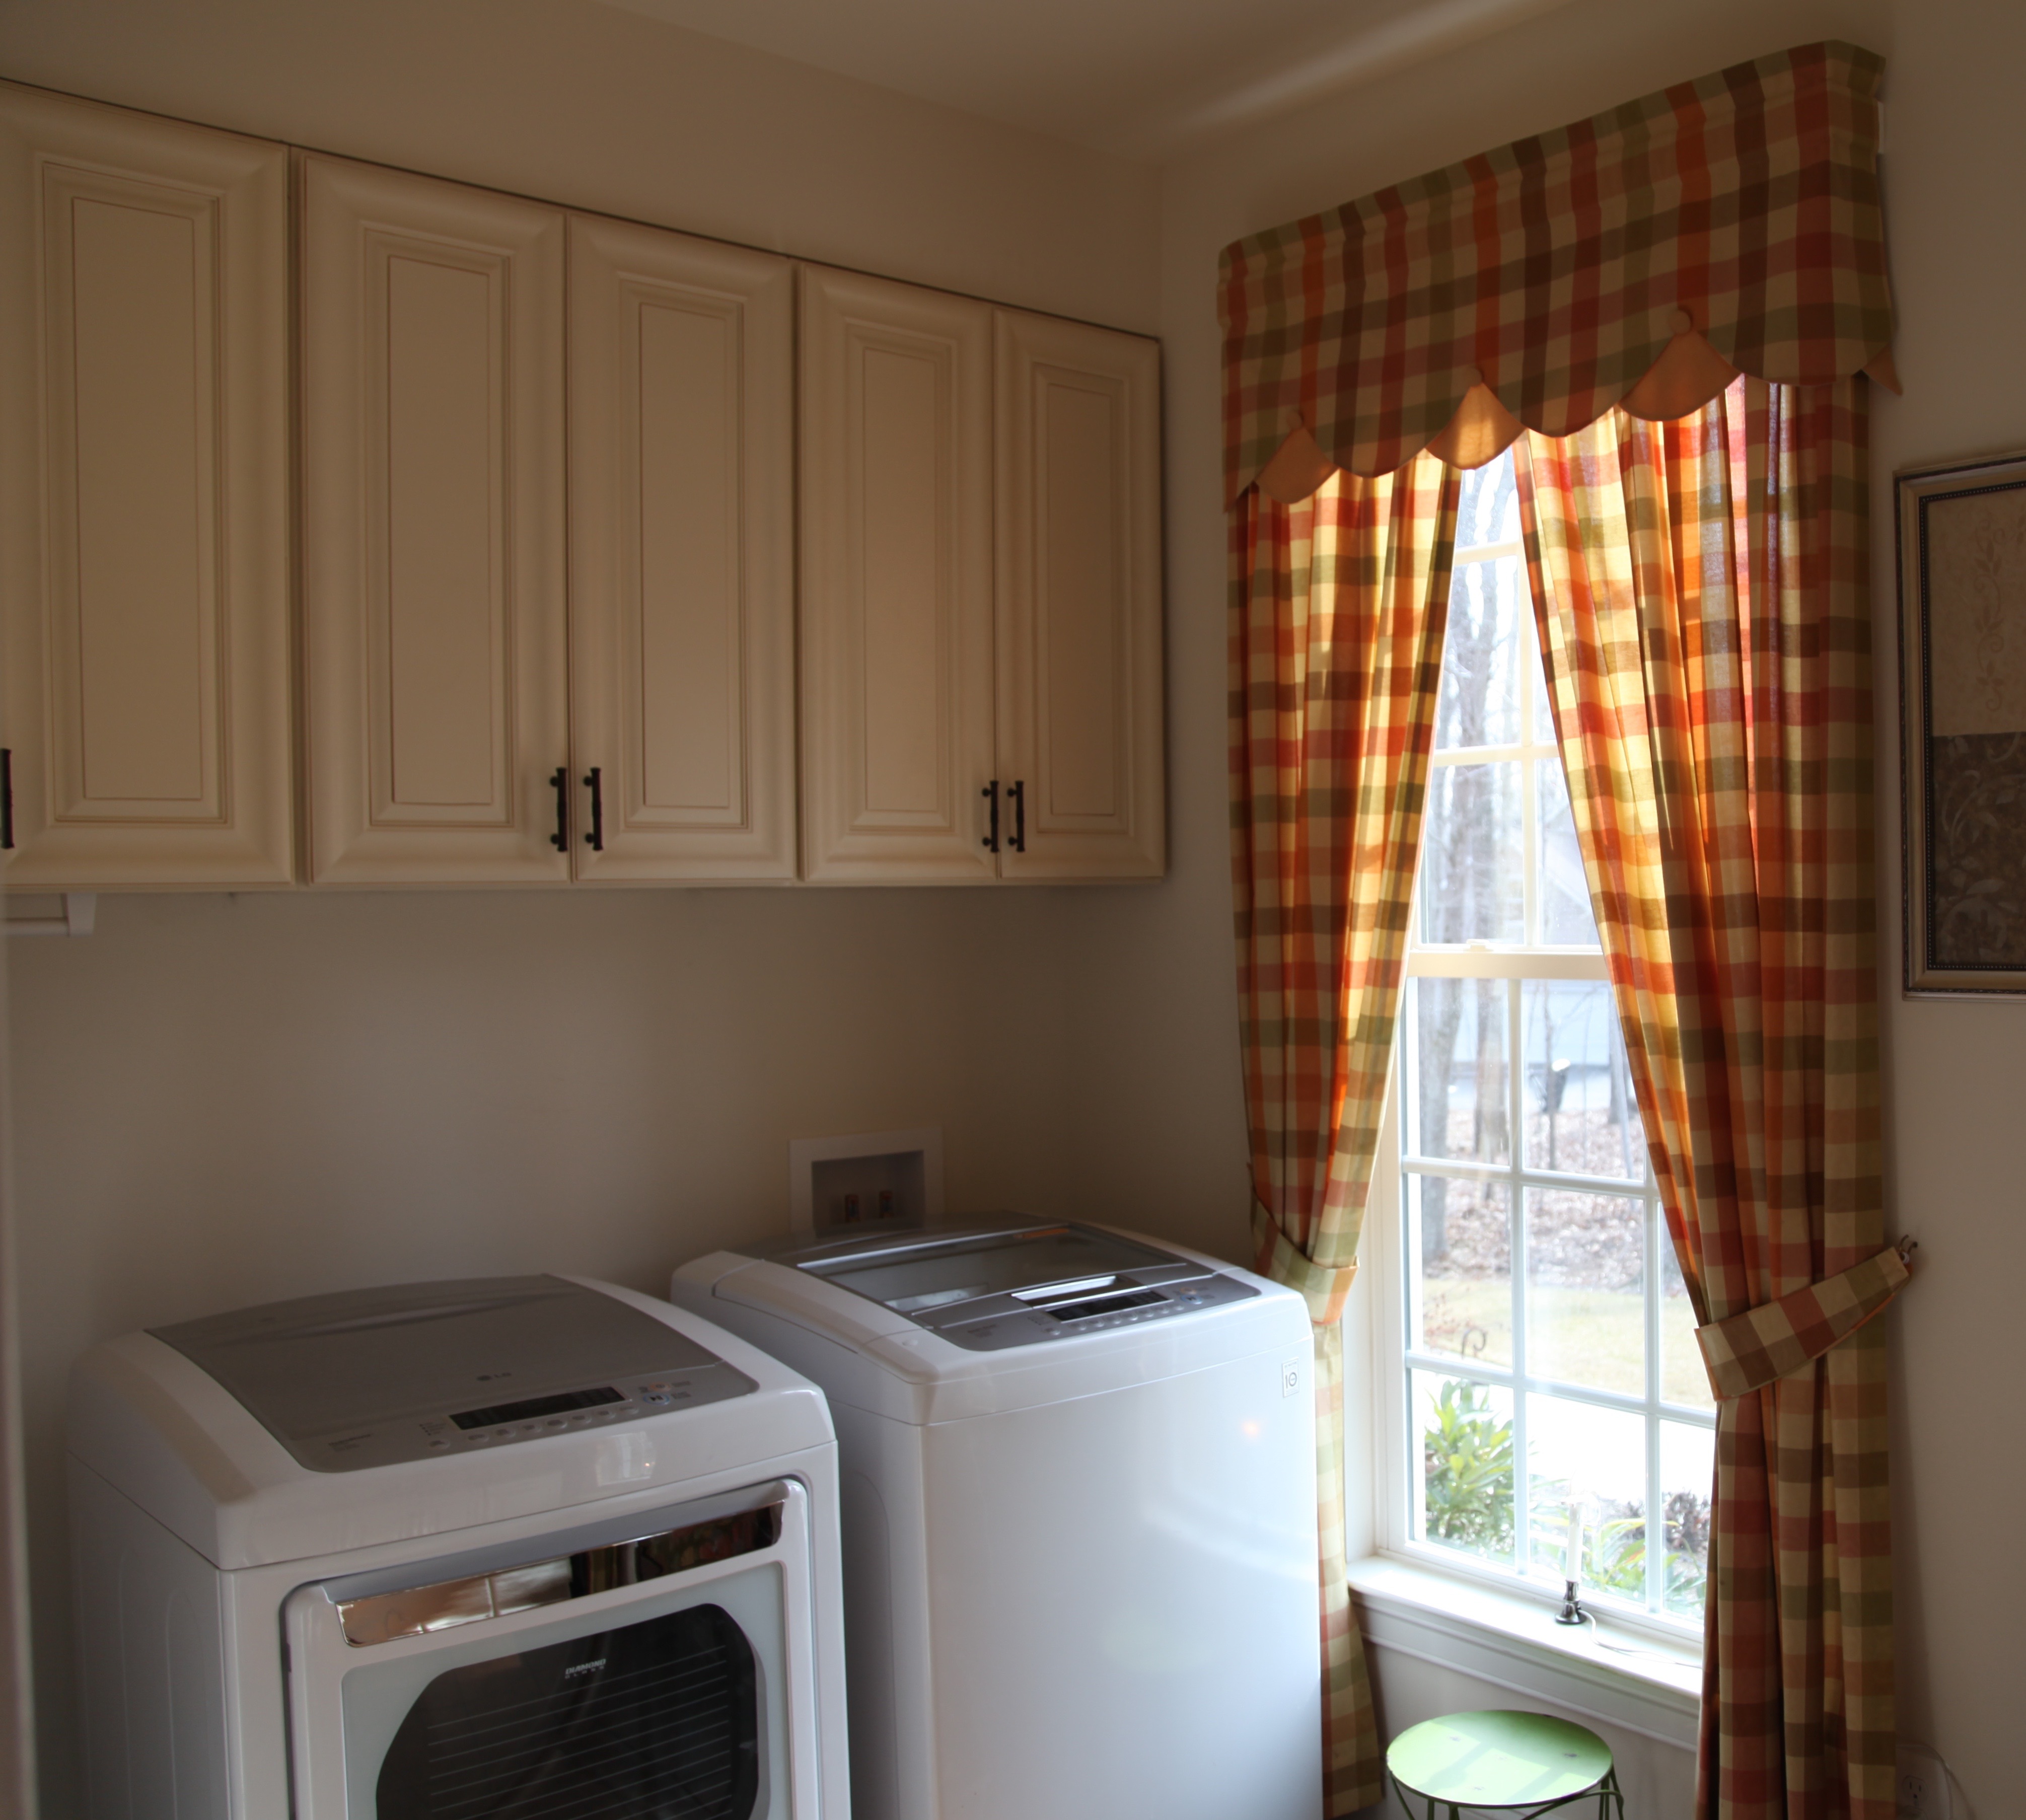
How about if we take a tour of our laundry room.  I’m sure to most people, the laundry room is about the least interesting room in the house, but to me, well, yes, it meets all of the necessary needs regarding doing laundry, but this room is so much more to me. 🙂  This is also where I feed the pups, do all of my ironing (trust me, I don’t do much of that), where the hubby washes out dirty brushes, or his dirty shoes and honestly we do a myriad of other tasks that I can’t think of at this moment in time. This is more of a utility room than a laundry room…and get this, it sits right on the front of our house. I have to be honest and tell you that I did baulk at that idea when I first saw the floor plans, but we went with this model because we loved the rest of the home so much.  Now that we’ve arranged it just how we want it to be, it is actually located in the perfect place; I can be nosy and look out those the two windows when I iron–not that there is anything but deer and woods to look at, but both things are sure pretty. 😉  Anyway, let me explain how we brought this empty space to life and made it exactly what we wanted and needed it to be. 🙂

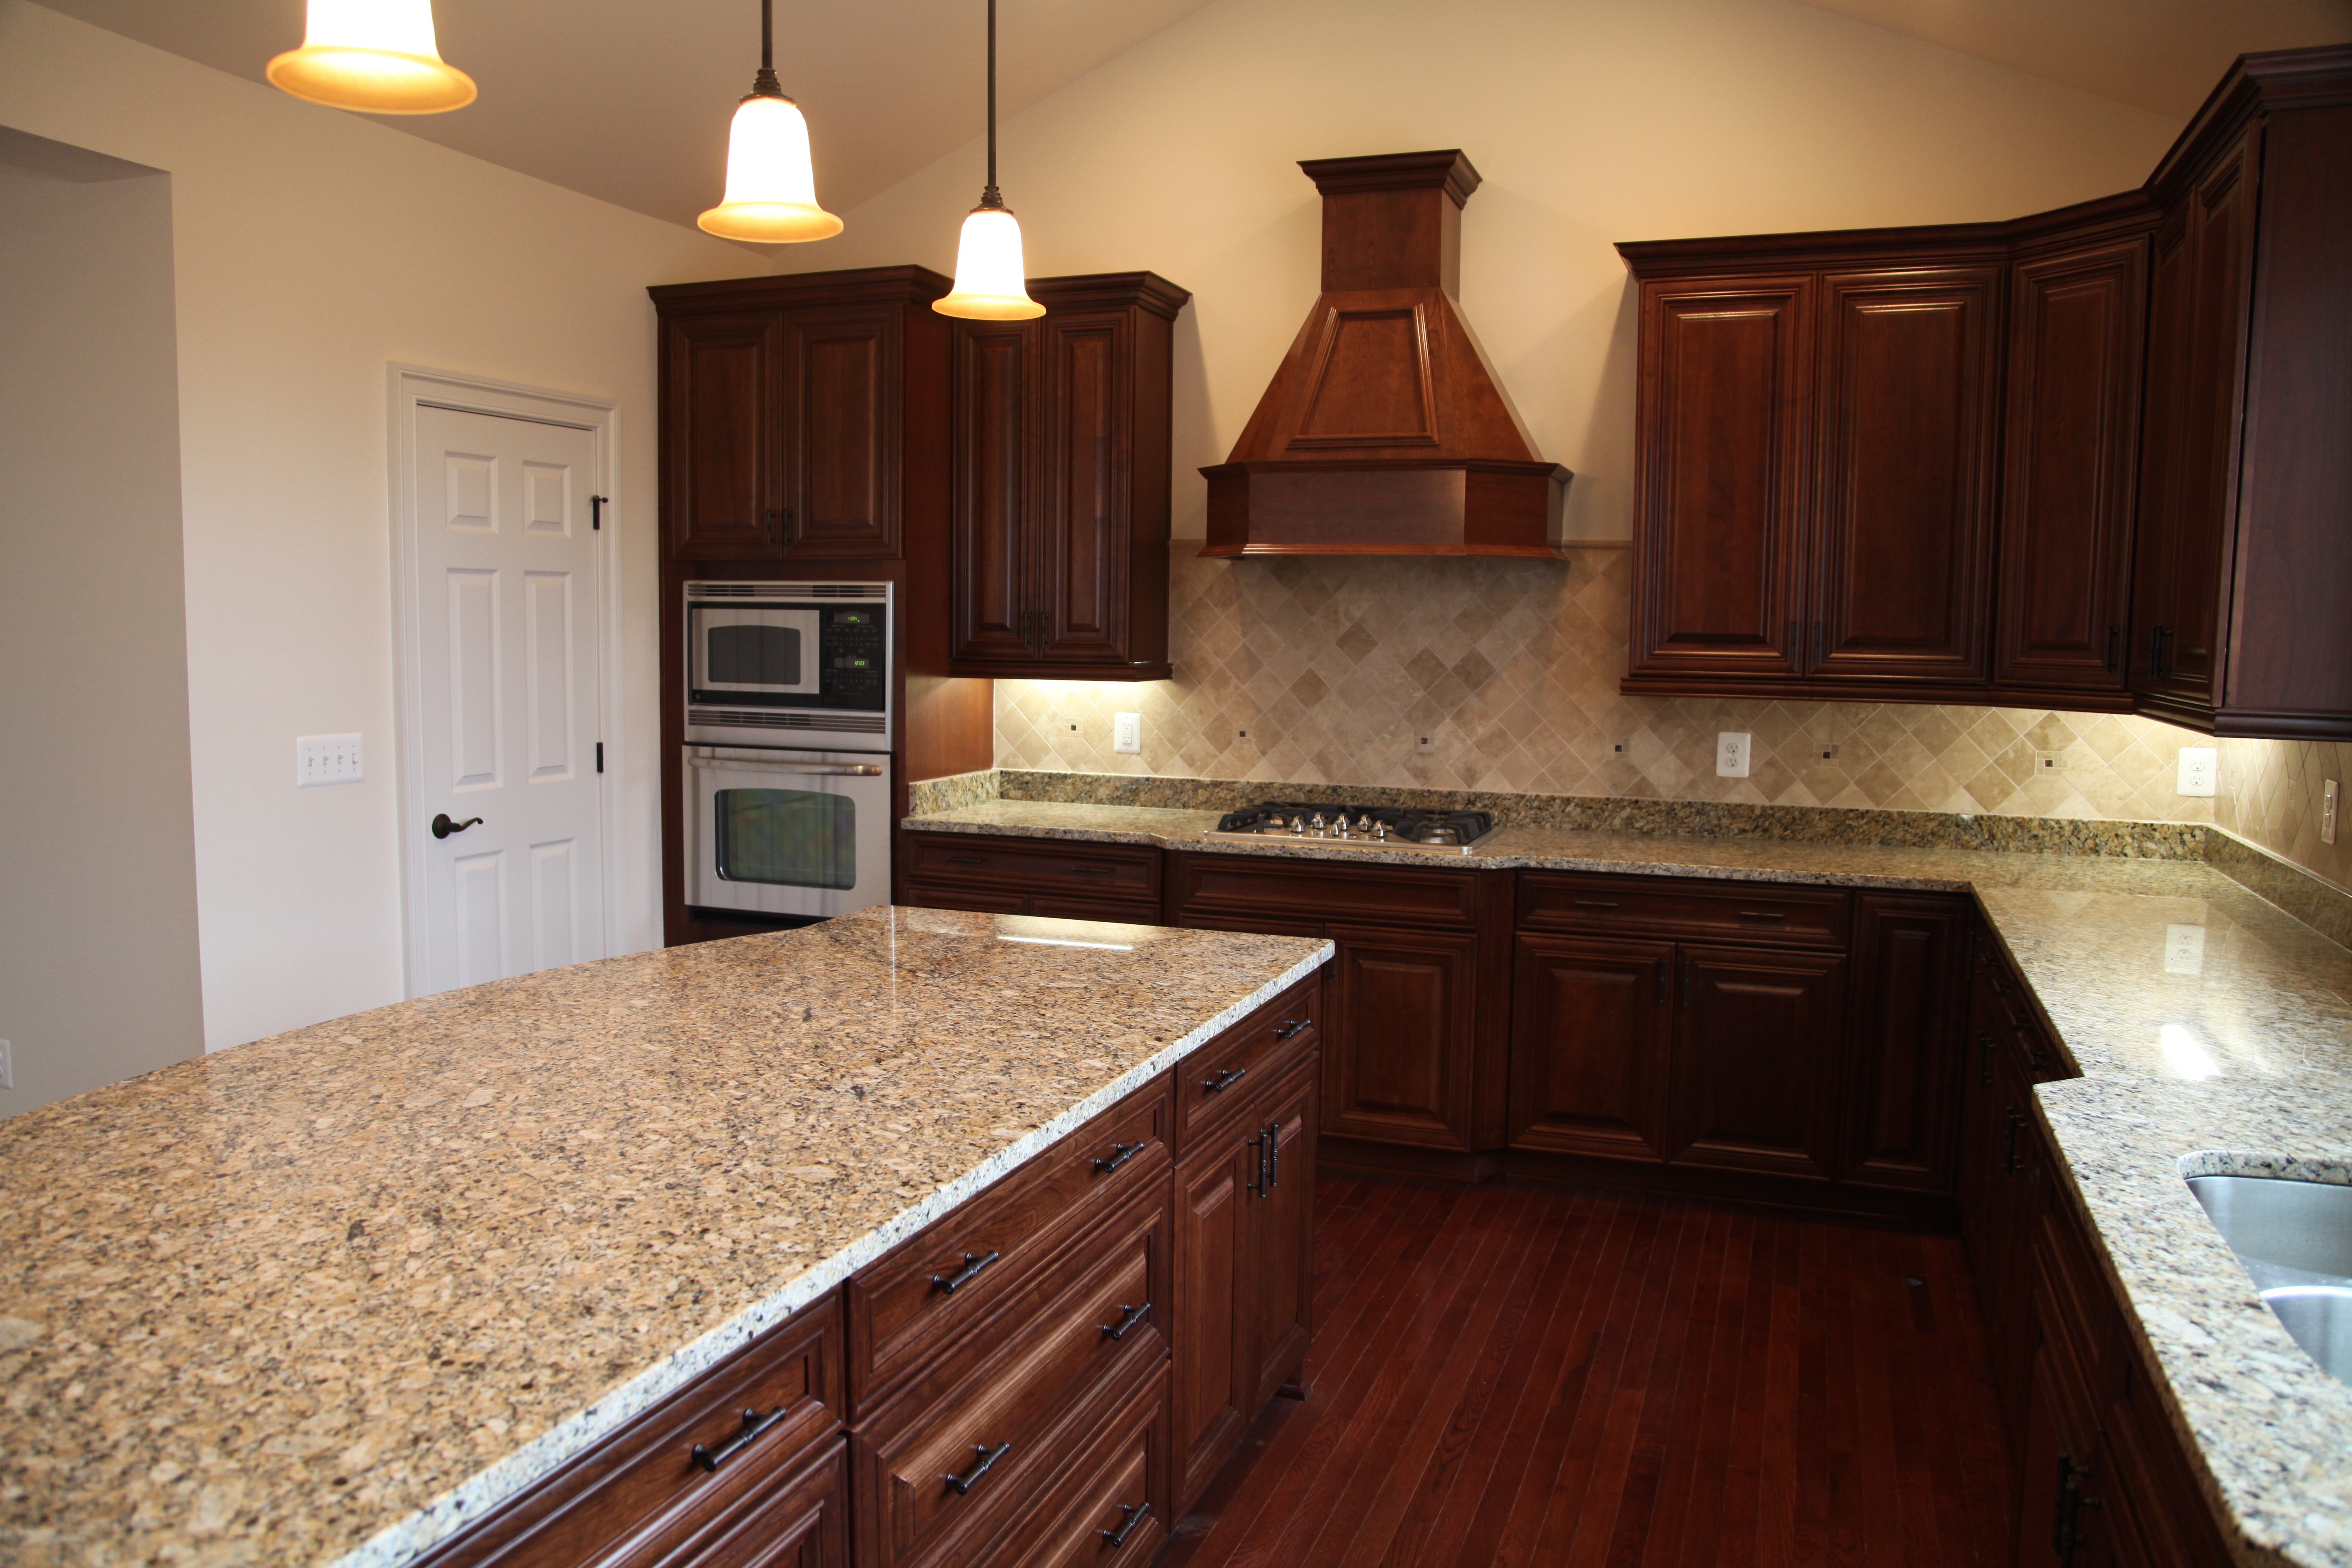
First, the color of the ceramic tile floor is almost a terra-cotta color–a bit out of my wheelhouse, but I loved it so much, I went with it and am so that glad I did…it is the perfect color for that room and snugs up nicely to the dark hardwood floor in the hallway. I ordered those curtains to match the floor from Country Curtains and I will say they were pretty pricy, mostly because I needed them to be 96″ long (yikes), but worth the cost, they are such nice quality and I know they will last me a good long time in there.

IMG_6518

IMG_9180

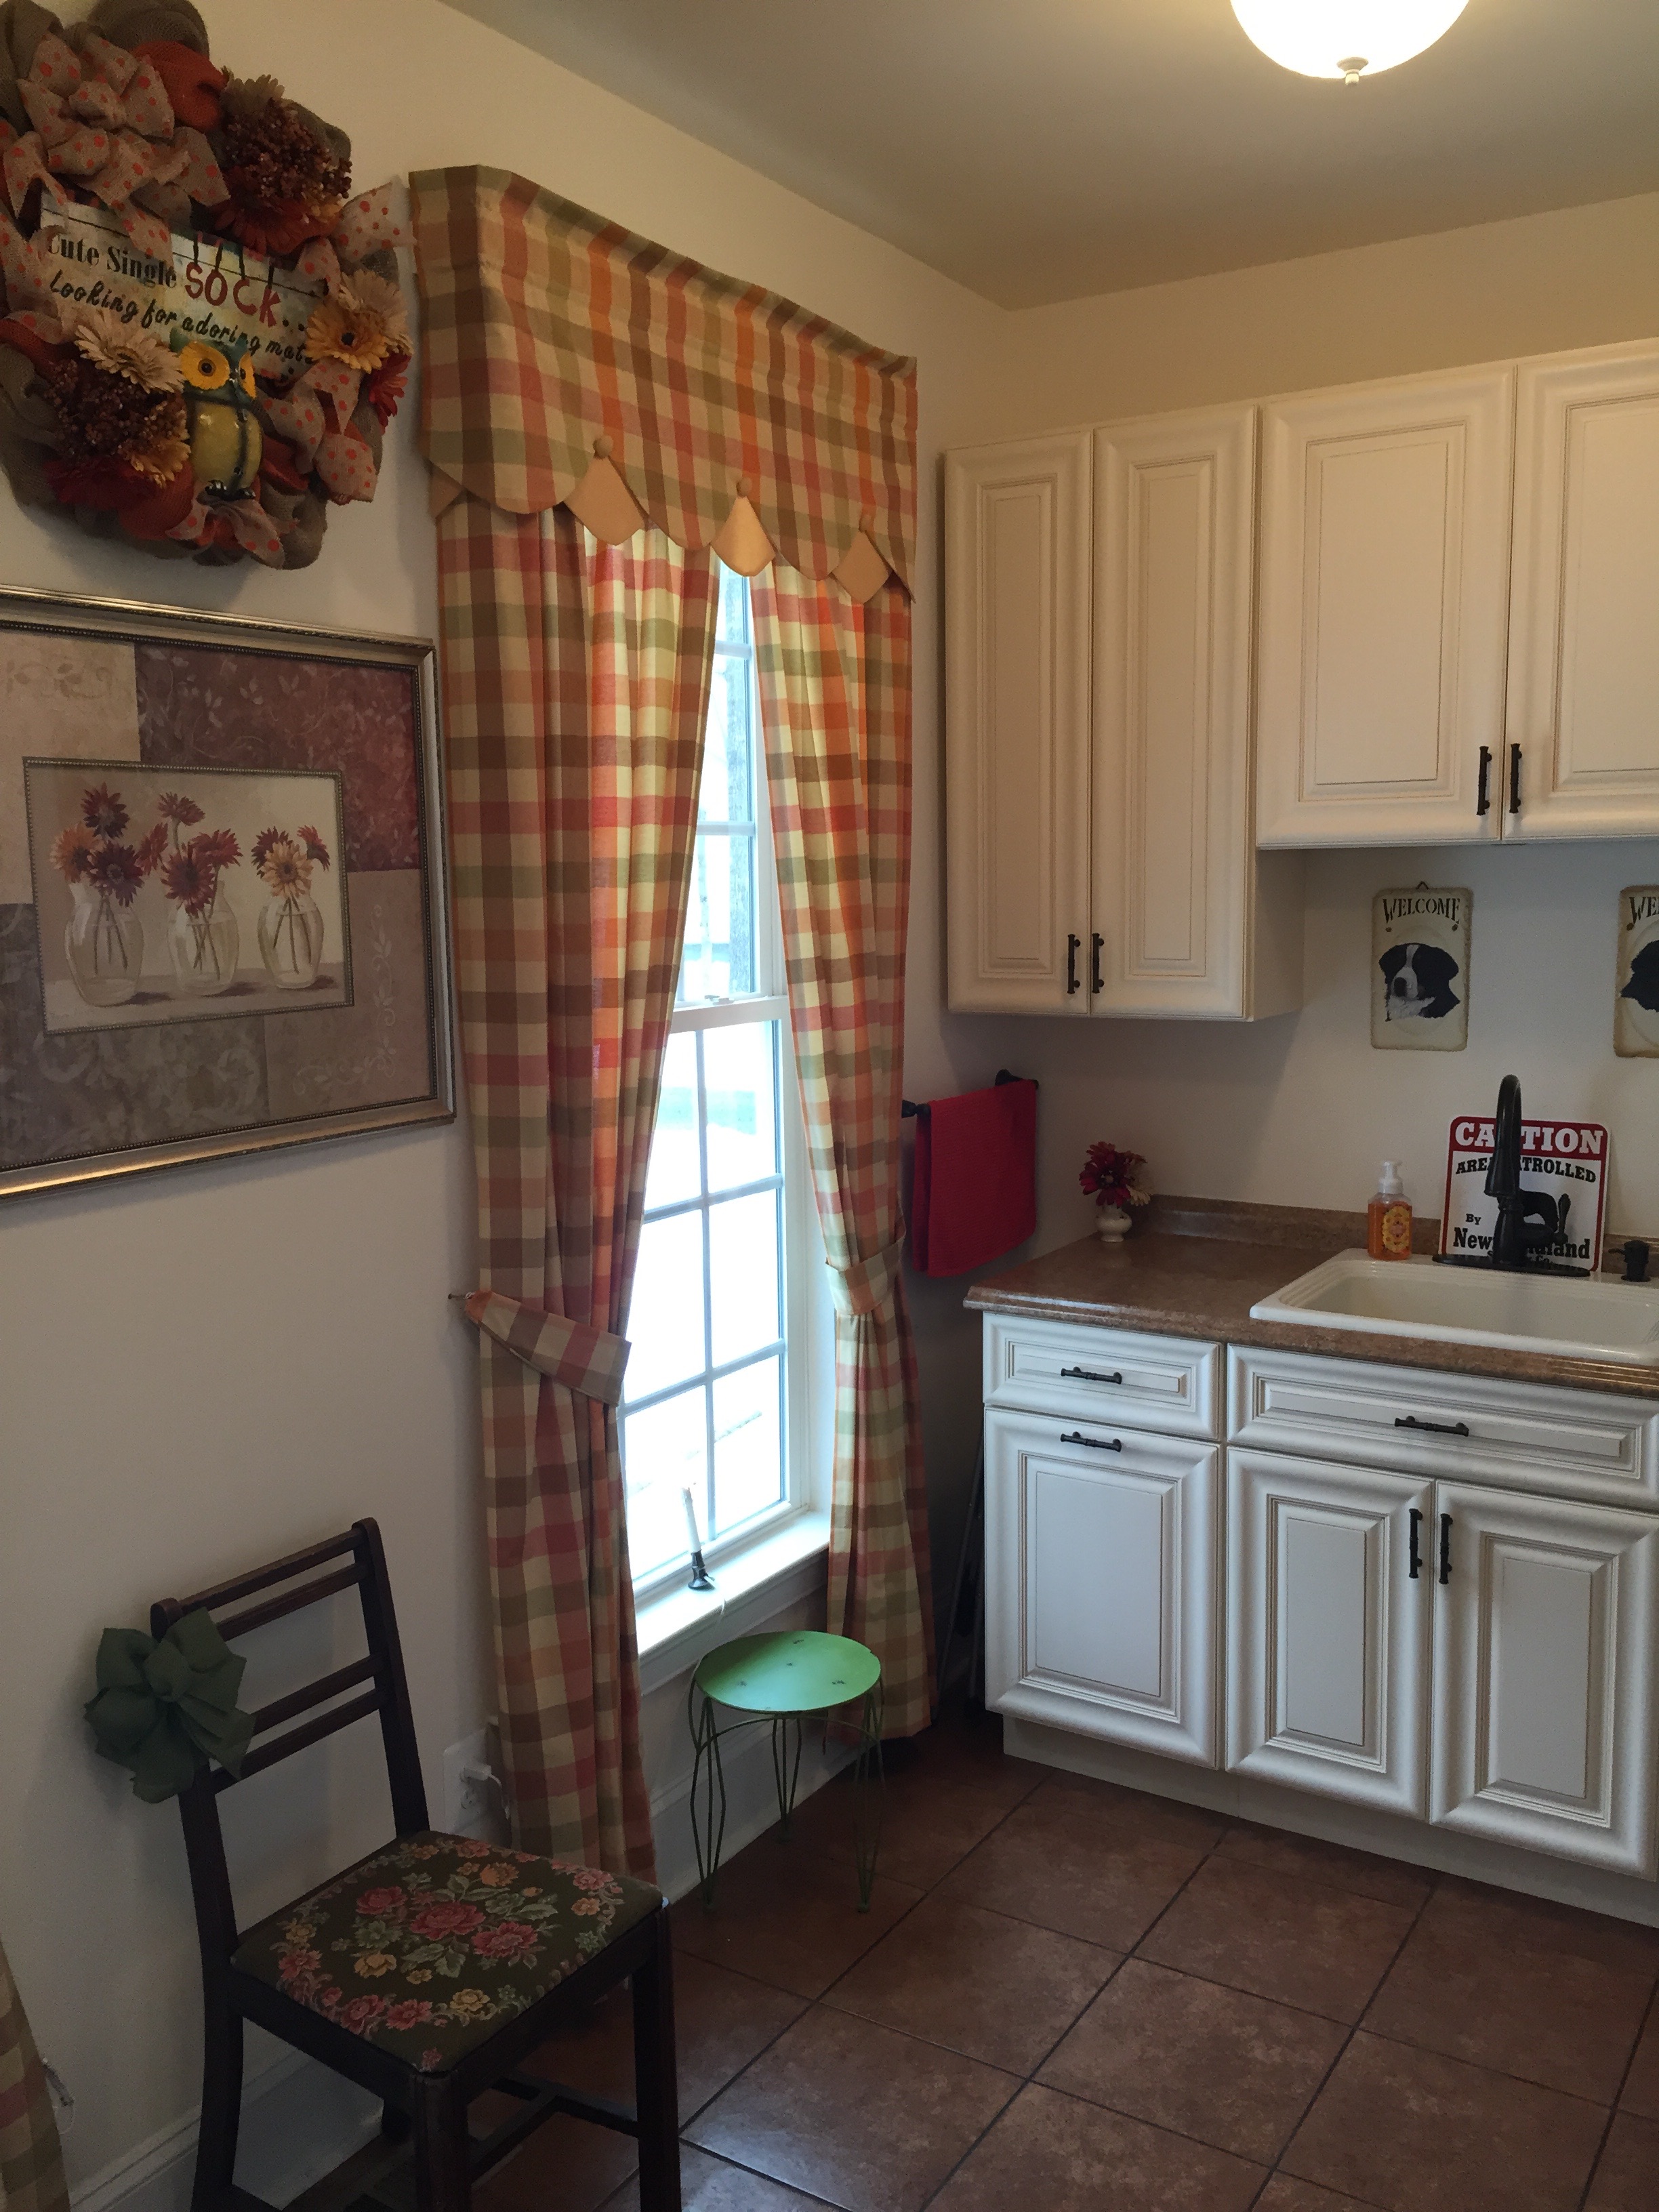
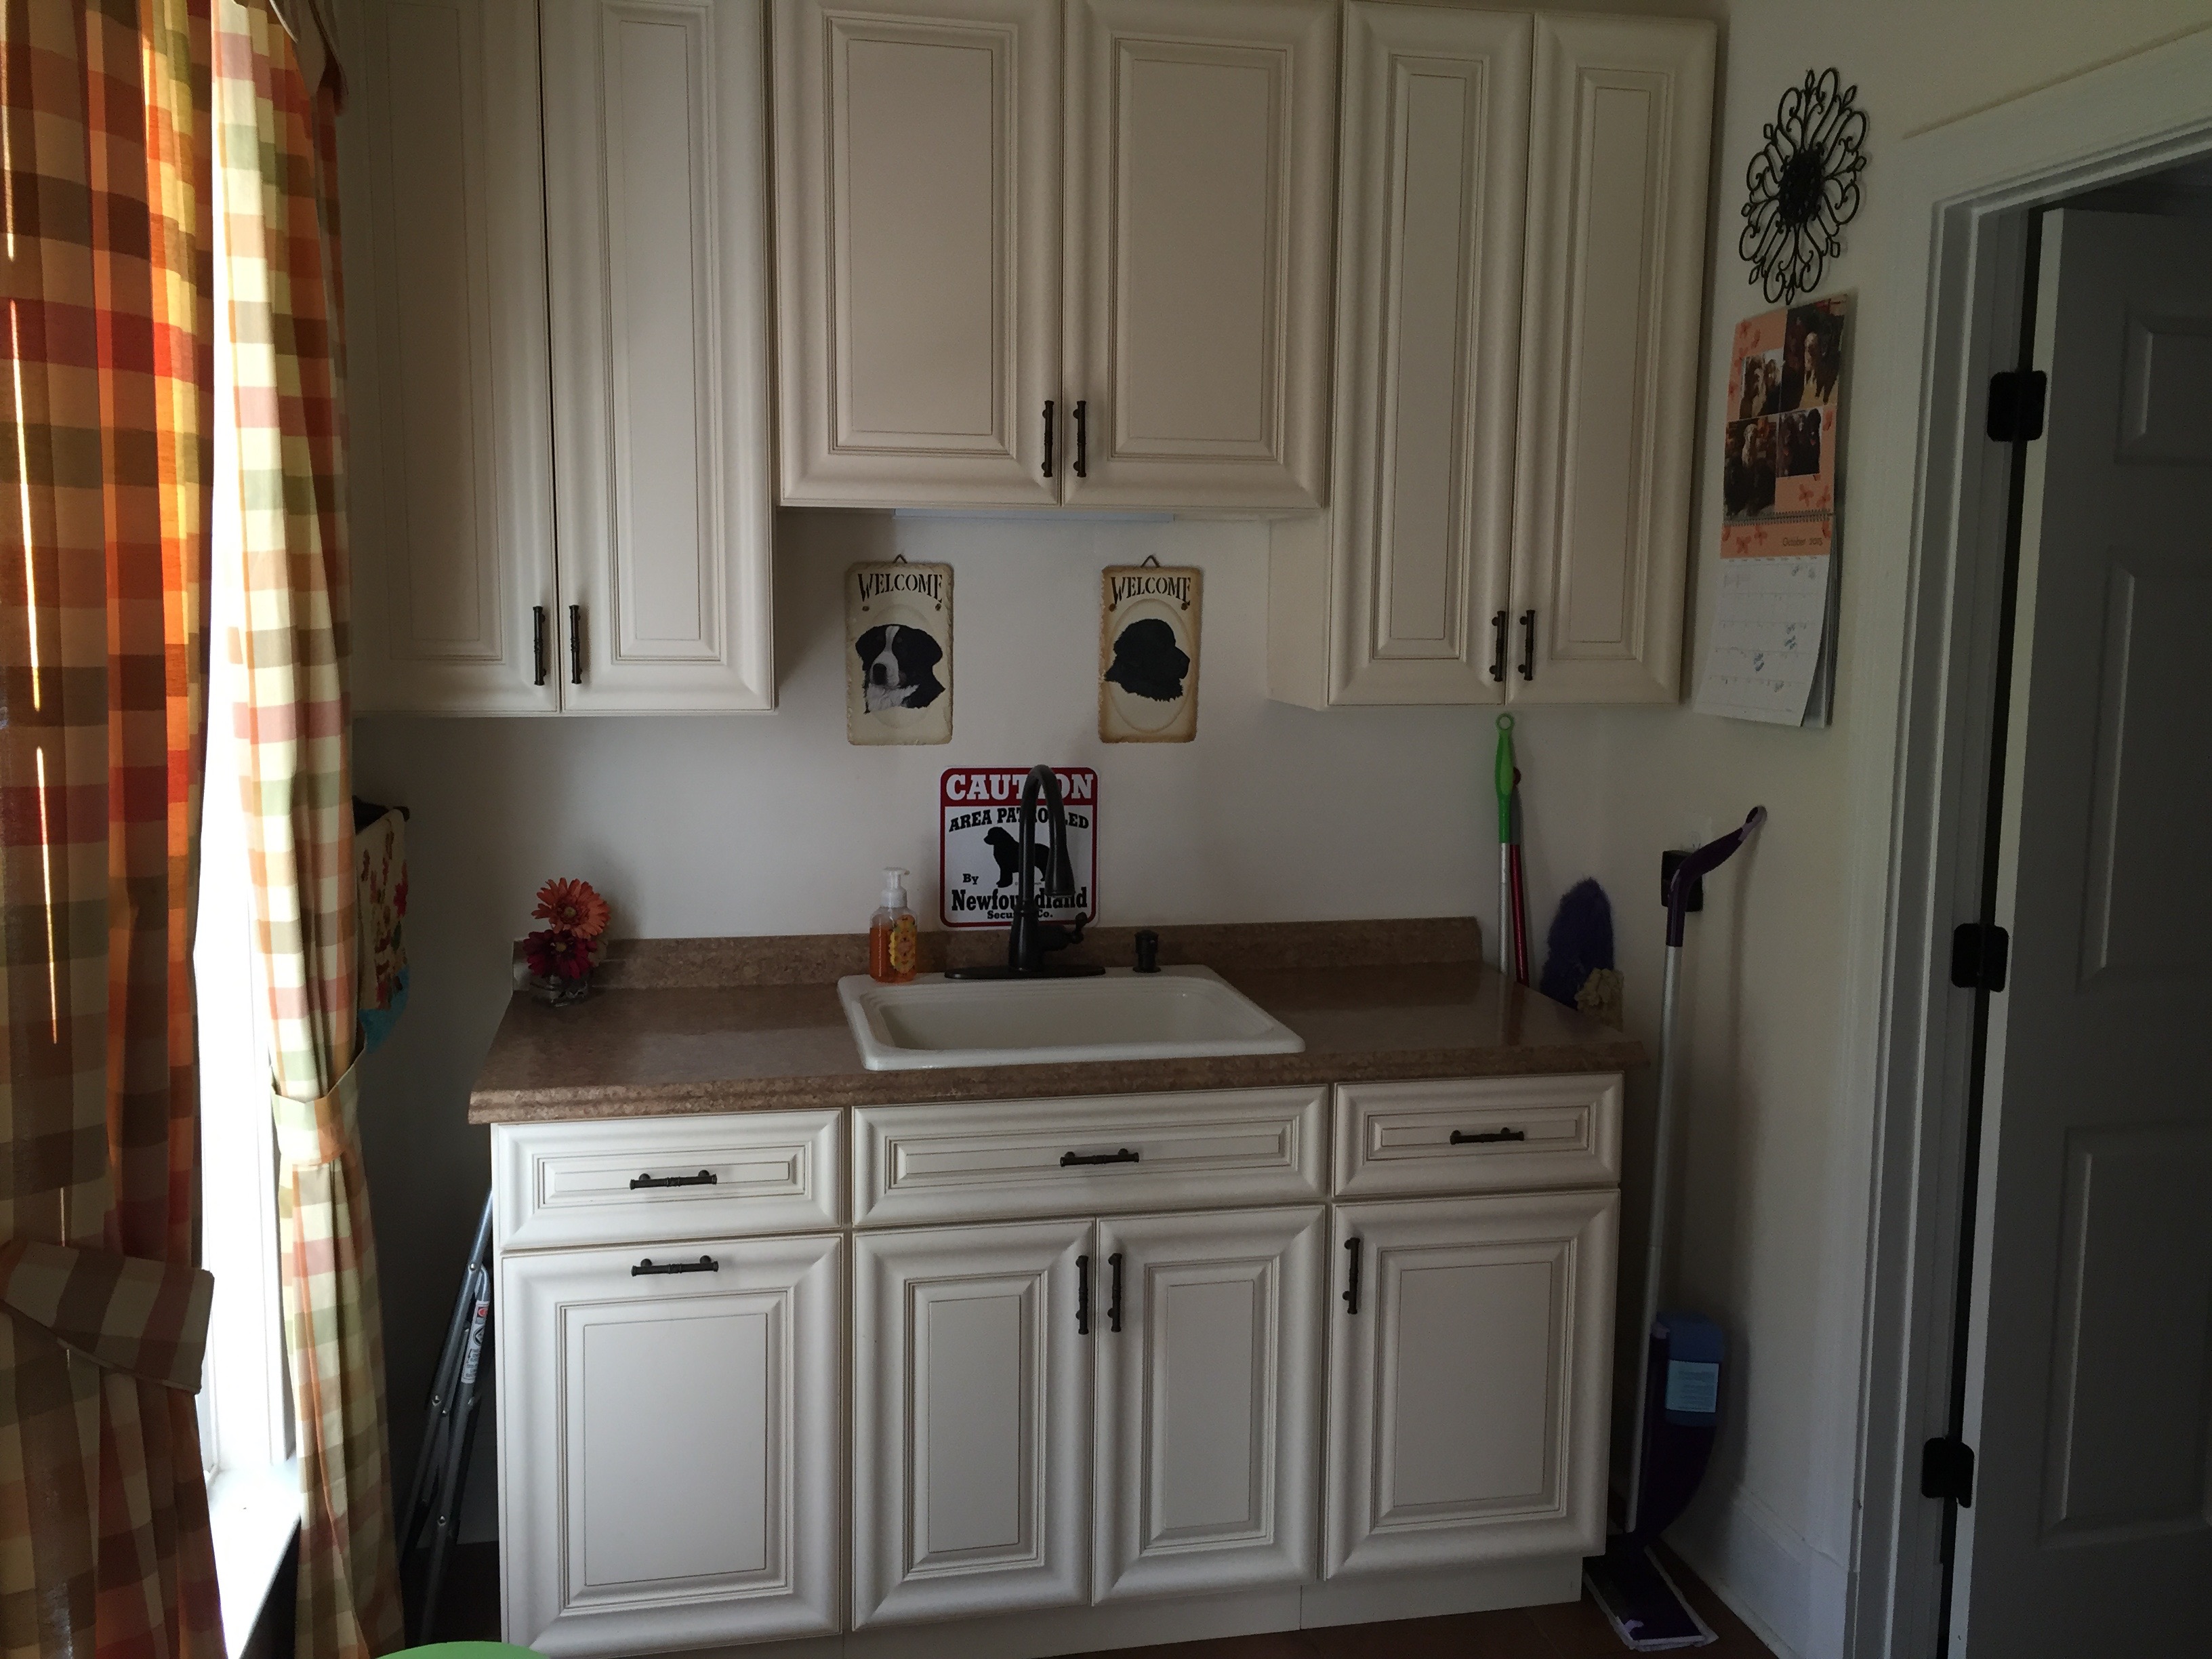
We didn’t pay our builder to put one thing in this room except that we did ask that it be plumbed for a sink on the opposite wall to where the washer and dryer would be located. My hubby installed every cabinet that you see in these pictures; he purchased them online at Kitchen Cabinet Kings, unfortunately, he just told me the other day that they no longer sell these fronts…good thing we got all that we needed.
photo

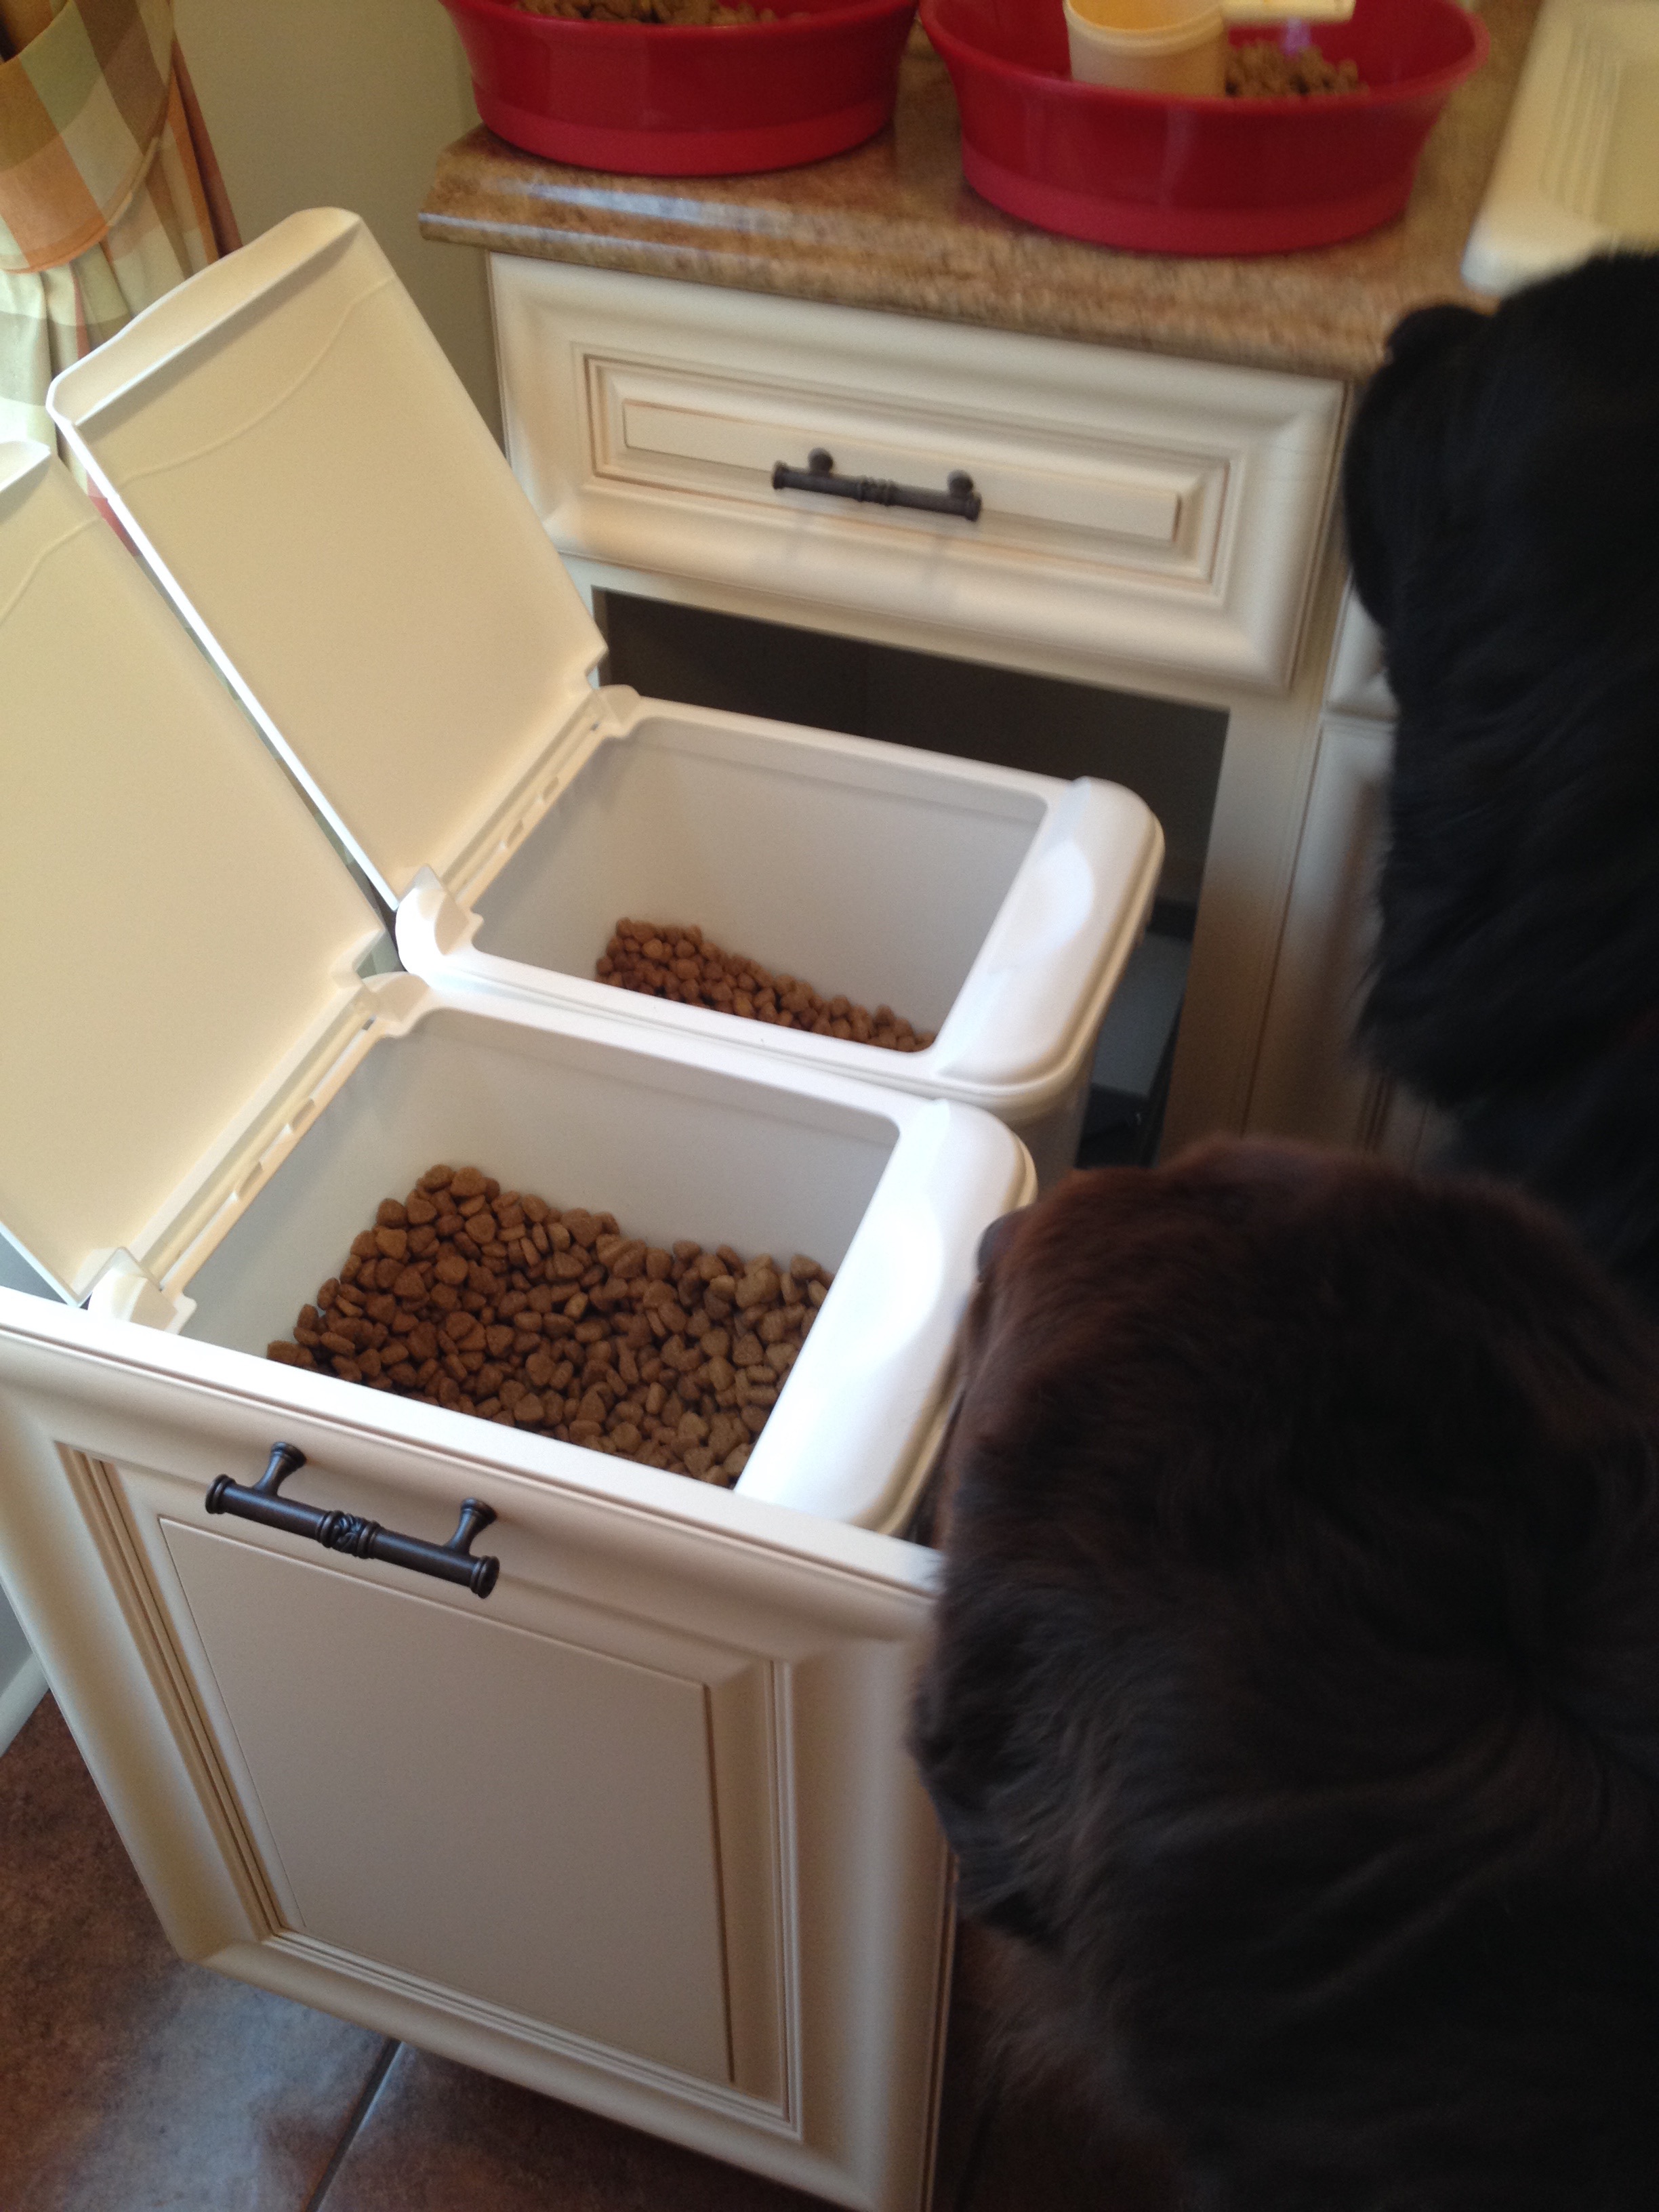
We chose to go with a cream color cabinet in there because of the dark flooring and to have something a smidge different.  We used the same cabinetry hardware in there as we did in the kitchen.  And best of all, he installed a “trash can” cabinet, but…guess what I keep in there? The dog food!! Yep, what a little bonus! No more hauling around huge bags of dog food (for my huge doggies…Meet the Pups <there).  You would not believe how much that cabinet helps me each and every day. 🙂

IMG_9181 (1)
IMG_9316

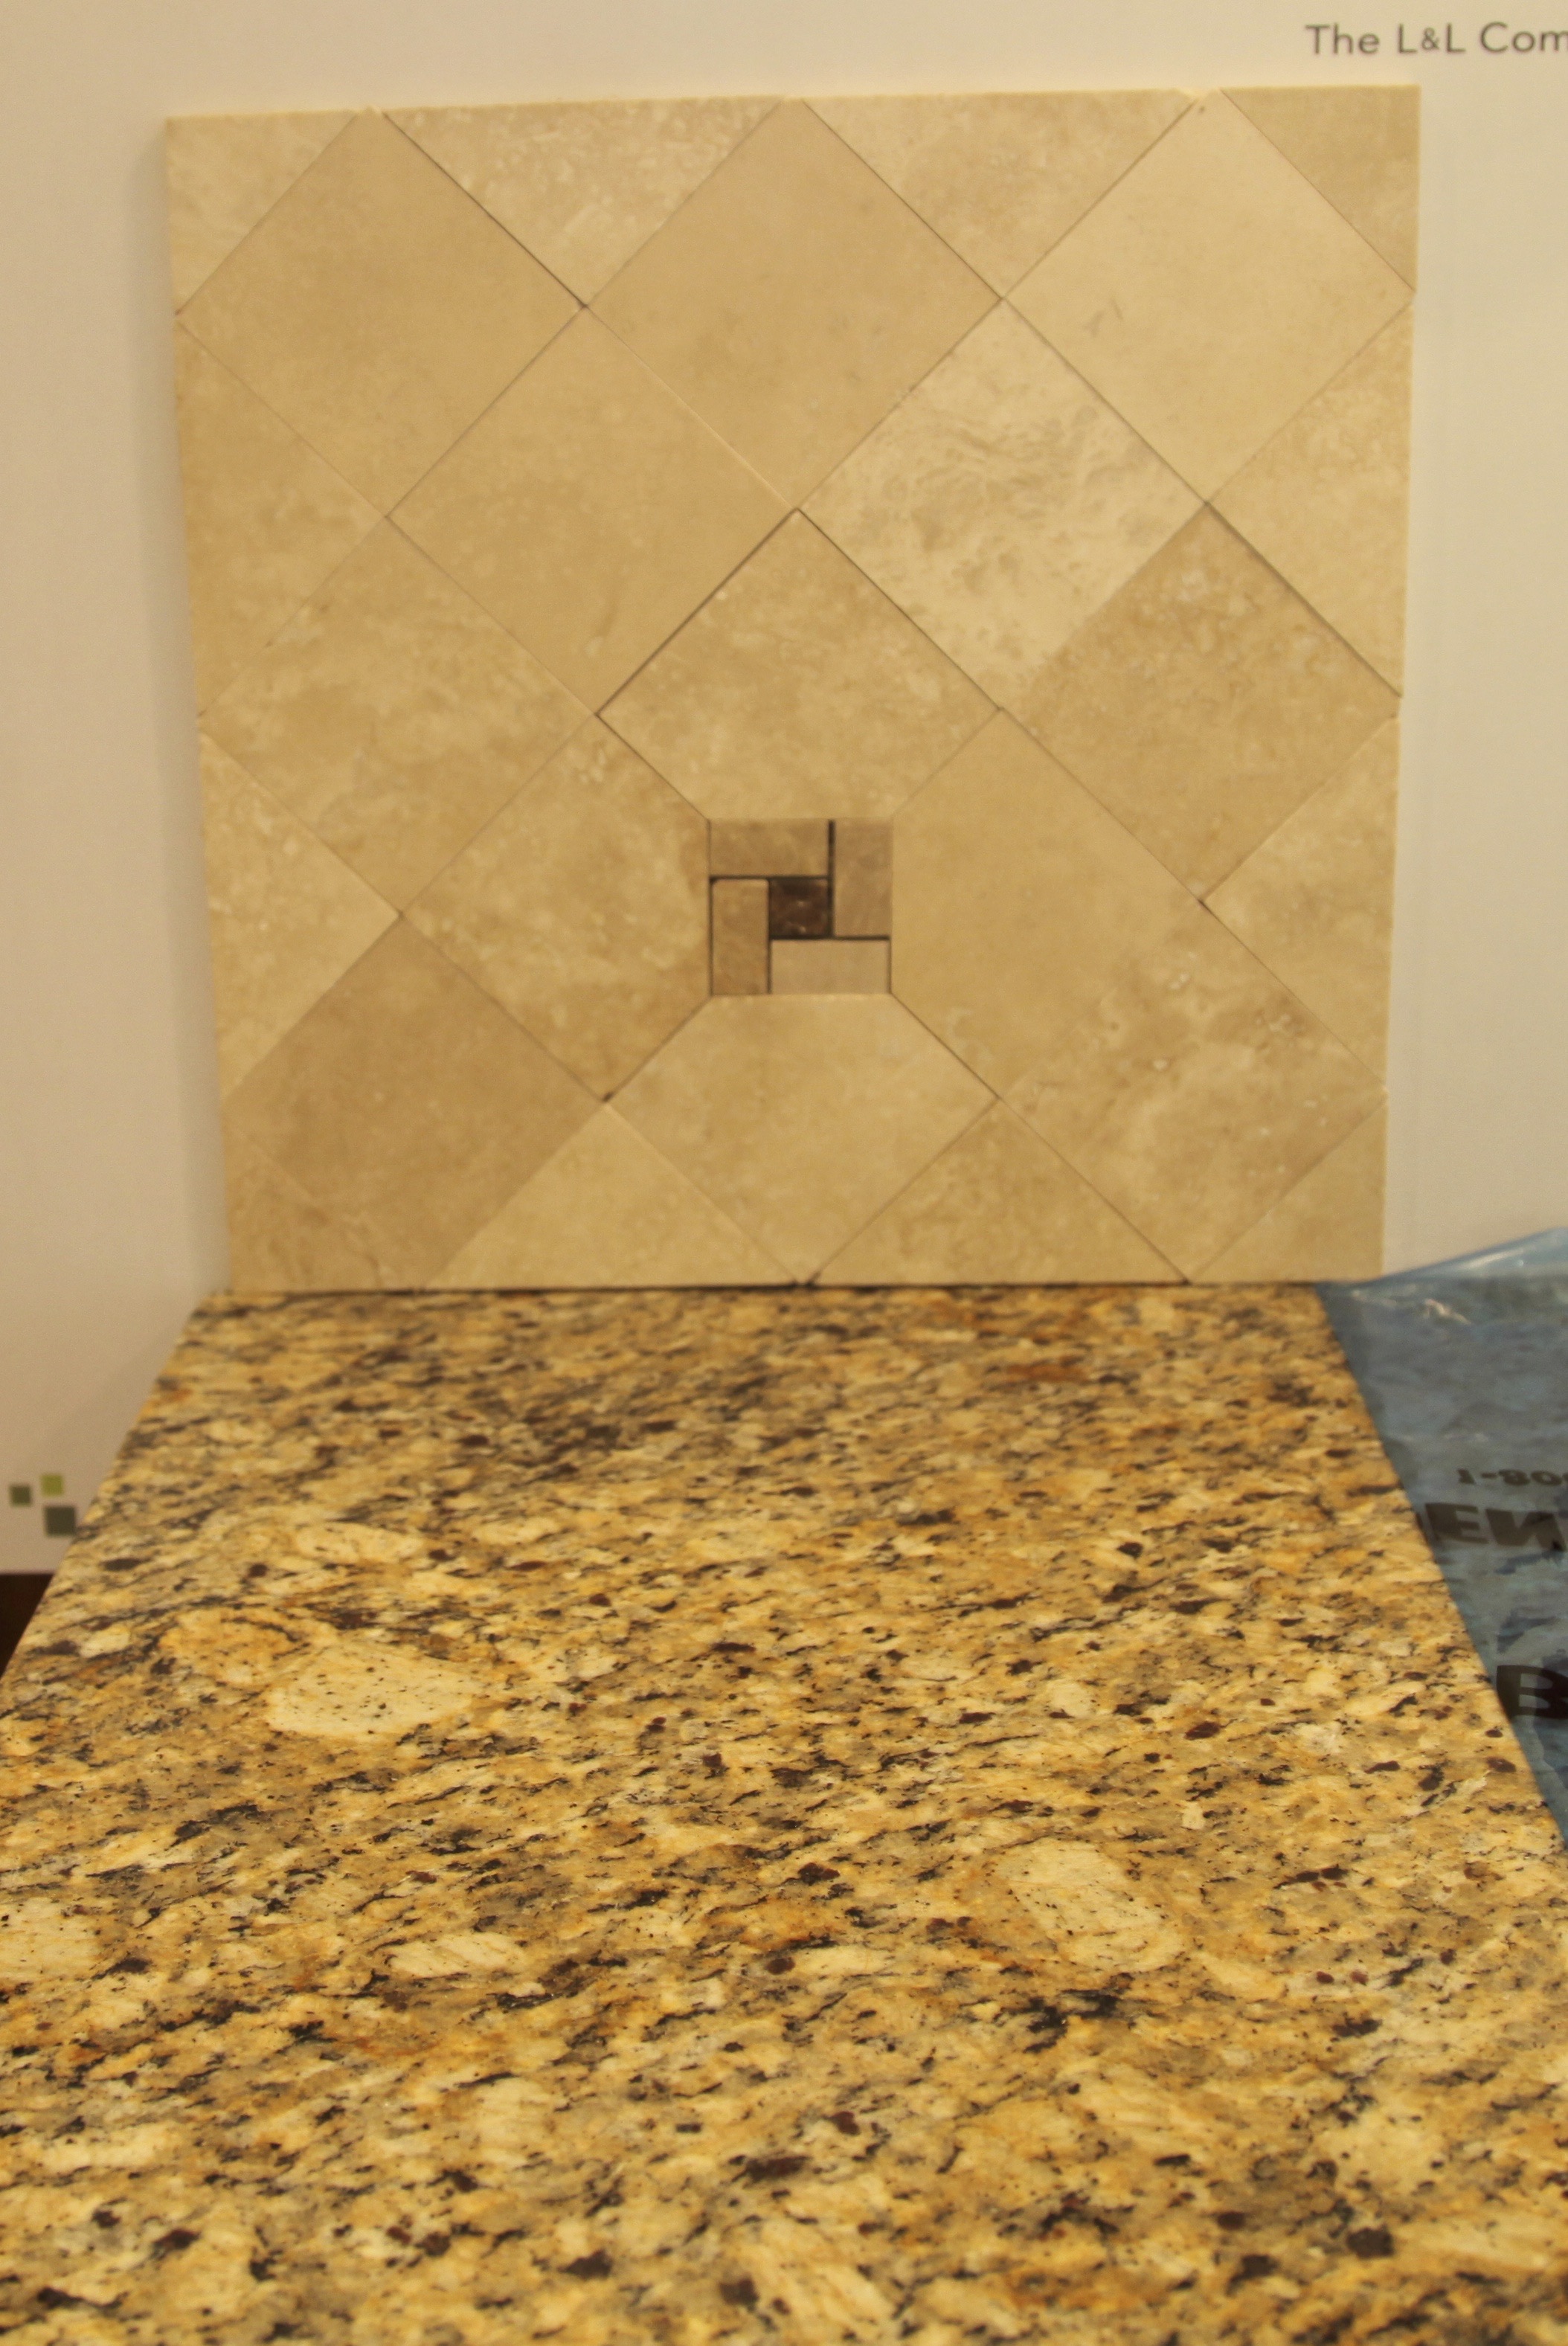
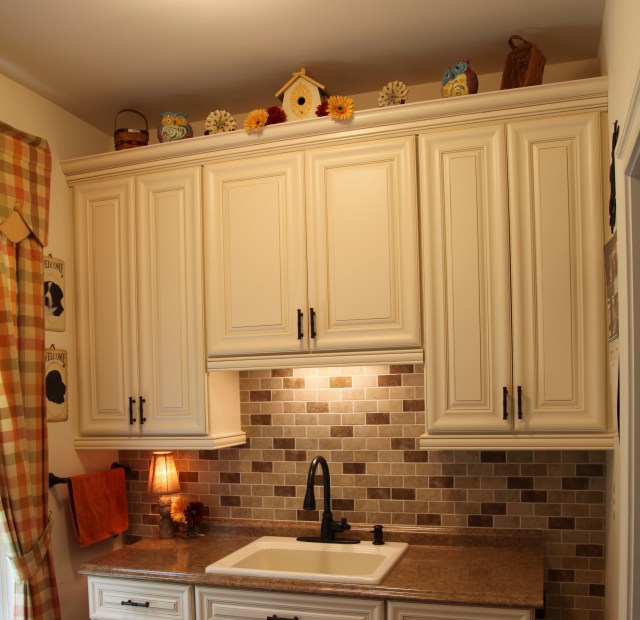
Here is the faucet and the counter top:

IMG_9182 (1)IMG_9183 (1)

IMG_9410

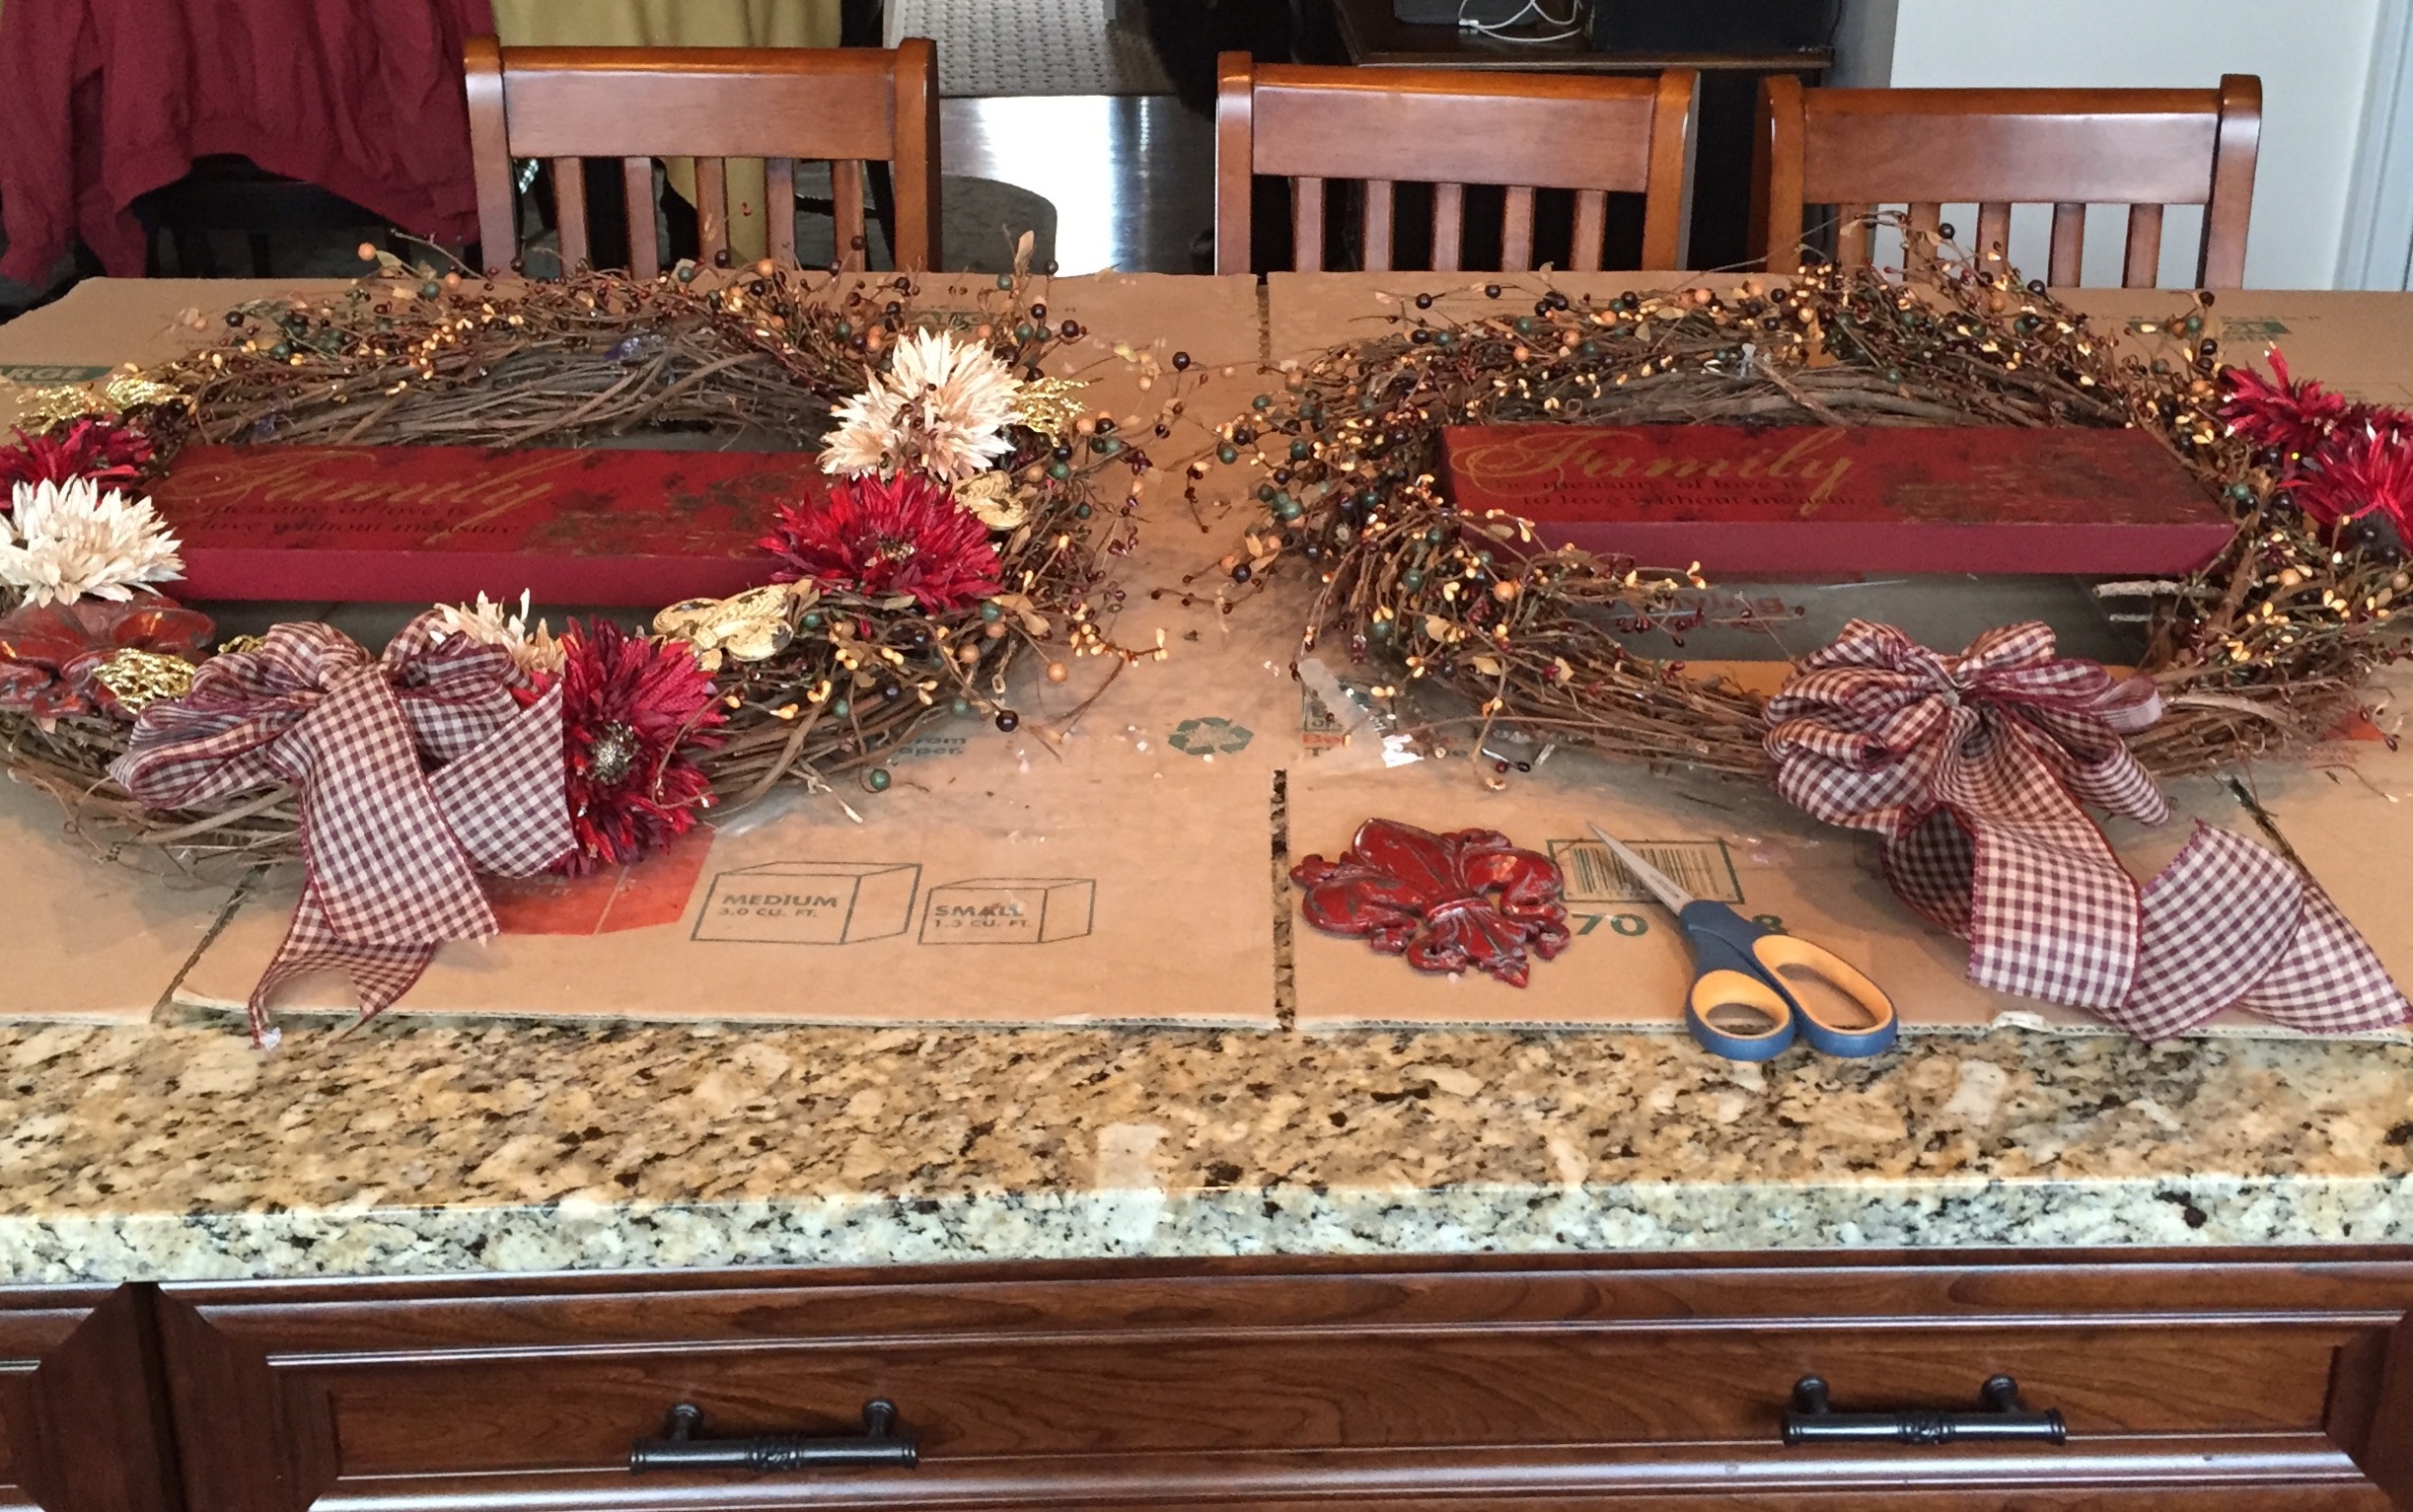
Shoot, I even made a wreath to hang in there…lol…I’m shaking my head and chuckling at myself for doing that. 😉

Now that this room is complete, we couldn’t be happier with it, yes, it is a pretty room to look at, but it also functions beautifully. 🙂

IMG_6518 IMG_8915  IMG_9411

***UPDATE- 9/9/16***

My hubby has done a little work in our laundry room as of late and I’m excited to show you what he has completed. 🙂  When he ordered the cabinets he has also ordered crown molding to go across the top and a light rain to go across the bottom of the upper cabinets.  Also, we had purchased ceramic tile a while back, and he installed a backsplash.  Here are some pictures of the *now* completed laundry room:

img_5484img_5486img_5488img_5489

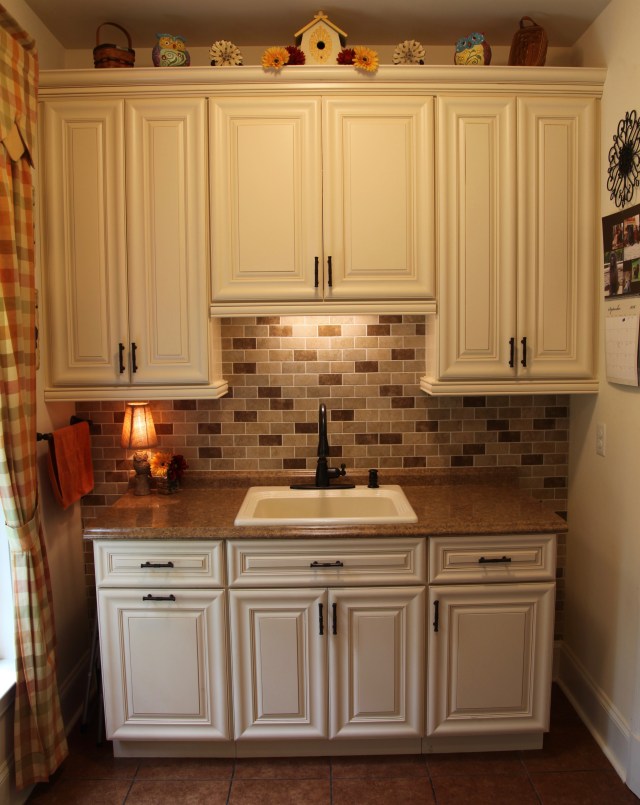
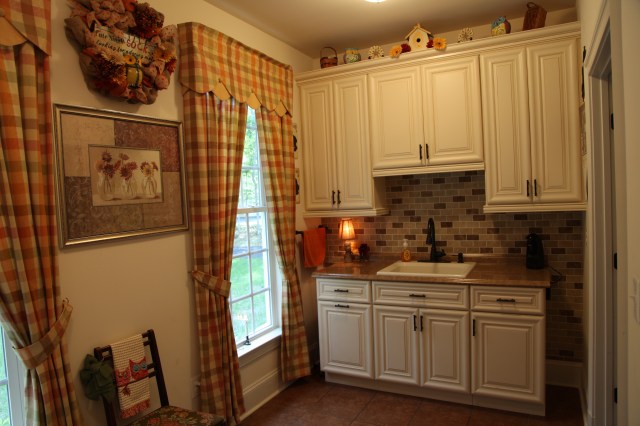
We are thrilled with the final result, the prettiness of this room now matches the functionality; it is definitely one of the most used rooms in the house. 🙂

Until next time, y’all take good care! ❤

**In crafting there are no mistakes just unique creations**

The Kitchen

Hi Y’all!

What better place to start my home tour posts than the kitchen, it is definitely the heart of our home and my very favorite room in our house.  In fact, this kitchen is one of the major reasons why we built this model. We did throw quite a bit of extra money into the kitchen, we upgraded the cabinets, the countertops, the faucet, the appliances, the hood was extra, and we added more recessed lighting (because it has a cathedral ceiling in there and the lighting provided from the builder was not gonna cut it).  The hardwood floors were also an upgrade.

Let’s go through our chosen materials and finishes:

The cabinets are KraftMaid, the uppers are 42″ high, and the color is called “Autumn Blush”.  The cabinet doors and drawers are all “full coverage” meaning it would be next to impossible to open them if they didn’t have handles on them. All of the doors and drawers are “soft close”, there is no way one can slam anything shut. 😉  All you need to do is push and the doors and drawers gently close softly.

IMG_0960

We chose to put a large crown molding around the tops of the cabinets, and a piece of molding around the bottom called a light rail. Those two pieces of molding really make those cabinets pop!

IMG_1227
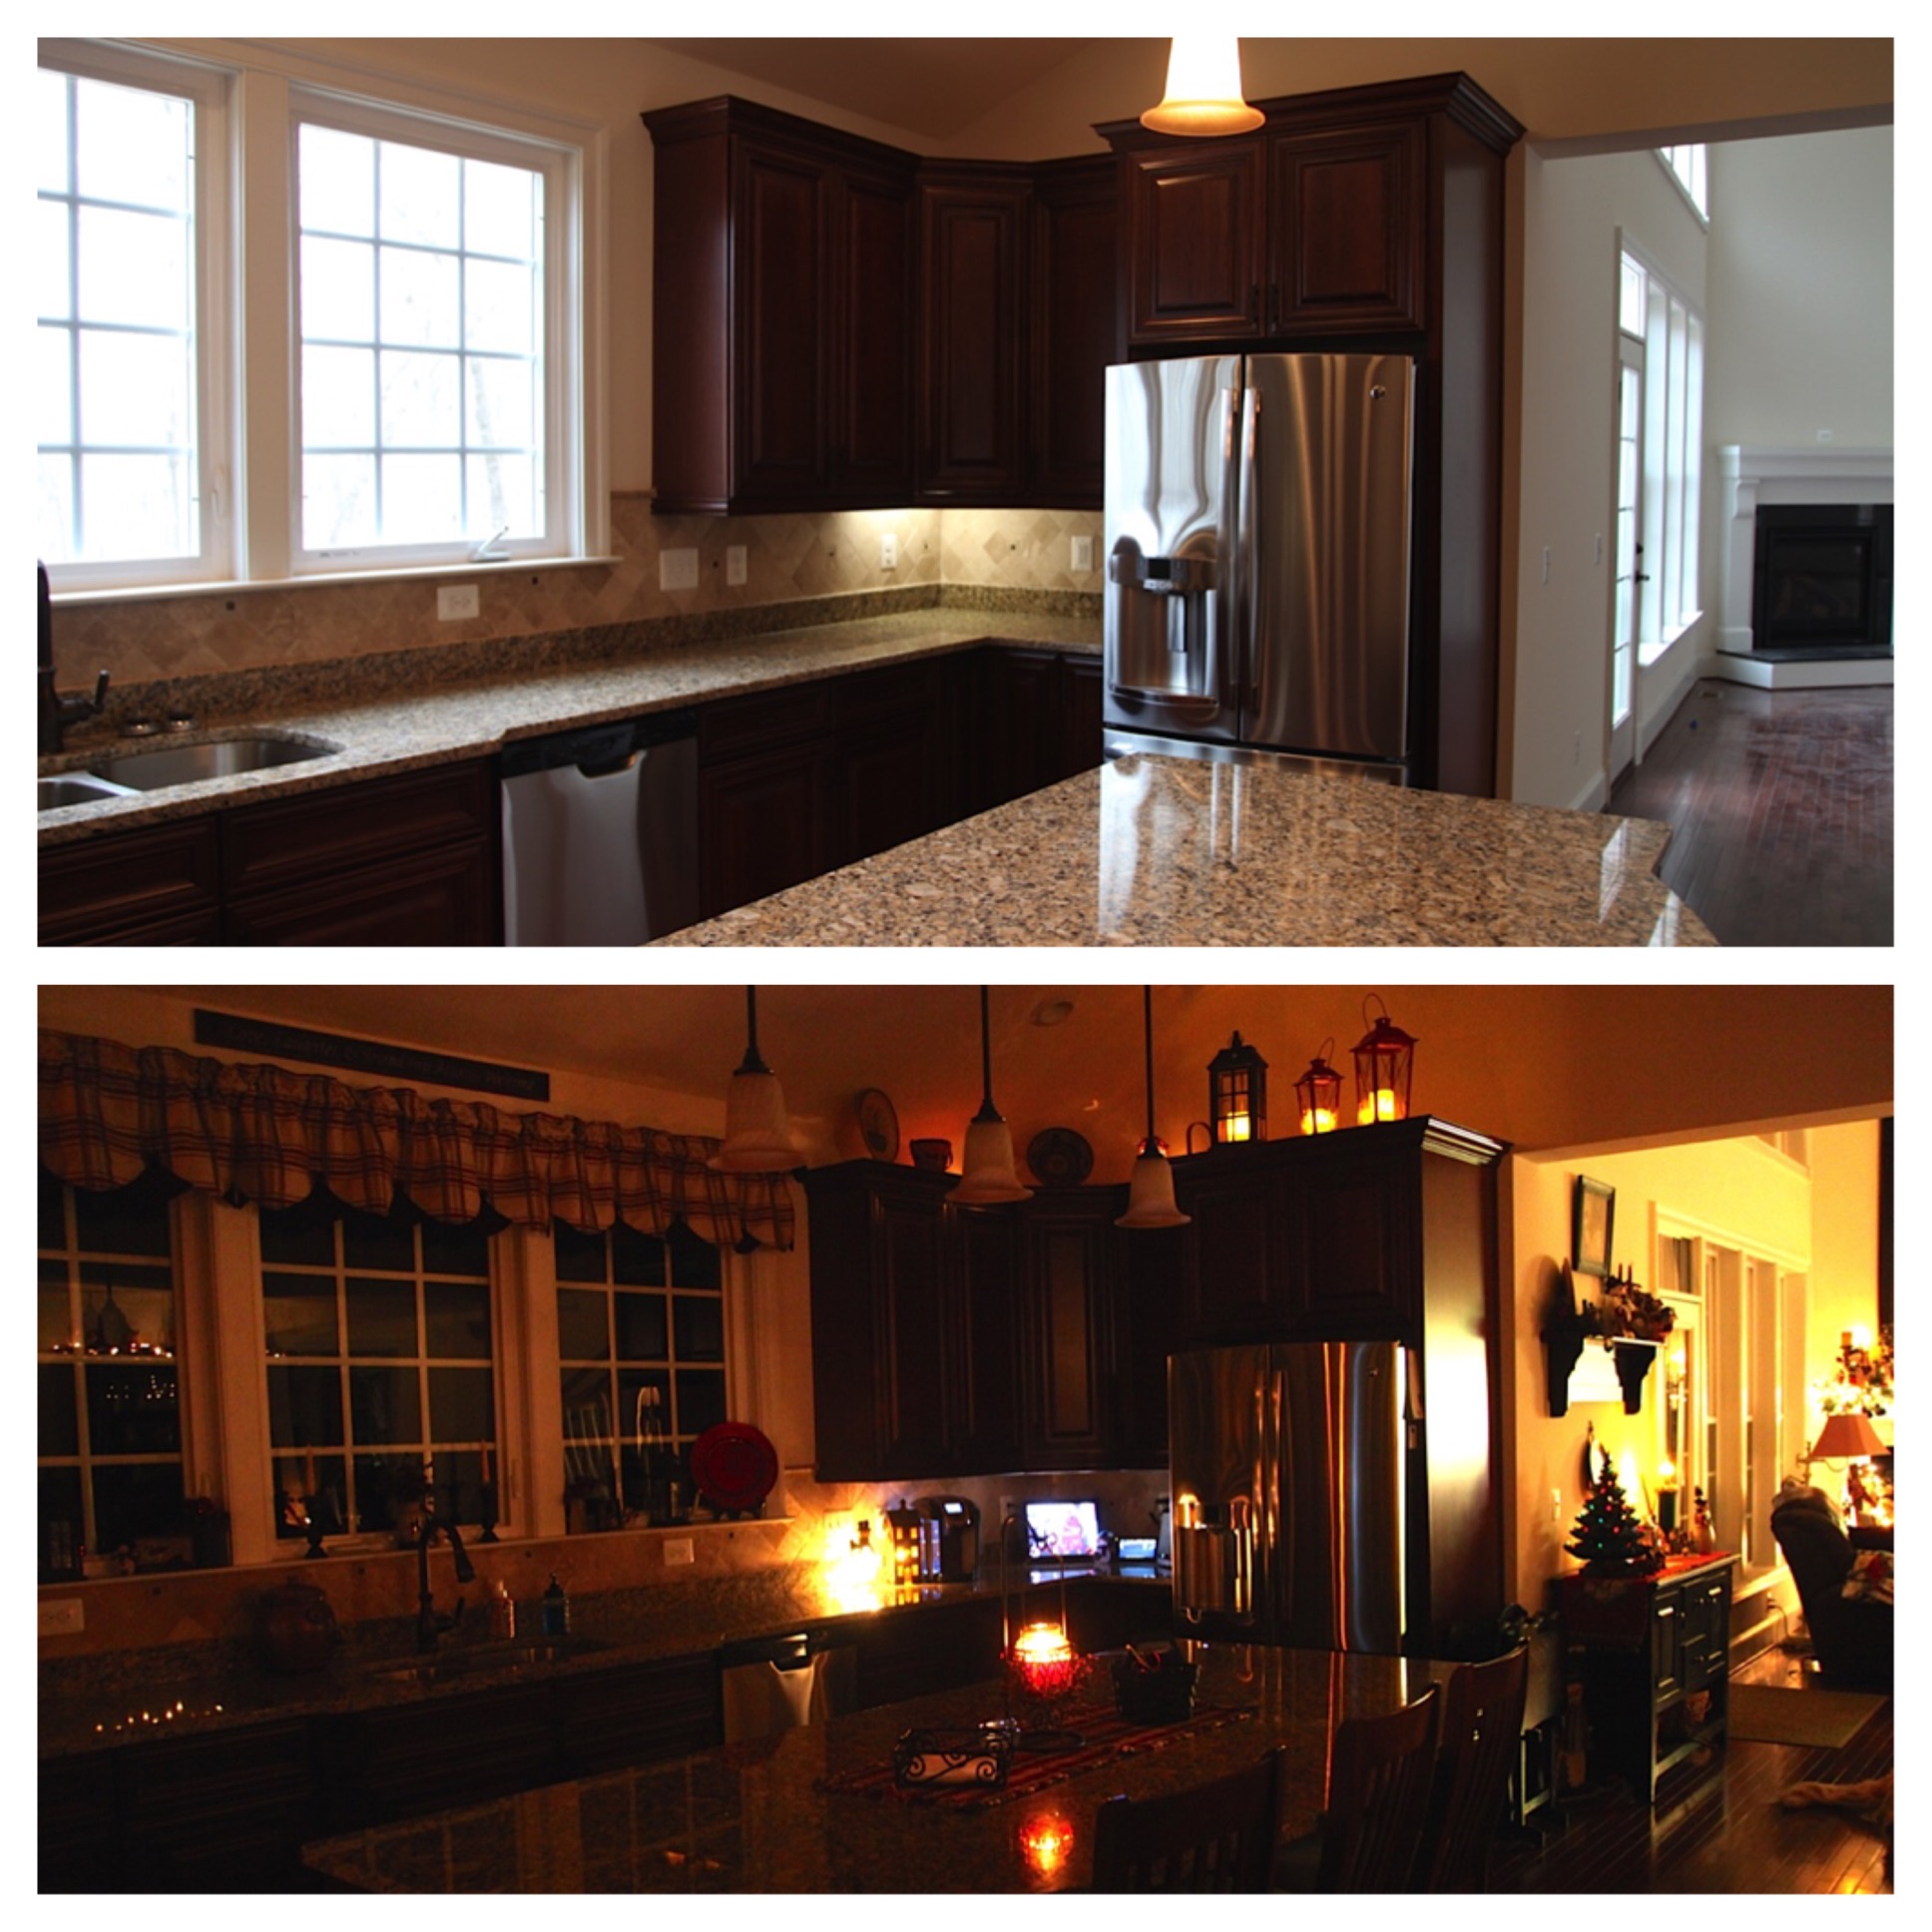
Here is the under cabinet lighting, I’m thinking that eventually we will change it out for more ambient lighting. But, it is fine for now, in fact, the flouresent lights aren’t as harsh as I thought they might be.

IMG_2025

My hubby is quite handy and is a pretty savvy online shopper; he saved us a ton of money with those door pulls.  The cabinet company was going to charge us $25 a piece installed, yes, I said *a piece* for each one of those door pulls. Complete highway robbery in my humble opinion! Yes, they are quite pretty and nice and heavy and they were including the labor for installation in that cost, but $25 a piece? Ridiculous!  My hubby found them online for $7 a piece and purchased enough of them for every door and drawer. Now, I’ve seen in other homes where folks choose a knob for uppers and a pull for lowers, or vice versa.  We chose these pulls for all doors and drawers and I love how they look.   AND **bonus** we didn’t have to pay an installation fee, my hubby made jigs and drilled the holes and installed every single door and drawer pull, 60 in all–better him than me…goodness knows I would not trust myself to drill holes in those pretty cabinets!

IMG_3169One spiffy upgrade that we chose was a trashcan cabinet.  In our other home, I used to keep a trashcan under the sink, I’m not one who enjoys seeing a trashcan sitting out on the floor, so even though we had a small kitchen in our previous home, part of the under the sink space was utilized for a trashcan. So this is a real luxury for me.

Now for the counter top and backsplash choices, to say we struggled with these choices is an understatement.  I wanted to keep the kitchen’s color pallet in a more classic hue.  Adding splashes of color via paint and decor is always a better option in my opinion. So we chose earth tones.  The counter top’s granite is called “Santa Cecelia Gold” and the backsplash is a travertine tile in beige tones. I feel that these colors paired beautifully with one another and also contrasted nicely with the hardwood and cabinet colors. I was glad these choices were finally made; I cannot tell you how many sleepless nights I had while making these decisions. I know how expensive it is to redecorate a kitchen and I didn’t want to have to do that…well, really…ever, so these choices were some of the most important that we made. 🙂

IMG_1410 IMG_1409

The island! I love the island! It has a pretty curved bump-out on one side where three chairs sit utilized by many people as they keep us company while we cook or while I craft. 🙂  It has tons of storage space underneath of it as well. It is 8′ long and 4′ wide at the widest point.  We use this island for tons of things, but, mostly, it is my creative hub. 🙂  I make all of my crafts on this island..of course many other uses are just as important, like setting dinner out, or setting up a buffet for larger gatherings.  It is awesome and I cannot say enough good things about it. 🙂

IMG_2029 IMG_1994

IMG_5822 IMG_5835

IMG_1813

The triple windows along the back wall are another one of my favorite features, I did an entire blog post here showing you how I change the window decor out as the Seasons change.

IMG_9158

There is also a walk-in pantry that holds anything and everything including our wireless router and printer.

I composed a Blog post that describes how I came up with the decor that is arranged on top of the cabinets. Here is a link to that post.

IMG_1820 IMG_1819

I cannot express to y’all enough how much I adore our kitchen, and again, I feel so humbly blessed that we are able to enjoy it from now on, this is definitely the last house we will ever have and we waited for a long time to build exactly what our vision was for our retirement years. 🙂

IMG_1618IMG_1616

Until the next time, y’all take good care! ❤

**In crafting there are no mistakes just unique creations**

Above the Kitchen Cabinets Decor

Hi All!!

One of the main reasons that my hubby and I chose this model of home to build for our retirement home was because of this kitchen.  It is definitely my dream kitchen and I feel humbled and blessed to be able to cook in it daily.  While our house was being built, I was doing a bit of  building of my own, I was building the decor that I would be arranging on top of the kitchen cabinets.  First, I have been collecting Longaberger baskets for decades so I knew that some baskets would definitely be part of the design.  I have also been collecting Dickens Houses for decades, and I’ve always added them into my decor no matter the time of year, so I knew a few of those would also be incorporated into the design.  I love wooden plates and had collected quite a few of those too.  To round out what I needed to complete my vision of the cabinet decor, I spent many a day collecting lanterns and battery operated candles to go in them as well as a *very* large plate and a couple of metal stars (for above and on either side of the hood).

The day finally came for me to arrange the cabinet decor.  I truly had no idea where to start, so I gathered everything that I had earmarked for this project and laid it all out on the island.

IMG_9260

My hubby went and retrieved a ladder; I sweetly (honest) directed and he placed things where I asked (bless his heart, he had to readjust a few items several times until I was satisfied with the placement). It didn’t take us long to get in a rhythm and we had everything placed in no time. 🙂

I am really happy with how it all turned out! To add, my hubby attached little chargers to the candles and plugged them in up there–during the building process we had arranged to have wall electrical sockets installed above the cabinets and they all run to a switch down on the wall.  Because he did that, I never have to replace the batteries in the candles and they stay on all of the time. 🙂

As you will see in future blogs, I love soft lighting and what it adds to the overall feeling of a room. My goal is always for a room to feel warm, welcoming, and cozy, I feel as if I accomplished that goal with the overall decor selections and my hubby’s help with placement and the magic he performed with those battery operated candles. I love it when a plan that has been formulating in my brain comes to fruition! 🙂

**In crafting there are no mistakes just unique creations**

picstitch
Here is a before and after comparison from one direction and then below from another direction:

picstitch 3

IMG_8427 IMG_2505 IMG_8426