A Purple Centerpiece (Video Tutorial)

When I am out and about shopping, I always keep my eyes open for good deals and man oh man did I find one a couple of weeks ago.  As I’ll tell you in my little video tutorial below, I found a huge, heavy bowl for 90% off (!!!) at Hobby Lobby, it just so happened that it had a bit of purple on it and well, my mind started to whirl wondering if there was *something* that I could do with that find.  First, I knew that it would look really pretty in our “Purple” guest bedroom that is made up with that most beautiful of colors. And, second, I knew that I had a bit of a bare spot on the bottom of a table shelf that needed a little something. *Even* if I hadn’t have had a spot with which to utilize that bowl, I’d find one!  So, I snatched that bowl right on up and I will now show you how I put together an easy centerpiece to add to that room’s decor.

Below the little video box, I’ll show you the finished project and where I placed it in the Purple room.

Screen Shot 2016-07-17 at 4.46.52 PM

Here is where I placed it:

1V4A56251V4A56421V4A5627

As you can see, this bedroom has a bathroom attached, it is not very big at all, but it serves its purpose…

1V4A5628

1V4A5630

I always have a little care package sitting in all of the guest bedrooms so that folks who come to stay will have a little selection of things from which to choose that they might have forgotten…

1V4A5632

1V4A5640

I made that wreath utilizing one of my daughter’s old Boyd’s Bear Bunnies.

1V4A5639

This is the view of the upstairs landing as you exit the purple bedroom…You can see the Turquoise Room to the right, and the Happy Room  to the left <~~~ Links to show you how I put those two rooms together, i.e. bedding, decorations, curtains, decor, etc…And here is a link to the Purple Room‘s blog post.  I also have a blog post here showing you how I put together that little chair and table grouping on the landing.

1V4A5644

Here is a peek at the Turquoise Room…

1V4A5650

And the Happy Room:

1V4A5651

And here is the hall bathroom upstairs, it sits right next to the Happy Room so I kind of brought that same feel into the bathroom…Again, it is a very small bathroom, but it serves its purpose:

1V4A5646

And the family room as you look down over the railing:

1V4A5638

And the fireplace as you walk down the staircase…haha…:)

1V4A5657

All righty, that centerpiece is now in its rightful place and the upstairs is ready for a couple of guests who might just be coming to visit in the coming days. 🙂

Until next time, y’all take good care! ❤

~Arlynn ❤


Shrimp Creole: Hubby’s Famous Recipe

My hubby is a jack of all trades…no seriously, I’m pretty sure that there is nothing he cannot do, i.e. fix anything and everything, create, construct; yes, he is pretty amazing!  To add to his repertoire, he is a wonderful cook!  Yeah, I’m not bad myself, but, I’m known more for the every-day kind of recipe like pot roast or spaghetti or a nice pot of soup…you know, things that Moms around the world cook on a daily basis.  The hubby, well, he cooks much fancier dishes like his version of crab cakes (to die for!!), home-made chicken nuggets (maybe not so ‘fancy’, but, OH so good), along with many other things our family has greatly enjoyed through the years.  His Shrimp Creole is one of my very favorites, so he has graciously said that I can share his recipe with all of you.

Let’s start with the ingredients–And I’ll warn you, there are *many*:

  • Shrimp- Deveined – 4 pounds-26-30 count (if you purchase frozen)
  • Butter – 1 stick
  • Onions – 3- 3-1/2 Cups, finely chopped
  • Green Pepper – 2 – 1/2 Cups, finely chopped
  • Celery – 2-1/2 Cups, finely chopped
  • Andouille Sausage – 4 links chopped into bite-sized pieces
  •  1 T  Fresh Garlic – Minced
  • 1 t – White Pepper
  •  1/4 t – Black pepper
  • 1 t – Salt
  • 2 Bay Leaves
  • 2 t – Basil
  • 4 t – Thyme
  • 2- 28oz. cans of diced tomatoes – drained
  • 1 – 16oz. can of tomato sauce
  • *Shrimp Stock–3 cups

First, here is how the hubby makes his Shrimp stock–He will usually make up a bunch and then he freezes it in individual 3 cup portion sized containers–He used one of said frozen containers of stock to add to his latest batch of Creole (just this past weekend):

Shrimp Stock:  Remove heads and shells from the shrimp, set shrimp aside. Place heads and shells in large pot, add 4 cups of water or just enough to cover the shells and heads. Simmer for 20 minutes. Strain stock into other containers for use as an ingredient.

IMG_5177

Now, here is how he pulls all of these ingredients together to create one amazing tasting dish:

In large pot, brown 1 – 1/2 cup of chopped onions in 1/2 stick of butter.

After browning, add remaining 2 cups of onions & 1/2 stick of butter, green peppers and celery. Cook till softened (5 minutes on medium-high stirring occasionally). Put on medium heat and add salt, pepper, seasonings, garlic and one cup of stock. Mix well and cook on medium for about 3 minutes. Add drained diced tomatoes and simmer for 5 minutes. Add tomato sauce and remainder of stock and simmer for 15 minutes. Add shrimp and sausage and simmer, take off of the heat when shrimp is cooked through–do not overcook the shrimp.

IMG_5169

IMG_5171IMG_5168IMG_5181IMG_5183

IMG_5176

IMG_5180 (1)

My very favorite thing to serve this luscious Shrimp Creole over is Fettuccine & I shred up some fresh Parmesan cheese to sprinkle over the top…mmm, mmm good!! Y’all might enjoy using something different, like rice, or maybe angel hair pasta.  Regardless of what you pour the creole over, trust me, it will be delicious!

IMG_2342

IMG_2331

We usually will have a couple of slices of nice, fresh Italian bread and butter served along with our creole.  IMG_2331 (1)

This recipe is definitely one of my hubby’s tried and very true creations!!

I hope that y’all will give this one a try–Yes, there is a lot of prep work, but, the end result is well worth the time and effort it takes to prepare.

Until next time, y’all take good care! ❤

~Arlynn ❤


Little Red Wagon Decor–Video Tutorial

I’ve been working diligently to make up a few tutorial videos for y’all, in this post, I will highlight how I switched out my Little Red Wagon decor yesterday.  As you will see in the video my wagon is starting to look ‘well used’, ‘rustic’, ‘a bit rough’, but, I love it so much that it looking a wee bit rustic is going to be okie dokie fine with me. When gathering items for this little project, I tried to mimic the Burlap & Birdhouse Wreath that I made for the front door last week.  Okay, I’m not going to yammer on any longer here in the body of this blog post other than to give you a link to my How To Make a Bow tutorial (because I promised I would in the video). 😉 🙂

Here are a few pictures of the finished product and then there will be a link to the tutorial below that:

1V4A55251V4A55261V4A5530

While I was at it yesterday, I also switched out my decorative flags that I have hanging in our front flower bed and added one Grapevine Wreath creations:IMG_2319

As you’ll notice the Grapevine wreath matches the front porch decor…:)

IMG_2320IMG_2321

And I redid the mailbox decor…If you’d like to see an entire post talking about how I change my mailbox decor out Seasonally, click here :

IMG_2300

All righty, here is that tutorial:

If y’all have any questions at all, please don’t hesitate to leave them in the comments below…

Until next time, y’all take good care! ❤

**In crafting there are no mistakes just unique creations**

~Arlynn ❤

My Deviled Eggs

With the 4th of July weekend upon us, I thought this would be a good time to share my Deviled Eggs recipe with y’all.  This is one of my family’s most favorite “tried and true” recipes.  And I will tell you the truth, figuring out the measurements for the mayonnaise, mustard, & sweet relish was interesting for me because I honesty rarely measure anything when I make these yummy eggs. 🙂  This recipe, as several of my recipes have been, was passed down through the generations to me—This is an oldie but a goodie! 🙂

Here are the ingredients:

  • Dozen Eggs (a week or two old, they peel better)
  • 4-1/2 T – Mayonnaise (I use Hellmann’s)
  • 1-1/2 T – Gulden’s Mustard
  • 1-1/2 T –  Sweet Relish
  • 1/4 t – Black Pepper
  • Paprika (to sprinkle onto the top of the eggs)

Here is how I prepare my Deviled Eggs…

Boil eggs for 13 minutes:

IMG_5132

In the meantime, gather up a large bowl and put some ice water into it–I soak my cooked eggs in ice water for 5 minutes after they come off of the heat–this helps the eggs membranes to pull away from the shell.  My daughter Christin actually gave me this trick as she watched me struggle with peeling eggs one time, she researched and found this spiffy little trick.  It works like a charm. 🙂

IMG_5134


IMG_5140

I bought this wonderful Deviled Egg tray several years ago from Pampered Chef, they do not have this particular one any longer, but, instead they now sell this.

IMG_5135

It has an insert that keeps the eggs cool while they are sitting out on the counter…

IMG_5136

After all of the eggs are peeled, cut in half, the yolks are removed and put into a separate bowl, smash the yolks up and start adding your mayonnaise, mustard, relish, & pepper.  By the way, the measurements that I gave can be tweaked to your liking, you may like more or less of any one thing…those measurements depict how my family has always enjoyed them. **Note:  I do not add salt because the mayonnaise is salty enough all by itself.

IMG_5139IMG_5148IMG_5146IMG_5152IMG_5155IMG_5156

I’ve seen people pipe their egg yolk mixture into their eggs, and I have wanted to try that, but, haven’t gotten out to get myself a piping bag and tip..SO I just did it the old fashioned way and used a spoon to place said mixture.

IMG_5161

I promise you that this Paprika is brand new–Don’t you love how my hubby relabeled my tupperware container? lol I THINK we KNOW it is PAPRIKA! 😉 😉 😉  Anyway, the last step is to sprinkle paprika onto the eggs.

IMG_5143

IMG_5164

And that’s all there is to it! 🙂

IMG_5165

These are some very tasty Deviled Eggs, I promise you that. 🙂  They are now in my refrigerator waiting for our cookout to happen and then they will be devoured lickity split.

I hope everyone has a safe and wonderful July 4th weekend!

🇺🇸 GOD BLESS AMERICA!!! 🇺🇸

Until next time, y’all take good care!

~Arlynn ❤

Burlap & Birdhouse Wreath (With Video Tutorial Included)

I tried something new today, my hubby got me all set up with a little video camera and I recorded myself while I put this new front door wreath together.  So I don’t have to do a ton of explaining here in words, I’ll tell y’all all about in the video. 🙂  I will list and show a few pictures of the supplies that I gathered to make this wreath.

IMG_5098Here goes:

  • 24″ Metal Work Wreath Form
  • 2 1/2 Skeins of Burlap Runner
  • 1 Bolt of Burlap Ribbon (Wired)
  • Scroll’y’ piece
  • 3 Cream Sunflowers
  • 2 Resin Daisies
  • 2 Metal Stars
  • Wooden Birdhouse
  • Red Berries

You will also need pipe cleaners, a hot glue gun, and a spool of floral wire:

IMG_5111

IMG_5117

And the hubby got me all set up with our new little video camera and this tripod–It was quite the operation. 😉

IMG_5099

Here is the finished wreath and below these pictures will be a link to my tutorial video. I tried really hard not to ramble! lol  I hope that it will help to inspire y’all to try and make one of these for yourself!!!

IMG_5121

IMG_5131IMG_5129

Here’s that link:

***Update:  Well, I wasn’t completely happy with my wreath, so I did a little work on it today–Here is a little video update for y’all. 🙂

Until next time, y’all take good care! ❤

~Arlynn ❤

A Lantern Centerpiece Tutorial (Video)

My daughter Christin took a video of me making a Fall Lantern Centerpiece last year, I’m going to go ahead and load it onto my little blog site here — I just recently upgraded my account and now have unlimited space for which to load more media (pictures and videos).  I hope that this gives those of you who might want to try to make one of these the courage to do so. 🙂  Of course, if you have any questions, please feel free to leave them in the comments and I’ll do my best to try and answer them. 🙂

Until next time, y’all take good care! ❤


Whimsical Summer Wreath: Burlap, Mermaid, Starfish, Metal, & Pip Berries

I was at my sweet cousin Stacey’s house a few weeks ago helping her prepare for her son’s Graduation party.  She had told me about some of her summer decor before I arrived, but, her words didn’t do her creations justice; I was in awe of how she had redecorated, her home looked amazing.  She has used mermaids, sea horses, shells, and all sorts of warm summery accent pieces all around her home, and they inspired me to try and make her a wreath that would blend in nicely with her creations.  Let me start by saying that I had made her a burlap summer wreath a couple of years ago and well, it didn’t quite fit in with her new theme (also, my wreath making skills have improved since I made that other one and honestly, I wasn’t happy with it…haha).

Here I am with Stacey (in the middle) and our other wonderful cousin Donita (left) when we were at the Grad party. 🙂

IMG_4833

Okie dokie…So first, let me show you the supplies that I collected to make this wreath:

  • 24″ Wreath Form
  • 2 1/2 Skeins of Burlap Runner
  • 1 Roll of Burlap and Polka Dot Ribbon
  • 2 Pip Berry Garlands
  • Scroll’y’ Accent Piece
  • 2 Metal Starfish
  • A Large Resin Mermaid
  • Sea Shells
  • 3 Large Cream Burlap Sunflowers
  • A Few Small Silk Flower Accents
  • Hot Glue Gun, Pipe Cleaners, & Floral Wire

Now to explain how I pulled all of those pieces together to make one pretty huge wreath…Here goes:

I attached the burlap to the wreath form by catching big tufts of the burlap into each chenille twist tie…I started on the outside ring and worked my way around, I transitioned to the inner ring and proceeded to work my way in the same way around the entire wreath form.  I went through 2 entire skeins and finished up with 1/2 of another skein.

IMG_5030

This is how far one skein of burlap runner got me, I wanted this wreath to look like it was large and in charge, so my loops were quite big. IMG_5031

When I finished with one skein and started with a new roll, I simply started literally where I left off; I added the burlap right on top of where I had just finished and continued tufting on around.  I completed the entire outer ring finishing by again adding the last tuft right into the the same chenille tie as where I started, then the next tuft was in the inner ring.  I continued to add until I had completely finished both rings.

IMG_5034

The next thing that I did…Well, honestly, my hubby helped me with this part…I flipped the wreath over and centered the scroll’y’ accent piece (got it for half price at Hobby Lobby)…

IMG_5012

And my hubby attached it to the wreath form using floral wire…By the time he was finished, that scroll’y’ piece was rock steady.

IMG_5037IMG_5038

Now, I paused for a second and took some time to hot glue some pipe cleaners onto the back of the mermaid:

IMG_5019

IMG_5027

The metal Starfish:

IMG_5021

And onto several Coral Starfish Shells:

IMG_5025

IMG_5028

Then I took a moment to create one pretty huge bow out of the burlap and polka dotted ribbon (BTW, I have created a video of me doing a bow tutorial, if you’d like to try to make a bow for yourself, click here)  I used the entire roll to make this bow:

IMG_5018

My daughter mentioned that the tails of the bow actually matched the mermaid’s tail…I told her that that was by design <~~~ I fibbed…LOL…I always cut my bow tails that way, it just so happens that my bow tails look like a mermaid tail–who knew? 😉 😉

IMG_5040 (1)

Next, I started to add the pip berry garland to the outer ring (only) catching it in each chenille twist tie.  I worked my way around the entire wreath form–I used 2 garlands and I only had about 3 inches of length left.  Here is where I purchased this Light Teal and Vanilla Cream Berry Garland.

IMG_5036

Now, I was ready to start placing and adding all of my accent pieces. Of course I used the glued on pipe cleaners to attach the mermaid, metal starfish, and coral starfish.  I also used hot glue to anchor them in place.  I can’t really explain I how pull a wreath together, it is just a trial and error sort of approach.  I’ll place an item, stand back and look and decide if I like it there or if I want to move it.  I do this with each accent piece and eventually it all comes together and when I’m satisfied with how it looks, I anchor everything down with hot glue (well honestly, I don’t *always* use hot glue–I’d rather not really, but, with wreaths this size, I often need to add the hot glue to give it more stability). Sometimes this entire process happens quickly & and sometimes I will tweak for hours…haha…I really wanted this wreath to be special for Stacey, so I will admit that I did a bit of tweaking for a good amount of time. 🙂

By being able to see Stacey’s home decor in person, it made this wreath easy to create.  I ‘felt’ her house while I was there, it was warm, cozy, and whimsical in places–I *think* I managed to create the same ‘feel’ with this wreath…Here is the finished product–It measures every bit of 32+” around:

IMG_5040

Stacey squealed when she saw it…hahaha…Bless her heart, I just love that girl to pieces!! And this is where she hung it when she got it back to her gorgeous home–I LOVE it here, and I am reallllly happy to see that those sunflowers, creamy pip berry beads, and the coral starfish match that frame around that beautiful mirror…gosh, how pretty does that combination look?!!  YAY!! 🙂  GREAT place to display that wreath Stacey!! You go girl!!

IMG_4559

I cannot tell you how special my entire family is to me–I would do ANYTHING for them, and this particular wreath was made with tons of love and with Stacey on my mind while creating it. ❤

Until next time, y’all take good care! ❤

**In crafting there are no mistakes just unique creations**

~Arlynn ❤


Liz, My Sweet Lizzy

One week ago today, my sweet lady friend Liz from Victoria messaged me to break some horrible and devastating news.  You know how when you hear horrible news, you will never ever forget where you were standing, what you were doing, and how you felt and reacted? Well, that was me last Monday–As I excitedly opened my Facebook message from Liz, you see, I am *always* so excited to hear from her; I love to chat with her, to commiserate with her about all things…Liz is one of those friends who gives of herself much more than I could ever give back and who I have come to love so very much. Anyway, what her short message said to me that day stopped my world…literally…I couldn’t move, I broke out in immediate tears, and I was stunned when I read the words…”I have ALS (Lou Gehrig’s disease)”. WHAT?!! NO, it can’t be!!  Yes, I knew that she had been to doctor after doctor and through test after test trying to find out what was causing the symptoms that she had been having as of late, but, never in a million years did ALS cross anyone’s mind, certainly not hers and certainly not mine–And then…

NO, I am not going to make this post about this debilitating and yes, eventually fatal diagnosis; I’m not going to give it the time of day that it doesn’t deserve…I hate it with and to my very deepest and most earnest thought and will not lament further on what it will put my sweet Liz through before it is finished with her.  ***Instead***, I want to tell you about Lizzy and to celebrate our friendship, while she can still read what I tell you about her, because you see, I want you to see and I want you to know that she *is* a fighter, she *is* a trooper, she *is* brave, she *is* smart, she *is* beautiful (inside and out), and she **is** my FRIEND!!

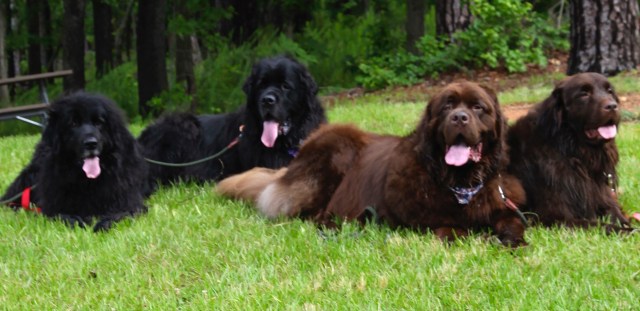
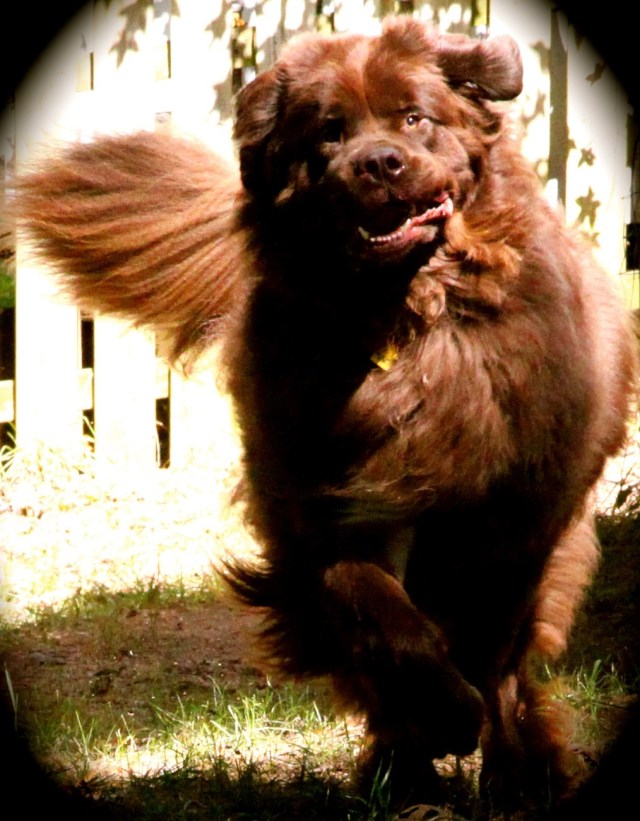
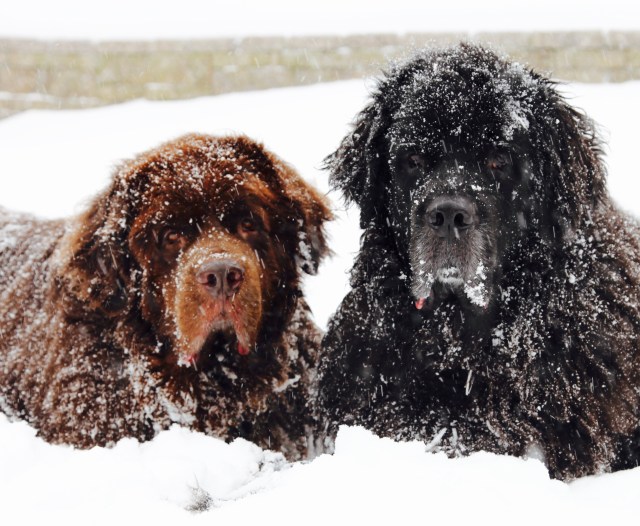
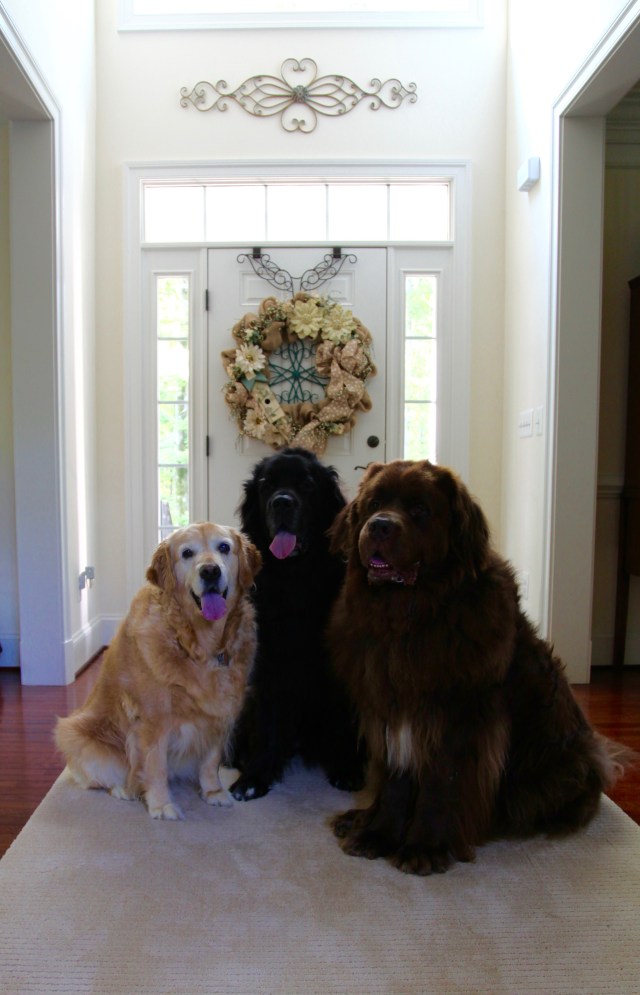
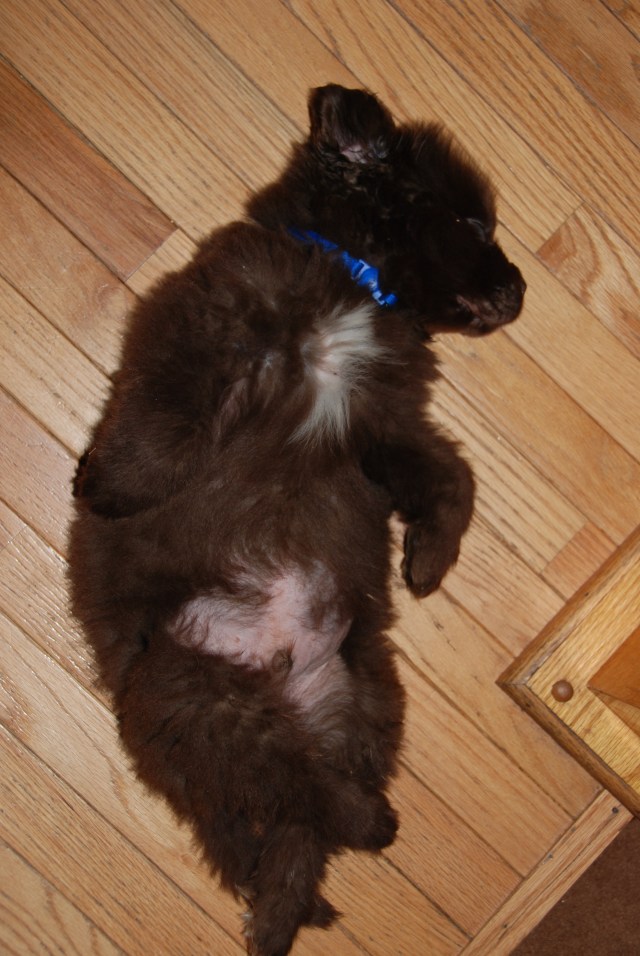
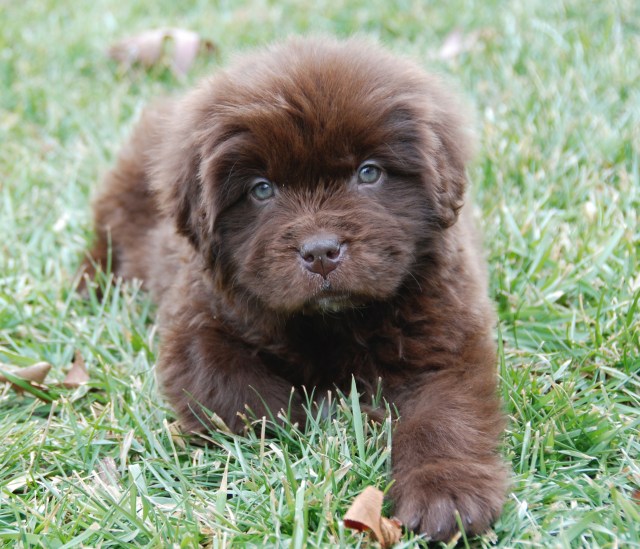
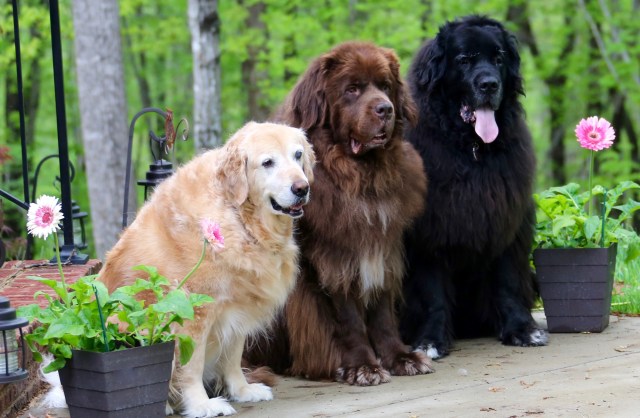
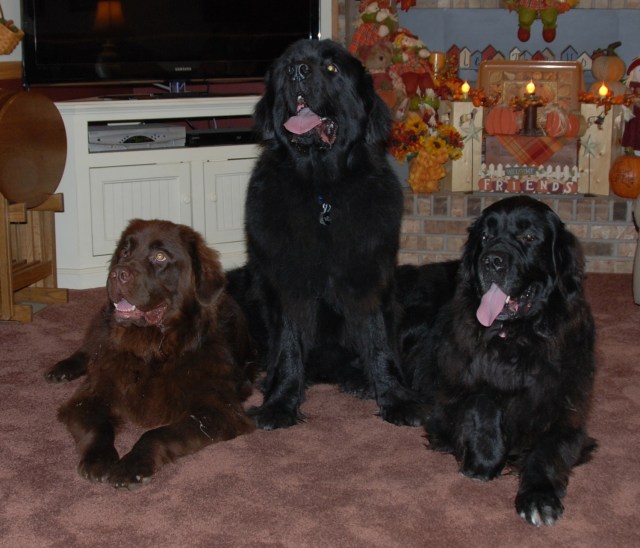
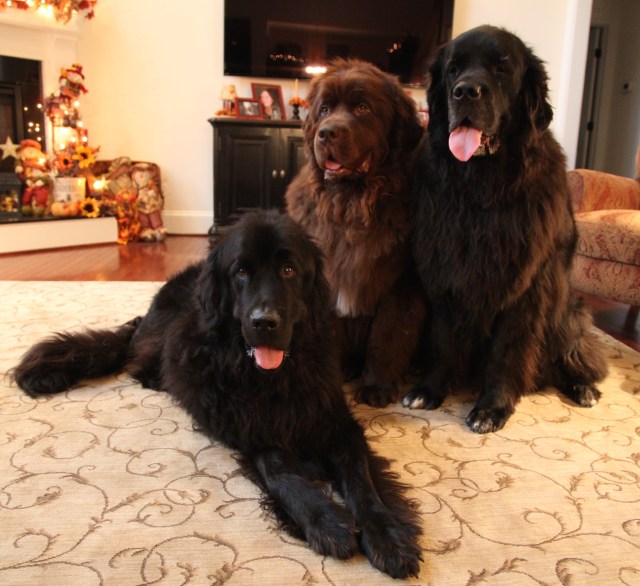
Liz and I met via Facebook many years ago via the relatively small Newfoundland Dog community.  We share a love for this most majestic breed of dog and have both been lucky enough to have been loved by 4 of these amazing creatures.  Sadly, one of Liz’ Newfs passed away almost a year ago–oh what a sad day that was, I know Liz misses her beautiful Fleur each and every day.  We still enjoy the 3 that remain, my two (Sophie and Samson), and her Jack, we share pictures, we laugh, cry, and completely enjoy our pups.  But, our friendship grew much deeper than it being just through our dogs when Liz reached out to me via FB message a week after my hubby had his open heart surgery 5 years ago.  I hadn’t been on Facebook for over a week (which is not like me because I’m always putting something up on my Wall).  She was so sweet when she queried about our wellbeing saying that she was quite worried that something awful had happened…Well, she was so right (she is a very intuitive lady), something pretty awful had happened and I proceeded to tell her all about our scary and pretty harrowing past week, all the while writing through tears because I was so touched that she cared enough to reach out to us.  ❤

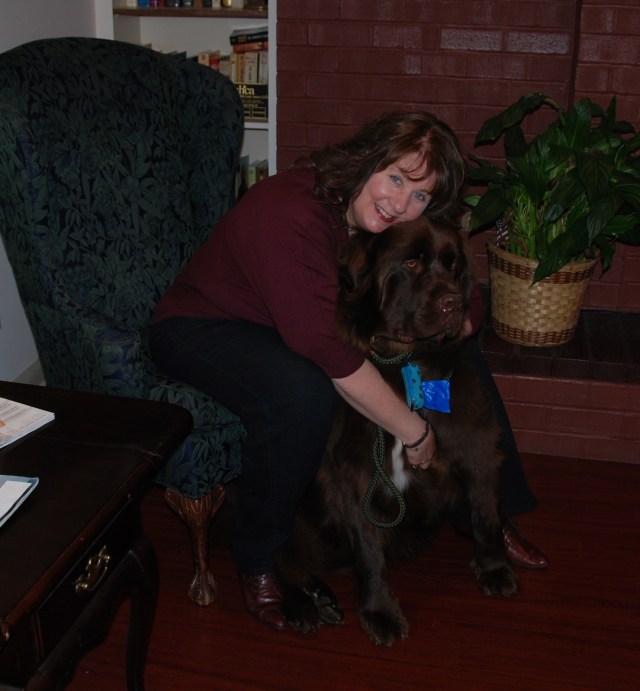
Our friendship grew and grew after that, YES, you can become dear friends with someone through Facebook without ever meeting them in person.  Of course one of our major goals was to meet one another in person, and when she moved from here on the East coast, to over there on the West Coast, I told her that it would probably be more likely that we would now get the opportunity to meet because my hubby and I routinely try to go to Alaska and we always disembark in Vancouver.  Last summer (2015), Liz and I finally got the opportunity to meet in person…the hubby and I took a whale watching tour over to Victoria from Vancouver after we disembarked our cruise ship that had been cruising in Alaska for a week.  I was SO excited to HUG Liz’ neck, I cannot express to you just how much.  Here is our very first meeting in person…

1V4A26041V4A26091V4A2610

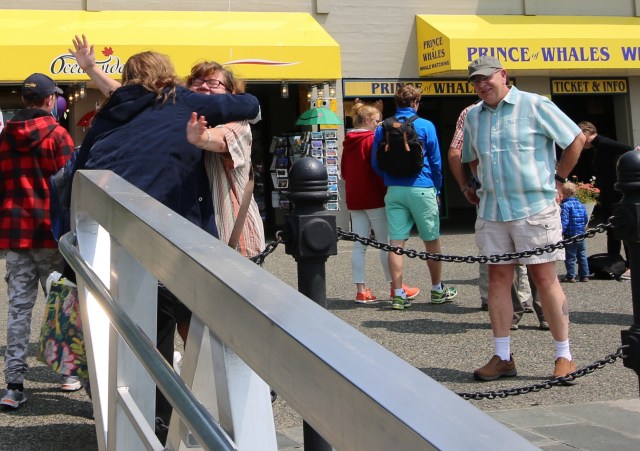
What an amazing feeling it was to HUG this woman’s neck!!! And we hugged for a good LONG time…I’m sure we made a spectacle of ourselves, but, we could have cared less what others were thinking, we were seeing one another in person and all was right in our world!!! ❤ We had an amazing couple of hours with Liz and her hubby…you see Liz is a chef and she cooked us the most AMAZING meal!! (Liz is also a cookbook writer and an amazing blogger…among SO many other things)  We sat on her deck and chatted and I was able to look out over the gorgeous cove where she had taken her “Daily Deck View” and her “Cruise Ship” (which I love) pictures that she posted on Facebook…It was quite surreal for me to actually be sitting there with Liz.  We laughed and we cried, and we laughed though those tears as we told stories and compared notes, and just enjoyed being right there sitting next to one another.  Also, unbeknownst to me, the day we were there just happened to be the one month anniversary of Fleur’s passing–And Liz was so gracious and said that our visit was special because it would give her something good to remember when she took a moment to reflect on Fleur’s passing anniversary.  How generous was that of her to us?!  Also, and ***bonus*** her hubby and my hubby hit it right off!!  Goodness gracious, I think those two men might have actually talked more than she and I did. 😉 That warmed both of our hearts to see them connect so quickly and nicely.

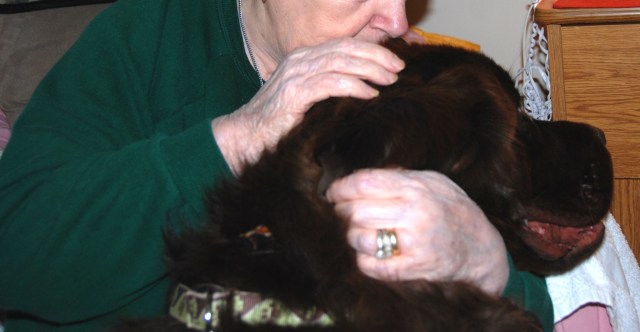
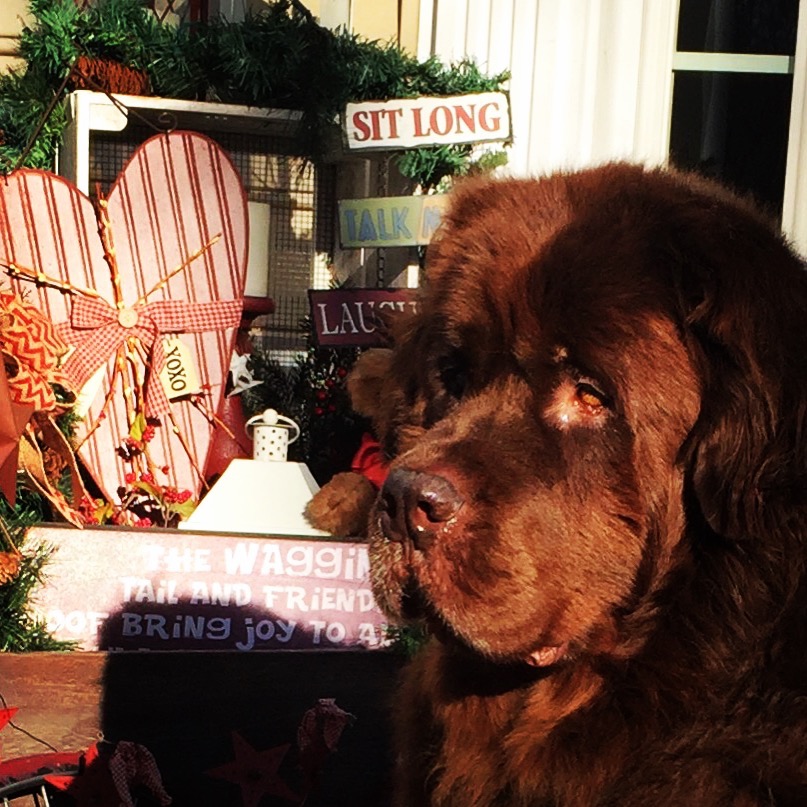
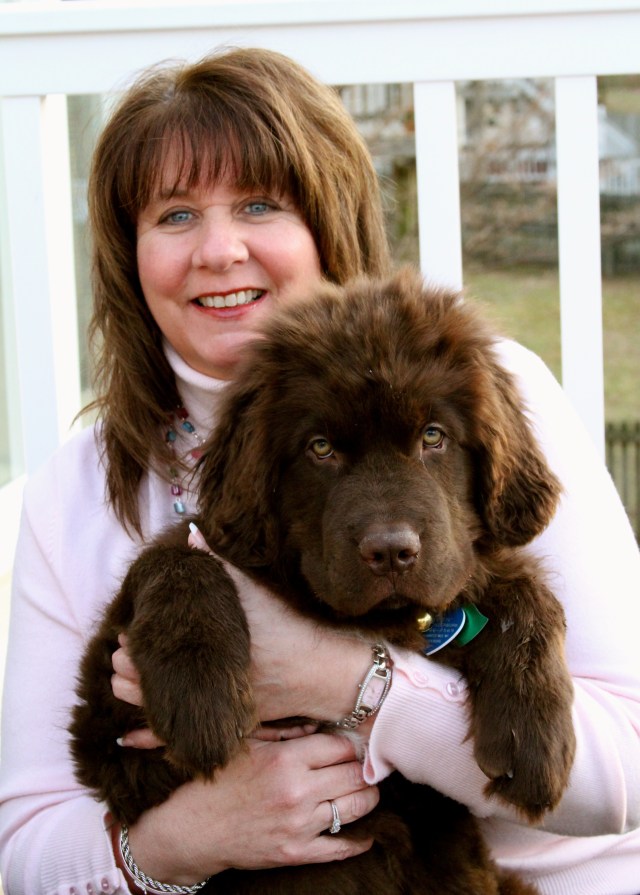
And of course I got to meet and love on Jack—An amazingly calm, gorgeous, sweet, ‘gentle giant’.  OH how I love that pup, I could not keep my hand off of him!!

IMG_8375

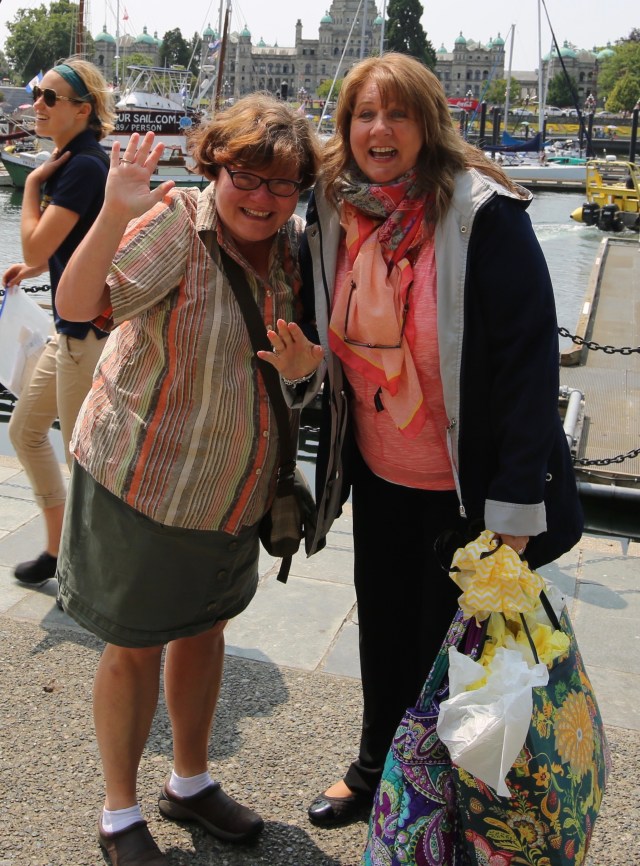
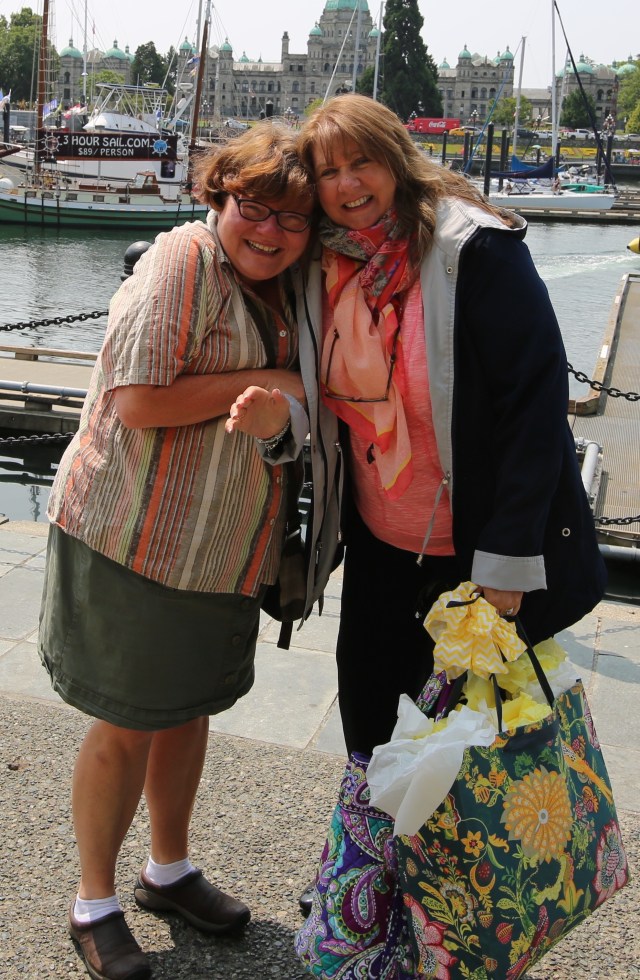
We were so sad to leave, but, I promised that we’d be back again…And less than a year later, my hubby and I were lucky enough to be able to go on another cruise, to Hawaii this time, but, we’d be starting our cruise in Vancouver.  When I told Liz that, and asked if maybe we could arrange a time to meet up with them, she generously said that they could take the Ferry from the Island over to Vancouver and meet us over there, spend the night in a hotel and then spend some more time with us the next morning.  I was OVER the moon with excitement again!!  So just this last April, Liz and I got the chance to see one another in person again. 🙂  The hug when setting eyes on one another was just as genuine and wonderful as that first hug we shared on the dock in Victoria…Here we are in Vancouver in April (2016):

DSCN0520DSCN0523

All was right with our world again!!! We spent hours together that evening, we went to a lovely restaurant and we chatted and chatted and chatted some more.  And all the while our hubbies were doing just as much chatting–Liz’s hubby is very special to me too btw…what a wonderful man he is…and you can tell that he and Liz are so much in love and are each others soulmates, it is lovely to watch them interact…sweet, sweet, sweet.

We also met up the next morning for breakfast and talked, laughed, and completely enjoyed each other’s company.  I really felt like we got to spend some great quality time with them this time around, here I am with Liz and her hubby:

1V4A3531

The love I feel for this lady is equal to how I feel about one of my precious family members–We truly have a lovely, very special friendship all grown and nurtured through the words we type to one another and through the pictures we share on Facebook.

1V4A3534

Liz is the lady that encouraged me to start writing this Blog of mine…She gave me the confidence in myself to just go for it and try and share my crafts, decorating, diy projects, our home, our dogs, & most recently our travel experiences.  It seems that Liz saw something in me that I had never seen in myself, she speaks about my ‘voice’ and how it can reach out and touch people…that I can put forth my personality, kindness, and such via the written word.  I was skeptical at first, but, I trusted her, so I went for it…and it seems that y’all enjoy seeing and hearing about my projects, our home, our dogs, and our travels…Liz has created a monster, but, I’ve always been a talker, and now, I’ve figured out how to reign all of that chatter in and put it into a succinct and coherent format.  I had to learn a new skill–meaning that I had to figure out how to set up my Blog site-and then I had to figure out how to start my very first post–I was scared and NOT confident that I’d be successful–but, I took a leap of faith because Lizzy had confidence in me!  Liz was there rooting for me and encouraging me every step of the way, she was AMAZING!!!  –And apparently, she was right…It seems that my Blog has taken off…surprising as that is to me, I am so grateful for every single encouraging word Liz! ❤

ALL of that said…

***To you Liz–My sweet, precious friend–YOU are so special to me, your light has and will continue to shine brightly–I’m going to continue to enjoy conversing with you about our pups, our hubbies, our likes and dislikes; I will enjoy your “Daily Deck View” and your “Cruise Ship” pictures.  I will continue to chuckle at every picture you put up of Mike walking with those silly ducks, and I will drink in every picture that I see of Jack.  I will read every single solitary word you write in your phenomenal Blog as well!! I’m hoping upon hope that we will be able to have SEVERAL more in person meetings and I will cherish each and every moment while typing and hugging you cyber’ly’ and hopefully hugging you in person (I HATE the miles that separate us!!).  I wanted to write this now so that you can see my heart staunchly sitting right out there on my sleeve for you.  My life is so much better because you are a part of it…I don’t want to stop writing this Blog post because I feel that my words will never be adequate enough to express just how much I love you and cherish you.  But, please know that my words are genuine and true and they come from a heart that is overflowing with love for you. ❤ ***

Thank you all for listening to this lady’s ramblings.  My Blog has become a sort of haven for me to express myself in many different ways…This may not have been an easy post for y’all to read, but, I just couldn’t go another day without putting all of the thoughts that have have been rummaging around in my brain for the last week to ‘paper’.

Until next time…Y’all take good care. ❤

Arlynn ❤


It’s All About Samson Today

Oh where do I start to tell you about our sweet Sam?  Well, I’ll start at the beginning. We had Samson flown in from Michigan as a 10 week old puppy, so on a cold night in January 2011, my hubby and I got in our car and drove to the airport where our little fella’s jet would be landing very soon.  His breeder is no longer in business, but, my goodness gracious, they did an awesome job with Samson.  I had a Facebook friend tell me about him and she was kind enough to go and pick him up from the breeder, take him to her vet, and have him vet checked and readied him for his journey South. Here I am holding Samson at the airport at the moment I retrieved him from his little traveling crate. I had been SO worried about him in that airplane…I was a nervous wreck till this very moment!  Our boy has adopted several endearing nicknames throughout the years:  “Wiggle Britches”, “Little Guy”, “Sam the Man”, “The Brown Clown”, “Handsome Samson”, “Sweet Sam”…and many others…

DSC_0170

From this moment on, this little tyke climbed right on into our hearts to stay.  Admittedly, he was the littlest Newfie puppy I had ever laid my eyes on, but as you will see, he has grown into a gorgeous perfectly sized Newfoundland–He meets all of the “breed standards”. I truly wasn’t worried about that though as I knew we would never show him.  Newfoundlands come in an array of ‘recognized’ colors, Black, Brown, Grey, and Landseer (black and white).  We love Samson’s brown color with his little speck of white on his chest.  Temperament wise, he matched the standard for the breed as well only magnified about a billion times!  Sam is so sweet, so very calm, so gentle, so loving, so cuddly, and a joy to have around.  He is the epitome of a “Gentle Giant” (the nickname for the Newfoundland breed).

Here are some pictures of him growing into the big boy that he is today; this was his first night at home, Sophie welcomed him with open paws and took over a mothering role that I didn’t know she had in her.  She was awesome with him and the patience she showed to him while he was growing up was unsurpassed, one would have thought that she was his Mama (she never had a litter of puppies of her own, so I guess this was her chance to mother a baby). 🙂 ❤

DSC_0195

DSC_0269

IMG_3129

IMG_2814

DSC_0229

IMG_3273

IMG_4352

IMG_4487

IMG_4094

IMG_4198

IMG_3946

IMG_7871IMG_7853DSC_0022

1V4A4636

As he grew and matured, I knew that he was a very special fella.  I made a point to socialize him very well and took him out and about into public places often.  Also, I made sure that he was well socialized with other dogs.  One year, I even hosted a “Teddy Bear Picnic” and added a fundraiser to the picnic to raise funds for Newfoundland Rescue.  I arranged this ‘picnic’ at a State Park near Virginia Beach, VA and one day we walked all of the Newfs out on the boardwalk at the beach…Here is a picture that shows you the effect a Newfoundland can have on little kids. 🙂 This little boy fell completely in love with Sam. ❤

DSC_0244

Some folks have also come to us to visit here in our town…One dear friend from New York, and another one from Canada! 😉  Both of these precious pups are no longer with us…The big guy in the middle of my two is Jack…He was awesome!!

DSC_0010

And the fella on the left in this picture, his name was Sam, and he was an amazingly sweet pup as well…<3  I am still very good friends with both of their ‘Mamas’ and I don’t think we’ll ever grow so far apart that we don’t touch base and check in on one another from time to time. ❤

IMG_7155


IMG_7142
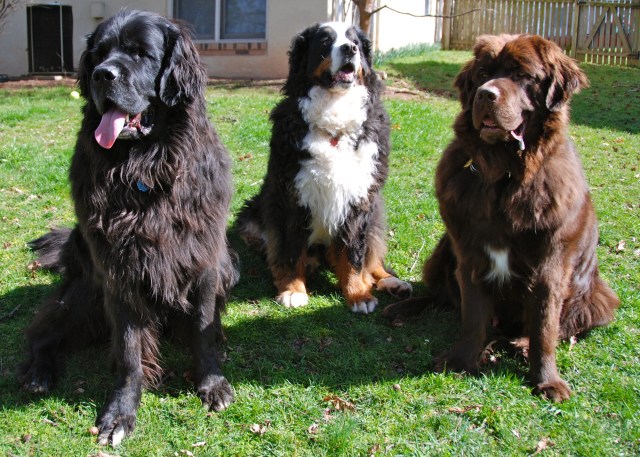
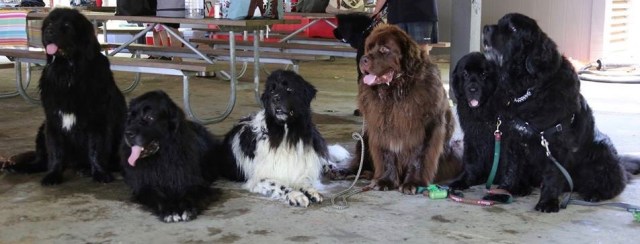
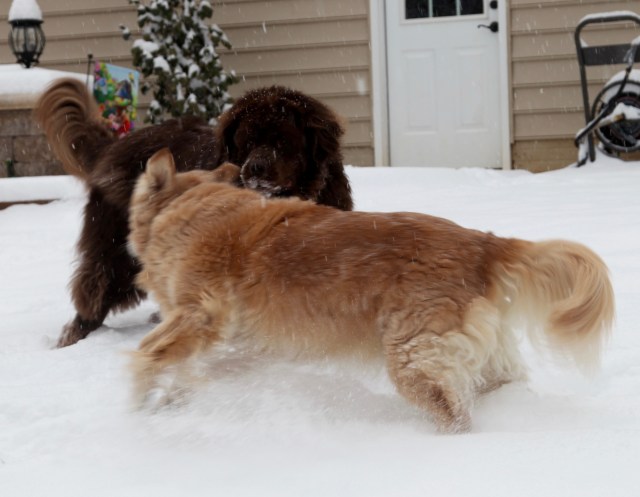
I have a dear friend who lives South of us, she and I have hosted a couple of  “Newf Around” get-togethers at a State Park on a lake near her home.  Oh what lovely times we have when we attend–Although Samson is NOT a water dog like most Newfies…haha…Most Newfies will RUN ***toward*** the water…Not, Sam, nope, he runs AWAY from the water as fast as his big ole legs will carry him.  Weirdo…<~~~Said with complete affection~~~  There is a name for Newfs like him…”Hang-a-Shores”…Yup, he falls nicely into that category. 😉

Here are some pictures of Samson and Sophie with some of the other Newfs that they have made friends with over the years. ❤ The big, precious fella in the middle of my two is Sydney–Unfortunately, he is no longer with us…<3

IMG_5041

The pretty black lady in the front is Belle, and the pretty Brown lady in the back is Zoey–I am good friends with their ‘Mama’ as well and as you can see, that quartet of Newfs got along famously. 🙂 ❤ IMG_5063

Here is a group of Newfs that we spent some time with down South at one of those Newf Arounds that I was talking about. 🙂 ❤ 10456002_10206624791048903_4762958641038314545_n

Here are Sophie and Samson (2nd and 3rd from the right) when we went to visit that same dear friend of mine, we try to get down to see her and her gorgeous pups at least once a year. She had invited several Newfoundland friends to her home and yes, all of their Newfs were invited too–We had all met on Facebook and have formed wonderful friendships that have endured through the years.  These are wonderful times!!!  (One more fella in the center of the picture is no longer with us too…His name was Barrett…He and Syd belonged to my dear friend whose house we were visiting. ALL of the pups that have passed on are so missed by all–these Gentle Giants leave footprints on your heart forever and ever!! (Little tykes do too, I don’t mean that at all…It’s just that we all have Giants…). 🙂 ❤

IMG_6068

So as you can see, my Newfs, both of them are very well socialized and very comfortable around people and other pups.  But, Samson, instead of excelling in the water, well he’d much rather try and help folks feel better.  Every time I take him out, in addition to being asked all of those regular questions…”How much food does he eat?, How much does he weight?…etc…”, he truly touches all who come in contact with him in a positive way.  He makes everyone feel better.

So during the time that my sweet Mom was in a nursing home suffering with Alzheimer’s, I got in contact with the nursing home and asked them if I could bring Samson in there with me when I visited my Mom (no, Sam isn’t a ‘Certified’ Therapy Dog, but, trust me, he has served as a Therapy Dog to MANY through the years).

Here are some pictures of just some of the people that he touched while visiting the nursing home with me:

DSC_0088

DSC_0349


IMG_8218

DSC_0296

He was a natural in that nursing home…But, to be honest, since my mom passed away I just cannot bring myself to take him into another nursing home, I know, I know, that is selfish of me because I do know that he could help others feel so much better and I love that idea so very much.  But, that time in my life was full of anguished memories, and honestly, Sam was as much my own therapy while visiting as he was others.  He is now ‘retired’ and spends his days relaxing, I do take him out and about around town to visit in the streets of our little city though(we are very dog friendly around these parts), so he continues to work his magic and help everyone who comes in contact with him feel better.

IMG_3599


IMG_0255

DSCN0039

He had a blast this past winter playing in the snow with Sophie and our Golden Gracie:

IMG_9135

IMG_3885

IMG_4011IMG_4305IMG_4335

Samson will be 6 years old in October (2016), weighs a perfect 153lbs., and I cannot believe how the time has flown by.  One thing is for sure, our lives have been forever changed because this special fella is a part of them…He puts a smile on my face every single day!!  He is an amazingly special, “Handsome Samson”. ❤

IMG_0328

Until next time, y’all take good care! ❤

~Arlynn ❤


Burlap & Birdhouse Wreath & Room Decor (Soft Green and Cream)

As y’all know, our living and dining rooms sit on the front of our home <link to home tour> and are separated by our foyer & front door.  I have found that I really enjoy putting a wreath on the inside of the door.  I have a pretty large foyer and that wreath helps to carry the decor theme from one room to the next.  I use a pretty green color–I see it everywhere–along with cream & burlap as my accent colors in those rooms.  These colors lend themselves to a soft, pretty, warm and cozy design that I have fallen in love with since moving into this house. Also, using these softer colors while incorporating my other favorite design accents into these rooms presents me with a bit of a challenge being that they are not necessarily your typical country themed colors.  In this post, I will highlight a wreath that I made while on a ladies craft day last March; I made it especially to hang on the back of my front door.  I will also show you some other soft country design elements and techniques like I’ve used in my family room/kitchen area (that are decorated in the more typical country colors of burgundy, green, blue, etc…) and carried into these softer hued rooms.

Okie dokie…So, first, let me list some of my very favorite accent pieces that I usually will use to augment my decor:

  • Pip Berries (picks and garlands)
  • Lanterns
  • Burlap
  • Gerber Daisies
  • Dickens Houses
  • Candles
  • Family Pictures
  • Rod-Iron Accent Pieces

As you will see, I’ve tried my best to try and incorporate some of my favorite things into my room designs and into that huge wreath on the door.  Speaking of the wreath, let me describe how I made that real quick…

Here are the supplies that you’d need if you wanted to try to make this wreath, also here is a link showing you a bit more detailed directions as to how to make a burlap wreath:

  • 24″ Work Wreath
  • 2 Skeins of Burlap ‘Runner’
  • Pip Berry Garland
  • Accent burlap ribbon (or whatever accent you might want to use)
  • Wooden Birdhouse
  • Resin Flowers
  • Burlap Daisies
  • Rod Iron Flower & Accent flowers
  • Floral wire

IMG_4542

IMG_4565

IMG_4554

The first thing that I did was to glue pipe cleaners onto the back of the birdhouse and the wooden daisies:

IMG_4563

IMG_4564

And the Birdhouse:

IMG_4562

Then I added the burlap to the work wreath:

Next I turned the wreath over and attached the rod-iron flower using floral wire:

IMG_4543

IMG_4556

IMG_4557

Then it was time to make it pretty, so I went about adding the pip berry garland simply by adding it in on top of the burlap, attaching it into each outer ring’s pipe cleaner…

IMG_4566IMG_4567

Then I added the bow, birdhouse, all of the daisies and other accent flowers…IMG_4568

And here is the finished wreath:

IMG_4764

Here I am at Karen’s house in the middle holding the wreath, I’m flanked by my sweet friends Karen and Katrina who worked on their lovely crafts on that nice day:

IMG_4580

Here are a few more pictures of that wreath in place:

1V4A4862

And of course, the pups always love to pose prettily for a picture–Left to Right–Gracie the Golden, and the Newfoundlands, Sophie and Samson. ❤IMG_4750IMG_4757

Here are some pictures of some of the other wreaths that I’ve made to go on that door at different times of the year:

And now to show you how these rooms are pulled together using that pretty green color, cream, and burlap.  I’ll start in the dining room with the tablecloth,  lantern centerpiece, flanked by rod-iron candle holders and green candles.  OH I also made that wreath hanging on the wall between the windows…

1V4A4848

1V4A4849

The table runner on my Sideboard matches the tablecloth. I also was really happy when I found those sconces that are on either side of the mirror at Hobby Lobby for 1/2 price:

1V4A4860

1V4A4861

1V4A3306

1V4A4850

And then a few decor elements in the living room:

1V4A4851


1V4A48571V4A4859

IMG_3531

1V4A4854

1V4A4847

If you’d like to read more about these rooms, here is a link to my Living & Dining Rooms blog post describing them in more detail (like where we got those rugs from, and more about the living room furniture, that lamp on the side board, etc…<here is a link>.

I’ll tell y’all, I’ll just go into those rooms and drink in the softness of the design…I love it, truly.  It calms my very soul. 🙂

Until next time, y’all take good care! ❤

And remember!

**In crafting there are no mistakes just unique creations**