Burlap, Pip Berry, & Rod Iron Wreath

I bet the title of this little entry was a bit confusing, who in the world uses rod iron as an accent piece in a wreath? Well, I have found that I do…haha. 😉  Seriously, my three main decor accents in the family room of my home are burlap, pip berries, and rod iron (as in scrolly pieces that I have scattered about on the walls).  I have decided to create a new category entitled “Transitioning Seasonal Decor” and this is my first post in that new category.  That said, I am in the process of transitioning my decor from Christmas to a more neutral decor theme that will take me through the winter months and in some cases beyond. I do this sort of thing a few times a year, so I thought a special category was in order to capture the transitions.

ANYway,  I started taking down all of the Christmas decorations the other day; it takes me quite a while to get everything down and packed away–I will say that I’ve been quite organized in my packing this year taking time to label boxes and bins carefully…go me. 😉  ANYway, I realized that I wanted to make a wreath to replace this wreath that I had hanging on the mirror for Christmas:

IMG_2443 (1)

I decided that I wanted to make a large wreath, one that would include some of those accent pieces that I mentioned above.  So here is what I gathered:

  • 24″ Work Wreath
  • 2 Skeins of Burlap Runner (15′ x 18″)
  • Pip Berry Garland (1-6’garland plus a little more)
  • Burlap Ribbon (for a bow)
  • One rod iron circular piece
  • 3 fleur-de-lis pieces
  • Silk daisies in burgundy and dark cream
  • Sparkly butterflies

IMG_9933

If you’d like to see how I put the burlap on the wreath form, check out my post here.

It was time to attach the pip berry garland, so I simply used the wreath’s twist ties…I only attached it to the outer ring.

Next, I added the accent pieces, first I made a bow out of a new burlap ribbon that I found online at The Paper Mart

IMG_9930-1

Then I attached the fleur-de-lis and the rod iron piece, I used floral wire to attach both things to the wreath form…

Then I hot glued the daisies where I thought they looked nice and called it done. 🙂

IMG_3326

And then the hubby was sweet enough to climb up that huge ladder and hang it on the mirror…

IMG_3328

And there it is in its final resting place, I doubt if I will change it out until next Fall.  The accent pieces will pair nicely with whatever little changes I make in the coming months.

IMG_3330

There it is from a distance, as you can see, it is a huge wreath, it measures about 32″ across…IMG_3331

And check out my poor mantel and hearth, they are quite barren at the moment; it is not often that they are like that, but, as you can see, I change out most of my decor for Christmas.  Whew, I’ve got my work cut out for me in the coming days…stay tuned. 🙂

Until next time, y’all take good care! ❤

**In crafting there are no mistakes, just unique creations**

~Arlynn ❤ 

Christmas 2015: My 12′ Slim Christmas Tree

Meet my nemesis, my 12′ Christmas tree…

IMG_2836

I have to be honest and tell you that decorating this puppy is not my very favorite thing to do.  I’ve seen many fancy Christmas trees on Pinterest and YouTube and I’m sure if I set my mind to it, that I could certainly create an over the top, very elaborate tree. I have decided against doing that though because this tree, when finished, exhibits many cherished memories.  A lot of the ornaments are ones that my kids made when they were little, there are some that were given to me as gifts, some to remember our past pets, some to commemorate trips, alma maters, well I could add to this list all day long.  Bottom line, I’ve chosen to keep this tree more simple and let it speak for itself instead of making some grand design and having all of our cherished ornaments get lost in the “foo-foo”.

IMG_2957 (1)

We purchased this “slim” tree when we moved into this home, I wanted it to make a statement, but, I didn’t want it to encompass the entire room.  It is quite tall at 12′ and it definitely requires a ladder when decorating.  I also chose to put colored lights on this tree because the family likes the colored lights and I love how it looks when it is complete…the colored lights set it apart from everything else in the room.

We started putting it up on Thanksgiving evening, a tradition that was started when our girls were born.  They were both here to help, here is our youngest up on a ladder hanging ornaments…

IMG_2842

Here is her older sister, she was sitting on the floor handing her the ornaments…They make quite a good team! ❤

535690_10100373333513753_114470516_n

My hubby had already fluffed the tree, put the lights on it, and wrapped those wooden beads around the it.  I had made that bow topper earlier in the day and tied it on…The tree was a work in progress…This is how it looked on Thanksgiving evening…

IMG_2858

Very pretty, but, *something* was bothering me, there weren’t enough lights on it for one thing (hubby had already put 500 in place). And it didn’t have enough ornaments and that stinkin bow was driving me crazy…from a distance, it looked like a big dark blob was on the tree.  Why oh why did I make that bow out of that plaid ribbon (as opposed to a sheer deco mesh ribbon that the lights would shine through)? Well, because I’m anal retentive and that bow *had* to be made out of the same ribbon that I had made for the bannister bows (not to mention the bows that I’d added to every other grouping in this part of the house).

So yesterday, I went about solving this little “tree needs help” problem.  I took a trip to Target and I purchased 300 more lights, and then I went down into my ‘store’ <~~~ basement, and I rummaged around and found about 30 more ornaments.  I went and gathered the step ladder out of the garage–and I tried not to knock anything down as I was muscling that stupid thing to the tree…sheesh, that thing was awkward and a bit heavy. 😉

This is what I came up with by yesterday evening…

IMG_2981 (1)

Here is a before (left picture) and after..

Image

I intertwined lights through the bow hoping that that would help it stand out and not be so much of a blob…and it worked! YaY!!

IMG_2964

Subtle differences, but those simple additions made a world of difference to me. I was finally happy with the tree.  Here are some more pictures of the ornaments…

And one more shot of a very special ornament that we purchased this year…to remember those lost in France…

IMG_2948

I took some time yesterday evening to walk around this section of the house and take pictures from different angles, I’m quite happy with how everything turned out.  All of the Christmas decor flows together quite nicely…

IMG_2992

IMG_2986

IMG_2988

IMG_3000

IMG_2994

IMG_2992

IMG_2999

IMG_2995IMG_3001IMG_3002

I fixed that big “lit-less” ^^^ gap at the top of the tree this morning after I downloaded these pictures onto my computer…haha…

I am definitely breathing a bit easier now that I know that all of my decorating is finished.  I’ve also been doing a bit (meaning a good bit) of shopping, so my ***least*** favorite task is ahead of me and that is wrapping gifts.  Yes, I love to create decor, I do not like to wrap presents…bah hum-bug to me eh?! 😉

I will close this blog post by quoting what I feel *is* the reason for this most glorious of Seasons…

“For unto us a Child is born, unto us a Son is given; and the government shall be upon His shoulder. And His name shall be called Wonderful, Counselor, The Mighty God, The Everlasting Father, The Prince of Peace” …Isaiah 6:9

God Bless you all!

Until next time, y’all take good care! ❤

~Arlynn


Christmas Decorations 2015: Merry & Bright With Battery Operated Lights

The one thing good about getting the Christmas decorations in place a little early is that between now and Christmas I can continue to add to, mess with, and tweak things…<rolling eyes>. 😉  Just kidding, once things are in place, I normally don’t mess with the creation too, too much.  But, I have to say that I’ve discovered these wonderful little battery operated mini light strands at Walmart this year, so some tweaking I did yesterday.  I’ve used battery operated strands in the past and they lasted for all of a day before they burned out and I got frustrated with them. Like everything else in the world, *they* <~~~those people who tweak these sorts of things~~~ must have improved the workability of these spiffy lights as they perform a ton better now-a-days and I’ve found that they add just a touch of ‘somethin’ somethin’ to a few of my wreaths and centerpieces. They add a subtle glow in the evening hours that just calms my very being. 🙂  I’m always all about accent lighting and how it warms a room right up. So here we go…

Here are the two types of lights that I found, they come in “Warm White”, “Multi-Colored”, and a array of solid colors, i.e. red, green, and blue. Also, there are different bulb counts, I used 18, 36, and on the larger bulbs, 20 count.  They range in price from $4 to $6 (for the larger bulb variety)…

IMG_9588IMG_9568

They come with a battery pack which is easily hidden in wreaths and centerpieces. They also have built in timers and once they are turned on they automatically turn off after 6 hours. (So I put them in place and waited for it to get dark outside before turning them on)

Also,  the timer has 3 different options…”Timer Fading”, Timer Flashing”, or “Timer Steady On”–I set mine to “Timer Steady On” just because ‘fading’ or ‘flashing’ would drive me bonkers:

IMG_9589

Here are some examples of how I’ve utilized these little lights…

This wreath hangs up on the mirror above the fireplace, I have a set of the “Ultra Slim” lights (36 count) on that wreath.

IMG_2395

I used a set of 18 multi-colored lights for this little arrangement…

12289632_10207684937991914_4490220147806743279_n

12249616_10207684937951913_2620237742855295913_n

I used a set of 18 warm white lights for this arrangement…

IMG_2726

IMG_2724

I used two sets of 18 warm white for this arrangement…

IMG_2788

IMG_2787

One set of 18 warm white lights brightened up this little centerpiece nicely…

IMG_2794

I used 2 sets of 18 multi-colored lights for this centerpiece that sits on the kitchen island…

IMG_2524

IMG_2796

I added one strand of 18 warm white lights to this little arrangement that sits in the powder room.  It sure brightens up a room that has no natural light…love it!

IMG_9592

IMG_9591

I wanted to brighten up a couple of my wreaths as well, again, I just snugged the battery pack down into the wreaths and actually caught the wire into one of the twist ties on the work wreath.  It worked like a charm.

IMG_2786

IMG_2785

And I used two sets of 20 warm white bulbs on this next wreath.  This wreath is huge, over 30+ inches around…

IMG_2790IMG_2789

So, there we go, I only tweaked a few things, but the warmth that a silly little battery operated light strand brings to a room is just amazing. 🙂

Until next time, y’all take good care! ❤

**In crafting there are no mistakes just unique creations**

Christmas Decorations 2015: Living & Dining Rooms (Silver & White with Touches of Teal and Light Green)

So, I was all finished decorating the back rooms of our home, i.e. family room, kitchen, kitchen’s eating area, powder room and all spaces that dwell within said rooms. As you have seen, I used the more traditional Christmas colors of burgundy and gold for that part of the house. In my past posts I have explained that my accent color for the front rooms of our home is a pretty green that is seen everywhere I look in most stores and I pair it with khakis and creams.  So, my Christmas decorating goal  was to utilize that same green and add silver, teal, and white therefore creating light, airy, and hopefully cozy rooms.  Let me reiterate a bit about my decorating style, my all-over goal is to always provide a place where whomever enters feels as if they can sit down, put their feet up, pet a big dog, have a cup of coffee, tea, or hot cocoa, and be as comfortable here as they would feel in their own home. I always, no matter the time of year, use warm mostly earth tones throughout the house and I add pops of color with my decor.  I mostly stick with burgundies, khakis, and creams (for my regular decor) in the back rooms of the house, and that pretty green color for the front rooms.  All that said, I was worried that by adding the lighter colors of silver, white, and teal for Christmas that I might ‘cool’ those rooms down a bit. BUT, I was determined to try because I love the clean and bright look that those lighter colors can bring to a room.  Also, those rooms are a smidge more formal to begin with just because of the cherry wood furniture; I have 3 pieces that were handed down to me from my grandmother and then my mom, we also have our own dining room furniture; all pieces are a dark cherry color. Before we moved in here, we purchased a new couch and 2 chairs for the living room selecting comfortable, lighter colored furniture that would help to stave off the formality that the cherry furniture inherently puts forth.  We tried our best to mix the old with the new, I feel like we accomplished our mission.

All that said, I’ll now show you how I decorated these pretty rooms that sit on the front of our home separated by the foyer…

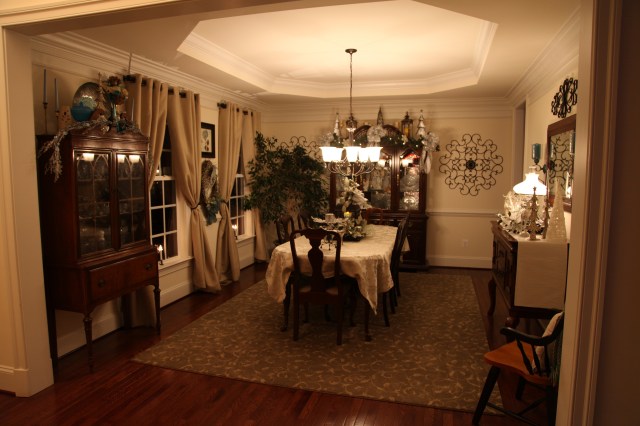
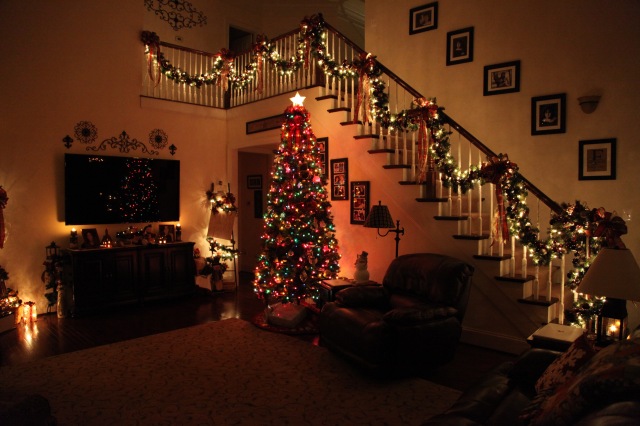
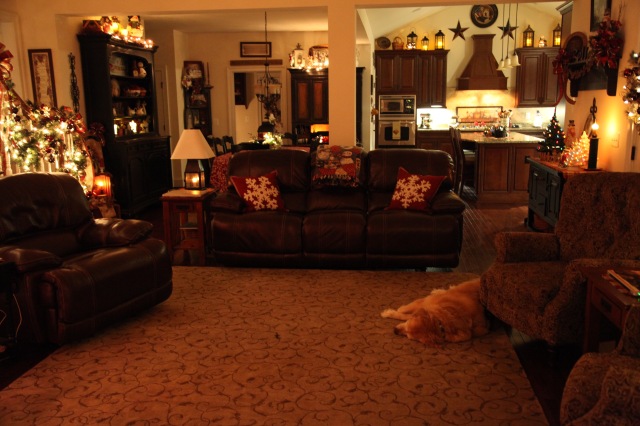
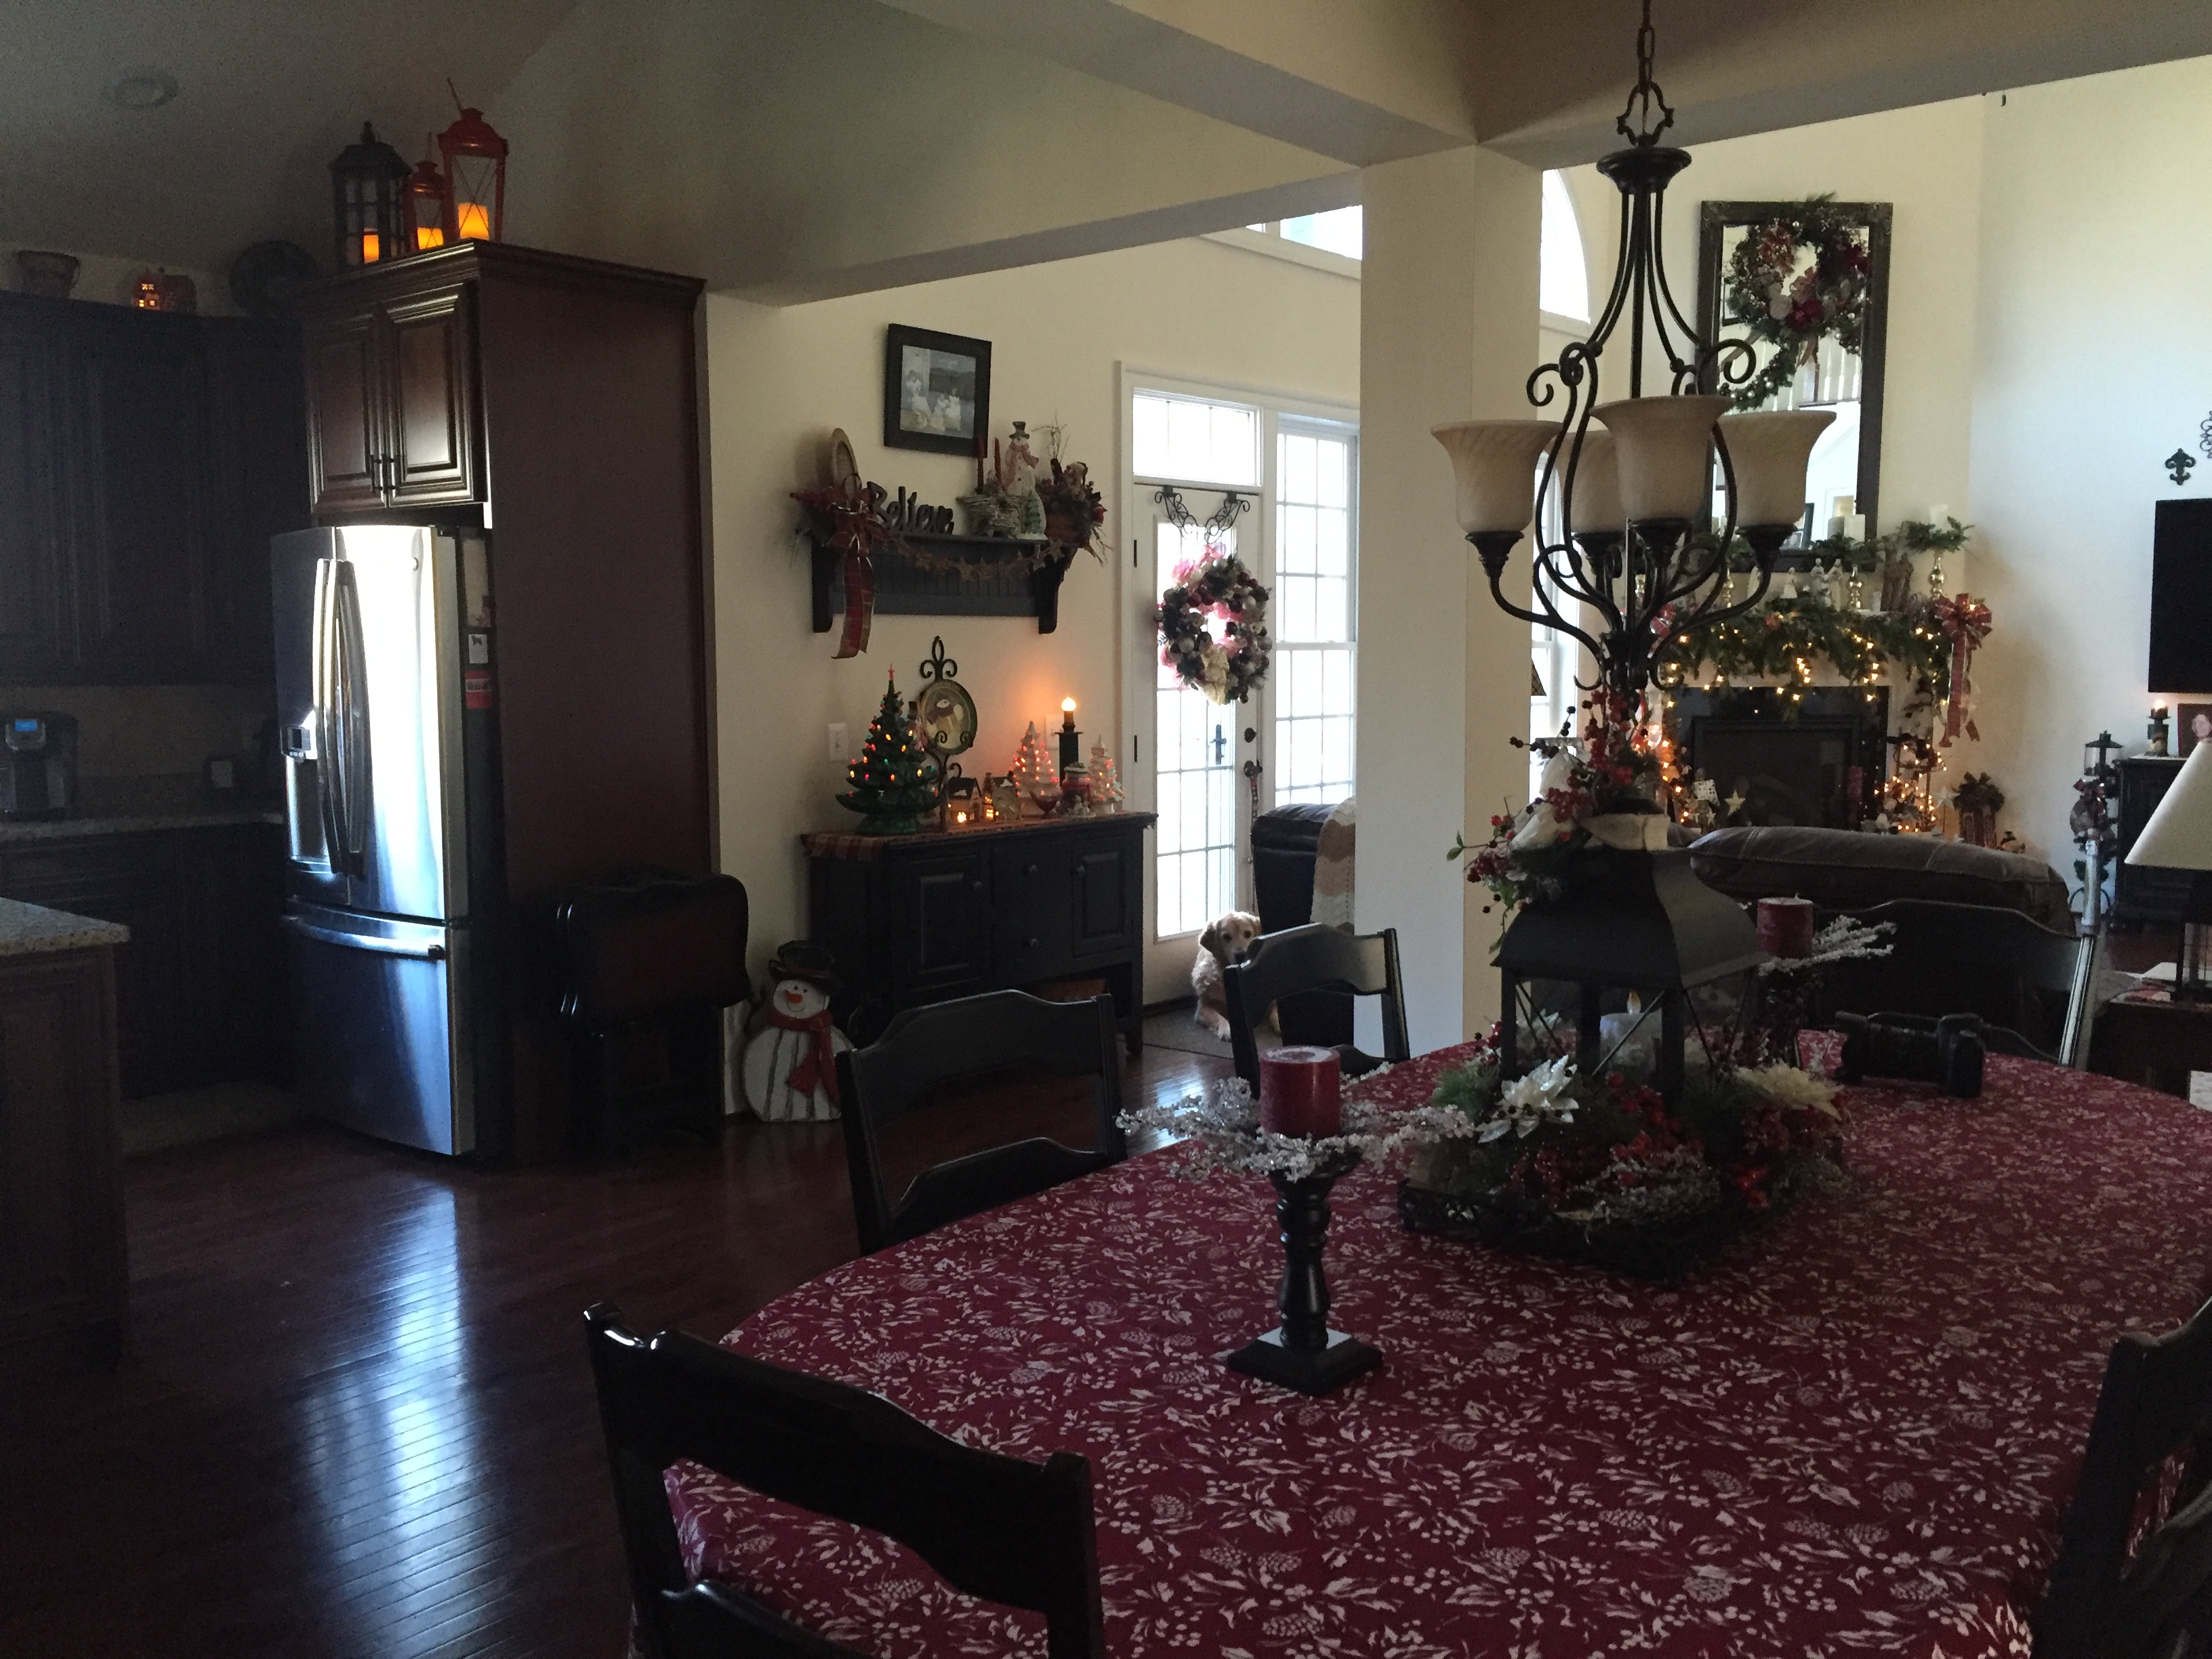
This is looking at the back of our our front door, living room to the left and dining room to the right, family room behind me…

IMG_2634

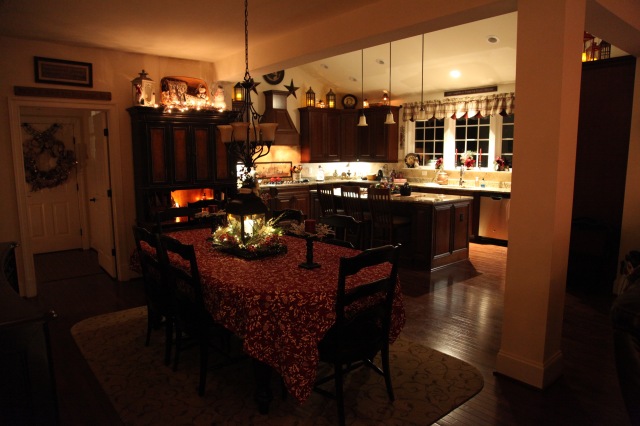
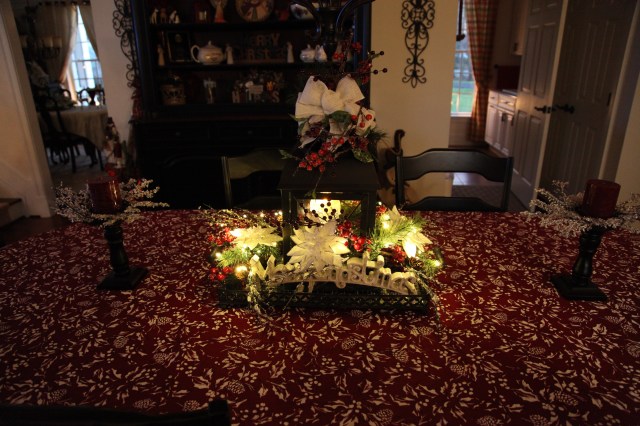
First, the dining room:

IMG_2694

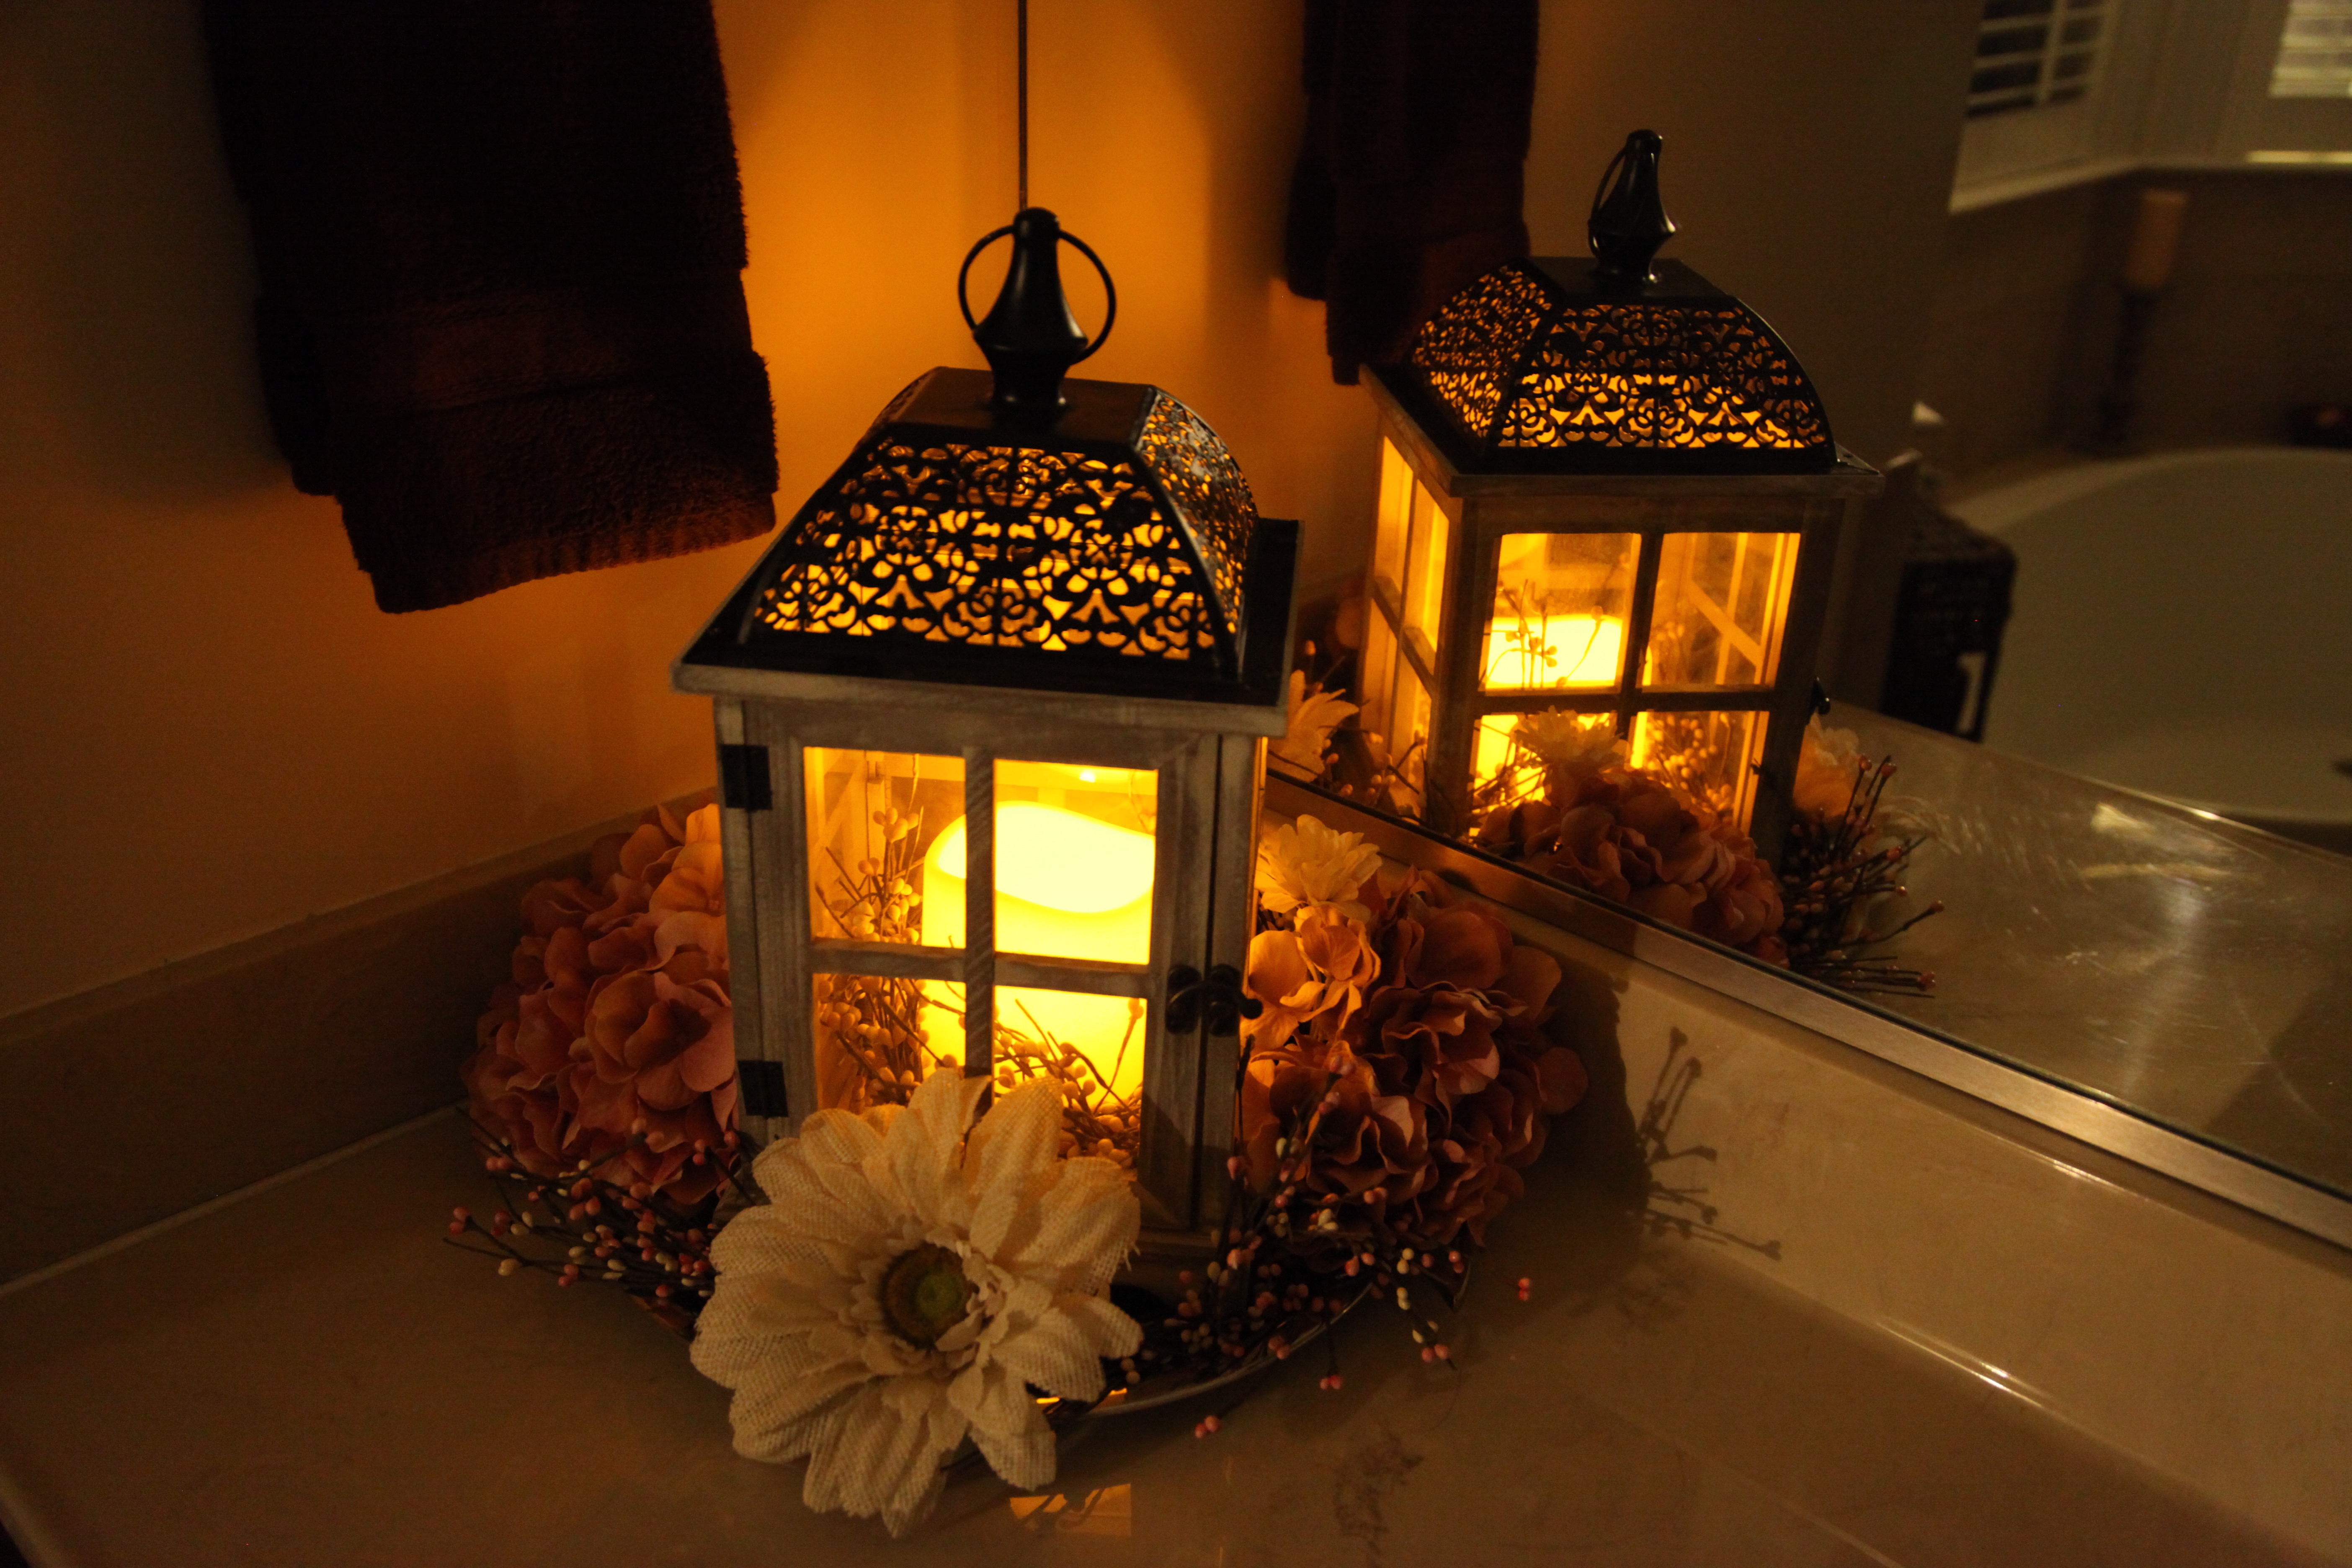
Here are a couple of things that I created for the dining room, first, the dining room table’s lantern centerpiece.  I will not bore you with another “how to make a lantern centerpiece” in this entry.  If you would like to know how to do so, please check out my A Lantern Centerpiece For All Seasons link. 🙂

IMG_2609

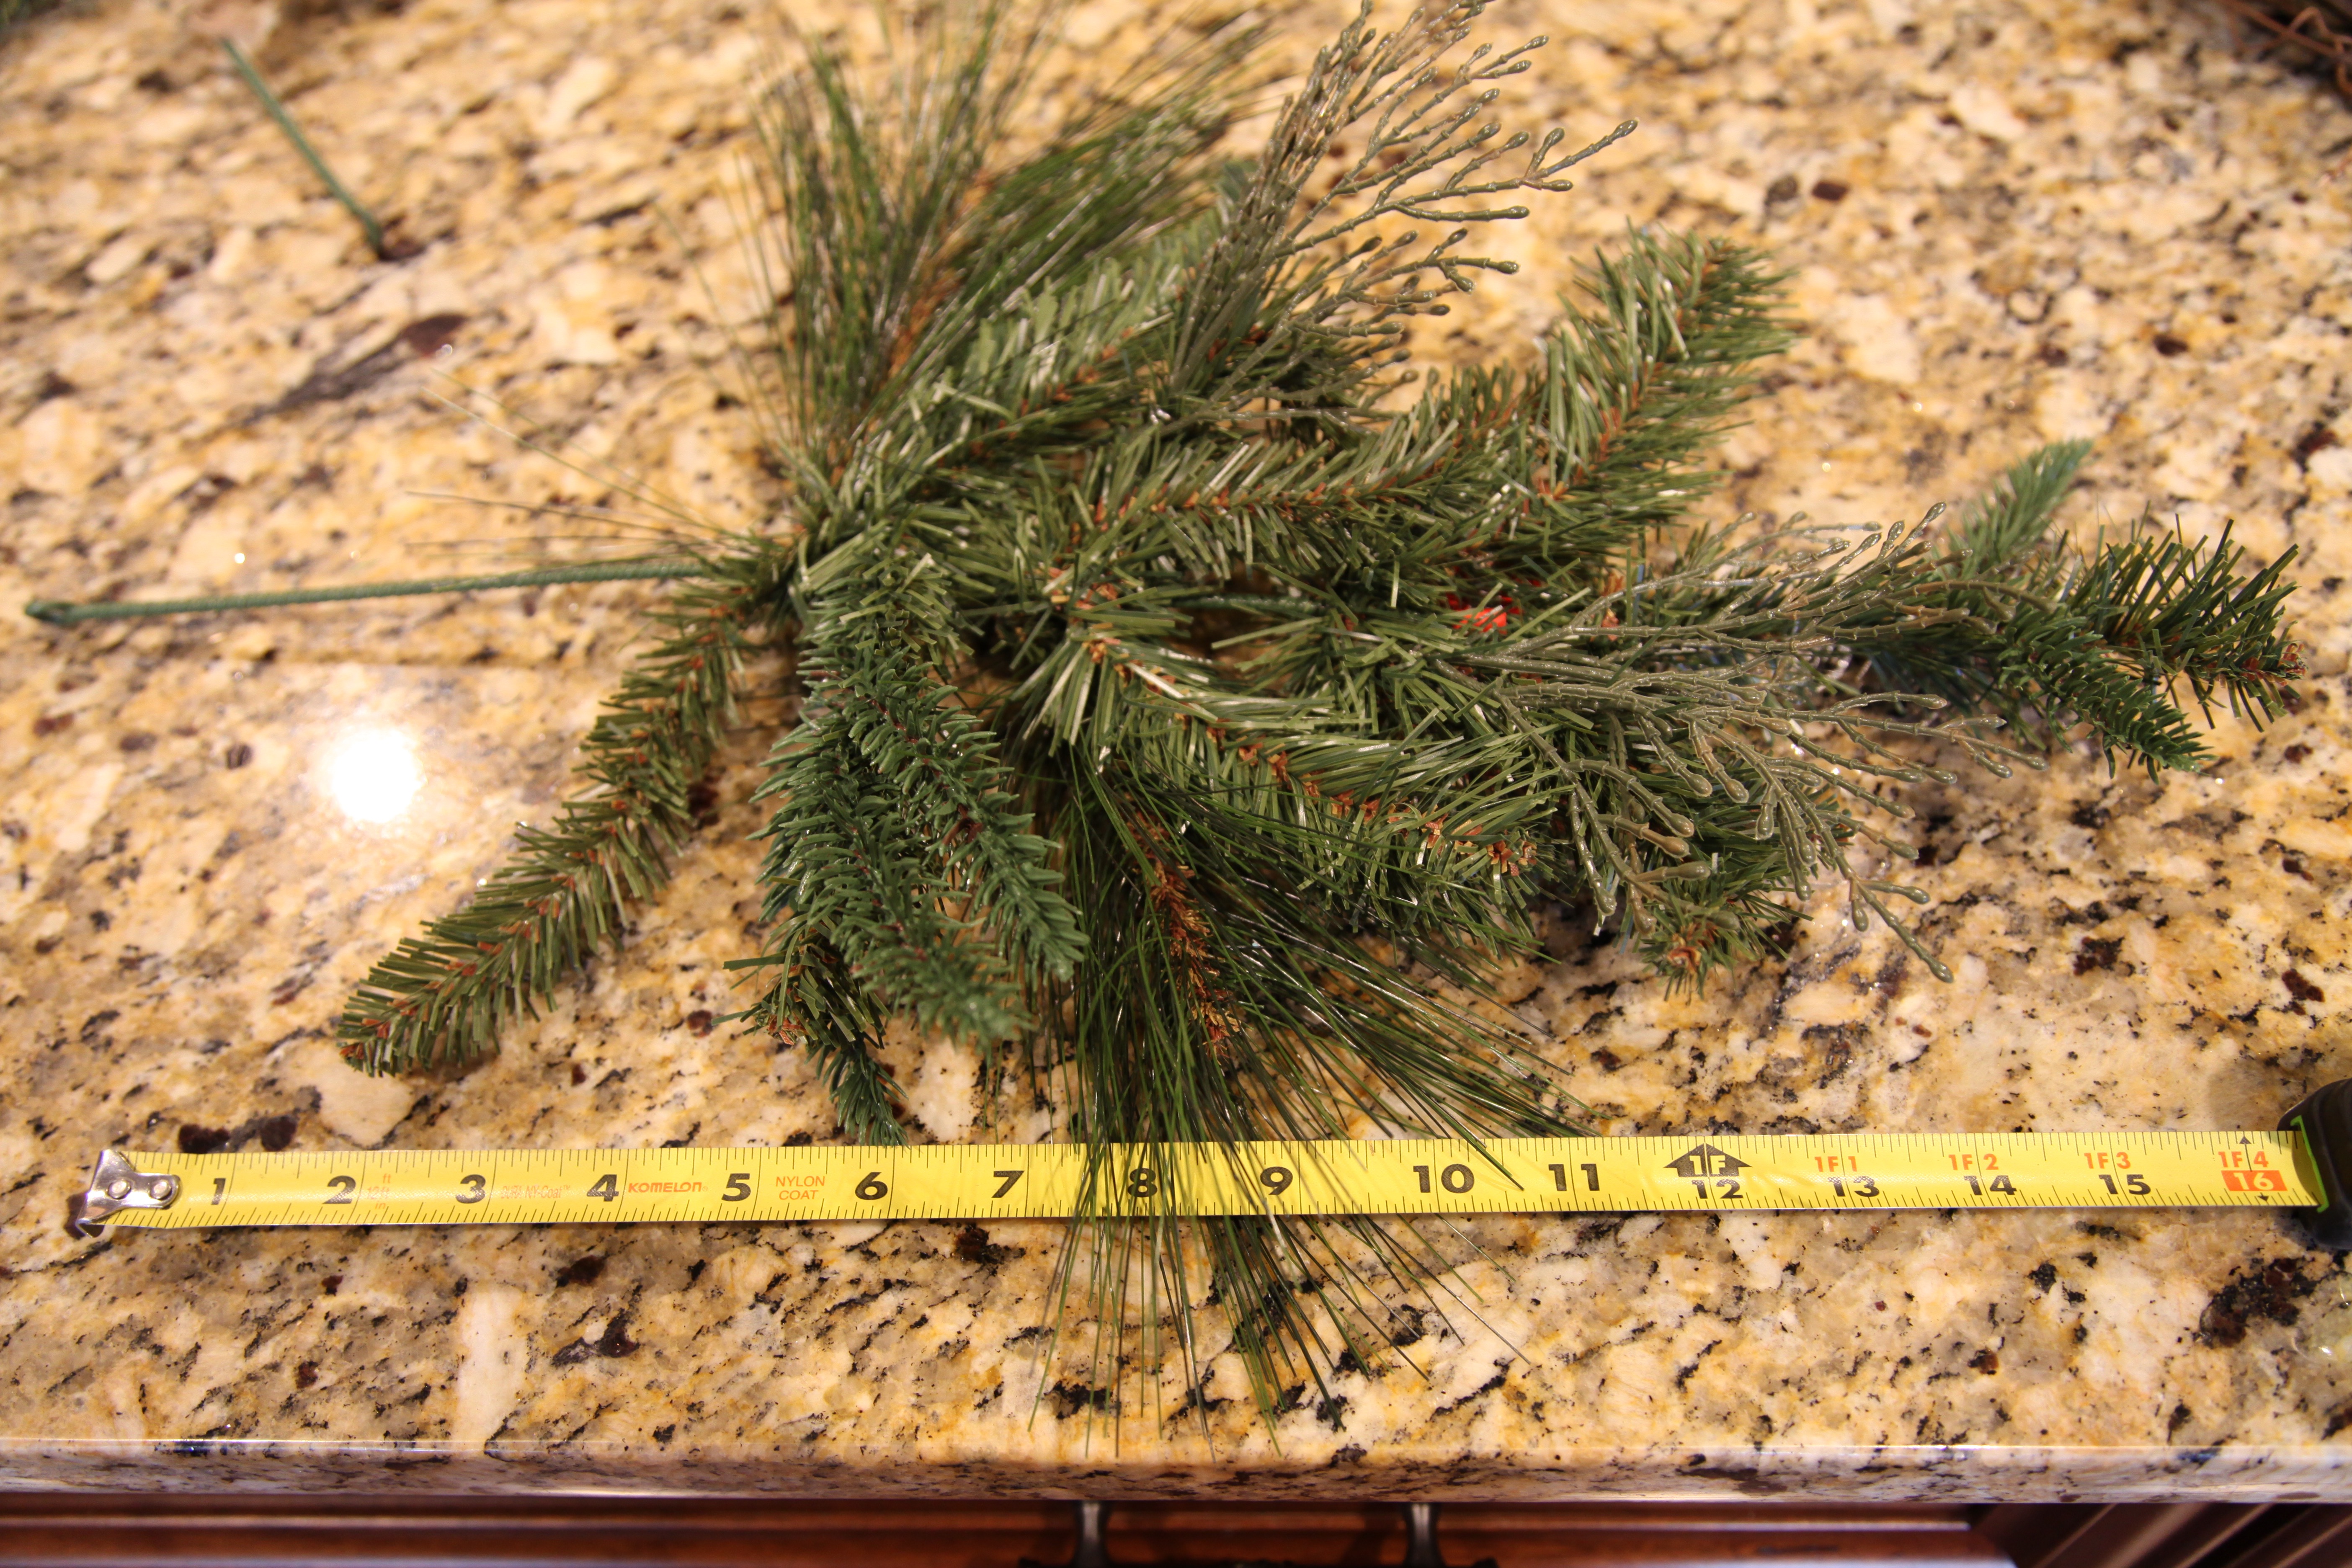
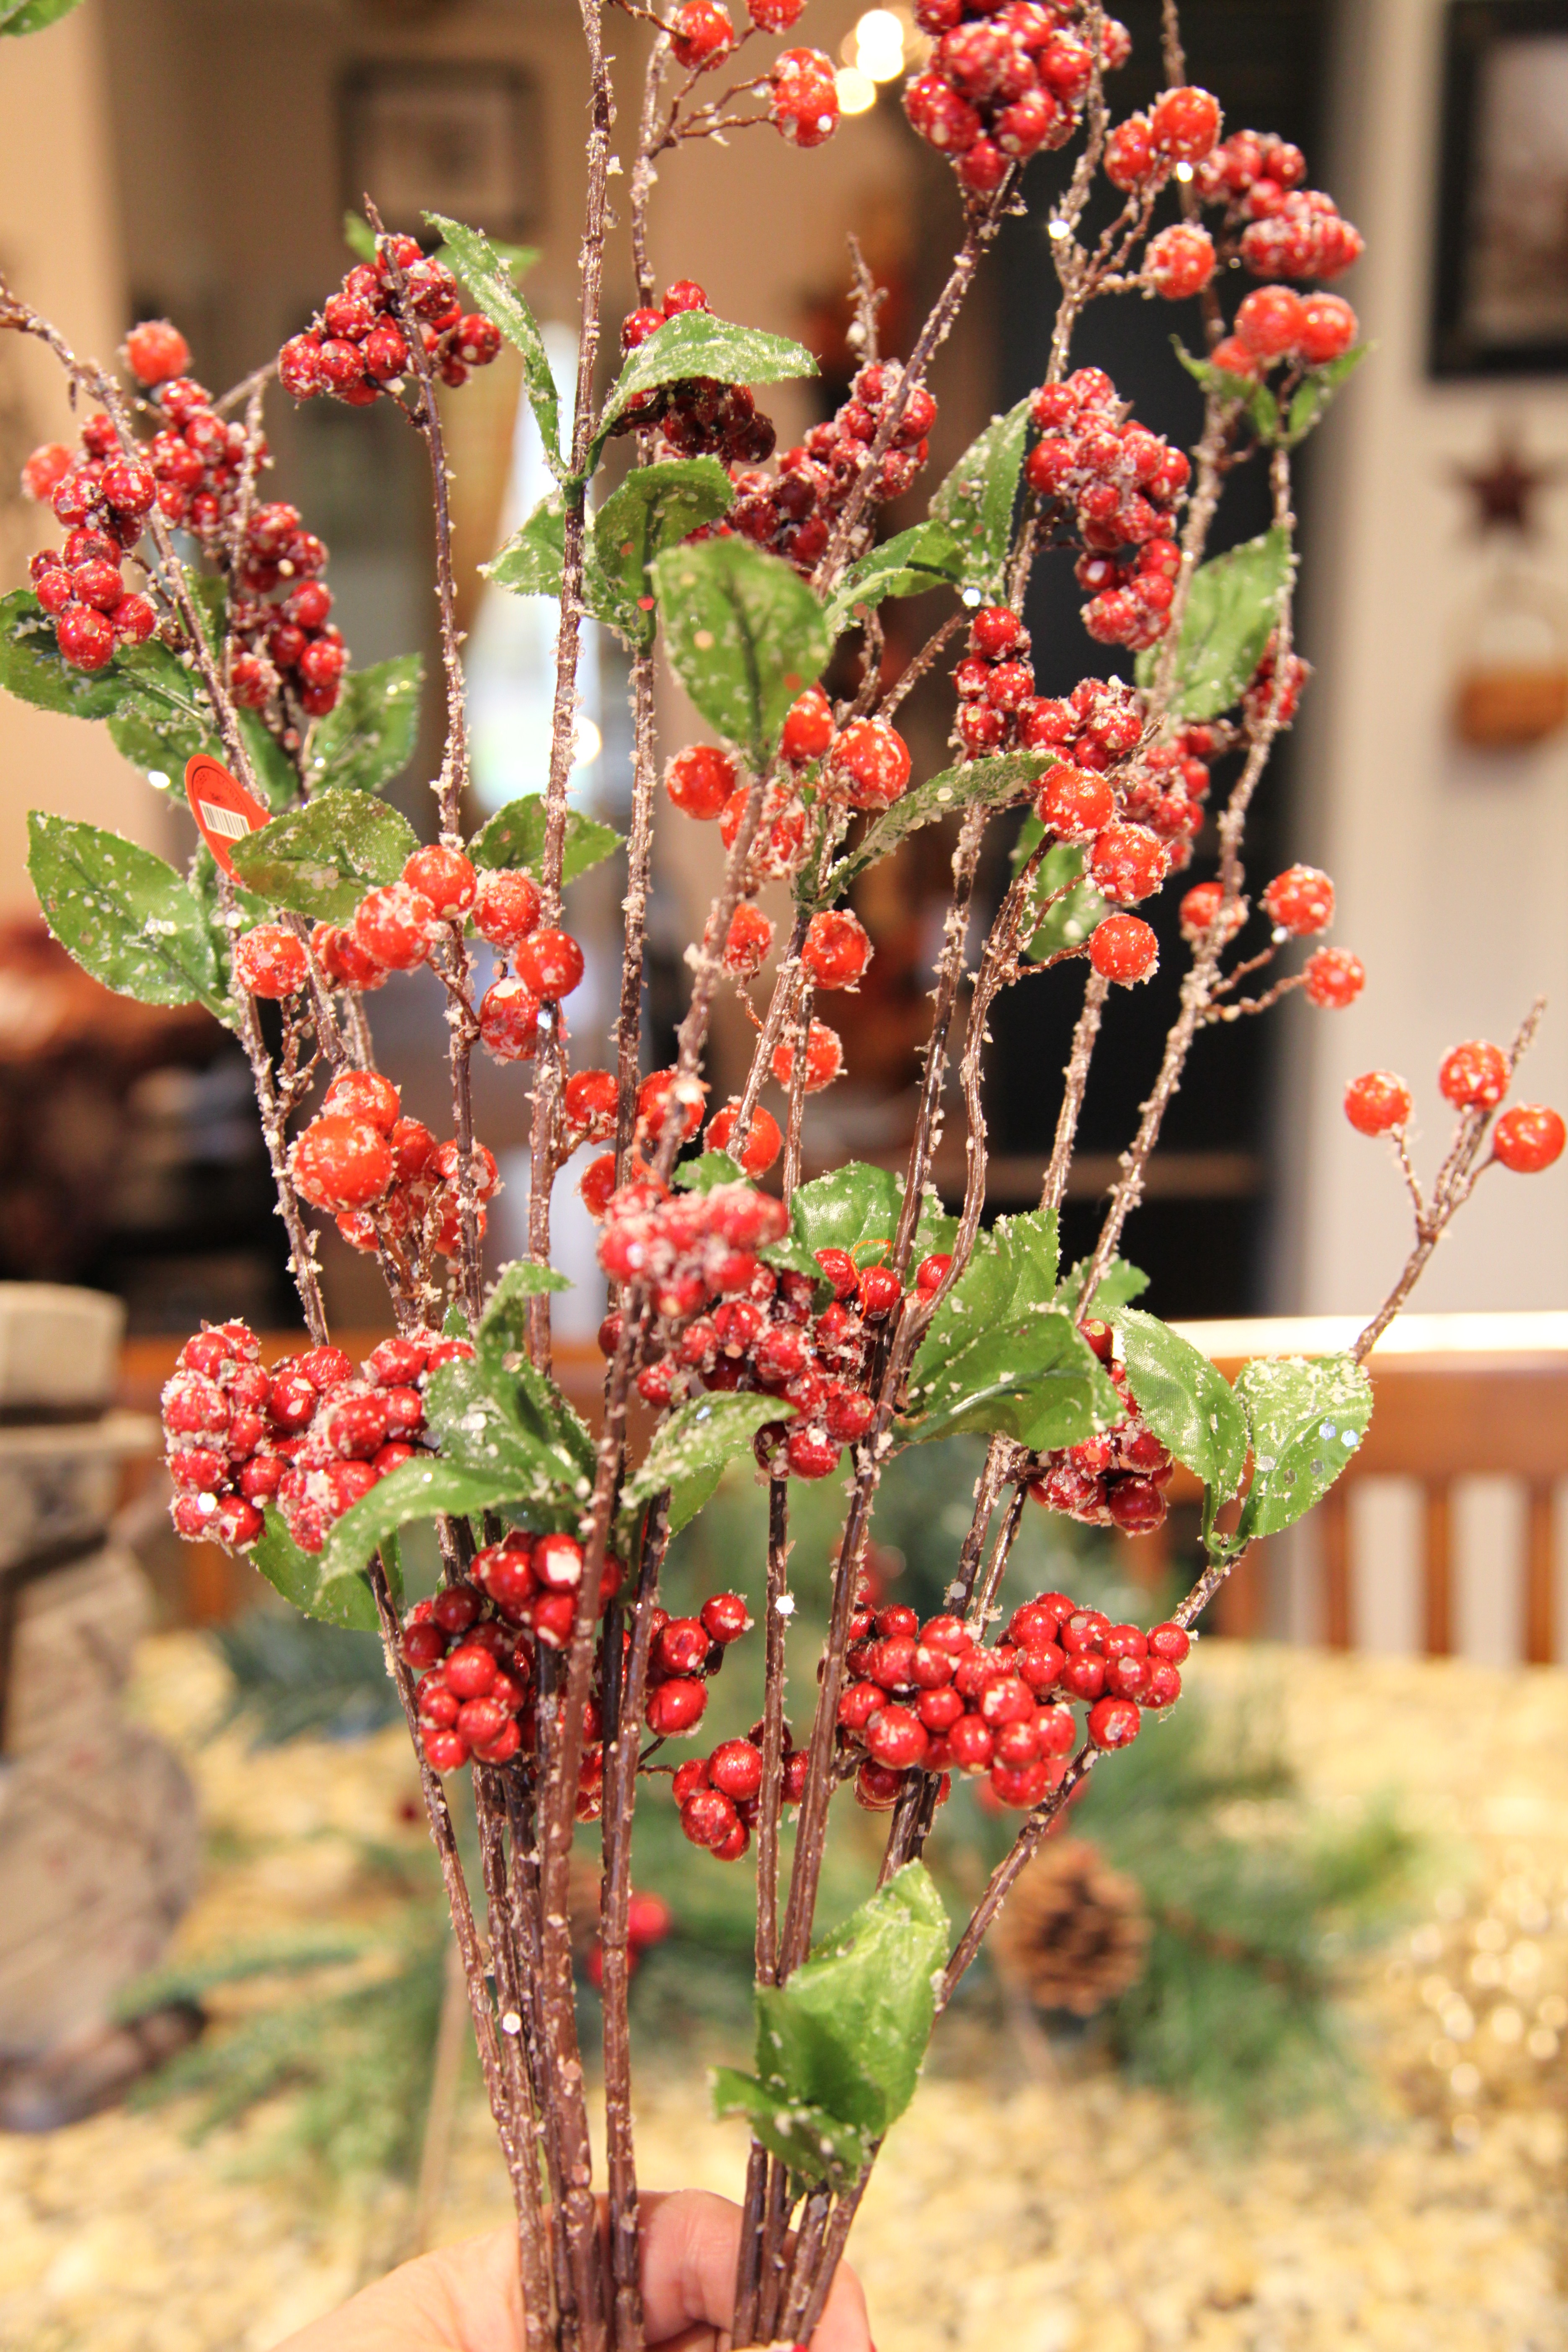
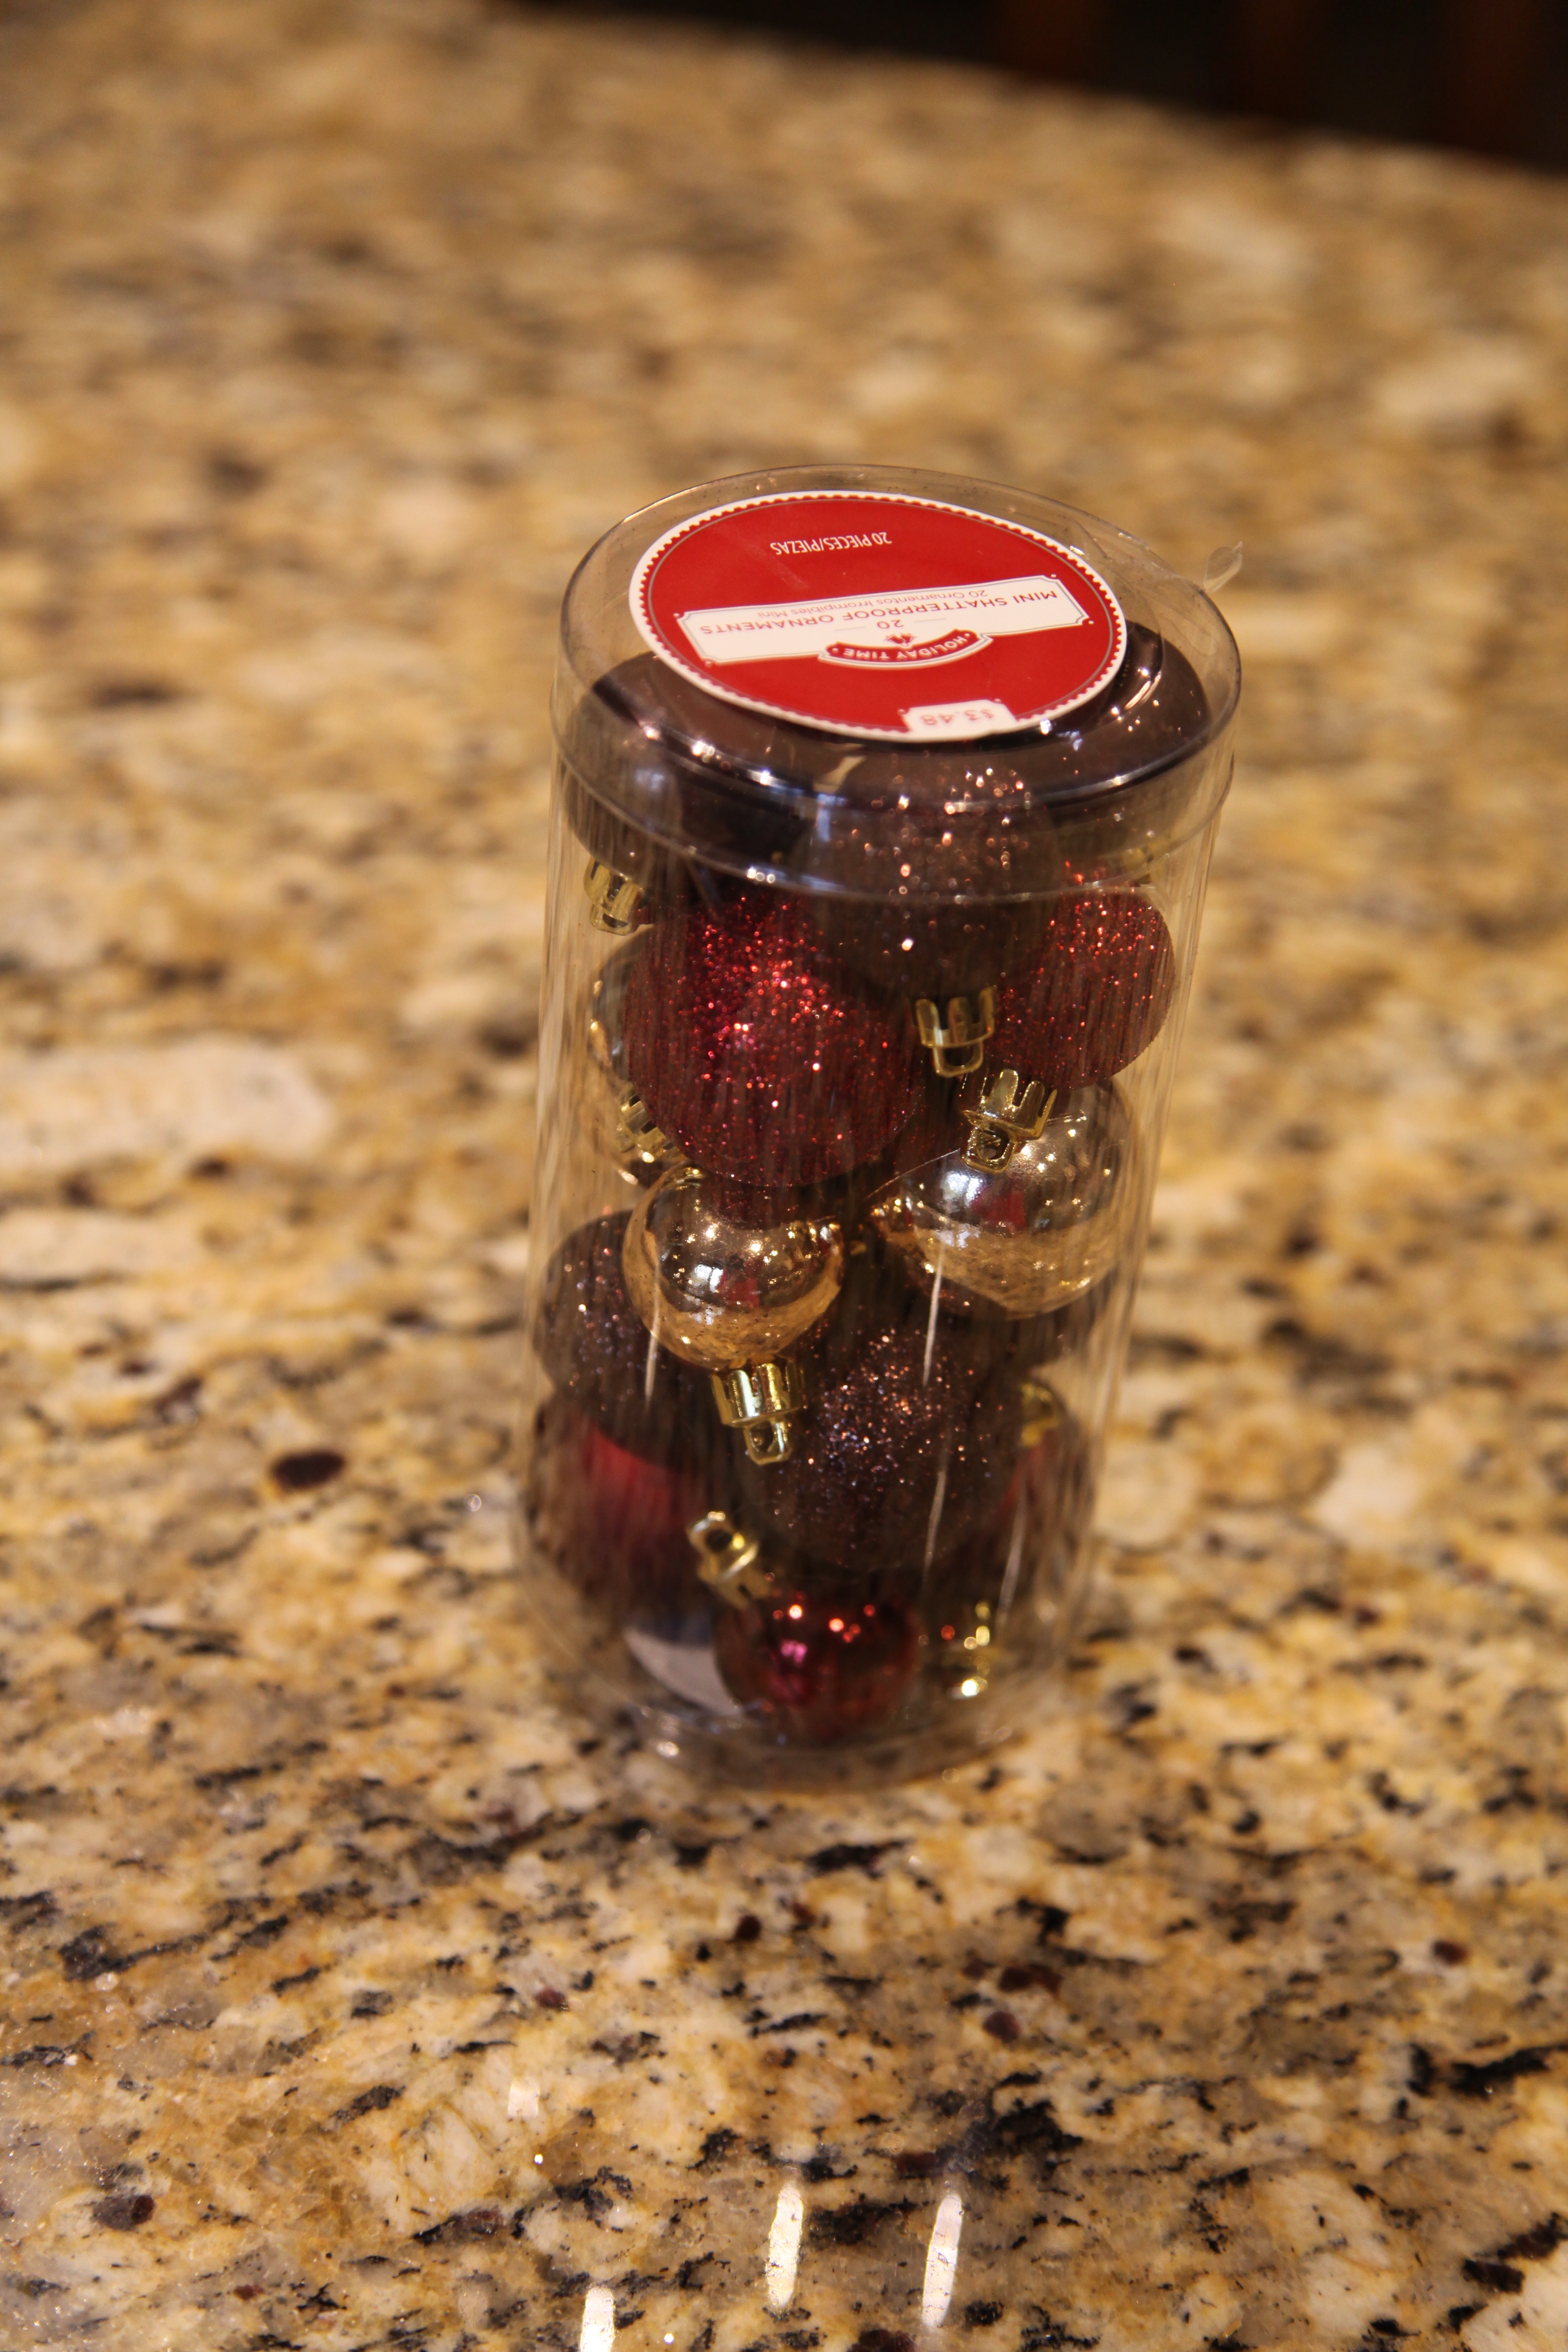
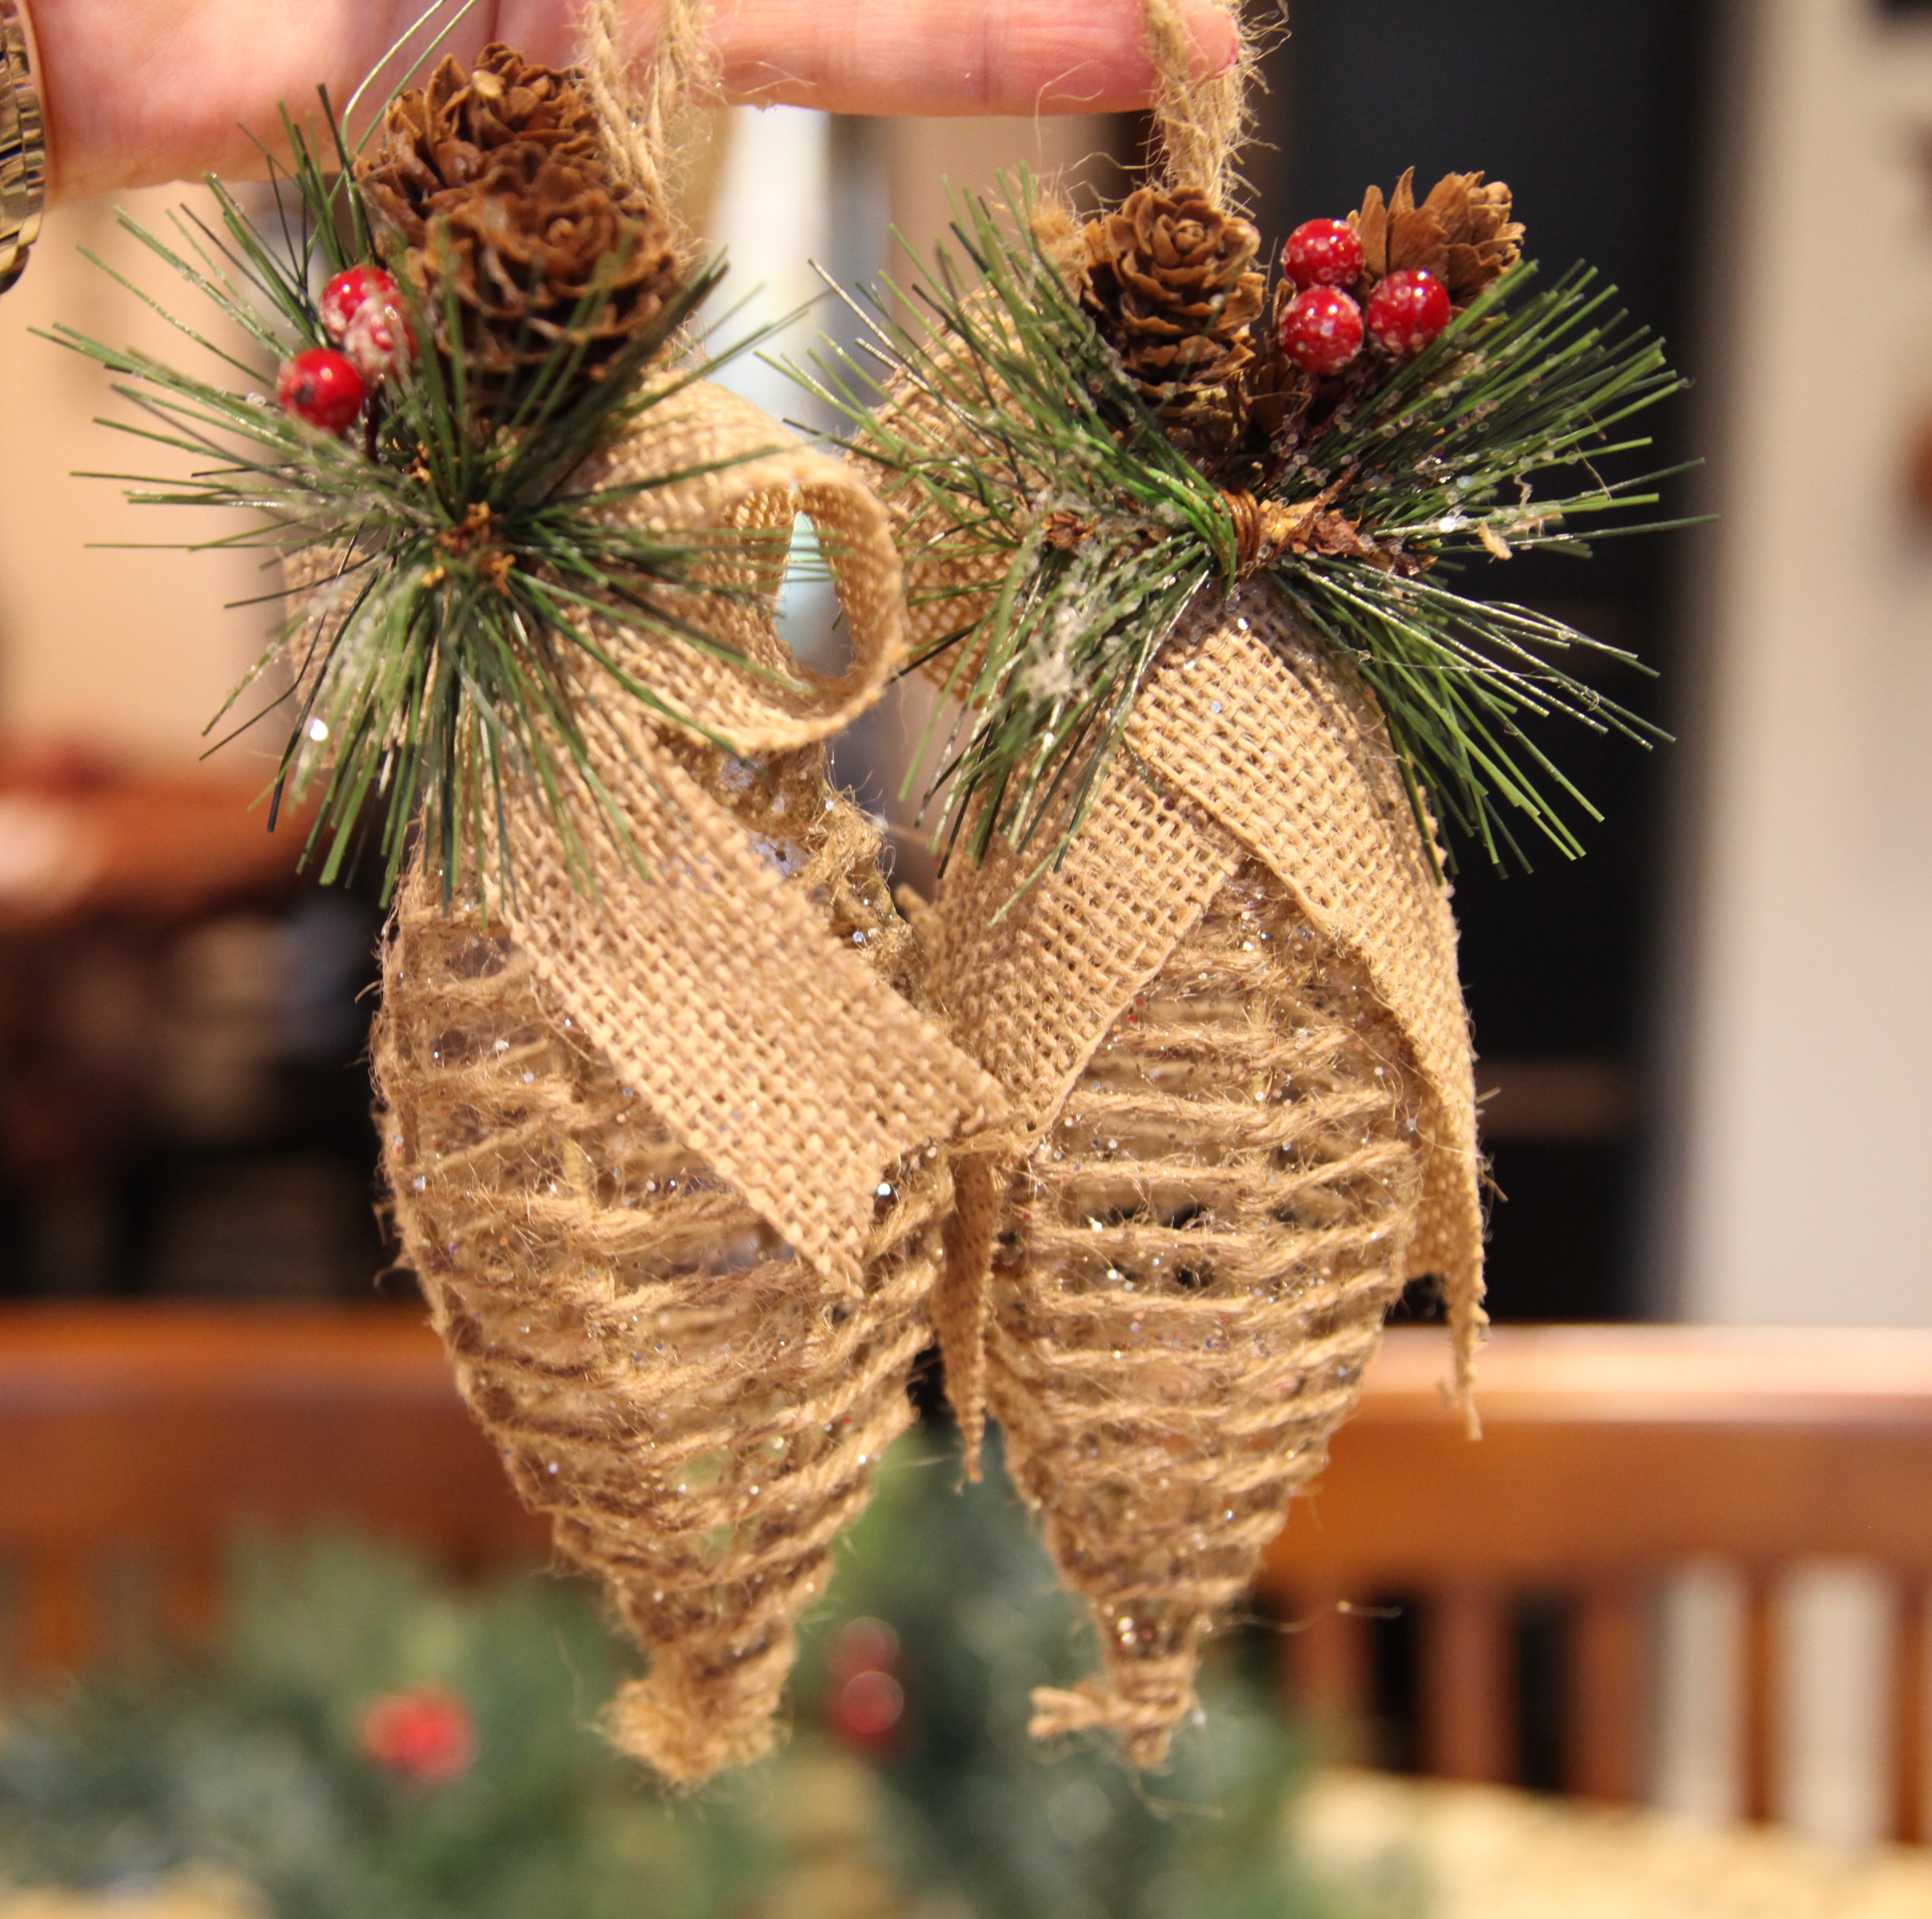
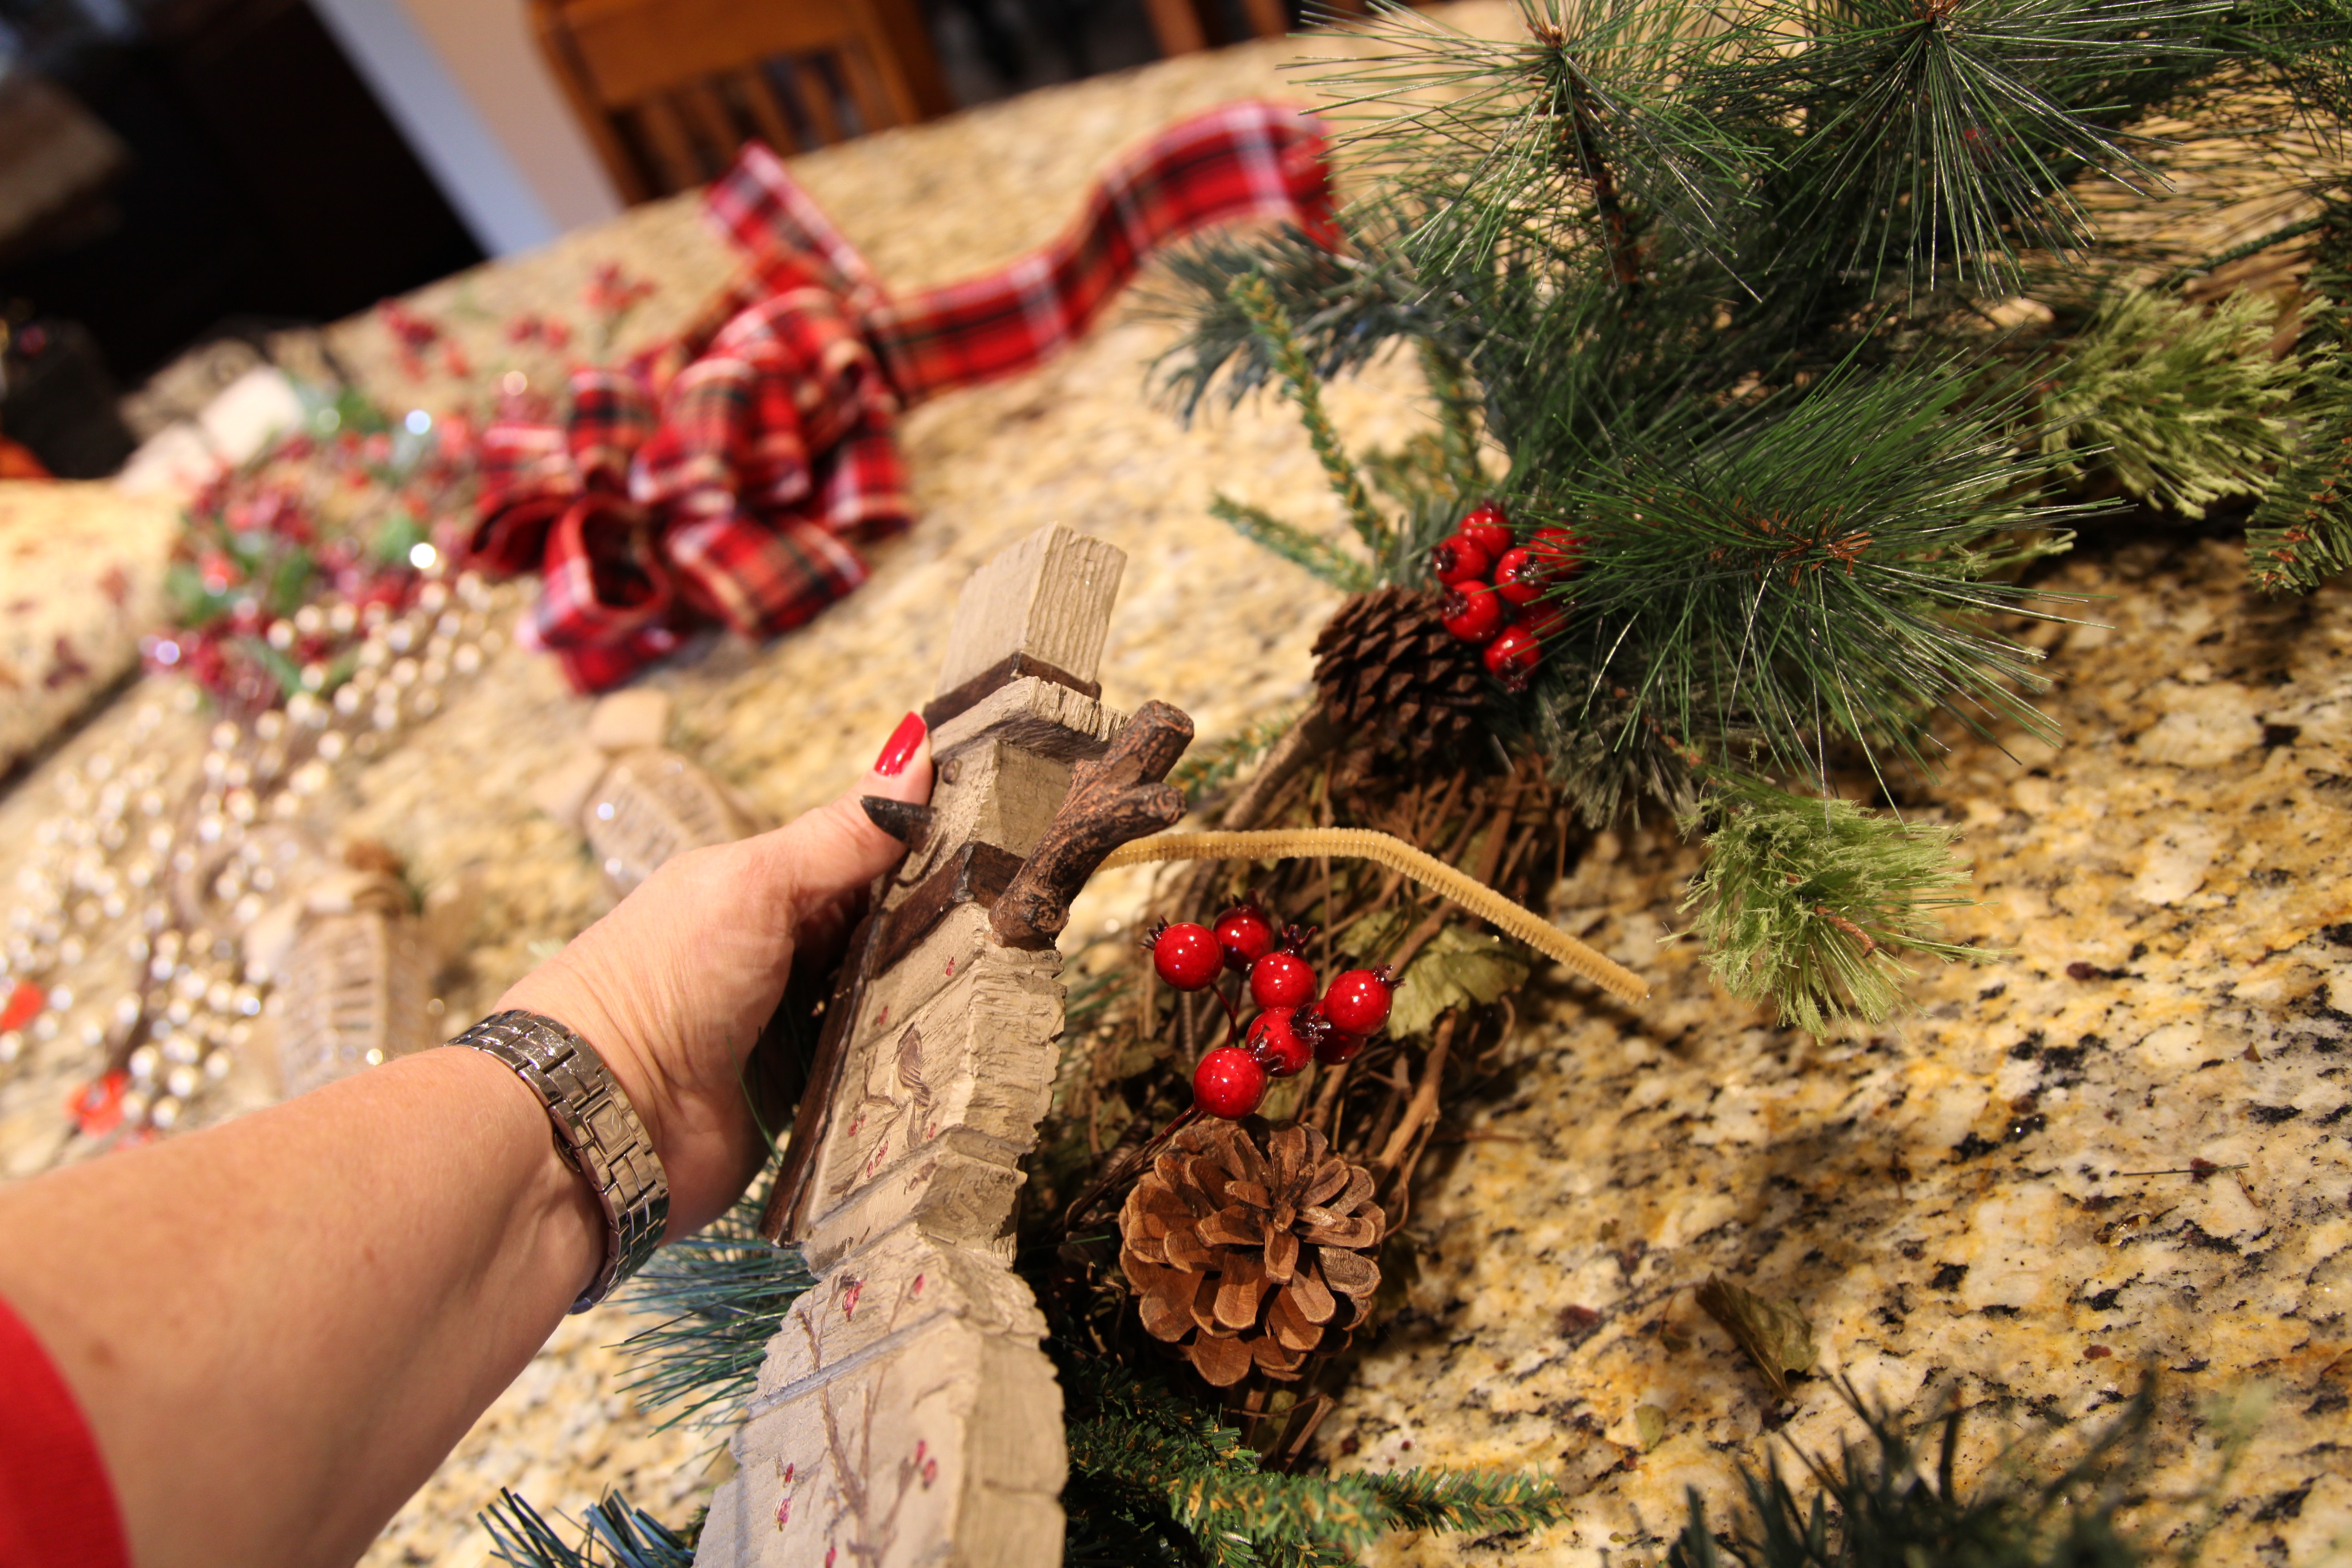
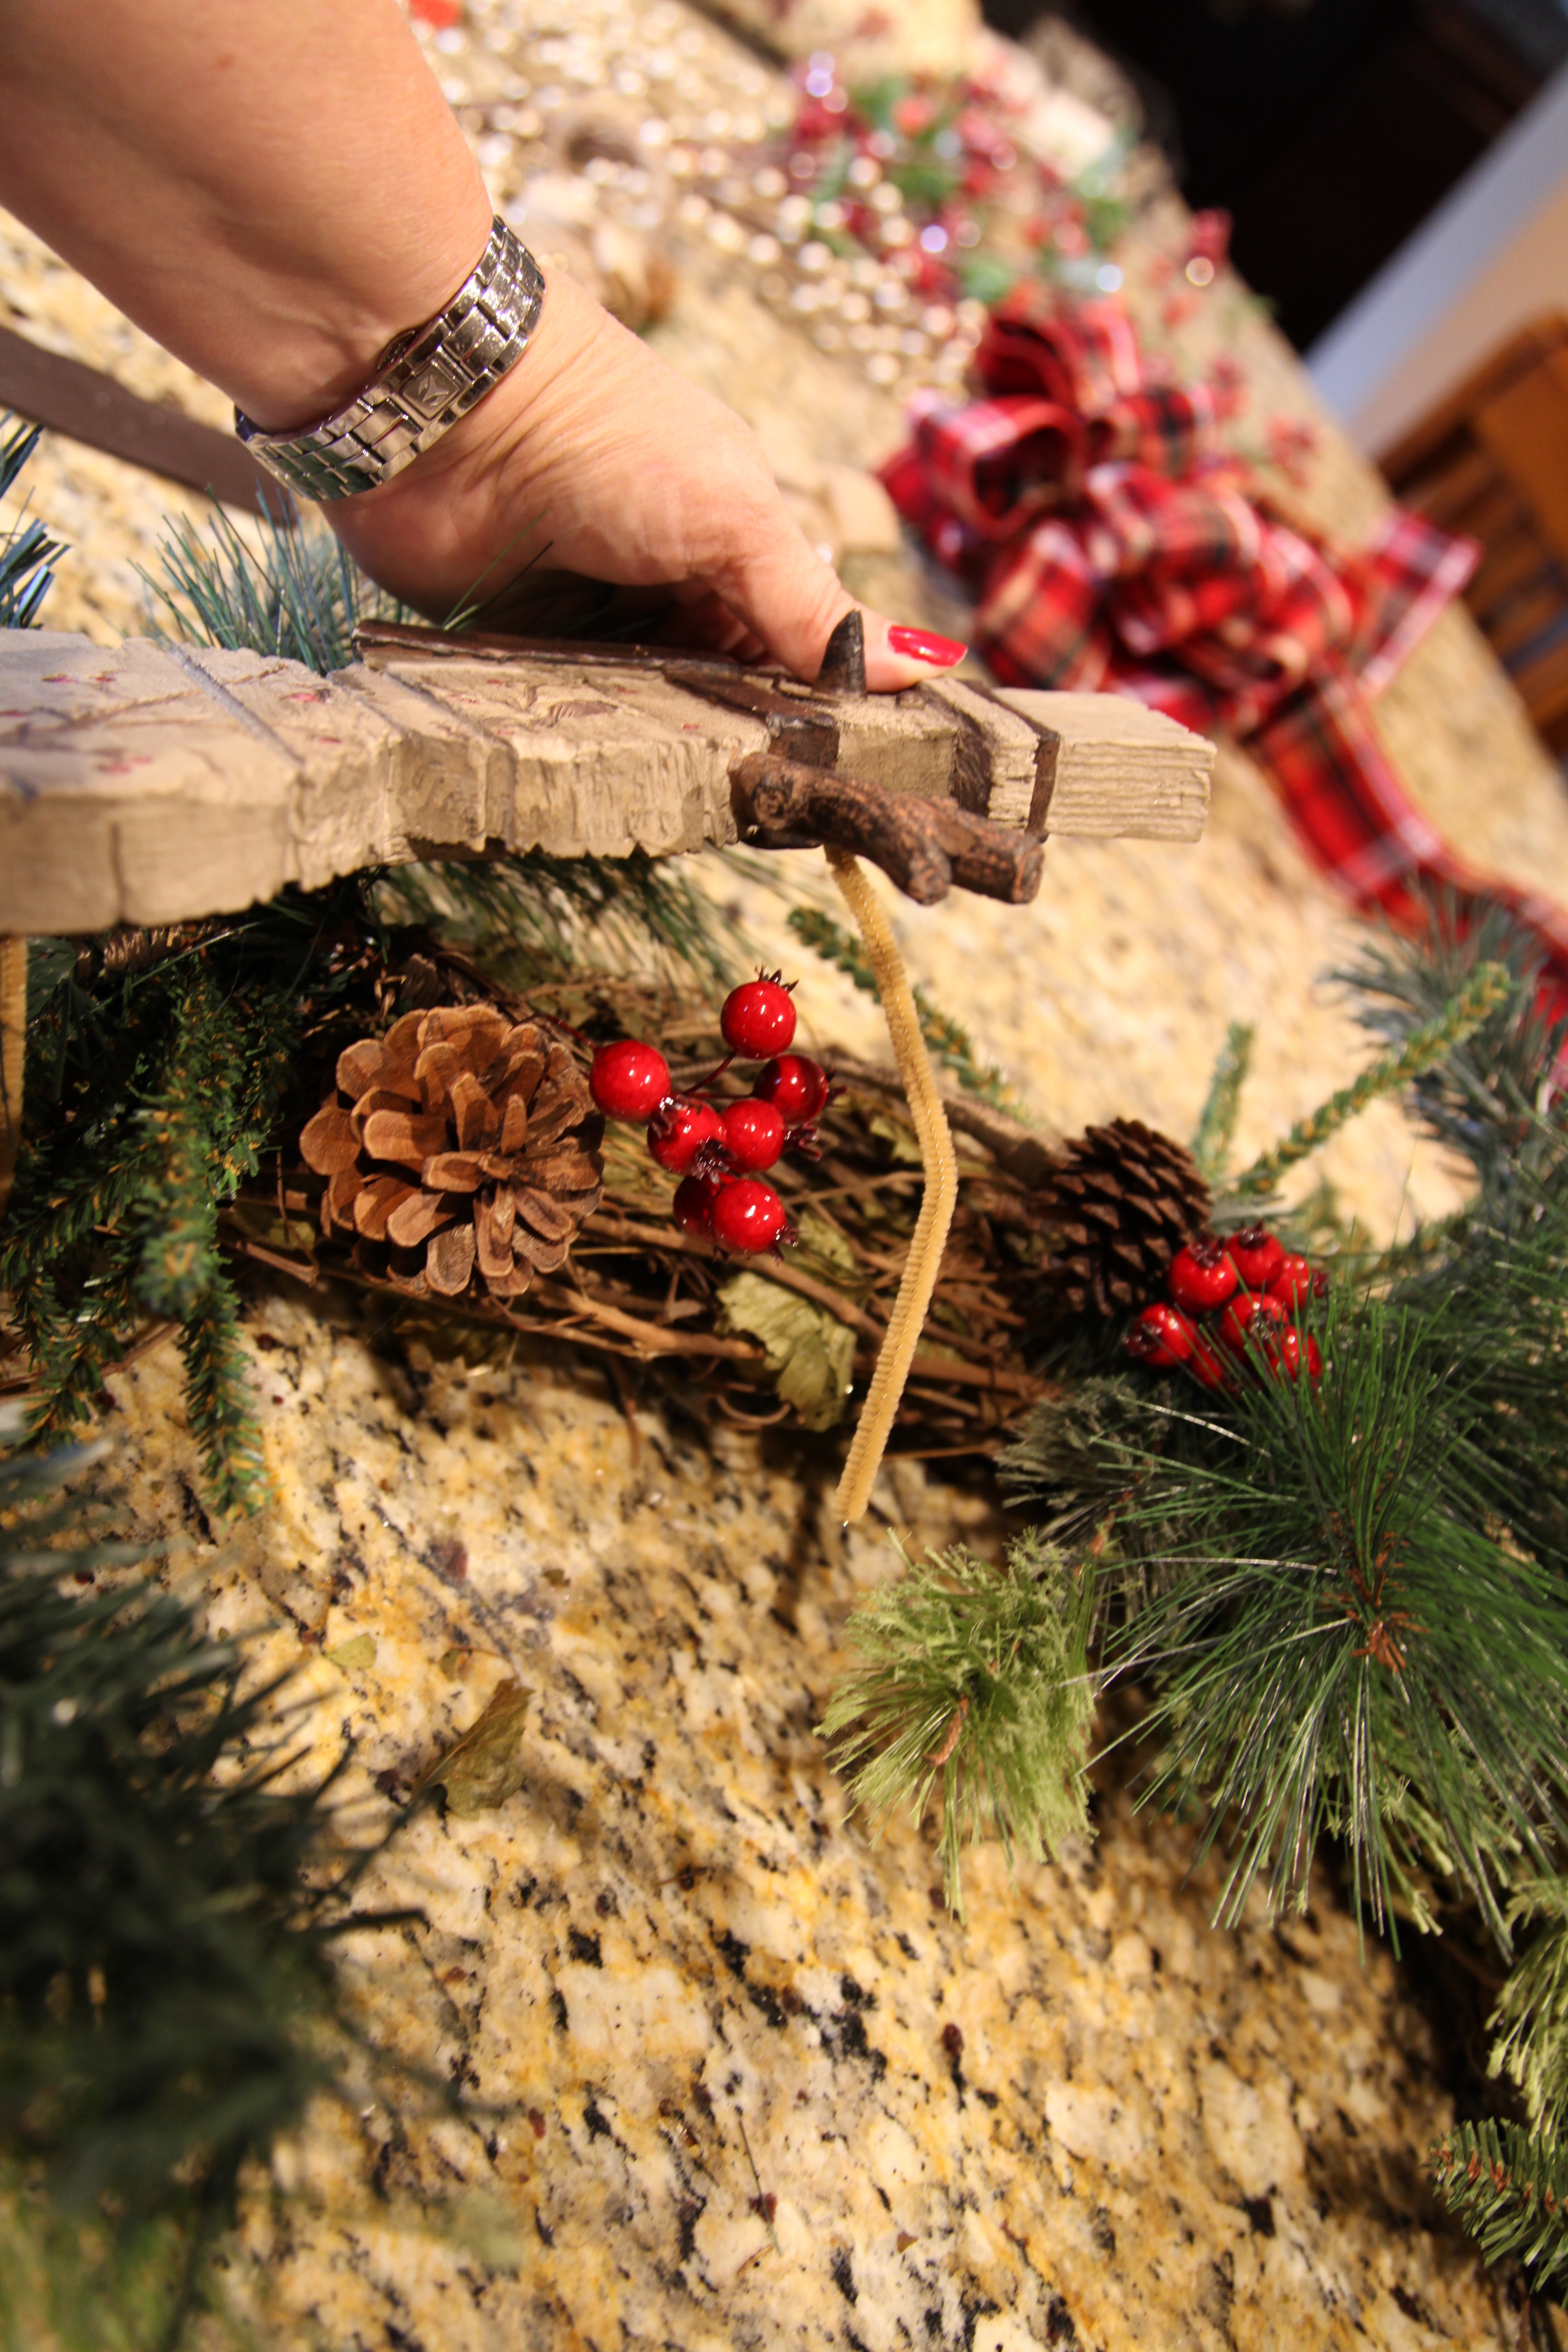
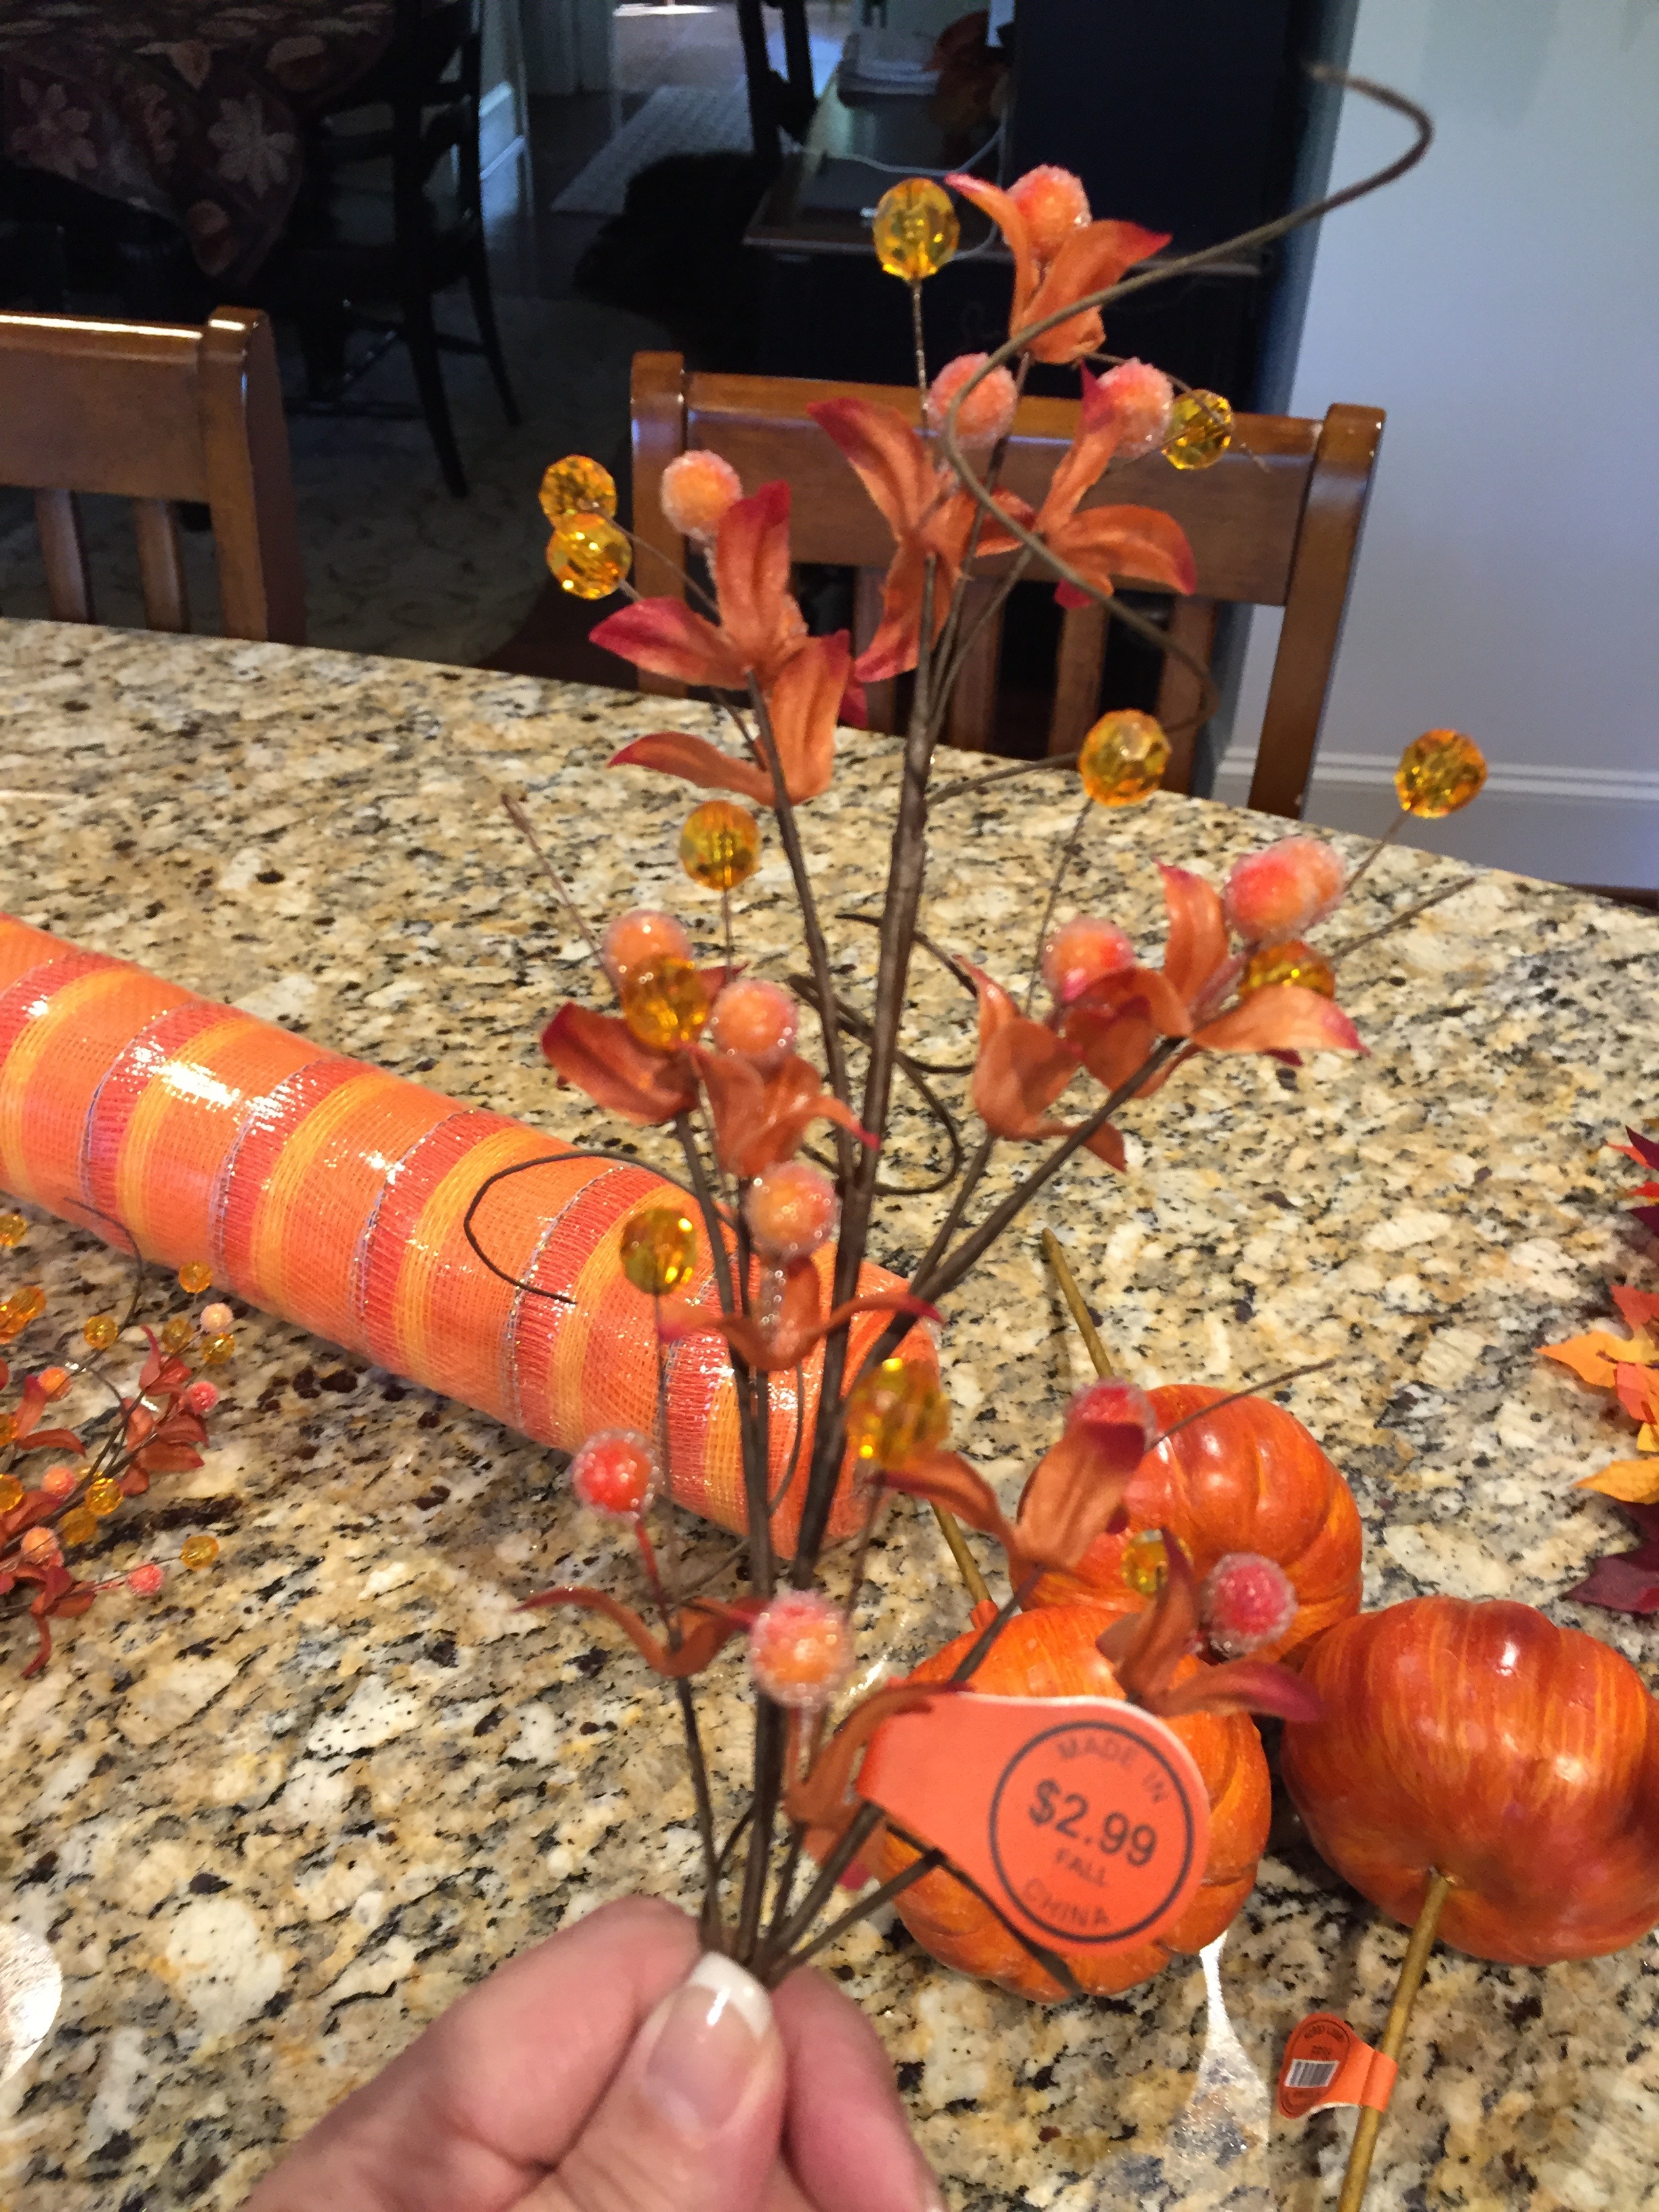
Here are all of the accent pieces that I used to create this centerpiece (using the very same tray and lantern as I highlighted in the link above):

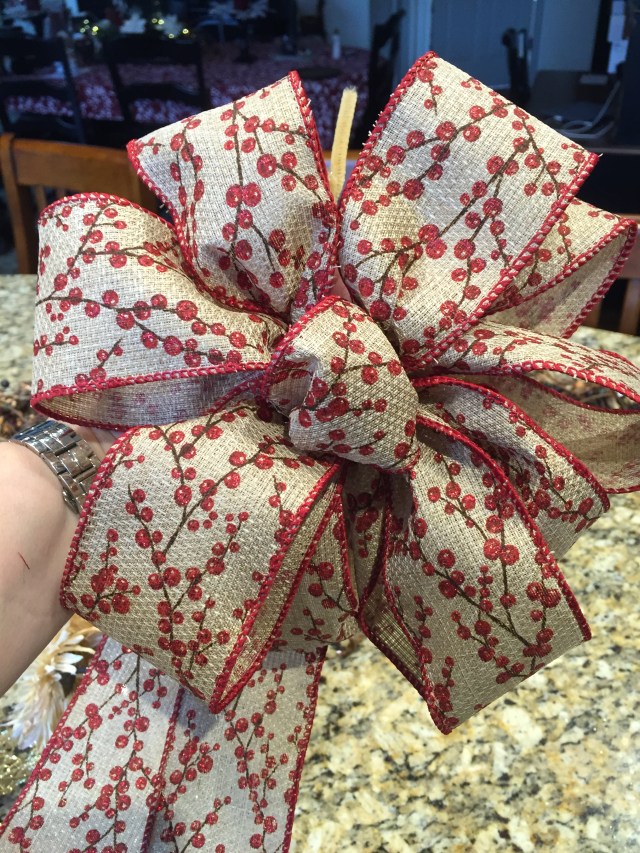
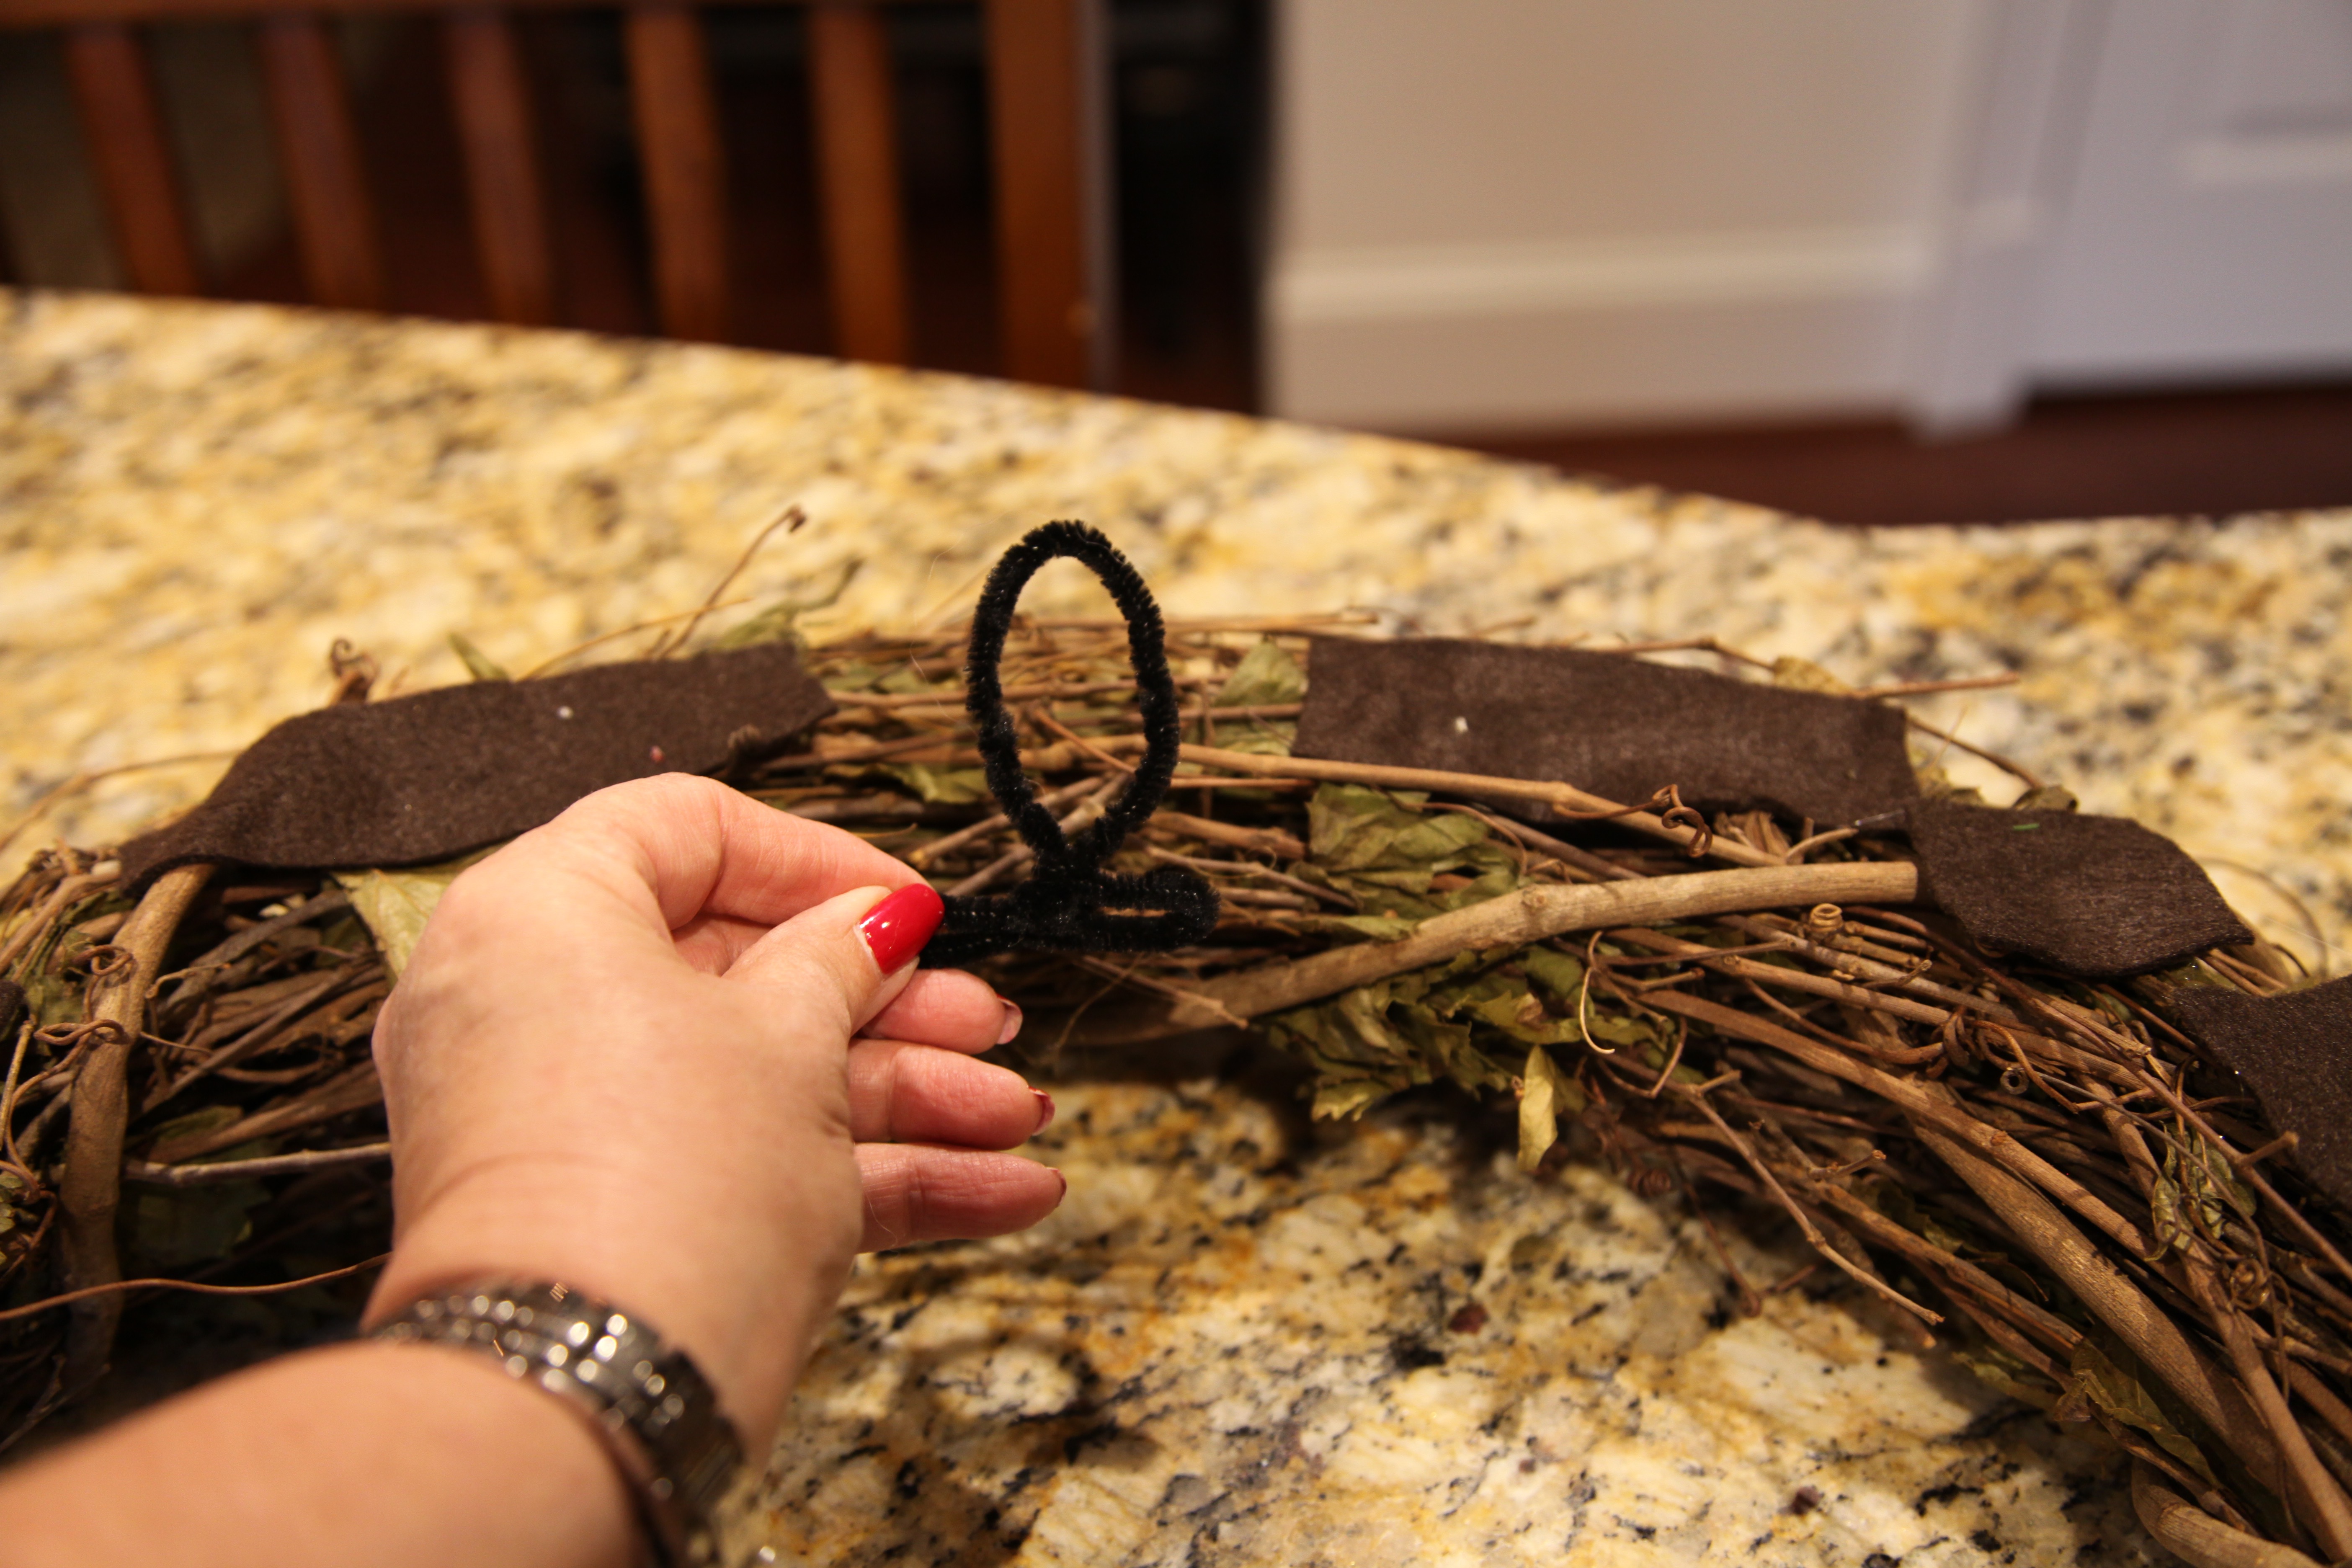
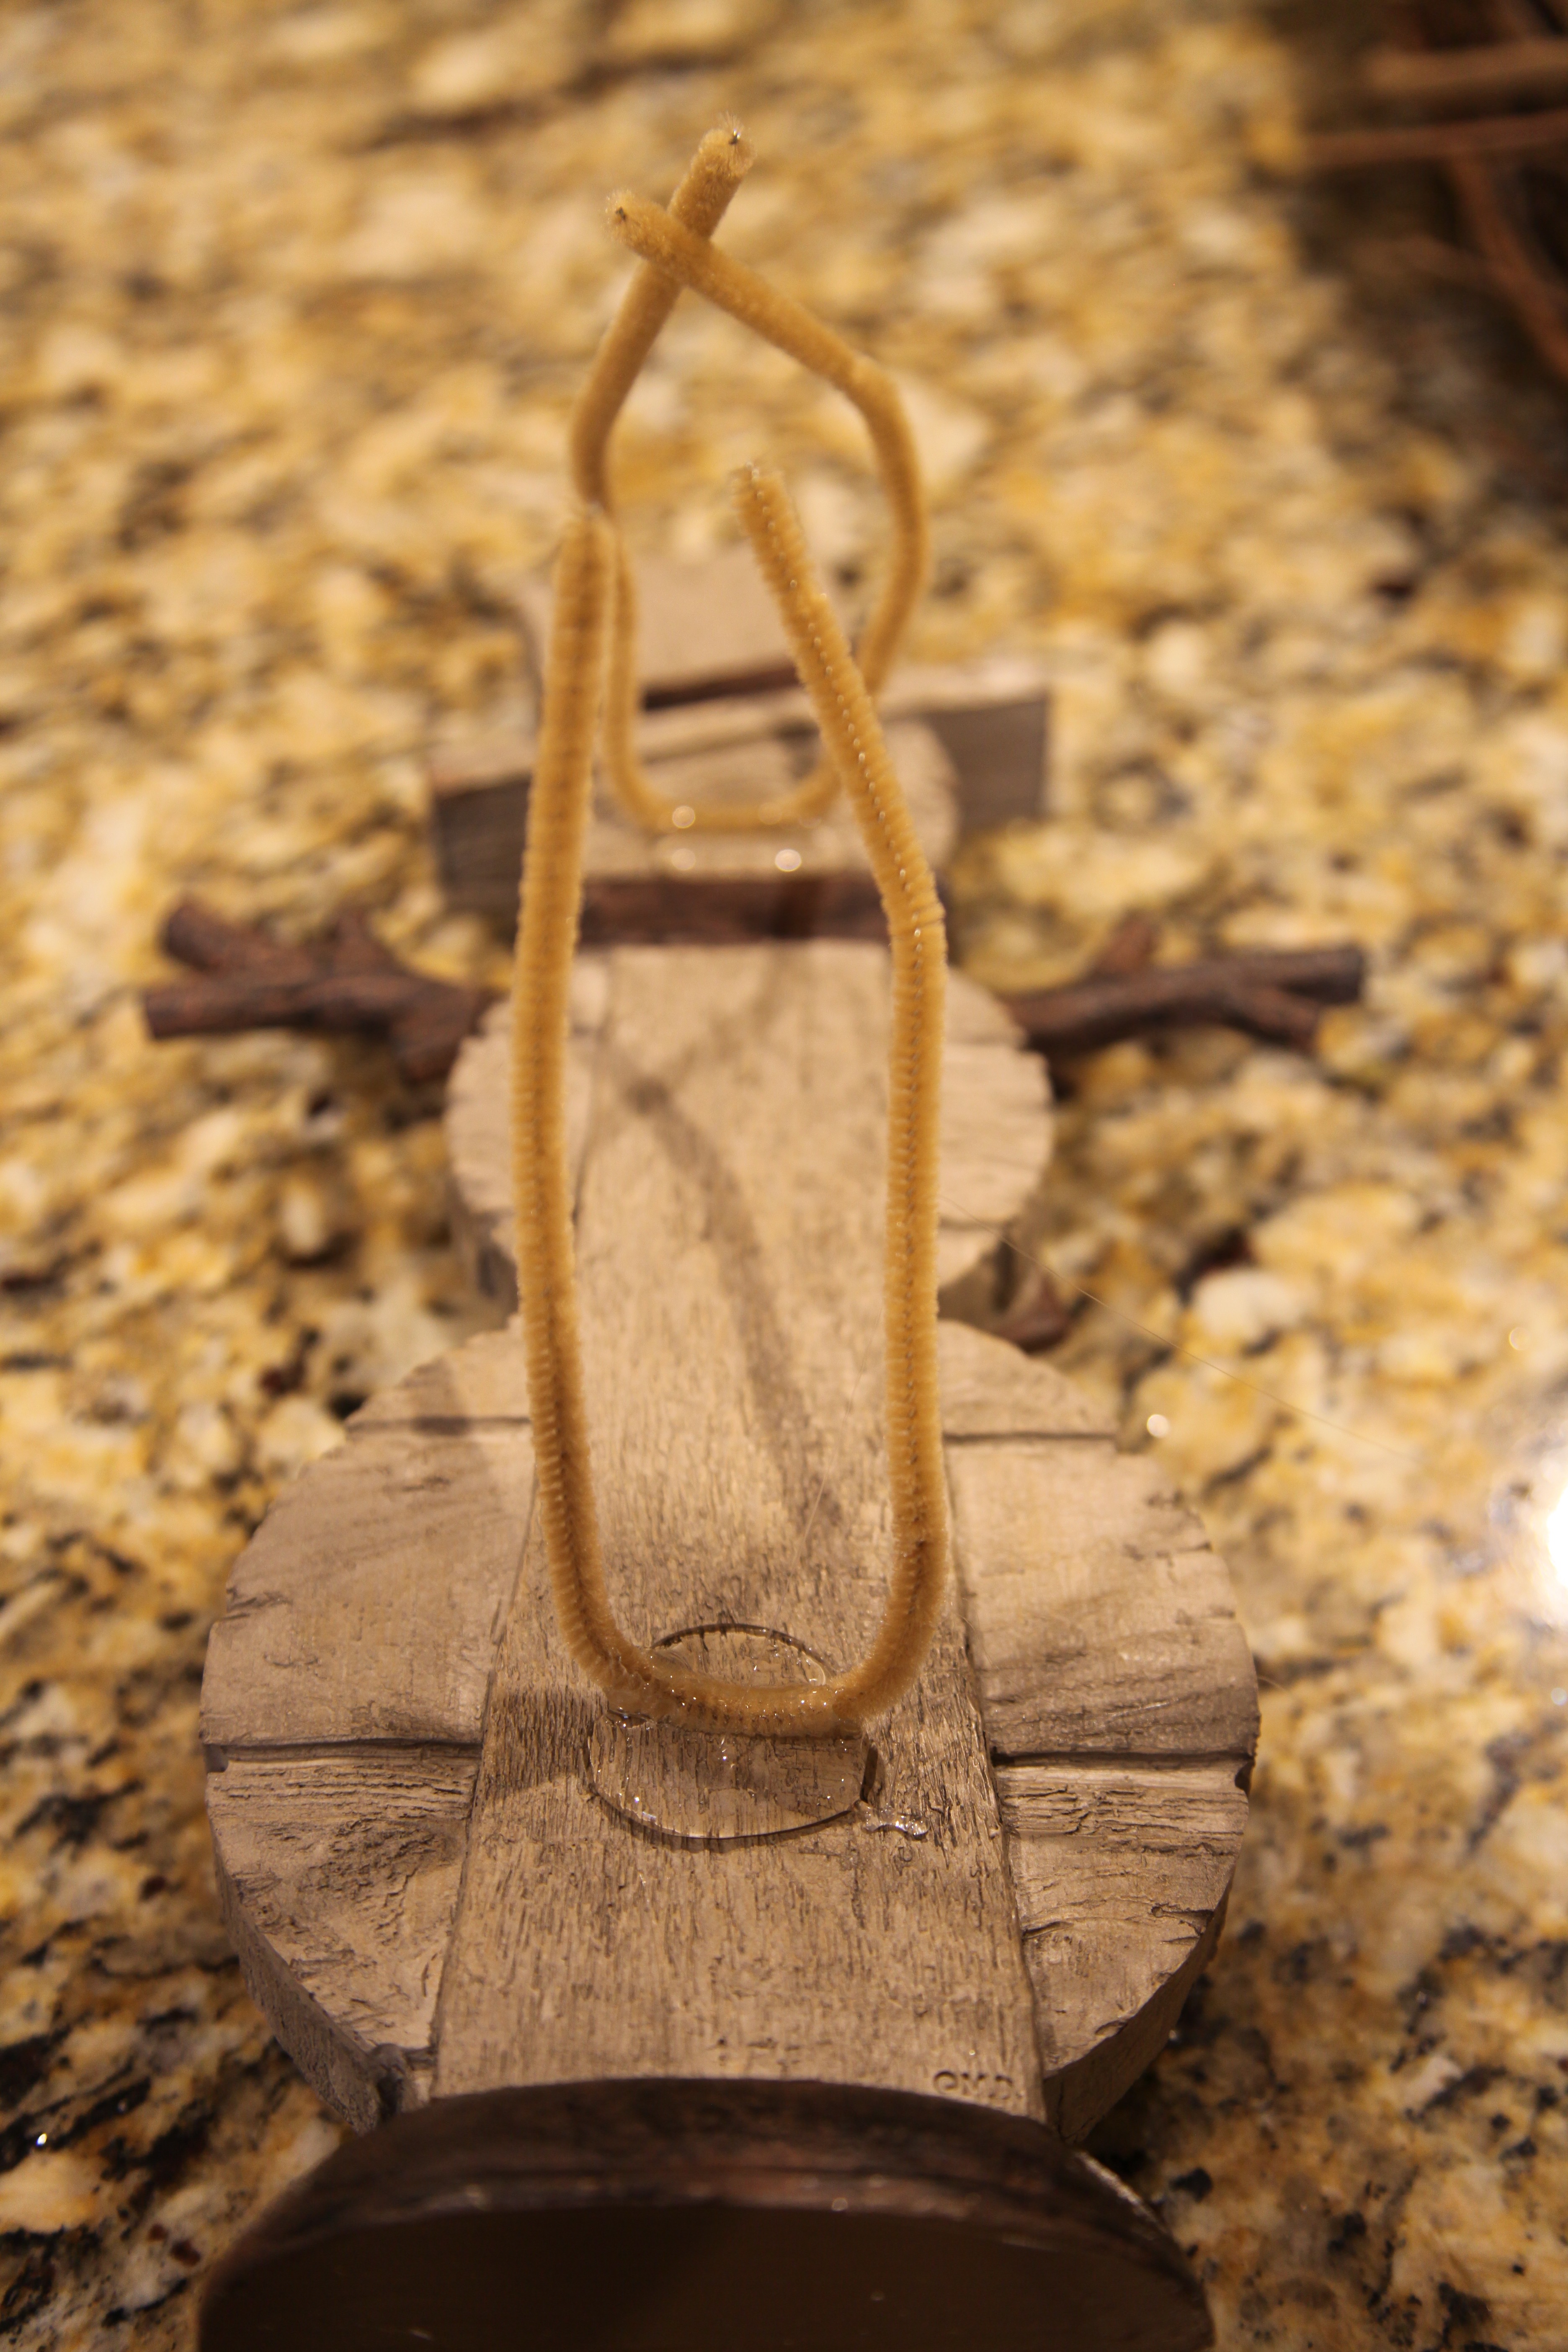
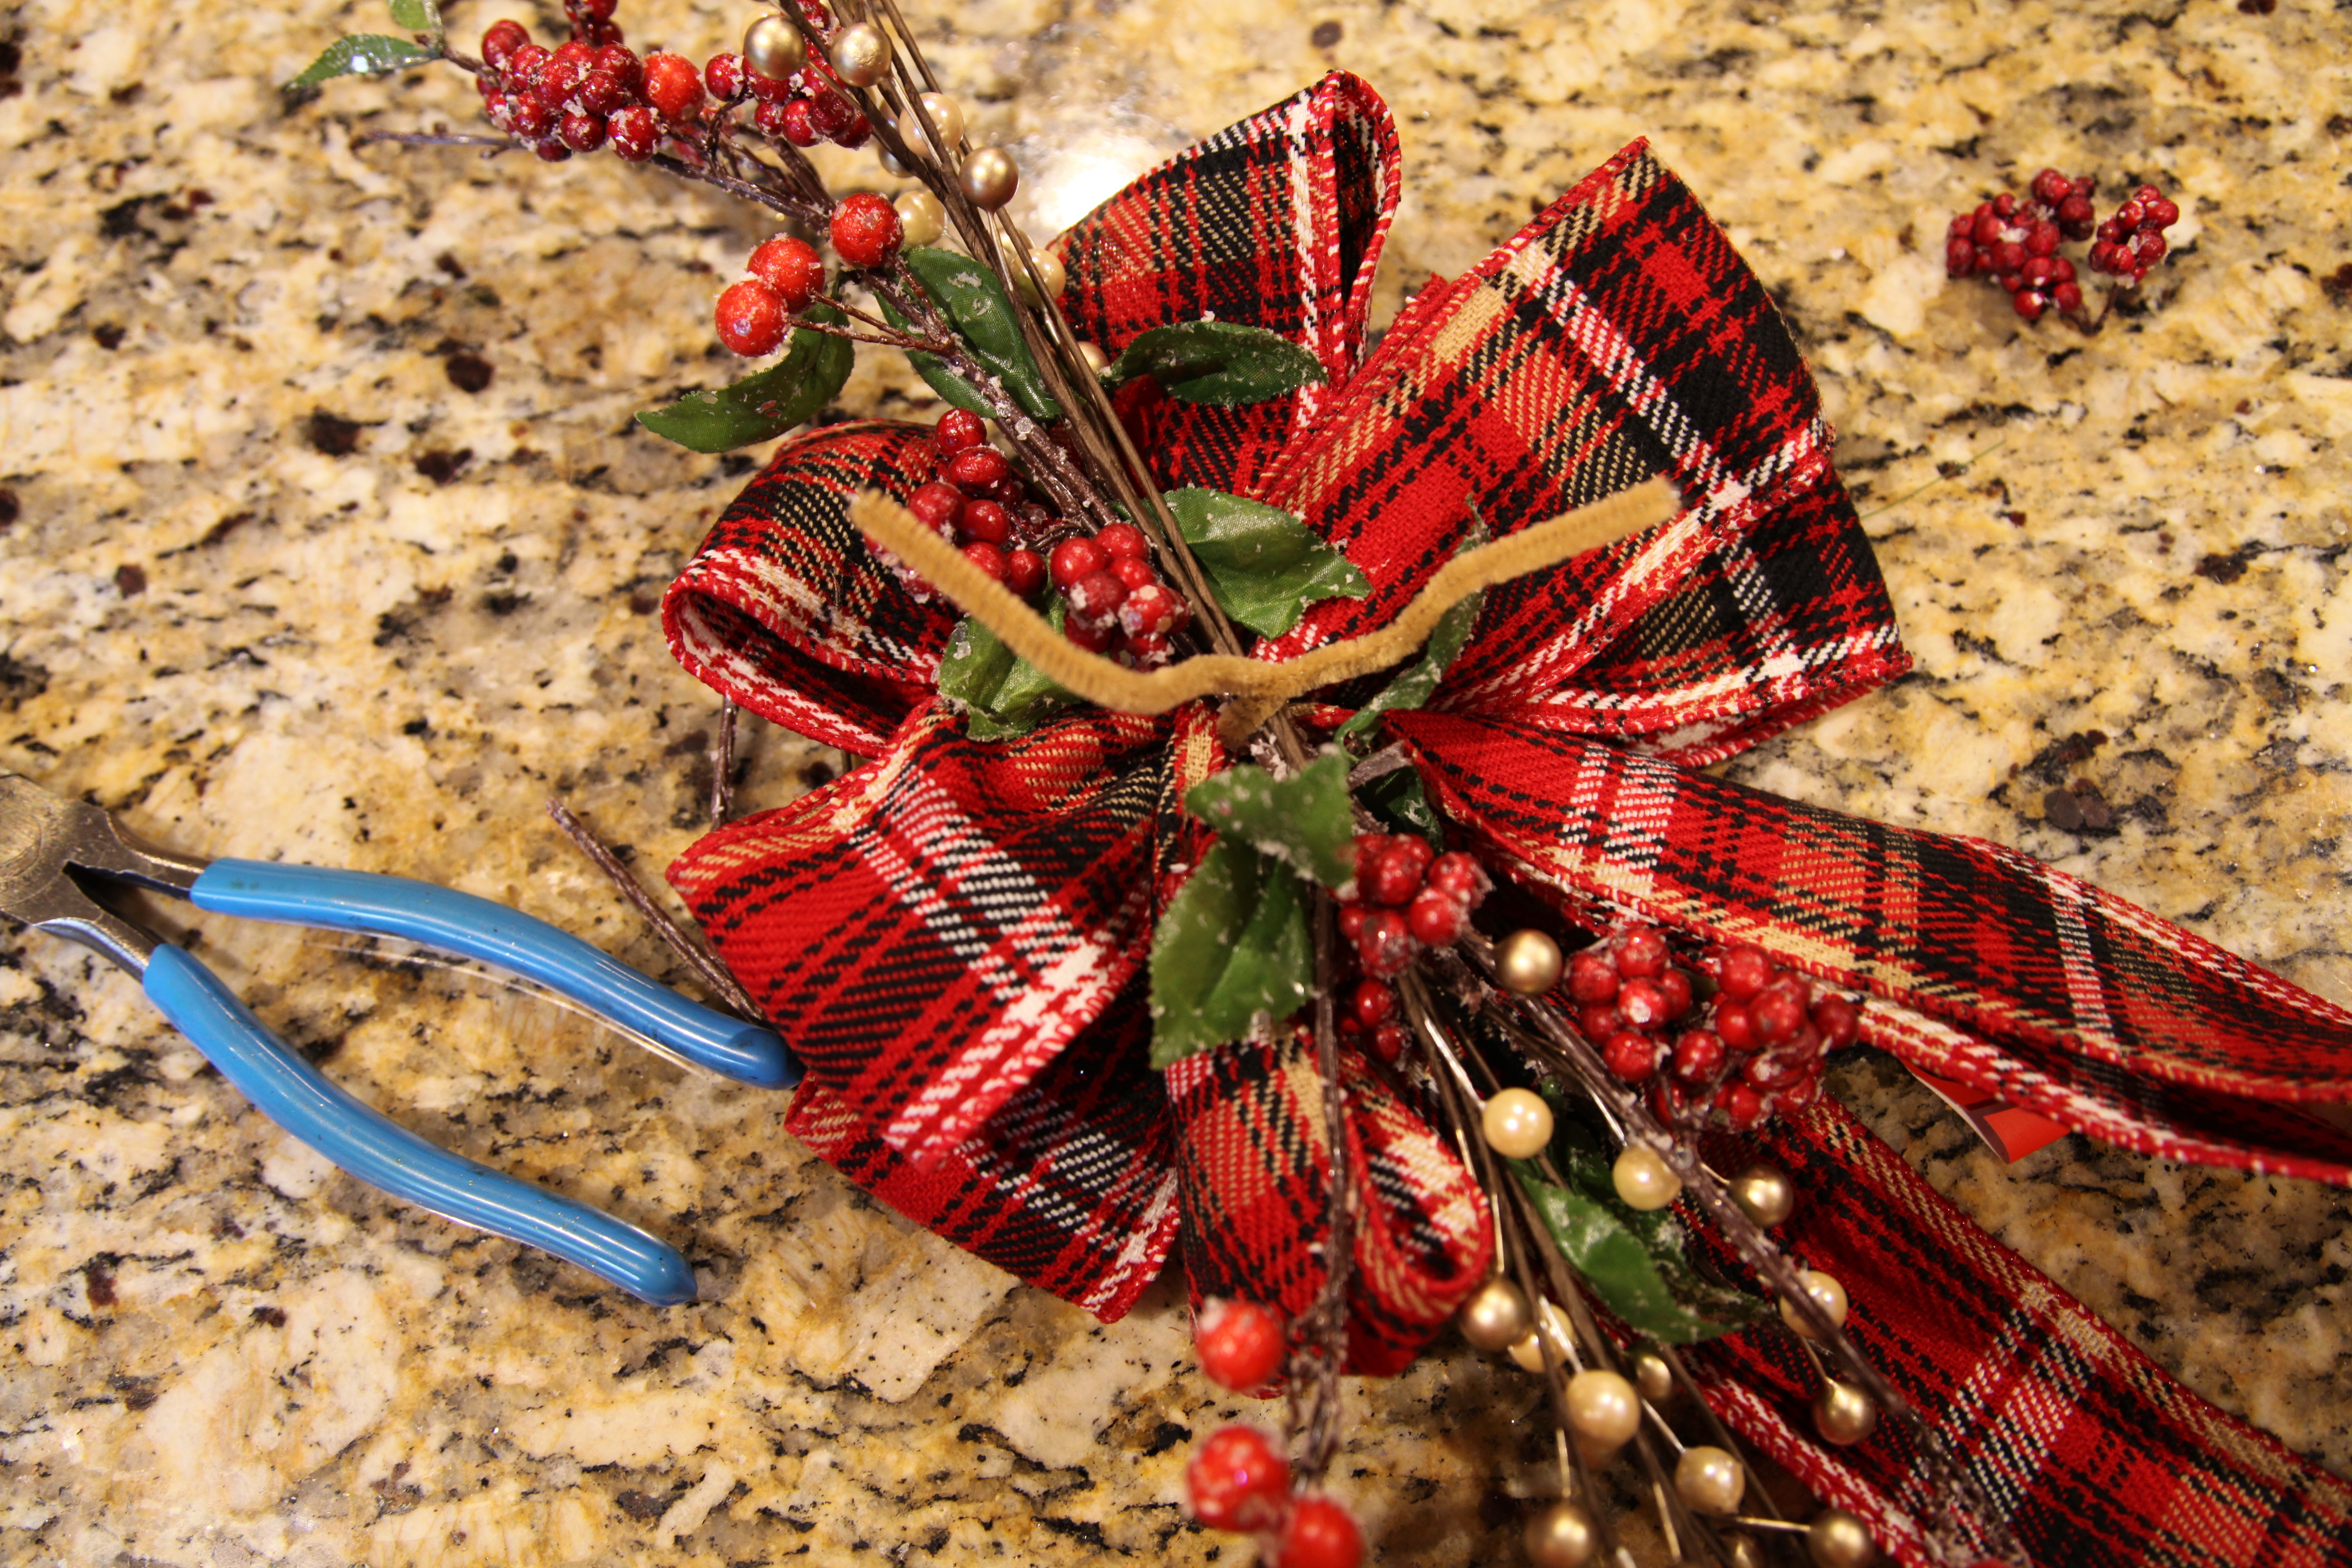
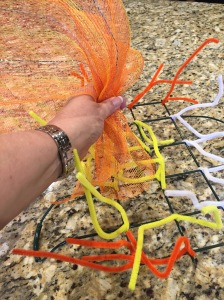
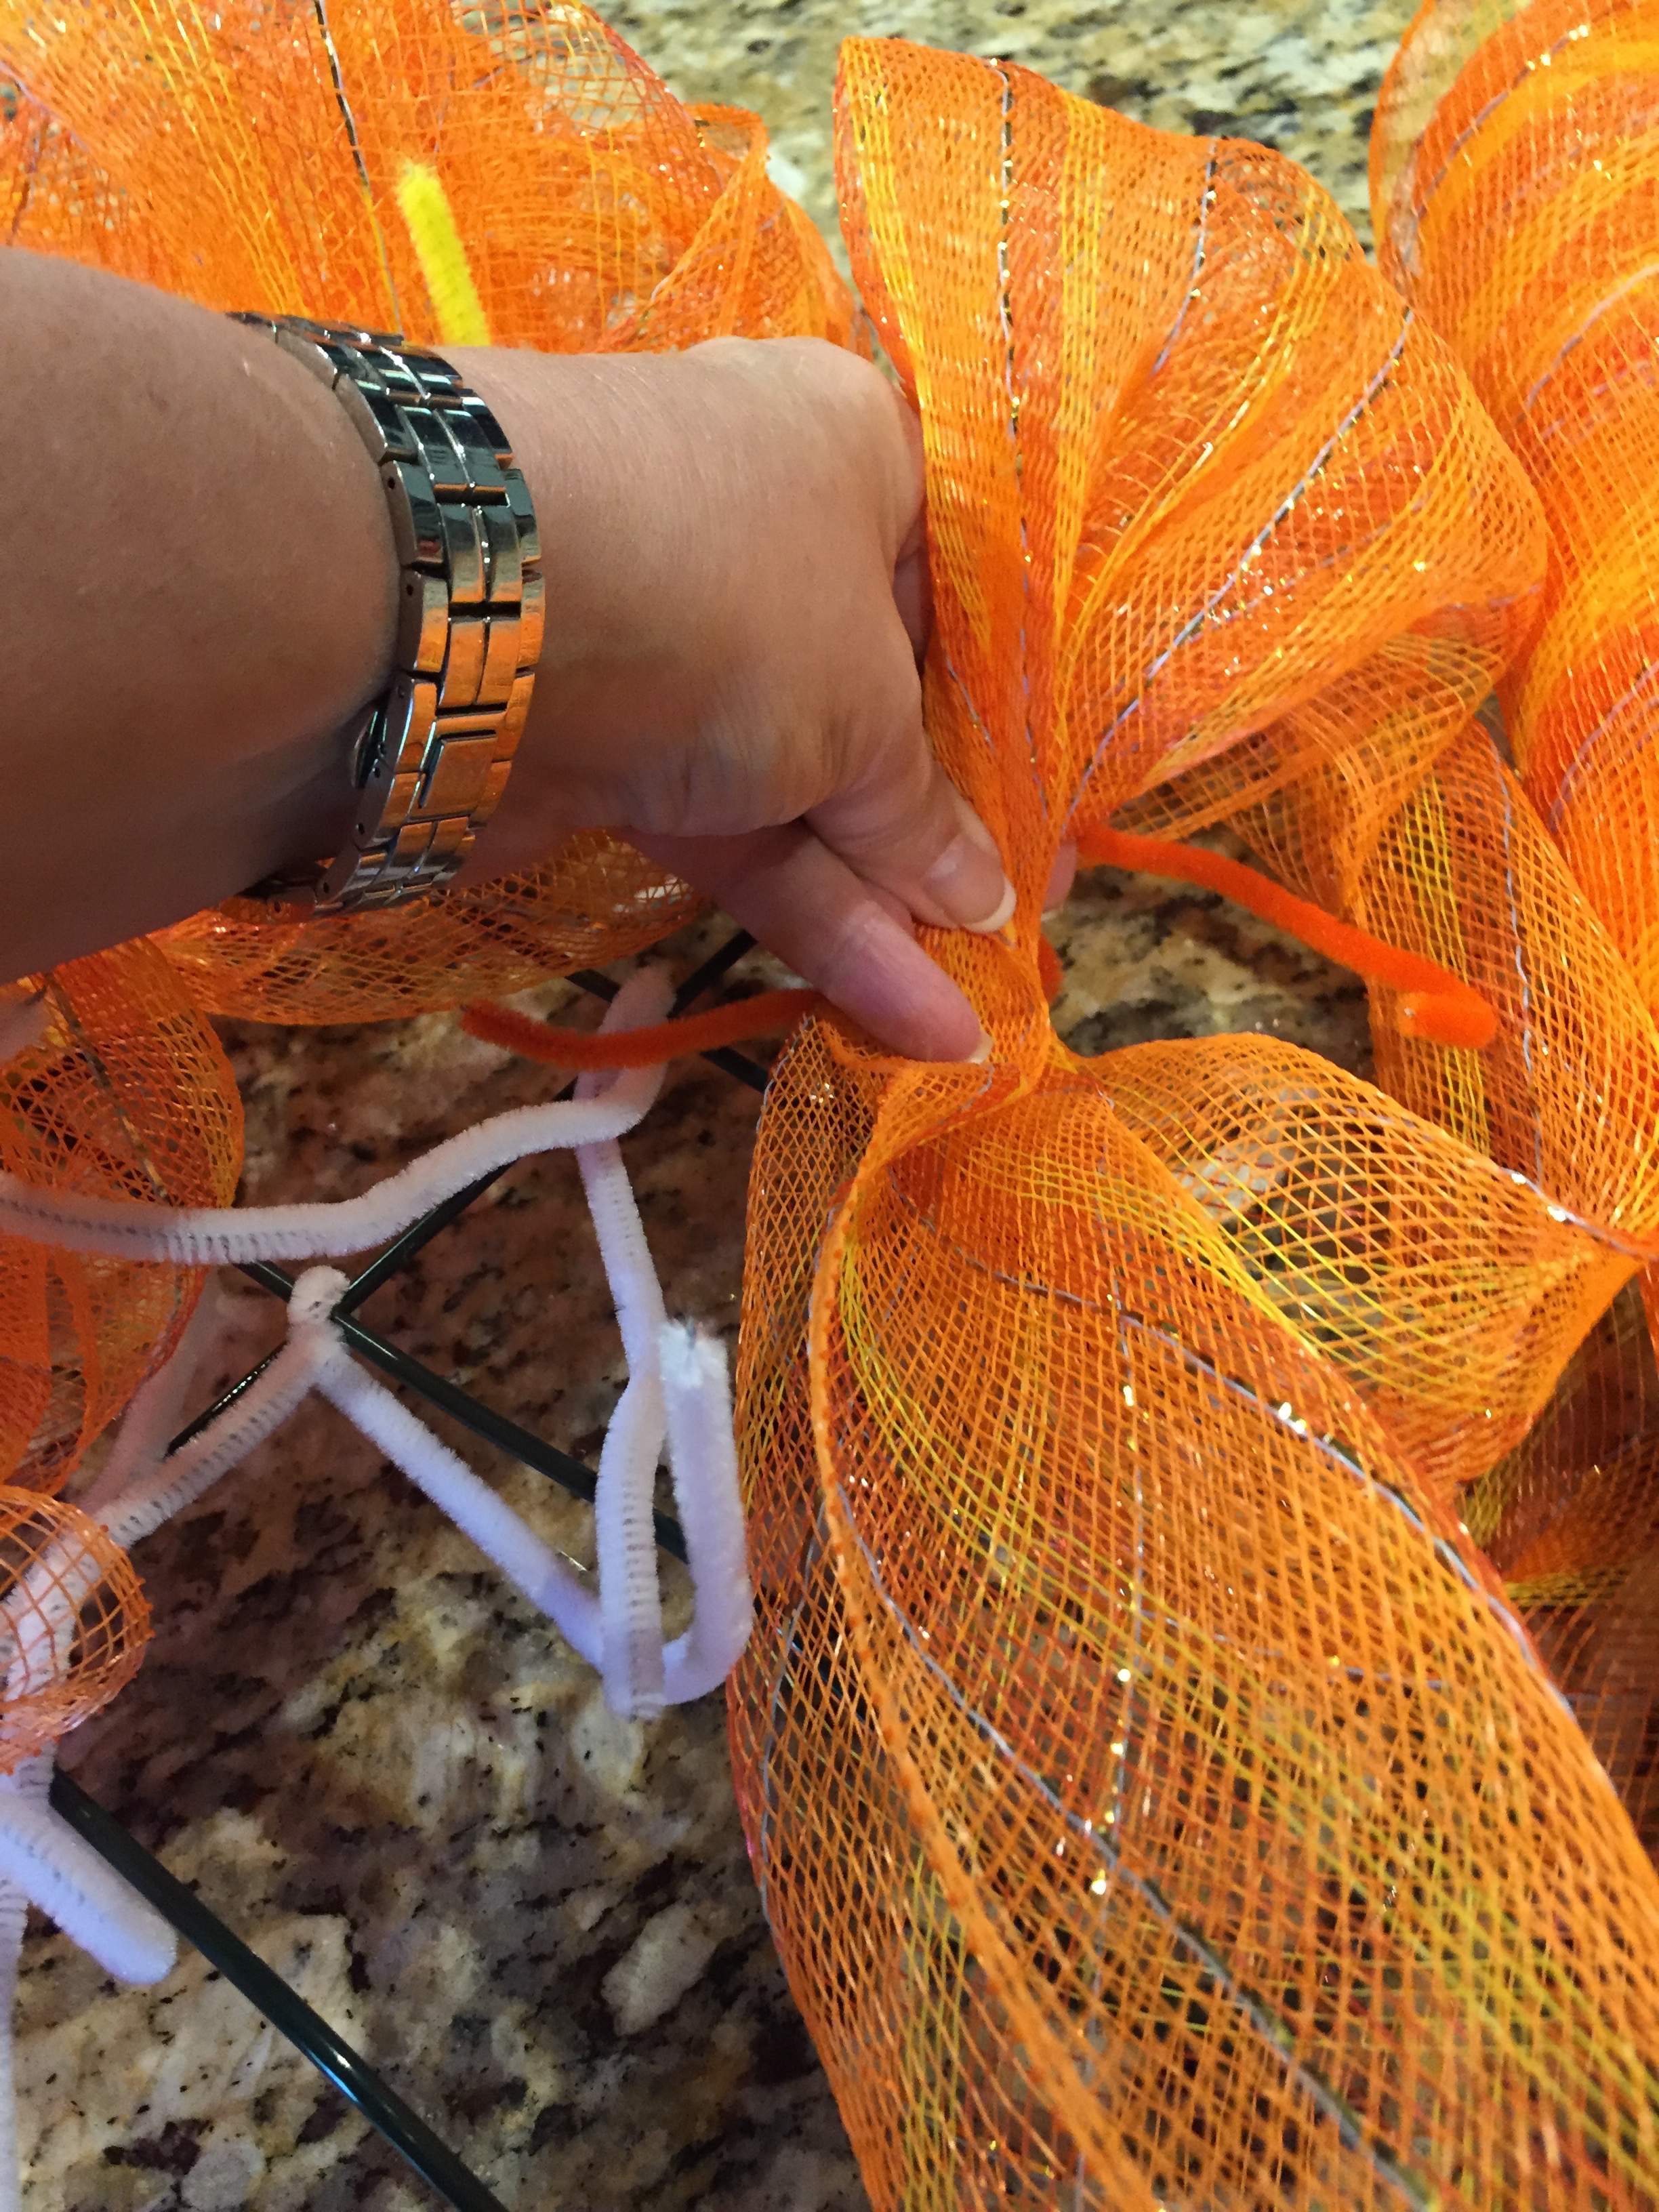
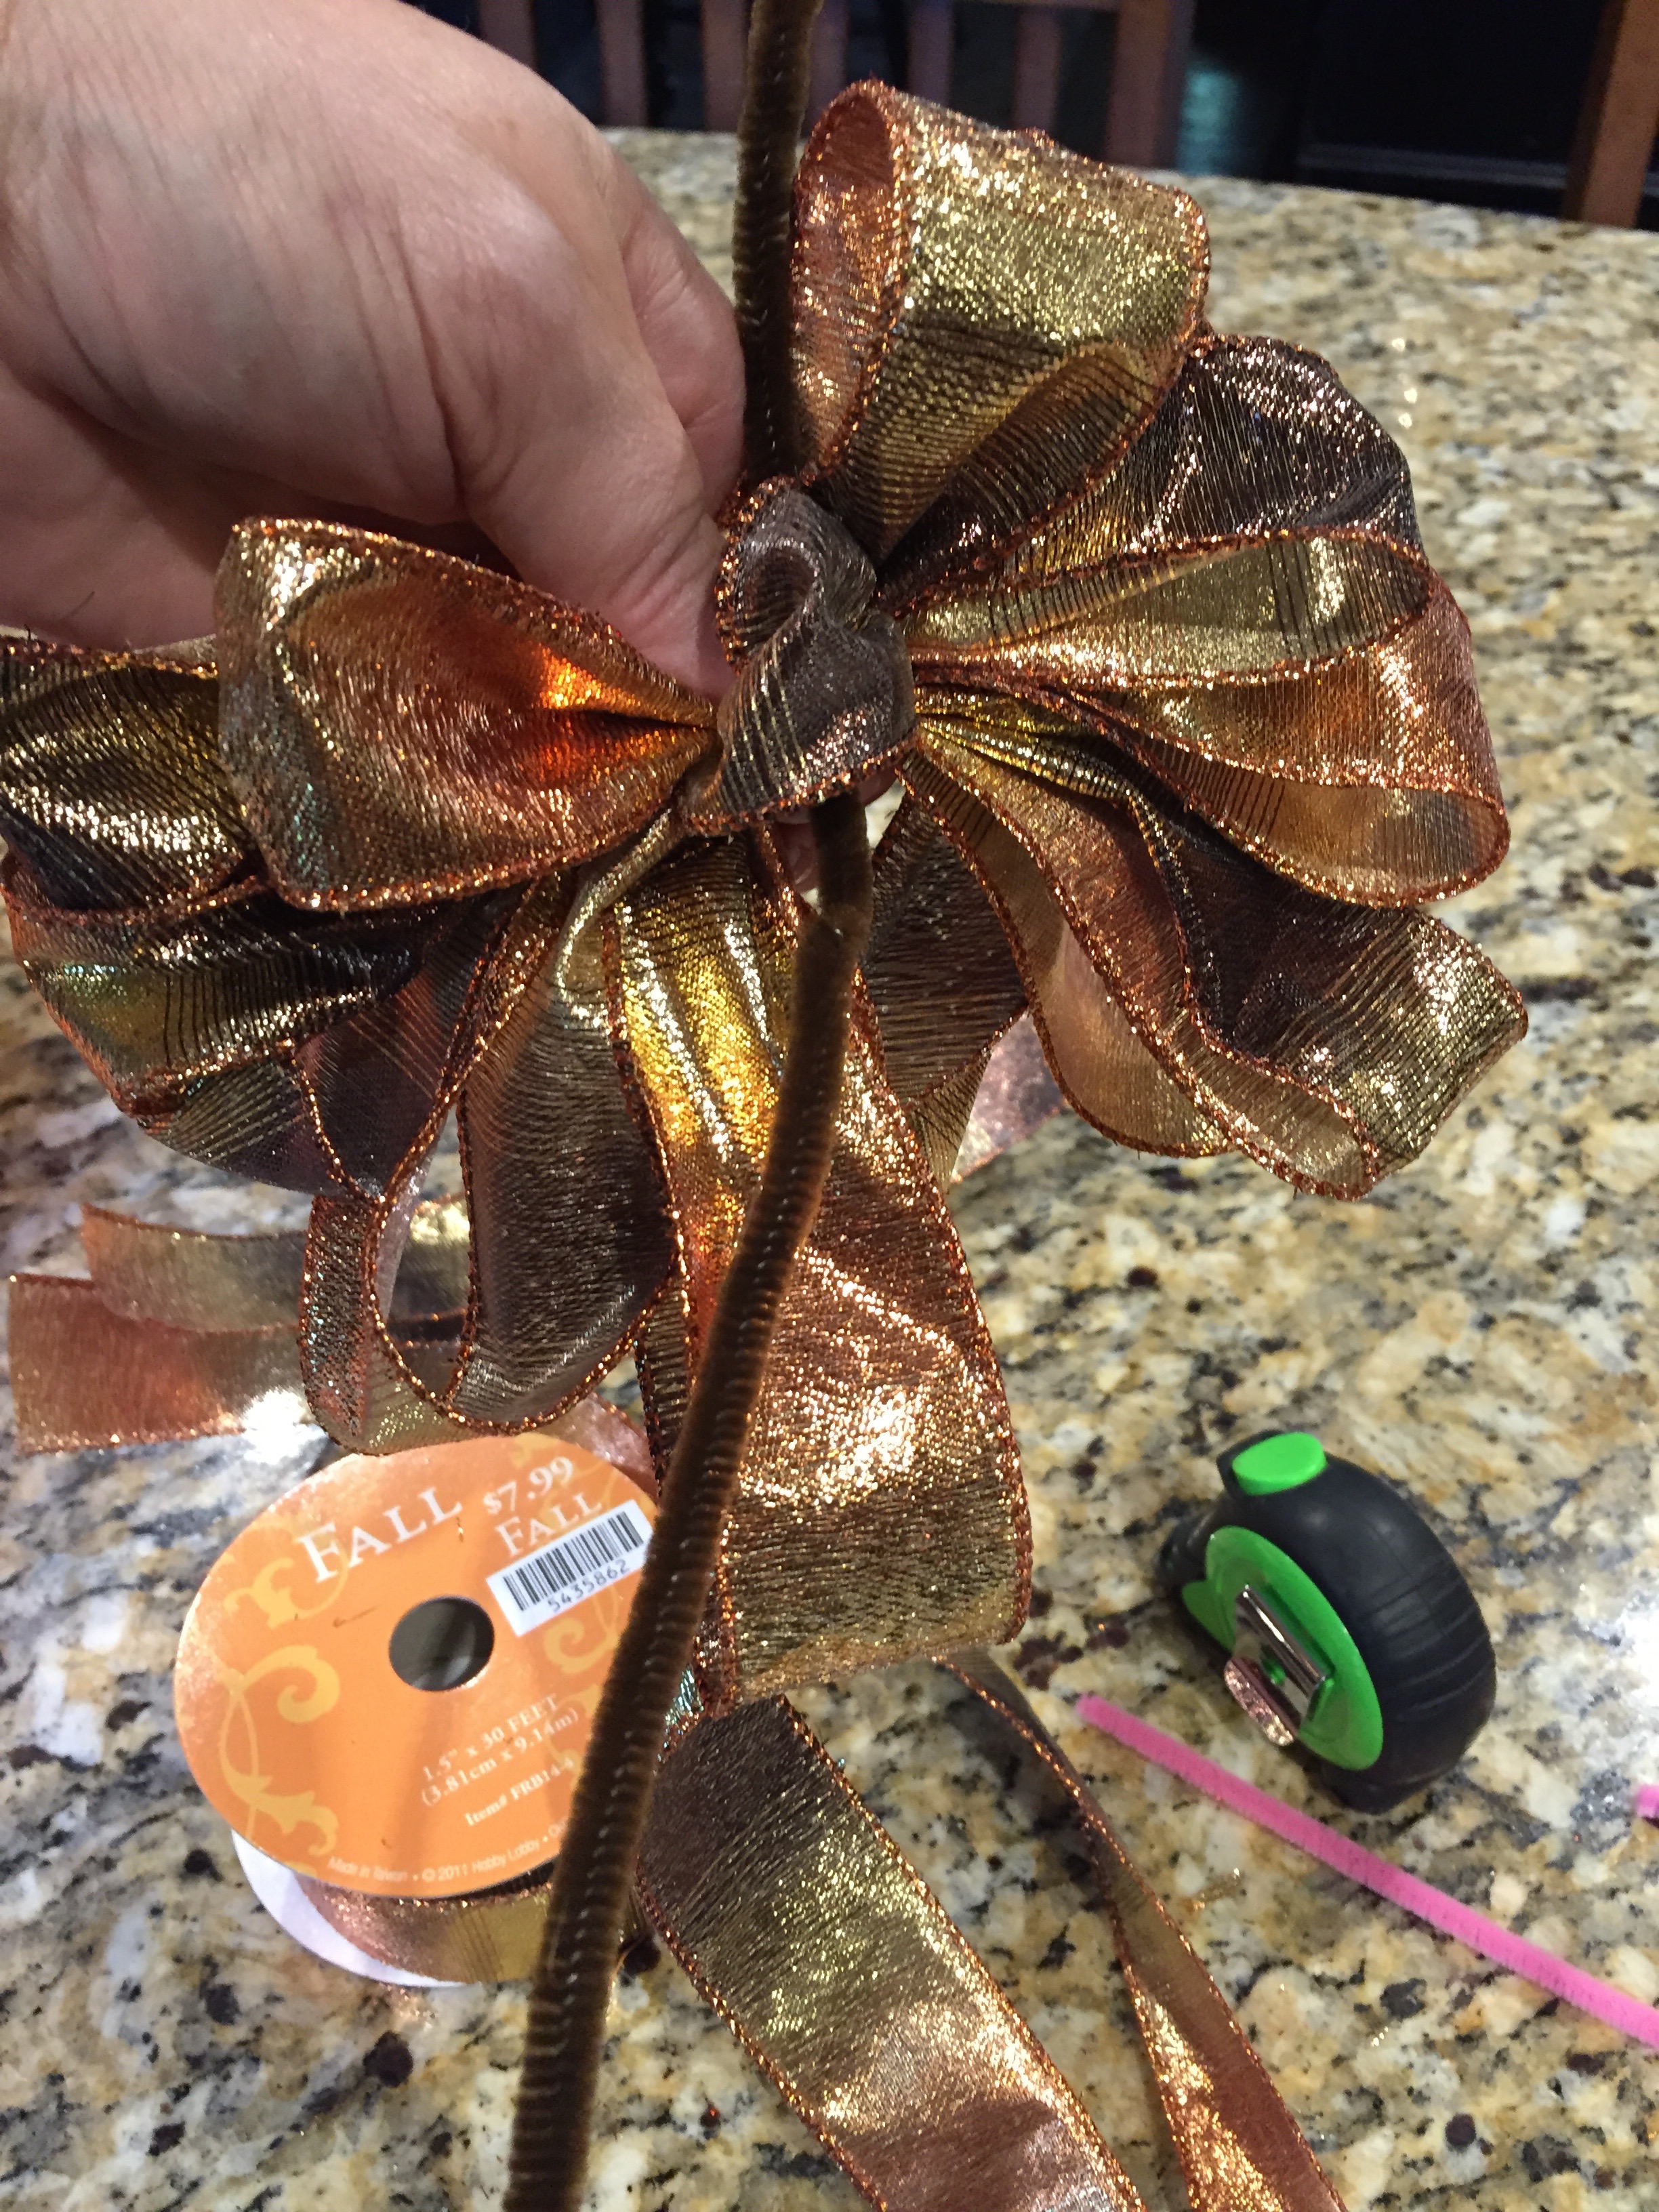
I also made a bow and attached some of the same accent pieces that I was using in the arrangement to the back of the bow via the pipe cleaner with which I closed the bow and tied it onto the top piece of the lantern.  Here is my Bow Tutorial (Video) if you’d like to see how to make a tiered bow…

IMG_2609

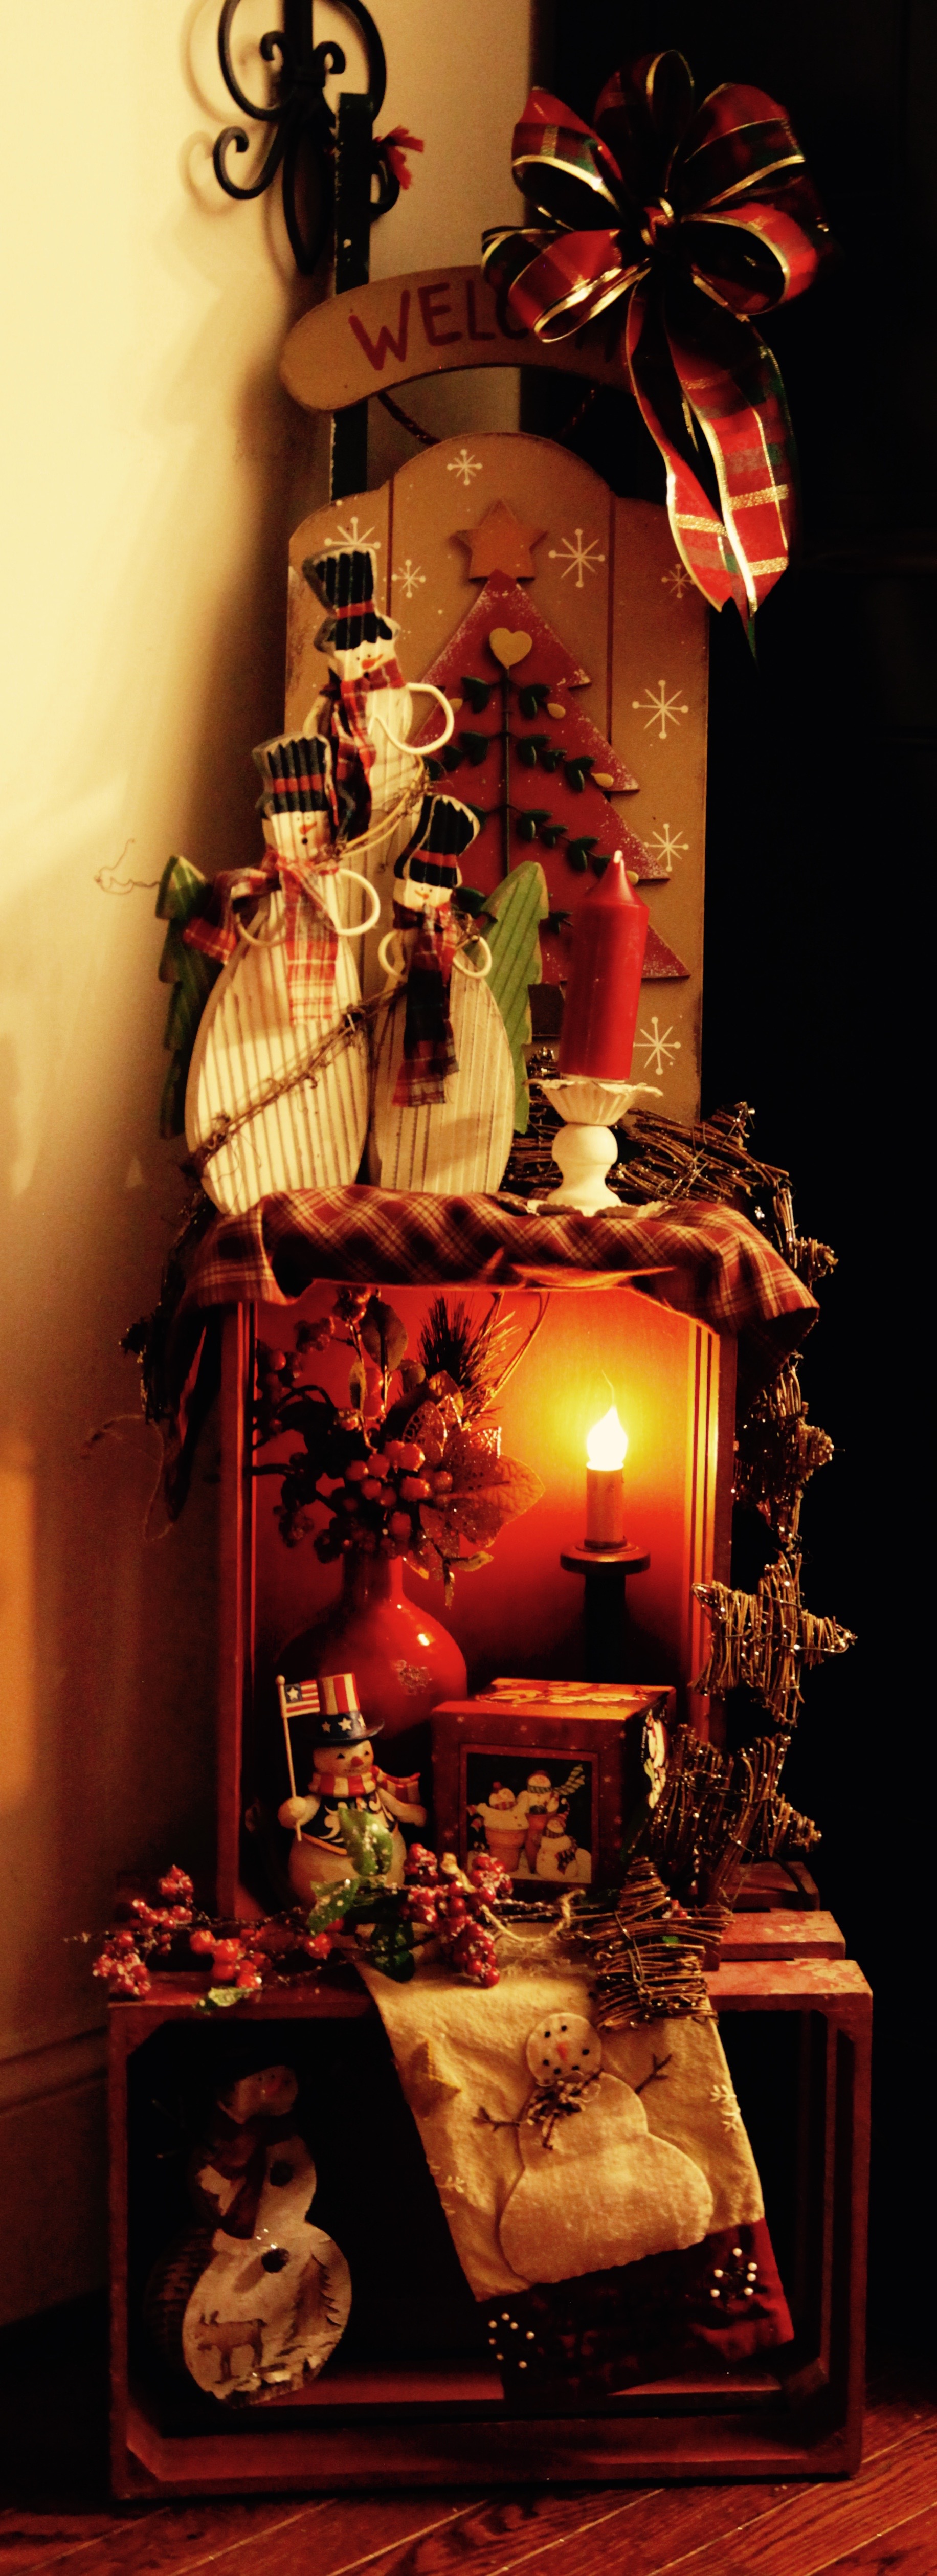
Next, the sideboard.

First, my Aunt and Uncle gave us that pretty white and silver bowl on the left, I was sure that this was the place that I wanted to show off its prettiness…so that was the very first thing that I set up on the sideboard.  I then added the candle sticks, Christmas trees, reindeer, and then set my sights on creating something special to go around that lamp…

IMG_2691

The lamp was my grandmother’s and then my mom had it in her house for many years, and its resting place before coming to me was in my mom’s nursing home room.

IMG_2692 It is a very, very special lamp so I wanted to do it justice.  Unfortunately, I was concentrating so hard on making this arrangement that I neglected to take pictures of how I created it.  It wasn’t hard though, all it really is are a couple of white flocked pine picks, a few white and silver pinecone ornaments, and a few sparkly white and silver poinsettias.  OH, I did add a battery operated mini light set (with a timer)…

IMG_2724

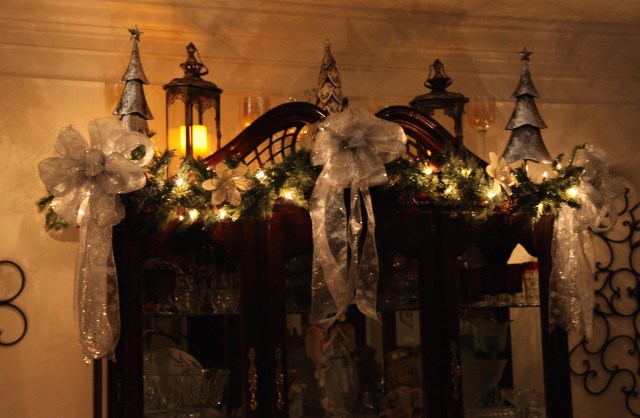
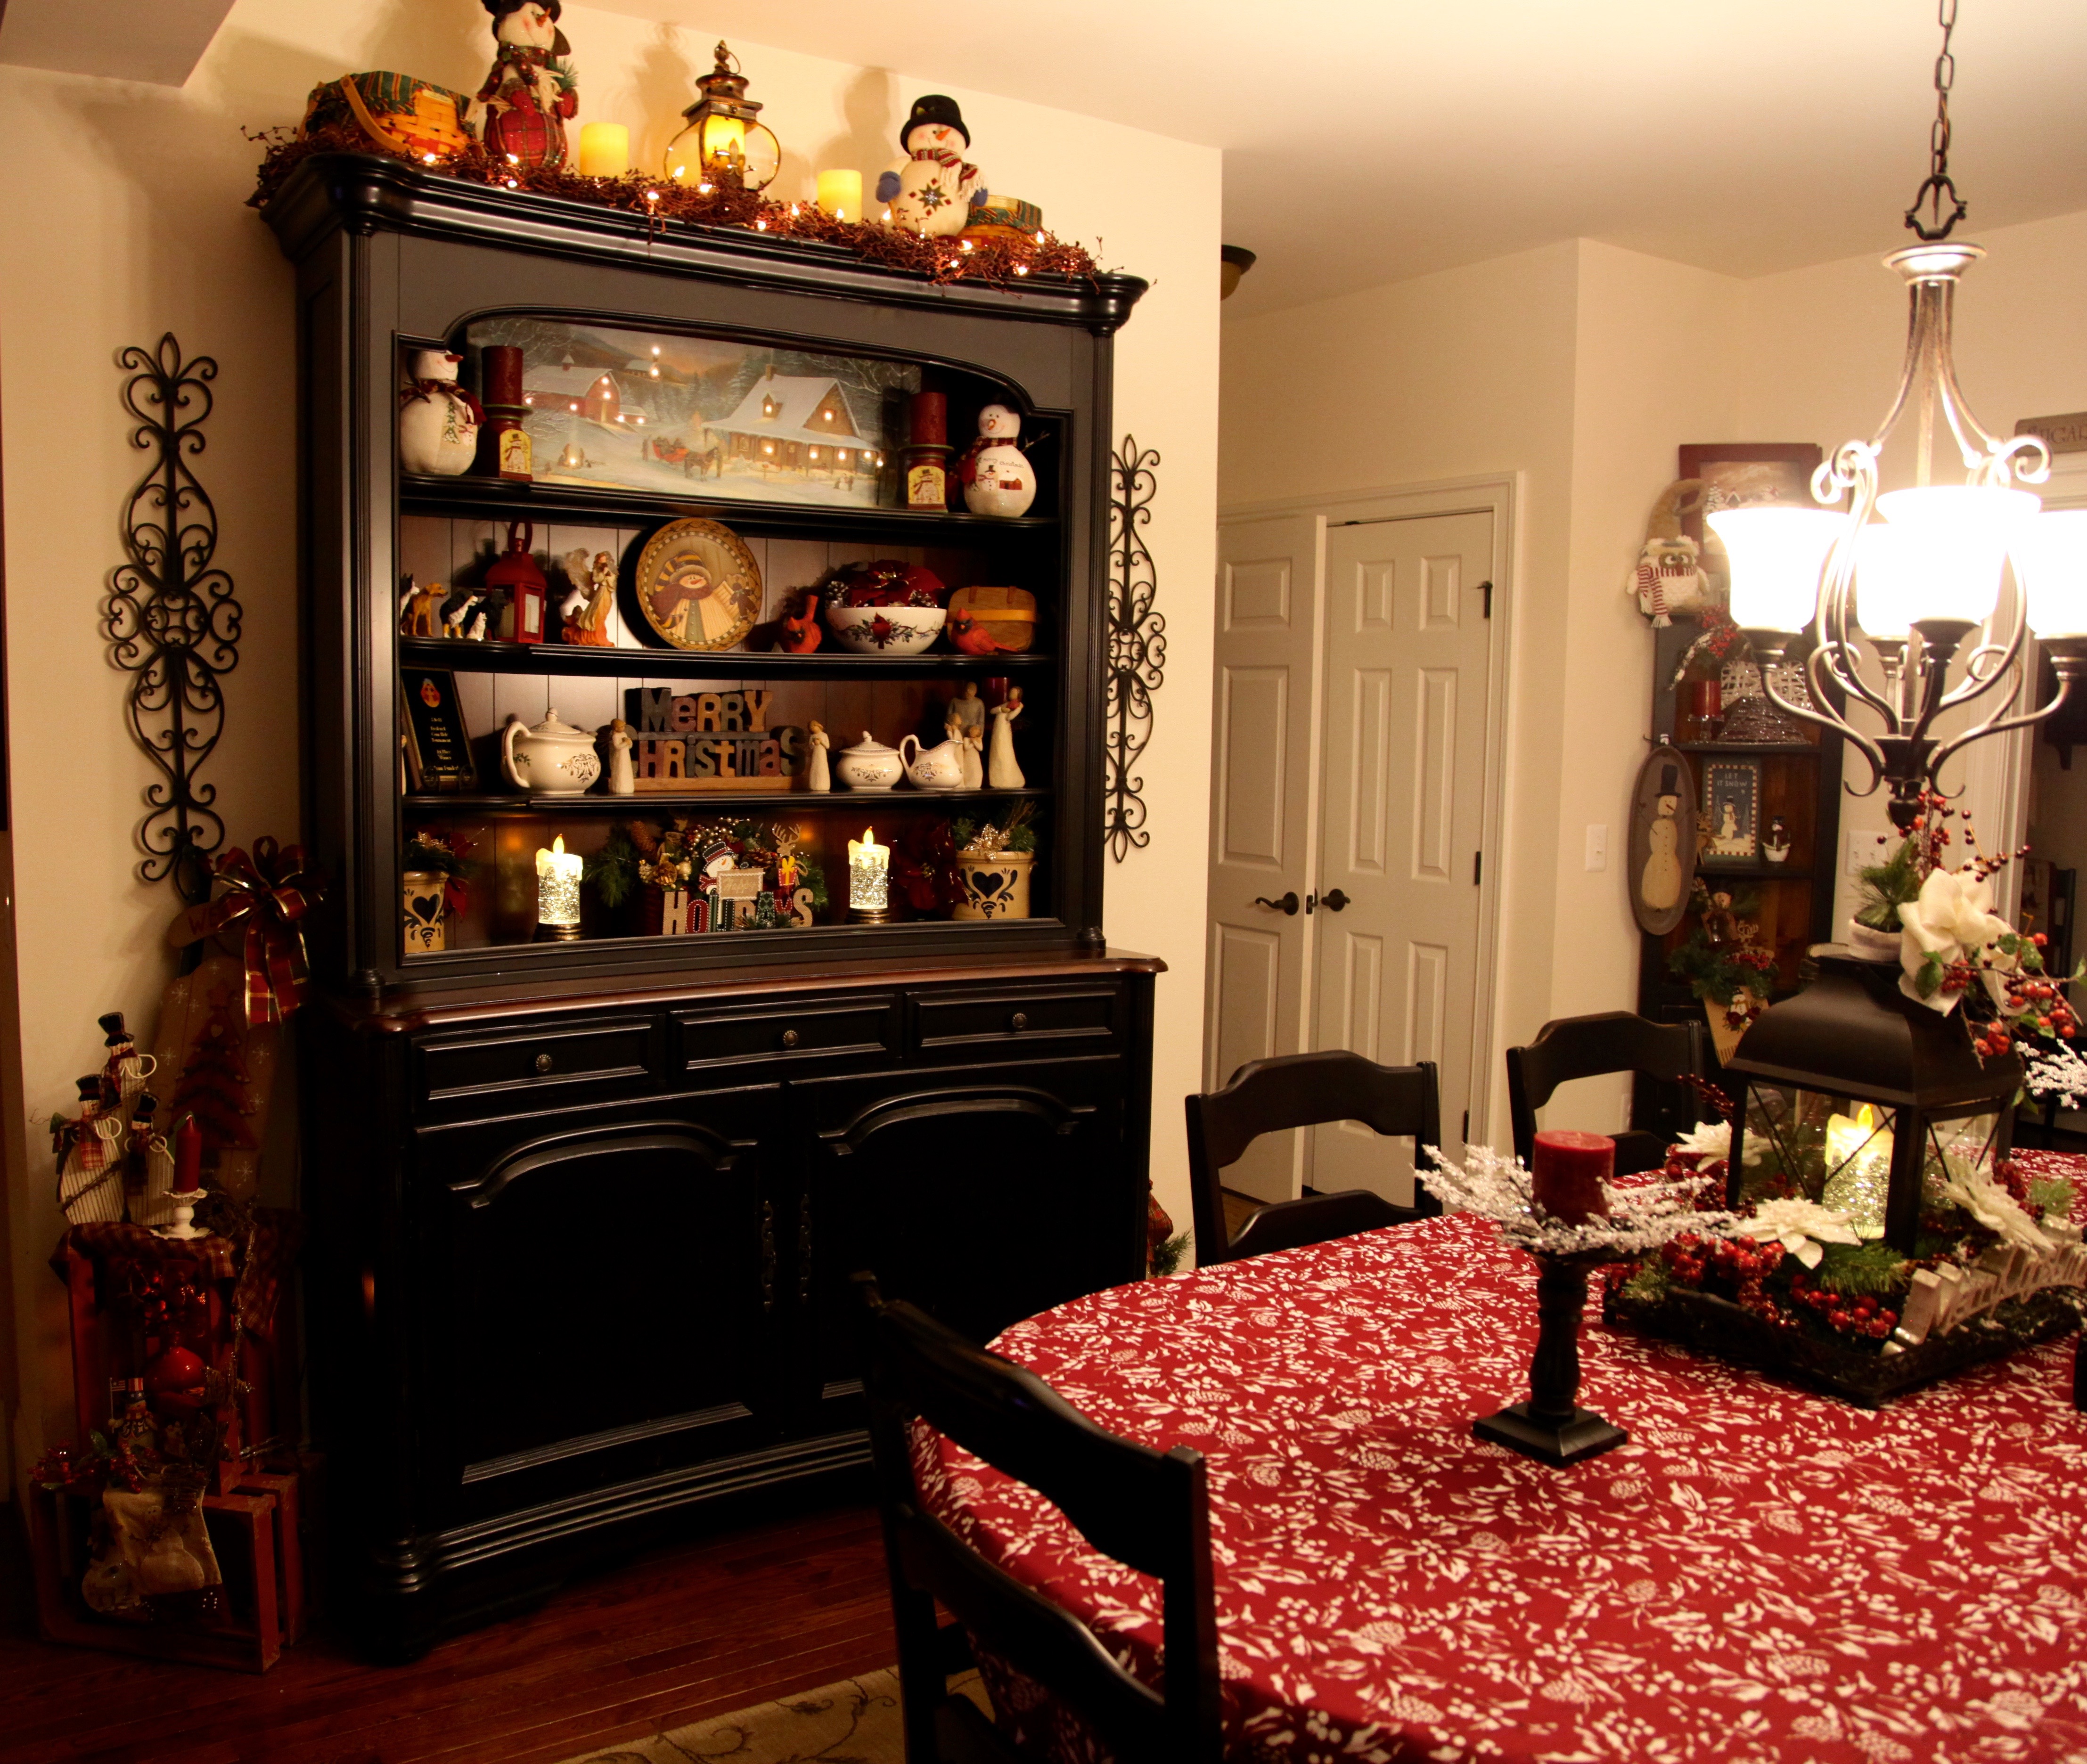
The dining room hutch’s decor is simply a green pine garland wrapped with white lights, 3 big silver bows, and a few silver Christmas trees, the lanterns and the rest of the decor remain on the top of the hutch year round…

IMG_2605

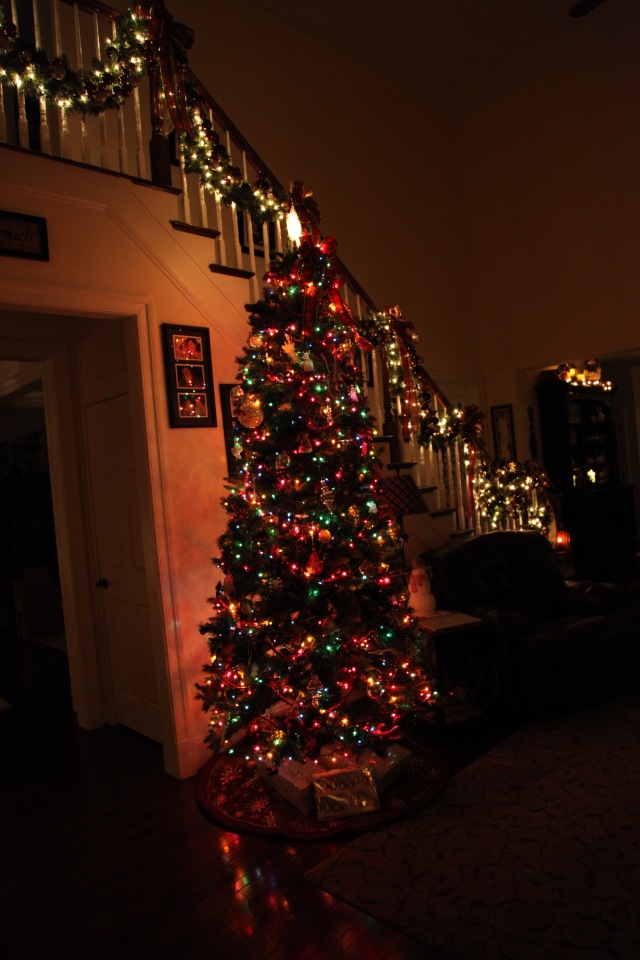
Now for the living room:

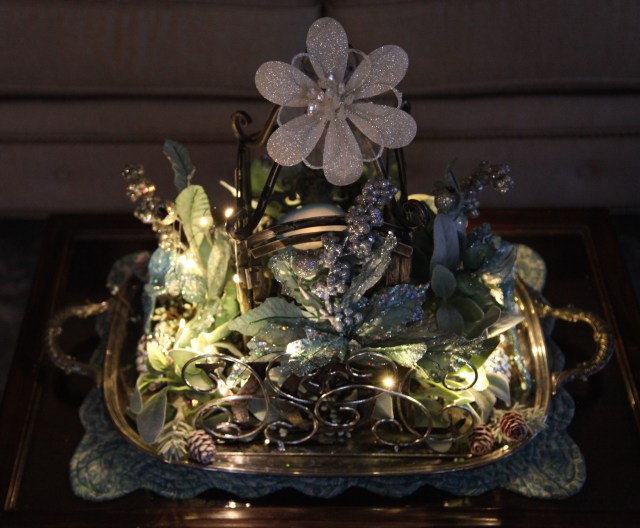
The first thing, I created for this room was a smaller lantern centerpiece to go on top of another one of my pieces that used to be my grandmother’s, this little table:

IMG_2665

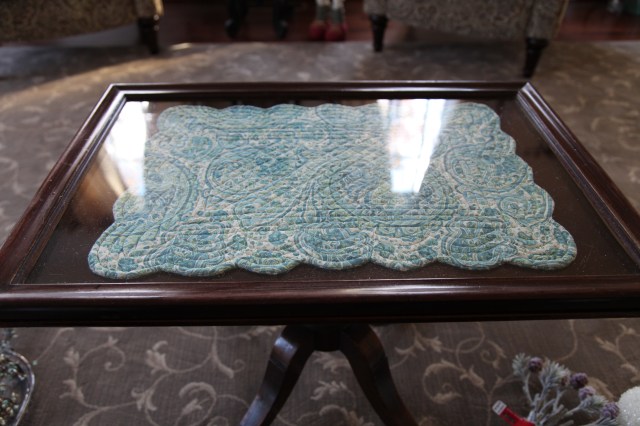
As you can see, it has a glass top on it, but check this out, you can actually lift the glass top completely off. I keep whatever doily that I am using under the glass…

IMG_2666

I started my centerpiece with a silver tray that used to be my mom’s (as you can see, there are many sentimental pieces in these rooms)…

IMG_2667

I placed a lantern on the tray and surrounded it with a pip berry garland and then started to add the other accent pieces IMG_2668

IMG_2672

I placed a battery operated candle inside the lantern and stepped back, I was happy with what I saw…

IMG_2686 (1)

IMG_2705

There is one more little grouping that I just made up today after I took a trip to our local Kirkland’s store.  I purchased those stackable lit gift boxes, I just couldn’t resist them, they were the perfect color to pair with the rest of the decor that I had planned for that rod-iron and glass table (which I also got at Kirkland’s shortly after we moved into this house)…

This old secretary is one of my favorite pieces that I inherited from my grandmother.  My Aunt just told me a couple of stories that I had never heard about this piece of furniture.  Apparently, my grandmother purchased this Secretary by selling her homemade candy (I remember as a child we’d help her pull butter mints, I’m not sure if that’s the candy to which she is referring, but what a neat story!). And apparently, the 13 panes of glass in each door represents the first 13 original States. What?! I love these stories!!! 🙂 ANYway, I love to give it a different look as the seasons change.  I remember sitting at it as a child and opening up all of the drawers that contained all sorts of fun treasures and pretending like I was a secretary…sweet, sweet memories.  ANYway, I choose to leave the big door open and put a bit of decor on the inside (maybe when I have grandchildren one day, I’ll have to fill up those little drawers with all sorts of goodies and help to make some sweet memories for those little tykes). The picture on the top is a picture of my beautiful mom on her and my dad’s wedding day. **Miss you mom!!**  Anyway, here is how I decorated it up for Christmas this year:

IMG_2703

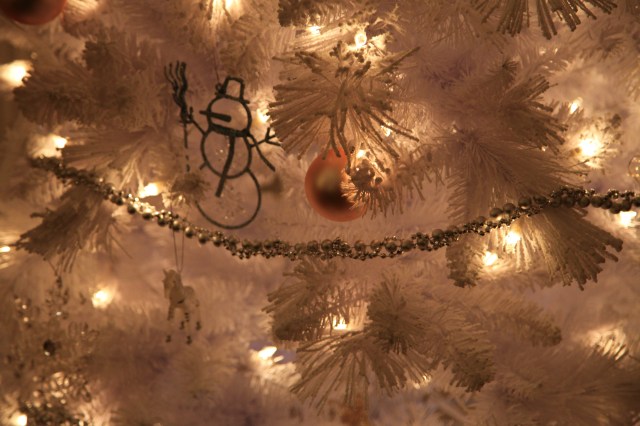
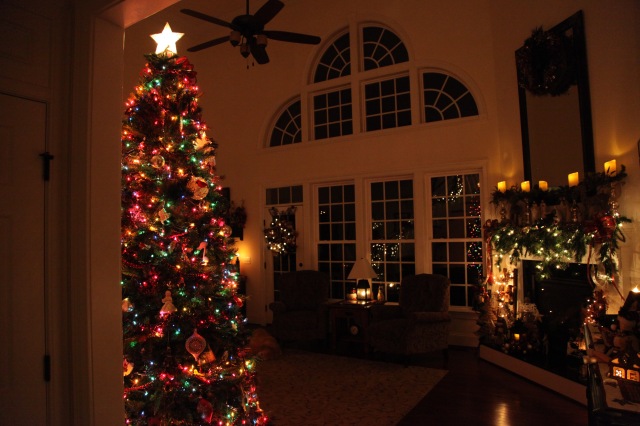
I purchased our white Christmas tree last year at Walmart if you can believe that?! lol And it is a beauty! It does put off a pink hue though, so I kept the decorations on the tree to a minimum.  I didn’t want to fight with the pink and I didn’t want to add tons of pink to the decor in the rest of the space.  So I added a big iridescent bow topper, a lit tree topper above the bow…IMG_2711

Then I added silver beaded garland, and ornaments in silver, white, a few pink, and ornaments that were a very subtle green…

IMG_2713

I put a white tree skirt on the floor and added a little lit church and tree and called it done. 🙂  It looks beautiful sitting in the bay window, I love to see the reflections of the tree in all of the windows.

IMG_2710

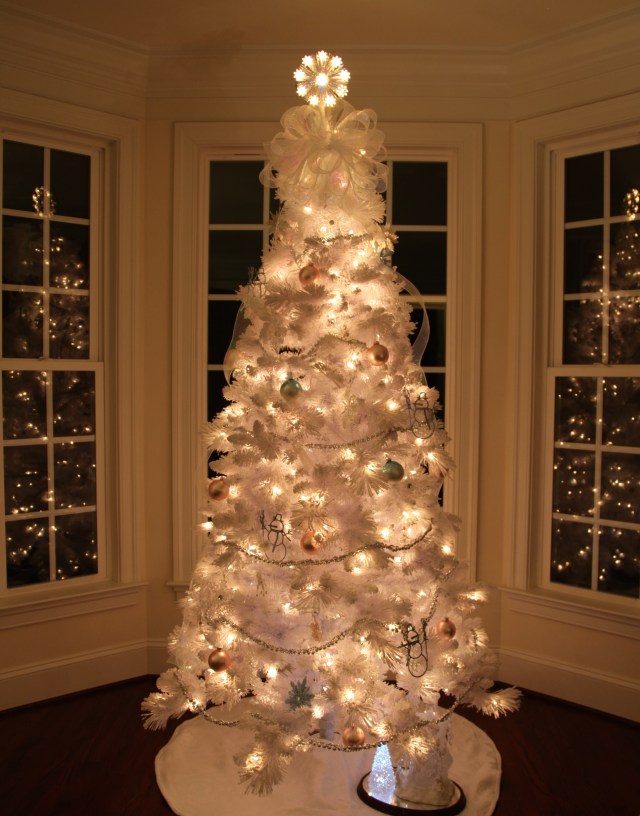
And check it out from outside…wow!!

IMG_2741

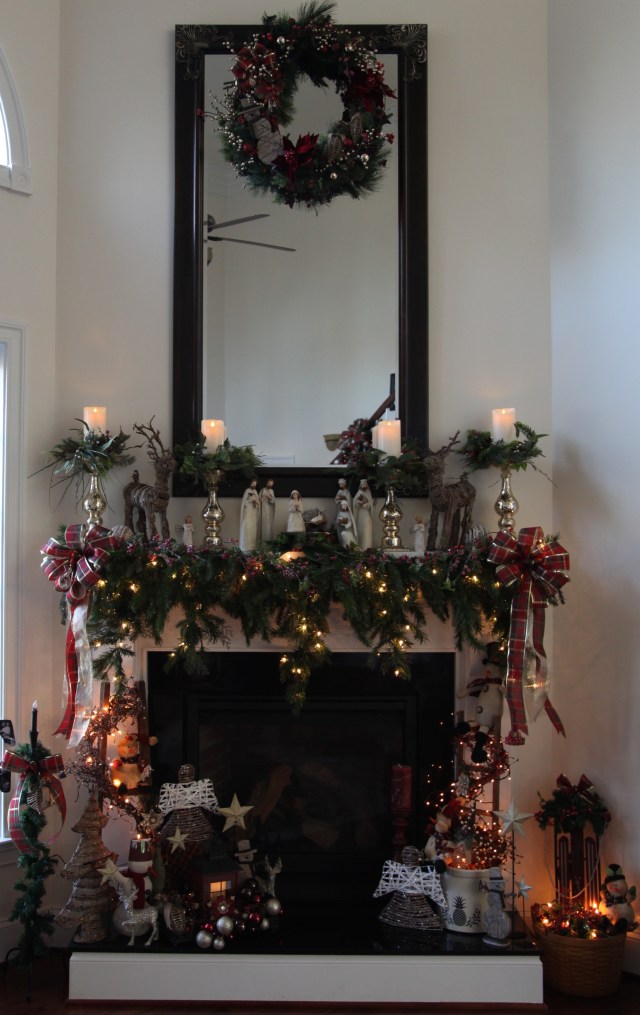
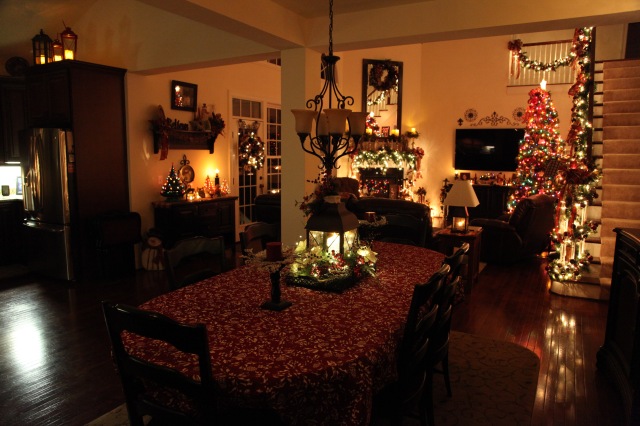
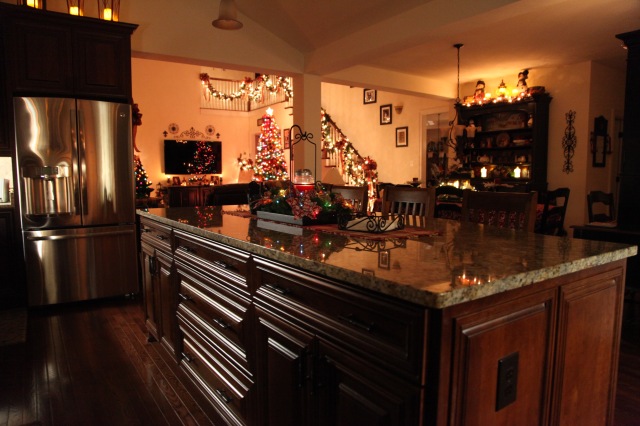
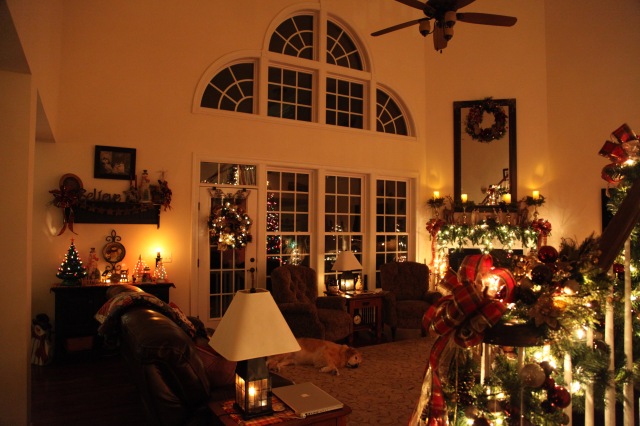
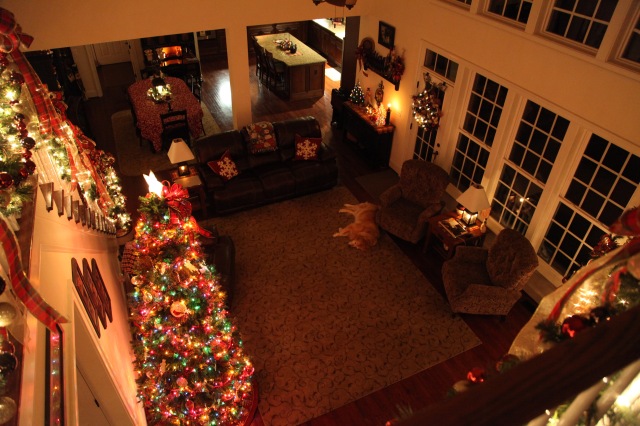
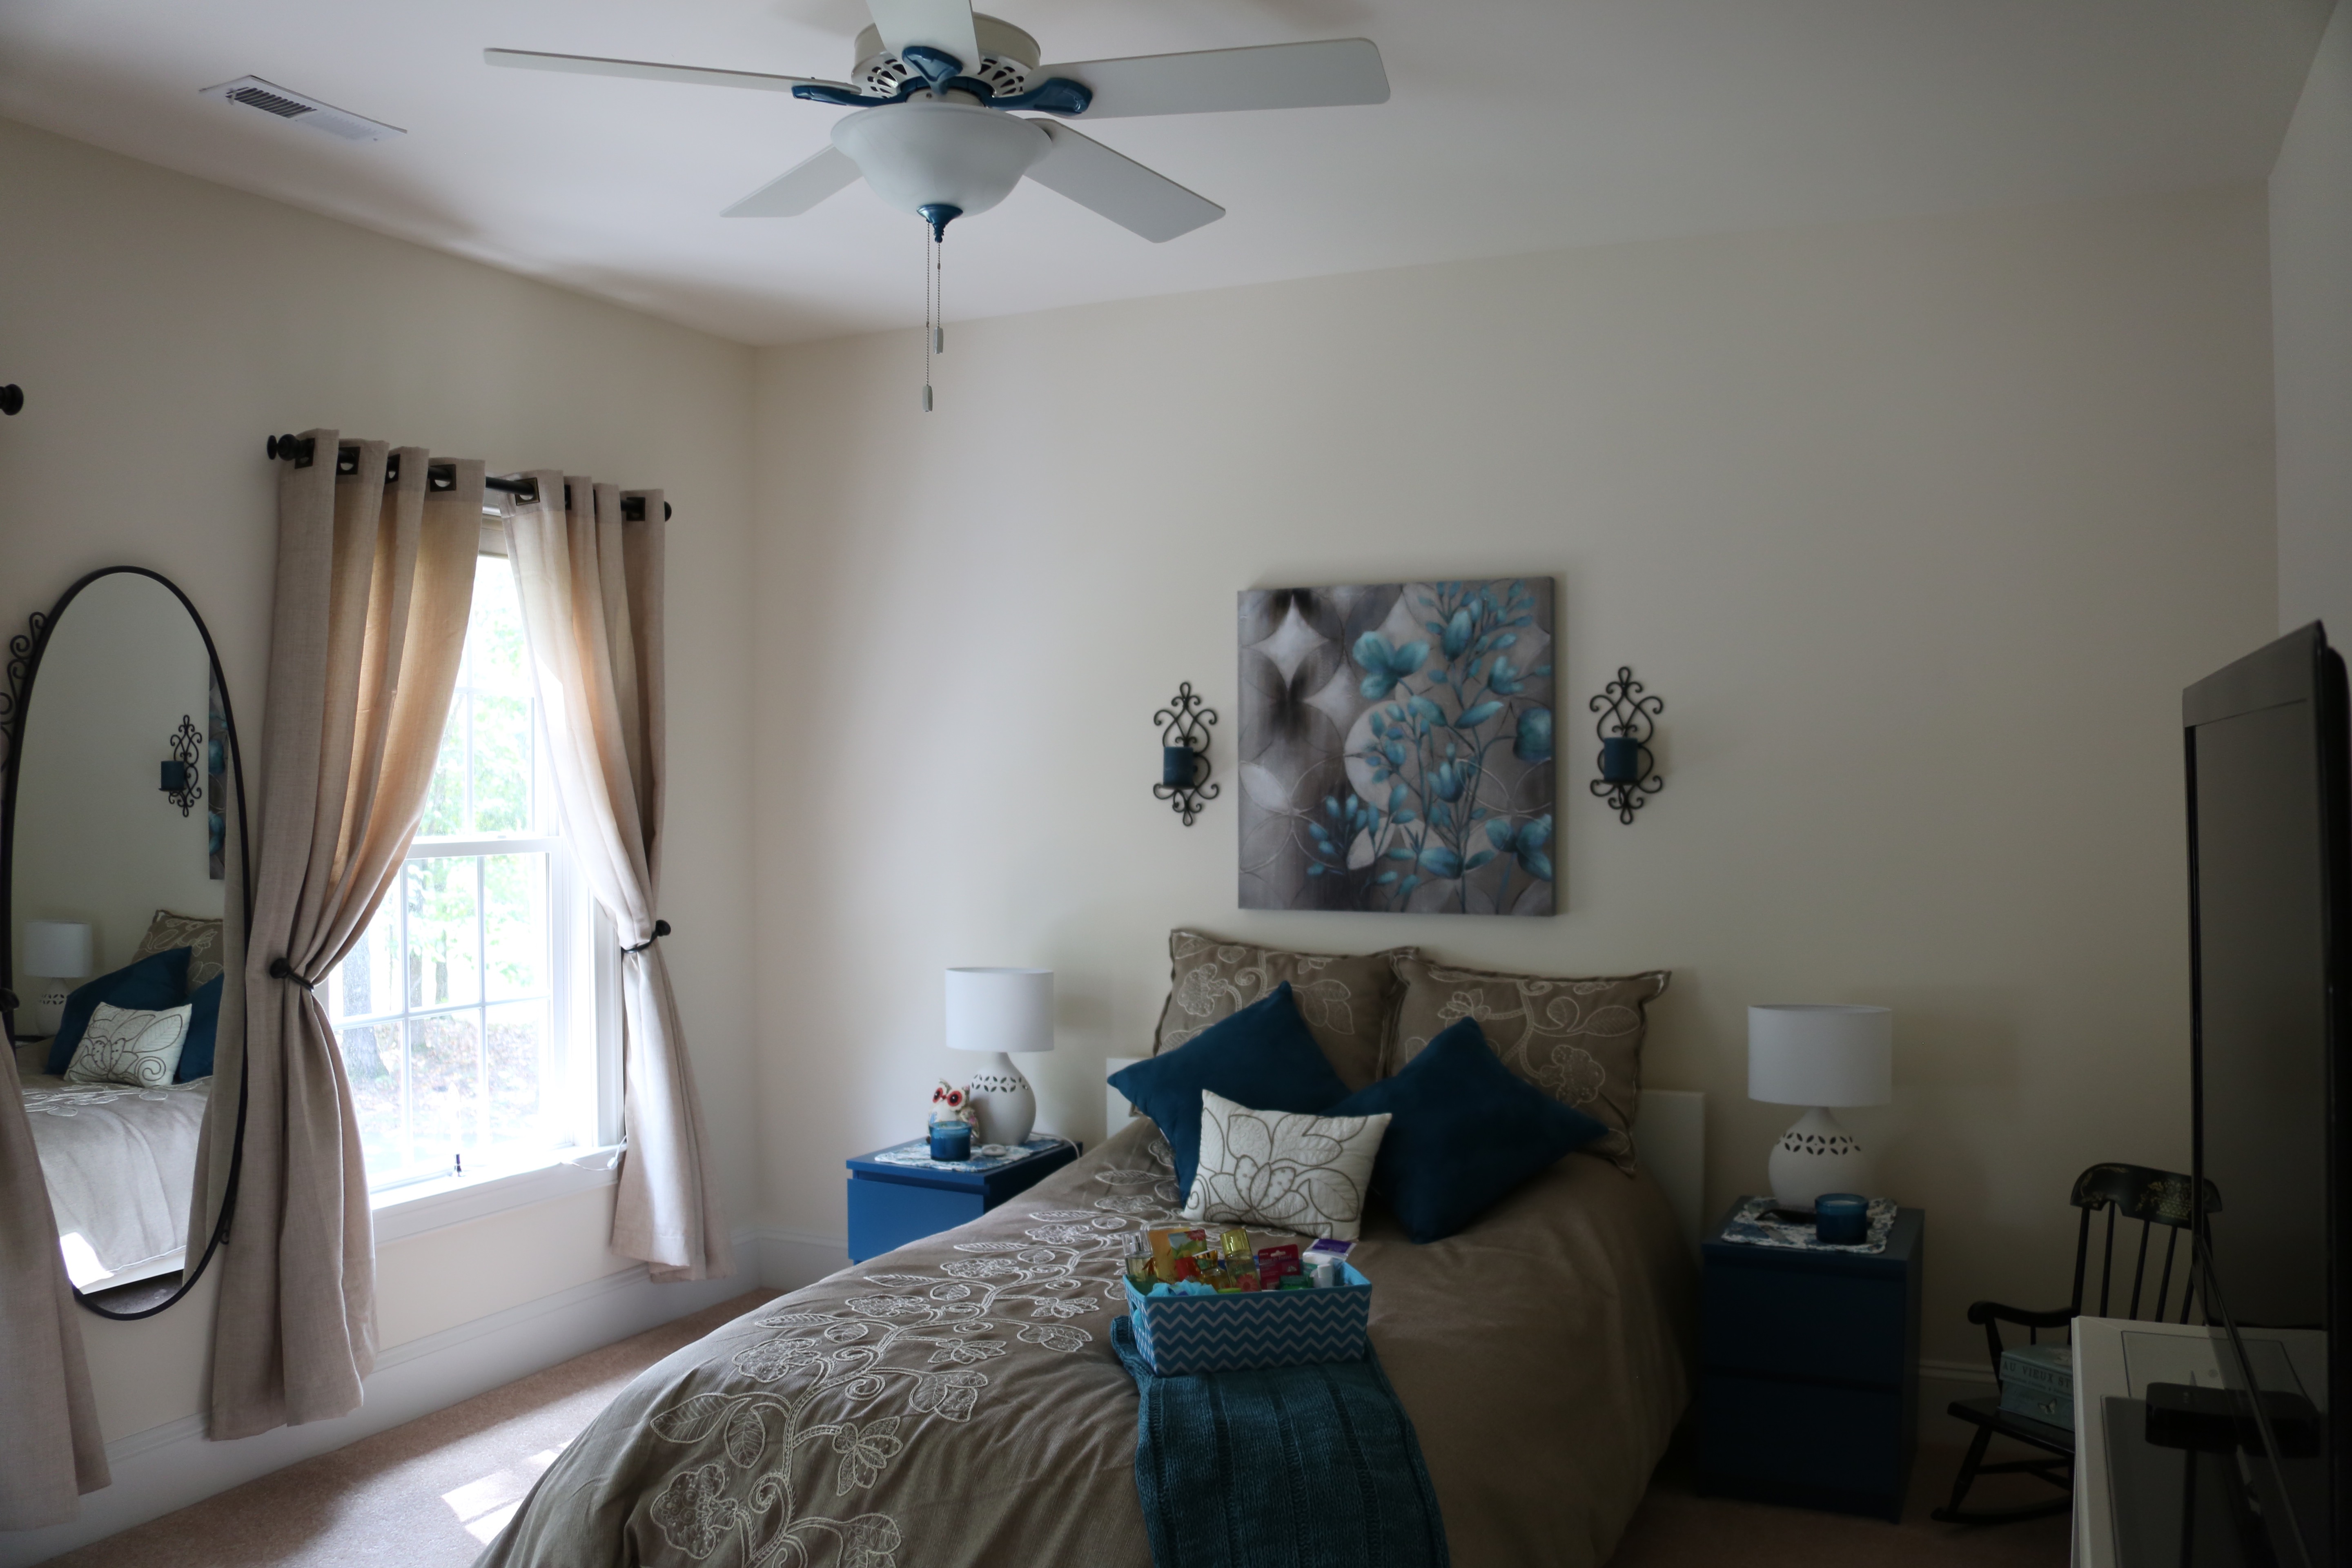
Here are some pictures of the rooms as a whole…I am quite pleased with how it all turned out. I have found myself walking in there and drinking in all of the memories that are conjured up while moving my eyes from one piece to the next.  Sweet, sweet, precious memories that I hold very close to my heart. ❤

IMG_2716

IMG_2698

I hope y’all have enjoyed seeing all of my creations for this Christmas, the only things that I have left to do are the big Christmas tree that will go up on Thanksgiving Day in the family room (the family will help to decorate that) and the outside.  I will be sure write a little blog about both things. Let me take a moment to thank those of you who have commented and those of you who come back and check to see what this silly crafter has been doing.  I’ve really enjoyed sharing my creations and home with you all…

Until next time, y’all take good care! ❤

**In crafting there are no mistakes just unique creations**


Christmas 2015: Tabletop & Shelf Arrangements, 2 Cozy Corners, & Powder Room

I cannot tell y’all how happy I am that I started to do my Christmas decorating early this year because it is taking me quite a long time to complete my task.  I have been decorating for a solid week and have been working on a section of my home each day.  I’ve done several brand new designs this year and they have presented me with more of a challenge than in years past when I’d just slap up whatever I had done the year before.  I’ve let the creative juices flow and have really stepped outside of my proverbial box.  Admittedly, I had kind of gotten in a rut with all of my snowmen and I wanted to try to do a bit of a more grown-up classic design this year.  I think I have been successful, yes, I’ve still used a good many of my beloved snowmen, but I’ve also added in other more classic decor pieces to round out the entire look a bit.

In this post, I will cover the rest of my creations in the family room, kitchen, kitchen eating area, and powder room.  I have used mostly burgundy, gold, and white as my color scheme, throwing in a bit of a woodland feel with grapevine and burlap touches here and there.  Since the powder room is separated from the rest of the spaces, I did a little something different, I mixed and matched a bit of burlap, white, and a brighter red for a fun look.

This table and shelf sit on a wall that is located between my kitchen and family room and it is a cozy little set-up…not to mention it gives me two more places with which to decorate. 😉 IMG_2561

I made this little arrangement to sit up on the shelf..IMG_2548

I love the little grapevine star garland (thank goodness for command strips as they are what is holding that up there)…

IMG_2562

My Grandmother made all three of those ceramic Christmas trees, I decided to group them all together in one place this year…I love the look! There are colored bulbs in the big green tree and the littler white tree and all red bulbs in the medium sized white tree…IMG_2563

Here is a better look as to where this table and shelf sit…

IMG_9523

Next, I arranged everything on my kitchen hutch’s shelves and made up a cozy little corner next to it…

I made this little basket arrangement to sit on the bottom shelf of the hutch…IMG_2550

There is the hutch on which an eclectic mixture of items reside.  Included are some lovely items that were gifts, some things I’ve collected, and other sweet items that are special to me…

IMG_2560

Here is how I start every single cozy corner or design that I create. I just gather a bunch of stuff that I think I might use, sit down, settle in, and just start placing things…

IMG_2558

And here is what I came up with when all was said and done…

IMG_2559

I used the same concept when I placed everything on this corner shelf that sits in my kitchen’s eating area…

IMG_2565There is a better look as to where this shelf is located…

Version 2

Last but not least (in this area of the house), I tackled the powder room.  I had created this wreath a couple of weeks ago and decided to use it in the powder room, I built the rest of the decor around this wreath. Here is a link to show you how I made the wreath: Burlap/Winter Wreath

IMG_2315
IMG_2573

IMG_2574 IMG_2575

My hubby made me that shelf several years ago…I just adore it!!
IMG_2576

All of this decorating has been an exhausting yet very satisfying process and I have been left with a real feeling of accomplishment as I have worked really hard on new and different design pieces and the all-over look for this year’s Holiday season.  They only thing left to add to this portion of the house is our 12′ Christmas tree.  I honestly do not do anything special to it as it includes ornaments that are special to us as a family.  We put colored lights on it because that is what the family prefers on that tree and I love it too…I do plan to make a big bow topper to add to it this year though…It definitely makes a statement when it is decorated–and we ALL decorate it…so it is a combined effort. 🙂  That won’t be finished until Thanksgiving evening. 🙂

I digress! Yesterday, I started to decorate the living and dining rooms which sit on the front of our home.  I’ll be using a more whimsical, light and airy color scheme in those rooms and in the foyer, including more teals, silvers, light greens, and a touch of pink…Here is a little preview…

IMG_2607

Until next time, y’all take good care! ❤

**In crafting there are no mistakes just unique creations**

Christmas Grapevine Wreath

Another bright idea popped into my head as I was piddling around my house yesterday morning; how about if I make a Christmas wreath to attach to the 6′ mirror that hangs above our mantel?!  Well, the first thing I needed to do was check with the hubby to see if it was even a doable task *for him* as I am not as agile way up on a ladder as I’d like to be. 😉 He assured me that he would be more than able and definitely willing to hang whatever wreath I created way up there on that mirror.

OH let me tell you a quick story about that pretty, *large*, *heavy* mirror (6′ tall x 45″ wide). My hubby actually was the one that found that on LightingDirect.com <~~~ That link is for a similar mirror, I can’t find our specific mirror at this time.  Anyway, it was delivered via 18-wheeler (freight) because it was *that* heavy.  Putting that thing up was quite the task, my hubby attached a piece of wood the width of the mirror to the back of the mirror and one of the same size to the wall, he had cut angles on the edges of the wood pieces so that the piece on the back of the mirror would snug down into the piece of wood on the wall thus anchoring it nicely and securely.  It took my daughter, my hubby (while up on a ladder), and myself to lift and muscle it into place, whew!!  Trust me, it isn’t coming back down…probably ever…haha.

IMG_2231 IMG_2235

So back to my bright idea, I decided to make a grapevine wreath for this location because I wanted to stick with my planned color and rather rustic theme.  I’ll be using a pine pre-lit garland on the mantel…I bit the bullet this year and went ahead and purchased it new from Grandin Road…here is a link… Christmas Garland. Yes, it was a bit pricey, but I had a 20% off your entire purchase coupon, so I went for it.  While I was at it, I purchased a set of 5 Candle Rings; I will be adding some of the same red and gold berries to them that I used for this wreath (subject for another blog).  Those candle rings will be placed on these gold mercury glass candle stick holders that will be on the mantel…

IMG_9373

Okay, I know all of the components that I’m mentioning for my fireplace decor sound like quite the hodgepodge, but I *think* when I pull it all together that it will look lovely…I hope anyway. 😉

Now, I wanted to make a pretty large wreath to place on the mirror, so I purchased a 24″ grapevine oval wreath (the shape wasn’t as oval as I wanted it to be though, but it’ll do)…

IMG_2202 IMG_2203 IMG_2204

The first thing I did was to cut strips of felt and I hot glued them onto the back of the wreath so that it won’t scratch the mirror or anywhere else that I might want to hang it in the future…

IMG_2205 IMG_2206

I also made a ‘hanger’ out of a pipe cleaner and I hot glued it on to where I deemed would be the top center of the wreath…

 IMG_2207

I had purchased this little wooden snowman to add to the wreath and I knew that it’d be too heavy to glue on, so I hot glued pipe cleaners to the back of it so that I could tie him onto the wreath…

IMG_2211 IMG_2212IMG_2213 IMG_2214

Here are the other accents that I chose…

Some pine greenery:

IMG_2198 IMG_2199

IMG_2200 IMG_2201

Red sparkly berries:

IMG_2208

Gold berries and small Christmas ornaments…

IMG_2228IMG_2224

I made a rather large bow and attached some of the red and gold berries into the pipe cleaner that I used to tie the bow shut.  I pulled them around to the front and through the bow loops to add a little interest…

IMG_2221 IMG_2223 IMG_2228 (1)

I also found these cute burlap ornaments that I thought would help the wreath feel a bit more rustic…

IMG_2209

Okay, so it was time to assemble the wreath…Here we go…

The first thing I attached (hot glued) was the greenery, one large piece and one smaller piece starting on the upper left bending it and circling around the top and half way down the right side of the wreath form.   I did the same thing around the bottom portion of the wreath leaving myself a bit of a space on the left side so that I could place the snowman…

IMG_2217 IMG_2216 IMG_2219 IMG_2218

After that, I added the bow, red berries, the gold berries and the little ornaments.  I then placed the larger burlap ornaments and called it done. 🙂 Here is the finished wreath…

IMG_2230

I really wanted to have this wreath lit for at least a few of the evening hours so I went on the search of a battery operated light strand with a timer an I found one at Walmart! There are 3 timing options and the one I chose was to have the lights come on at a certain time each evening, they will stay on for 6 hours and automatically turn off.  The perfect solution! 🙂 AND **Bonus**  they were only $6.88!

IMG_9384IMG_9385FullSizeRender   IMG_9386 IMG_9388

I do think it will look really pretty on the mirror above the mantel…I sat it up on the mantel this morning to see if the size was going work okay, and I do think that it will. I had to do a little visualizing because I will not even attempt to hang that puppy up there by myself. 😉

IMG_9380

Wow, I do think that it will make a nice bold statement on that mirror and it will help to pull all aspects of the fireplace decor together. Yippee!!

I’m really itching to redecorate my house for Christmas; my Dad will be coming to join us for Thanksgiving and he enjoys Christmas decorations so much, I might just decorate a little earlier this year so that he can enjoy it when he comes for our feast. 🙂


~~~Well, it is a week later and I’m amending this post just a bit, just as I’ve amended this wreath…haha.  My color pallet for my family room is going to be burgundy and gold.  Then why (you might ask) did I put that bright red plaid bow on a wreath that would be an integral part of that room’s decor? Because I lost my mind for a moment? Because I *thought* it would blend in? 😉 😉   Shoot, I was losing sleep over this little issue, so I couldn’t stand it any longer.  I made a new bow out of 2 different ribbons (burgundy and gold) because I couldn’t find any ribbon that I liked enough. I added a couple of poinsettias, some more gold berry beads, and a couple more ornaments.  I feel much better now and I’m sure I will sleep much better tonight. 😉

Here is a before and after comparison:

Image (1)

And this is the wreath that will hang on the mirror…I loved that red plaid ribbon, but not enough to completely throw off my entire plan for the room. 🙂

IMG_2325

Until next time, y’all take good care! ❤

**In crafting there are no mistakes just unique creations**

The Backyard Patio

Hi All,

We moved into our house on the Monday before Thanksgiving a couple of years ago, we only had a few weeks to get moved in and kinda settled before the masonry company started to construct our stamped concrete patio.  I have to admit, it was a rather stressful project because it took them a couple of months to complete; the temperature had to be above 50 degrees for them to come and work–it was winter and well, you get the picture. :/  Not to mention the fact that our backyard was nothing but…well mud and hay.  In fact, the reason we went ahead and had the patio put down then was so that it would be done by Spring and we could then grow some pretty grass. 🙂

Here is the original design and all of the different colors and attributes that we chose. The finished product differs a bit:

PROJECT DESIGN LAYOUT

We ended up choosing to have only one set of stairs coming off of the patio versus two as depicted in the rendering.

Preparing the space took upwards of a week:

IMG_2688 IMG_2689 IMG_2690 IMG_2693

I neglected to get pictures of them pouring the concrete because I was mesmerized by them running their little bobcat that carried the concrete in and out of our yard and how they spread it out and evened it all out…it was quite the process.  Then the stamping began, they truly are artisans, all of our choices started to come to life.

We chose two different patterns, one for the main body of the patio and a different one for the walkways:

IMG_2876IMG_2885

IMG_2887

We chose a pretty daisy pattern for the borders; have I mentioned before that gerber daisies are my very favorite flower? 🙂

IMG_2877

We chose to put a compass rose on the largest part of the patio:

IMG_2878

The next thing they did was construct the knee wall and the light columns, this took every bit of a week to complete:

IMG_3426 IMG_3434 IMG_3496 IMG_3501

Then it was time to build a little deck and stairway; composite materials were used…

IMG_3504 IMG_3534

The next and one of the most tedious tasks was the staining process.  We chose a neutral color for the main body of the patio and the walkways.  The borders were stamped with the daisy pattern; the borders and the steps were stained a terra-cotta reddish color.  They hand painted the compass rose:

IMG_3755 IMG_3750 IMG_3760 IMG_3854

We chose the same lights for the patio that the builder put on the front of our house and there are also lights under the lip of the knee wall and on the deck stairs.                   (I’m all about the lighting…I love the lighting!)

IMG_3859 IMG_3862 IMG_3861 IMG_3855

When all was said and done, they did a lovely job on our patio!  We utilize it all of the time in all Seasons. 🙂

IMG_4385

IMG_1079 IMG_4681 IMG_5293

We have hosted a few cookouts for our kids here and we’ve also hosted our Family Reunion and this patio has worked out beautifully for all events:

1V4A0554 1V4A0552 1V4A0551 1V4A0548 1V4A0547 1V4A0546

My hubby has now  been able to grow himself a gorgeous lawn to go with the patio, so all is right with his world. 😉  All is right with my world as well, it is really nice to be able to have an outdoor space that provides comfy seating to be used for conversing, drinking hot cocoa, and helping people feel cozy and welcome. 🙂 Again, I have to stop and say how blessed we feel to have this lovely home…

IMG_4400 IMG_4396 IMG_0254

Until next time, y’all take good care! ❤

~Arlynn

Master Bedroom & Bathroom

Hi All,

I would have to say that our bedroom is the least decorated of all of the rooms in the house, but, regardless, I’ll go ahead give you a little glimpse.  When we built this house, we had this room extended by 4 feet which makes this quite a large room–25′ x 16′ (or thereabouts).  We have a king-sized bed, two bedside tables, two dressers, a corner shelf, two chairs with a stand in between them, and my cedar chest and we still have tons of room.  We have two walk-in closets and master bath as well.


 IMG_6224 IMG_8860

The master bathroom is quite large as well, and I must admit that I do love it.  We had a master bathroom in our other house, but it was tiny (not complaining, at least we had one). We have a separate soaker tub in there, I’ve never had one of those in my life. 🙂 Also, we did special order those plantation shudders for on the bay window; I will admit, they are wonderful and I’m so very glad that we bit the bullet (they were pricey) and purchased them.

1V4A2840

We each have our own vanity…Of course, I had to make a little something to sit on mine. 😉

IMG_8822 IMG_8864

A couple of extras are that the tiles in the shower go all the way up to the ceiling and the shower door is a very heavy piece of glass (devil to clean too…haha).

IMG_8871

We also have a toilet room…goodness gracious! 😉 Of course I had to do a little decorating in there…

IMG_8873

IMG_7744

IMG_7745

Well, that does it for the interior of our home, except for the basement and I’m not going to show that to you…haha.  Stay tuned for a couple more Home Tour entries describing our backyard patio and the front of the house lighting. 🙂

Sneak peek of the patio:

IMG_3860

I must say one more time how blessed we feel to have this home; we waited and saved for a very long time to have it and we honestly will never build or move to another one. 🙂

Until next time, y’all take good care! ❤

~Arlynn

A Fall “Spray” For The Wagon Wheels

Hi All,

I woke up this morning thinking about making a mailbox spray, that said, I’ve never made a mailbox spray, so I thought I would go to the craft store and buy some materials and try my hand at making one for myself.  So, off to my happy place I ventured (Hobby Lobby), and I started to search for something that might work; I was definitely winging it and really didn’t have a clue what I might come up with.

Okay, I’m driving home, and as I’m pulling into my driveway, I looked at my mailbox and decided that I was quite happy with how I had decorated it already and I decided that it didn’t need a Spray…

1V4A2753

So I decided that instead of a Mailbox Spray, I’d make a spray and hang it on our wagon wheels (that hide our well pipe/head).  Of course, again, I really had no idea what I’d come up with, but here are the materials that I purchased (all on sale for 40% off) and that I would be working with:

This ‘wreath’/’mailbox’ form:

IMG_9236

One roll of deco mesh and one roll of Fall ribbon:

IMG_9237IMG_9237 (1)

IMG_9242

Leaf, Berry and Leaf, and Pumpkin picks:

IMG_9240 IMG_9241 IMG_9243

I also went and collected some pipe cleaners from my craft supplies and I dove right into this project.  The first thing I did was twist pipe cleaners around each crossbar of the ‘mailbox’ form..Like this:

IMG_9238

Once all of the pipe cleaners were in place, I started to attach the deco mesh in each pipe cleaner…making pretty large loops as I worked my way down one row…

IMG_9244IMG_9245

IMG_9246

Then working my way to the next row until I completed all three rows…If you try this, don’t be afraid to make your loops large, the bigger the better in my opinion…it gives you more to work with and manipulate.

Okay, so that worked out well, I was ready to start adding a bit of the coordinating ribbon.  The first thing that I did was cut 12-12″ strips:

IMG_9248

Then I cut points into the ends of each side of the ribbon strips…

IMG_9255 IMG_9256

I then put them in 4 piles of 3 and tied a pile into each corner’s pipe cleaner–spreading them out once they were attached.

IMG_9257

I then made a bow (see my Bow Tutorial Video) and attached it to the center of the spray by using the pipe cleaner that I used to close the bow…

IMG_9258

Now it was time to add in the Fall picks, I quickly realized that I was going to need to hot glue them into place, it was way too poofy for me to add them into the existing pipe cleaners (which is what I sometimes do on my Deco Mesh Wreaths).

IMG_9259

There was no rhyme or reason to how I arranged the picks, I just stuck them where I thought they looked nice and then I put glue on the stems and that held them in place very nicely.

IMG_9260

And this is what I came up with, I was pretty happy with myself… 😉

IMG_9262

I used tie wraps to attach the Spray to the wagon wheels:

IMG_9264

And here it is on the wagon wheels:

IMG_9266 IMG_9268

Considering that I had never made what I’m dubbing a “Spray”, I was pretty pleased with my accomplishment.  It just goes to show you, if you just give it a try, you might surprise yourself as to what you come up with in the end. 🙂 Please don’t hesitate to leave me any questions that you might have in the comments below. 🙂

IMG_9265

Until next time, y’all take good care! ❤

**In crafting there are no mistakes just unique creations**

Guest Bedroom #2 – The Turquoise Room

Hi All,

I debated about what I wanted this room to be for months and many options came to mind, how about making it into a craft room? Since it sits on the front of the house and has great light it would make a lovely place to be creative. Or, maybe it would make a great office, or possibly we could turn it into a nice upstairs rec room.  In the end I ended up making it a guest bedroom.  I don’t need that room to be any of those other things, but, now that it is a bedroom it has already been utilized several times to house visitors.  I decided to use turquoise as the accent color because, one, it is my daughter’s favorite color and she had claimed this room as hers when she comes to spend the night, and two, because I love how turquoise pairs with khaki; I had already chosen and hung the curtains in a khaki color (the same curtains that I used downstairs in the living and dining rooms and upstairs in the Happy Room).  In addition, I had found the bedding in Bed, Bath, & Beyond and I wanted to use something that would pop against that choice.

10173585_10203493702733652_7358230111975863156_n

We didn’t have extra bedroom furniture left over from our other home to put in this room, so we needed to buy new, but, we decided not to spend a ton of money creating the wheel (so to speak).  So, one day while looking at the IKEA website, we stumbled across these turquoise bedside tables!

IMG_8701

I knew it was meant to be, so off we went to do a little shopping at IKEA.  We ended up purchasing 2 bedside tables, a queen sized mattress, a white bed frame and headboard, a full length mirror, two white lamps, and a white table to be used as a tv stand.

1V4A2860

After I had the furniture in place, the bed made up with the comforter, pillow shams, added the throw pillows, and hung mirror on the wall. I started searching for the accent pieces that would help to bring this room to life.

photo 5
Here are some of the turquoise and khaki colored accent pieces that I found one day when I was shopping specifically for this room. These items are from several different stores…World Market, Hobby Lobby, and Bed, Bath, and Beyond.
IMG_8702
We already had that little table, we painted it white and I found that basket that is housing the towels at IKEA on the same day that we purchased the furniture.
IMG_8704
I got the canvas picture that is over the bed at Bed, Bath, and Beyond for 80% off. What a deal!!

I found this sweet little chair at World Market and I used a $50 off coupon on the day I purchased it and the pillow.

IMG_8781

My hubby painted parts of the ceiling fan in a turquoise color…spiffy! 🙂

photo 2

I made this burlap wreath, I absolutely love owls and had already found others to use as accents around the room!  So, when I found that owl in Hobby Lobby, I snatched it up to use in this wreath.

IMG_8806

IMG_8807

As I do in all of the bedrooms, I leave a little basket of goodies on the end of the bed for those who might forget to pack something.

IMG_0169

1V4A2860

In the end, this turned out to be a lovely room full of warmth and a bit of charm thrown in for good measure. My hope is that anyone who might to stop by to stay for a spell will lay their head down in this room and will feel the love with which it was created engulf them like a warm snuggly blanket.

IMG_8793 IMG_5857

Until next time, y’all take good care! ❤

~Arlynn