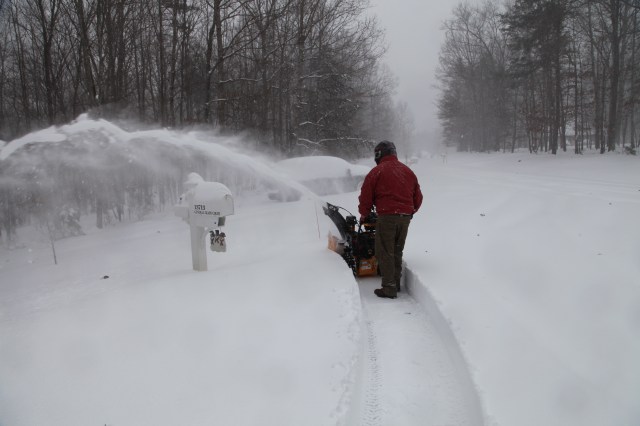
“Snowzilla”& “Snowmageddon” were just two of the names that the blizzard “Jonas” received as it roared through our area last weekend. In the end, it was an historic storm that dumped a copious amount of snow on an area that isn’t used to having to deal with *that* much snow. Goodness gracious, it was a mess around here, we just don’t have the snowplows and other resources that Northern States who routinely get snow like this have. Here at our house, we got upwards of 2 feet of snow, and I heard of some areas that got 30 and 40 inches of snow; it truly did shut us down for quite a few days. In fact, the kids still haven’t gotten back to school.
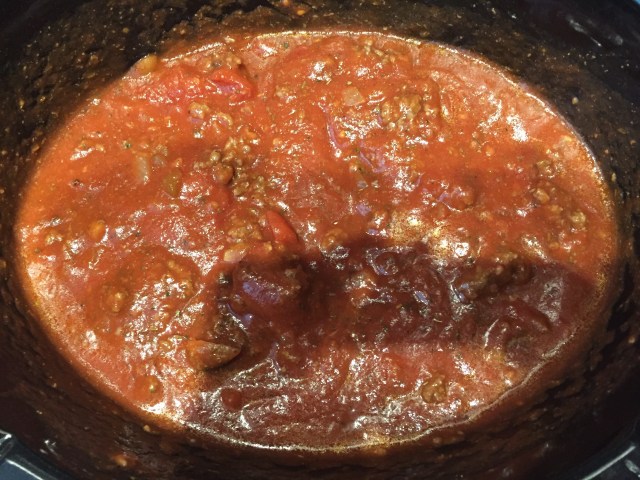
I do enjoy a good snowstorm every now and again, I spent my days cooking some of my family’s favorite meals…
Chicken and Yellow Rice one day:
Beef & Vegetable soup one day:
And Spaghetti one day:
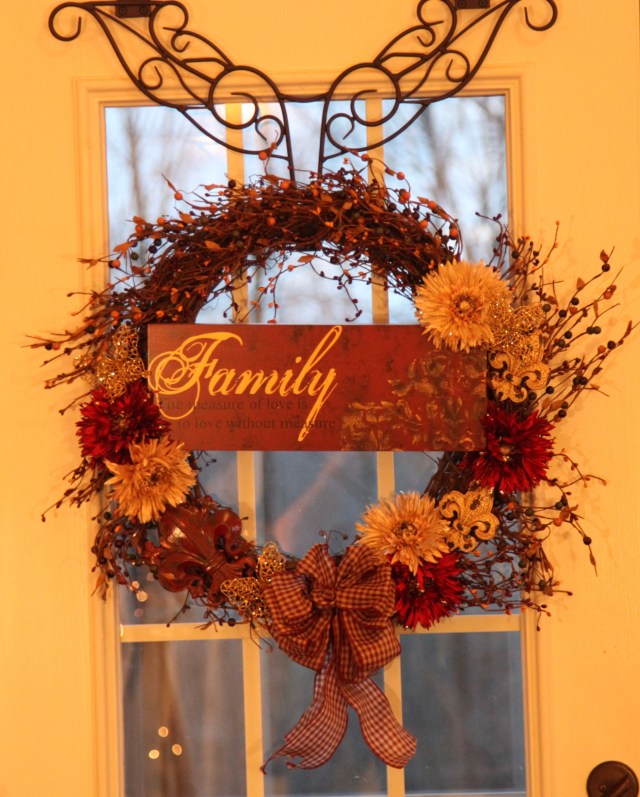
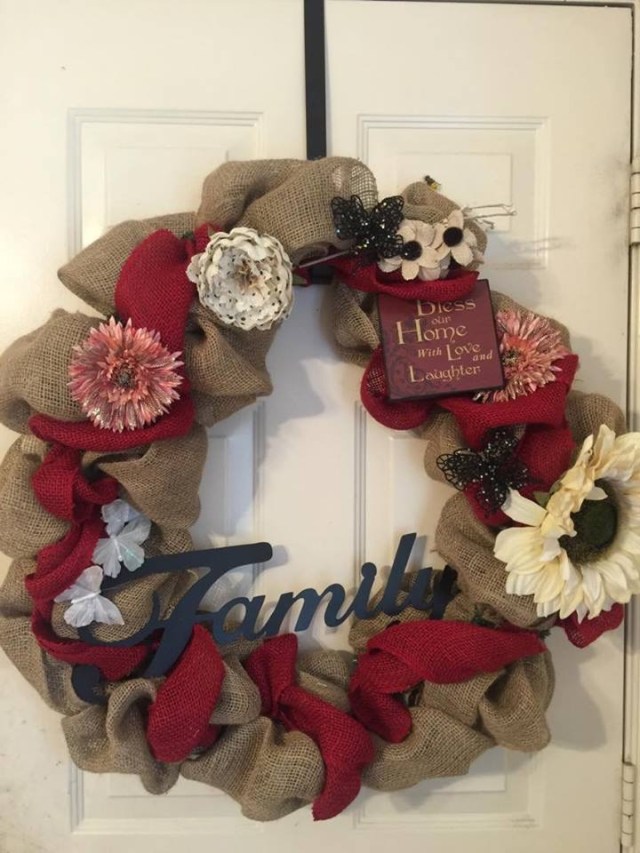
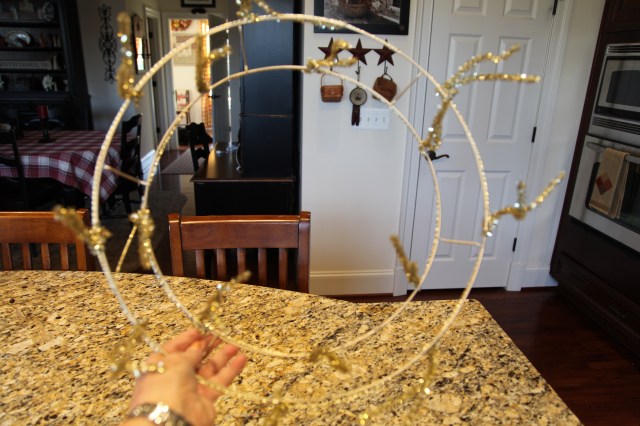
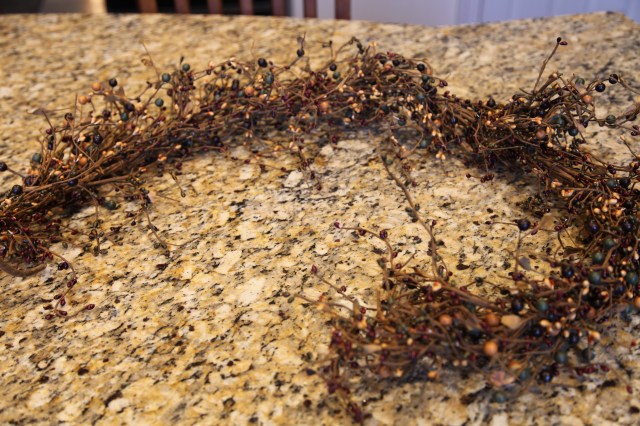
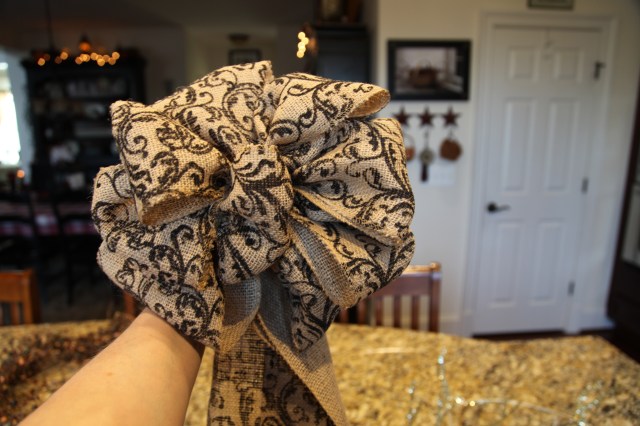
I also made a wreath on one day:
Sam and I had a few moments like this…haha…
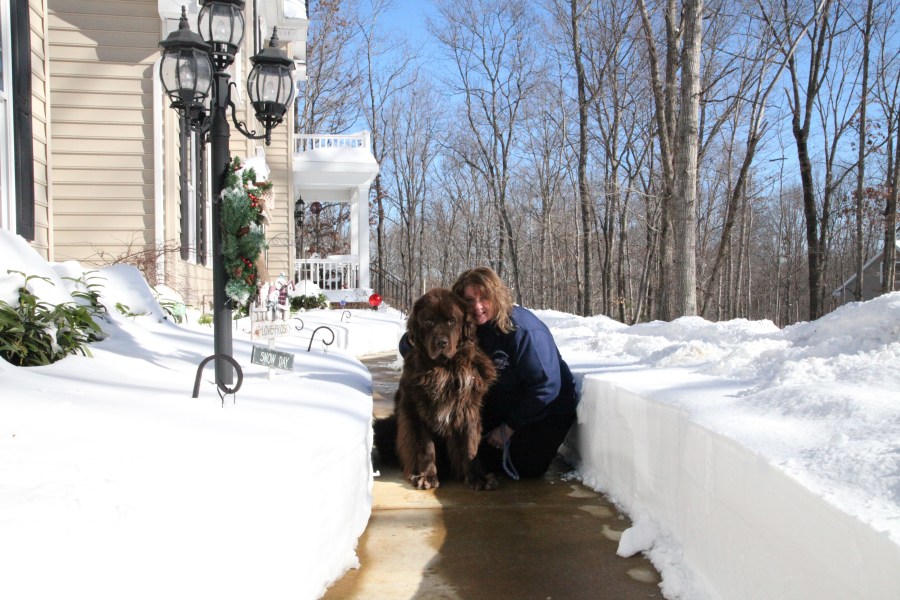
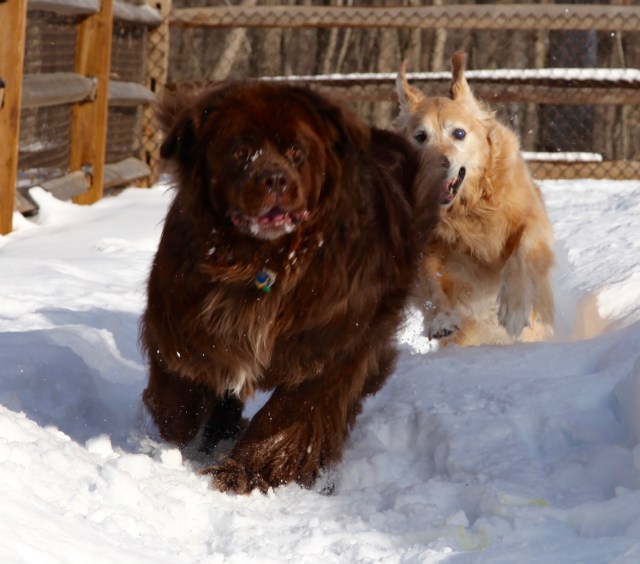
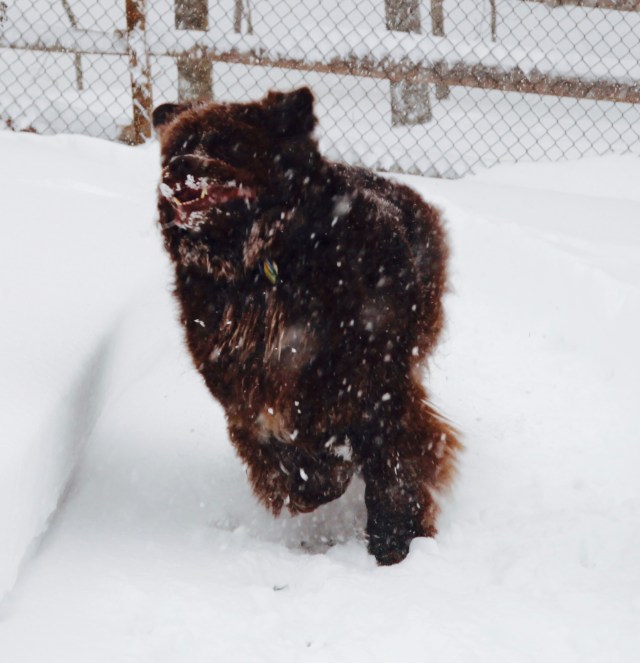
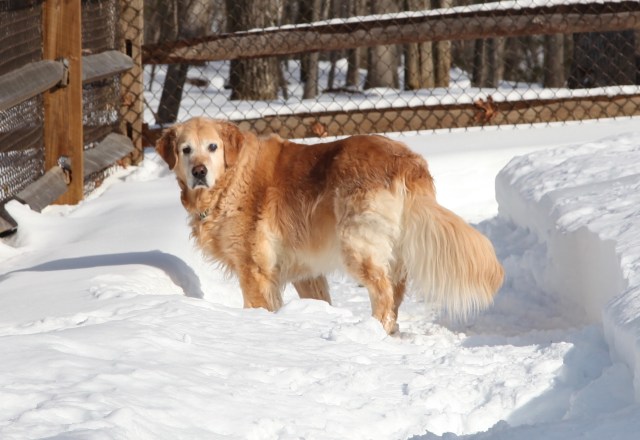
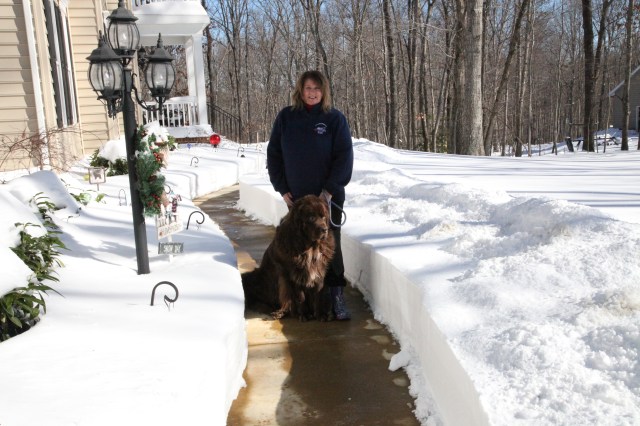
I took a ton of pictures of our pups playing in the snow and of the house. Here are a smattering of pictures of the dogs (Sophie the Black Newfoundland, Samson, the Brown Newfoundland, and Gracie the Golden Retriever). Be prepared to scroll a lot as I took many, many shots…haha. 😉
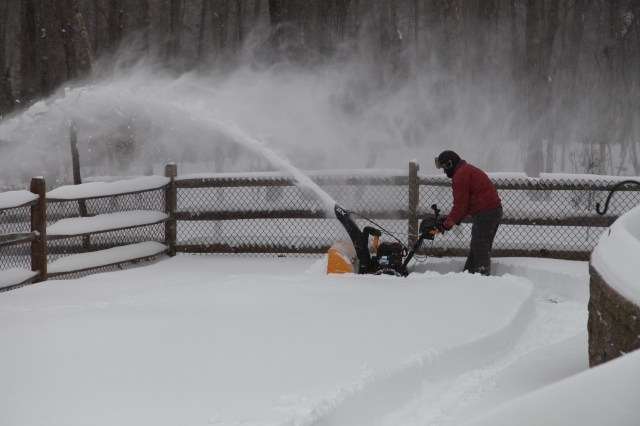
Thankfully, my hubby had invested in a snow blower last year, to say that that came in handy is an understatement! He used it to create a nice oval track for the pups in the backyard! This was genius on his part because even as big as our pups are, they were having troubles traversing through the mounding and drifting snow…
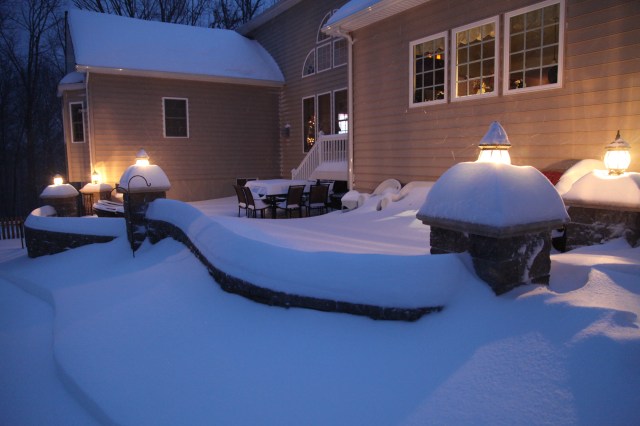
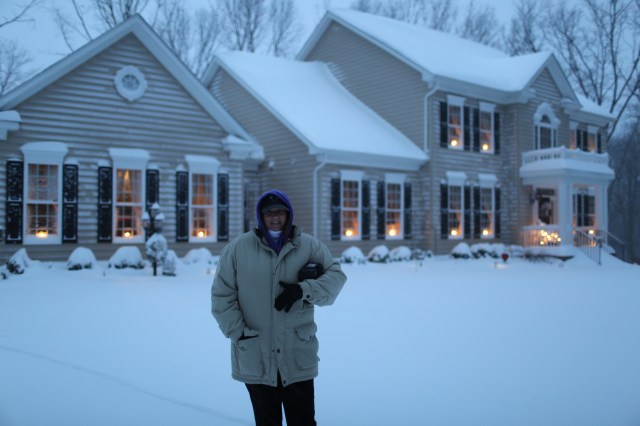
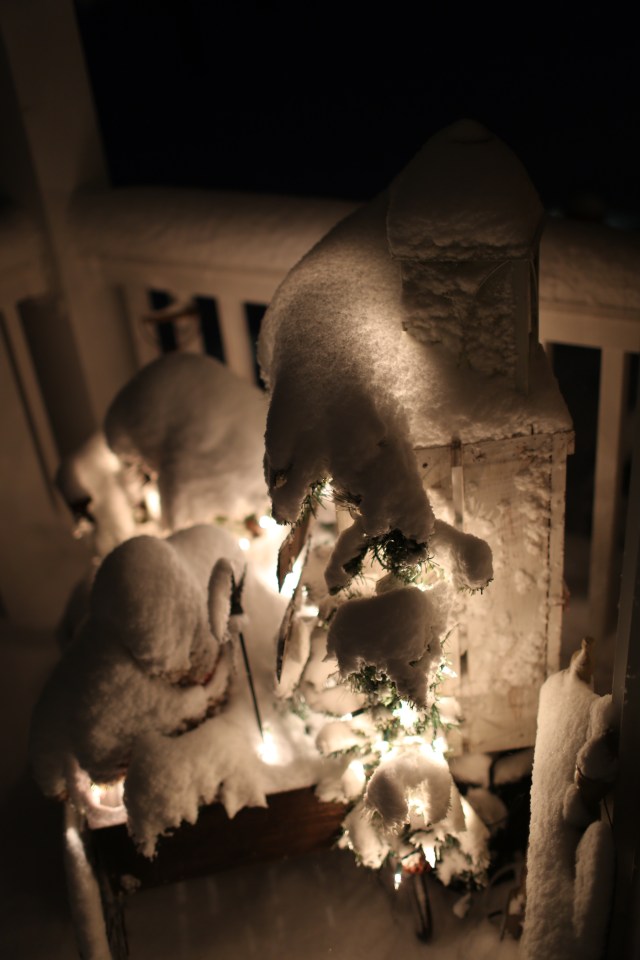
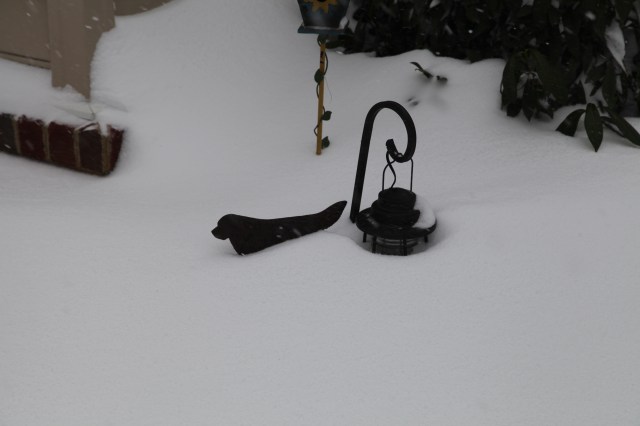
Here are some shots of the house during the storm:
I was taking this picture:
And then the snow finally stopped and the digging out process began:
I’m hoping upon hope that this is the biggest snowstorm that will come our way this winter! I am very grateful that the storm happened to fall on a weekend when the hubby was off and didn’t have to try and traverse to work. I am grateful that we had food in the house and that I was able to hone my cooking skills a bit. I am grateful that one of our daughters came and stayed at our house and kept us company as the snow fell and that our other daughter and her beau were safely tucked in their home warm and cozily hunkered down. I am grateful that my family and friends also weathered the storm and are sufficiently dug out now and are starting to enjoy their *normal* life again. We all took a moment or two to *pause* and reflect on the beauty and fury that nature can bestow upon us in a moment’s notice. I will say that I’ve had my fill of snow for this winter and will be quite happy if I don’t see another flake fly. 😉
This past weekend we had one massive snowstorm around this area and pretty much all I’ve done for the last several days is cook everyone’s favorite dish, watch the news that is reporting on how this area is completely shut down and how it will take days to dig us out, and battle my cabin fever. I’ve also played with my pups in the backyard, they are having a blast…I think I will write a post in the coming days so that I can show you what a good time they’ve had. 🙂 In the meantime, here are a couple of pictures…:)
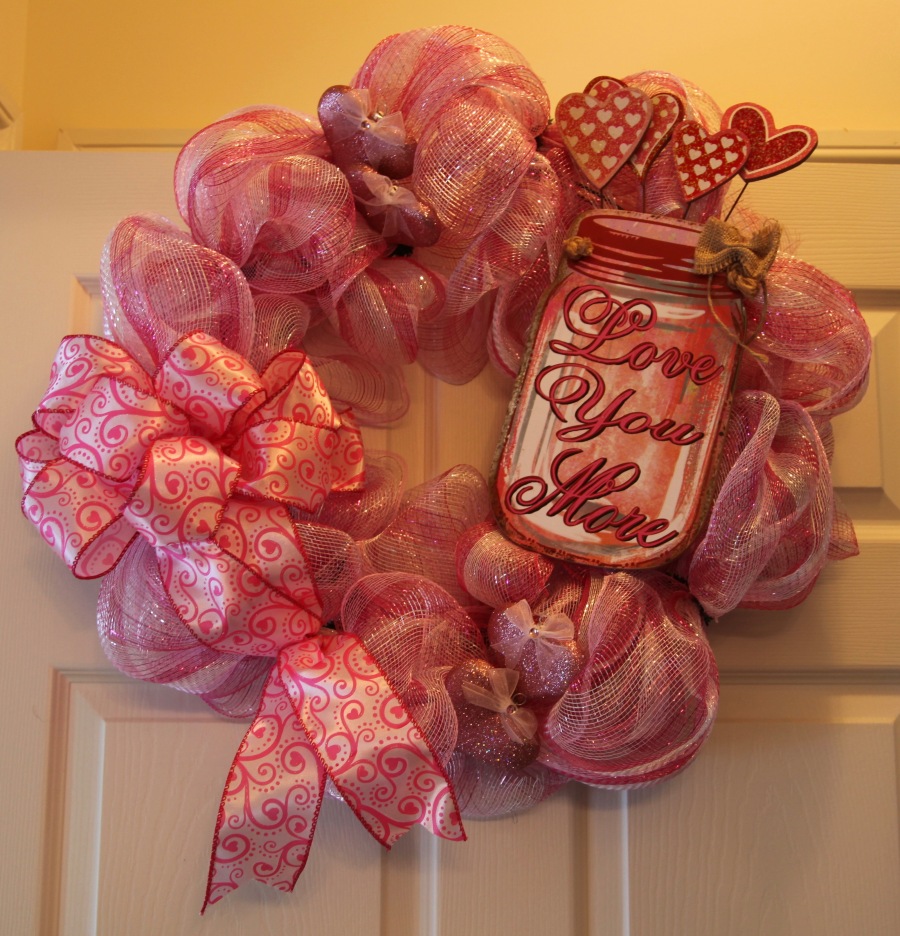
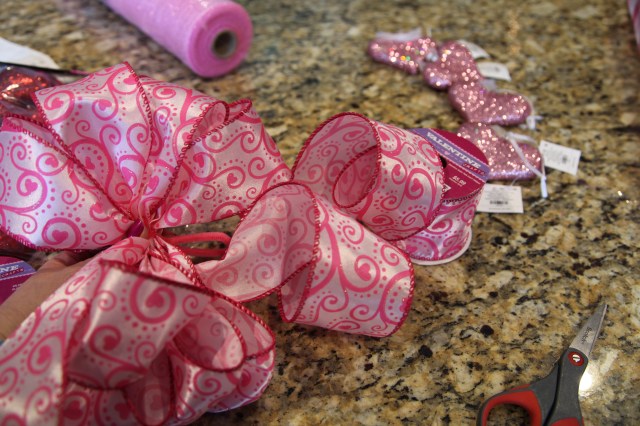
And today, I took a few minutes out to combat my cabin fever and to create a very quick Valentine’s Day wreath. This wreath literally took me an hour (at most) to make. It was easy peezy to put together and anyone could do it. 🙂
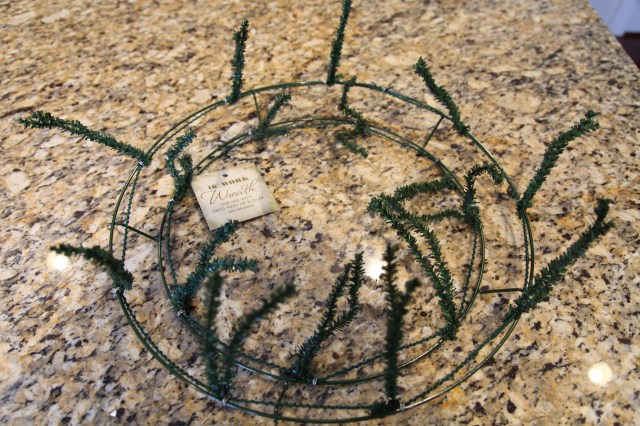
Here are the supplies I used:
16″ Work Wreath
1 Roll of 21″ x 10 yard Deco Mesh
1 Bolt of Wired Ribbon
4 Heart ornaments
1 Wooden Plaque
The first thing that I did was to hot glue some pipe cleaners onto the back of the wooden plaque so that I could easily tie it onto the wreath form…
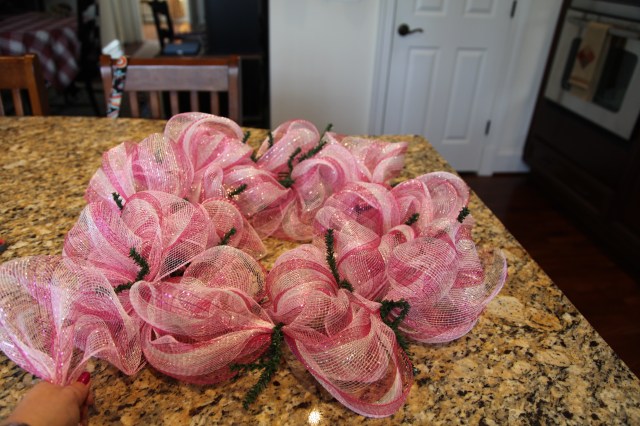
Then I looped the deco mesh into the work wreath’s pipe cleaners; I worked my way around the outer ring, then the inner ring, and then I put another row around the outer ring.
I made a big bow out of the ribbon…and tied it onto one side of the wreath, and then I tied the wooden plaque on the opposite side. I hot glued the heart ornaments on and called it a day. Honestly, easy as can be. 🙂
Here is the finished wreath:
I’m not totally sure where I will hang it quite yet…It will definitely be hung outside, possibly on my light post out front…
Or I might hang it on my wagon wheels…
Productivity is a good thing, and today, I felt like I was definitely productive. 🙂 Go me! 😉
Until next time, y’all take good care! ❤
**In crafting there are no mistakes, just unique creations**
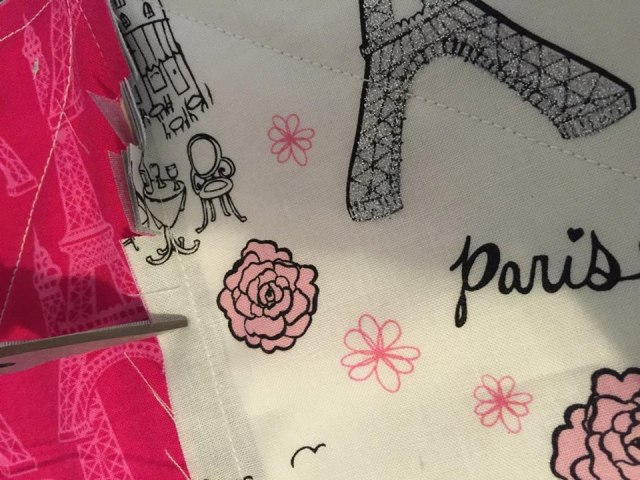
I admit it, I am not a quilter! I can do pretty much any other craft, and yes, I can sew and have sewn many things in the past, but, quilting, well, I’ve just never had the patience to sit and learn how to do it correctly. I envy those that have the talent, the expertise, and yes, the patience to create something that evokes such a warm, very special feeling. One of my dear friends *Billie* is a wonderful quilter, so when she asked me for some instructions as to how to make a burlap wreath, I was touched and humbled that she liked my stuff so much that she might like to make something like what I create. I was thrilled to give her a little extra help and I provided her with a shopping list and some basic instructions and pointed her to my Front Door Burlap Wreaths Blog post in hopes that it might help her put her wreath together. She was making it for her Mom for Christmas, and she ended up doing a fabulous job!!! Here is a picture of her finished wreath, this is the first burlap wreath that she has ever made and I think she nailed it perfectly!!
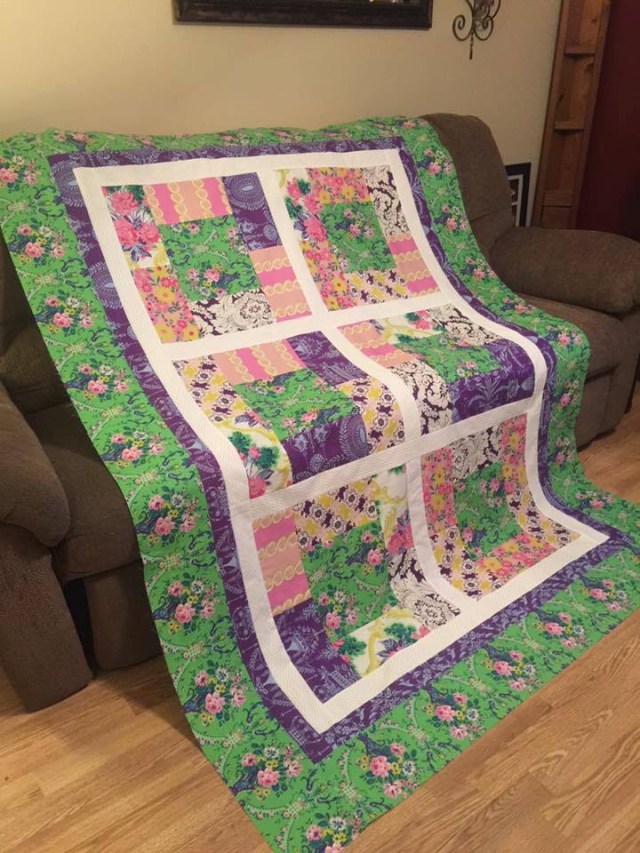
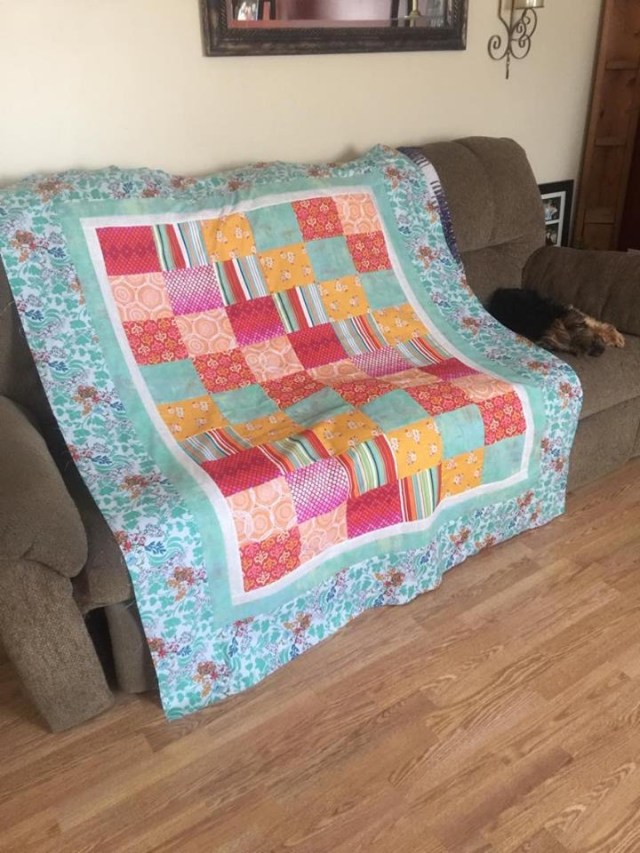
Billie has been kind enough lend her quilt making expertise to my little ole Blog here; she has sent me instructions and some accompanying pictures that might serve to help one of y’all out there to make a Rag Lap Quilt. First though, let me show you some of the other quilts that Billie has created over the years, she does gorgeous work! **AND don’t miss Billie’s little pup Penny who obviously loves her Mama’s work too…LOL…She is so stinkin’ cute in these pictures!! ❤
My gosh, aren’t those quilts just the prettiest things you’ve ever seen?!! I can’t choose a favorite…I honestly can’t! I know without a doubt that I could find a special place for each and every one of them in my home…what a TALENT!!!!! Wow, wow, WOW!!!
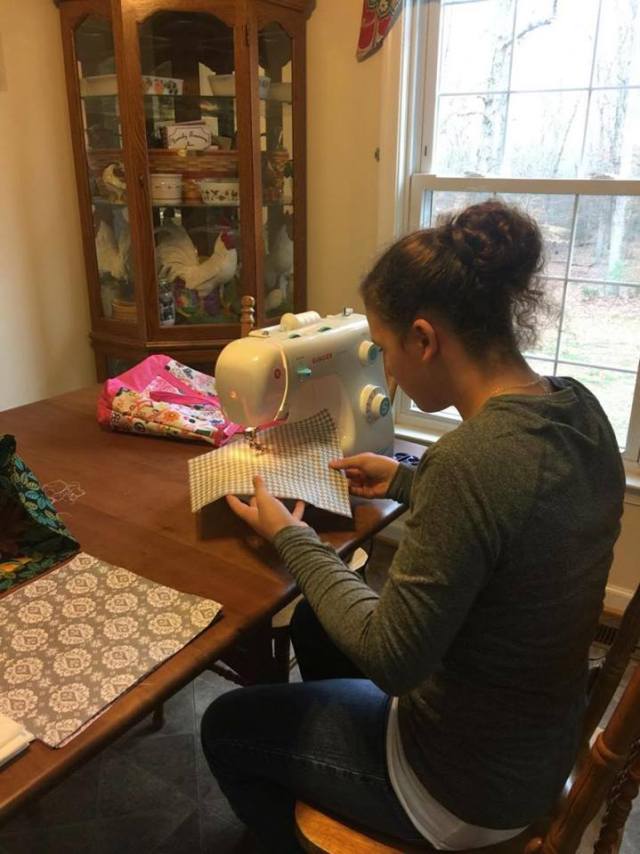
So, here are some instructions that Billie sent me and she has graciously given me permission to pass on to y’all as to how to make a Rag Lap Quilt. Before we get started, she wanted me to assure y’all that this project is a great project for beginners and advanced sewers, any imperfections in cutting and sewing are forgiven when all is said and done, beginners can enjoy sewing without having to worry about making mistakes and advanced sewers can sew without being perfectionists. Here is Billie’s friend Alexis who is only 11 years old sewing for the very first time ever making herself a fun, fast and easy rag quilt. It’s just a wonderful and adorable project for all levels!
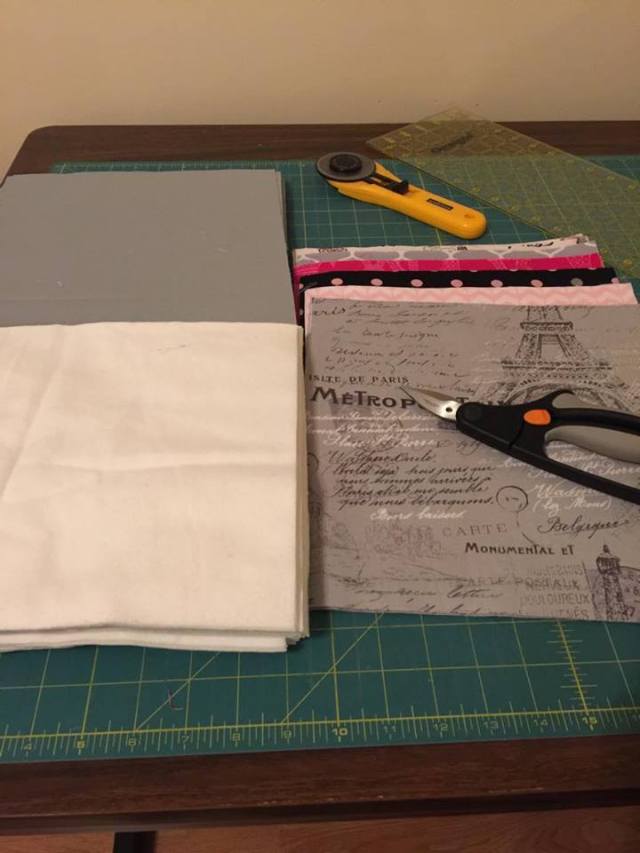
Fabric requirements for this project include:
2/3 of a yard of 6 different coordinating cotton fabrics for front of quilt
or 4 yards of any fabric of your choosing 4 yards of coordinating fabrics for back of quilt
4 yards of flannel for inside of quilt
Rotary cutter
cutting mat
acrylic ruler
rag quilt snip scissors
and of course a sewing machine 😉
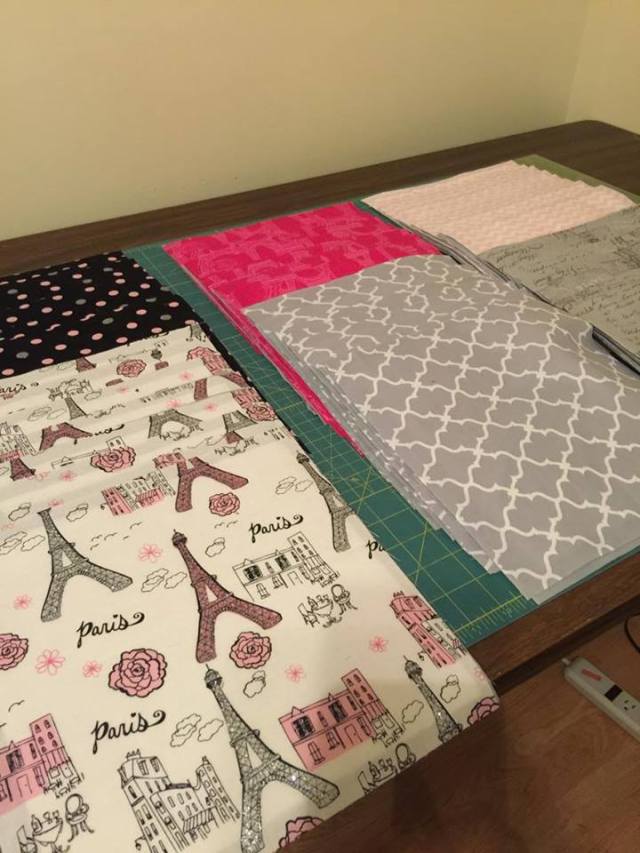
Cut all the fabric for the front and the back of the fabrics using your rotary cutter into 10 1/2 inch strips by WOF (width of fabric) and then sub cut these strips into 10 1/2 inch blocks. You will have 8 blocks for each coordinating fabric you chose for the front of this quilt and 48 blocks from the fabric for the back of your quilt. Cut your flannel fabric into 9 1/2 inch strips by WOF and then sub cut into 9 1/2 inch blocks. This project is one of those that you just can’t go wrong, the accuracy on cutting and sewing doesn’t show, which makes it that much more fun.
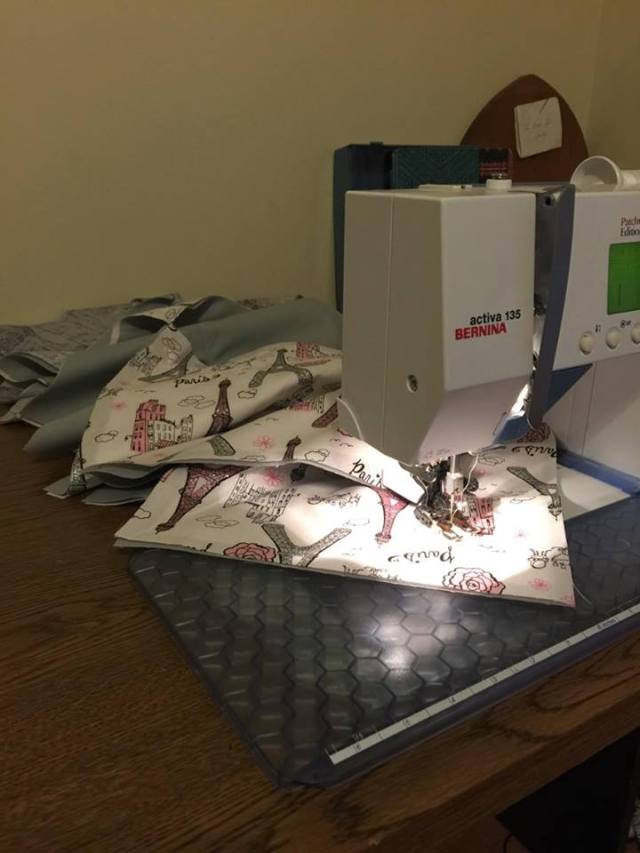
Take your flannel square and sandwich it between your fabric squares for the front and back of your quilt, you should have 48 of these…
Sew a diagonal line from each corner to create an X on each one of these sandwiches…
This project is great for chain piecing just keep feeding one sandwich after another into the machine (also a walking foot on your sewing machine during this project is nice you don’t have to have one, but it does make it easier to feed the fabric through the machine)
After finishing all 48 blocks lay out your blocks 6 across and 6 down this is where you can create a pattern with the different fabrics I did a diagonal line with matching blocks in mine.
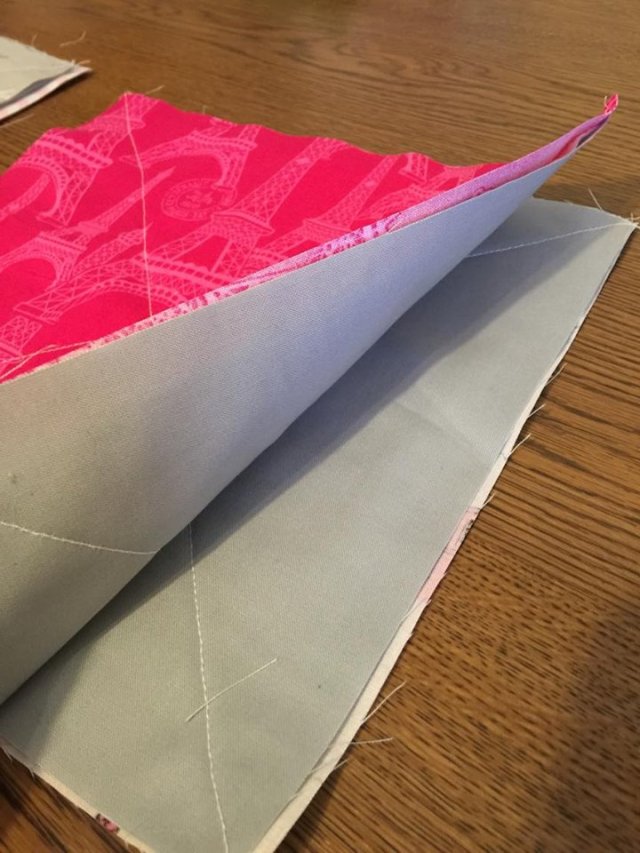
Now you’re ready too begin sewing your blocks together with 2/3 inch seam, place one block on top of another with the fabric for the back of the quilt facing each other so that the seam allowance will face the top of your quilt; this is key because this is where the rag comes in on the rag quilt. You will sew 6 blocks together to complete a row.
Now that a row is finished you can take your rag scissors and clip towards your seams be CAREFUL not to cut your seam, you want your cuts to be about 1/2 inch – 1 inch apart, if you do this as you go it’s less tedious to do after your finished putting everything together.
Make 8 rows and then sew your rows together the same way you sewed your blocks, again with the fabric for the back of your quilt facing each other so that your seams are facing the front of your quilt and clipping as you go. You’re almost finished, you’re going to need to place a 2/3 inch seam all the way around the edges of your quilt this closes up the blocks on the top, bottom and sides of your quilt, clip those seams and now it’s time to wash and dry your beautiful creation so that all those clipped seams rag up and make your quilt absolutely adorable!
OH my gosh, that really is completely and totally adorable!!! I LOVE IT!!! Thank you so very much for showing us how to create this fast and easy rag lap quilt Billie!!!! You are a-m-a-z-i-n-g!!! I might even give something like this a try!! 🙂
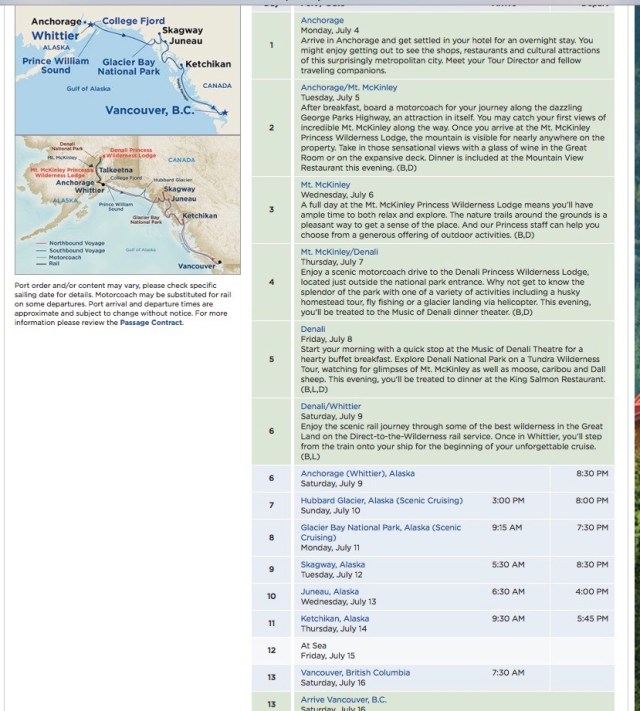
As y’all have read, my hubby and I have been lucky enough to be able to do 4 cruises in Alaska, we love the Princess Cruise line, they do a phenomenal job in Alaska and beyond. Princess has their own lodges placed at strategic locations in Alaska and they run their land tours like a well-oiled machine, they are so efficient…and to this organized lady, that is music to my ears. SO, back in June (23rd through July 7th), 2012, we decided to add a land tour onto our 3rd Voyage of the Glaciers Southbound cruise; the hard part was choosing which land tour we wanted to do, so when all was said and done, this is the tour we chose (well actually, this isn’t *exactly* the tour we chose…I’ll explain later….there was only one slight change). We decided that we wanted to do the tour first, and then the cruise. That said, I’ll also explain later why I’d choose a slightly different land itinerary on our next journey:
Here is a little cheat sheet to acclimate you as to where Princess’ Lodges are located:
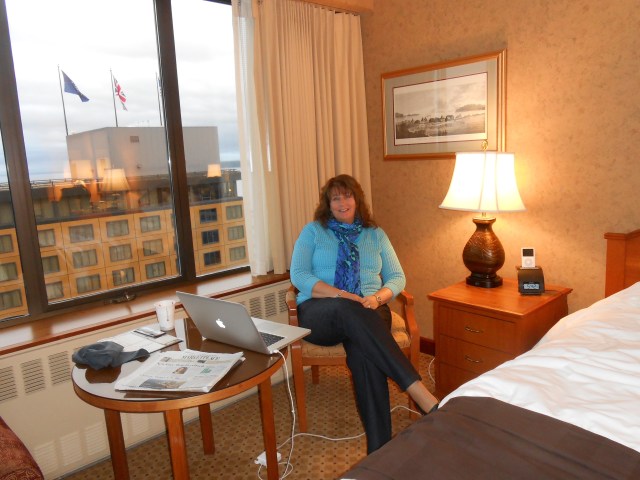
So we landed at the Anchorage airport, collected our luggage and wheeled them right to our our Princess Rep who was waiting for us right beside the luggage carousel. We were then transported by motor coach to our hotel for one night, the Captain Cook…
We paid for Princess to handle all of our reservations and transfers, so we were pleasantly surprised when we entered our room; it was a corner room and it was gorgeous! What a start to our vacation, I was beyond excited to see what the interior of Alaska was about to offer up. 🙂
**Note: On our arrival at the Captain Cook, we were handed a packet from Princess with our land tour’s itinerary. It spelled out what time we needed to have our luggage ready to go the next morning–the Princess folks came around and gathered it up at each location when it was time to move to the next location. Also, if there was a piece of luggage that you would only be using on the ship, they provided you a special luggage tag and it was put into storage until it was time to be placed outside your stateroom door…I’m telling y’all, Princess is awesome. The itinerary also included where and what time we were to meet and what mode of transportation would be used on that particular day. It was very detailed and really didn’t leave you with any unanswered questions.
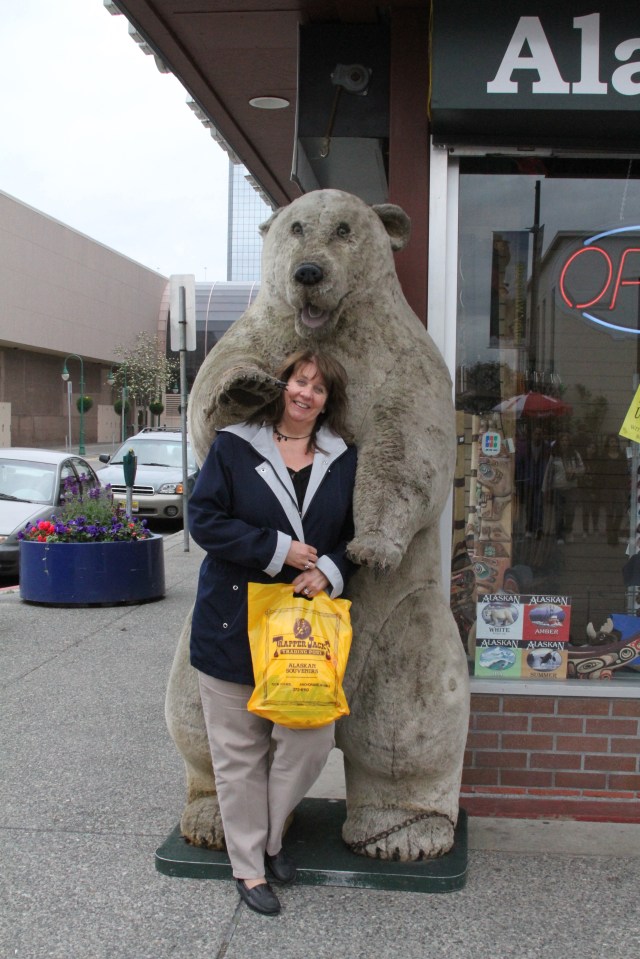
After a wonderful night’s sleep, we went out to explore Anchorage for a little while…
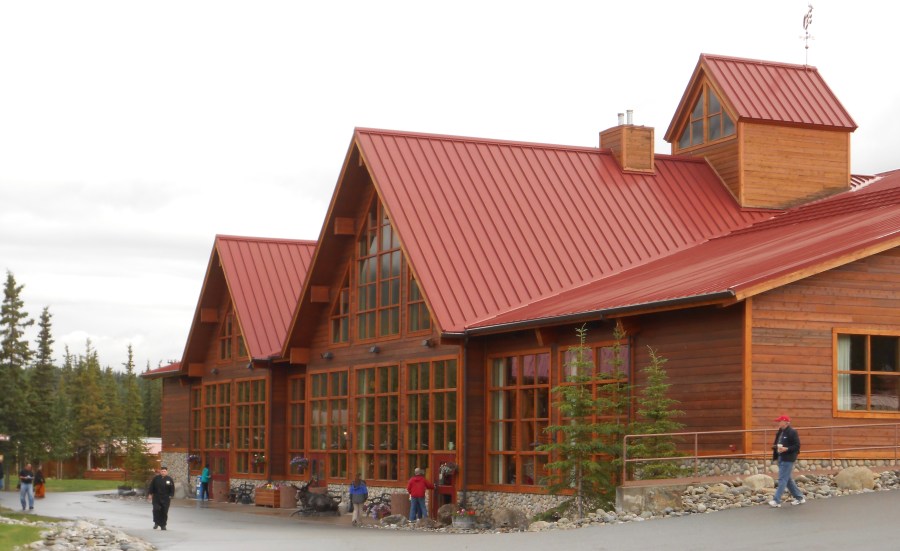
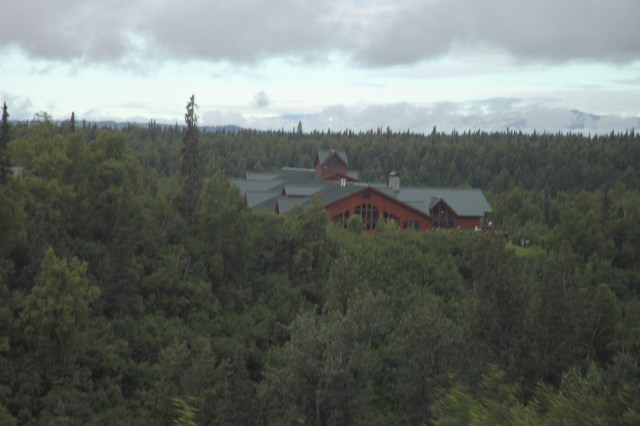
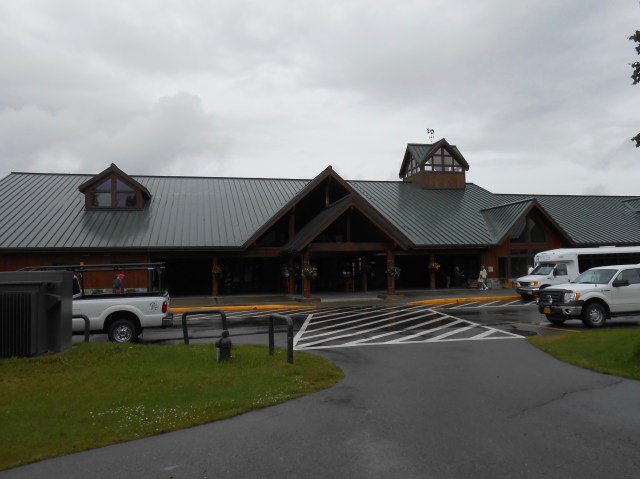
Then it was time to board our motor coach and start our trip to our first stop The Princess Mt. McKinley lodge. It was a beautiful drive! In just a couple of hours we pulled up in front of the lodge, we would be staying there for 2 nights…
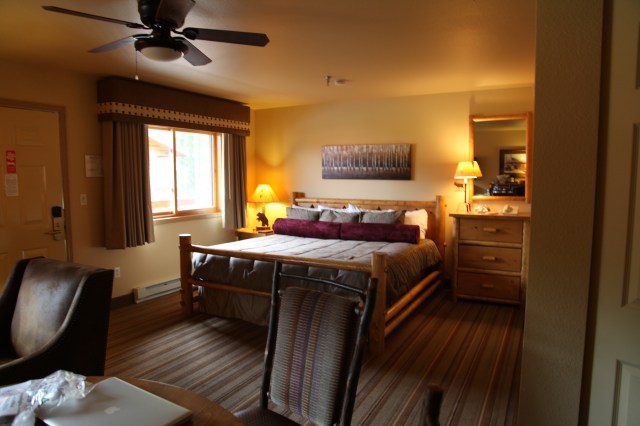
Unfortunately, I cannot tell you about the regular rooms that they offer at the lodge because my hubby and I got a huge surprise when we arrived. We were actually given one of the few rooms *in* the lodge itself…what? The rest of the rooms were a bit of a walk (nothing too strenuous by any means) away from the lodge and set up similar to a motel, with outside entrances…everyone said that they were well-appointed rooms, but I’m sorry to say that we never laid eyes on one.
Here is the room that we were given, and no, we didn’t arrange for this room up front, I guess they do a random drawl type thing, and we were chosen…wow, how lucky were we?!
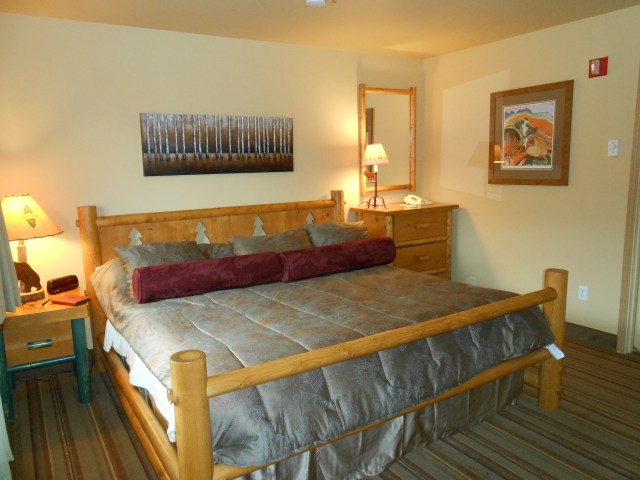
This window in our room was positioned so that you could gaze upon Mt. McKinley, sadly, it was a cloudy rainy day that day and we didn’t see the mountain…
We had a lovely meal at the 20320 Alaskan Grill which was a short, easy walk from the lodge–One more note for those of you who have not done a cruise tour…On the tour portion of the itinerary, you have to pay for all of your meals–unlike when you get on the ship:
On our way to the restaurant, there was a sign that you could stand under and on a clear day, Mt. McKinley can be seen over your head…Unfortunately, that beautiful mountain never showed herself to us.
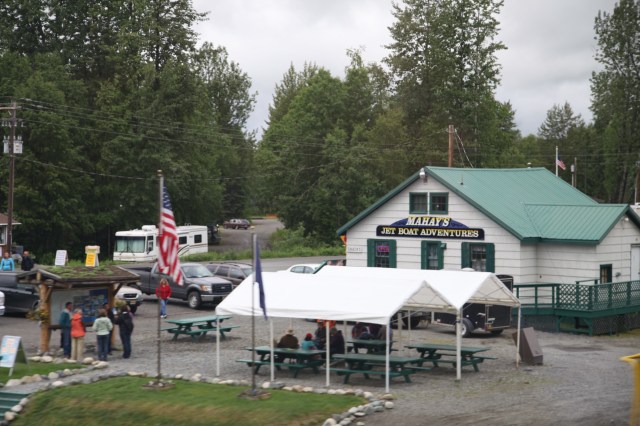
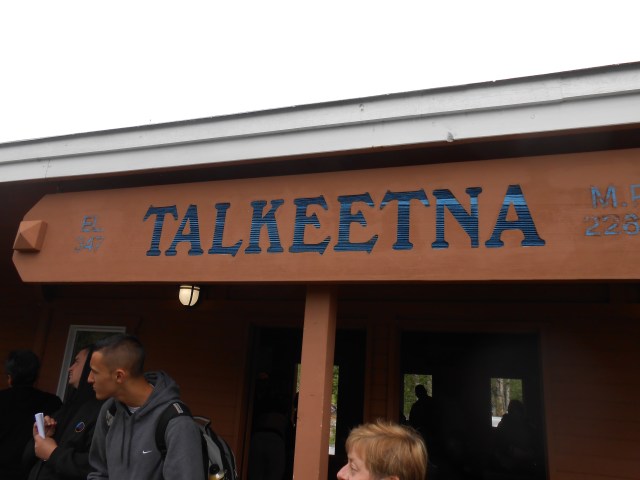
The next morning, we boarded a motor coach and took off down the mountain to Talkeetna where we’d be catching our jet boat excursion to Devil’s Canyon. Here is a video describing this wonderful trip: Mahay’s Devil’s Canyon Adventure.
On our way to The Devil’s Canyon and those class 5 and 6 rapids, we were lucky enough to see this mated pair of bald eagles:
And this tree that a beaver had done a real number on!
And this mama moose and her baby!
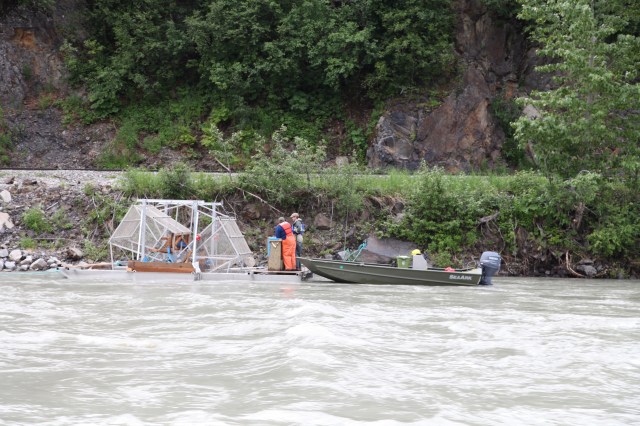
A fish wheel:
Then we reached the rapids and the captain stopped the jet boat in an eddy and we were able to take some great pictures of that rushing water!
We had so much fun on that excursion, if anyone out there is taking an Alaskan cruise and would like to set this excursion up beforehand, here is a link.
And here is a video that I compiled of our time on this excursion:
We spent one more night at the Mt. McKinley lodge and arose bright and early the next day and took a little trip back down to Talkeetna via motor coach; we’d be catching the Alaska rail (this is where our Itinerary differs from the one pictured above–above, you take a motor coach to the Princess Denali Wilderness Lodge–we took the train).
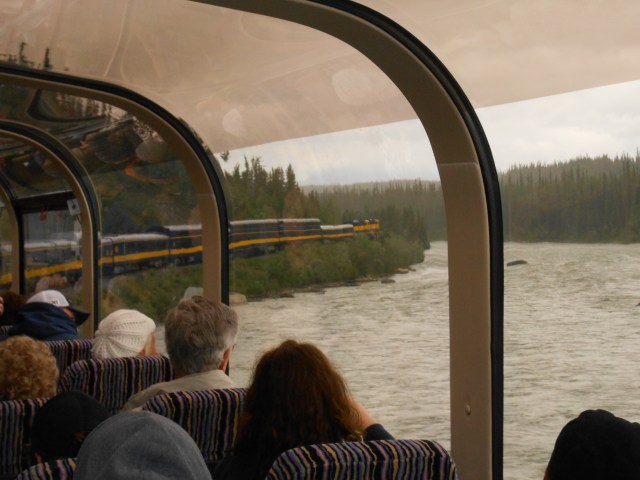
The train cars are wonderful!! The seats are nice and roomy and comfy…It was a lovely trip, full of gorgeous scenery as we made our way further to our new destination…
And of course, while on board, a Princess staff member told us all about the area and watched out for wildlife and so on. It was such a relaxing, lovely journey. 🙂
It wasn’t long before we pulled into the depot and boarded our motor coach that took us to the Princess Denali Wilderness Lodge, we would be staying there for 2 nights…
A Princess Representative met us at our motor coach and we were given our room key. Again, I was amazed at the room that we were given, and again, we didn’t pre-arrange to have this room. What I found out later was that our room was twice as big as others rooms. Trust me, one half of the room would have been more than sufficient, but, by the luck of the drawl, we were given a spiffy, upgraded room….
Our luggage was delivered almost immediately and after we got settled in, we decided to take a walk around the area, there were beautiful vistas no matter which way you looked…such a beautiful place.
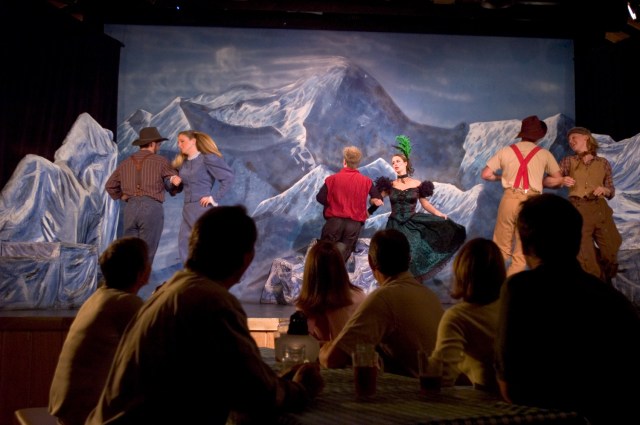
Later that evening, we had pre-arranged to go to the Music of Denali dinner show that is located on the Princess Denali Wilderness lodge’s premises and is only a short walk from our room. There’s a link there up there in red ^, to say that we had a fantastic time and were fed way too well would be an understatement; it was very, very entertaining and the food was excellent. I would highly recommend this if you are going to be in this part of Alaska.
We only had one more day on our land tour and we were supposed to go into Denali National Park on a school bus, but the hubby and I decided that we’d forego that trip and trek out on our own. He took a long walk and I did some laundry—yes, I actually did laundry in Alaska…haha…;) After he got back from his walk we took a nice stroll and crossed the road and did a bit of exploring at a little Alaskan style strip mall–wasn’t much to it, but there were some fun things to look at and we had the very best fish chowder we’ve ever tasted at a little rickety restaurant for which, for the life of me, I cannot remember the name.
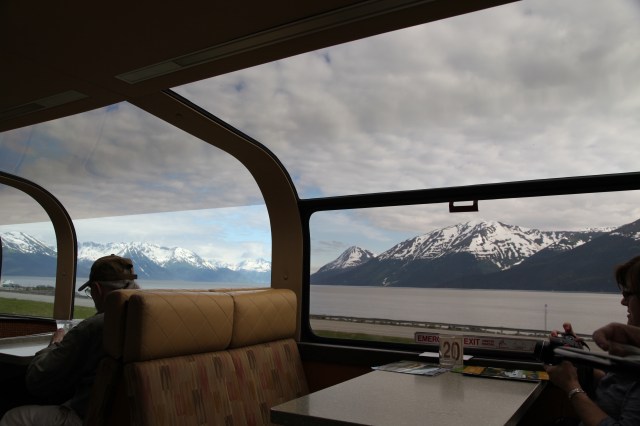
The next morning, they came and collected our luggage and away we were whisked back to the train depot and onto another rail car that would take us to Whittier (close to Anchorage) and our awaiting cruise ship The Diamond Princess. We ate lunch in the train with another couple–we don’t normally do that, we usually like to stay on our own, but it was lovely and they were quite a nice couple. The food was delicious. 🙂
To be honest, I would not choose to do this particular Itinerary again because this train ride was literally 8 hours long. As you can see in the picture above, you are given “assigned” seating and another couple joins you at your table–for the entire trip. Of course you can switch around tables and such, but it was a little awkward to spend that long trying to think of something to say. They offer a tour where you start in Fairbanks and work your way towards your cruise ship as each day passes so that means that you never have to spend an entire day traveling on a train or bus with strangers. I would definitely choose to start our next land tour at the furthest location away from the cruise ship and slowly work our way toward the ship. Needless to say, we were 2 tired campers by the time we made it to Whittier and through the tunnel (I describe the tunnel and how it works in my Alaska: Voyage of the Glaciers Cruise – Days 1 & 2 post).
I was quite happy to see the beautiful Diamond Princess sitting there grandly waiting for our arrival. We were the last group to board the ship at around 6:30 in the evening (normally, we’d be on the ship for hours by that time)…
There you have it, we were happy to climb on that ship. The first thing that we did was to dash off to find our mini-suite; we were bushed and ready for some relaxation and pampering. Regardless of that long, long train ride, we were quite pleased with the land portion of our vacation and we greatly enjoyed the cruise portion of our trip. We got to see gorgeous scenery, take an awesome jet boat excursion, a couple of train rides, and for whatever reason we got to reside in the creme de la creme rooms that are offered…haha. Once again, Princess didn’t disappoint!
I am going to give my hubby some of the credit for giving me the idea to accent my country decor with rod-iron pieces. When we moved into this new house, I wanted to take my decorating up a notch, meaning I wanted to pull away from having walls full of this, that, and everything that goes with this and that. 😉 I wanted this home to look warm and cozy which of course country decor definitely invokes but I wanted to be really careful and not fill every available bare wall and tabletop with a plethora of ‘foofoo’ <~~~hubby’s word for random decor pieces~~~. At first I was a little afraid of the rod-iron. But, now that I’ve incorporated it into almost every room in some way in our home, I love it. I feel as if I’ve been able to keep the warm and cozy feel of our home intact with a bit of sophistication thrown in for good measure. 🙂 I will show you how and where I’ve incorporated said scrolly’s’…but first, let me explain a bit of how I came to utilize said pieces.
When we where choosing accents for this new home with our builder, we chose oil-rubbed bronze for all of our light fixtures and door hardware. I didn’t know it when we were making those choices, but, they provided us a wonderful pallet with which add our dark furniture and later those rod-iron scrolly pieces. 🙂 In addition, we had chosen this gorgeous mirror for over our fireplace and its design inspired me greatly (hubby picked the mirror btw…he has a great eye).
Our builder provided the lighting over the kitchen island as an upgrade so in turn that provided us with the style that we took through the kitchen, into the dining room, and ultimately into the foyer.
We only purchased the island lights from our builder, my hubby found the other 4 accompanying fixtures online and purchased them that way (for a good bit less than we would have paid via our builder) and he installed them himself.
Here is the light fixture that hangs over the kitchen table:
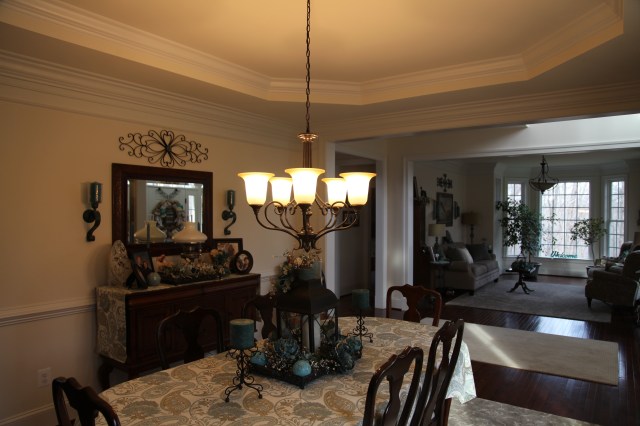
Here is the light fixture that hangs over the dining room table:
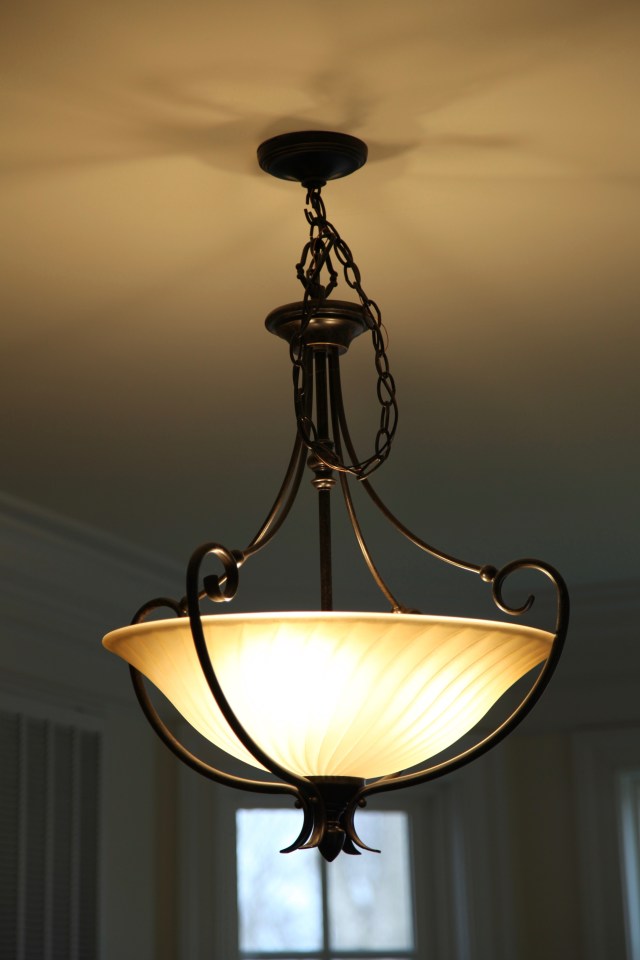
And this is the light fixture that hangs in the foyer. I had to look away when the hubby was up on a huge ladder installing this puppy…talk about precarious! Whew!!
The hubby installed one more light fixture and that was in our living room:
As you can see, all of the light fixtures are the same style and once installed really pulled the entire lower level together.
In addition, I chose a couple of lamps that I felt paired nicely with the light fixtures…
And we refurbished this floor lamp which is metal…
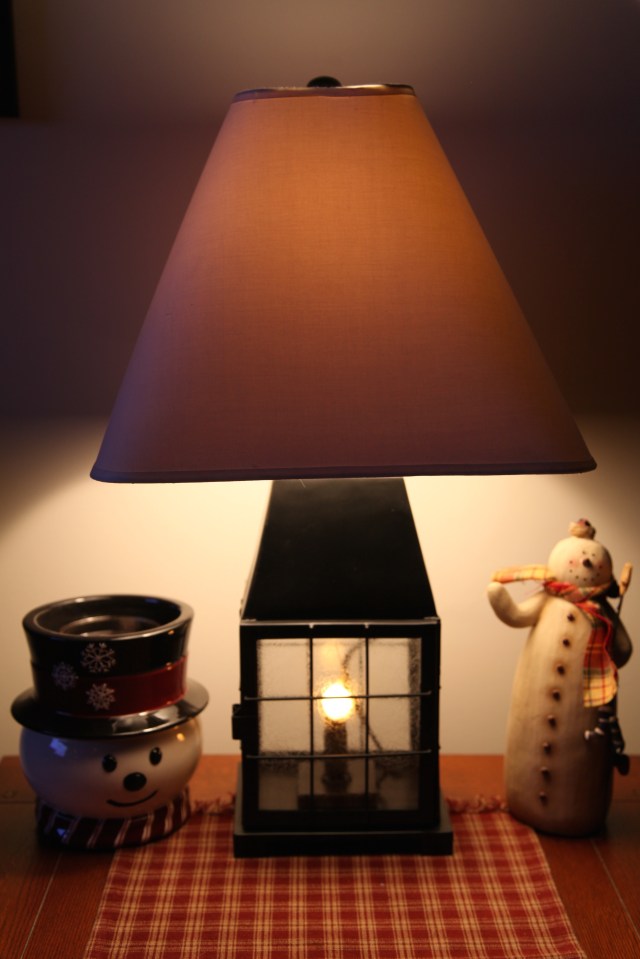
And this is a light that sits in one corner on the kitchen countertop:
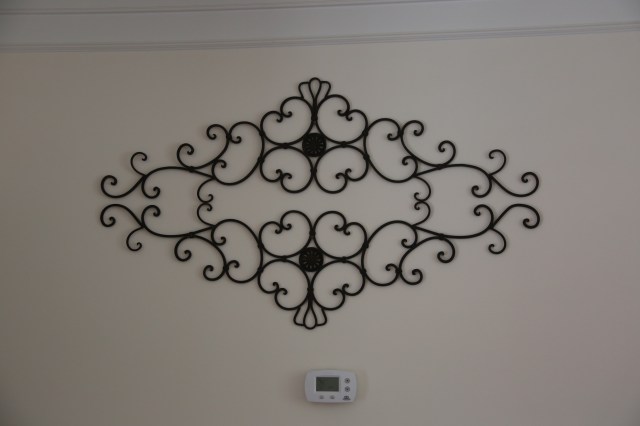
Now, onto how I came to start using the rod-iron scrolly accent pieces. The very first place with which we utilized some scrolly’s’ was at the top of our staircase. You can see that space from wherever you are located in our family room and kitchen areas and it looked nekkid up there. My hubby is the one that came up with the idea to put two scrolly pieces together to make one large wall unit.
I love the look of that and little did my hubby know…he had created a monster! I will now show you where else I’ve placed these scroll’y’ accent pieces throughout our home. They add just a little somethin’ somethin’ to the space in which they reside…
The dining room:
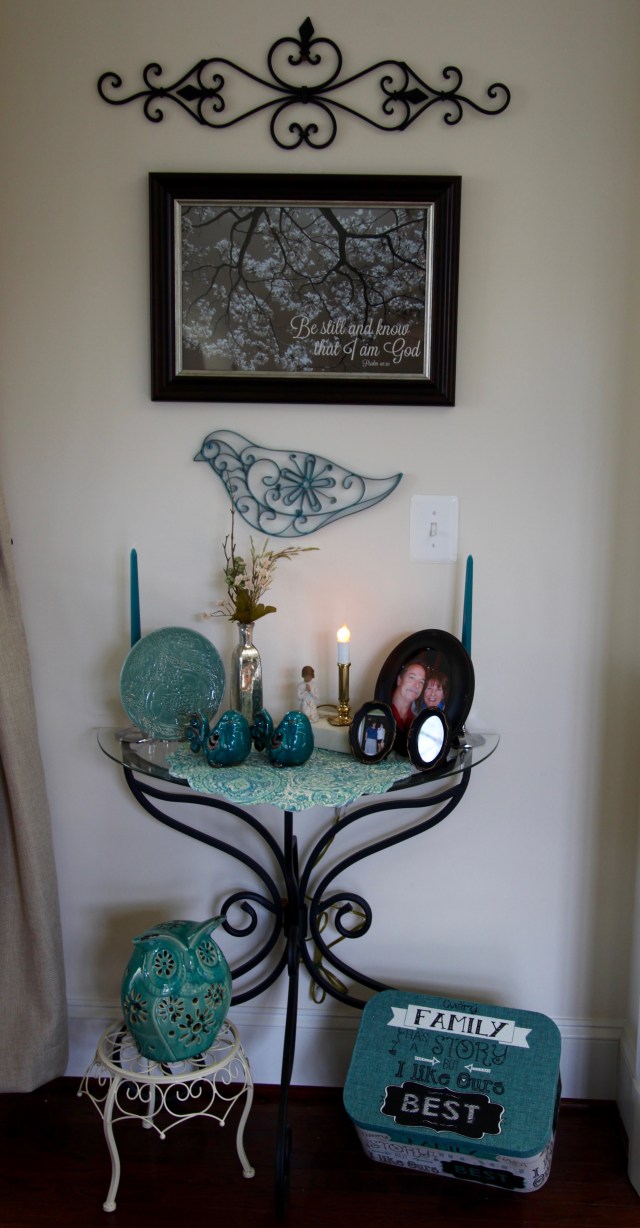
The foyer:
The living room:
The family room:
Here are some examples of how I’ve used pieces in our bedrooms:
I’ve also used black and oil-rubbed bronze metal pieces for sconces, wreath hangers, shelves, and as accents on wreaths. In addition, I’ve utilized some in lanterns and other table top candle holders to augment the wall pieces…Here are a smattering of examples:
I am quite happy with how incorporating what one might construe as a cold accent piece into a warm surrounding upped my entire design theme throughout the house. 🙂
Until next time, y’all take good care! ❤
**In crafting there are no mistakes just unique creations**
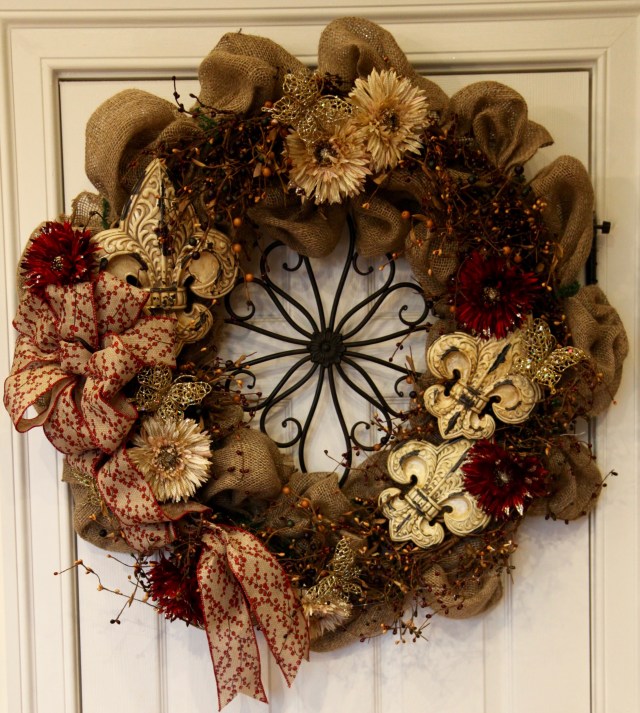
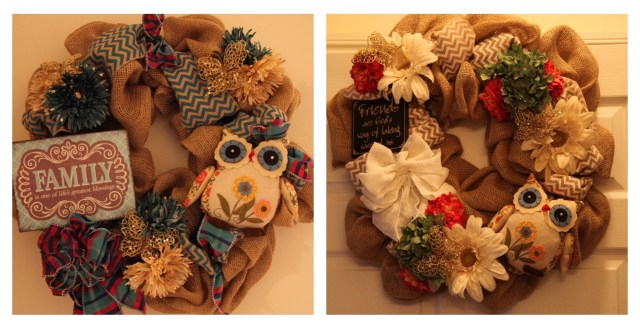
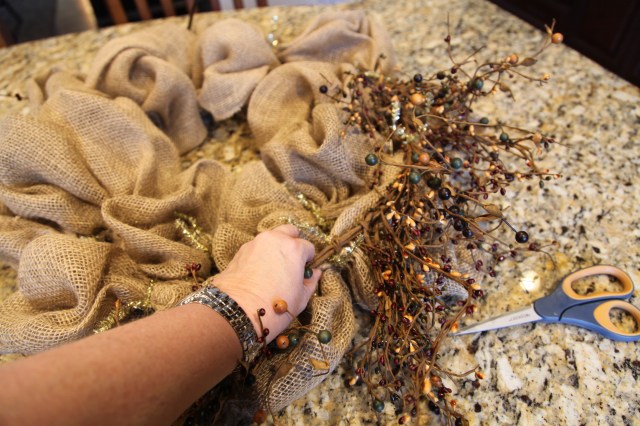
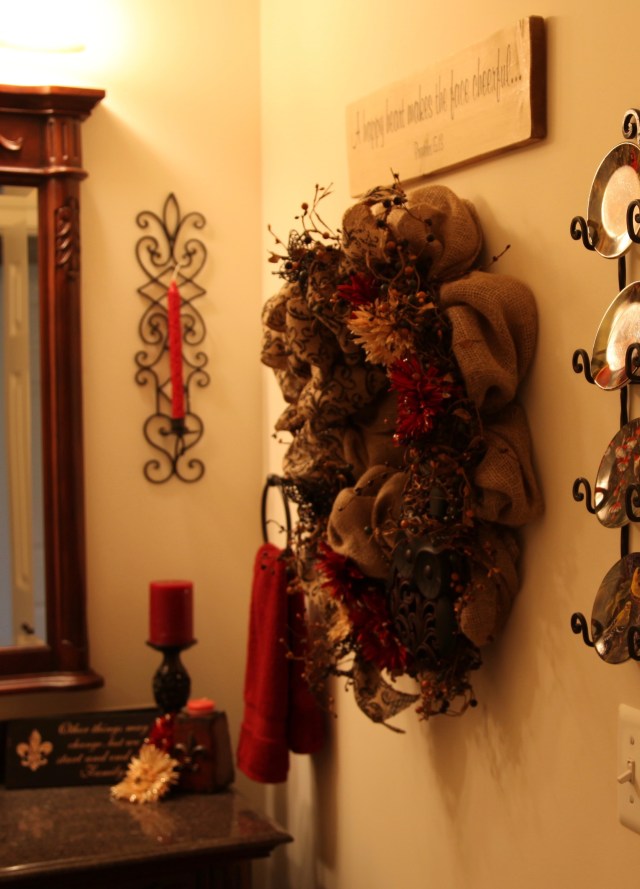
It has become obvious that I have a real affinity for adding owls to my wreaths…after all they are cute little creatures. 🙂 Here are the wreaths that I’ve made in the last year that I’ve adorned with an owl…or two… 😉
Of course, I don’t have all of these hanging up at one time, and the one on the bottom right was given as a gift to a dear friend. BUT, as you can see, owls are often my choice with which to build an entire wreath. 🙂
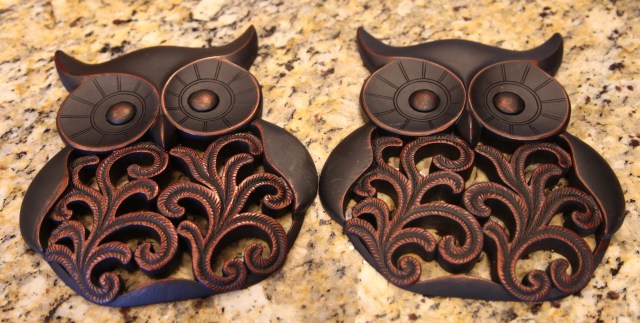
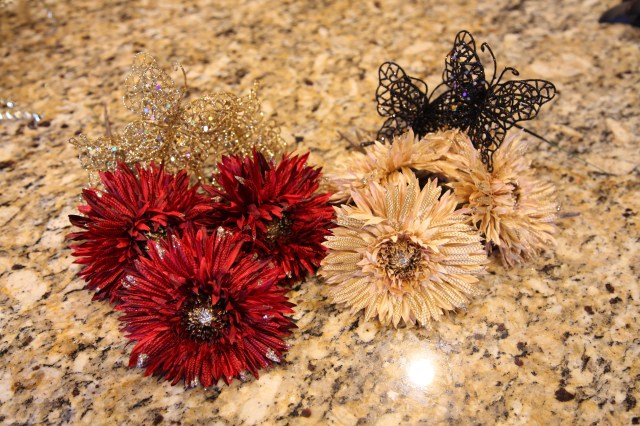
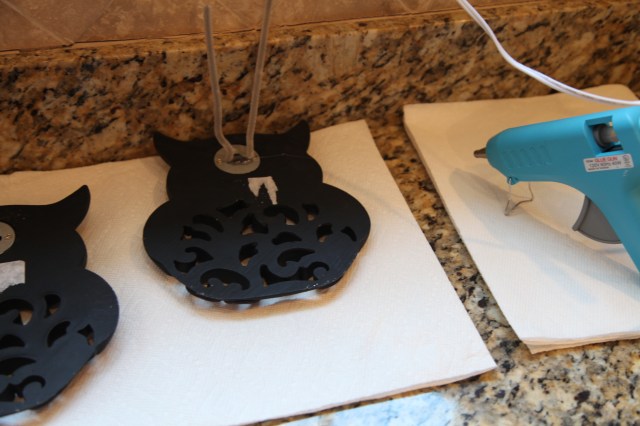
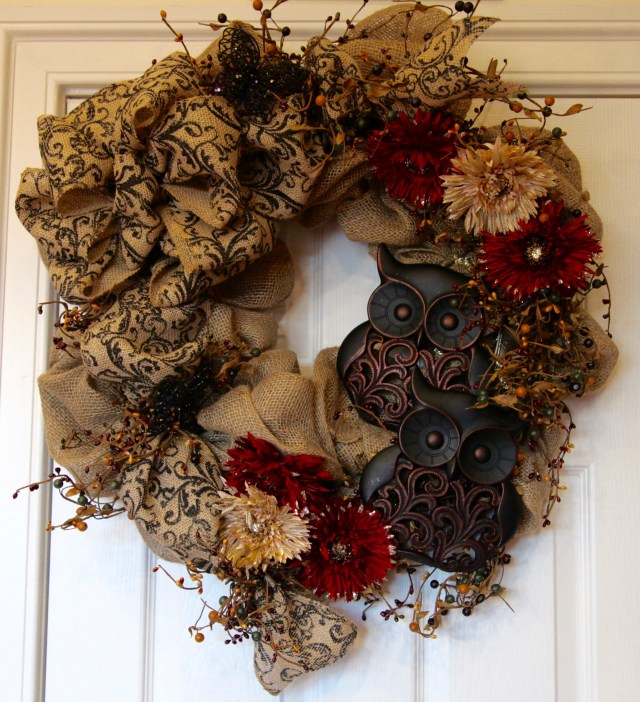
That said, I did not surprise myself when I picked up these two wrought-iron *looking* owls (they are really resin, still pretty heavy though) and started formulating a plan for a wreath that I wanted to make for my powder room.
Here are the other supplies that I collected so that I could bring the wreath that was in my mind’s eye to fruition:
Work Wreath (90% off at Hobby Lobby)
Burlap ‘Runner’ (1 – 1/2 Skein)
Pip Berry Runner
5″ Burlap Ribbon (for a bow)
Burgundy and Khaki colored daisies
Sparkly Butterflies
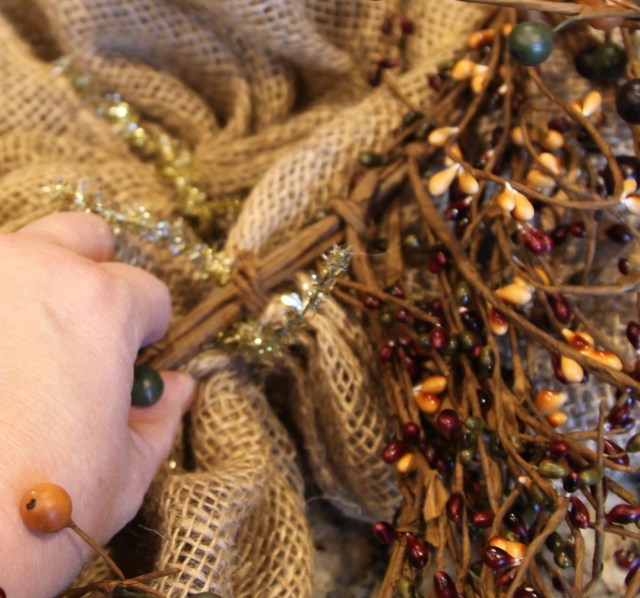
The first thing that I did was to hot glue pipe cleaners onto the back of those owls…they were pretty heavy and pretty big so I knew that glueing them onto the wreath was not going to be an option, the pipe cleaners provide a nice sturdy way with which to attach the owls to the wreath…
The next thing that I did was to make a bow out of the burlap ribbon…This was not wired ribbon, but it sure did make up into a pretty bow. I just taught myself how to make this kind of bow at Christmas time, check out this link to see how I learned: Big Beautiful (Christmas) Bows…
I then started to build my wreath; so as not to bore you with the “how-to” details here, if you’d like to know how I put my burlap wreaths together here is a link to my Front Door Burlap Wreaths post, in there I describe my process…
As you see in the pictures of the wreaths that I’ve made, I usually will attach a contrasting colored burlap or ribbon to the wreath to add interest. But, I did a little something different with this wreath in that instead of a contrasting burlap or ribbon, I used a pip berry garland. I attached the garland to each of chenille pipe cleaners on the outer ring of the wreath (I just added it right on top of the burlap that I had already attached)…
After that, I tied the bow onto one side of the wreath and the owls onto the other side and I placed the flowers and butterflies where I thought they looked nice and hot glued them in place. I took a moment to fluff out the pip berries and the burlap. I pulled one of the bow tails up and around the top and caught it in a couple of pip berry twigs and I did the same thing under the bow and around the bottom of the wreath; I cut the tails of the ribbon into an inverted ‘v’.
In the end, this is what I came up with:
And here it is hung up in its spot in the Powder Room:
I truly do love the creative process and am very happy with how this wreath turned out. It fills up that wall nicely and it will be a lovely every-day wreath. It will most likely hang there until next Fall.
Until next time, y’all take good care! ❤
**In crafting there are no mistakes, only unique creations**
I try to be a positive, upbeat person all of the time, I figure I have so much to be thankful for and I’m extremely grateful that I can put my feet on the floor each morning and traverse through my day with only a semblance of pain (in my knees…stupid things). Regardless, I would be fibbing if I said that I am a lover of the winter months because honestly, looking at the trees devoid of leaves is not my favorite site to behold. 😉 SO, I try to brighten my world a bit by adding some pops of my favorite color red into my outdoor decor, nothing too over the top just a little bit of somethin’ somethin’ here and there.
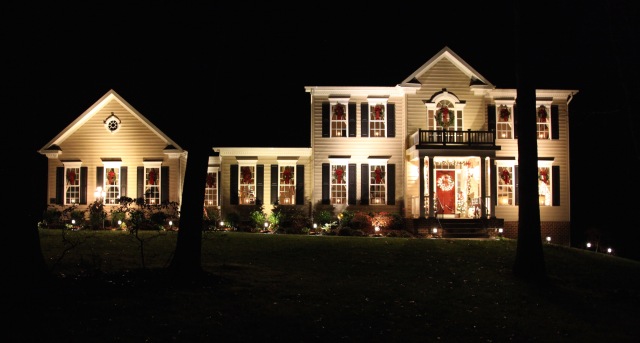
This was the house all decked out for Christmas:
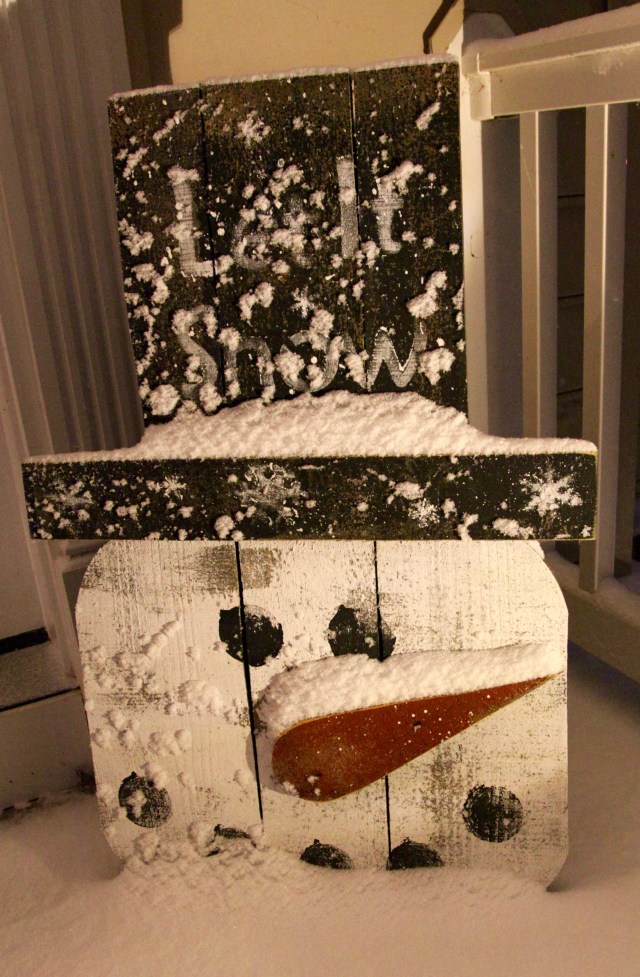
We had wreaths on all of the window, and I decorated the front porch with little lit trees flanking the front door, lit garland around the door, and with my little red wagon filled with Christmassy accents. I also added that great “Let It Snow” Snowman:
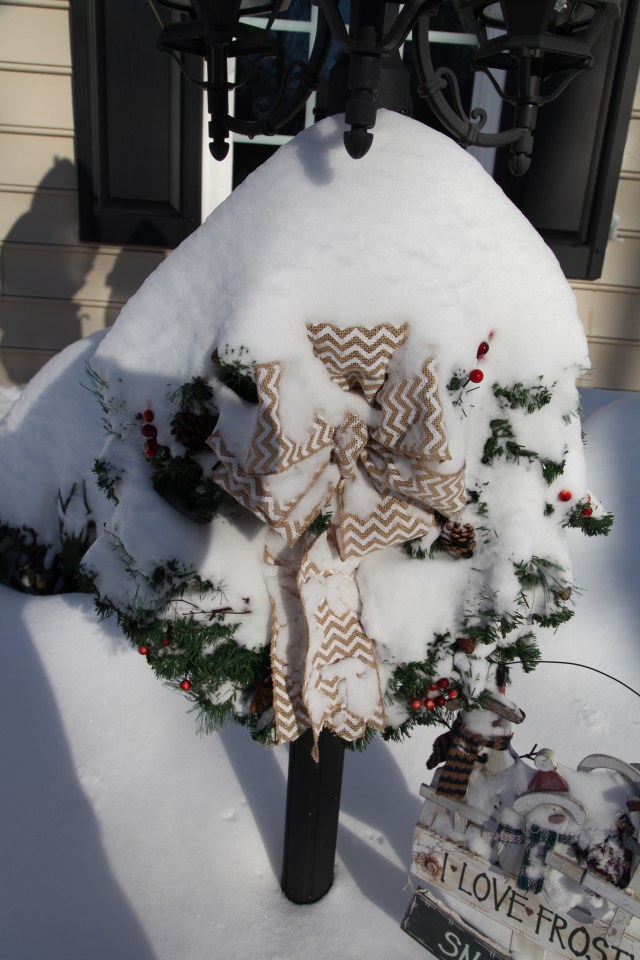
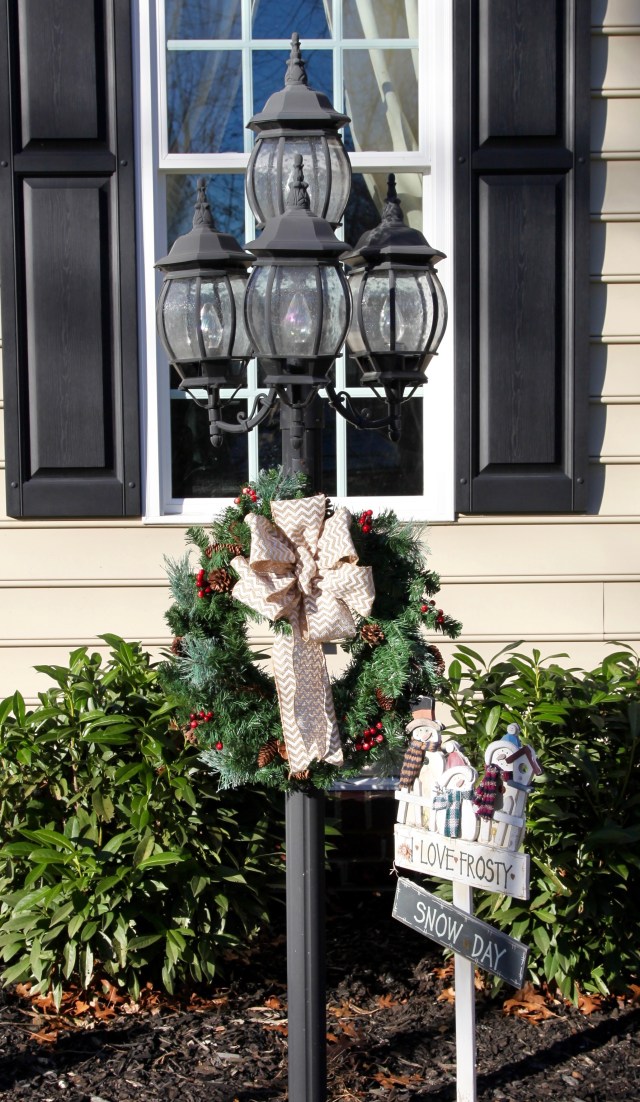
I was completely thrilled with those decorations, and transitioning over to a more generic decor was going to create a less festive approach to the front door. Regardless, I soldiered on…The first thing I did was make several bows to go on the front door wreath along with the light post wreath, wagon wheels wreath, and mailbox. I didn’t want to go and buy new ribbon for this task, so I went to my honey hole (where I keep all things crafty) and found that I had enough of this white and burlap chevron ribbon:
I didn’t change out all of the wreaths out from my pine wreaths, instead, I just changed out the bows:
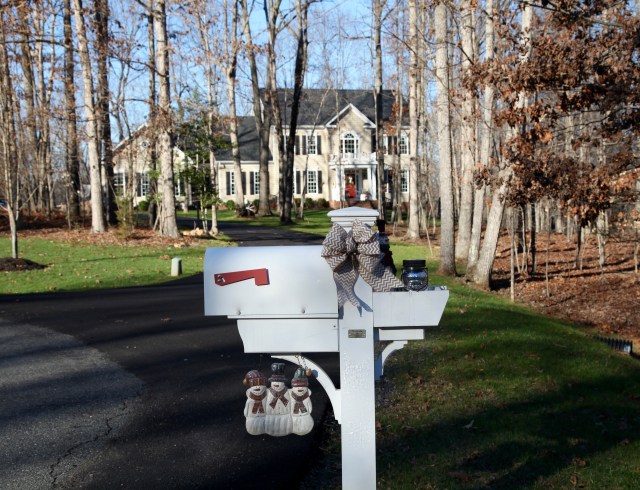
I did hang up that snowman trio — I change out that sign with each season, I’ve gathered quite the collection of these signs over the years. They are actually meant to hang on their own holder; I get them from Piper Classics, check out that link and you’ll see what I’m talking about. I choose to hang my signs on my mailbox though as here in our neighborhood it is the *in* thing to decorate up one’s mailbox…well, I’m all over that! lol 😉
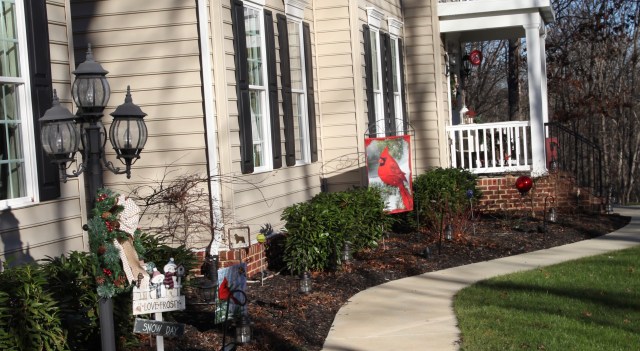
I changed out the decorative flags in the front flower bed to ones with a wintery scene and with cardinals <~~A pop of that red color that I mentioned above….
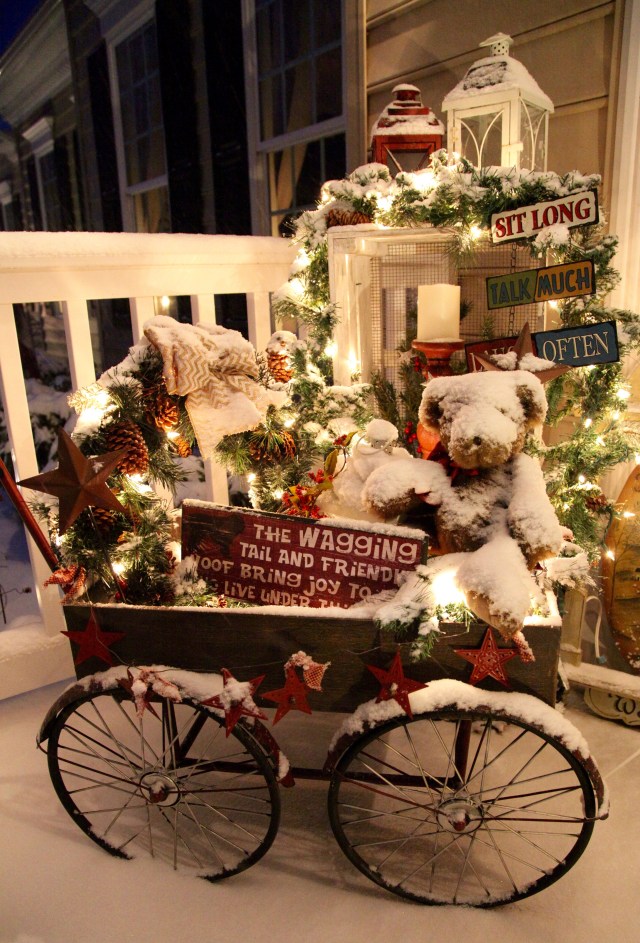
Then I set to the task of tweaking the little red wagon decor, I certainly didn’t recreate the wheel here, instead I did more removing of the Christmas decor. I left the pine wreath and the lit pine garland (looks pretty in the evening), and I added back in my favorite doggie sign (pop of red), a bear (his bow is red), and a few other little items that add a bit of interest and they have touches of red as well–the little sign that is hanging on the crate and the red star ‘garland’ hanging on the front of the wagon. I really do love red and tend to gravitate toward it a lot. 🙂
I chose to leave the Snowman sign on the other side of the porch…
Gracie the Golden and Samson and Sophie the Newfoundlands approve. ❤
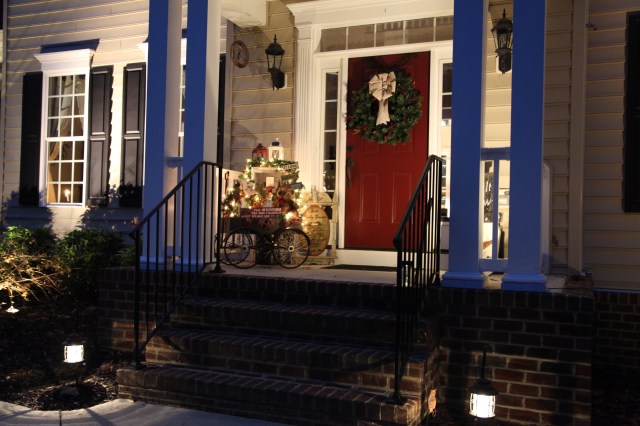
Here is the wagon in the evening hours:
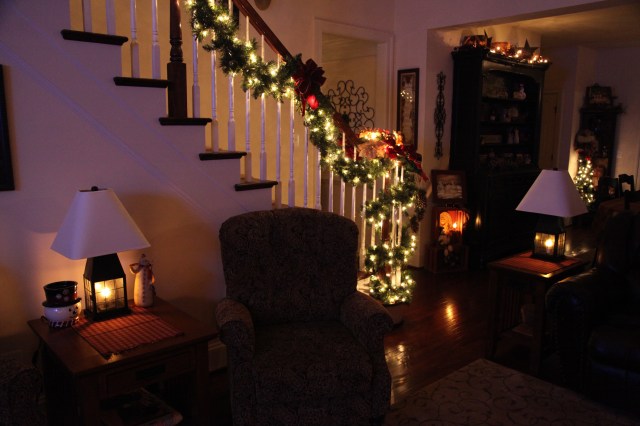
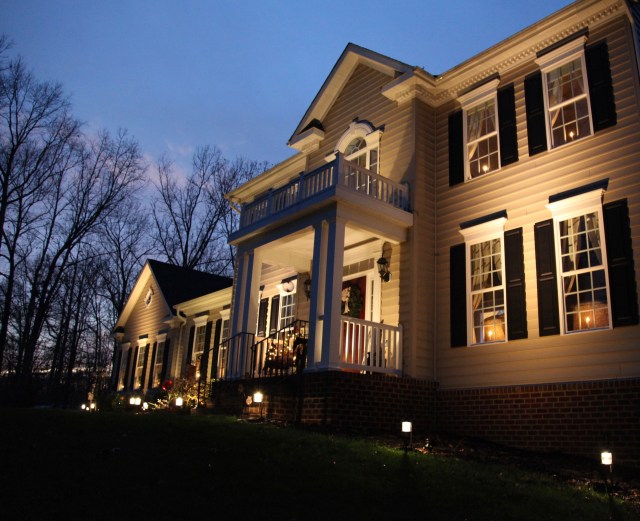
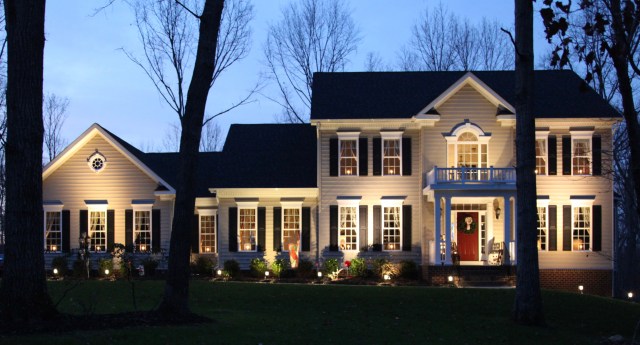
And here are a few pictures of the house in the evening hours. My hubby worked really hard on all of the outdoor accent lighting, if you’d like to see what he did with up lights and wash lights, check out my blog entry entitled Special Outdoor Lighting.
So, now that everything is redecorated for the winter months, I think I might take a little break…uh huh, sure I will! 😉 Honestly though, I’m not positive what I’ll get into next, but, I’m sure it will have something to do with making something to add to this house that is gradually becoming a home filled with warmth, love, and cherished memories with each passing day.
Until next time, y’all take good care! ❤
**In decorating there are no mistakes, just unique creations!**
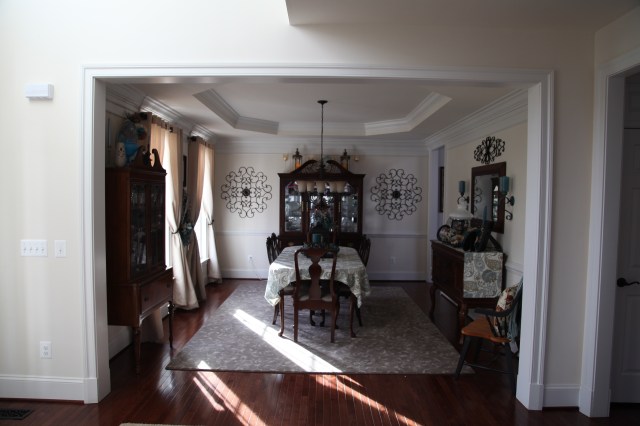
Now that the decor in the back of the house including the staircase was completely transitioned over to my every-day decor, it was time to tackle the two rooms that sit on the front of our home, the living and dining rooms that are separated by a foyer. I was able to complete these rooms in one day.
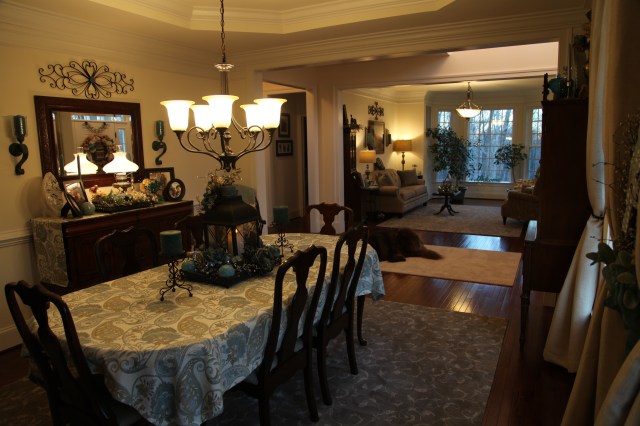
The first thing that I did was to change out the dining room table’s tablecloth and the sideboard’s table runner. I was thrilled that I found a matching set last Spring (I found the tablecloth at Home Goods and the table runner at World Market). 🙂
I love the paisley pattern, it pulls in all colors that are in the room and highlights the green color that I use in most of my accents; they couldn’t be more perfect. 🙂
The first thing that I decorated was the sideboard, I started with that pretty lamp…
**A bit of a back story on the lamp, it was my Grandmother’s and she passed it down to my Mom who cherished it for many years. My Mom, bless her heart, passed away a few years ago and now the lamp belongs to me and I will cherish it for the rest of my time on this earth. It is a very special family heirloom**
That said, I placed the lamp on a mirrored tray and I built a flower arrangement around the lamp, much like I do with my lantern centerpieces.
As you can see, I also added a strand of timed battery operated mini warm white lights…Here is a better look at it in the evening hours:
I added some family pictures, a lovely bowl displayed on a plate holder that my aunt and uncle got us as a housewarming gift, and I threw together a little flower arrangement in a mason jar to match the arrangement around the lamp:
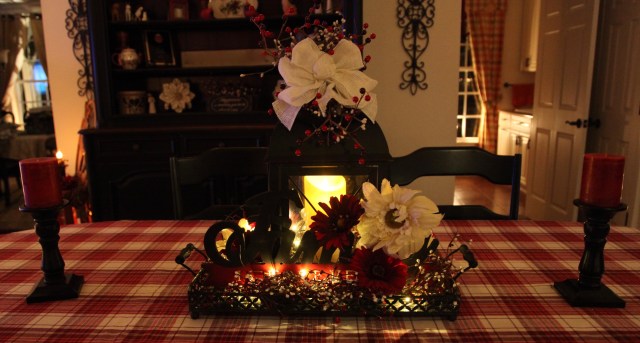
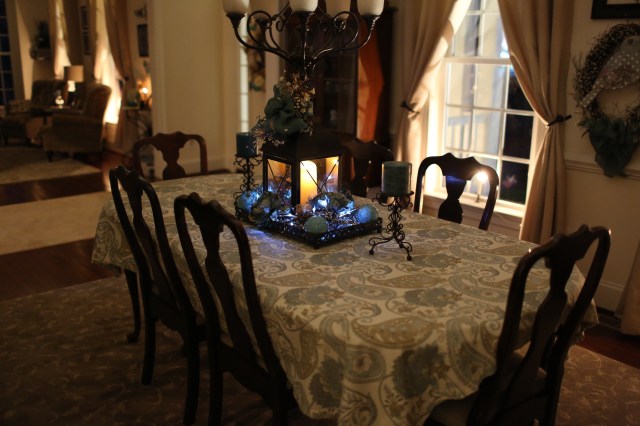
Then I moved on to a lantern centerpiece that I would place on the dining room table. I won’t go into great detail as to how I put it together here, but if you’d like to know more about the ins and outs of creating a lantern centerpiece, check out my A Dressier Lantern Centerpiece post.
That said, there is one thing that I want to tell you about before showing you pictures of the completed centerpiece. I found these LED bendy branch lights at Michaels and I just couldn’t pass them up. They glow a blueish green color and look beautiful lit up in the evening hours. 🙂
Here are the lights that I purchased (if you search for these, please be careful to make sure that the the branches bend, they do sell ones where the branches are stiff and those of course wouldn’t work in a flower arrangement):
I decided to use one of my Luminara battery operated candles in this lantern, it came with a remote control, but, actually I have set the timer on the candle itself, it comes on in the evening and stays on for 5 hours…
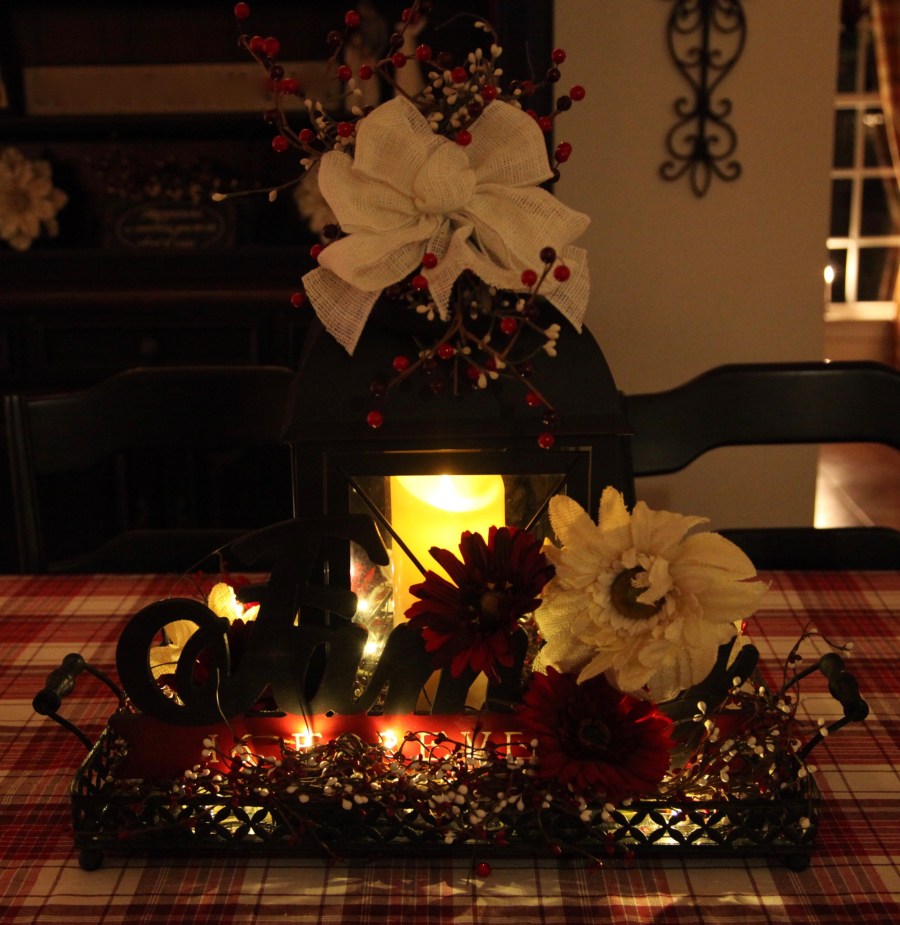
Here is the finished centerpiece:
And in the evening with those pretty bluish lights on:
Then I moved to the foyer, I simply replaced the Burlap Snowman Wreath with this one:
If you’d like to know how I put this wreath together, check out my blog post entitled Front Door Burlap Wreaths:
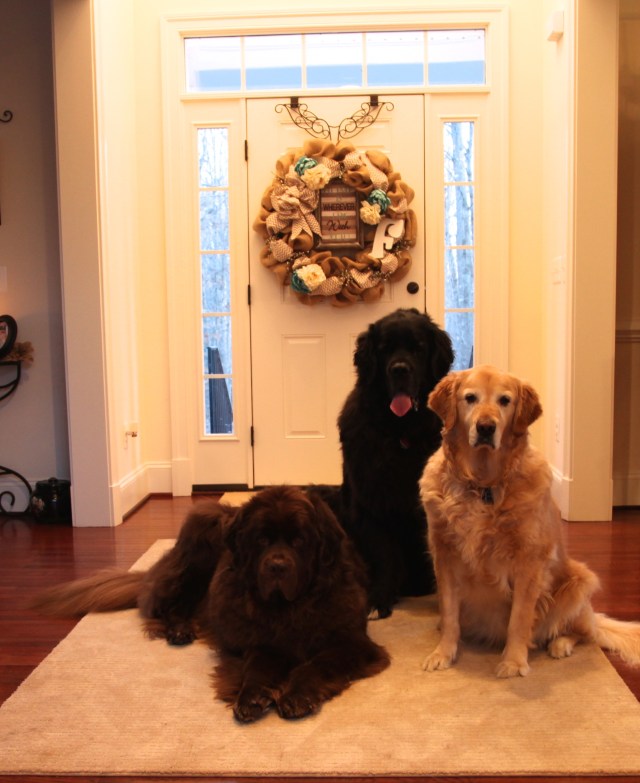
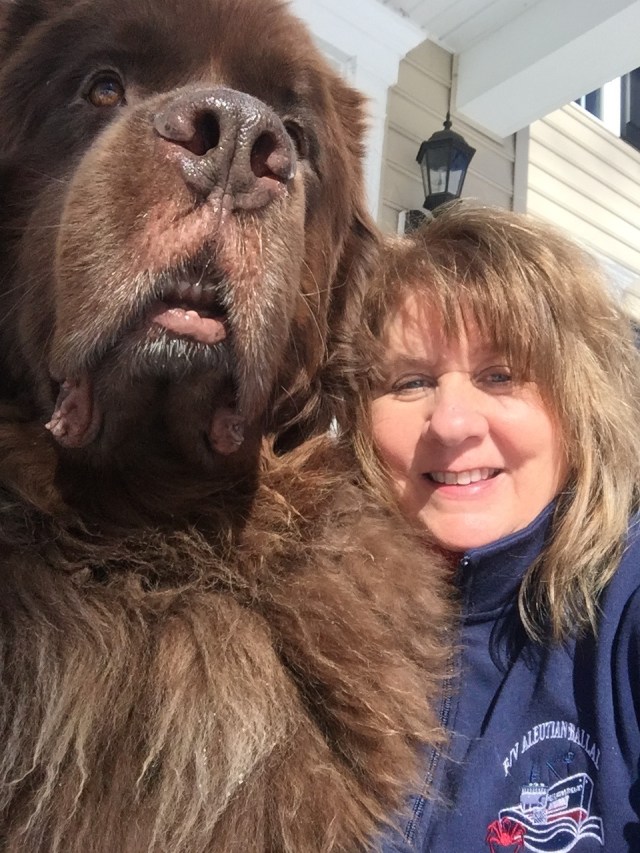
Here is my ever vigilant helper Samson the Newfoundland, this boy is never too far from my side, he is great company and I just adore this fella!!
And here are all three of our pups, the Newfoundlands Sophie and Samson and the Golden Gracie. ❤ ❤ ❤
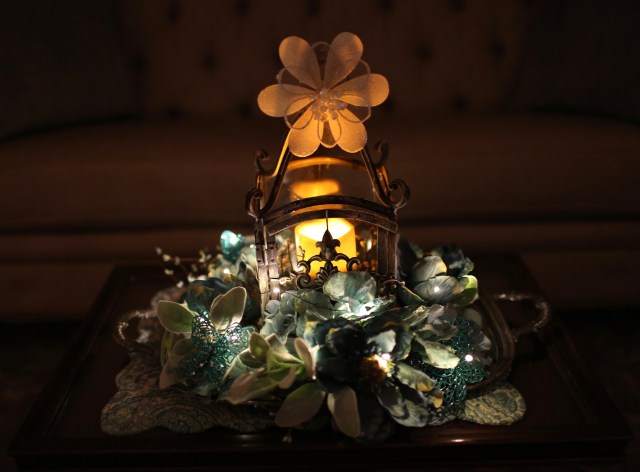
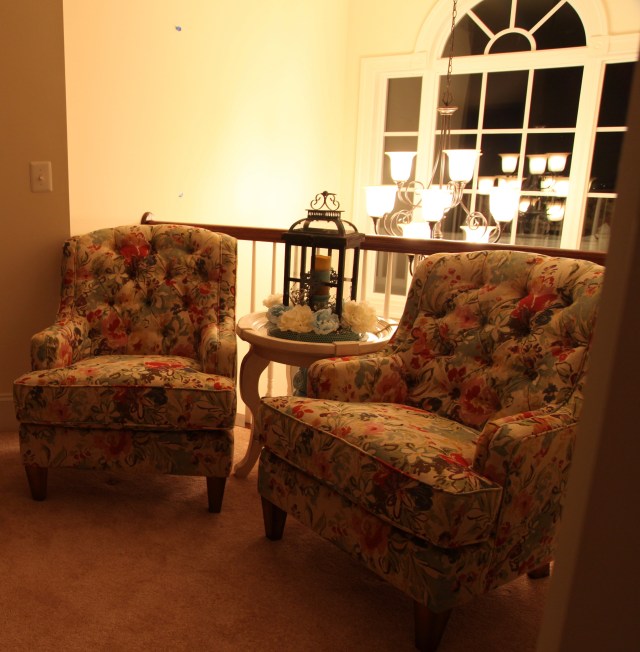
I finished my decorating by moving to the living room and placing just a few accent pieces and pictures on my secretary and on a glass table grouping. I also redid the lantern centerpiece on our little coffee table:
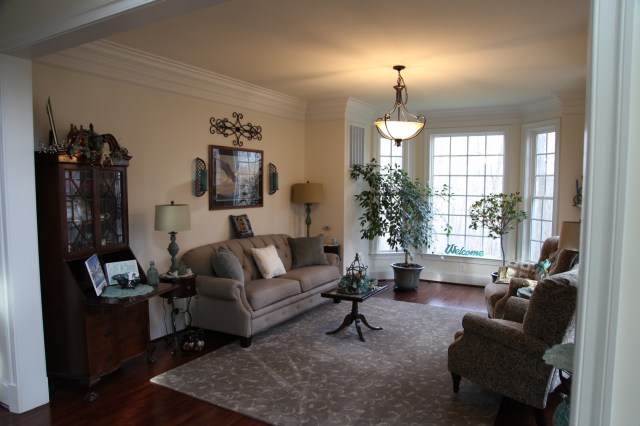
Here is a look at the finished rooms:
And with that, I had completely transitioned all of my indoor decor from Christmas back to my every-day theme. I do love Christmas but, I will admit that I was quite happy to get everything back to normal. 🙂
I have one more post to do in this little block of entries and that is one describing what I did outside…and that wasn’t all that much honestly, but, it did include redoing my little red wagon decor…
There it is from a distance:
Until next time, y’all take good care! ❤
**In crafting there are no mistakes just unique creations**
The hard part of my transformation from Christmas to my every-day decor was finished. The Staircase Decor, Fireplace Decor, & Family Room (along with the surrounding corners and shelves) always takes the most time and effort. (I inserted posts that describe those specific spaces). In this post, I’ll be highlighting the kitchen, kitchen eating area and surrounding area including a couple of cozy corners. I will not bore you with the “how-to” details in this post. I will provide you links to my “how to” posts along the way and they will show you how I put together my cozy corners and lantern. 🙂
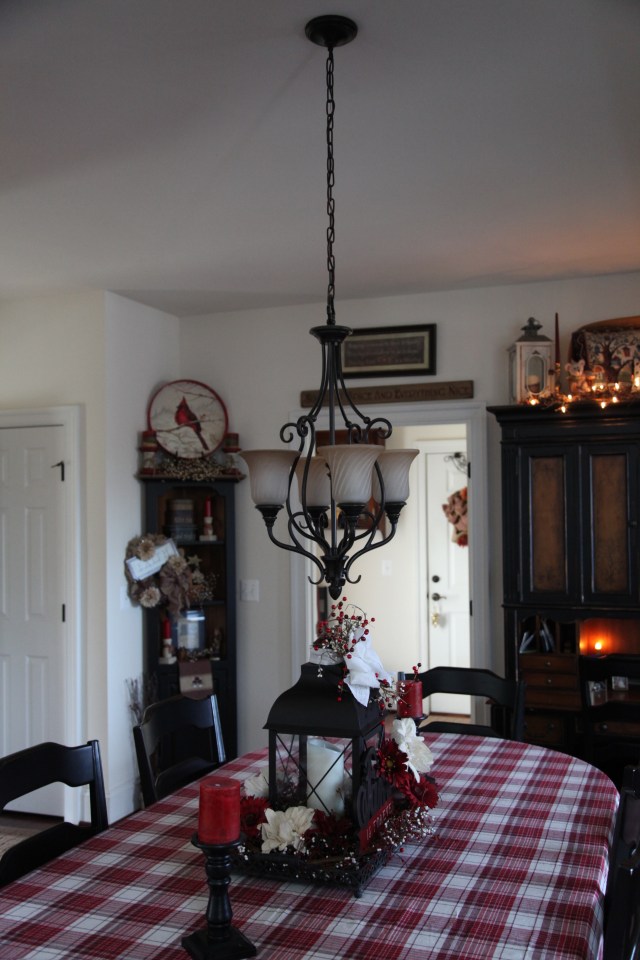
Here we go…I started by switching out my tablecloth on the kitchen table and then I created a lantern centerpiece…
Here is a link to my A Lantern Centerpiece For All Seasons post, in that post I describe how I take this same lantern and tray through the Seasons. 🙂
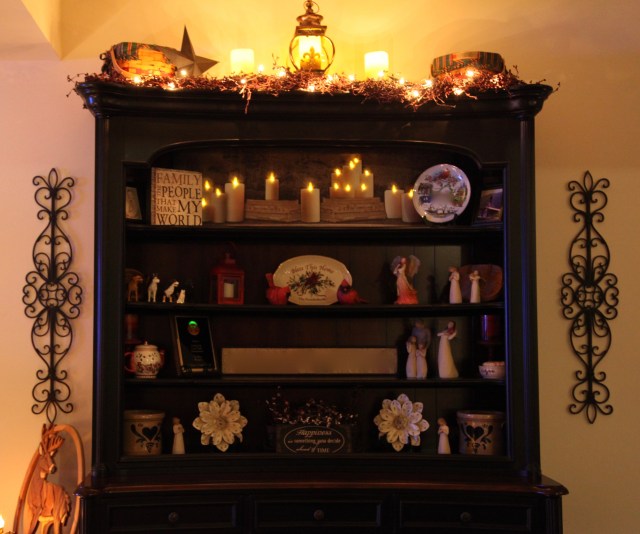
Next, I worked on my kitchen hutch:
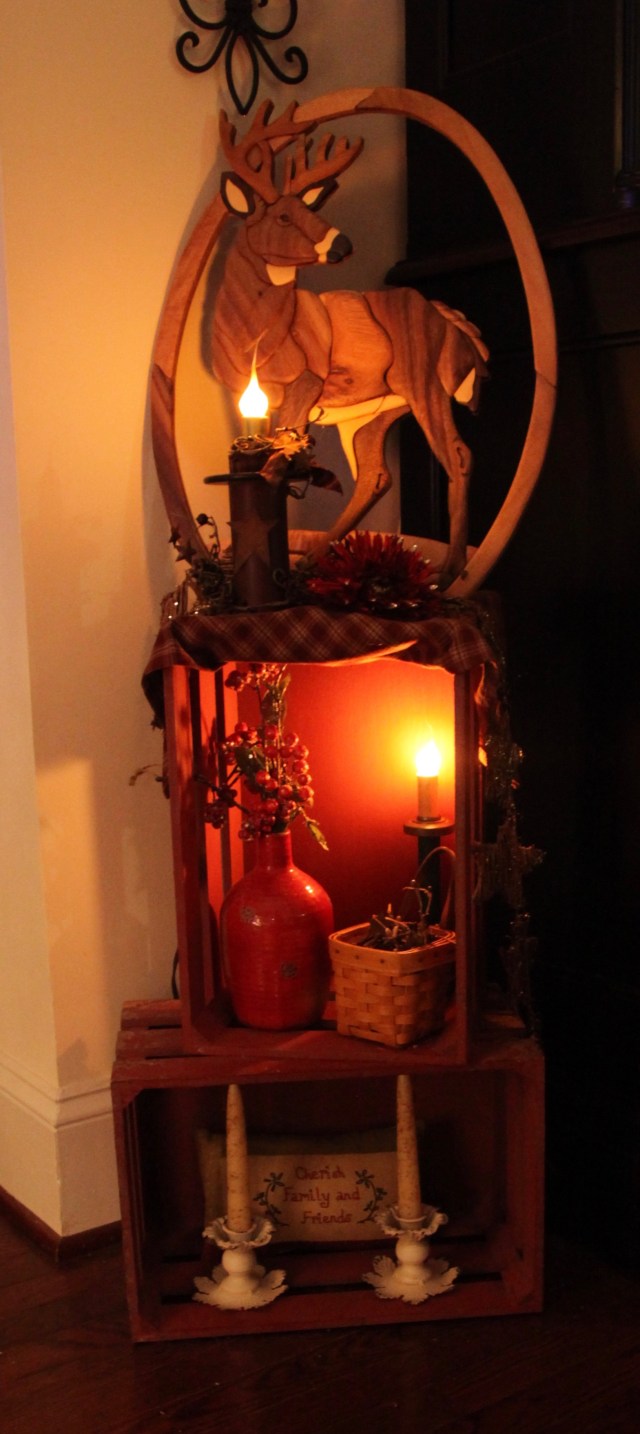
And then a cozy corner that sits to the left of the hutch:
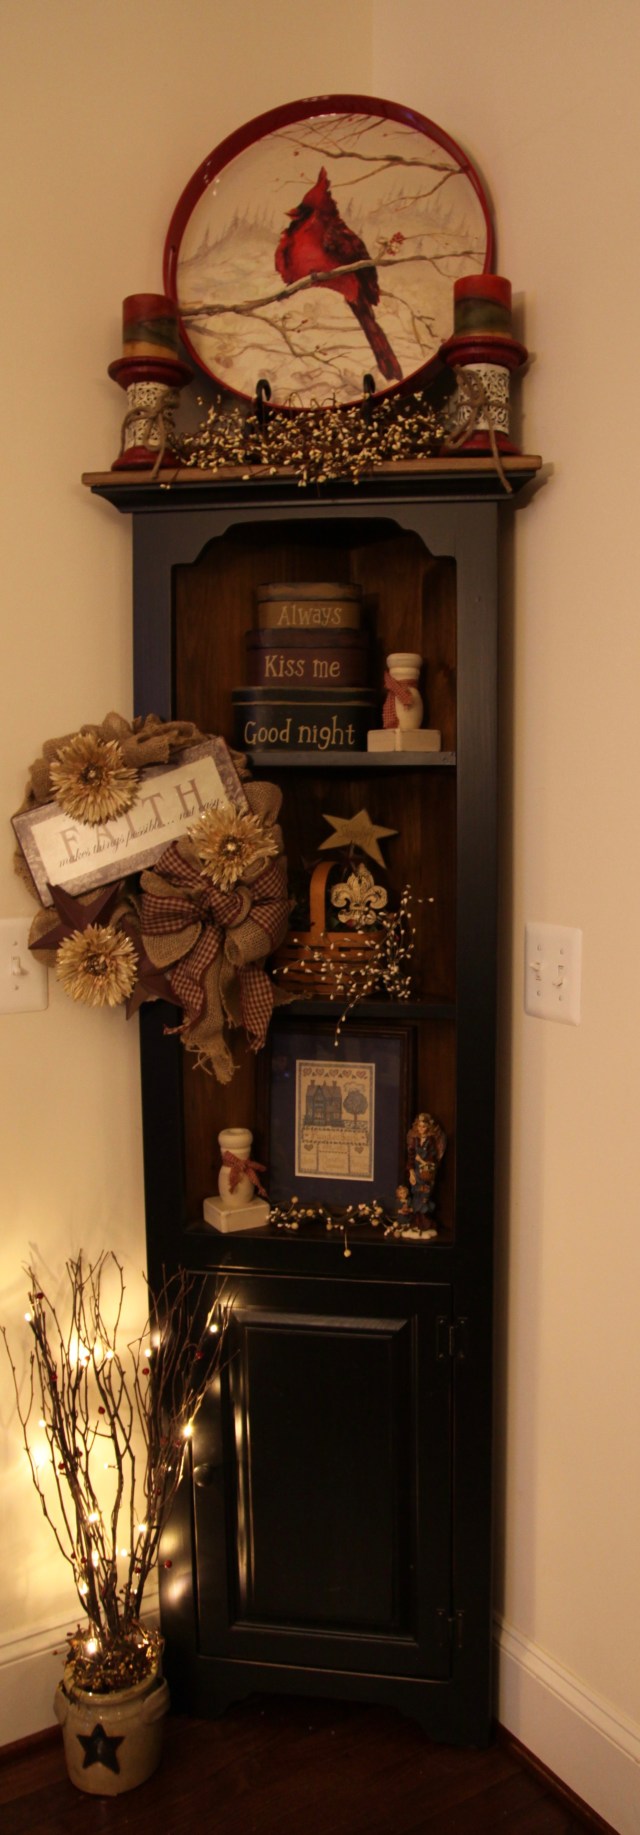
I have a lovely corner shelf, that is what I worked on next:
And then I moved into the powder room:
I added a few little things to this grouping that sits on top of the kitchen desk:
And then I moved on to the kitchen windows:
After I got those windows finished, this side of the house was done!!!
Yippee Skippee!! I did the “Happy Dance”!! It felt so good to get all of that accomplished. 🙂
Here is that link that I promised to provide y’all to my How To Create Cozy Corners and More post. There is a plethora of info included in that link. 🙂
I still had the living and dining rooms left to do, and I did a little tweaking to the outside of the house as well. Both of those posts will be coming up in the next couple of days…stay tuned. 🙂
Here is a sneak peek of the living and dining rooms:
Until next time, y’all take good care! ❤
**In crafting there are no mistakes just unique creations**
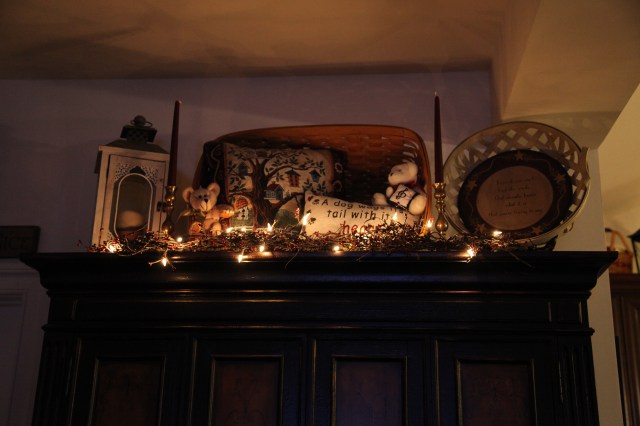
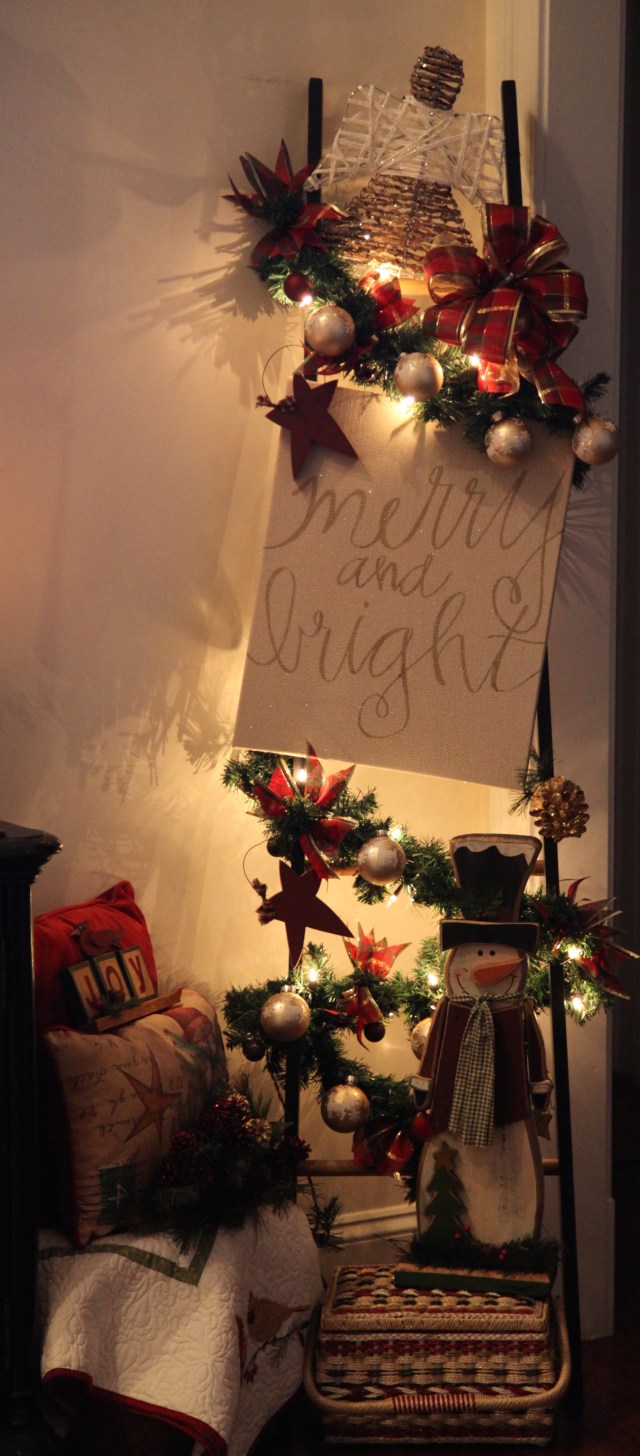
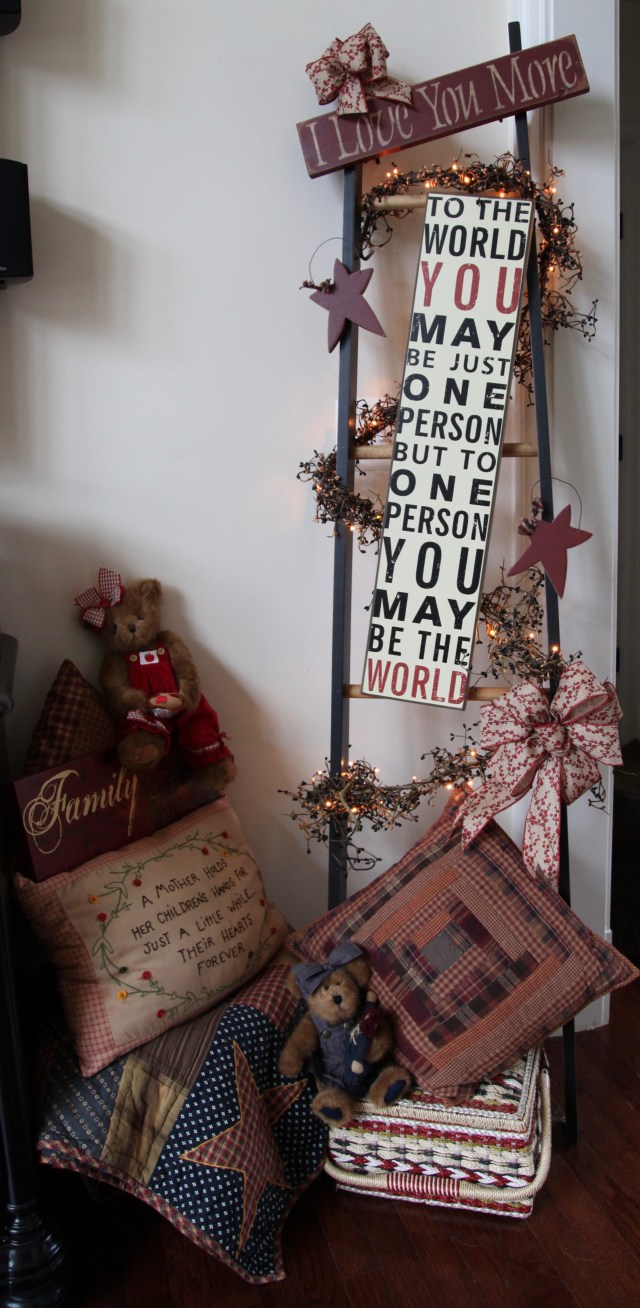
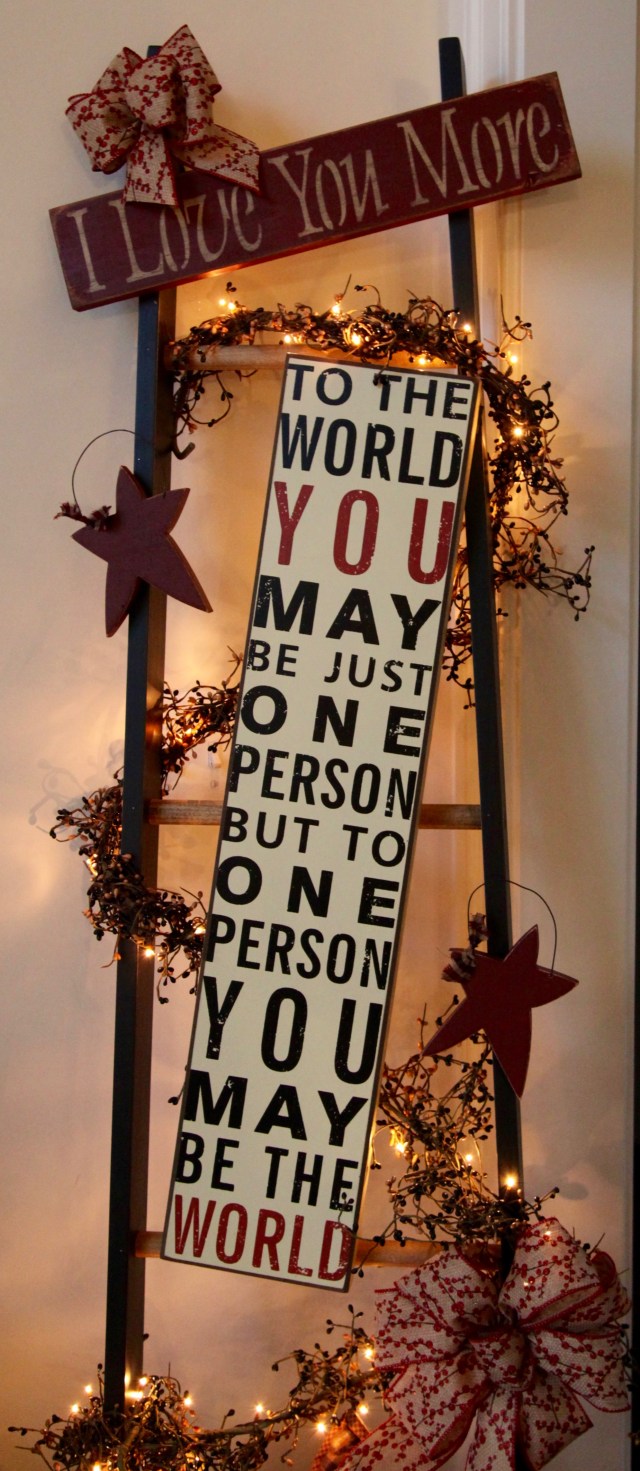
Now that the staircase bannister and the fireplace decorations were transitioned over to a more every-day sort of look, I started to work my way around the rest of the family room. The first project that I took on was this “Cozy Corner” <~~~My name for a grouping of decor that is well thought out and planned to go into a certain space>>>. I have many such corners in my home but, in this case, this is the corner that I was fixin’ to transform:
I hated to take that apart as I was really happy with how the Christmas decor turned out (this year was the first time I had decorated that ladder for Christmas). Anyway, I disassembled this grouping and packed it away for safe keeping and I started to gather the items that would make up my new grouping.
The first thing that I did was to wrap a pip berry garland with a set of 50 deco lights; they are teeny tiny and are so pretty peeking out from the pip berries.
Let me pause here and provide a link for y’all. I wrote up an entire blog post describing how I put my Cozy Corners together, here is the link to my Cozy Corners & More post. I *will* let you know for this project that I did have to glue some pipe cleaners on the backs of those plaques so that I could tie them onto the rungs of the ladder…Note: I had tried to use Command Strip Velcro, but it just wouldn’t hold.
That said, I’ll just show you how this turned out in the end. 🙂
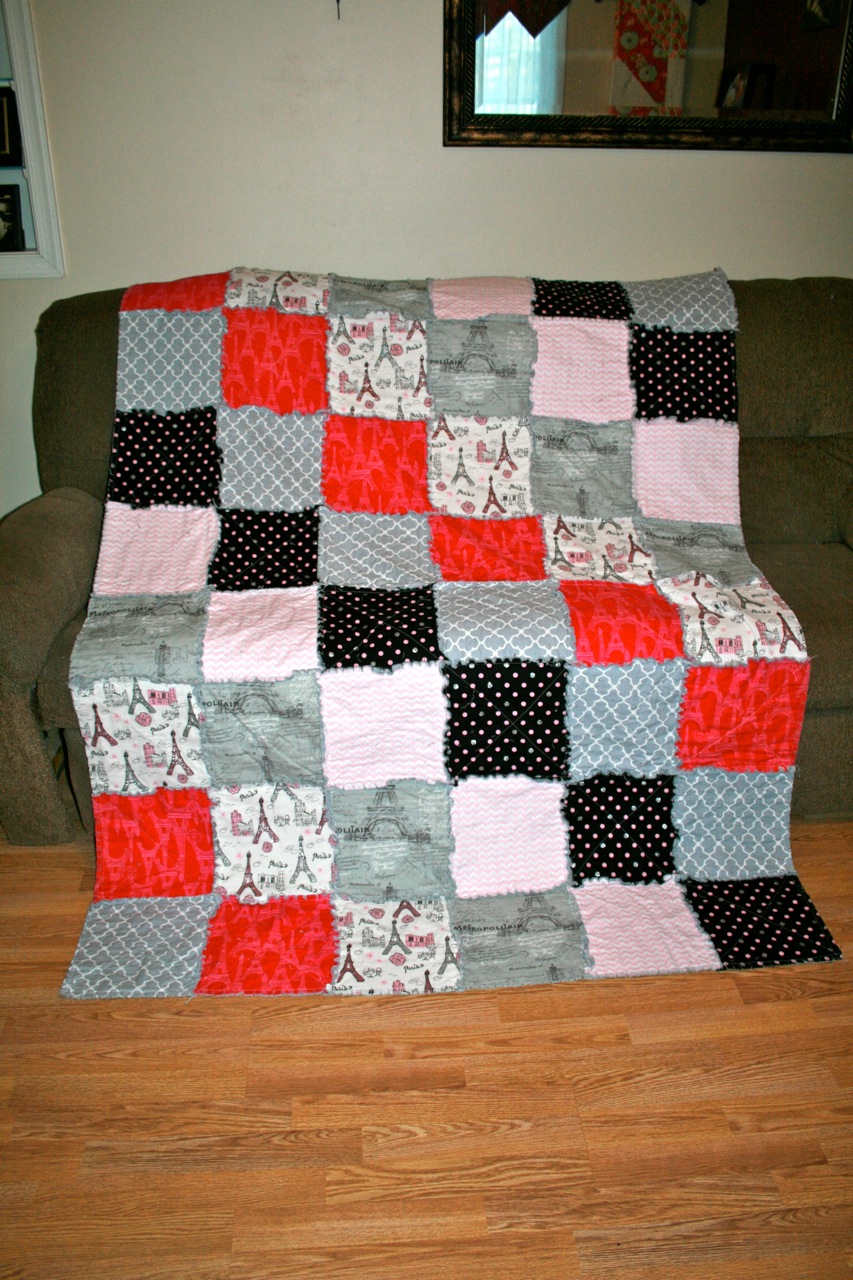
As you can see, I folded a lap quilt nicely and placed it over an old basket, piled some pillows on top, and placed a plaque (that matches a grapevine wreath that I made–I’ll show you that in a minute), and a couple of old Boyd’s Bears. That sewing basket was my grandmother’s and it serves as a nice little piece with which to add a bit of interest.
In the evening hours, those little lights twinkle so nicely–BTW, those wooden stars are held onto the ladder with velcro…
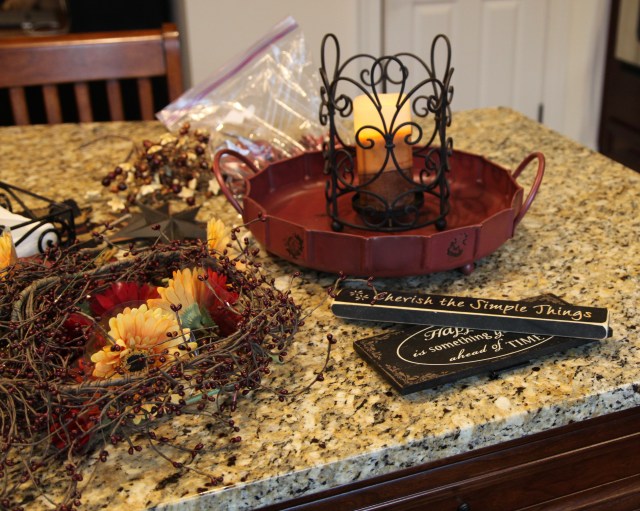
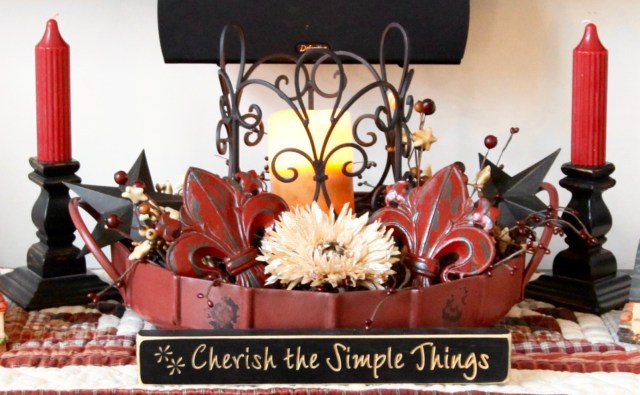
So, that little corner was complete and I moved onto the top of the credenza that sits in front of the tv and in between the fireplace and the cozy corner that I highlighted above. I started by making up a quick little centerpiece…Here is what I came up with:
As you can see, I gather a bunch of accent pieces but, I don’t always use every single piece, here is the finished centerpiece (I chose not to use one of the plaques and I took the yellow all gerber daisies save for that one fluffy one in the front out of the mix)…
Here is how that end of the room looks now that it is all transitioned over to a more generic country decor:
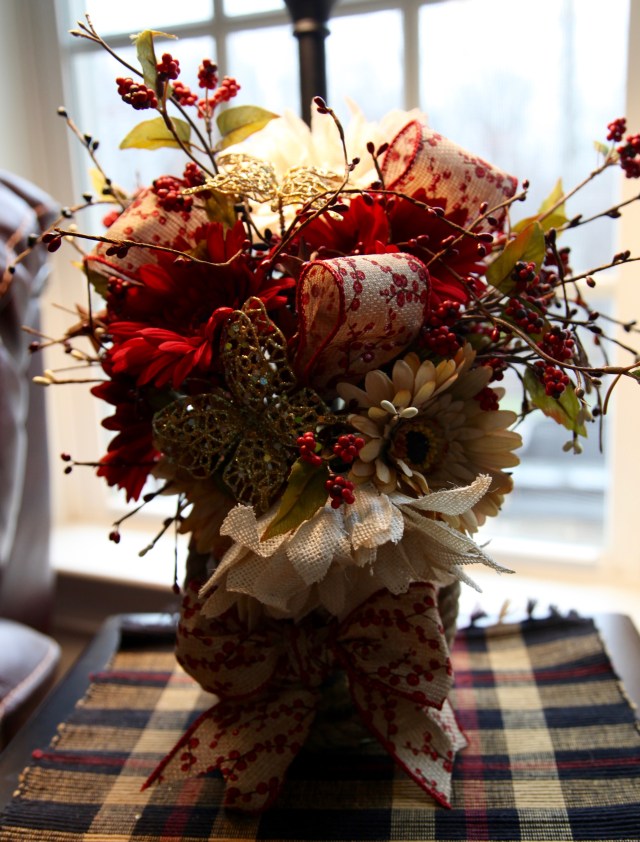
Then I made an arrangement to put on a side table…
Next I moved on to a table and shelf that separate the kitchen and the family room…
This will give you a bit of perspective as to where these pieces are located:
And here is that grapevine wreath that I referred to above:
I absolutely love to decorate and as I have mentioned before, I have no formal training, but gosh, I really do get a feeling of accomplishment when I, little ole me, can actually pull a room together through decor. I’ve had decades of practice and I’ve spent a ton of time honing my skills; at 50+ years of age, I finally feel as if I’ve found my niche. 🙂
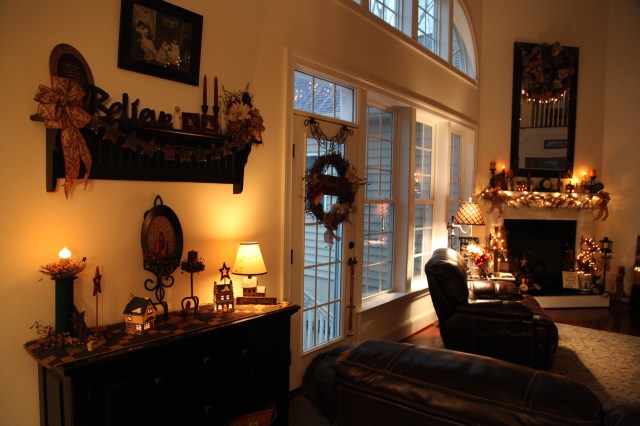
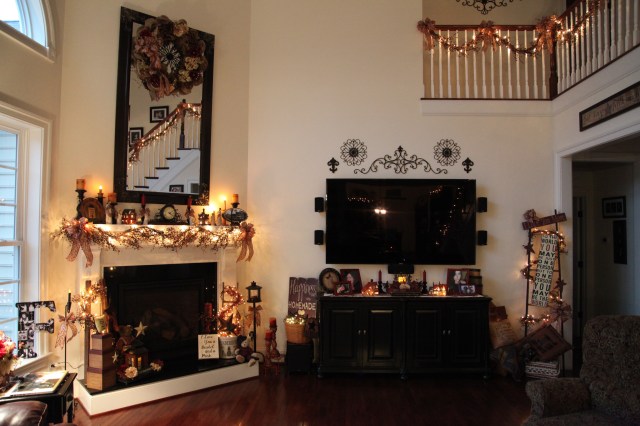
Here is the entire family room completely redecorated for the winter months (and possibly beyond)…the big black blurb close to the fireplace is our Newfie Sophie…haha:
In my next post, I’ll highlight the kitchen and eating area where I created a new lantern centerpiece for the table…Here is a sneak peek:
I did a few other things in this area too, so stay tuned…and thanks a bunch for joining me as we transition my home from Christmas to every-day decor. 🙂
Until next time y’all take good care! ❤
**In crafting there are no mistakes just unique creations**


 After a wonderful night’s sleep, we went out to explore Anchorage for a little while…
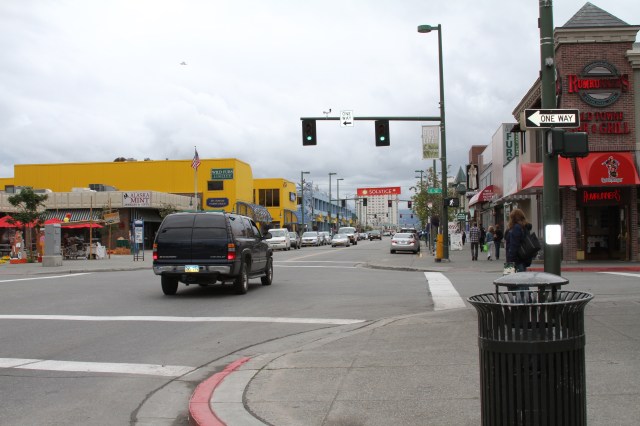


")


 Here is my ever vigilant helper Samson the Newfoundland, this boy is never too far from my side, he is great company and I just adore this fella!!