Fireplace: Mantel & Hearth

The fireplace is usually where I start when I’m transitioning my decor from one Season to the next.  I have to admit though, that I was so happy with how my Christmas decorations turned out that I almost hated to change it.  BUT, in the end, I’m *just* as happy with how it all turned out using my everyday accents pieces.

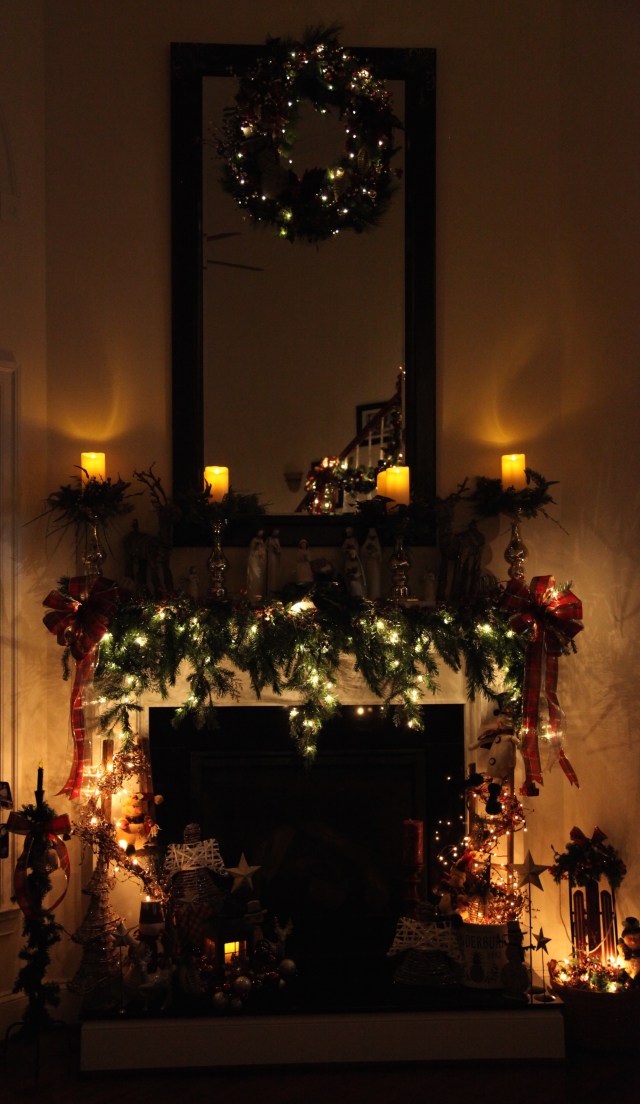
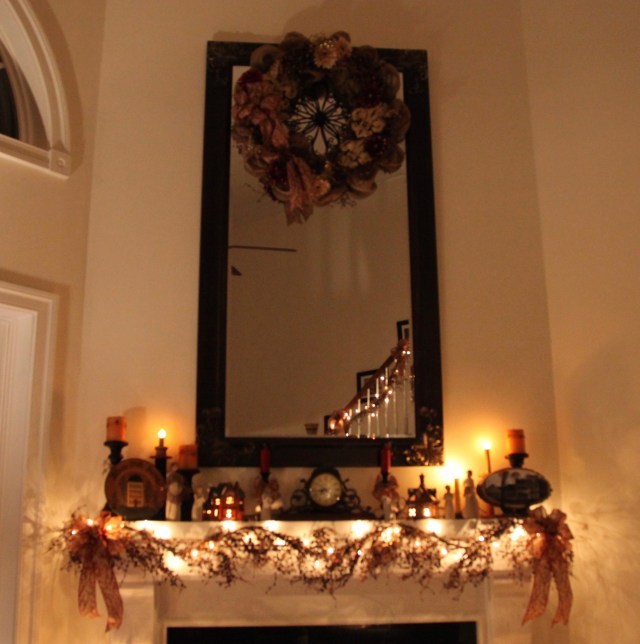
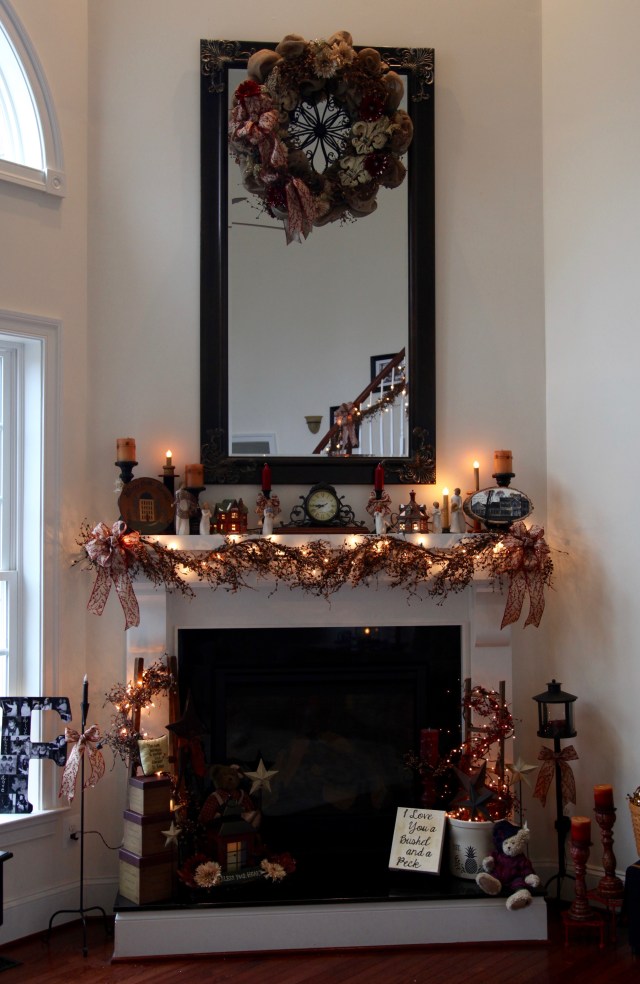
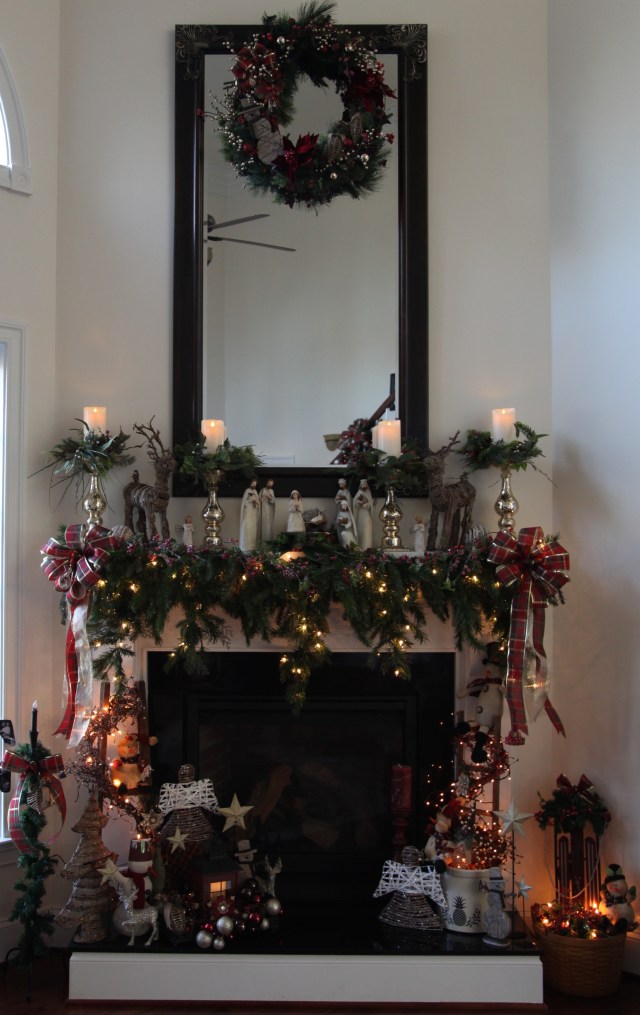
Here is how I had the fireplace decorated for Christmas:

IMG_2441

The first task was to take all of Christmas decorations down and pack them away, that took 1/2 a day in and of itself…not kidding…:)  This is what I started with  IMG_3331

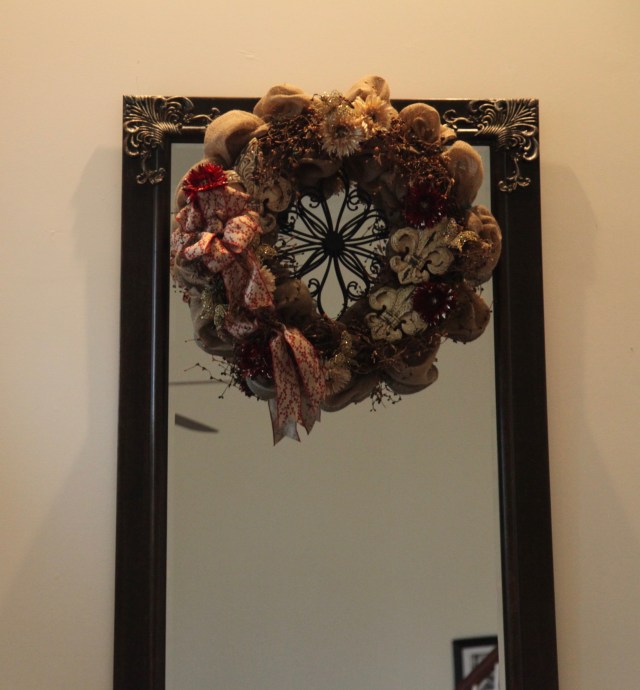
The first thing that I had replaced was the wreath on the mirror.  Here is a link to show you how I made that wreath, Burlap, Pip Berry, & Rod Iron Wreath

IMG_3327

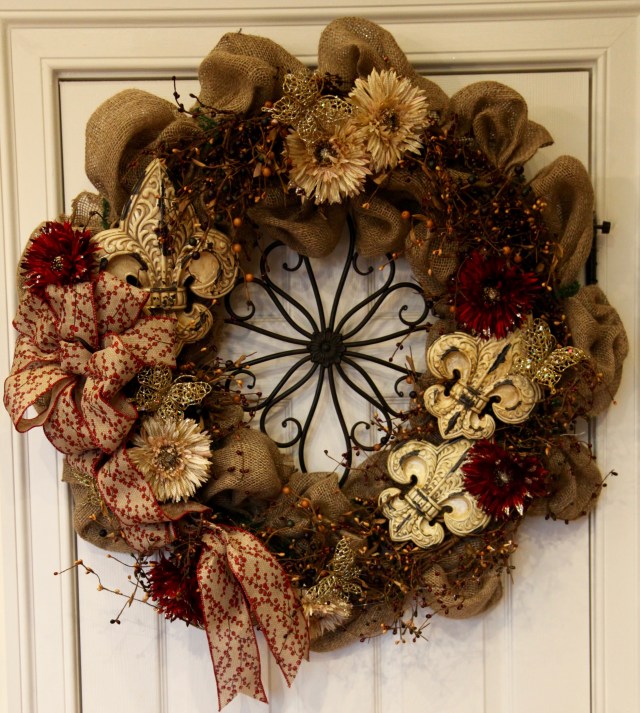
There it is in place…

IMG_3344 (1)

The next thing I tackled was the mantel…

IMG_3362

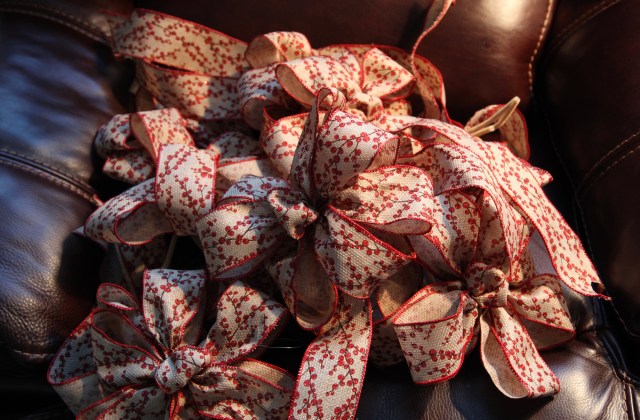
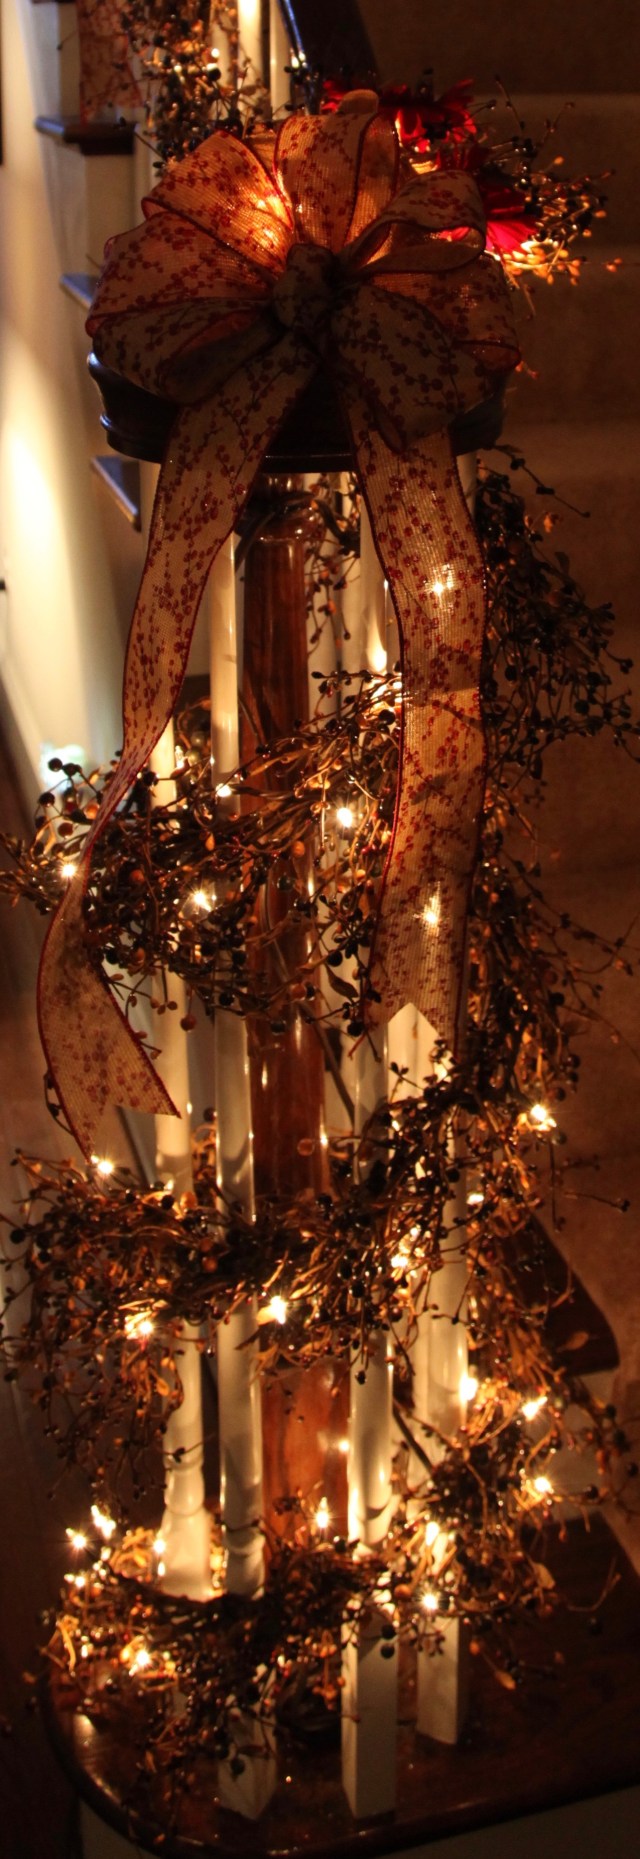
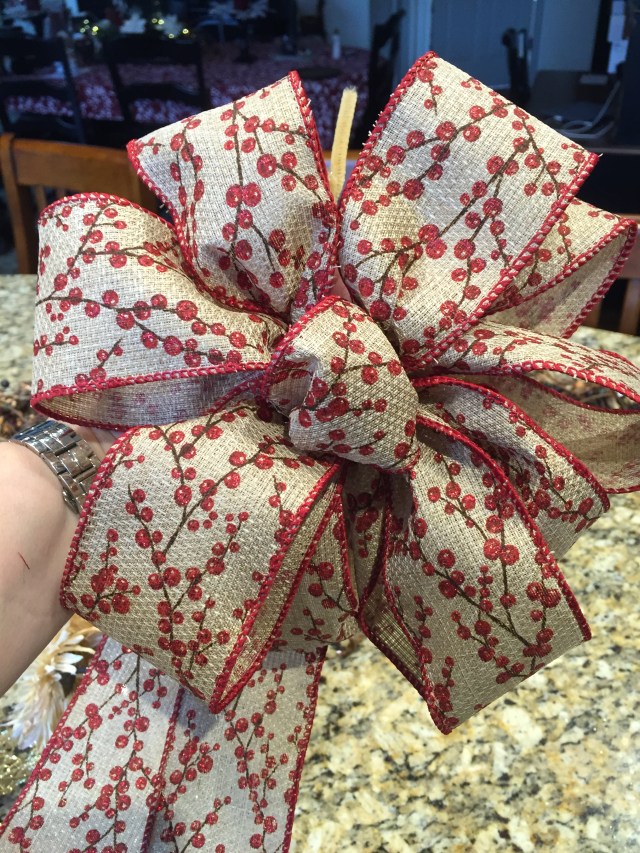
I started with a pip berry garland that matches the staircase garland and I wrapped a set of 35 white lights around it;  I always purchase my pip berry garland from The Pip Berry Barn.  Then I made two burlap bows that I have on the staircase (here is a link for my Staircase: Lit Pip Berry Garland post). After that I added black wooden candlesticks and topped them with candles with metal stars wrapped around them.

IMG_3343

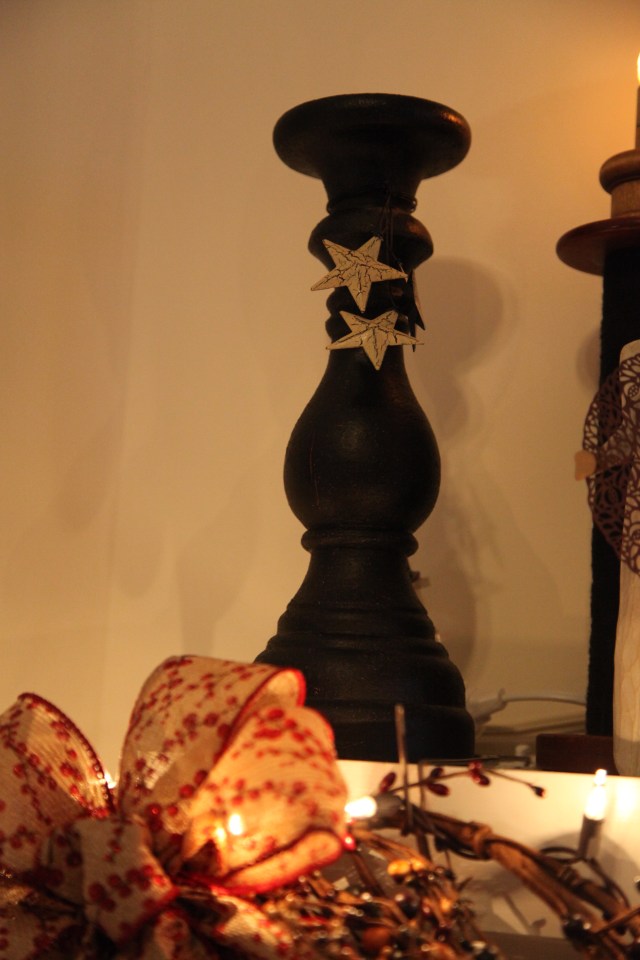
I got the candlesticks and candles from Piper Classics

Next, I added a couple of Dickens houses, a few electric spool candles with silicone light bulbs, a couple more plain wooden candle sticks (that I tied a bit of the ribbon around), and some pieces from my Willow Tree collection.   I stood back and took a look see and was happy with what I’d created.

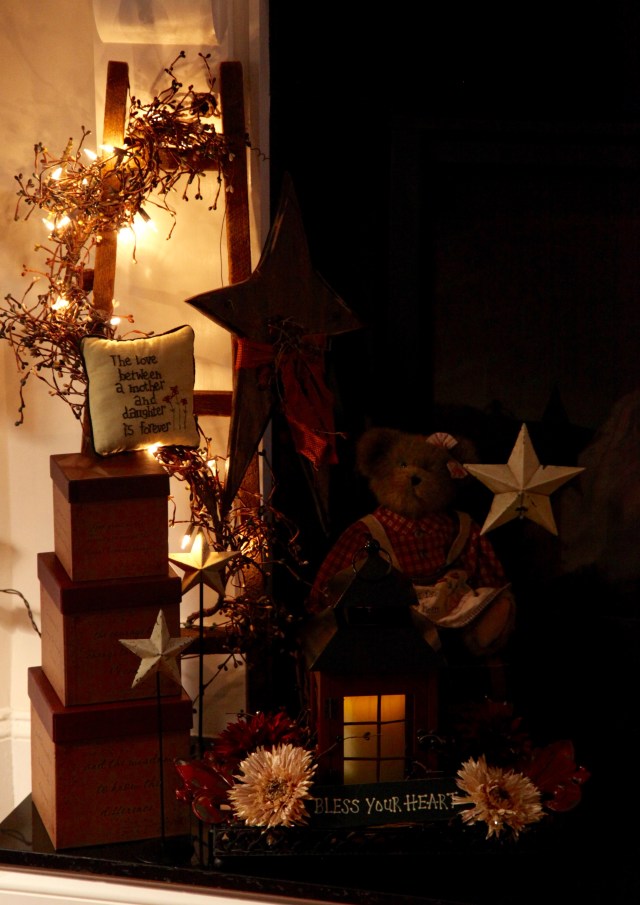
Then I moved on to the hearth, the first thing that I did was to recreate a basket decor that I’d had sitting next to the hearth at Christmas; here is a picture of how I had it decorated up for Christmas…

IMG_2436

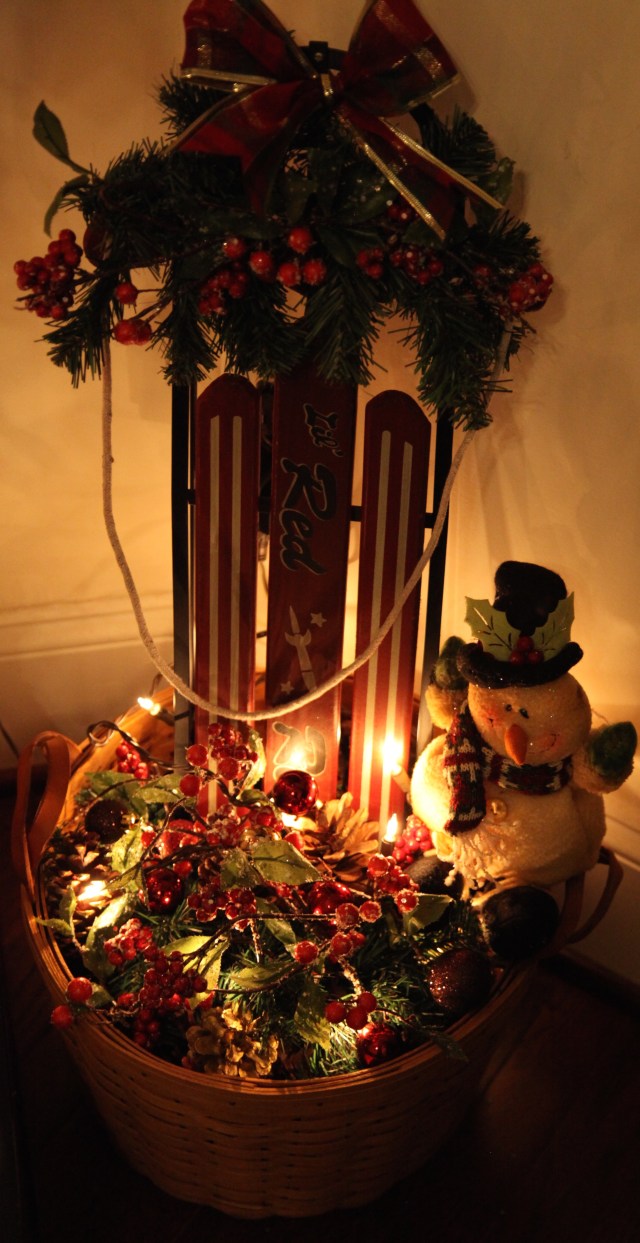
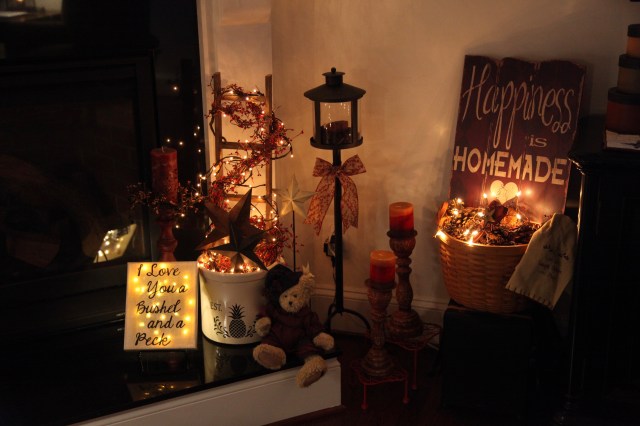
And here is how I recreated it using more generic accent pieces:

IMG_3392

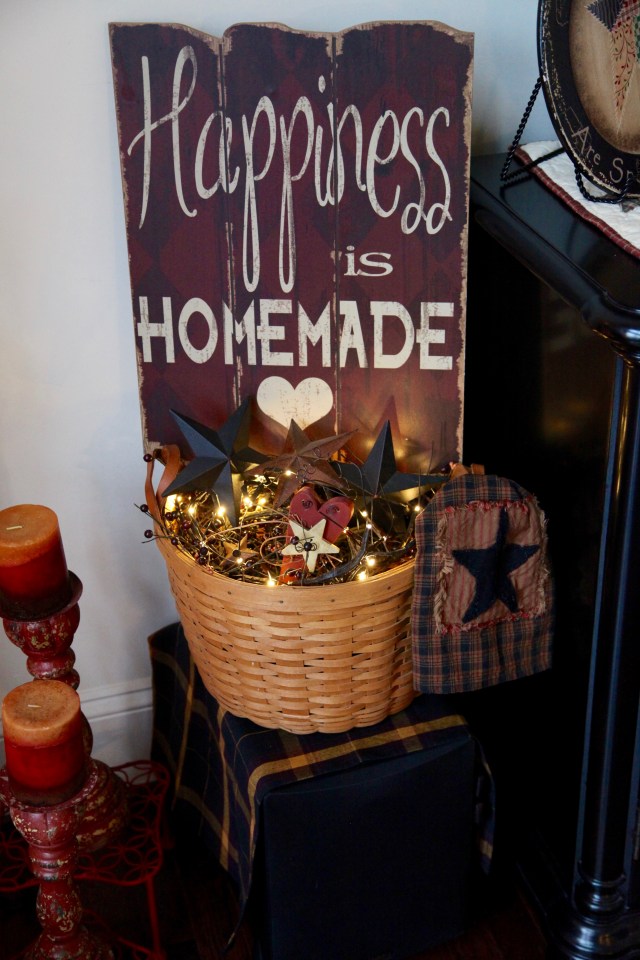
I found the “Happiness is Homemade” plaque at Hobby Lobby for 40% off, and I already owned the rest of the accents which included an old pip berry garland, metal stars, a little wooden heart, and a country themed towel that I tied to the basket.  I did add a set of lights to the very top.  I found these spiffy sparkl’ies’ at Michaels, they are battery operated and have a timer (although, I will say that my hubby rigged them up with a little transformer and mine are plugged in and never go off).

IMG_3385

After that little project was complete, I moved to the hearth.  As I’ve explained in this How To Create Cozy Corners post, I started to build the decor on either side of the fireplace box.  If we want to have a fire these pieces are easily slid out of the way.

First, I took a moment to put together a quick little lantern centerpiece…

And then I just built the rest of the decor…I ended up with this.

IMG_3361

Then I moved to the other side, here is what I came up with there…

IMG_3359

See that “I Love You a Bushel and a Peck” lit canvas plaque? My cousin Stacey made that for me and gave it to me for Christmas (and yes, I cried like a baby when I opened it…that saying is very special to us because our Grandma used to say it to us all of the time).  If you’d like to see how she made that, here is a link to her Light Up Christmas Canvas blog entry.  Stacey is sweet enough to be a guest blogger for me every now and again. 🙂  I will cherish that piece forever and ever!! ❤

So when all was said and done, here is a look at how everything turned out…

IMG_3412 (1)

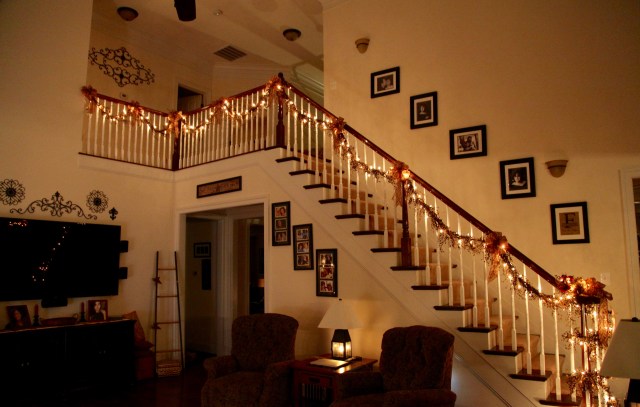
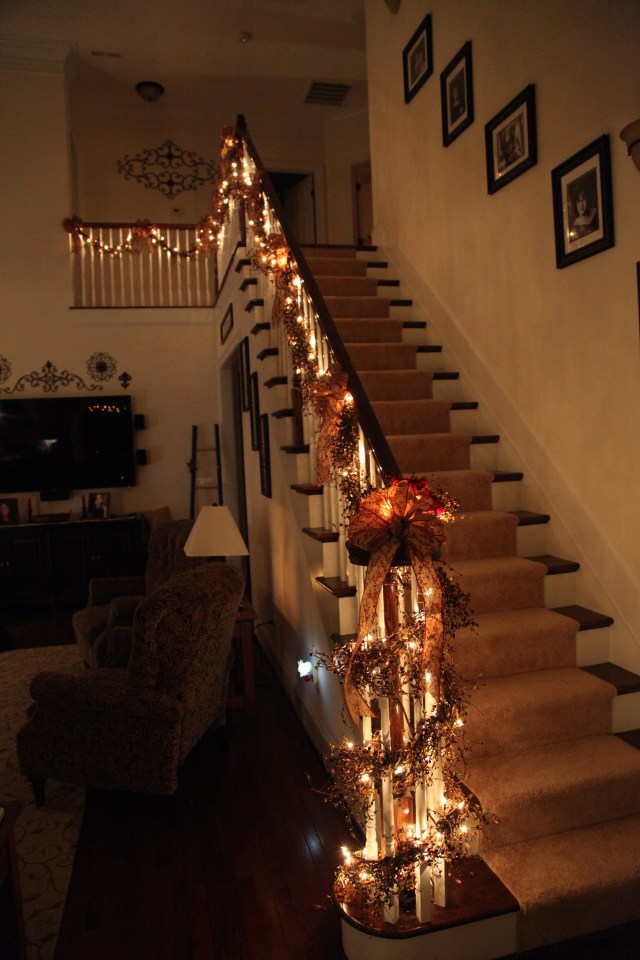
And how it looks in the evening hours…

IMG_3360

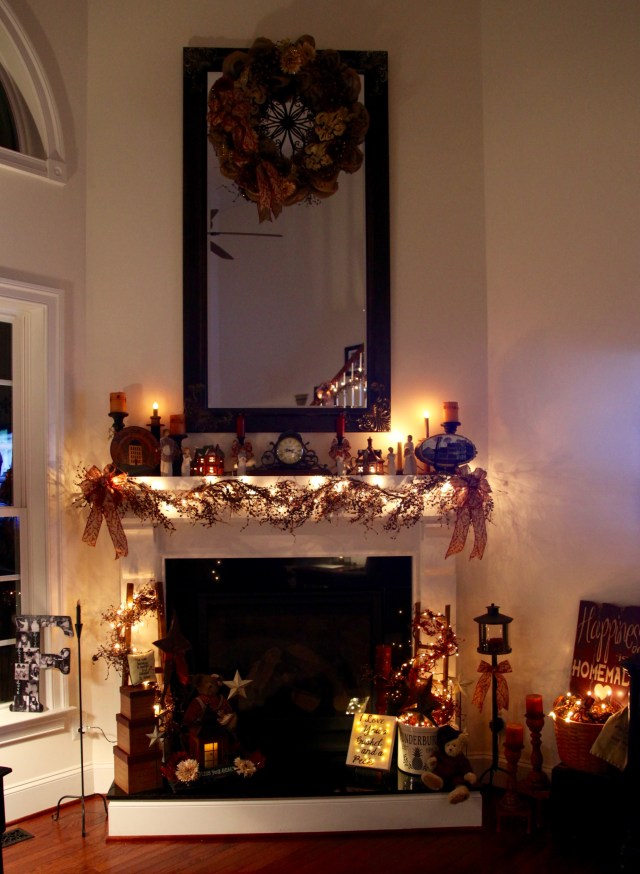
Yes, I can honestly say that I am just as happy with this look as I was with the Christmas look.  And it was so much fun to create, I truly thrive on this sort of thing. 🙂  This fireplace design set the tone for what the rest of the decor would look like. In my next post, I’ll describe how I put together that cozy little corner to the right of the tv…along with a few other little creations…

IMG_3402

Until next time, y’all take good care! ❤

**In crafting there are no mistakes just unique creations**

Staircase: Lit Pip Berry Garland

My hubby is awesome! He knew that I was ready to transition from my Christmas decorations to my more multi-Seasonal (generic) decor.  He is always up really early in the morning so before I opened an eye one morning, he had taken this Christmas ornament garland off of the bannister…

IMG_2400

…and replaced it with our pip berry garland.  When he removed it back in November so that I could decorate for Christmas he had put a marker at each swag point so he said it was a pretty easy task.  Regardless, I was SO appreciative of his help and self-motivation to go ahead and do that big job while I was still sleeping.

IMG_3364

So once I was up and moving, the first thing that I needed to do to complete this job was to make new bows to tie to each swag point.  I had found this new burlap berry ribbon online at “The Paper Mart”, here is a link.  It took me quite a little while to create all 9 bows…talk about some hand cramps, yep, I was definitely a hurtin’ pup at the completion of that task.

IMG_3338

Thankfully, our daughter was here to help me when I tied all of the bows onto the garland; she was able to tell be if I needed to angle the bow up or down or if I needed to straighten a tail here or there.  I appreciated that so much as I have bad knees and going up and down stairs multiple times to check to see if I have everything situated just so is not tops on my enjoyable things to do list. 😉

IMG_3366

The next task was to put together a little spray to be placed on the bullnose (bottom of the stairs).  There is really no specific way that I put this together, I just gathered pip berry picks and gerber daisies together in a bunch and arranged it till I liked how it looked, then I tied it all together with tie wraps and added a bow…

The stems snug down into the bullnose nicely and because the lights are plugged into the extension cord below it stays put…

IMG_3419

Here is the completed look…

IMG_3365

I am so happy that this task is complete, the pip berry garland will stay on the bannister until next Christmas (unless I come up with another bright idea before then). I might change out the bows to match whatever season we are going through, but that would be the only change I make.

IMG_3364

IMG_3367 (1)

I’m so happy that we’ve decided to decorate up this bannister, I feel that since this staircase is such a prominent feature in the house it lends itself nicely to be adorned with prettiness. 🙂  It completes the entire look and brings a warmth and coziness into the space…And as y’all know, I’m all about bringing warmth and coziness into our home.

Next, I’ll be telling you how I transitioned the mantel and hearth from Christmas to my multi-Seasonal decor…Here is a sneak peek:

IMG_3362

Until next time, y’all take good care! ❤

*In decorating there are no mistakes, just unique creations!*

~Arlynn 


Burlap, Pip Berry, & Rod Iron Wreath

I bet the title of this little entry was a bit confusing, who in the world uses rod iron as an accent piece in a wreath? Well, I have found that I do…haha. 😉  Seriously, my three main decor accents in the family room of my home are burlap, pip berries, and rod iron (as in scrolly pieces that I have scattered about on the walls).  I have decided to create a new category entitled “Transitioning Seasonal Decor” and this is my first post in that new category.  That said, I am in the process of transitioning my decor from Christmas to a more neutral decor theme that will take me through the winter months and in some cases beyond. I do this sort of thing a few times a year, so I thought a special category was in order to capture the transitions.

ANYway,  I started taking down all of the Christmas decorations the other day; it takes me quite a while to get everything down and packed away–I will say that I’ve been quite organized in my packing this year taking time to label boxes and bins carefully…go me. 😉  ANYway, I realized that I wanted to make a wreath to replace this wreath that I had hanging on the mirror for Christmas:

IMG_2443 (1)

I decided that I wanted to make a large wreath, one that would include some of those accent pieces that I mentioned above.  So here is what I gathered:

  • 24″ Work Wreath
  • 2 Skeins of Burlap Runner (15′ x 18″)
  • Pip Berry Garland (1-6’garland plus a little more)
  • Burlap Ribbon (for a bow)
  • One rod iron circular piece
  • 3 fleur-de-lis pieces
  • Silk daisies in burgundy and dark cream
  • Sparkly butterflies

IMG_9933

If you’d like to see how I put the burlap on the wreath form, check out my post here.

It was time to attach the pip berry garland, so I simply used the wreath’s twist ties…I only attached it to the outer ring.

Next, I added the accent pieces, first I made a bow out of a new burlap ribbon that I found online at The Paper Mart

IMG_9930-1

Then I attached the fleur-de-lis and the rod iron piece, I used floral wire to attach both things to the wreath form…

Then I hot glued the daisies where I thought they looked nice and called it done. 🙂

IMG_3326

And then the hubby was sweet enough to climb up that huge ladder and hang it on the mirror…

IMG_3328

And there it is in its final resting place, I doubt if I will change it out until next Fall.  The accent pieces will pair nicely with whatever little changes I make in the coming months.

IMG_3330

There it is from a distance, as you can see, it is a huge wreath, it measures about 32″ across…IMG_3331

And check out my poor mantel and hearth, they are quite barren at the moment; it is not often that they are like that, but, as you can see, I change out most of my decor for Christmas.  Whew, I’ve got my work cut out for me in the coming days…stay tuned. 🙂

Until next time, y’all take good care! ❤

**In crafting there are no mistakes, just unique creations**

~Arlynn ❤ 

Crab Souffle

I hope that everyone had a VERY Merry Christmas filled with family, friends, good food, and whatever else your hearts desired. ❤

My hubby and I hosted our family’s Christmas Eve celebration this year. My cousin Stacey and I do a round robin sort of thing each year. 🙂  This recipe for crab souffle has been in our family for decades and is definitely one of my tried and true dishes. One of my parents very good friends shared this recipe with us back in the 70’s and we’ve made it every year since on Christmas Eve.  I’ve also made it for other special occasions throughout the rest of the year.  I am going to make two batches of it next year, we barely had enough for everyone at our Christmas Eve feast this year; there is it in the picture below in the red baking dish. 🙂 IMG_3240 
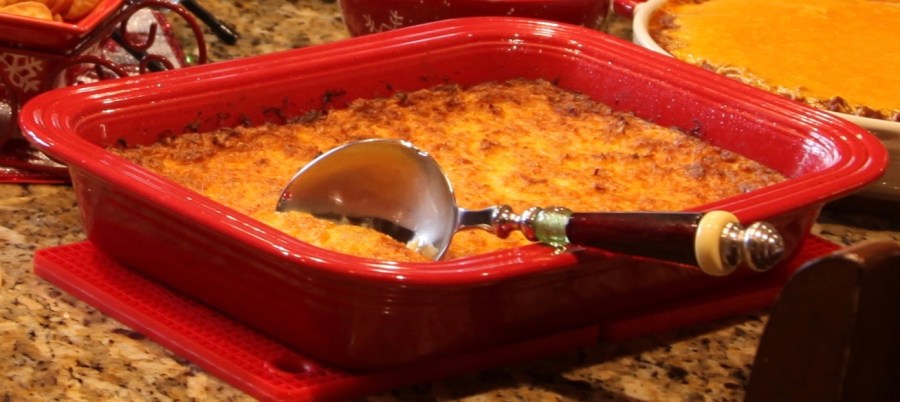
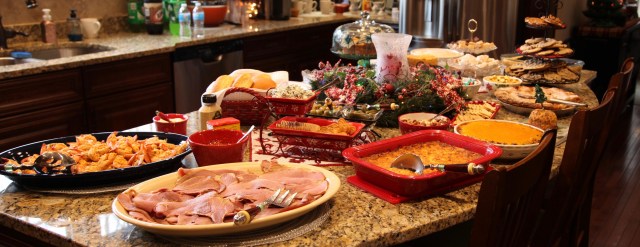
Historically, we’ve always prepared an eclectic array of food on Christmas Eve; we never stick to one theme and we look forward to the same dishes every single year because everyone has their favorite thing and they know that it will be in ‘attendance’ at the buffet.  Crab Souffle is the one dish that everyone loves, without fail, it is always completely gone after our meal is complete.  This year’s menu just like every year’s menu included Shrimp (6 pounds!! Stacey brought that…wow!), Ham, Crab Souffle, Lil’ Smokies wrapped in bacon and topped with brown sugar, Stacey brings those (among many other things..), Meatballs (of some variety, we all have our own recipe so whomever is hosting usually make them–my daughter made them this year with a new recipe that she found using grape jelly and barbecue sauce–so so good). IMG_3243
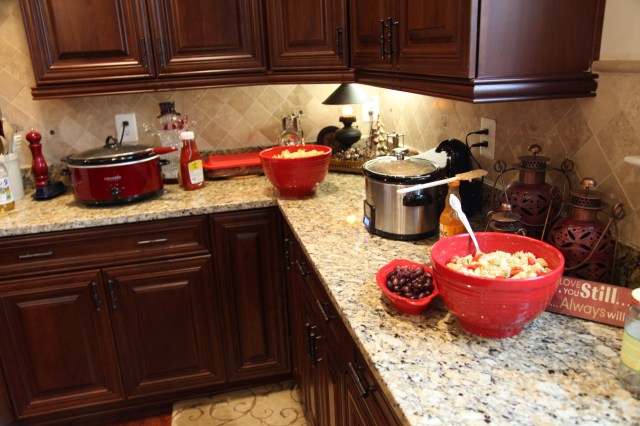
In addition, Buffalo Chicken Dip (a newer addition to the buffet, my other daughter added this to the buffet and it has now become a staple, everyone loves it),  Taco Dip, Spinach Dip, Pasta Salad, Nuts, Gerkins, Olives, and whatever else we have.  My dear friend Karen gave me a lovely cheese ball and summer sausage (and an adorable Santa cutting board with Christmas tree cheese spreader), so I set that out as well.  IMG_3242
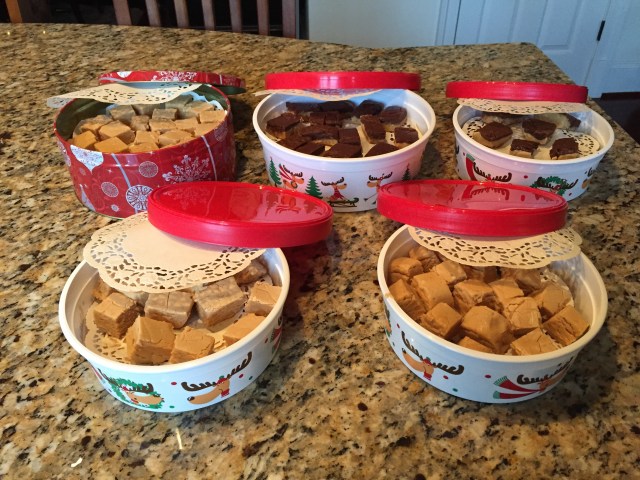
On the sweet side of things we had, 2 different types of Peanut Butter Fudge & Peanut Butter PieBlueberry Topped CheesecakeFresh Apple Cake, <~~~ links to my blogs with those recipes. We also made several varieties of cookies, and a few other goodies.

SO, all that said, here is the recipe for

Crab Souffle

1V4A3283

Soak Overnight:  6 Slices of buttered bread and 2 Cups of Milk 

  • 3 eggs
  • 1 teaspoon salt
  • 1 teaspoon dry mustard
  • 1 lb. grated sharp cheese
  • 16oz. can of crabmeat (from the seafood section)

Beat 3 eggs well, add to the buttered bread mixture.  Add 1 teaspoon of salt and 1 teaspoon of dry mustard.  Mix until smooth.  Blend in the grated cheese; gently fold in the crabmeat.

 Bake in uncovered greased 13” x 9” baking dish at 300 degrees for 1 ¾ hours.

**Note:  I always use that Italian bread, real butter, & Kraft “sharp cheddar” cheese (the recipe calls for ‘sharp’ cheese).  Also, I found this Chicken of the Sea premium crab meat this year and I didn’t have to ‘pick’ the shells out of it, there were none to find!!  Wow, was that ever a nice little bonus. 🙂 **

1V4A3280

I hope that this becomes a favorite of yours too and that your family enjoys it as much as mine does! 🙂

Version 2

Until next time, y’all take good care! ❤

~Arlynn ❤

Blueberry Topped Baked Cheesecake (Made With a Duncan Hines Yellow Cake Mix)

I have been making this cheesecake for 25+ years, Mooney (my grandma) found this recipe on the side of a Duncan Hines cake mix box back in the 70’s and it was passed down from her to my mom, then on to me, through the family and beyond. Everyone who makes it raves about it, it always turns out beautifully and it tastes so good, it is always moist, and it is a favorite in this household. I make it for our Christmas Eve family gathering every year and many other times throughout the year. We don’t just save this one for Christmas, it’s way too good. 🙂

I just found out something very interesting about this recipe about 2 weeks ago.  As I mentioned in another Blog entry, my Aunt Carole just sent me Mooney’s old Better Homes cookbook, copyright 1942…

IMG_9616

Well, stuck inside of this cookbook (along with many other old recipes) was the original recipe for this cheesecake; Mooney had cut it off of the side of a Duncan Hines Yellow cake mix box…Wow!! What a find!! 🙂

IMG_9825
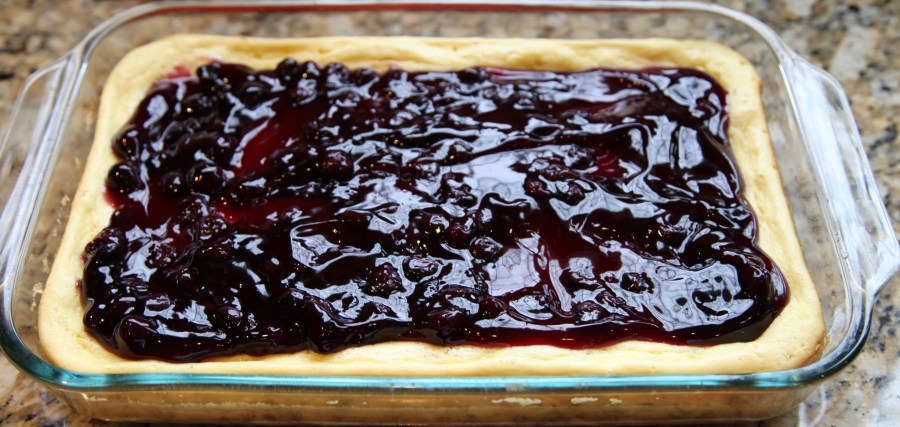
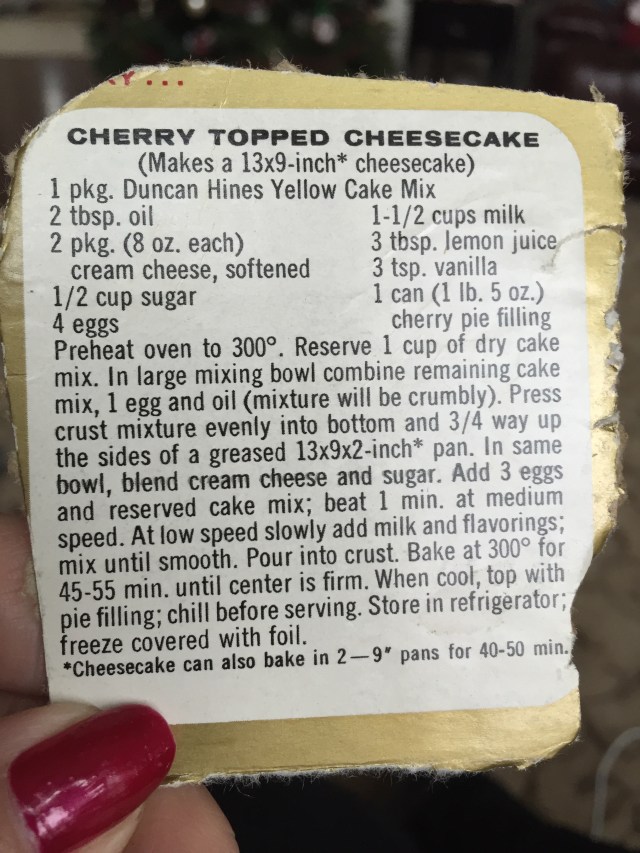
As the recipe has been passed along in the family, we’ve done a little tweaking.  For one thing, I didn’t realize that there was supposed to be lemon juice in the cake…haha…and we’ve always topped it with blueberries (I do switch the topping out if I know that someone likes another fruit topping better than blueberries).

Here is the recipe that I’ve always used:

IMG_3172

Anyway, the recipe is pretty self explanatory, but I’ll quickly show you the steps that I take to make this dreamy cake…

IMG_3171

The first thing to do is to grease a 13×9 baking dish…

IMG_3174 
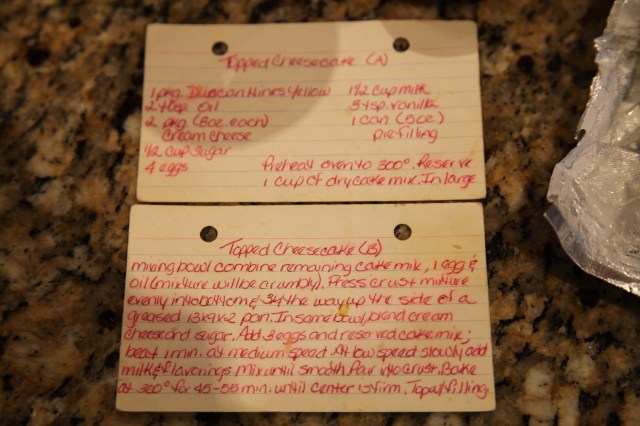
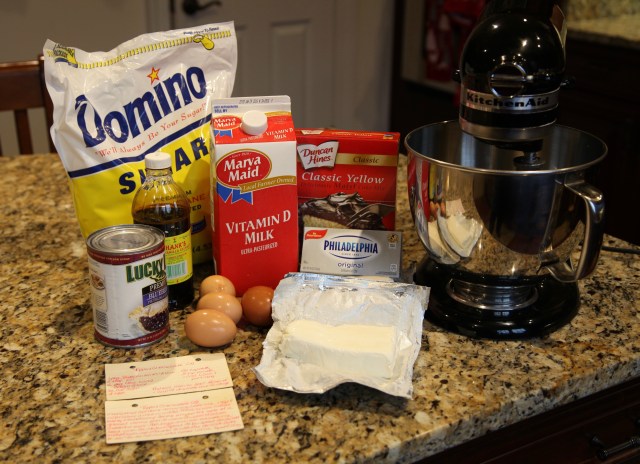
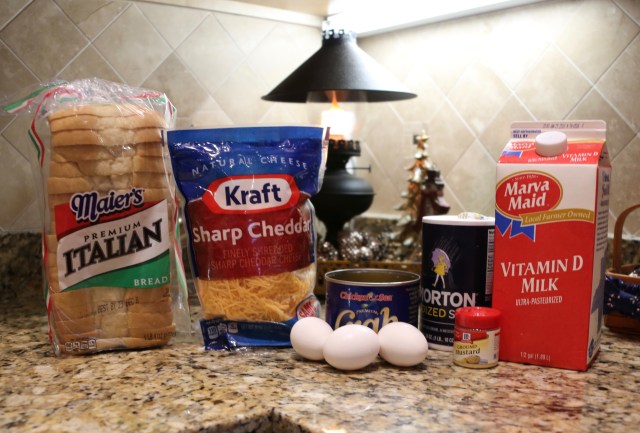
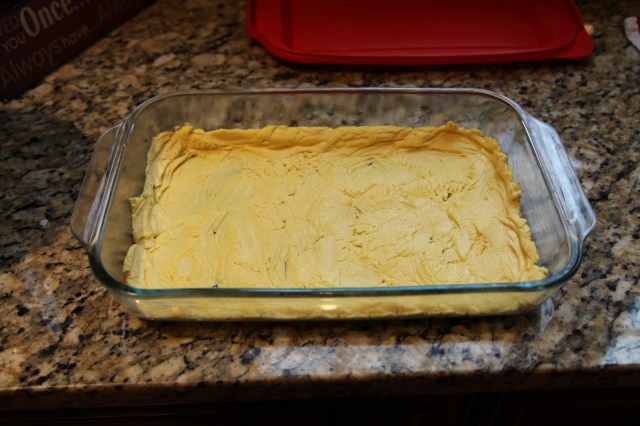
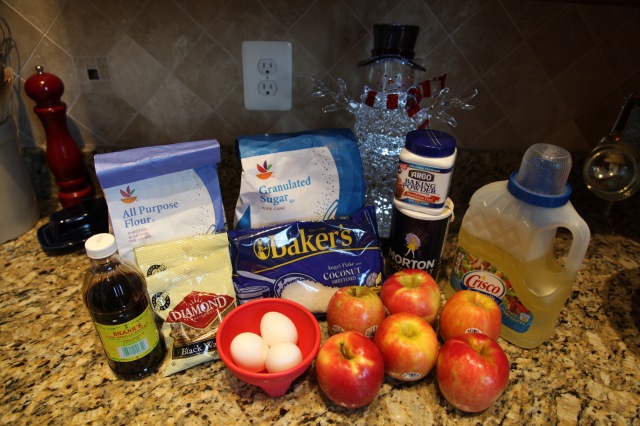
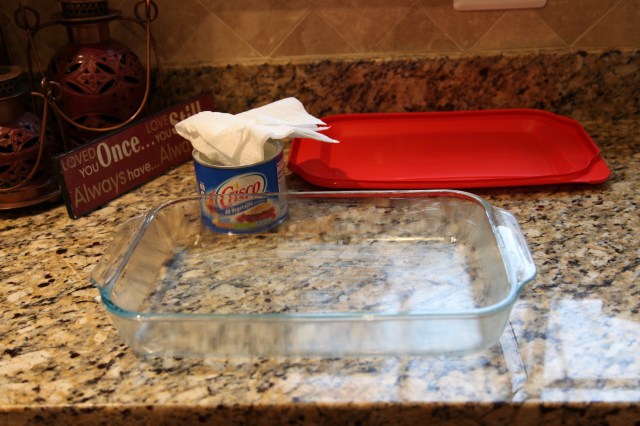
Then reserve 1 cup of the cake mix (it will be used in the body of the cake), and pour the rest of the cake mix into the mixing bowl–to it add 1 egg and 2 Tablespoons of oil.  When mixed, it will make a soft crust, carefully spread it into the bottom of the baking dish.

IMG_3175

IMG_3181

After that, mix all other ingredients together making the milk and vanilla the last two ingredients added.  When everything is blended, the batter will seem “thin” but have no fear, it will turn out to be light and fluffy and yummy!

IMG_3197

Place it into the pre-heated 300 degree oven; I cooked mine for exactly 48 minutes…

IMG_3199

And it came out perfectly fluffy and wonderful…I waited until it was completely cool and then I poured the blueberry pie filling all over the top.

IMG_3200

You can be sure that I *will* be having a piece (or two) of this luscious cake in a few days. 🙂 This is definitely one of my tried and true recipes, one that seems and is so easy to make and *bonus*, it tastes great every single time.

Until next time, may peace be your gift at Christmas and throughout the rest of the year. ❤

~Arlynn ❤


Caramel Corn

It is that time of the year when I cook so many things that I wouldn’t dare cook at other times of the year because I am *always* watching my weight and when I see all of these goodies sitting around, well, my good eating habits get lost. 😉  I especially have a hard time keeping my fingers out of this yummy Caramel Corn, it really is quite tasty, but my family loves it and so I make it. 🙂

A friend of mine gave me a version of this recipe years ago and I’ve literally doubled the amount of butter and brown sugar for my recipe.  In my humble opinion it is much better with more caramel on that popcorn! 😉 I’ve tweaked and tweaked this recipe and I’ve now gotten it just the way we like it.

Here is my recipe:

  • 6 Bags of Microwave Popcorn (I use Pop Secret Movie Theatre butter)
  • 1/8 t salt
  • 1/8 t baking soda
  • 4 sticks butter 
  • 4 cups brown sugar

Pop all popcorn and pour into a large roasting pan(s) being careful to make sure that all un-popped kernels are discarded.

Mix all but popcorn in large saucepan.  Cook over medium heat until sugar is dissolved.  Pour over popcorn in roasting pan.  Mix well.  Bake at 250 degrees for 40 minutes, stirring after 20 minutes.

**I use real butter and cook and stir the brown sugar, butter, salt, and baking soda mixture until the oily butter that rises to the top blends in with the sugar.  It only takes a couple of minutes after it starts bubbling**

IMG_3139

~Note: I hadn’t gotten the baking soda or salt out yet hence the reason why they are not in the picture above…

The first thing I did was to get the brown sugar, butter, salt, and soda into a large 8 quart saucepan onto the stove and turned the burner onto medium…

IMG_3142

Then I turned the oven on and started popping the popcorn…

IMG_3140

It is very important that you allow the brown sugar and butter to blend together completely, you’ll have the very best result.  Trust me, I am not a very patient person, so I must force myself to wait until they are nicely combined. 🙂

IMG_3146

After the butter, brown sugar, soda, and salt mixture is well blended, remove it from the heat and immediately pour it onto the popcorn.  I needed that red roasting pan and another medium sized roasting pan to hold all of the popcorn.  I split the caramel mixture between both pans of popcorn and I took a little extra time to really stir the popcorn after I poured the caramel mixture all over it.  I then placed both roasters in the pre-heated 250 degree oven.

IMG_3147

I took them out after 20 minutes and stirred them well and stuck them back in the oven for 20 more minutes.

I purchased this very large clear jar at Walmart several years ago specifically to hold all of the Caramel Corn.

IMG_3143

I allowed the Caramel Corn to cool completely before I filled my big jar to the brim…

IMG_3150

And I even had enough left over to make up a few favor bags…

IMG_3159

I have to say that this is absolutely one of my tried and true recipes as I’ve definitely tried and tweaked and tried and tweaked this recipe until it is truly what I am showing to y’all.  We all love this, I hope that y’all do too!! 🙂

Until next time, may the spirit of Christmas bring joy to your heart and happiness to your home. ❤

~Arlynn


Fresh Apple Cake

Here is another one of my very old tried and true recipes, my MIL (Mother-in-Law) passed this one onto me over 3 decades ago.  She made it for us to enjoy one Christmas and I asked her for the recipe, she didn’t have anything to write on so she improvised and tore off a box top and wrote this out for me:

IMG_3132

Here is the recipe just in case you have troubles seeing what she wrote:

Mix:

  • 3 eggs
  • 2 cups sugar
  • 1 cup cooking oil

Mix:

  • 3 cups flour
  • 1 tsp salt
  • 1 tsp baking soda
  • 1 tablespoon vanilla

Add:

  • 1 cup coconut
  • 1 cup black walnuts (chopped small)
  • 3 cups diced apples (peeled and diced)

Bake:

  • 325 degree oven
  • greased and floured tube pan
  • 1 hour 25 minutes

I believe she told me that her Mom used to make this for her and her siblings when they were small; I would venture to guess that this recipe is 60+ years old.

We gathered all of the ingredients together and then my hubby who is a *great* cook started to build the batter, and by building, I mean that almost literally because when all of the ingredients are combined it is quite thick and difficult to stir…

IMG_3122

One side note: We didn’t realize that we were completely out of baking *soda* (who runs out of baking soda? ME! <shaking my head>).  So we substituted baking powder, I went to my best friend Google and inquired about what to do if baking soda wasn’t available but baking powder was…Google told me not to fear, that the answer was to triple the baking soda measurement when using baking powder only (we didn’t quite do that though, we only used 2 teaspoons of baking powder and it didn’t affect the way the cake turned out at all…it worked great).   Also, we used 4 apples as opposed to the 6 pictured.  Regarding what kind of apple you use…that is totally up to you, we used “Pink Lady–Pink Cripps” and they taste yummy–according to the hubby.  (I can’t eat this cake because I am a migraine sufferer and black walnuts are a big trigger for me…)

The hubby started by combining all dry ingredients in one bowl, and all wet ingredients in another bowl:

IMG_3123

And I prepared the tube pan:

IMG_3124

Combine all the ingredients except for the nuts and apples with a mixer, then fold the apples and nuts in by hand.

IMG_3126 
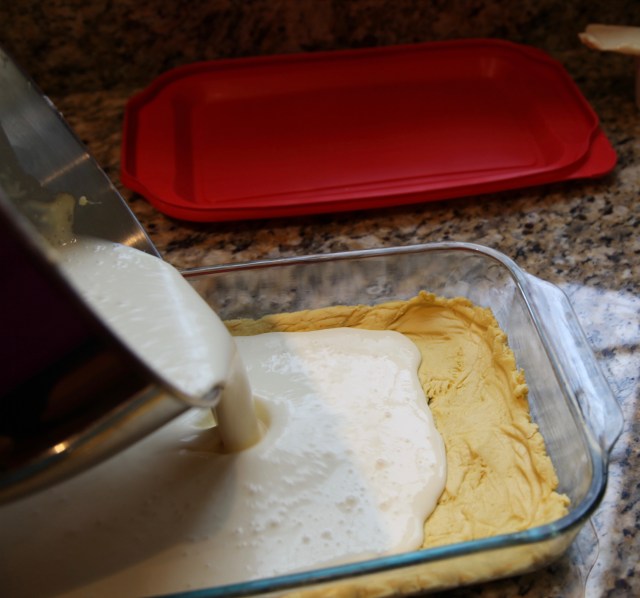
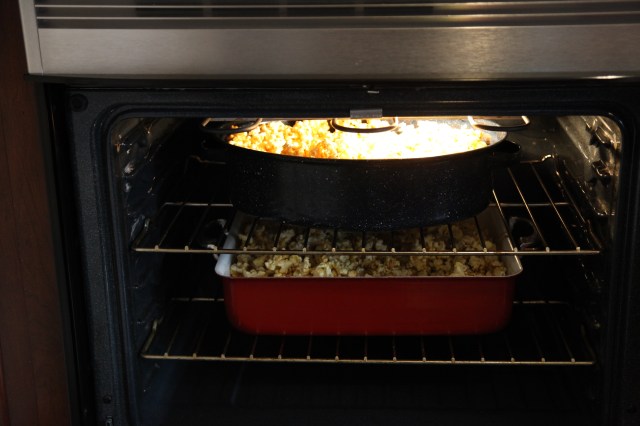
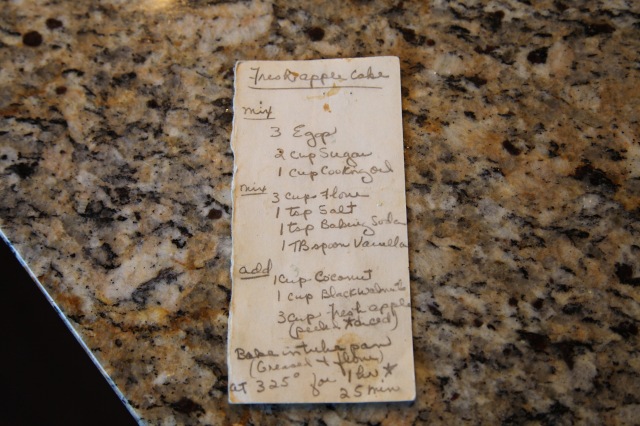
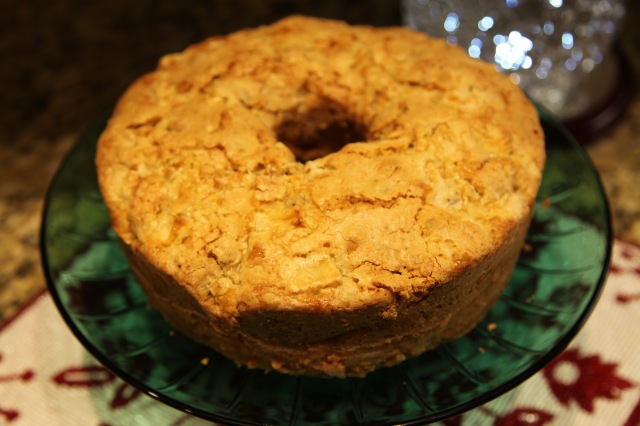
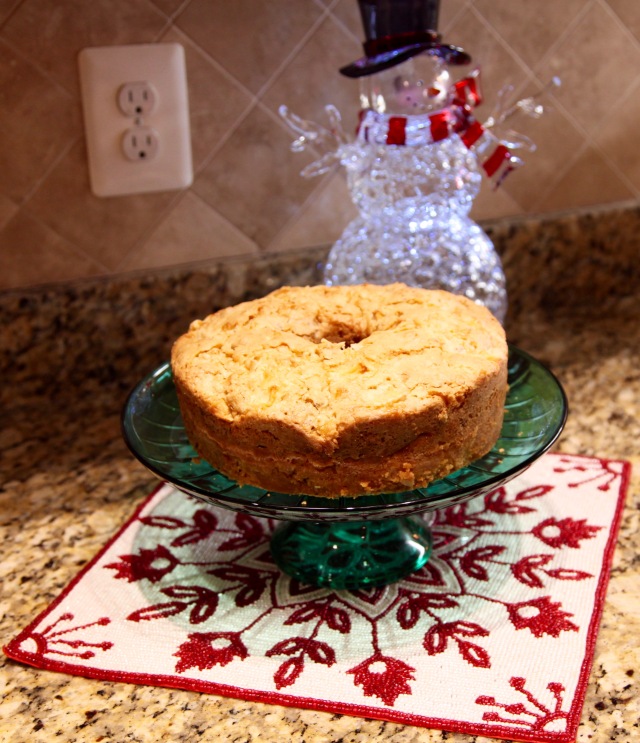
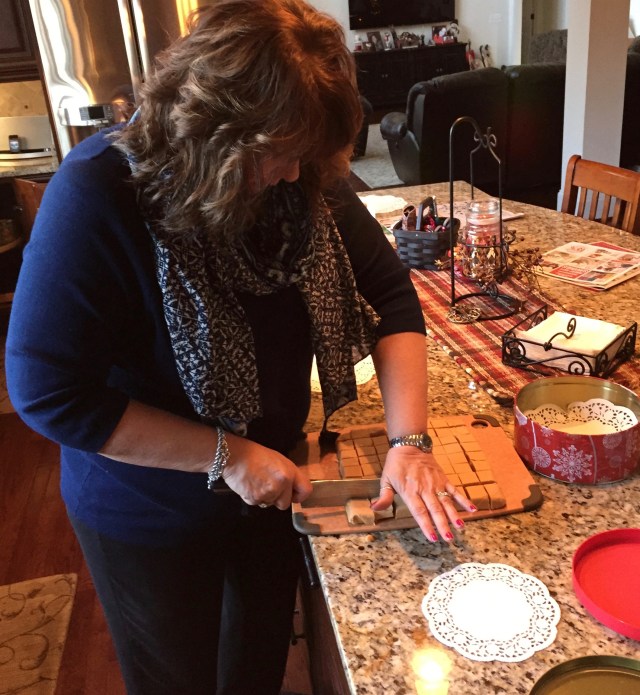
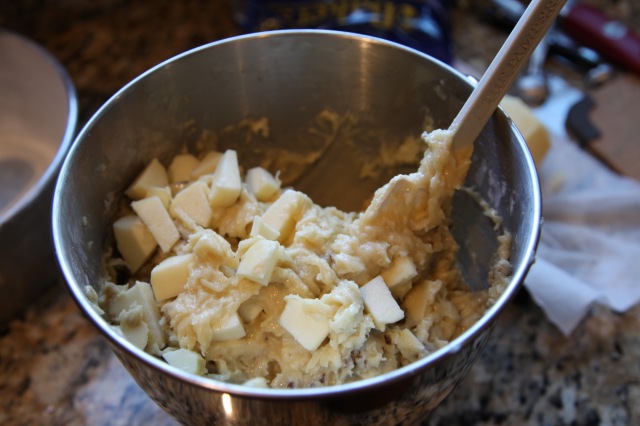
The hubby literally spooned the batter into the greased and floured 10″ tube pan.

IMG_3128
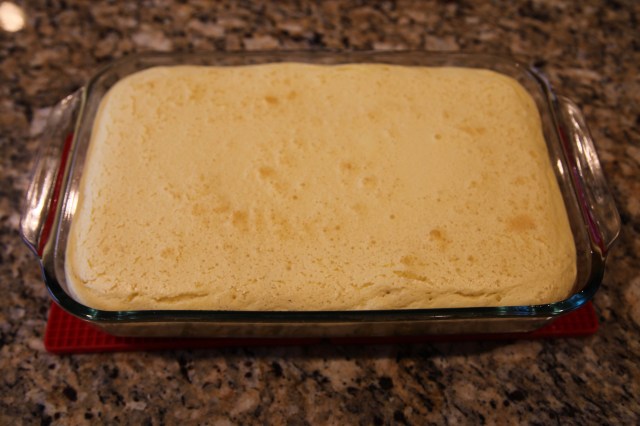
We put it in the pre-heated 325 degree oven for 1 hour 25 minutes.  It came out perfect, in fact, now that I think about it, it always comes out perfect. 🙂

The hubby has already had a piece of this cake this evening and he says it tastes great!! I’m hoping it will still be around  on Christmas Eve so I can set some out for my visiting family members to enjoy. Something tells me that that might not be the case though. 😉

IMG_3135

IMG_3137

My hubby isn’t an icing lover, so he didn’t want to put icing on this cake, but, my MIL always puts caramel icing on it when she makes it and I’ve heard many family members rave about the cake with that icing, so I would encourage you to have a can on hand so that you can try it with and without the icing. 🙂  My MIL only uses Pillsbury Creamy Supreme Caramel icing…like this:

IMG_9815


Well, there we go, another tried and true recipe from my recipe basket. Stay tuned, I will be posting more yummy recipes as I prepare for our Christmas celebration.  Tomorrow is fudge day for me, I did already post my two best Peanut Butter Fudge recipes that I will be making.

Until next time…May your days be “Merry and Bright!! ❤

~Arlynn ❤


Reese’s Cup Christmas Trees

My dear friend Karen and I have always loved to get together and do crafts, so when she posted a little YouTube video on her Facebook of these sweet little Reese’s Cup Christmas Trees, we decided that we’d try our hand at making some.  A little back story about my friendship with Karen.  She and I met when our daughters (2 mine and 2 hers) were in the high school’s marching band.  Karen and I were very involved in the Band Parents Association and we got very close during that time; going on a plethora of trips with many talented teenagers will bring friends closer together.  Also, I was the Band Parents Association’s President and she took that job over from me after my youngest graduated which ended my tenure.  All of our girls are out on their own and thriving now-a-days and Karen and I have continued our friendship…I feel very blessed to have her in my life and I cherish our times together. 🙂

Here we are standing in front of our Christmas Tree…I’m in the red sweater. 🙂

IMG_3105

Let me first start by giving you a little list of what you’ll need to make each of these sweet little Reese’s Christmas trees:

  • 1 regular sized Reese’s Cup
  • 2 miniature sized Reese’s cups
  • 1- Hershey’s Kiss
  • 1  tub of pre-made chocolate icing
  • 1 tub of pre-made vanilla icing (we had green colored vanilla icing)
  • Christmas themed sprinkles
  • Piping bags
  • Piping tips (I’m thinking you could also use a zip-lock bag and snip one of the bottom corners if you don’t have piping bags and tips)

The first thing that we did was take some time to unwrap all Reese Cups and Hershey kisses.  Then we filled a piping bag up with some of the chocolate icing…

IMG_3079

Karen owns these cute piping tips and we chose to use #7

IMG_3083

The icing would be the “glue” that would hold all parts of this little spiffy Christmas tree together. Then we just simply piped a dollop of icing on the Reese’s cups and started building the tree in this order…1 small cup, the large cup, 1 small cup, & top it off with the Kiss.

And the constructing began…

IMG_3084

IMG_3078

IMG_3077IMG_3085

Aren’t they cute?! 🙂  Next, it was time to add the ‘garland’ (icing)…Karen loaded some green icing into another piping bag and away we went…

IMG_3081

IMG_3085

Next came the ‘ornaments’ (sprinkles)…I was so involved in creating that I neglected to take a picture of one completely finished Christmas tree…yeah, go me eh?!!

IMG_3093

I decided to make up little favors (to give to my family on Christmas Eve) with my trees. I had purchased these little buckets, clear gift bags, and gift ribbon from Hobby Lobby…

IMG_9724

I had decorated up one of the little trees with icing and sprinkles and then I tried to place it down into that bucket…ummm…that did not work well, I had icing everywhere and well, I had to come up with another plan of action.  So here’s is what I did…

First, I placed the bucket inside the bag and snugged the bag down so that I had access to the inside of the bucket.

IMG_3086

IMG_3087

IMG_3088IMG_3089

Then I decorated the tree while it sat inside the bucket…that took a little manipulating and a bit of patience, but I managed to get them done…

IMG_3091

IMG_3092

IMG_3096IMG_3098

Then I pulled the bag back up and gathered it together and tied it shut with the gift trim…

IMG_3099

IMG_3100IMG_3101

I placed all of my favors into a pretty Christmas box and actually put them into my freezer for safe keeping until Christmas Eve…I’ll take them out that morning and they should be perfect to transport home with their new owners. 🙂

IMG_3102 (1)

So, when all was said and done, Karen and I had a very productive day creating a fun new little treat and making many fun memories to cherish. YaY!!!

Merry Christmas to all and to all a good night! ❤

Until next time, y’all take good care!! ❤

~Arlynn


Peanut Butter Fudge (2 kinds) & Peanut Butter Pie

To say that my family loves peanut butter is an understatement.  Well everyone *except* my hubby…what?! lol Now that Christmas is approaching I’ve entered into my usual fudge making frenzy stage because it seems that everyone loves my peanut butter fudge.  I will be sharing 2 different peanut butter fudge recipes with you; I cannot take credit for either one of these recipes though as they were both passed on to me years and years ago by dear lady friends. On second thought, I guess I can kind of call them my own now as I’ve probably made hundreds (literally) of batches of these two fudges.  Also, I’ll be highlighting that wonderful ingredient *peanut butter*, in the form of a pie.  I stumbled upon the very best peanut butter pie recipe *ever*…honestly, it is awesome! I cannot remember where I collected it from, but I found it in my recipe basket a couple of years ago and now I am sweetly *expected* to provide it for family get-togethers because my extended family completely LOVES peanut butter…yes, indeed they do. 😉 🙂  I love to be *expected* to provide any recipe…makes a girl feel loved and appreciated ya know? 😉 🙂

So here we go, these 3 decadent recipes are ones that I make every Christmas without fail, and I usually make them in bulk…well at least I make both kinds of the fudge in bulk. (I will share my secret for cutting perfect fudge squares after the recipes)

The first recipe I’ll be highlighting is:

Creamy Peanut Butter Fudge

Ingredients:

2 cups sugar

½ cup milk

7oz. jar marshmallow crème (fluff)

Small jar peanut butter (or just under 2 cups)

Directions:

Combine sugar and milk in a saucepan and bring to a boil on medium heat; boil for 3 minutes.  Remove from heat and add marshmallow crème and peanut butter and stir vigorously until completely combined. 

Pour into a buttered 9” x 9” dish (I line the dish with foil and butter the foil, that way, when it is cool, you can just lift the foil and fudge right out…makes it easier to cut in even squares) Enjoy!! 🙂

One note…I cannot find the “Jet-Puffed” creme this year, so I got this and it tastes and works out exactly the same…I’ve already made two batches…IMG_9764


Next:

Double Decker Fudge (Tastes like a Reese’s Cup!)

Ingredients:

2 cups (12 oz. package) Reese’s Peanut Butter Chips, divided

IMG_9765 (1)


1/2 cup cocoa

IMG_9767

1/4 cup butter, melted

1 tsp. vanilla extract

______________________

4 1/2 cups sugar

1 jar (7 oz. ) Marshmallow  Creme

IMG_9764

1 1/2 cups (12 oz. can) evaporated milk

1/4 cup butter

Directions:

Line 13x 9 inch pan with aluminum foil. Place 1 cup of peanut butter chips in medium bowl; set aside. In second medium bowl stir together cocoa, melted butter and vanilla until mixture is smooth; add remaining 1 cup chips. Set aside. In heavy 4qt saucepan stir together sugar, marshmallow creme, evaporated milk and ¼ cup butter. Cook over medium heat, stirring constantly, until mixture comes to a rolling boil (this is what takes so long); boil and stir 5 minutes (time this). Remove from heat. Immediately add half of hot mixture to bowl with peanut butter chips only. Pour remainder into cocoa mixture; stir to blend. Beat peanut butter mixture until chips are completely melted; spread evenly in prepared pan. Beat cocoa mixture until chips are melted and mixture thickens. Spread evenly over top of peanut butter layer. Cool until firm. Remove from pan; peel off foil. Cut into squares. Store in airtight container in cool, dry place (I actually store this in the refrigerator). Enjoy! Makes 6-8 dz. squares.

IMG_5333

Now my cutting secret…not the it is that much of a secret, but I have found that it is pretty full-proof.  I lift the fudge out of the pan with the aluminum foil and place it on a cutting board.  I peel the aluminum foil off and I take a large knife and I eye-ball what I feel the center is, I cut all the way through, then I half each half, then I half each half of each half.  I then turn the fudge and do the same thing going the other direction.  It works out every single time. 🙂  Then I place the squares in air-tight containers and I separate the layers with paper doilies–makes for a prettier presentation and it also prevents the fudge sticking together.

IMG_5342

IMG_5344

Last but not least, I’ll give you my Peanut Butter Pie recipe, trust me, it is really, really, *really* tasty!!  Here goes:

Ingredients:

1 1/2 cups heavy whipping cream

1/4 cup sugar

8 ounces cream cheese

1 cup creamy peanut butter

1 cup confectioners’ sugar

1 graham cracker crust, store-bought or pre-made

(I always make my own using this)

IMG_9766

 Directions:

Whip cream with 1/4 cup sugar. Mix all other ingredients until smooth and fold in whipped cream until well blended. Pour mixture into a graham cracker crust and chill for several hours before serving.

Easy peezy and SO so good!!! 🙂

IMG_9605

Life is just better with peanut butter don’t ya think? 😉

Until next time, y’all take good care! ❤

~Arlynn


Christmas 2015: Doggie Treats & Stockings


As y’all know by now, my family is the most important thing on this planet to me.  Now, when I say my family I’m not only talking about my kids, hubby, dad, aunts, uncles, cousins, nieces, nephews, and so on, I’m also talking about my doggies.

Here they are…from left to right…Gracie the Golden Retriever, and the Newfoundlands Sophie and Samson. ❤ ❤ ❤

IMG_2757

IMG_2822

They are such a part of my heart and our lives on an every day basis; to say that I’d be lost without them is a huge understatement.  So, at Christmastime, these pups also receive their own stockings and said stockings are usually filled with a couple of their favorite toys and treats.

Let me show you the stockings that I just ordered up for my pups a couple of weeks ago.  My cousin Stacey that y’all have met for a few guest spots  here in my blog, the most recent being her “Light Up Christmas Canvas” post, gave me the link for these Customized Holiday Paw Stockings.  Here is a picture of what I ordered this year:

12295490_10207735788703150_7127908770205692549_n

“Valentino” is our daughter Candace and her beau’s pup, here is a picture of that little dude:

12308525_10207774188343117_922537198557539083_n

I have already collected some stuffed toys with which to fill the stockings, but, I thought I might like to make them some healthy doggie treats as well.

I have a couple of great recipes that I’d love to share with you, the first one is from Stacey and her gorgeous white labrador Piper. Here they are looking stupendous last summer at the beach. ❤ ❤

11781823_10206036970477147_4741239806116885547_n

Stacey made these treats for our pups last year, here is a link to the recipe:

Homemade Peanut Butter Dog Treats–Stacey did want me to let you know that she substituted “real bacon bits” (the kind you can find with the salad dressings in the market) instead of frying real bacon. 🙂

12348283_10206747817607881_174118173_n

12335897_10206747817487878_663146995_n-1

Piper did a taste test and gave her hearty approval. YUMMY!!

And here I am feeding them to our pups on Christmas Eve evening last year, they LOVED them!!

IMG_8341

A lovely friend of mine named Anna gave me another doggie treat recipe and my pups just gobble these up!!  Here is the recipe:

Pumpkin Dog Treats:

Preheat oven to 350 degrees F. Lightly grease cookie sheet.

Ingredients

4 Cups Oatmeal (Old fashioned or Quick Cooking)

1 – 14 oz. can of 100% Pumpkin (not pie filling)

1 Tsp. Cinnamon

1 Tsp. Vanilla

1/4 Tsp. Ground Cloves

2 Large Eggs

Dump all ingredients in a bowl and mix well.

Drop by rounded teaspoons full on cookie sheet, flatten with the back of a spoon and bake for 1 hour.  Let cool on cookie sheet for 5 minutes and then remove to cooling rack or waxed paper to finish cooling.  When completely cooled, place into storage bags or tightly sealed container and keep refrigerated.

Makes approx. 6 dozen cookies

I searched for pictures for an hour this morning and couldn’t find one of them partaking in these spiffy treats…<sigh> OH well…

I will share some recent pictures of our pups though…


My life would definitely not be complete without these precious beings in my life…and as I have said before, yes, I am one of *those* dog moms…haha. 😉

Until next time, y’all take good care! ❤

~Arlynn