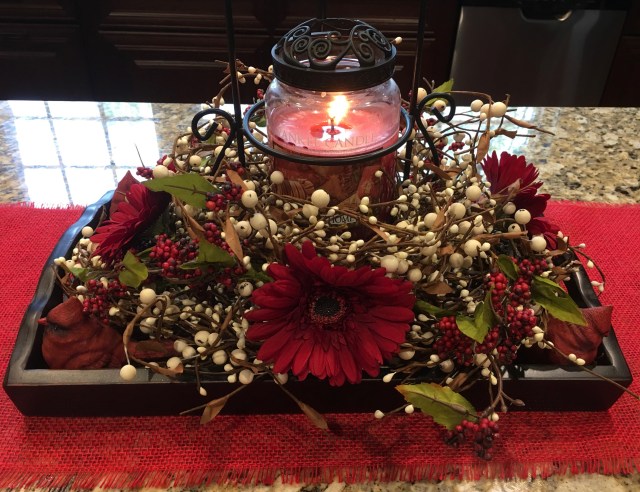
As most of you know by now, I absolutely love to decorate and redecorate our home…I truly am in my “Happy Place” when I’m able to switch out to a new fresh look. Such has been the case for the last couple of weeks when I diligently worked on putting my Easter decorations away and redecorating with some summer decor accents. At first, I had told myself that I was going to use ALL of my red and white gingham decor pieces–the ones I had used for our Family Reunion. I came up with that idea after one of my YouTube subscribers has asked me how I set up my kitchen island for buffets or dinner parties. That brought to mind the red and white gingham, mason jar, and gerber daisy decor and hence my decision to switch back over to that for summertime. I did change that family reunion decor up a bit when I decorated though, I ended up using just a touch of red and white gingham and throwing in pops of yellow and red here and there. Come along with me as I walk you through all that I created. Let me start by sharing a YouTube video that I created and where I show and tell about how I came up with the Family Reunion decor and accent pieces, talk about how I might set up my island for a buffet, and I demonstrate how to make a quick and easy centerpiece. 🙂
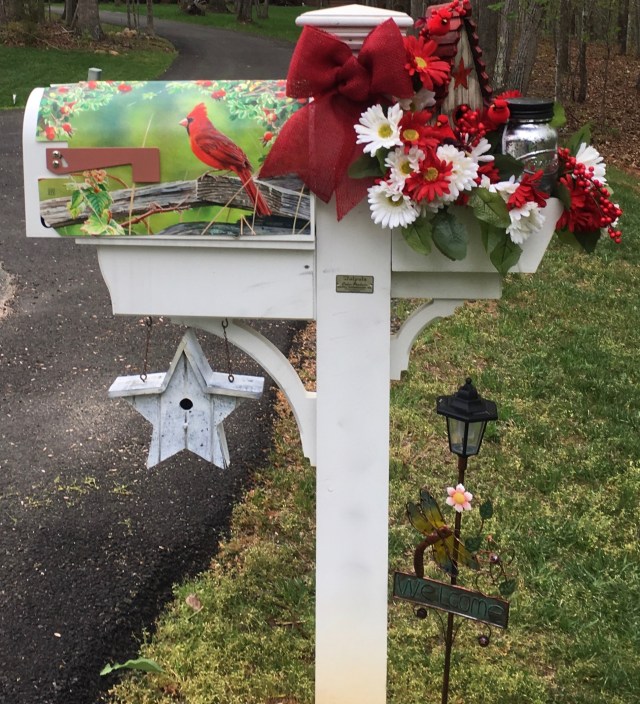
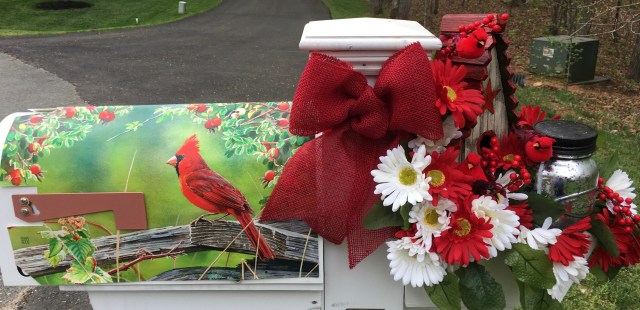
I was now ready to start the redecorating frenzy–And trust me, it is a frenzied event when I go to switch my decor out. Thank goodness for Chris and his muscles and good knees, as he helps me by carrying bins up from the basement. The very first place I started to redecorate was out at the mailbox on the Monday right after Easter. 🙂 Here are a few pictures of my mailbox design, and then I’ll share my YouTube video in which I show you how I put said design together. 🙂
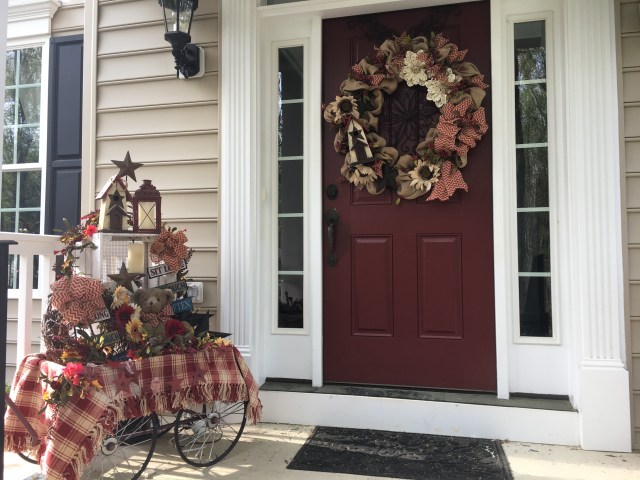
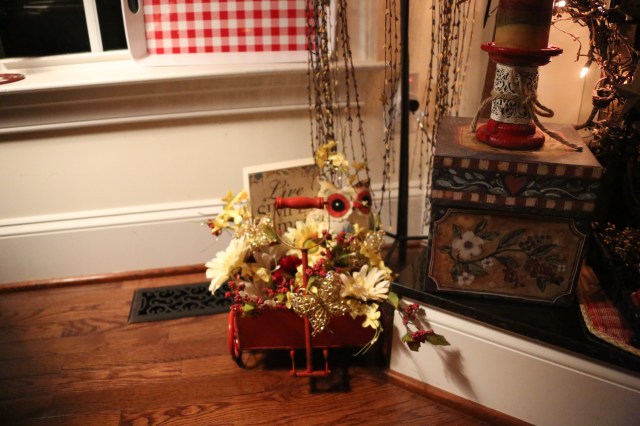
Next, I moved onto the other outdoor decor. I switched out the wreath on the front lamp post, changed out my flags, switched out the gazing ball for a red one, and recreated the Little Red Wagon arrangement, finishing up by replacing the front door wreath:
Here is the little red wagon in the evening hours:
And here is my YouTube video where take you for a little walk down the front sidewalk and then I demonstrate how I decorated my red wagon:
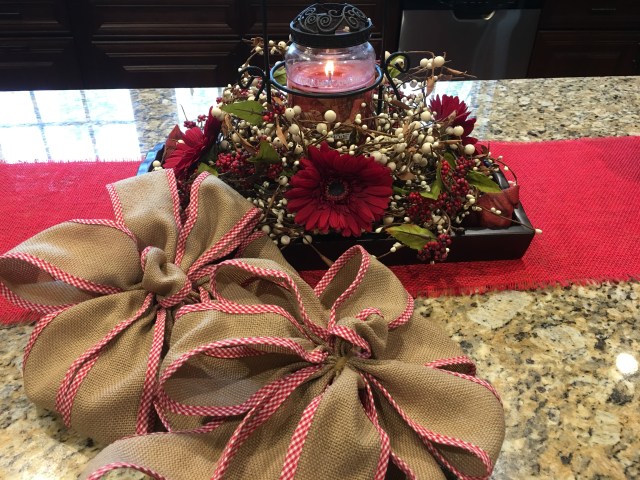
All righty, now that the outside was all switched out, I proceeded into the house and started redecorating in there. The very first thing that I worked on in there was the centerpiece that sits on the kitchen island, and to make a copious amount of bows to be used on our staircase. Here is a video where I share how I put that together along with showing you items that I purchased from CraftOutlet.com.; it also includes a bow tutorial.
My next task was a pretty large one, it was time to change over some and create other new centerpieces. So the first thing that I did was go around and collect all of the Easter centerpieces and arrangements and congregate them onto my hub, the kitchen island. Here are all of the arrangements that I had made for Easter:
I was sad to have to deconstruct these beauties, I had worked hard on them. 🙂 Here is a video where I show you how I took these apart and packed them away and how I created my new centerpieces for the summertime.
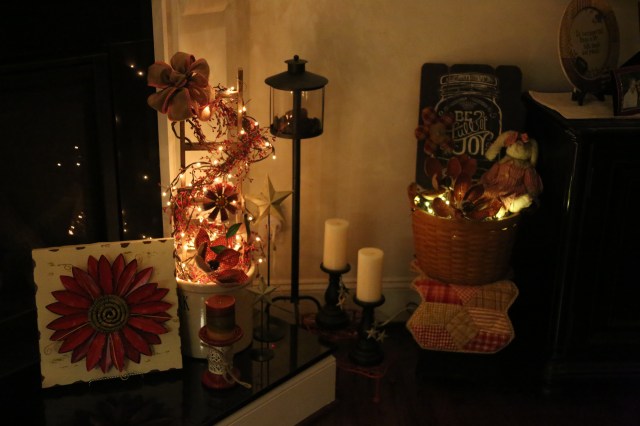
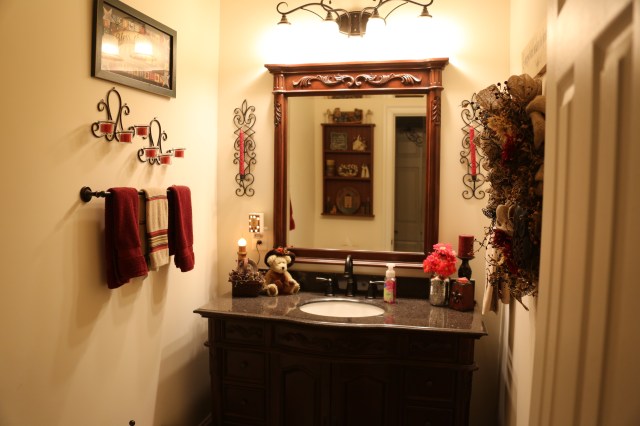
Here are some pictures of the family room, kitchen, kitchen eating area, and powder room redecorated for summertime:
Here is a video where I show you how I put together this ^^ sweet little arrangement:
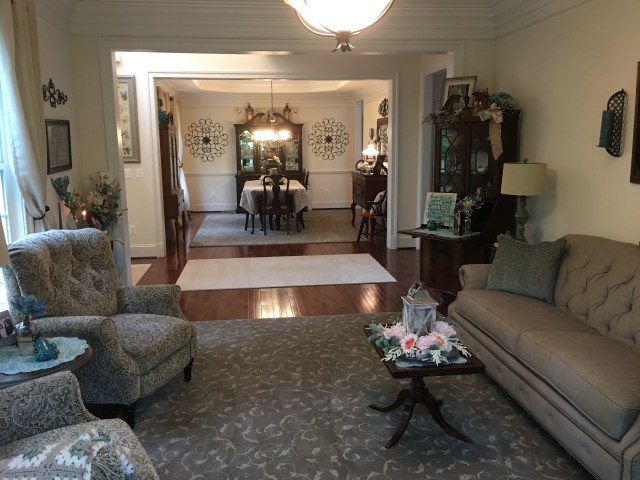
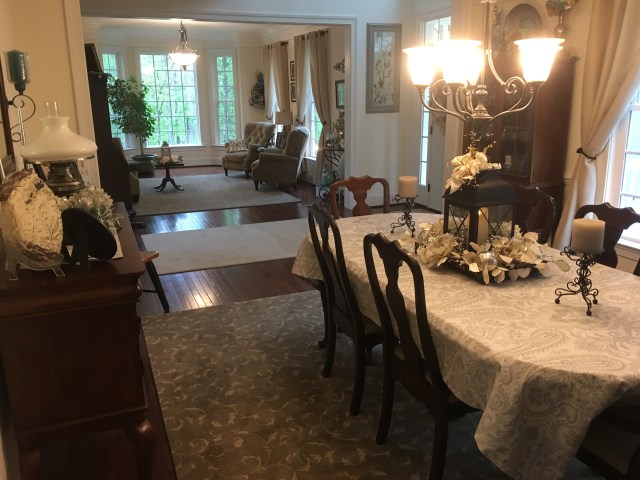
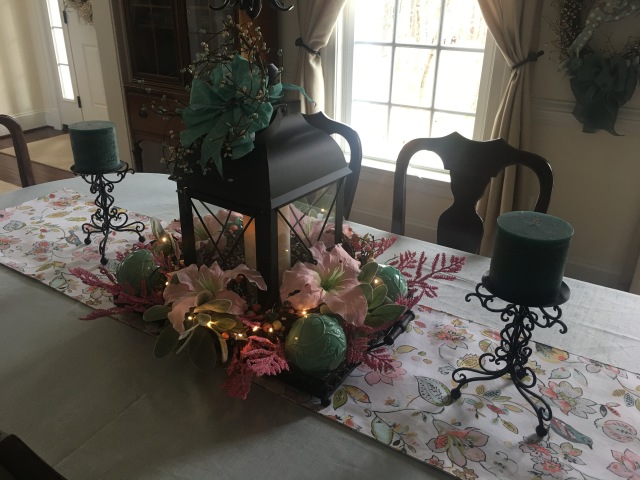
Now it was time to move on into the Living and Dining rooms–I didn’t do too, too much in there because I decided that I would leave my “generic” decor with the green accents in there for summer. I did recreate my dining room lantern centerpiece and I created a new little arrangement in a mercury glass mason jar..first pictures of those arrangements and the other living/dining room decor, and then a video showing you how I created both arrangements. 🙂
And, I was finally finished…This process took me a couple of weeks to complete. Here is a video where I give an entire house tour showing you all of the redecorated spaces up close and in detail (and I even venture upstairs and do a quick little tour up there as well):
All righty, that does it for now…As y’all can see, I’ve been a busy lady over here in Virginia. We are ready to go (decorating wise) for summer, and it has been feeling like summer as of late too, temperatures have already been in the 80’s and 90’s! Yikes!! Welcome to summertime in Virginia…100 degrees with 100 percent humidity….Not even kidding about that…lol. 😉
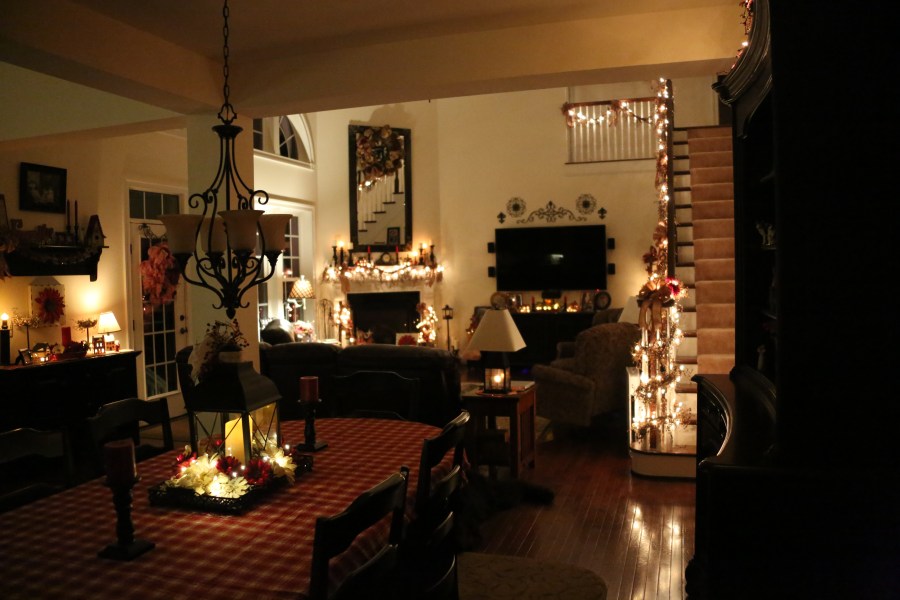
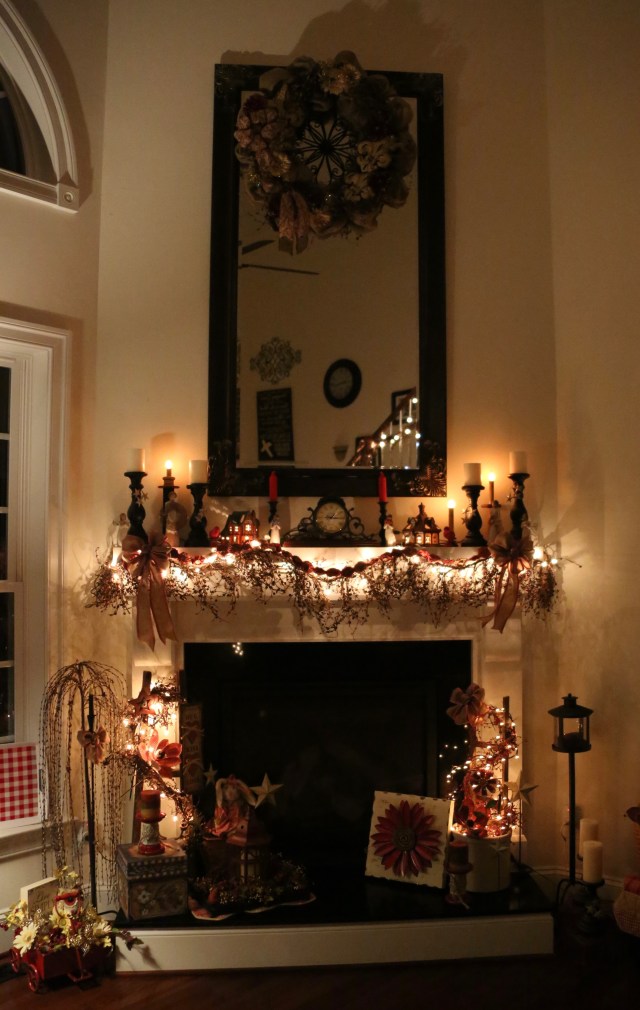
Here are a couple of more shots of the house after dark, Chris did such a fabulous job on the outdoor lighting!
~Until next time, y’all take good care! ❤
**In crafting there are no mistakes, just unique creations**
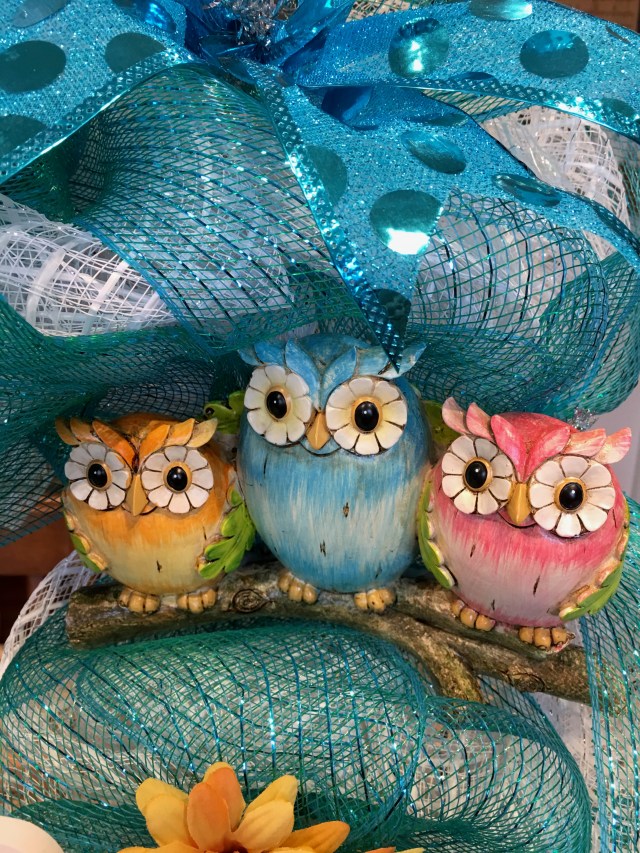
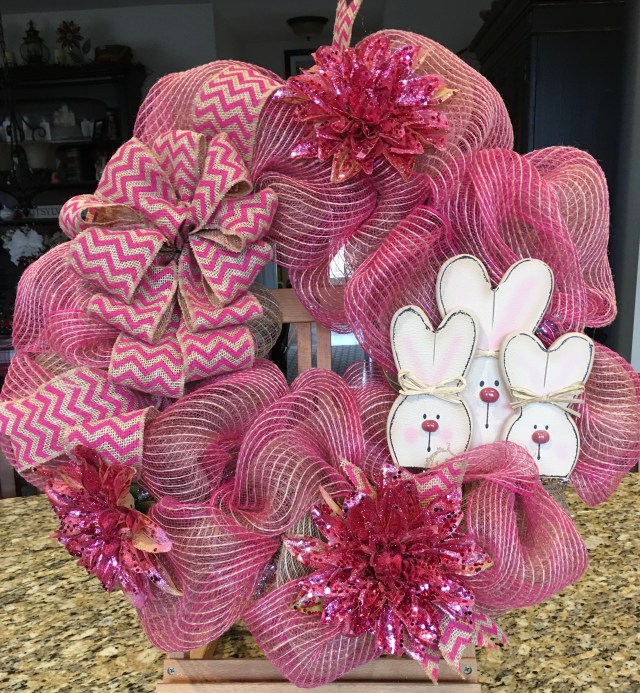
I woke up one day and had a bright idea! That happens to me a lot…haha…I have my best ideas first thing in the morning—I have no idea why that is, probably because my mind is forever moving and trying to come up with the next craft to create or room to decorate during the day, so when I sleep, ideas finally have a chance to come to the surface. Anyway, that morning’s bright idea was that I wanted to create a wreath for our daughter Christin’s Kindergarten classroom. I knew how she had her room decorated, it was done up in owls and soft greens & blues…It looks so sweet! So I decided that a deco mesh wreath would be the perfect thing to pair with her room’s decor. 🙂 And when I found this Owl Trio in Hobby Lobby one day, I just couldn’t resist, I had to build a wreath around them!
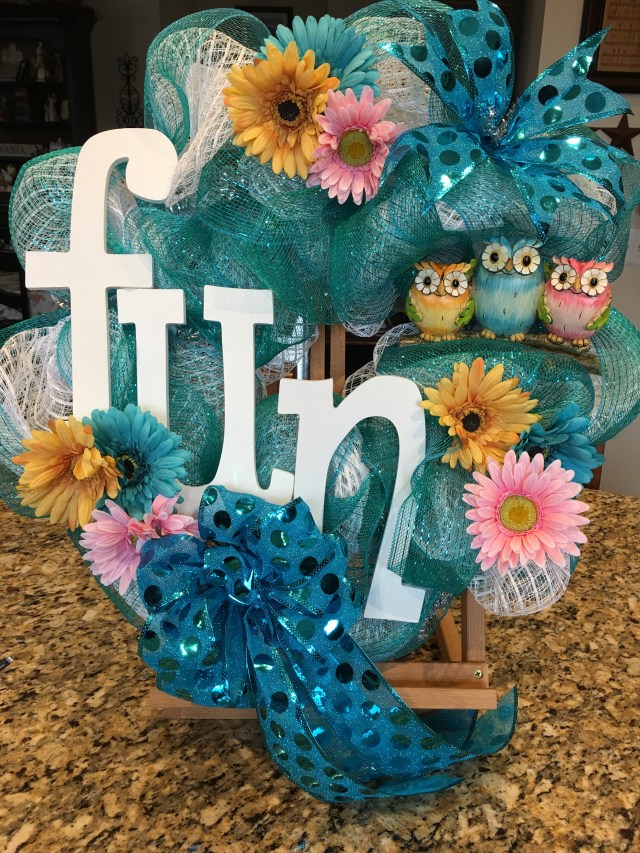
I have made a video tutorial for my YouTube crafting channel, and I’ll put a link for that below, but first, I’ll give you a list of the supplies that I used to create this ‘fun’ and whimsical wreath (the first three letters of Christin’s last name are F-U-N, and her students call her Miss Fun, so I had to incorporate those letters into this wreath. 🙂
Okie dokie, here goes:
1- 16″ Metal Work Wreath with the chenille ties already attached
1 Large (21″ x 24′) Roll of White Deco Mesh
1 10″ Roll of Teal Deco Mesh
1 Roll of Teal wired Craft Ribbon (for a bow)
3 Wooden letters of your choosing
A Wooden Owl Trio (or any other accent piece of your choosing)
Gerber Daisies to match (I chose 3 gold, 3 blue, & 3 pink ones to match the owls)
Hot Glue Gun, Scissors, & Pipe Cleaners
Here is a picture of the finished wreath—I am very happy with the final result! 🙂
And here is my Video tutorial that I have posted on my YouTube crafting channel (the video also includes a “Car Chit-Chat” where I tell how Chris and I met among other things):
Please feel free to subscribe to my YouTube Crafting Channel…Here is the main link:
I had such a great time decorating for Easter this year. As I mentioned before in my It’s Beginning To Look A Lot Like…Easter! (w/Links to my YouTube tutorials included) post, I had only decorated this house once for Easter/Spring. So, I did need to recreate the wheel this year–I love recreating the wheel btw, one of my very favorite pastimes. 😉 Unfortunately, I did break my monthly budget…um…by quite a little bit…haha. BUT, that’s okay, I will now have the items that I’ll need to redecorate moving forward in time. I have really enjoyed the lighter and airier colors that Easter and Spring bring forth–it is quite different than my every-day decor and I am patting myself on the back for a “job-well-done”…haha…NOT really, but, I’m pretty happy that the creative juices flowed in the direction that my mind’s eye had pictured. 🙂
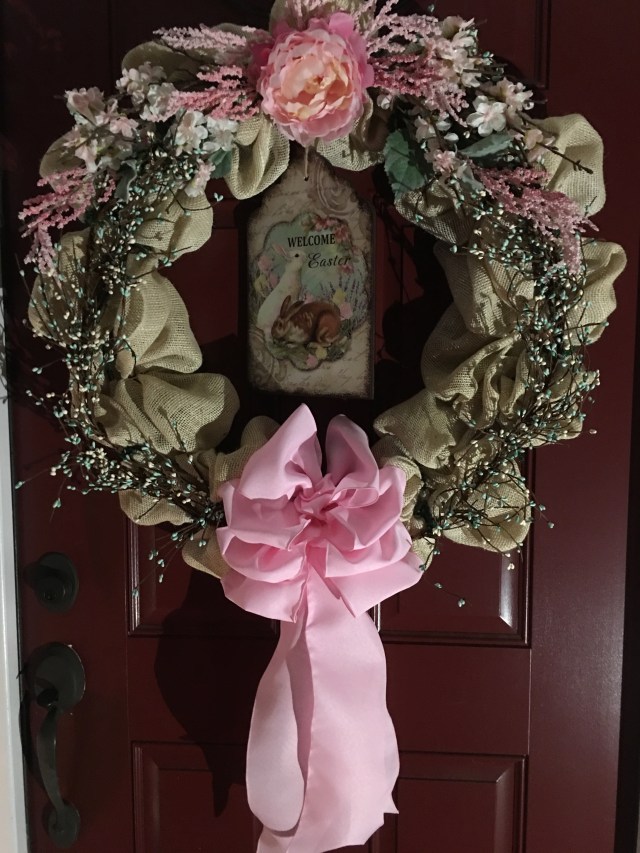
I have now finished the outdoor spaces as well. I started redecorating out there with the front door wreath, if y’all will remember, I had the bright idea to use the same cream burlap wreath that I created using St. Patrick’s Day accent pieces and no glue for my Easter wreath. So, I pulled my St. Patty’s Day wreath off of the front door and I pulled all of the green accent pieces off and replaced them with pinks and soft greens and transformed it into an Easter wreath that I truly love!! 🙂 Here is a picture of the finished Easter wreath and then my YouTube video showing you how I brought the transformation to fruition:
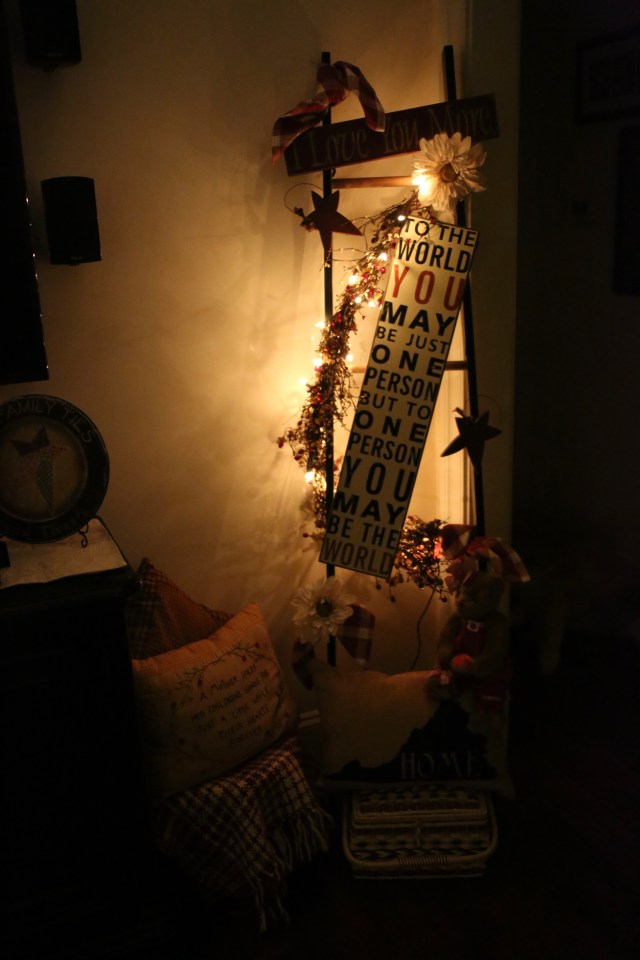
And here it is in the evening hours:
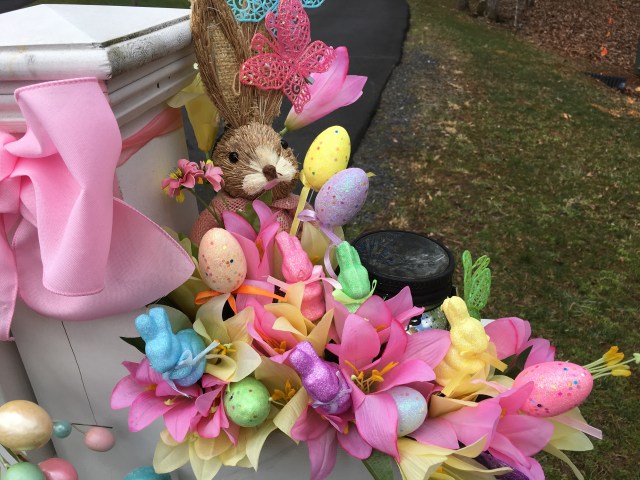
So after that little task was completed, I moved onto my other outdoor spaces, one of which was my “Little Red Wagon” that I love to redecorate for each Season. Here is what I did to that, one of my very favorite spaces to work within:
After that, I moved on out to the mailbox and finished the outdoor decorations:
I was pretty impressed that I could see the big pink bow that I had placed on the front door wreath… literally from the road. YaY!! 🙂
The doggies and I posed for a few pictures too. 🙂
Here is my YouTube video where I give you a tour of the outdoor spaces:
Okie dokie, that’s it for now…I’m quite satisfied and happy with how everything turned out and now my mind is already awhirl with ideas of what will come next…been thinking of revising the red&white gingham/mason jar/gerber daisy decor that I had created for our family reunion…uh huh, that’ll probably be next once May arrives. 🙂
Remember what I always say:
**In crafting there are no mistakes, only unique creations**
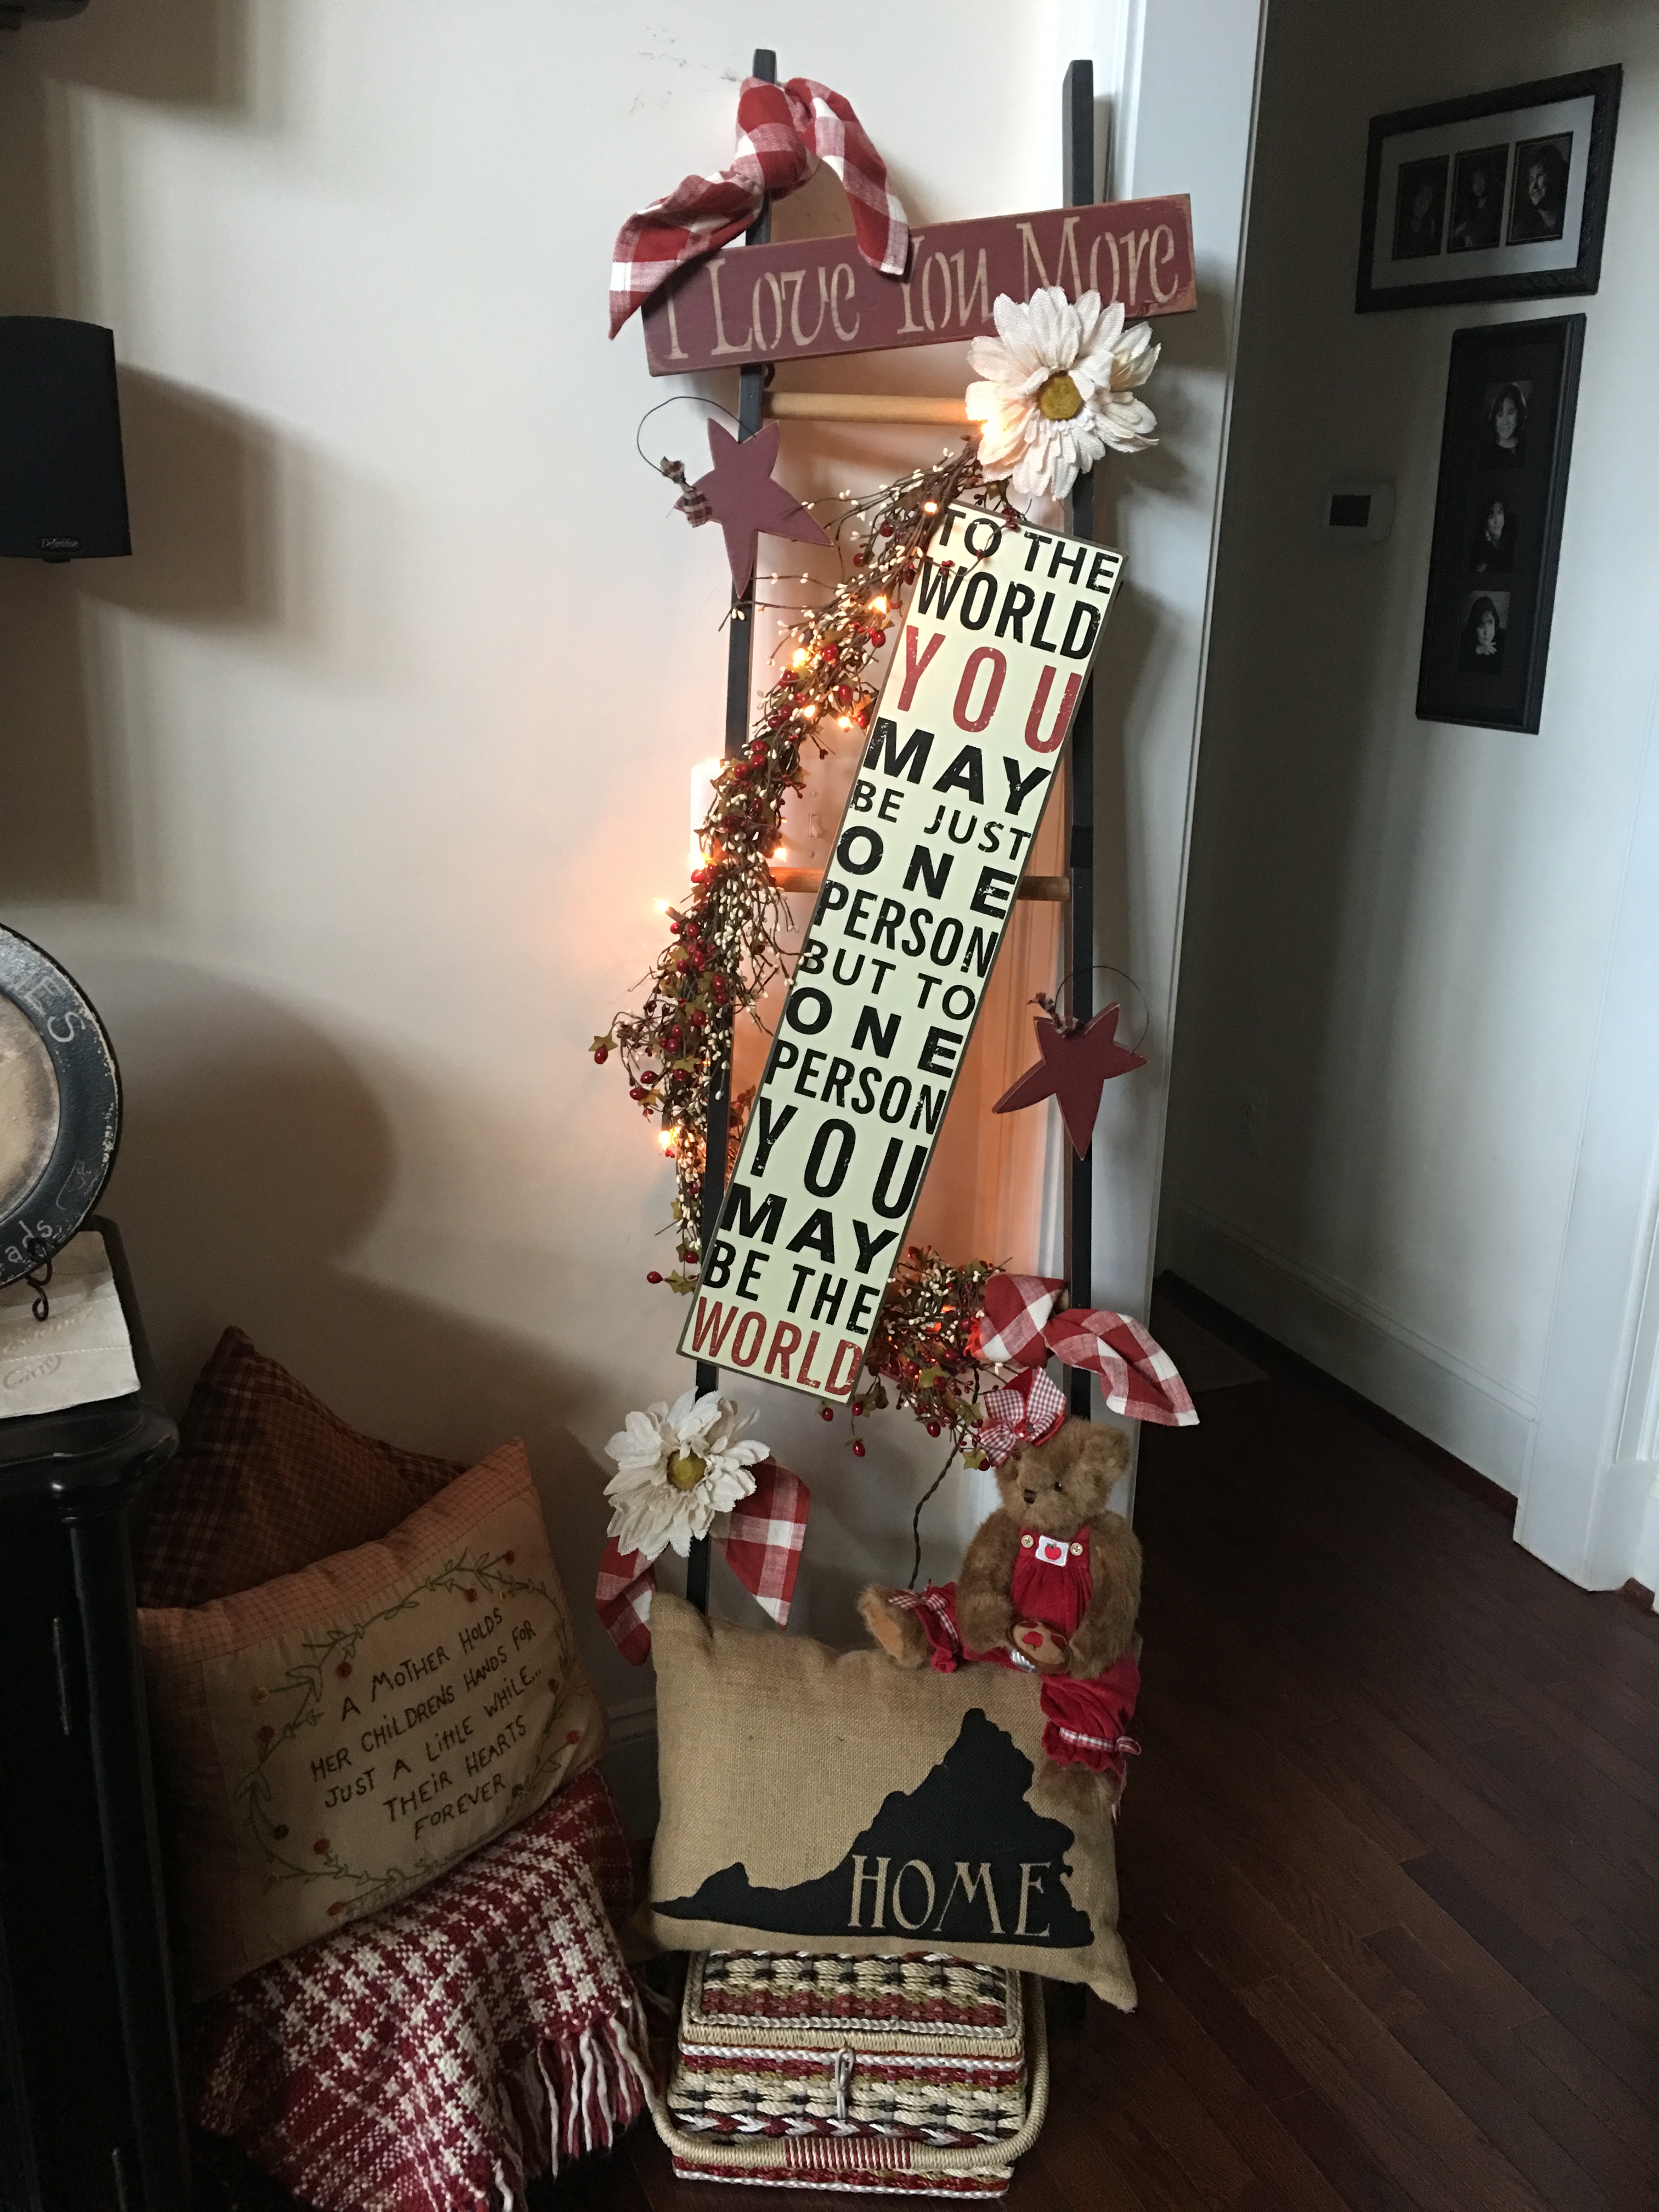
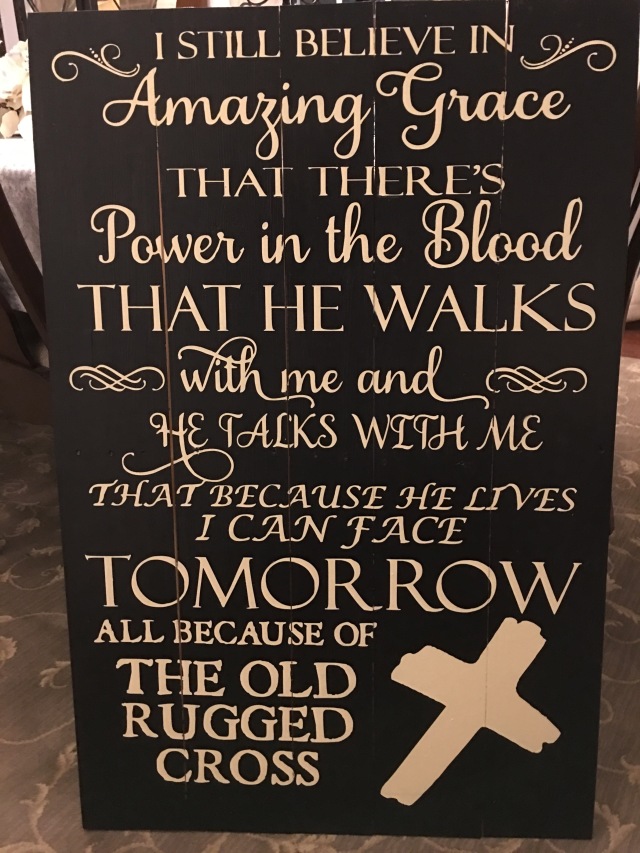
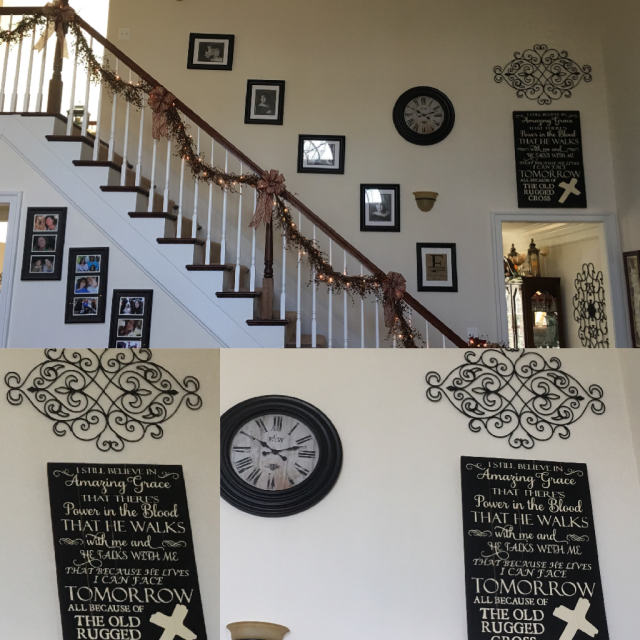
Life throws us curves at times doesn’t it? Please accept my sincere apologies for not getting this blog post written a little sooner, although if truth be told, I just finished my indoor Easter/Spring decorations the other day. But, I needed to push the pause button with my decorating and my blogging/vlogging–My sweet Aunt Midge passed away last week, and I needed a little bit of time to mourn, reflect, and to go and spend a little bit of time with my family. Crazy things like what I’m about to tell you happen to me all of the time, and I don’t know if it is a good or a bad thing, but, it is a *thing*. Chris and I had scheduled a visit up to “God’s Country” as we call it because I had commissioned a lady to make me a sign like this:
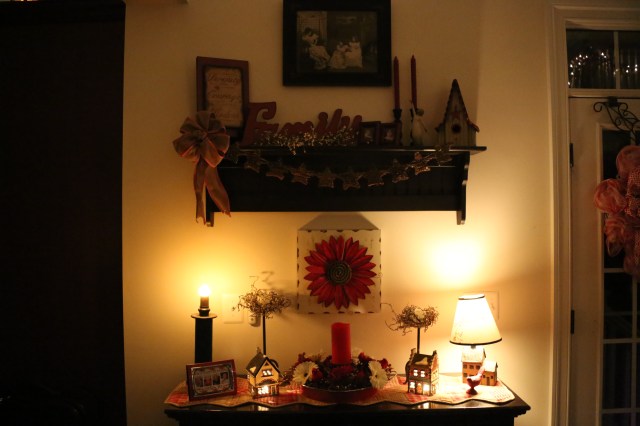
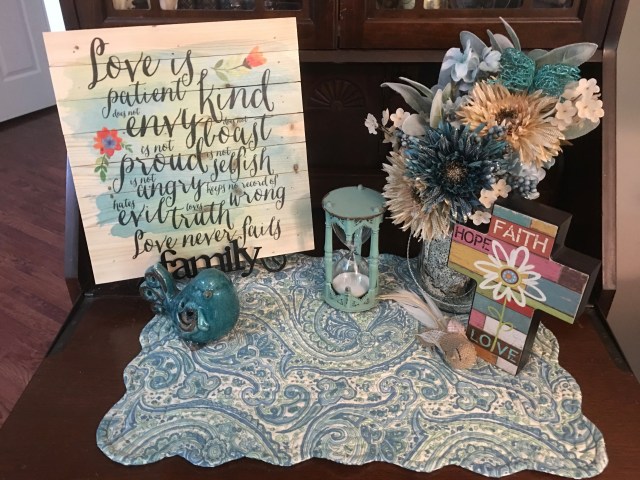
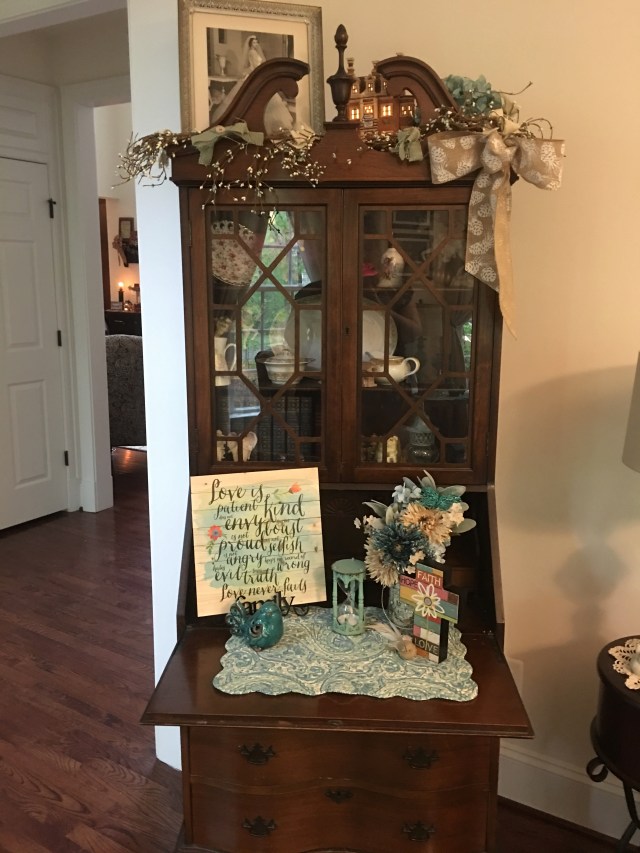
I saw that one of my cousin’s had gotten one, then another one got one, so I wanted one too, and I got one for my cousin Stacey (who y’all have met here on my site), and then my cousin Donita and I split the cost of one and we gave it to our Aunt Barb (Stacey’s Mom). SO that means that most of us here in my family have one of these precious signs now. It contains all of the old hymns that we sang as a family when I was growing up, and to this day, every time we’re together, we sing these hymns. I cannot tell you how special this is to me. ANYway, that’s the backstory of the sign, but, what I wanted to tell y’all was that my Aunt Midge who was in a nursing home up there in God’s Country happened to take a turn for the worse on the day that we were traveling to collect our signs. Bless her heart, it was so special for us to be able to go up and visit with her for that day—she passed away the next evening and her funeral (really a celebration of her amazing life, she touched so many with her sweet ways, knowledge of the Bible, her piano playing, and much, much more) was last week. When my Mom was dying, I happened to be shopping across town and got a feeling of dread and I literally hopped in my car and drove the 100+ miles to my Mom’s nursing home–I walked in and my Dad asked…”How did you know? I was just getting ready to call you”…Whew…cold chills when up my spine and I was very grateful that I had listened to that little inner voice that told me to GO. SO, anyway, I ramble…But, I wanted y’all know where I’ve been and why it has taken me a bit of time to stop, sit, and write a blog about the rest of my Easter/Spring decor. 🙂 Here is where that sign went to live in our home–We added that scroll’y’ piece over it and the clock to the left of it to try to pull all of the decor together.
NOTE: If you would like to get one of these signs, here is the contact information:
Craft Allie on Facebook Orders can be taken through Facebook or email at Ali.Candelas@yahoo.com or phone at 301-268-0816.
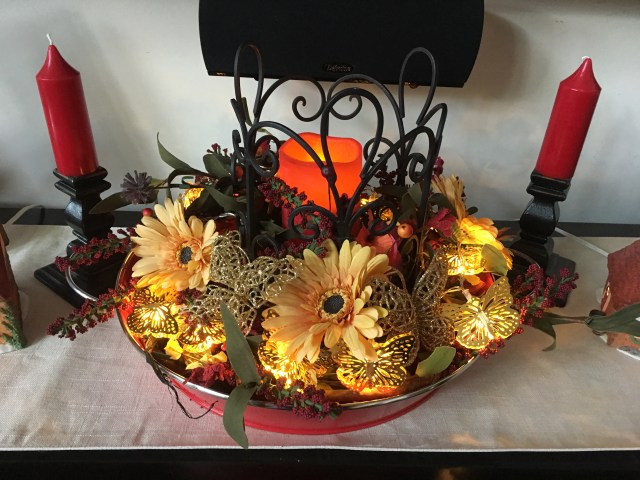
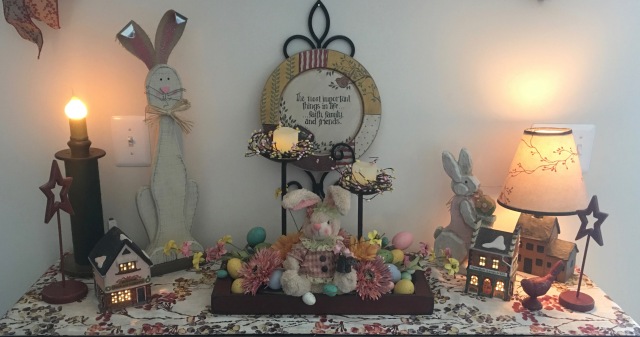
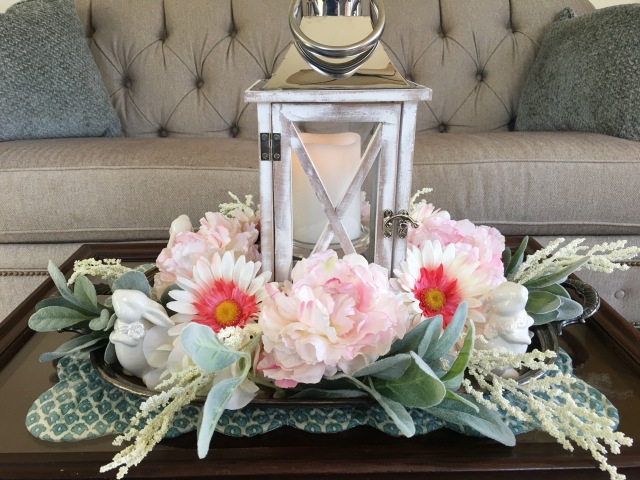
So onward we soldier folks…Okie dokie, when last I wrote, I do believe I left off at the fireplace. This sweet little arrangement is what I created next. It sits on a table that is between our family room and kitchen. I found that sweet little bunny at a country store we have in our town…I’ll post a video where I give a little tour of that store and where I show you how I created that centerpiece. 🙂
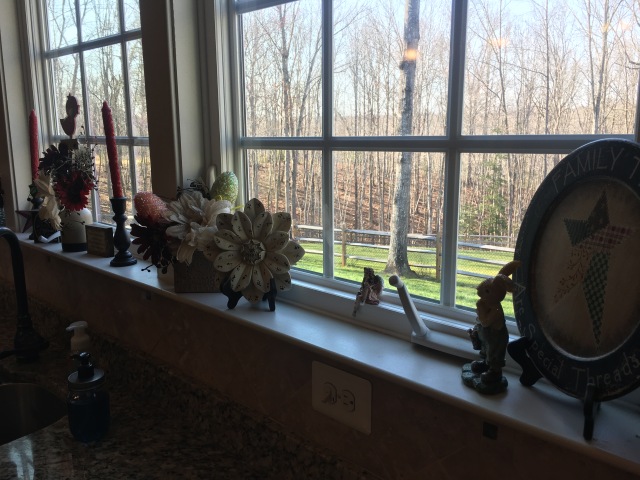
I did add a few things to the kitchen windows:
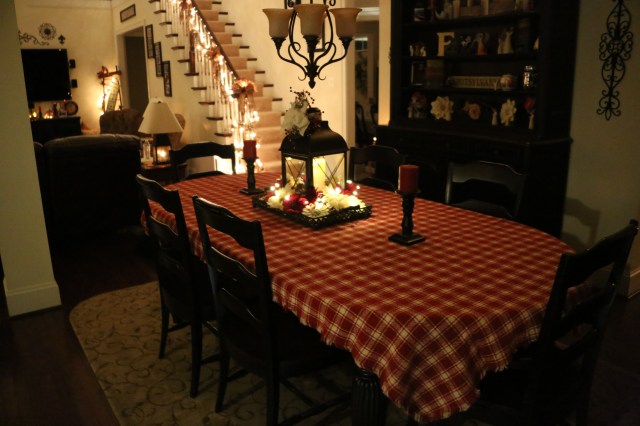
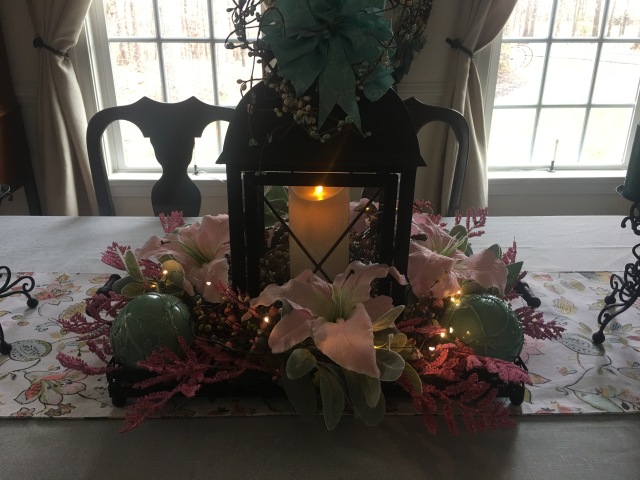
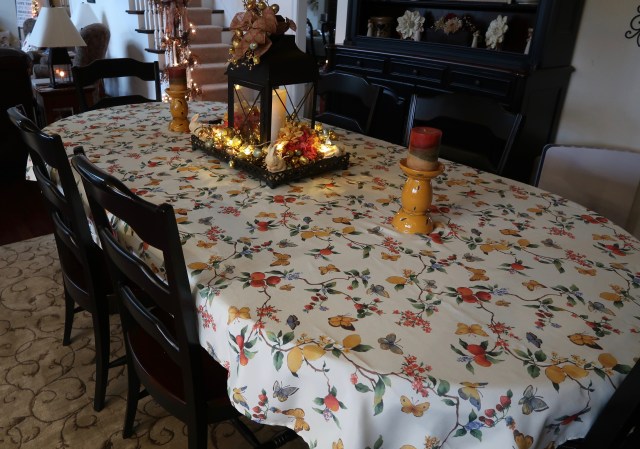
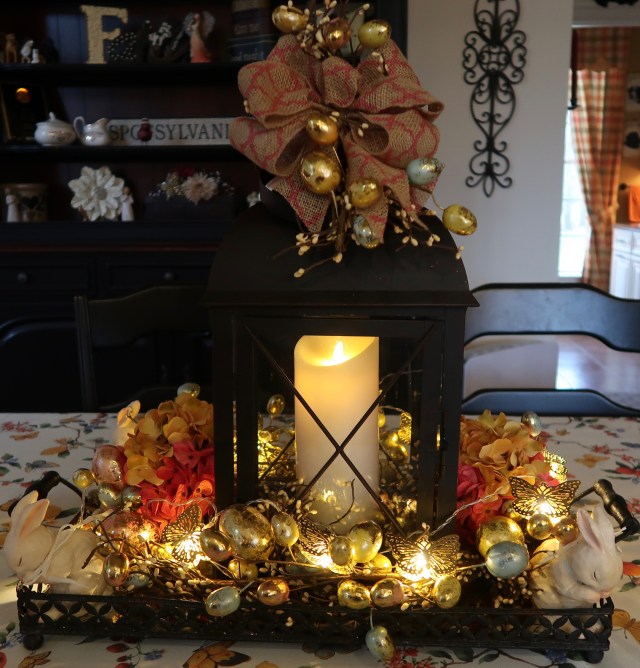
Next I moved into the dining room where I created this lantern centerpiece, switched out my tablecloth, and added a pretty Springy table runner:
Here is my YouTube video where I show you how I put together this dining room table:
And just the other day to finish my indoor decorations, I added a few little things to the living room to bring Spring and Easter into that space. 🙂 Of course I did make a video of that too and I will post a link below the pictures.
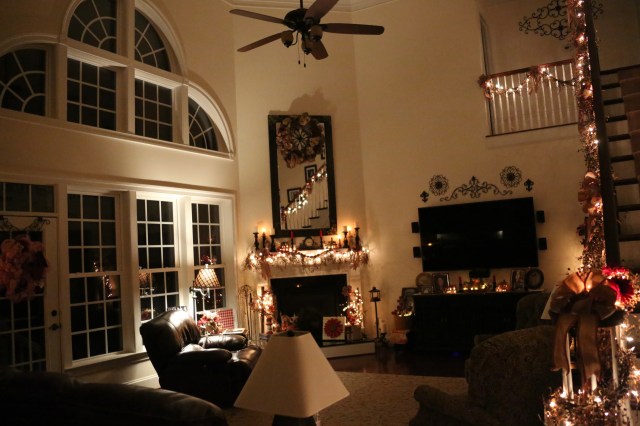
Here are a couple of shots of the family room and then the living and dining rooms:
And here is my YouTube video where I show you how I finished up the living room, and then after that I’ll share a “Car Chit-Chat” video that has a home tour of everything that I did for Easter/Spring after the Chat. 🙂
Next, I’ll be moving outside and decorating out there for Easter. 🙂
**In crafting there are no mistakes, only unique creations**
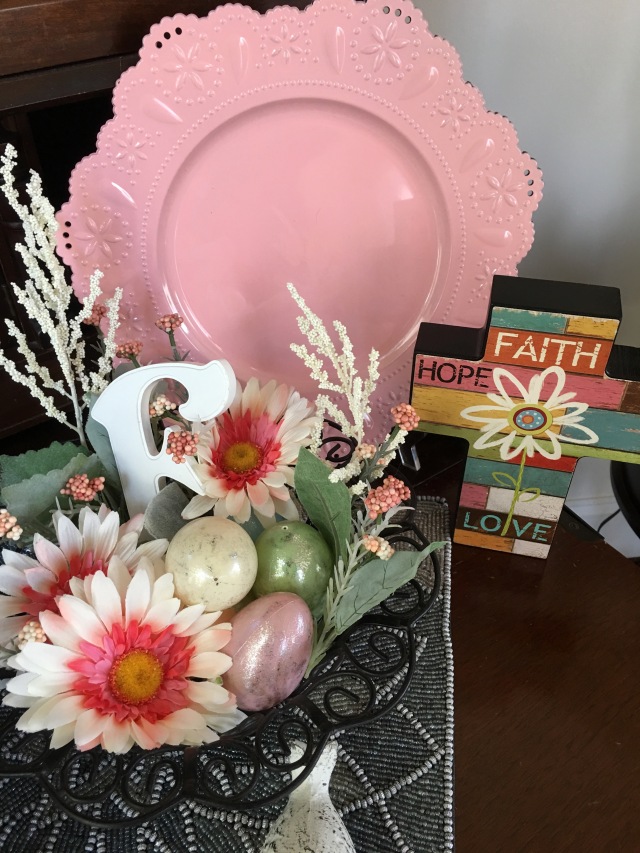
Do y’all know what I realized this year? I had only decorated this our new house once for Easter. What?! That hardly seemed possible, after all, I live to decorate for every little thing. 😉 But, nope, I had only decorated once, so I’ve gone on a mission this year, I’m trying to add a little bit of the Easter/Spring feel into our home. This has proven to be a bit of a challenge for me in our family room area because my usual decor lends itself to the more traditional country colors of burgundies, reds, dark greens, tans, khakis, and so on. In that one year that I had decorated, I had purchased a few things, and had only done the fireplace hearth, but, this year, I’ve been on a mission to find more decor accents that I can incorporate into our home to bring in the light and airy feeling of Easter and Spring. Well, little did I know when I found an egg garland in Hobby Lobby one day that I would base my entire design around that–at first I thought that garland was a little over the top with its gold tipped eggs of all pastel colors of the rainbow, but, I’ve really embraced it for my family room, and as you’ll see, I’ve incorporated it into every little venue and centerpiece.
This year, my plan is to only decorate “here and there” for Easter/Spring…WISH me luck please!! I’m trying really hard not to re-create the entire wheel (so to speak) like I do for Fall and then for Christmas–As much as I love the creating and decorating process, I do not love the pulling out of Seasonal bins and then un-decorating and storing all of my decor. I’m trying to keep some of my existing decor in place and augment with my Easter accents so I don’t go through the *pulling out of hair and gnashing of teeth* part of the redecorating journey. I’ve been somewhat successful, but, admittedly, I have done a bit of recreating of that wheel…haha. Although, I do think I’ll only be left with one bin of things that I’ve removed to make room for the Easter/Spring accents and therefore will only have 1 or 2 Easter/Spring bins versus the 8,9, & 10 (not exaggerating) bins I have for Fall and then Christmas.
All that said, I will show you what I’ve completed so far in the family room, and I will not be expanding my efforts too much further, meaning, I will not be removing any more decor in this area of the house. I have switched out my kitchen table’s tablecloth and redone that lantern centerpiece though, I’ll show you pictures of that below. From now on, in this portion of the house, I’ll just be adding an accent piece here or there to continue the theme throughout the kitchen and possibly powder room. 🙂 (I’ll put links to the YouTube Videos that I’ve created during this process below).
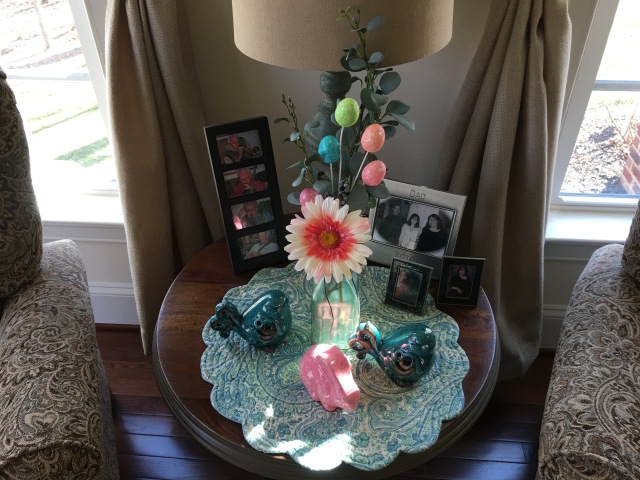
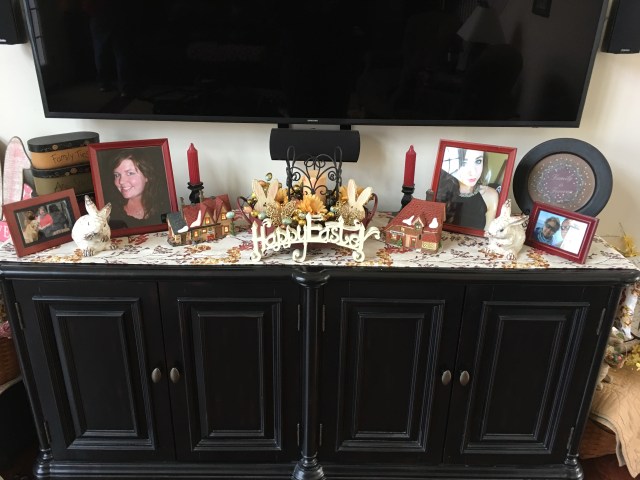
Here is the “Cozy Corner” that sits beside the tv credenza, admittedly, I did remove all of the decor and created this new design; there’s that new bling’y’ egg garland, and I wrapped it in pastel colored lights–OH gracious, did that ever make it pretty!
I switched out the table runner, added a couple of bunnies, and made a new centerpiece for the top of the credenza:
There’s a bit more of the egg garland peeking out of the centerpiece:
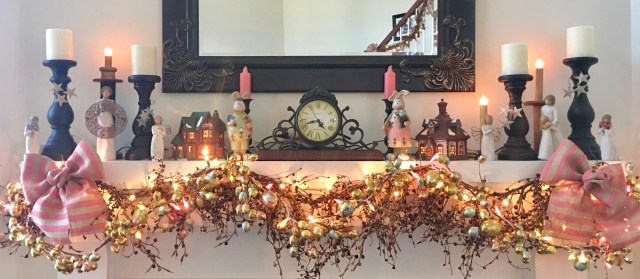
Here is the mantel, and instead of removing the pip berry lit (with white lights) garland, I simply wrapped another egg garland in those pastel lights and added it right on top of the pip berry garland…wow, I didn’t know if that would work out, but, I LOVE it…Other than the garland, I simply replaced the candles, made a couple of bows and added them to either side of the garland, and added a couple of ceramic bunnies on either side of the clock. I can’t tell you how happy I am with this mantel…so light, so airy, so, so pretty–if I do say so myself…lol…nothing like patting one’s self on the back a bit huh? haha
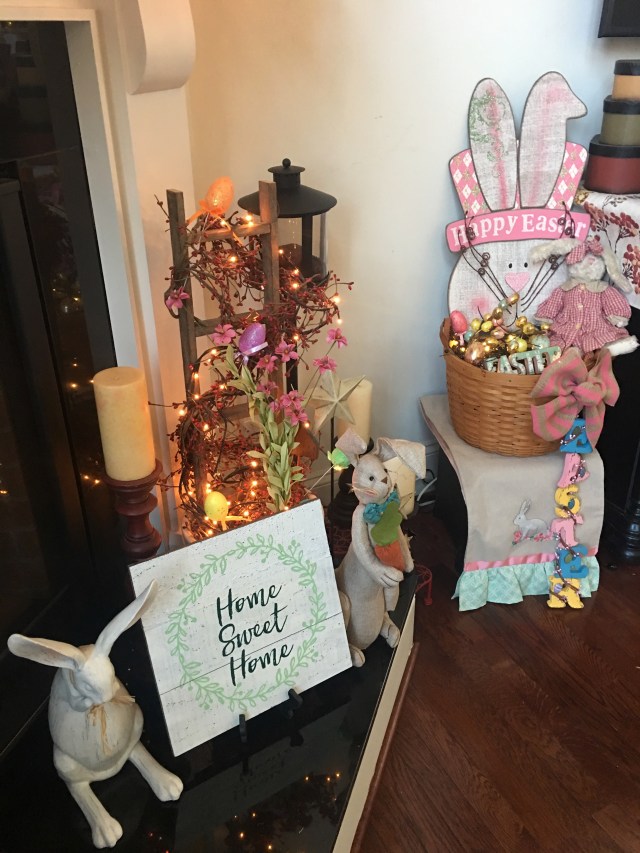
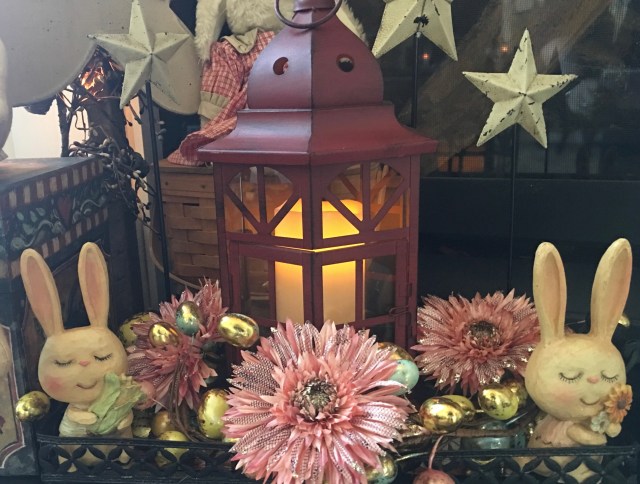
And here is the hearth–I made a new lantern centerpiece, and admittedly removed a good bit of the more traditional decor…this is the focal point in the room, I needed to really work with it and lighten it up in feel and design in order to bring everything together. I also redid the “cozy corner” basket design I have sitting right next to the credenza.
Here is the kitchen table–I had purchased the tablecloth last year, and I had some of the lantern centerpiece’s accent pieces, but, I did add a few more things to it this year…like…some of that egg garland, I’m nothing if not consistent. 😉 I also found a lovely golden butterfly light strand here at Victoria Trading Company.
I fell in love with those sweet little “praying” bunnies that I used to anchor the corners of this centerpiece. 🙂 ❤
Okie dokie…That about does it for what I’ve completed so far…I do have a table runner to add to the Island, and I might redo the centerpiece that I have sitting up there, and I plan to do a little something with that table that sits between the family room and kitchen…and then maybe add one or two things to the Powder room…maybe..haha. 🙂 I will then move into the living and dining rooms, I do have supplies to redo the dining room table’s lantern centerpiece, but that is about it for in there…we’ll see if I’m satisfied with that. 🙂
I’m pretty proud of myself that I’ve been able to step outside of my box and expand my decorating into the pastel arena—I’m quite happy with the results so far. 🙂
Here are a couple of links to my YouTube channel. I’ve been making tutorial videos (along with a car Chit-Chat too), as I’ve been working my way through this process. 🙂
Remember what I always like to say:
**In crafting there are no mistakes, *only* unique creations**
I am gearing up to do a little bit of Easter/Spring decorating in the coming days–Not too much, but just enough to bring a touch of one of my favorite times of year into our home. 🙂 I’ve only decorated this new house once for Easter, so I didn’t have many decorations to work with, I’ve been out and about doing a bit of hunting and gathering as of late. 😉 My YouTube channel is really growing nicely, so I am going to be linking some of my shopping trip/haul videos here for y’all to take a peek at…I’ve been a busy girl, like the energizer bunny–There *are* days that I wish I could find my “off” switch though..haha. ANYway, before I give you all of those links, I will post the supply list and the video that goes along with my new Easter Deco Mesh wreath (it will hang out on our front light post). 🙂
Here is that supply list:
1- 16″ Metal Wreath Frame (with the chenille ties already attached)
1 Roll of 21″ Deco Mesh in a burlap color
1 Roll of 10″ Deco Mesh in pink
1 Roll of Burlap and Pink Chevron Ribbon (for a bow)
1 Bunnies accent piece
3 Sparkly Pink Flowers
Scissors, Pipe Cleaners, & a Hot Glue Gun
Okie dokie…Here is my YouTube video tutorial–I do a craft bow tutorial in the video too:
Here is a link of one my shopping trips and Easter haul videos:
And here is where I explain how I’m going to decorate with the new items and I also show you what I’ve used in the past. 🙂
And here are a couple of “Car Chit-Chat” Videos that I’ve made up in the last couple of days where I’m collecting a few more supplies with which to get my Easter/Spring decorating completed. 🙂
A-n-d, my decorating will commence today!! YaY!! Finally! 🙂
Until next time, y’all take good care!
**In crafting there are no mistakes, only unique creations**
I have tried something new this year, can y’all believe that I’ve really never decorated many spaces for St. Patrick’s Day?! What? Sheesh, incredibly unbelievable…haha. Well, that is not a completely true statement, I did make this deco mesh wreath for our front light post last winter.
I just did a voice over YouTube tutorial for this wreath, here is a link if you’d like to take a look at how I brought this little beauty together:
Other than that one thing, the only other thing that I did last year was to hang one of my little decorative accent signs on our mailbox and tie a green plaid bow around it. This year, I did add some green and white flowers and a shamrock decoration to the mix. Here is a picture of what it looks like this year:
Okay, so those two spaces were completed, and I knew that I didn’t really want to decorate up the inside of the house—I’m waiting for Eastertime to do a tiny bit of redecorating for that lovely Holiday, not wishing my life away again, but, I’m looking forward to the bright and pretty colors that comes with some Eastery decor.
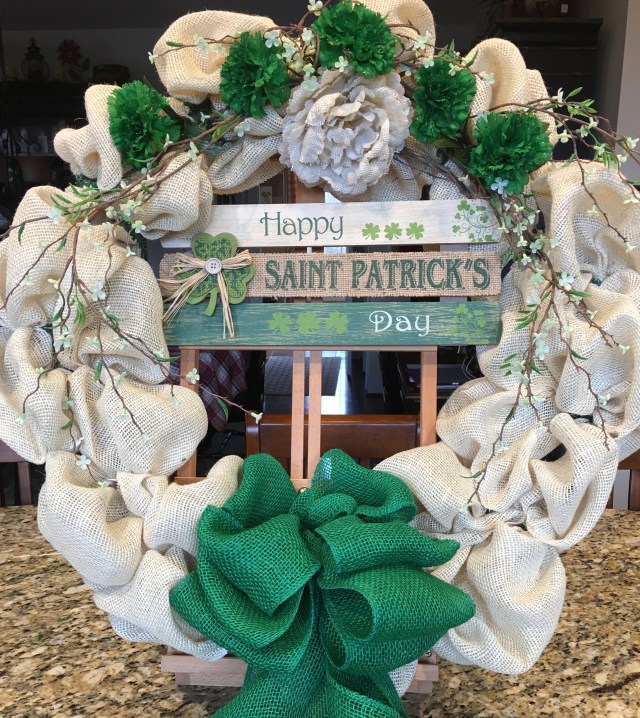
Okay, so now that that decision to not decorate inside was made, I set to the task of doing a little something more with the outdoor spaces. The first thing that I did was to make a cream and green burlap wreath for the front door.
And get this, I came up with a spiffy idea regarding this wreath. I decided I didn’t want to use any glue on it because my plan is to remove the green/St. Patty’s day accent pieces leaving the cream burlap in place and then adding Eastery accent pieces making it so I get two wreaths out of one so to speak. Here is a little video I made for my YouTube channel in which I describe and show you what I mean:
And here is a video tutorial (including a craft bow tutorial) of me making that St. Patrick’s Day cream and green wreath:
And here is the supply list for that wreath:
24″ Metal Work Wreath with the chenille ties already attached
Tooth Picks (wait till you see what I used those for…;) )
Floral Wire, Wire Cutters, Scissors, & One Pipe Cleaner
All righty, now that I had my front door wreath taken care of, I turned my attention to the other accent pieces that I wanted to add to the outdoor spaces. So I went to our “And That” store to purchase some things that I would use in my little ‘red’ wagon that sits on the front porch.
And here it is in the evening:
And here is my video tutorial showing you me shopping for all of the outdoor decorations and then explaining my haul:
And finally, here is my video of me getting all of my decorations in place. 🙂
Here are some close up pictures of the finished product. I am completely thrilled with how everything turned out–even that plastic tablecloth that I got to go into the wagon, it worked out perfectly. 🙂
Next up, I’ll be waiting patiently until it is time to decorate for Easter–I didn’t get to do that last year because we were on our Hawaiian cruise…so I’m looking forward to doing it this year.
Always remember:
**In crafting there are no mistakes, only unique creations**
I know, I *know*, it is only February, and we won’t be heading out for our Alaskan Cruise for several months yet, so y’all might ask, “Why in the world are you writing your Alaska Cruise Wardrobe blog now?”. Easy answer, now is the time when you can find awesome sales on wintery’ish’ clothing. 🙂 I have been on the look-out for some things that I know I’ll need and as you’ll see below, I’ve come across some cute things that will be perfect for our trip.
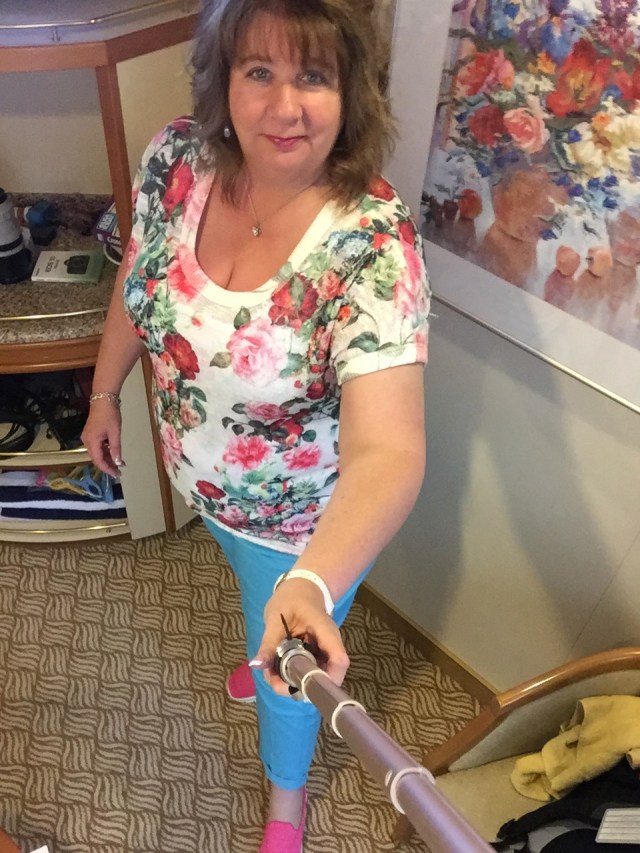
As I mention every time I go to write a cruising wardrobe post, I am *no* fashionista…truly. But I do really enjoy clothes, shoes, jewelry, and anything else that can help this ole girlie feel pretty. 🙂 I am a tall (5′ 8-1/2″) plus-sized lady, so that presents me with some challenges at times, and I do think I’ve gotten pretty good at highlighting the good things and camouflaging the not so wonderful things about my figure…like the hips that go on for days, and the ‘menopausal’ belly (hate that!). ANYhoot, y’all didn’t come here to hear me lament on my figure…full as it is. 😉
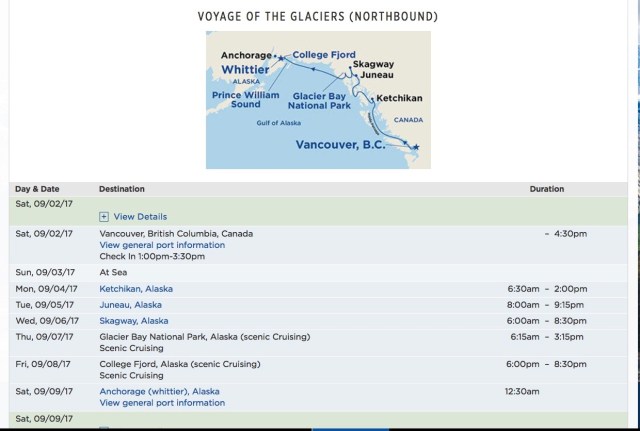
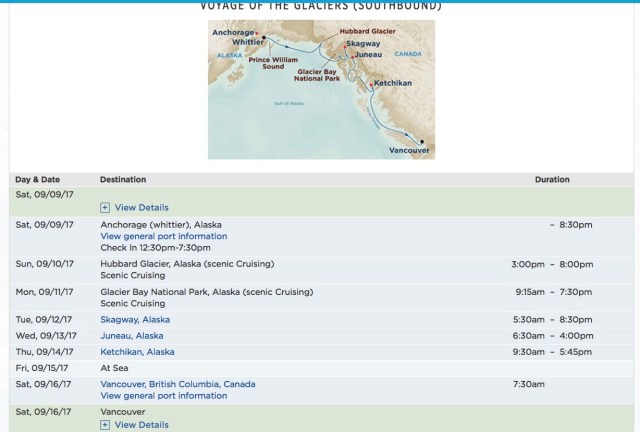
Let me start by telling you that Chris and I are planning on going on back to back Alaska cruises with Princess Cruise Lines. In years past, we’ve taken the Voyage of the Glaciers Southbound cruise which starts in Whittier (Anchorage), AK and ends in Vancouver, B.C. This time we are combining that same cruise with the Northbound Voyage of the Glaciers–Vancouver to Whittier–In fact we are starting with the Northbound after spending a day in Victoria with my dear friend Liz. ❤
These two cruises have basically the same itinerary with only a couple of differences–both visit Glacier Bay which is one of the main reasons we return to Alaska again and again–the feeling that I get when sailing through there, well, it is unsurpassed, and almost soulful…truly. Here are a couple of pictures of the two itineraries that we’ll be enjoying:
Before I start showing you my wardrobe choices for this trip, I should tell you a little bit about the climate in Alaska in the Spring/Summer/Fall. Temperatures can vary greatly, during the day they can soar up into the 60’s and 70’s (and higher I’ve heard but never experienced in the past 4 Alaskan trips that we’ve taken). The temps in the evenings can be chilly–into the 40’s and 50’s, especially on the water. On this trip, we’ll be doing several Glacier viewings: Glacier Bay (twice), College Fjord, Hubbard Glacier, and then we are also doing the 26 Glaciers excursion out of Whittier on our turn-around day–During those viewings, I know for a fact that it is going to be downright chilly–like 30’s – 40’s chilly. The chance for rain is also high. So all that said, layering is key for me. I will take a rain type jacket, and some water resistant shoes as well.
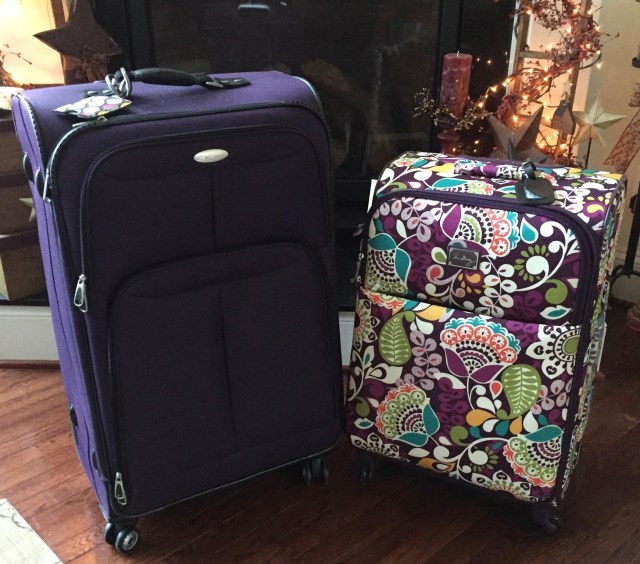
Okay, let’s get started, I plan to take one large 29″ suitcase, and one medium 24″ suitcase, and one backpack for my carry-on bag. Here is a picture of the suitcases I plan to take:
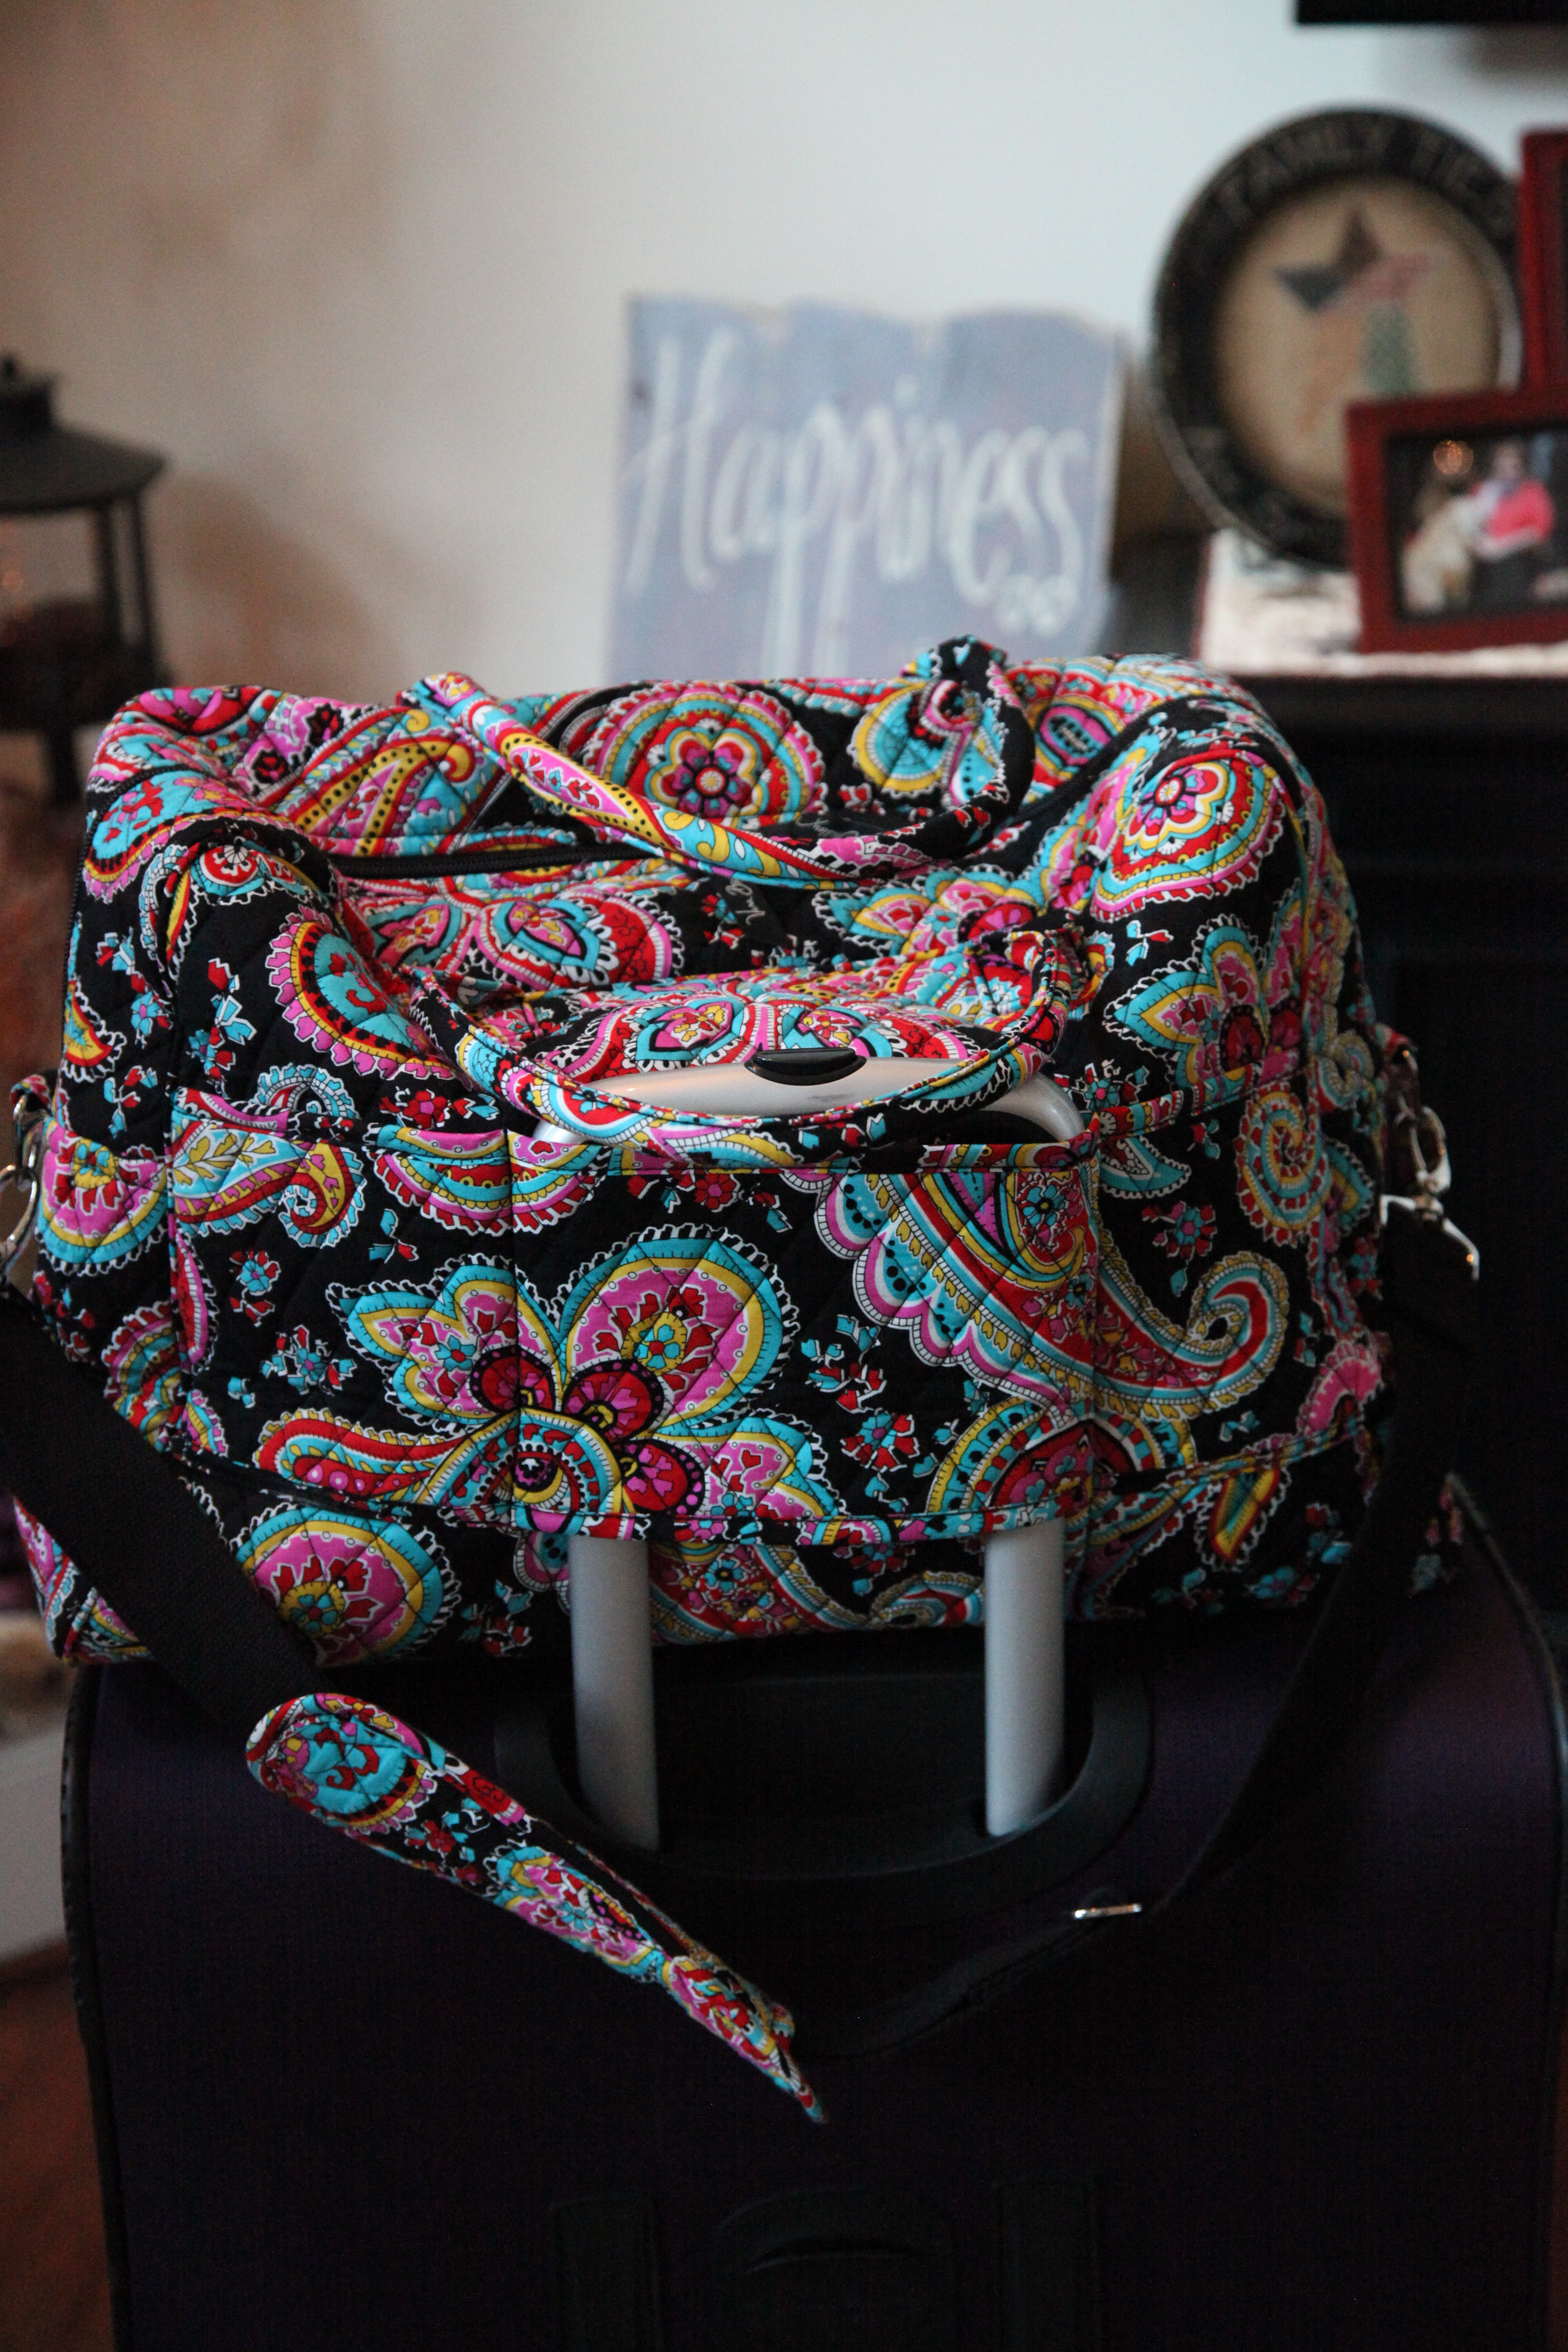
I will also pack an extra Vera Bradley Weekender bag (my pattern is Parisian Paisley) in one of the suitcases so that I’ll have it to use on the way home as a carry-on–it will be used to place our last day on the ship clothing, last morning toiletries, and other sundries that might be left over after packing to go home (we have to set our suitcases out in the hallway the evening before disembarkation).
This weekender is a spiffy bag folks…It holds a plethora of items and it also has a sleeve on the back so that you can slide it down over the suitcase’s handle:
Here is what I’ll be using as my Carry-On bag, it is a Vera Bradley Campus Backpack (my pattern is Midnight Paisley). I will use this to pack up my laptop, travel papers, wallet, a little bag of necessities, crossword puzzle book, my kindle, etc…:
A couple more little tidbits of info before I show you my clothing, shoes, and jewelry choices…I use these wonderful packing aids…Our daughter Christin introduced us to packing cubes and packing folders and I have used them for two cruises now…gracious, I cannot tell you, it has changed the way I pack and the amount of items that I can take. Of course, I always still need to be aware of the weight of the suitcase if flying, but, even with that, I can fit so much more in and it is all organized and everything is easily found.
All righty–Here are some of the clothing choices that I’ve made and will be taking with me on this cruise. We will be gone for 15 days, but, I’m only going to pack as if I were going on a 7 day adventure as I will have access to a laundry room on board the lovely Coral Princess. And I will definitely wash at least once.
I’m only going to be taking black stretchy, comfy slacks–no jeans (I never wear jeans in my every day life, they are just not my thing), no skirts (well maybe one maxi), no other colored ‘bottoms’, and no dresses. <~~~ My attempt at keeping my packing to a minimum. In the past I’ve shared with you some links for the black slacks that I get from Dressbarn, but, I just tried to go to one and poof…they do not have any in stock at the moment. Ugh…I’m so sorry! I will be sure to let y’all know if and when they get them back in…I’m so bummed about this!!!!
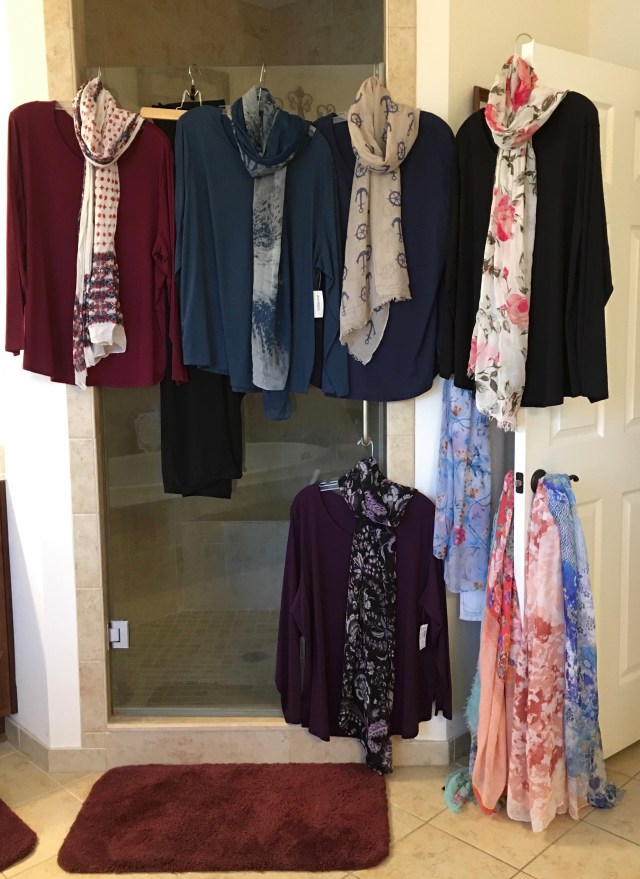
I did just find some lovely long-sleeved t-shirt type tops on the 60% off rack in Dressbarn a couple of weeks ago. I bought pretty much every color they were offering, got 5 tops for $32 (I had a coupon too for 25% off of my total purchase…what? Pfft, I got lucky on that one girls). One important thing to mention, I did have to go *up* a size in these (just in case you want to get any…here is a link–But, truly, if I were you and I wanted to order some of these tops, I’d do it pretty quick because they are selling out fast). I got home that day and I set up all of the tops with a different scarf for each one (and then added more scarf choices that I have hanging on the doorknob in the picture…I’m all about those scarves ladies—they can make an outfit look totally different, and then pack up so nice and small—I like to have options, it is obvious that I’ve been collecting them for years and years (I got many of them at the $10 sale on Princess ships and have received many as gifts from family). Anyway, here are those tops that I will pair with my black slacks:
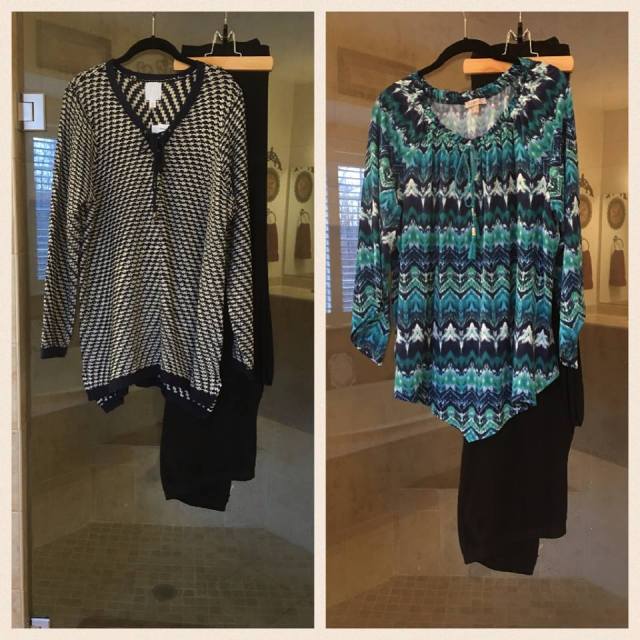
Here are a couple of other tops that I will be taking, I also found these on the 60% off rack at Dressbarn:
So that makes 7 tops, I have a some other options from which to choose as well, here are some of the outfits that I wore on our Canada and New England Cruise–I packed pretty much the same for that one as I will for this Alaskan cruise:
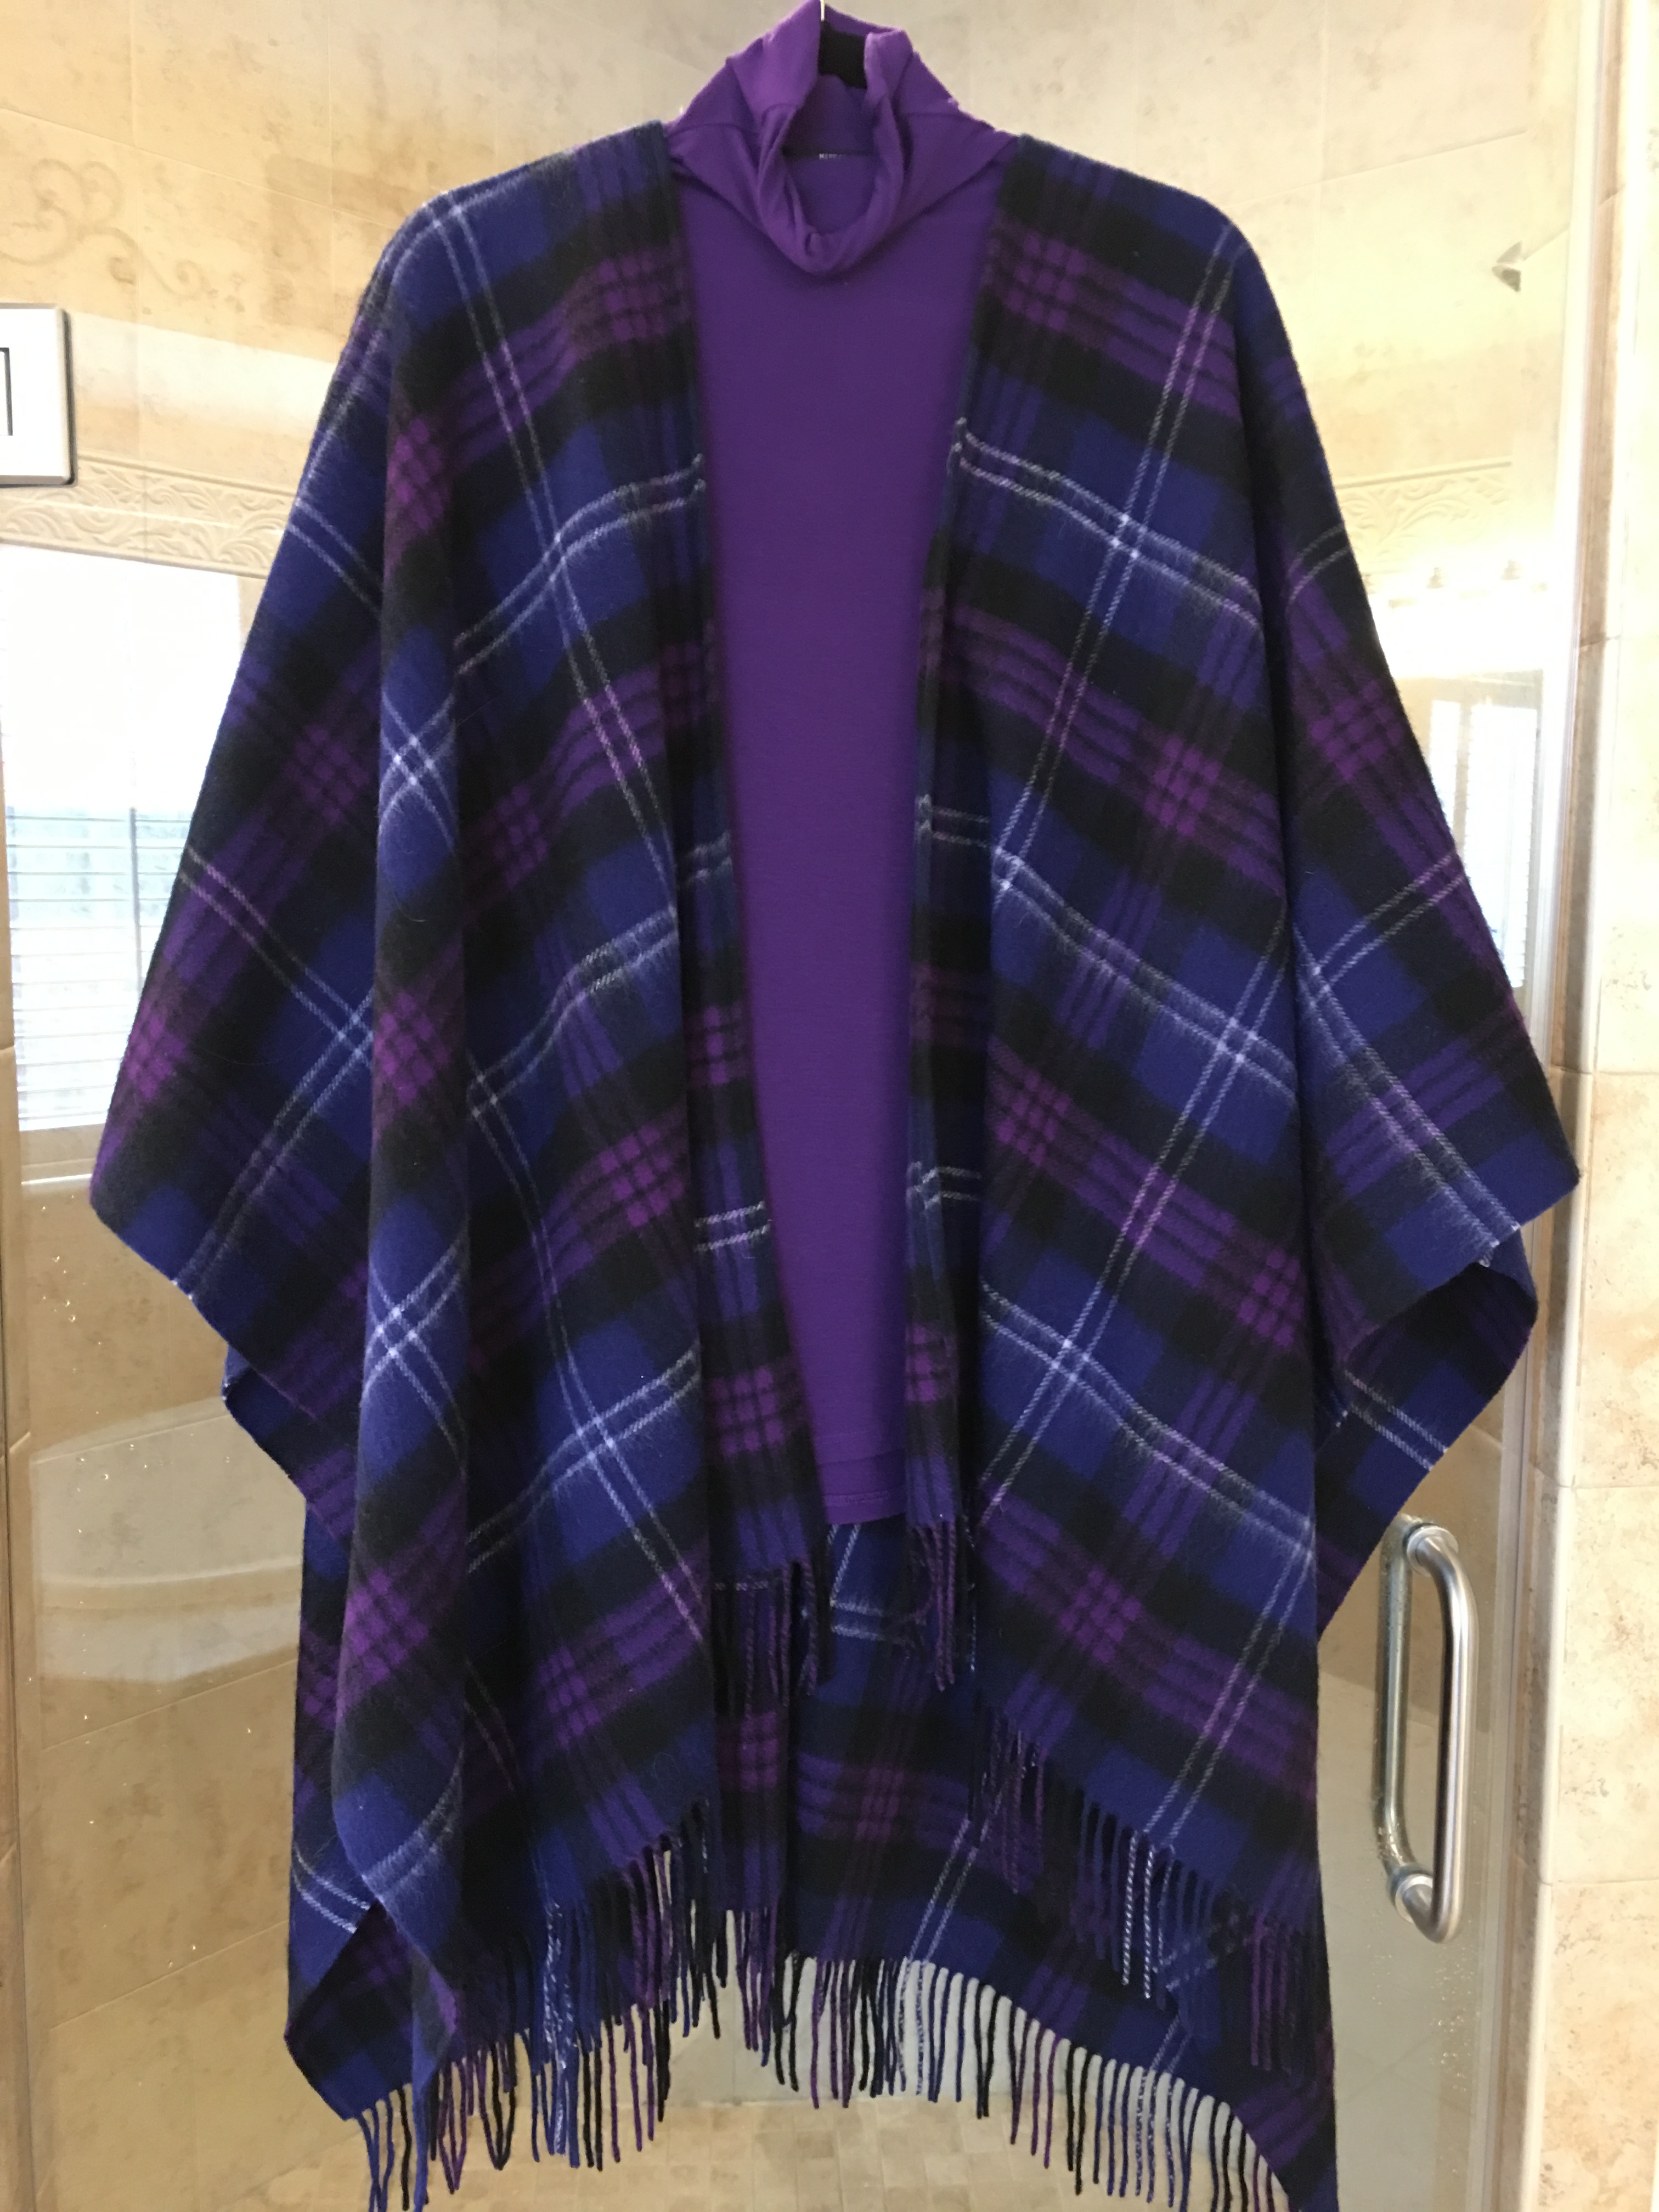
I’ve just found some very (really can only be used for layering or if you wear a cami under) lightweight turtleneck tops from Amazon–Again, I went up a size for these — Here is a link: Women’s Lightweight Long-Sleeved Ribbed Turtleneck. These look lovely under the capes, and also could be used on glacier days to put under one of those other tops or possibly a sweatshirt (that I will either take with me or buy while in one of the Ports heading North):
Side Note: Chris and I do not participate in formal night, we choose instead to go to one of the Specialty restaurants where the dress code is always business casual (please don’t judge, this is a personal choice of ours, we don’t want to pack the formal wear and we will not enter a dining room unless we are dressed in what we deem to be appropriate). Nuff said on that subject. 🙂
All right, let’s talk jewelry, I truly do not take a ton of jewelry with me. Mostly just some basic necklaces and earrings. I’ll definitely take a couple of watches and several bracelets though…Here are some things that I might throw in:
Now for shoes–I will take two pairs and wear one pair, all black, and all comfy. 🙂
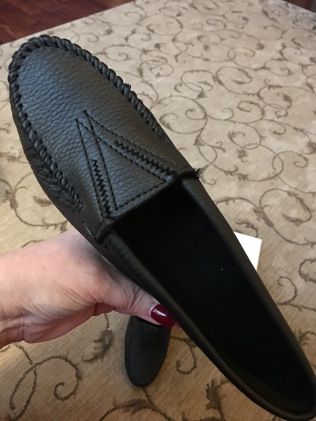
I have just rediscovered these spiffy Minnetonka Women’s Deerskin Gore Front Moccasin shoes again, I had a pair years and years ago that I wore completely out. These hug your feet like a nice warm blanket and conform to your feet. I will wear these around the ship and possibly on an excursion where I know my feet won’t get wet and where I might not be doing a ton of walking. I purchased these in my true shoe size. These are the shoes I will travel in as well…I canNOT tell y’all how comfy cozy these shoes are…I love them!
Here is a really comfy pair of shoes that I actually discovered while on board the Star Princess when my feet were so swollen (have no idea why that happened because it *never* happens to me…ever..) and I couldn’t wear the shoes that I had taken with me. I paid way too much for these on board in one of the gift shops, but, I was very grateful to have them…I purchased them in a pretty pink that time because I knew I had outfits that I was planning to wear on excursions in Hawaii that they would pair nicely with:
But, when I got home from that trip, I ordered up a pair in black, they are Skechers Performance Women GoWalk 3 I did order up a 1/2 a size in these and they fit like a glove.
And last but not least, I will take a pair of waterproof shoes from LL Bean. These are Coastal Rain Skimmers, yep, they are pretty pricey, but, I’ve had a pair of these for literally a decade and they work like a charm. Now, one word of warning on these shoes, I do order mine in my regular shoe size, but they definitely need a little wearing in before your trip…they do loosen up pretty quickly though and in my opinion would be too big if ordered up a 1/2 size.
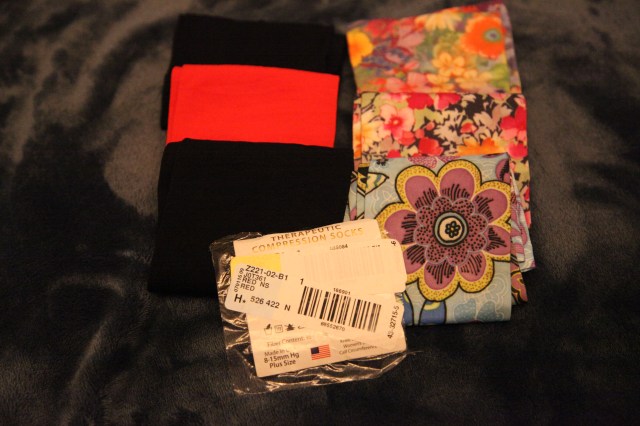
Obviously, I have chosen shoes that will go with my wardrobe, but, I’m often asked if one should take hiking or snow boots. And I will tell them, if they are going to be taking an excursion to a glacier or hiking through the forest, then yes, one might need to take some boots with them. For me, I will not be atop a glacier or hiking through the forest, so these 3 choices will work perfectly for me. 🙂 OH yeah, I’ll also be taking some spiffy compression socks too–mostly to wear on the flights, but, also, to pair with a couple of my outfits. Here is where I got these Plus Sized Support Like Crazy Compression Knee-Highs (thank you Pat for sharing this site with me!!
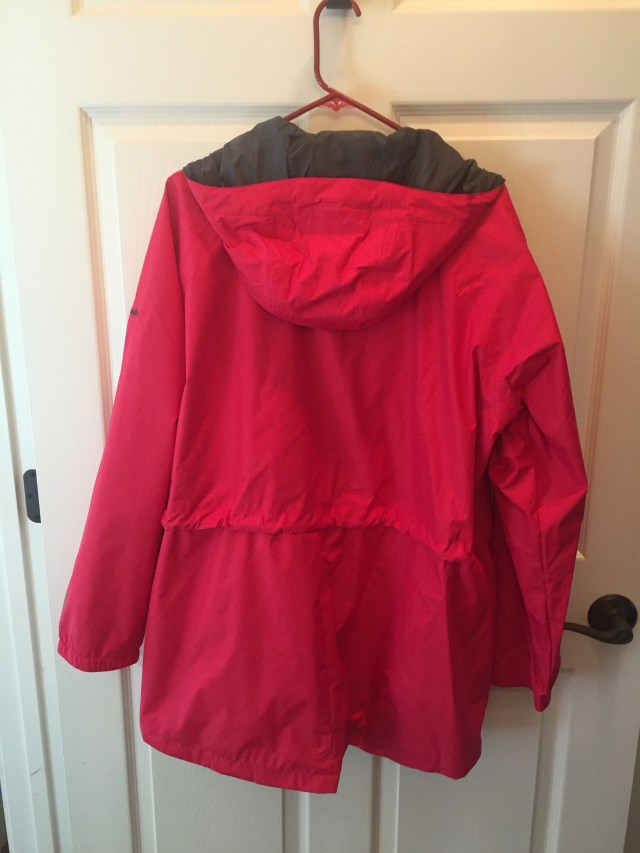
Okay, time for a chat about winter garb as in jackets, hats, gloves, & winter scarves. Truthfully, I do not think it is necessary to take a heavy winter coat, again, unless you are going to be atop a glacier and even there you can layer up and should be fine (I’ve also heard that the excursion companies will provide boots). BUT, that said, it will, I cannot stress that enough…***WILL*** be chilly on the days that glaciers are viewed–during the Scenic Cruising portions of the cruises, and let’s face it, we are in a rainforest when in Port and there is a high probability of a few raindrops plopping down upon you. 🙂 I have chosen to take one rain jacket with me and I will definitely be purchasing a jacket in Alaska—either on board or in one of the Ports because I want one with “Alaska” embroidered on it and they are a pretty cheap purchase once in Alaska. If I need gloves, scarves, and the like…I will purchase them at a spiffy sale that they’ll have on board on Glacier days. Here is the rain jacket that I will be taking, it is a Columbia Arcadia Casual Jacket.
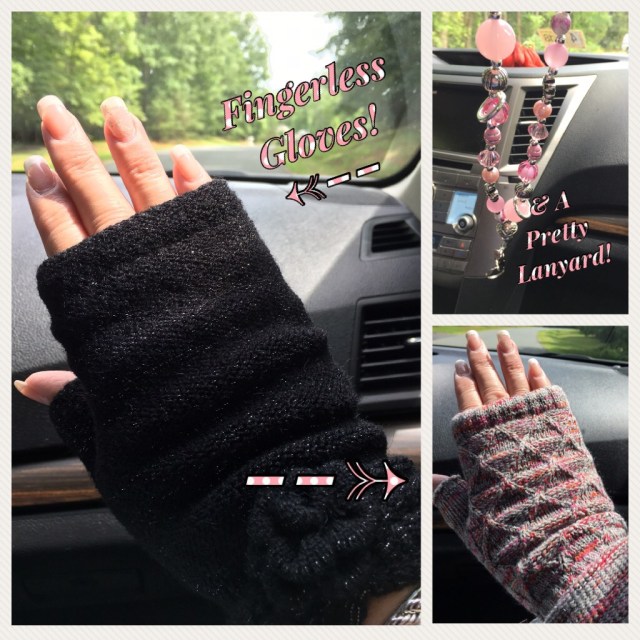
**** A little update about gloves…Well, I decided that a nice thing to have with me might be a pair of fingerless gloves for glacier viewing days when a camera is attached to my hands for pretty much the entire time. 🙂 I found these two pairs of beauties on Amazon here. You’ll see a lanyard in this picture as well, I love it! I’ll be utilizing this for my cruise card. 🙂 Here is where I purchased the pictured lanyard:
So, there we go, I’ll continue to tweak my wardrobe, probably until the moment it is all packed up in that folder and those cubes, and, admittedly, I might change out an outfit or two, but, this is the ‘look’ I’m going for–Outfits that are casual but will carry me into the evening meals while on board, ones that I can dress up with a change in jewelry/scarves/etc…
I am so excited to be going back to my favorite place on the planet, and as I watch my countdown click away, I try my best not to “wish my life away” like my Mom always told me I shouldn’t…but, it is so hard not to be anxious and feel those butterflies zipping around in my belly when I think of the adventure that awaits.
Until next time, y’all take good care!!
***If I rise on the wings of the dawn, if I settle on the far side of the sea, even there Your hand will guide me…Psalm 139***
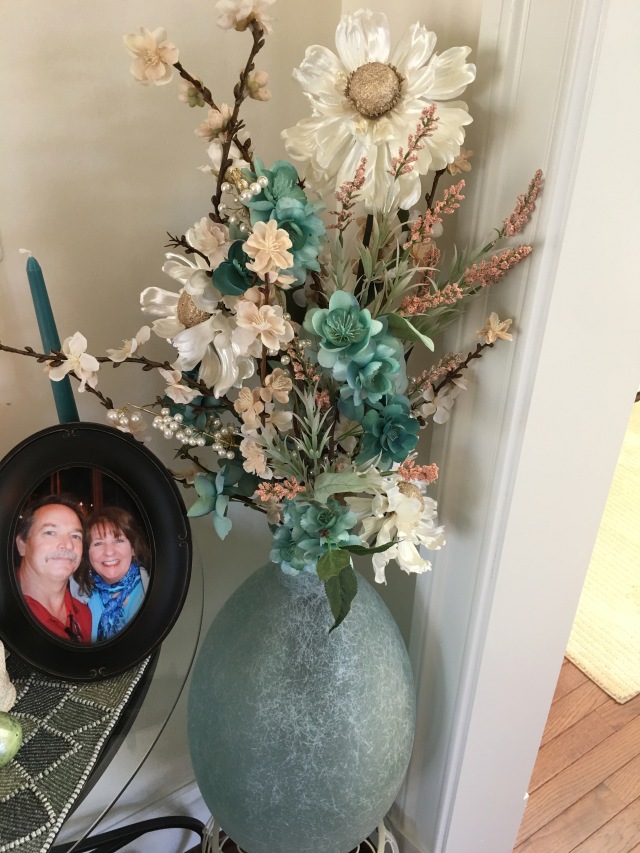
Big vases, my gracious I’ve been seeing them everywhere as of late…And when I went to visit my cousin Donita last week and I saw a couple in her home and was wowed by them, and then I remembered the large vase that my cousin Stacey has displayed in her home so prettily…Well, I was hooked, I needed to get myself one too! 🙂 So when I walked into our local Home Goods store the other day to do a tour for my YouTube channel, I eyed one that I knew would be perfect for our home and I immediately knew where I wanted to display it.
Here is a video of me arranging the flowers in that vase and getting it into place there in that Cozy Corner in my living room:
And while I’m at it here, I will go ahead and give y’all links to all of my Craft Store Videos that I’ve been working on this week:
Hobby Lobby:
Michaels and Home Goods:
And That:
All righty, as you can see, I’ve been a busy lady, I’ve been trying to fill up these winter months that admittedly are not my favorites of the year with being productive and creative. 🙂 Next, I will be working on doing some organizing of craft supplies and beyond (Lord help me) in our garage…I have several shelves out there that desperately need my attention. I’ll be making a video of the process as well and when I’m finished I’ll share it here too. 🙂
My sweet cousin Donita and I were chatting on the phone earlier last week, and in conversation, she asked me to make her a wreath (that she said she’d pay for…uh huh, like I’d ever accept payment from her…haha…the girl had a little brain hiccup when she suggested that obviously…lol). 😉 First of all, here is a picture of me (in the middle), my cousin Stacey (on the right), and our cousin Donita (on the left):
We are 3 of 7 first cousins on our Dads side of the family. I am the “middle” child of the family as Donita is a little bit older and Stacey is a little bit younger than I am…I won’t say how many years going either direction. 😉 Suffice is to say, it is easy for us to remember how old any of us are.
Okay, I digress, back to Donita’s and my conversation. I asked her what she wanted her wreath to look like, and she told me that she has been redoing some of her decor to match some furniture that she just got, her main colors are chocolate brown and cream…Ooooooh, I just love that color combination! Okay, so we know that I had just discovered cream colored burlap when I created Stacey’s Cream on Cream wreath — the one I gave her for Christmas…Here is a picture of how that one turned out:
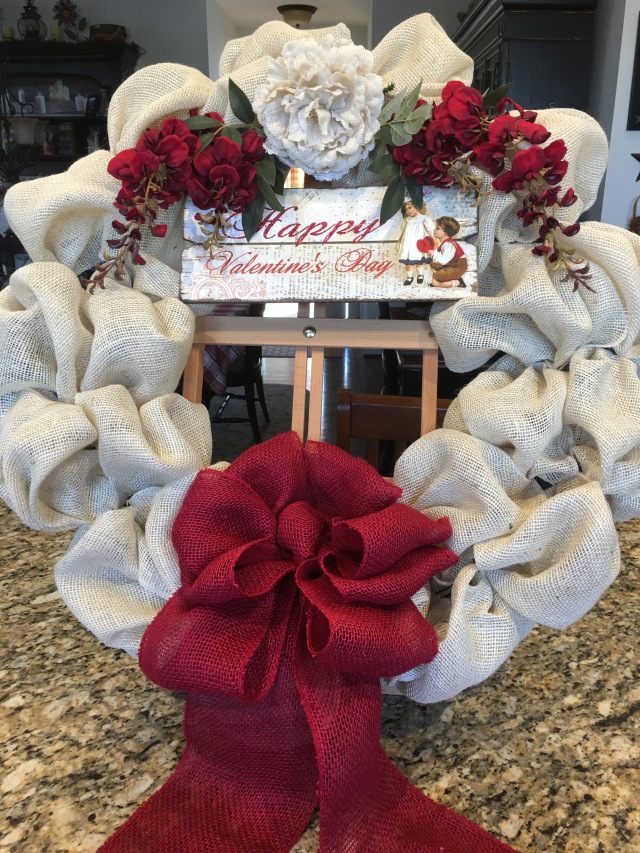
Donita also like how I arranged the bow and accent pieces on my large Valentine’s Day wreath. Here is a picture of that one:
So for her wreath, I kind of meshed both wreaths together, here are the supplies that you’d need if you want to try to make a wreath like this for yourself:
1-16″ Metal Work Wreath with the Chenille Ties already installed
1-5.5″ x 15′ roll of brown burlap (for a craft bow)
3 Sprigs of brown flowers of your choosing
1 Cream and brown Burlap Sunflower
1 Wooden Cross
Hot glue gun, Scissors, Wire Cutters, & Pipe Cleaners
Here is a picture of the finished wreath:
I have created a YouTube tutorial video showing you how I used that brown burlap to make a craft bow, and then I move on into a wreath tutorial. Here is that link:
Chris will most likely be making me a box so that I can ship this wreath to Donita in the coming days. 🙂 They just don’t make boxes to fit my wreaths…haha…even though this one isn’t as large as some I’ve made, it is still about 24″.
I hope upon hope that Donita loves this wreath, one thing is for sure, I made it with a ton of love in my heart for her!!
Until next time, y’all take good care! ❤
In crafting there are no mistakes, just unique creations…


 In the past I’ve shared with you some links for the black slacks that I get from Dressbarn, but, I just tried to go to one and poof…they do not have any in stock at the moment. Ugh…I’m so sorry!