Guest Bedroom #1 – The Happy Room

Hi Y’all!

Continuing on with my “Home Tour”,  here I will be highlighting the first of 3 upstairs guest bedrooms.  My hubby and I have dubbed this room “The Happy Room” because of the bright colors and whimsical decor.

1V4A2871 1V4A2872 IMG_1605

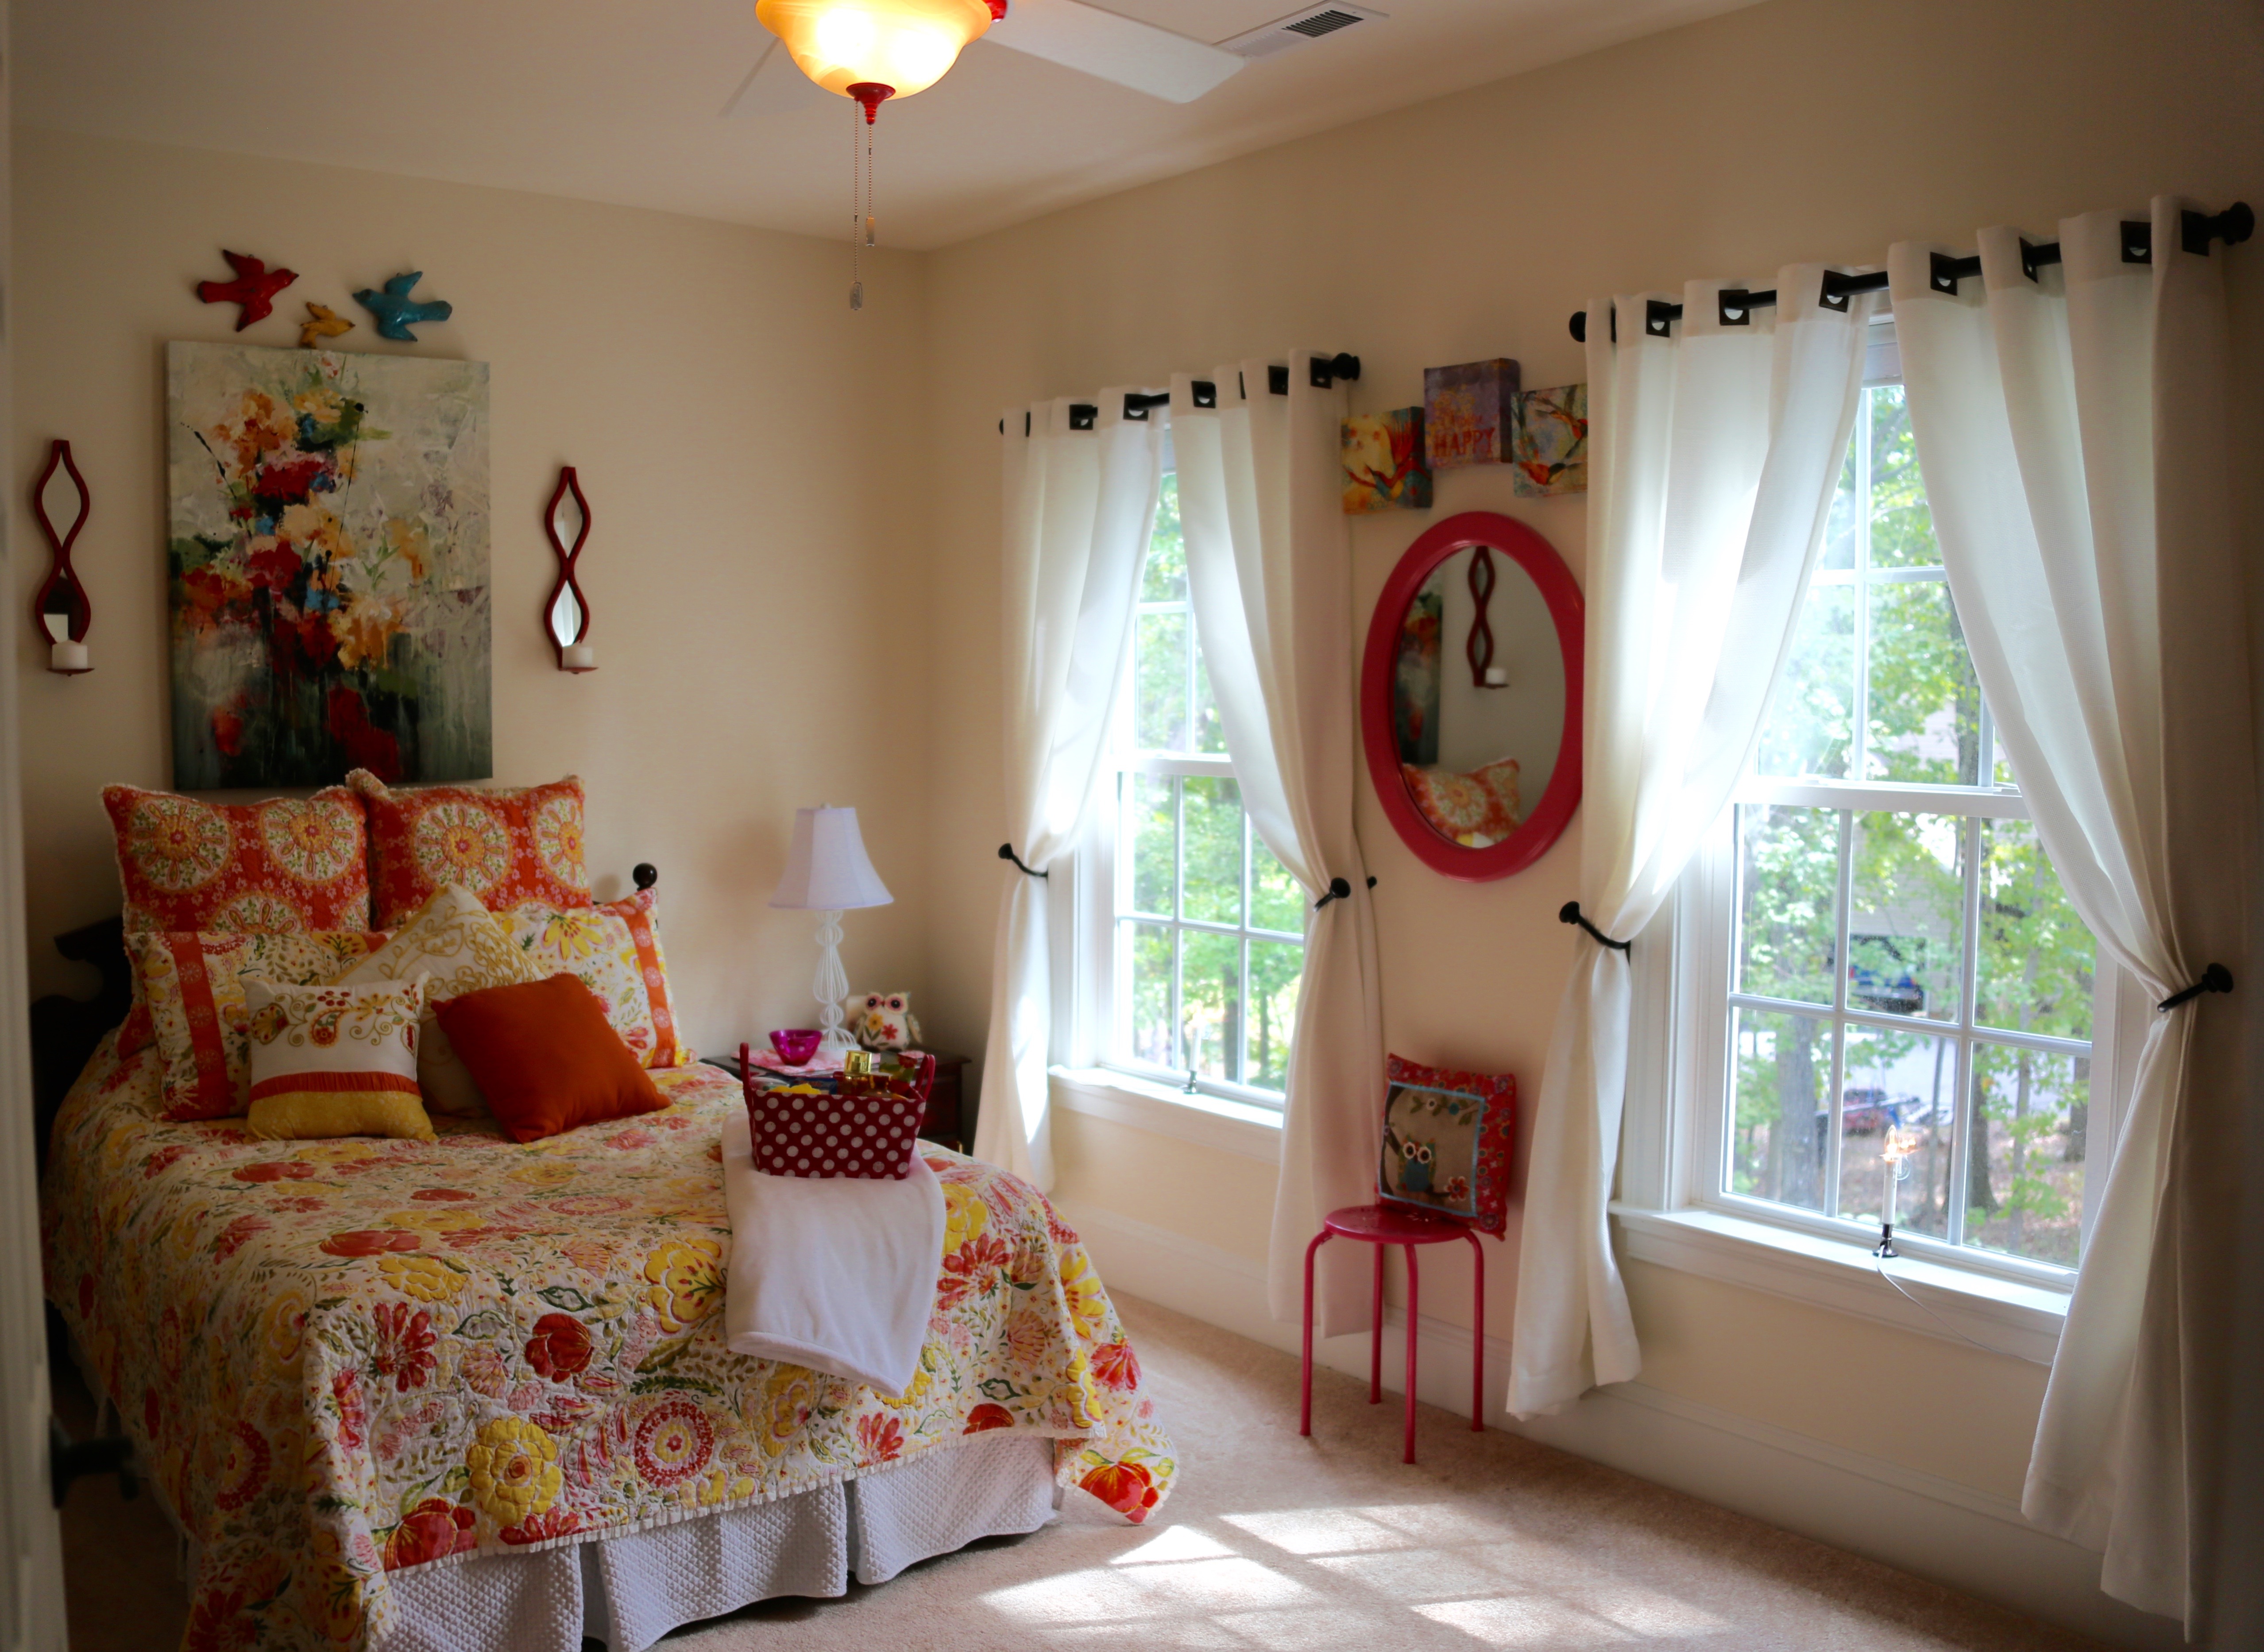
I found the quilt, pillow shams, & throw pillows in Bed, Bath, and Beyond and I’ve built the rest of the room’s decor around those vibrant colors; pinks, oranges, yellows, “happy” colors. 🙂  The room’s furniture is kind of a hodgepodge, we’ve had the headboard and dresser for years and years, my hubby made one of the end tables to match.  The other white end table, the vanity, and the ‘towel rack’ were items that we had in our other house and I just decided to incorporate into this room.  I chose panel curtains with oil-rubbed bronze grommets (they are the same as the curtains in the living and dining rooms downstairs only in white); the curtain rods and tie back hooks are also in oil-rubbed bronze.

10846077_10205656296157136_6352492561990070575_n

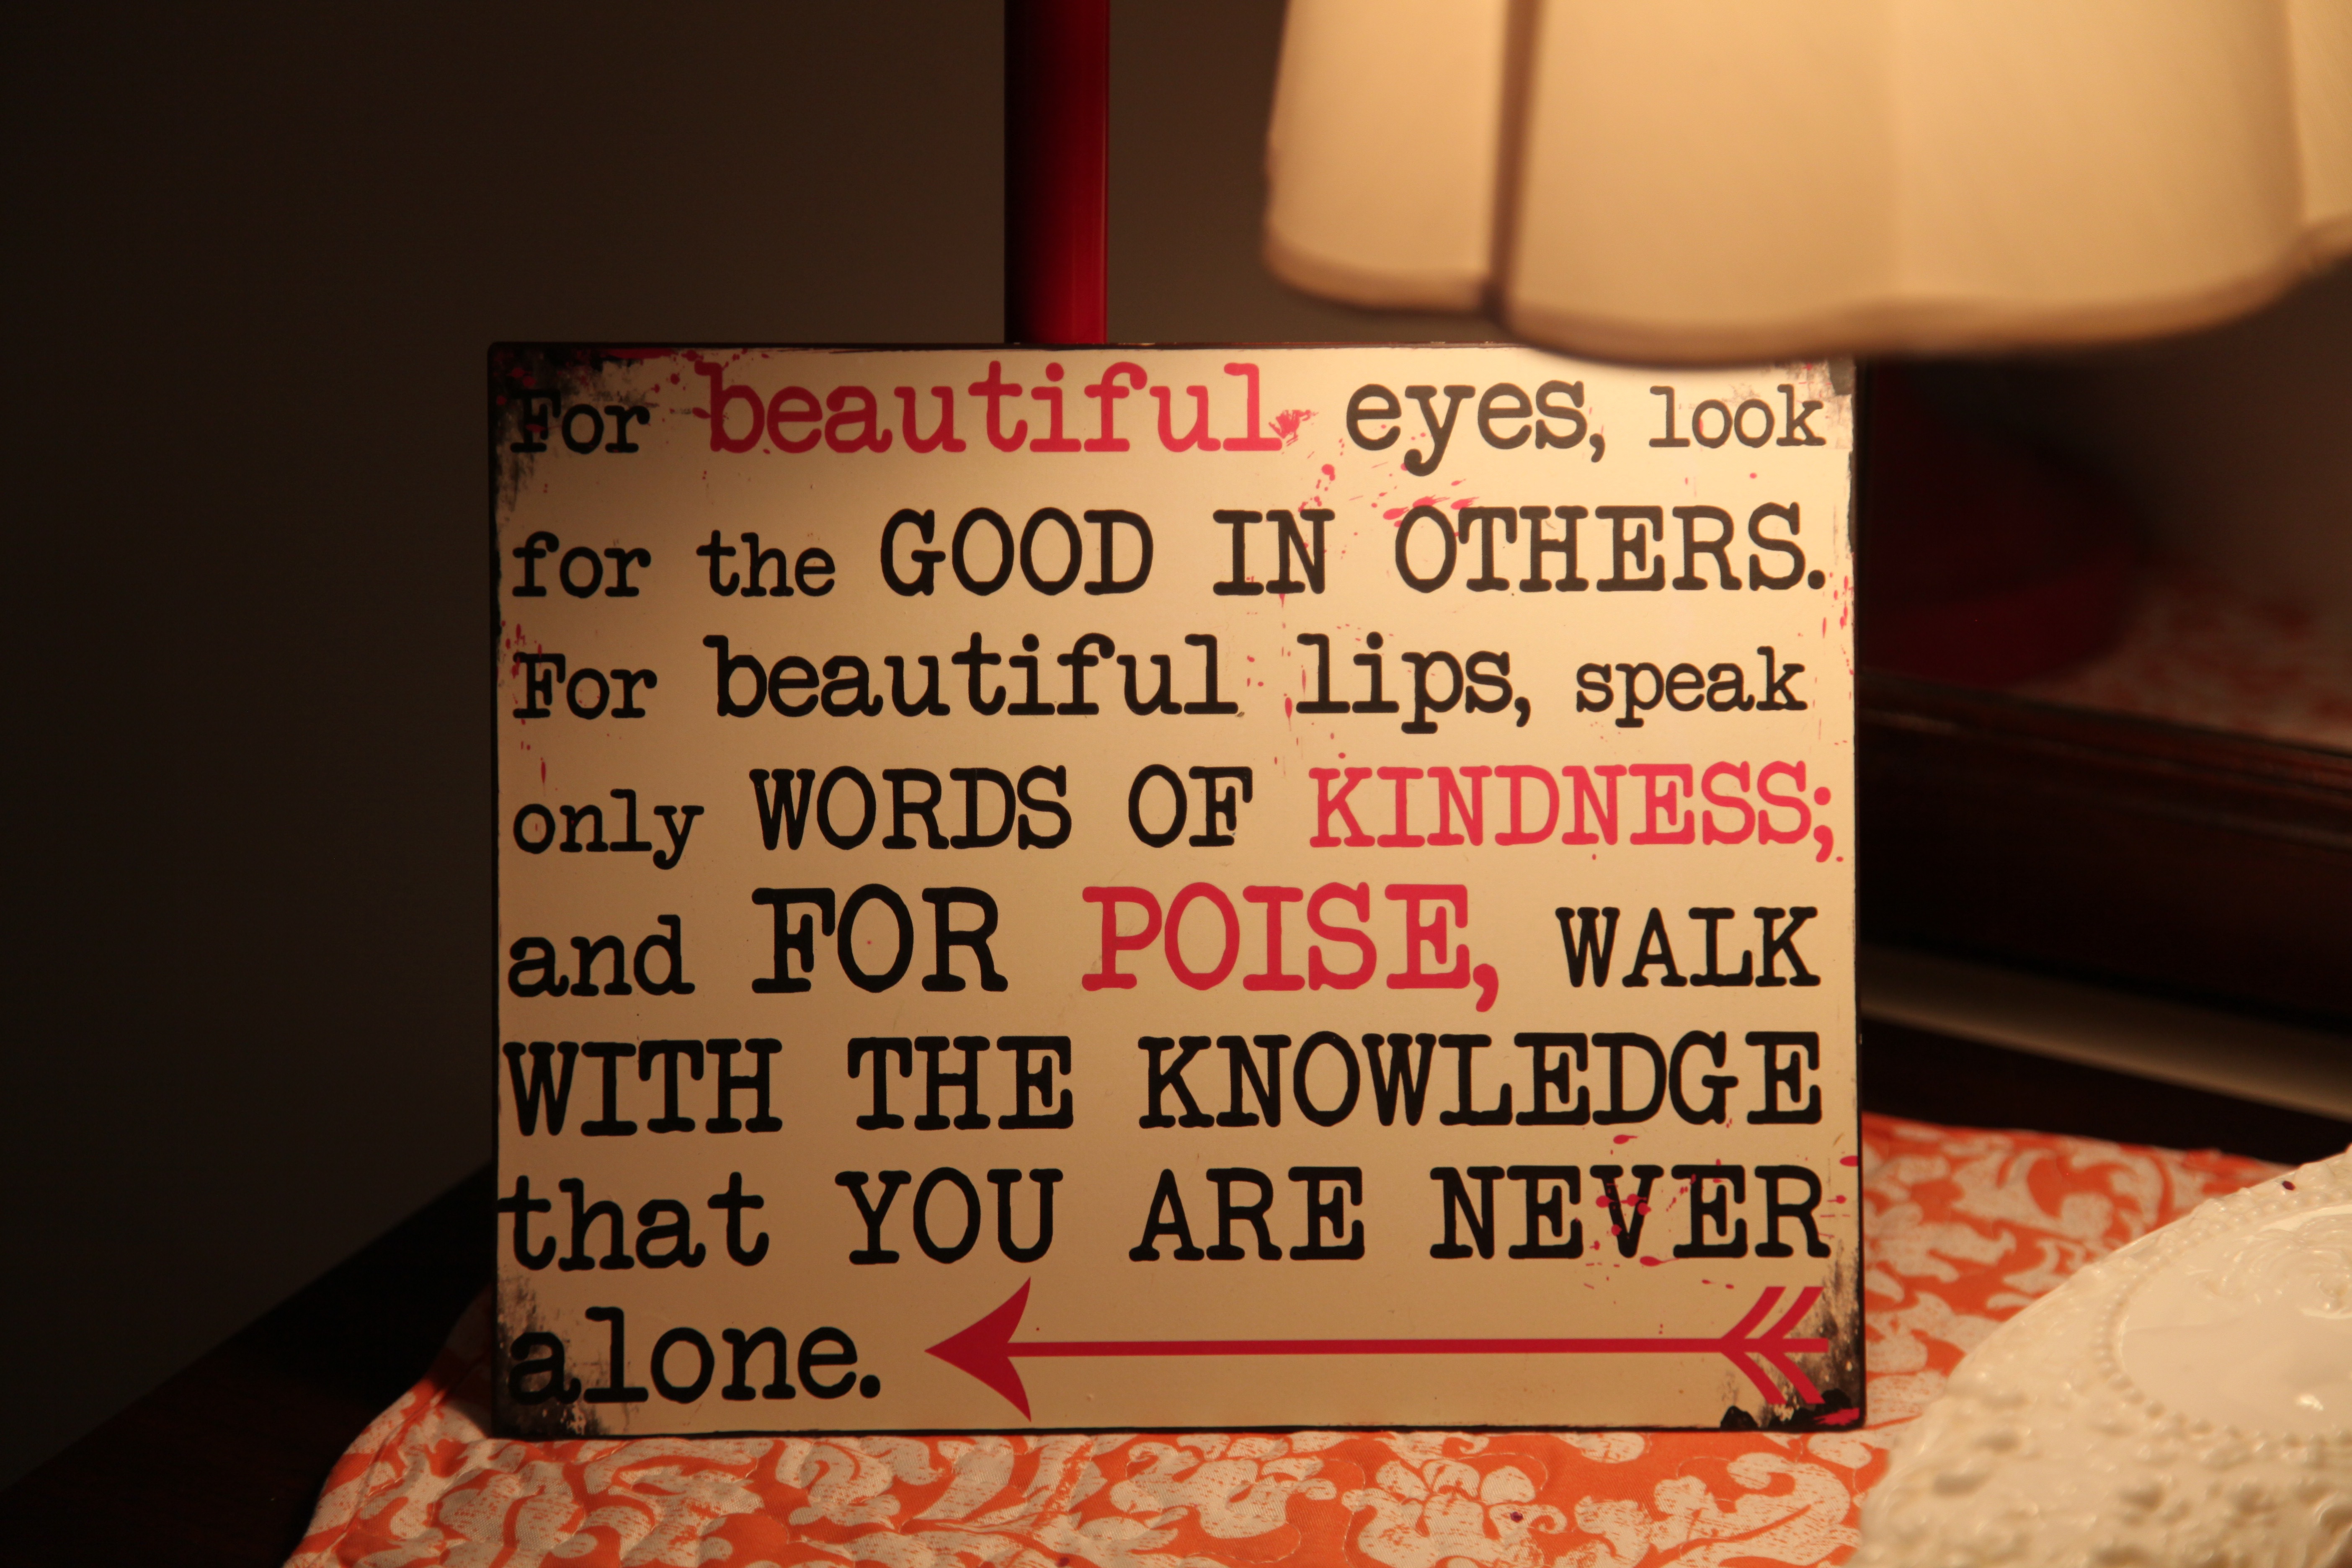
I found this picture on sale at Bed, Bath, & Beyond and I couldn’t pass it up, the colors match the quilt set perfectly.  I found those three doves at an online store, they are pretty heavy, but they were not expensive at all.

10603594_10205703437775647_1391654389842580740_n

I found these sconces at Hobby Lobby for 50% off one day, they match the picture that I put over the bed perfectly! 🙂

I fill baskets full of little goodies and I leave one on the bed of each guest room. I include items such as shower gel, hand cream, chap stick, a loofa, bandaids, etc…I know when I travel, I invariably forget something, so I want to provide our guests with some little necessities just in case they have done the same. 🙂

IMG_0168

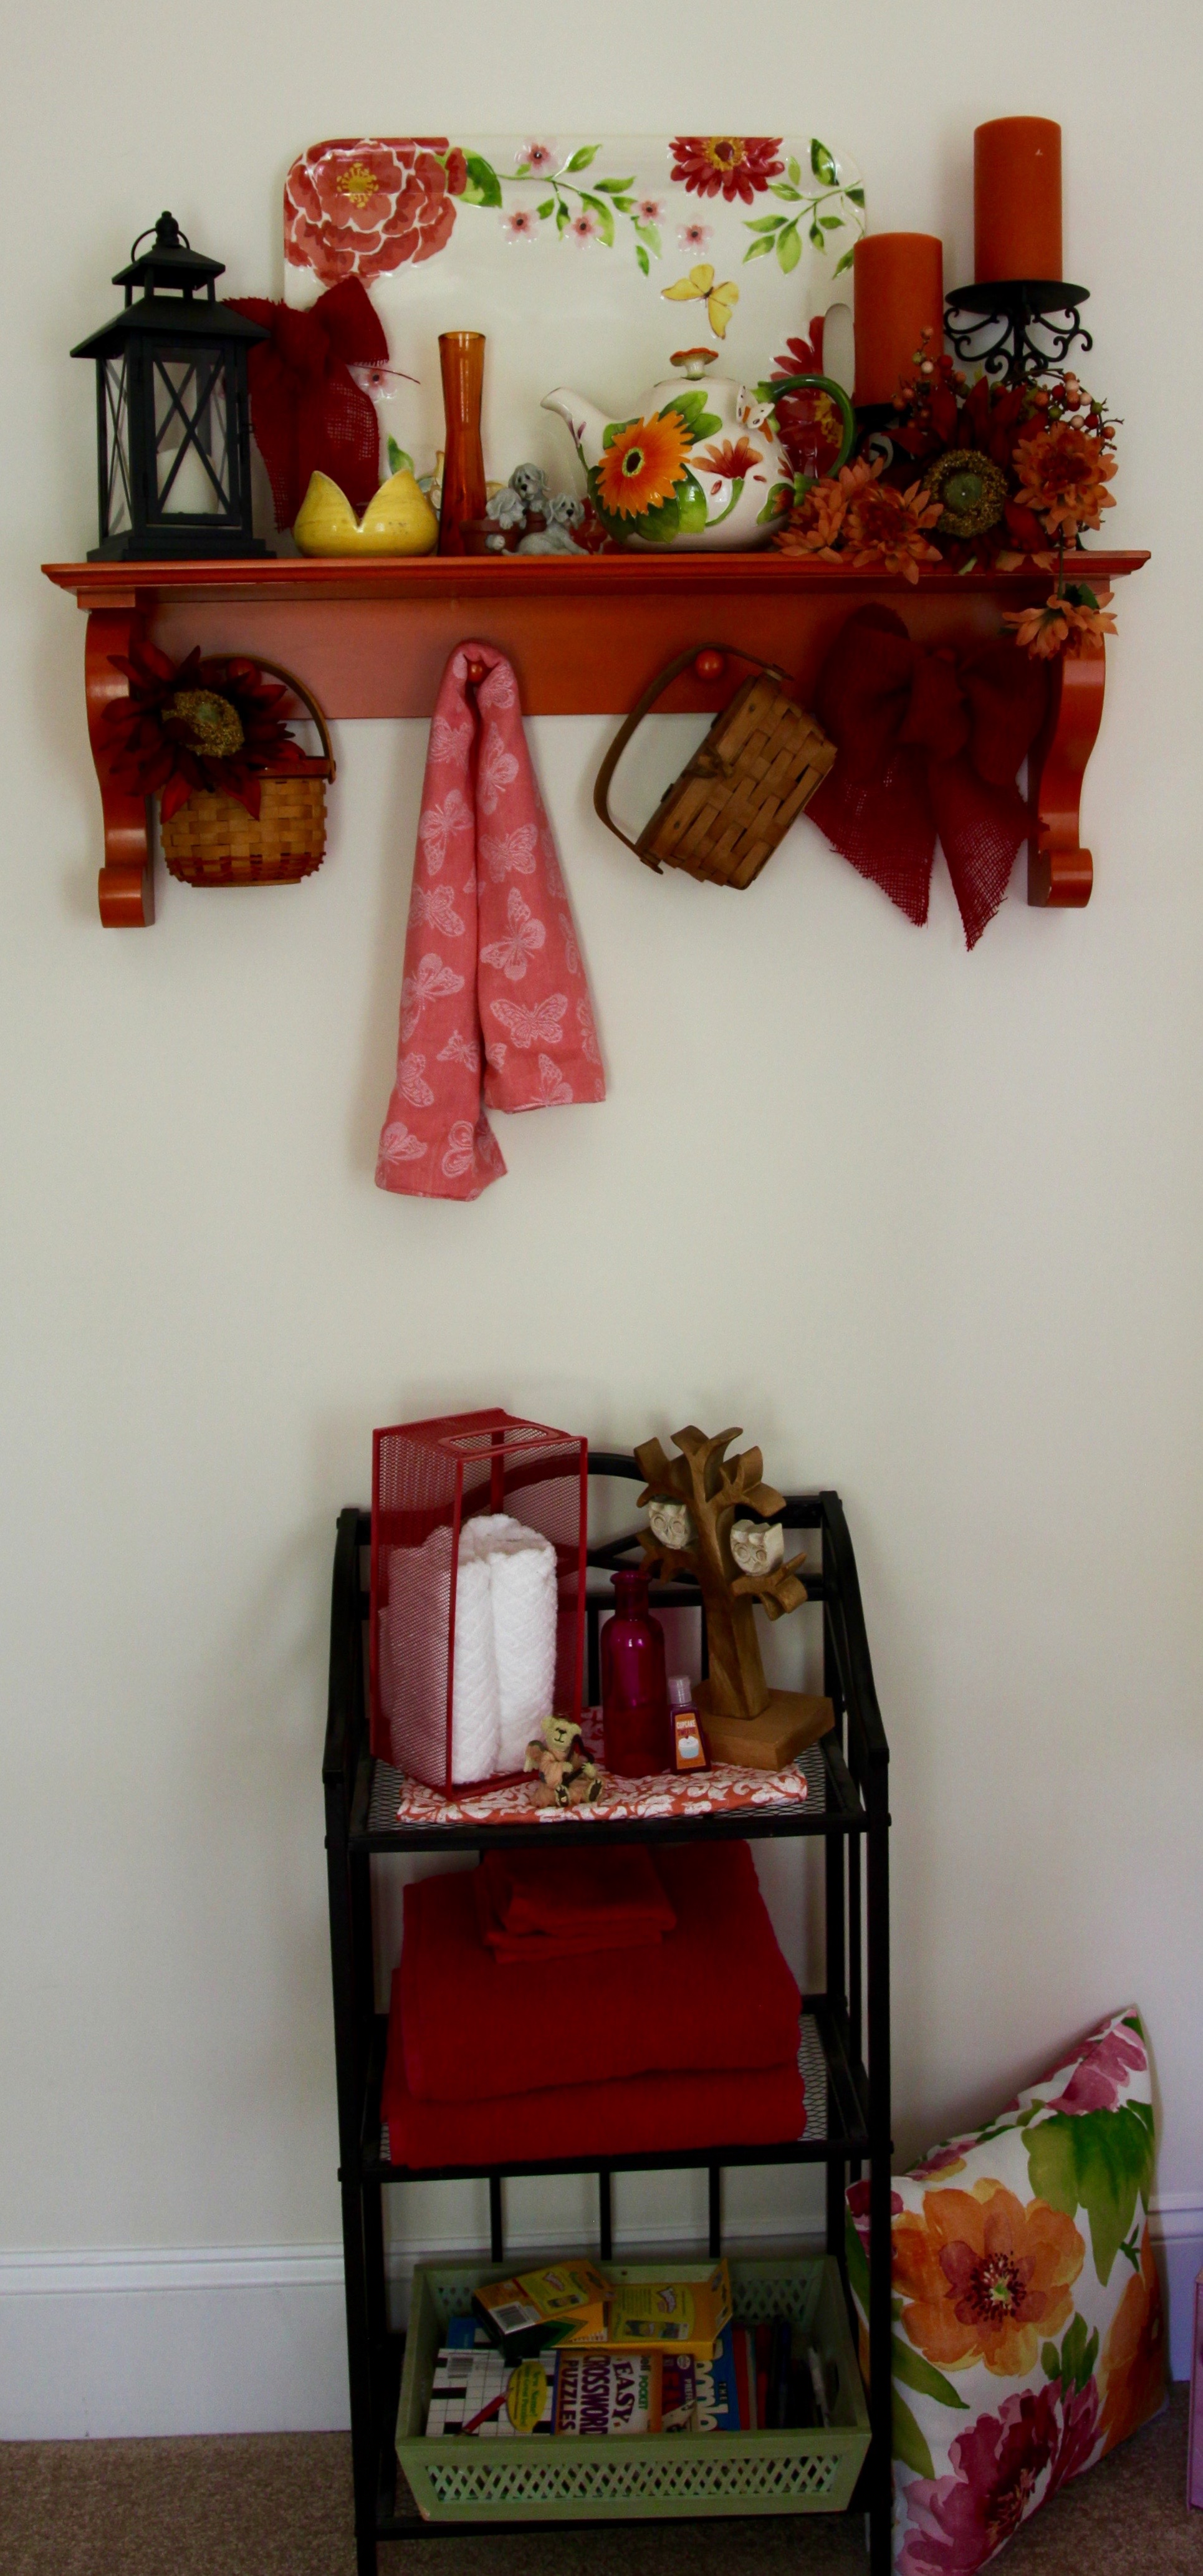
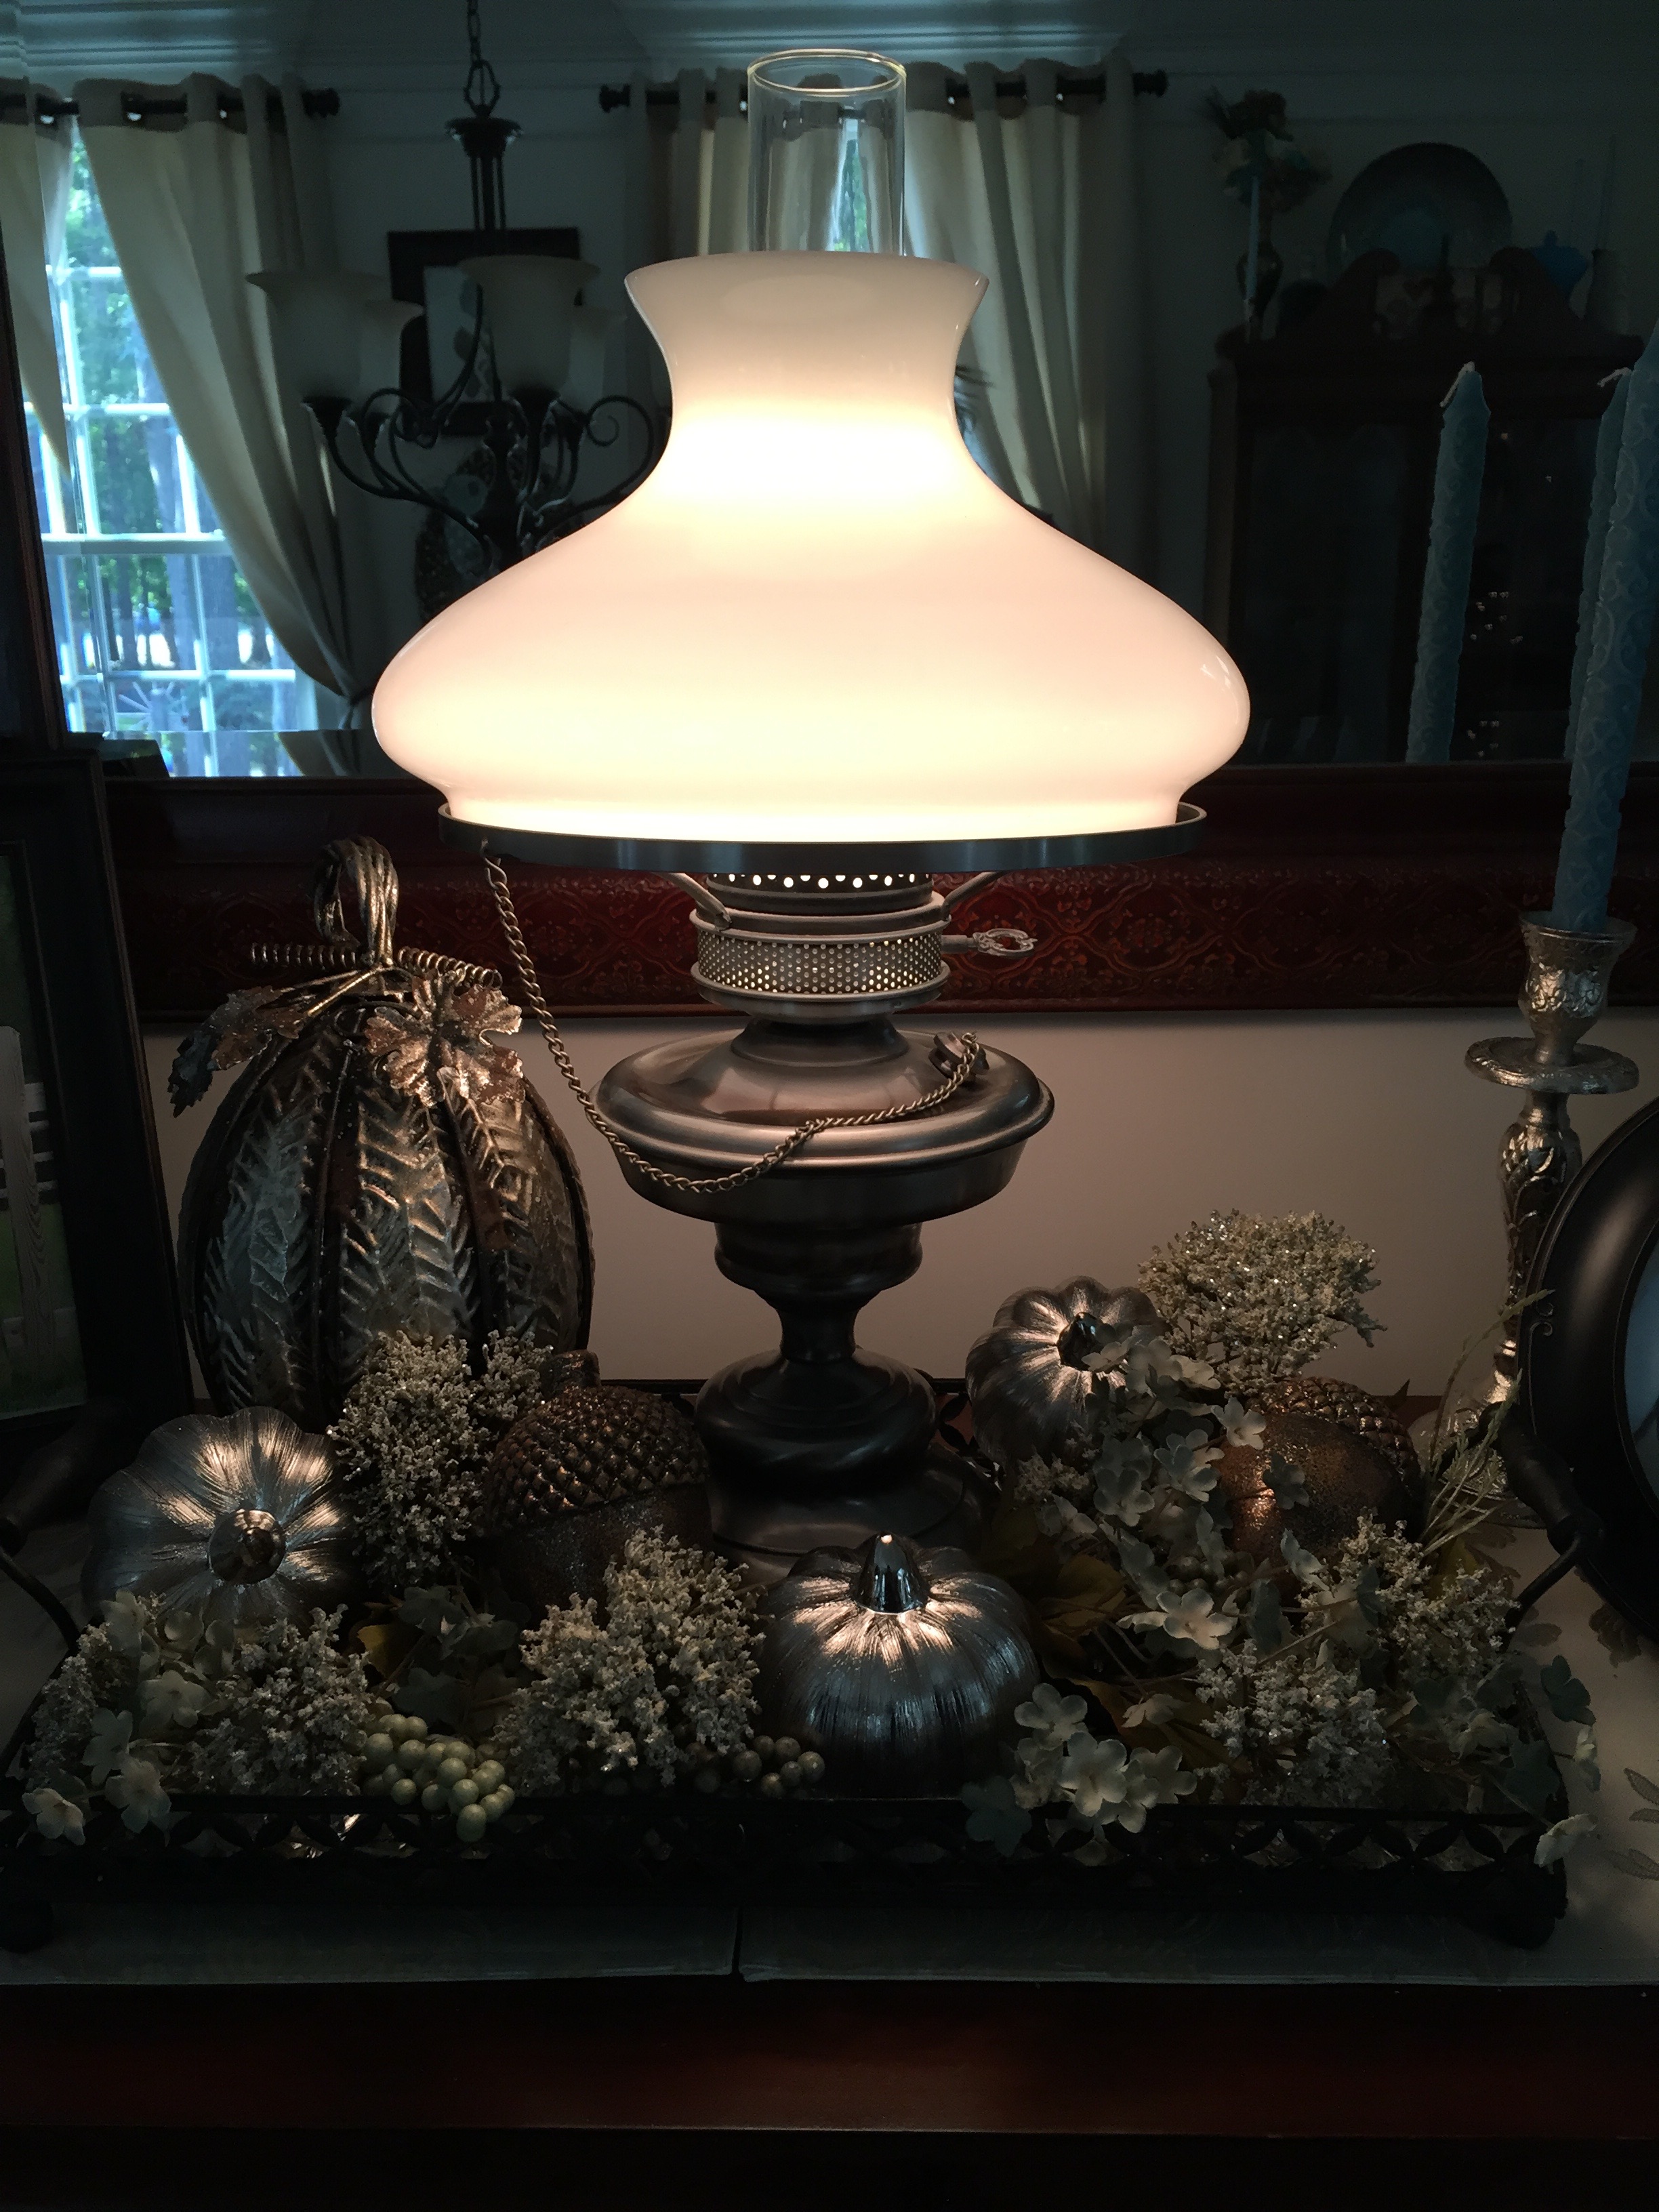
I found that orange shelf at our local Home Goods store along with that sweet tea pot and tulip candle holder.  The glass plate standing up in the back was purchased on the same day that I found the quilt because it matched perfectly and I couldn’t pass it up.  Arranging the items on that shelf was so much fun! I included many different accent pieces, but, I used the same technique that I always use to do my Cozy Corners.

IMG_1606 IMG_1608

1V4A2869

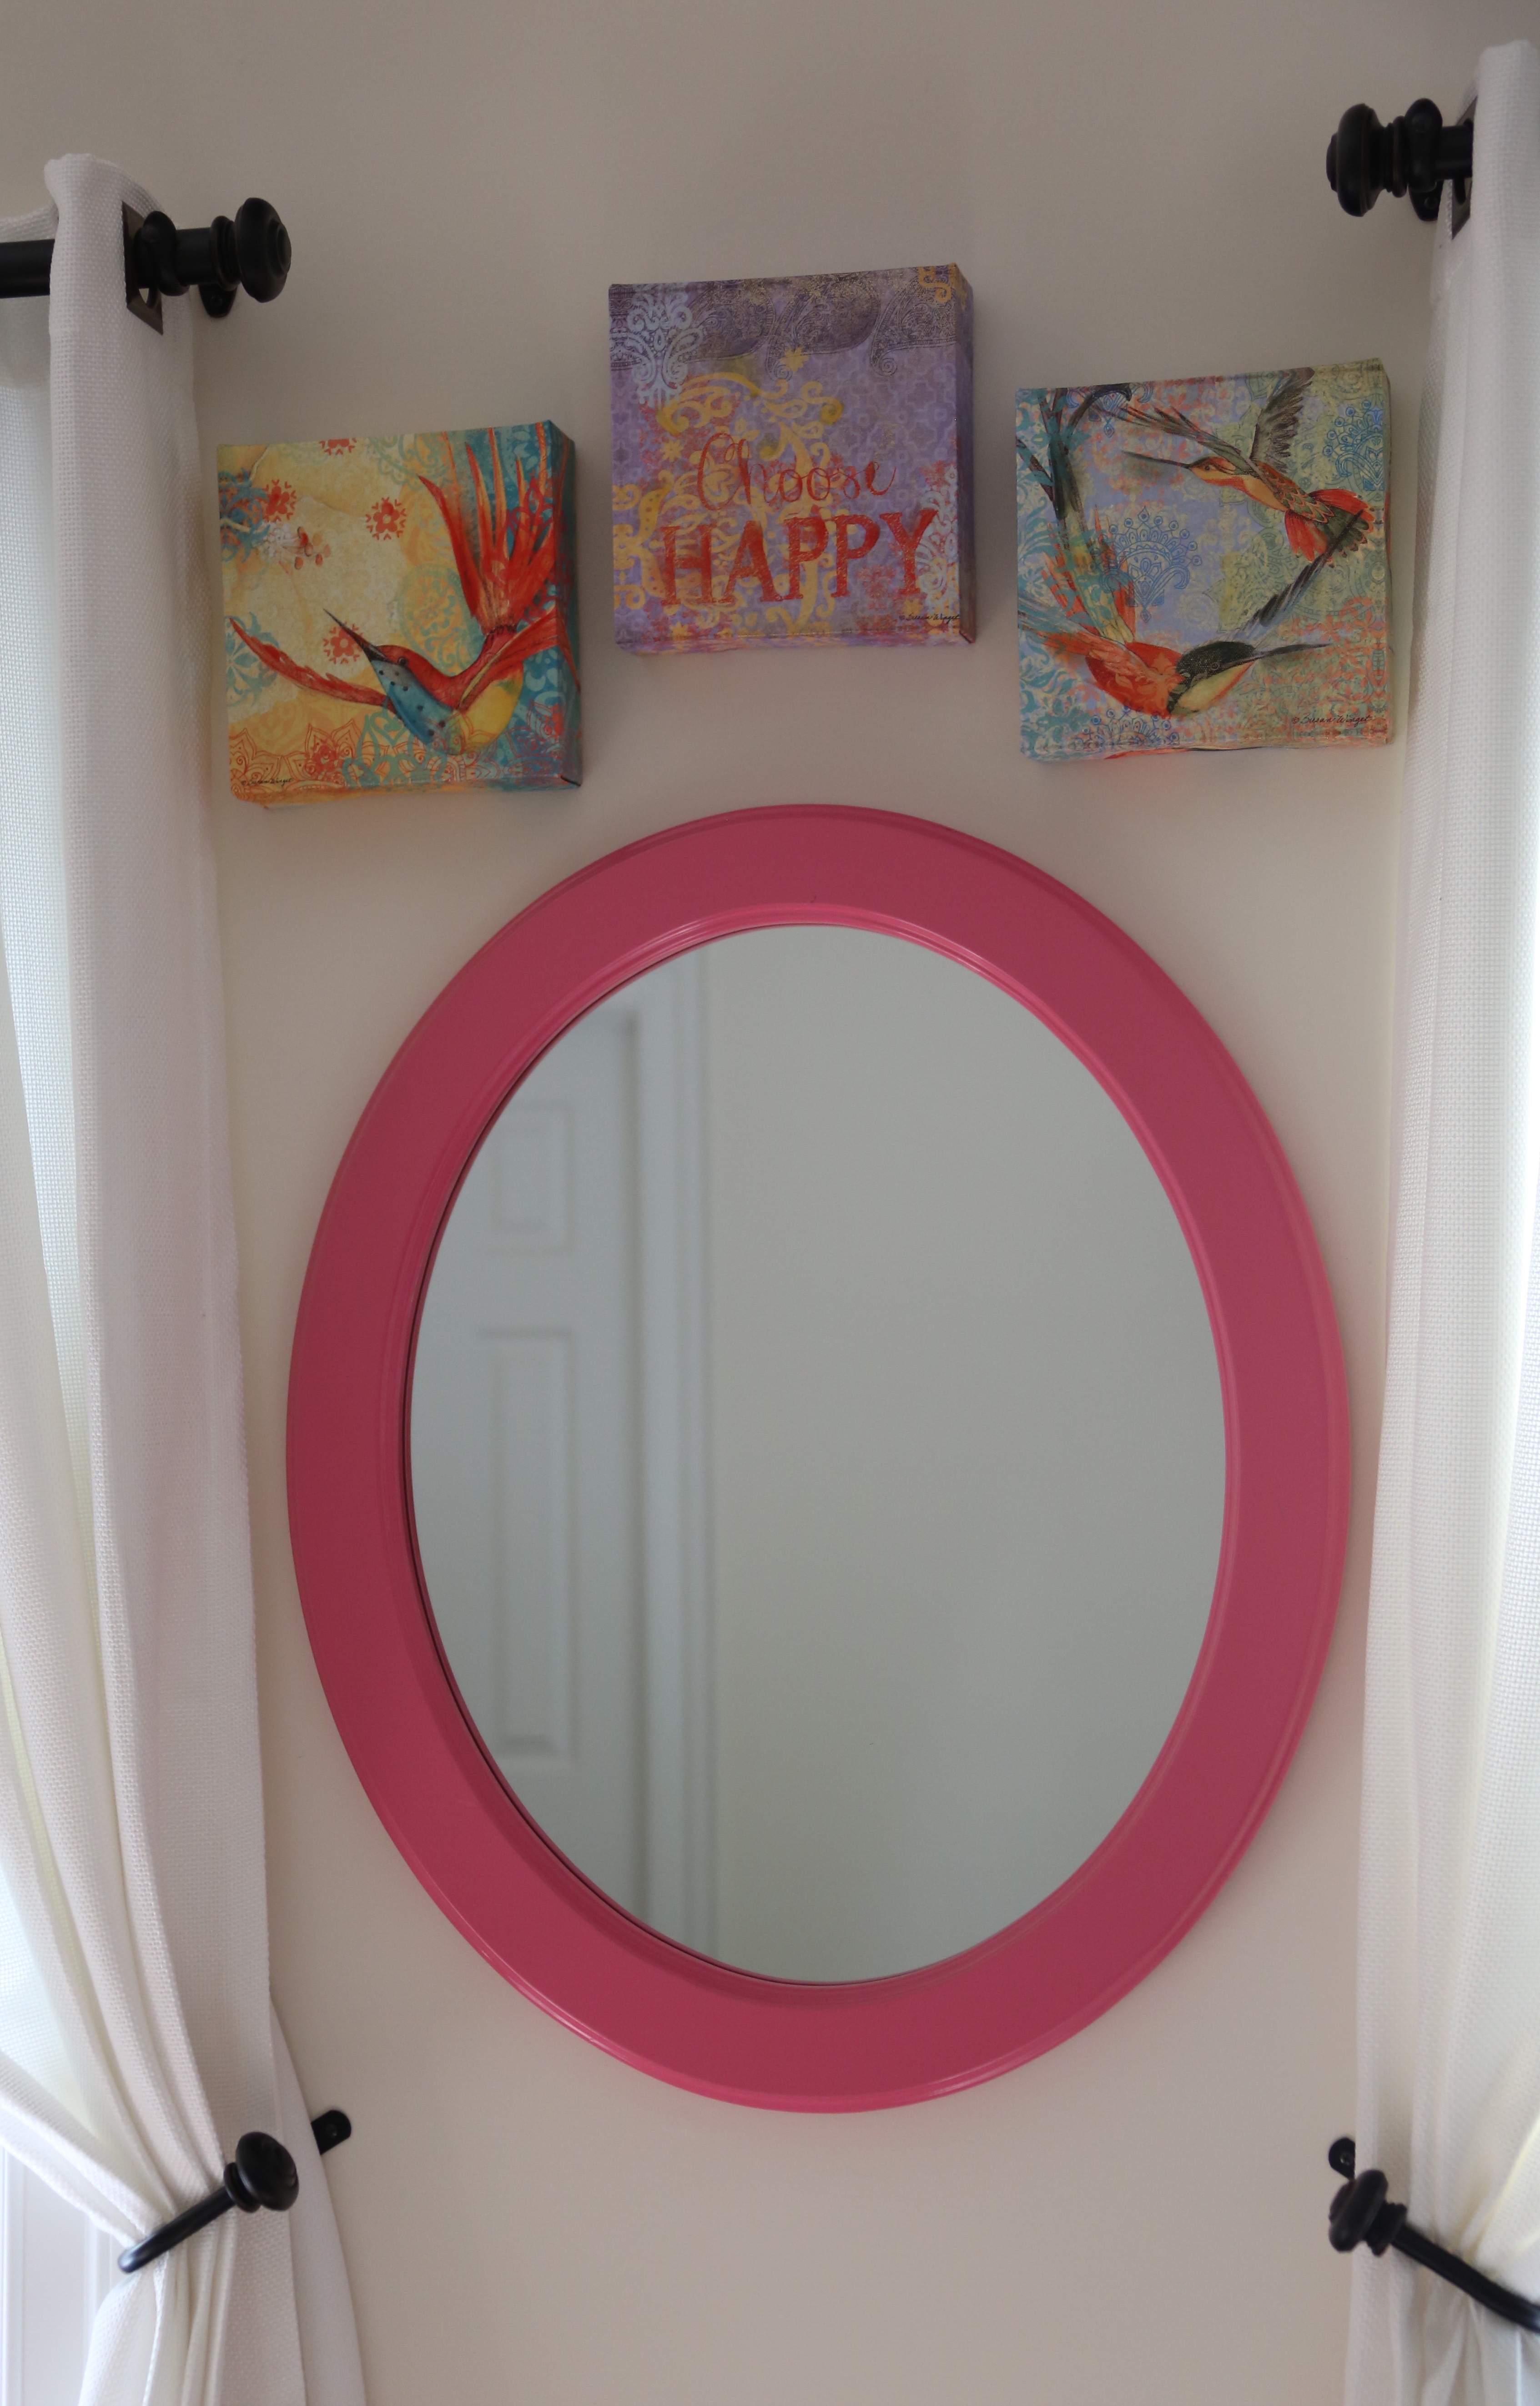
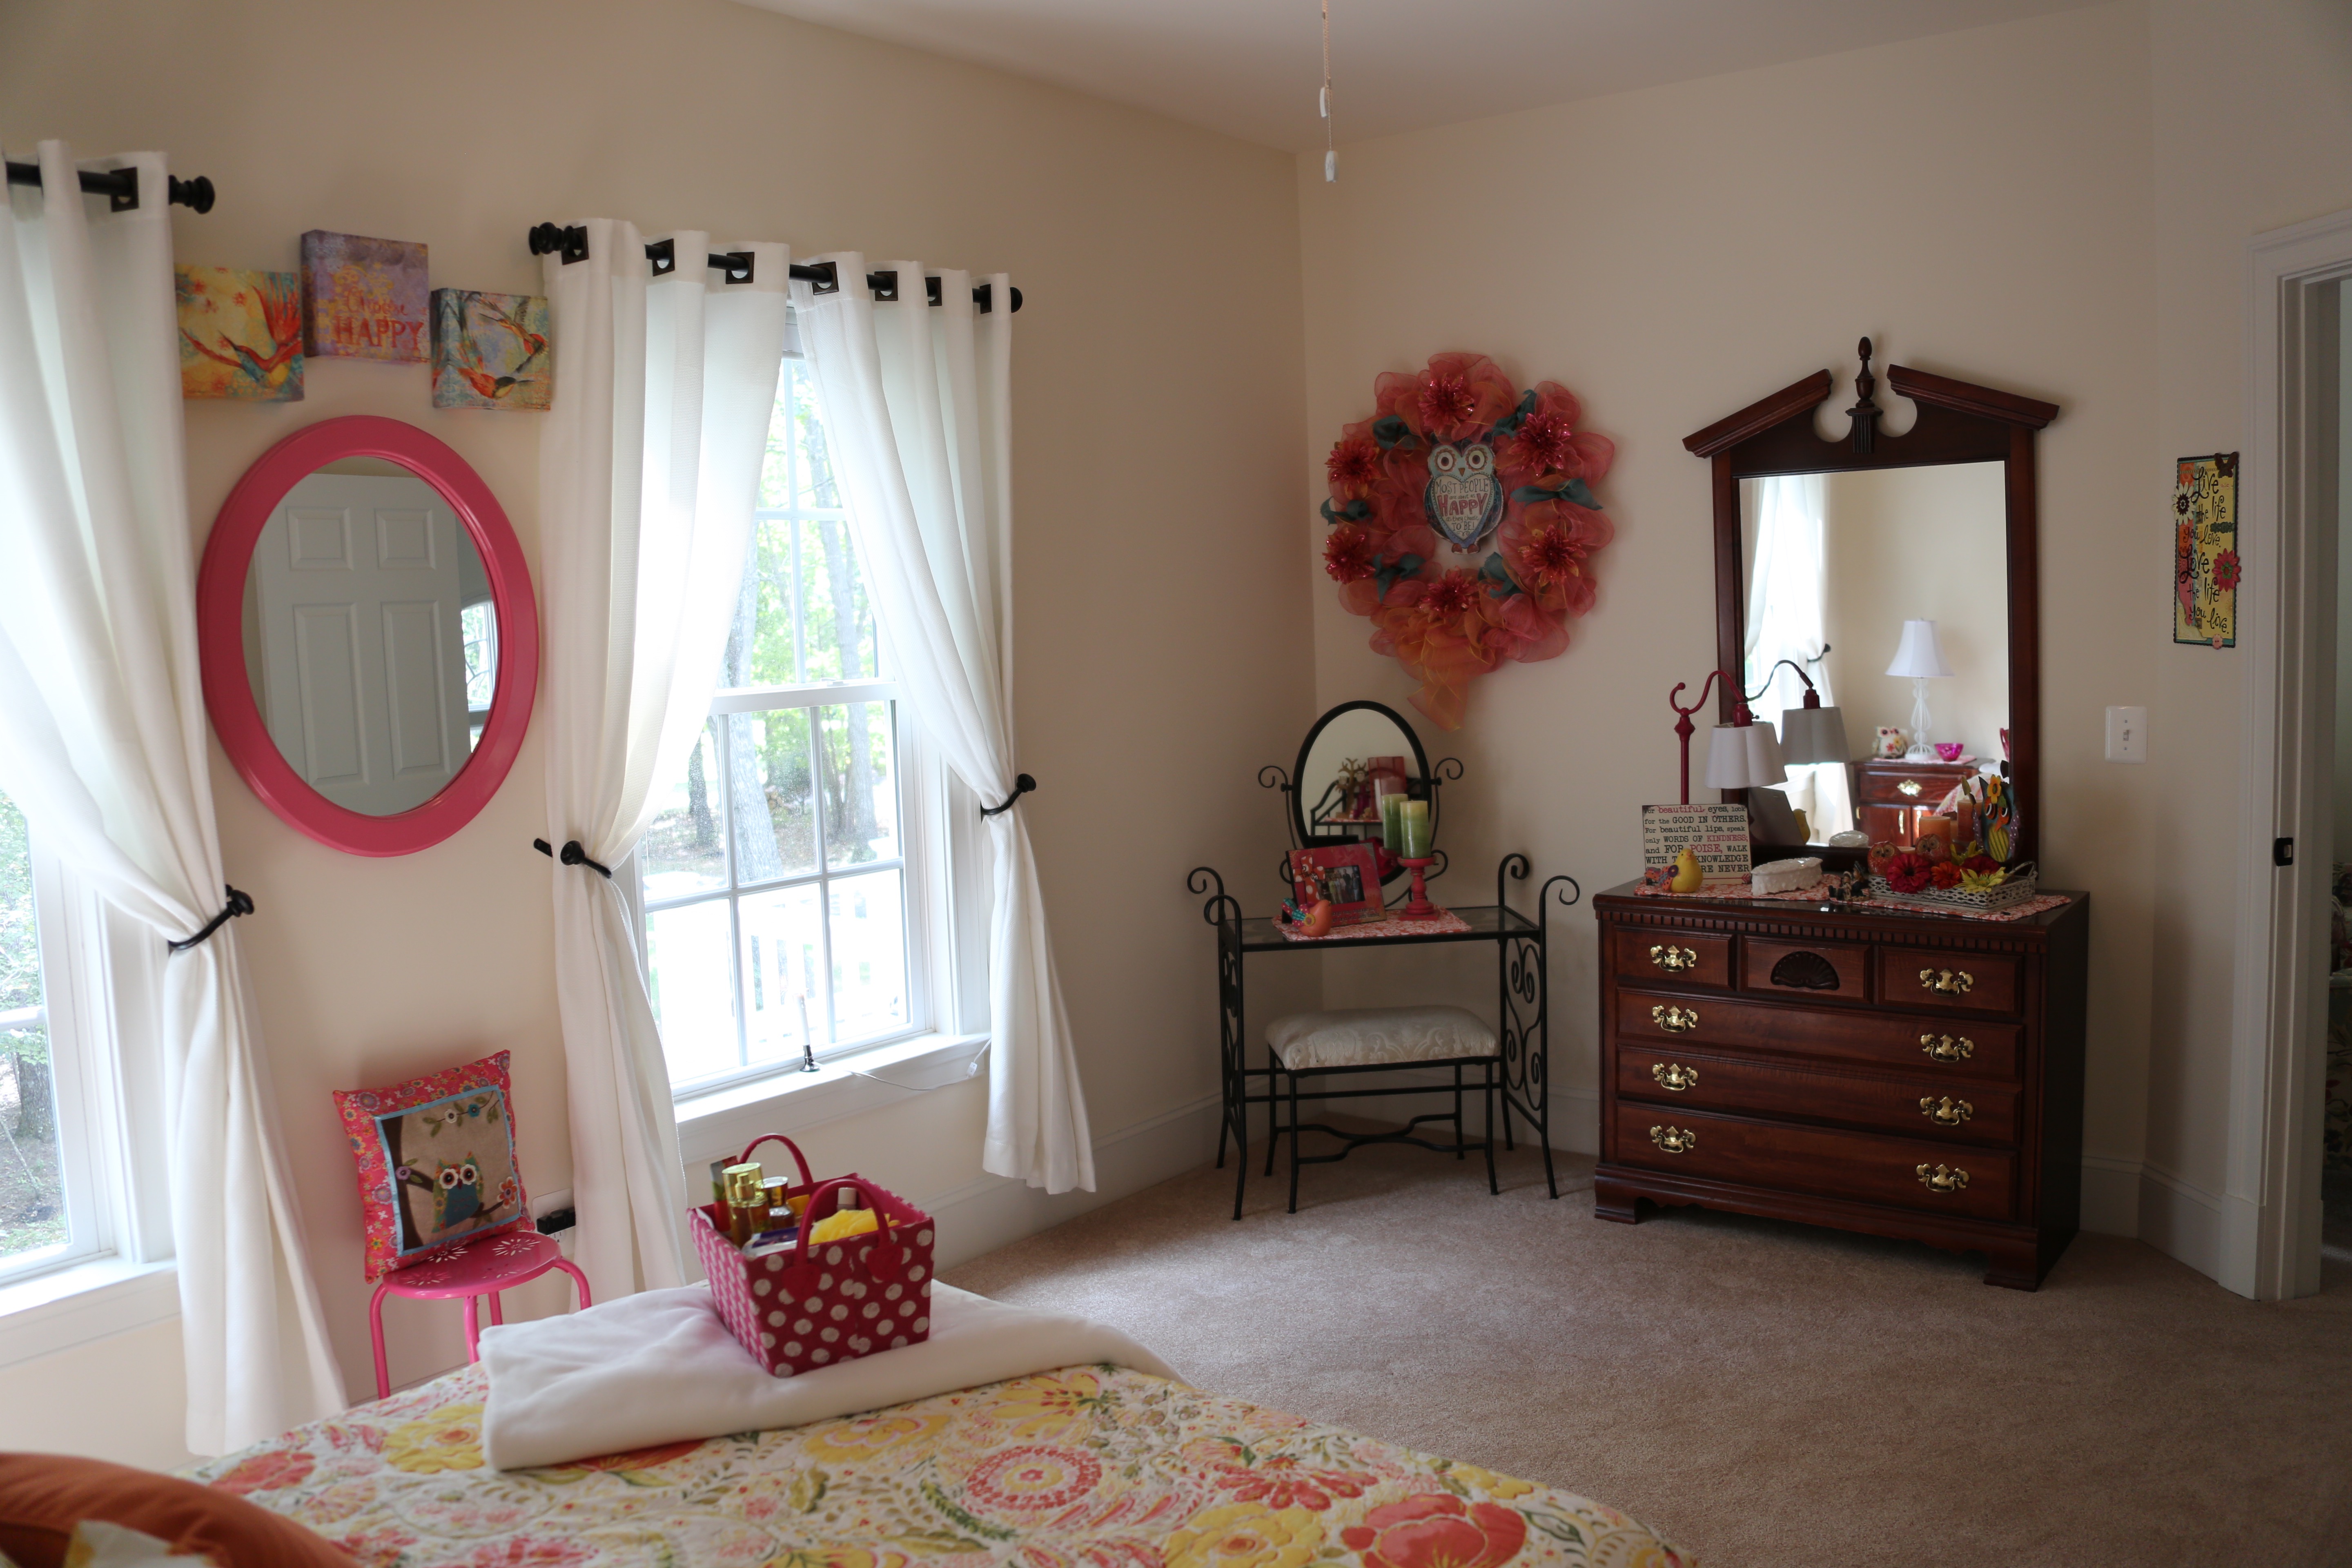
I found these cute little canvas pictures at JoAnns Fabrics on sale (I would never pay what that price tag says for something like those). I got the mirror at Hobby Lobby for 80% off…*Score*!!11904676_10207177669190511_4753264848253983202_n

IMG_6237

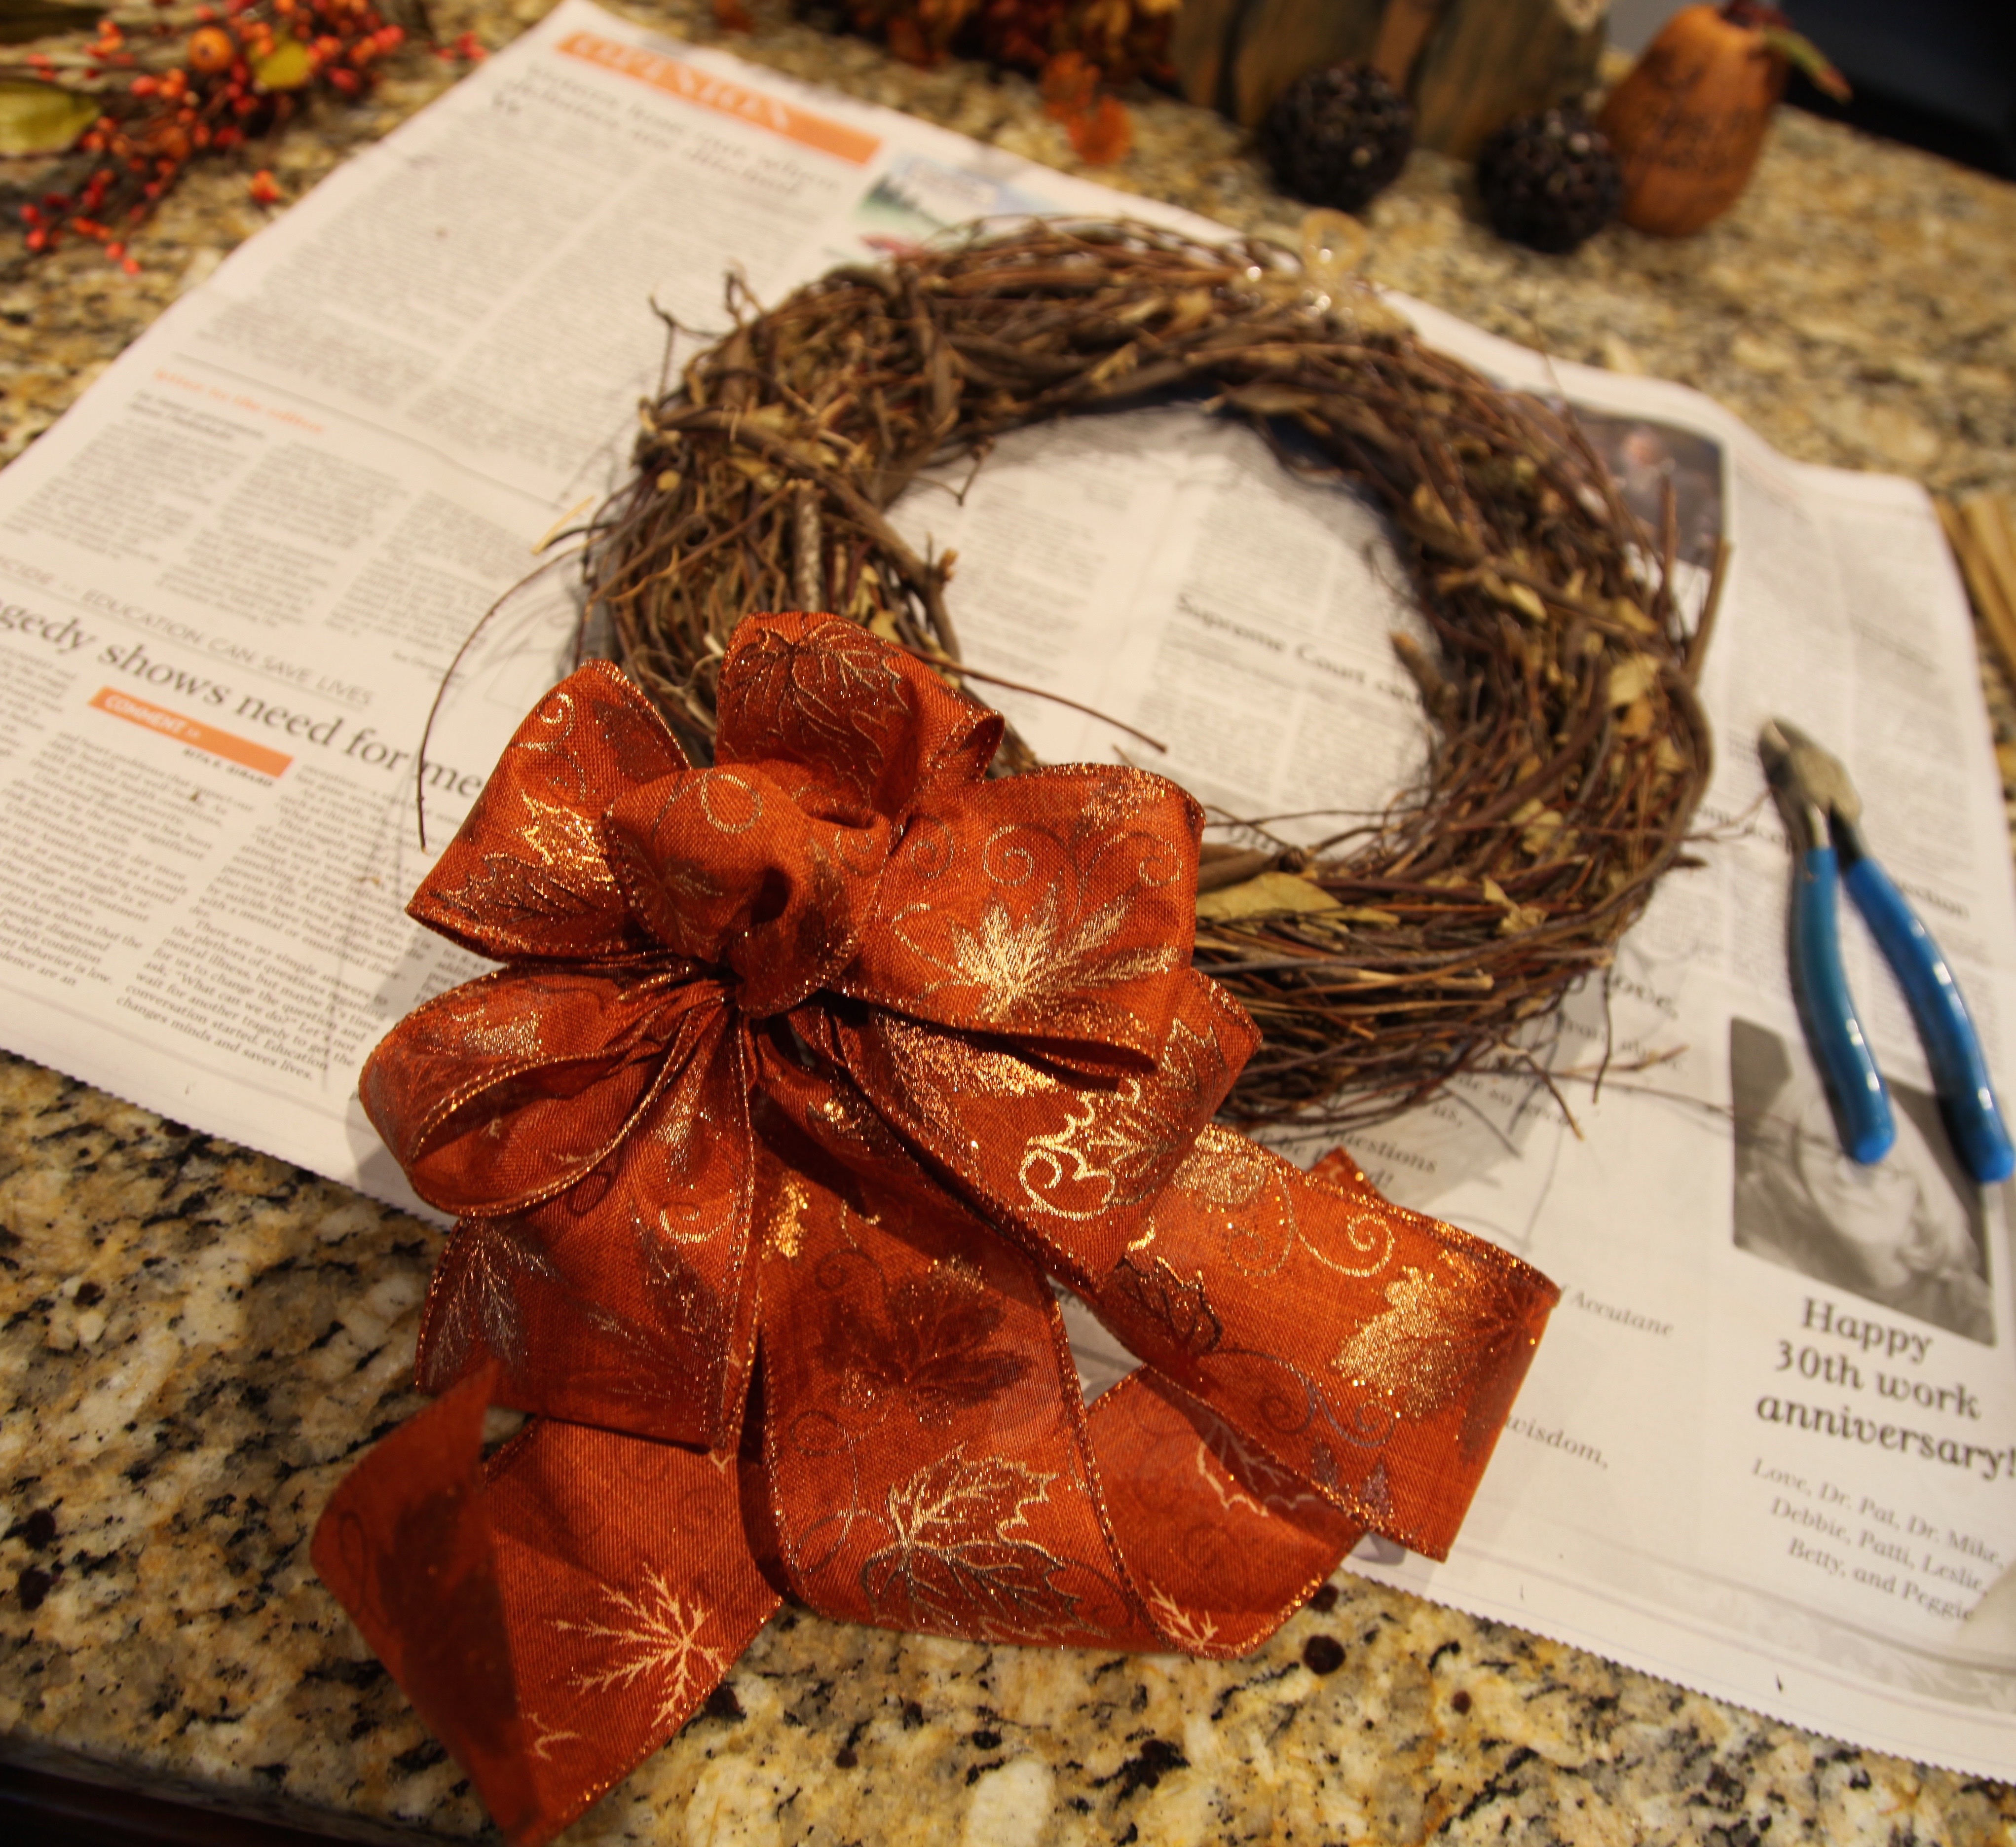
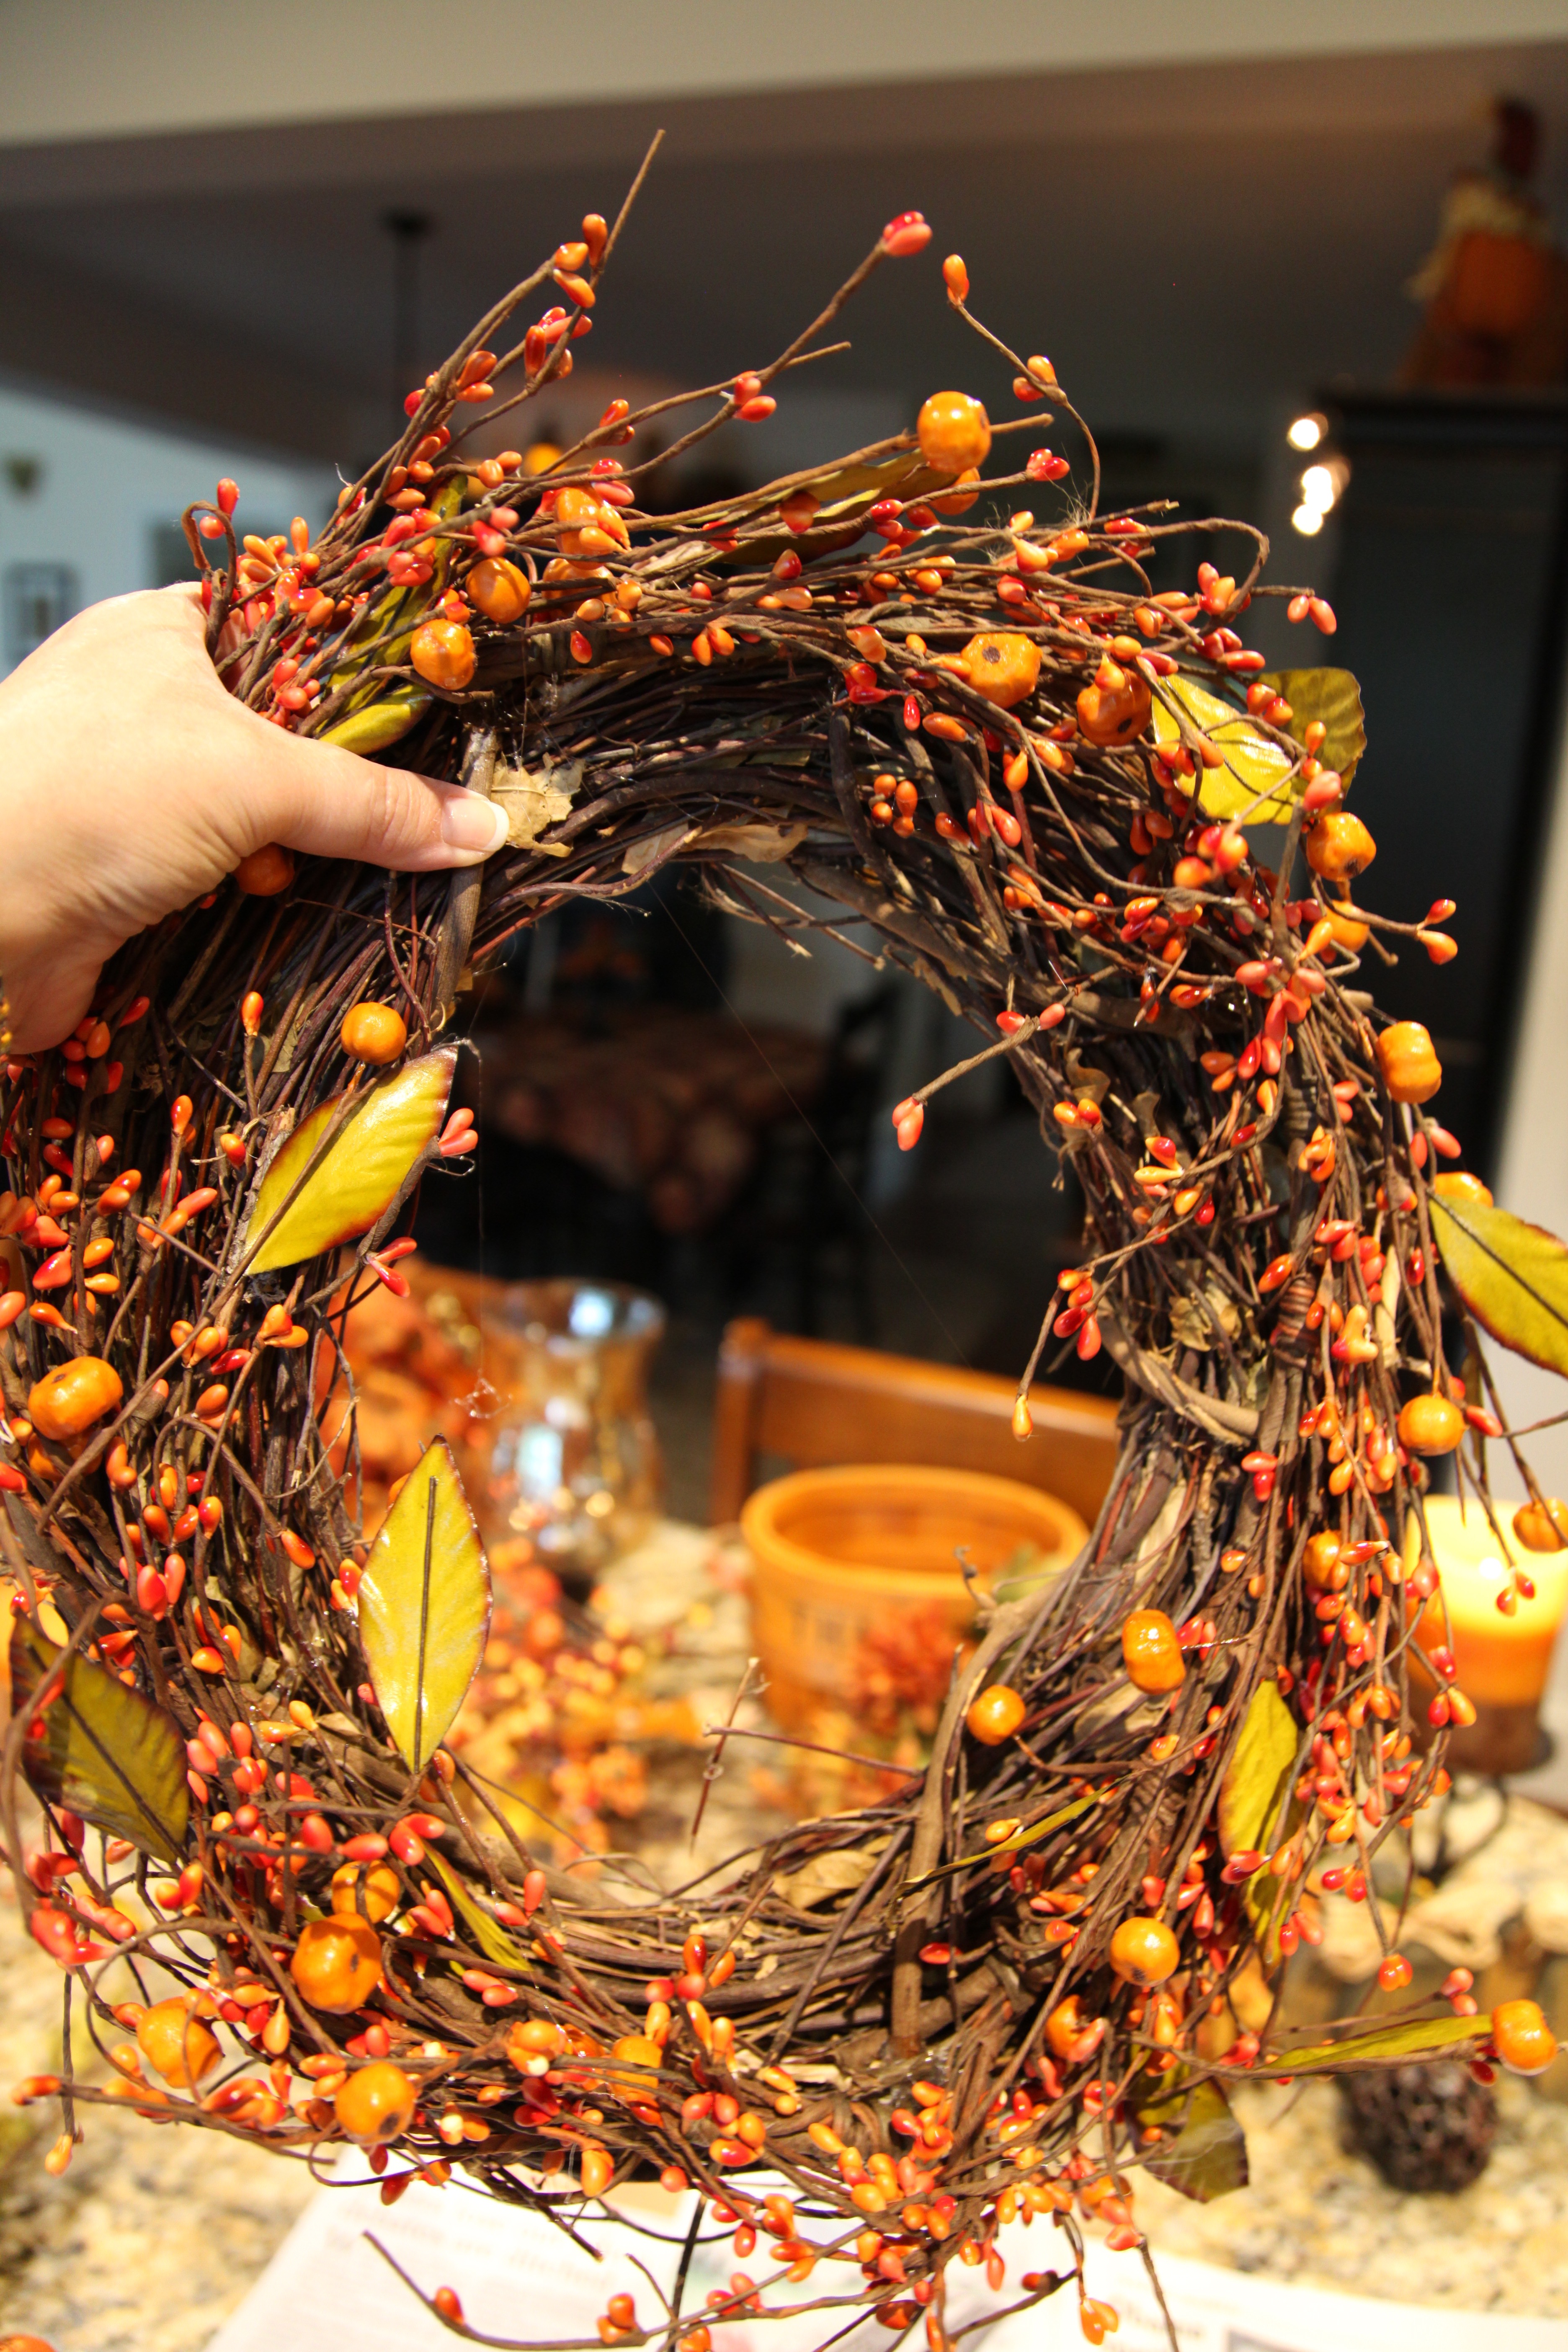
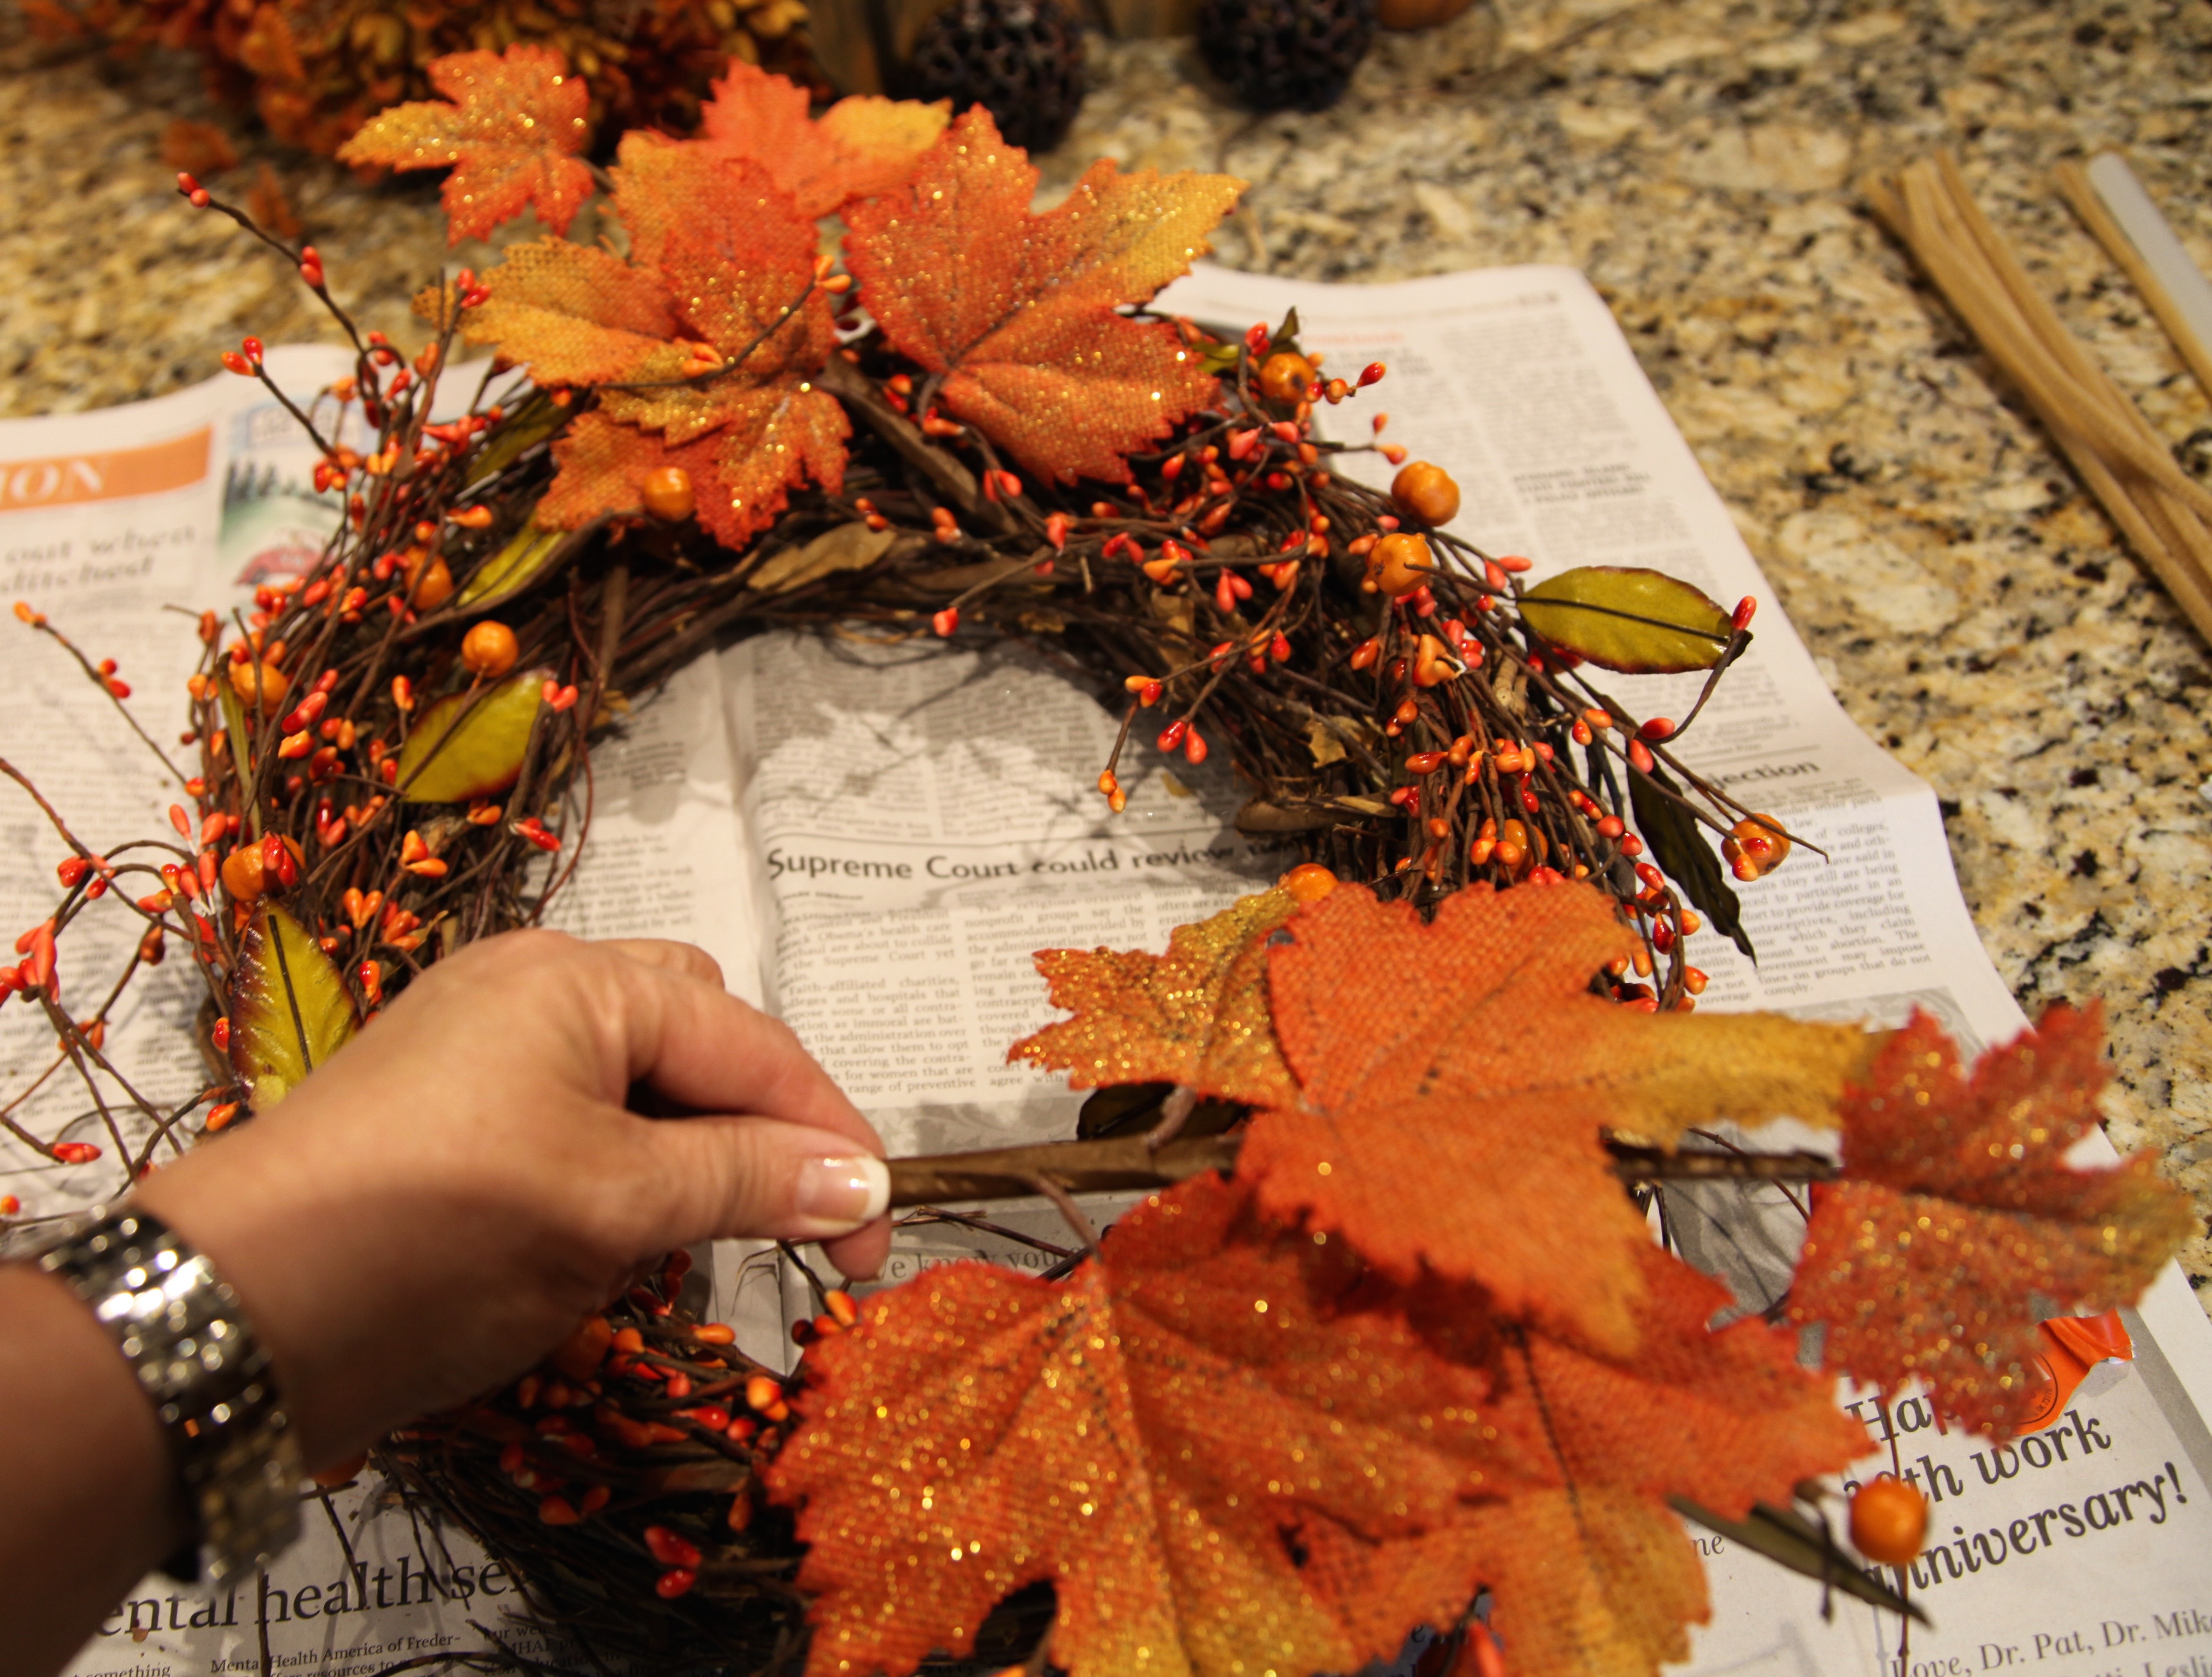
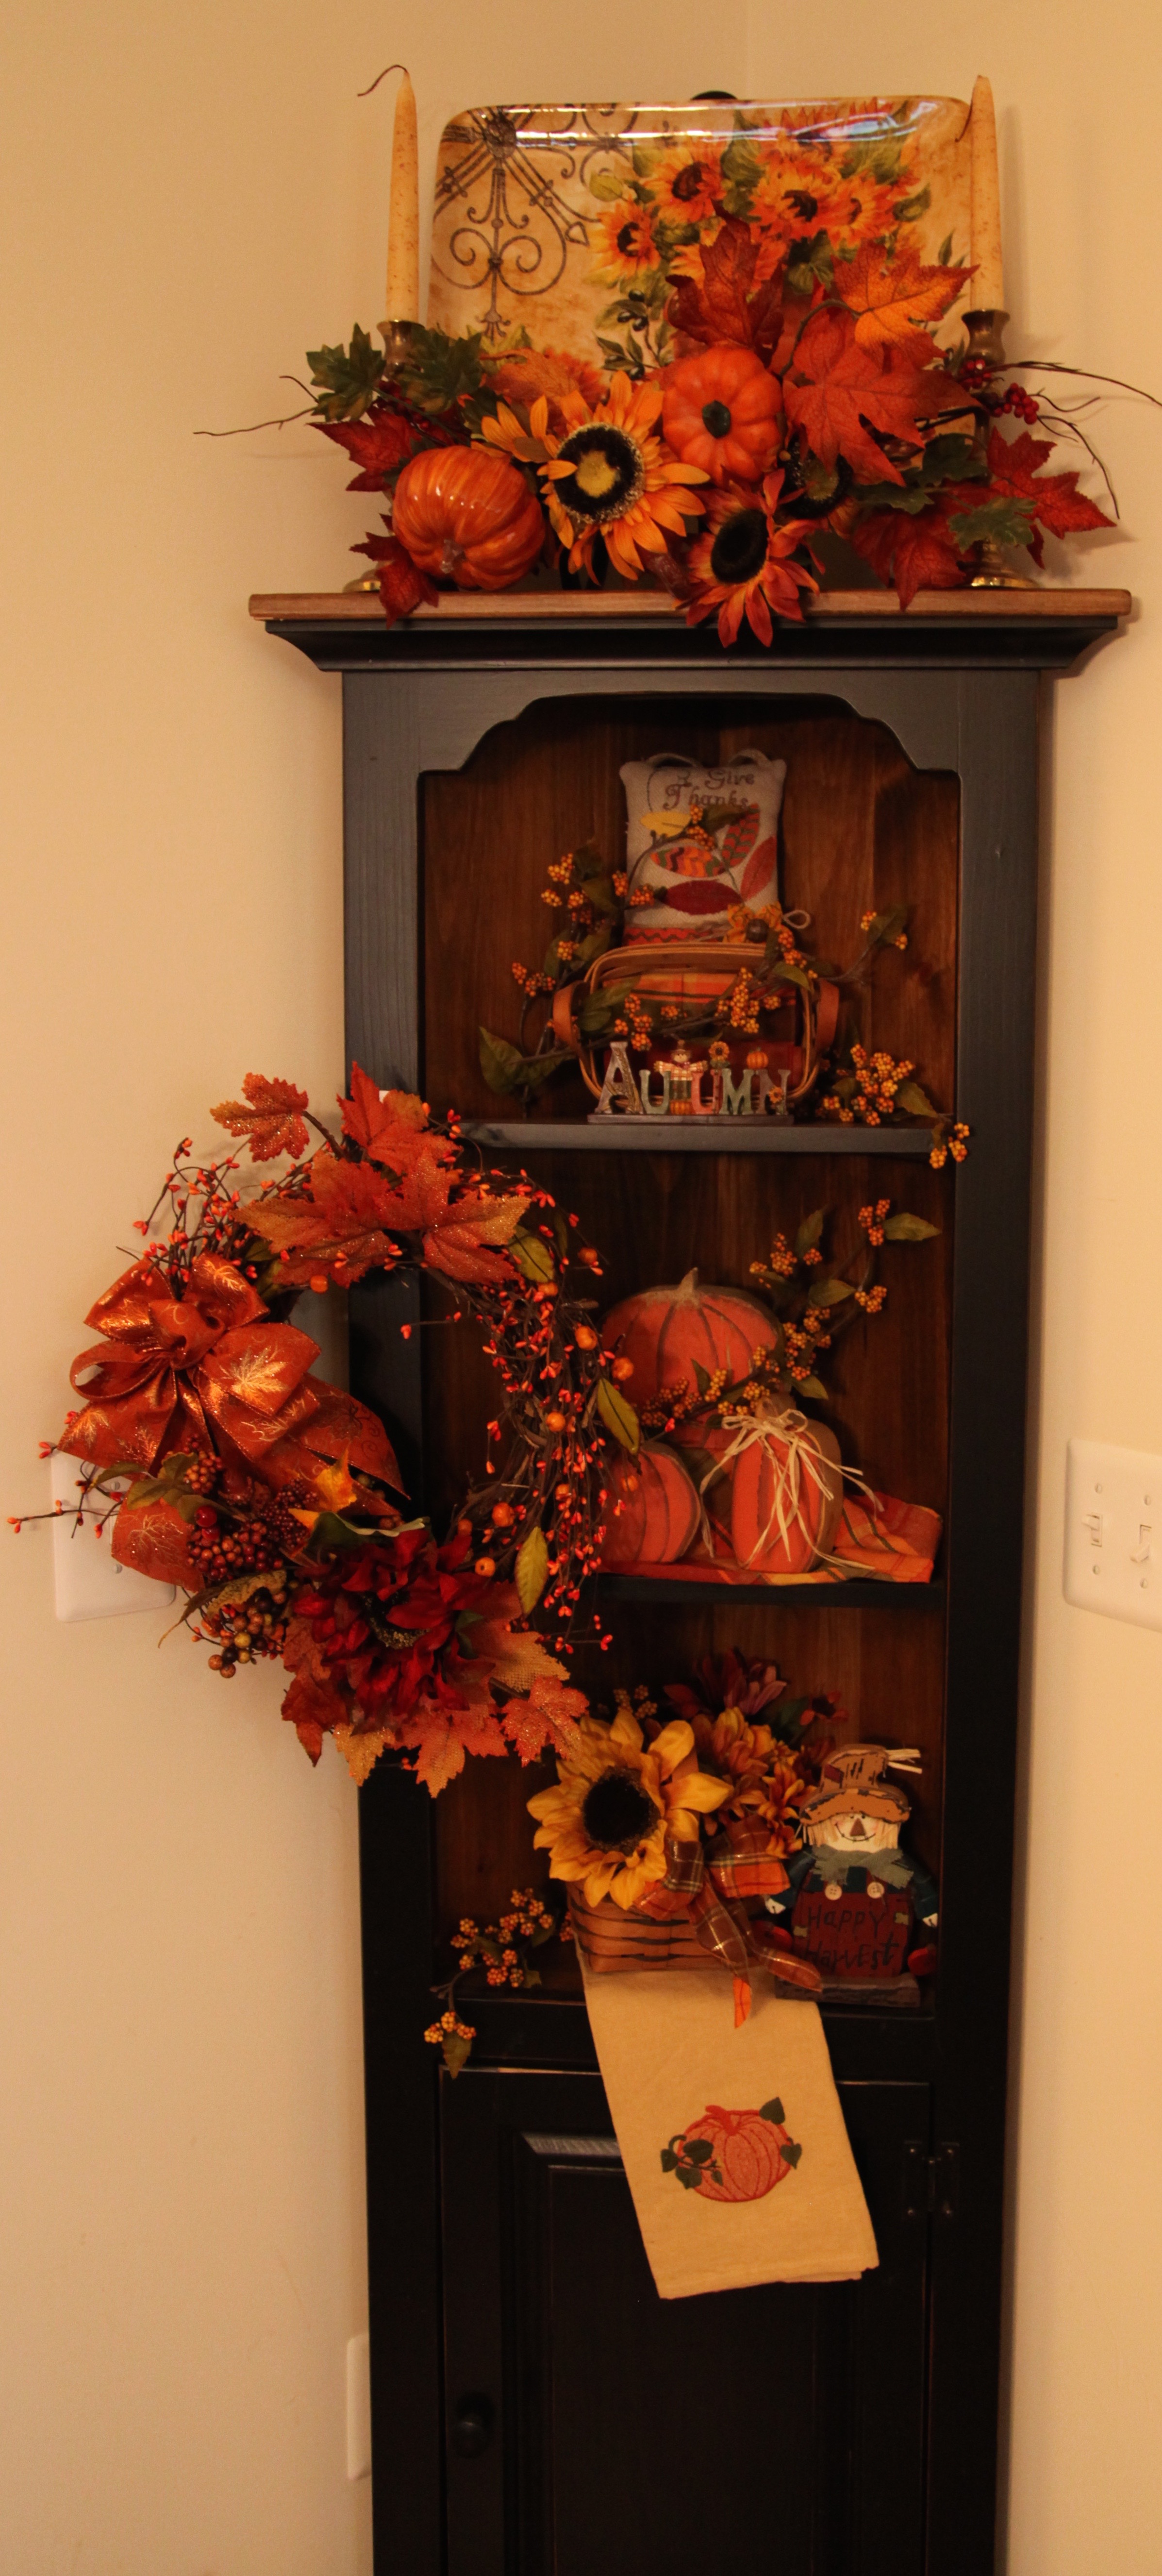
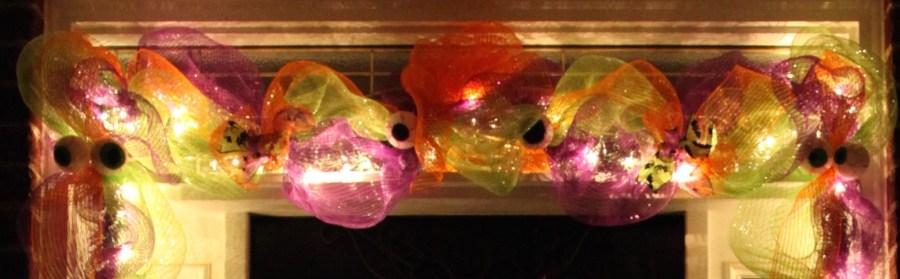
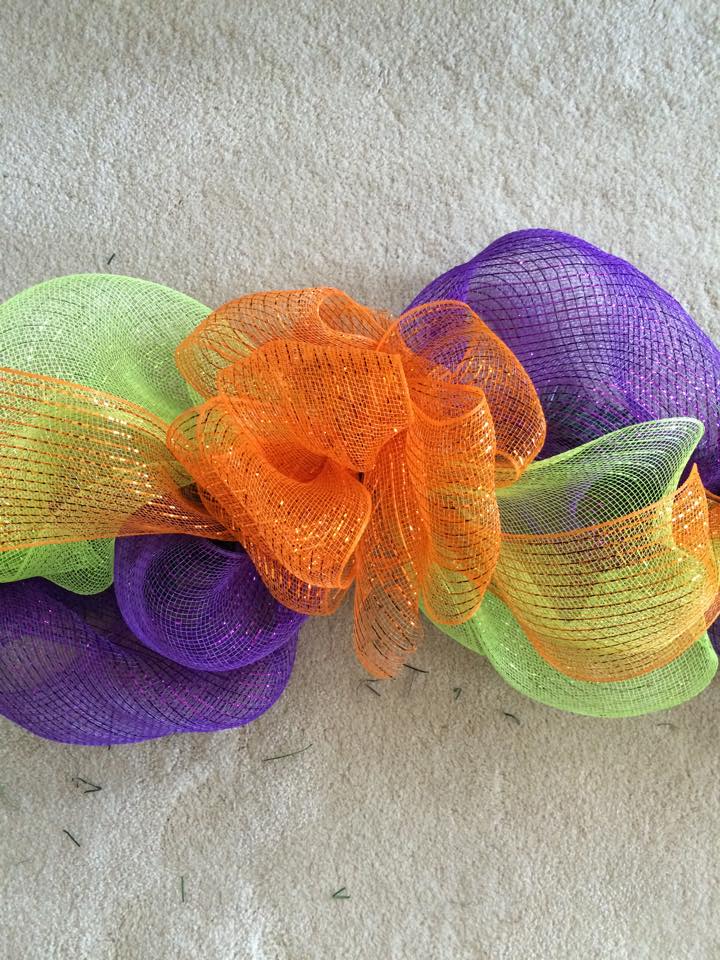
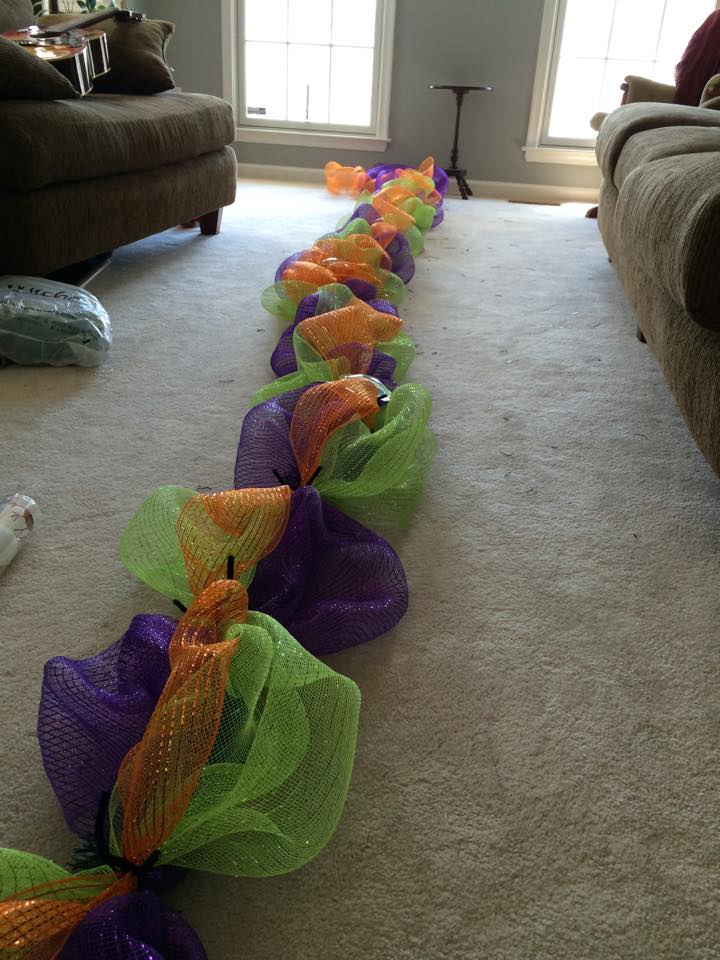
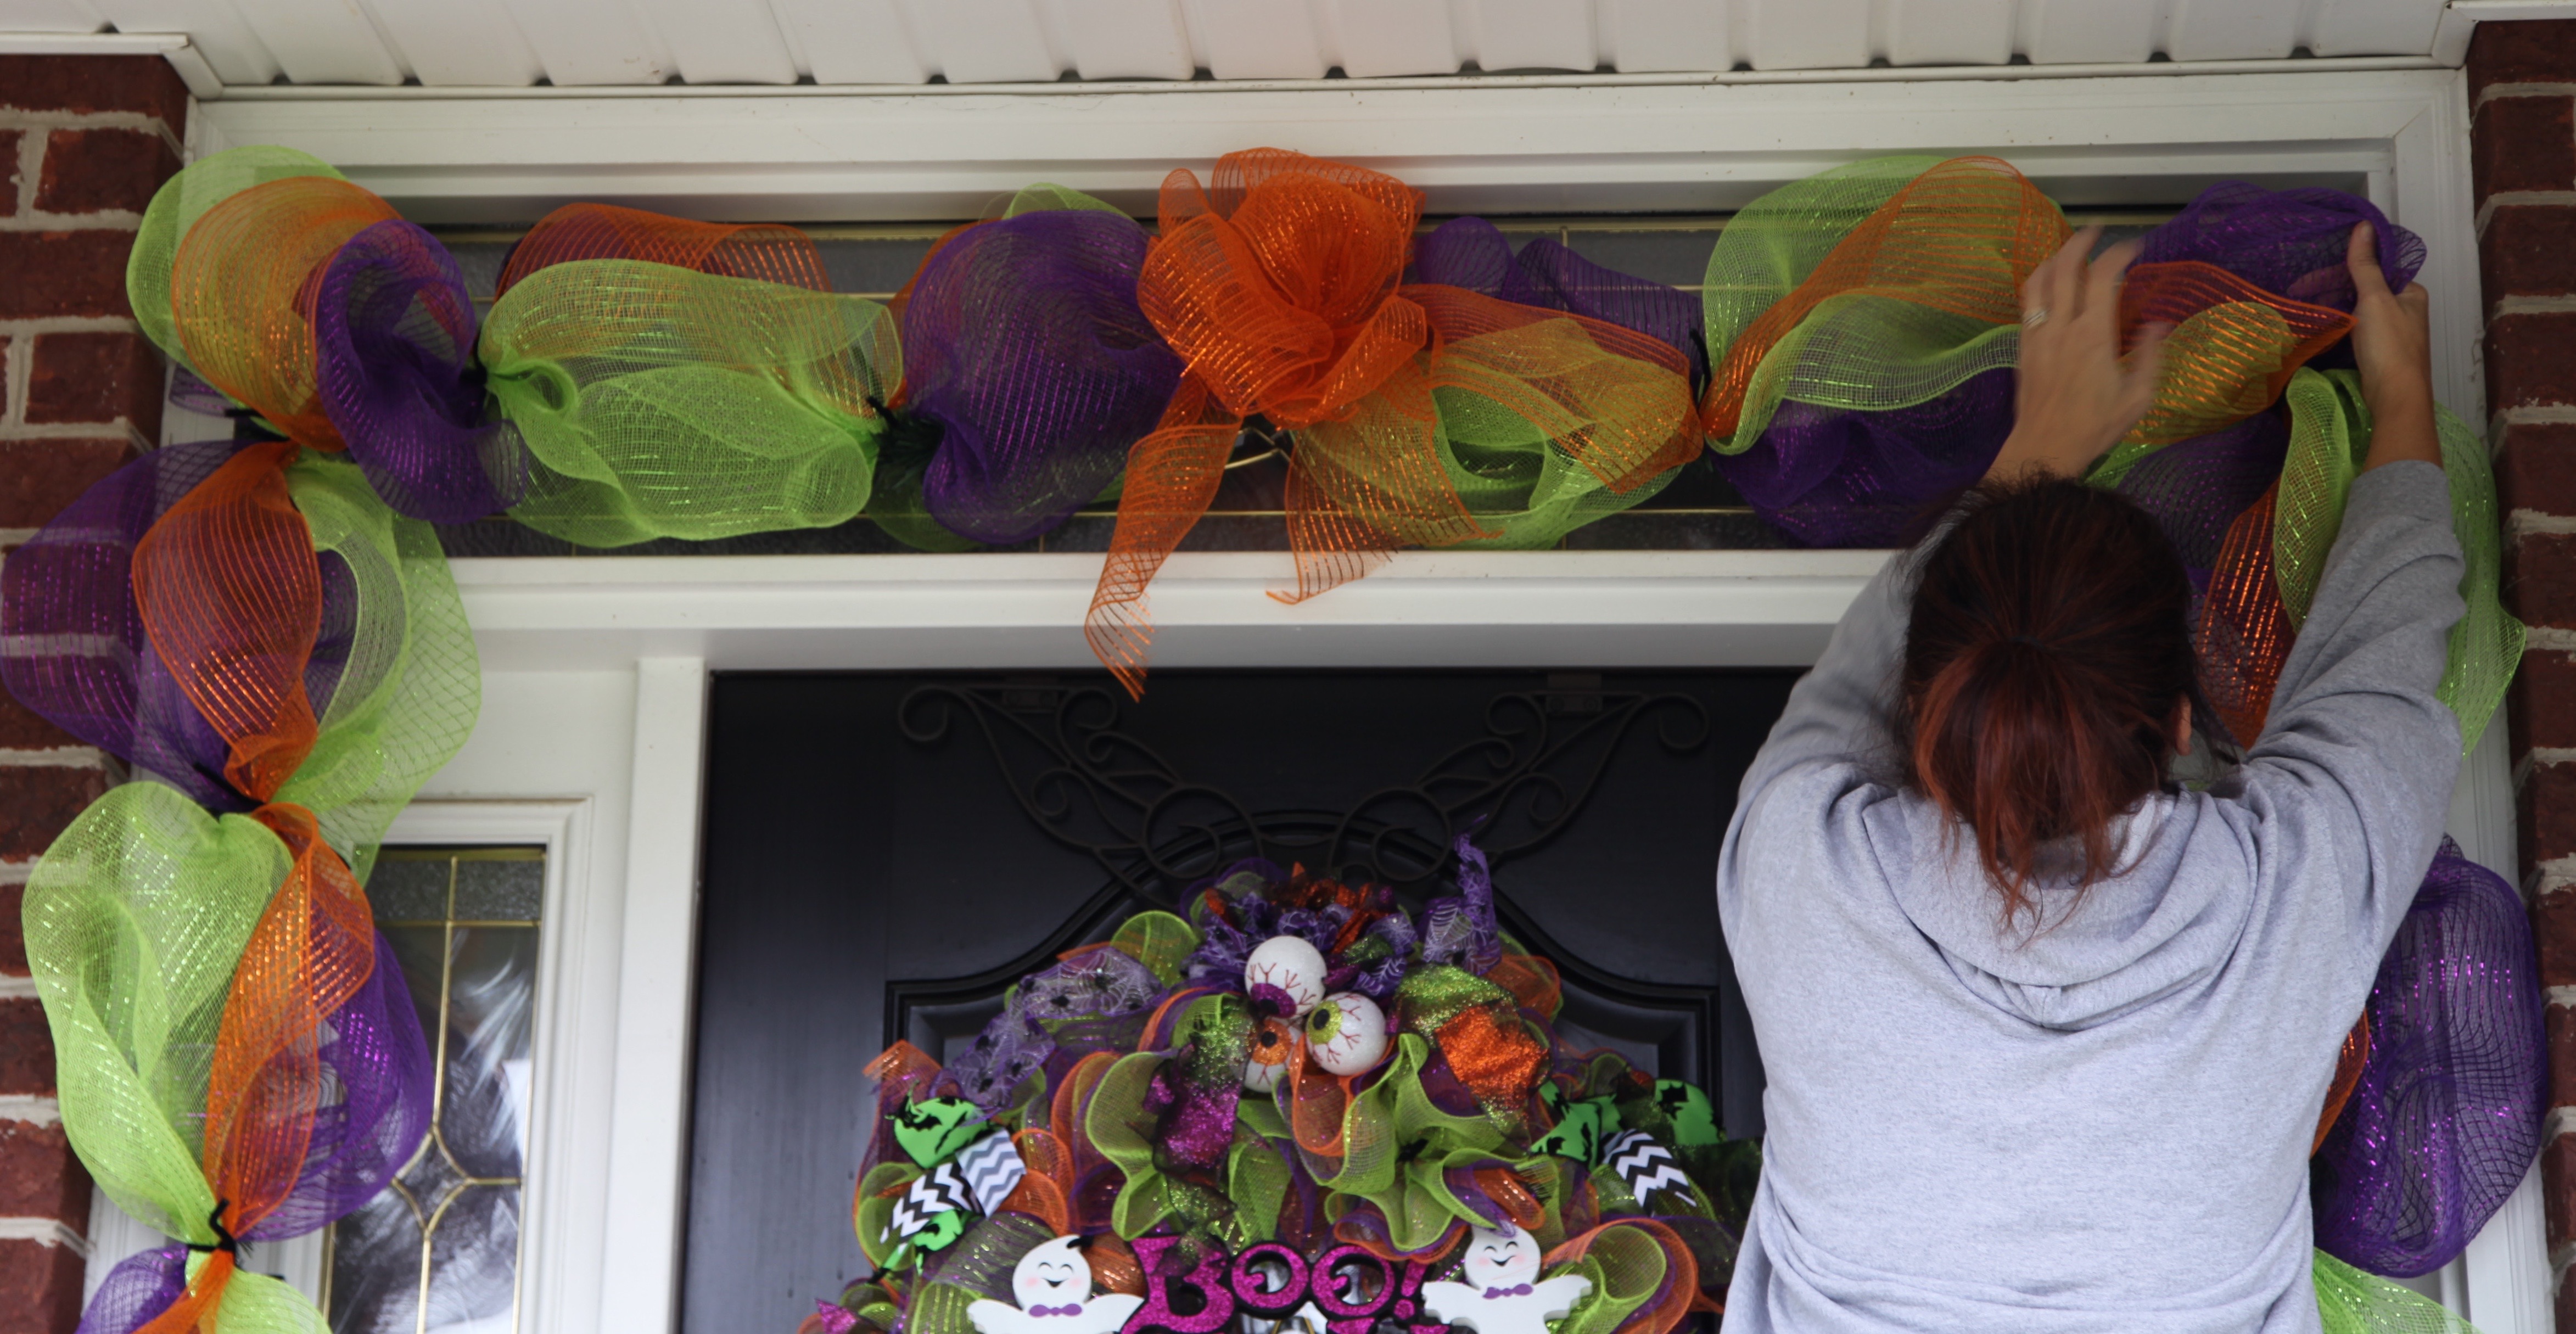
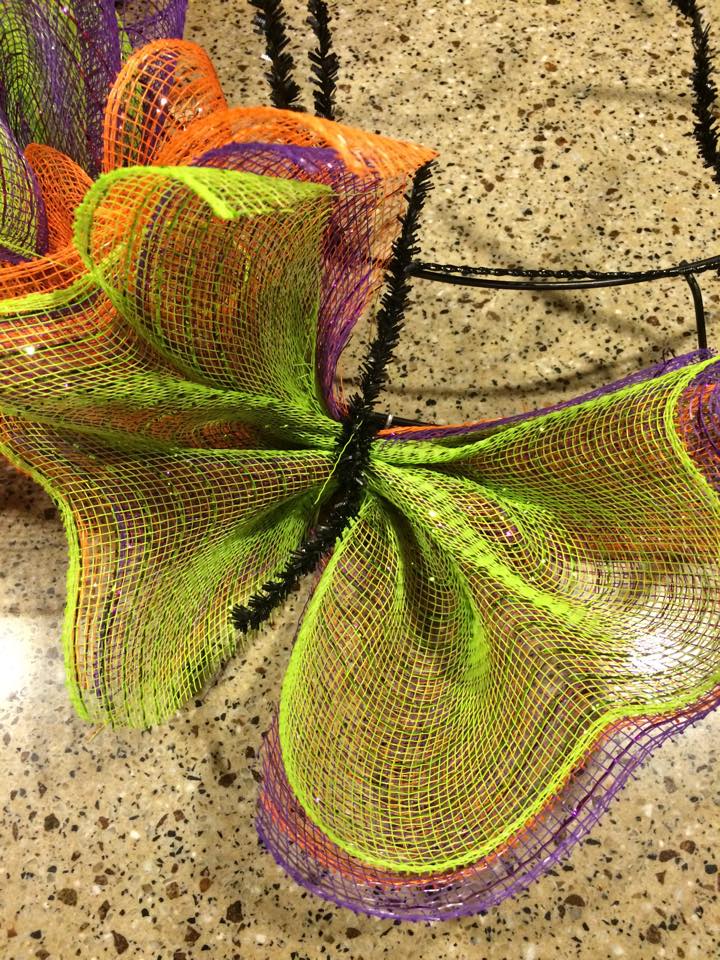
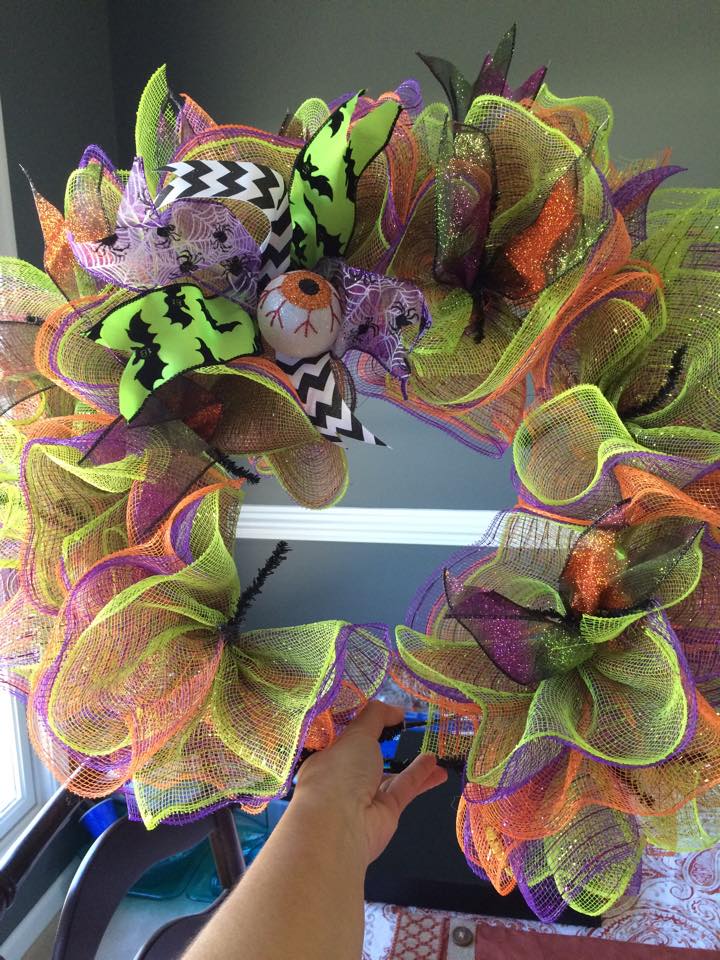
I made that deco mesh wreath, this is one of the first wreaths that I made on a 24″ wreath form and it turned out to be huge!  I found that little metal owl plaque with the saying “Most People Are As Happy As They Choose To Be” and that was the inspiration for that wreath.  I think it fits into “The Happy Room” nicely. 🙂  1V4A2985

We decided to install a white ceiling fan in the room; my hubby came up with a great idea, he painted some of the brackets on the fan to match the room colors…sweet! IMG_8885

I have found that when I’m out and about shopping that I stumble across all sorts of things that match this room, so I’ve been picking stuff up here and there–all on sale– for quite a little while.  Here are some of the things that have found their way into this “Happy Room”. 🙂

1V4A2988 IMG_6249 IMG_1671 1V4A2986

I put this little arrangement together to sit on the dresser:

10968504_10205703440015703_884390916971852366_n

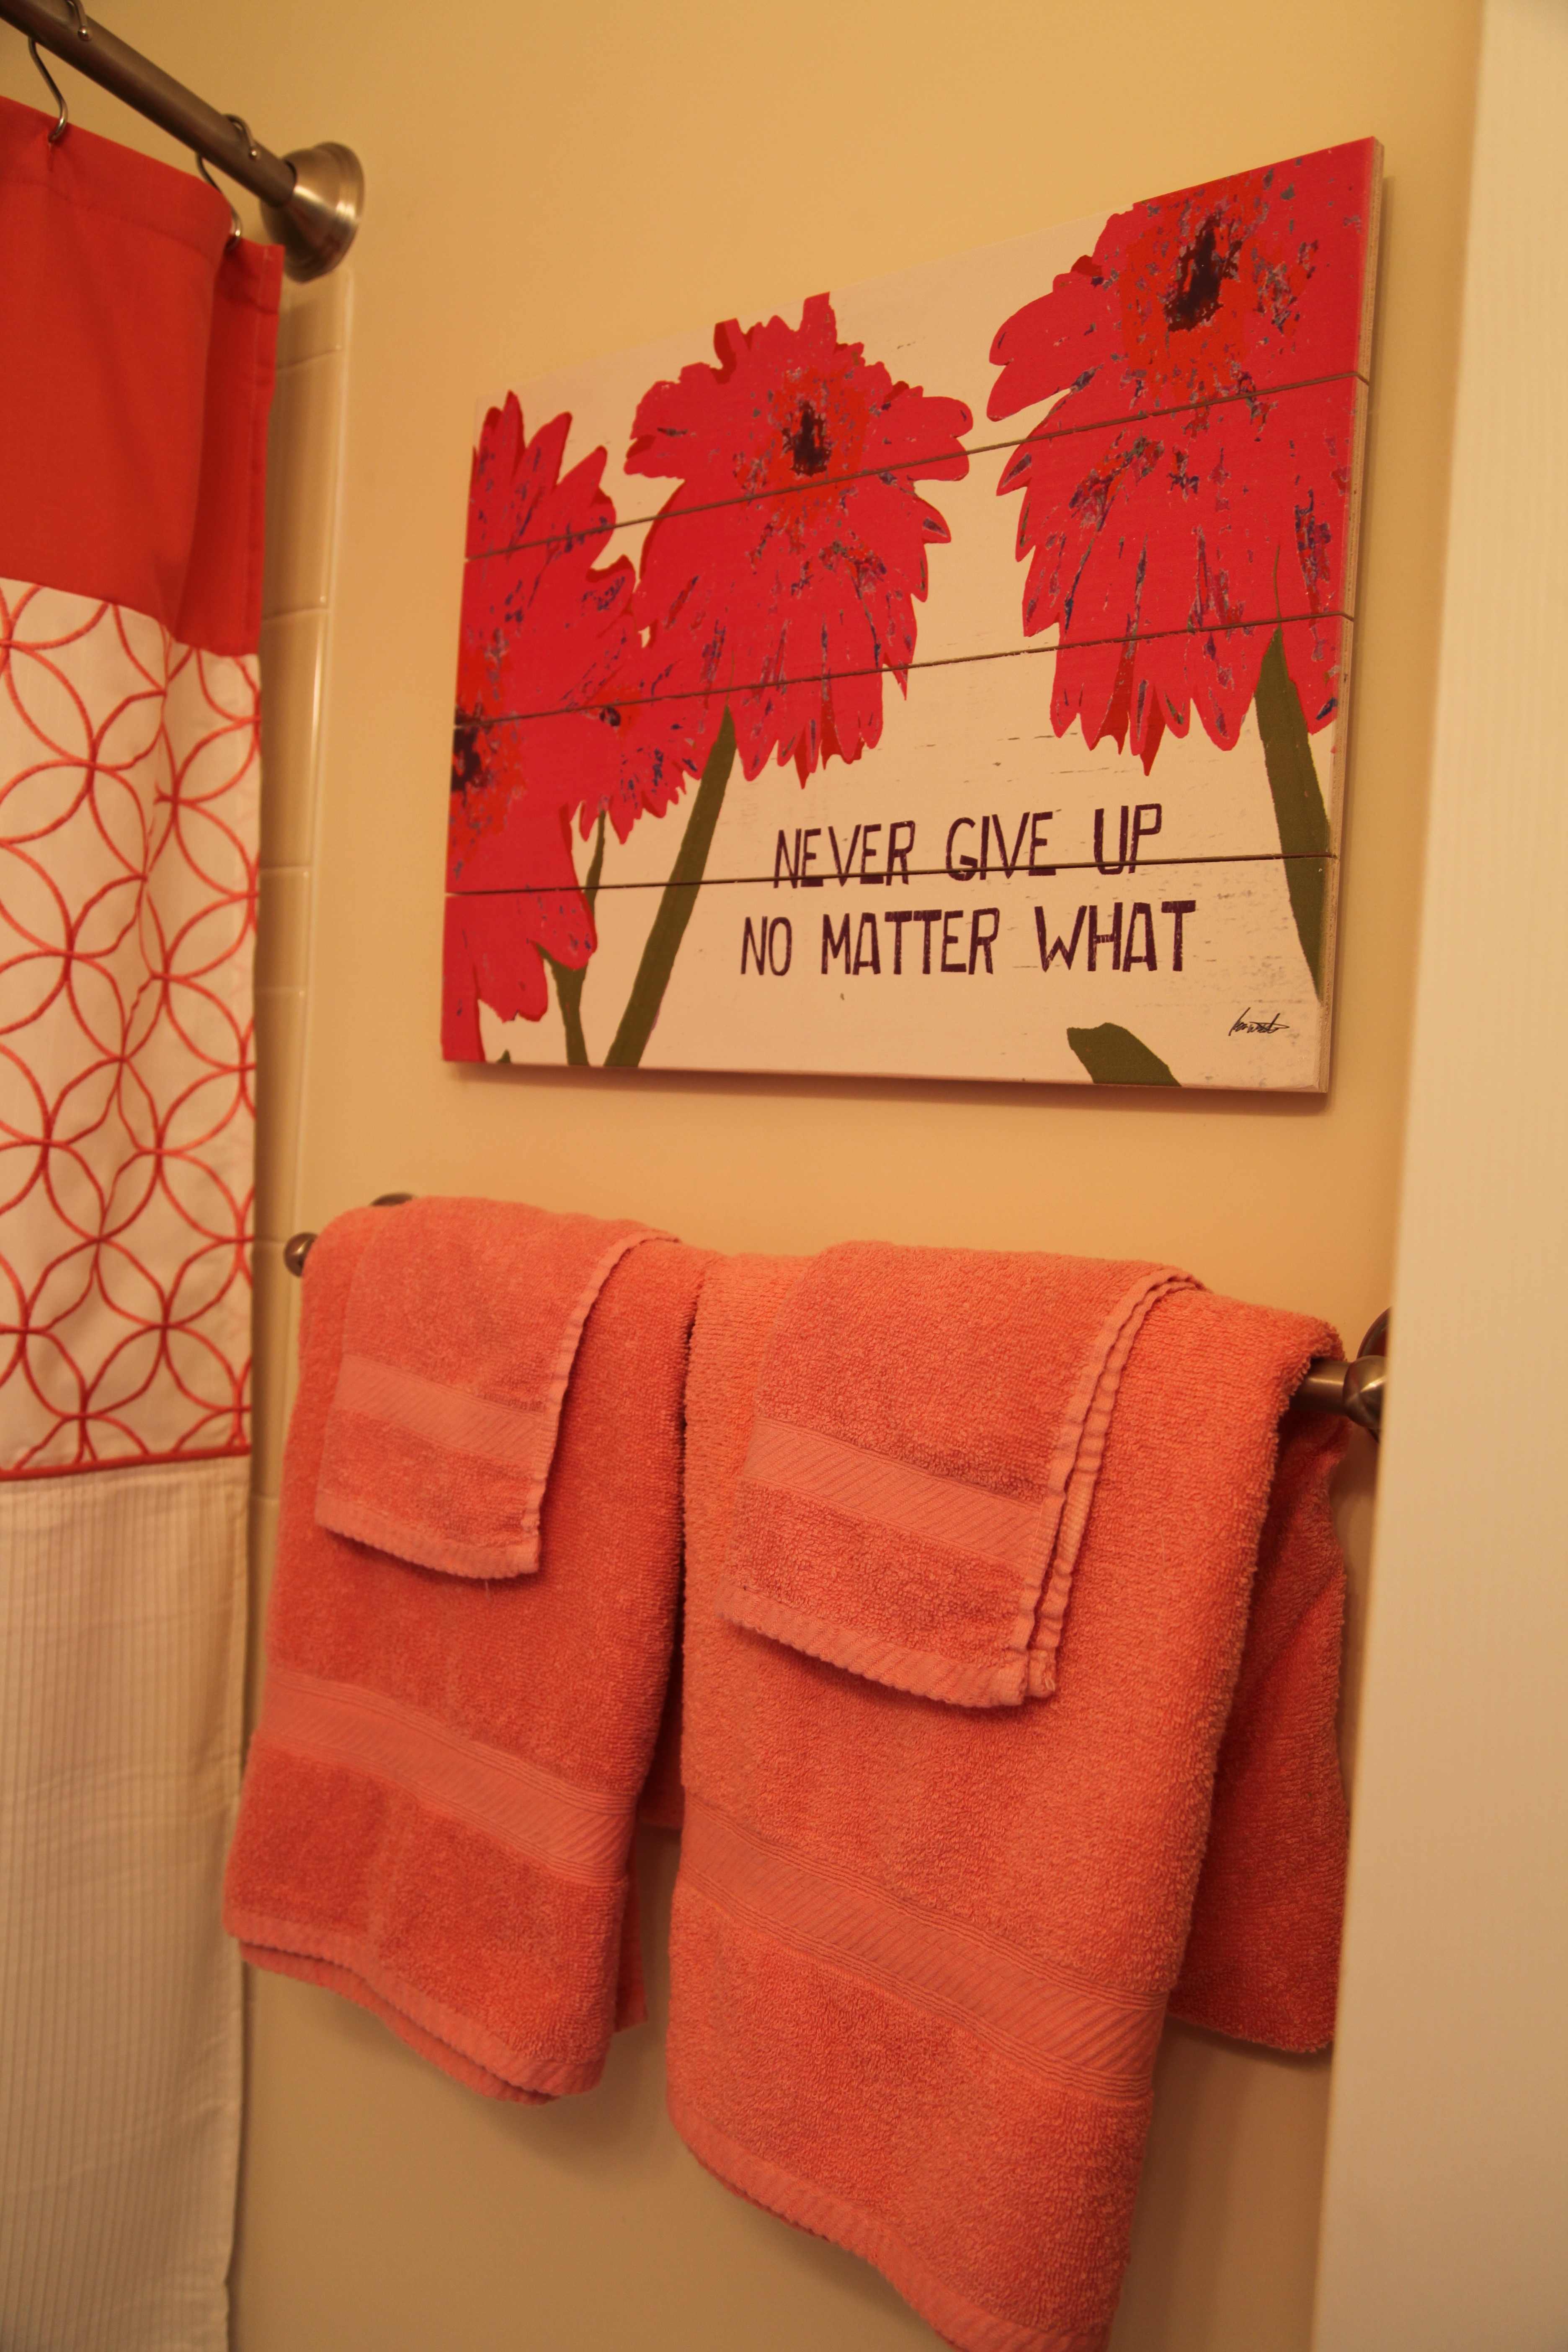
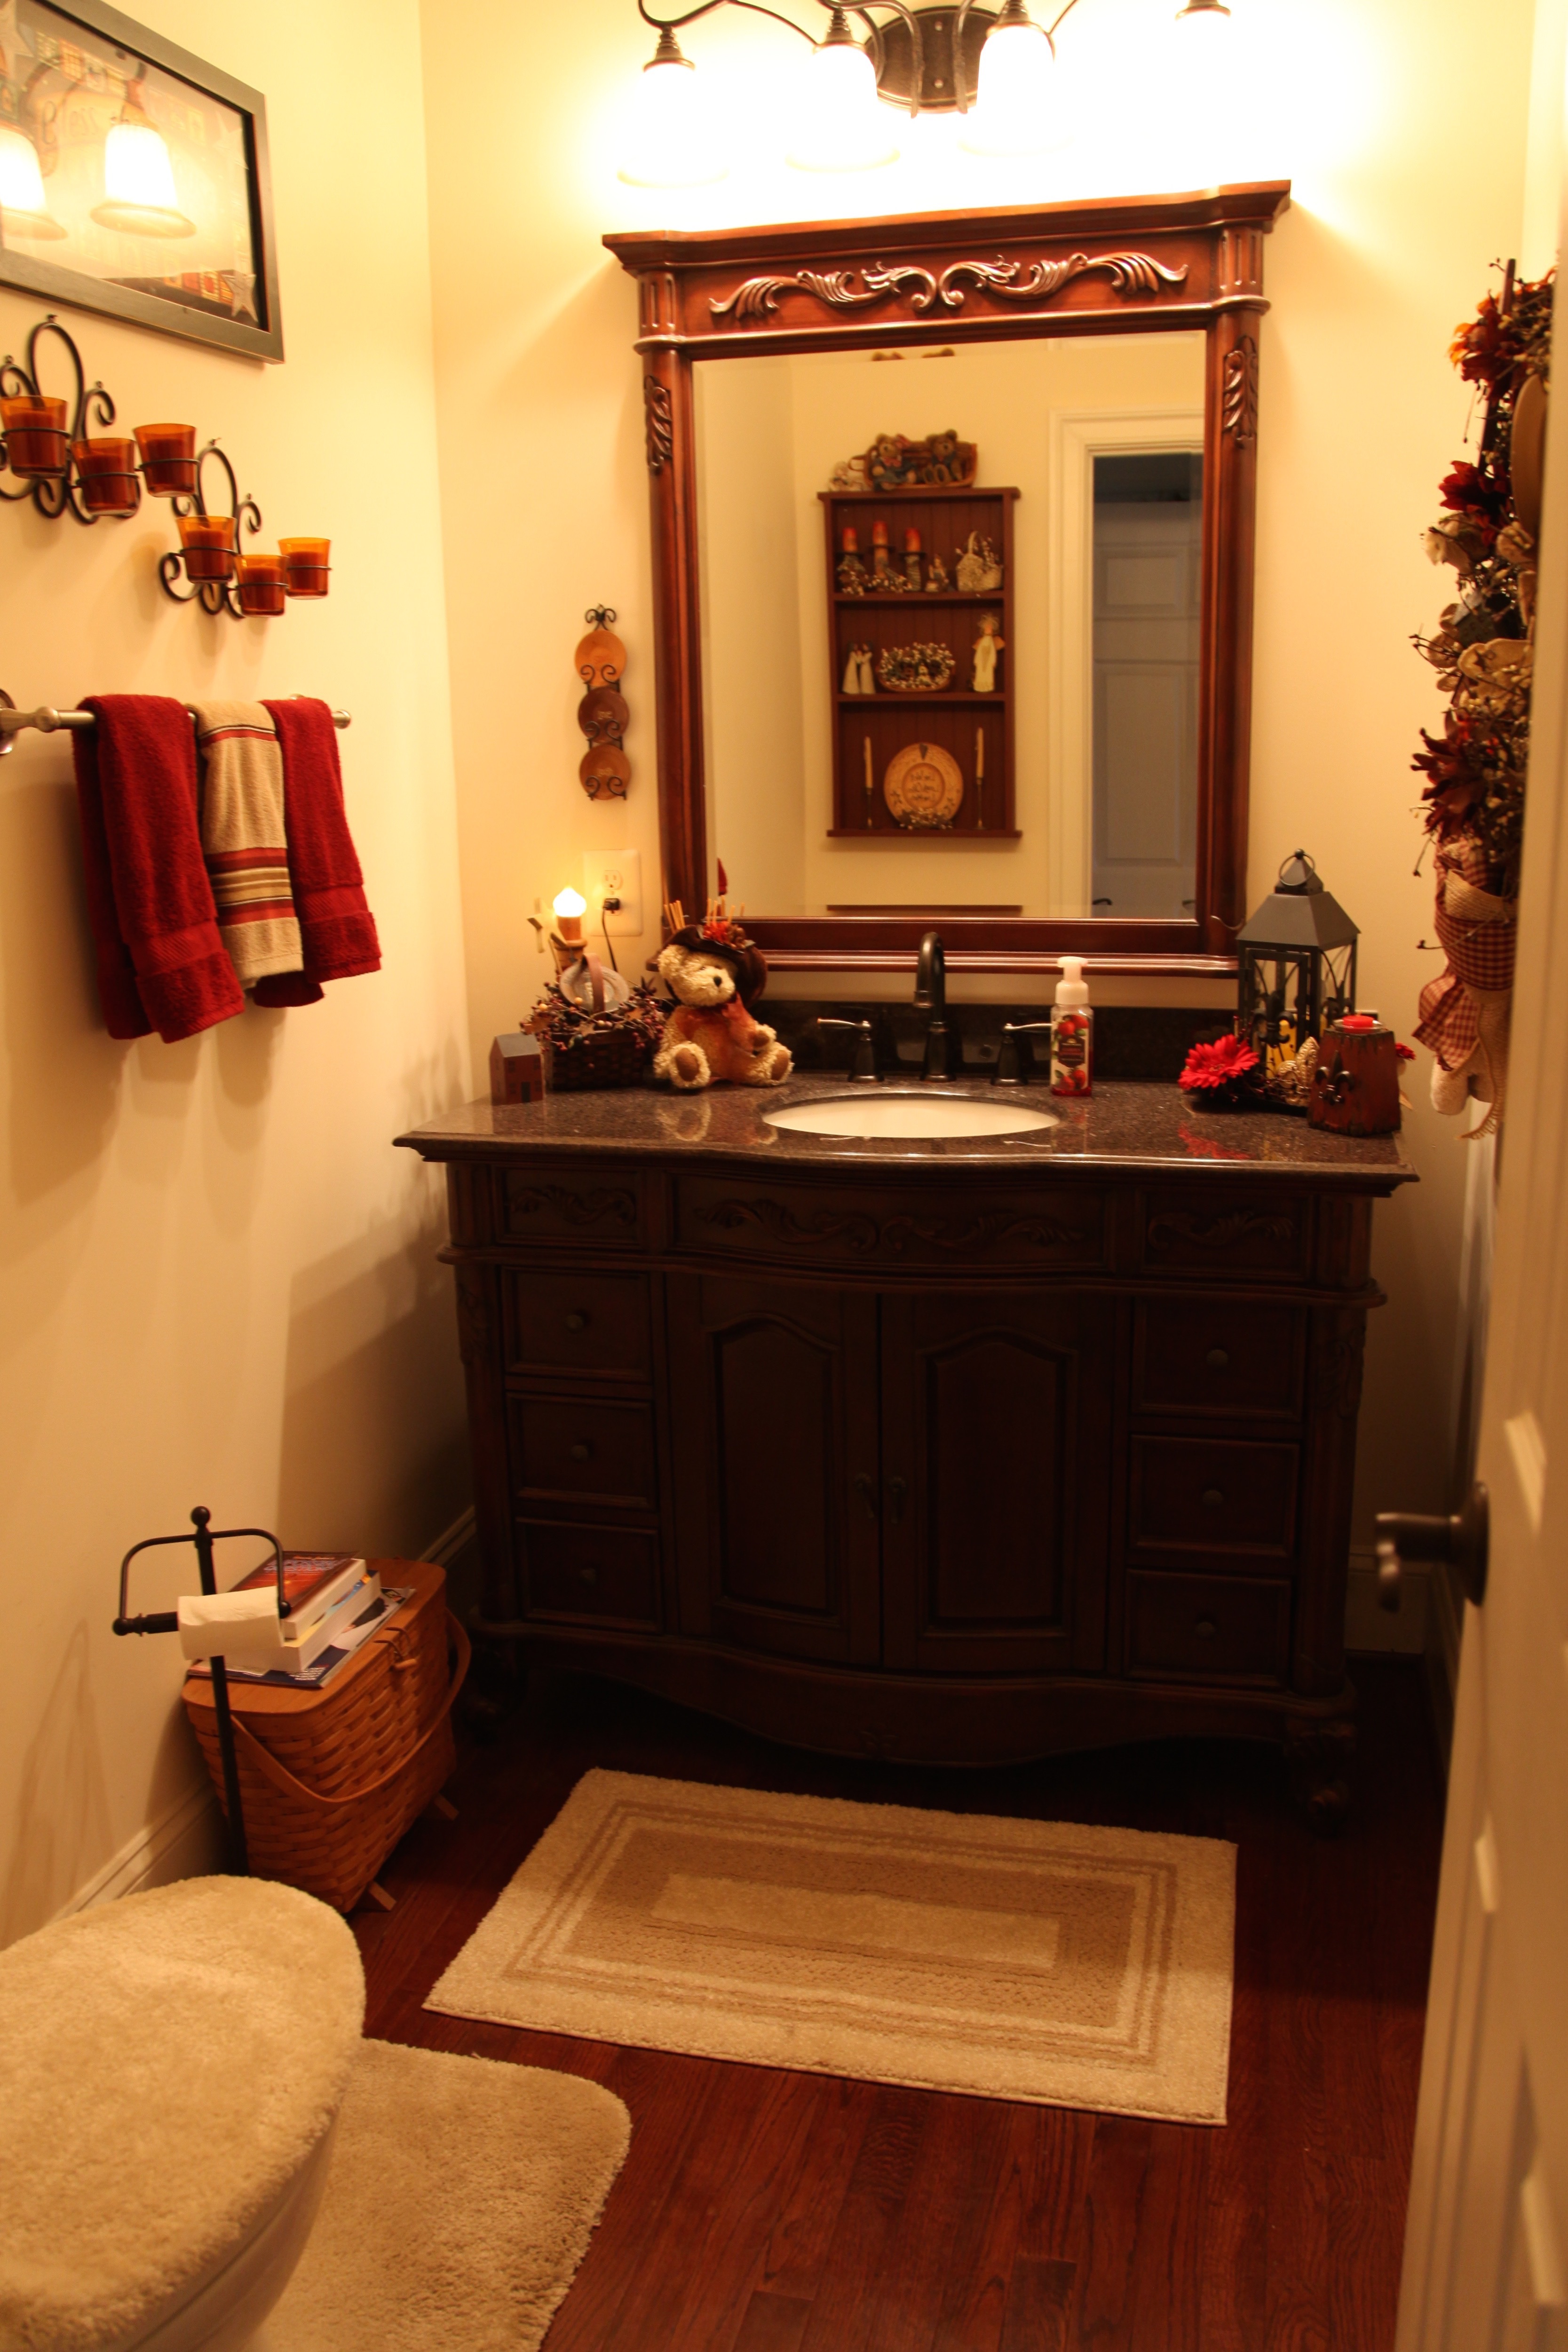
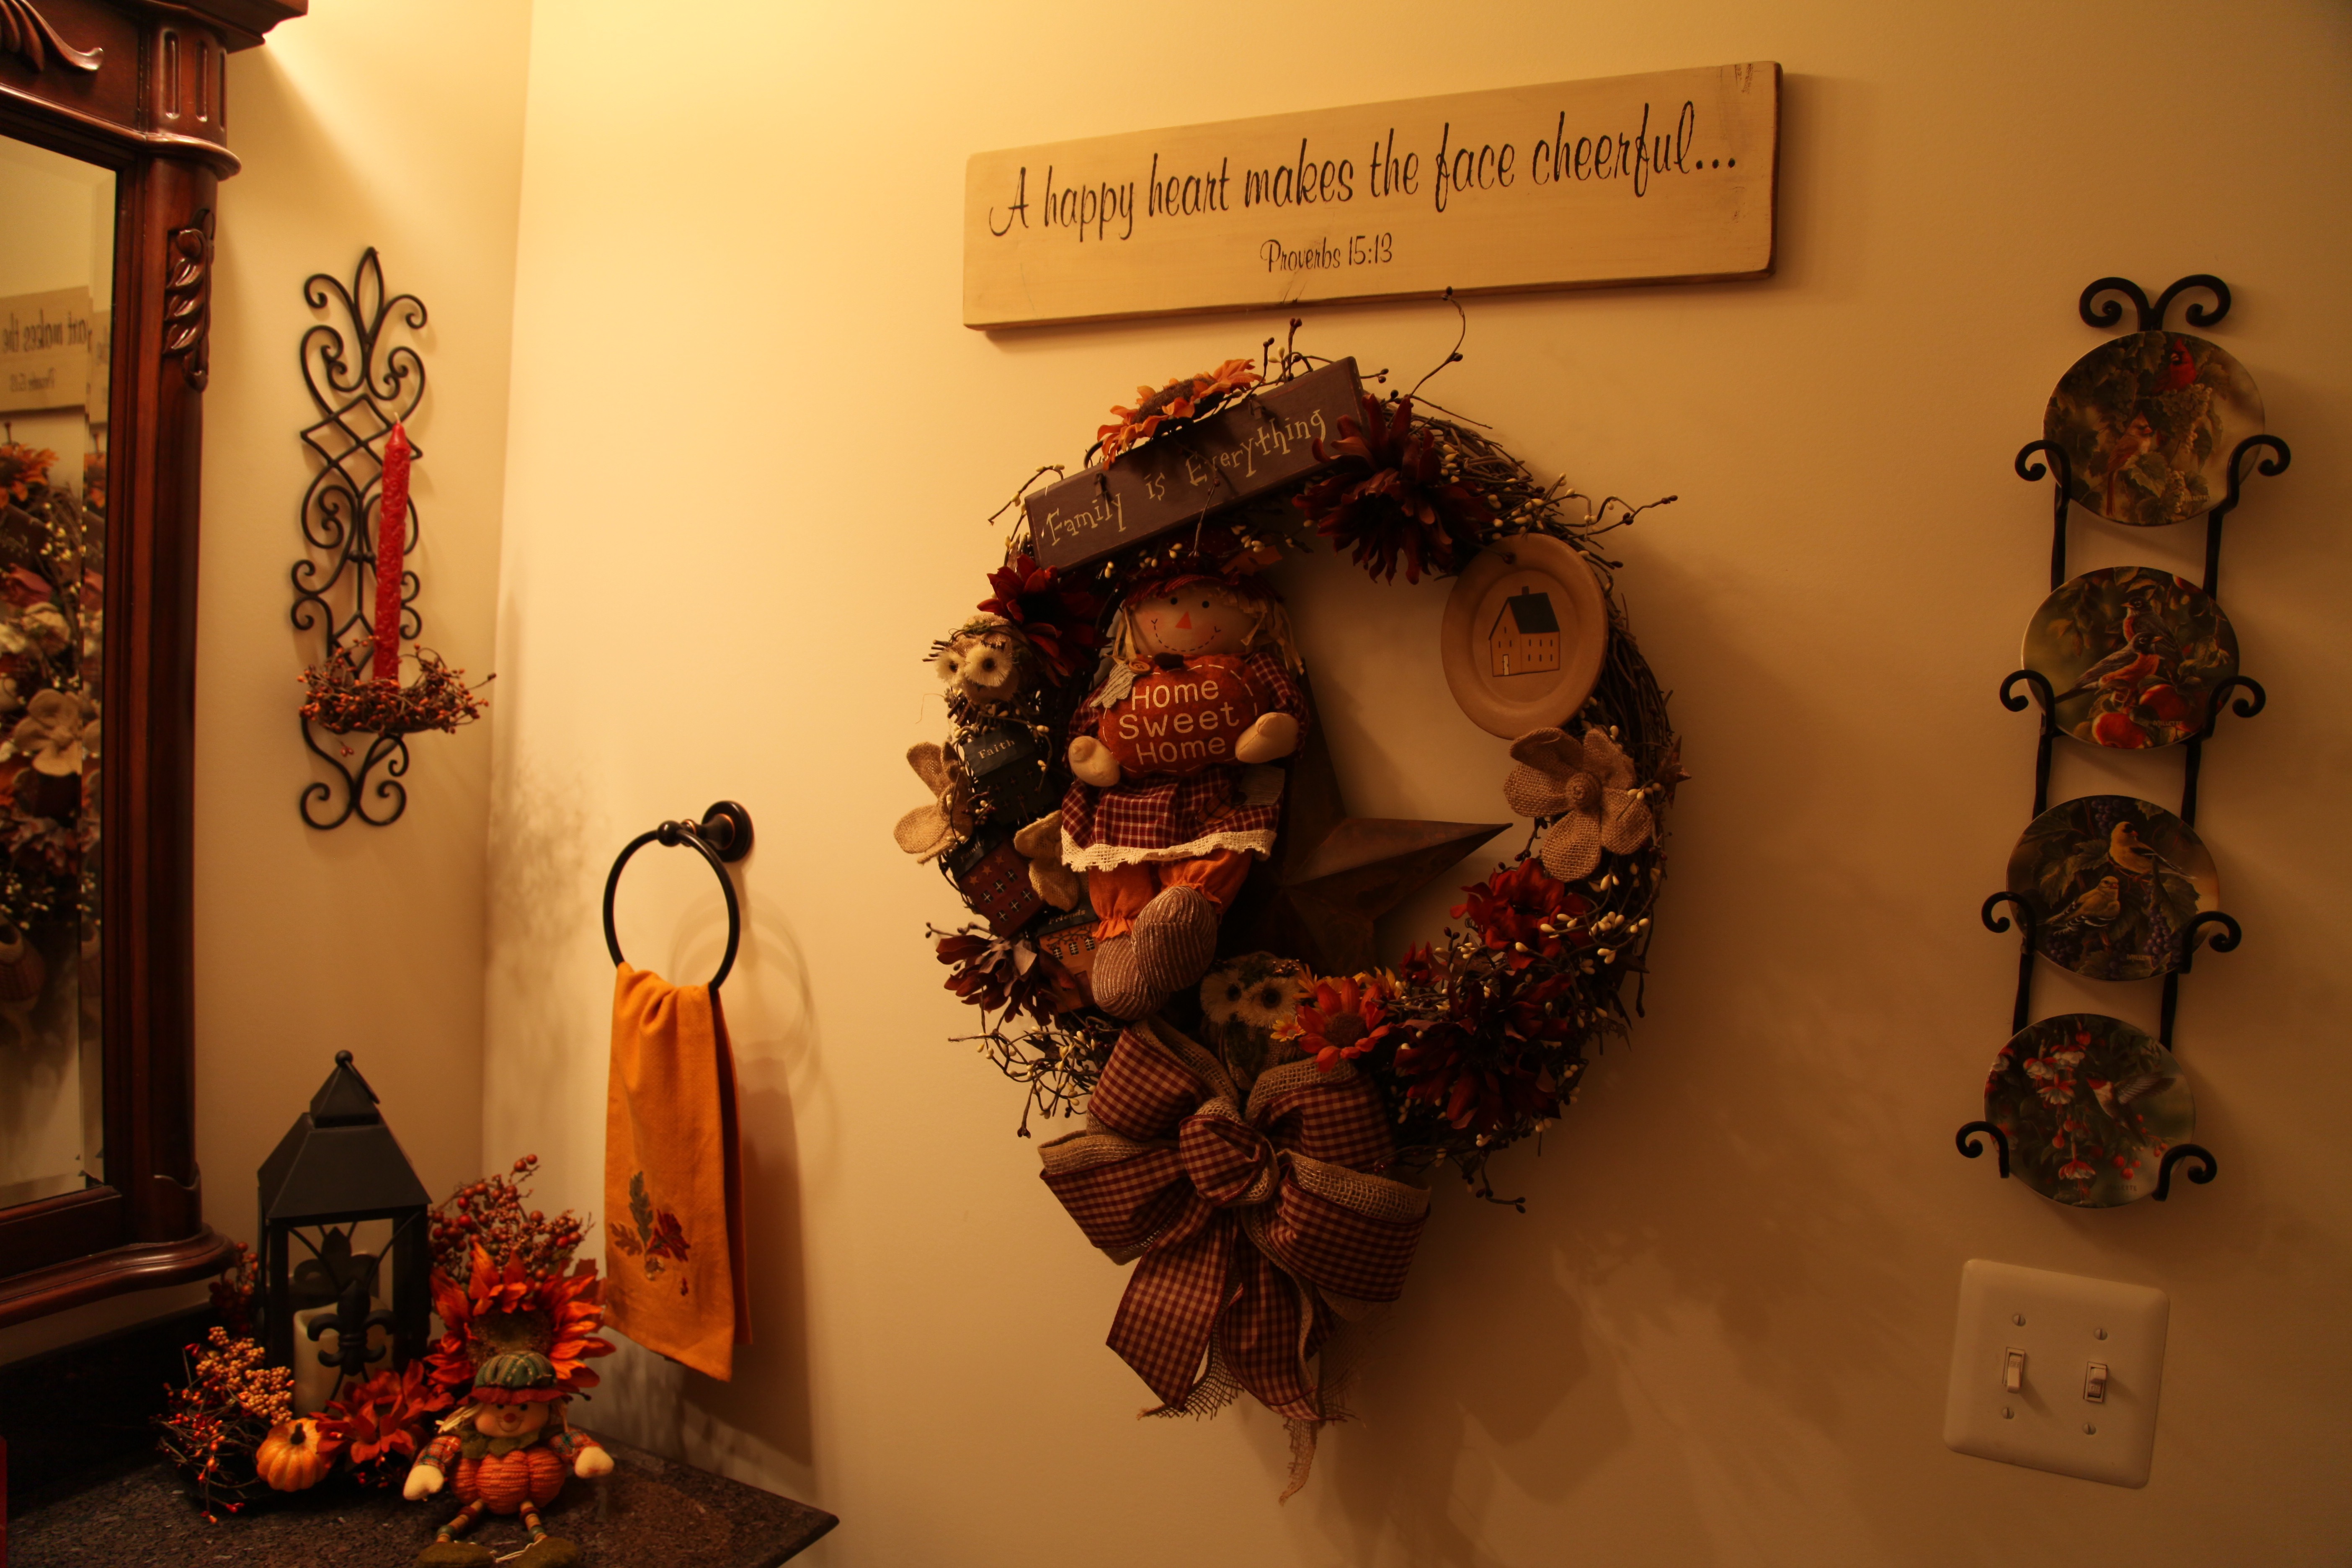
This hall bathroom serves 2 of the 3 bedrooms upstairs, but it sits beside the Happy Room, so I went ahead and decorated it to match and gave it a similar feel.

IMG_1613IMG_1614 IMG_3593

My hope is that when folks come to visit and they choose to stay in The Happy Room, that it puts a smile on their face and makes them feel cheerful, content, and comfortable.

Until next time, y’all take good care! ❤

**In crafting there are no mistakes just unique creations**

The Living and Dining Rooms

Hi All,

Many people have asked me why we built a home that had a living, dining, *&* family room…”why did we need that much space”? Well, first off, we have had the dining room furniture for a couple of decades and I wasn’t willing to part with that, not to mention the fact that I totally fell in love with these rooms.  They are bright and airy and flow beautifully from one to the other. I wouldn’t say that I’ve created a strong “country” style in these rooms, it is more of a subtle touch of country here and there.   The staircase that you’ve seen in the pictures of our family room separates the front and the back of our house.  The living and dining rooms sit on the front of the house and the picture below shows you the view as you walk into the front door, dining room to the left, living room to the right, and the family room, straight through the foyer separated by a little hallway:

IMG_9186

And if you look straight up, you can see the landing up on the 2nd level:

IMG_1715

IMG_1718

Here is the foyer looking through the family room straight through to the front door:

As I explained in my Mud Room, Powder Room, Kitchen Eating Area, & Family Room post, we purchased these rugs from a local carpet store. We chose a nice piece of carpeting and had rugs cut to our measurements and had them bind the edges.  This soft gray color with a touch of a khaki & cream is what we chose for these two rooms.  We also chose a cream colored piece of carpet for the foyer rugs.

IMG_3202

0023102_LATROBE-EVANSBLACK-FLICKER-212349720023776341_300

IMG_9171
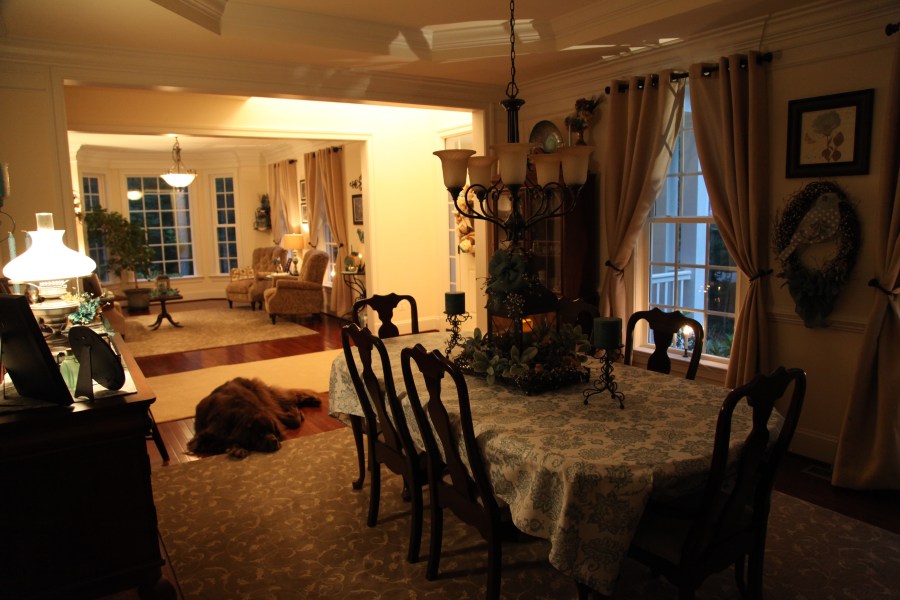
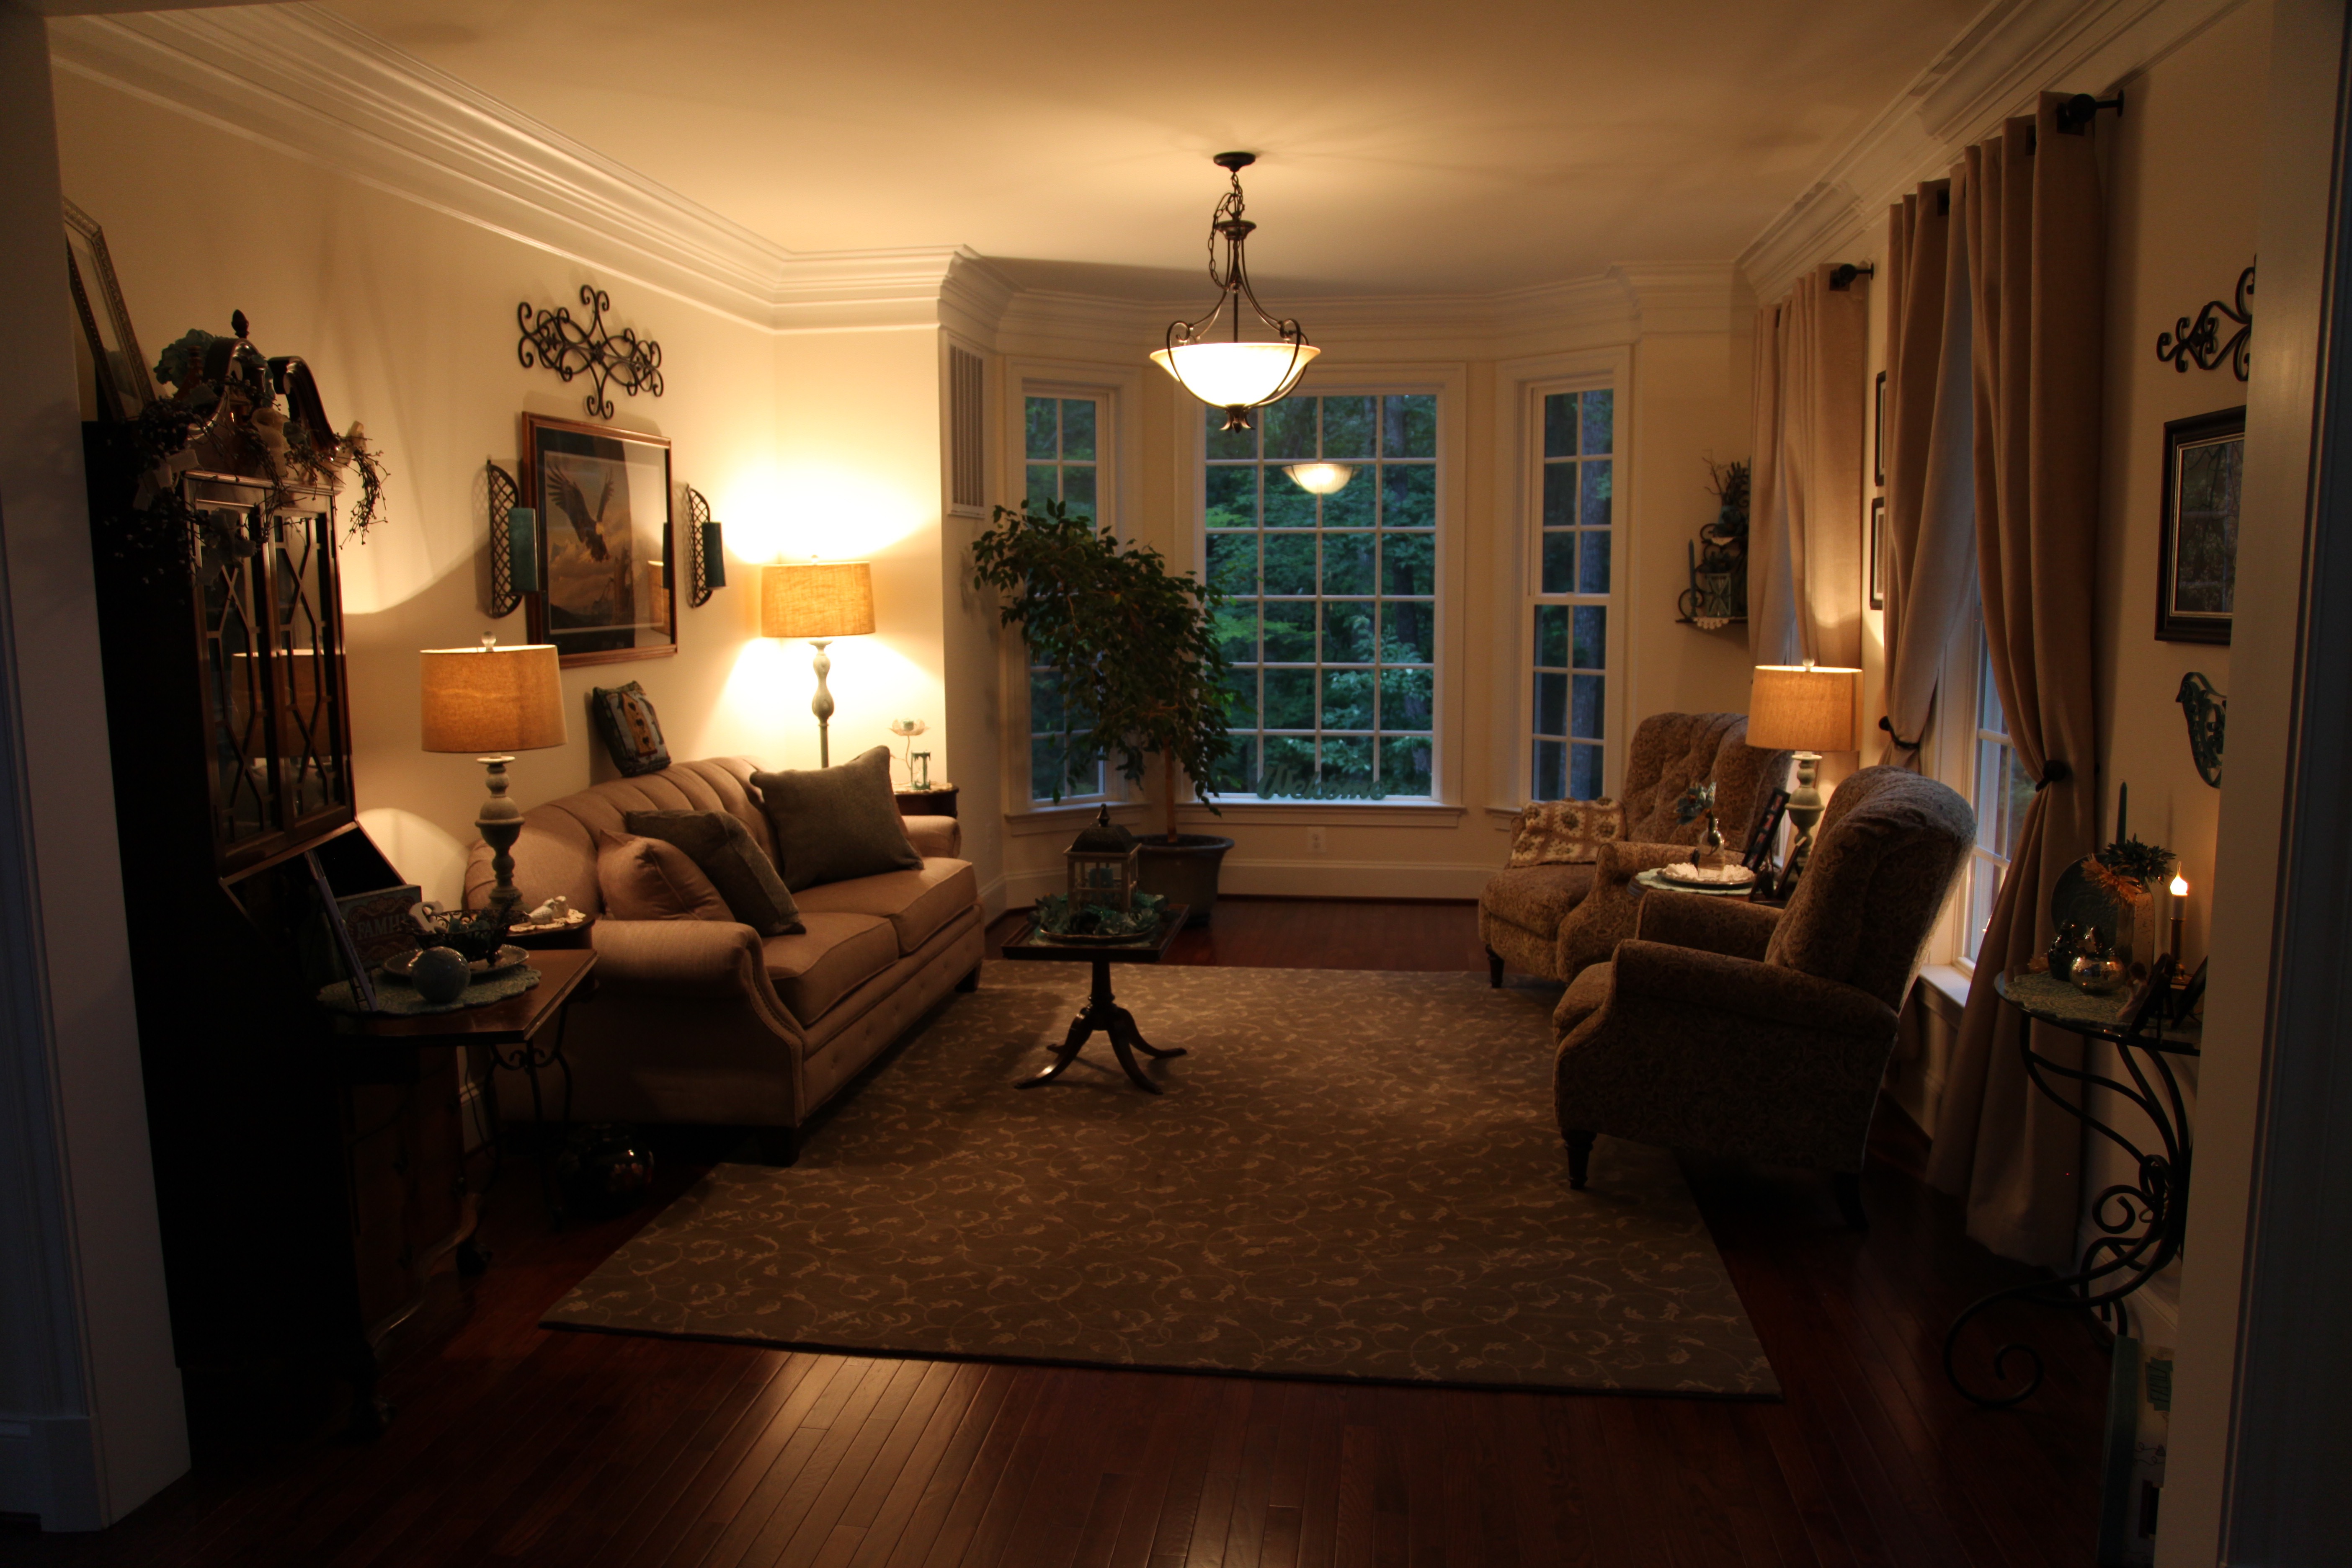
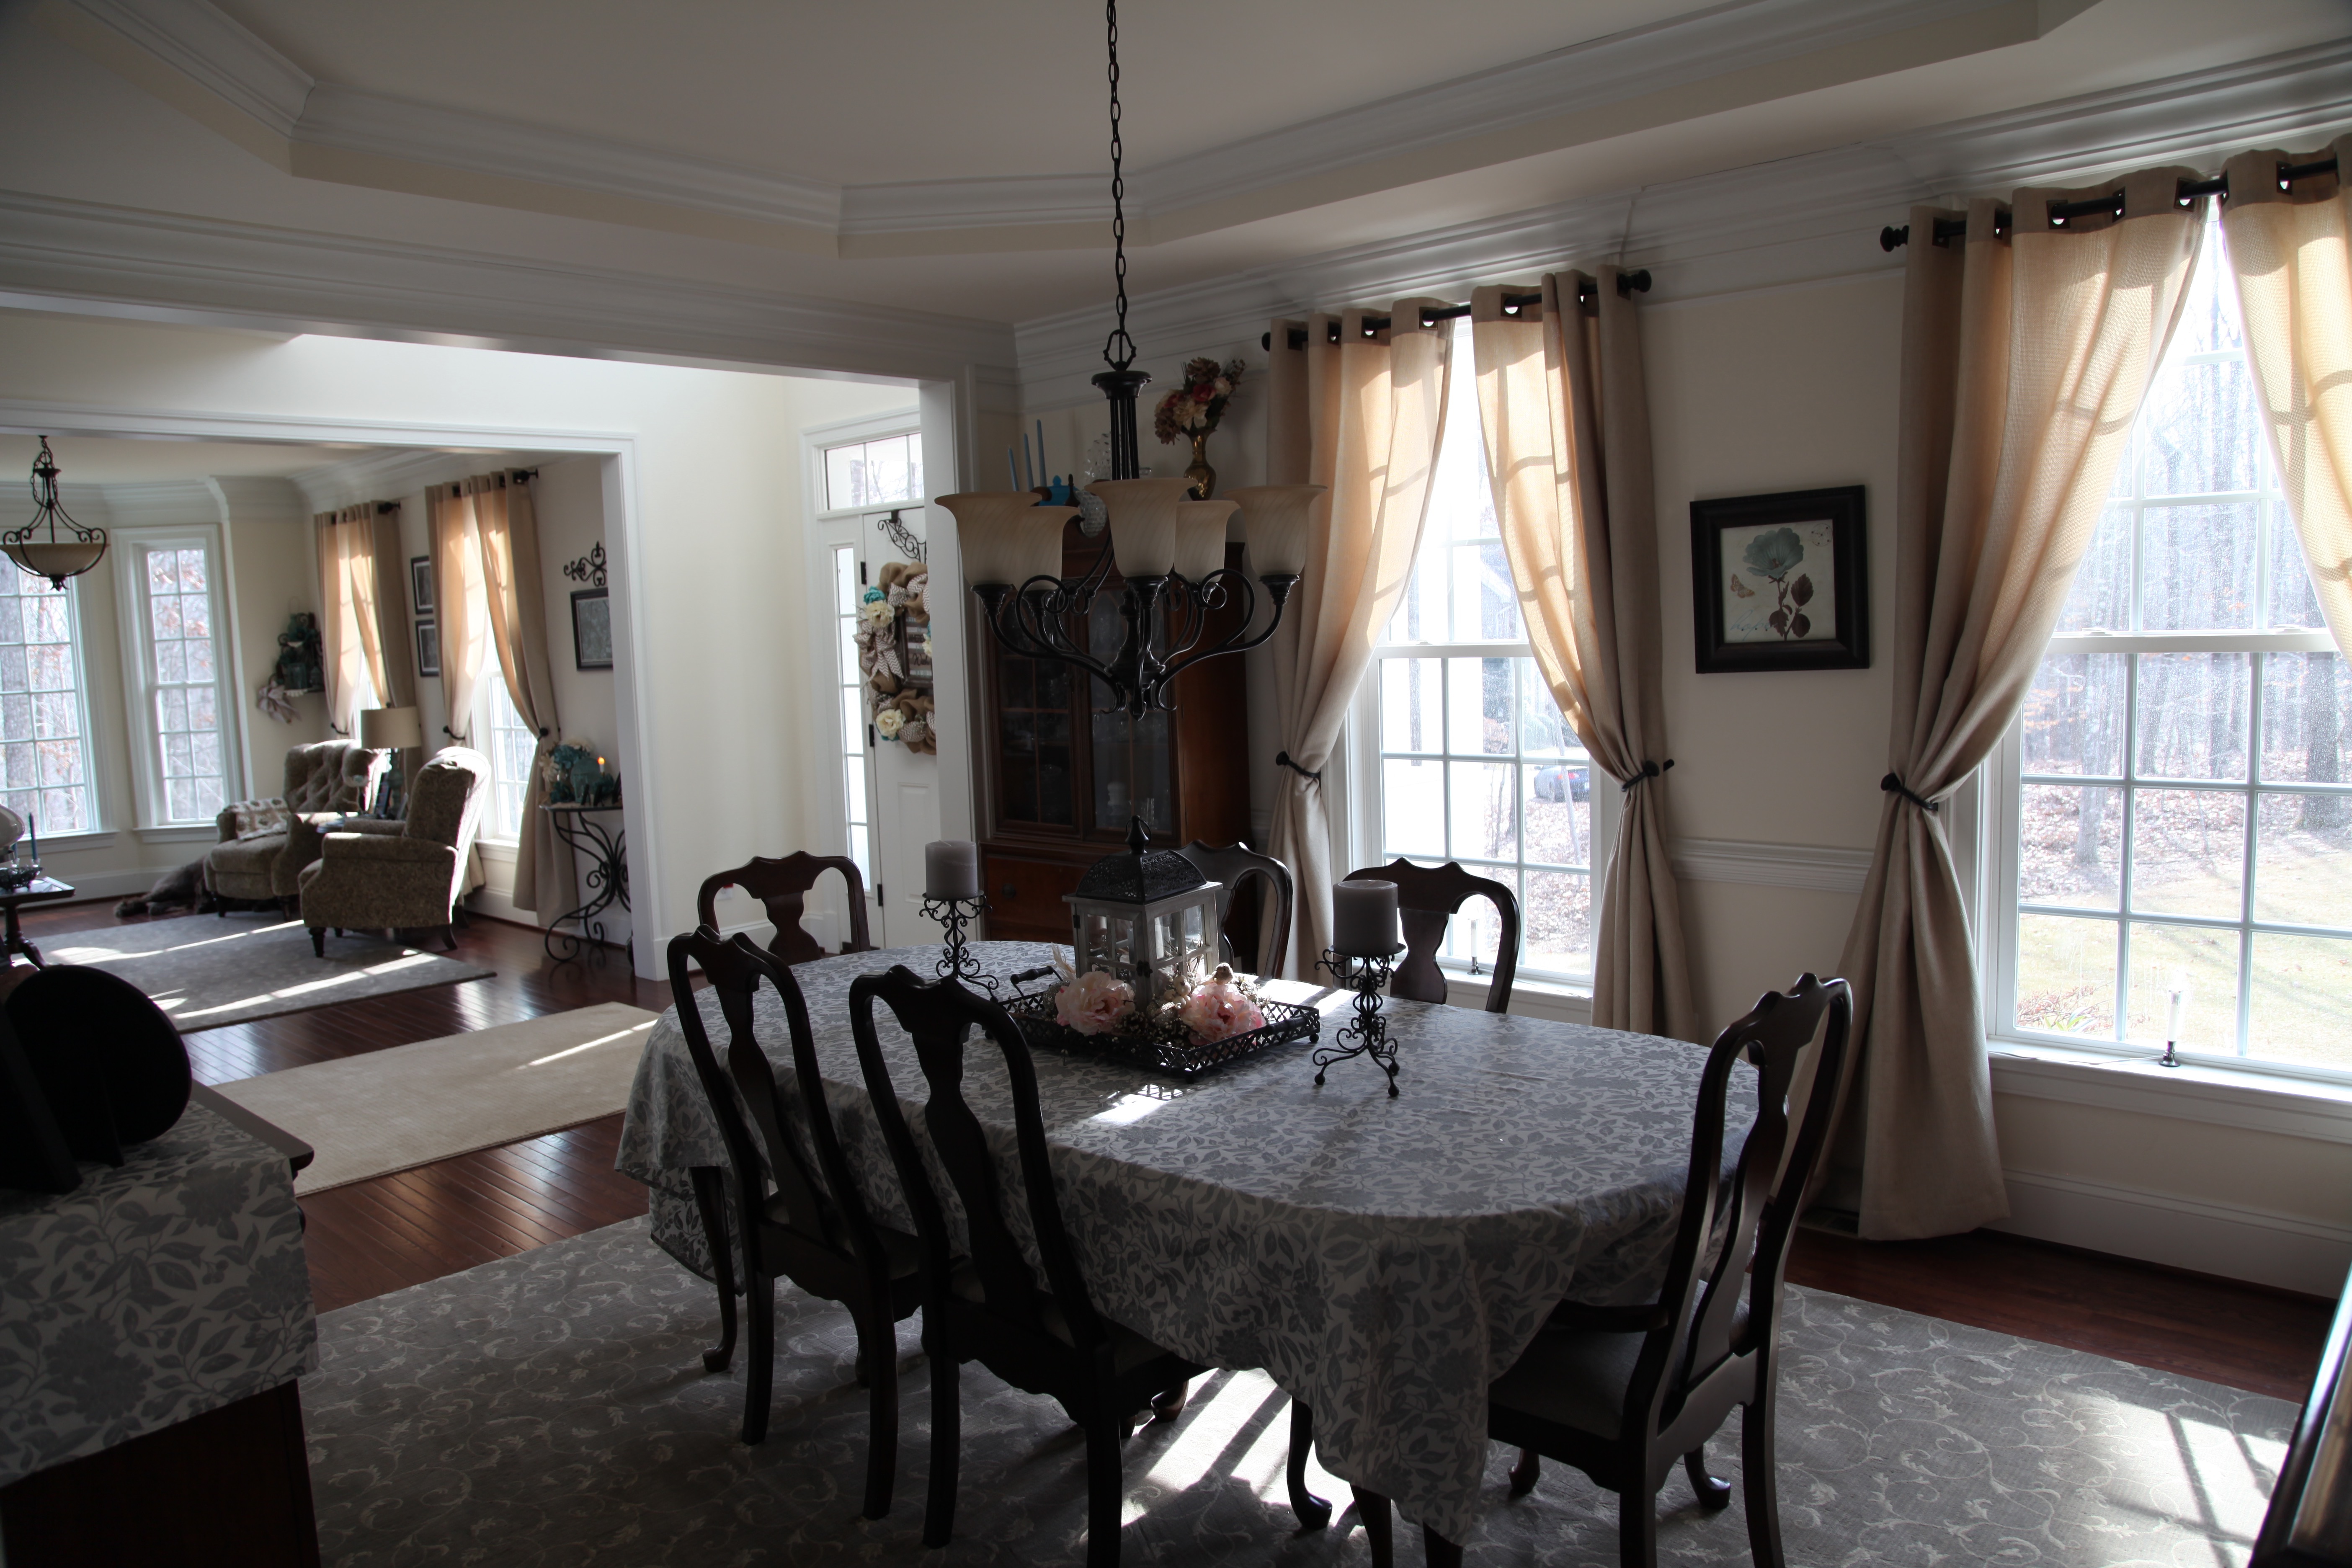
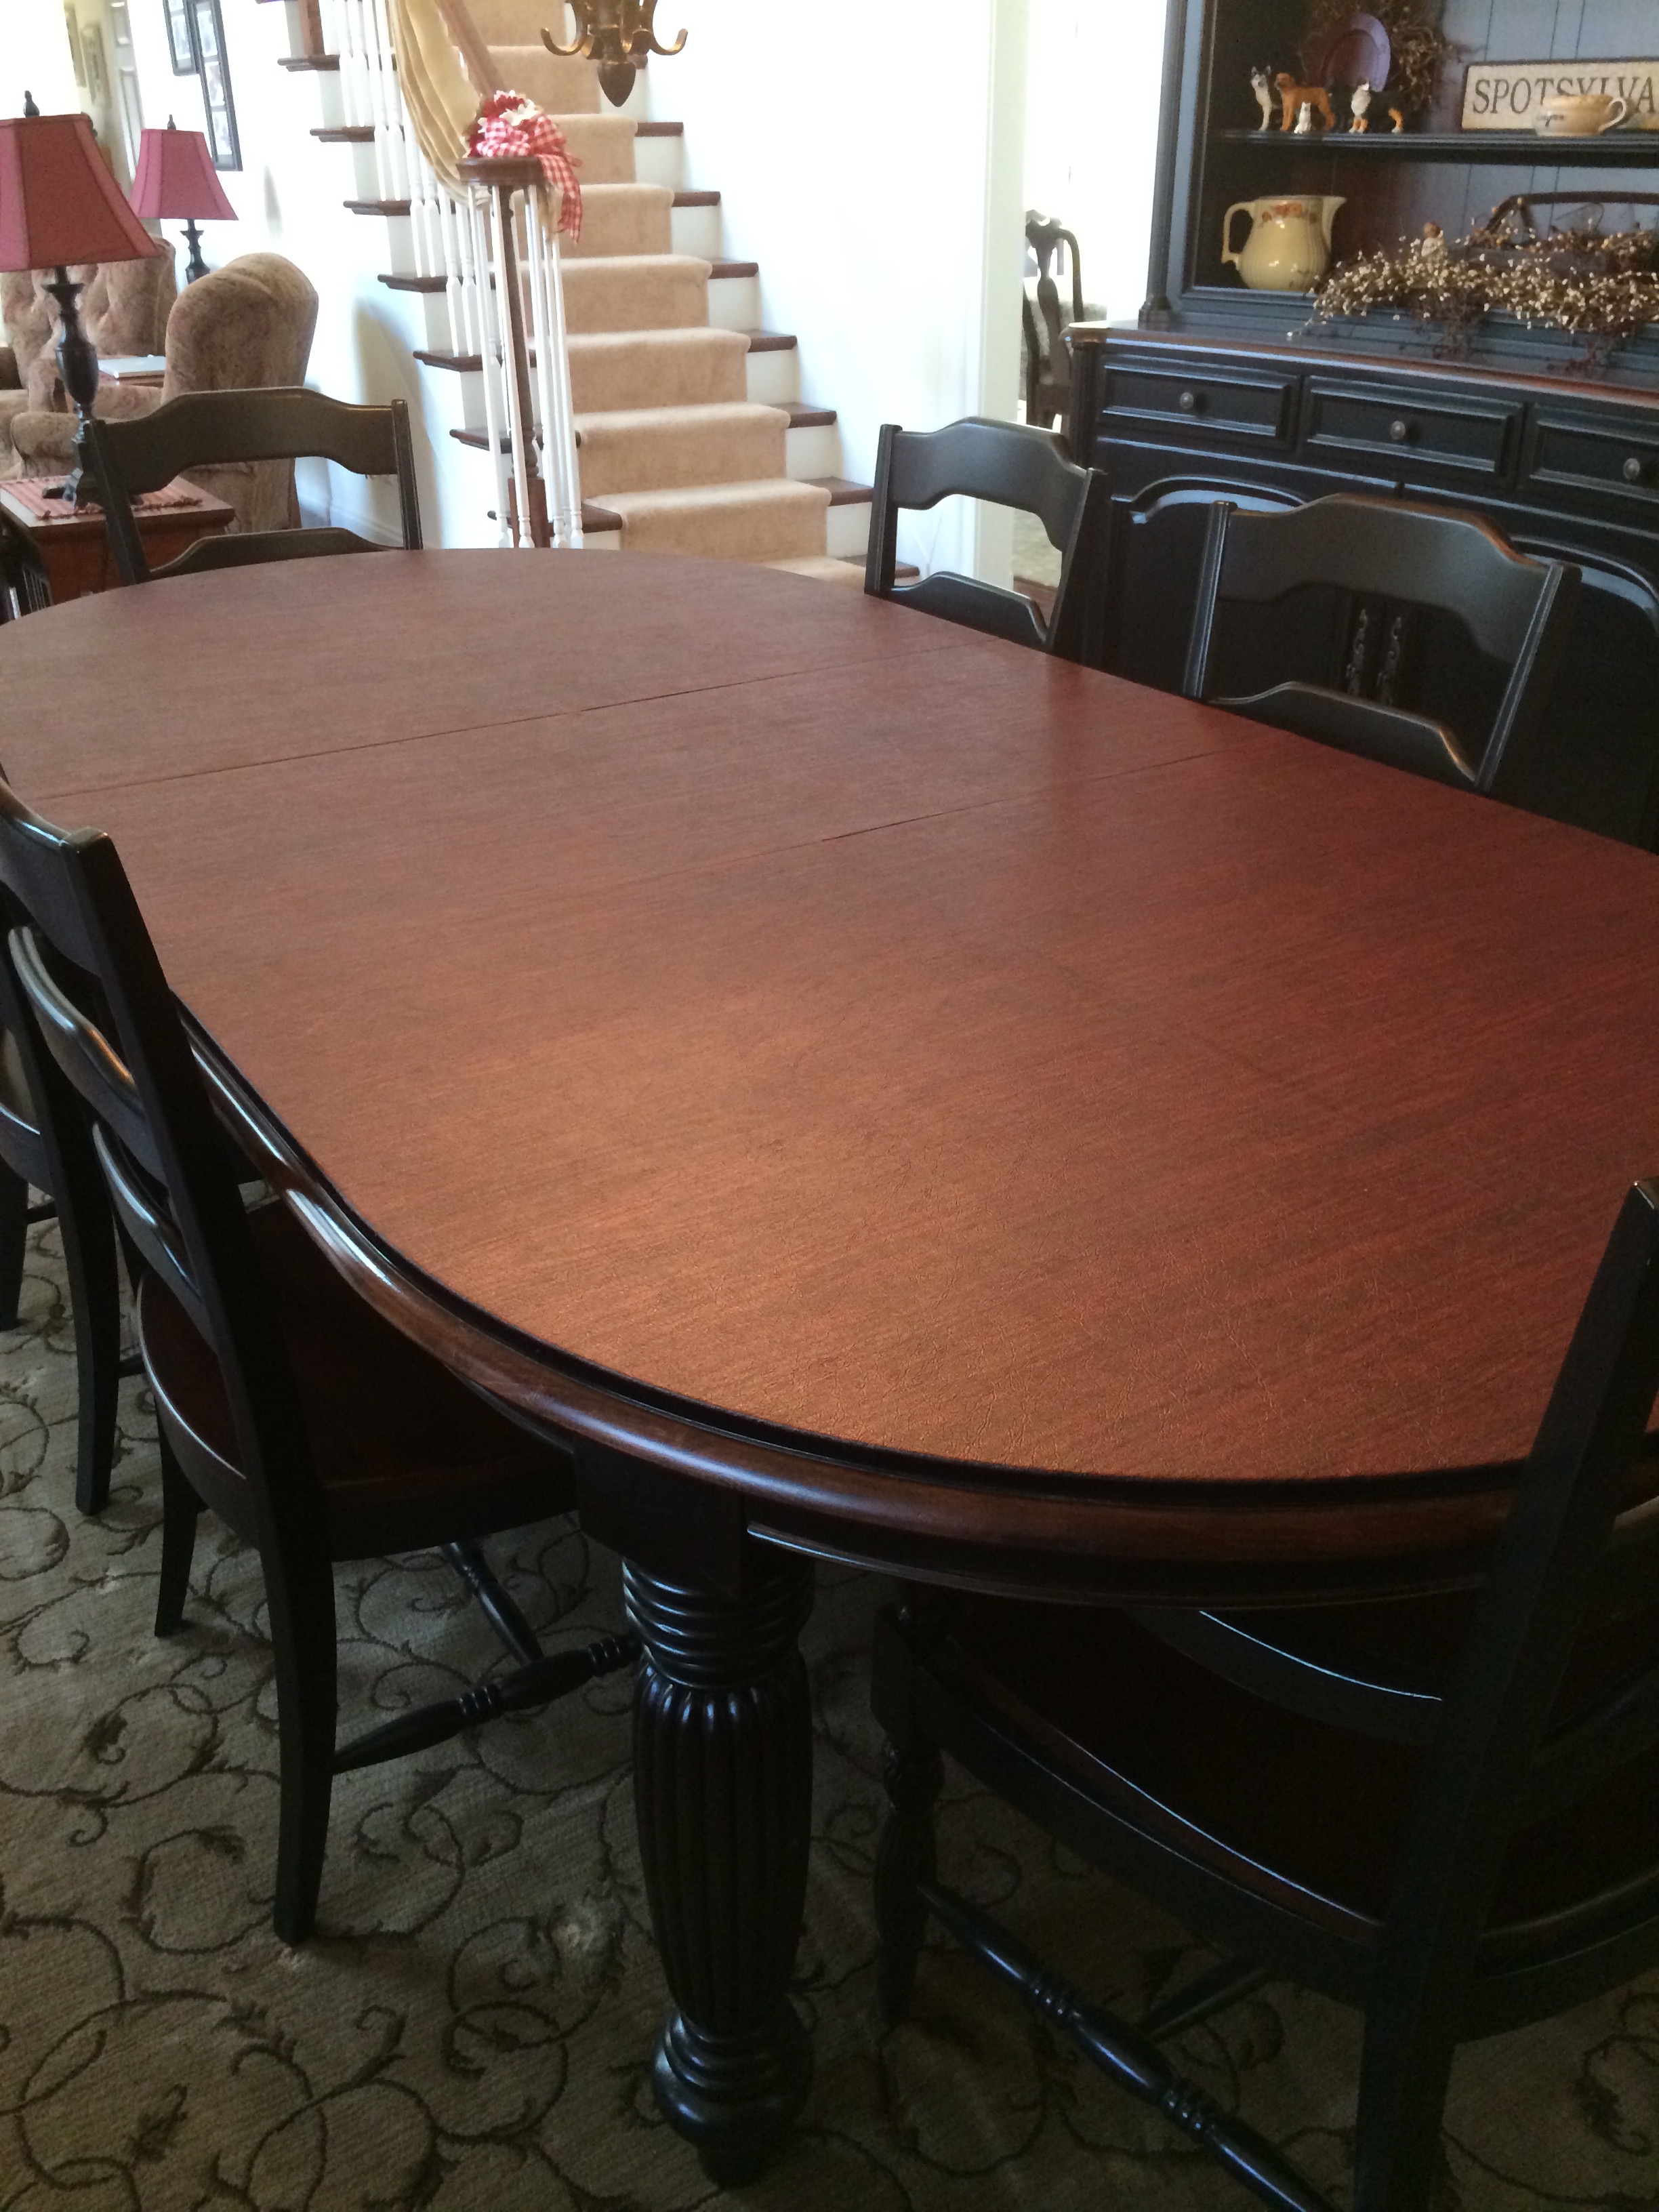
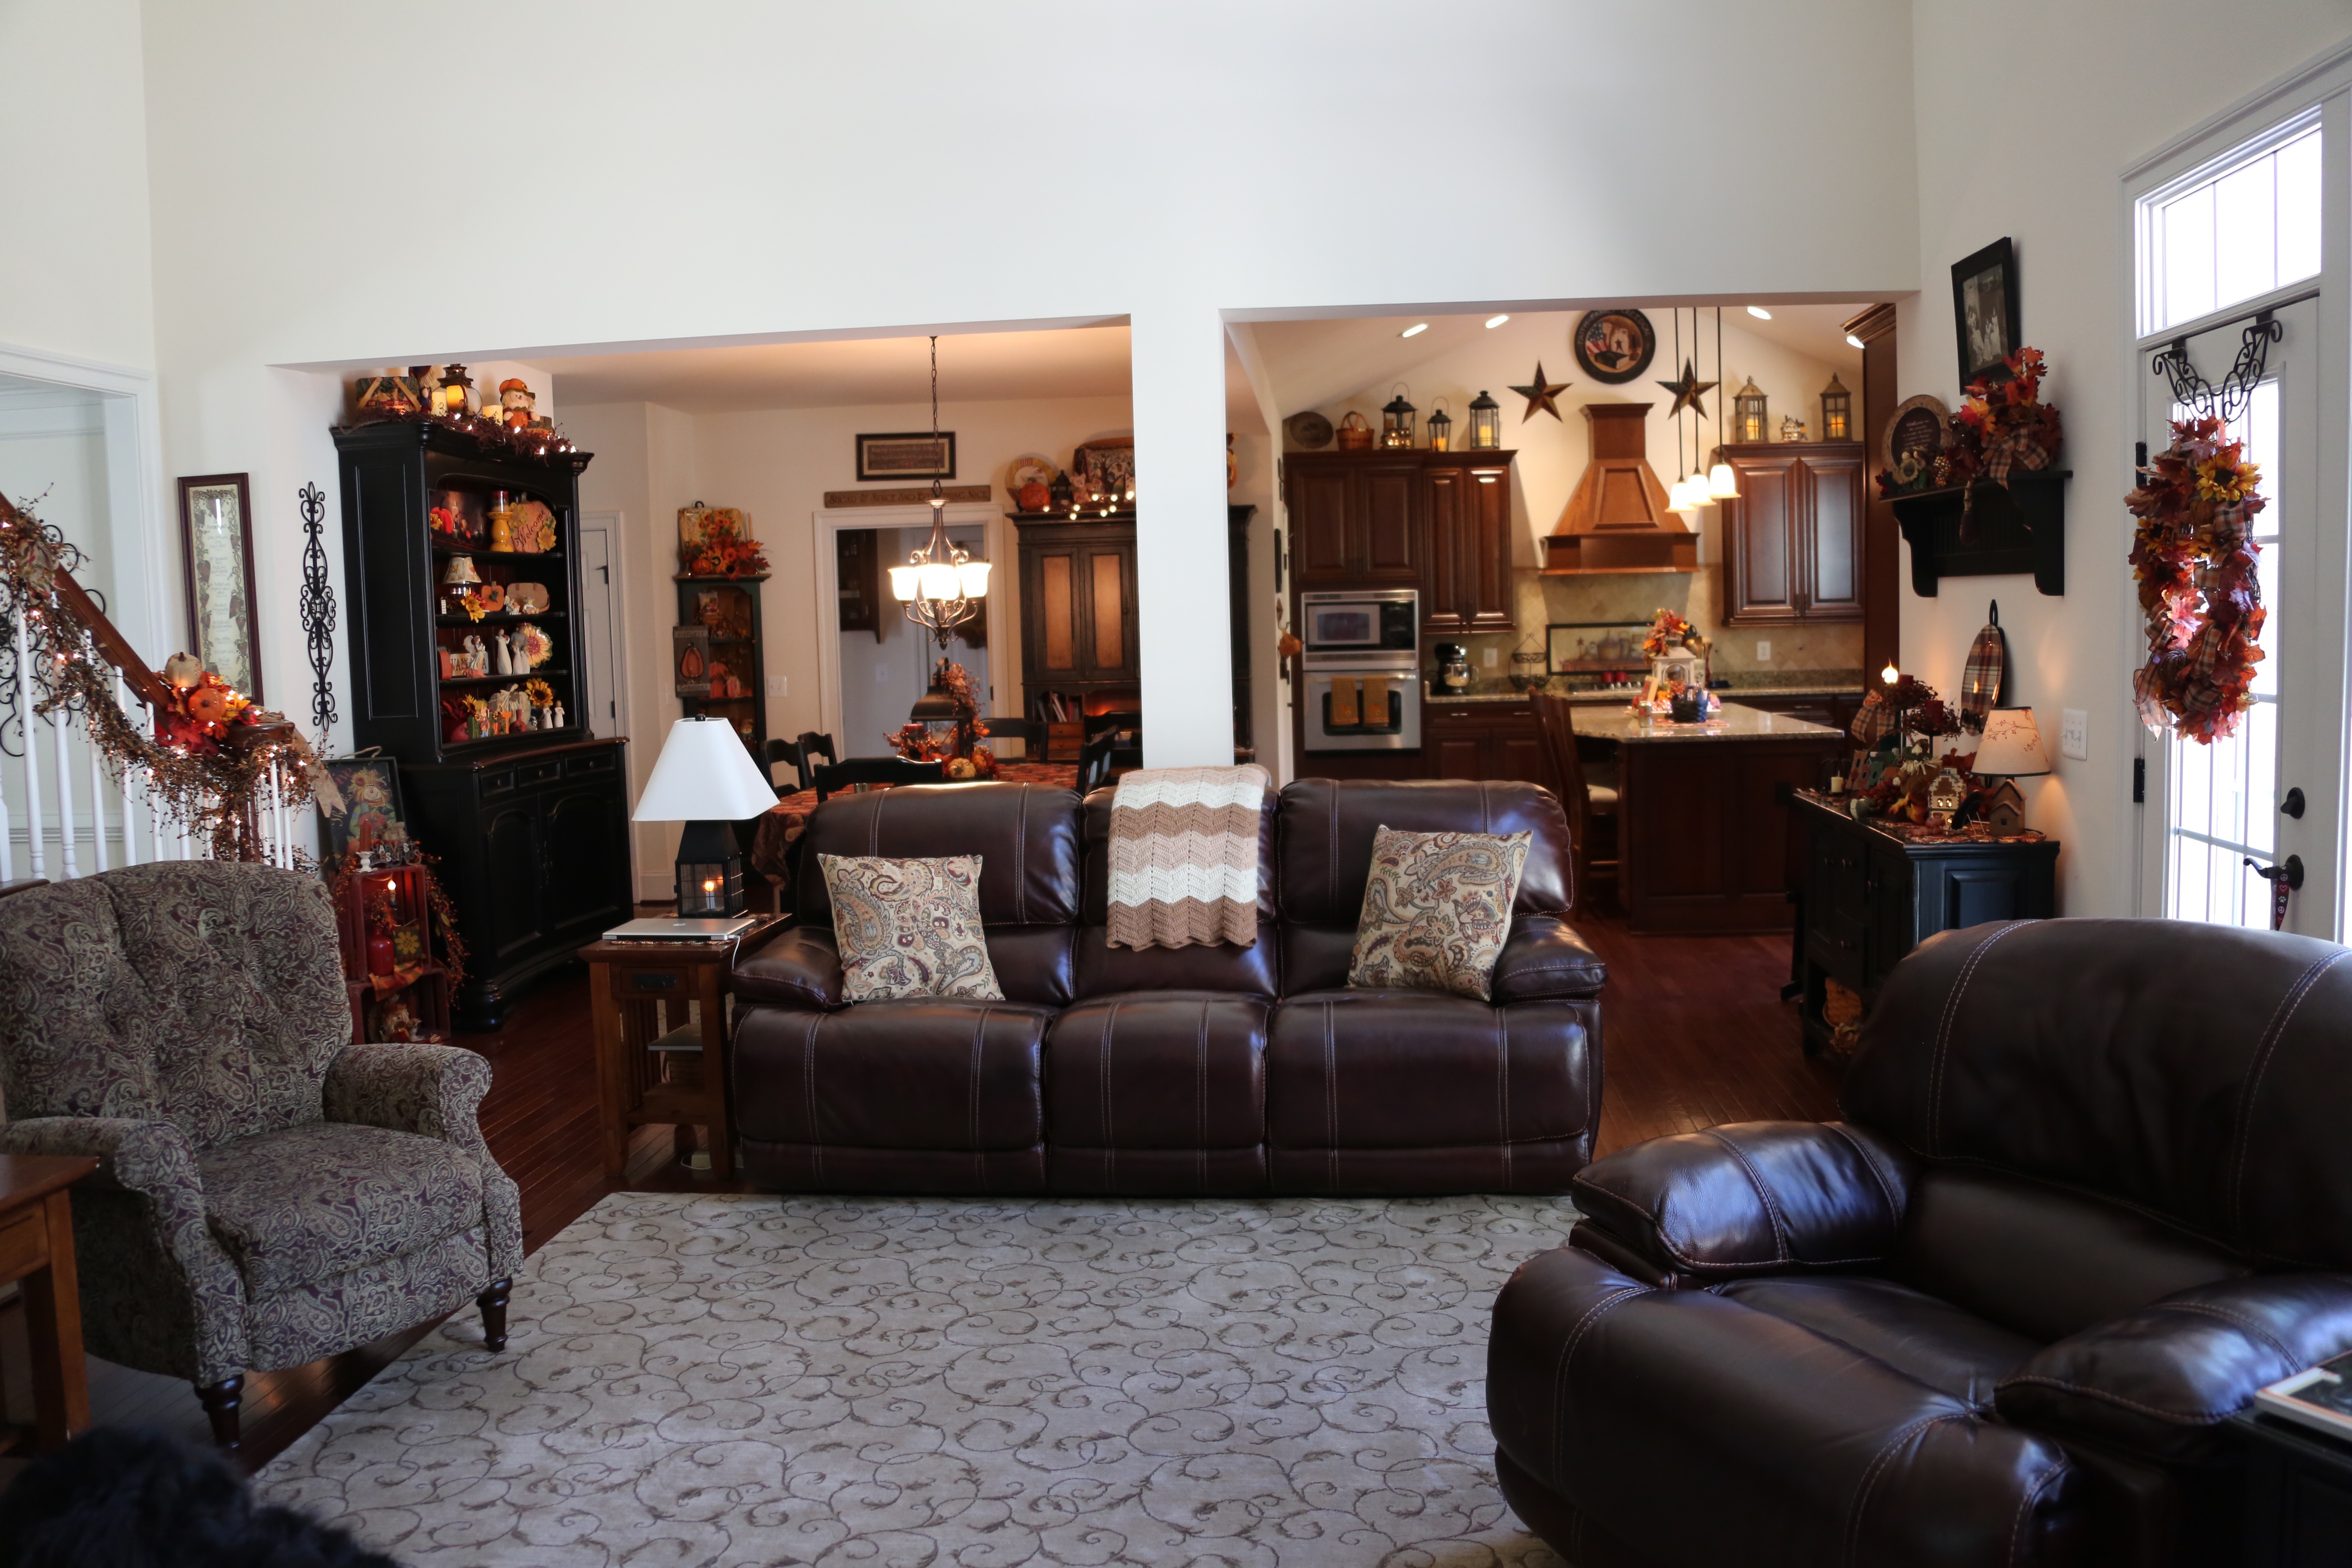
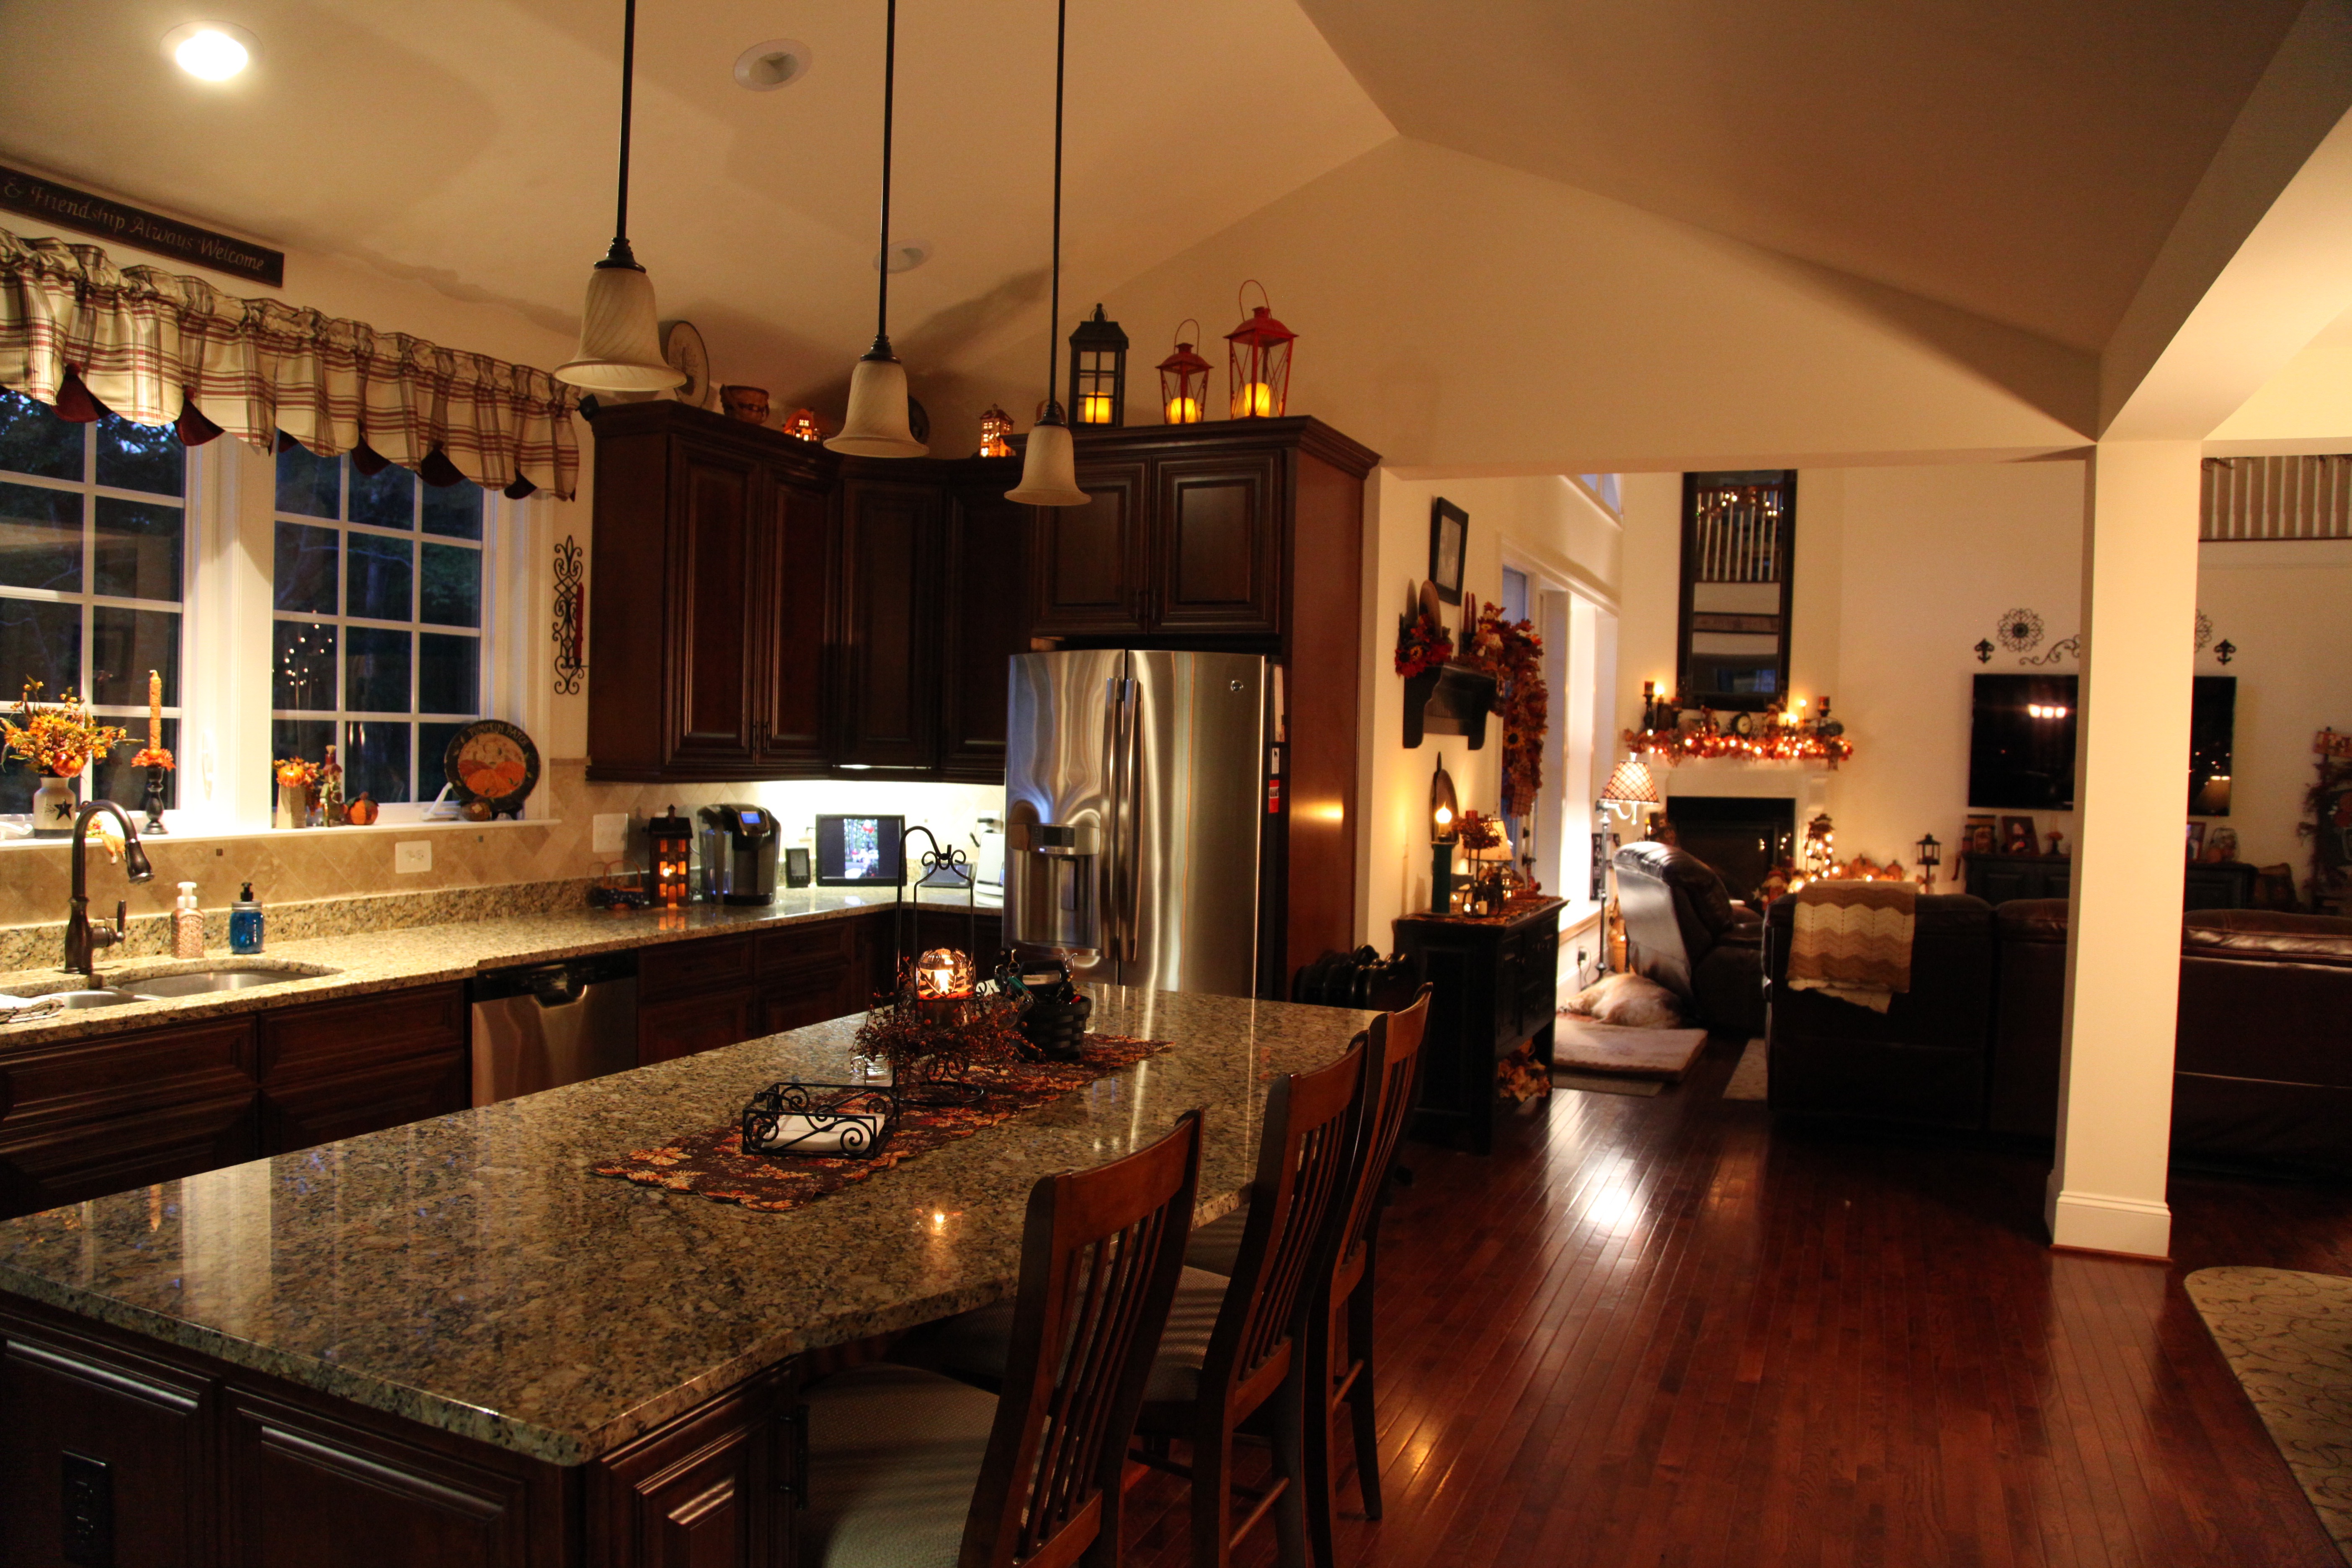
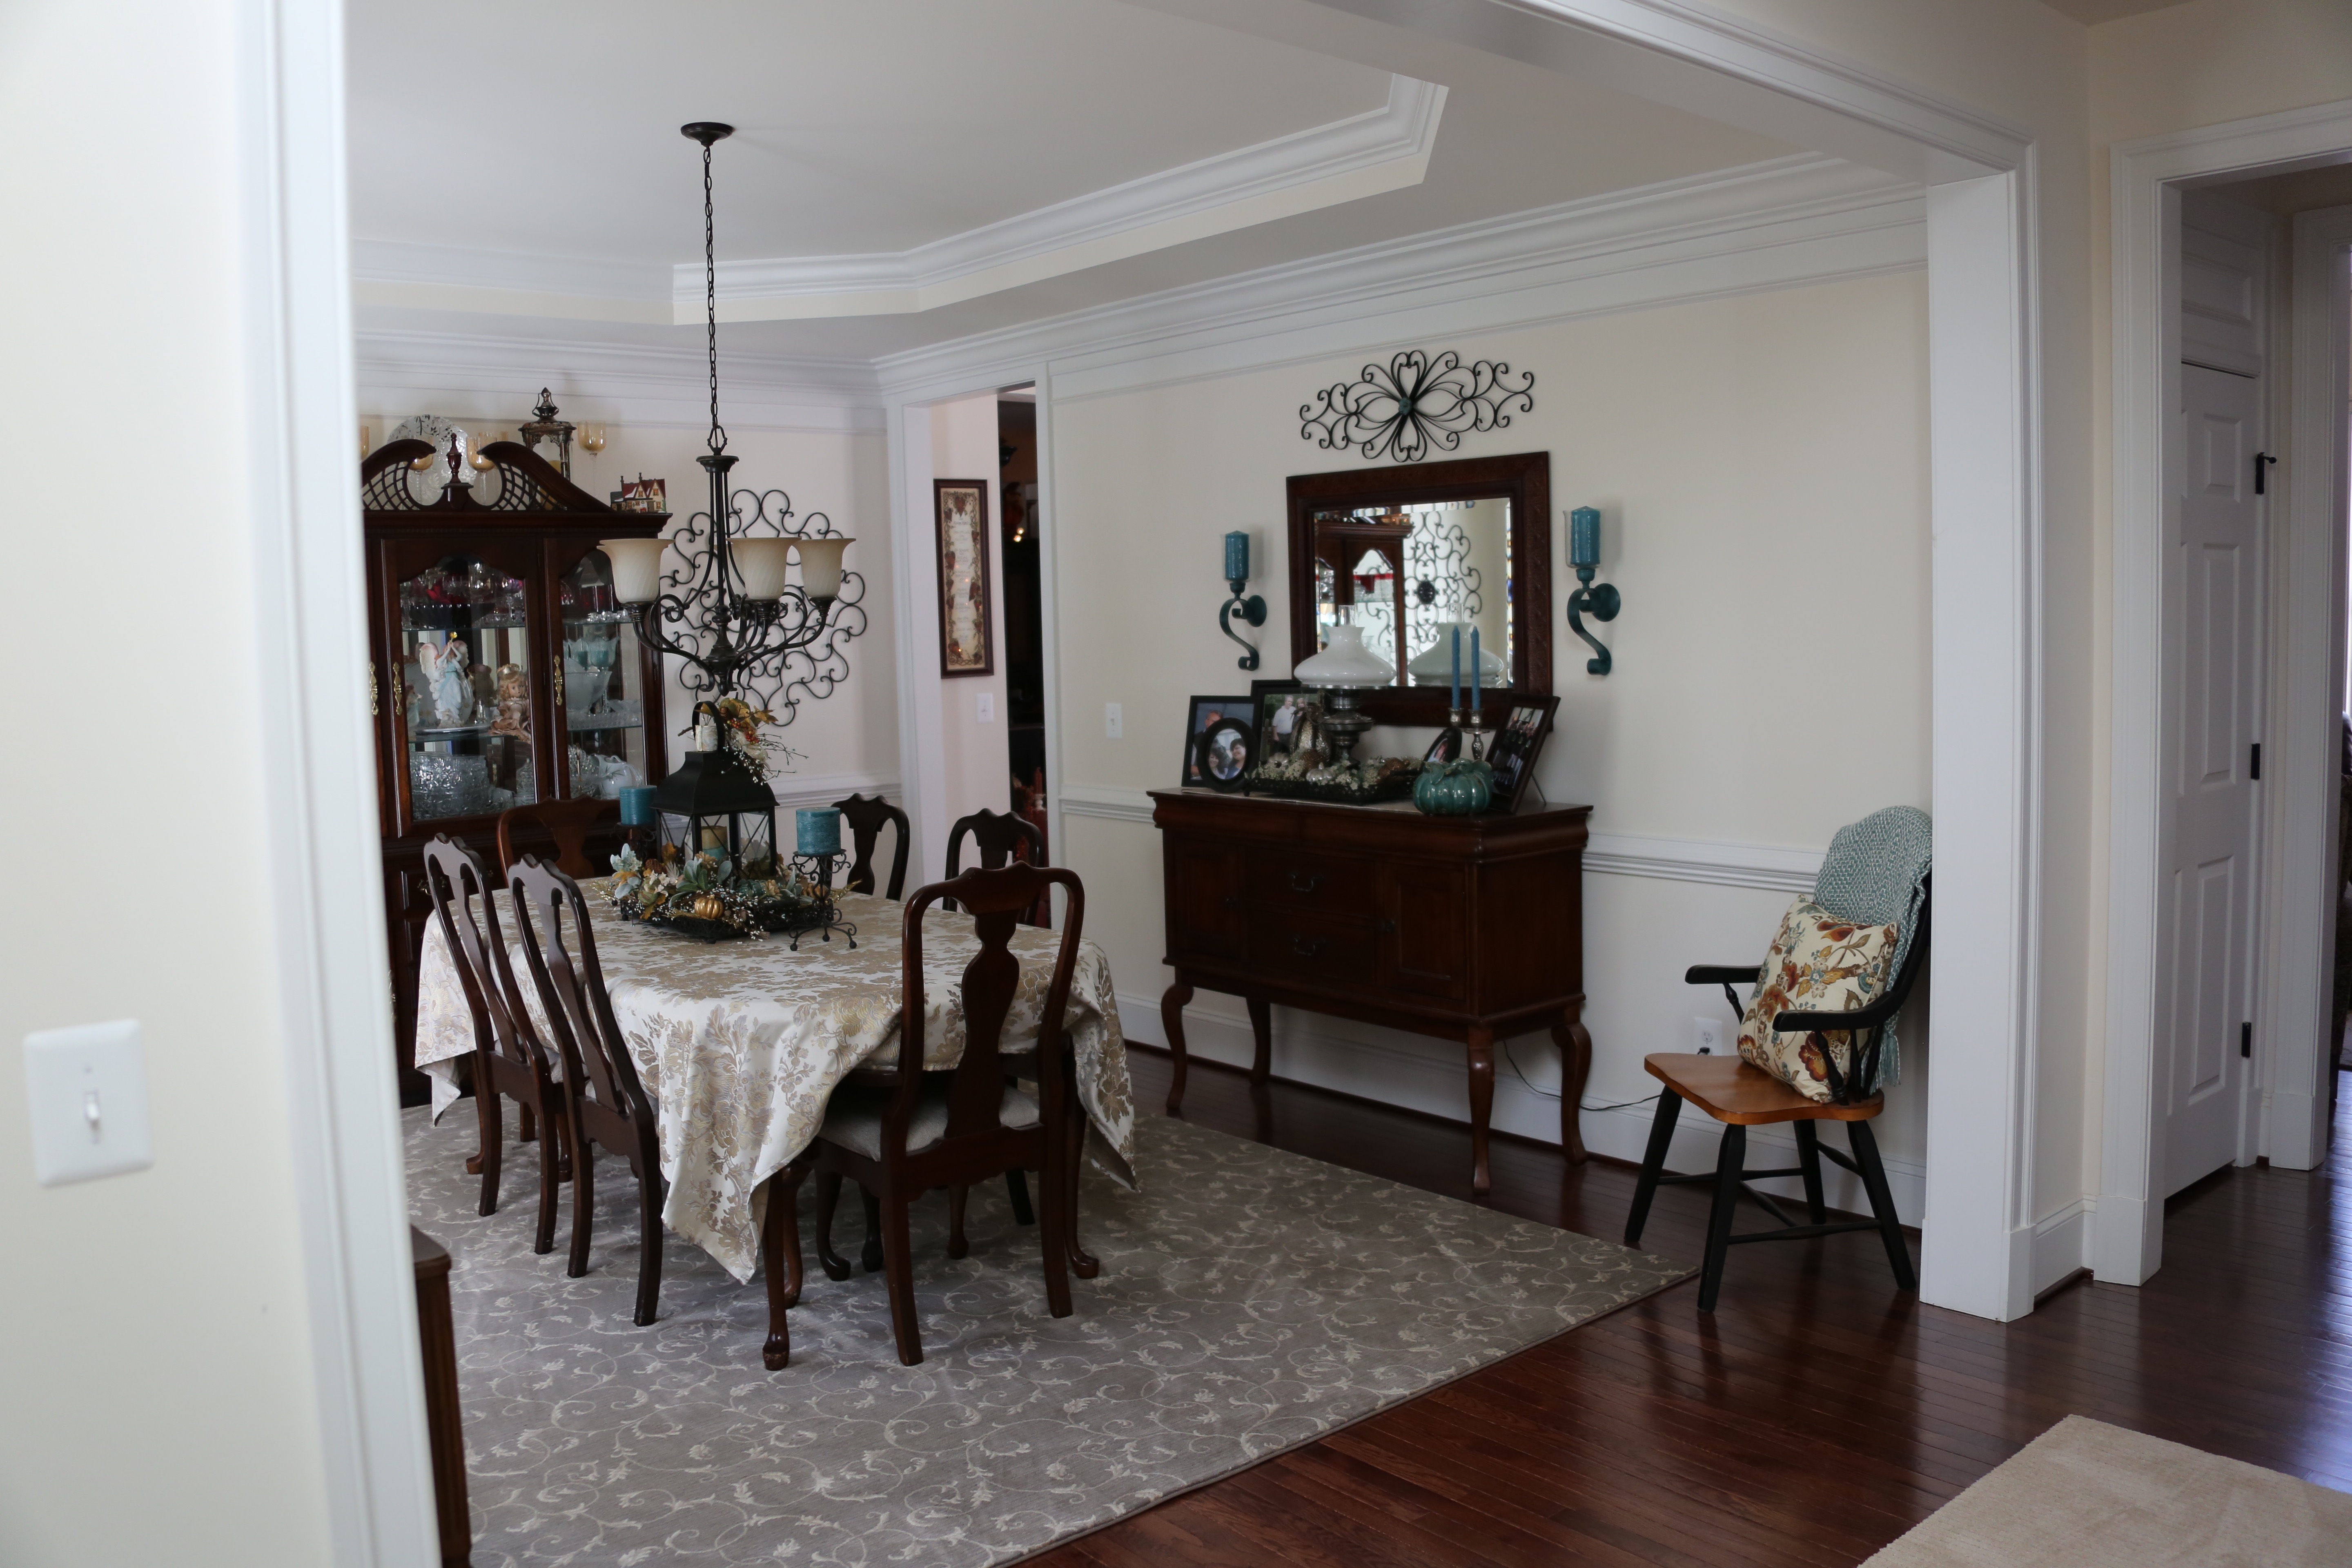
Both the living and dining rooms are pretty much the same size the only difference being that the dining room has a tray ceiling and the living room has a large bay window at one end. The dining room furniture is every bit of 25 years old and because it wasn’t used too much in our other home, it is still in great shape.  We did purchase all new furniture for the living room before we moved into this house and when we did that, I ordered a bolt of the same material that the couch was made from so that we could reupholster the dining room chairs to match.

Here is the dining room, the hutch and the sideboard were mine, but the little hutch on the left was my Grandmother’s:

1V4A2848 1V4A2895

IMG_8880

This lamp is another keepsake that was passed down to me from my Grandmother, it sits atop my sideboard.  I sat it on a tray and decorated around it, this is the arrangement that I created for Fall.

Here is the living room:

IMG_1706 IMG_1703

I especially love it at Christmastime, last year I purchased a white Christmas tree and placed it in the bay window…Trust me, it *will* go back there again this year. 🙂

IMG_7716IMG_7704

IMG_1704

This was my Grandmother’s Secretary, she would always keep it closed and I used to love to play in it when I was a little girl, but one day I had a little epiphany and decided to open the big front door and do a bit of decorating inside of the Secretary. I’ve really enjoyed creating new groupings on top of that opened door.

IMG_8715IMG_1858

IMG_4062

These are the most comfy chairs and they recline! I chose a soft green color to be used as an accent in these rooms, that color runs through the paisley in these chairs. They set the tone for both rooms decor.

I chose very basic curtains for these rooms; they are drapery panels sheered on with square oil rubbed bronze grommets; we chose oil rubbed bronze curtain rods and tie back hooks as well.  I purchased them from Bed, Bath, & Beyond, unfortunately, I am not able to find them and provide you with a link. My apologies!

**Side note:  All of the light fixtures, faucets, and door hardware on this level are in oil-rubbed bronze.**

IMG_8854IMG_2656

Here is a shot of the foyer rugs and the three pups posing so prettily:

IMG_8761

I couldn’t be happier with how these rooms have turned out, I’ll go into the living room to sit in one of those comfy chairs to read, talk on the phone, work on my blogs, or just relax; the ‘feel’ in there is soft and calming.  I’m a pretty high-strung lady at times and these rooms help me to find my “off switch”. 🙂

IMG_1713 IMG_1717

Until next time, y’all take good care! ❤

**In crafting there are no mistakes just unique creations**

How To Make A Bow Tutorial (Video)

Hi All,

I’ve made y’all a little “How To Make A Bow” tutorial…I hope this helps any of you who might like to attempt to make one.  In this video, I make two bows, the first one is with a one-sided, (meaning it has a back and a front) burlap ribbon and I made the second one out of a double-sided wired country plaid ribbon.  If you have any questions, don’t hesitate to leave them in the comments section below. 🙂

~Arlynn ❤

Mud Room, Powder Room, Kitchen Eating Area, & Family Room

Hi All,

One of the reasons that my hubby and I chose this model of home to build was because we loved the open and airy feel of the entire floor plan.  In this little post, I will highlight what you see as you enter our house from the garage.  First, you pass through a mud room and as you enter the main house, you can look past the kitchen table (kitchen is to the left) and on into the family room.  We have 9′ ceilings throughout the entire house, except for the kitchen, it has a cathedral ceiling and the family room’s ceiling soars up to about 18′ (it is completely open up to the second story); the high ceilings really add to the open feeling of the whole house.

Here is the mud room as you enter from the garage:

IMG_2640

IMG_2684
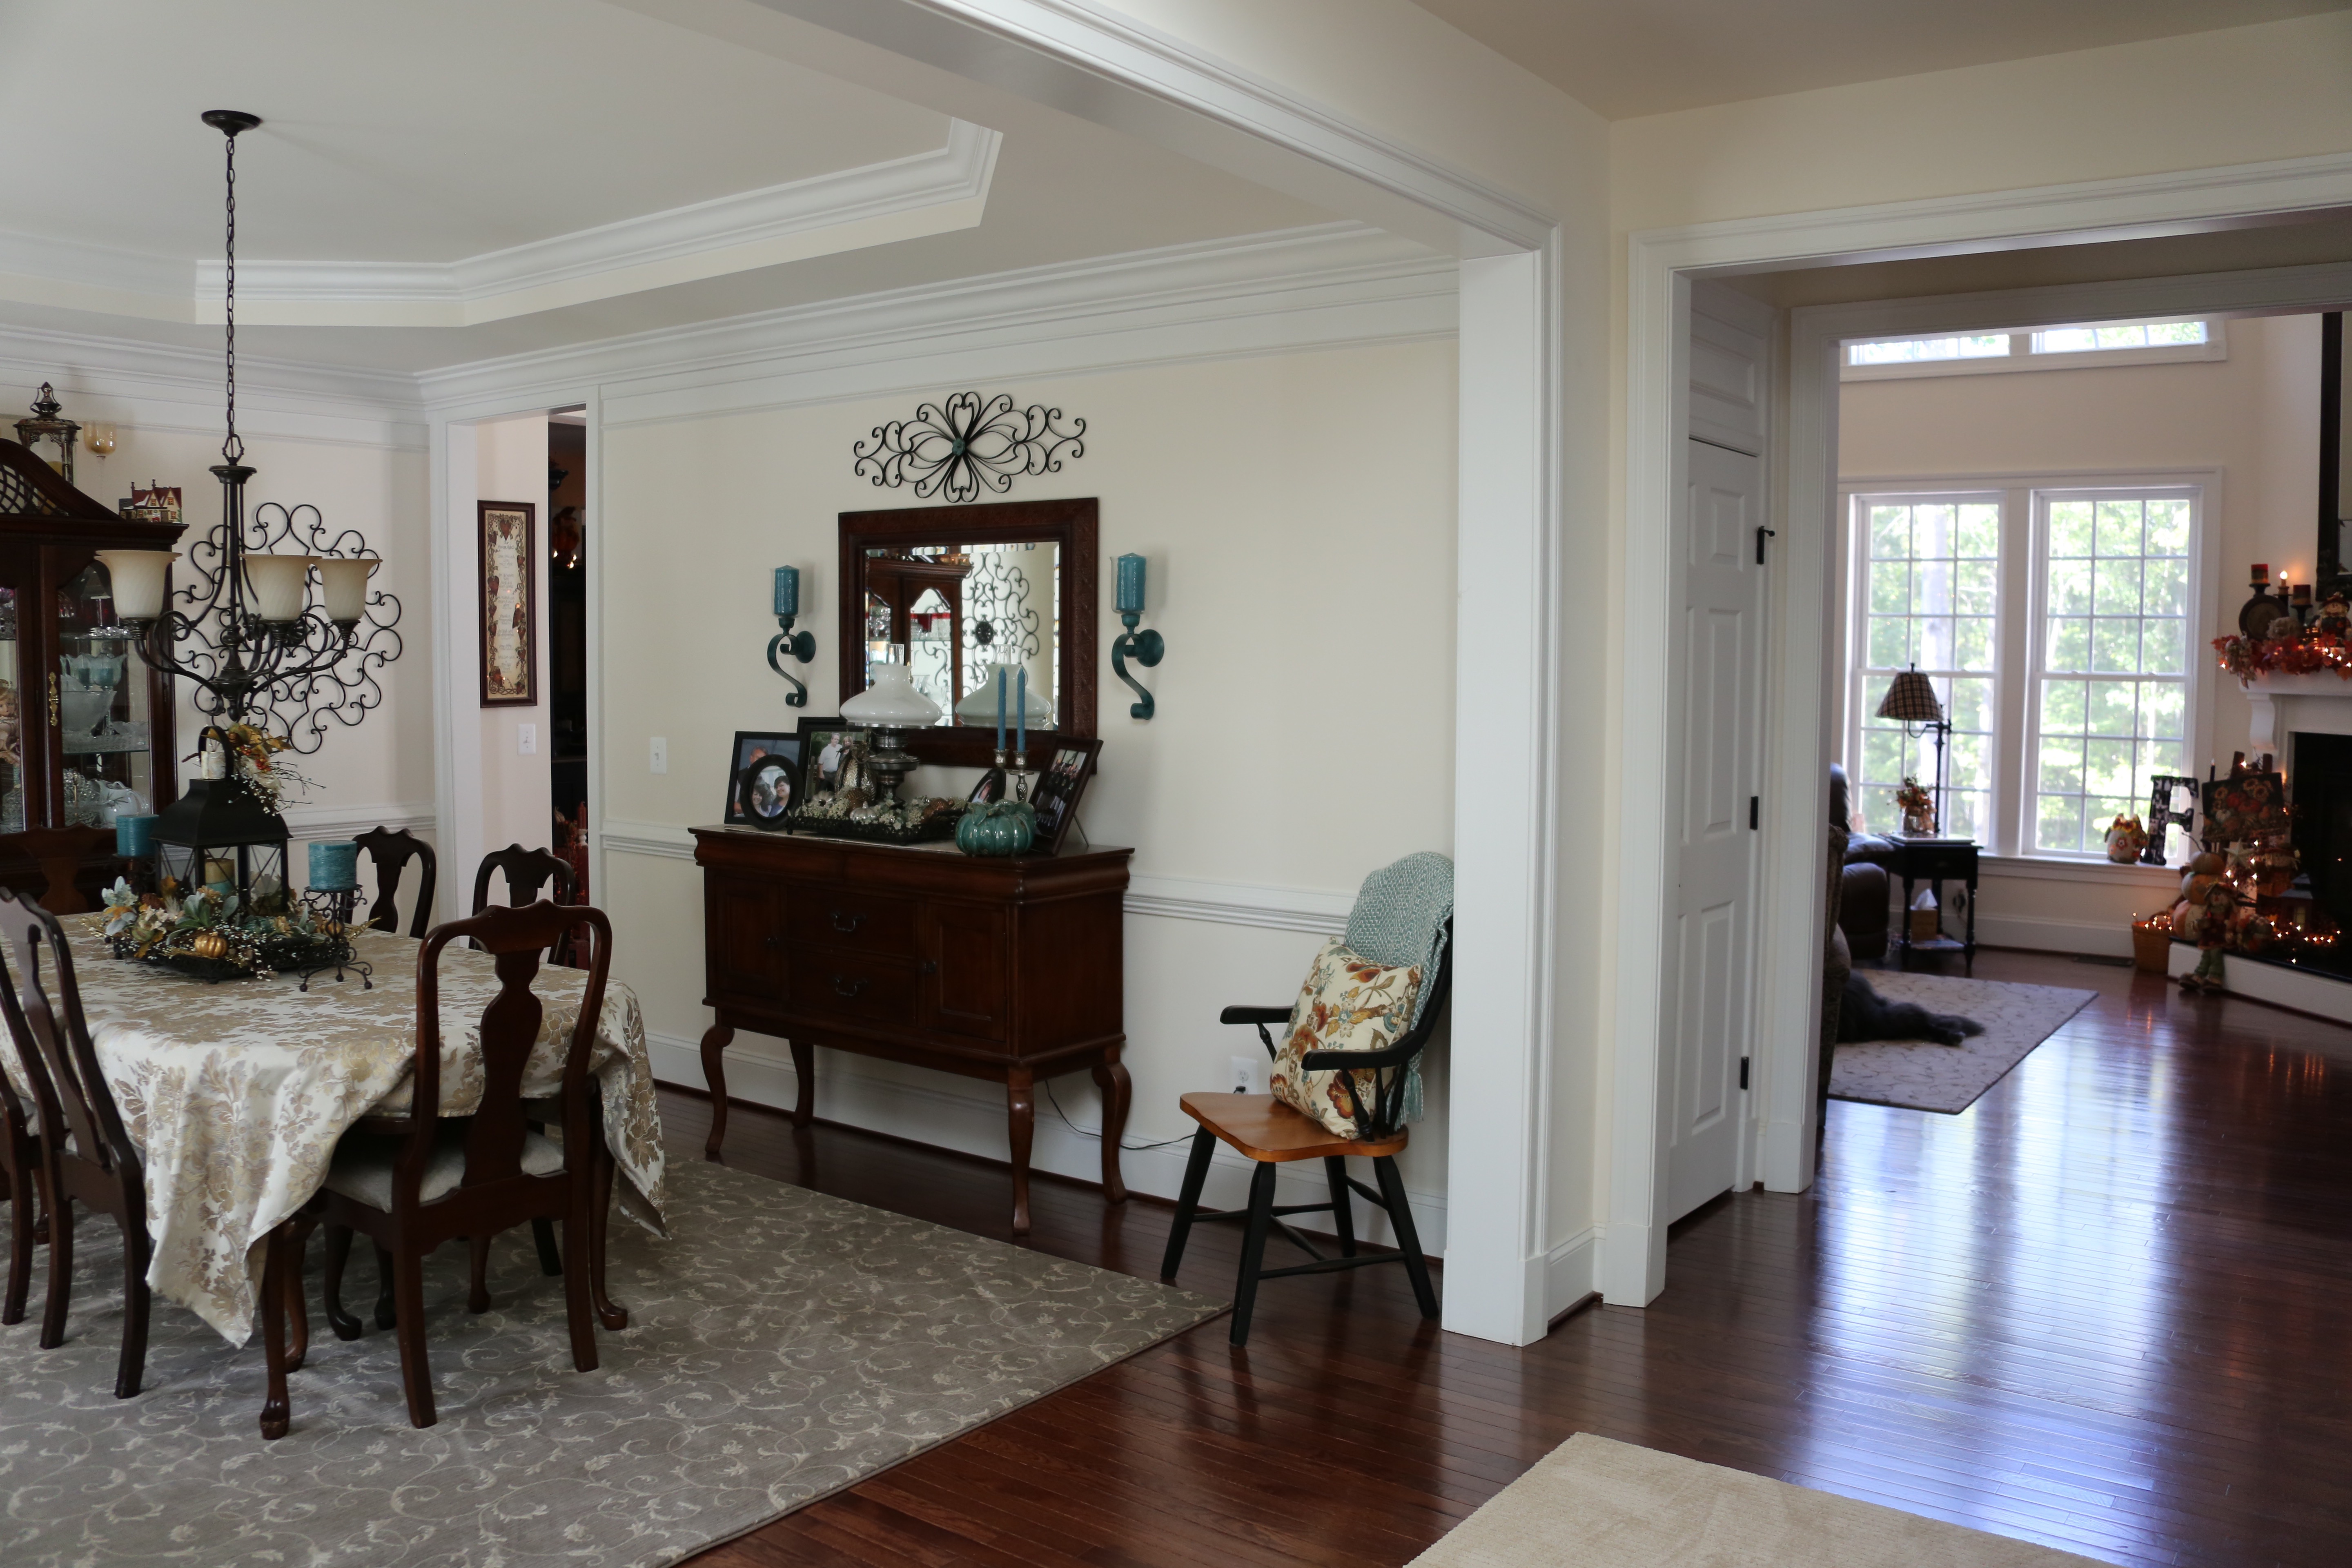
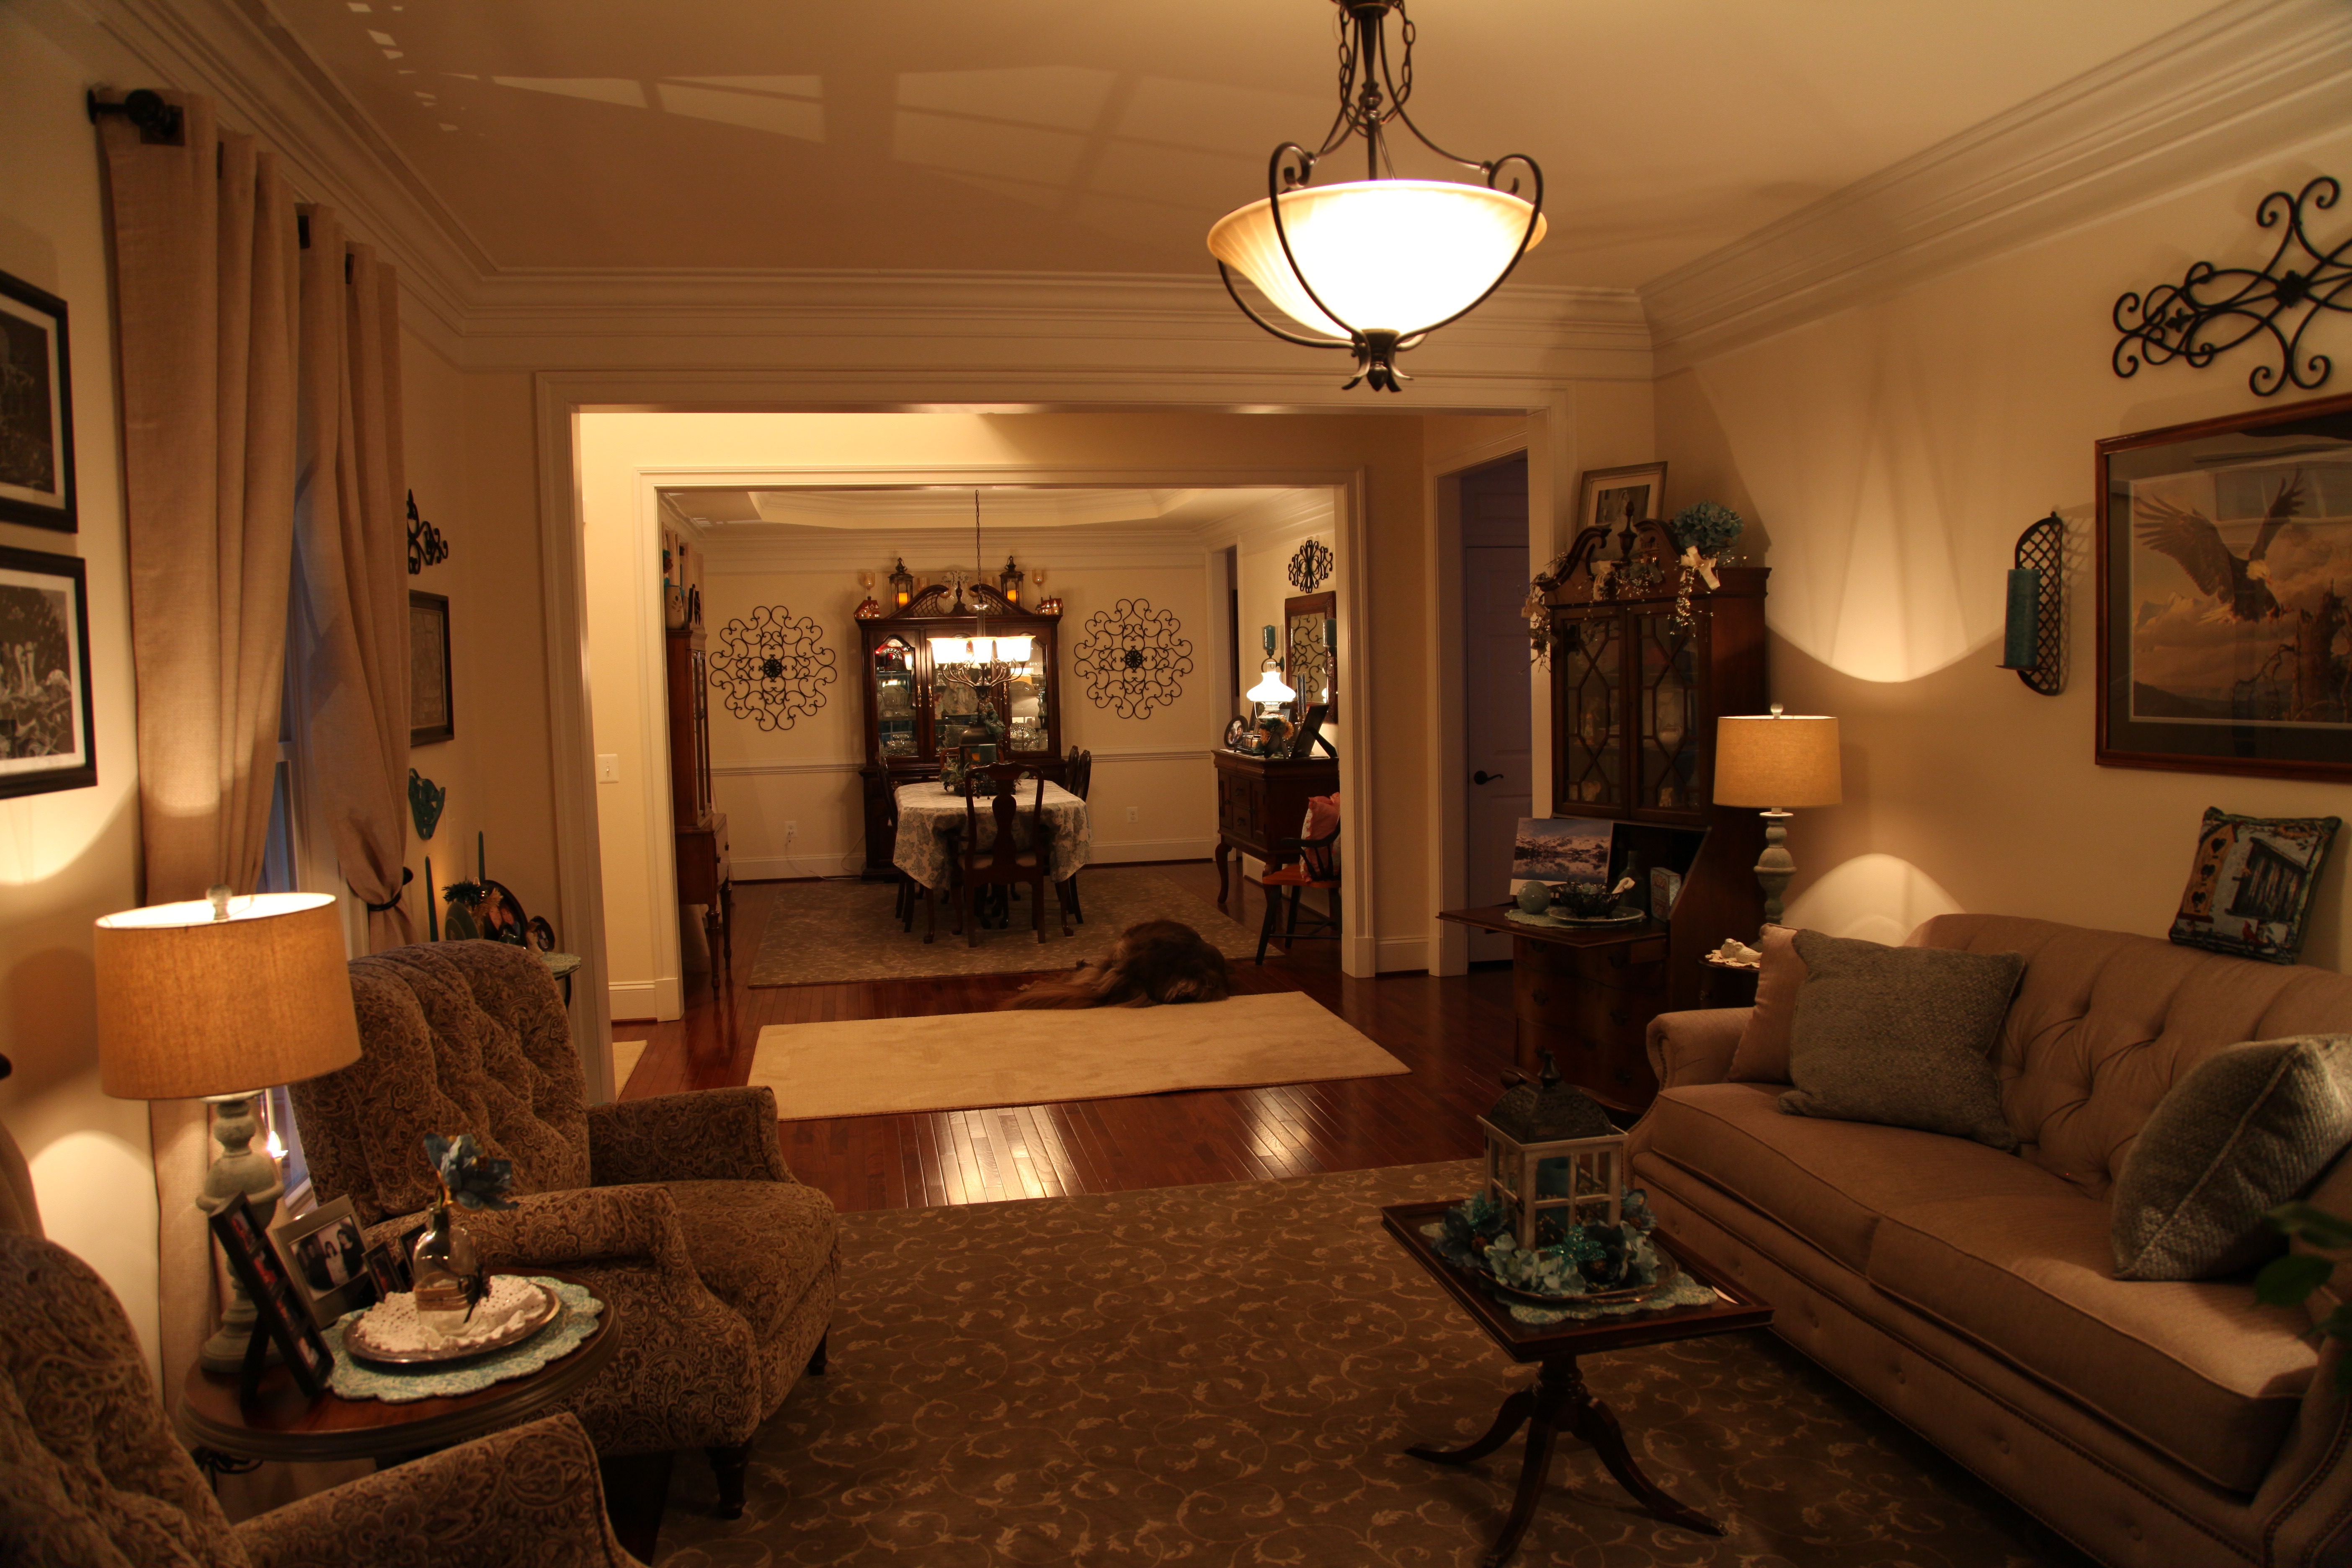
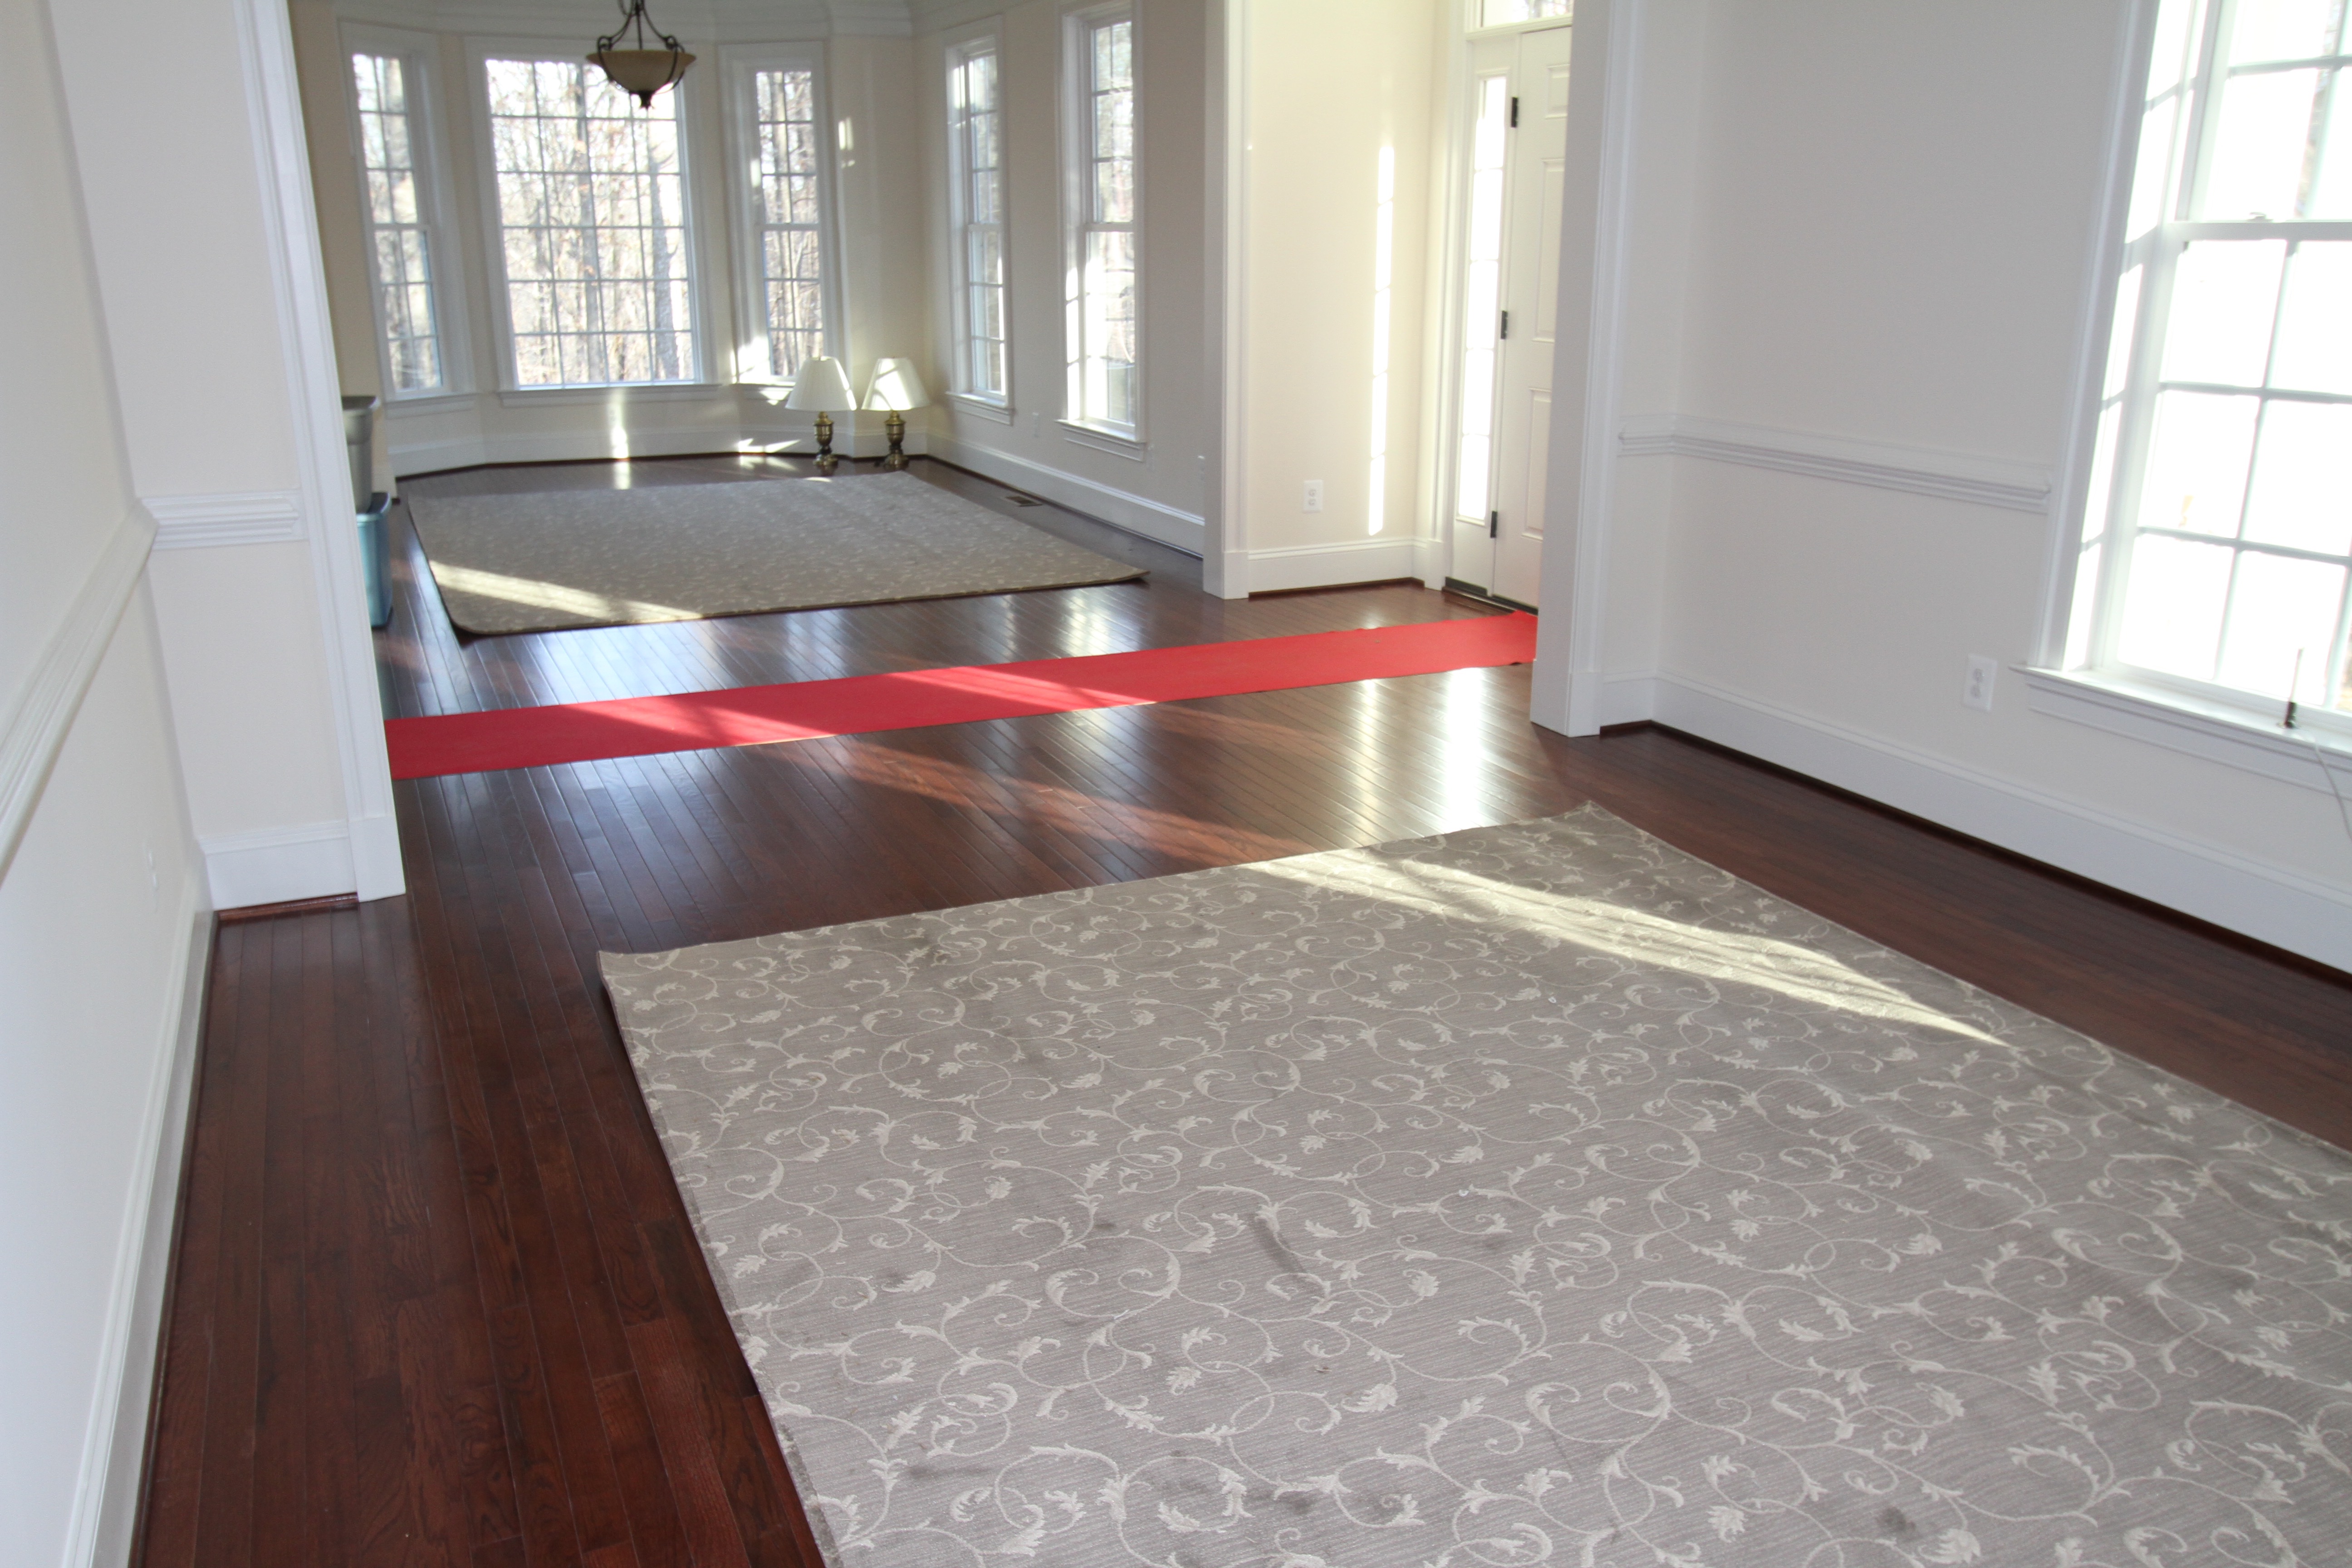
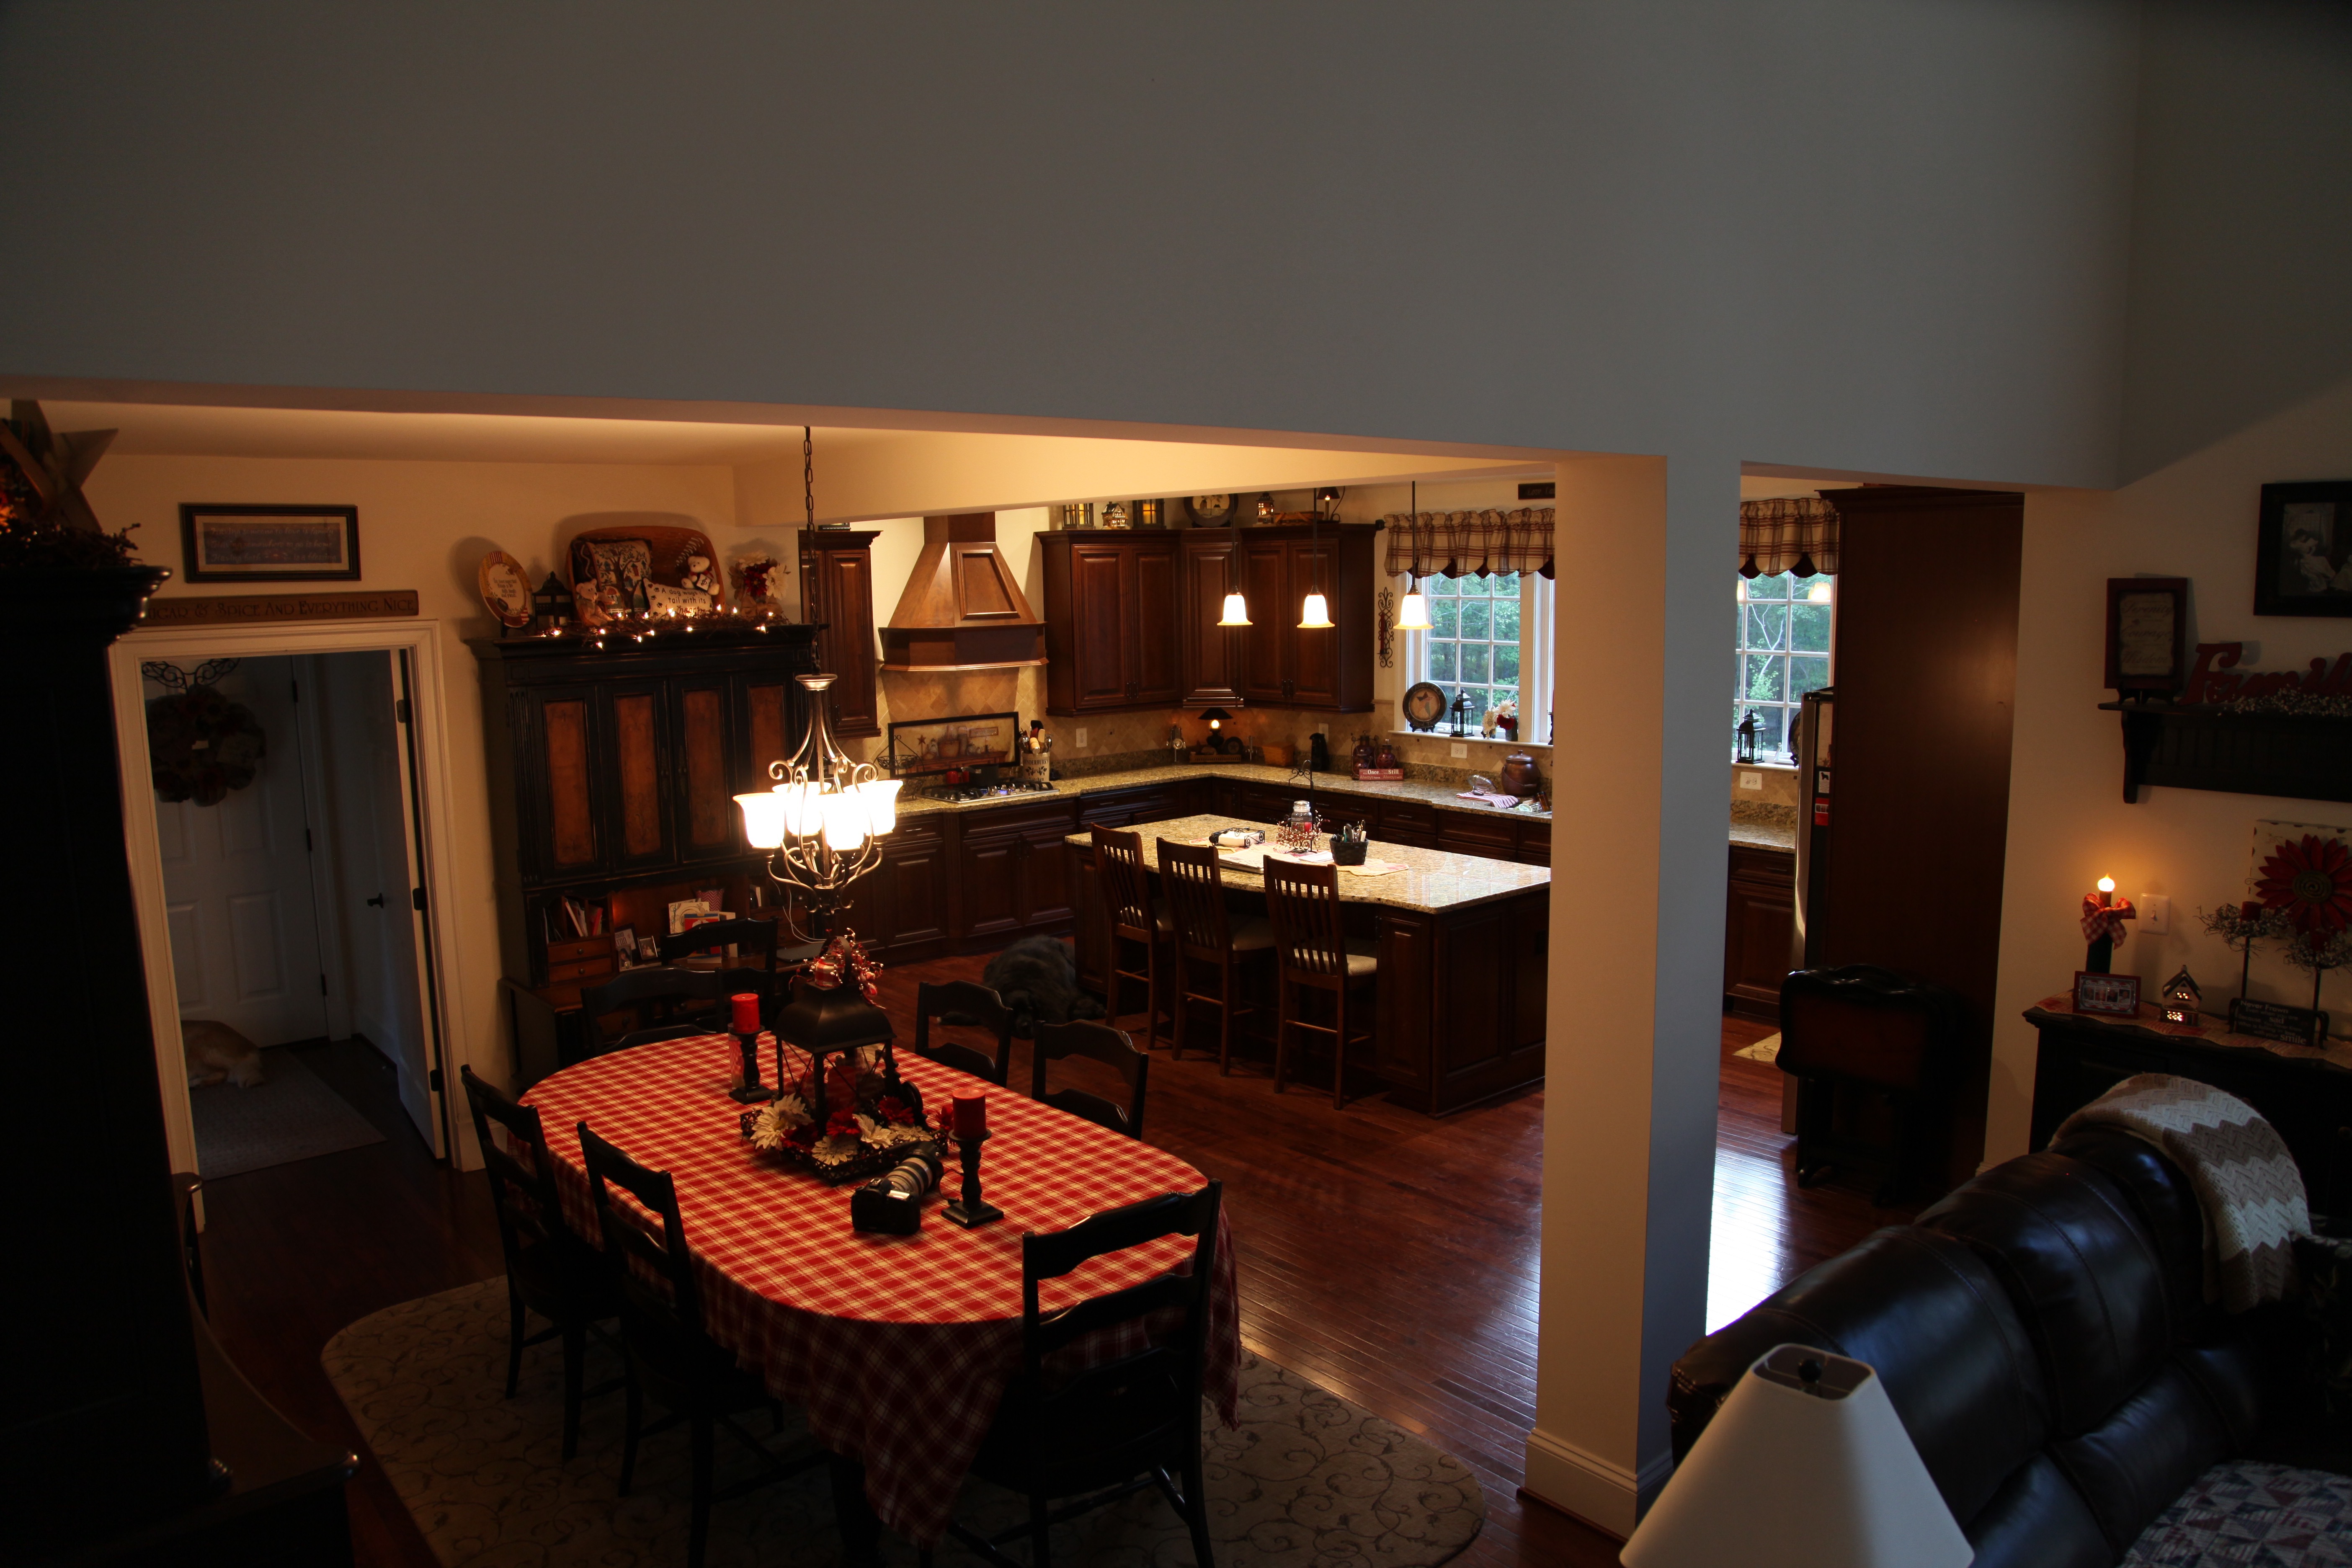
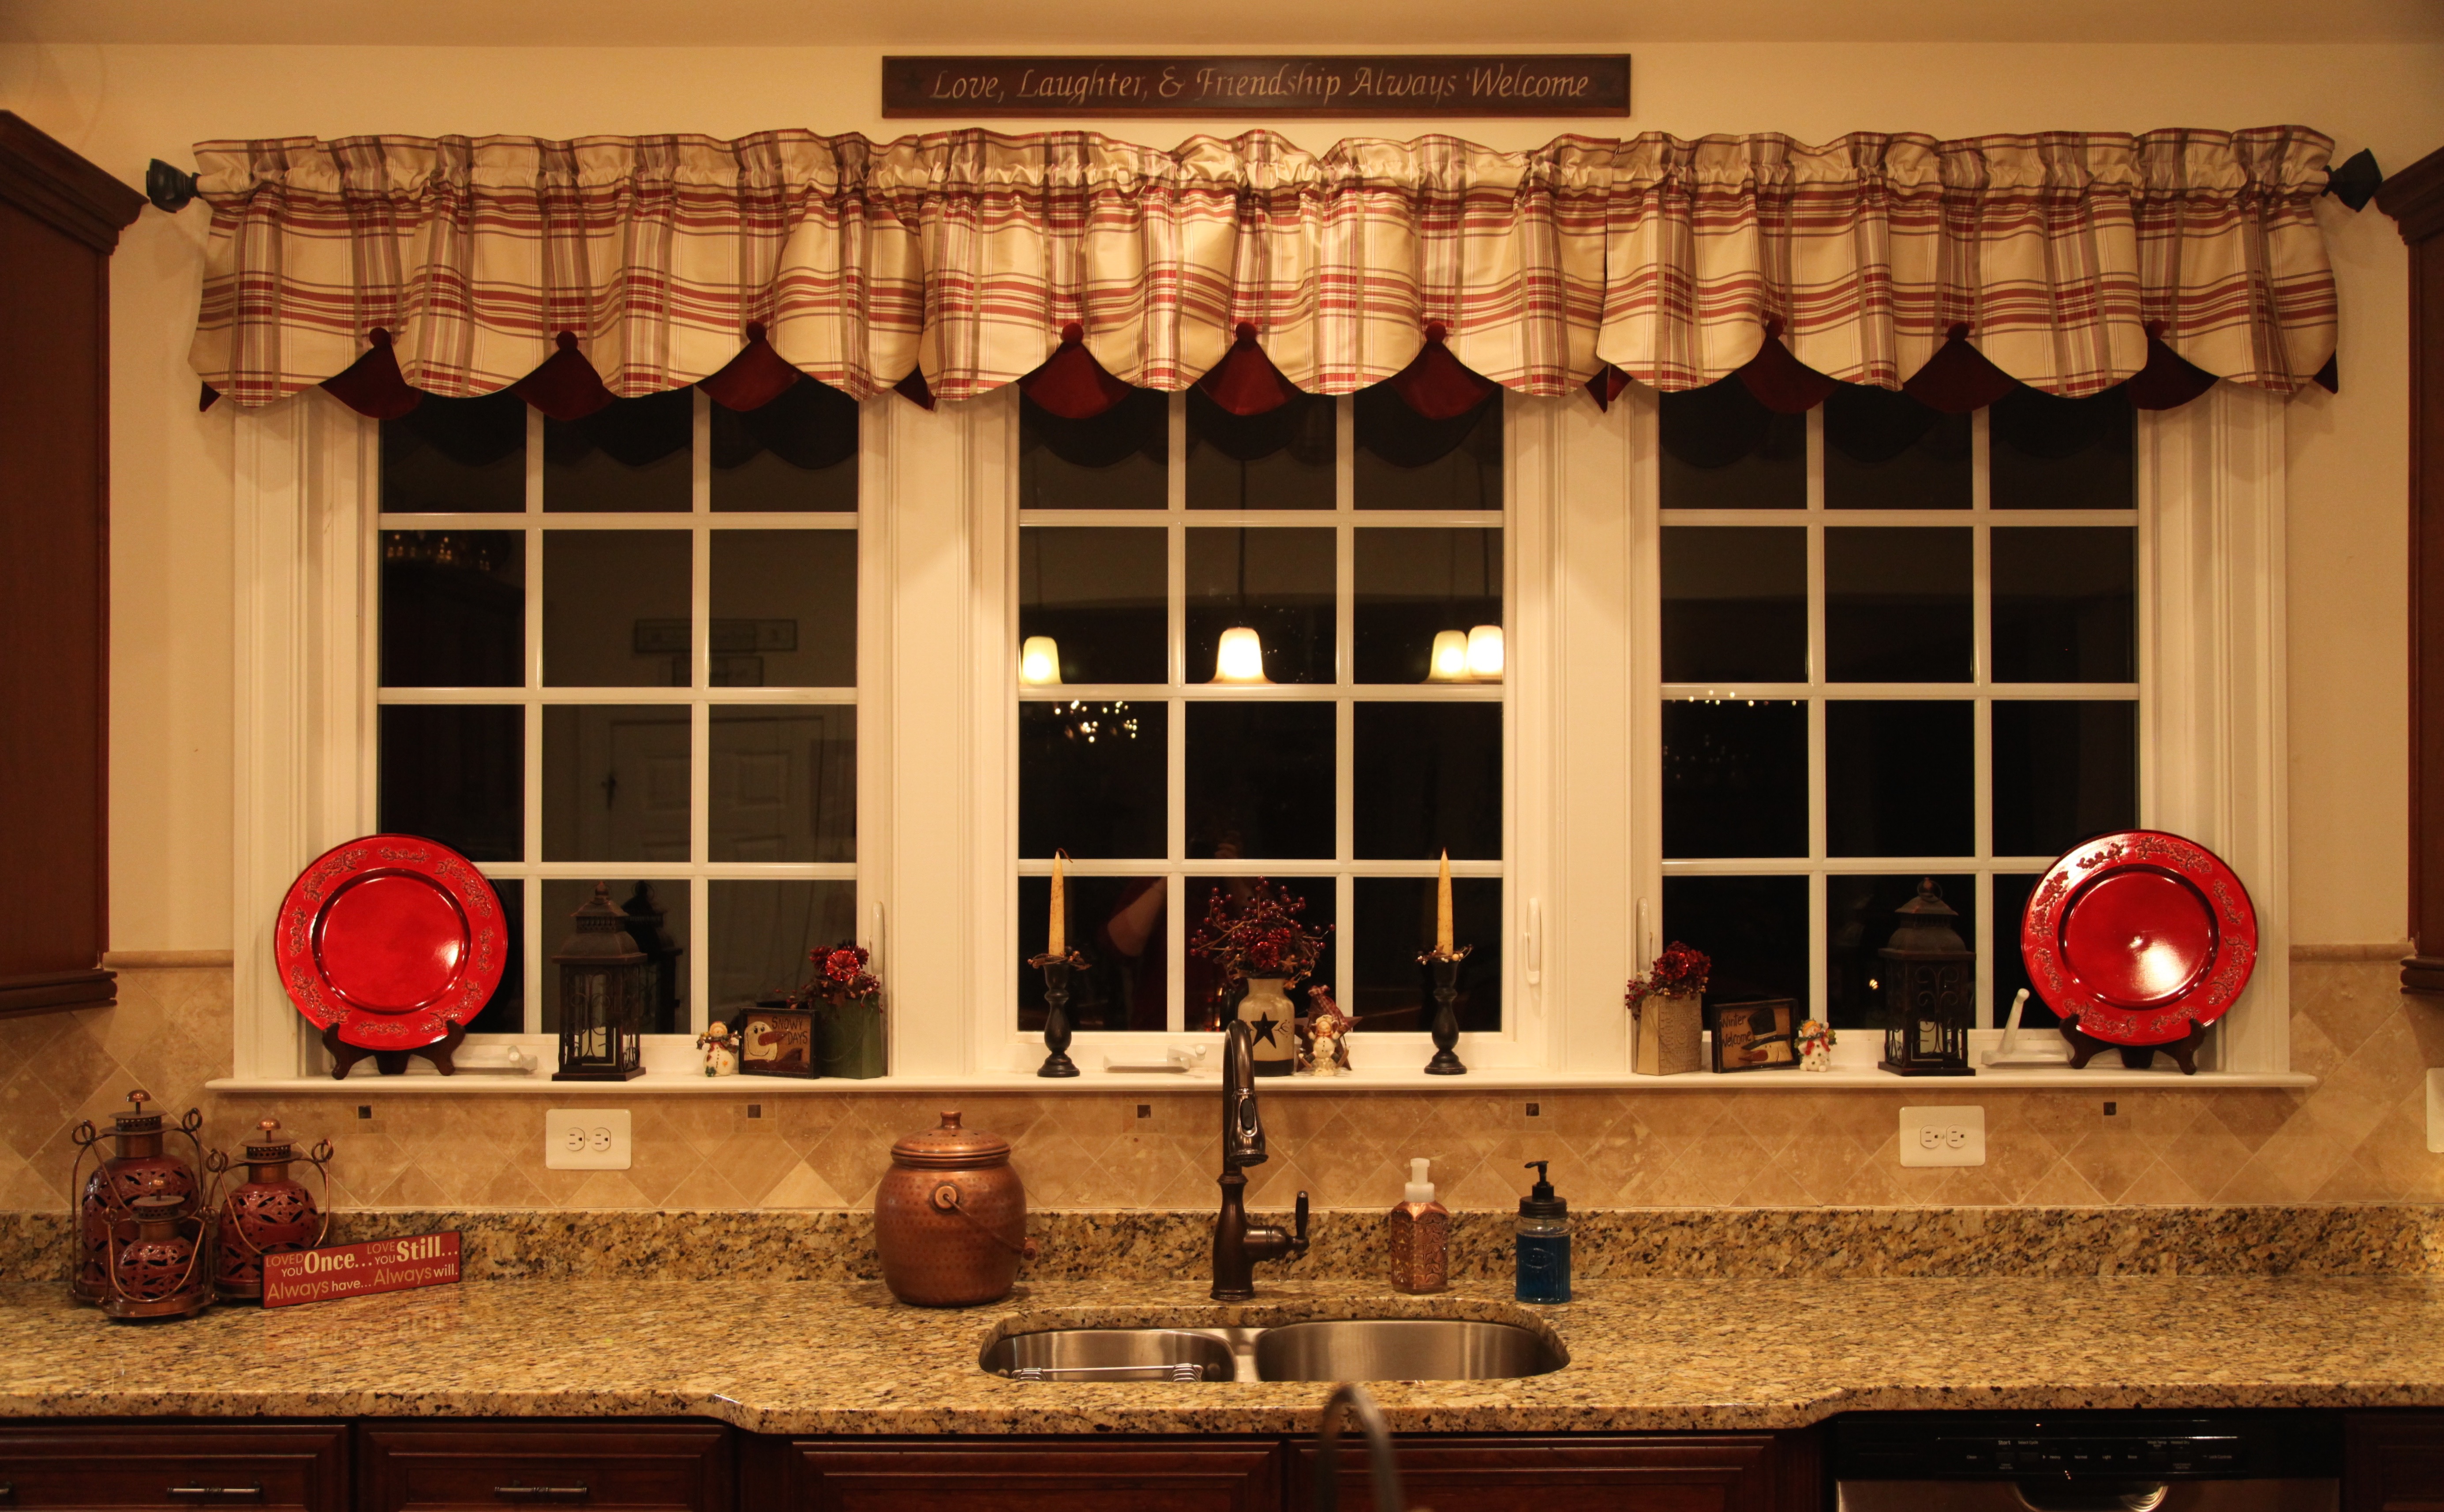
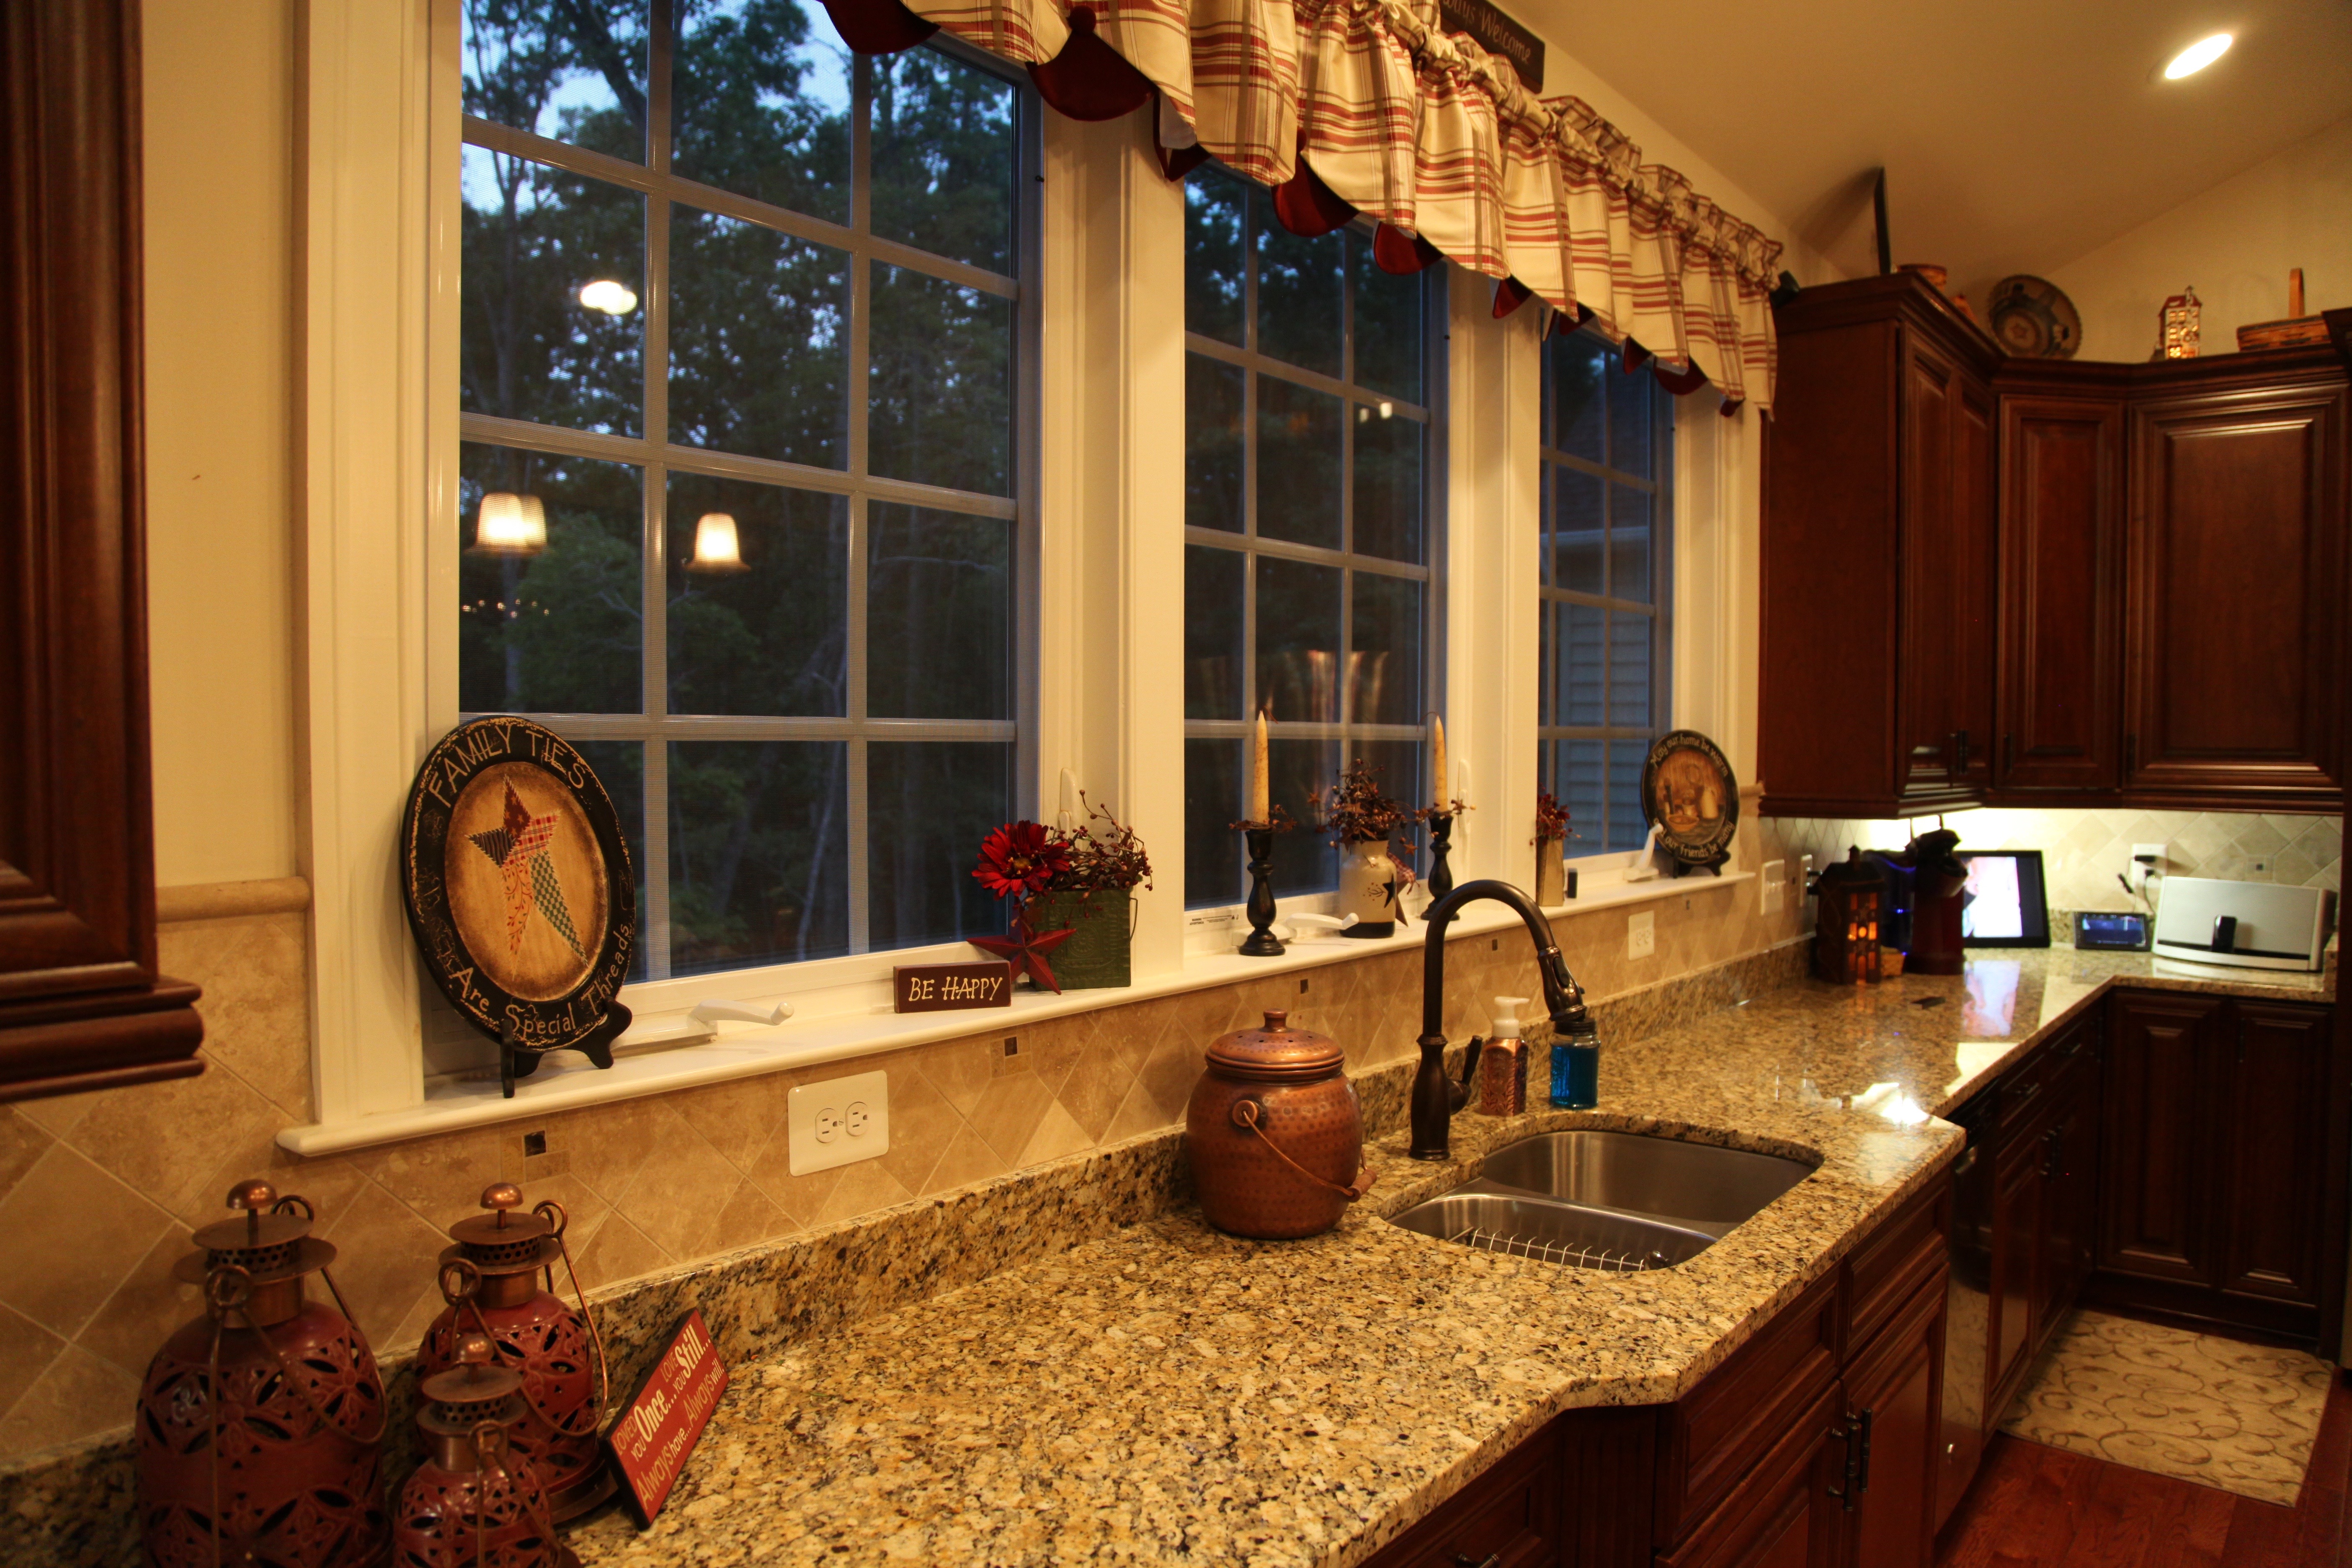
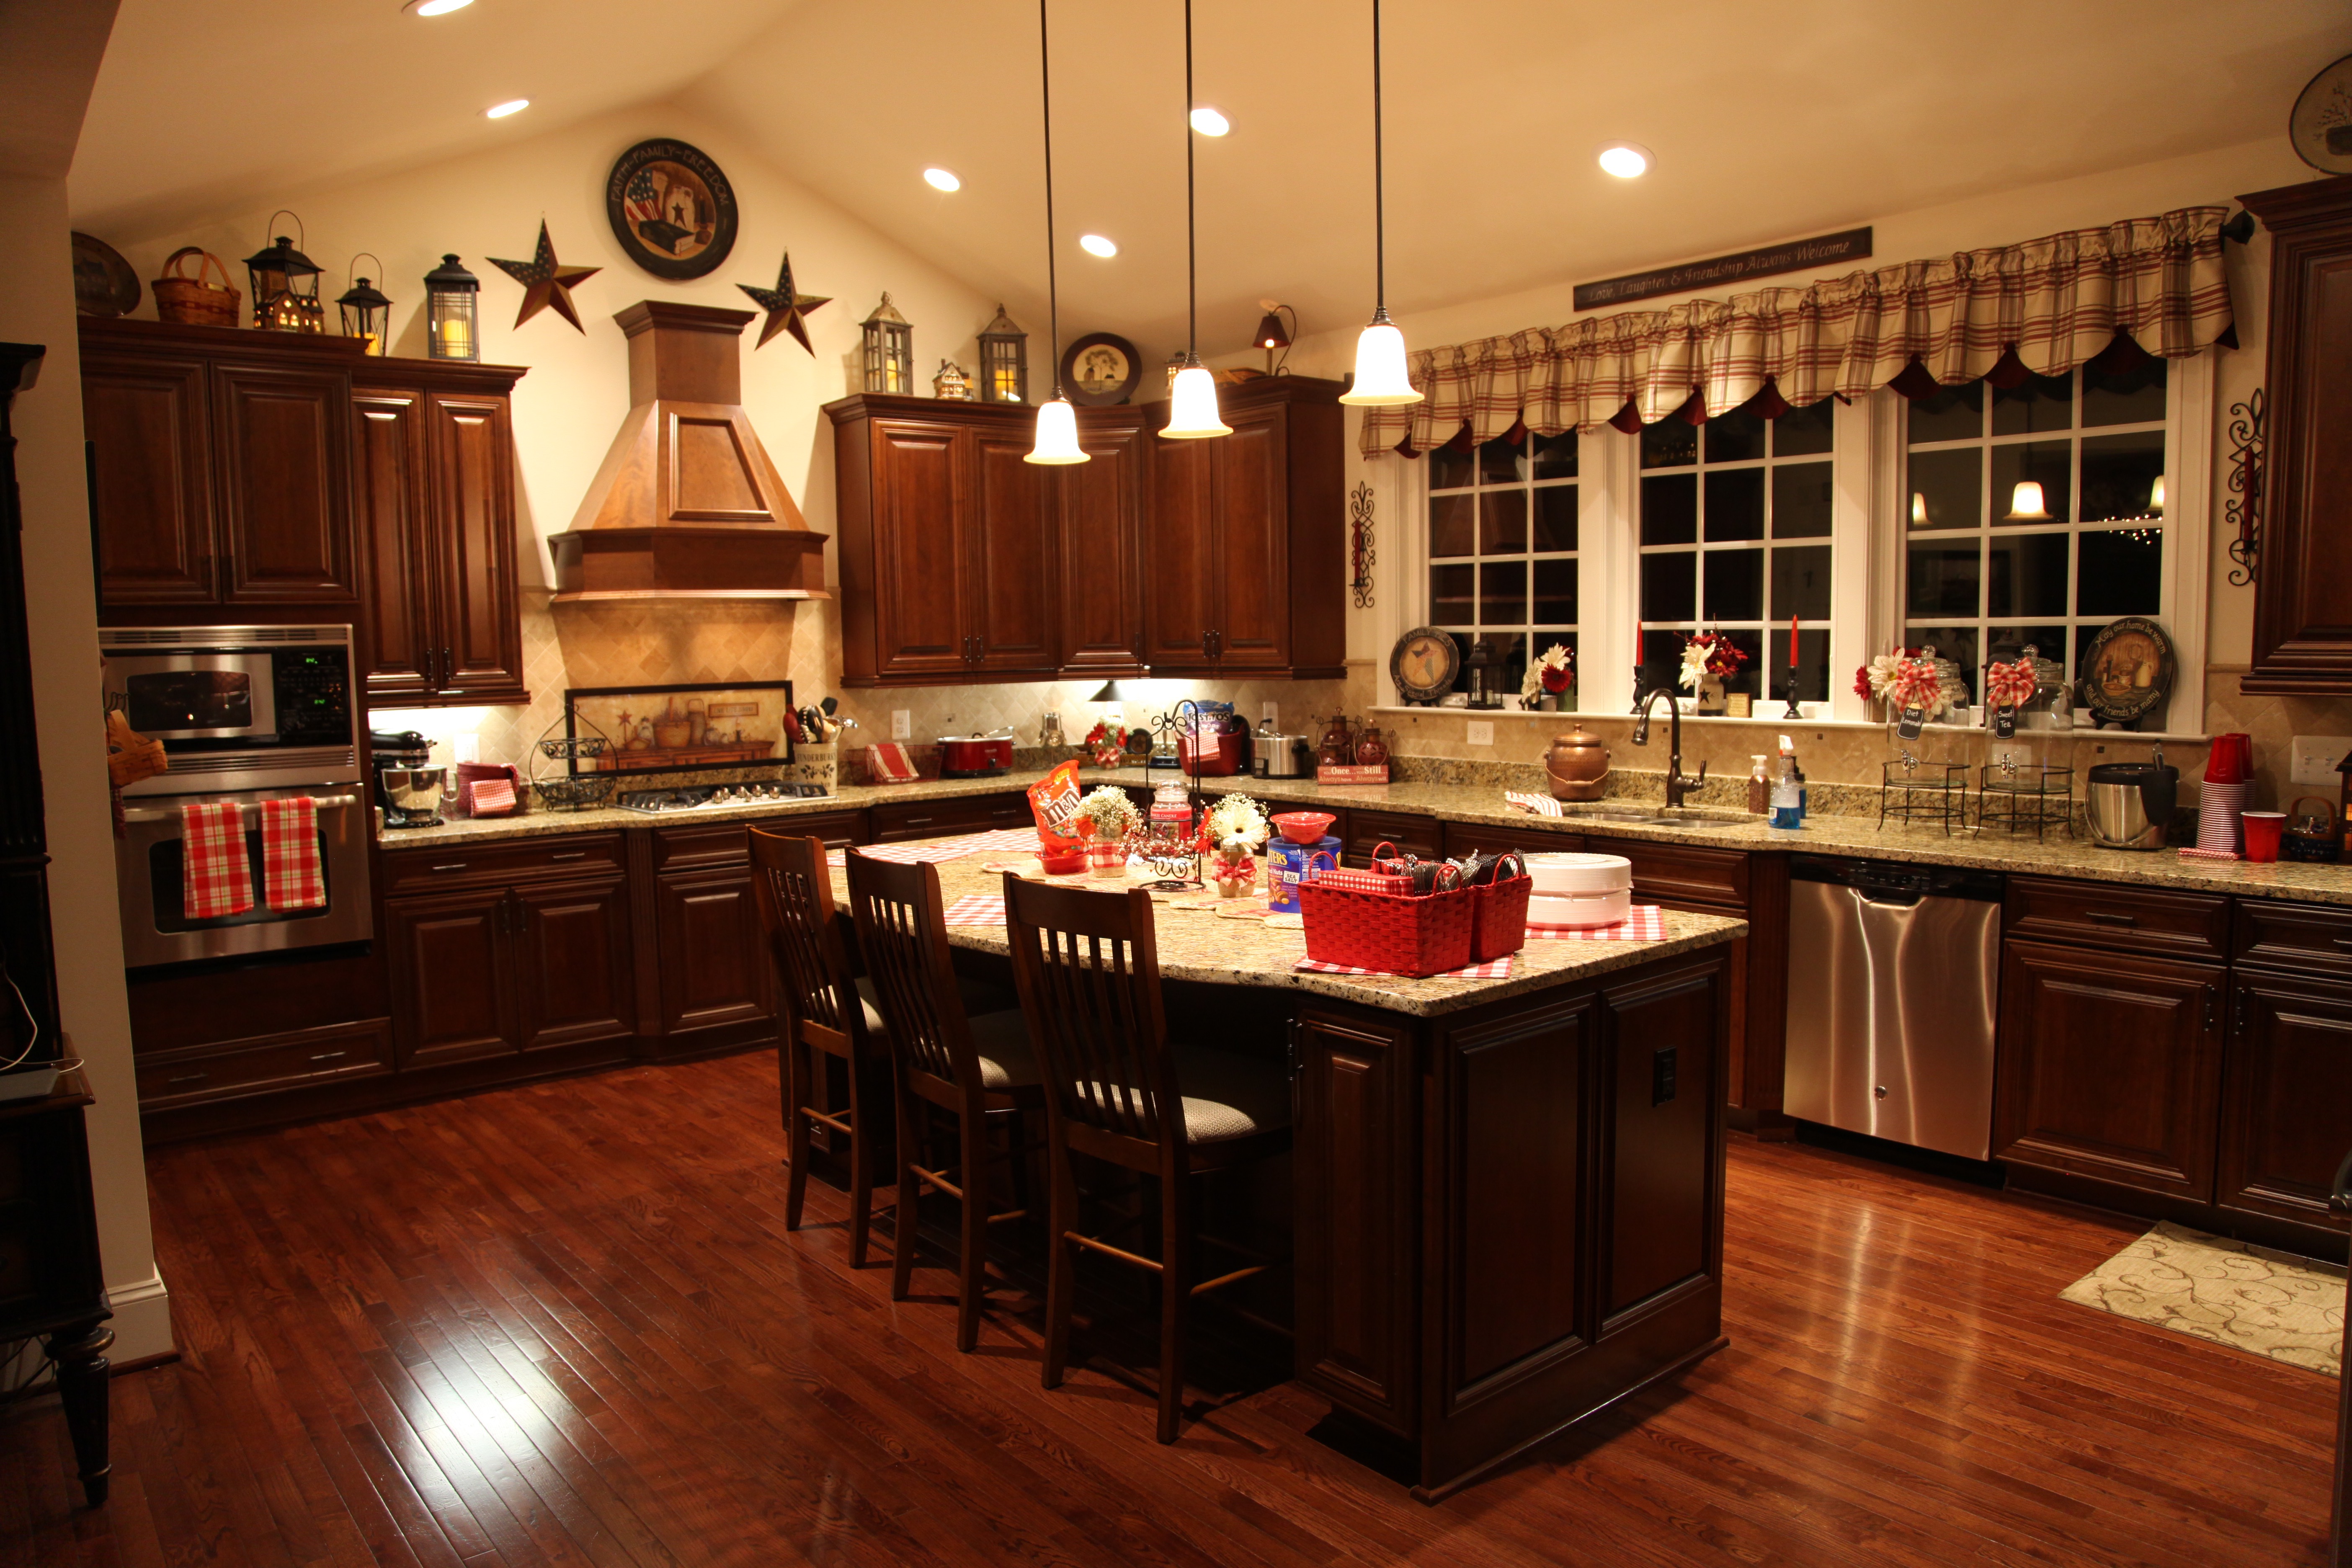
And if you go to the doorway that leads into the kitchen’s eating area and turn around, this is what you see:

IMG_8778

As you enter the kitchen eating area, to the right there is a little hallway with the powder room on one side and a coat closet on the other side and at the end of the hallway you enter the laundry room. You can see the hallway leading to the laundry room to the right in this picture.

IMG_8536

IMG_1816

I’ll talk about the powder room next.  The builder offered a pedestal sink and an oval mirror with a small light above it as their standard. We knew we wanted a little something more substantial in there as it is a pretty large powder room so after we moved in we decided to purchase a new vanity, wood framed mirror and light (from Home Depot).  Here are a couple of before and after shots for you:


IMG_9836
 IMG_1831
IMG_1833IMG_1831

IMG_8534

IMG_8546

Moving on into the kitchen’s eating area, as I mentioned above, if you stand at the mud room door and look through, you can see straight past the kitchen table into the family room. IMG_8534IMG_1815

We purchased a new kitchen table, chairs, and hutch for this home and I wanted to make sure that the kitchen table didn’t get ruined because invariably, things ‘land’ on that table and it was just a matter of time before something sharp landed and scratched that pretty top.  So we ordered a table pad with leaves included from Affordable Table Pads. This table has 2 leaves and we were able to purchase the table pad with two removable leaves (with magnets on the edges so that the leaves stay in place when on the table).  I love it!

IMG_1254

IMG_1255

Here is a view from the staircase of the mud room doorway on the left, the kitchen table and the kitchen .

IMG_1618

Next, let me tell you about the rugs that are under the kitchen table and on the family room floor. We went to a local carpet store (I’m sure that Lowe’s or Home Depot would do this sort of thing as well) and chose a piece of carpeting that we liked with a subtle pattern and neutral color and we had them cut them to a size (we provided them with the exact measurements) and they the bound the edges.  We found that this was much more cost effective than purchasing large rugs.  Admittedly, we had to choose pretty high-end carpeting because they told us that the binding holds up better on better quality carpeting, made sense to us, so we went with it.  We’ve lived in this house for 2 years now and our rugs still look brand new, I am so happy with how they turned out and the design we chose pairs beautifully with all seasons and with our decor. Here is a picture of the pattern and color we chose for the kitchen/family room rugs (the ones in the living and dining room are a slightly different color, I’ll show you those rugs when I write about those rooms):

0023110_LATROBE-EVANSBLACK-SHINE-212349720023776033_300

The family room is one of my very favorite rooms in the house.  I love the open staircase, that wall of windows, and the height of the ceiling.  The gas fireplace serves as a wonderful focal point, and I have so enjoyed decorating it up as the seasons pass.


1V4A2882
1V4A2884

And a couple of shots from the other direction:1V4A2887

1V4A2889

1V4A2890

One of my major concerns when moving into this home was how in the world was I going to make this home look and feel warm with decor. I have worked diligently to *not* over decorate, but, instead to subtly bring Southern warmth and charm into our home with a touch of country but without the cluttered look that I felt I had at my previous home.  I’d love to change the paint color to a warmer color (nothing too wild, just like a sandpiper color or possibly a little darker), but other than that, I’m extremely happy with how things have turned out. 🙂

My hope in showing you these pictures of our home as a whole will help you to ‘see’ my crafts, groupings, and arrangements and how I’ve tried to bring them all together to create one complete decor theme.  By keeping the basic color of the furniture, rugs, flooring, and walls in more of a neutral pallet,  it lends itself to being able to accent with color or design for whatever event or season for which you are decorating.

Until next time, y’all take good care! ❤

**In crafting there are no mistakes just unique creations**

The Kitchen

Hi Y’all!

What better place to start my home tour posts than the kitchen, it is definitely the heart of our home and my very favorite room in our house.  In fact, this kitchen is one of the major reasons why we built this model. We did throw quite a bit of extra money into the kitchen, we upgraded the cabinets, the countertops, the faucet, the appliances, the hood was extra, and we added more recessed lighting (because it has a cathedral ceiling in there and the lighting provided from the builder was not gonna cut it).  The hardwood floors were also an upgrade.

Let’s go through our chosen materials and finishes:

The cabinets are KraftMaid, the uppers are 42″ high, and the color is called “Autumn Blush”.  The cabinet doors and drawers are all “full coverage” meaning it would be next to impossible to open them if they didn’t have handles on them. All of the doors and drawers are “soft close”, there is no way one can slam anything shut. 😉  All you need to do is push and the doors and drawers gently close softly.

IMG_0960

We chose to put a large crown molding around the tops of the cabinets, and a piece of molding around the bottom called a light rail. Those two pieces of molding really make those cabinets pop!

IMG_1227
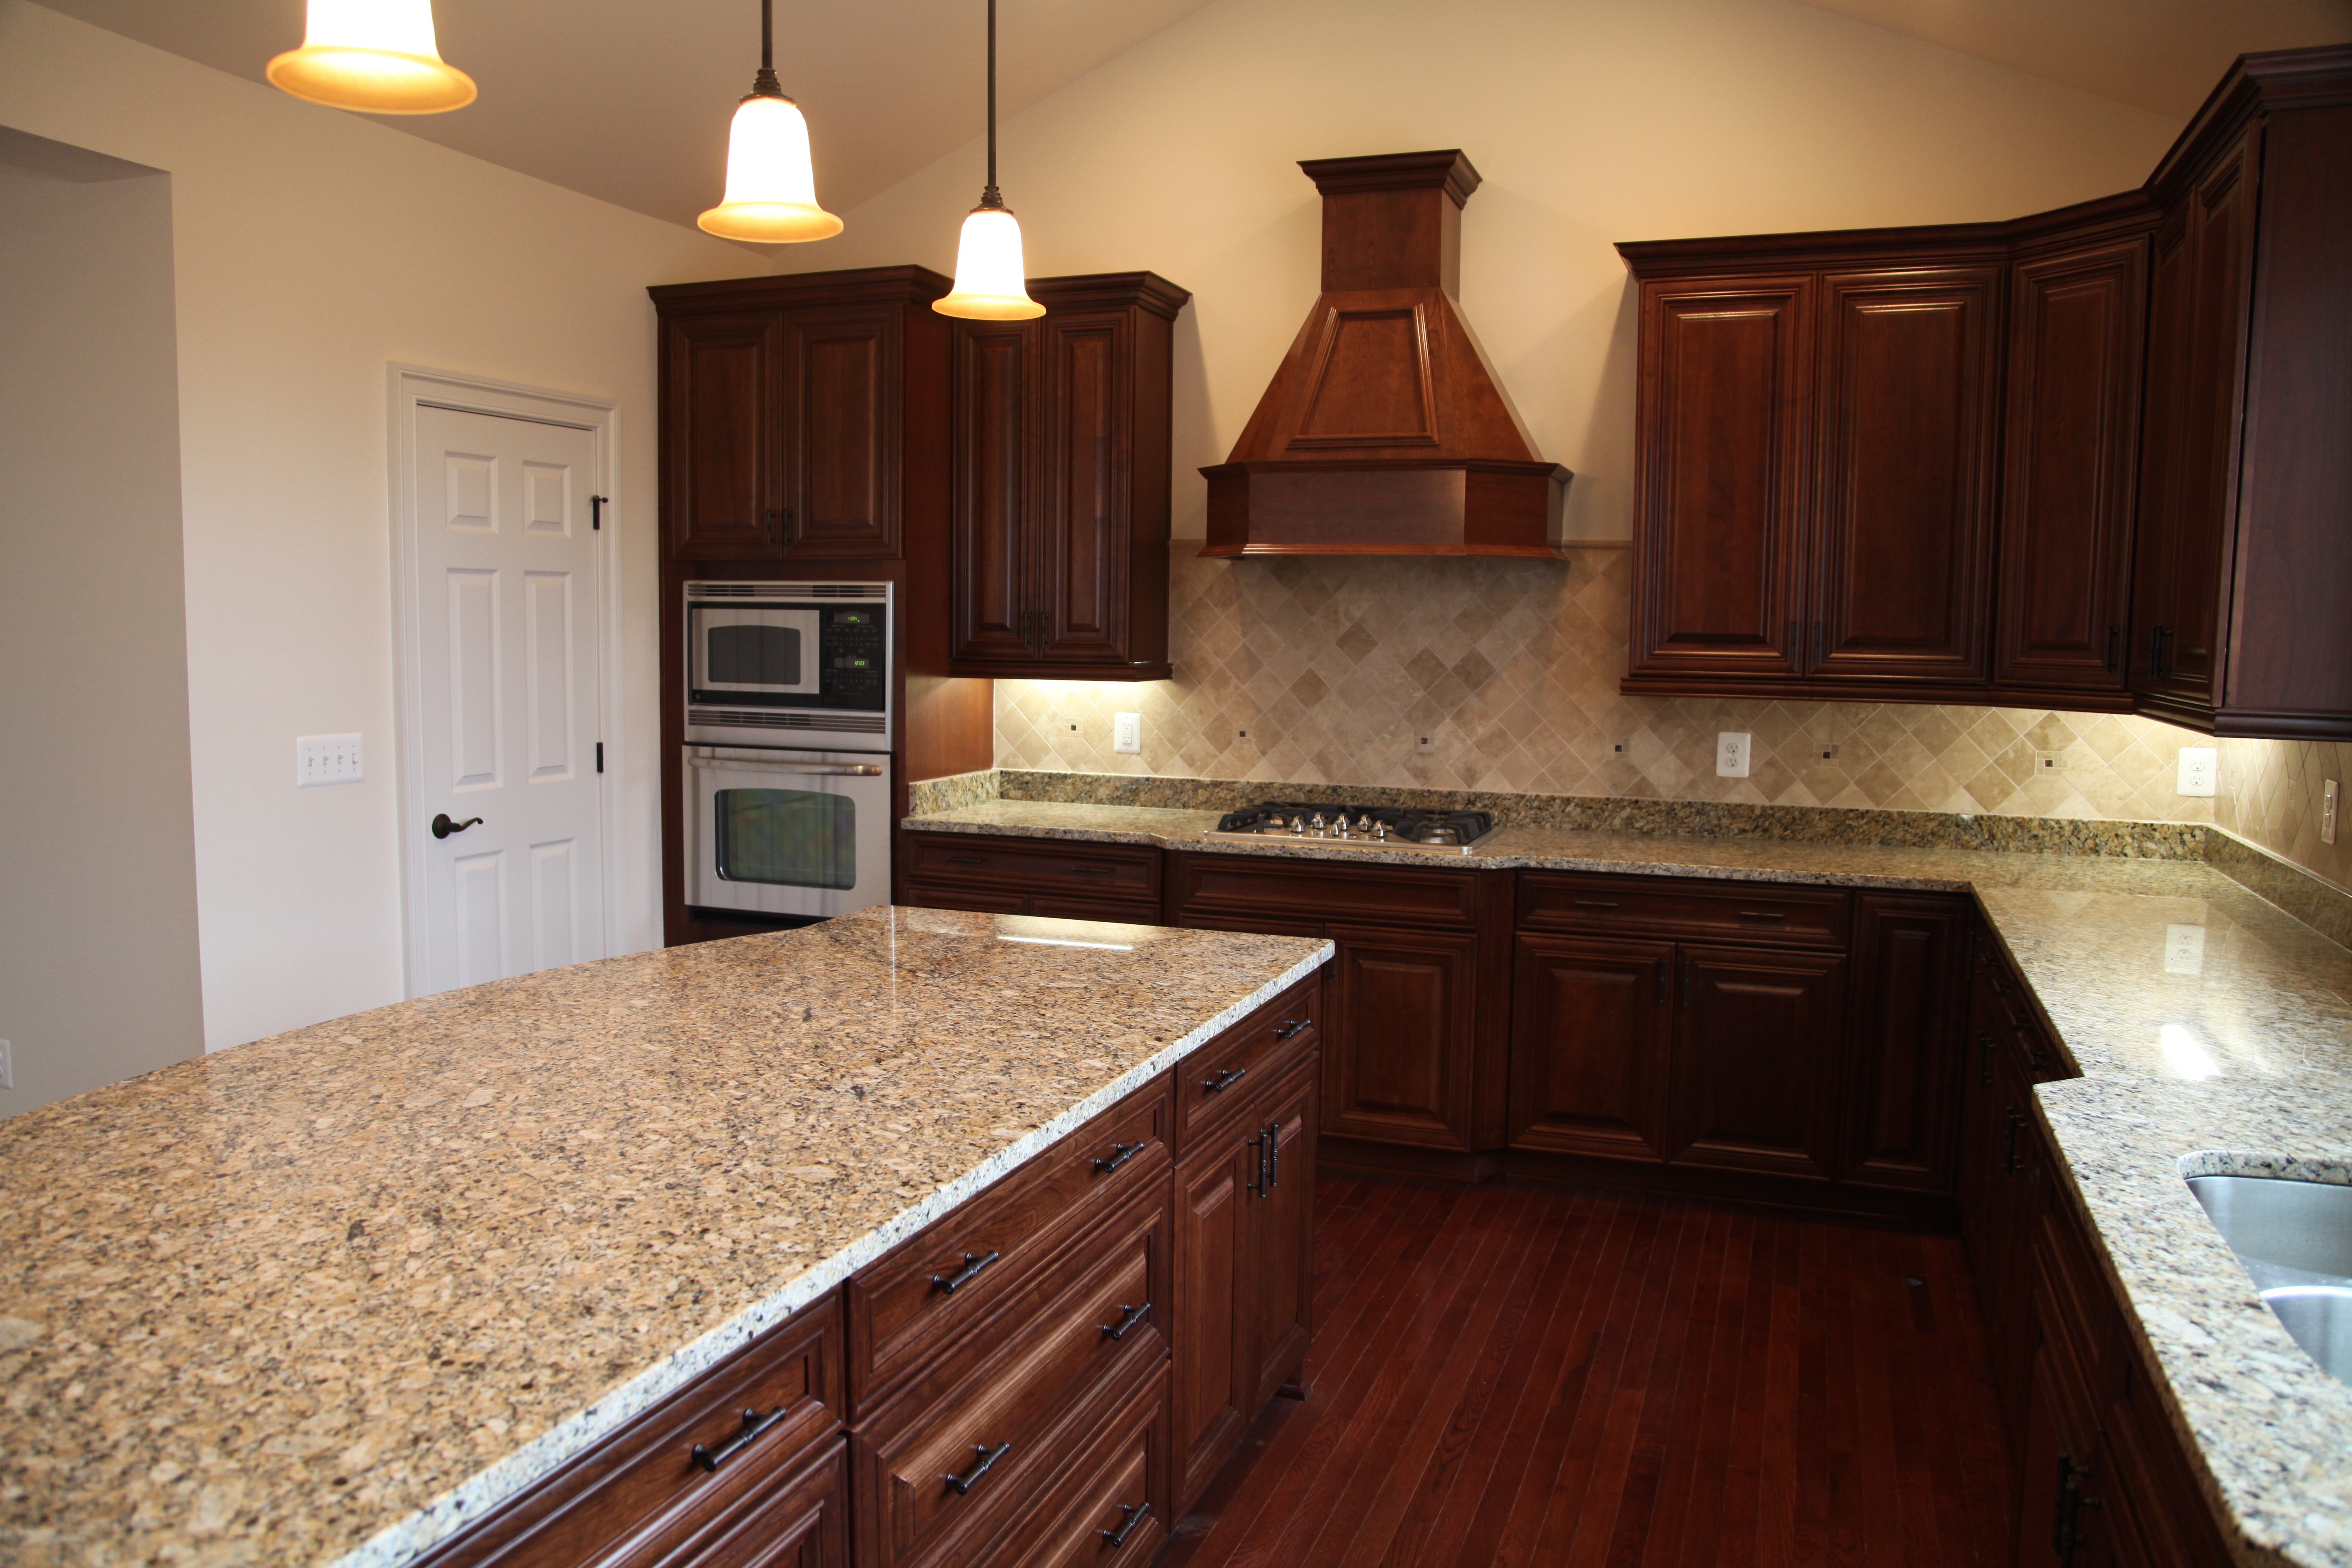
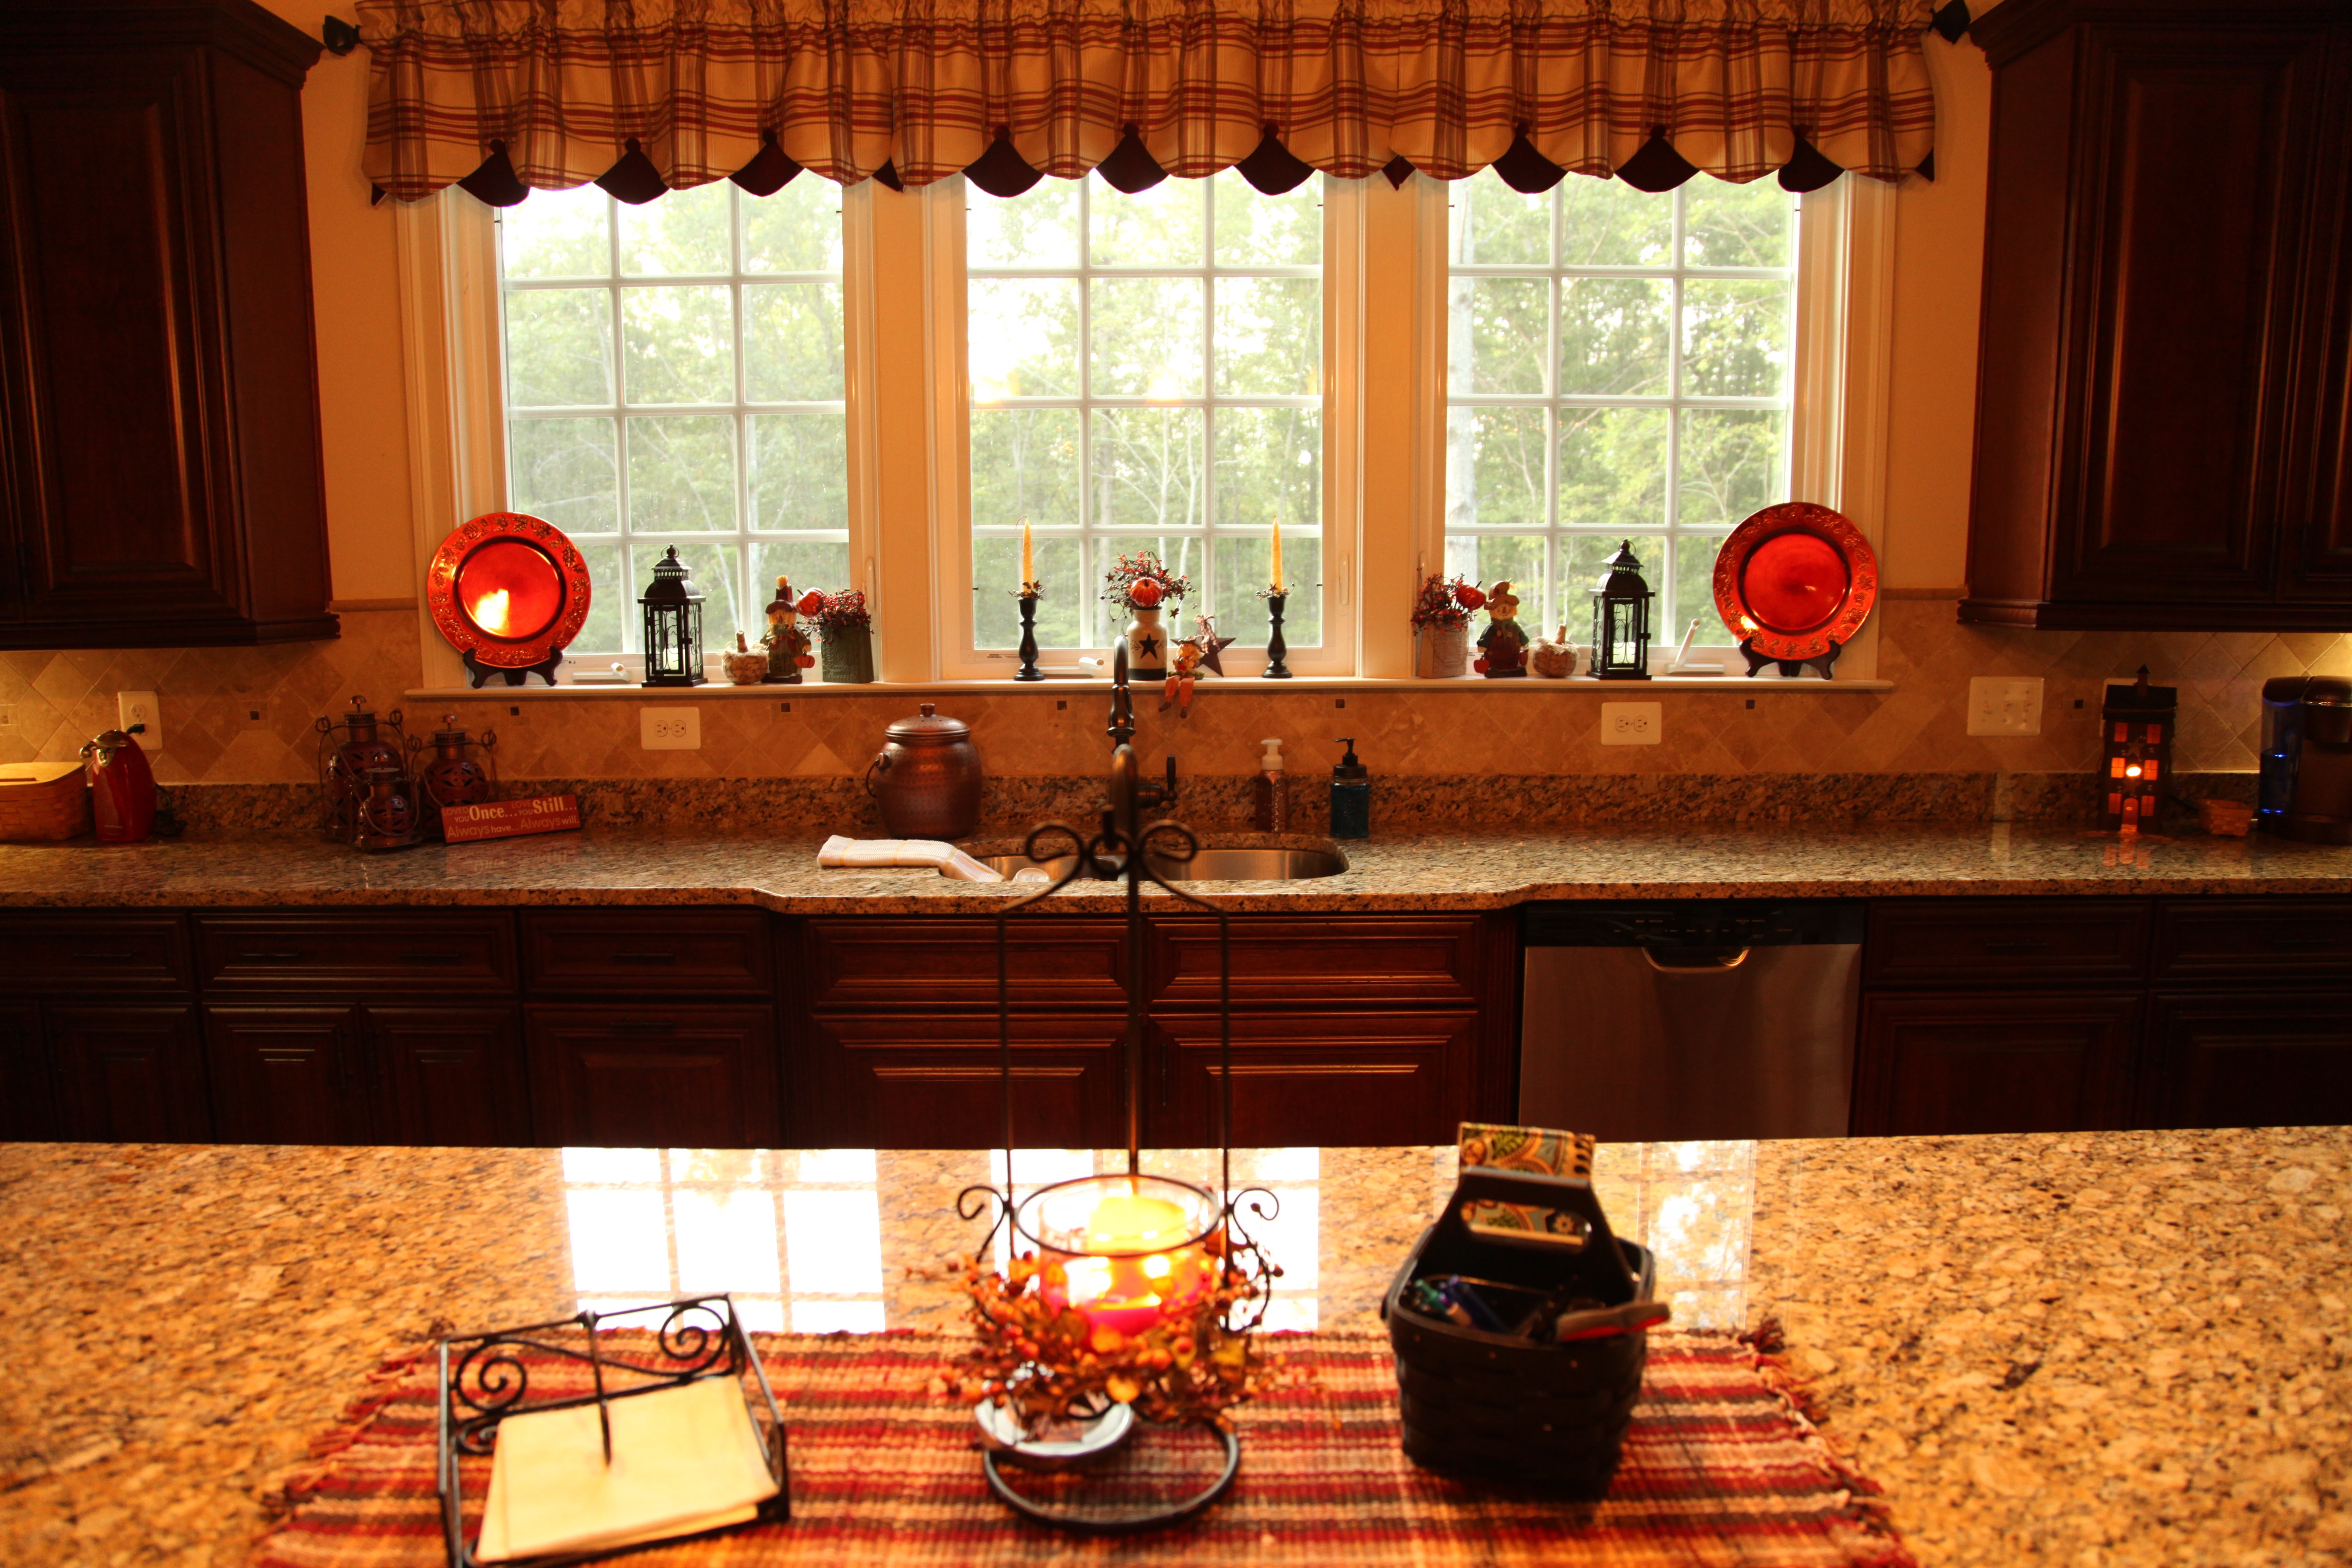
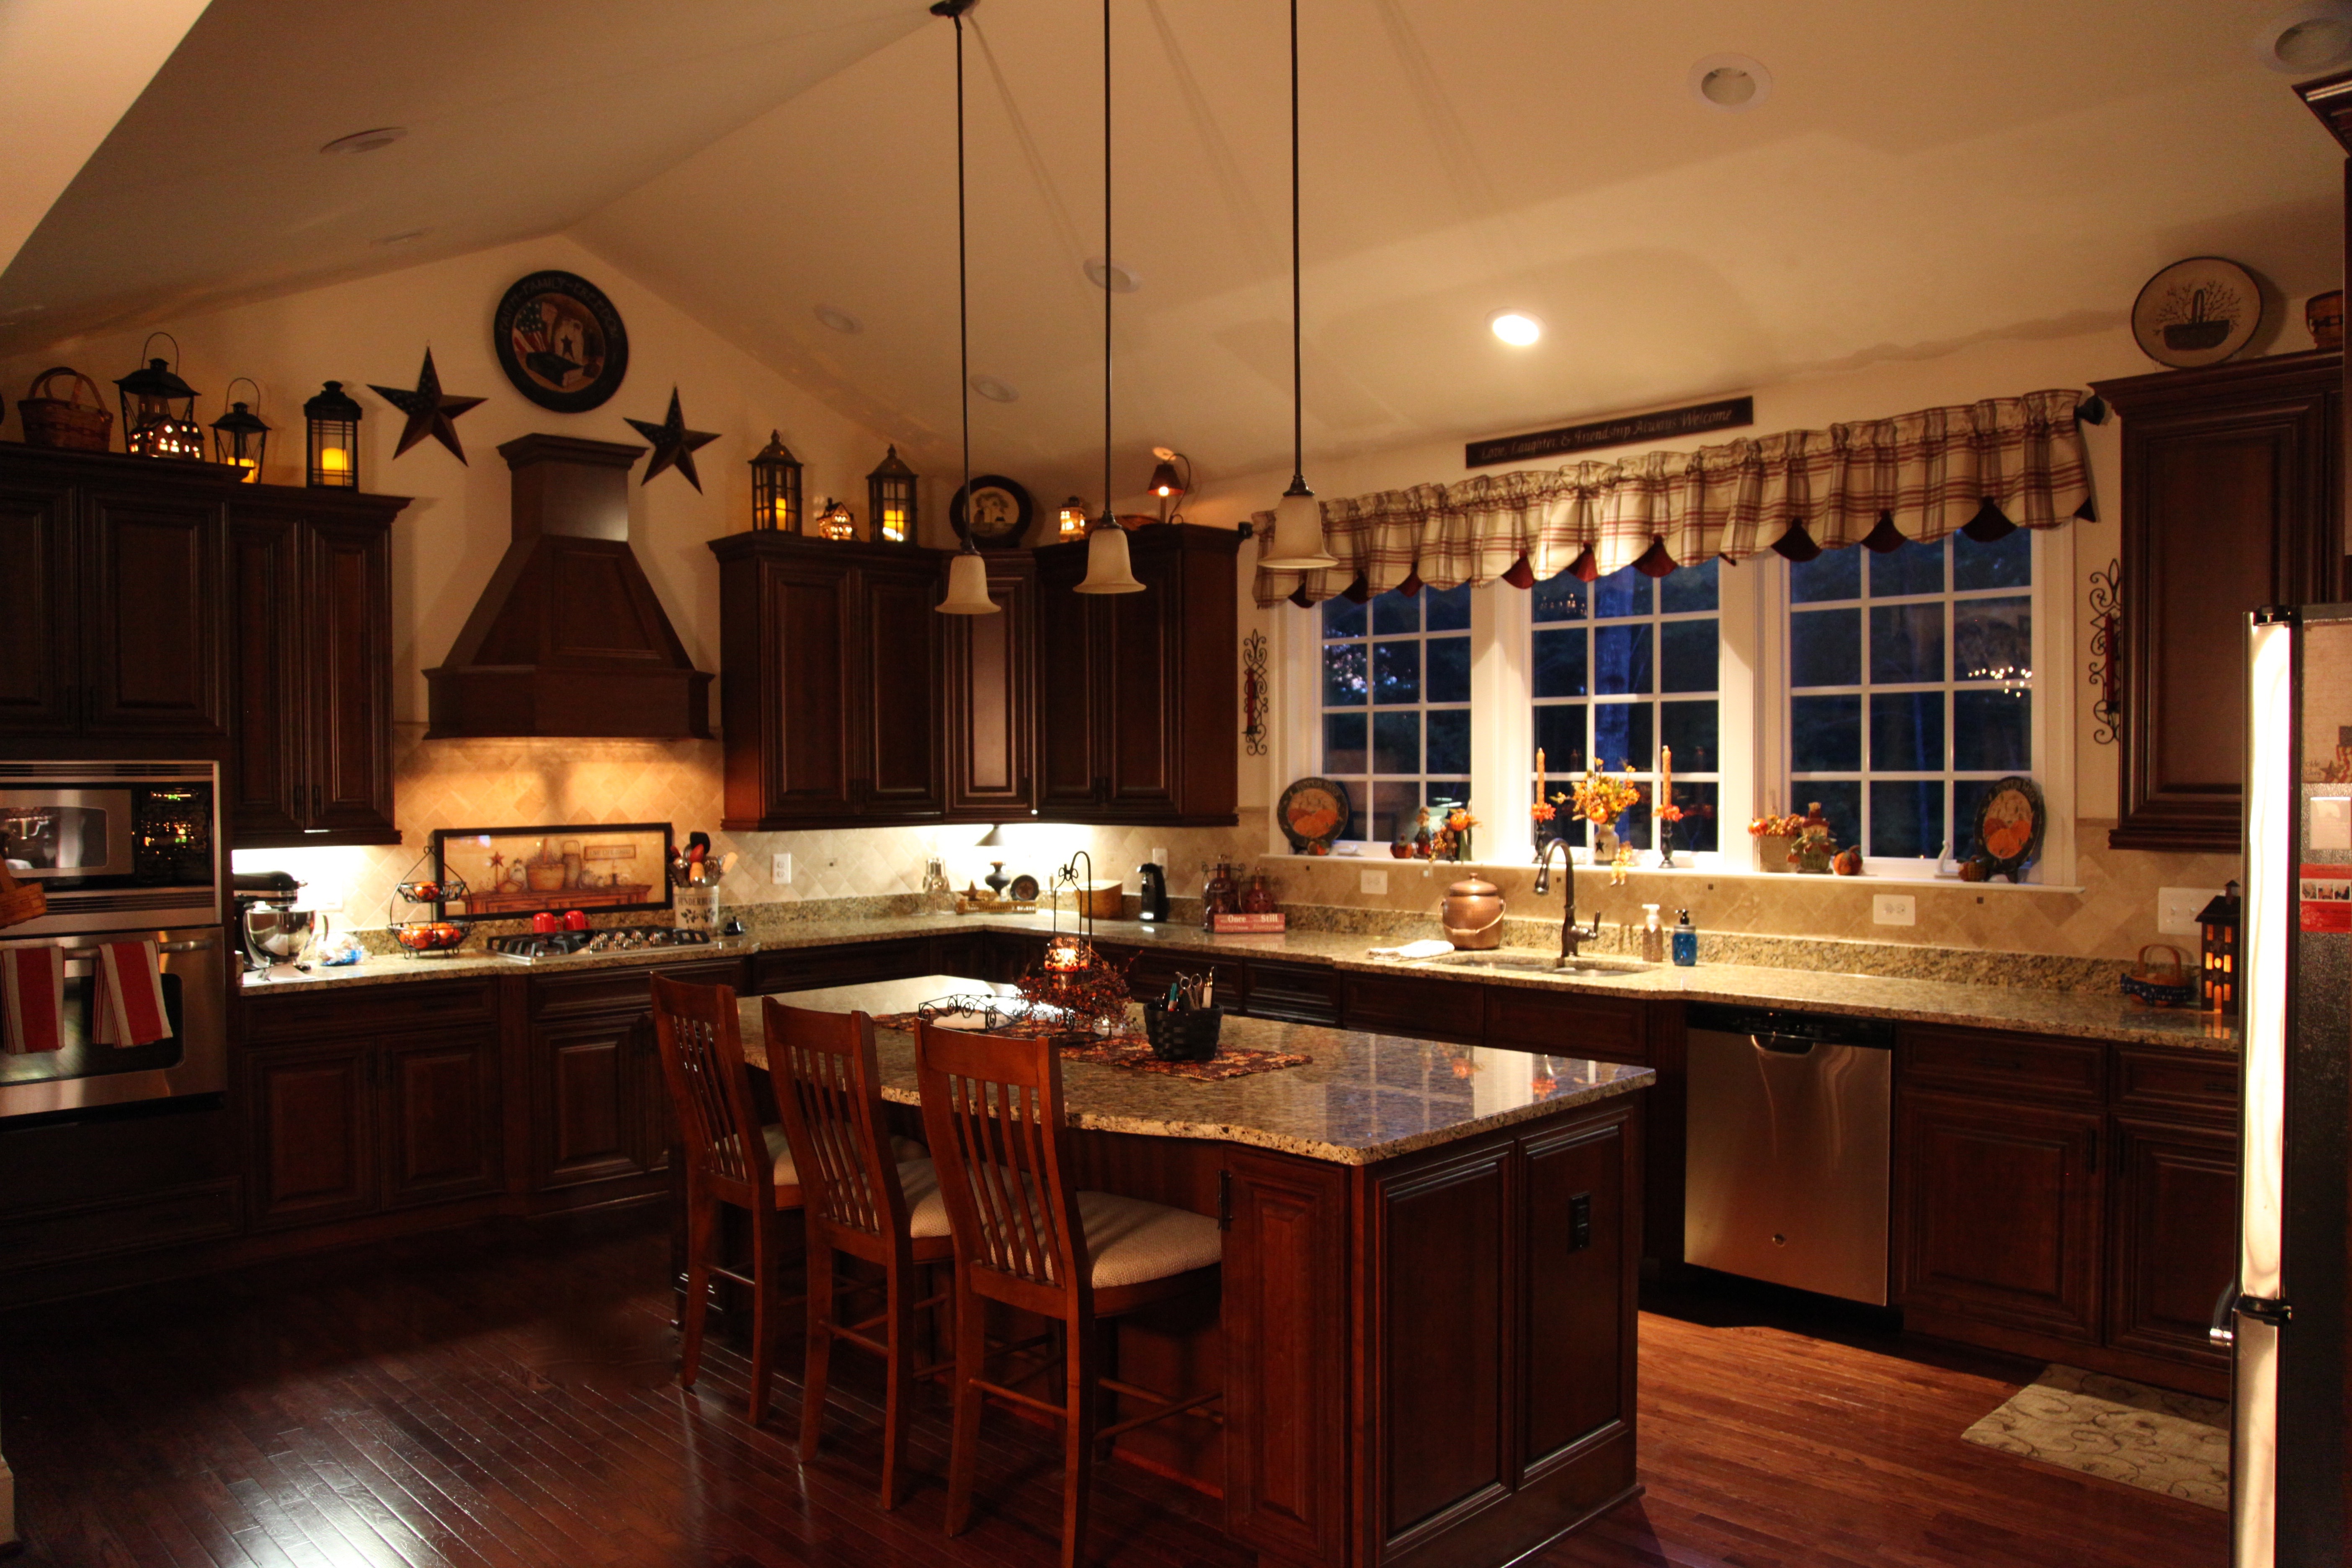
Here is the under cabinet lighting, I’m thinking that eventually we will change it out for more ambient lighting. But, it is fine for now, in fact, the flouresent lights aren’t as harsh as I thought they might be.

IMG_2025

My hubby is quite handy and is a pretty savvy online shopper; he saved us a ton of money with those door pulls.  The cabinet company was going to charge us $25 a piece installed, yes, I said *a piece* for each one of those door pulls. Complete highway robbery in my humble opinion! Yes, they are quite pretty and nice and heavy and they were including the labor for installation in that cost, but $25 a piece? Ridiculous!  My hubby found them online for $7 a piece and purchased enough of them for every door and drawer. Now, I’ve seen in other homes where folks choose a knob for uppers and a pull for lowers, or vice versa.  We chose these pulls for all doors and drawers and I love how they look.   AND **bonus** we didn’t have to pay an installation fee, my hubby made jigs and drilled the holes and installed every single door and drawer pull, 60 in all–better him than me…goodness knows I would not trust myself to drill holes in those pretty cabinets!

IMG_3169One spiffy upgrade that we chose was a trashcan cabinet.  In our other home, I used to keep a trashcan under the sink, I’m not one who enjoys seeing a trashcan sitting out on the floor, so even though we had a small kitchen in our previous home, part of the under the sink space was utilized for a trashcan. So this is a real luxury for me.

Now for the counter top and backsplash choices, to say we struggled with these choices is an understatement.  I wanted to keep the kitchen’s color pallet in a more classic hue.  Adding splashes of color via paint and decor is always a better option in my opinion. So we chose earth tones.  The counter top’s granite is called “Santa Cecelia Gold” and the backsplash is a travertine tile in beige tones. I feel that these colors paired beautifully with one another and also contrasted nicely with the hardwood and cabinet colors. I was glad these choices were finally made; I cannot tell you how many sleepless nights I had while making these decisions. I know how expensive it is to redecorate a kitchen and I didn’t want to have to do that…well, really…ever, so these choices were some of the most important that we made. 🙂

IMG_1410 IMG_1409

The island! I love the island! It has a pretty curved bump-out on one side where three chairs sit utilized by many people as they keep us company while we cook or while I craft. 🙂  It has tons of storage space underneath of it as well. It is 8′ long and 4′ wide at the widest point.  We use this island for tons of things, but, mostly, it is my creative hub. 🙂  I make all of my crafts on this island..of course many other uses are just as important, like setting dinner out, or setting up a buffet for larger gatherings.  It is awesome and I cannot say enough good things about it. 🙂

IMG_2029 IMG_1994

IMG_5822 IMG_5835

IMG_1813

The triple windows along the back wall are another one of my favorite features, I did an entire blog post here showing you how I change the window decor out as the Seasons change.

IMG_9158

There is also a walk-in pantry that holds anything and everything including our wireless router and printer.

I composed a Blog post that describes how I came up with the decor that is arranged on top of the cabinets. Here is a link to that post.

IMG_1820 IMG_1819

I cannot express to y’all enough how much I adore our kitchen, and again, I feel so humbly blessed that we are able to enjoy it from now on, this is definitely the last house we will ever have and we waited for a long time to build exactly what our vision was for our retirement years. 🙂

IMG_1618IMG_1616

Until the next time, y’all take good care! ❤

**In crafting there are no mistakes just unique creations**

Not Just Fall A Grapevine Wreath

Hi All,

There are days when I wish my “off” switch was more easily found, lol, my brain is always going a million miles an hour and it is hard to harness its energy and focus on tasks that need to be or that I want to get accomplished. 😉  Of course I’m teasing–well mostly. 😉  My brain really has been working overtime since yesterday afternoon though after I found a rather small, oval shaped grapevine wreath when I was wandering aimlessly around Hobby Lobby.

Here it is along with a bunch of other Fall accent pieces that I will be using to show you how to make a small oval wreath and then use the *same* wreath to make 3 different centerpieces. I’m all about using the same basic staple pieces and building and layering on different decor to change the feeling, for instance, from casual to more formal or from one Season to another.

IMG_2043

Some of the accent pieces that I gathered include a oil-rubbed bronze metal tray, various wooden pumpkins, Fall floral picks, a Fall themed pip berry garland, Fall ribbon, a scarecrow, a leaf garland, a wooden basket, a couple of candle holders, and a battery operated candle.

IMG_2046

So the very first thing that I did was to make a pipe cleaner ‘hanger’ and I glued that to the back of the grapevine wreath; it is not hard to do, just make a loop and hot glue the heck out of it.

Next, I made a bow–I really am going to make a bow tutorial for y’all one of these days…honestly, I promise!

IMG_2049 IMG_2051 IMG_2054

After the bow was made, I grabbed up the pip berries garland and started to lay it onto and around the wreath form measuring how much I needed.

IMG_2055

Then I trimmed off the excess garland and proceeded to hot glue it into place on the wreath.

IMG_2056 IMG_2057

The only other things that I glued into place on the wreath were these two Fall leaves picks, one at the top and one on the bottom.

IMG_2058

After that, I attached the bow simply by wrapping the pipe cleaner that I used to tie the bow shut around the wreath and twisted it closed to hold it on the wreath (I did not use hot glue), and I added a Fall sunflower pick that had some larger pip berries and leafy accents on it; I didn’t glue it on either, instead, I stuck the pick in between some of the twigs of the grapevine wreath.  That is *all* I put on the wreath and I called it done.

I carried it around my family room and kitchen trying to figure out where I wanted to hang it, *if* I decided to use it as a wreath–I’ll explain that statement after I show you the different places the wreath landed.

The first place I tried it was on this corner shelf …hmm, yeah, it looked okay there, but, nah, let’s see where else I could put it… IMG_2059 IMG_2060

How about on my hearth, hmmm, nope, it’s busy enough on that hearth as it is…It looked cute there though, but, I tried one more place…

IMG_2062 IMG_2063

IMG_2065

The last place I hung it was on that lamp…yep, looked really cute there, but I was already admitting to myself that I did *not* need yet *another* wreath hanging anywhere…so…I decided to do something different with it…

Here are three different centerpieces made with this wreath and a oil-rubbed bronze metal tray.

First, I took the leaf garland and wrapped it around the inside edge of the tray. Then I placed the wreath into the tray sideways (I removed the bow and that sunflower pick). After that, I placed the hurricane lamp candle holder into the center and started to surround it with Fall picks, then I placed the bow where I thought it looked pretty and added a little resin pumpkin…too cute!

IMG_2068 IMG_2069 IMG_2070 IMG_2071

Okay, I really liked that one, but I thought I might try to make something a bit more casual, so here is what I tried second.  I removed the hurricane lamp, bow, pumpkin, and picks. I then snugged a wooden basket into the center, placed that sweet scarecrow into the basket, placed the bow, and then filled in and around the basket with additional Fall picks. Then I sat the resin pumpkin on the scarecrow’s lap:

IMG_2073 IMG_2074 IMG_2075 IMG_2076

And here is that finished centerpiece, more casual, but cute as can be. 🙂

IMG_2077

I liked that one just fine, but I thought since I had gone to the trouble of digging out that black candle holder that I might as well try to do something with that as well.  So,  I once again went into “deconstruction mode” and reconstructed the third centerpiece like this:

IMG_2079 IMG_2081

Honestly, that was my least favorite design ^^^^

This is what I ended up creating and where I chose to place it:

IMG_2087 IMG_2085

I placed it on our desk that sits in the kitchen eating area, it is going to look pretty in the evenings with that candle glowing in that hurricane lamp.

IMG_2086

So, for now, my brain is at rest, goodness knows what I’ll come up with next! I hope that this little post has shown you that if you have an old wreath laying around or if you find a neat form to use to create a wreath, that there are other things that you can do with it instead of hanging it on a wall.

Until next time, y’all take good care! ❤

~Arlynn

**In crafting there are no mistakes just unique creations**

The Ever Changing Kitchen Window Decor

Hi Everyone!

I think we are having a monsoon here in the South, it has been raining for days and it is predicted to rain for many more days to come.  I am one of those people who really likes to see the sun shining, so all of this rain has me clambering to do something productive inside; I will definitely get to that productive project soon (maybe..haha), but in the meantime, I thought I’d show y’all how I decorate my kitchen windows throughout the year.  I love my kitchen windows, they open by using a crank so that design lends itself to me being able to place decor on the wide window sills.

I have tried really hard not to over-decorate this new house, in the past at our previous home, I *might* have been known for decorating every available wall and surface and admittedly, it got to be a little overwhelming.  So when we moved here, I’ve tried to minimize my decor yet still put a touch of *somethin’-somethin’* on most available spaces; this house has a very open design so there really isn’t a lot of wall space to utilize and I don’t have a ton of tables just sitting around to be used solely for decorating upon, so these windows are a pretty place to pull some seasonal accents into the kitchen.

So here we go, this is how I had them decorated in the Fall of 2014:

IMG_6748IMG_6751

I placed plates at either end to anchor the look, in this case I used very cost friendly plastic chargers–I think I paid $1.99 for each at our local Michaels. I also have 2 tin ‘boxes’ for lack of a better word, and I change out the flowers/pip berries to match whatever decor feel I’m trying to capture.  The lanterns on the two end window sills stayed there for a while, but honestly, I removed them when I decorated for Fall this year because the complete look was getting too busy (I’ll show you a picture of this Fall’s window decor at the end of this entry).  In addition, the country vase and candle holders are always there and I change out the candles and the vase contents as I go through the year.

Next was Christmas, as you see, I changed out the chargers for Christmassy ones; still plastic and bought at Michaels as well.  I changed out the flower/pip berry arrangements in the tin boxes and the vase and just added a few little snowmen wooden plaques and ceramic snowmen ornaments:

IMG_7601 IMG_7600

After Christmas was over I wanted to create a look that would carry me through the winter months. I found those two awesome wooden plates at a local craft store, so I placed them to anchor the look, and then I just changed out the arrangements in the tin boxes and vase for something a bit more generic, added stars and some wooden words and called it done.  (I did take the lanterns away for this look, they were blocking too much of the windows)

IMG_6545 IMG_6544 IMG_6541 IMG_6547

IMG_6546

Now it was time to decorate for our family reunion/spring/summer (haha…I really did leave the same stuff up there from May-September).  By now, y’all know that my theme for the family reunion (see link for all of that decor) was red and white gingham, red and white gerber daisies and mason jars.  I made new arrangements in the tin boxes and the vase utilizing burlap and silk gerber daisies and pip berries, and I added a resin cream color gerber daisy (found at Hobby Lobby for 1/2 off) in front of/beside each tin box. Yep, those lanterns showed back up for this grouping…;)

IMG_0282 IMG_7095IMG_7098

Last but not least, I just decorated for Fall and I’ve changed out a few things.  I found 2 wooden Fall themed plates at a local country store and bit the bullet and purchased them (they were about $15 a piece, I rarely spend that much on a Seasonal decor accent, but I couldn’t resist and I will reuse these every year moving forward). I, again, changed out the flower/pip berry arrangements in the tin boxes and vase, changed out the candles, and added a few scarecrows and fabric pumpkins here and there.  I’ve removed those lanterns for good now, I’ve found that I like it much better without them.

IMG_1813 IMG_1816 IMG_1817 IMG_1818 IMG_1820

I’ll be decorating for Christmas next, so I’m on the lookout for a couple of wooden plates with which to replace those Fall themed ones. And who knows what else I’ll come up with once I get started designing; I try not to look back on past design pictures, instead I start each new project by gathering everything that I want to use for any certain grouping and let the creative juices flow…I love the process and will tweak and tweak until I love the end design. 🙂

Well now, there we go, I did do something productive inside…I wrote a blog entry…Each one of these is a little project in and of itself. 😉 🙂

Until next time, y’all take good care! ❤

**In crafting there are no mistakes just unique creations**

Cousins Craft Weekend – Part 3 – Deco Mesh Garland with Guest Blogger (my) Cousin Stacey

Hi Everyone!

It’s time for Part 3 of our Cousins Craft Weekend series; I’m excited to let Stacey take the proverbial wheel and explain how she brought this beauty to fruition!

IMG_2014

Click this link to Part 1 Deco Mesh Halloween Wreath  to see how Stacey describes how she made that wonderful Halloween wreath that matches this garland. 🙂

Take it away Stacey!

“Yes!! You have now made a pretty sweet wreath! You NEED a garland to match!

You will first need to measure your doorframe and decide how long you want your garland.  Once that’s decided, you will also need two large rolls of deco mesh (21” x 30’) and one roll of the small. (5.5” x 45’) You will need pipe cleaners to attach everything and all the decorations and ribbons to finish it off and jazz it up. (Again, I cannot stress enough.  Stick with your theme!!)

I didn’t want to go back out to buy a pre made form or wire to create my own.  So, down to my honey pot (the basement storage) to see what I could re-purpose.

AH HA!! I found some old pre lit Christmas garland that would do nicely!!  I used two 9’ lengths of garland.  If you don’t have any old garland lying around, it can be found in any mega store.  This is just the plain old indoor/outdoor kind.  I think the garland with the long twisty branches would be awesome as well.  Then you could use the branches themselves as the twist ties and save needing pipe cleaners!

First thing I did was lay my garland out and plug it in.  Man, how mad would I have been to finish this thing and the lights not work! Grrrr!! Thankfully, everything was in working order and I could get down to business!

12047286_10206380285979820_1930083196_n

I got out my trusty tape measure again, and laid it down beside the garland.

Every foot or so, I would lay a pipe cleaner under the garland. These are the points at which I will attach my deco mesh.

I then went back and gave each one a little twist so that they would stay attached to the garland and not lose their spacing.

12047327_10206380286899843_198353081_n 12048814_10206380286299828_6395095_n

12064069_10206380287179850_1151806391_n

I found the easiest way to attach the deco mesh was to unroll it and leave a bit at the end to make a little tail. This helped me to see just how much mesh I had to play with.  I used the entire roll.  My mind is a strange place, so I started in the middle and worked out from there.  Once I had one color attached, I moved onto the next color. 12033823_10206380287659862_1272208342_n

Messages Image(811433779)

My sweet lab Piper is a crafter as well.  She was checking to see if I had enough volume in my “Poofs” and that they were secured properly.

Messages Image(716481391)

Piper seemed satisfied that I was doing a good job. She suggested I use a back and forth pattern with the two colors. I agreed!! Good idea pup!

12048838_10206380287899868_1457561932_n

Here it is with both colors attached with the back and forth pattern and then below, you see it all stretched out!

12029064_10206380288099873_1094222603_n

12041756_10206380289419906_571152707_n

Lastly, I took the small roll of orange deco mesh and went straight down the middle.  Making poofs and attaching where I felt it looked best.  I had just a smidge of the orange left, so I made a little bow and found the center of my garland and attached it there.

Here is the garland with all three colors and ready for ribbons and eye balls!!

12032338_10206380289619911_115940883_n

And here is the garland all lit up, wow!

12030691_10206380294580035_37713269_n
I decided on Monster Eye Balls as  a theme.  I had found some sweet little eyeball ornaments for the wreath I made. Unfortunately, they were not going to be large enough for the garland.  I purchased some plain white Styrofoam balls and painted them like giant eyes! I used my red Sharpie marker to make the creepy veining.

12053376_10206380289739914_830654323_n

12041792_10206380290139924_1754555849_n

12030767_10206380290339929_378126768_n

12064064_10206380289859917_860391847_n

Now it was time to take the finished garland out to the front porch and figure out how to hang it up, I decided to use command strip hooks, very large ones.  But, first I laid it down in the yard to find the center point. As I mentioned above, that is how my brain works, I find the center and work out in either direction from there. As you can see, Piper arrived to assist me in my endeavors…she is quite the helper! 😉
Once the center was found, it was time to get it hung up and ready to receive those monster eyes and other ribbon accents.

IMG_1977IMG_1970IMG_1969

Okay, once that garland was sturdily in place, the first accent pieces that I added were those spooky eyeballs. To attach the eyes I just folded over and twisted the pipe cleaner (at every other swag point where I caught the deco mesh) to make it sturdier and then just poked the eye ball onto to them.

IMG_2010IMG_1993

12064514_10206380291579960_126380108_n

After all of the eyeballs were attached Arlynn filled in the rest of the swag points with a ribbon cluster. She just took whatever ribbon I had leftover from making the wreath and cut pretty edges on them, piled them up, cinched them together with her fingers and then attached them to the garland using the pipe cleaners. Then she wrapped the ends of the pipe cleaner around a pencil to finish off the look. 🙂

IMG_1991

IMG_2006

IMG_2007

Once all was said and done and I had it hung in place, we all stood back and admired our work! What a fun project this turned out to be! And my front porch looks so festive and we’re all ready to receive the little Trick or Treaters!!  I can’t wait!”

Arlynn here again, I cannot express to you what a wonderful time I had with these two ladies! (Left to right, Donita, Stacey, and me).

12027822_10206379917330604_8485612119921766505_n (1)

Spending time with family is something that we never take for granted;  working on these crafty creations just added to the excitement of our visit. We are happy to share our final products with all of you and if any of you have any questions please don’t hesitate to leave them in the comments section below and I (or Stacey) will try and answer any and all queries. 🙂 

As I was leaving Stacey’s house, I was sure to take a picture of her awesome wreath and garland.  Her porch looks amazing and will be so very welcoming as the weather cools and the leaves start to fall.  Here is the last thing I saw as I was driving away (in tears because I missed my sweet cousins so very much already). ❤

IMG_2041

Let me take a moment to thank Stacey for adding her amazing talents to my Blog, I’m sure she’ll be my guest many more times in the future as she has a plethora of creations to share. **Love you Stacey!!**

Until next time, y’all take good care! ❤

**In crafting there are no mistakes just unique creations**


Cousins Craft Weekend – Part 1 – Deco Mesh Ruffle Halloween Wreath with Guest Blogger (my) Cousin Stacey

Hi Everyone!

I just returned home from my cousin Stacey’s house, she lives 1-1/2 hours away from me and during our visit we had a wonderful time laughing, crying through laughter, hugging, chatting, and crafting with another one of our cousins Donita.  Here is a picture of the three of us, left to right: Donita, me (Arlynn), and Stacey (I adore these two ladies!!):

:IMG_9063

We’ve dubbed our fun time together as “Cousins Craft Weekend” and I will be posting three separate Blog entries to showcase what we created during our time together.  Stacey will be contributing to two of the entries, this one (Part One) where she will describe a ruffle deco mesh Halloween wreath, and another one showcasing a matching deco mesh garland.  Both things turned out fabulously well, and have now adorned her front porch with a splash of Halloween fun!  Stacey is an amazing mother/wife/daughter/cousin/friend AND crafter! I love her dearly and I know that you will enjoy her sense of humor as you read through her entry as she describes the process that she used to create her finished product. 🙂

Here goes:

“Hello!!  My name is Stacey and my fabulous crafty cousin has graciously allowed me to hijack her blog for an entry! (I hope she doesn’t regret that!)  I, like Arlynn, love my family more than my own life and enjoy making my house a home using crafts.  I love to paint, build, design, create and repurpose just about anything to accomplish that task! Maybe, in the future, I’ll share some of my other creations here as well.

Since Halloween is almost upon us, I’ve decided to show y’all how to make a ruffle deco mesh wreath and garland to spookify your front porch!  The hardest part of this entire craft is deciding on a theme. This is really important.  Stick with your theme.  If you try to add too many different ideas into one craft, you will end up with a disjointed and confused product.  We want FABULOUS not WTF? (What the Flip)

I decided to go with Monster Eye Balls! I don’t really do ghouls, witches and anything especially dark and/or scary.  You may choose whatever makes your little holiday heart go pitter patter!

Once I decided on my theme, I took myself to our local craft stores and purchased all the goodies I needed! And even some I didn’t! LOL!!

For the wreath I bought a 16” pre made wreath form, three 10” rolls of Deco Mesh, Halloween ribbon, eyeball ornaments, assorted picks and black pipe cleaners.  The 10” deco mesh can sometimes be tricky to find. I found mine at JoAnn’s Fabric but there are lots of great online stores that sell all colors and even patterns of this particular size.

To make the garland, I recycled some old pre lit Christmas garland I had languishing in the basement.  I bought two rolls of 12” deco mesh and one roll of 5.5” deco mesh.  I purchased some foam balls and painted them to look like eyeballs.  (More on that in the garland post.)

12028918_10206380285019796_966716533_n

I began my project with the wreath.  I decided instead of the traditional deco mesh wreath, I would make a ruffle mesh wreath! Let me tell you, it was WAY easier and super fast!

12041993_10206380290379930_504345407_n

I also loved using the pre-made wreath form! What a time saver! These forms already have the pipe cleaners attached and spaced.
I started by laying out a tape measure and taping it to my workspace.  I then rolled out my deco mesh and cut 20” lengths of mesh.  One thing you must know about me before I go on. I am incredibly lazy and impatient!! So, with that in mind, you will see that I stacked all three rolls of mesh on top of each other, cut them all at the same time and made 17 rolls. (the number of pipe cleaner attachment spots).

12064331_10206380290419931_2116009763_n

12048431_10206380290619936_300674655_n 12053158_10206380290819941_1372788171_n

12064472_10206380300180175_840598585_n

Once I had all my rolls cut, I scrunched them up and attached the bunch at each pipe cleaner.  *Remember my laziness? Well, I didn’t even separate the colors! I just left them all stacked and bunched them all at the same time!! YEA Laziness!!
12026633_10206380291179950_2126649088_n

After all the spots had been filled in, I started work on my ribbon accents.  I began the same way as before.  Rolling the ribbon along the tape measure and cutting 12” lengths of ribbon.  *Note to self. If you decide to use glitter ribbon, be prepared to look like Tinker Bell exploded all over your skin, counter, floor, dog etc!! That stuff is harder to get rid of than grey hair!!

12064514_10206380291579960_126380108_n

I had all my ribbon lengths cut. To finish the ends I just cut pretty little tails on them. To do that, fold your ribbon lengthwise and cut at an angle. 12025444_10206380300220176_1242147290_n

12064229_10206380294340029_1223221283_n 12026680_10206380294380030_2038096492_n

OK!! At this point, you have all your deco mesh attached, and all your ribbons cut!! TIME TO FLUFF AND DECORATE!! Fluff and separate your mesh to add the fullness and ruffle effect.  Then, use your creativity to add ribbons, eyeballs or whatever makes your Halloween Wreath strike fear into all Trick or Treaters!!

12047682_10206380294500033_1360308006_n

The last thing I added was a “Boo Y’all” sign! How cute does that look?!!

Oh now look at that!! What a beauty!!   Guess what?!?!  Yours will be AWESOME too!”

IMG_1955

***Arlynn here again…Wasn’t that wonderful?  Stacey is as sweet and funny in person as she sounds in this entry. 🙂  Stay tuned for Part 2! I can’t wait to share with you the wreath that I made for Donita and Stacey will be sharing the deco mesh garland that she made to match this awesome wreath!***

Until next time, y’all take good care! ❤

**In crafting there are no mistakes just unique creations**

A Dressier Lantern Centerpiece

Hi Everyone!

It is a rainy, rather dreary Monday afternoon here in Virginia so I thought I’d sit down and put together this little post about my dining room lantern centerpiece and also show you how I transform it to match the season or Holiday. I found the large lantern featured in this post in a local country store and for its measurements, please refer to my “A Lantern Centerpiece For All Seasons” blog post; where along with the lantern’s measurements, I also give a bit of a tutorial showing you how to put one of these centerpieces together.

I’ve been using a very pretty country sea foam green as my accent color in the dining and living rooms; I love the light and airy touch that it adds to a room.  I have been pairing it with grays and taupes and have been very happy with how it has all come together.  It has been a bit of a challenge for me to stay in my country comfort zone while using that accent color, but I do believe I’ve successfully kept my decor warm and have created some cozy groupings, arrangements, wreaths, and centerpieces to keep within the country theme.

Here is the first lantern centerpiece I created for the dining room table:

11229371_10206418622294813_3374812849677624591_n

I purchased the same mirrored tray that I used for the kitchen lantern centerpiece to go under this lantern and it is used to build all of the arrangements featured in this post

Easter was the next Holiday, in years past, I haven’t typically decorated for Easter, but this lantern inspired me to create a new centerpiece.

11025802_10205867980249106_6163841860063345285_n
10996801_10205867980289107_192302559589102839_n

I also made that wreath that is hanging on the wall…it didn’t stay there for long though as I moved it out onto the porch and added it into a grouping that I put together out there.  There it is added to the front porch grouping…

1V4A0229

Next, I needed something to go with our family reunion decor, so I switched out the tablecloth and a few other decor items that helped me incorporate my red and white gingham, gerber daisies, and mason jars reunion theme.

IMG_6979 IMG_6983 IMG_7041

This centerpiece and the red and white accents only stayed in there for the day of the reunion.

After the reunion, I went ahead and changed the dining room decor back to its softer color tone, here is the centerpiece that I chose to make to complete the room’s transformation back to ‘normal’:

IMG_1708

This arrangement stayed in place until it was time to decorate for Fall. I was very happy with how this one turned out, I just love to add that bow/pip berries topper. 🙂

Fall has arrived and here is the dining room with the Fall decor including the lantern centerpiece in place:

IMG_1866

And here is the bow, pip berries, fall pick topper:IMG_1867

The Fall decor in this room is quite subtle, but I’m happy with how it looks. I feel that it still looks warm, inviting, and cozy despite not using all of the typical Fall colors.

IMG_1869  1V4A2894 1V4A2848

I cannot tell you how much I am enjoying working with these lanterns and creating all of these different centerpieces.  I do use lanterns in other capacities as well–a subject for another blog post. 😉  I do feel as if the softer green color lends itself to a ‘fancier’ centerpiece; I don’t want it to be too formal in the dining room, but I do want it to be a bit lighter and airier in design.

Well, it’s time for me to get myself in gear and to make my hubby and I some dinner, so, until next time, y’all take good care! ❤

**In crafting there are no mistakes just unique creations**